
Setting up Storefront for restricted data access

A Storefront groups your account into hierarchy levels — by location, product line, or reporting structure — so you can restrict dashboard data by hierarchy level instead of sharing the same full view with everyone. It's useful whenever different people should only see their own slice of the data: a store manager who should see only their store, a regional head who should see their whole region, or a department lead who should see only their team's numbers.
Prerequisites
- Admin access to create a Storefront and share dashboards.
- At least one dashboard already built with the widgets you want to restrict.
- Employees you plan to restrict already added to your Employee Directory.
Creating a Storefront
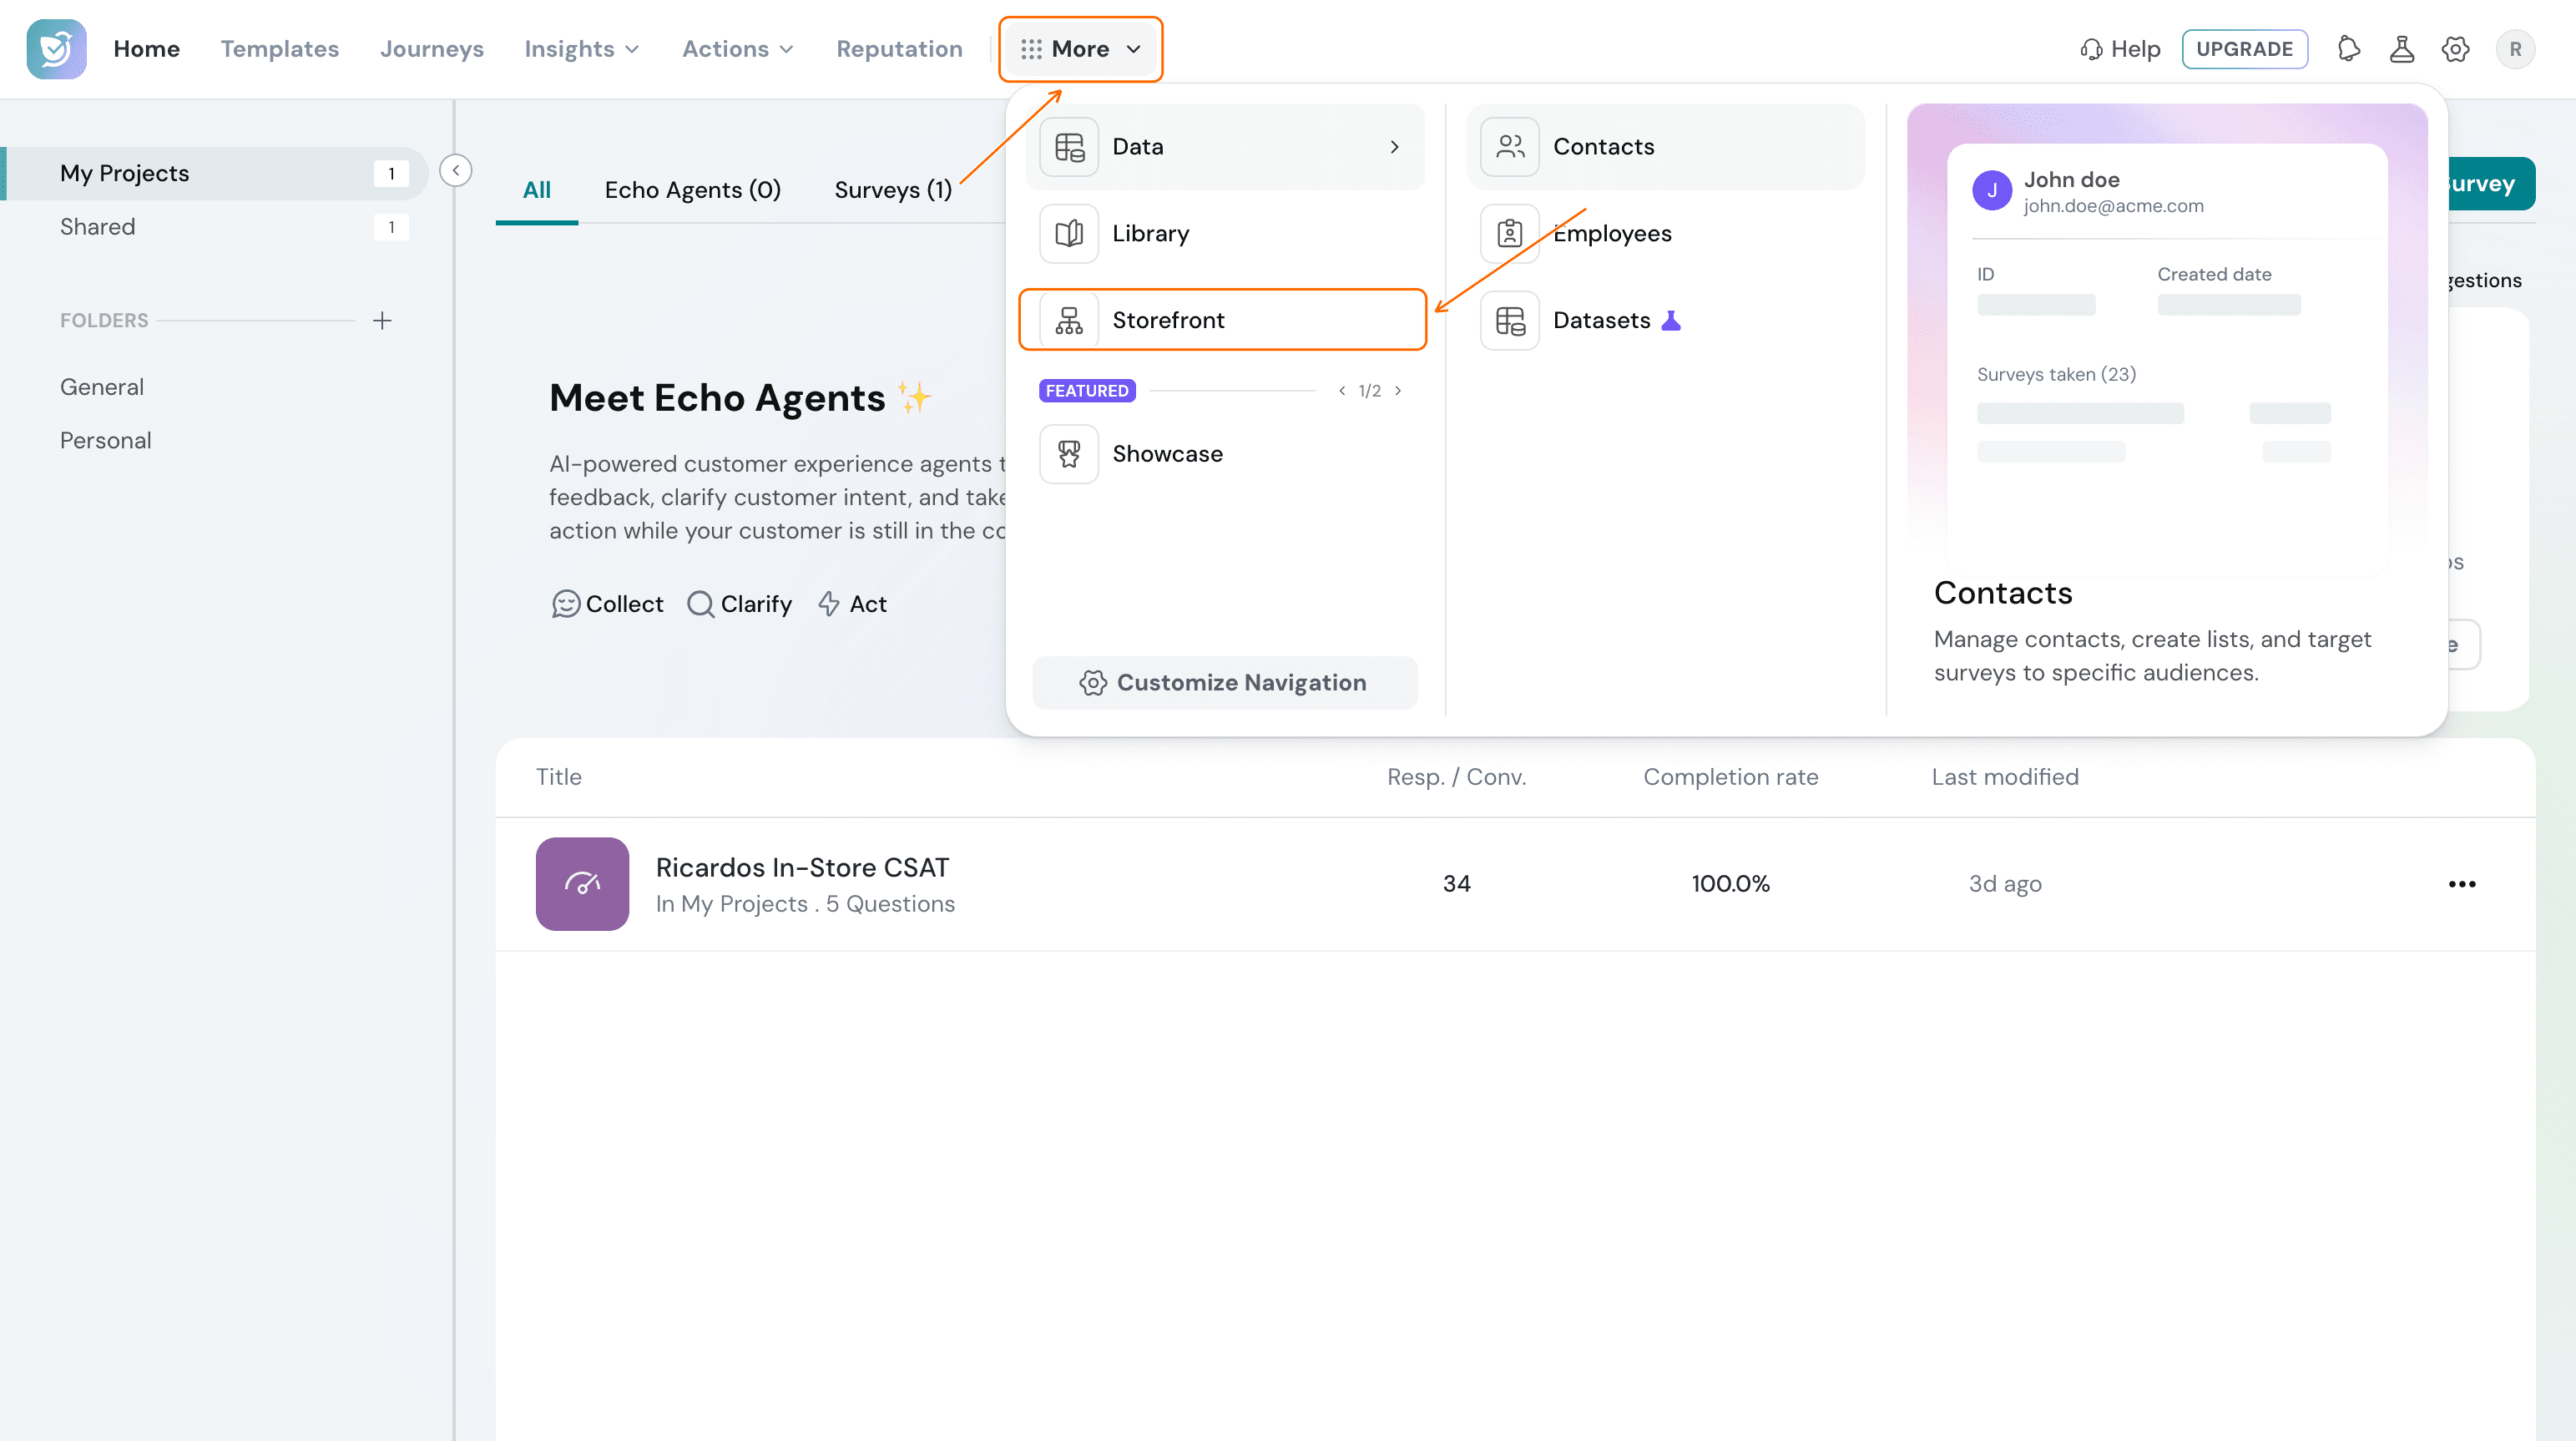
1. From the top navigation of the home screen, click More, then Storefront.Setting up a Storefront for restricted dashboard access
A Storefront groups your account into hierarchy levels — by location, product line, or reporting structure — so you can restrict dashboard data by hierarchy level instead of sharing the same full view with everyone. It's useful whenever different people should only see their own slice of the data: a store manager who should see only their store, a regional head who should see their whole region, or a department lead who should see only their team's numbers.
Prerequisites
- Admin access to create a Storefront and share dashboards.
- At least one dashboard already built with the widgets you want to restrict.
- Employees you plan to restrict already added to your Employee Directory.
Creating a Storefront
1. From the top navigation of the home screen, click More, then Storefront.
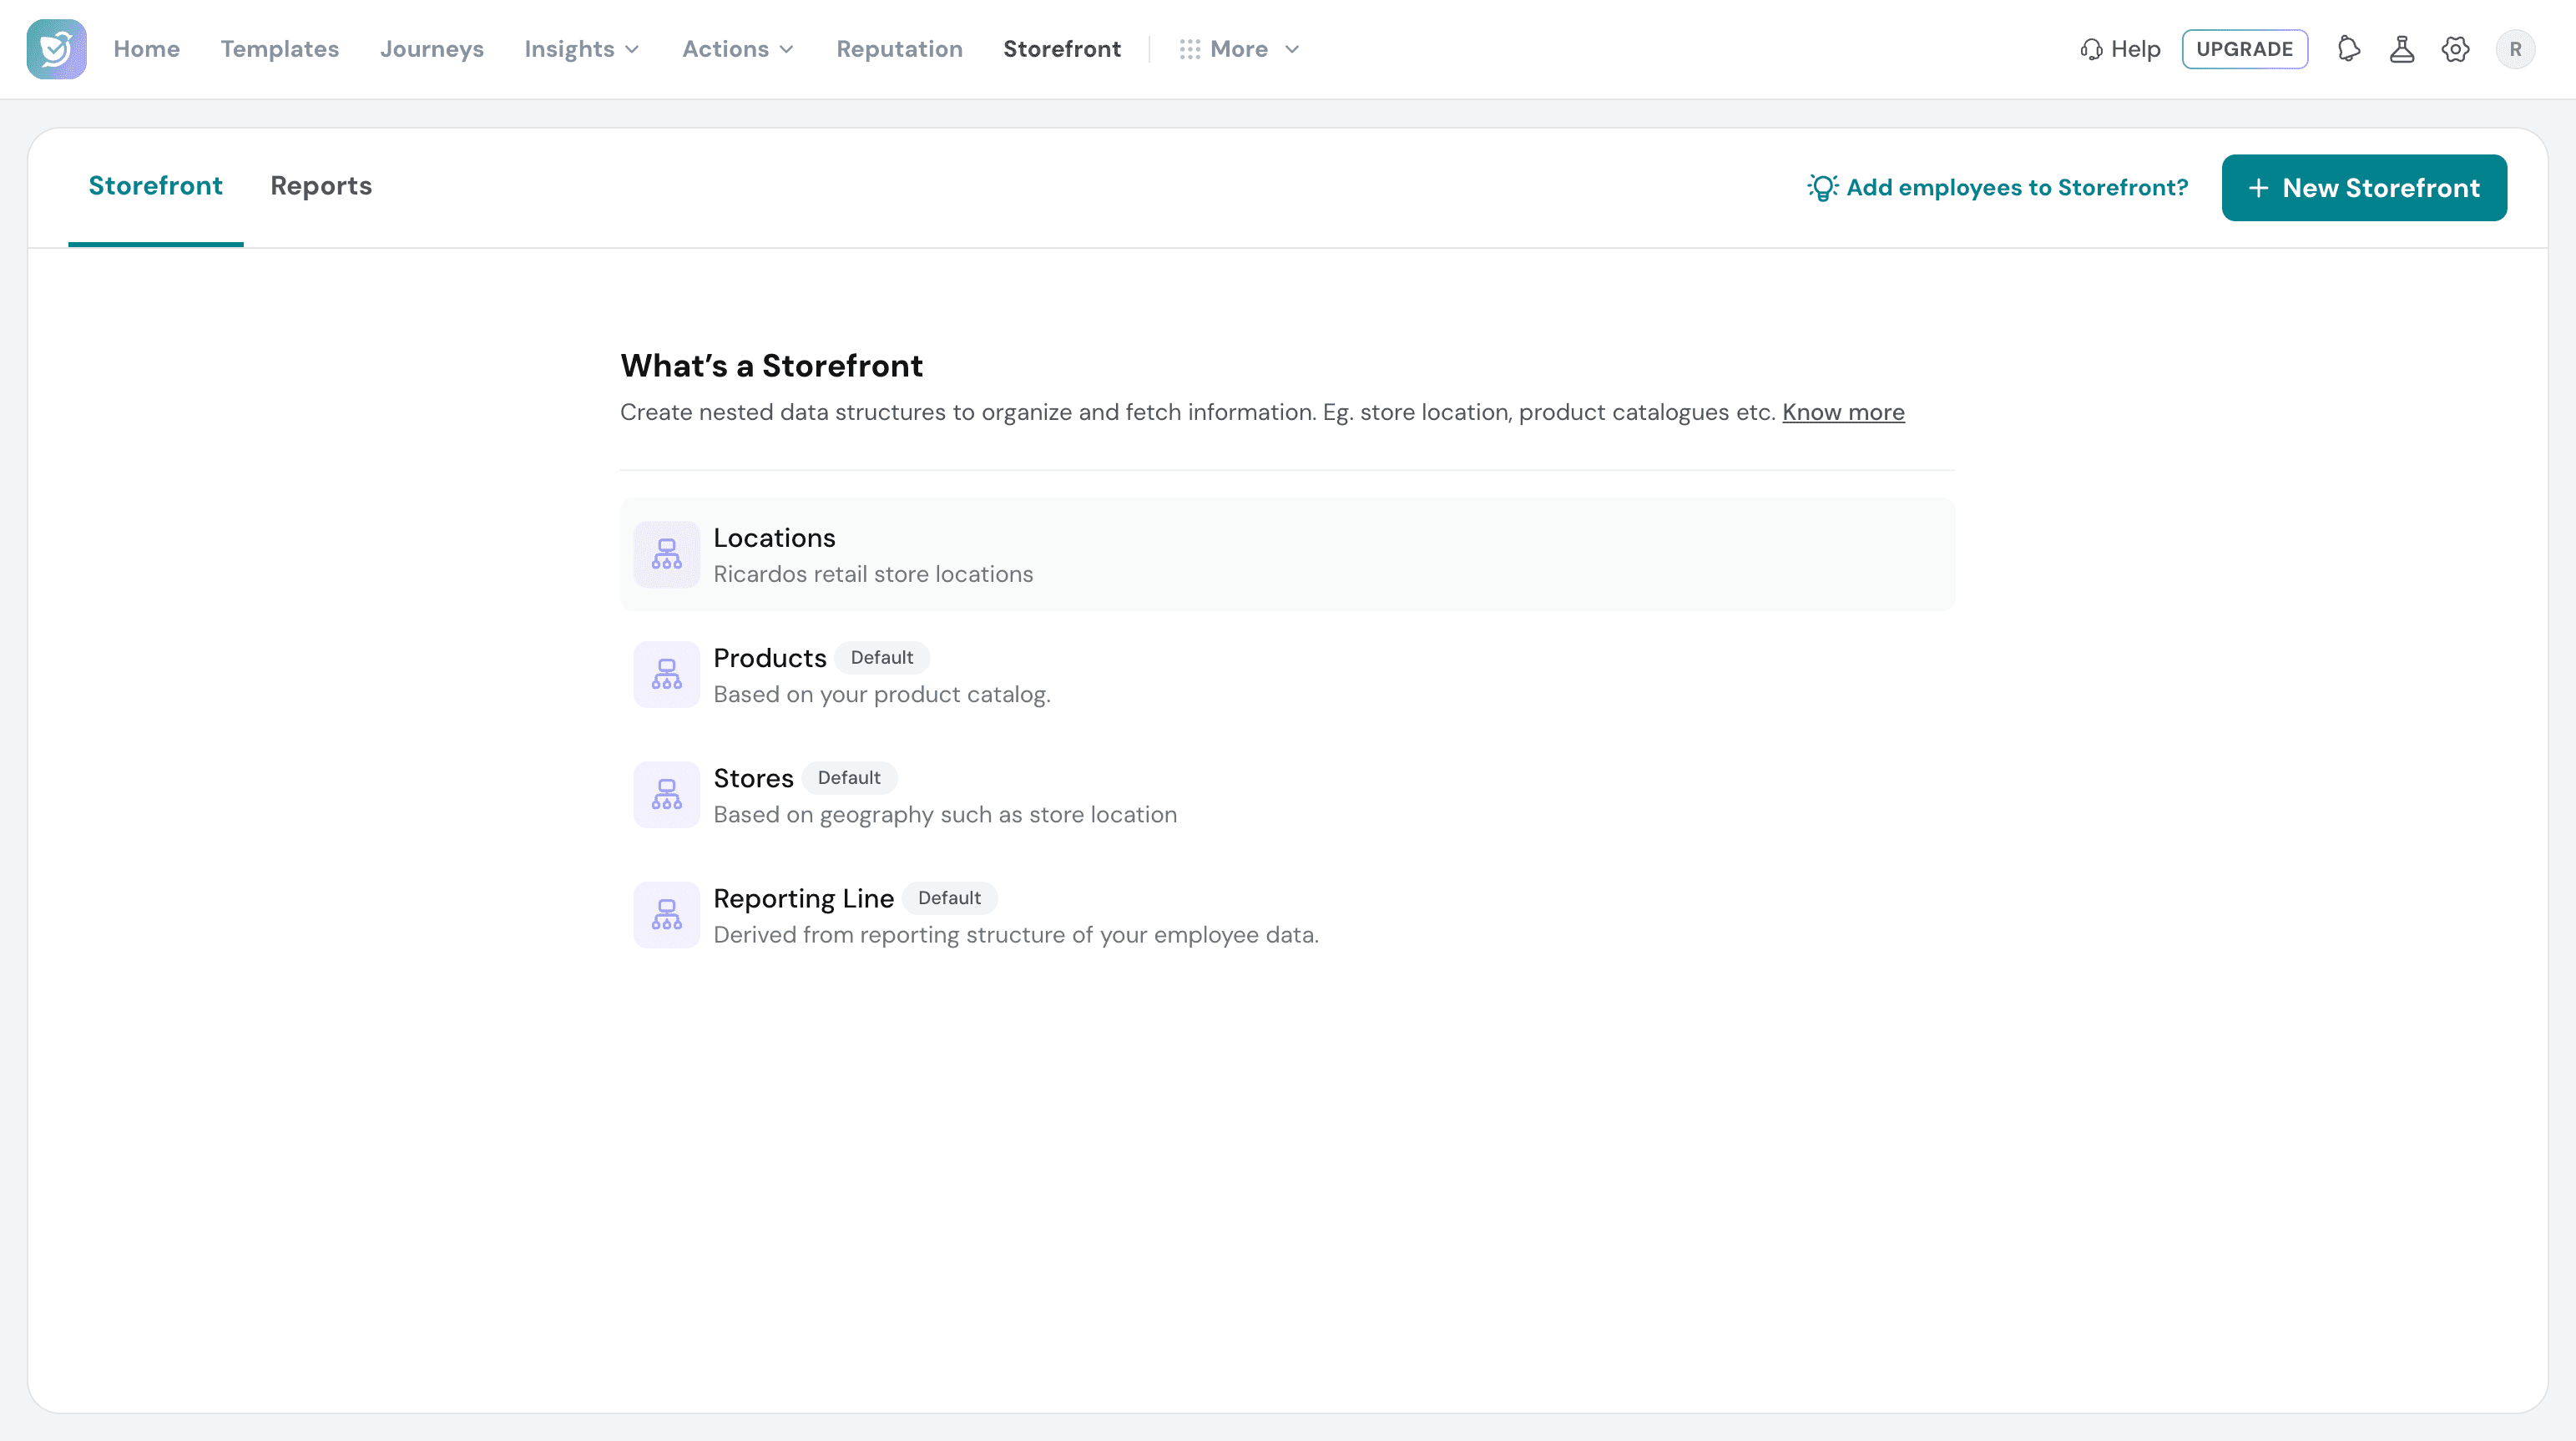
2. We've already set up three templates for you — Products, Stores, and Reporting Line — each marked Default. They're ready to use as they are, and you can edit or delete them if they don't fit.
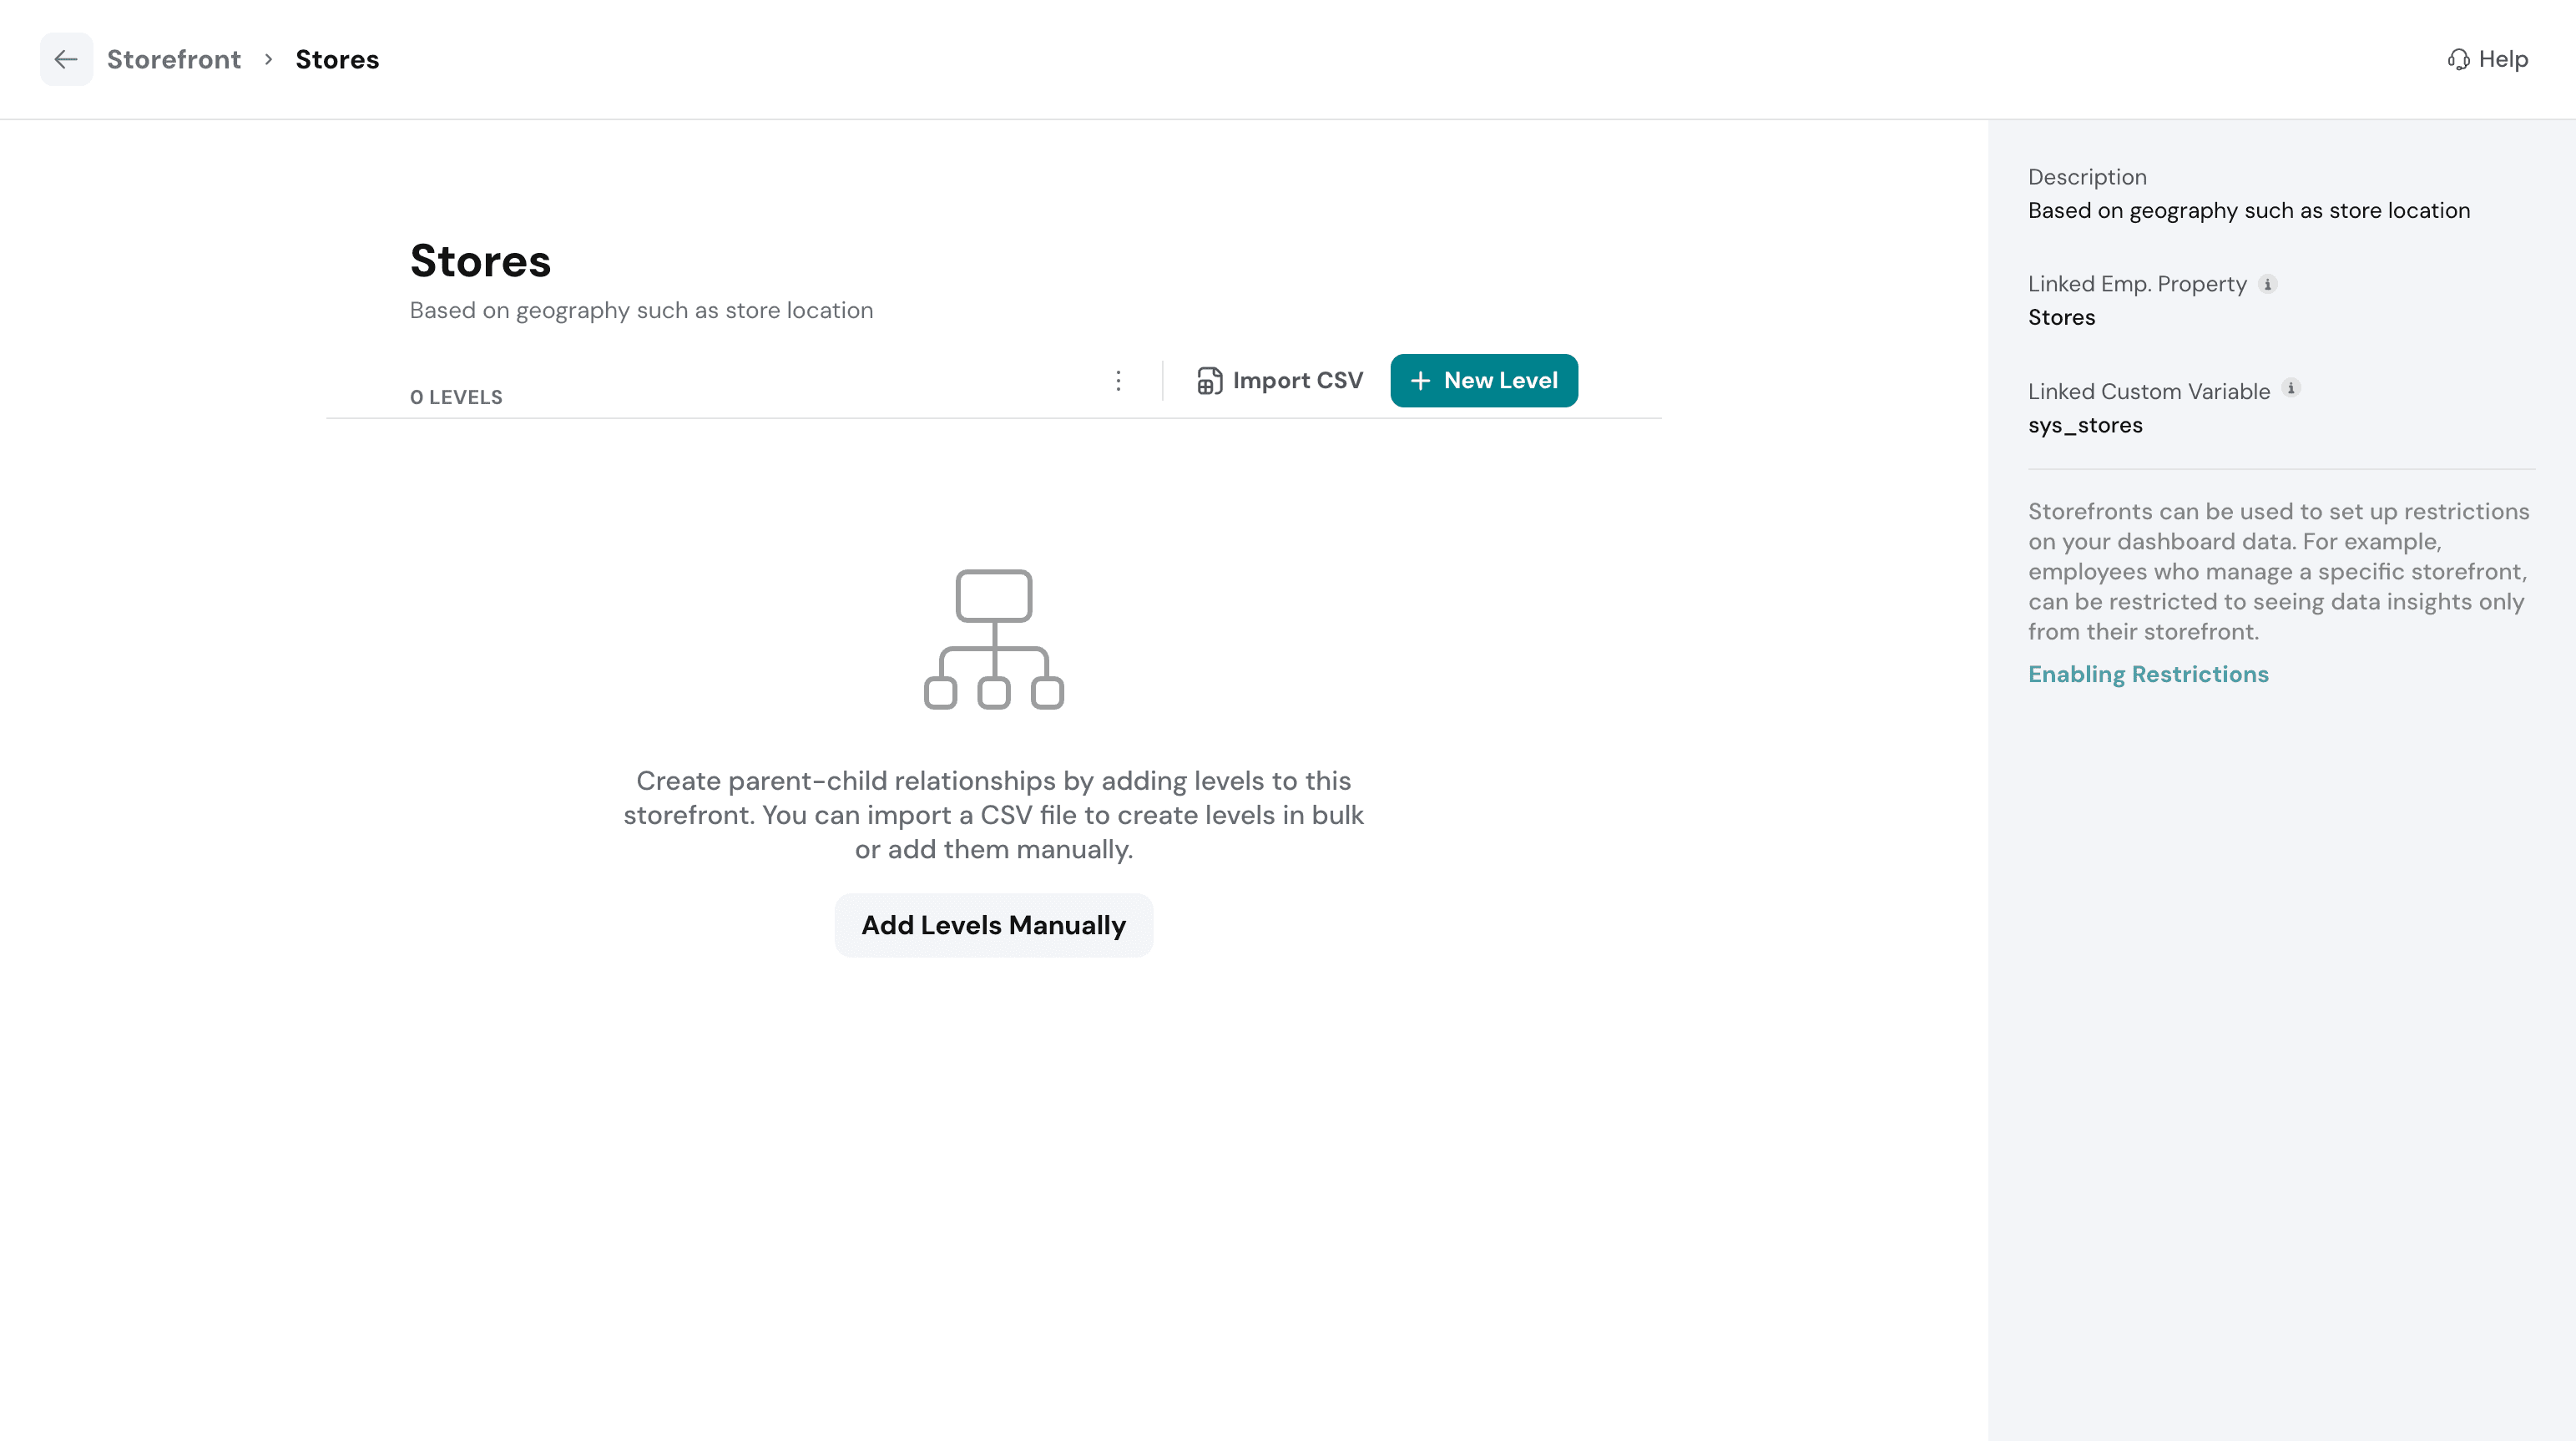
3. Click any template to see its structure.
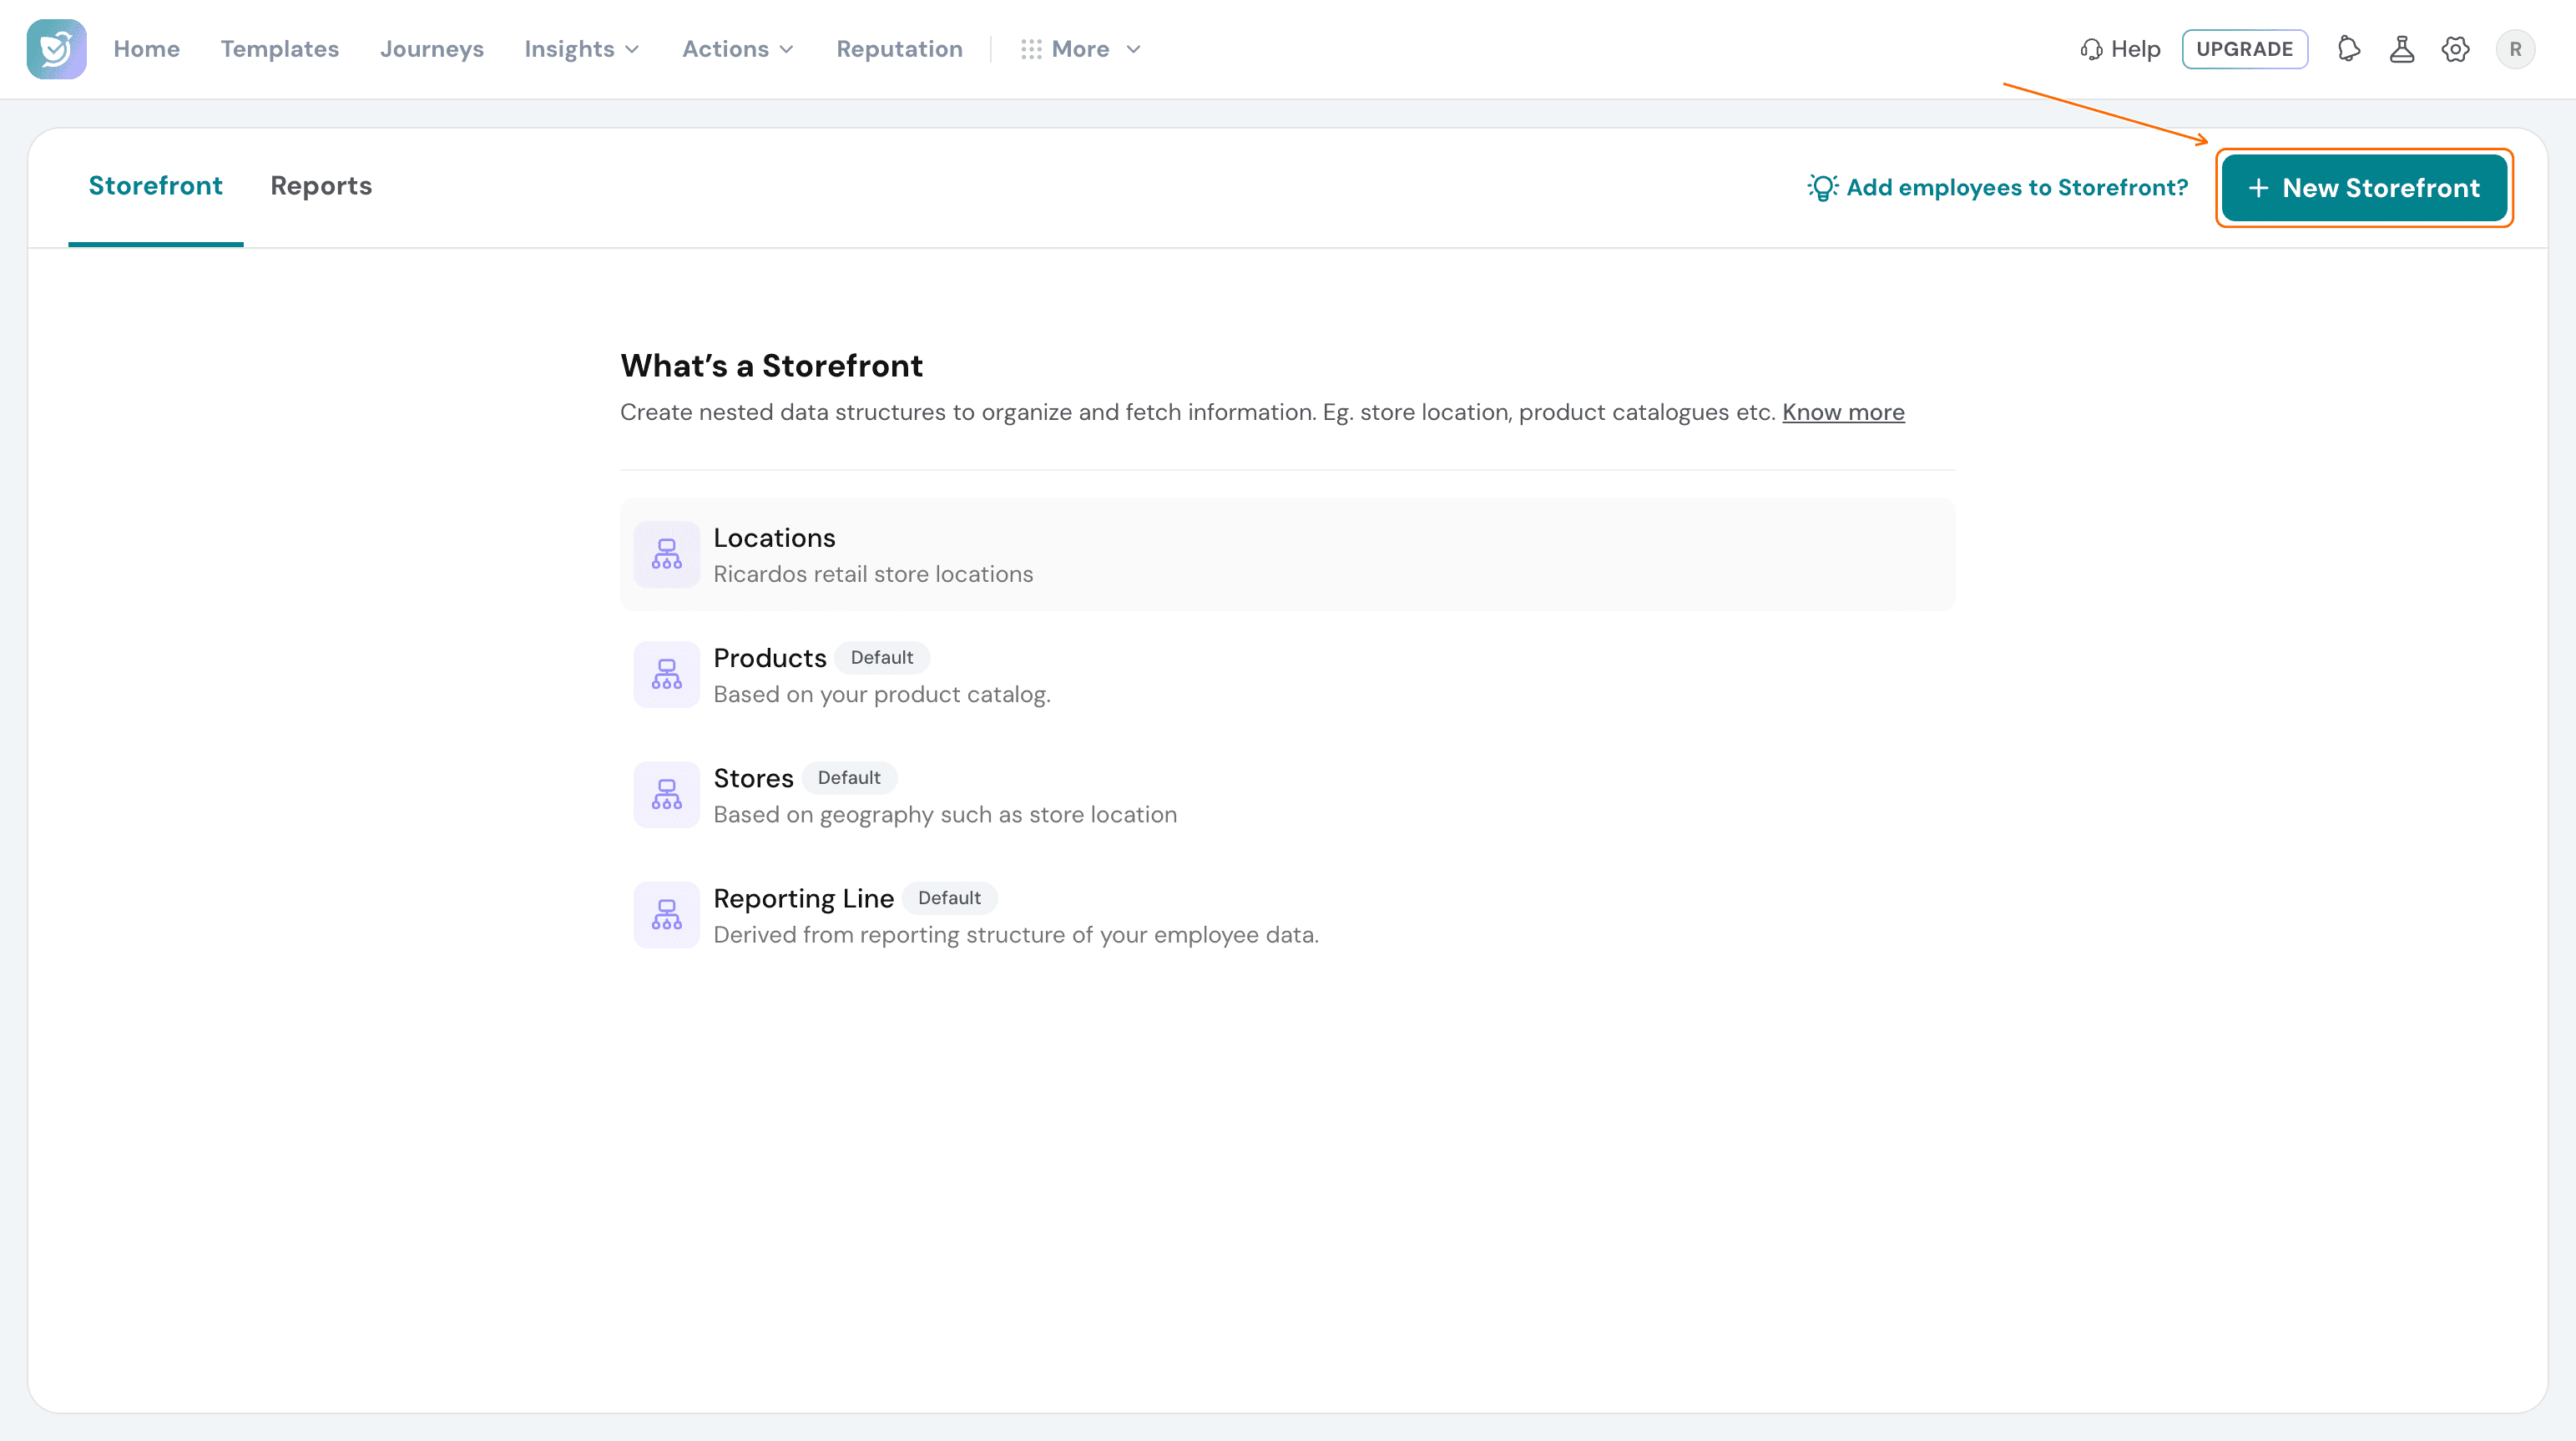
4. If none of the templates fit, click New Storefront to build your own from scratch.
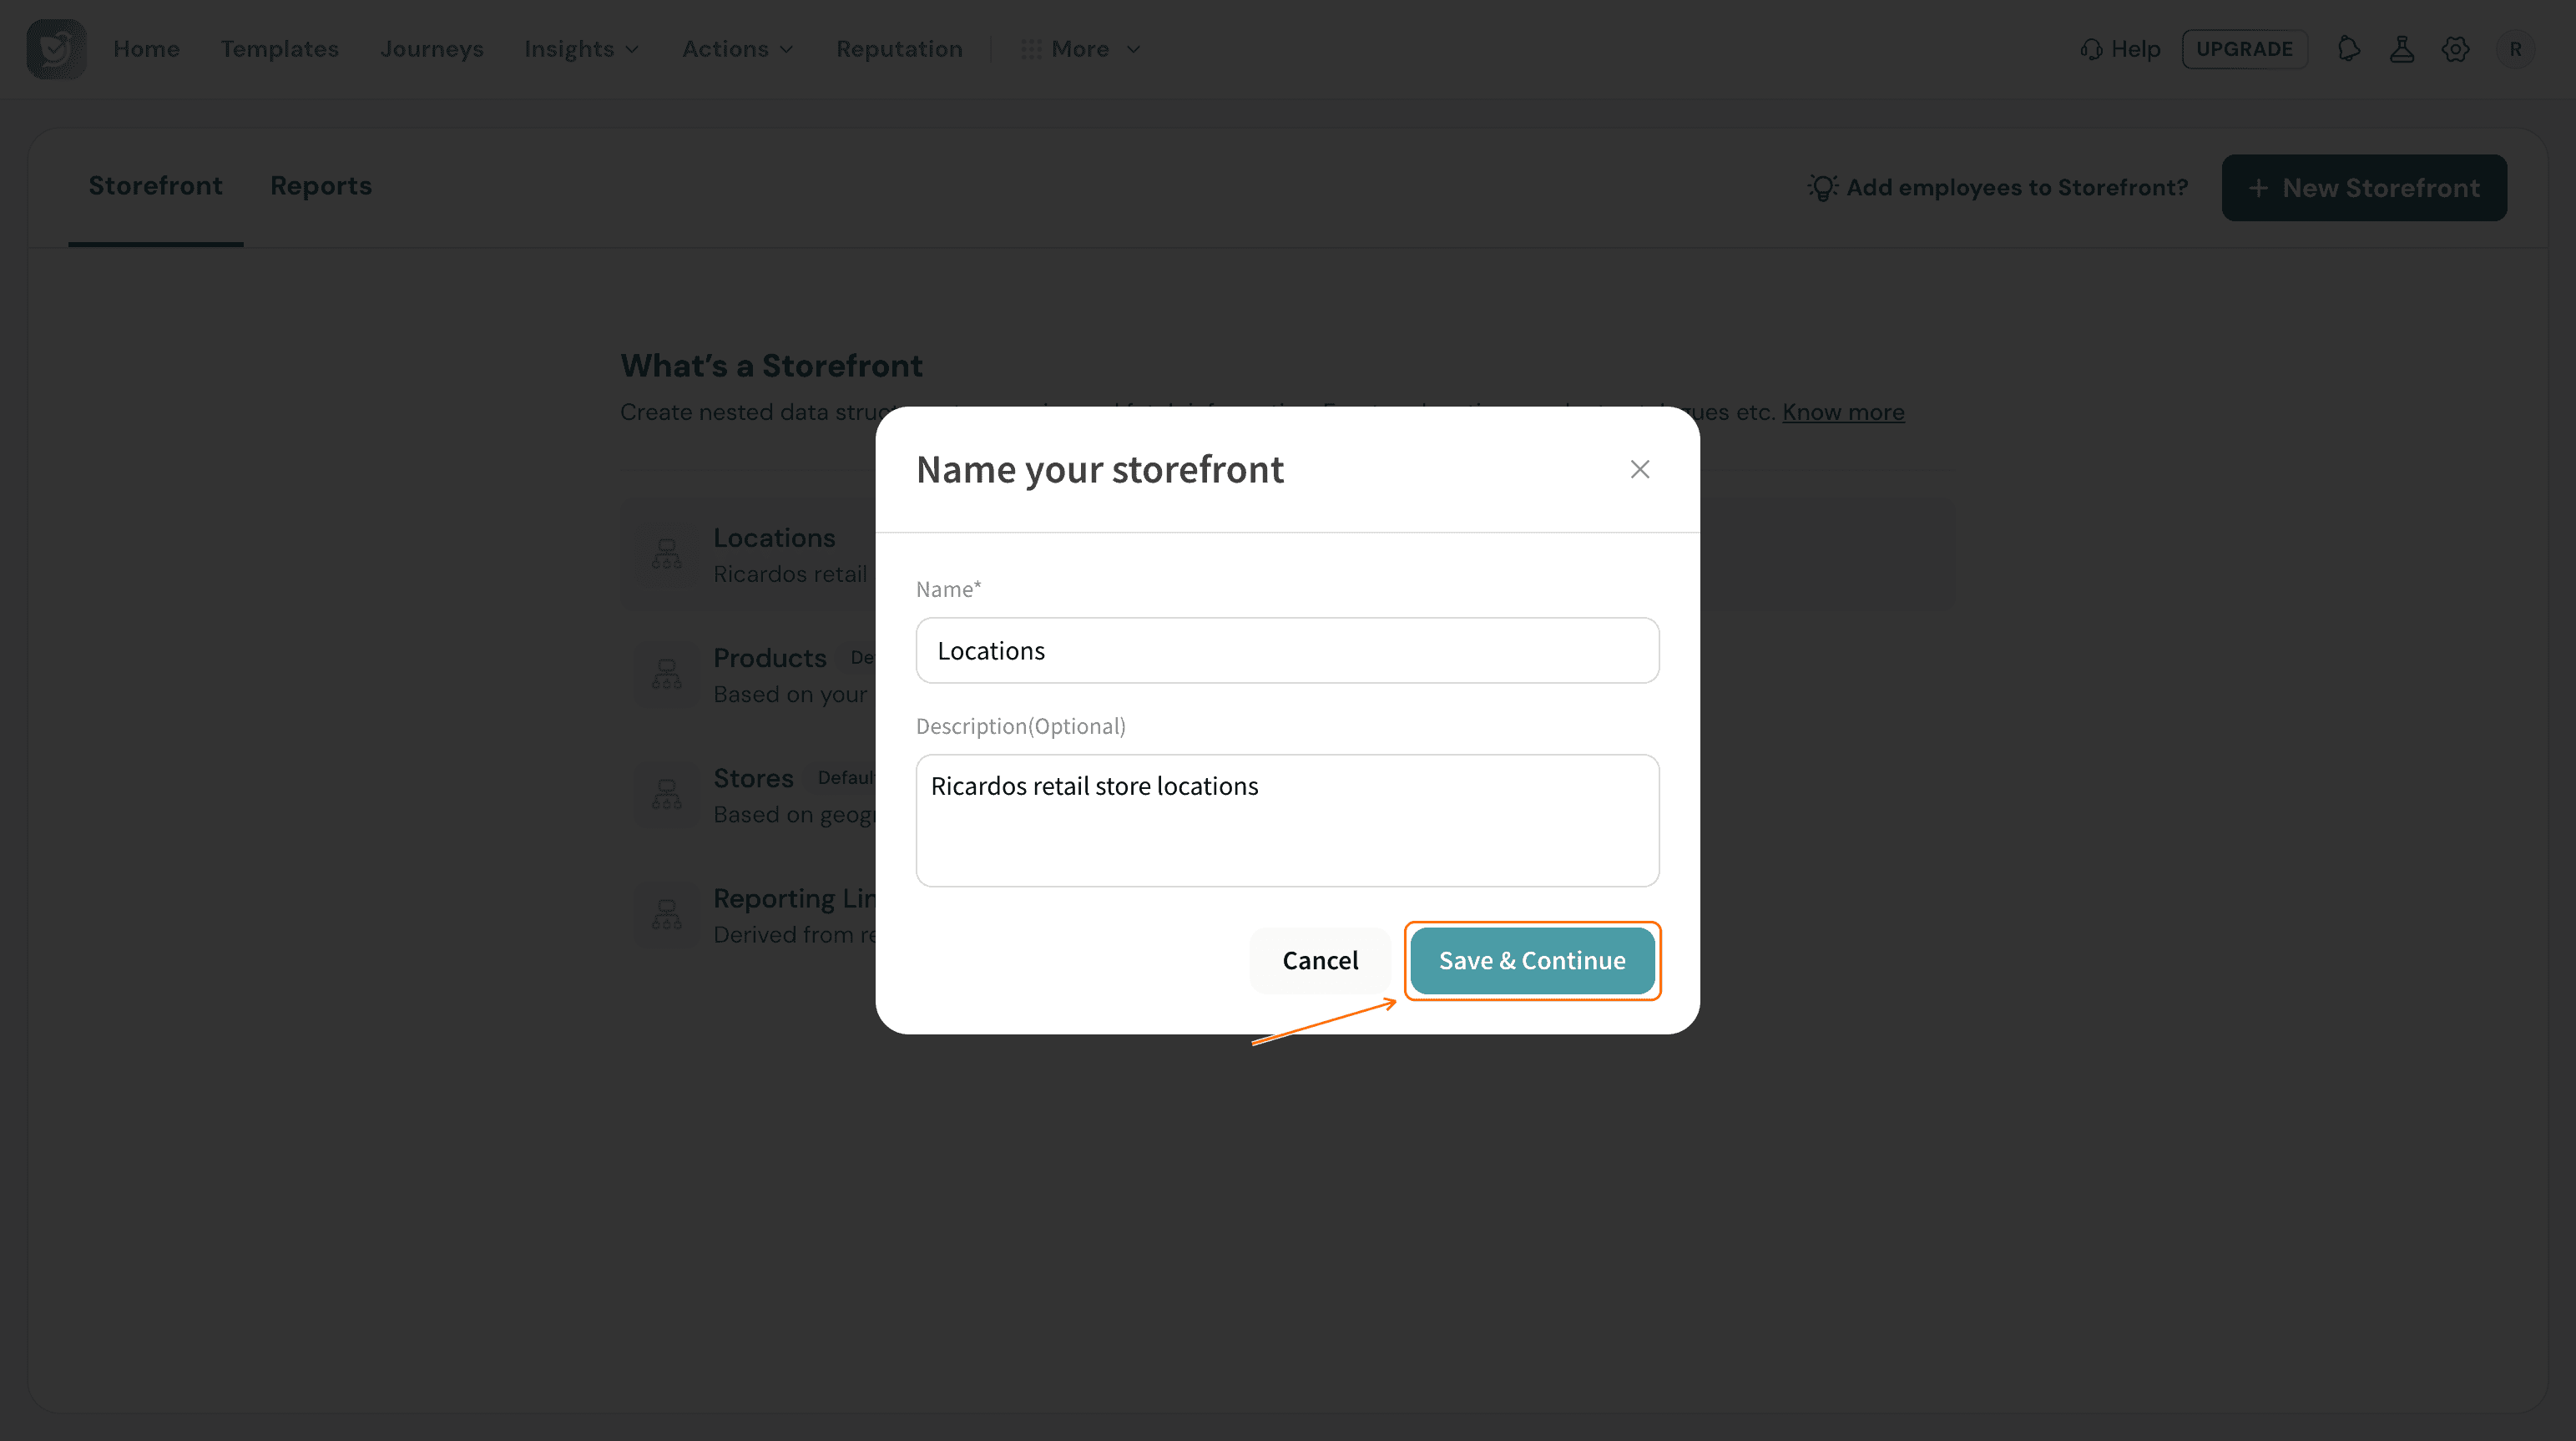
5. Give it a name and a short description, then click Save & Continue.
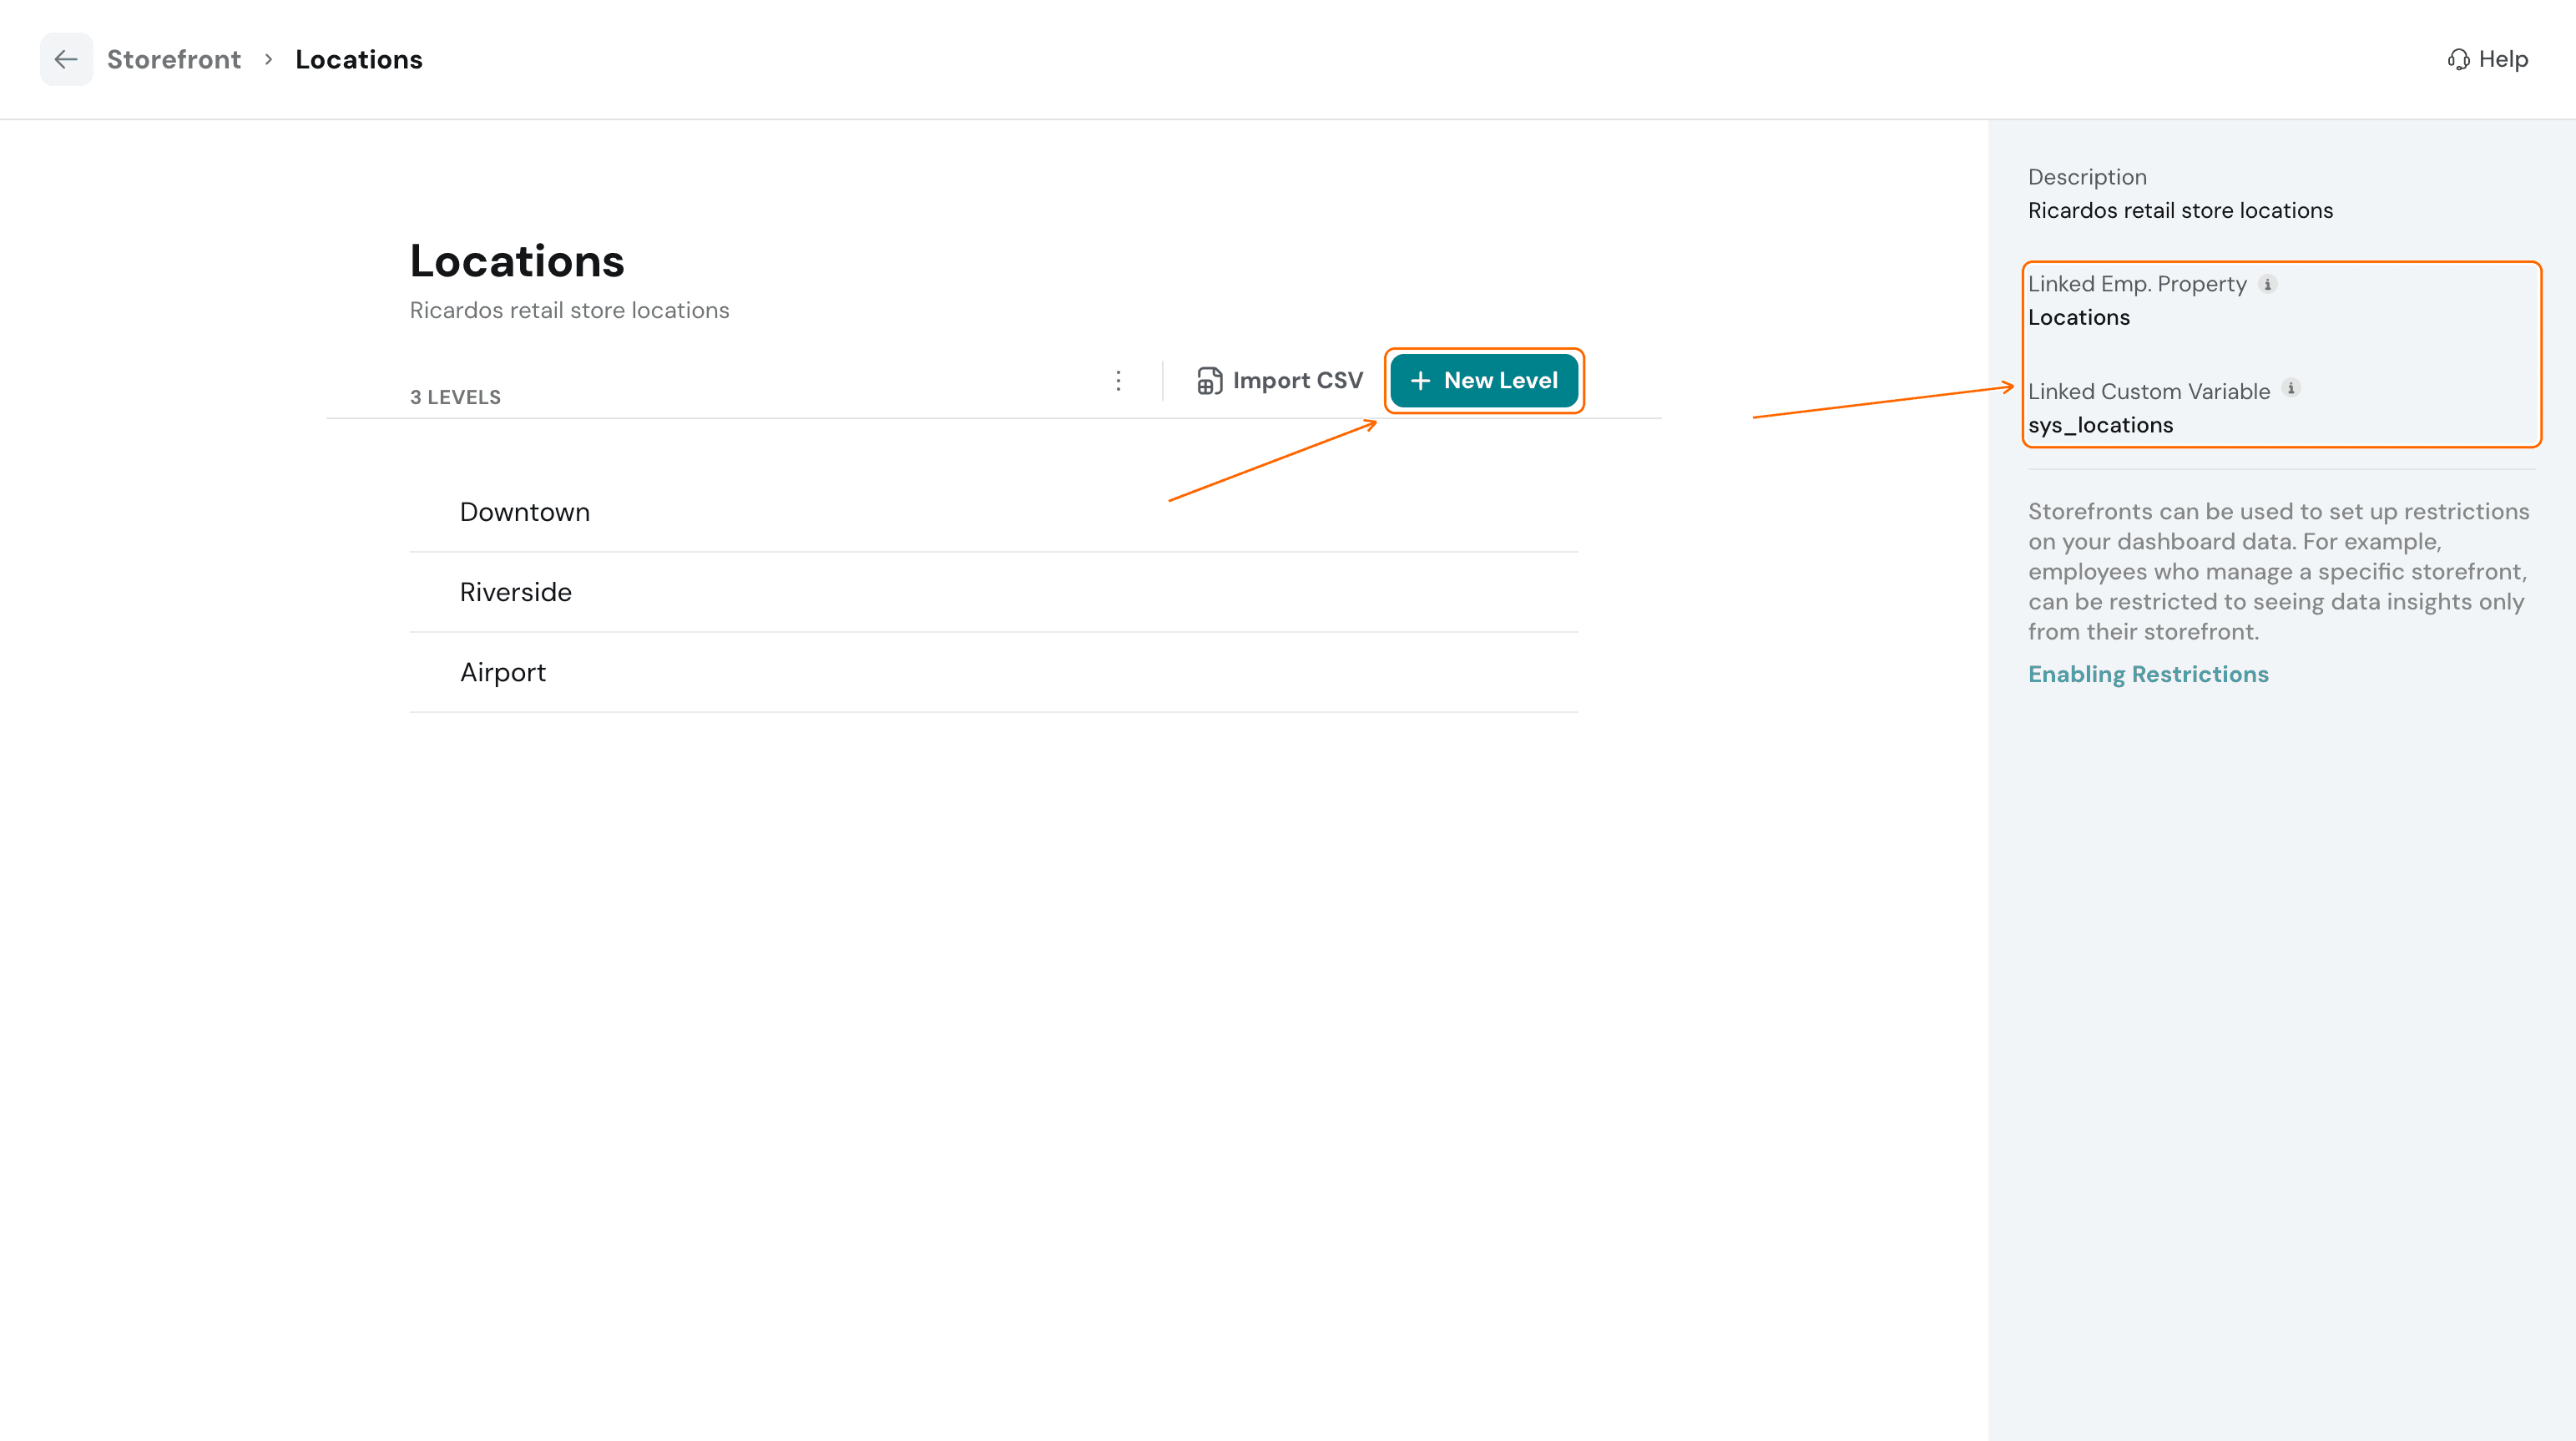
6. As soon as you save, Storefront generates two fields you'll use later — an employee property and a custom variable prefixed sys_ — for a Storefront named "Locations," that's the variable sys_locations. Click New Level to continue.
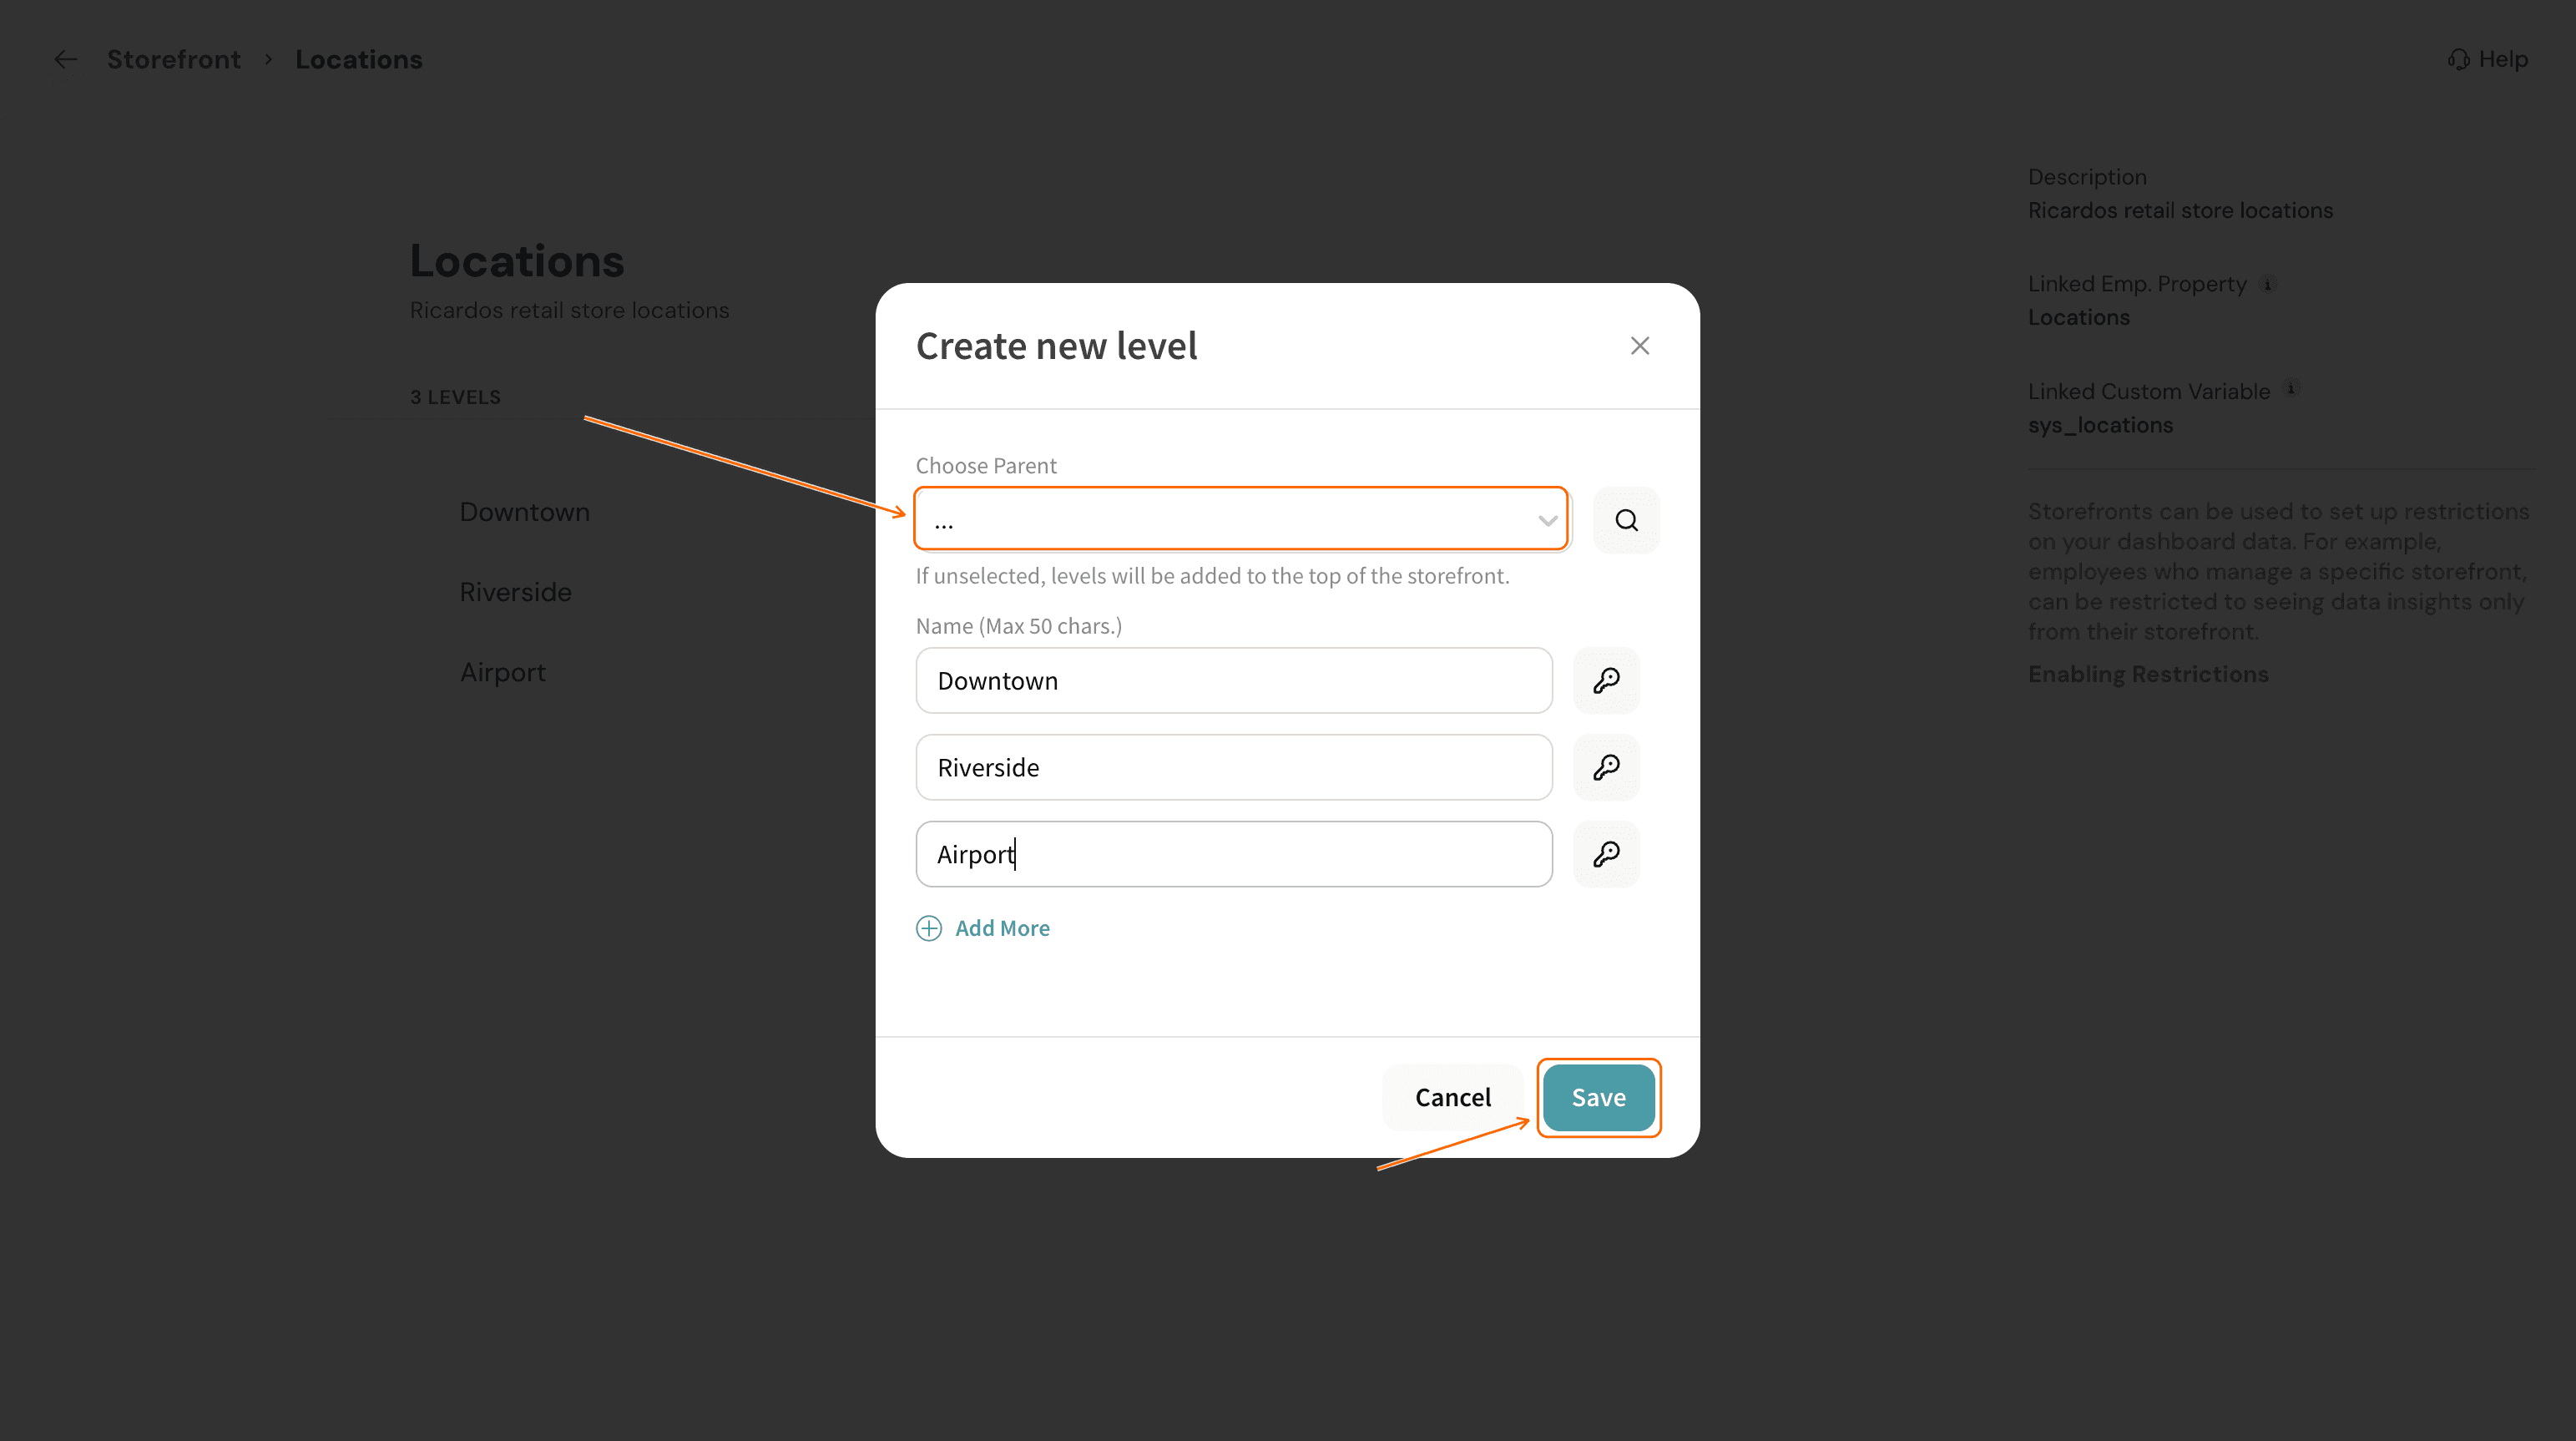
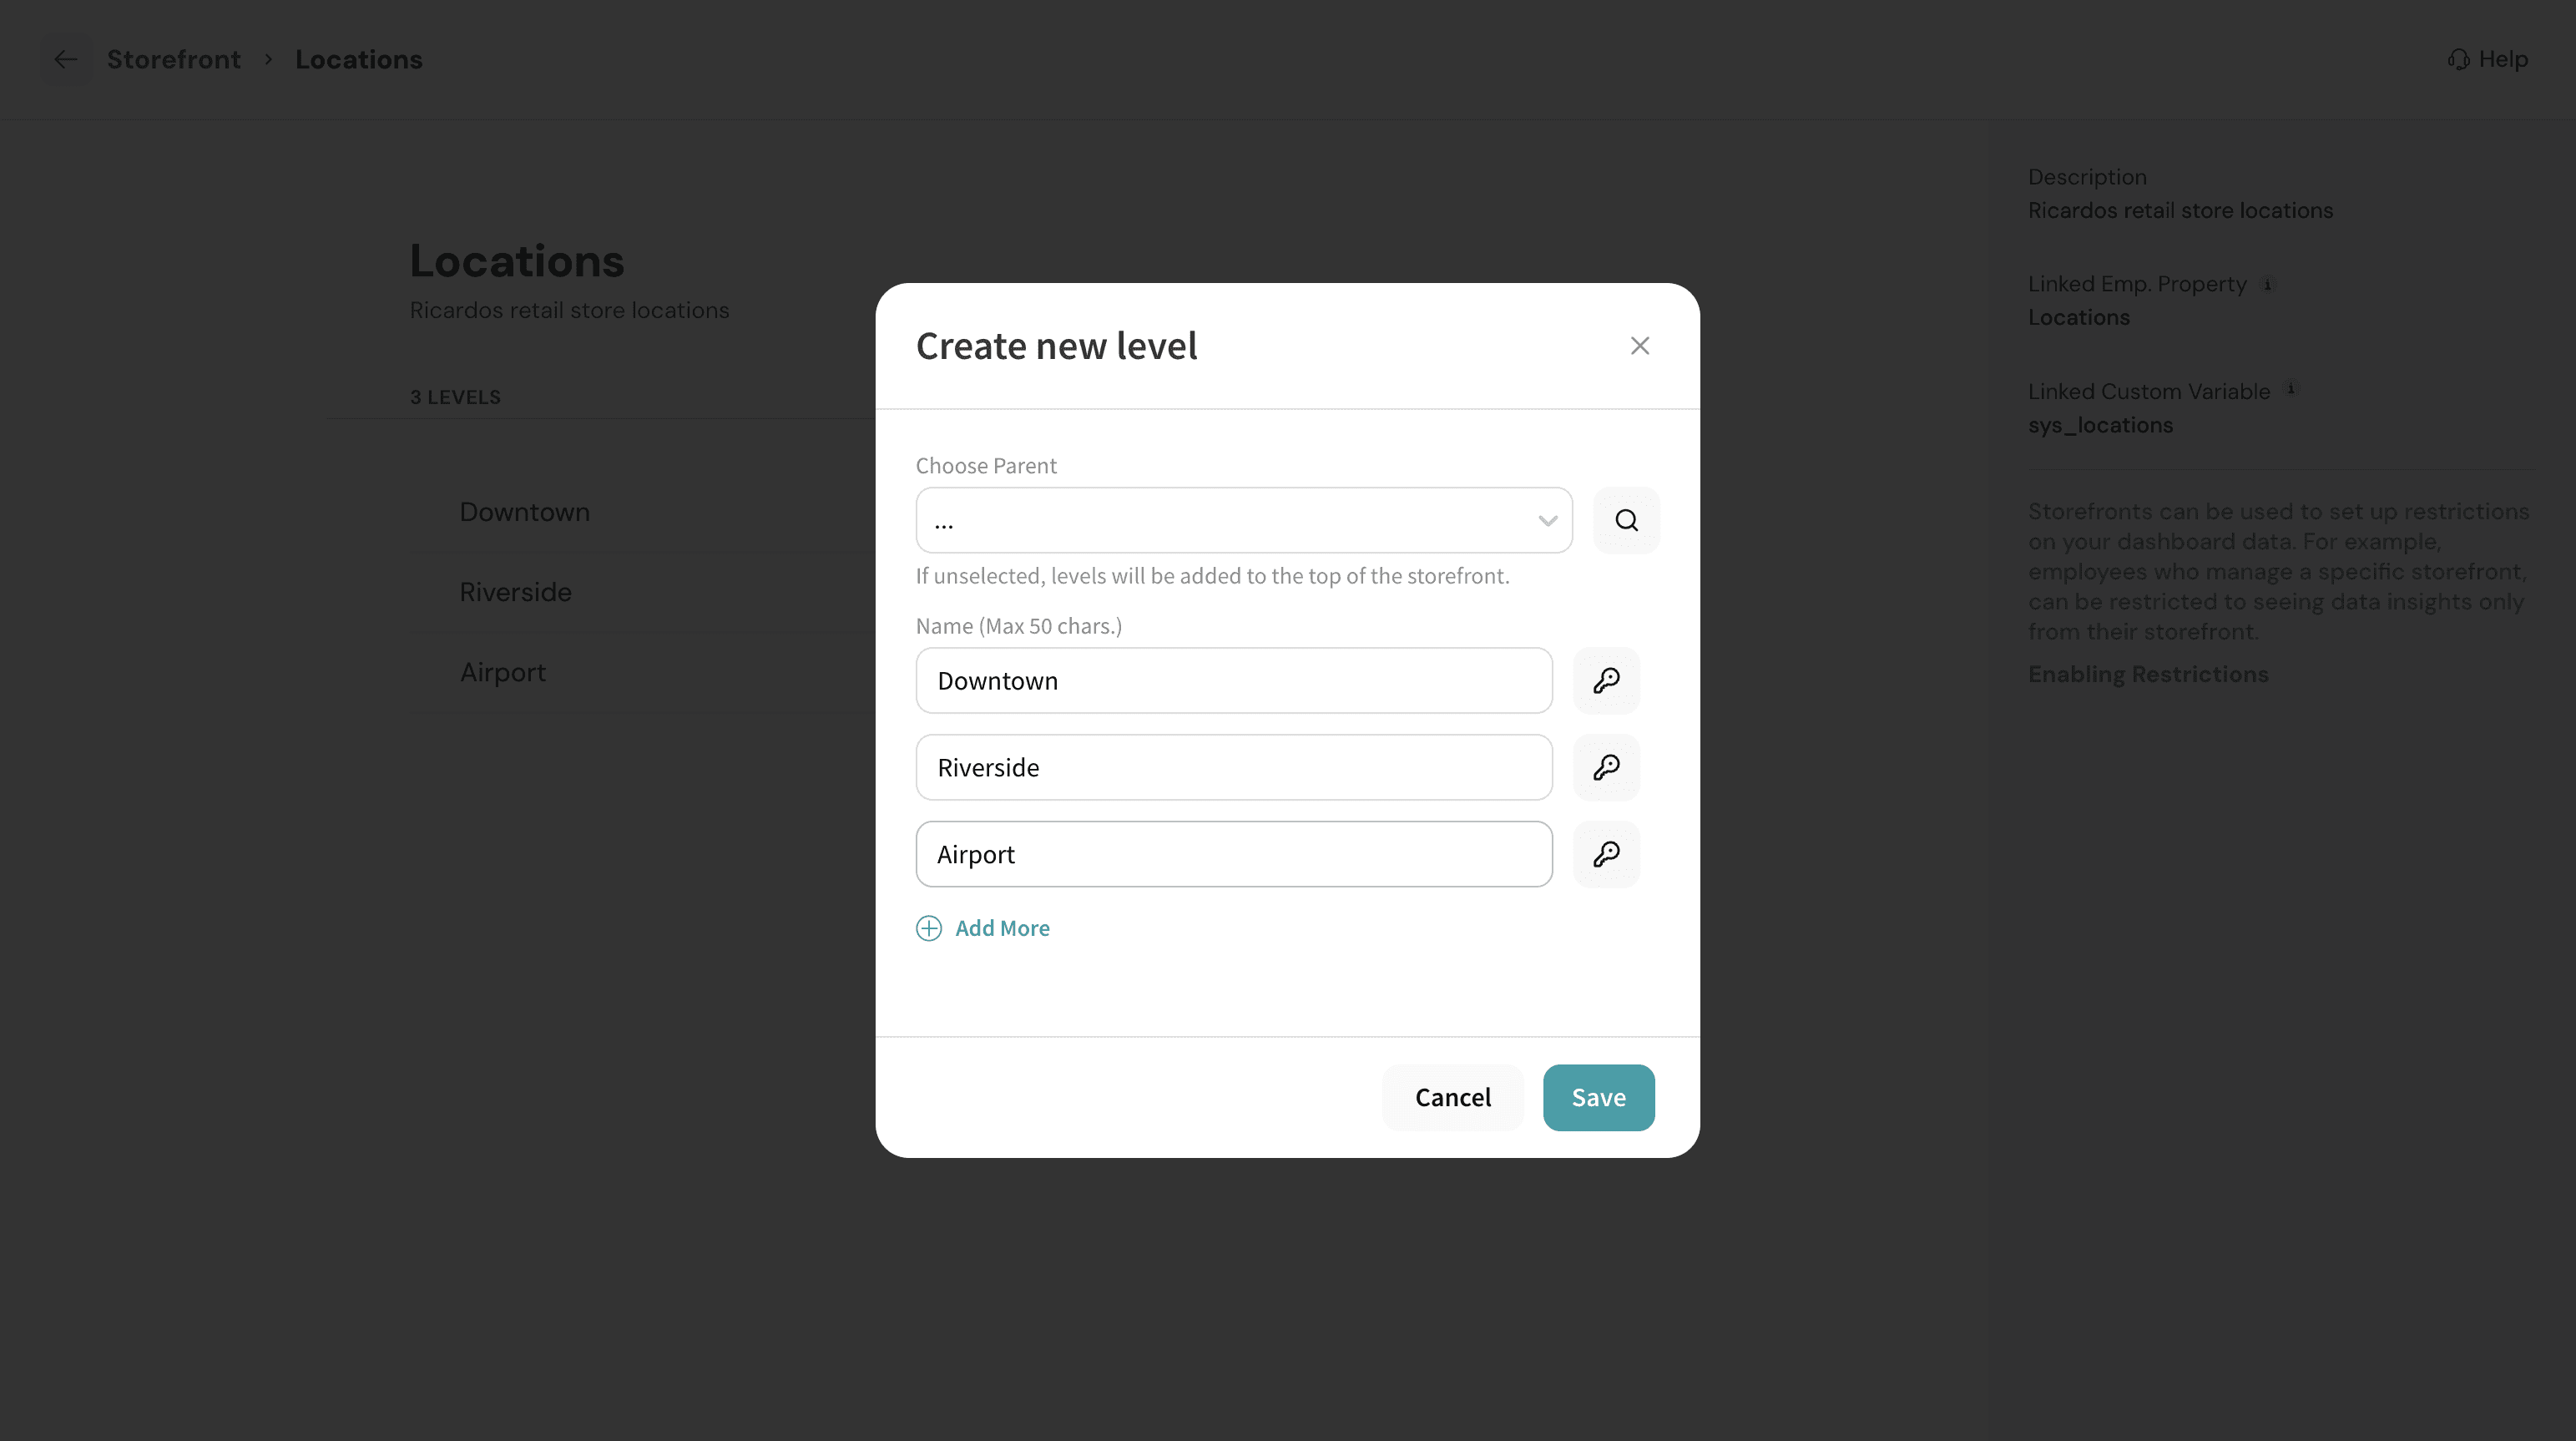
7. Type each level's name in the dialog that opens. Each level also has its own key (the small key icon next to its name field, defaulting to the level's name in lowercase) — you'll use this key in Step 11. You can choose a parent to nest a level under an existing one, and use Add More to add further levels. When you're done, click Save.
Your levels appear as a flat list once saved.
Mapping Storefront levels to employees
8. From your Employee Directory, click Add Employees.
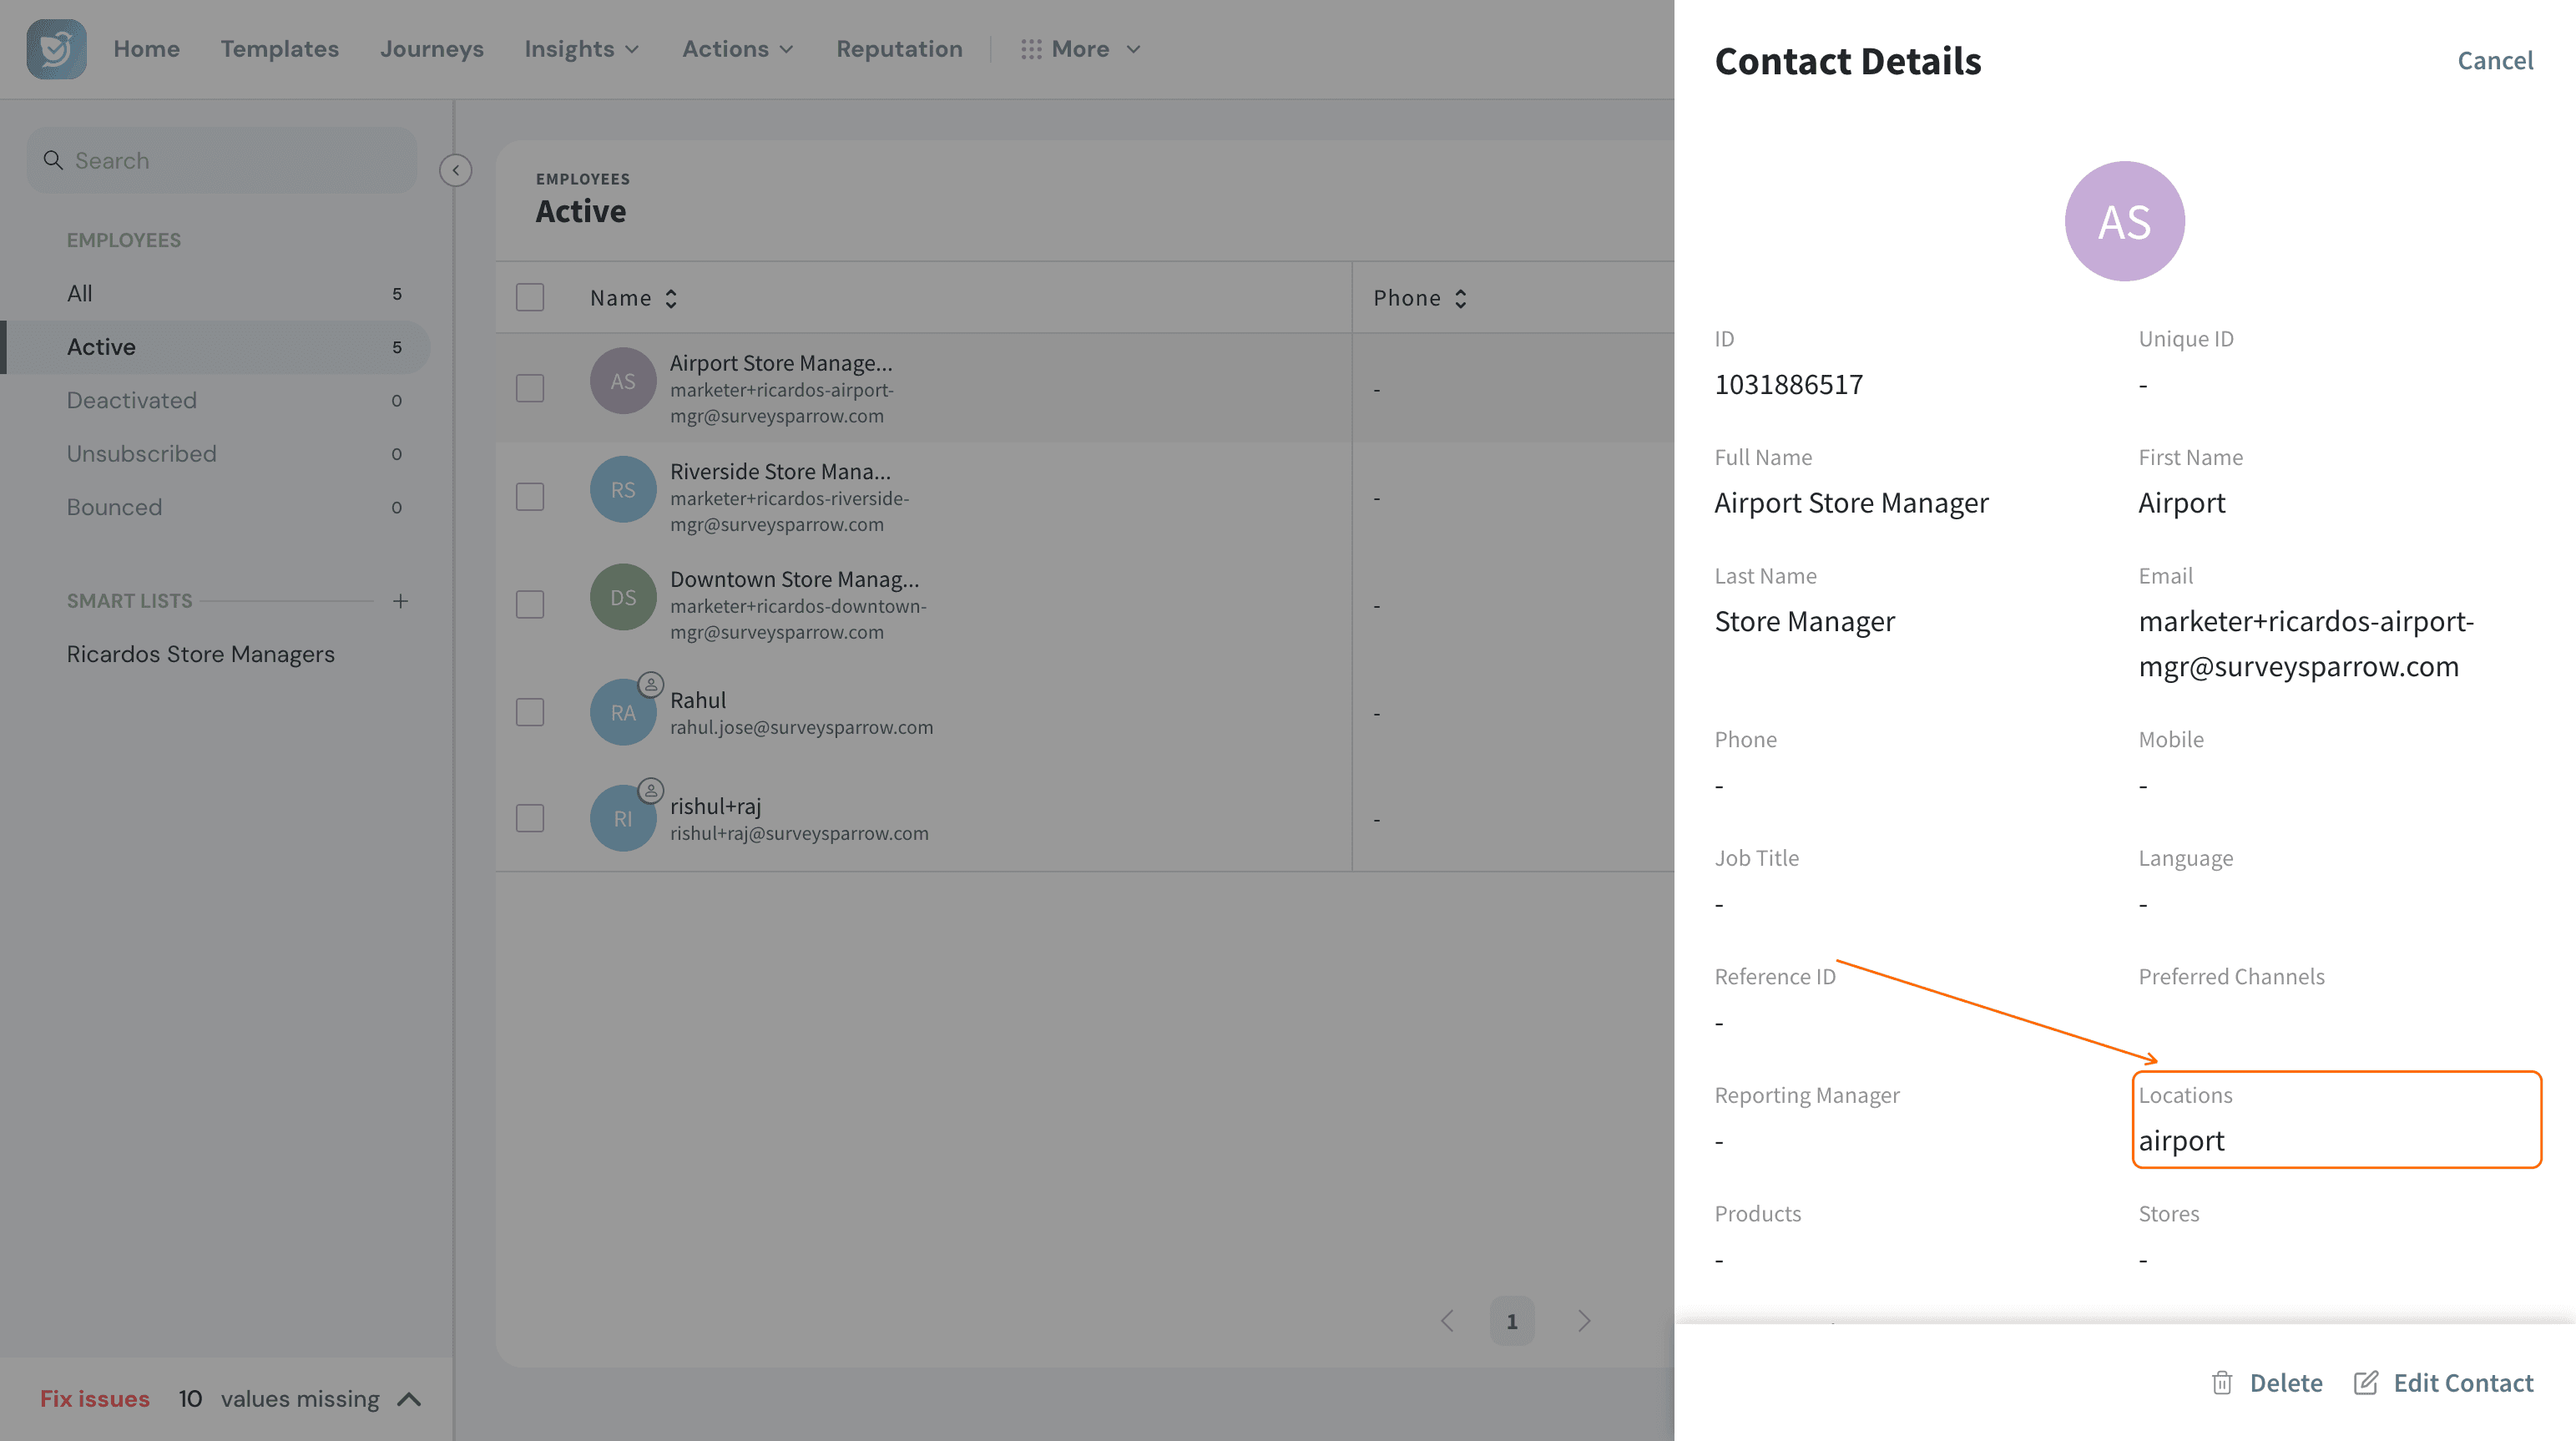
9. The property Storefront created for you in Step 6 appears as a field on the employee record. Set it to the level that person belongs to.
Mapping the Storefront variable to a survey
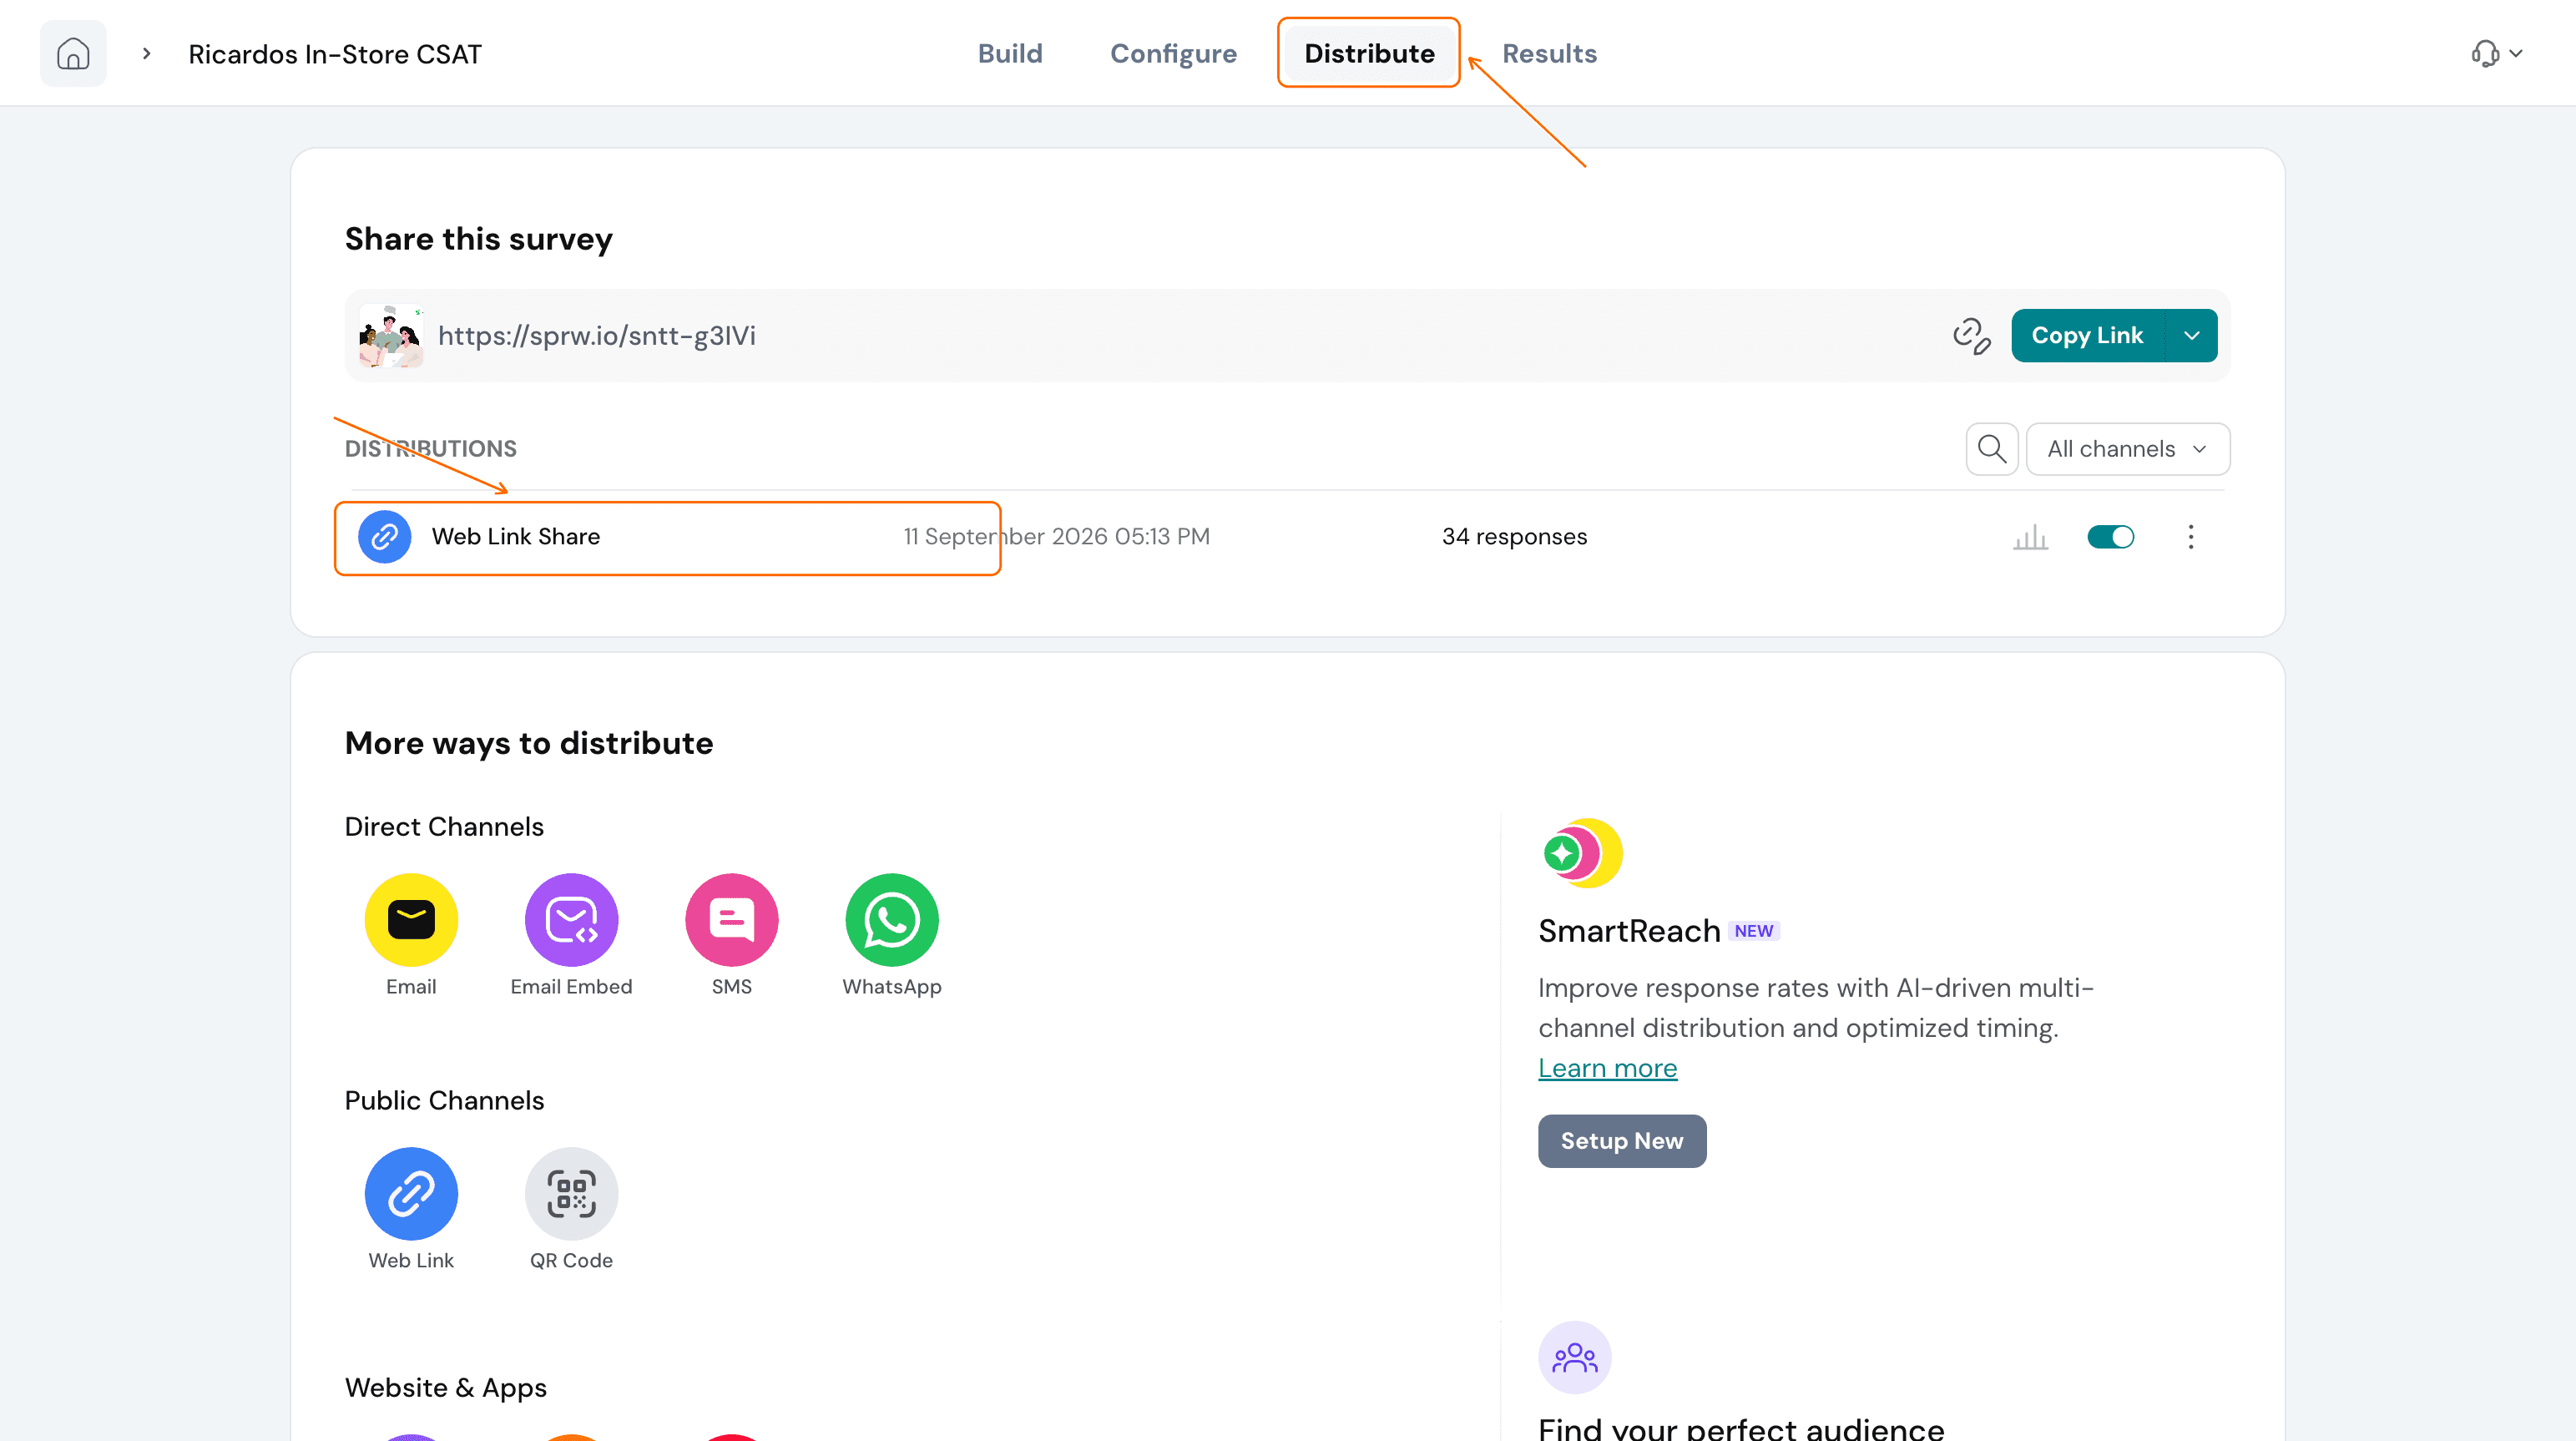
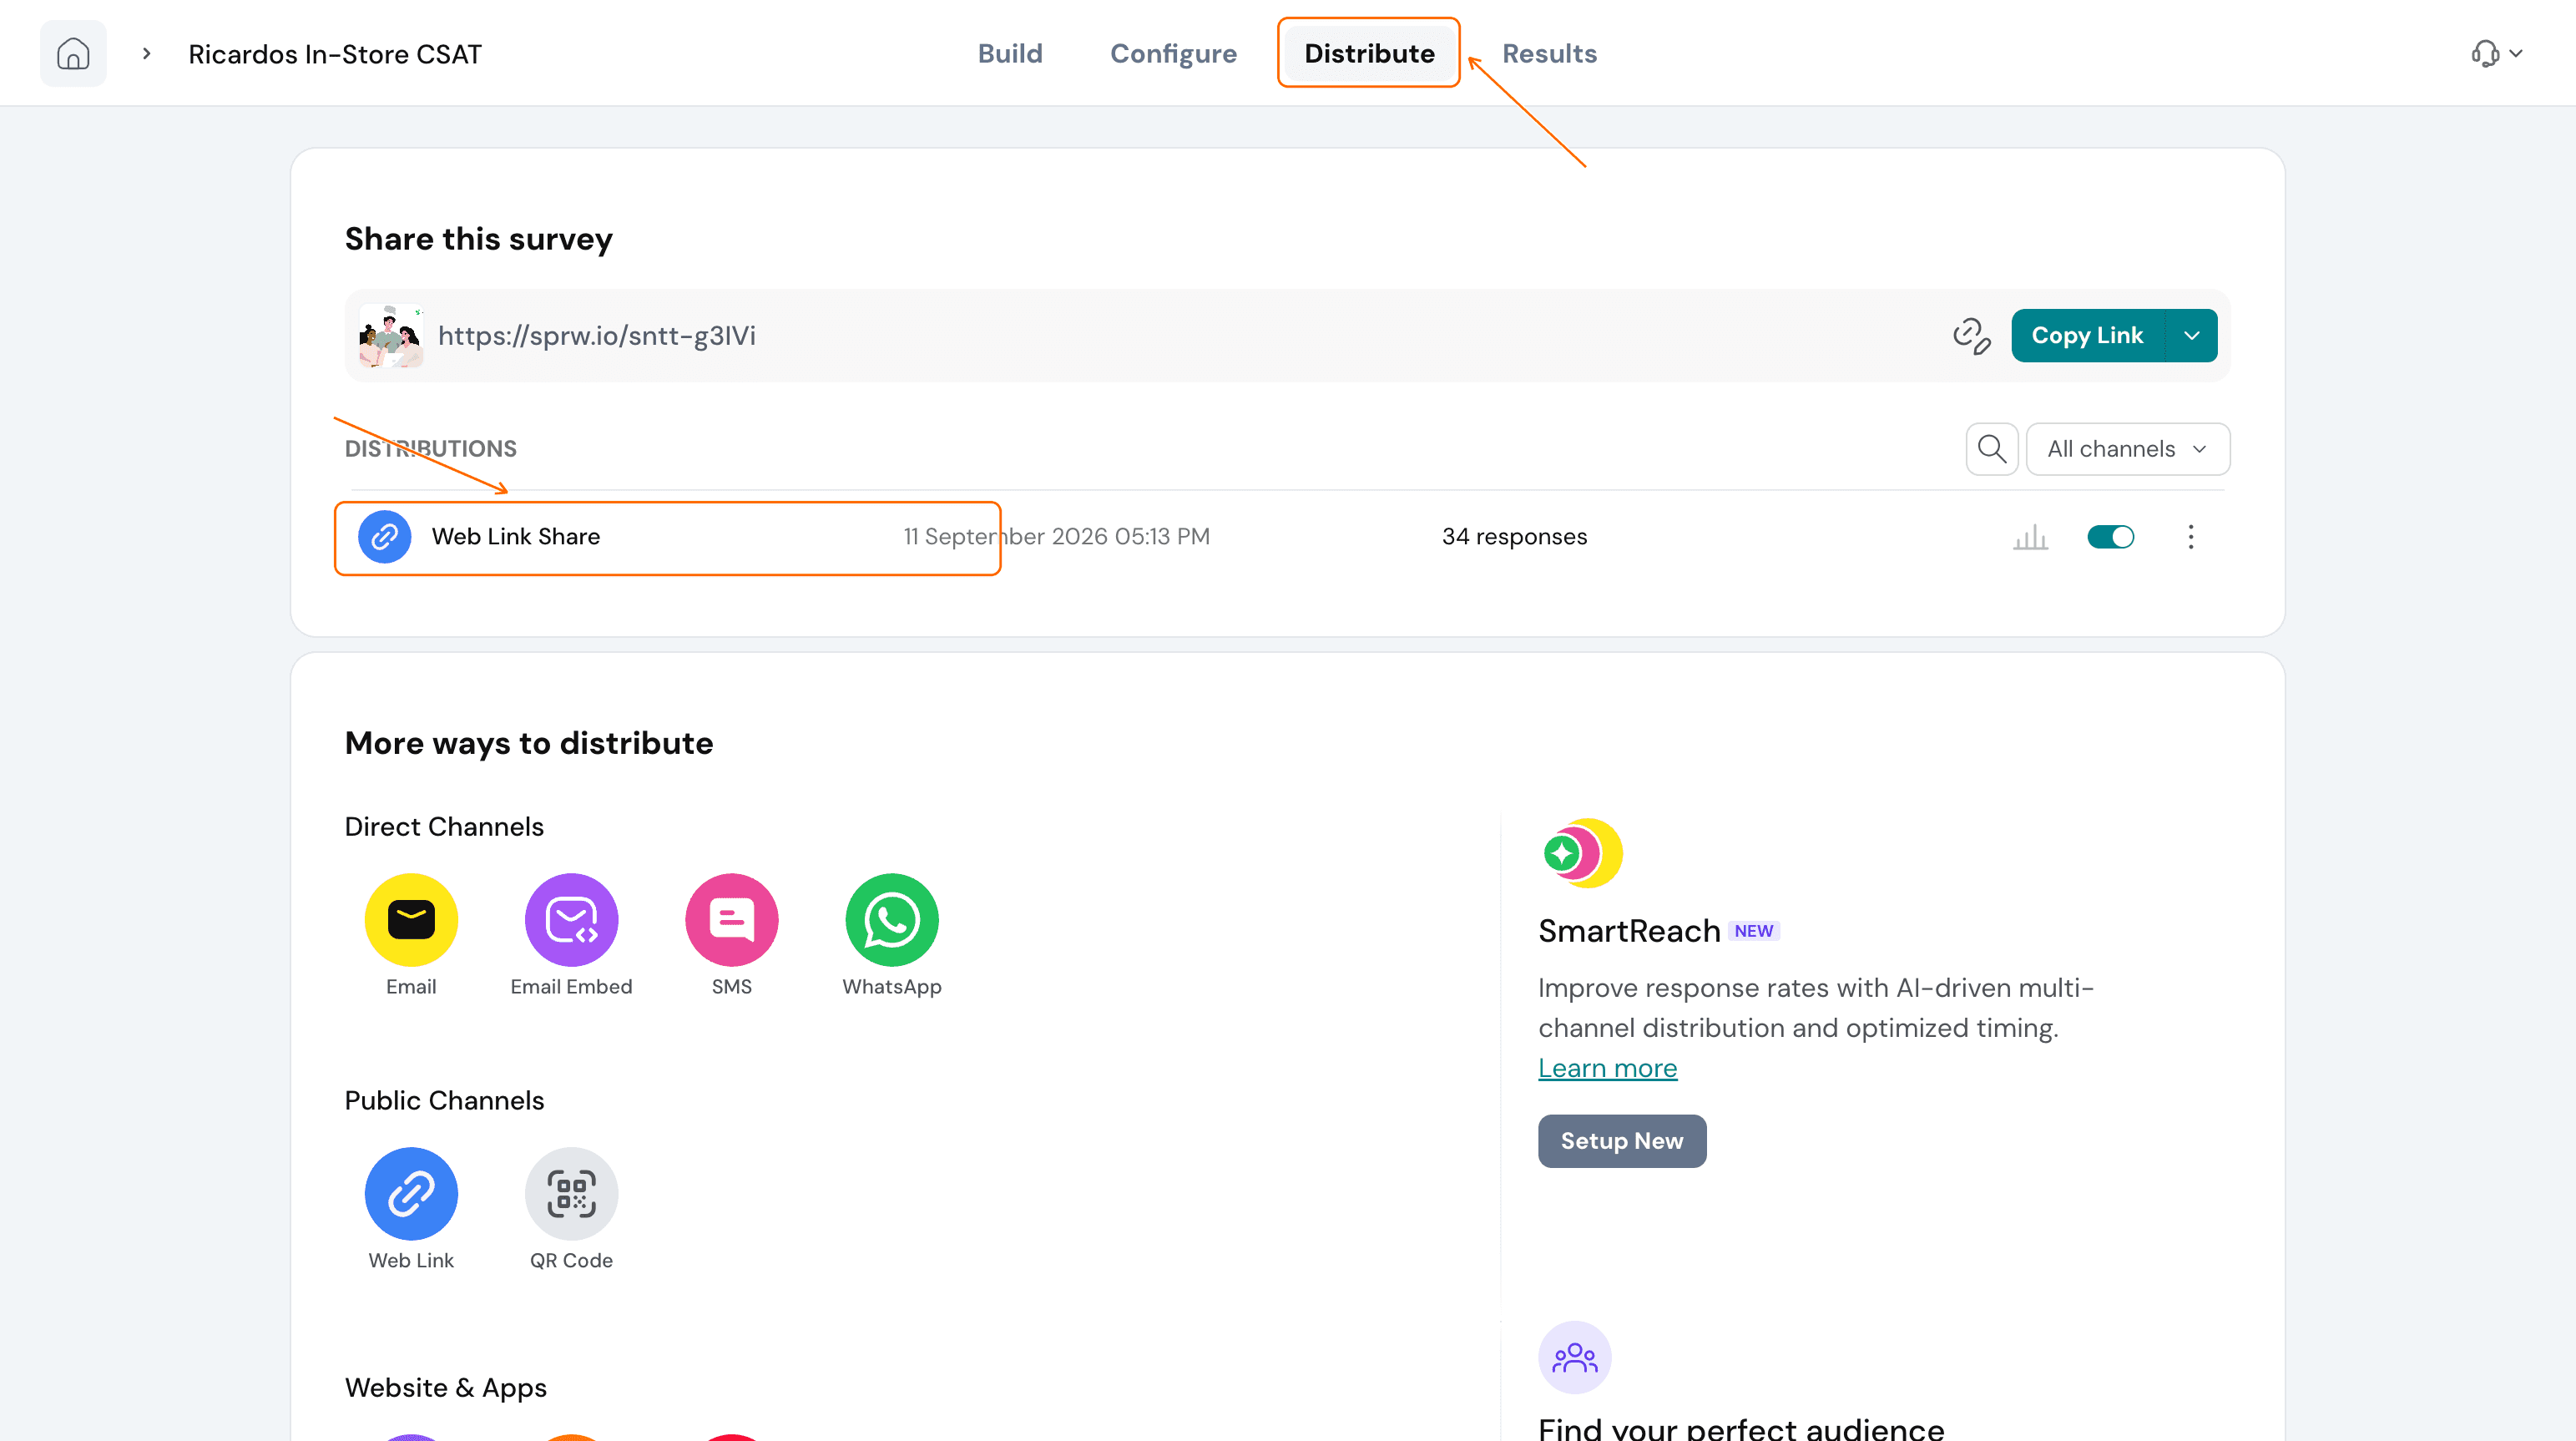
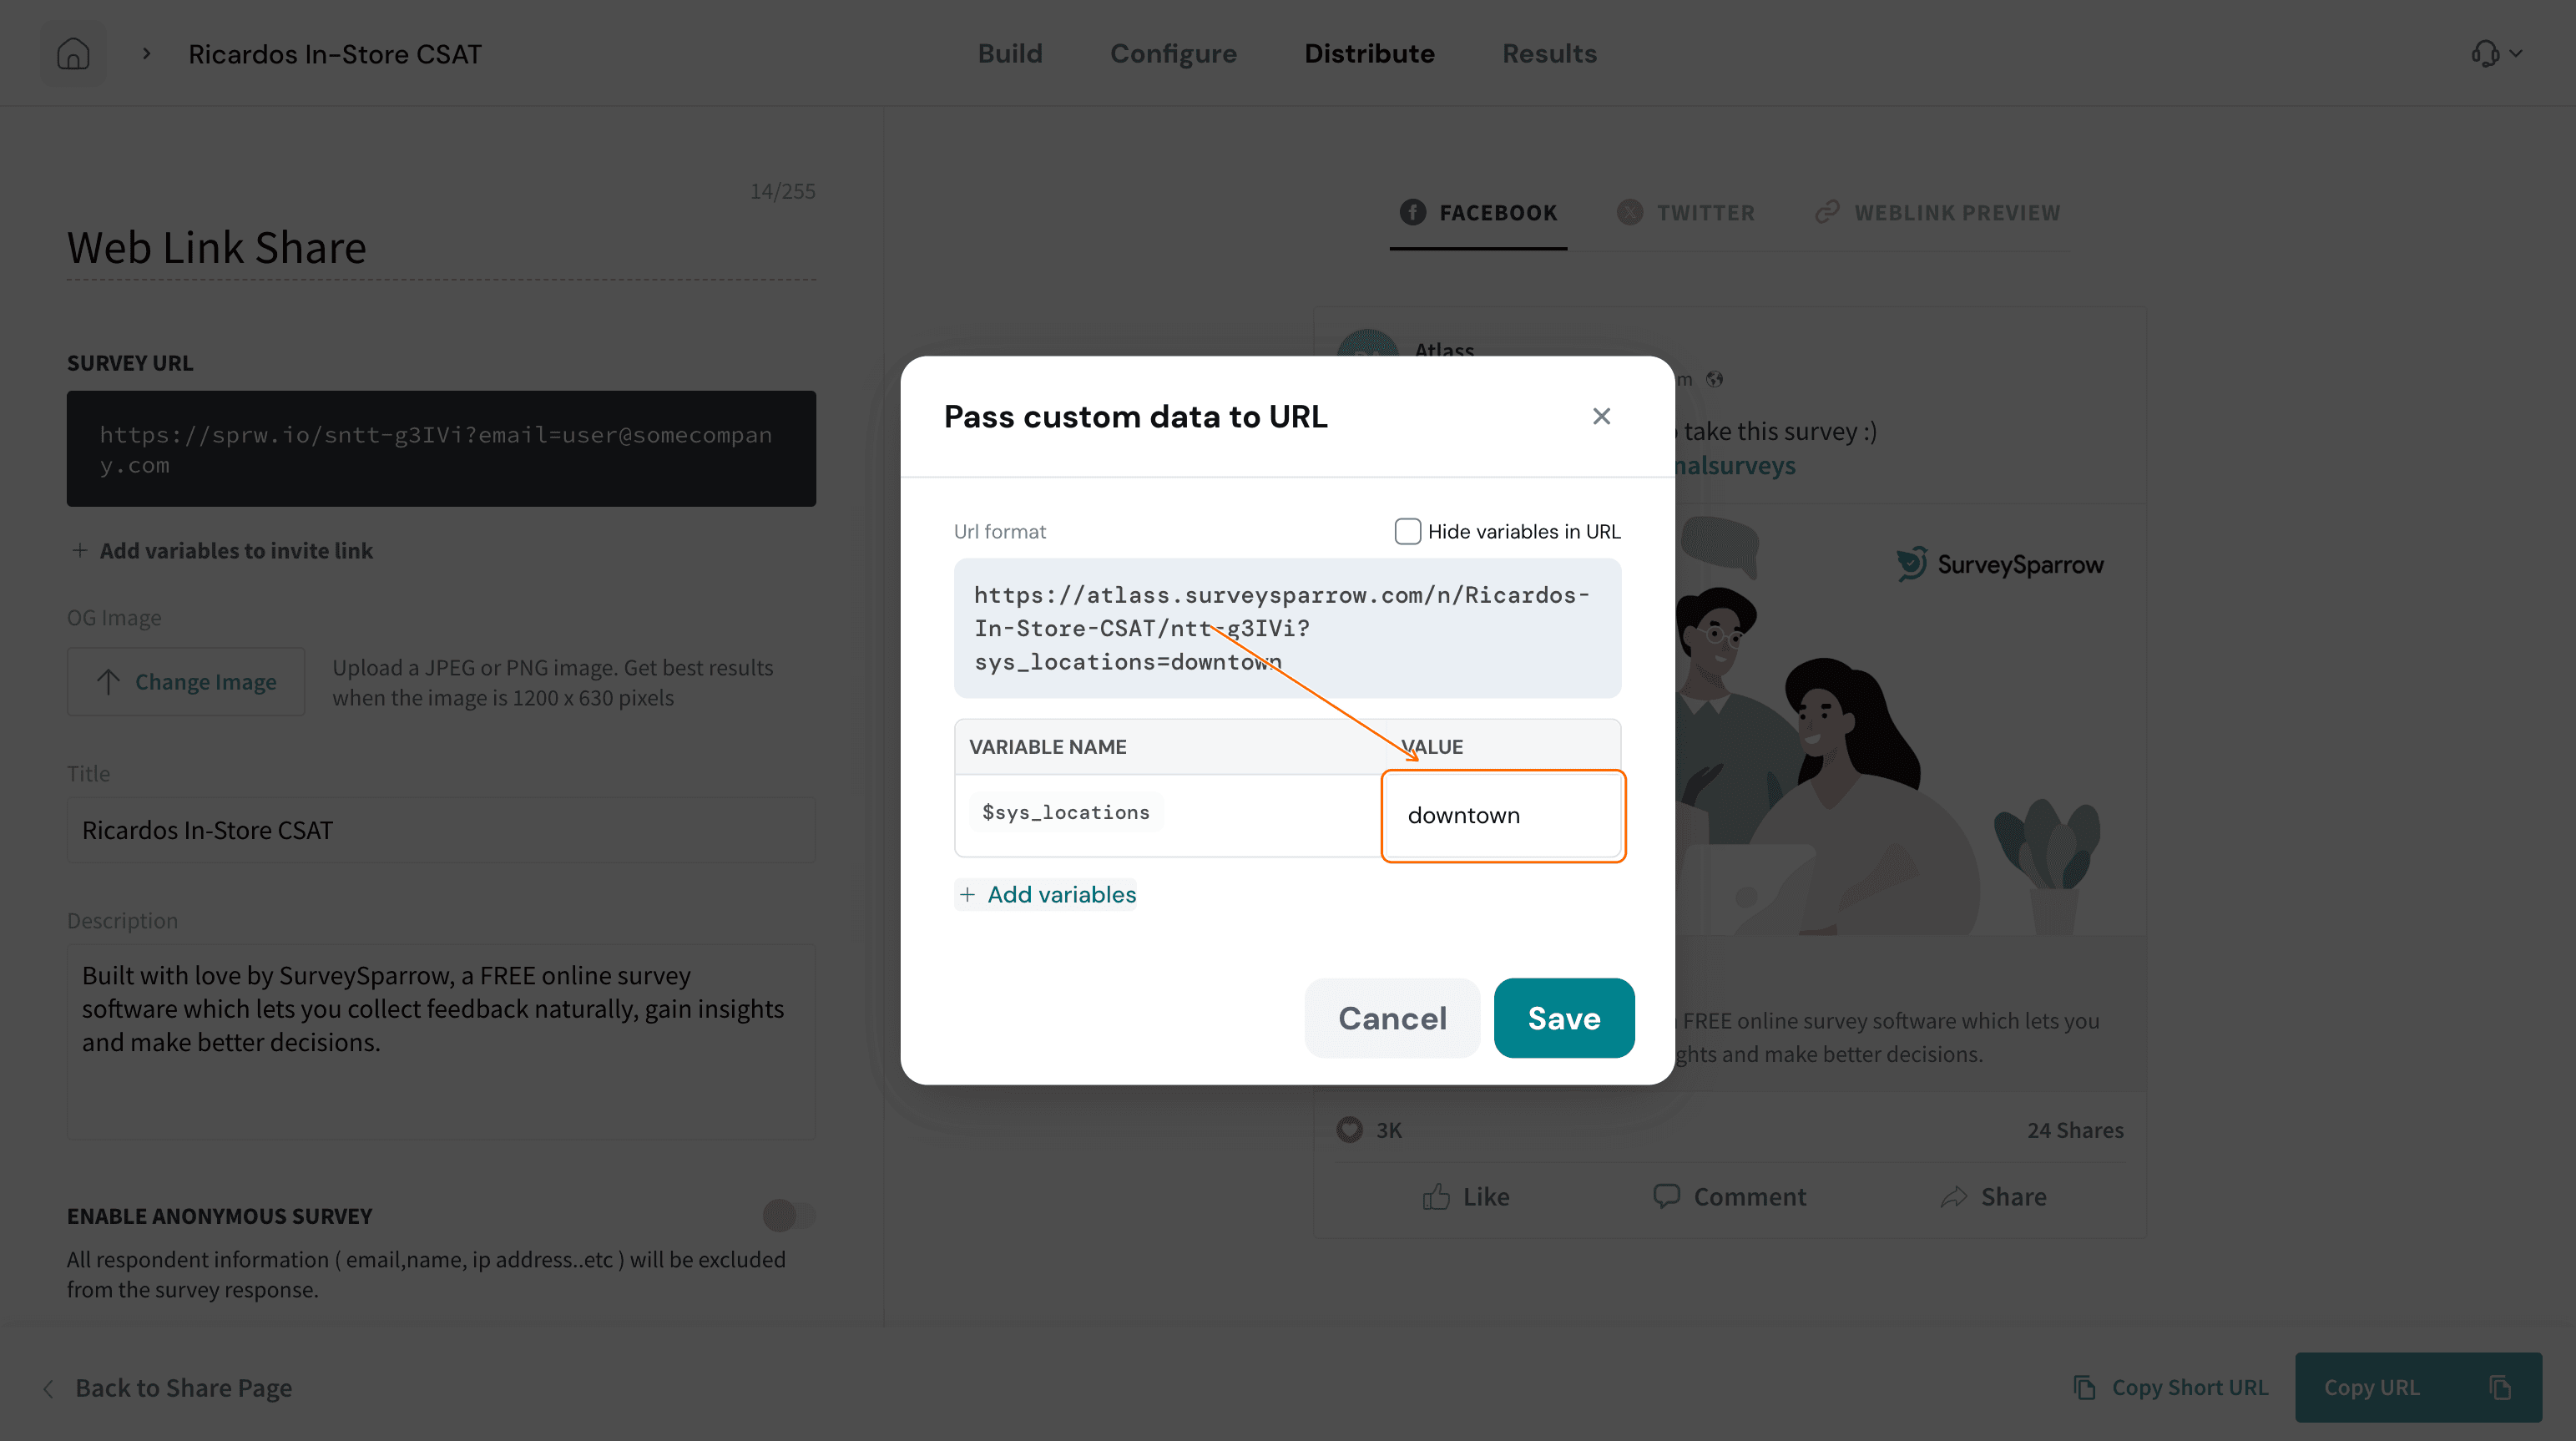
10. Open the survey whose responses you want to restrict, then go to Distribute, and select Web Link Share.
11. Click Add variables to invite link.
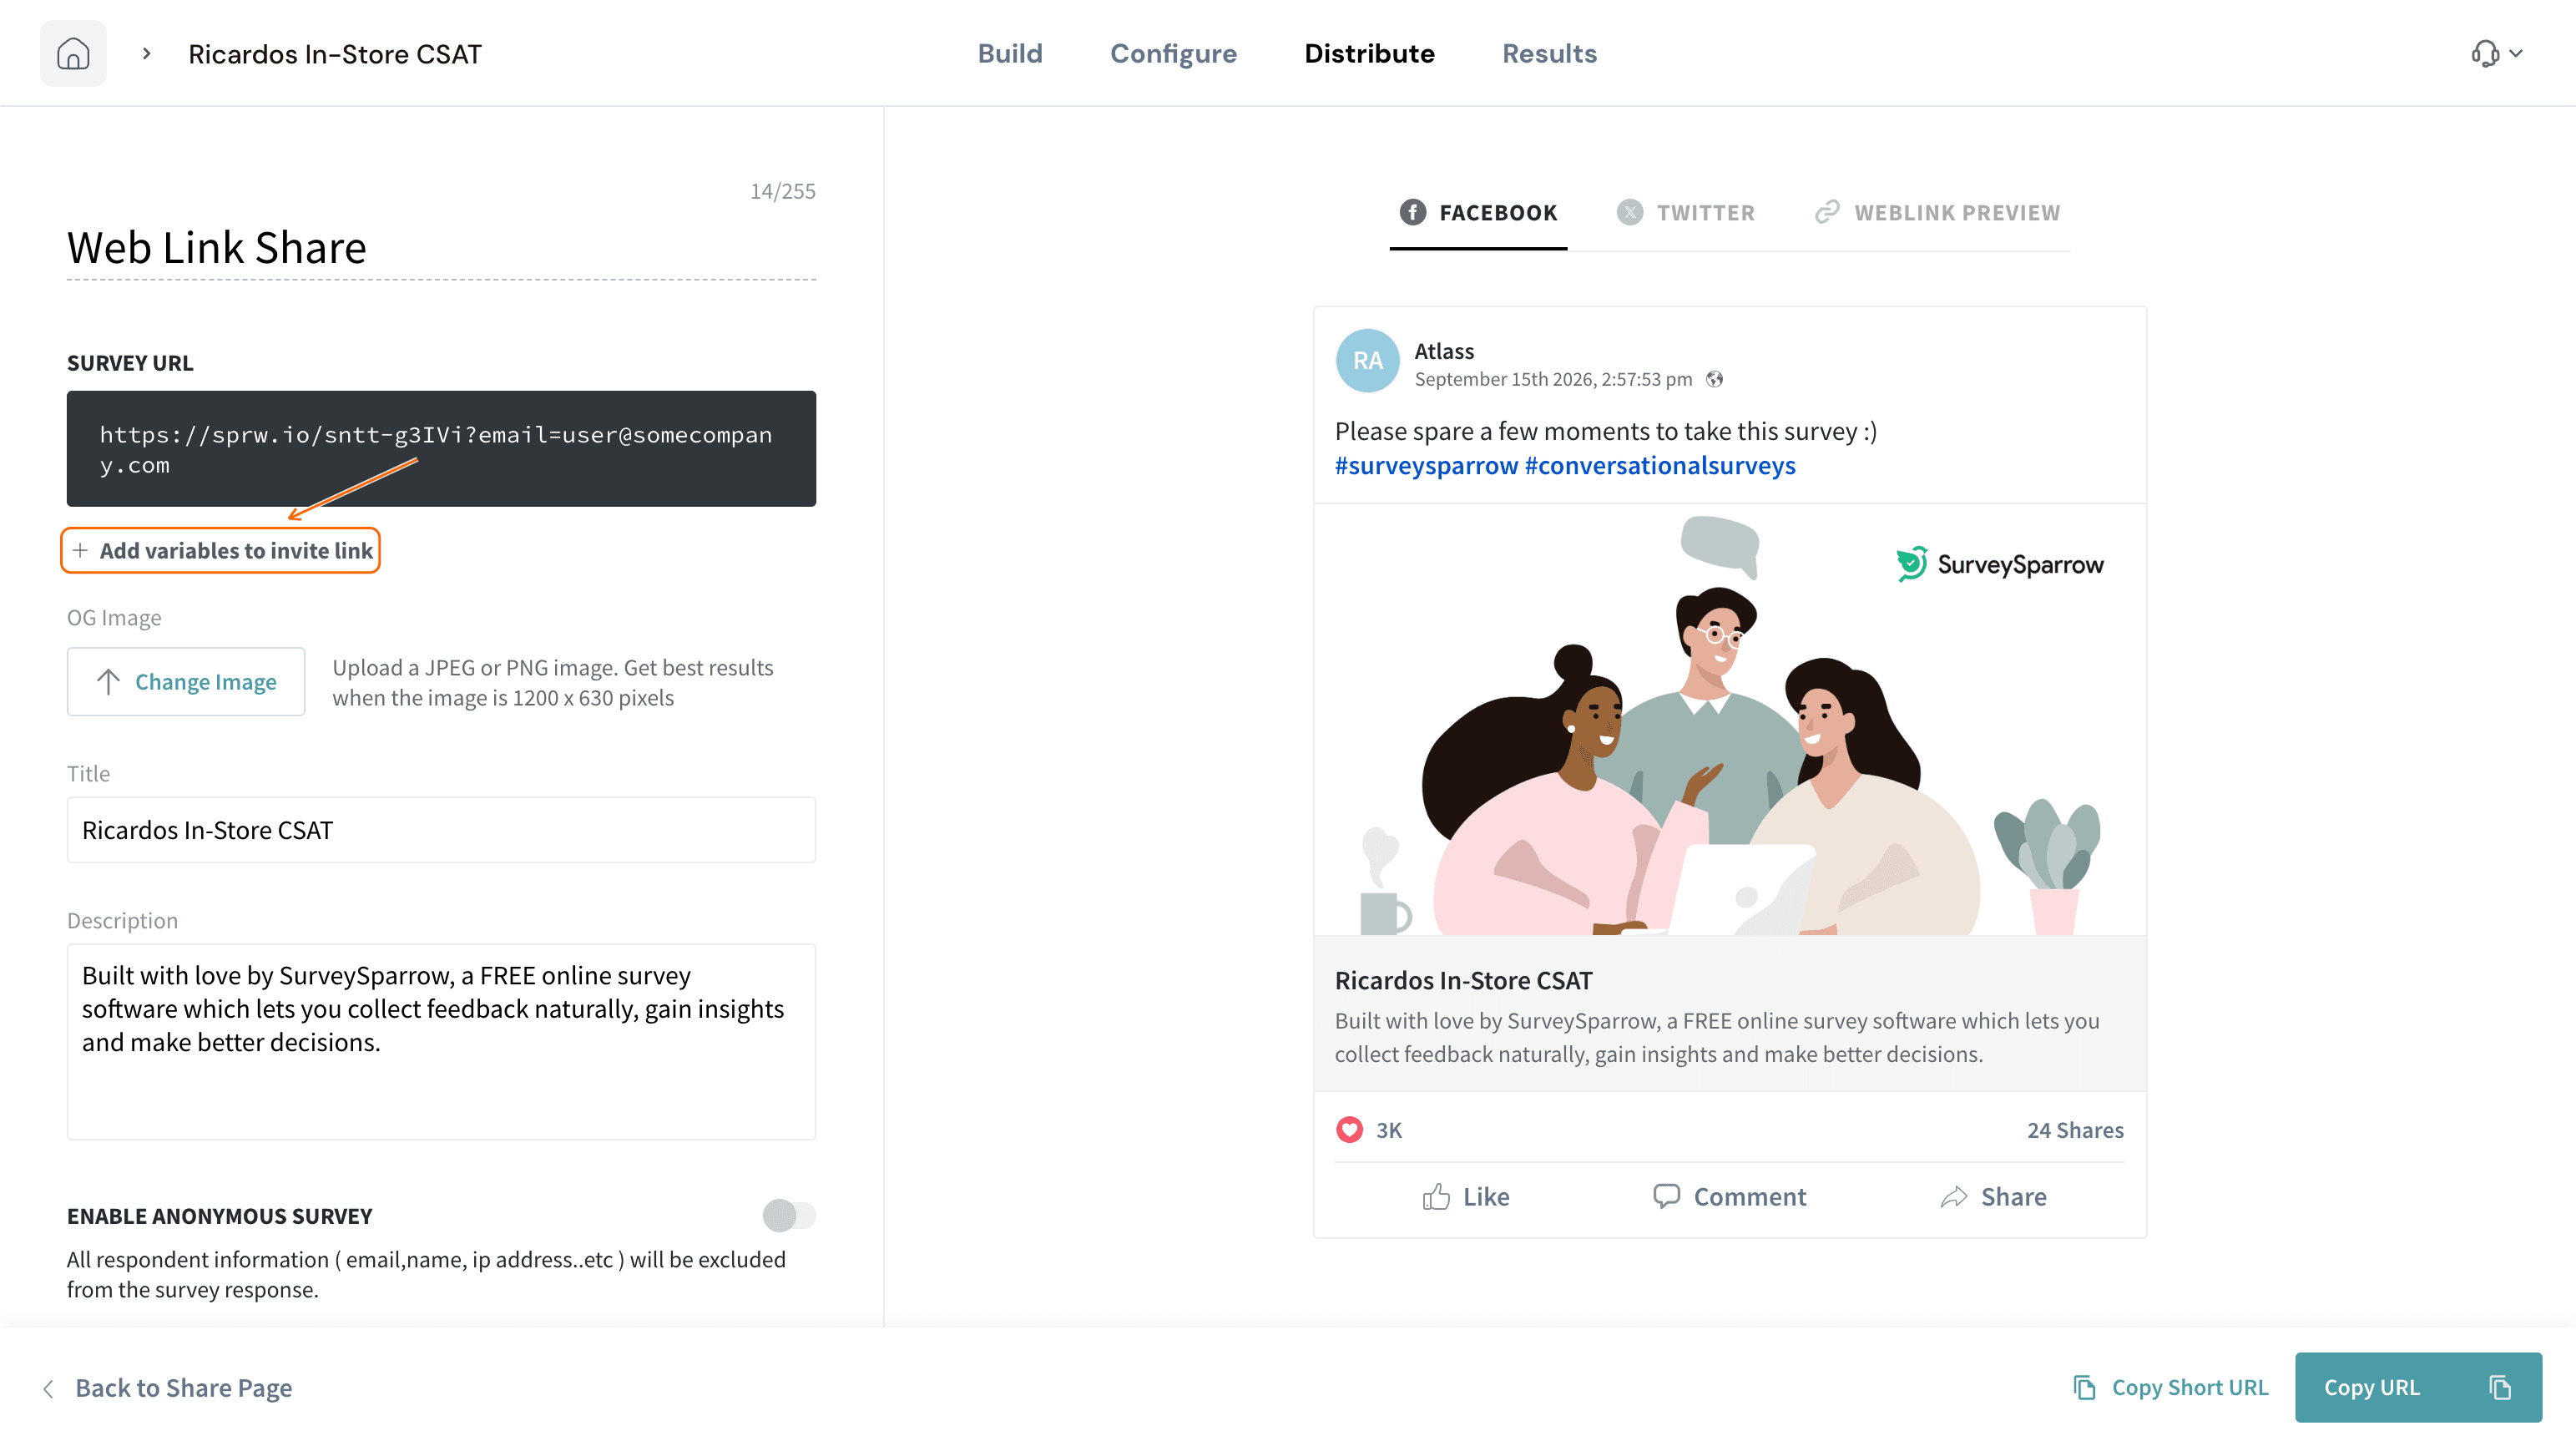
12. In the dialog that opens, set the variable's value to the matching level's key from Step 7 — for example, downtown for a response tied to the Downtown level. Storefront reads this value when it decides who can see that response's data.
Sharing a dashboard with restricted access
Once your Storefront and your employees are set up, you can share any dashboard so each person only sees their own slice of it.
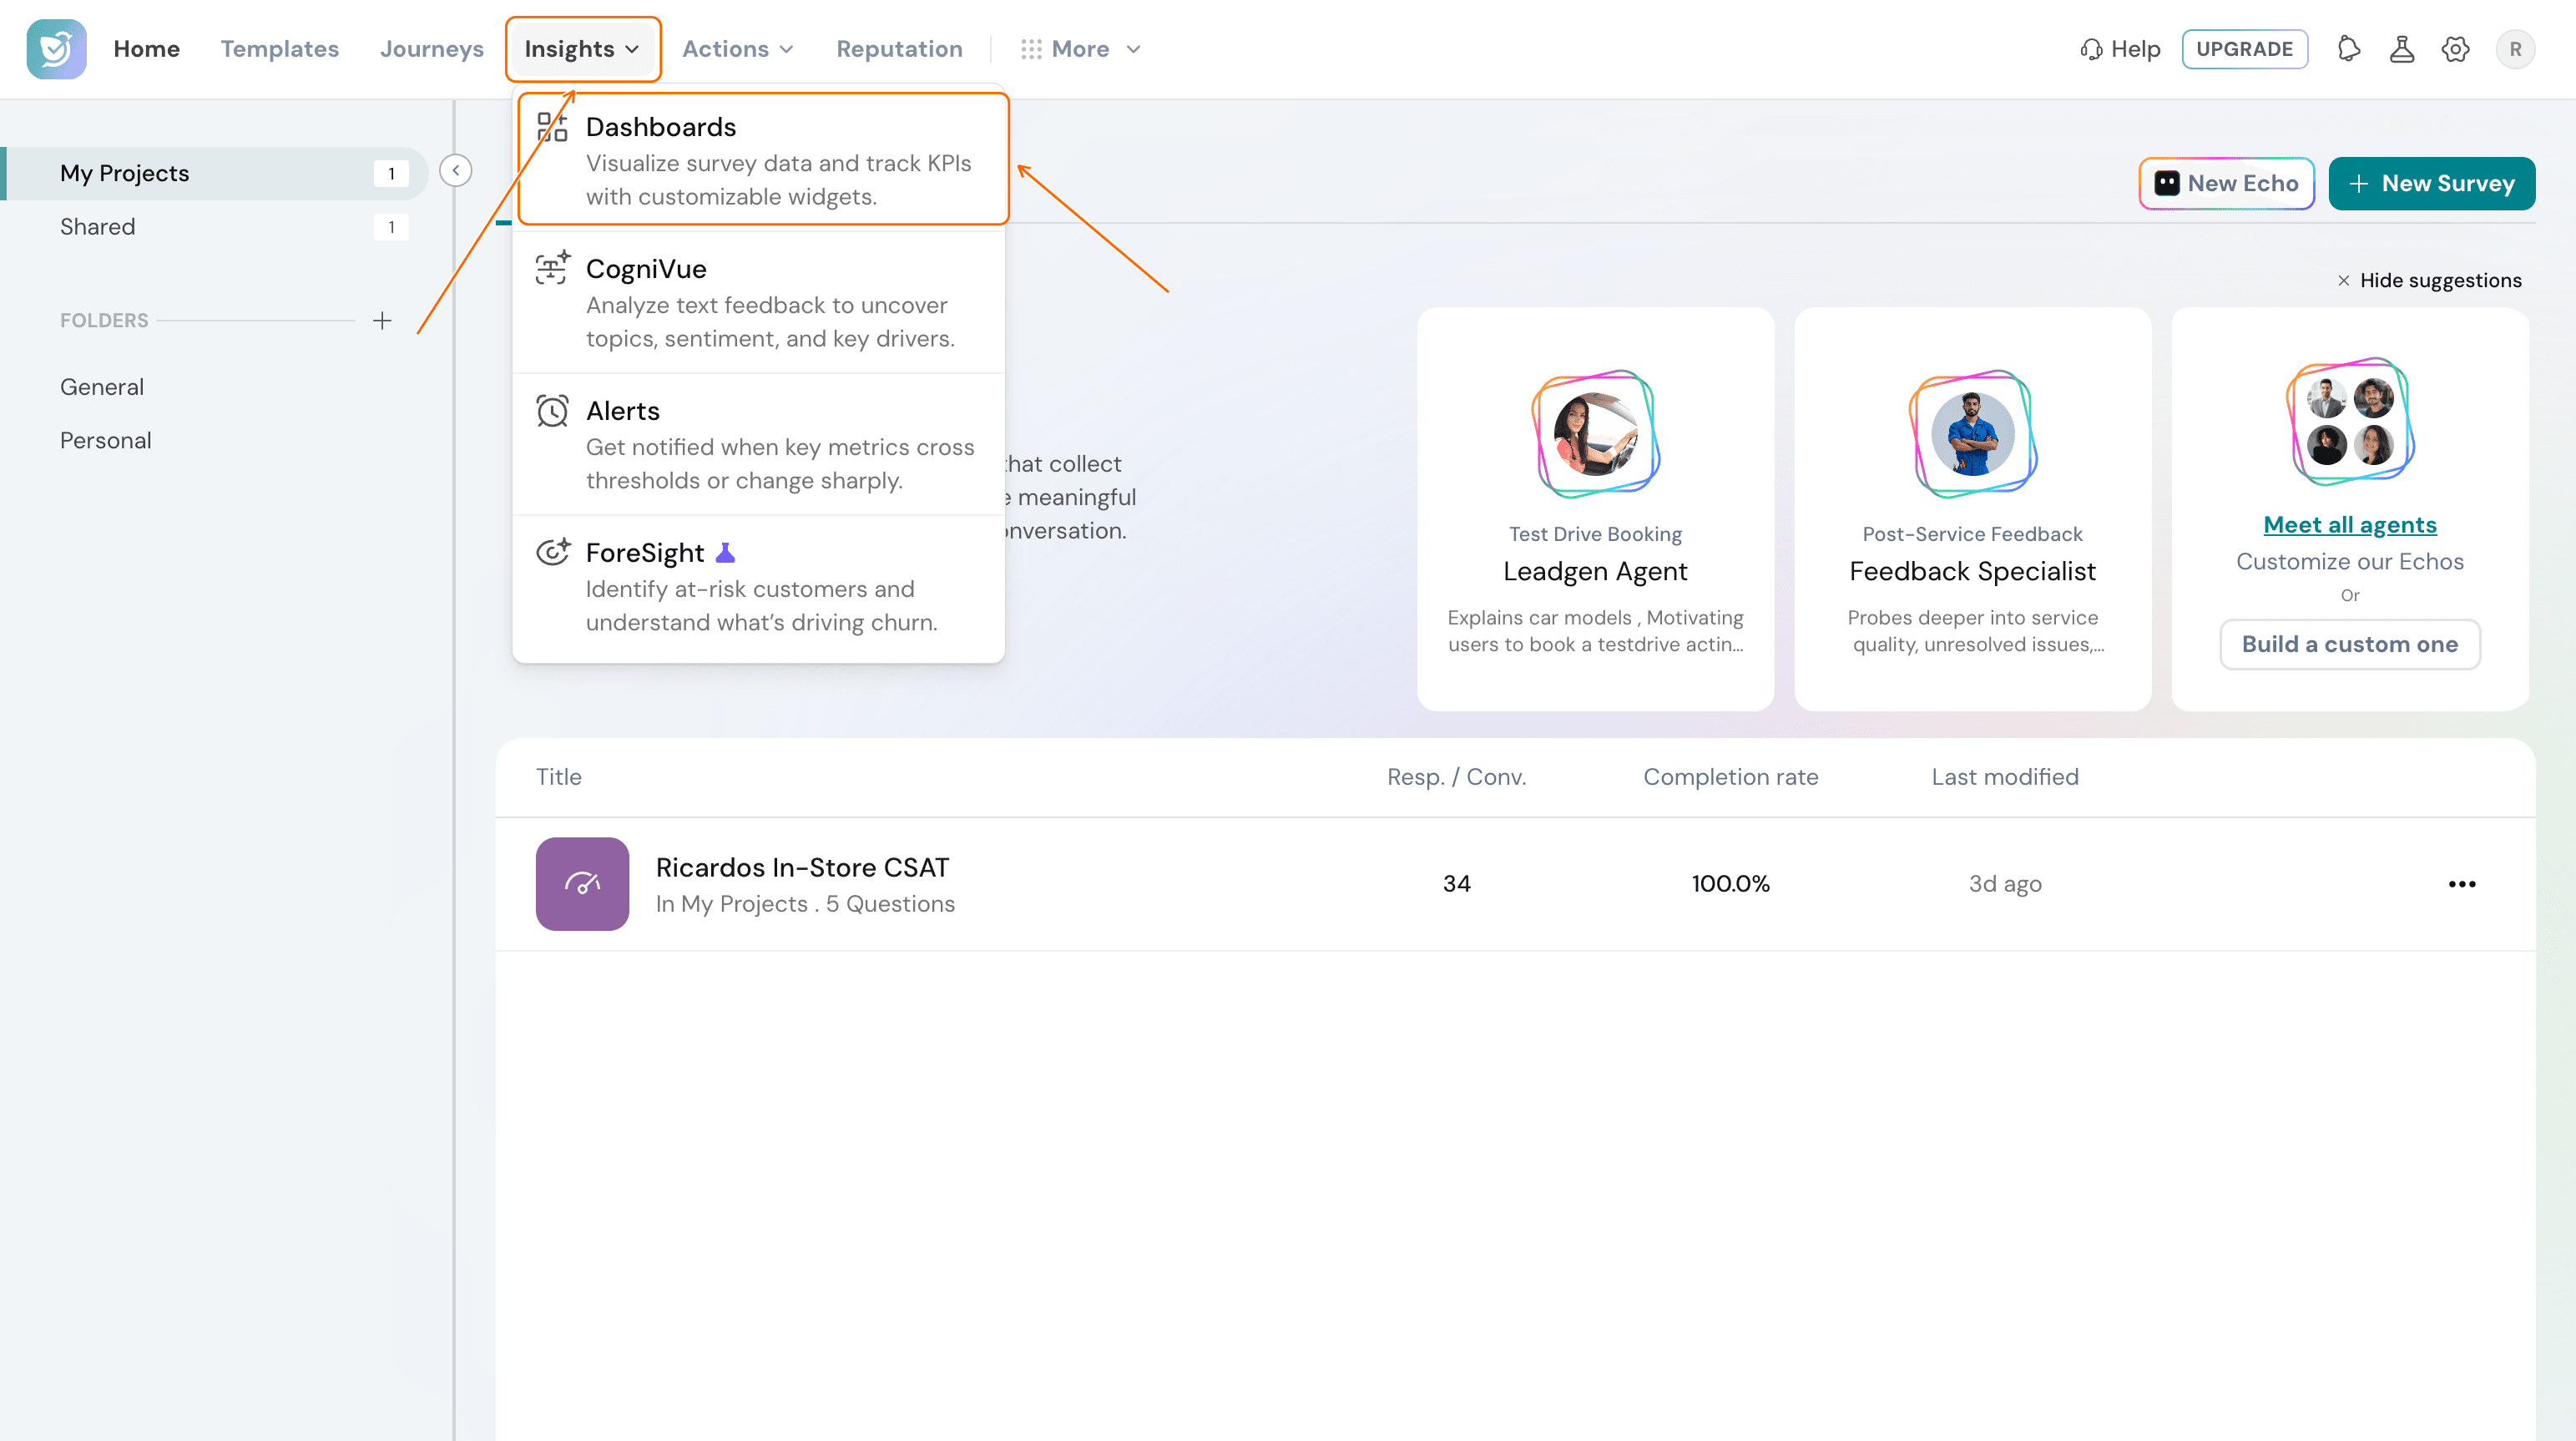
13. From the top navigation, click Insights, then Dashboards.
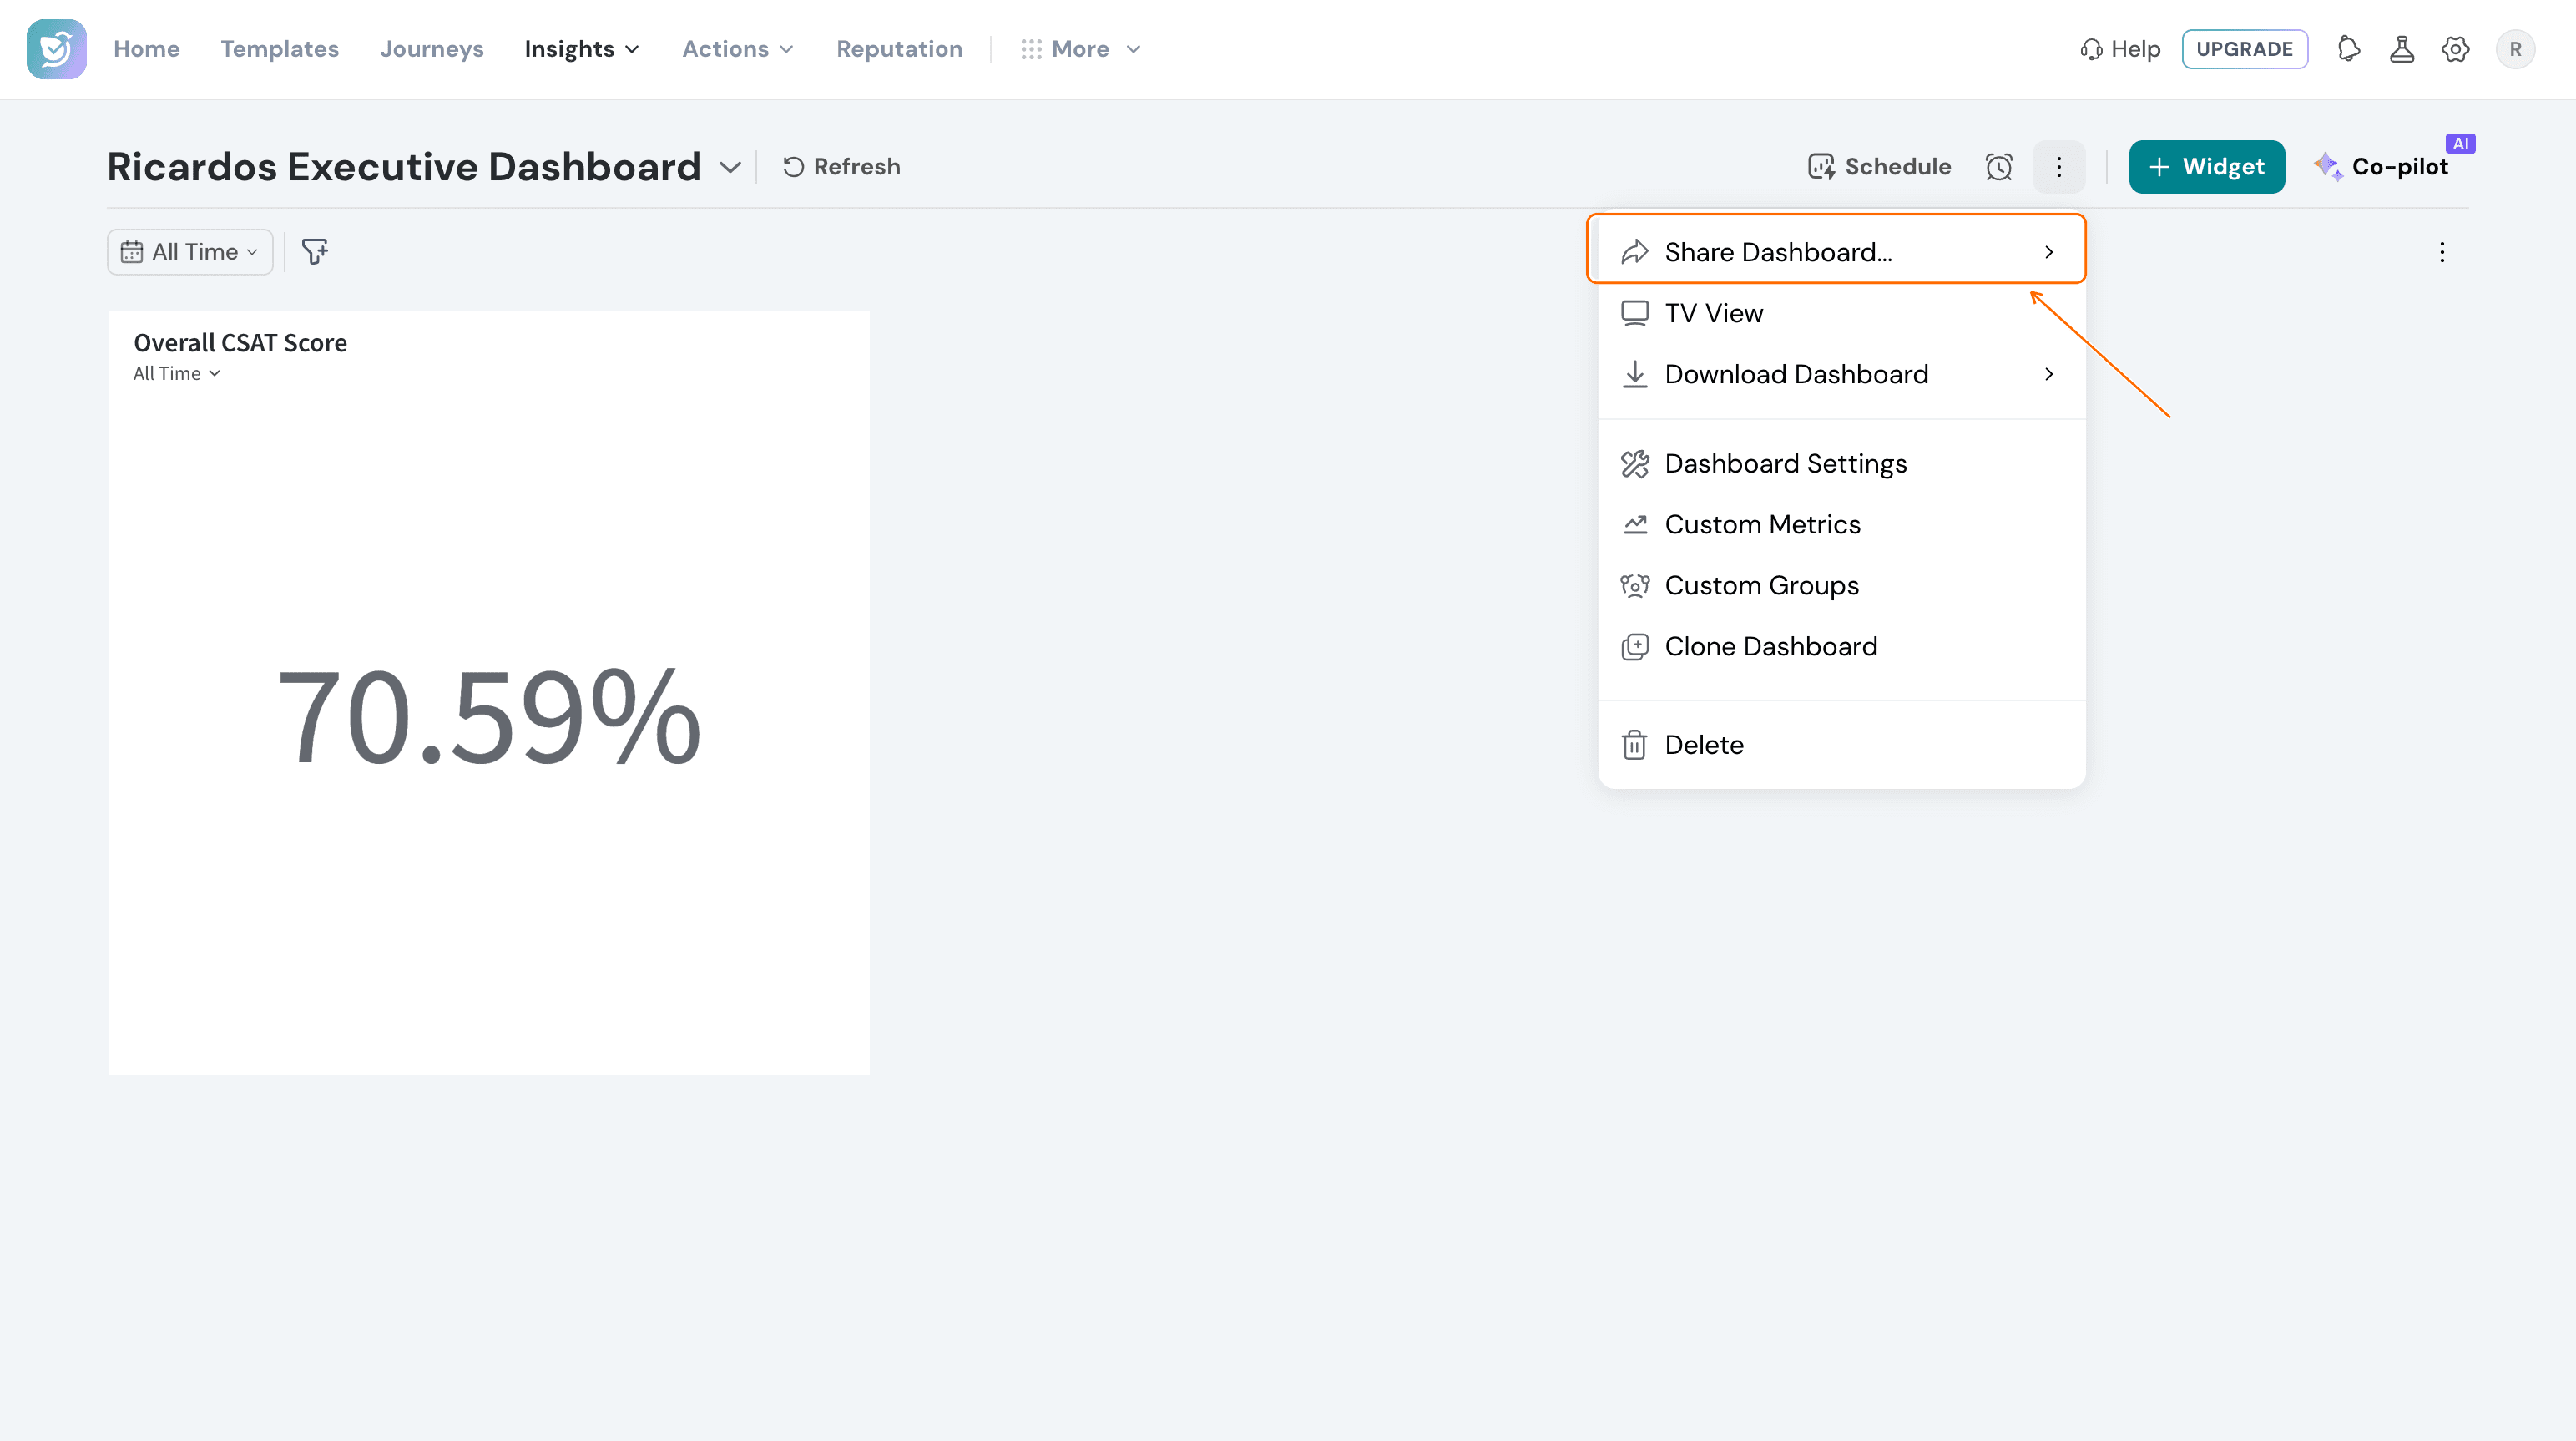
14. Open the dashboard you want to restrict, click its ⋮ menu, then Share Dashboard.
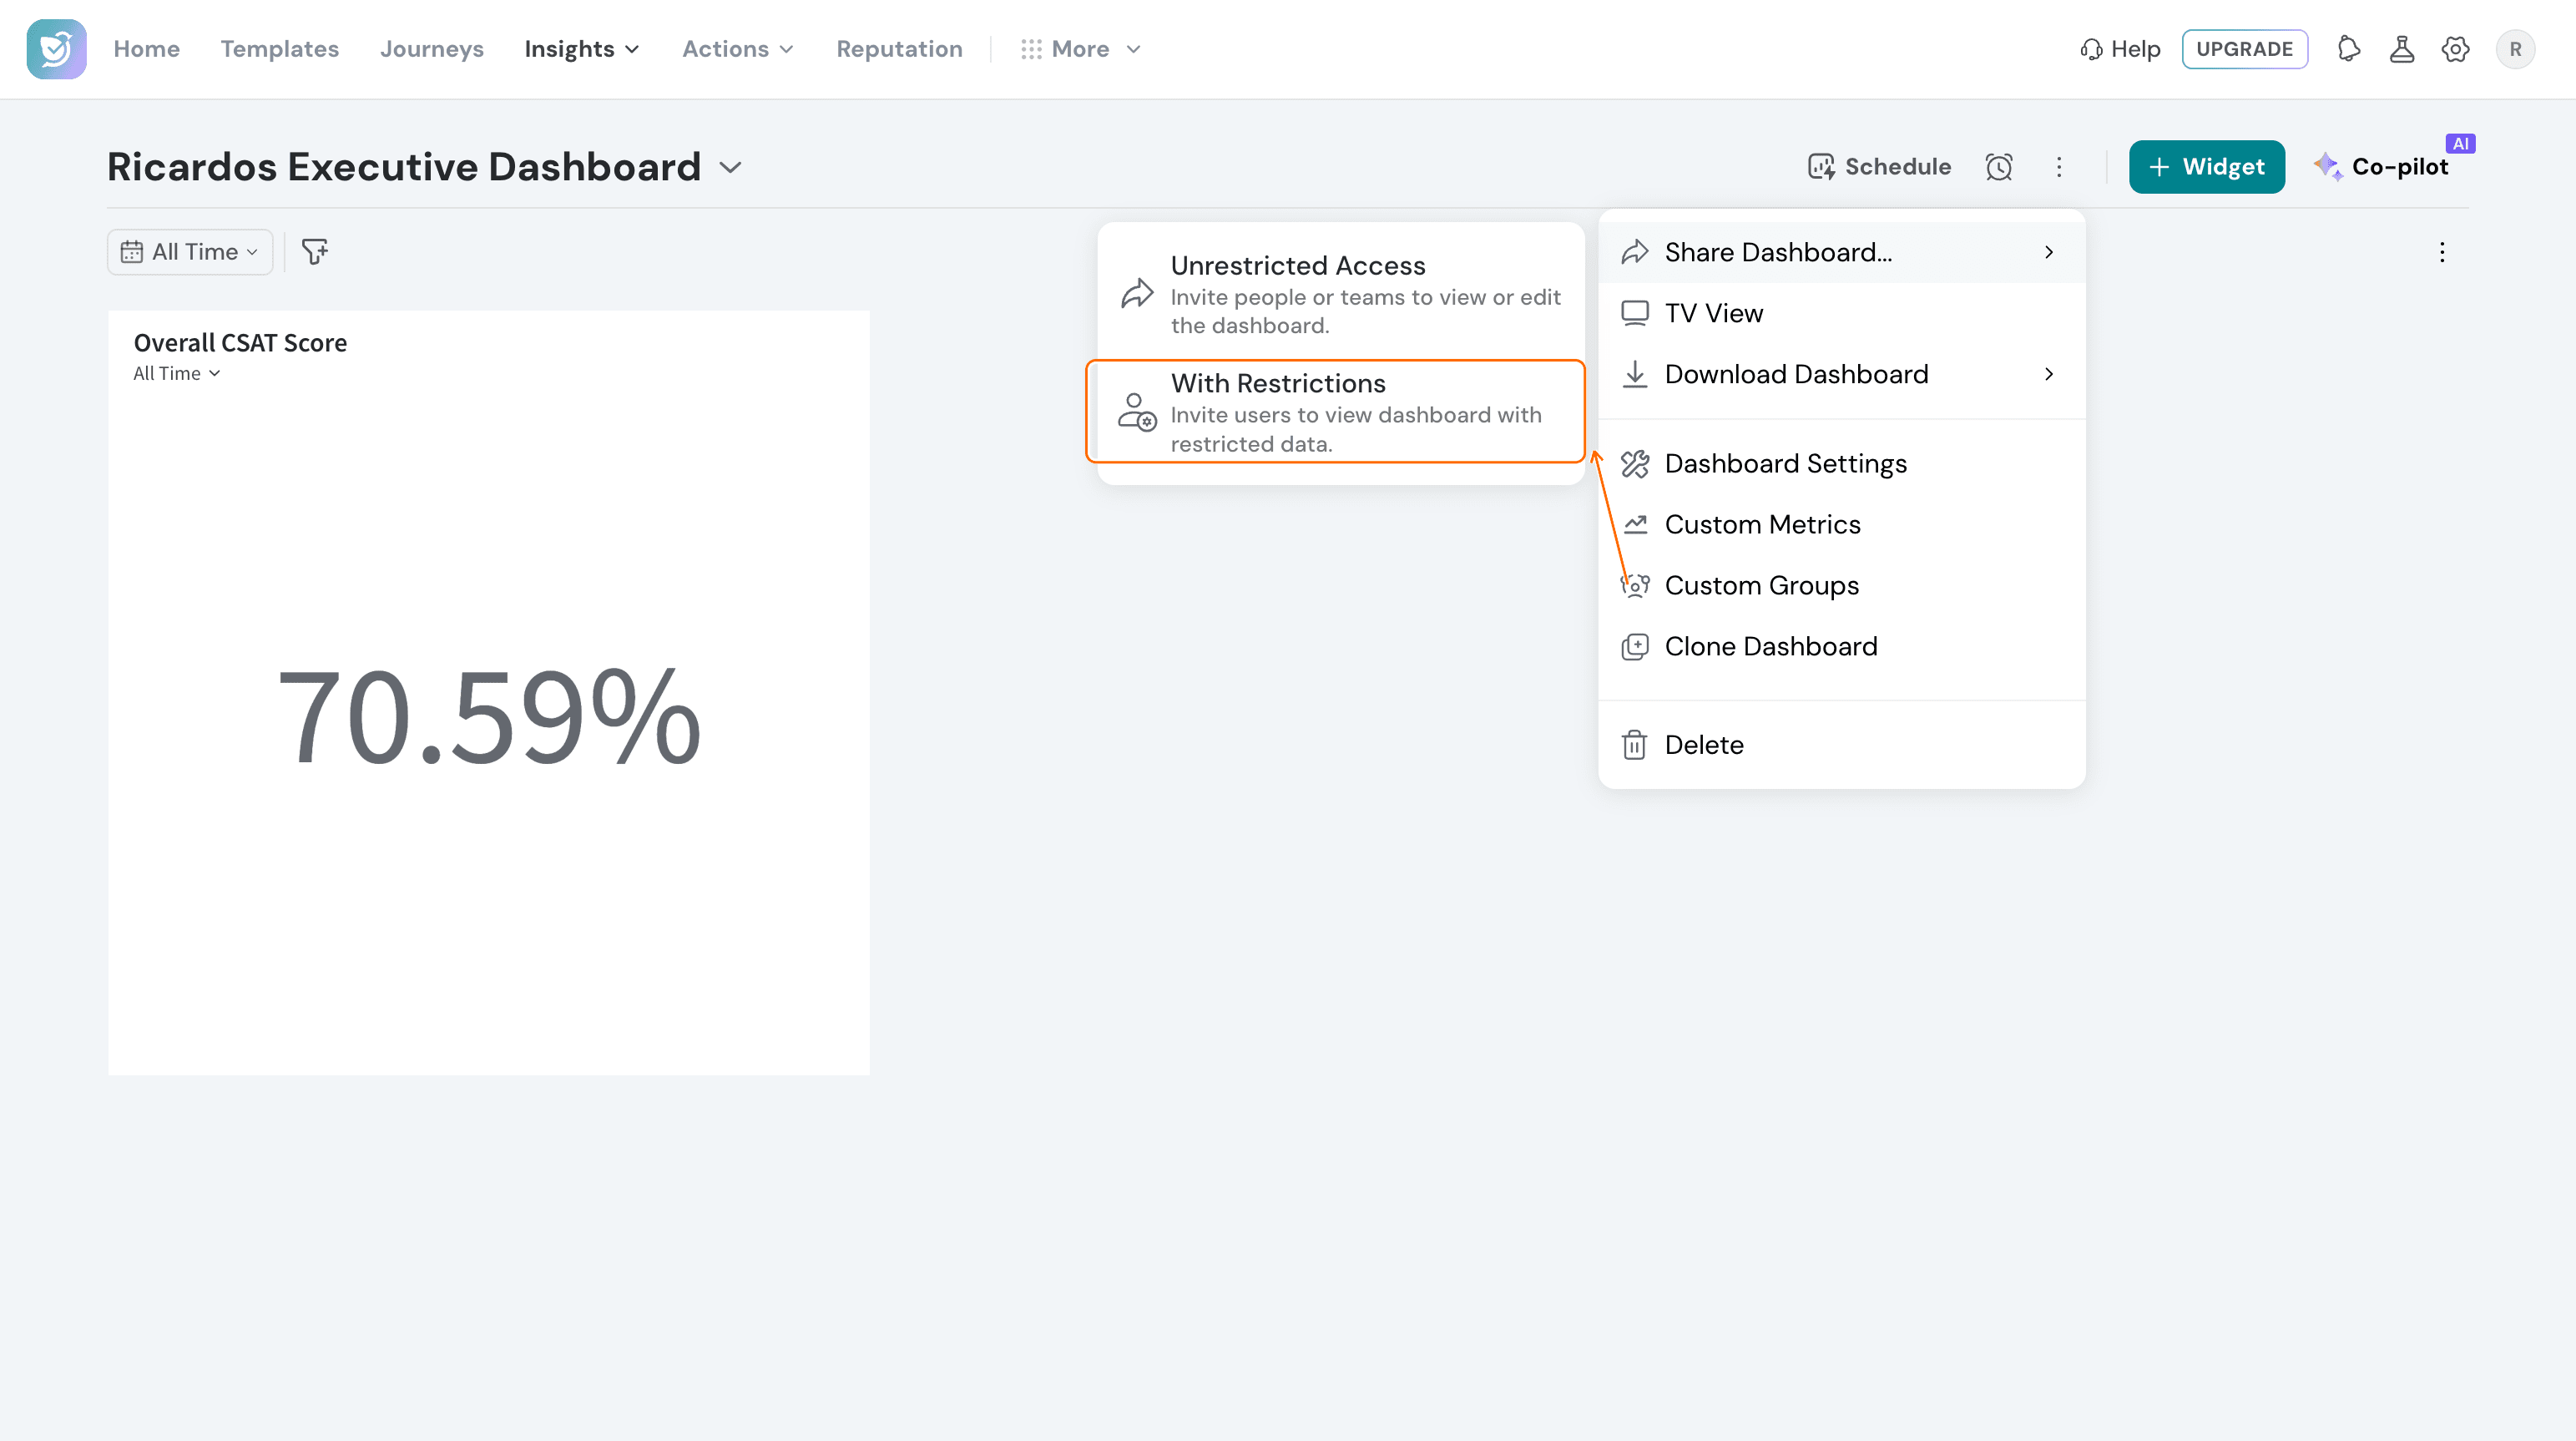
15. Choose With Restrictions rather than Unrestricted Access — the unrestricted option invites people to view or edit the whole dashboard with no data limits.
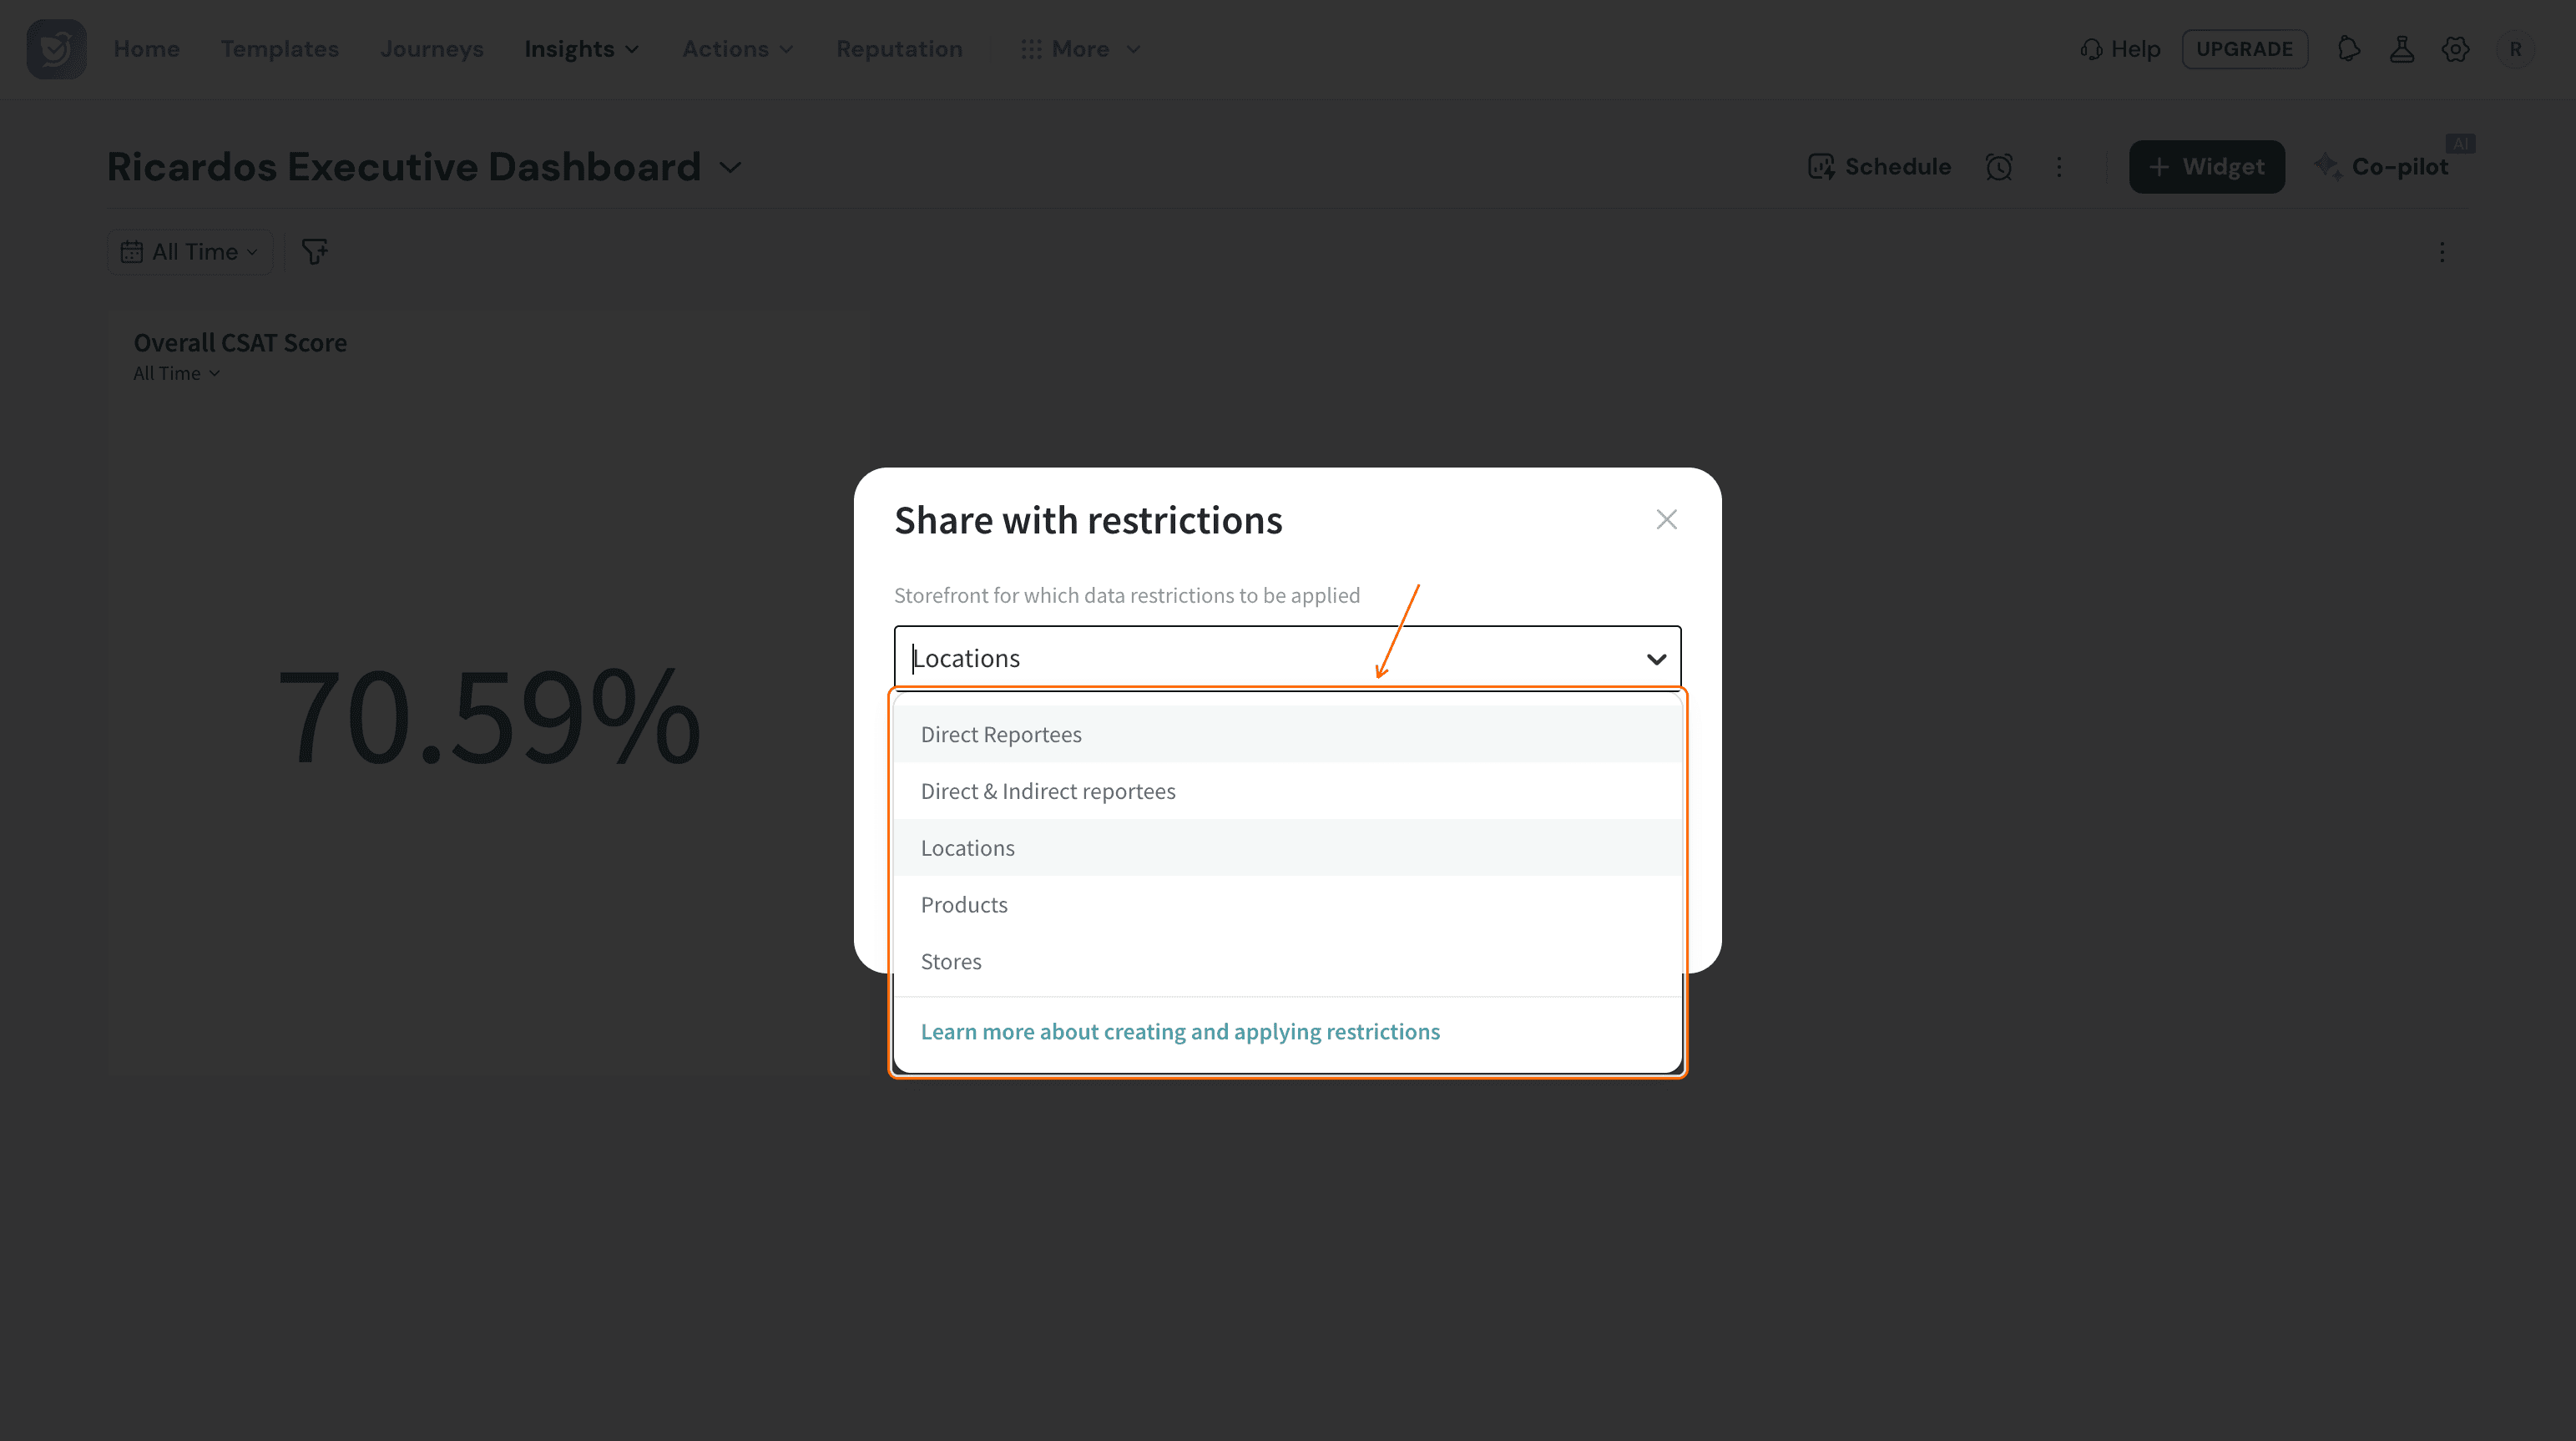
16. The Storefront for which data restrictions to be applied dropdown holds five options: your Storefronts (Locations, Products, Stores), plus Direct Reportees and Direct & Indirect reportees for restricting by your existing management chain instead. Pick whichever matches how you want to split the data.
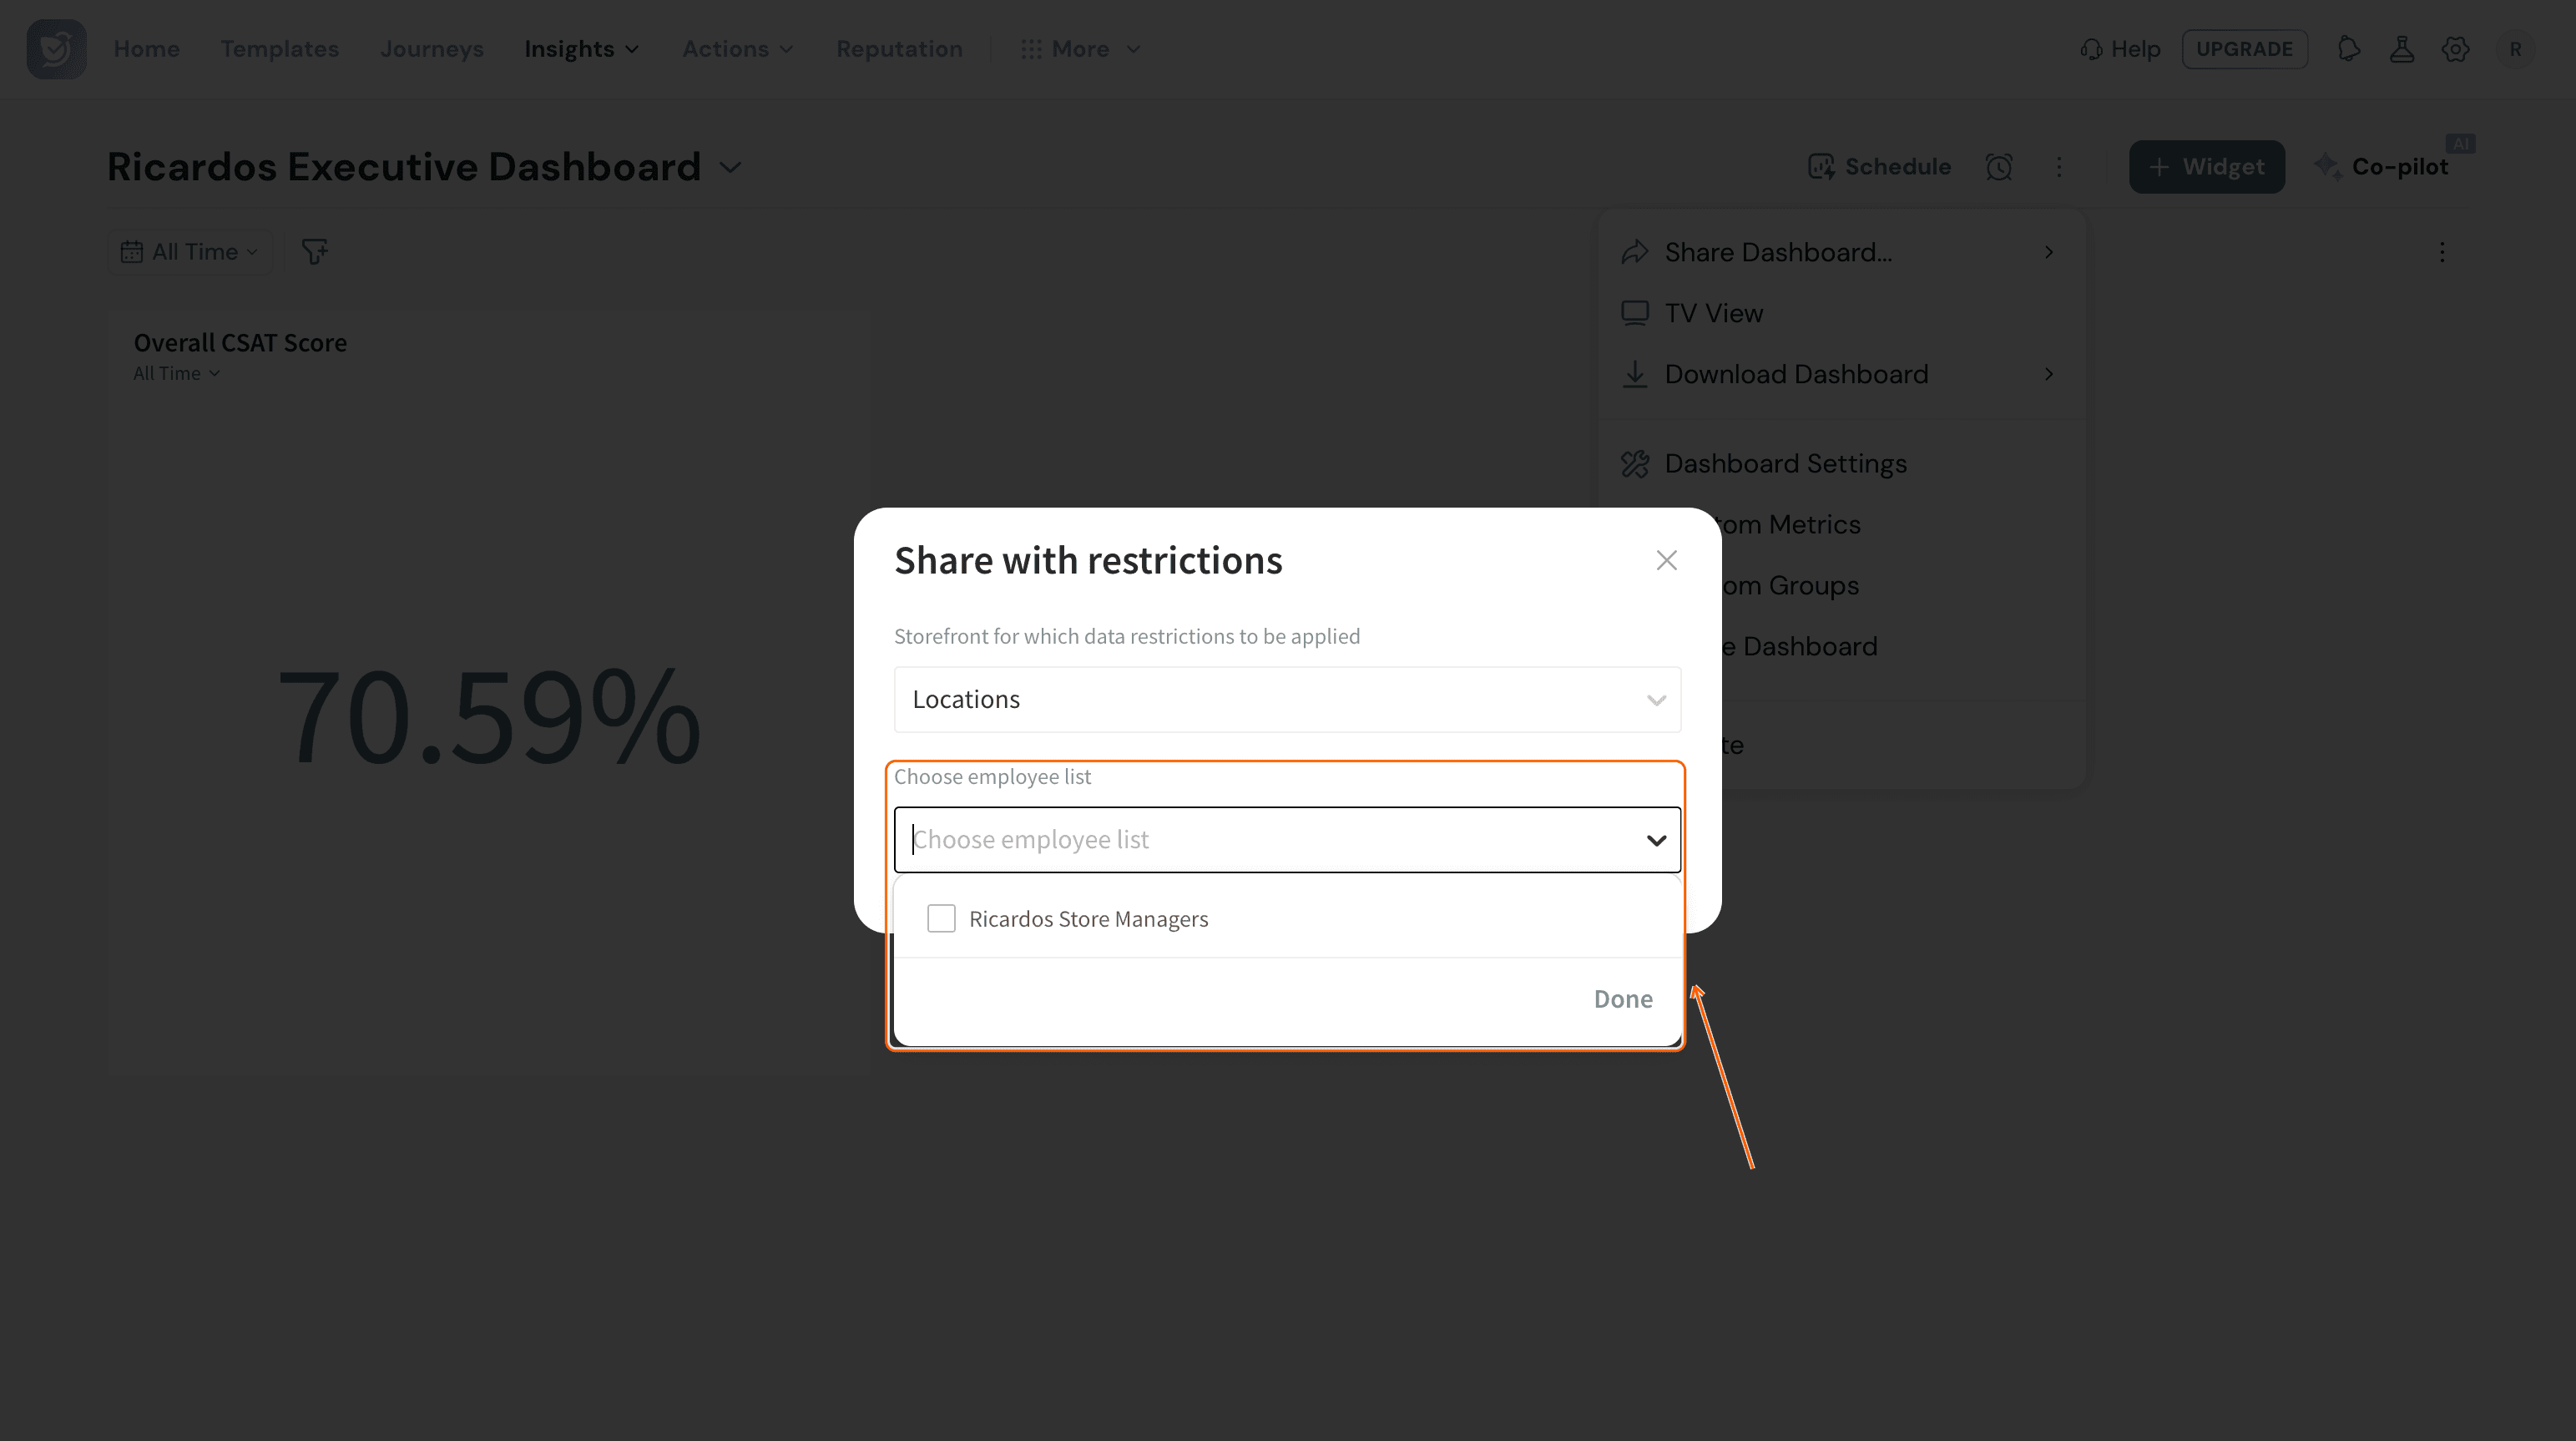
17. Under Choose employee list, choose (or create) the list of employees who should get access.
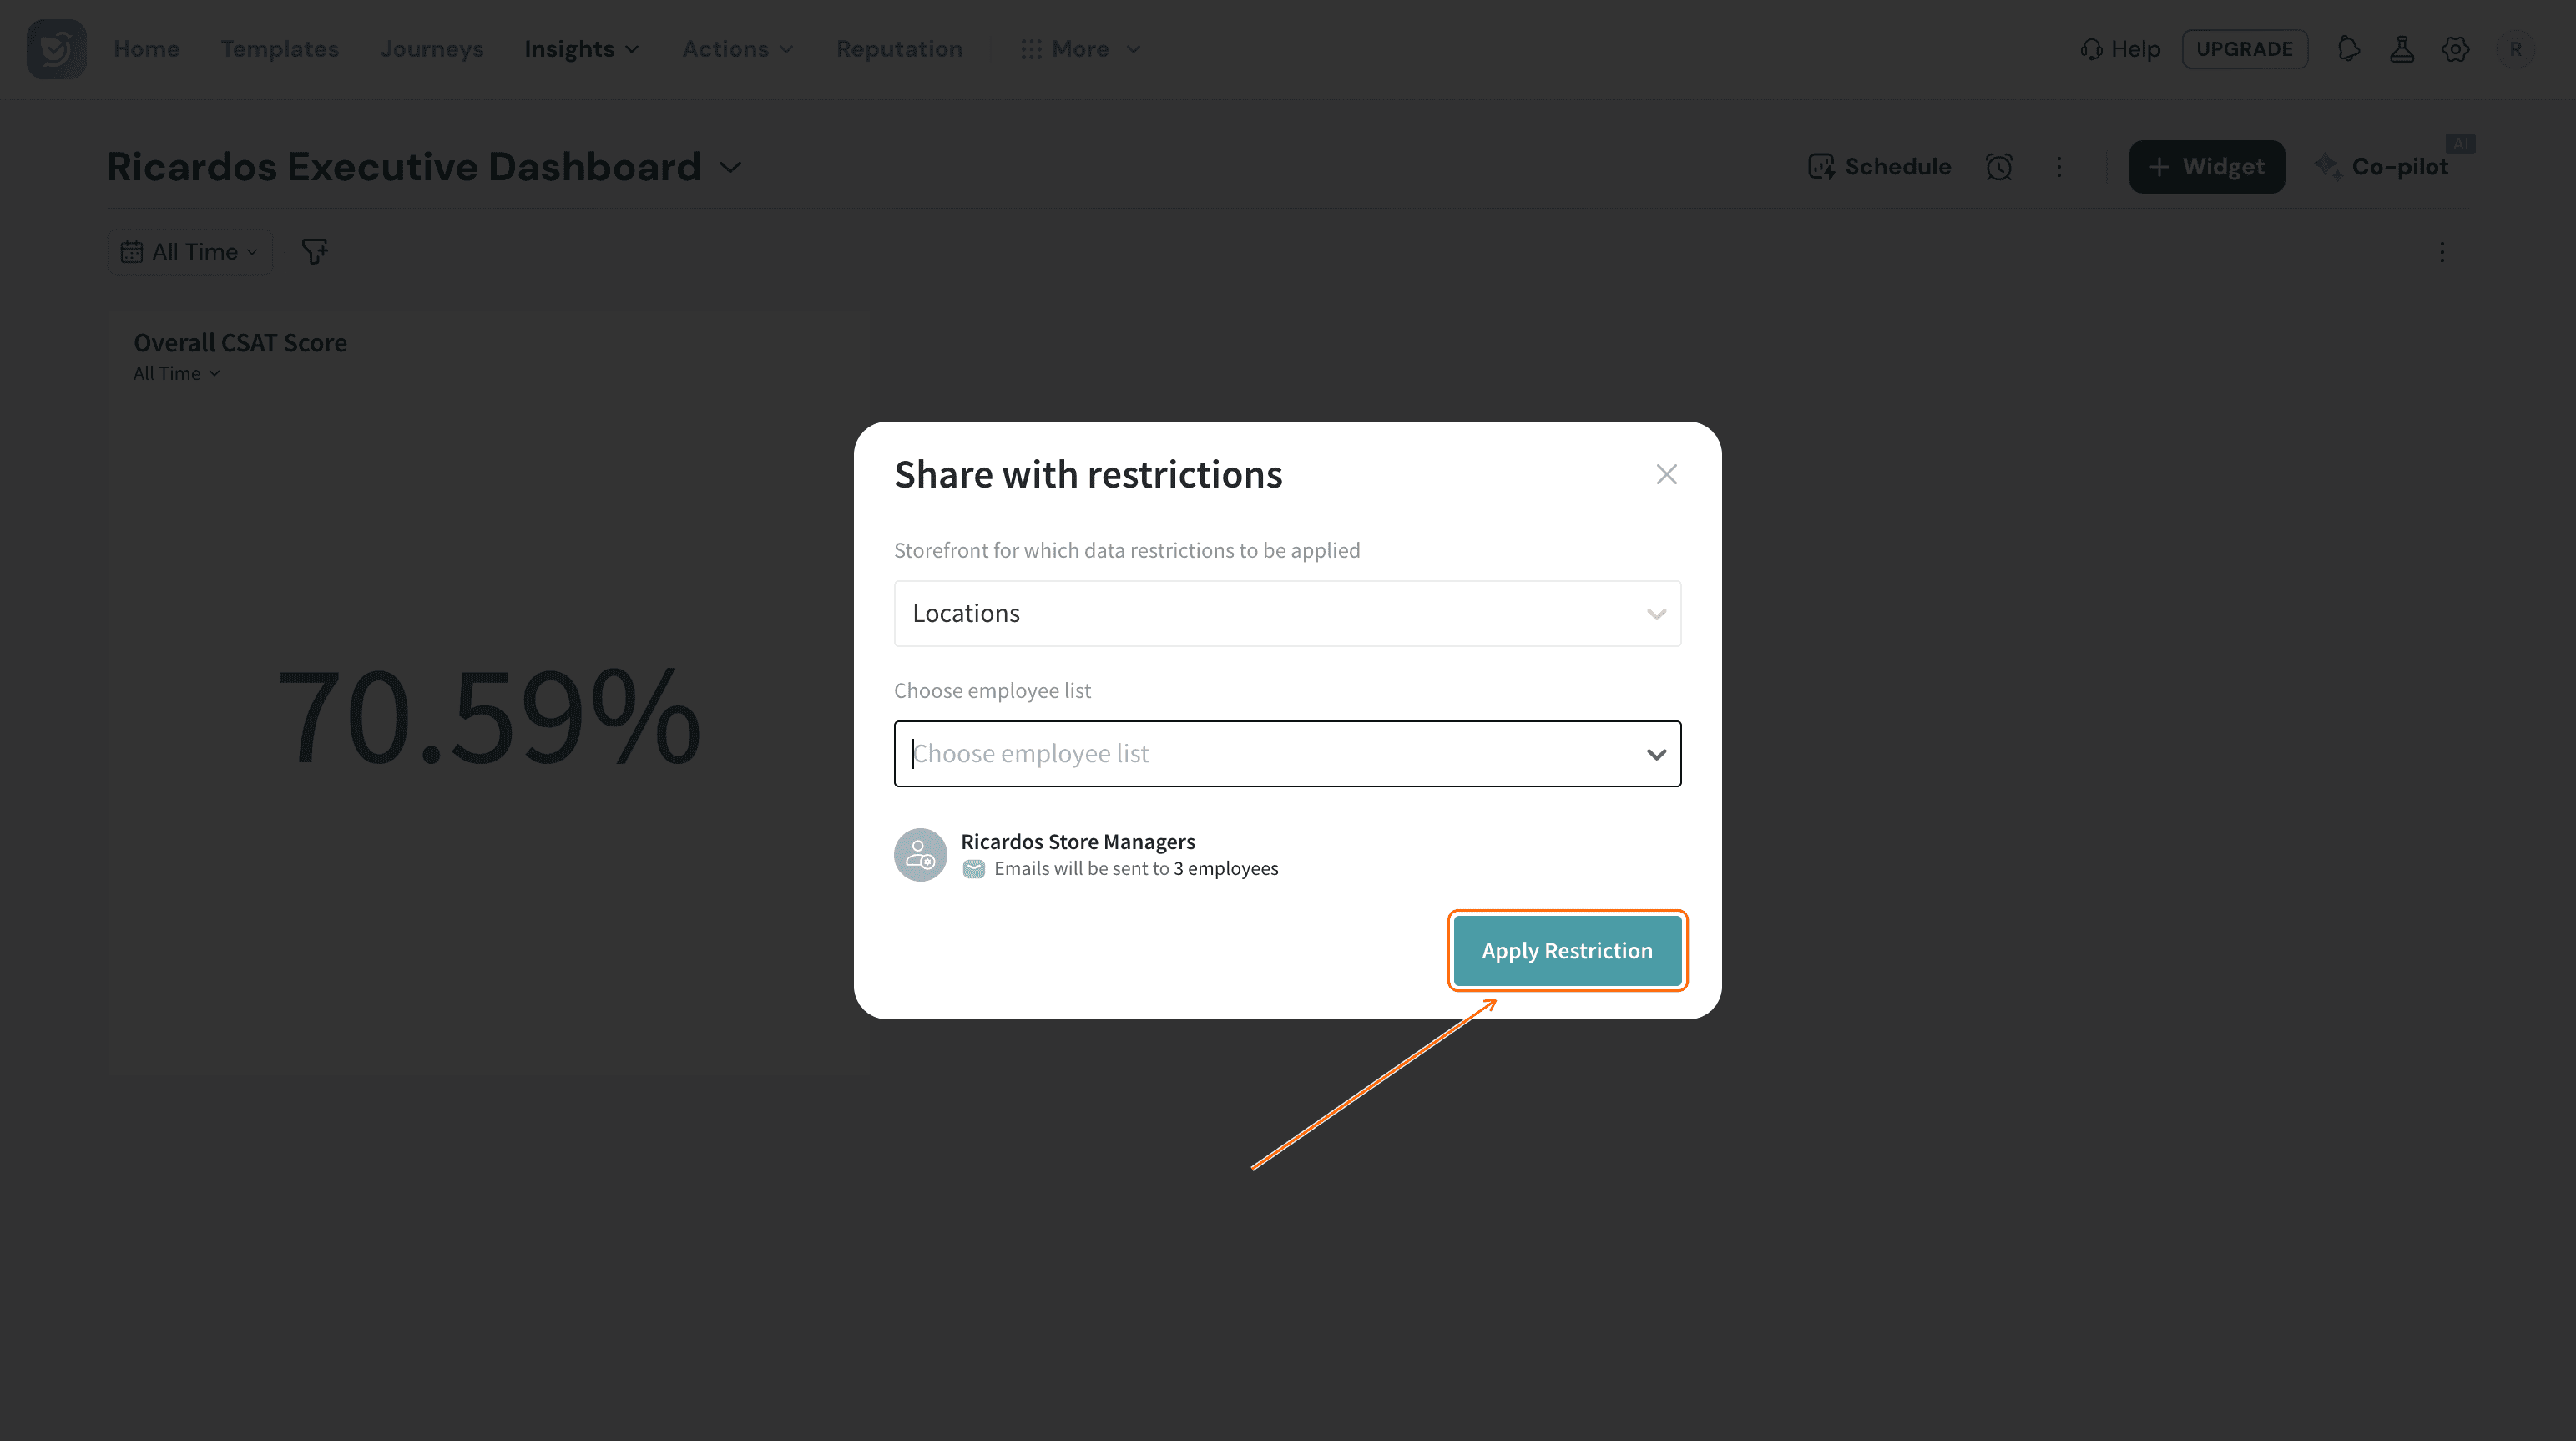
18. Click Apply Restriction.
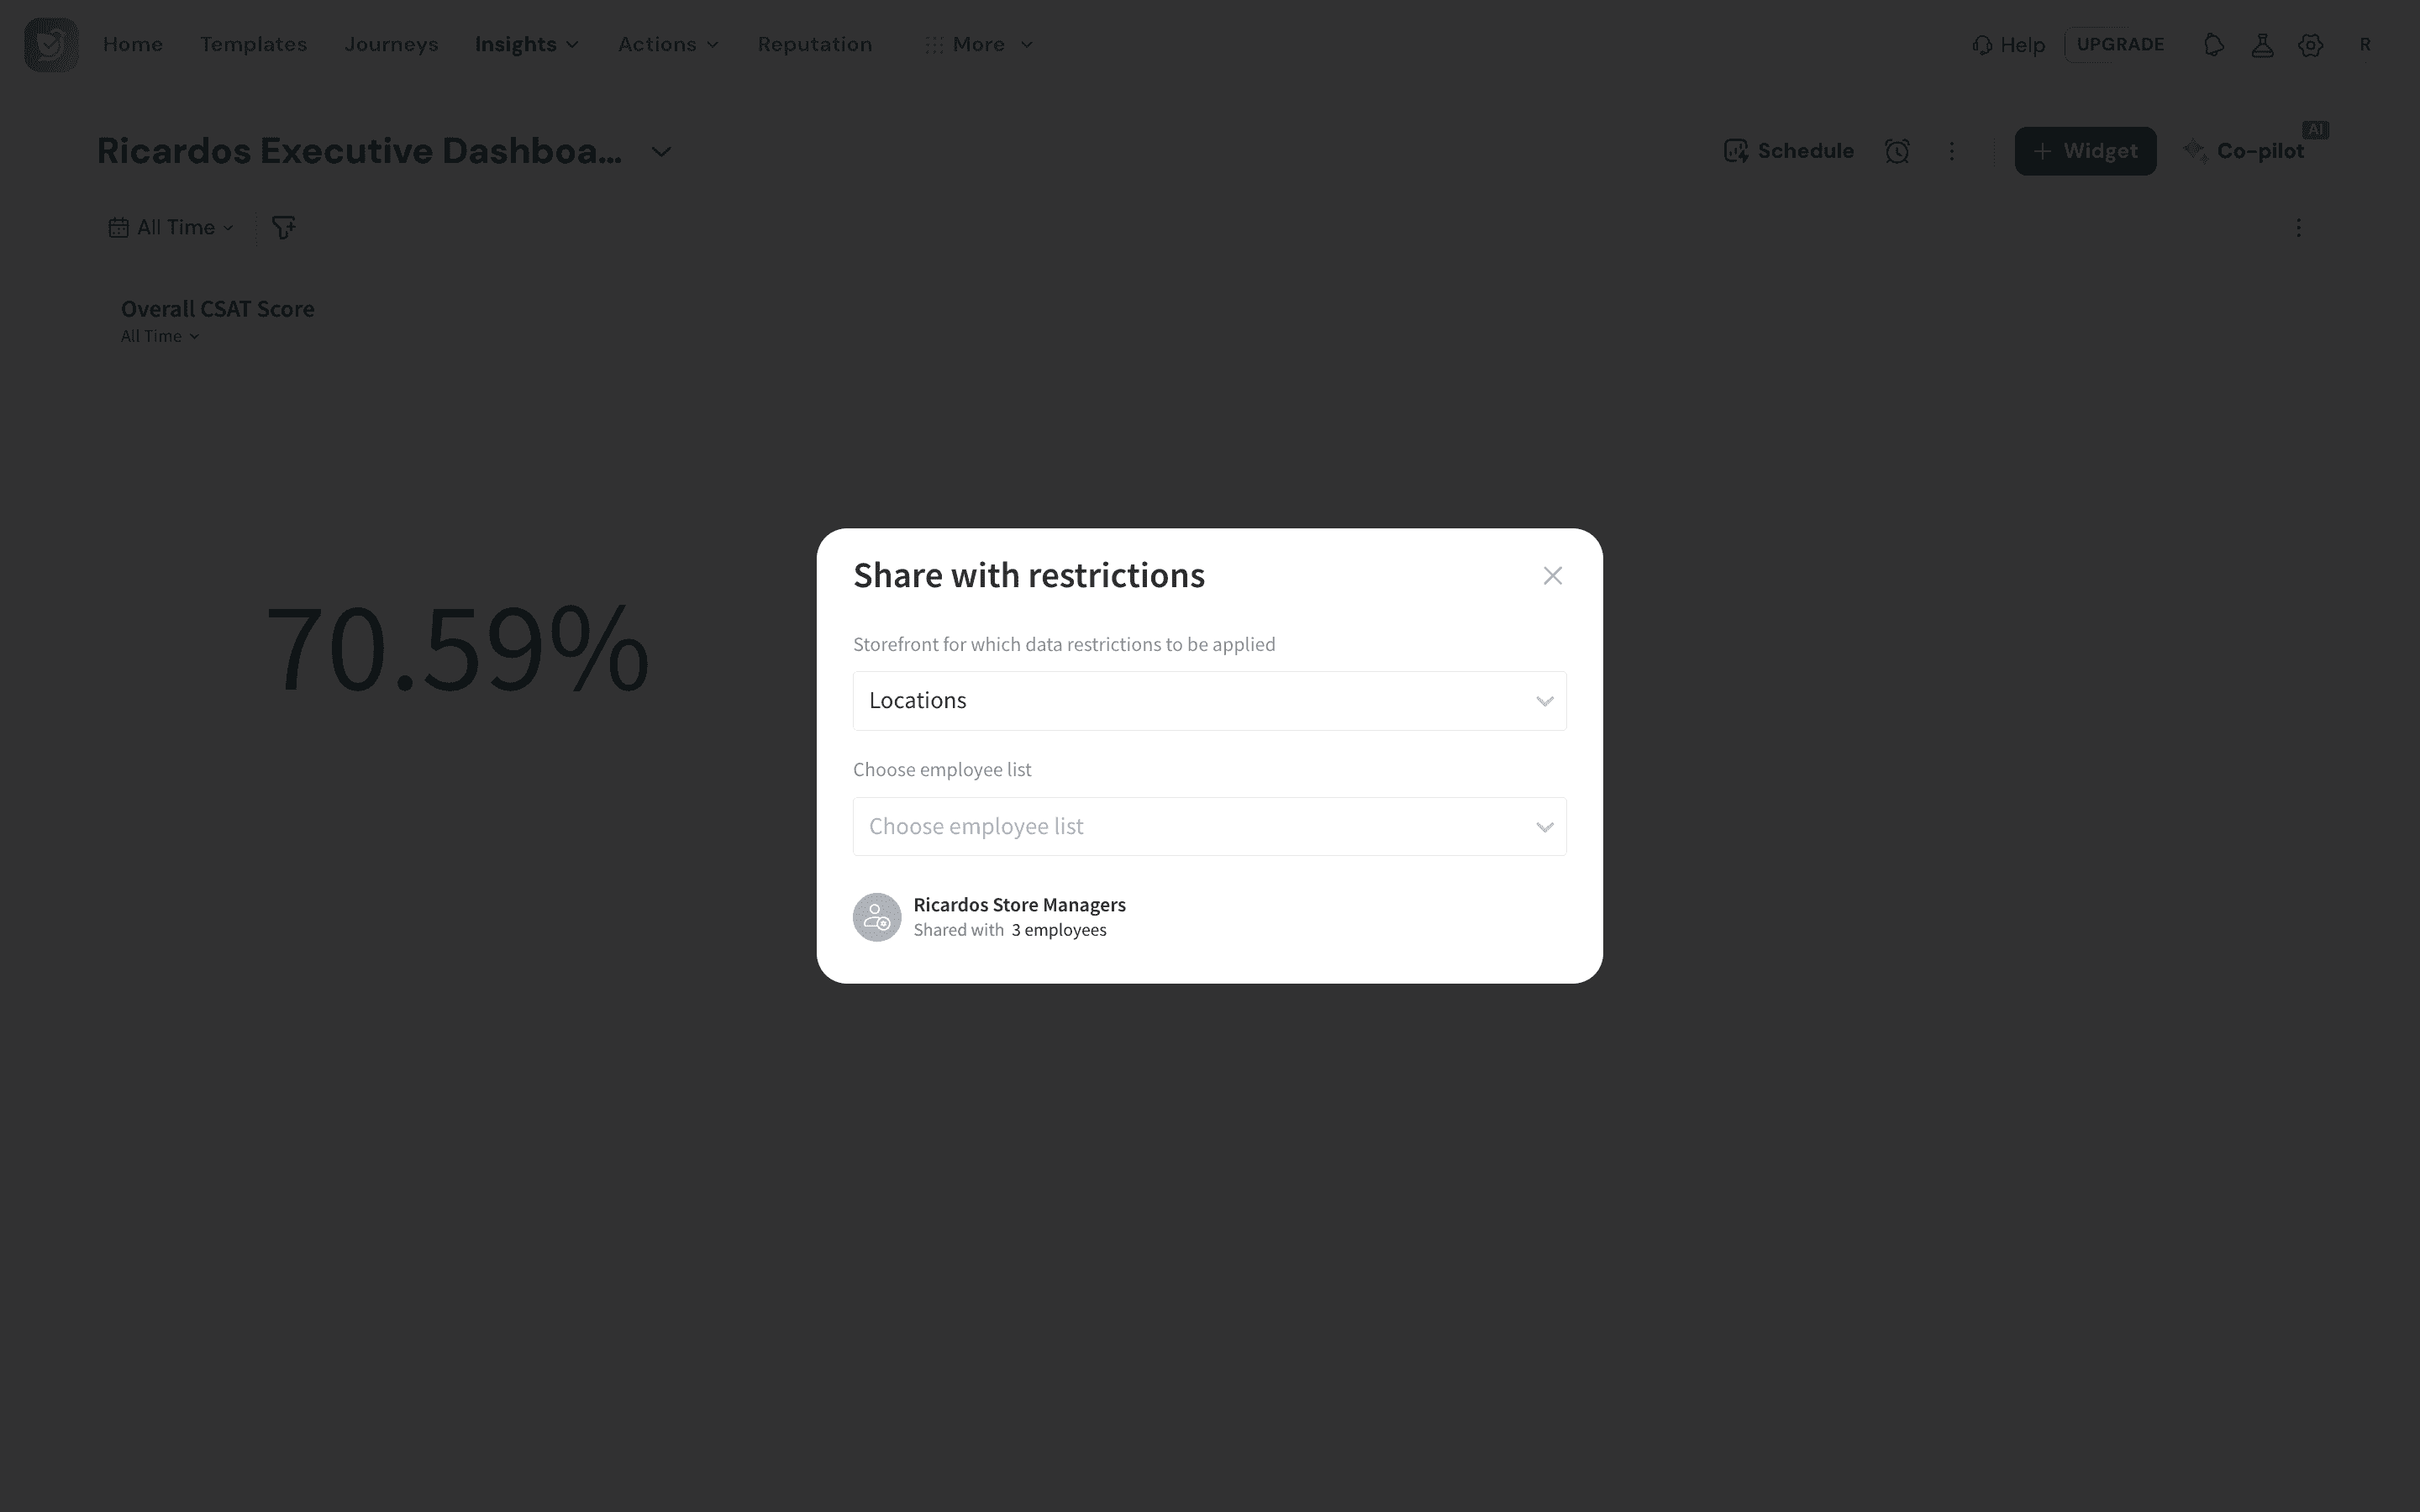
19. Once applied, the panel lists the smart list and how many employees it reached. Each of them gets an email link into the dashboard, scoped to their own Storefront level.
Troubleshooting
A manager says they can't see any data on a dashboard I shared with restrictions. Check that their employee record has the right Storefront level set (Step 9), and that they're actually in the smart list you attached to the restriction. A missing or mismatched level is the most common cause.
FAQ
Does exporting or downloading a restricted dashboard bypass the restriction? No. Downloaded and exported data from a dashboard shared with restrictions respects the same access limits as the dashboard itself.
Can I just use the default Storefront templates instead of building my own? Yes. Products, Stores, and Reporting Line are ready to use out of the box, and you can edit or delete them to fit your account.
What's the difference between restricting by Storefront and restricting by reportees? A Storefront (like Locations) restricts by whatever grouping you've built — store, region, product line. Direct Reportees and Direct & Indirect Reportees restrict by your existing management chain instead, with no Storefront setup needed.
Which survey types can I restrict data from? Classic and CX surveys.
Related articles
Still stuck? Reach out to us — we're just a chat away.