No more scouring through multiple systems to find and manage your employee data. Everything you need is now accessible in one single, centralized location- the employee directory. That’s right, say hello to a nifty database that streamlines your workflows like never before.
Ready to see what's new? Here's an overview of all the changes-
Starting the scoop with the first and foremost change- we have transferred all contacts associated with 360 into the employee directory.
To access it, navigate to the “Contacts” section on your SurveySparrow account. Click on “Employees.”
Here, you’ll be able to view all your employee data, including both active and deactivated employees.
To toggle the active or deactivated status of one or more employees, simply select them and navigate to the "Mark As" tab in the upper right corner. Repeat these steps as needed to modify their status at any time.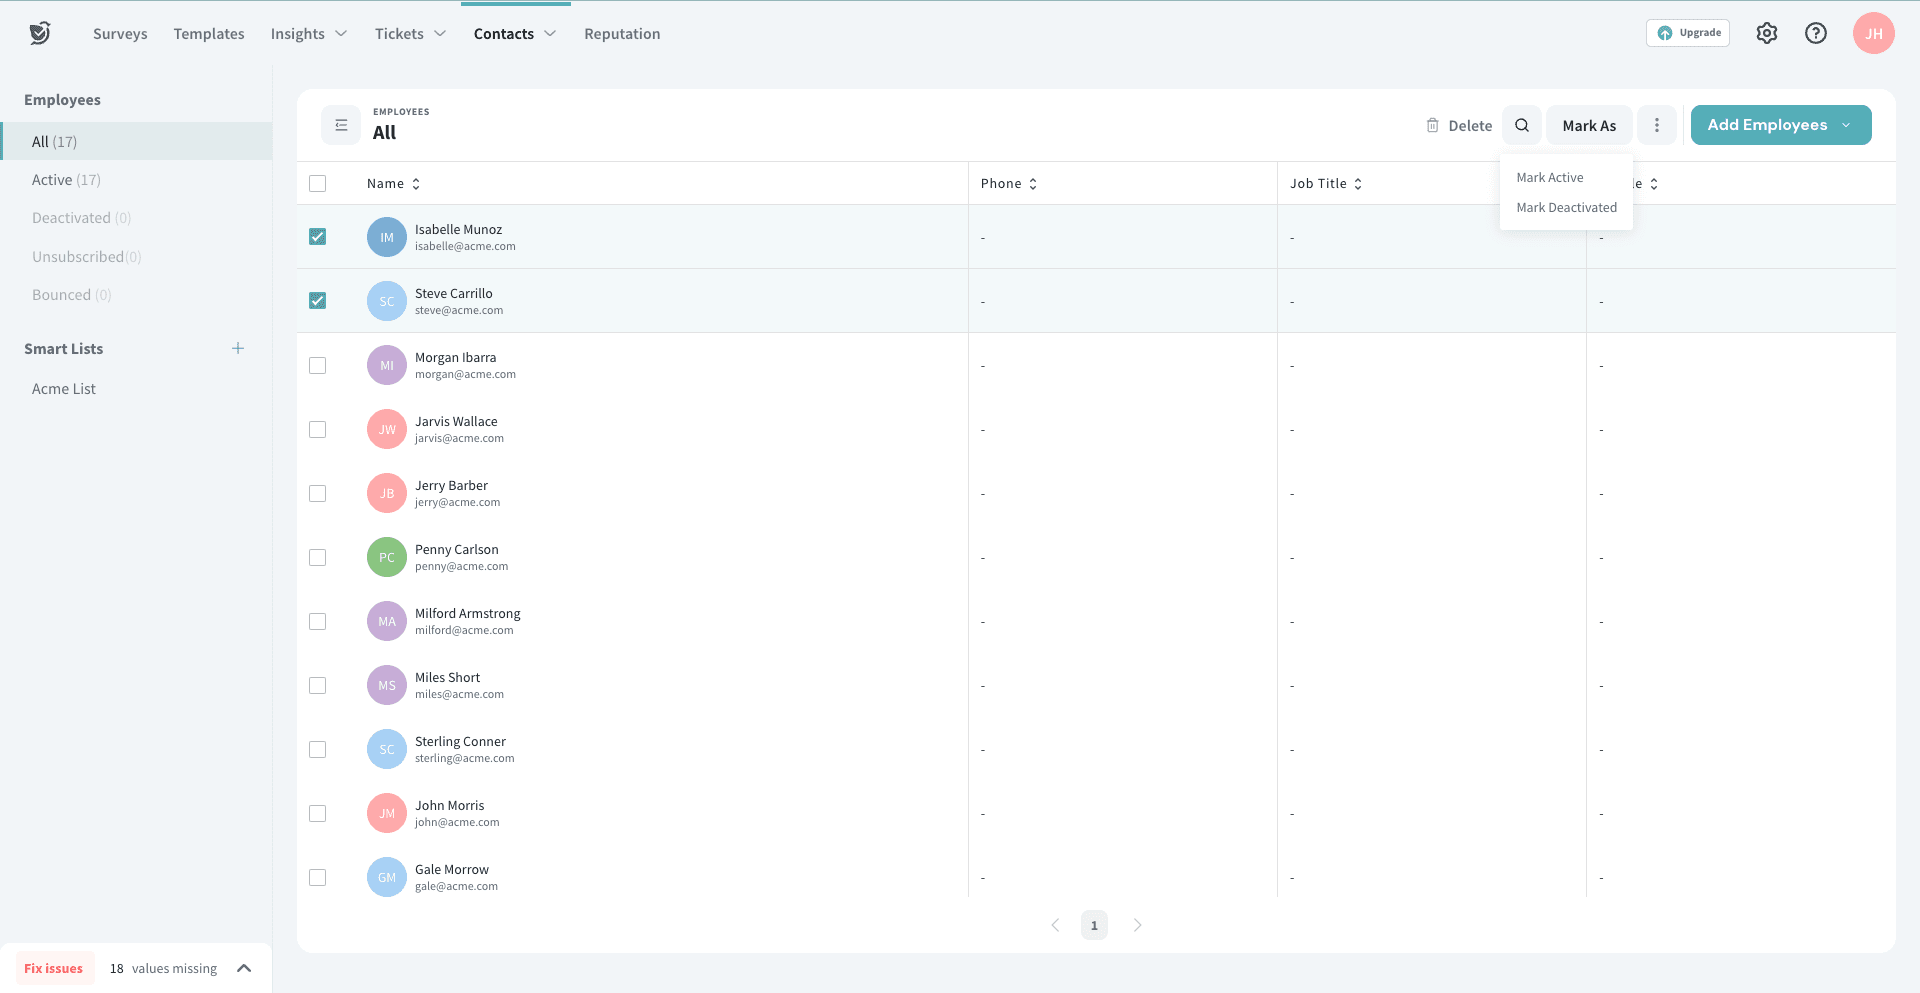
Alternatively, you can also navigate to the ‘Active’ or 'Inactive' list under Employees, select the contacts you want to change the status of, and head to “Mark Active/ Mark Deactivated” to achieve the same effect.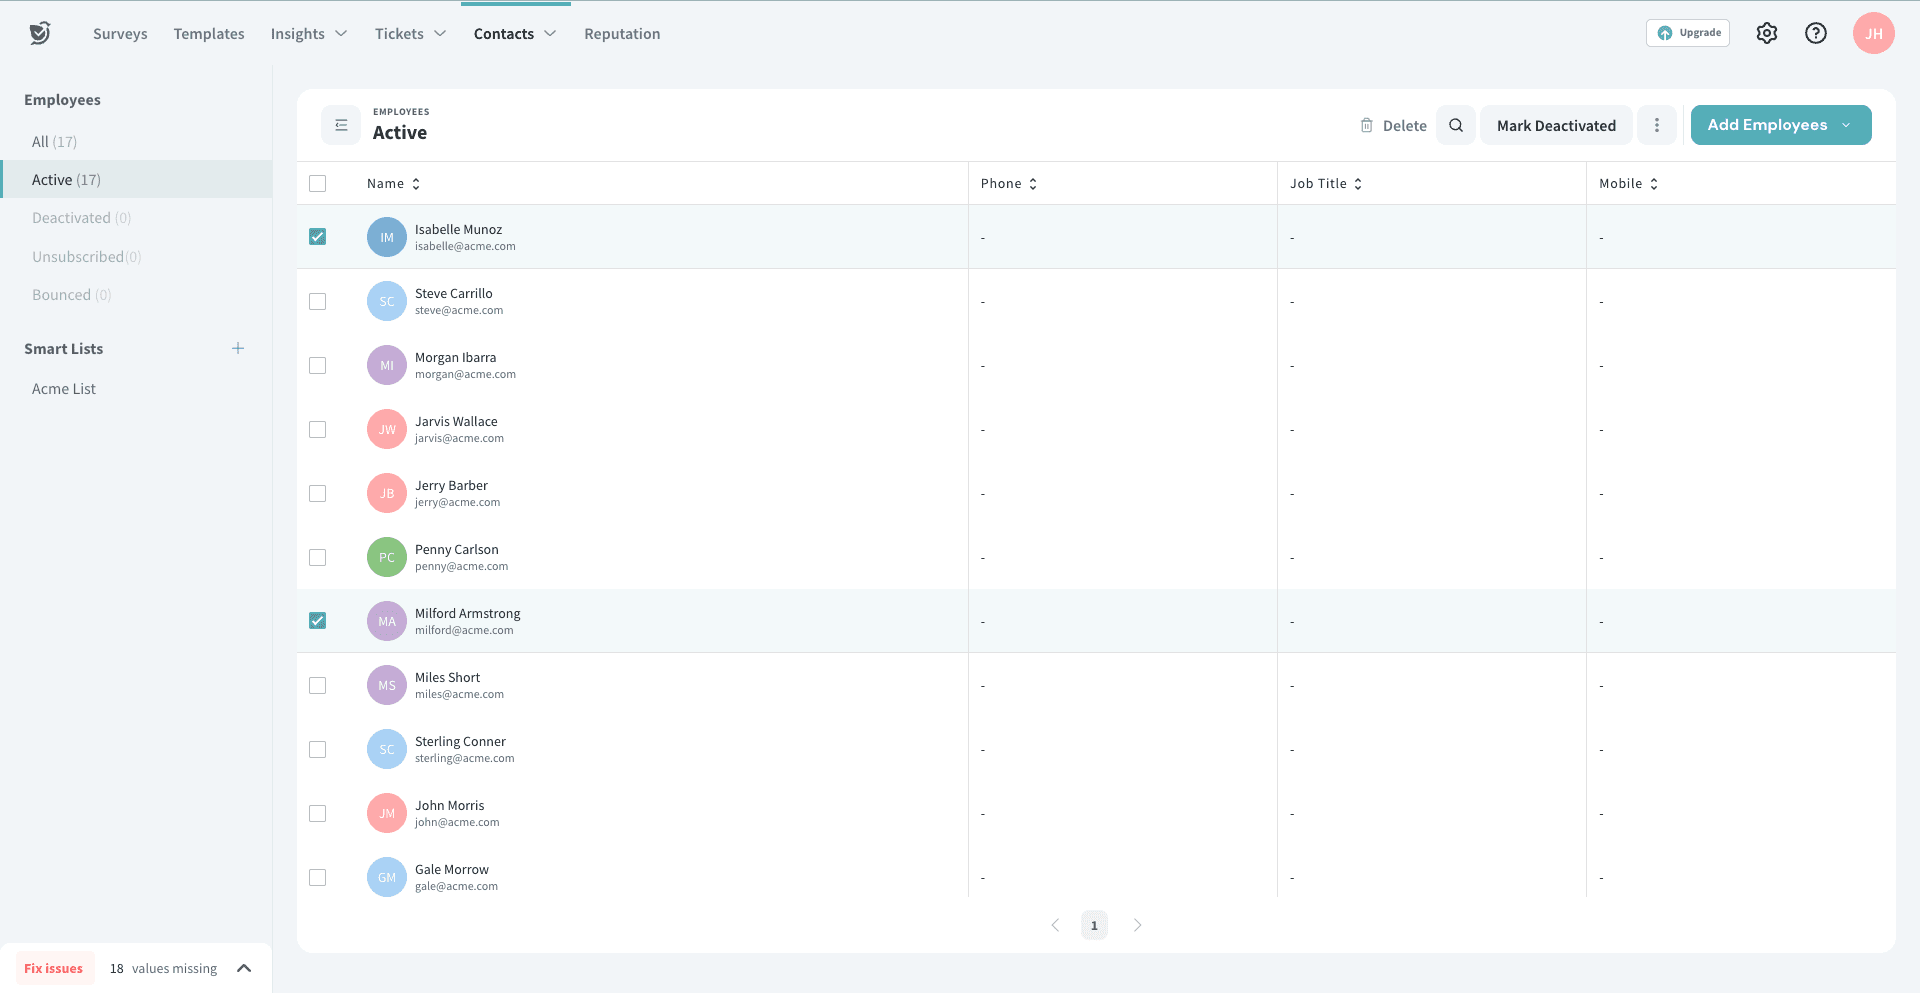
There are two ways to add new employee data: manually or by importing a CSV file
To manually add new employee data
- Navigate to the employee directory and select the 'Add Employee' button, then choose 'Add manually.'
- This will bring up a form where you can enter all the necessary details for the new employee, such as their name, contact information, department, job title, reporting manager, and other relevant information. You can also choose to add them in bulk by entering the contact email line by line
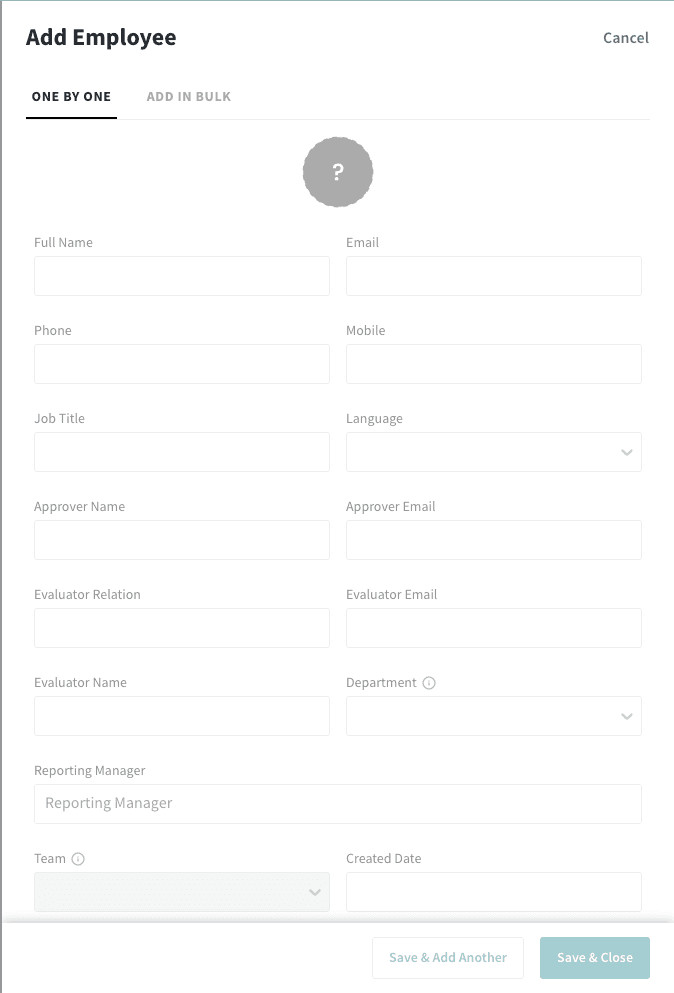
- Once you've filled out the form, just click "Save," and the new employee will be added to the directory
To import new employee data
Alternatively, if you have a large amount of new employee data to add, you can always choose to import it as a CSV file.
- To do this, you'll first need to create a CSV file with all the relevant information for each new employee
- You can then access the employee directory and click on the "Import" button to upload the CSV file
- Once you have finished importing the CSV file and made any necessary adjustments, click on 'Save import' to give it a name for future reference. Finally, click on 'Finish Import' to complete the process

- The system will then automatically add all the new employees to the directory based on the information in the CSV file
That’s right-your employee directory is now stocked with a complete roster of Properties from the Contacts section!
Before we take you through that, do note that we have moved the option to manage properties from the ‘Contacts Section’ to Settings. That is, from now on, both ‘Contact Properties’ and ‘Employee Properties’ will be managed under one, unified place-Settings
Now that’s out of the way, to take a peek at employee properties and manage them-
- Click on the three ellipsis icon right next to search.
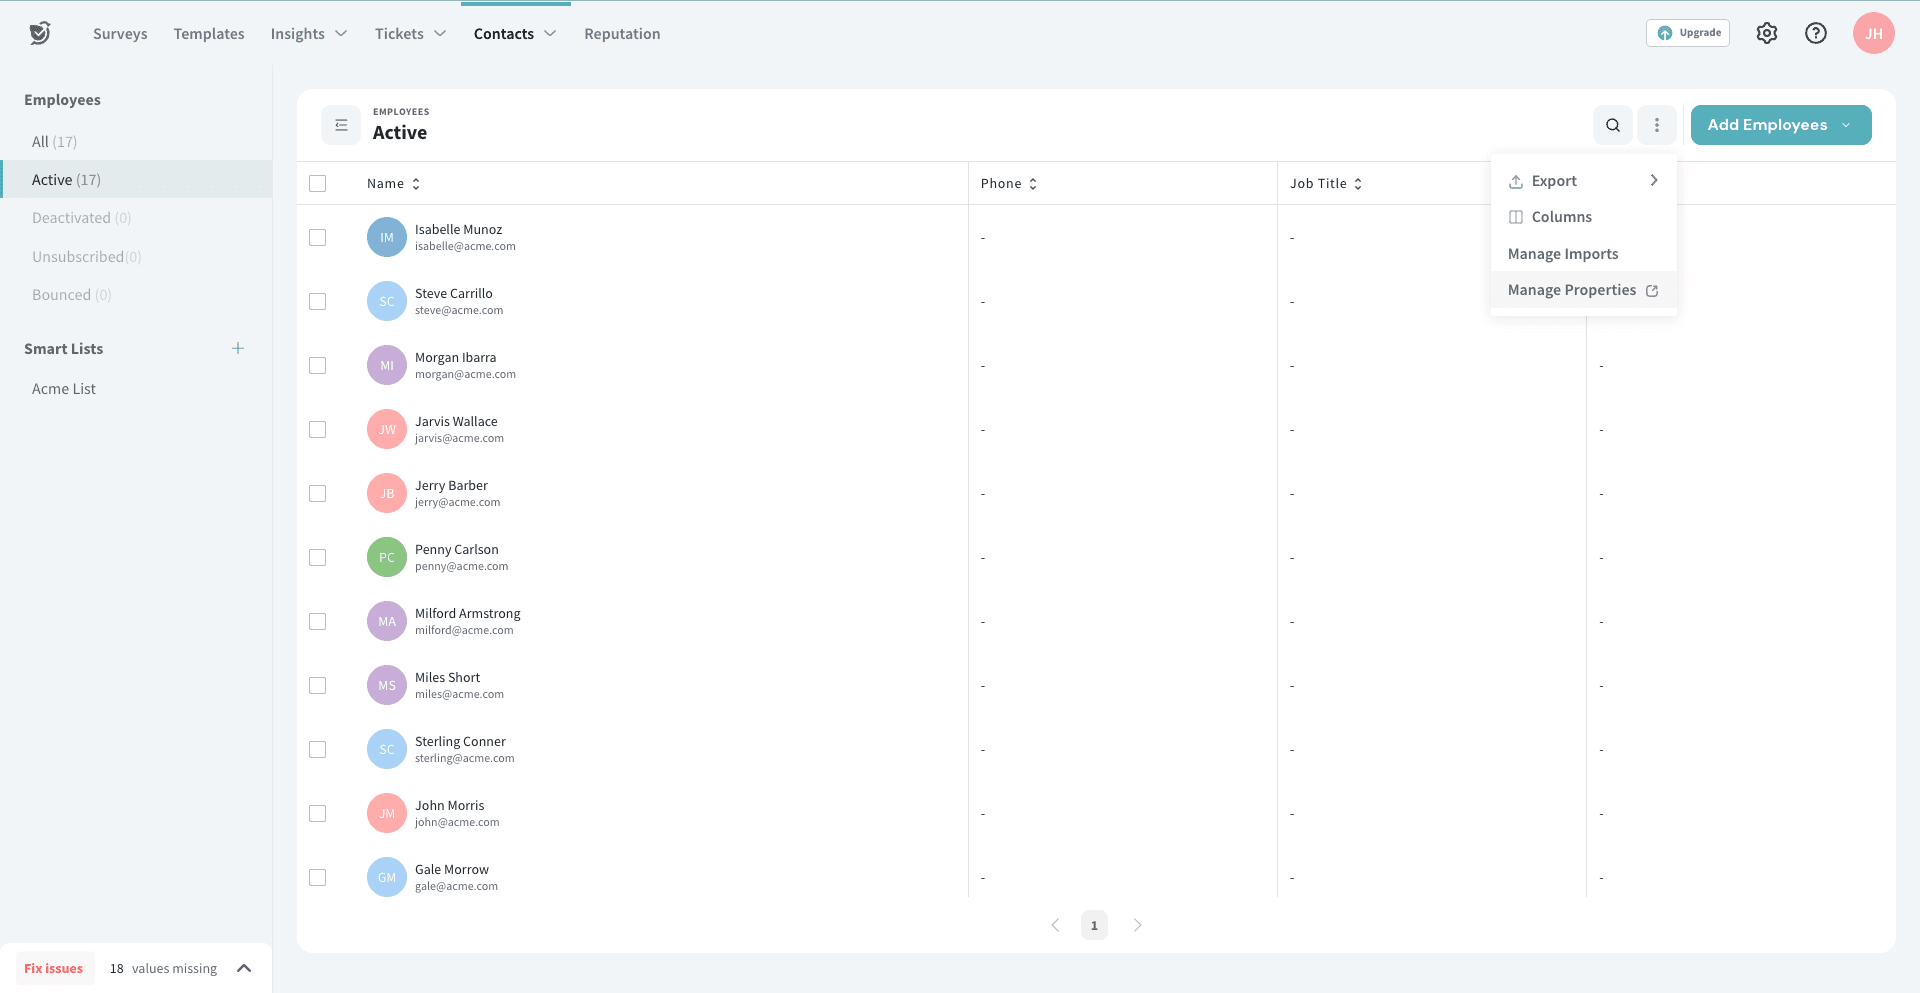
- Hit ‘Proceed,’ upon which you’ll be redirected to the Settings Page
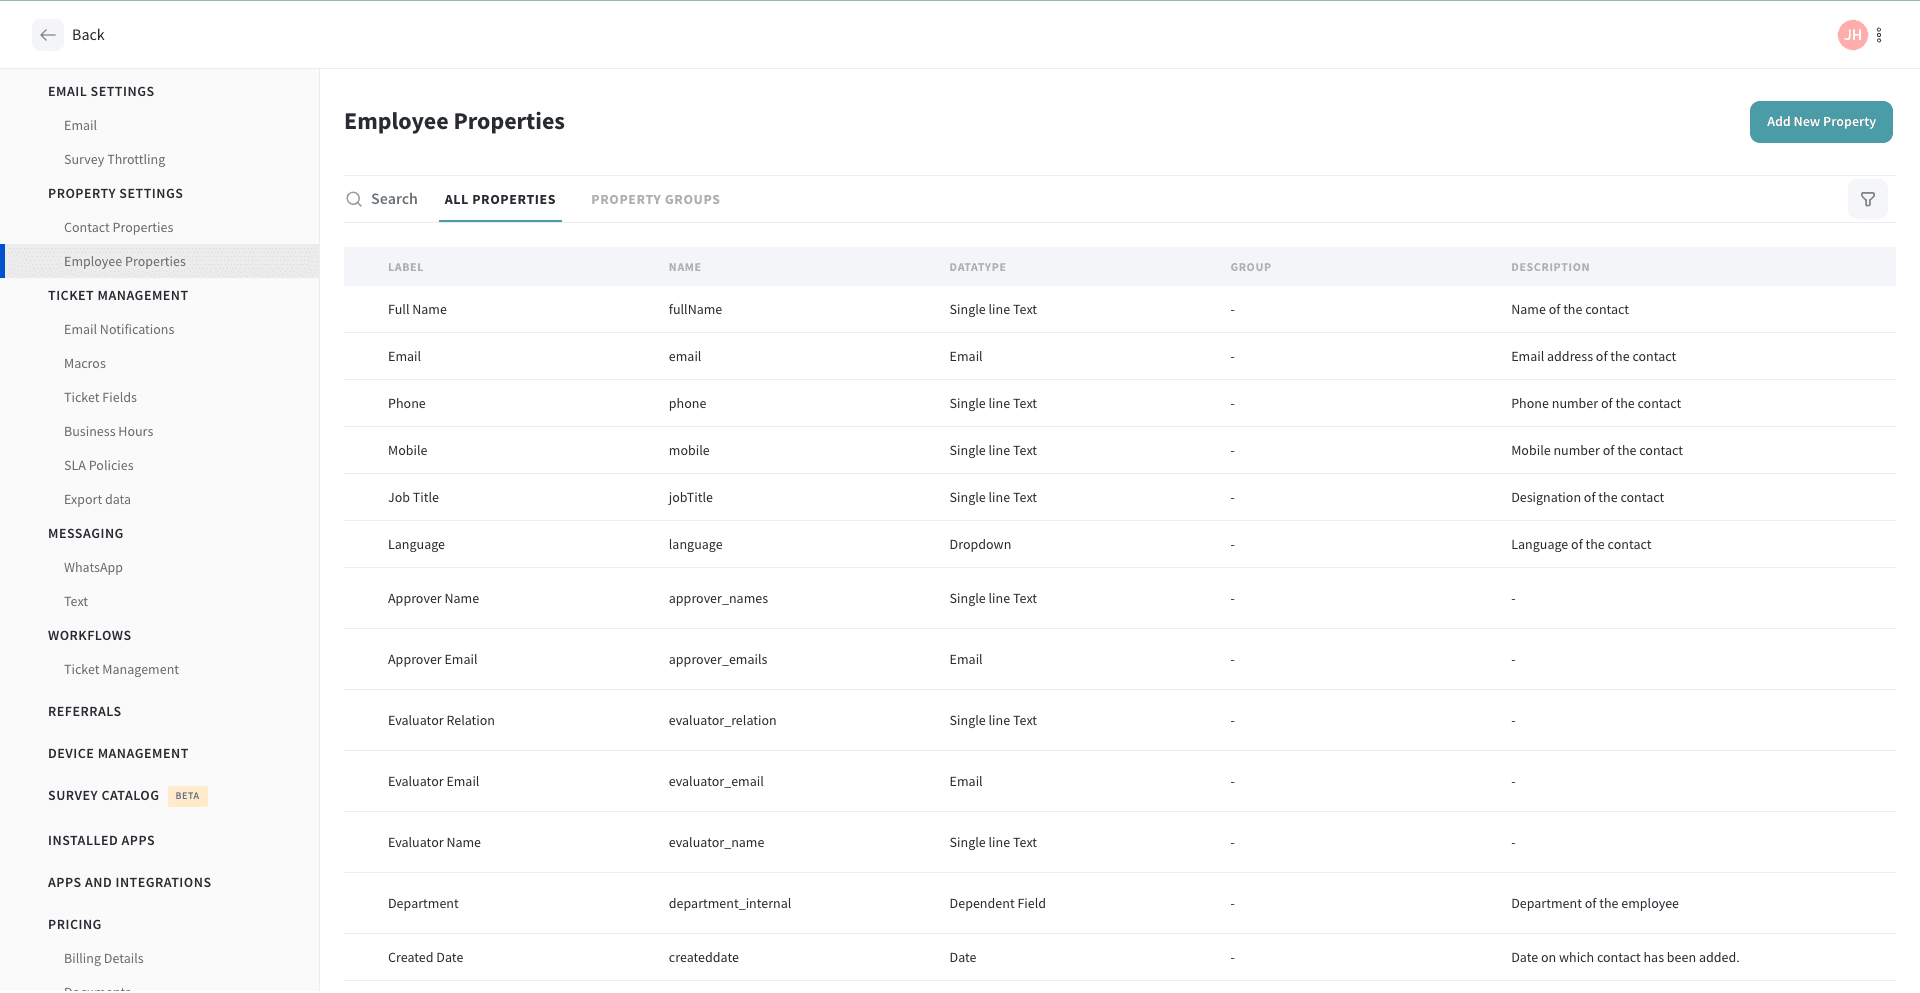
- There, you can review existing properties and make amends if any, by clicking on the edit button
- To add a new property, simply click on the “Add new property” button on the top right and fill in the relevant information

- Therein, you also have the option to designate a property as belonging exclusively to employees or as shared between both employees and contacts
Departments and Teams to supercharge the employee directory
We are introducing two new properties in the employee directory - Departments and Teams. These fields are interdependent, which means each department can have multiple teams associated with it. In other words, the teams are nested under the corresponding department.
Here are the steps to specify department and teams
- Navigate to the Employee Properties and locate the "Department" label. Afterward, click on the edit button
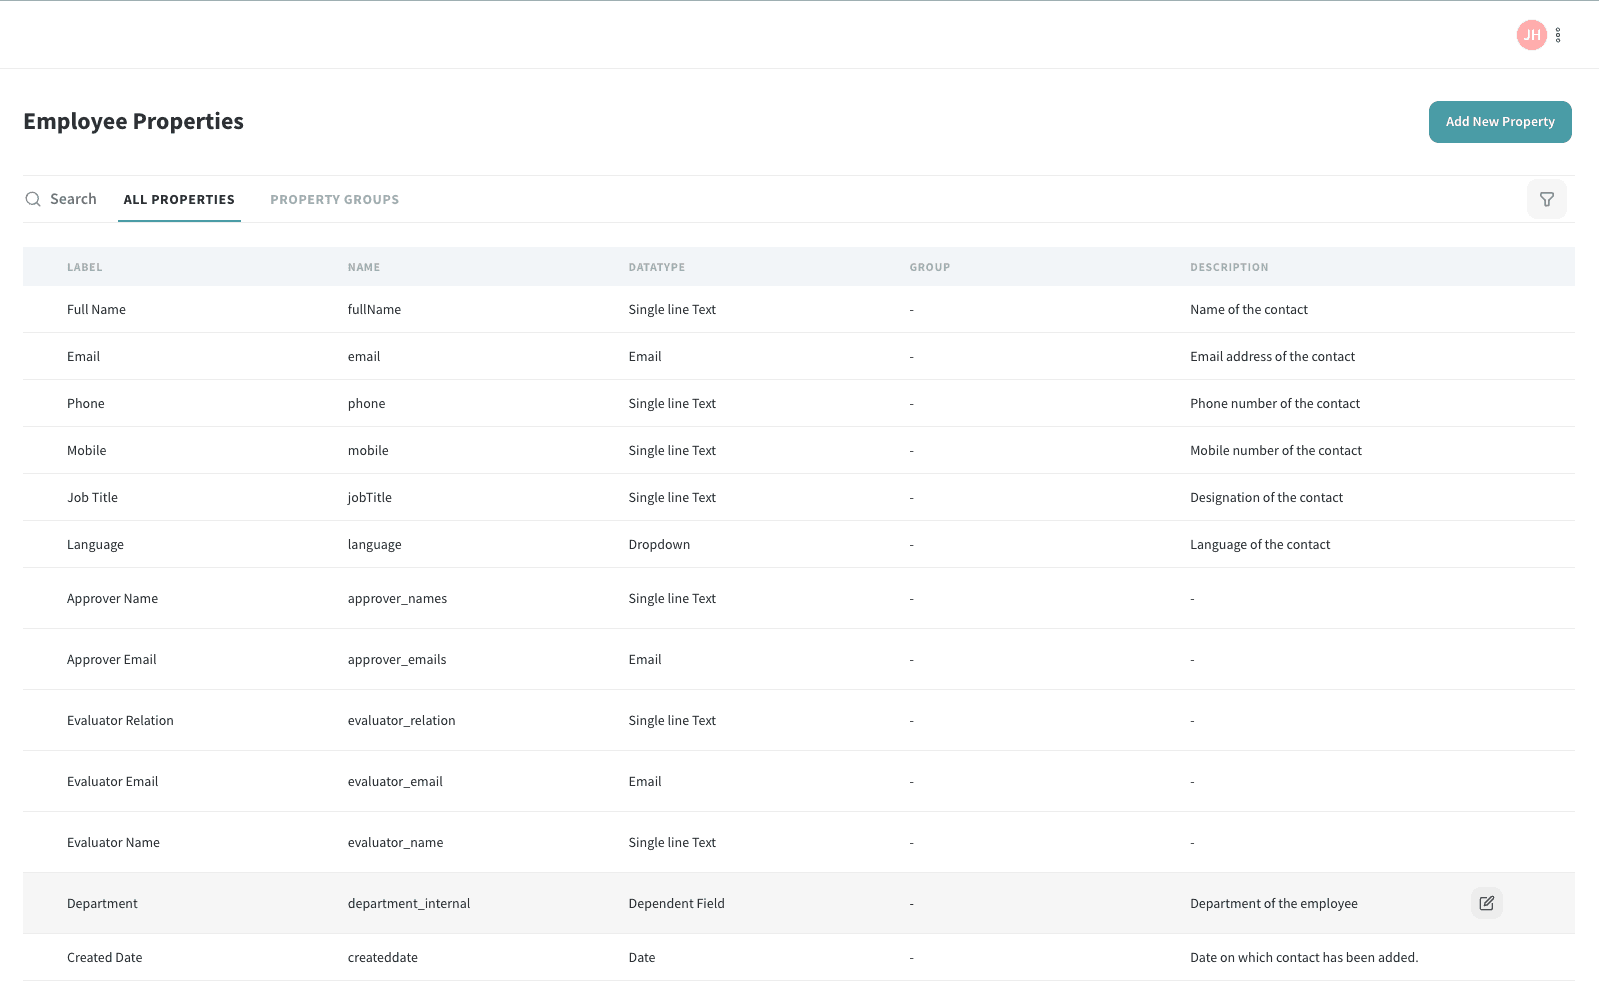
- In the newly popped-up window, under the ‘Department Structure’, click on the ‘Add Department’ button
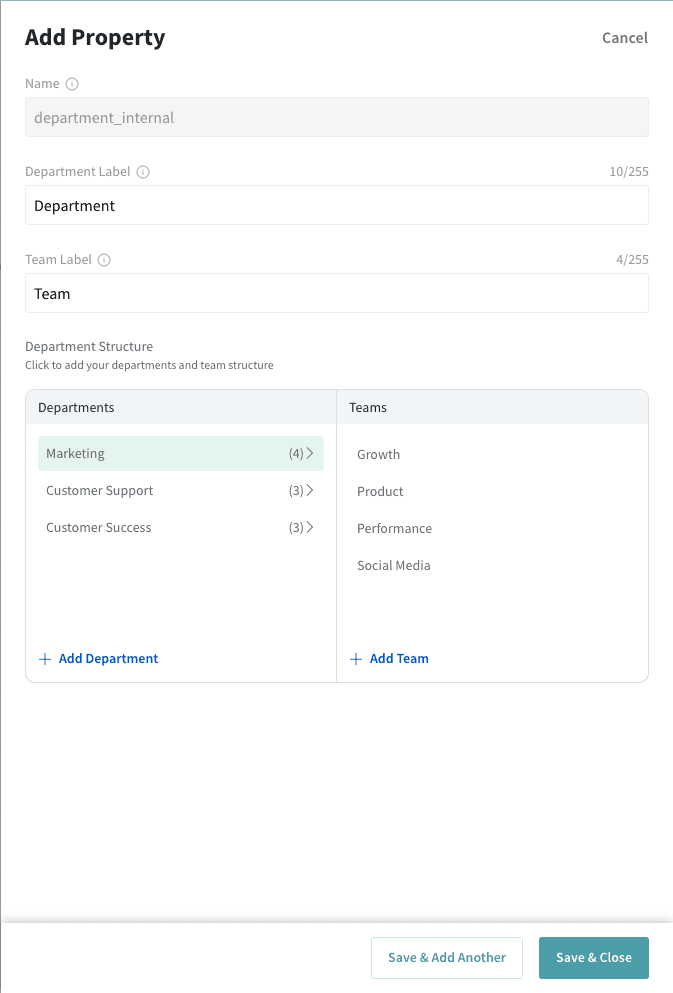
- To create a new team within the department you've just added, click on the "Add Team" button
- Once you have entered the team names, click on "Add" to save your selections. This will add the team to the department, and you can repeat the process to add additional teams within the same department
- Save your changes upon completion
Note
In case you already had these properties in the Contacts section, we made a copy of these properties in the employee directory. We avoided label conflict with the predefined properties in the directory by-
- The label of the property 'Departments' has been changed to 'Department_Default_Unused
- The label of the property 'Teams' has been renamed as 'Teams_Default_Unused'
No More Missing Pieces: Mapping Employee Data for a Comprehensive Directory
When importing data into the Employee Directory, it's crucial that all fields are checked. But don't worry if you don't have all the information upfront. Any vital fields that go unattended will be flagged as missing so you can make quick and easy updates for specific employees or larger bulk changes later down the line.
At the moment, we're highlighting missing values for the following properties:
- Reporting Manager
- Departments
- Teams
To update missing fields individually-
- To update specific employee information, select the employee and simply click on 'Fix'
- This will open a search box where you can search and select the appropriate option from the list to rectify any missing information.
To update missing fields in bulk-
- First, choose the relevant property. Say, for example, Reporting Manager
- You will then be displayed a list of employees who are missing the field
- Next, select the group of employees that you want to update and click on ‘Fix selection.’
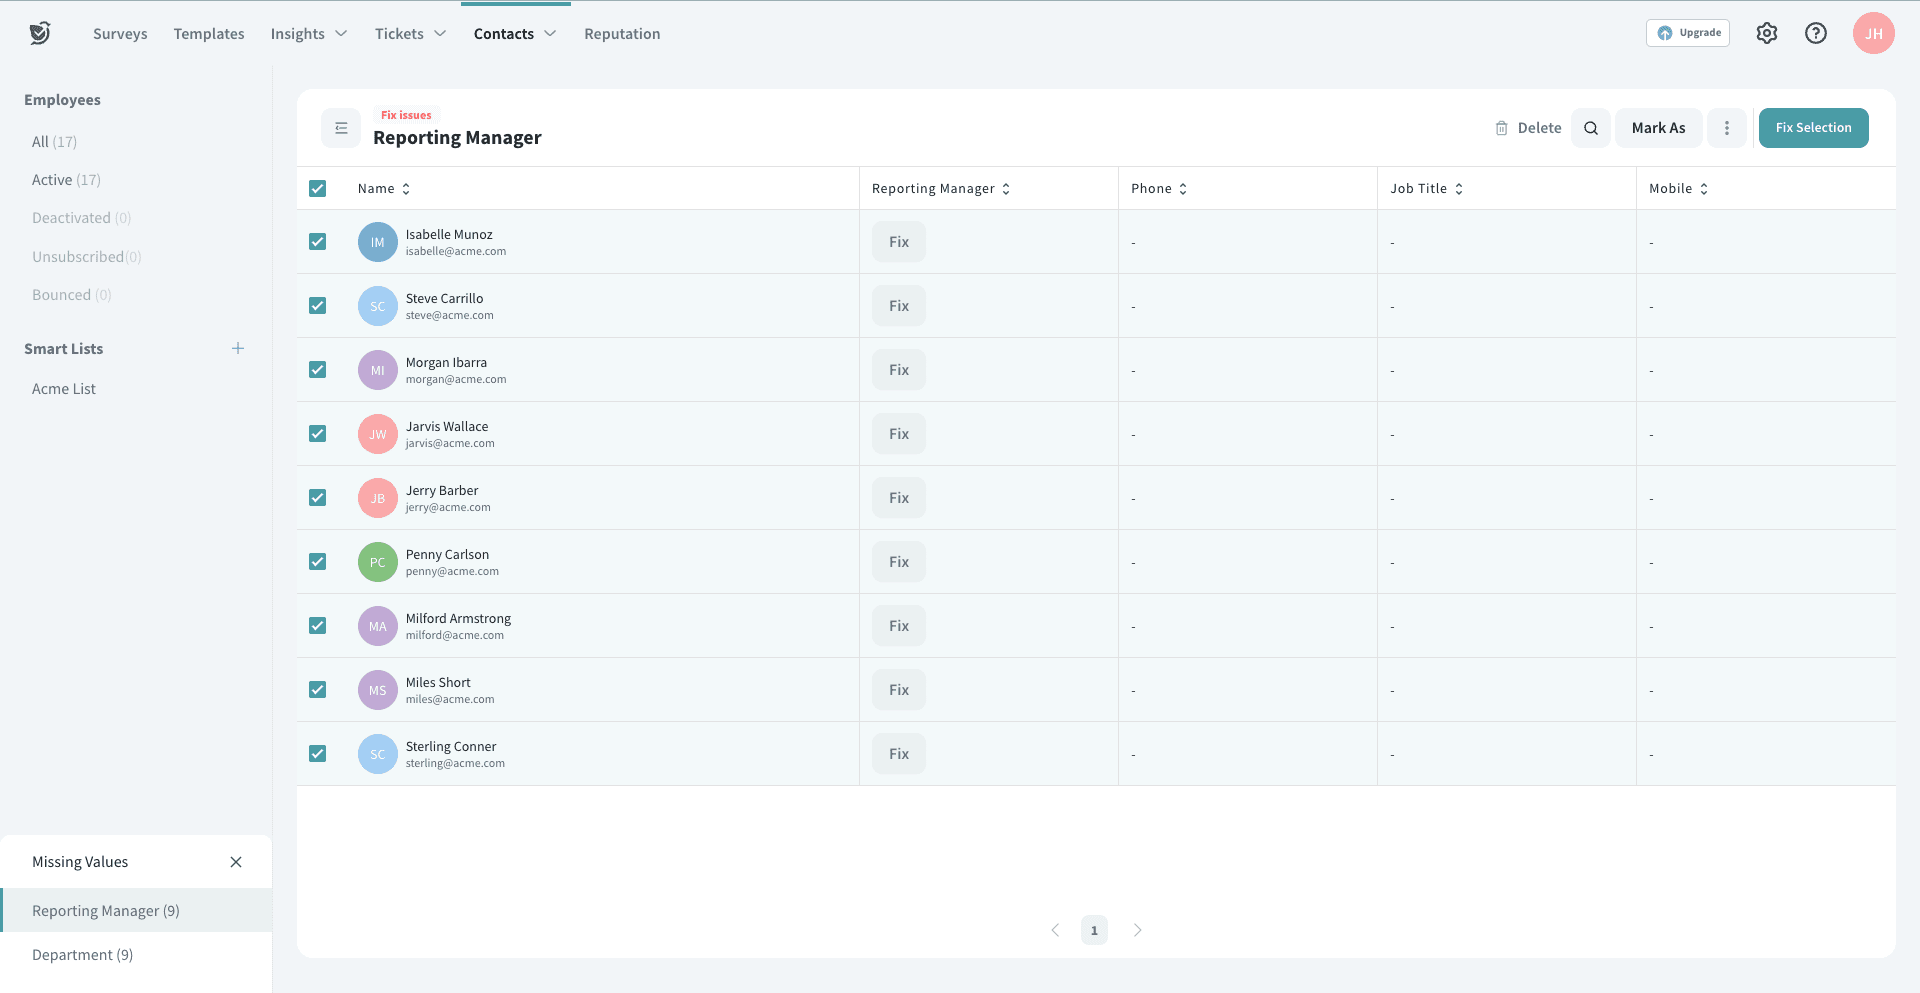
- A search box will appear where you can find and select the appropriate option from the list

We hope this overview of the new employee directory feature has been helpful. If you have any further questions or concerns, please don't hesitate to reach out to our team for assistance.


