Search
Echo is the no-code agent builder that helps you build smart agents that capture feedback, clarify intent, and close the loop with real-time actions. You can build Echo Agents for obtaining better feedback with deeper insights.
In this article, let’s see how to build out your agent. Create, train, and deploy your first AI Agent with this step-by-step guide.
To make the process simple, let us take the case of building an agent for collecting post-purchase feedback for a smartphone brand.
Let’s get started!
Click on Create New and choose Echo Agents.

You can choose one of the following creation methods:
By default, you are taken through Quick Creation.
Click on the link below to skip and go through manual creation.
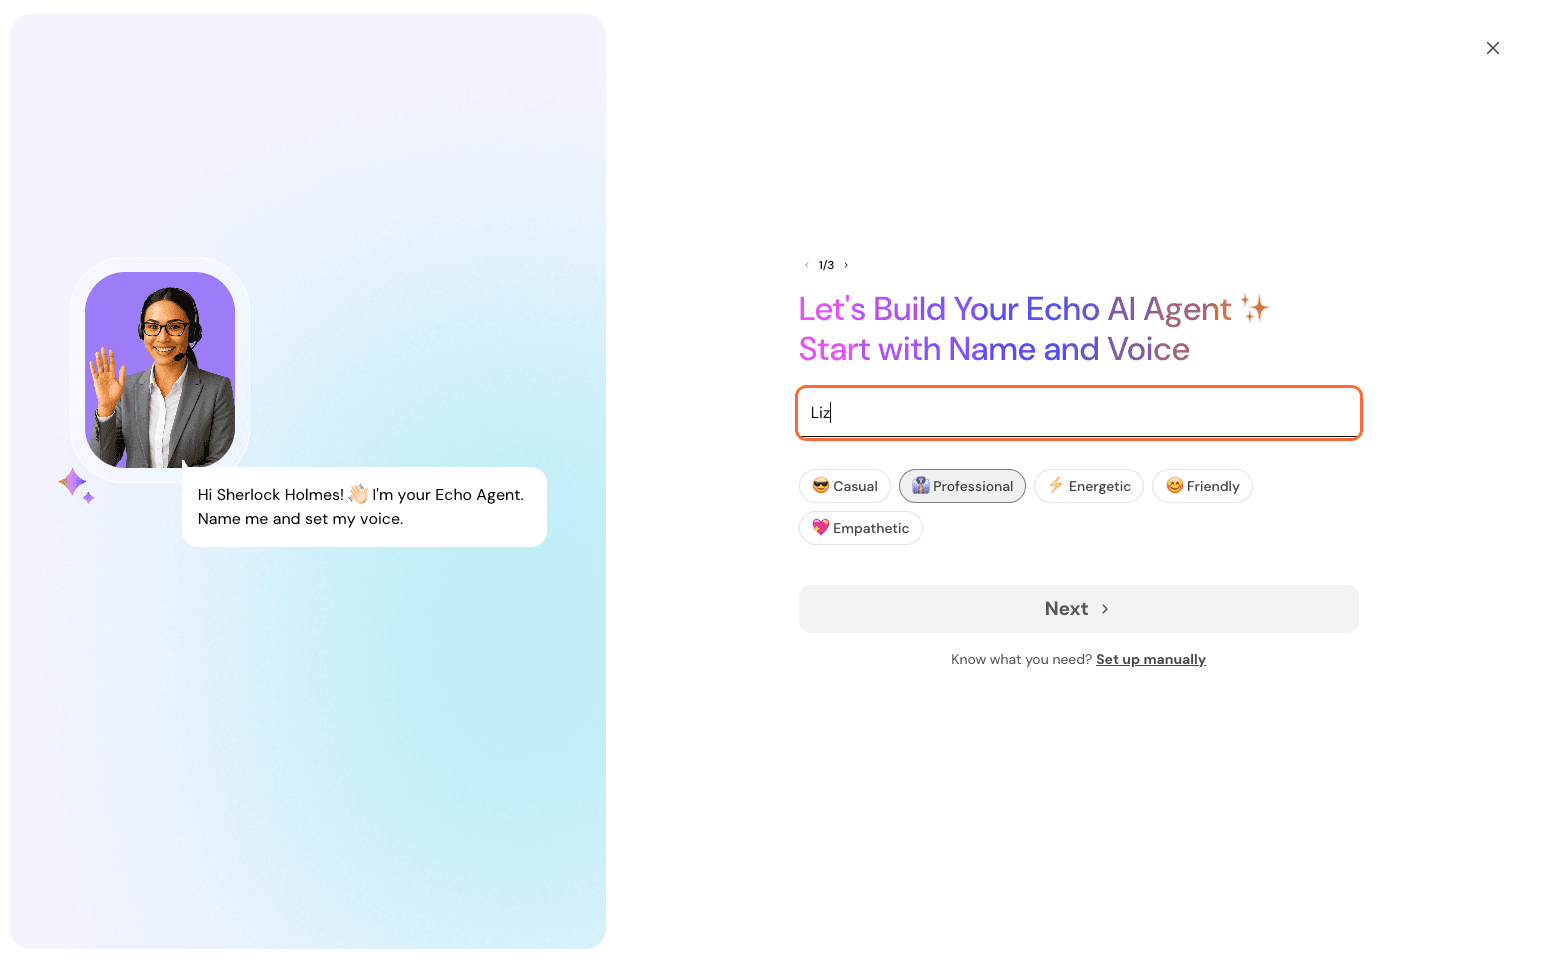
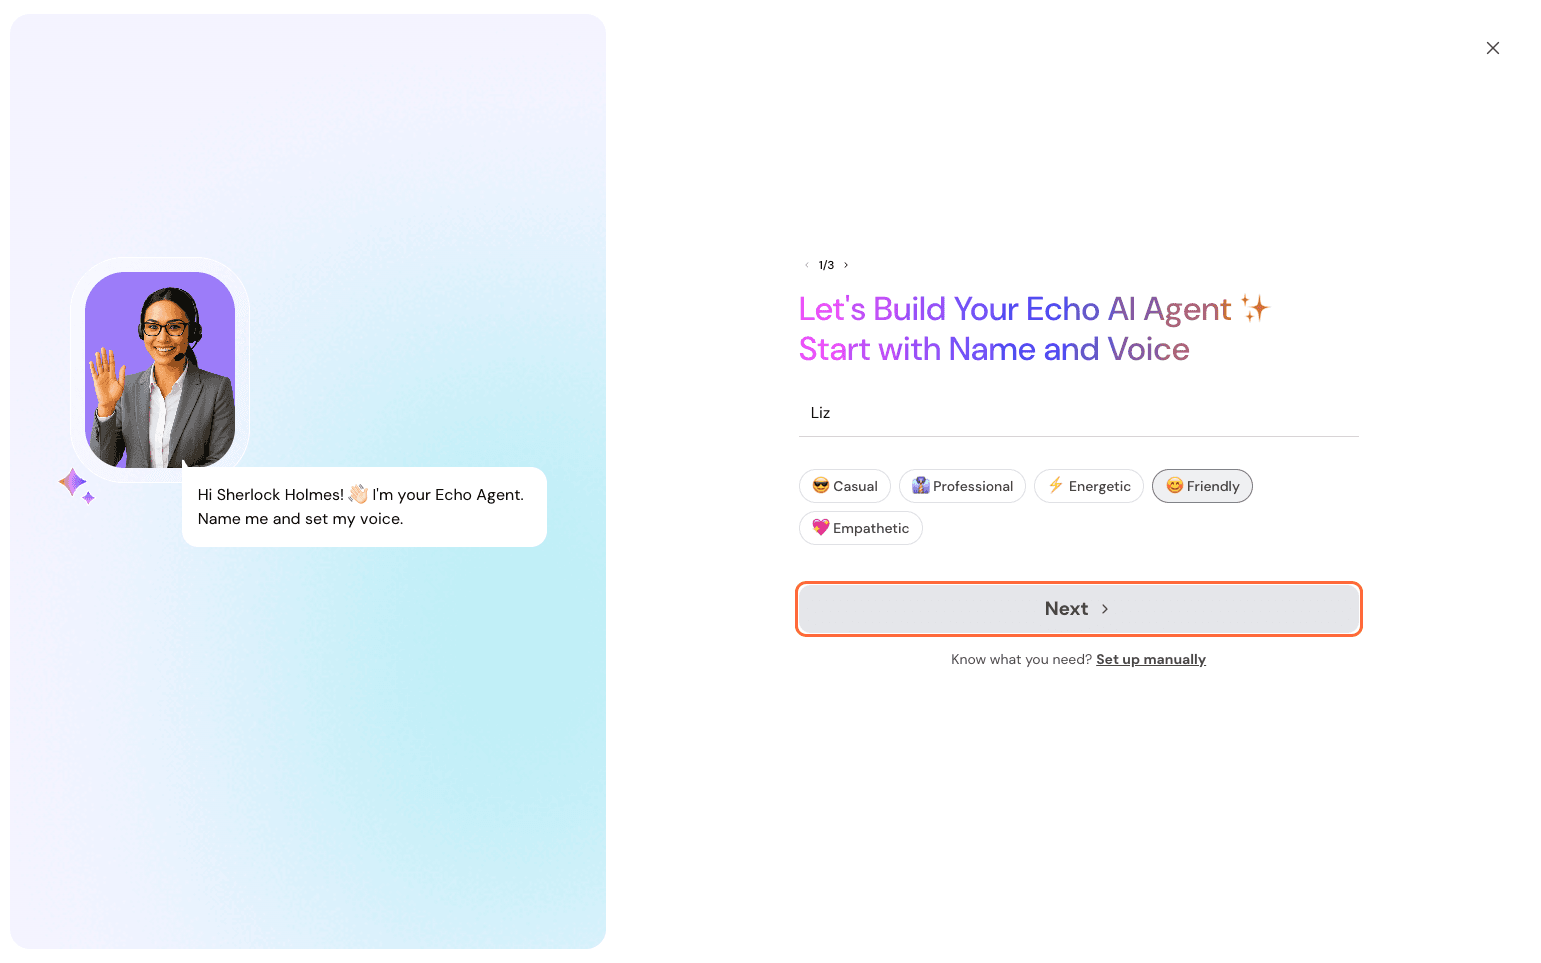
Name your Agent and decide on the tone for the Agent. This tone sets how your Agent interacts with users: be it in a friendly, empathetic, or professional way only. Click Next to proceed.
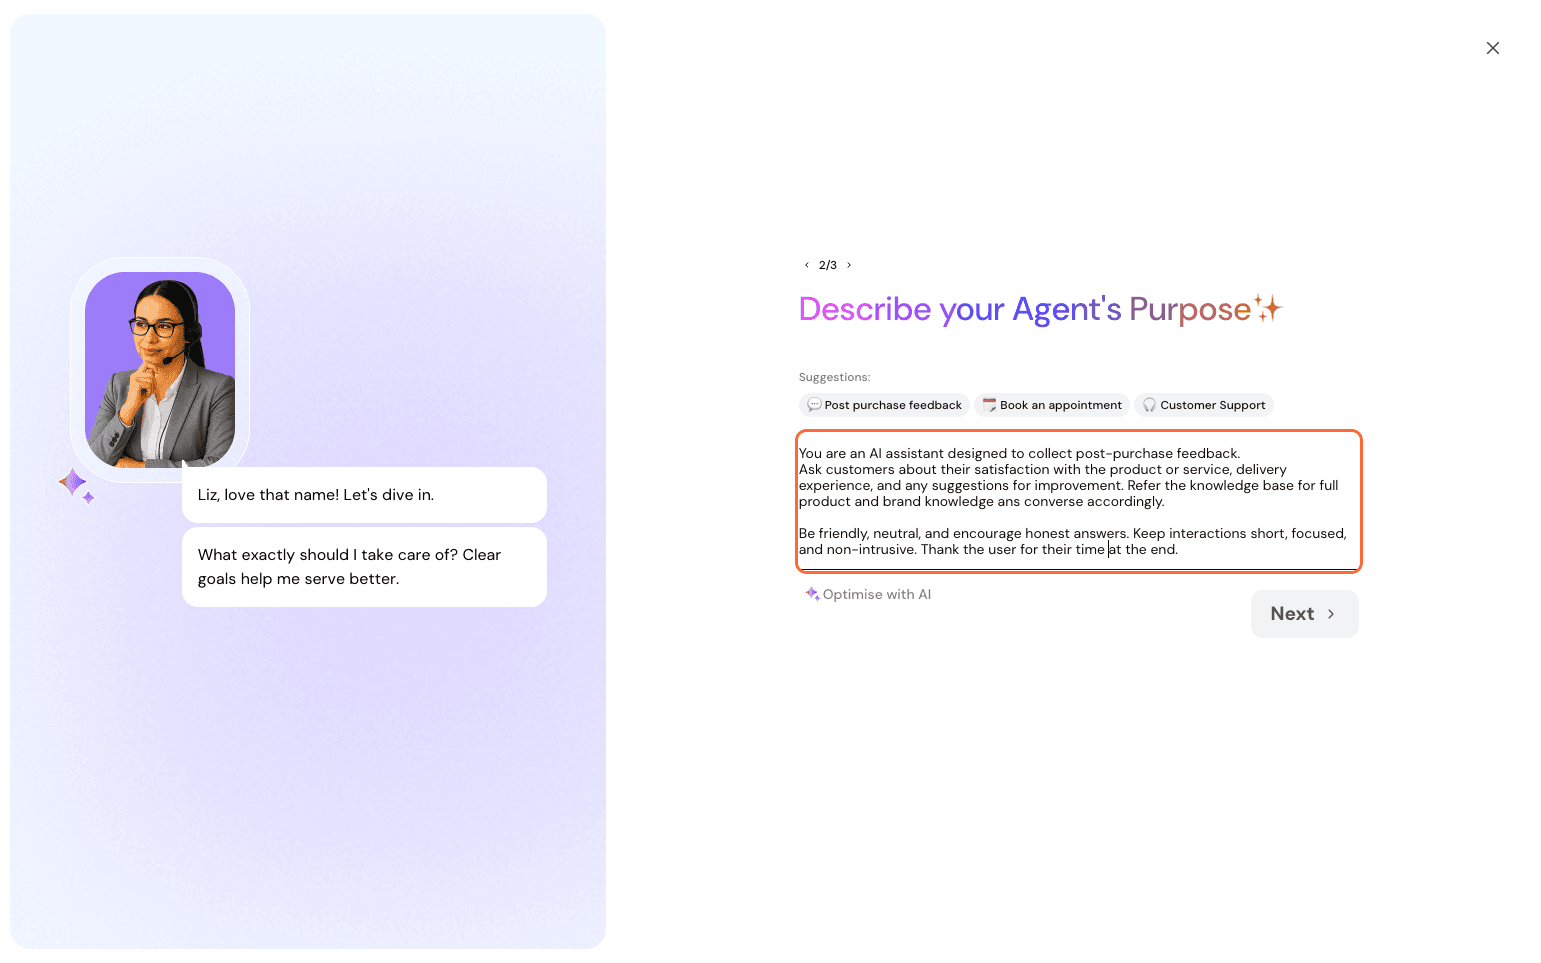
Next, set the context or purpose of the agent. Be as descriptive as possible. This helps Echo understand what the agent is meant to do and how it should behave. You can refine your prompt using AI as well - just select Optimise with AI. You can choose from some suggestions if they match your intent to kickstart the process. Click on Next to proceed.
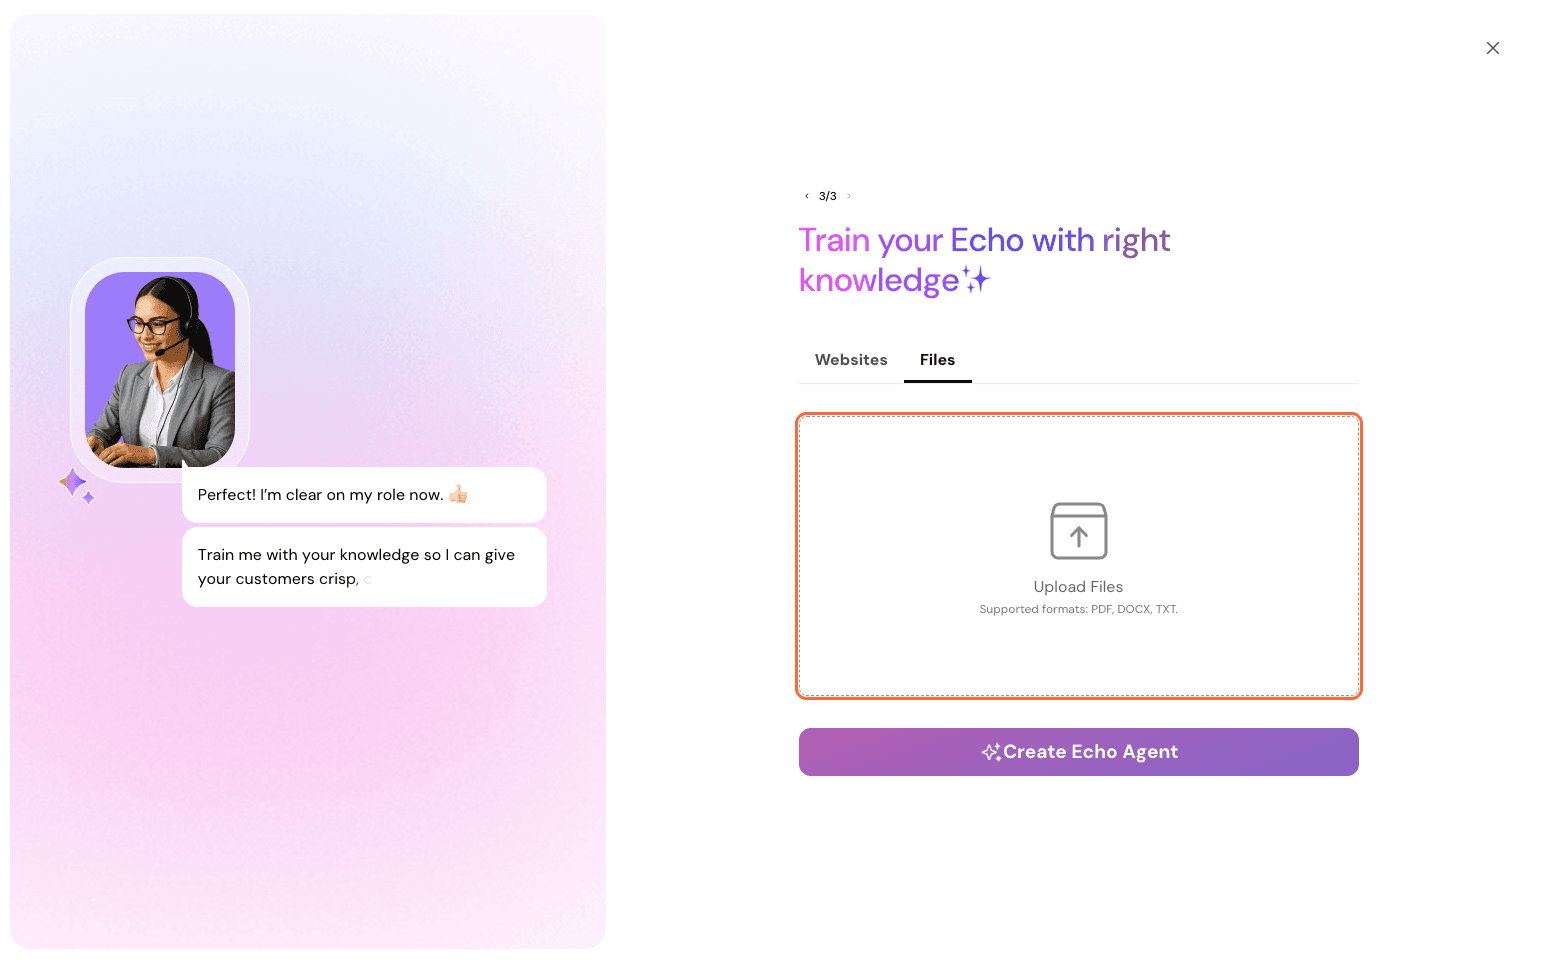
Finally, train your agent with the right materials so it understands your organization and can respond appropriately.
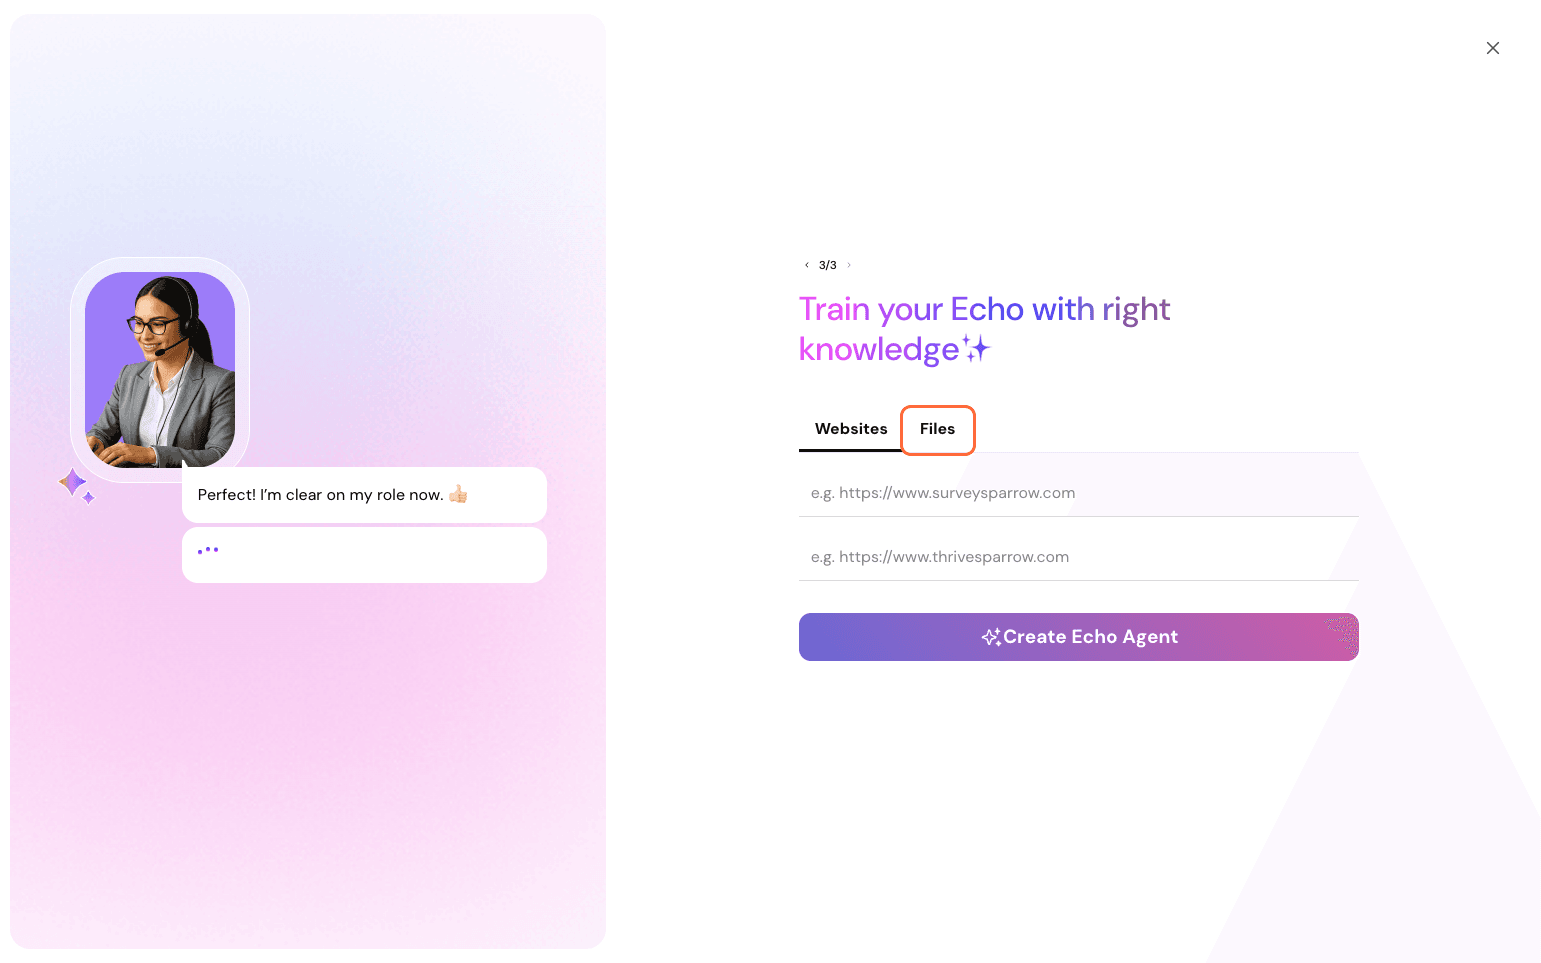
You can paste website links or files for the agent to read through. File formats supported are: PDF, DOCX, and TXT.
Now, you have set up your Echo Agent. It is time to train the agent some more.
Let us have a look at the steps filled out and refine them further to our satisfaction.
You have Preview at the side that shows all changes you make in real-time. Choose any of the views: chat, web, and WhatsApp, to see how it applies across platforms.
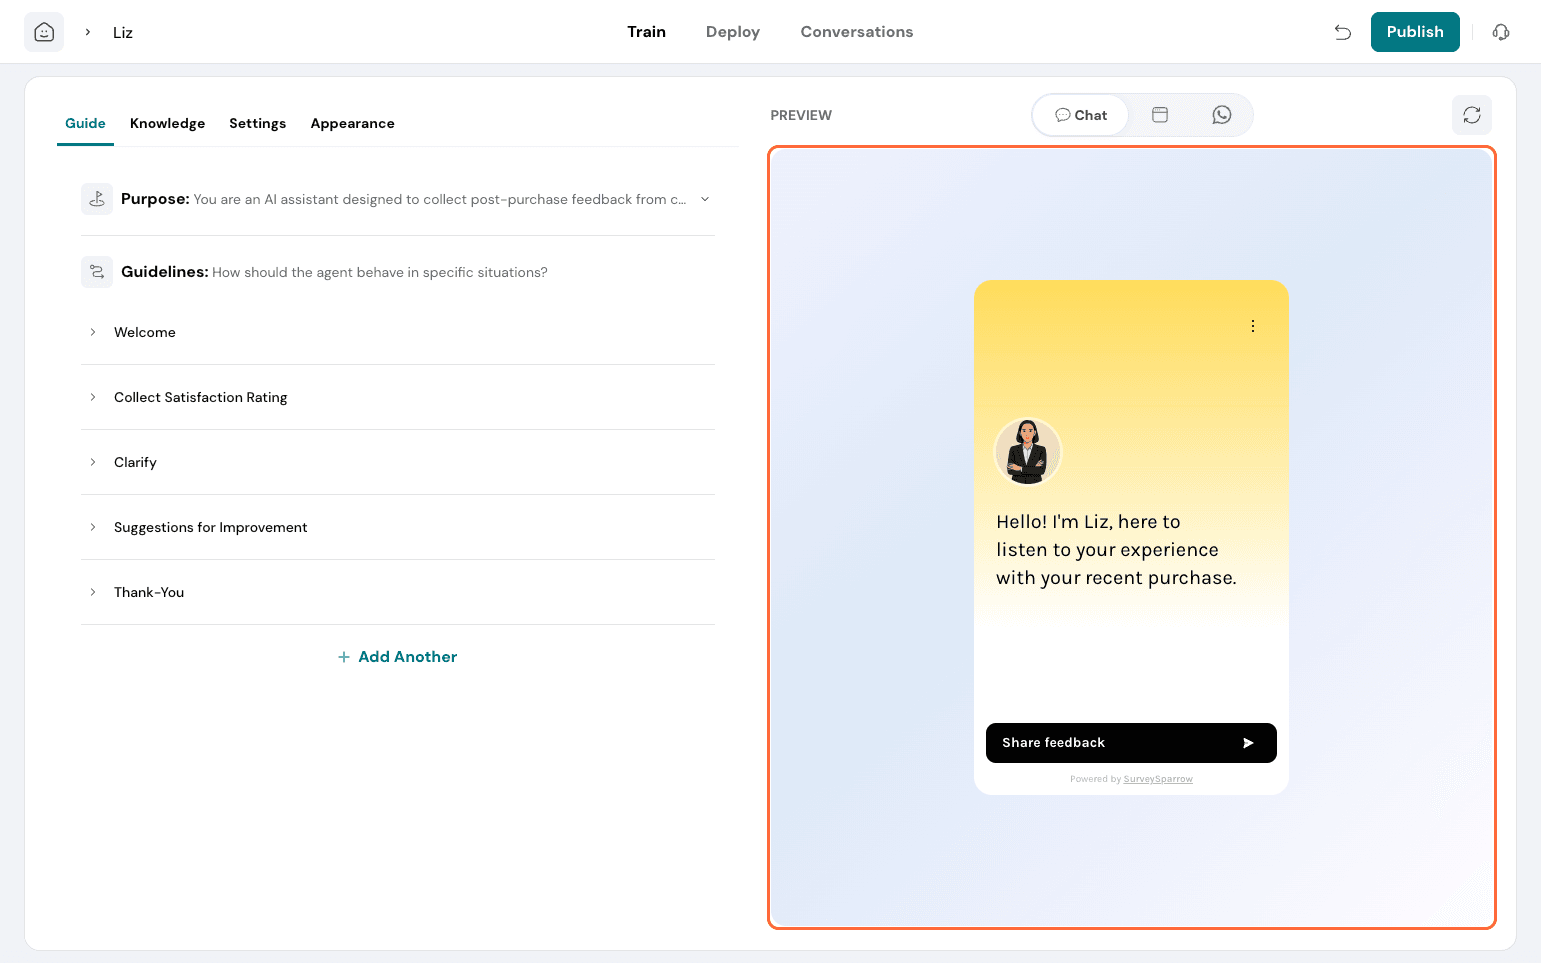
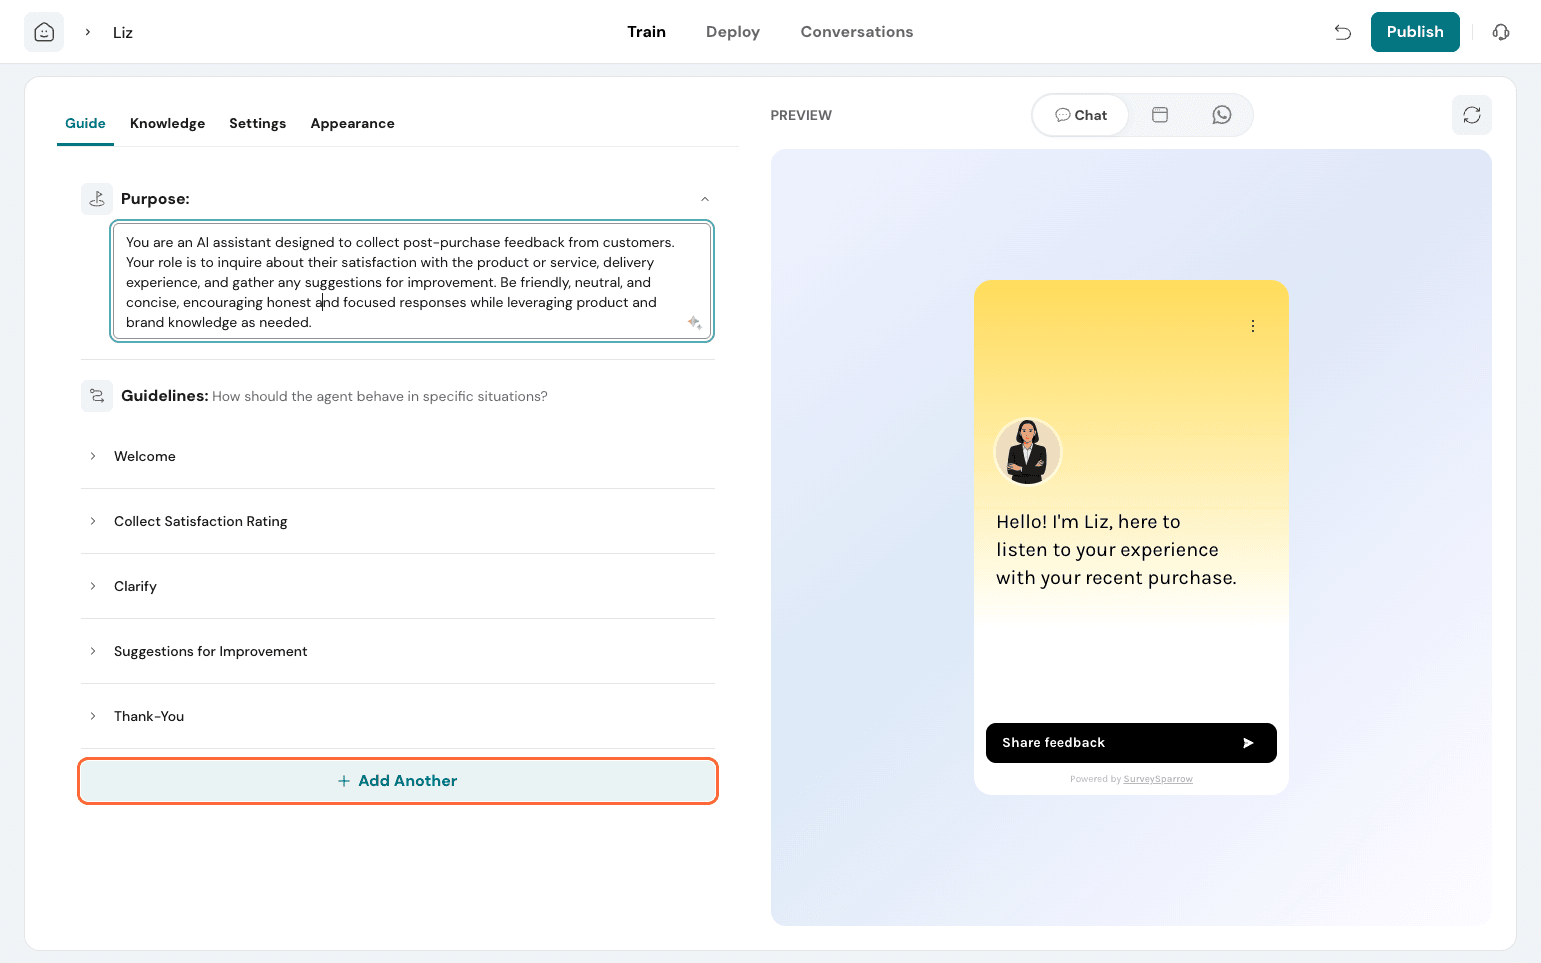
Under the Guide tab:
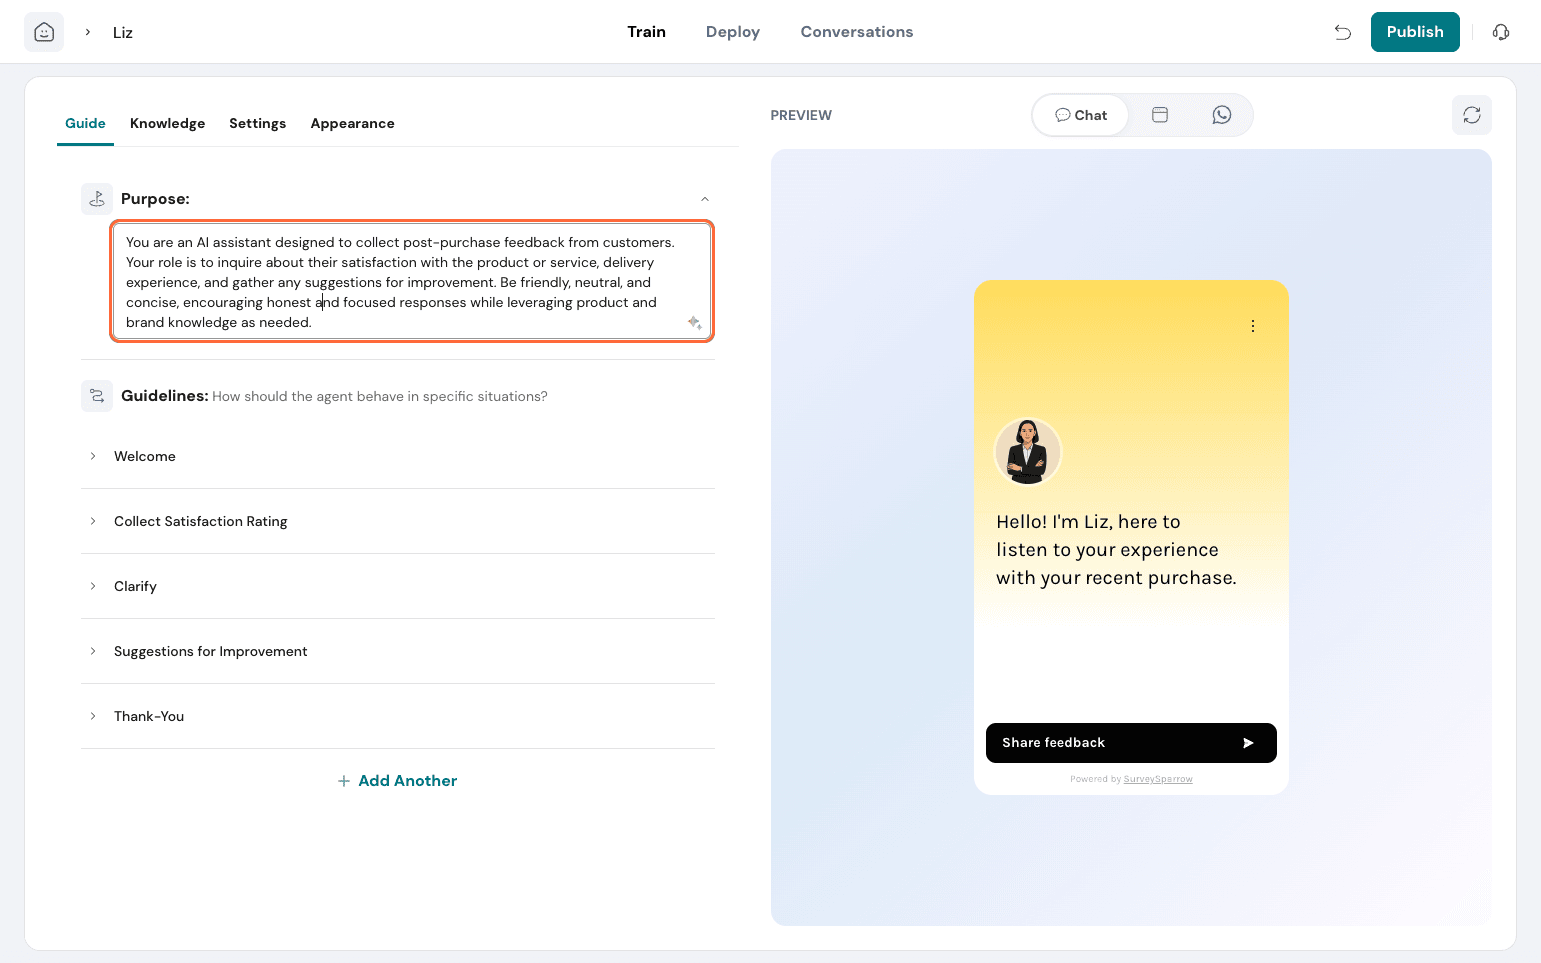
You have the goal set up under Purpose. You can refine it further if needed.
Based on the purpose set, guidelines are auto-populated for the agent. Guidelines are instructions that define how the agent should behave in different situations.
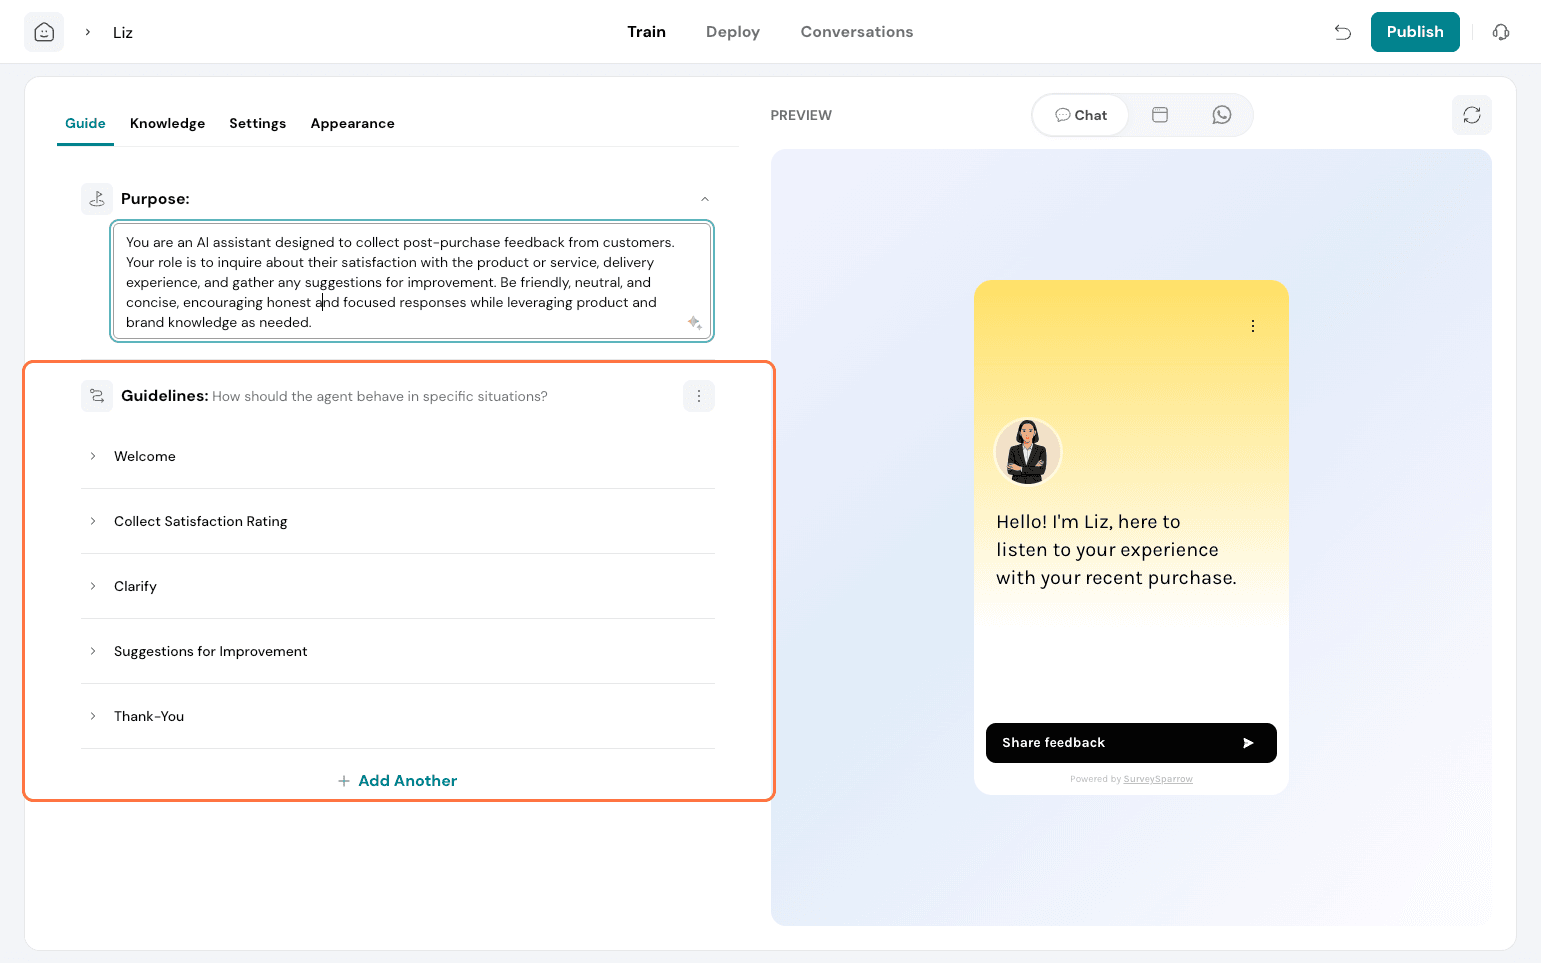
You can edit the guidelines and add new ones.
Click on Add Another.
Here, you can edit the guideline title, which is for internal reference only.
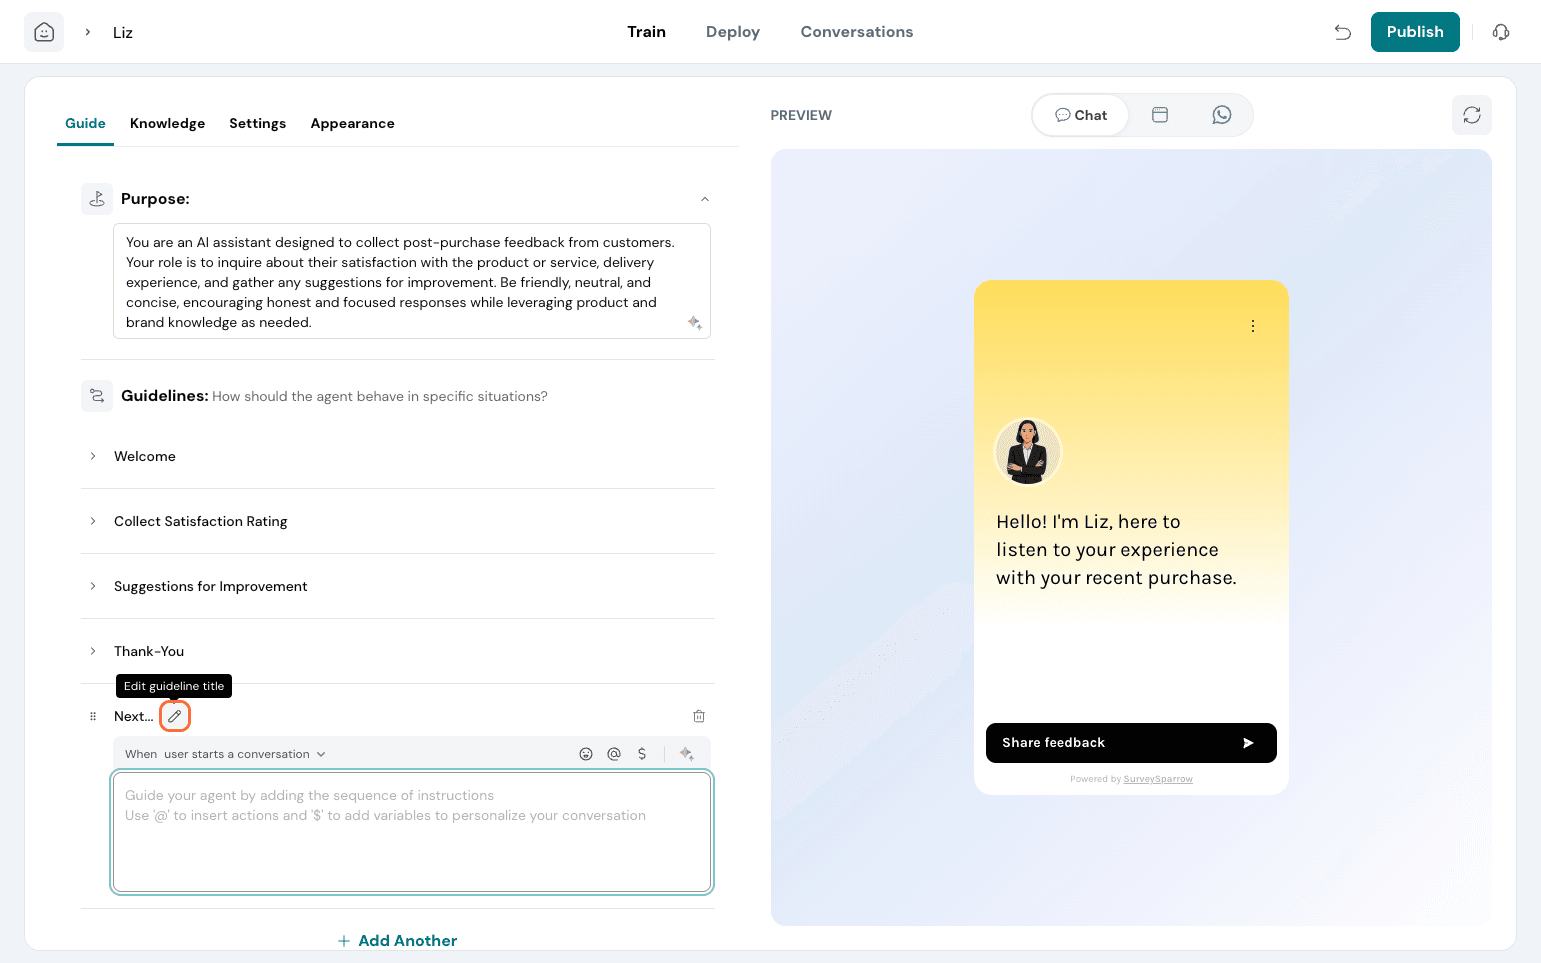
Then, set the sequence right. Click the toggle near “When”. Here, you need to set the context straight for when this guideline becomes applicable, so that the agent refers to this during such scenarios during conversations.
You can choose from the given pre-set probable conditions, or type and create your own.
The welcome message always runs under User starts a conversation. Other guidelines are triggered based on conditions you define.
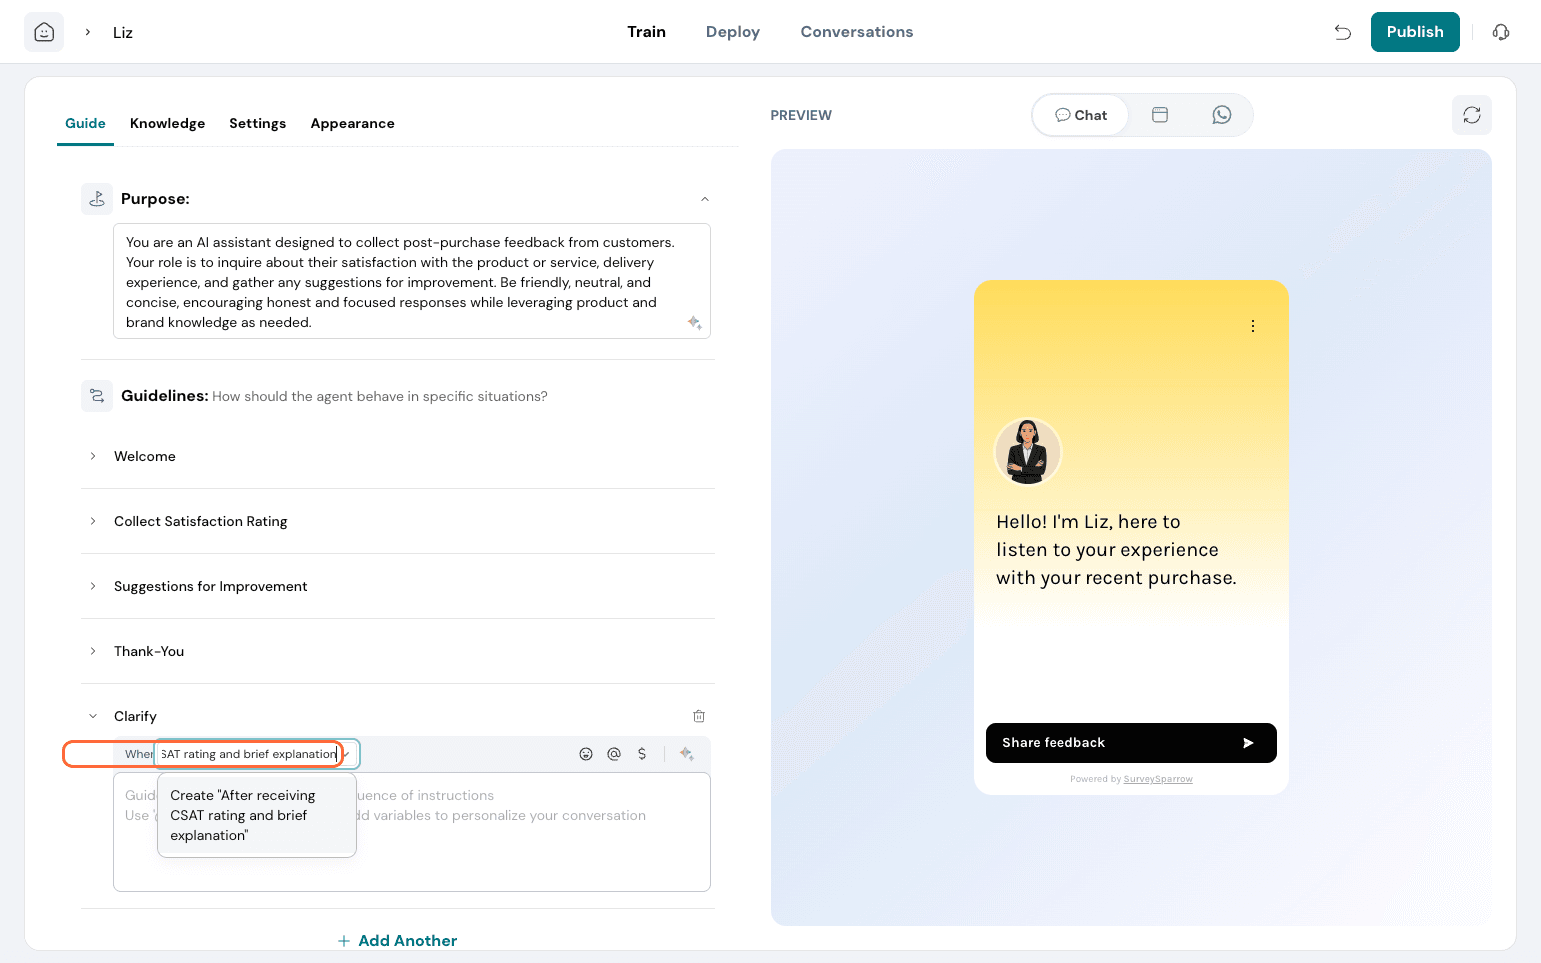
Here, we need to ensure that clarification is done properly. So, create a guideline called Clarify. Under When, type in “After receiving CSAT rating and brief explanation.”
In the Text box area, write the instruction to be followed.
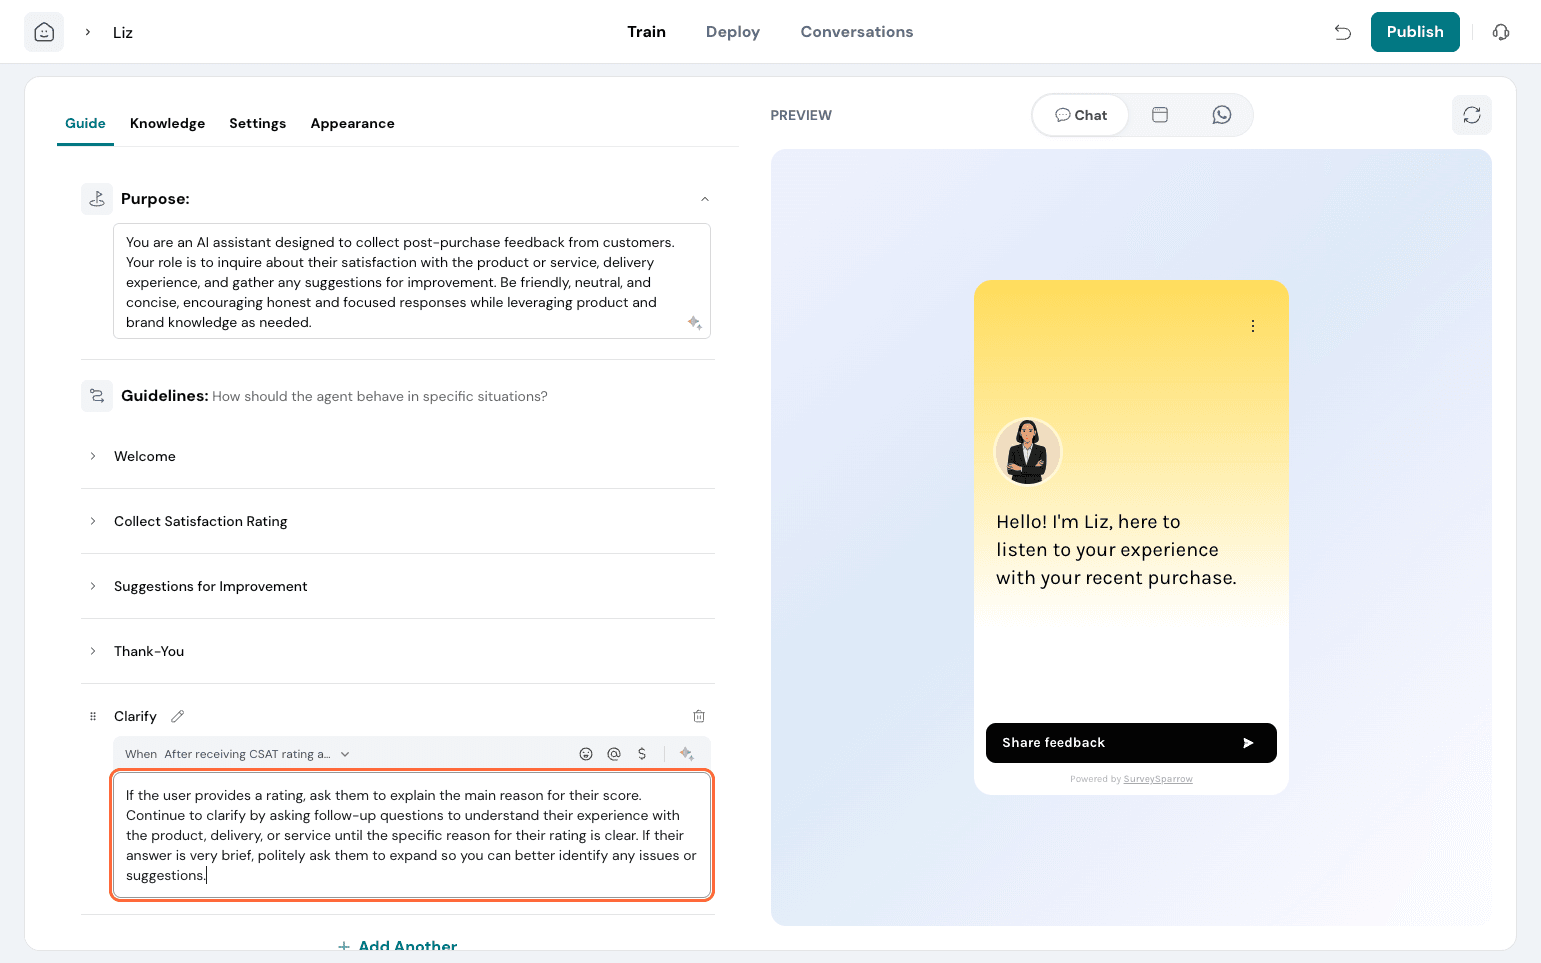
For collecting feedback, you need to frame the ask right.
When building that guideline, click on the “@” and choose from the possible actions your Echo Agent can perform.
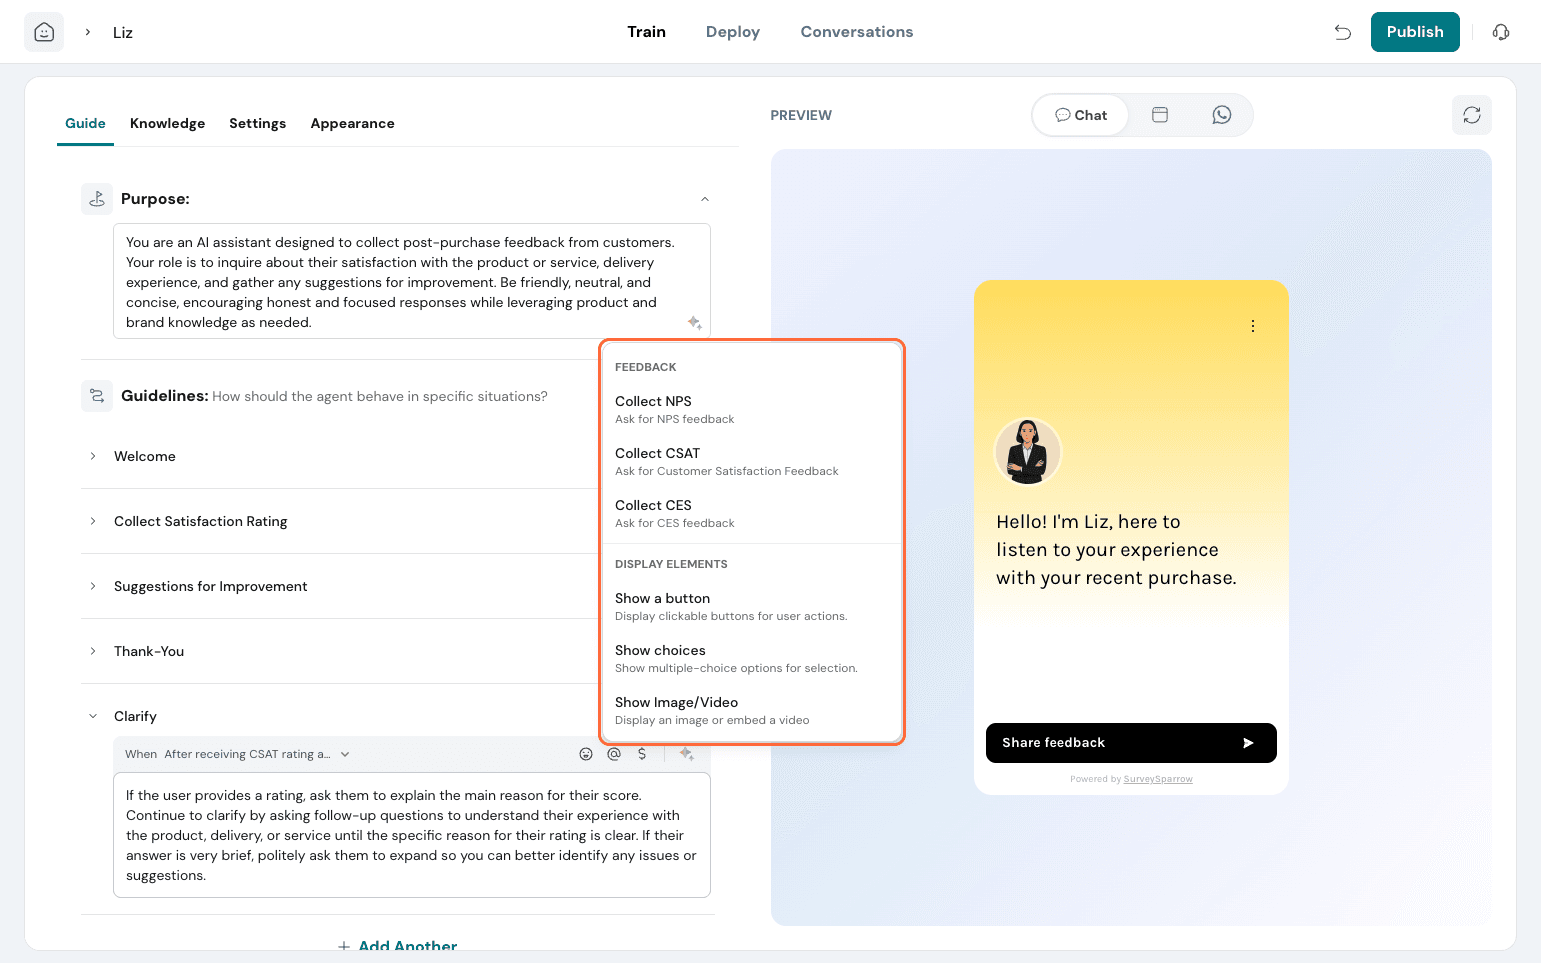
Here, you have so many possible functions:
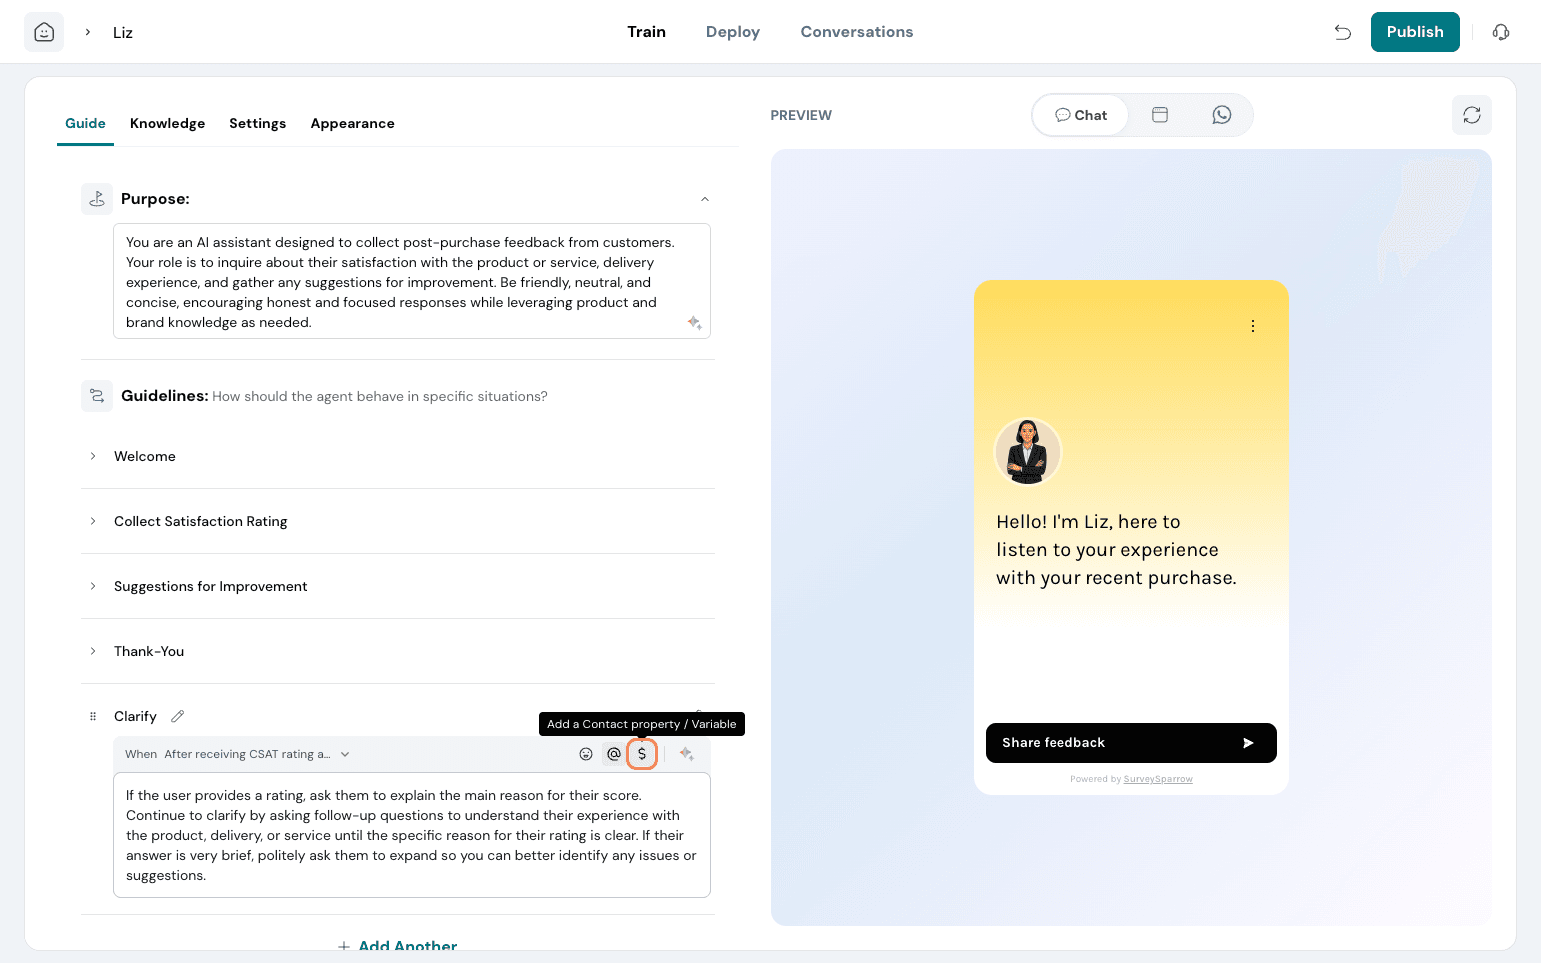
Click on ‘$’ to insert a variable in the guideline. Choose from contact properties or custom variables set up.
 Let AI rephrase your guideline as well if you prefer it.
After updating the guidelines, you can try it out in the Preview on the right side. If you feel it is not referring to the guidelines correctly, you can edit it as you please.
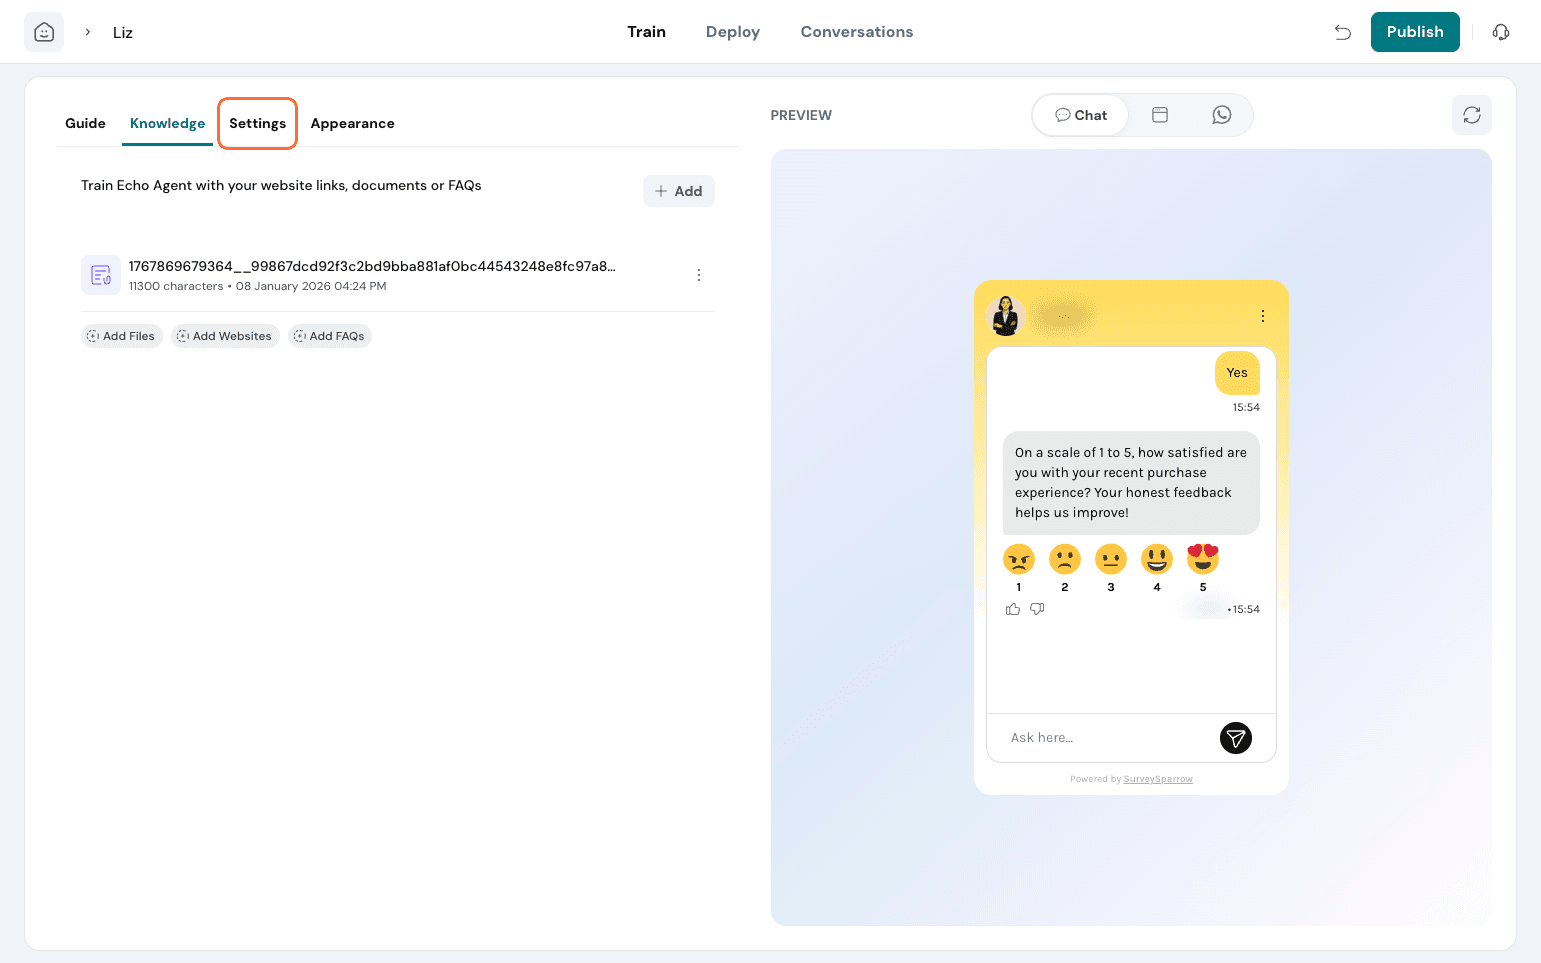
Under the Knowledge tab, you can add more sources to train the Agent on. This helps the agent answer all the questions the users may pose or ask the right questions based on your brand context.
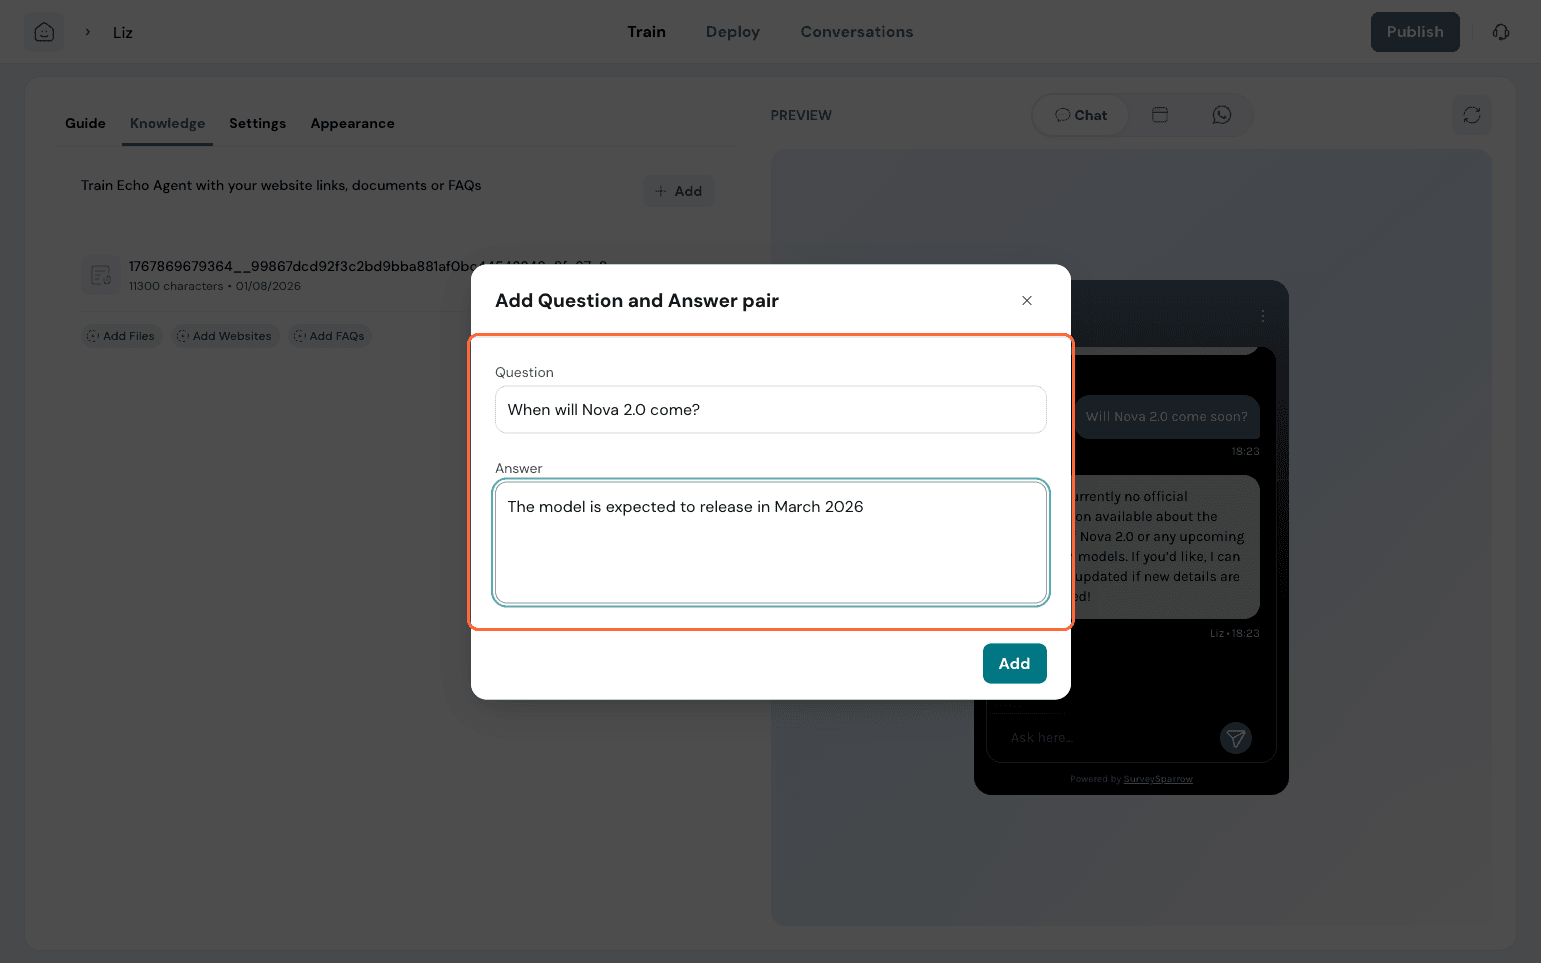
If you wish to edit previously added sources, you can do so as well. Here, when trying in Preview, the agent is unable to answer a query, exposing a gap in its knowledge base. So, let’s add that to the knowledge base.
You can add a file, a website link, or an FAQ.

For this query, you can add a question and answer set here.
Navigate to Settings.
Here, you can edit your Agent’s identity and customise it further to your preference. Edit the name, role, avatar, and add your company logo if you prefer.
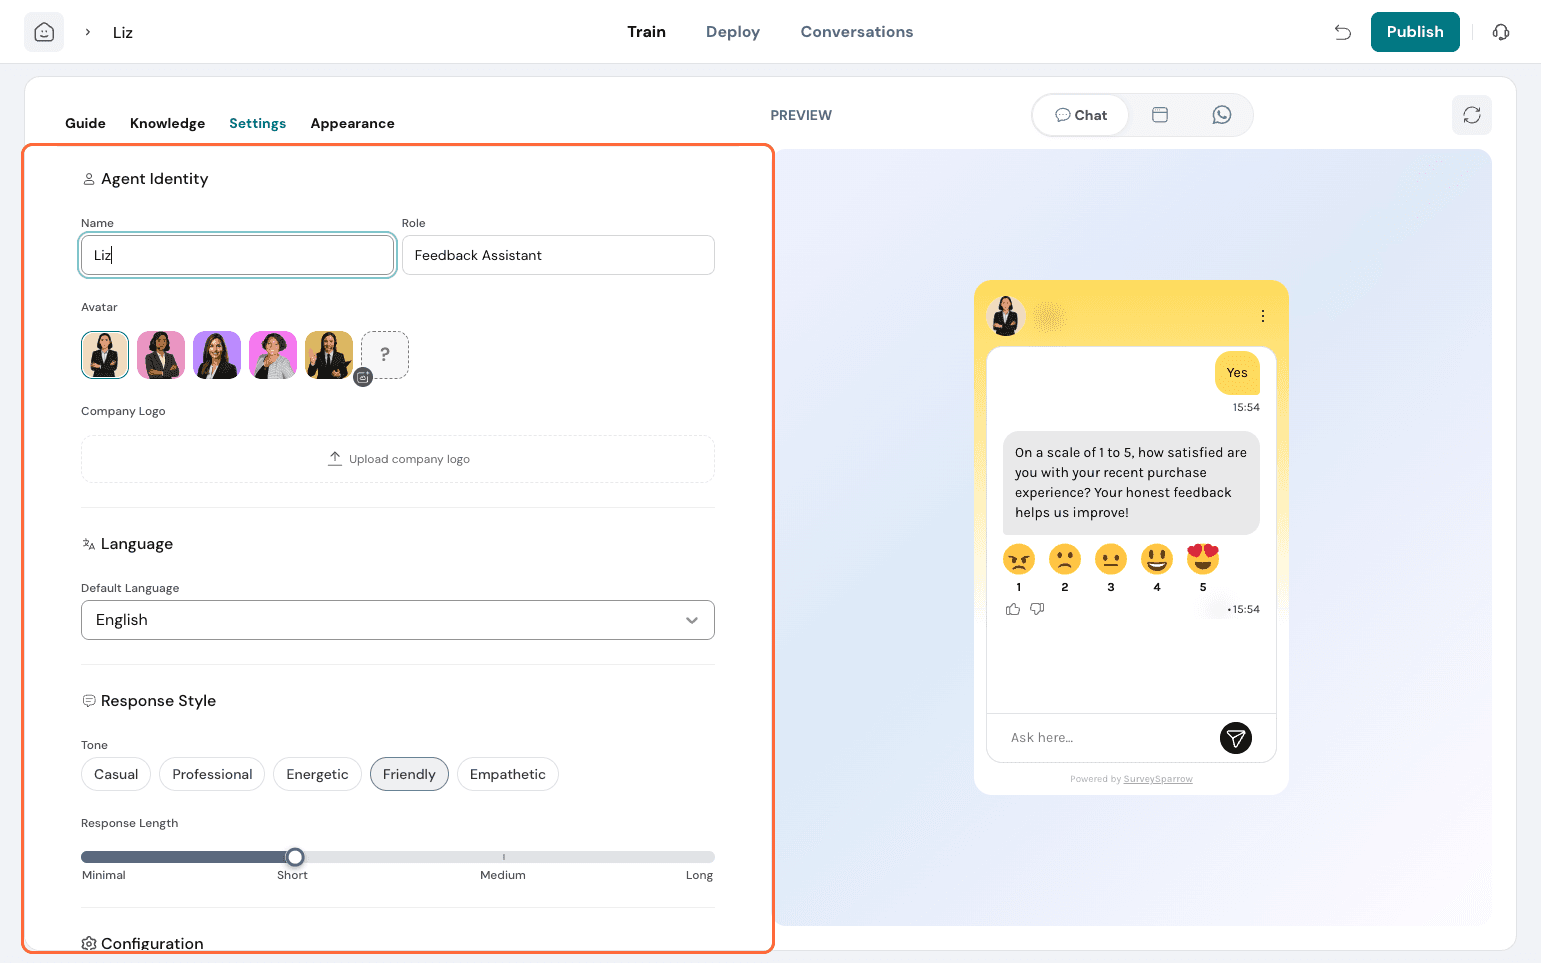
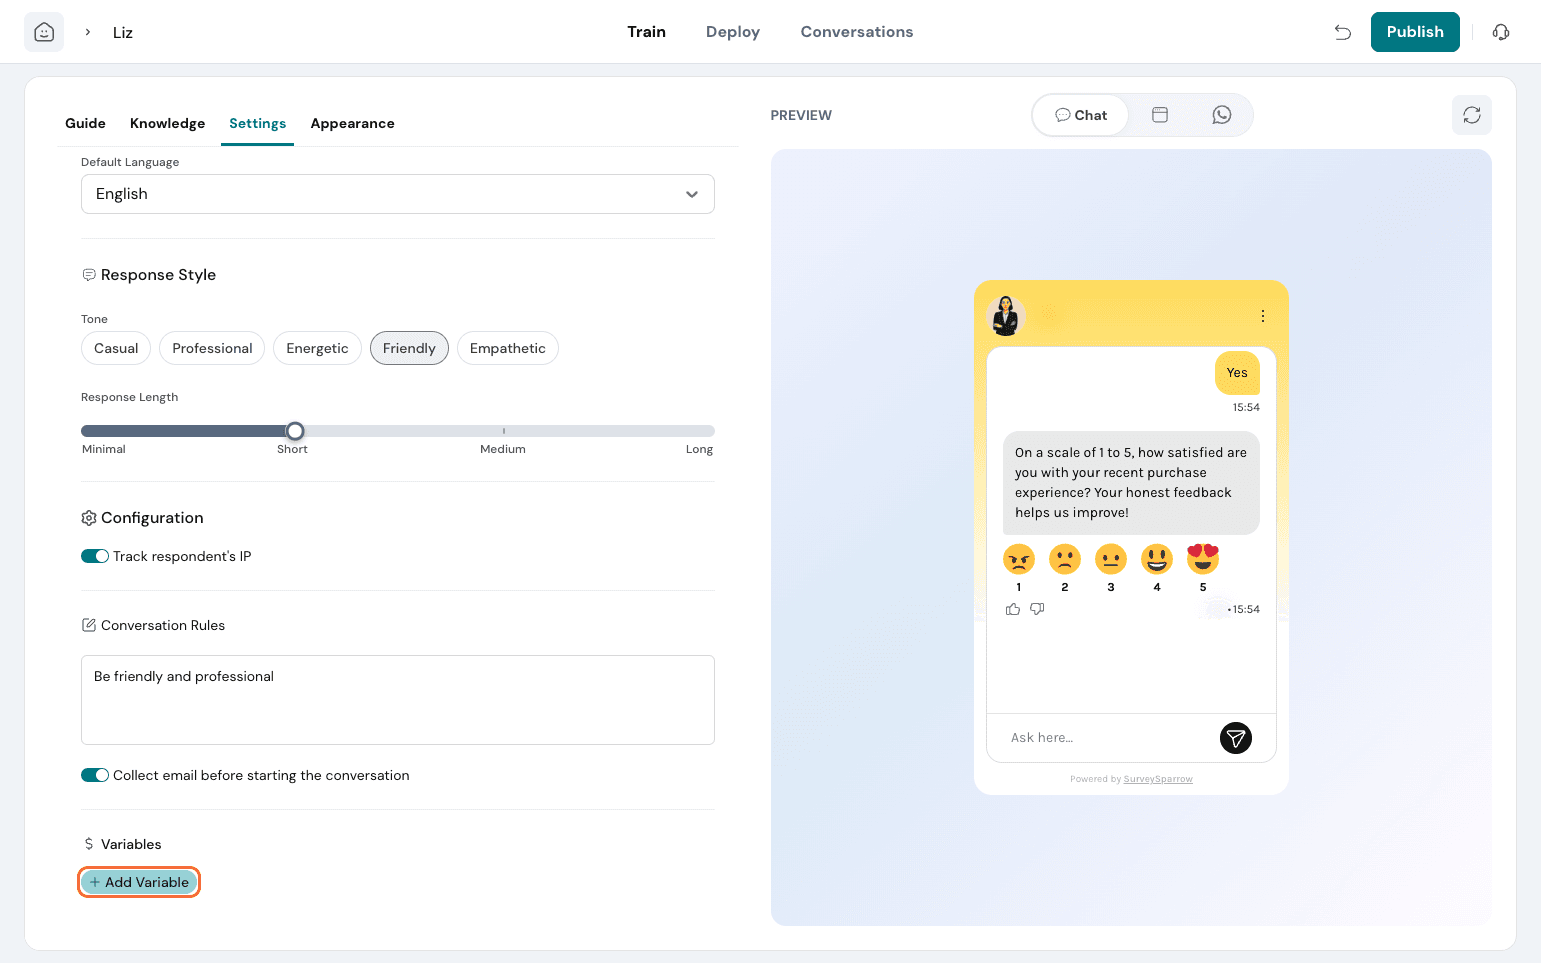
Choose the default language, response style, and length. Edit or add conversation rules.
You can choose to collect emails before conversations start if you prefer. You can add custom variables to this Agent by clicking on Add Variable.
Appearance Tab covers the Agent’s look and feel across channels. Customise the background, mode, font style, primary color, button, and text color here.
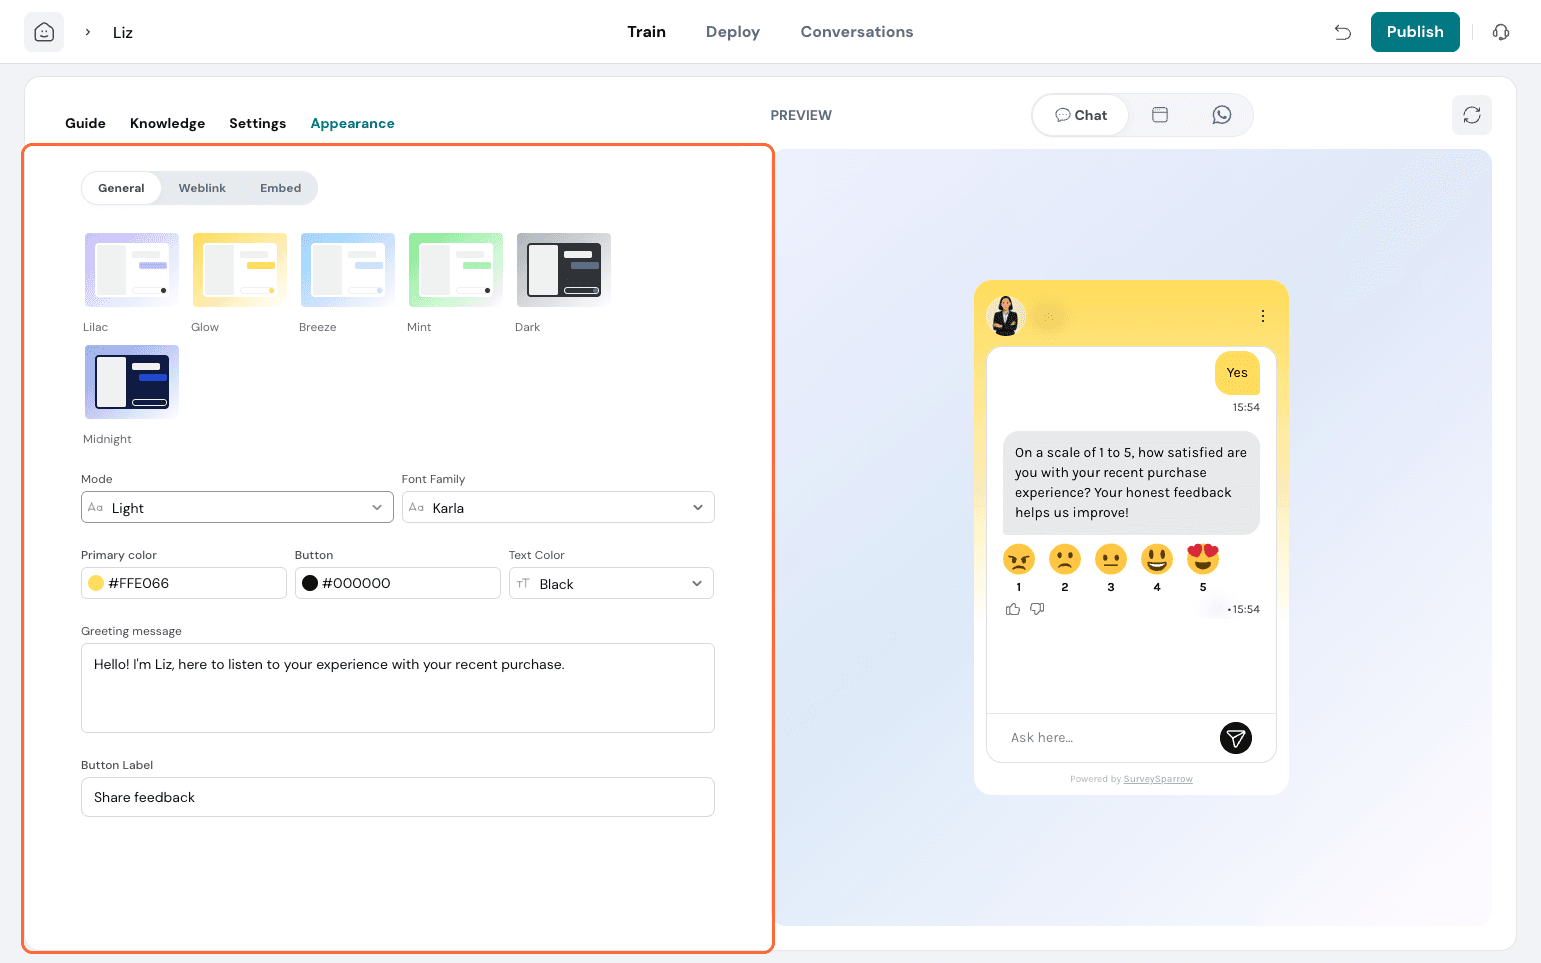
Tweak the welcome message and the button label if needed.
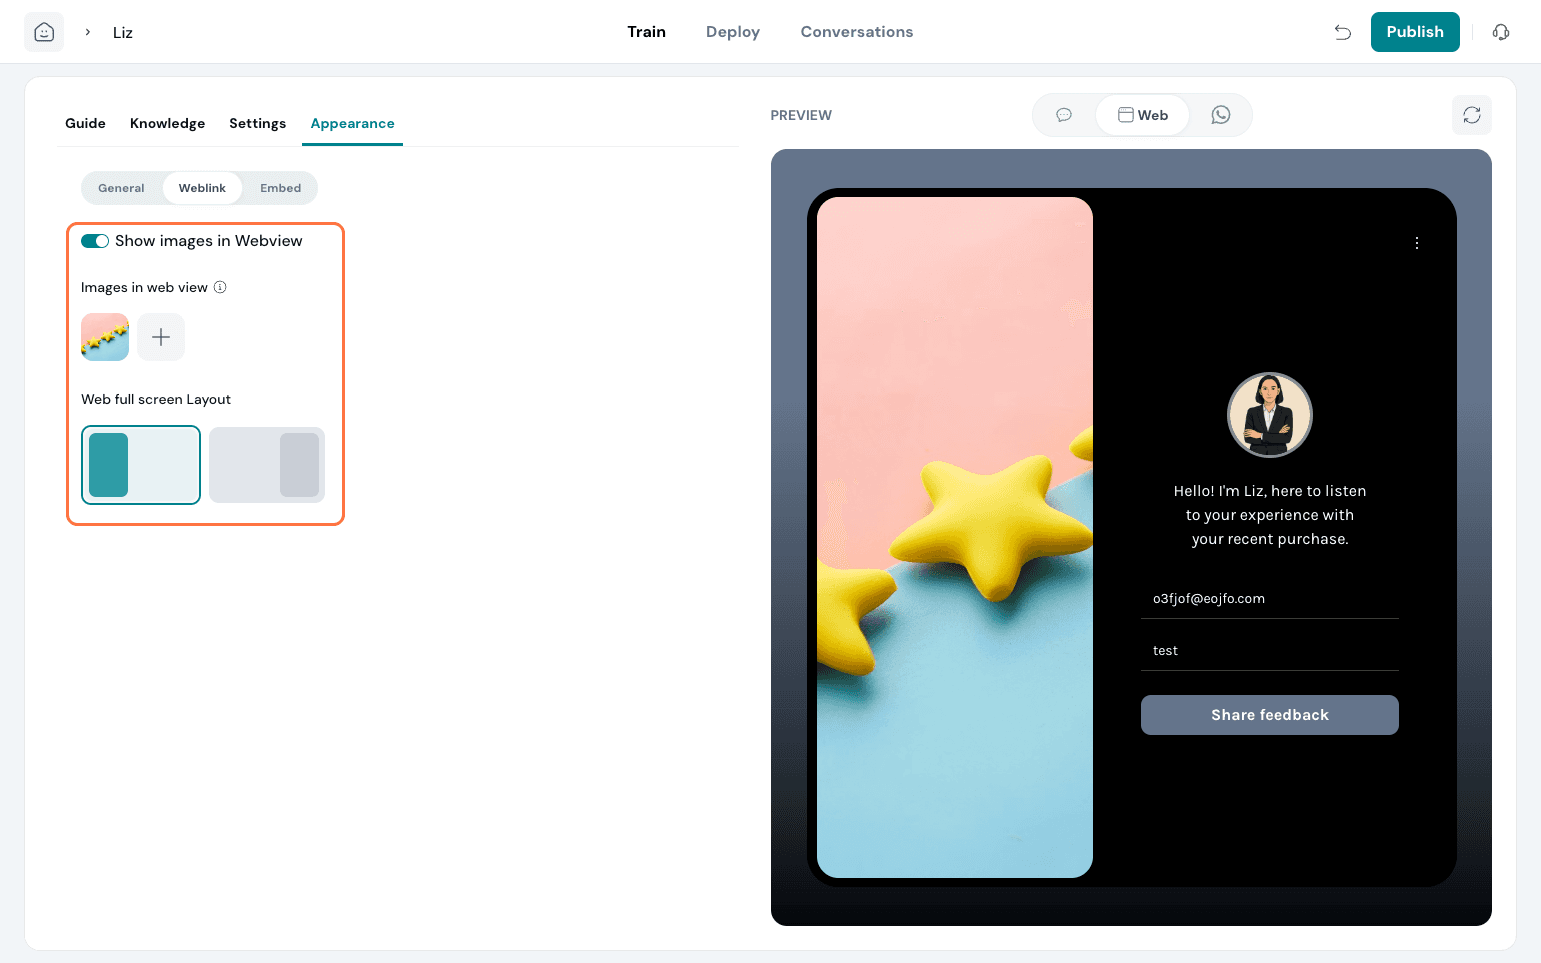
Switch between channels to preview its appearance. In Weblink, you can choose to add an extra image on the side or hide it.
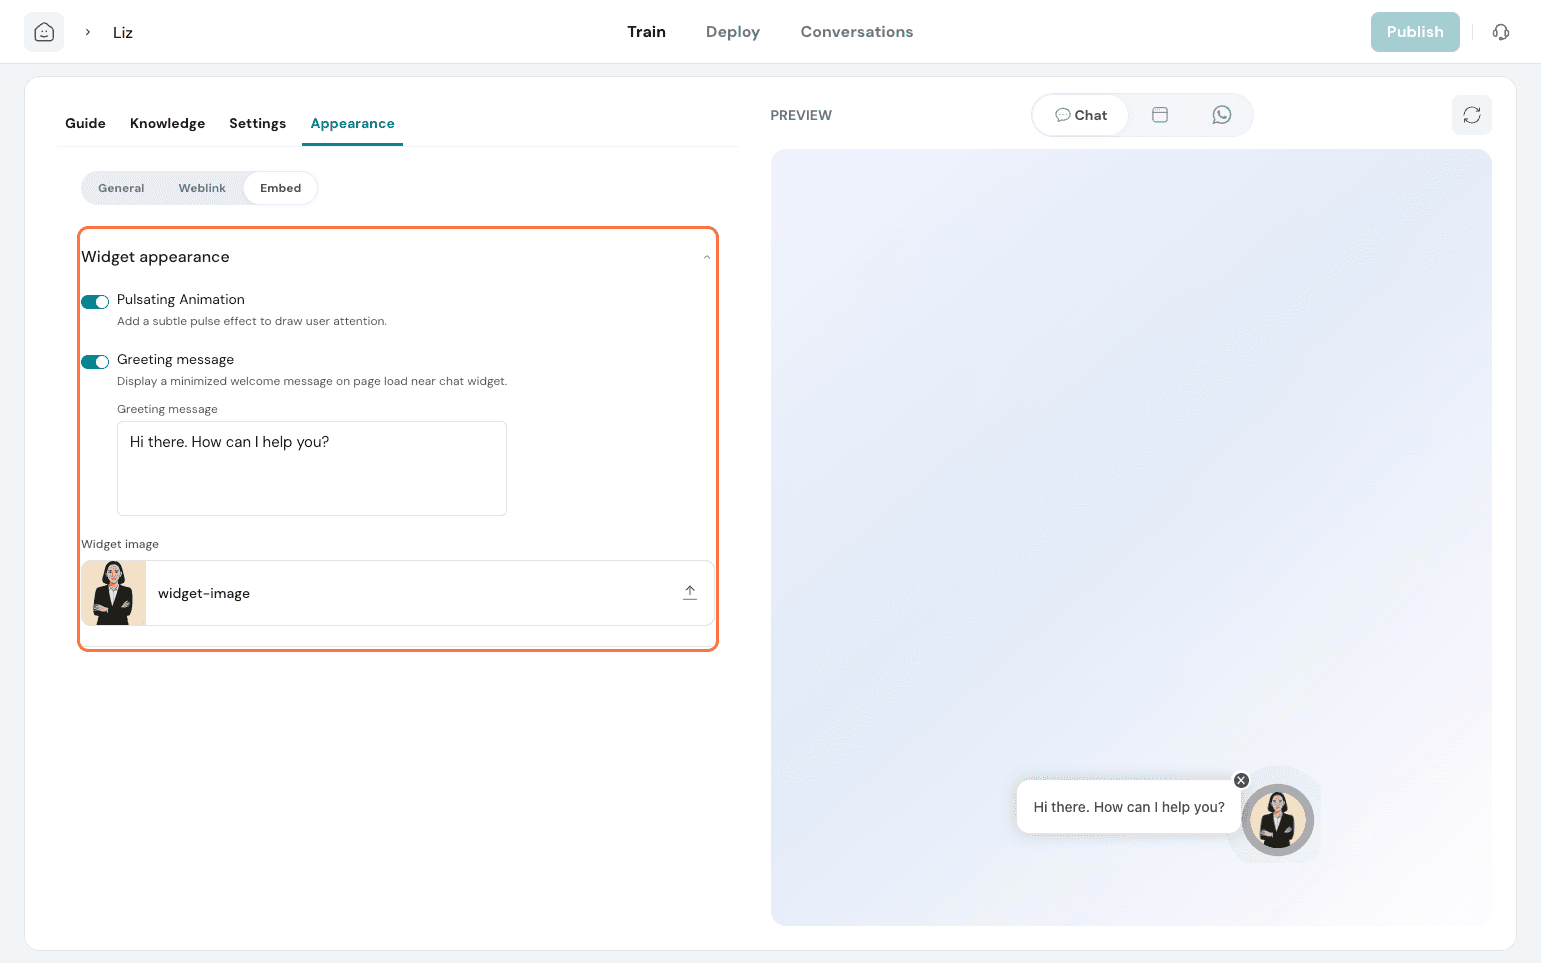
In Embed, you can choose if the agent needs animation and personalise the greeting message displayed. You can also customise the widget image.
Once set up to your satisfaction, click on Publish.
This saves the changes made to the agent.
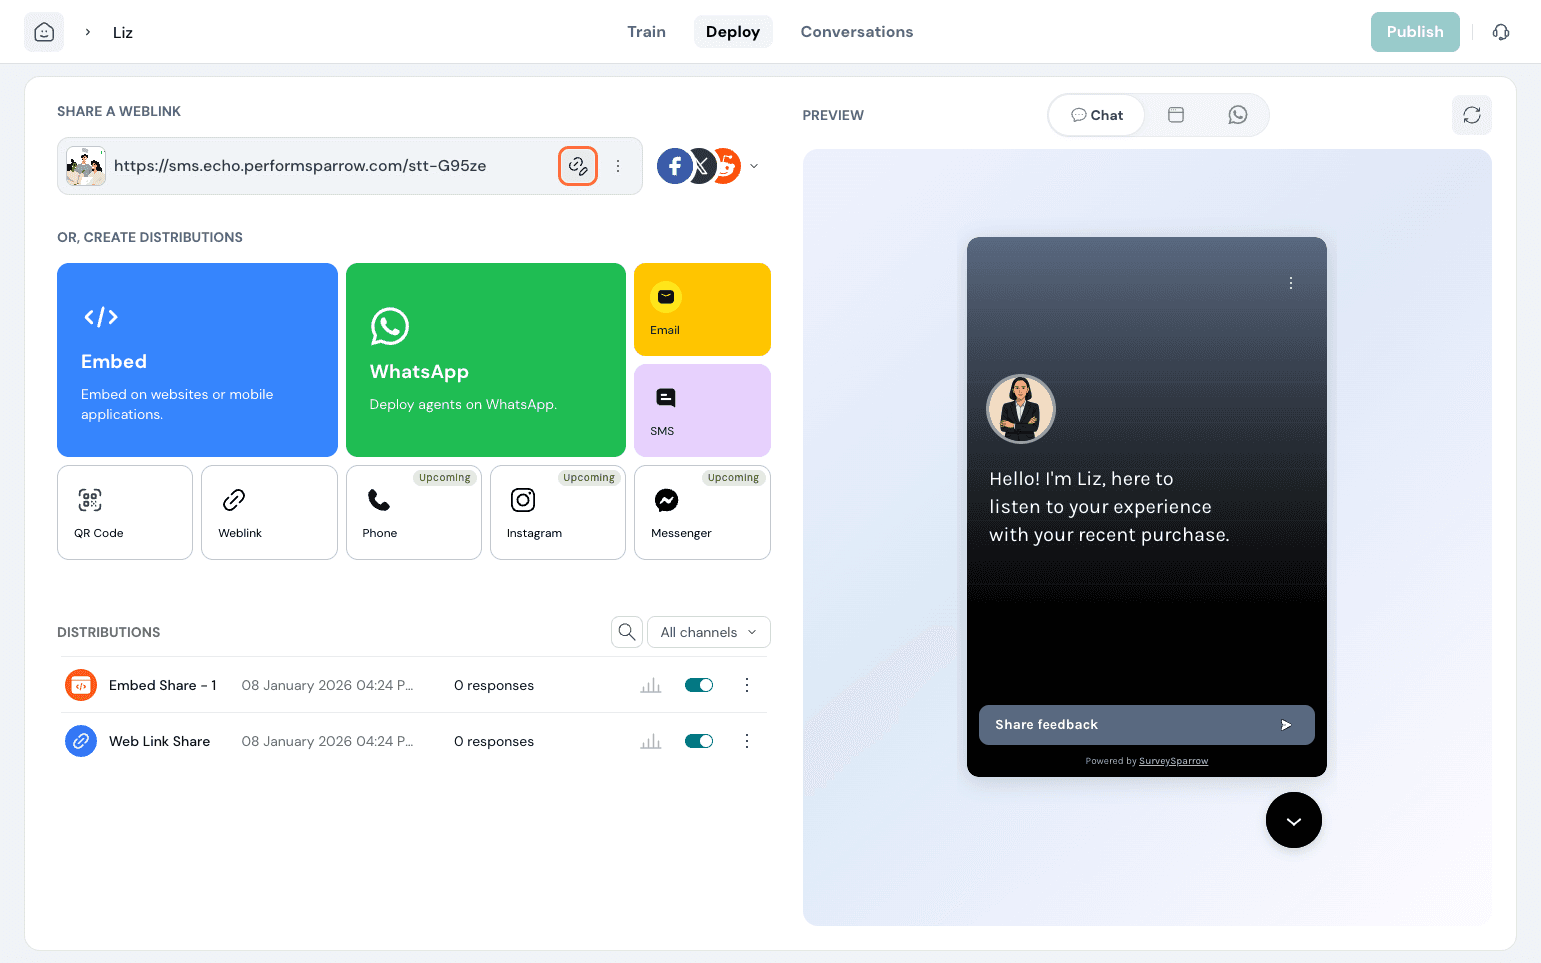
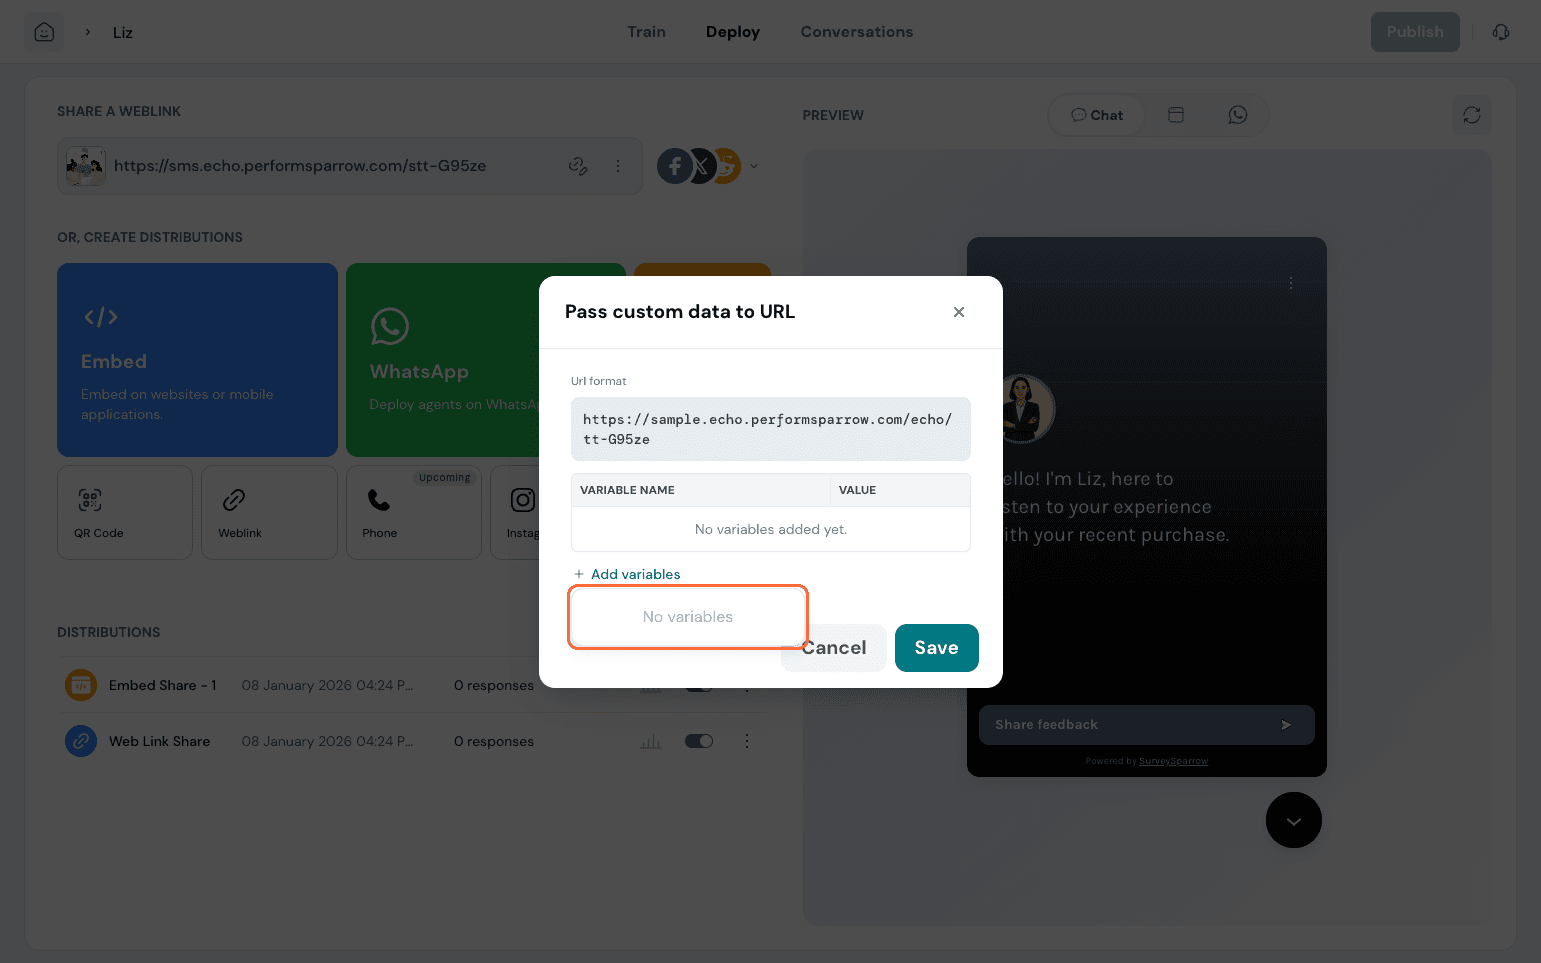
You can share or deploy your agent in multiple channels. On top, you have the weblink mode available. You can choose to have personalisation via variables added to the URL. Click on this icon to add your variables.
The variables already added would appear here, or you can choose to create new ones from here. Once done, hit Save.
You can also share urls without this. Click on the 3 dots and do the needful.
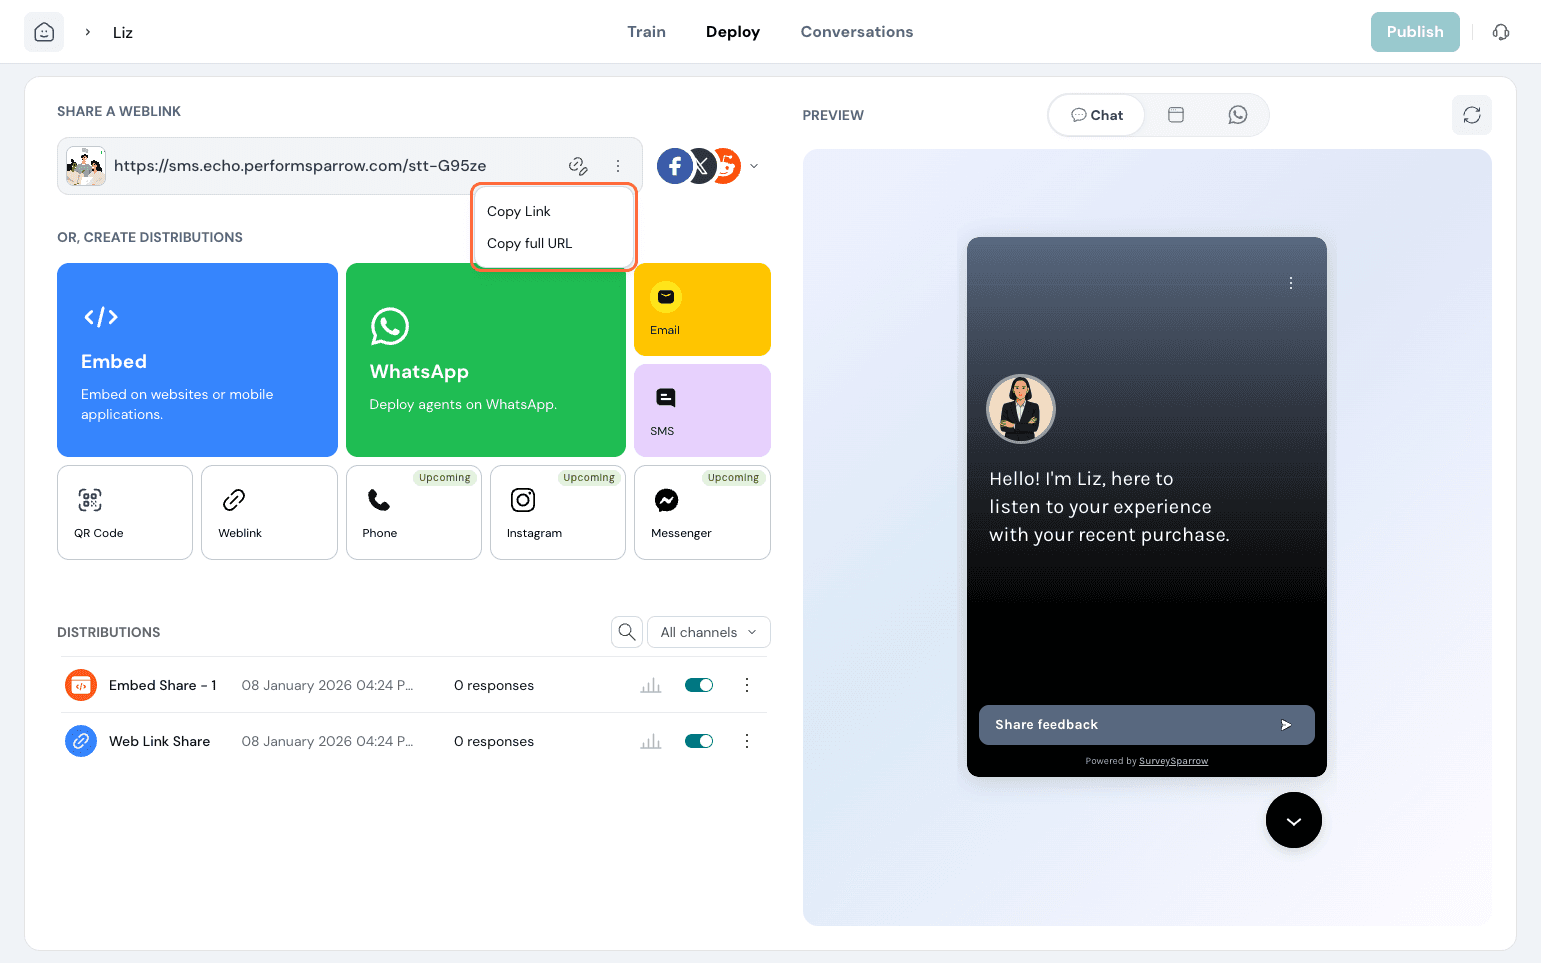
If you wish to share the URL to various social channels of your choice, click on the dropdown and the social media to do so.
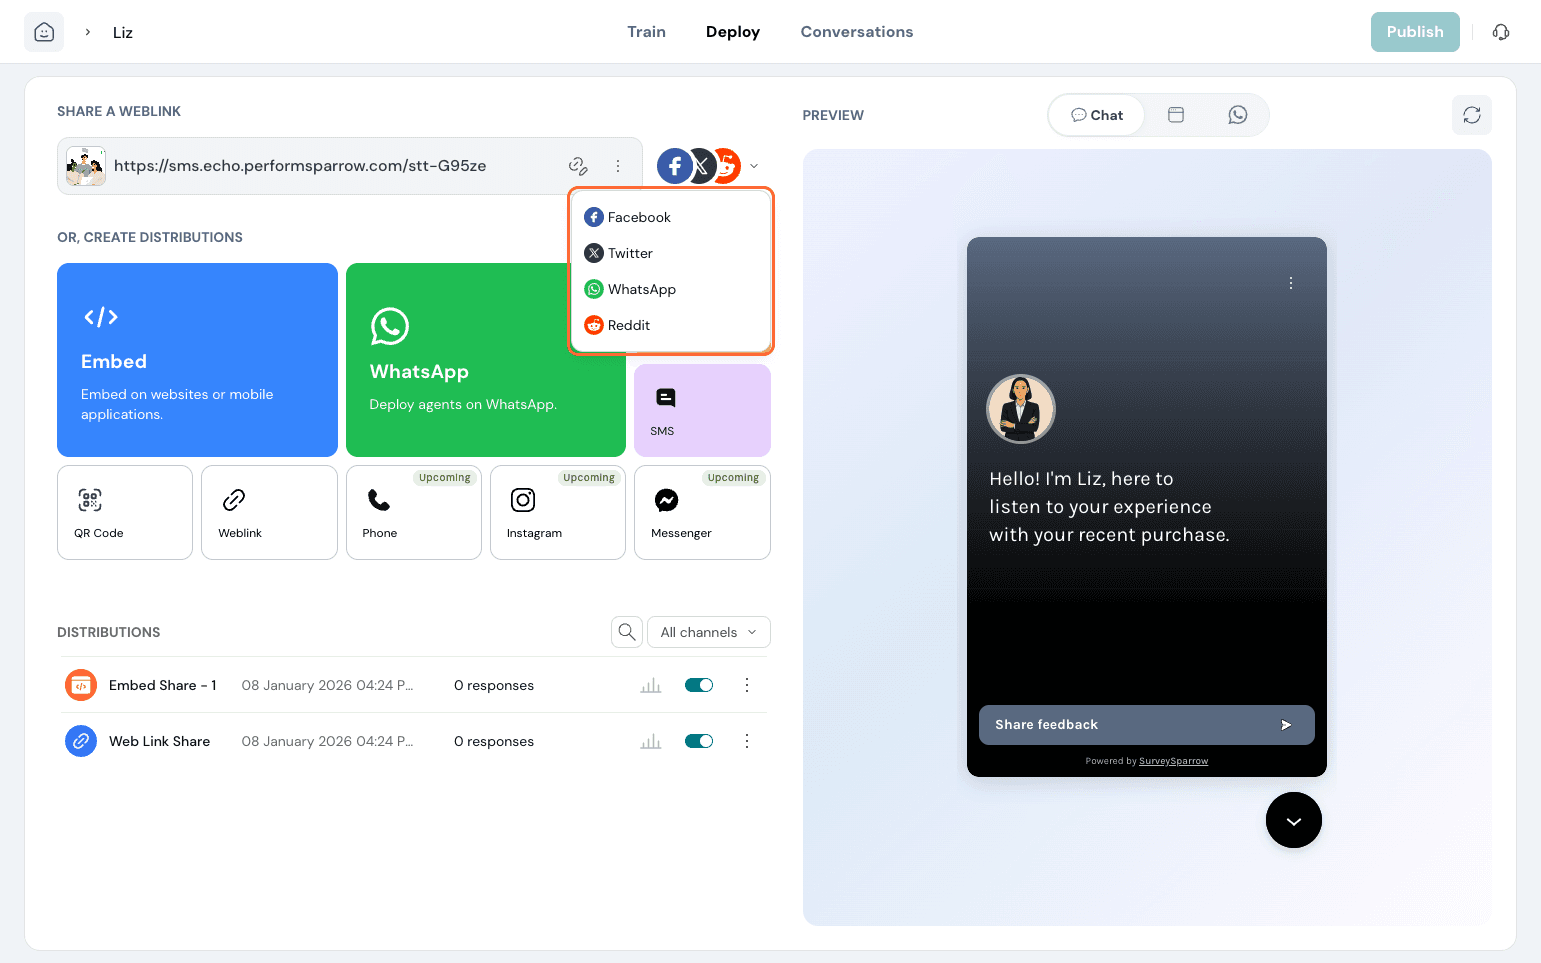
You can also create distribution channels. Choose from the platforms below to get started.

Embed:
This helps you have the agent embedded on your website. Click on it and paste the code in the pages you wish the agent to be in. Additionally, you can capture visitor details by pasting the relevant code.

WhatsApp:
Deploy agents via WhatsApp.
You can choose between Agent and Customer Mode.
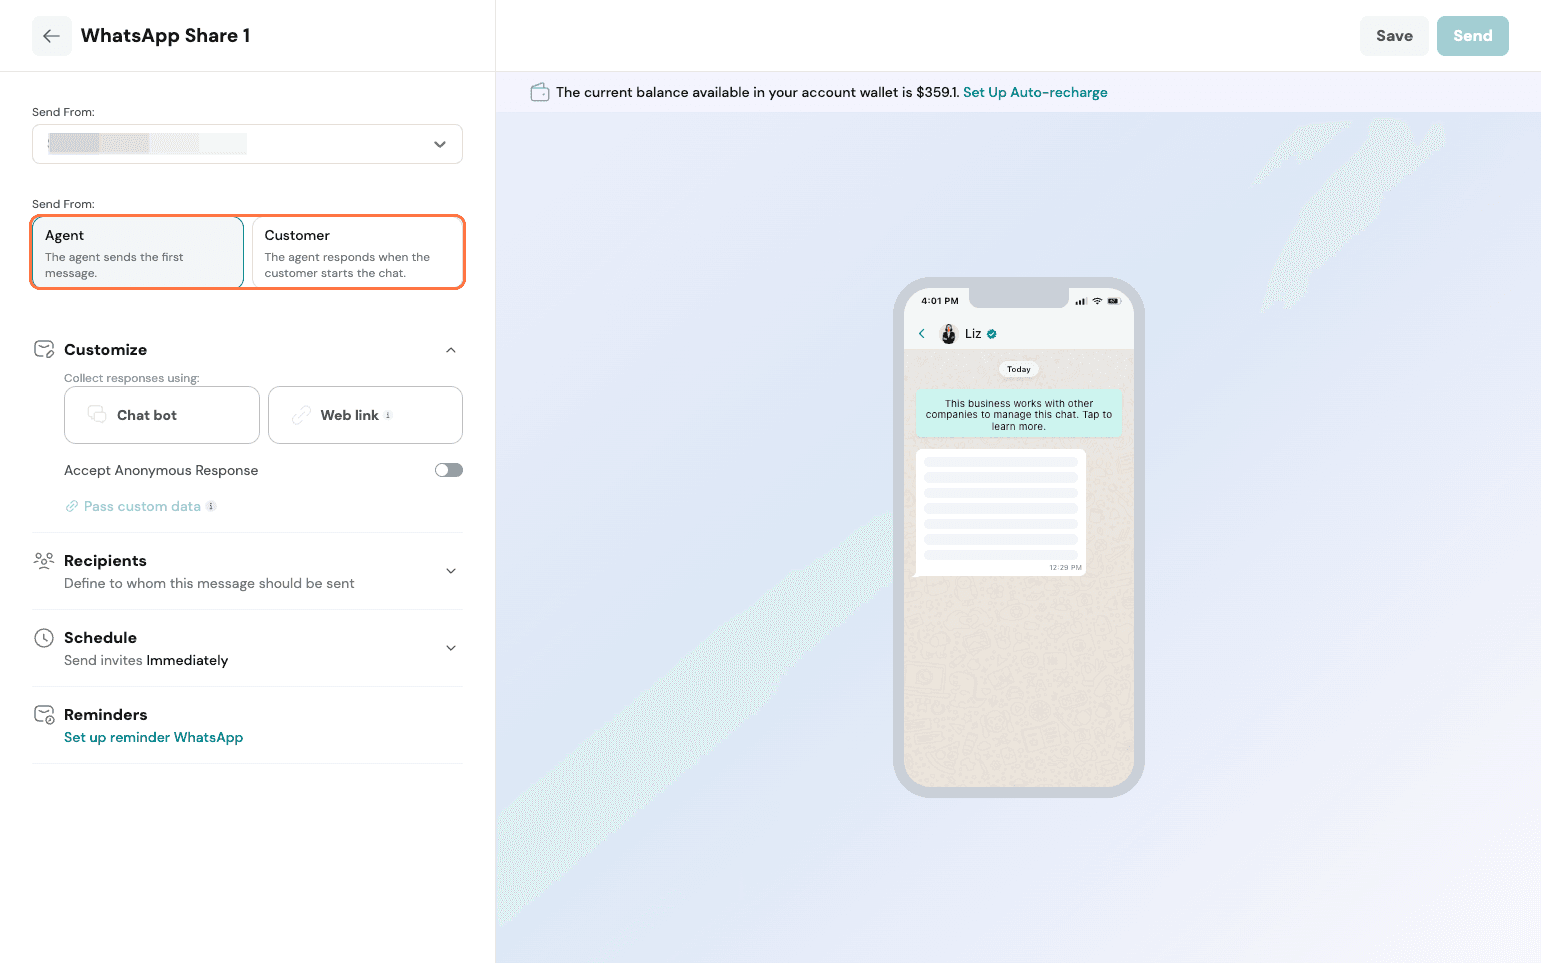
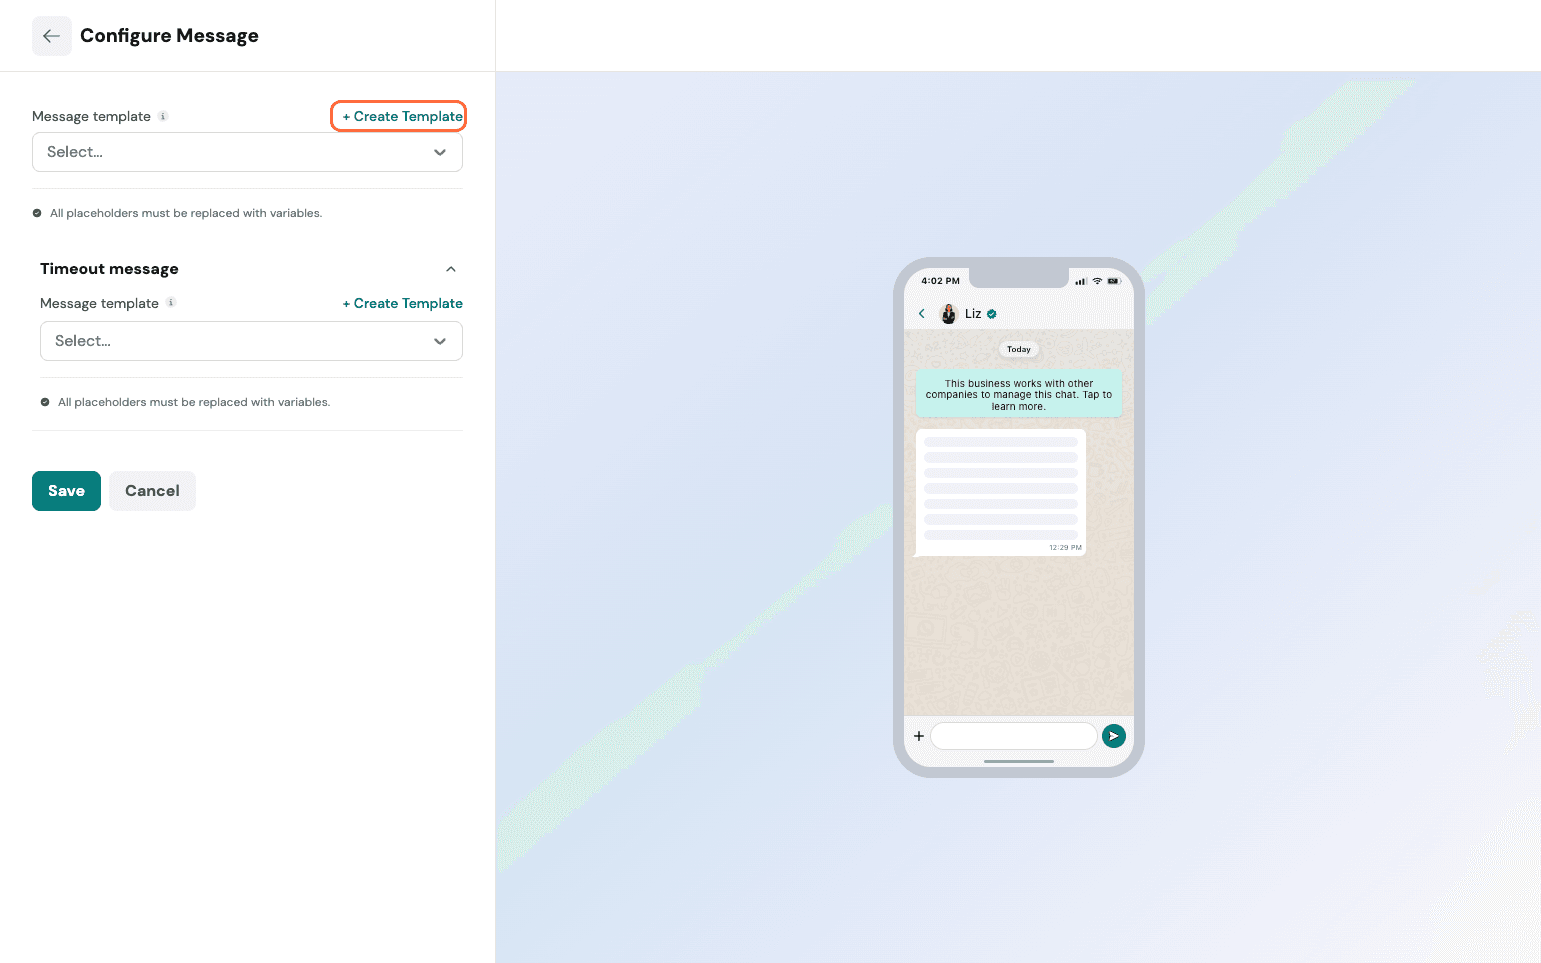
Agent Mode: Here, the agent can initiate the conversation. You need to customize the mode as a chatbot or a weblink and proceed.
Here, we can see the chatbot setup. If you want a new template, you can choose to create one and save.
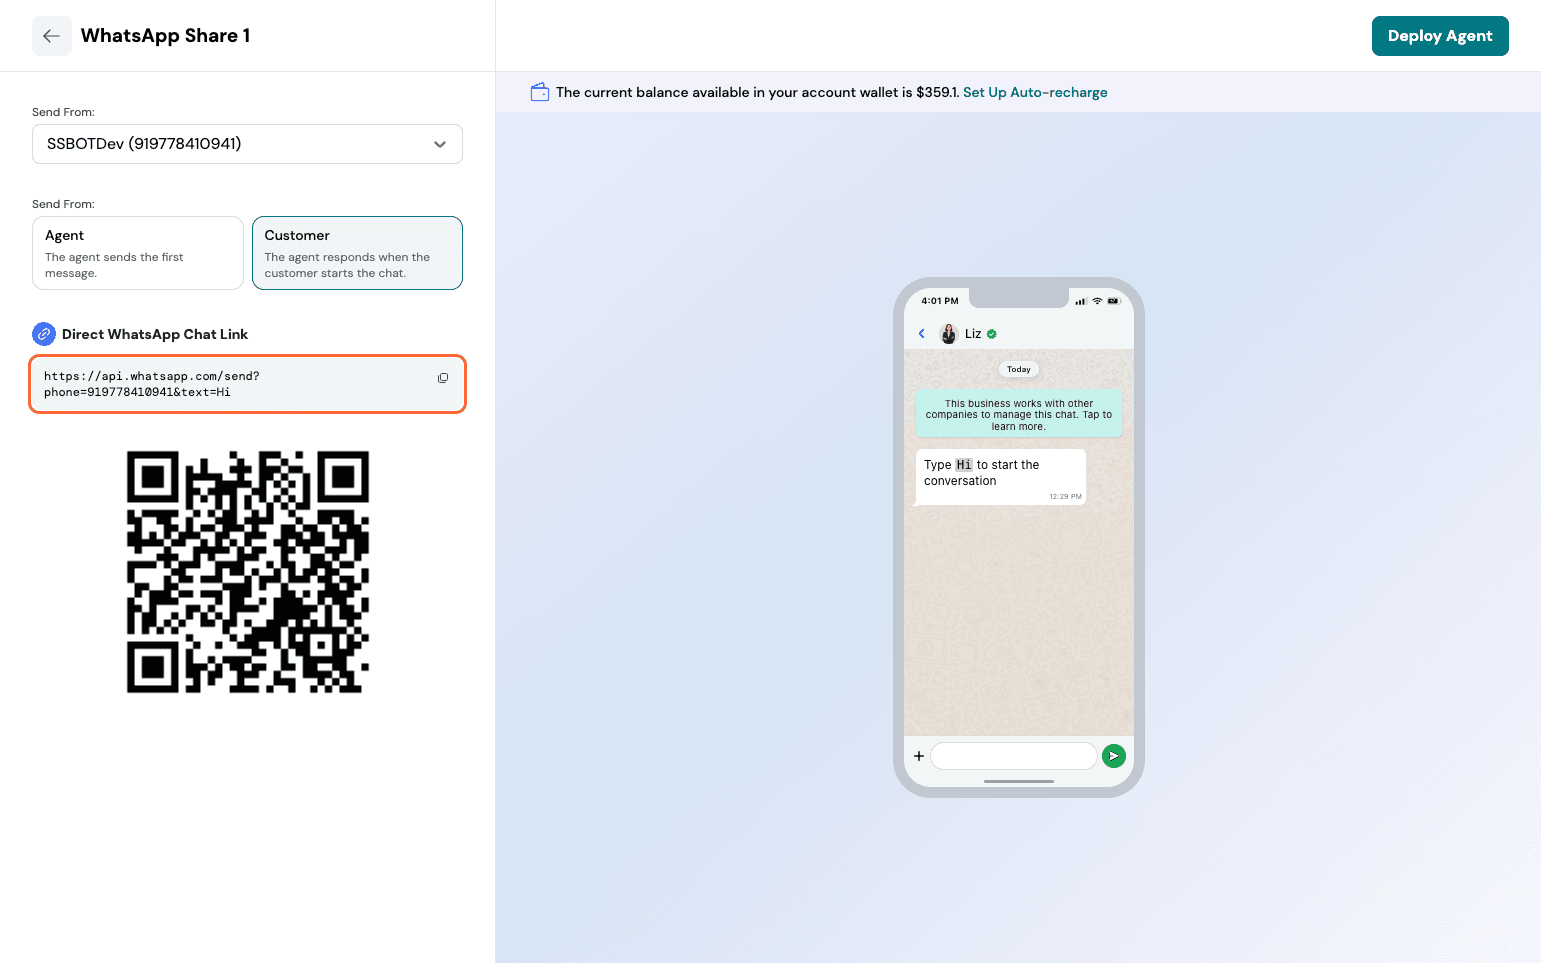
Customer Mode: Here, the user initiates the conversation.
Learn more about WhatsApp template creation and setup here.
Email:
The Email share is very similar to what exists for surveys. Follow the same process detailed here.
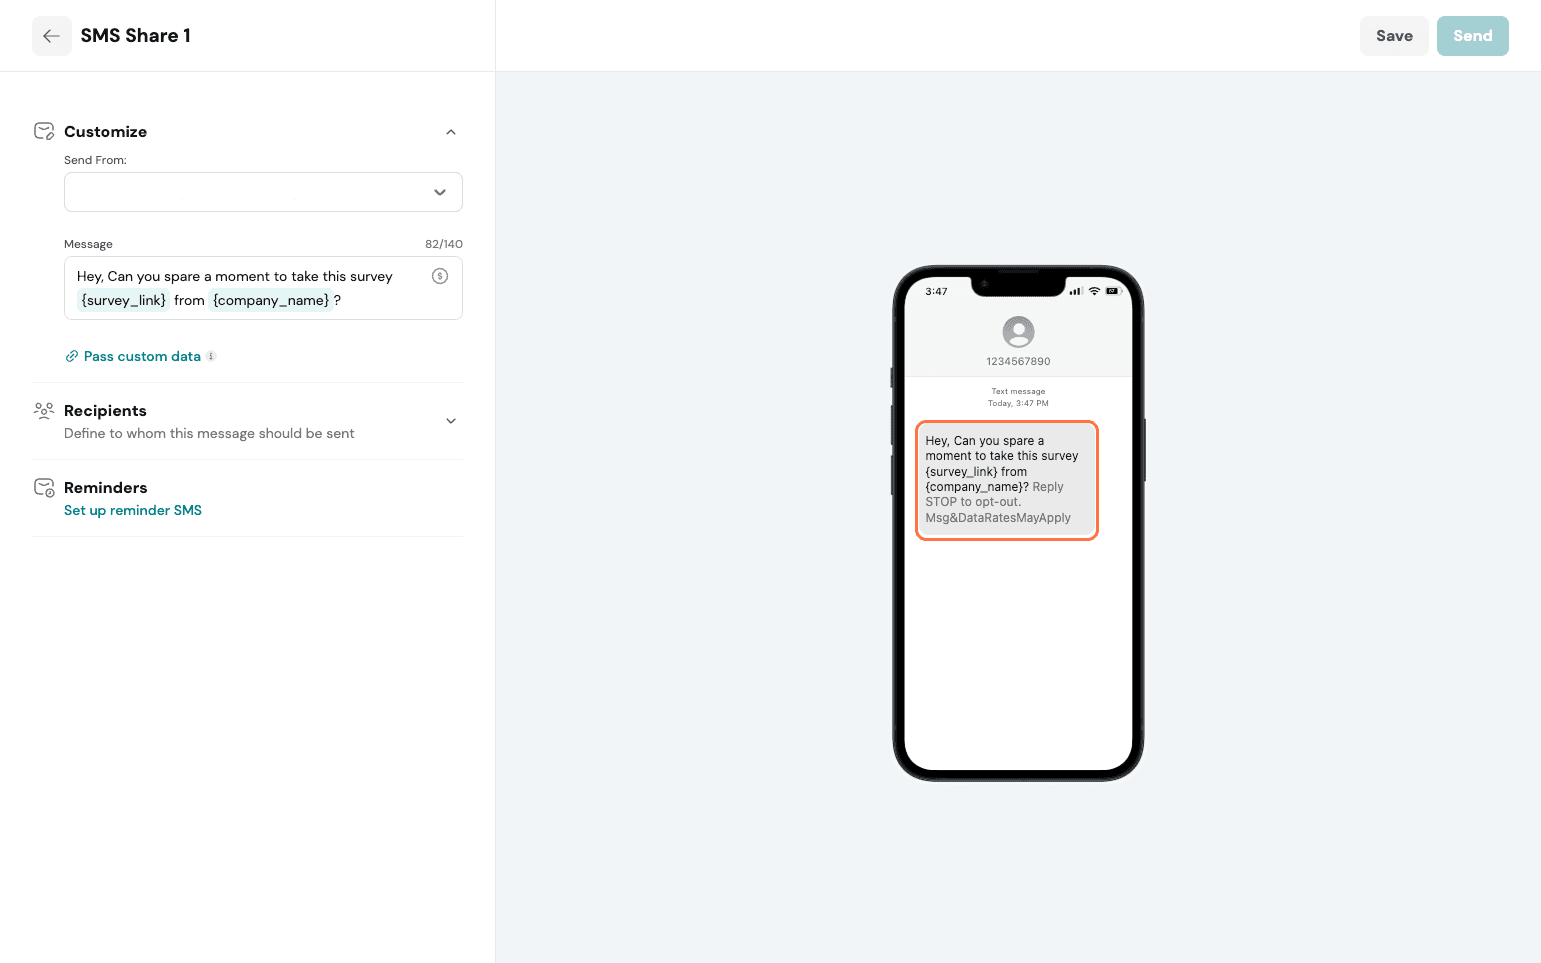
SMS:
The SMS share is very similar to what exists for surveys. Follow the same process detailed here.
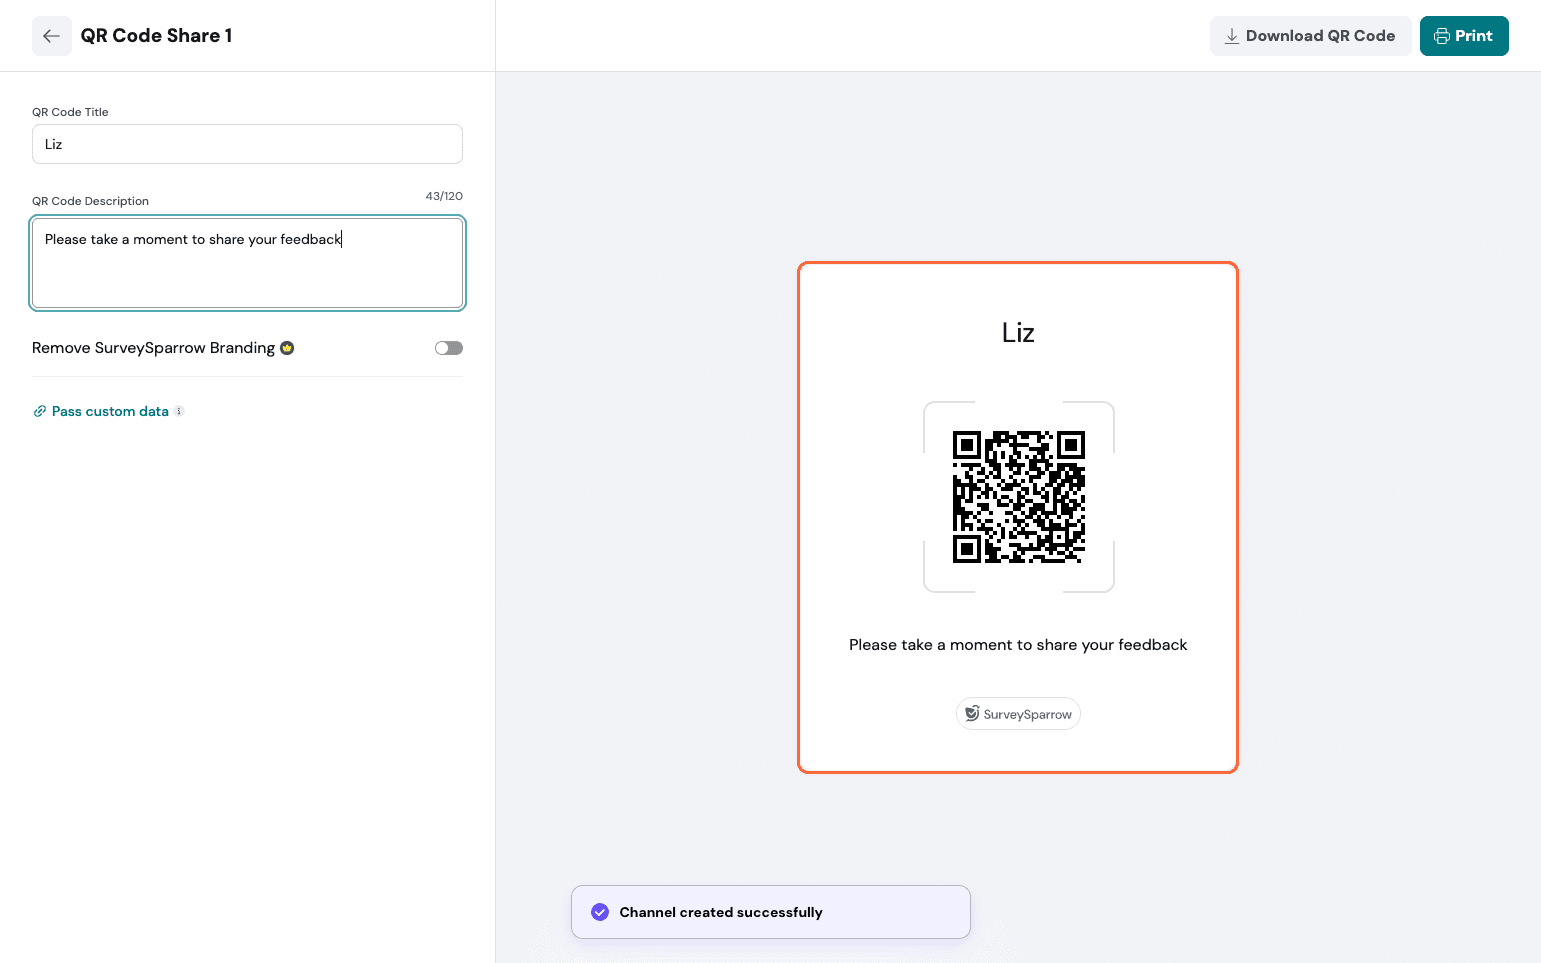
QR Code:
Set up a name and description, add custom variables, then generate the QR Code.
Weblink:
You get the additional option of editing the OG image via this share.
Once shared, you start getting your distribution analytics right below the share channels.
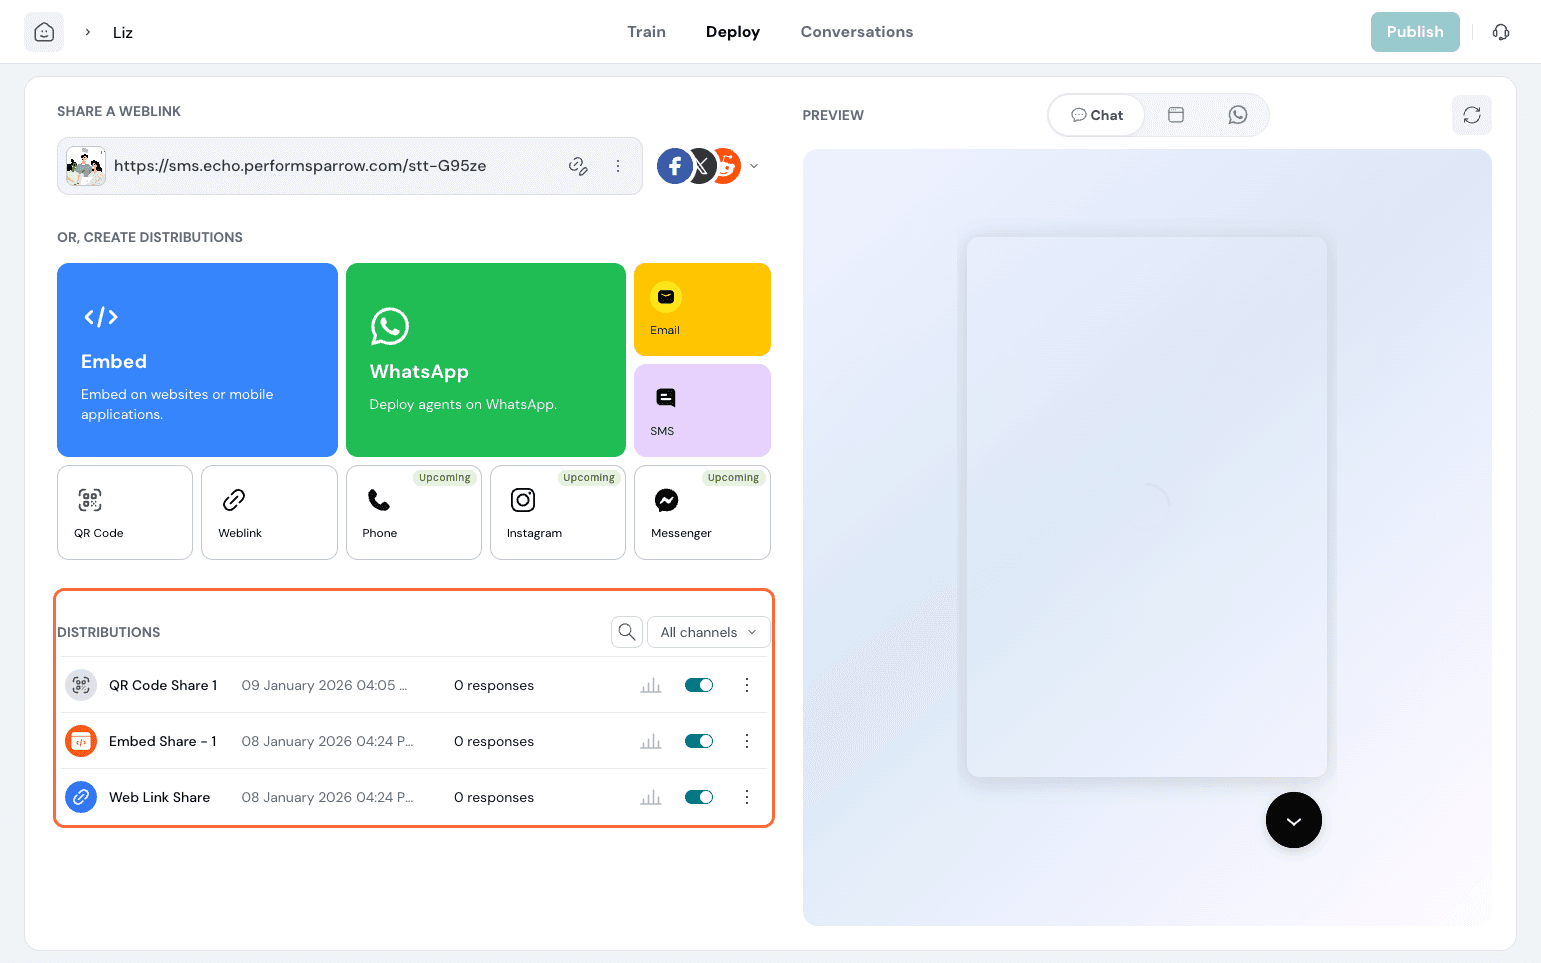
You can have detailed analytics on how many users answered from each channel.
Now, we can monitor the Echo Agent’s performance after publishing to see how it does and identify areas for improvement.
In the Overview section, you get an overall picture of the number of conversations and user engagement.
The total Conversations widget tells the total number of users, along with the percentage increase over time. There are widgets measuring unique user engagement and returning users.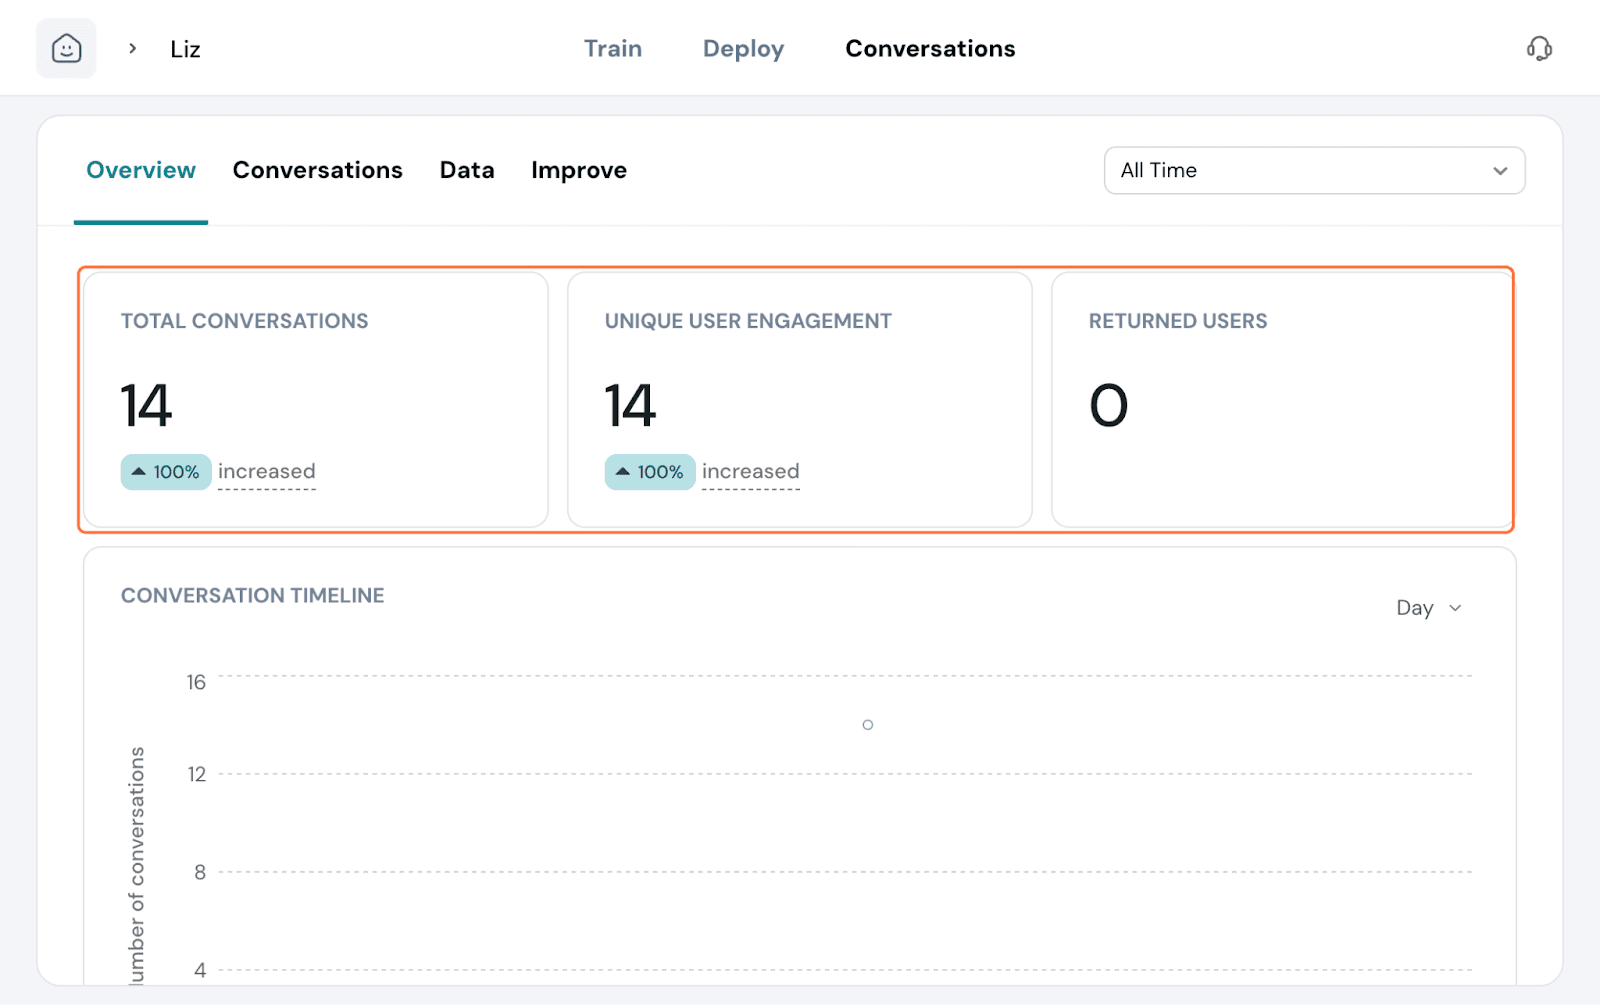
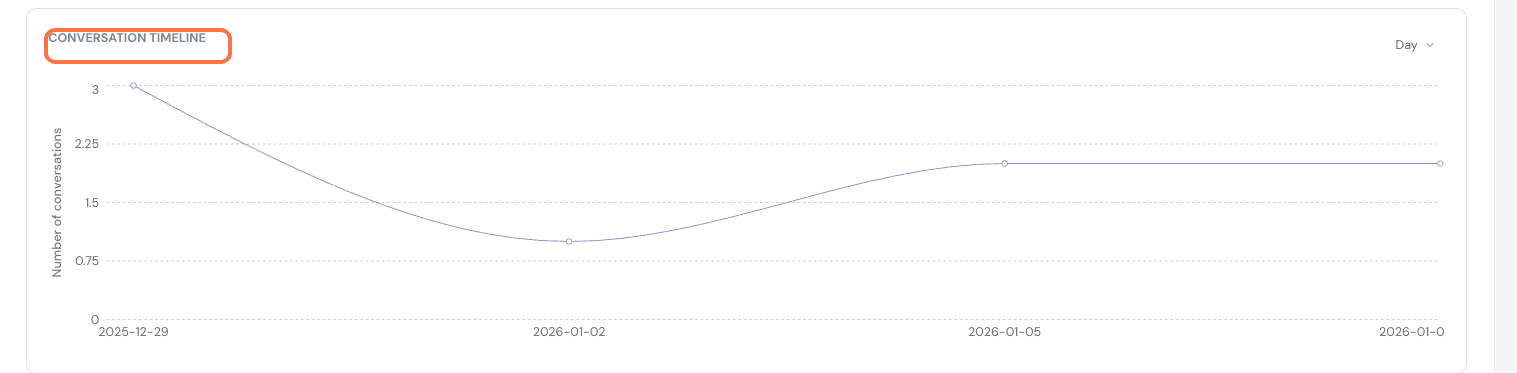
The conversation timeline shows the number of conversations over time as a line graph.
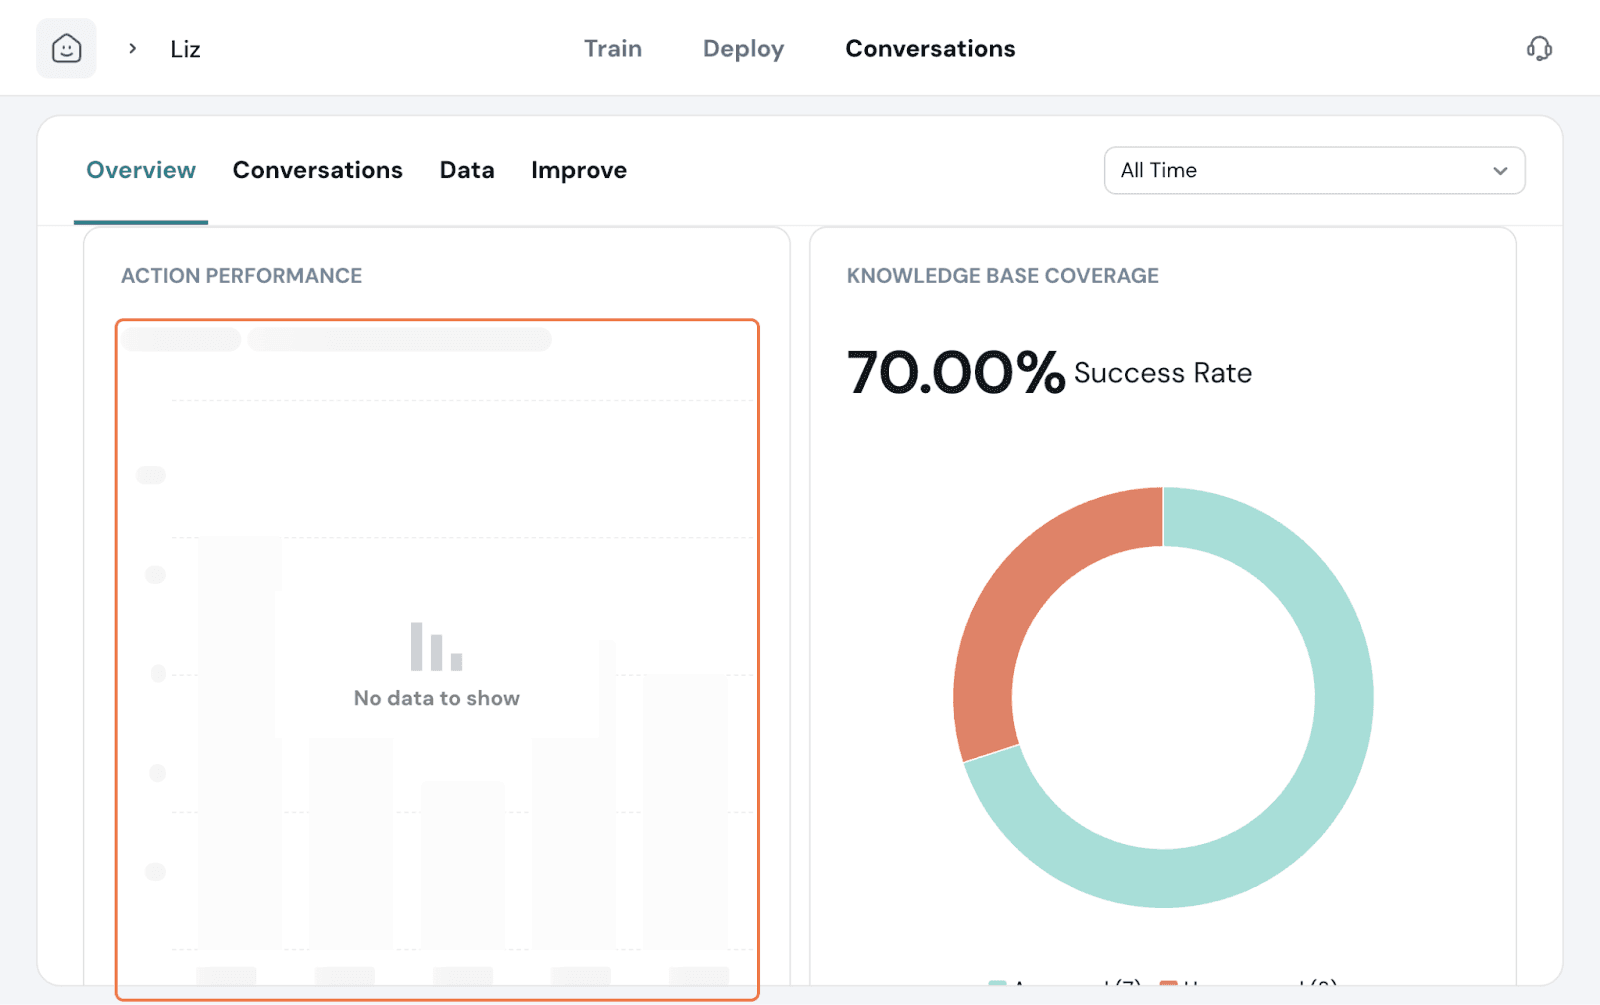
The Action Performance widget shows the top actions performed by the agent. Here, the agent’s goal is to collect feedback, so there is no action embedded to perform as such.
 returning
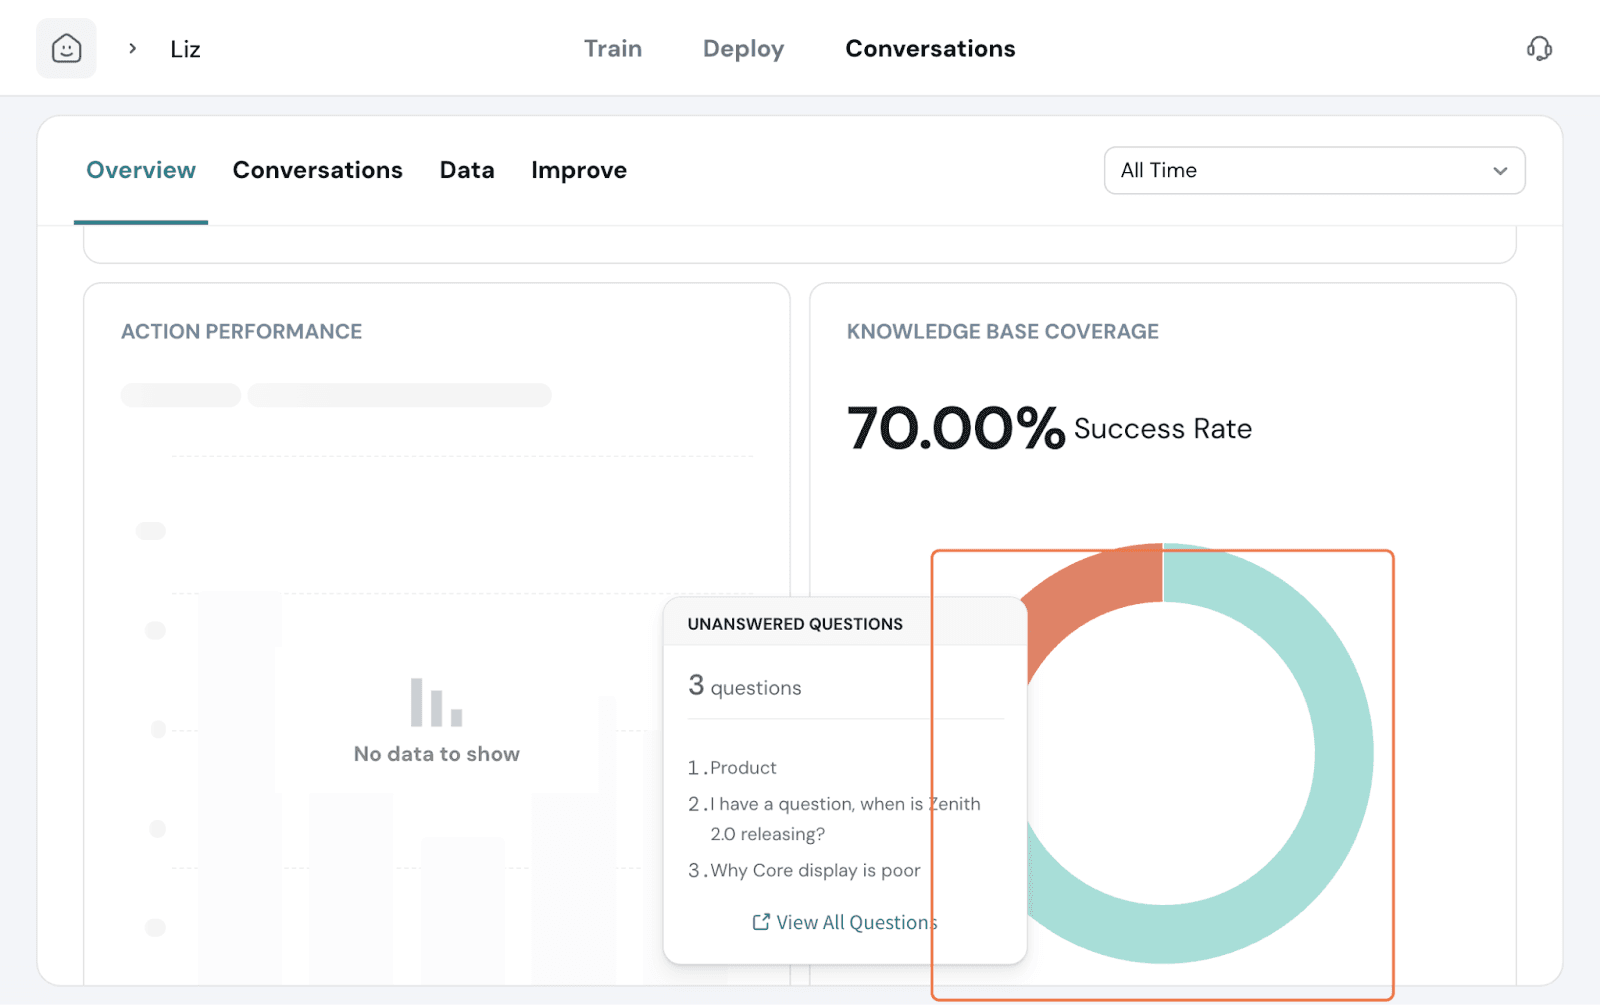
The effectiveness of covering the knowledge base by the agent is also shown as a widget.
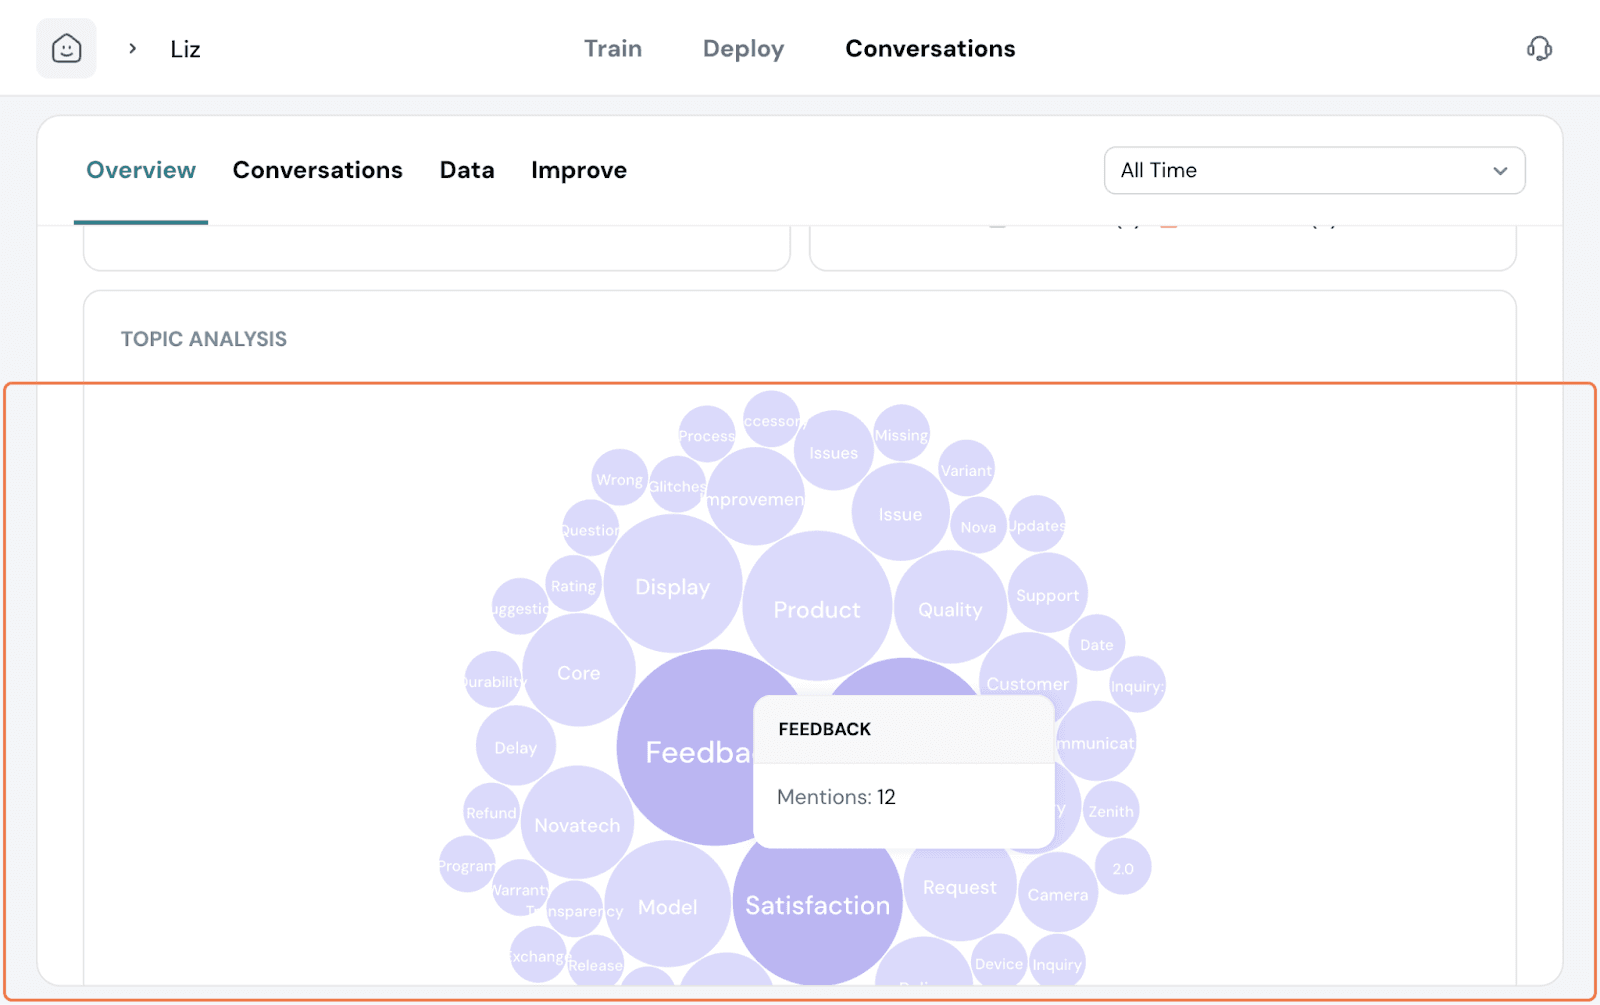
The last widget is a bubble chart depicting the topic analysis from all the conversations with the agent.
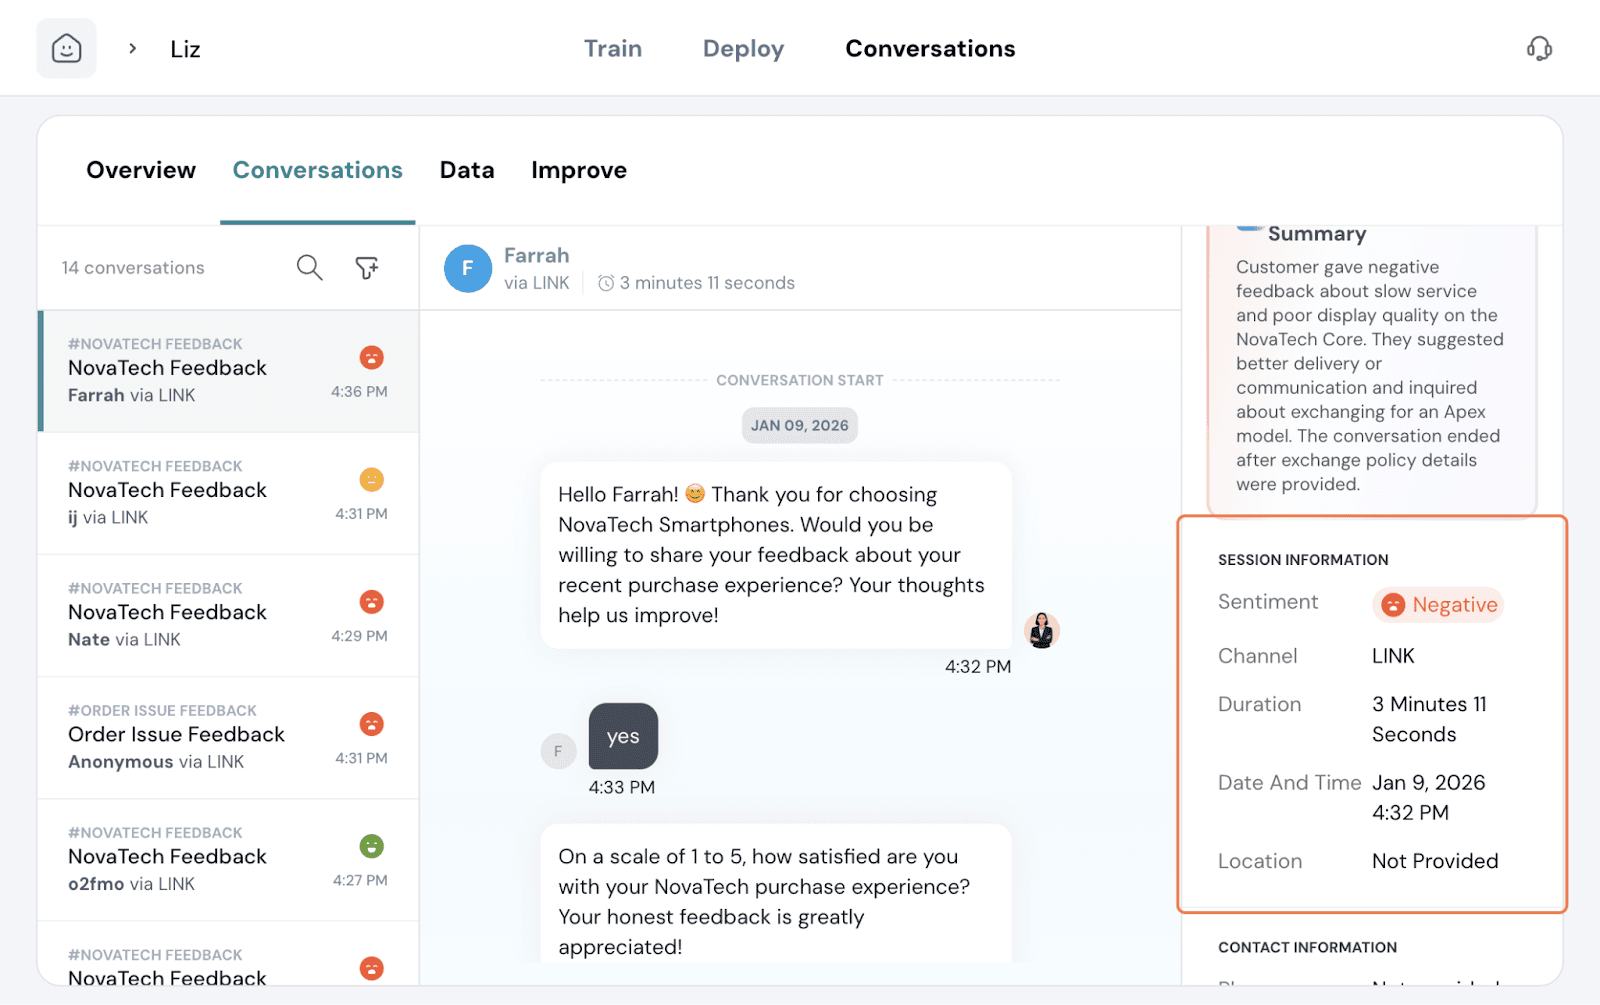
Under this tab, you’ll find the detailed view of all conversations users had with the agent. You can read through the conversation if you prefer.
A summary is presented on the right side with pertinent information like the overall sentiment, channel of conversation, duration of the conversation, date, time, location, and the contact information.
You can also filter through the conversation with the search and filter icon on the left slide. Click on the filter icon and click on the plus.
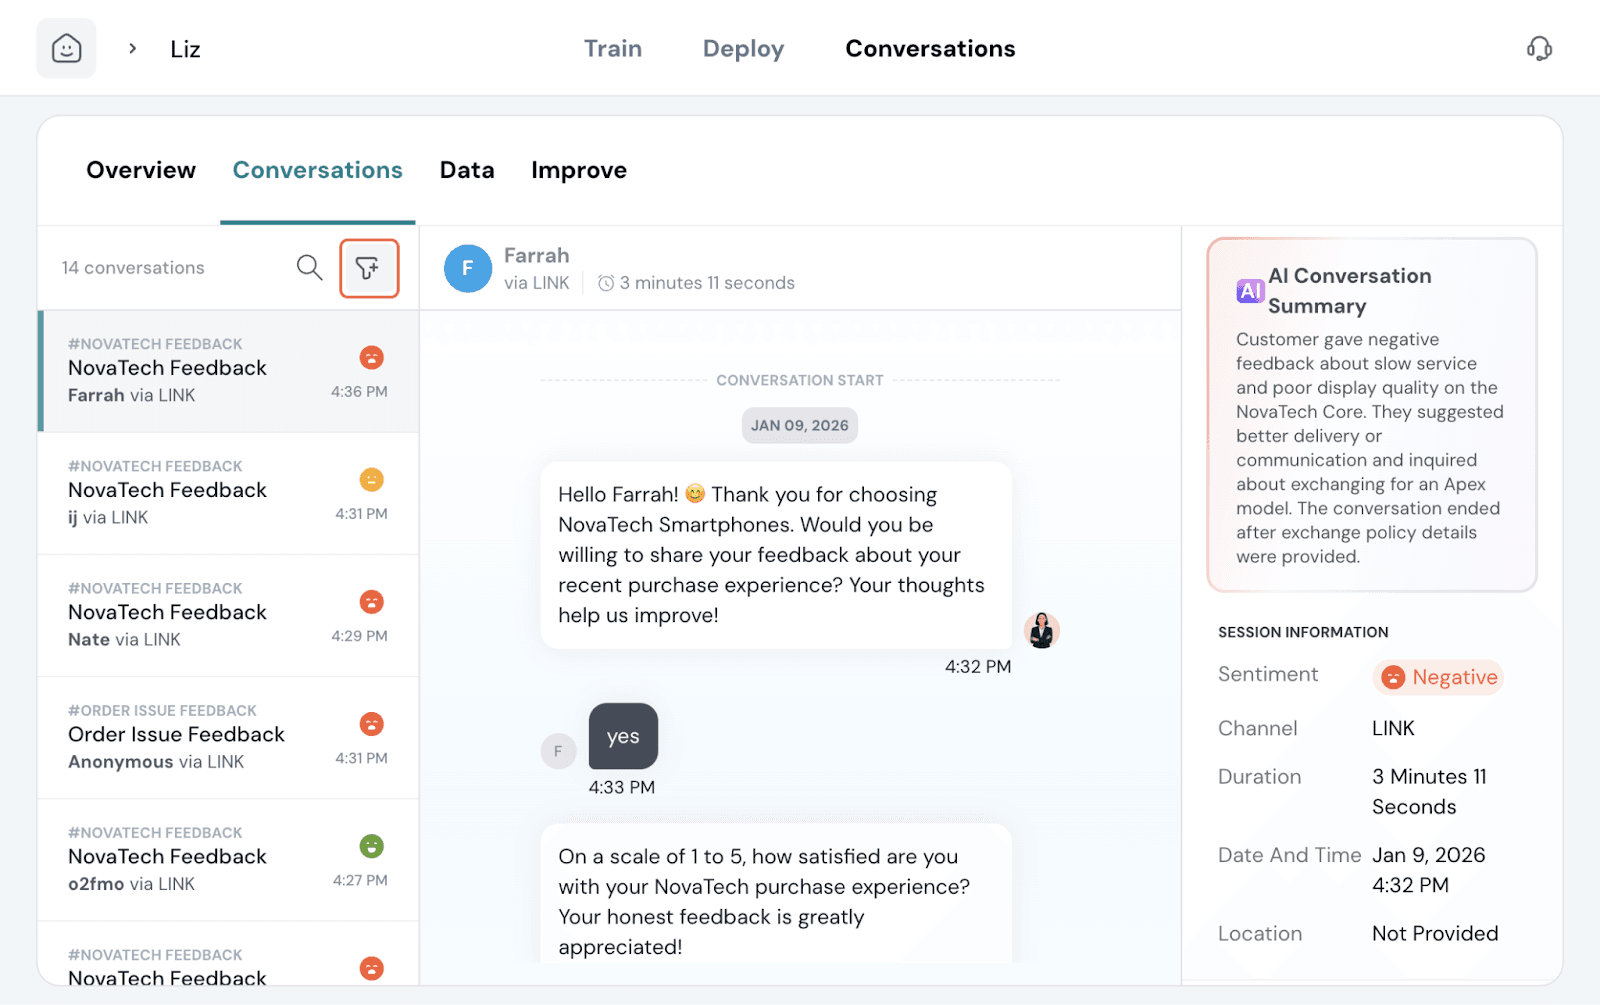
You can filter by the following criteria: contact fields, topic, channel, date, and sentiment.
In this tab, you can extract data from all conversations had with the agent. Click on Extract Data.
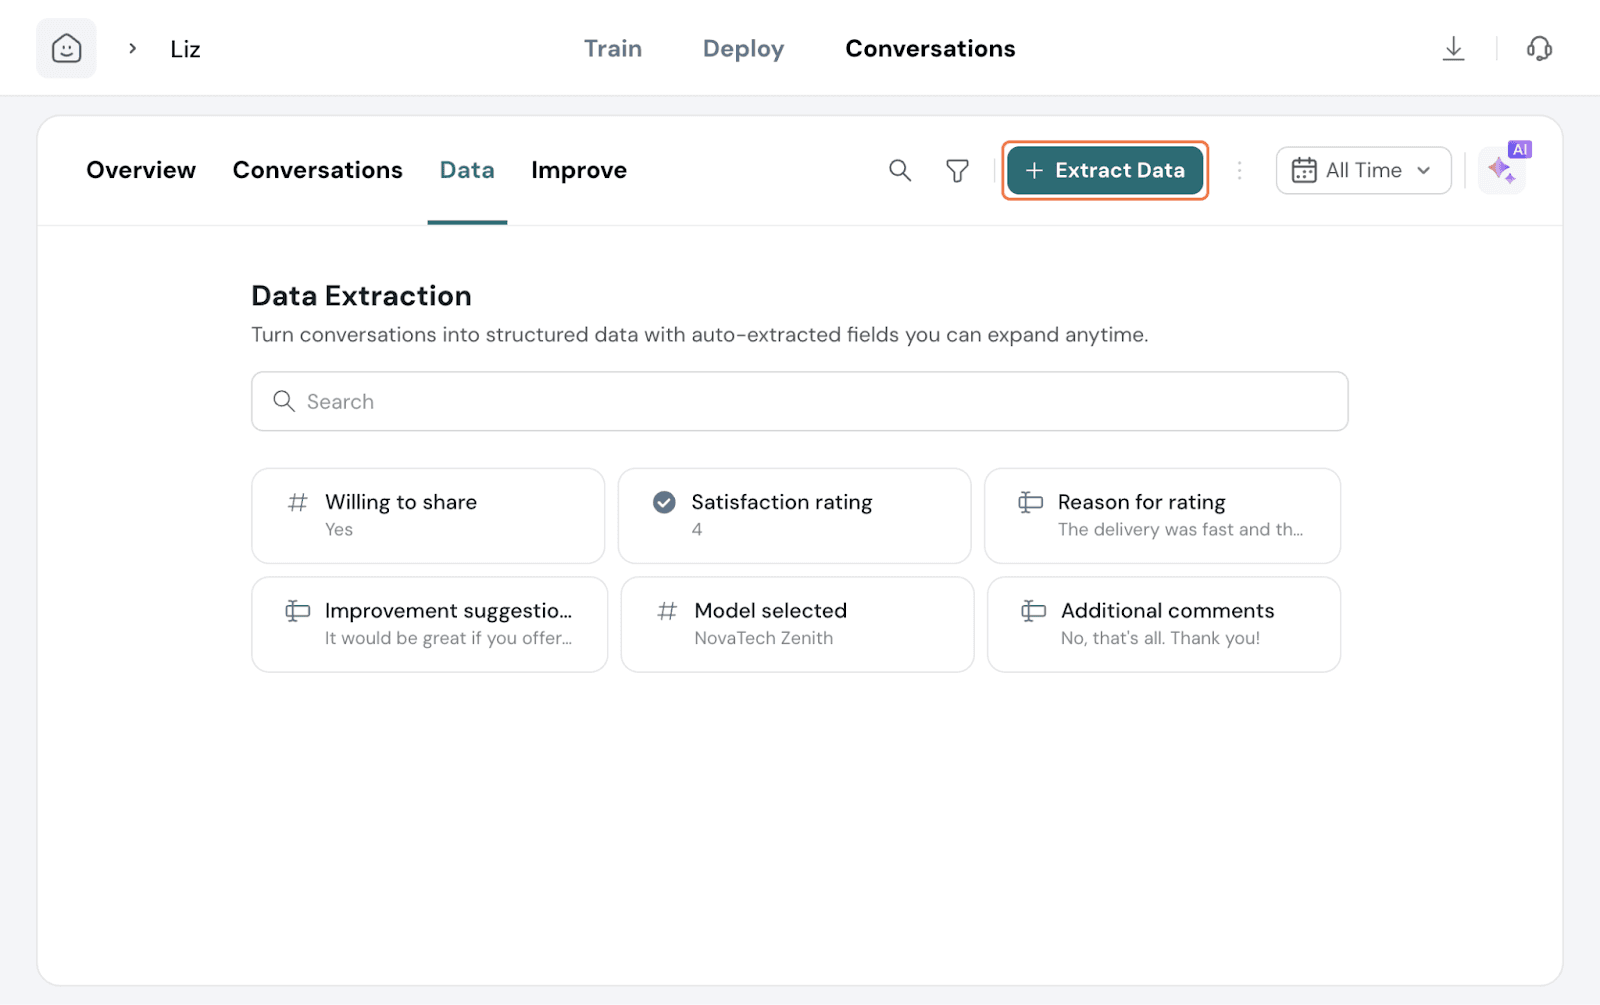
Choose from the suggestions or type in and let AI do the rest.
Once done, it will auto-populate fields by extracting data from future conversations as well.
You can click on a respondent to expand and view the details in the sidebar.
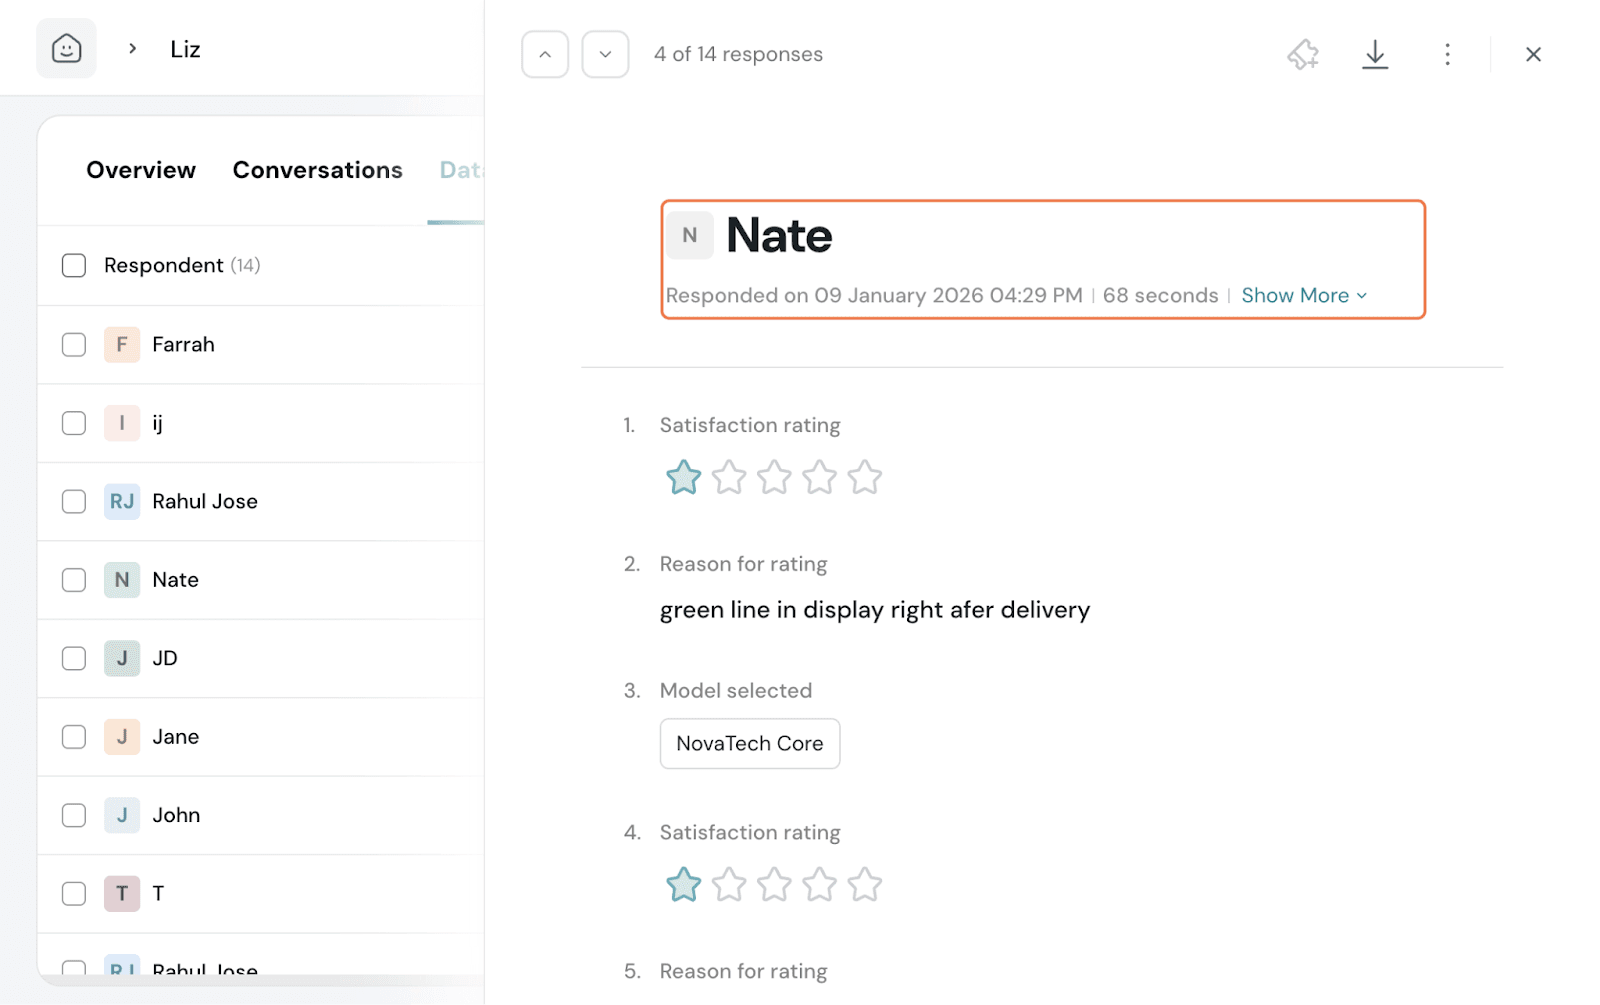
You can add tags to the responses as well, similar to how it is done in the Responses page of surveys.
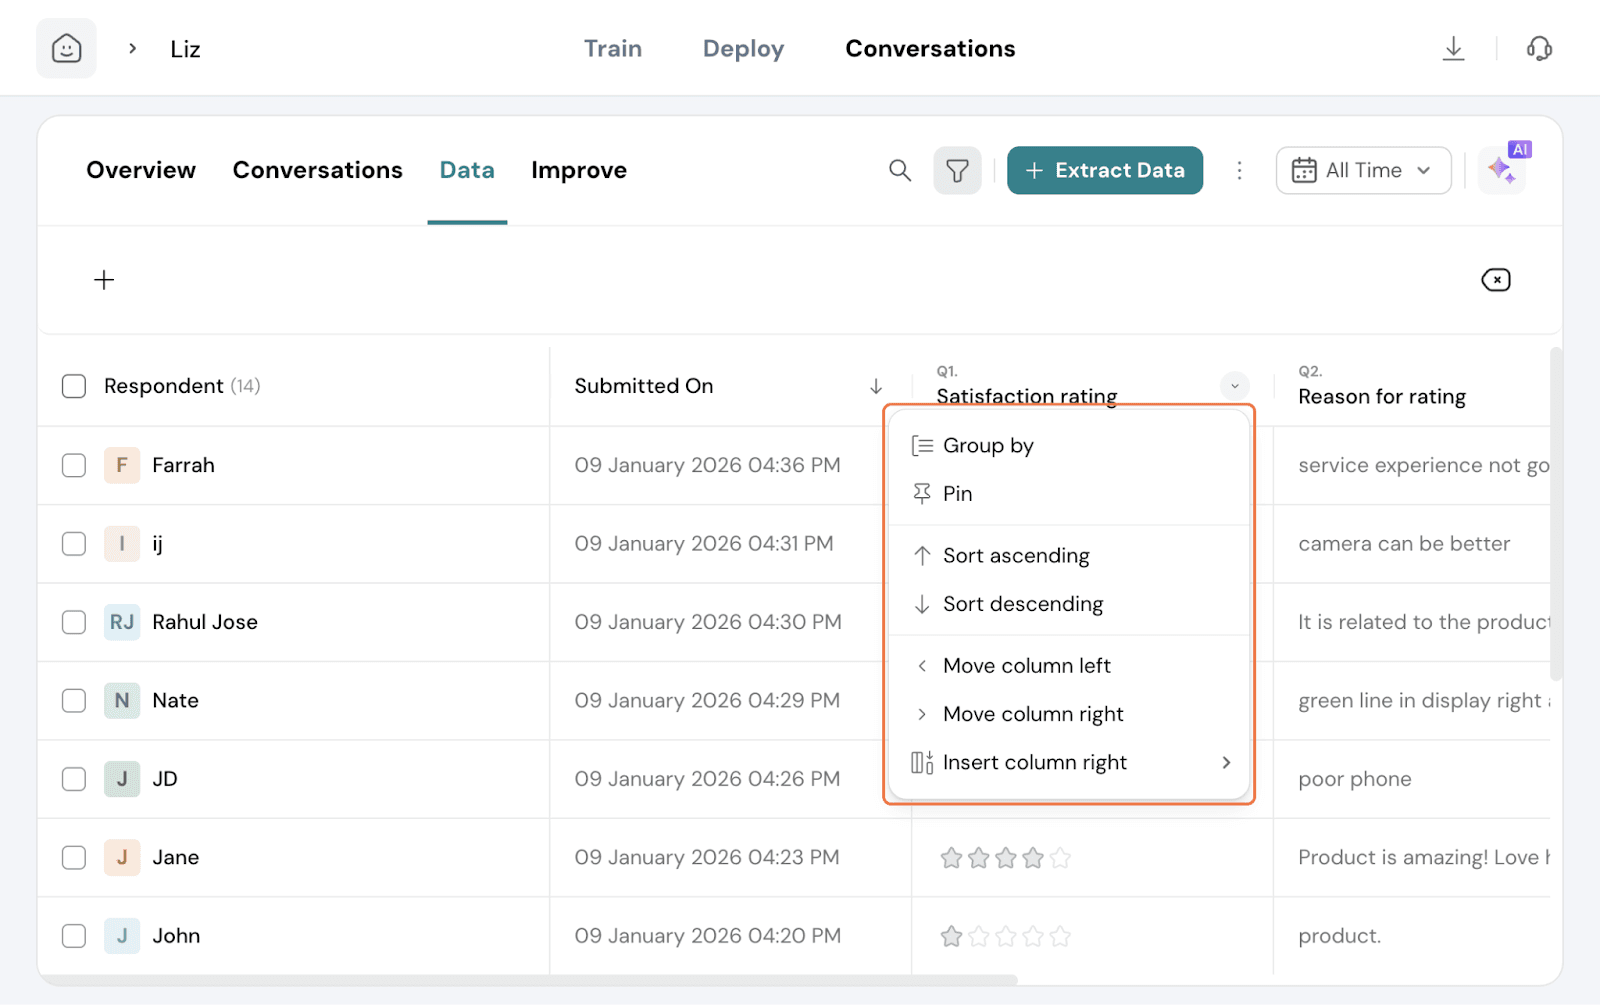
If you click the toggle on a column header, you get the options to Group by, Pin, Move the column left or right, and insert a new column.
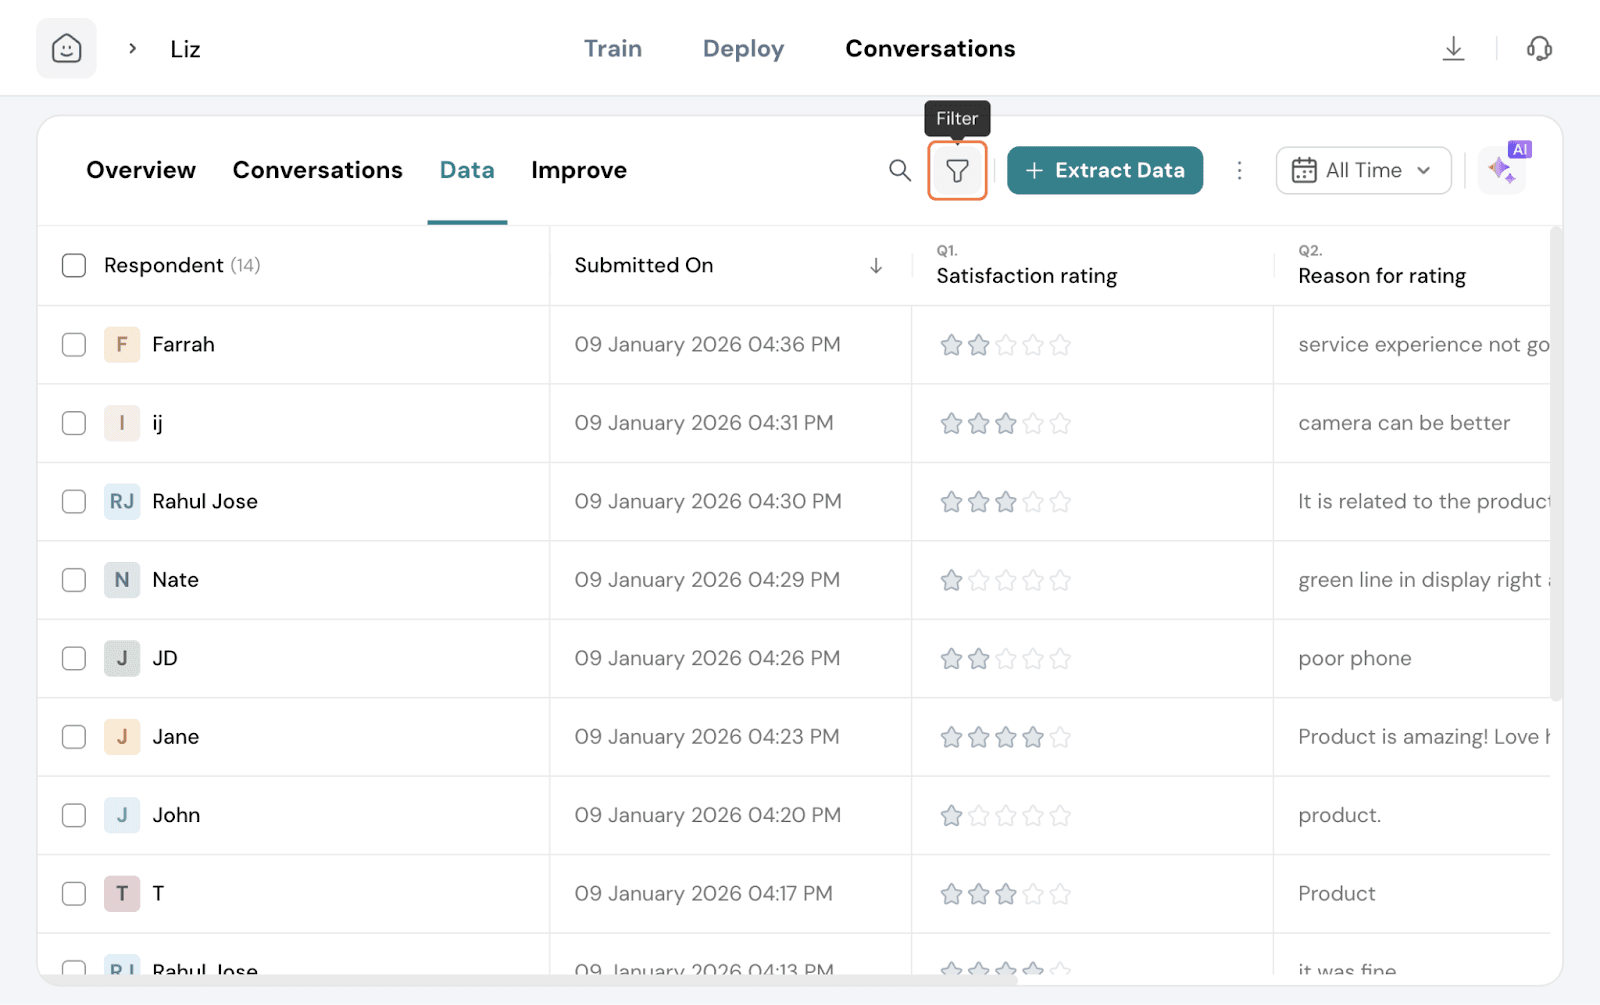
Filters are available to use and filter data accordingly. Click on the Filter icon and set up your filters.
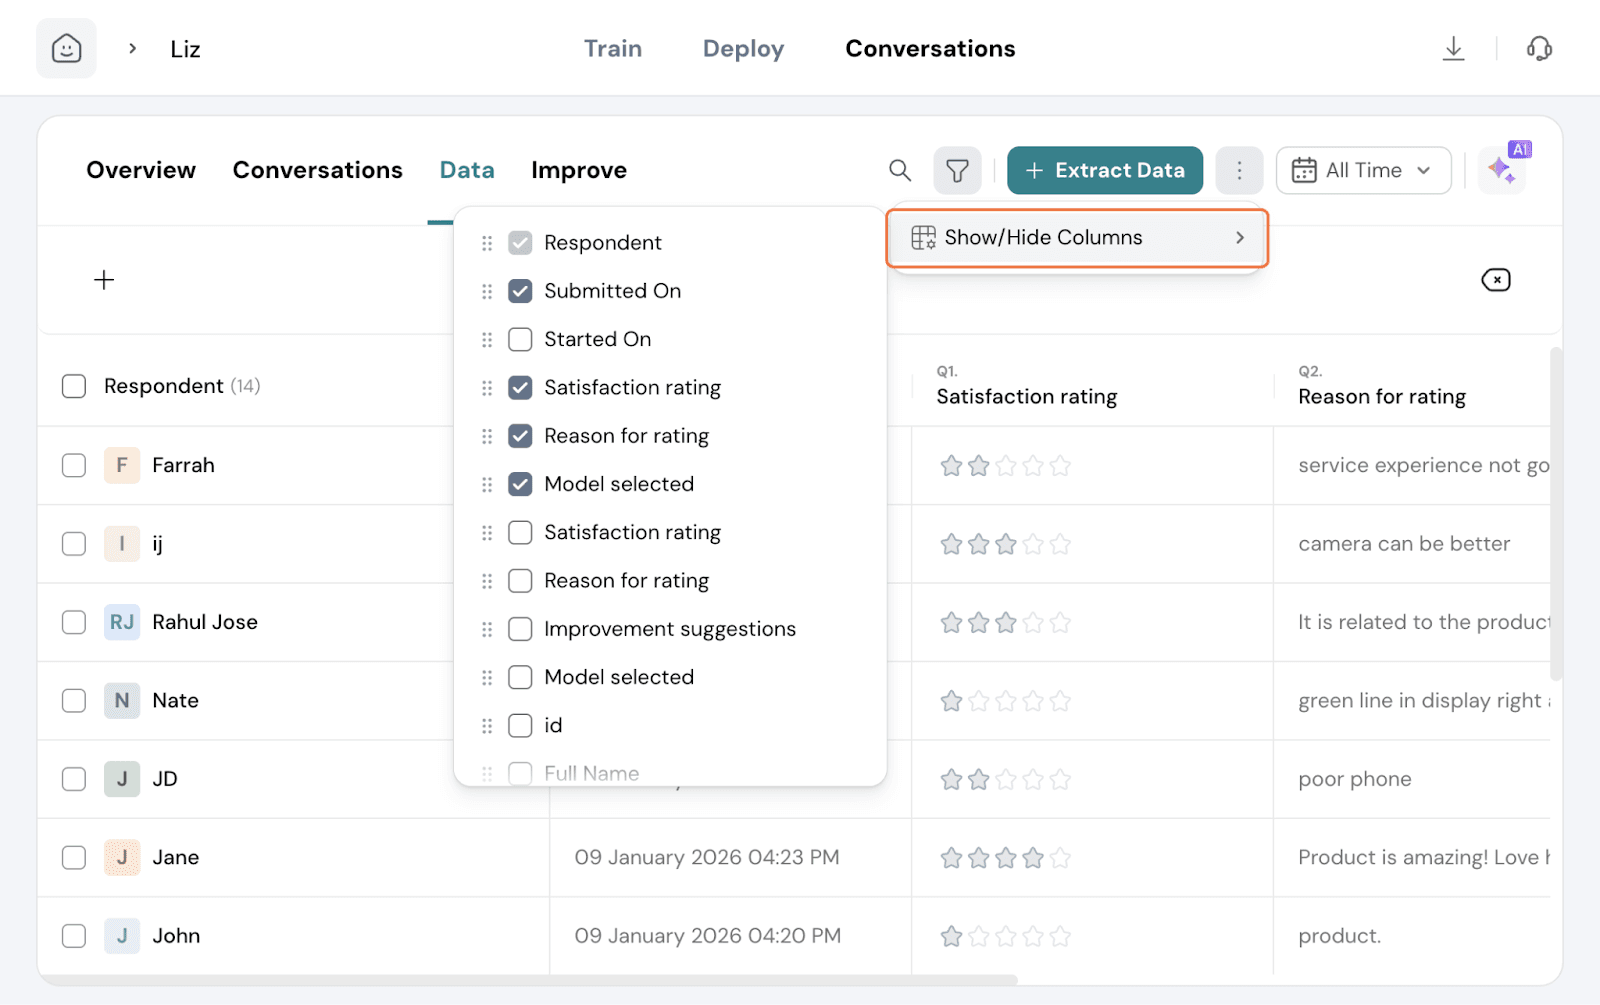
You can also have extra columns added. Click the 3 dots and select which columns need to be displayed.
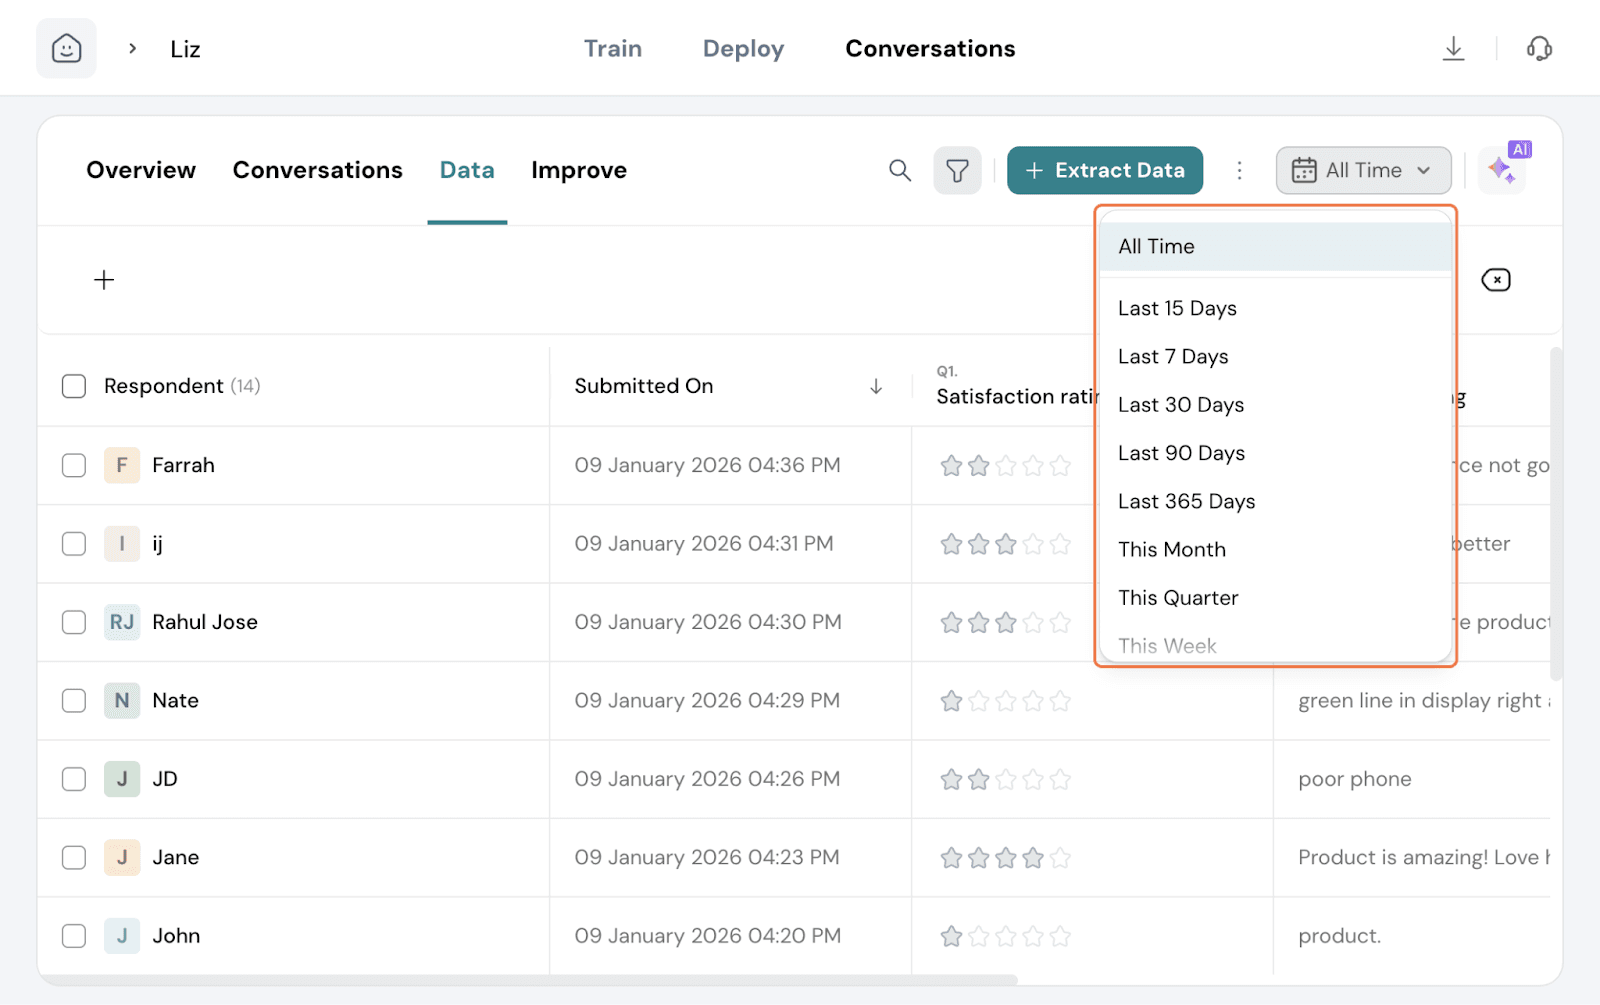
You can set the timeframe for which you want to observe the data at present. By default, it is at All Time. Click on the calendar icon and choose your preferred timeframe from the options or make your custom range.
If you need to get some particular answers from your data, the AI assistant is always there for help. Simply click on the AI icon and chat away to understand your data better.

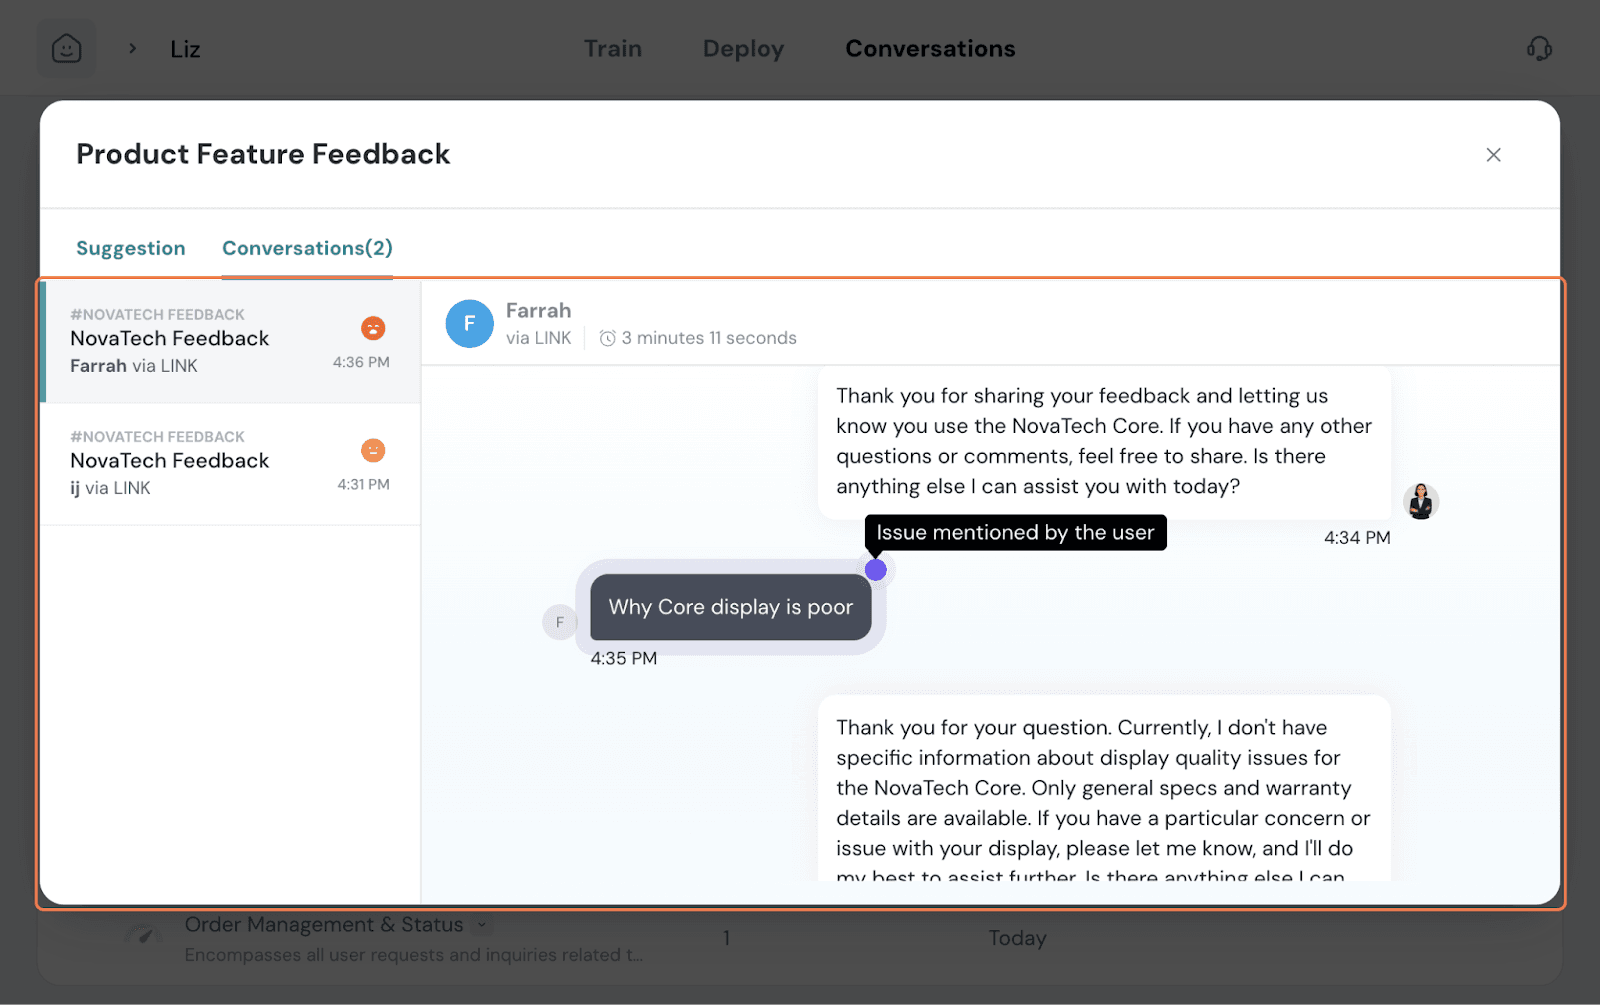
This tab displays the common issues encountered by your agent due to gaps in the knowledge baseset up. It would list areas or specific topics that users enquired about, but the agent was unable to process the request correctly.
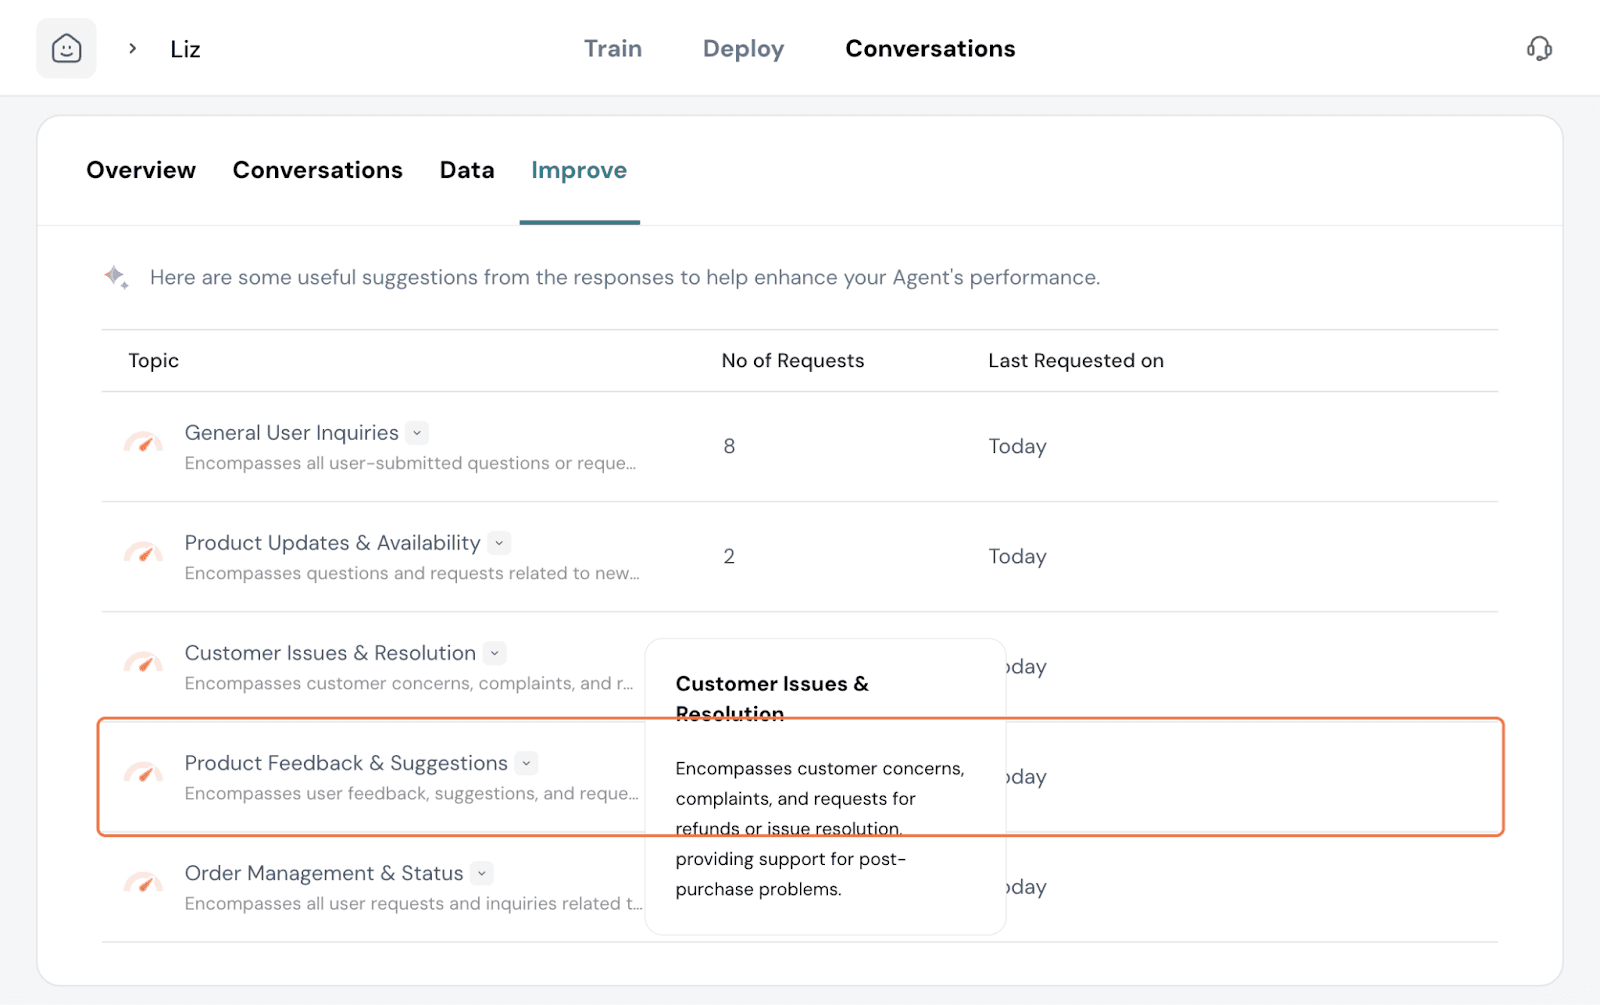
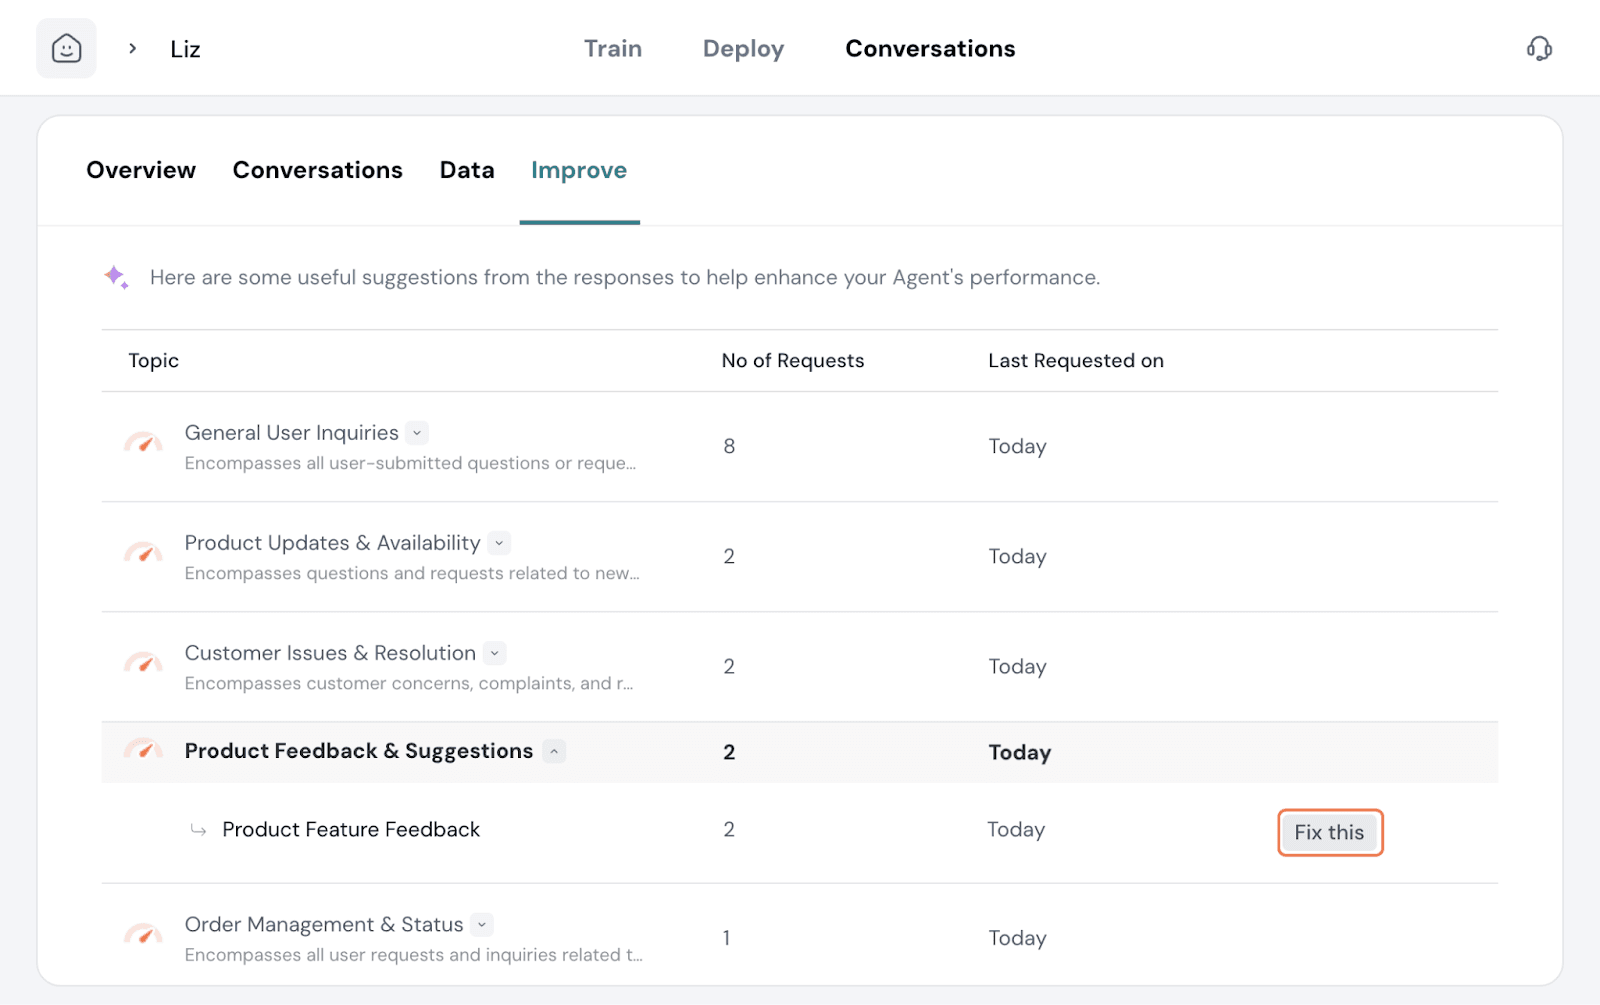
Here, you can see that users asked human agents to answer queries on Product. When clicking on Fix this, you get suggestions on what actions need to be taken to fix the gap.
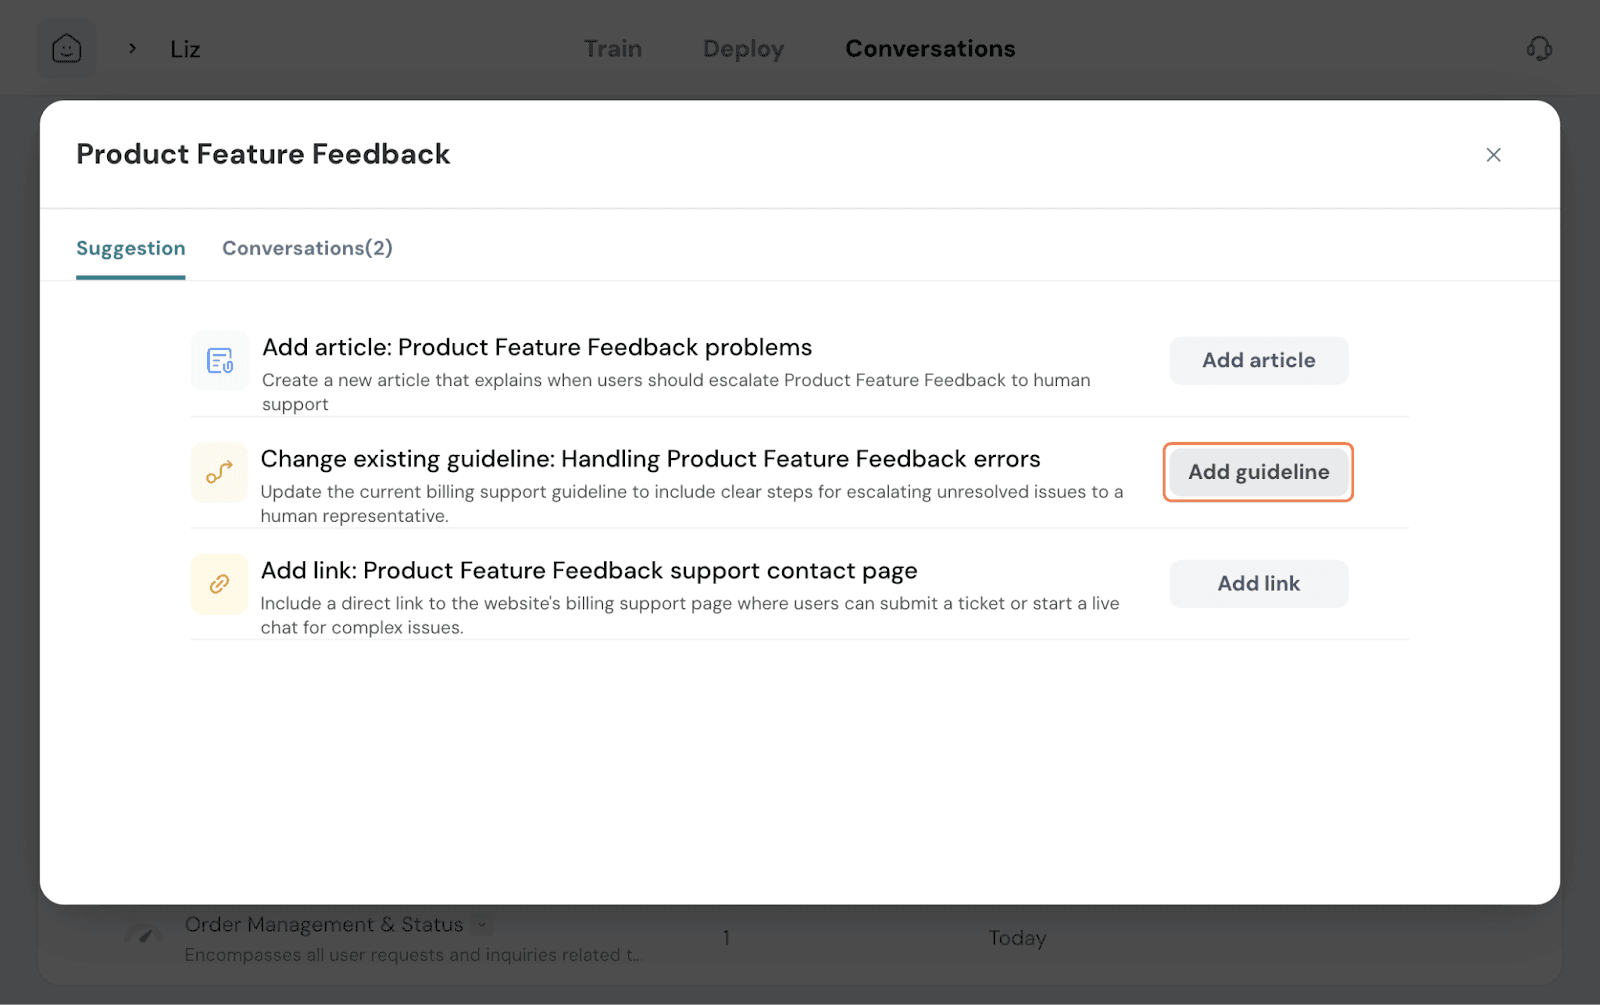
Under to answer, you get the suggested actions to take.
In some cases, the existing guideline is vague on what course of action to take. So amending and clarifying the guideline with precise instructions would rectify the issue. Click on Add guideline.
This opens a modal for you to add instructions. You can choose to add a new guideline or add it to an existing guideline.
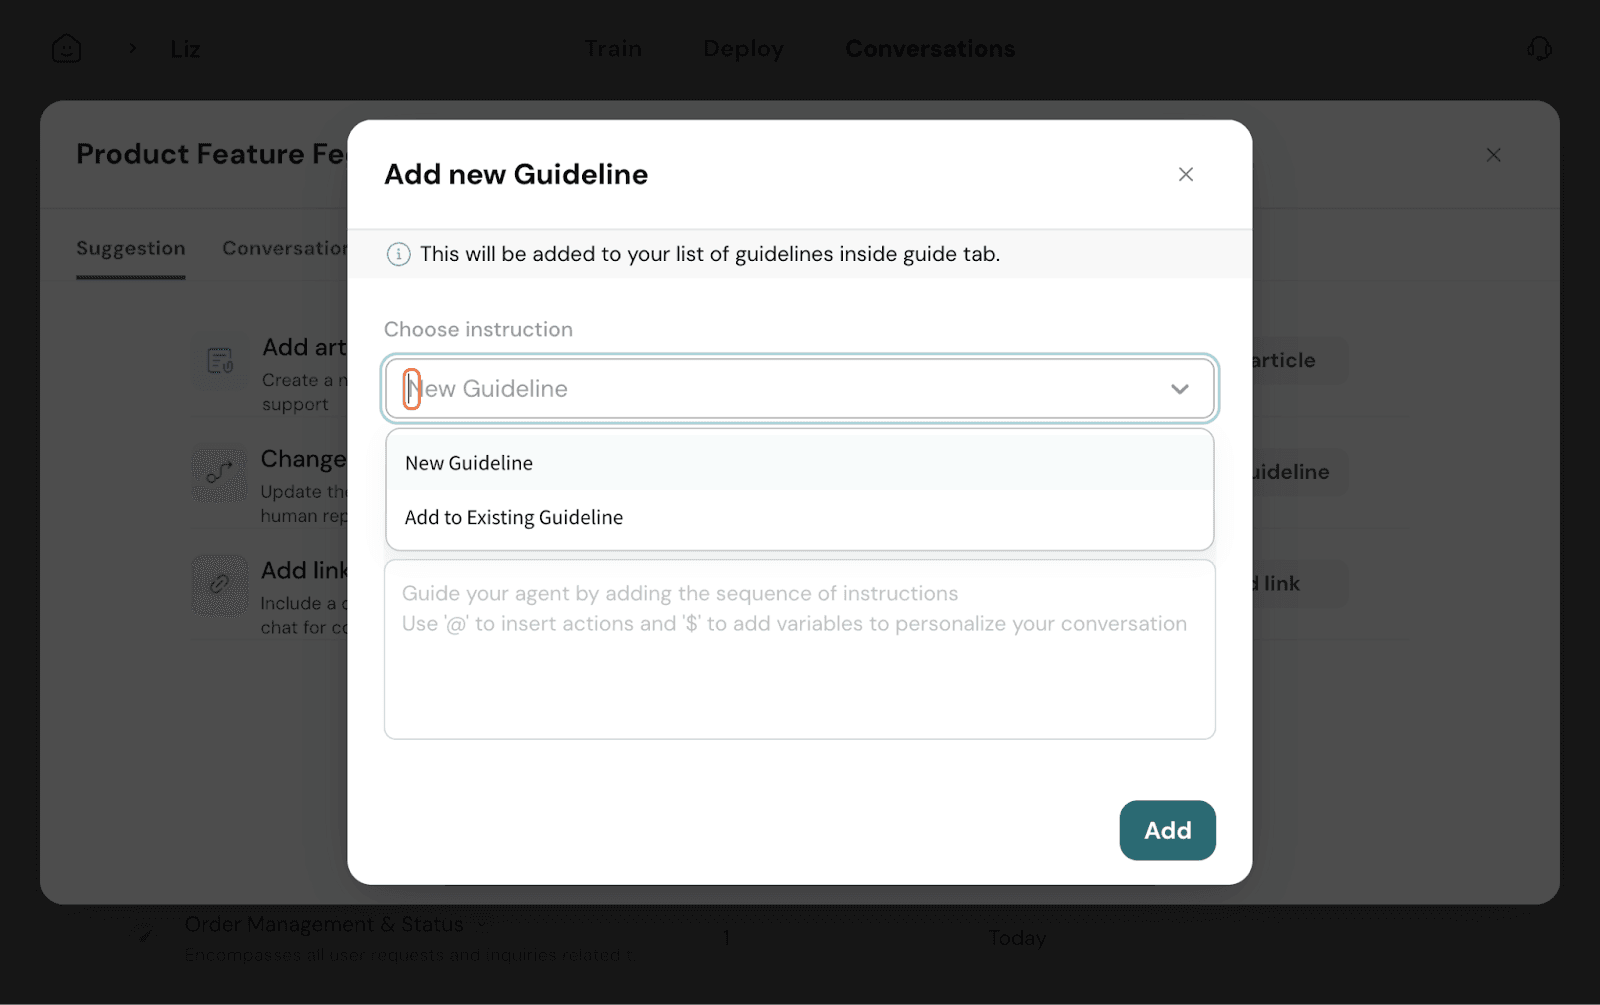 Set the trigger for the guideline. Write out the guideline and use actions and variables if needed. Once done, click Add.
In some other cases, it would be a true knowledge gap with people asking about topics your agent is not trained on. Once you feed the right material, the agent is retrained and equipped to handle the topics moving forward.
Here, if you click Add article you get to upload the specific documentation. If it’s a missing link, you can amend it as well.

You can identify the causes of the specific issue by examining the conversations where the issue happened. Click on Conversations and read through the chats. This helps you make an effective decision.
And that’s it! This covers creating an Echo Agent end-to-end, from setup, training, deployment, to analytics, and improving its effectiveness.
Feel free to reach out to our community if you have any questions.
Powered By SparrowDesk