
Search
Dynamic tickets assignment is a system that automatically assigns tickets based on predefined criteria, such as customer responses. Instead of requiring manual intervention to route tickets, it ensures that each ticket is instantly directed to the appropriate agent.
This helps tickets get resolved quickly by the right people, streamlining workflows and improving response time and customer satisfaction.
Let’s look at an example.
Twiggy, a food delivery service company, sends post-delivery surveys to its customers. When Sun Ltd company, a key client, submits a poor rating due to a delayed delivery, they request immediate action. Previously, Twiggy had to manually assign these tickets to the Customer Success Manager (CSM) responsible for delivery issues. This process was repetitive, time-consuming, and prone to delays.
With Dynamic Tickets Assignment, Twiggy can now automatically link Sun Ltd tickets to a particular agent based on their specific delivery concerns. This means that whenever Sun Ltd submits a delivery-related complaint, the system will instantly assign the ticket to a particular agent , eliminating manual intervention.
This leads to faster issue resolution, smoother workflows, which results in higher satisfaction and an improved customer experience for the company.
Now let's see how this works
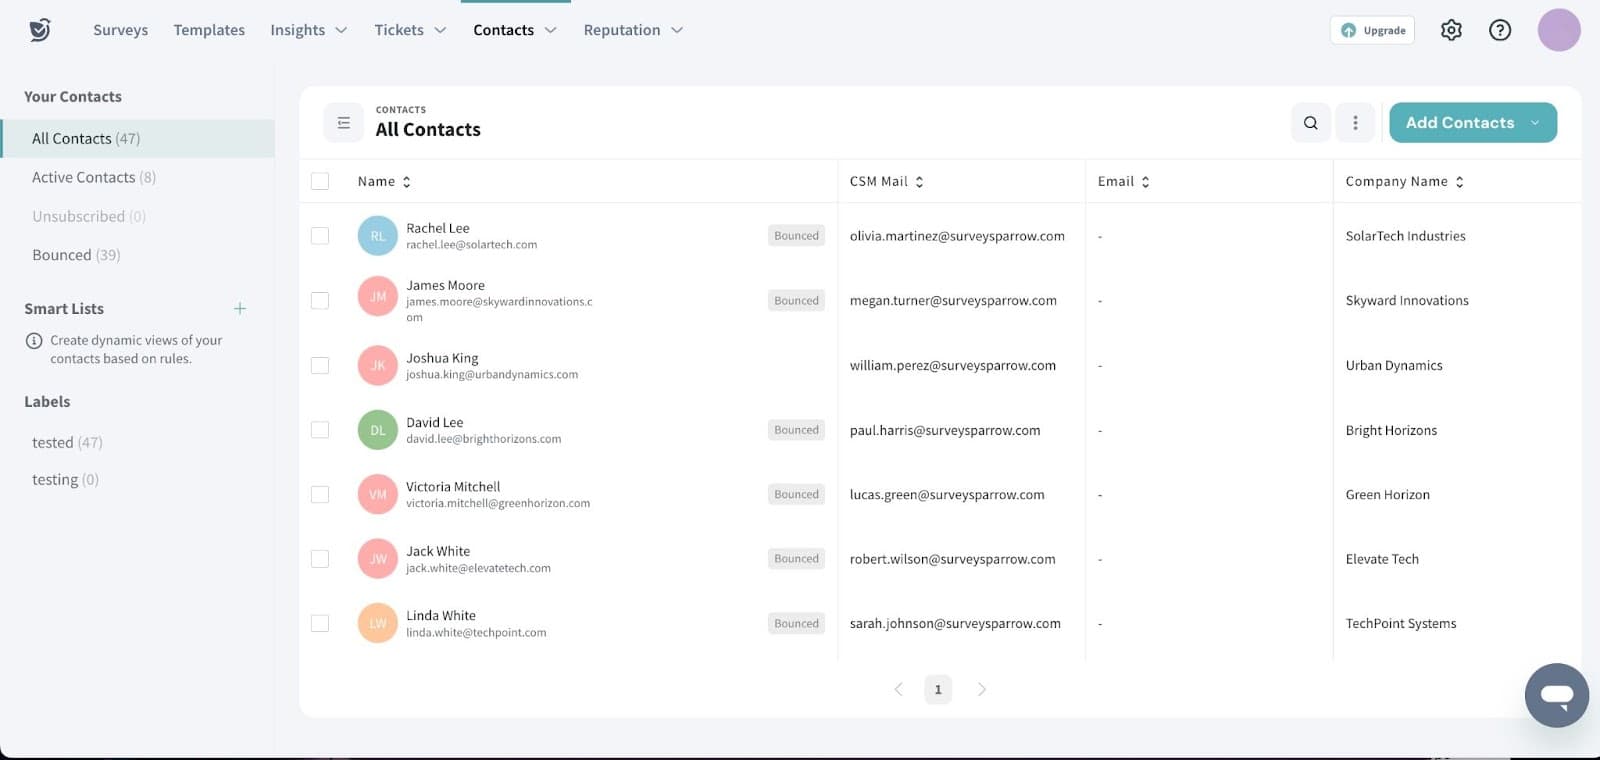
1. Before setting up Dynamic Ticketing, make sure your contacts include the correct email IDs of the agents (CSMs) linked to each customer. The custom contact property should be of email data type for this to be used for dynamic ticket assignment.
In case you would like to add a custom property click here to know how to set it.
You can link agent email IDs to customers manually, upload as a CSV file or using contact sync integrations.
Once done, the platform will automatically match the tickets with the respective agents.
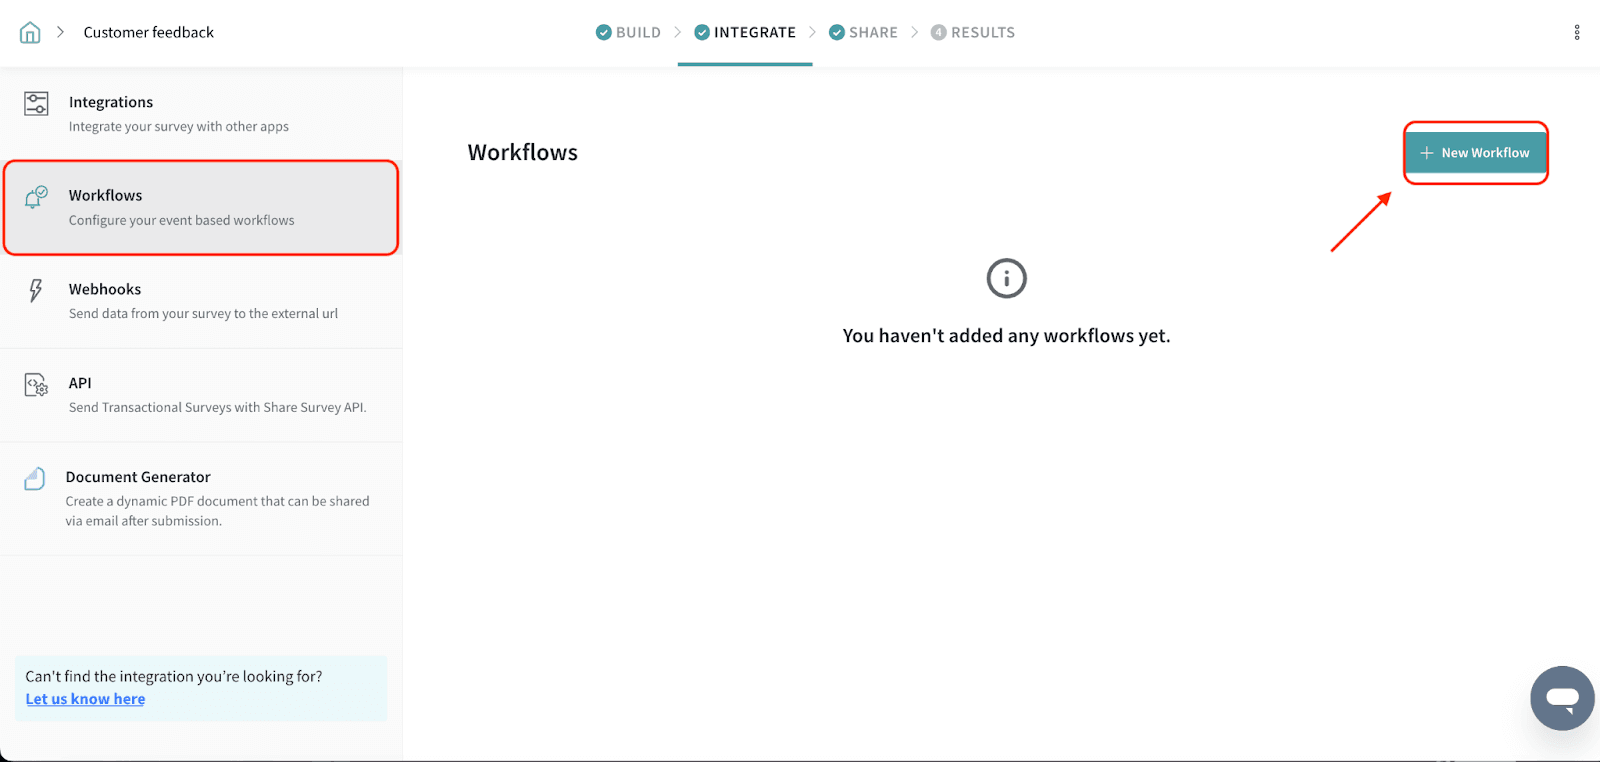
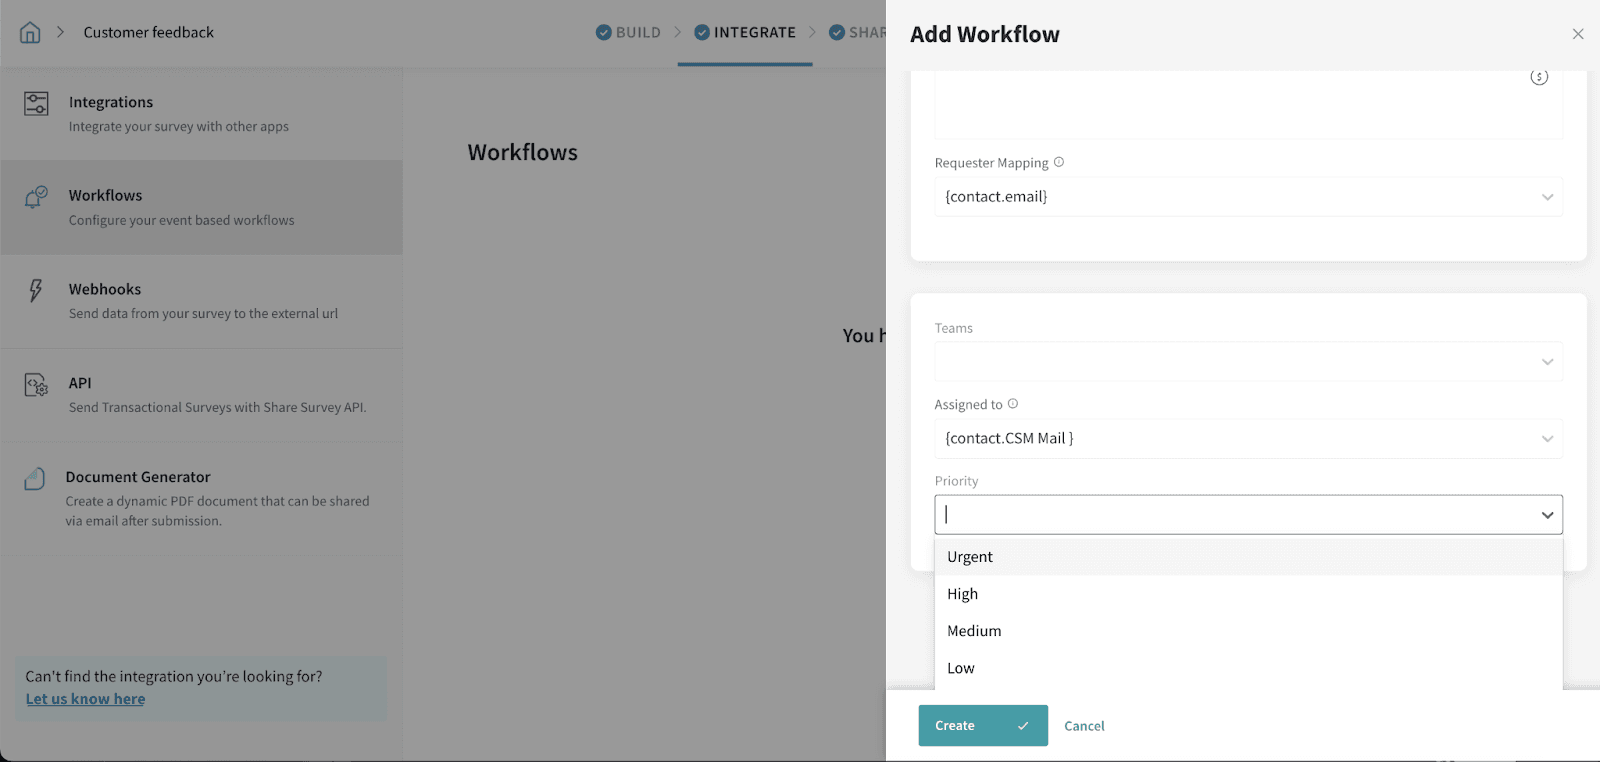
2. Navigate to the Integrate section and go to Workflows and click on New Workflow.
You can also refer help article on how to create a workflow in tickets management
3. Choose Ticket under Actions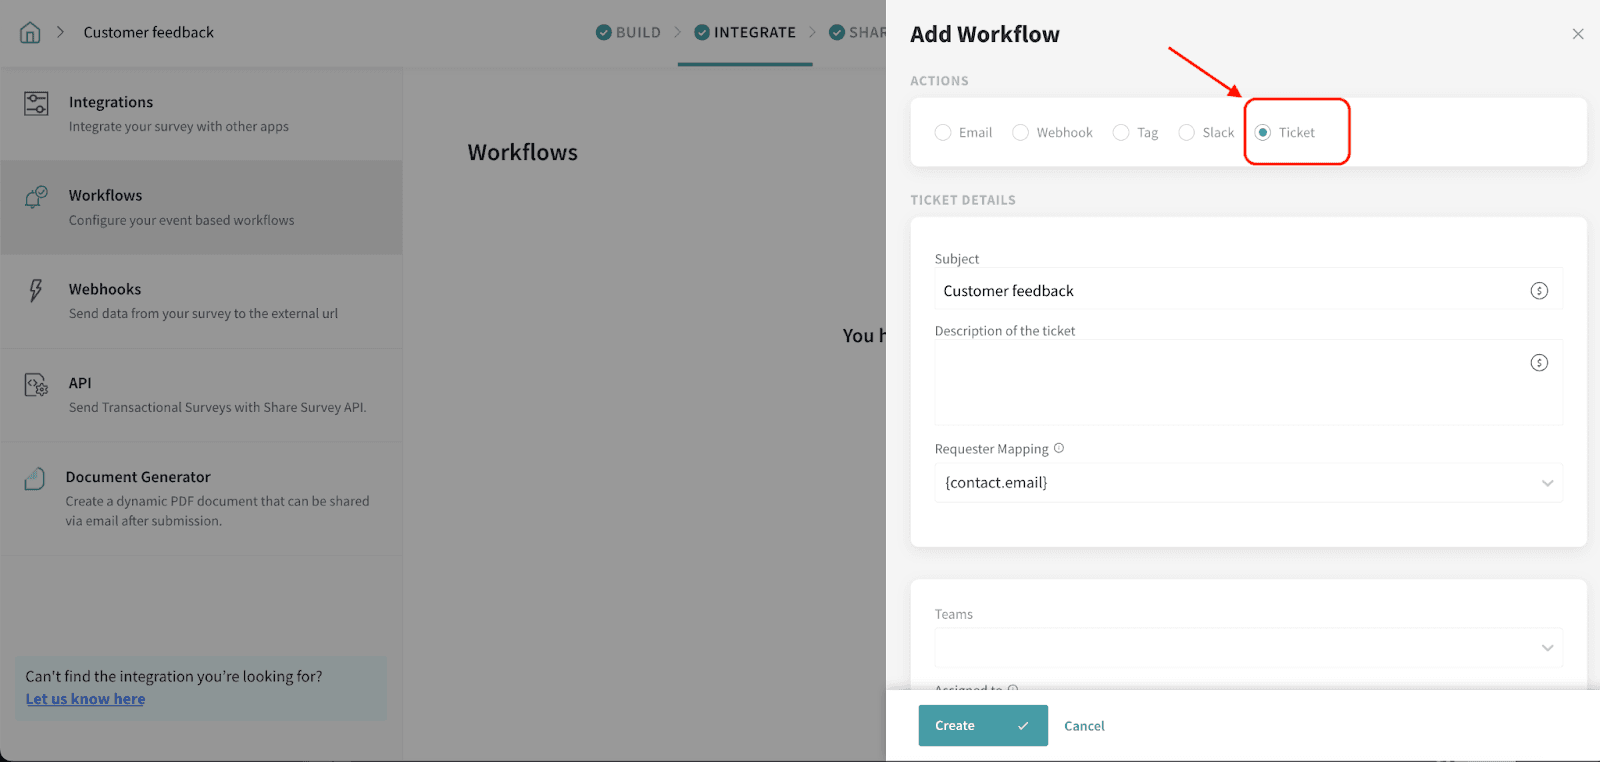
4. Under ‘Assigned to’, you will see the Agent (CSM) Email ID, which is mapped to the specific customer. Selecting this ensures that tickets from a particular customer are automatically assigned to the designated agent without any manual intervention. By selecting this option, the system directly routes the ticket to the agent responsible for handling that customer’s concerns. 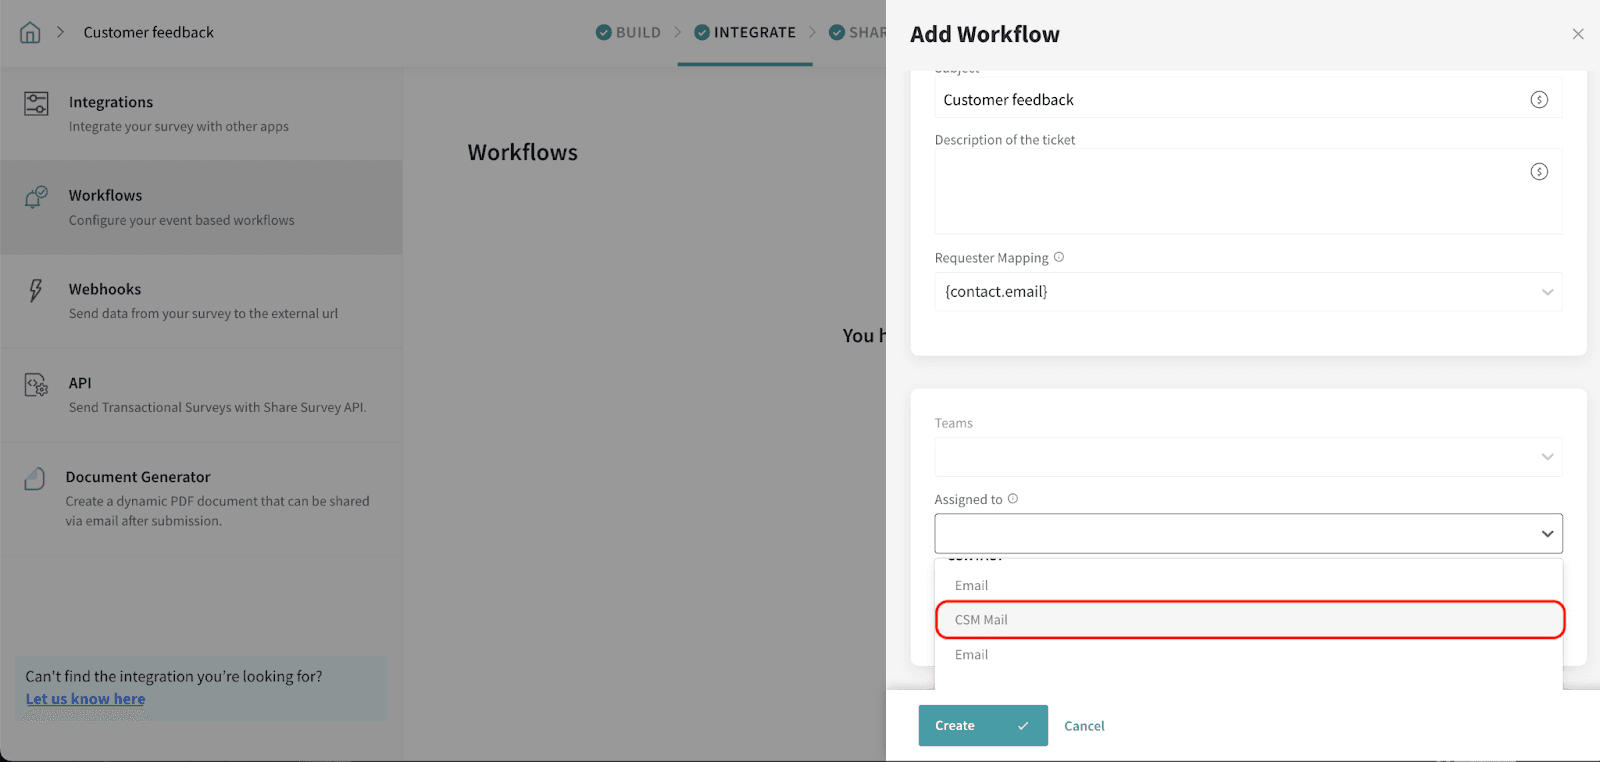
5. Based on the criticality level, priority can also be set.
NOTE:
Powered By SparrowDesk