Search
Custom properties let you pick your survey audience. Identify and manage your contacts by labeling them. Adding custom properties lets you populate customer personas with minimum effort.
Let’s see how it works:
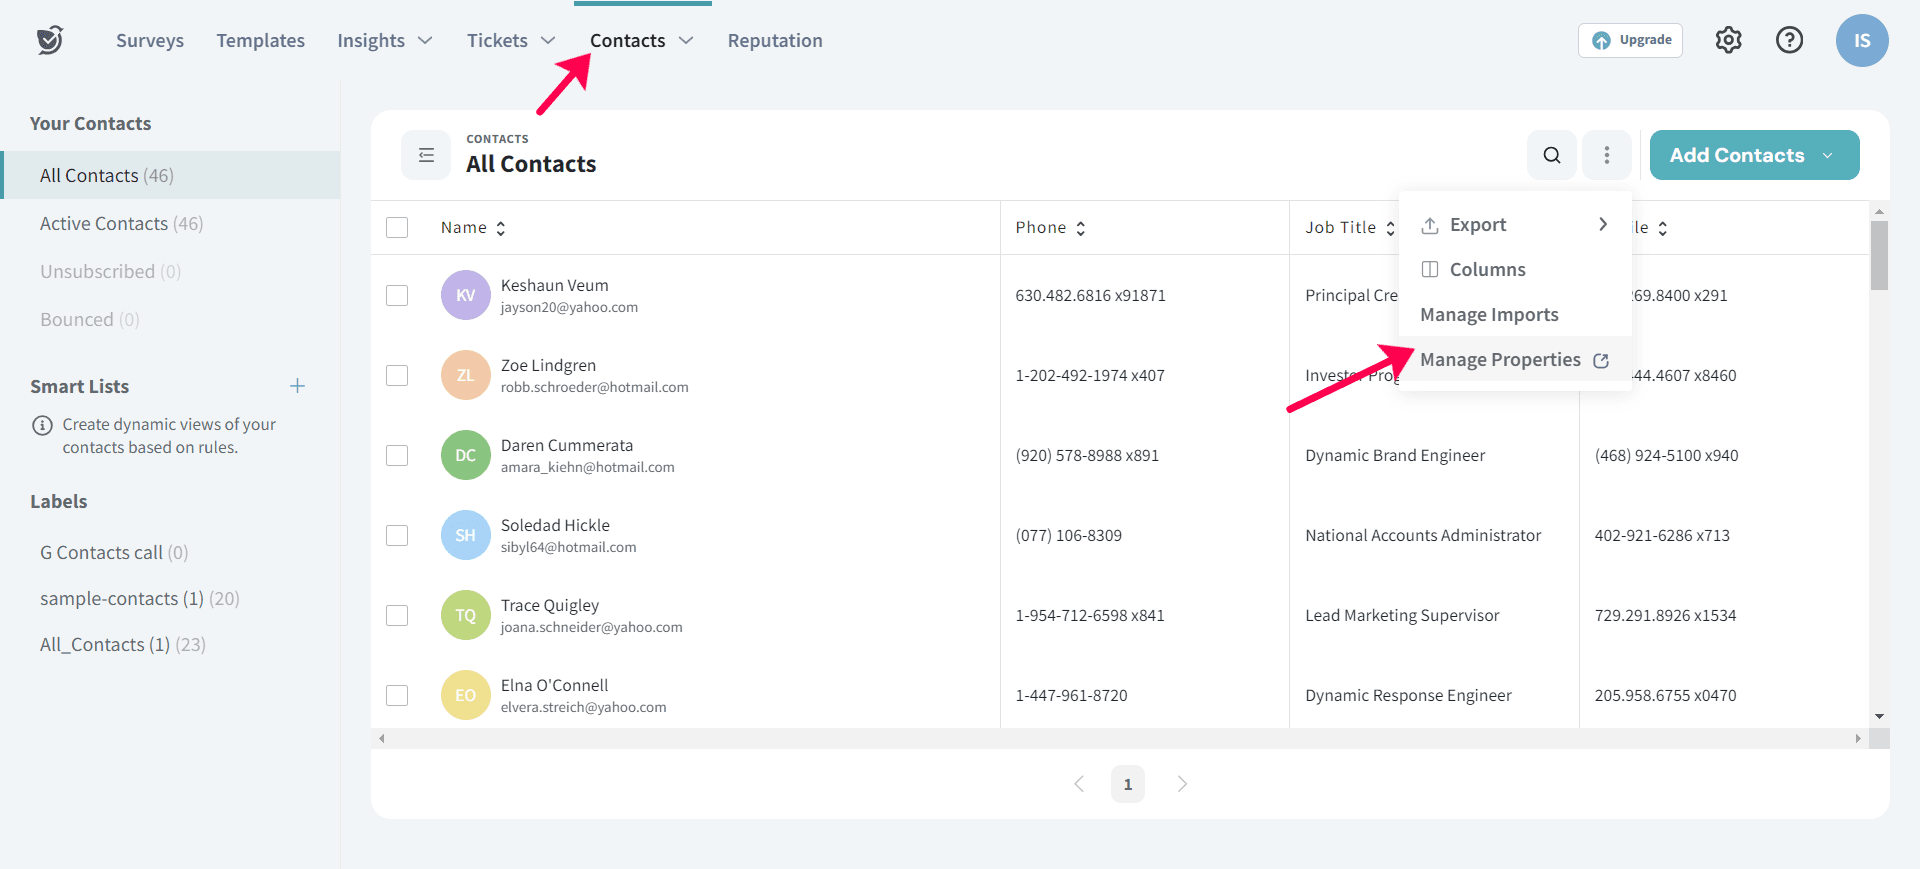
1. In the contacts page, select Manage Properties.
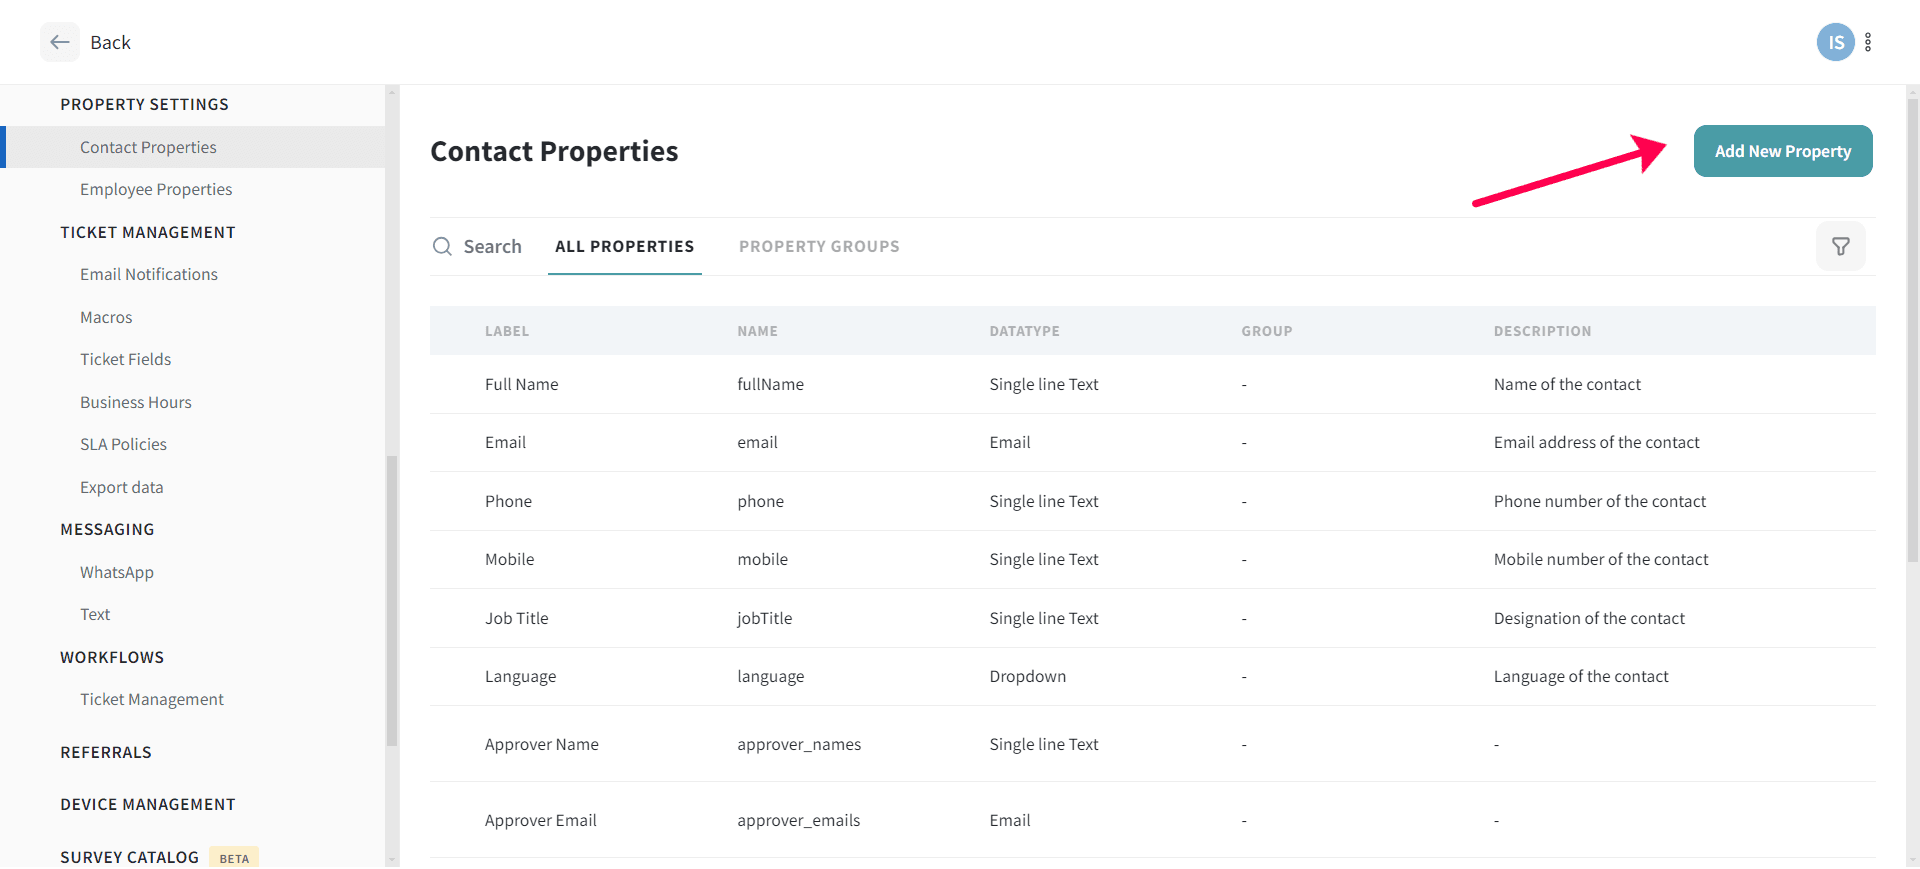
2. Select Add New Property.
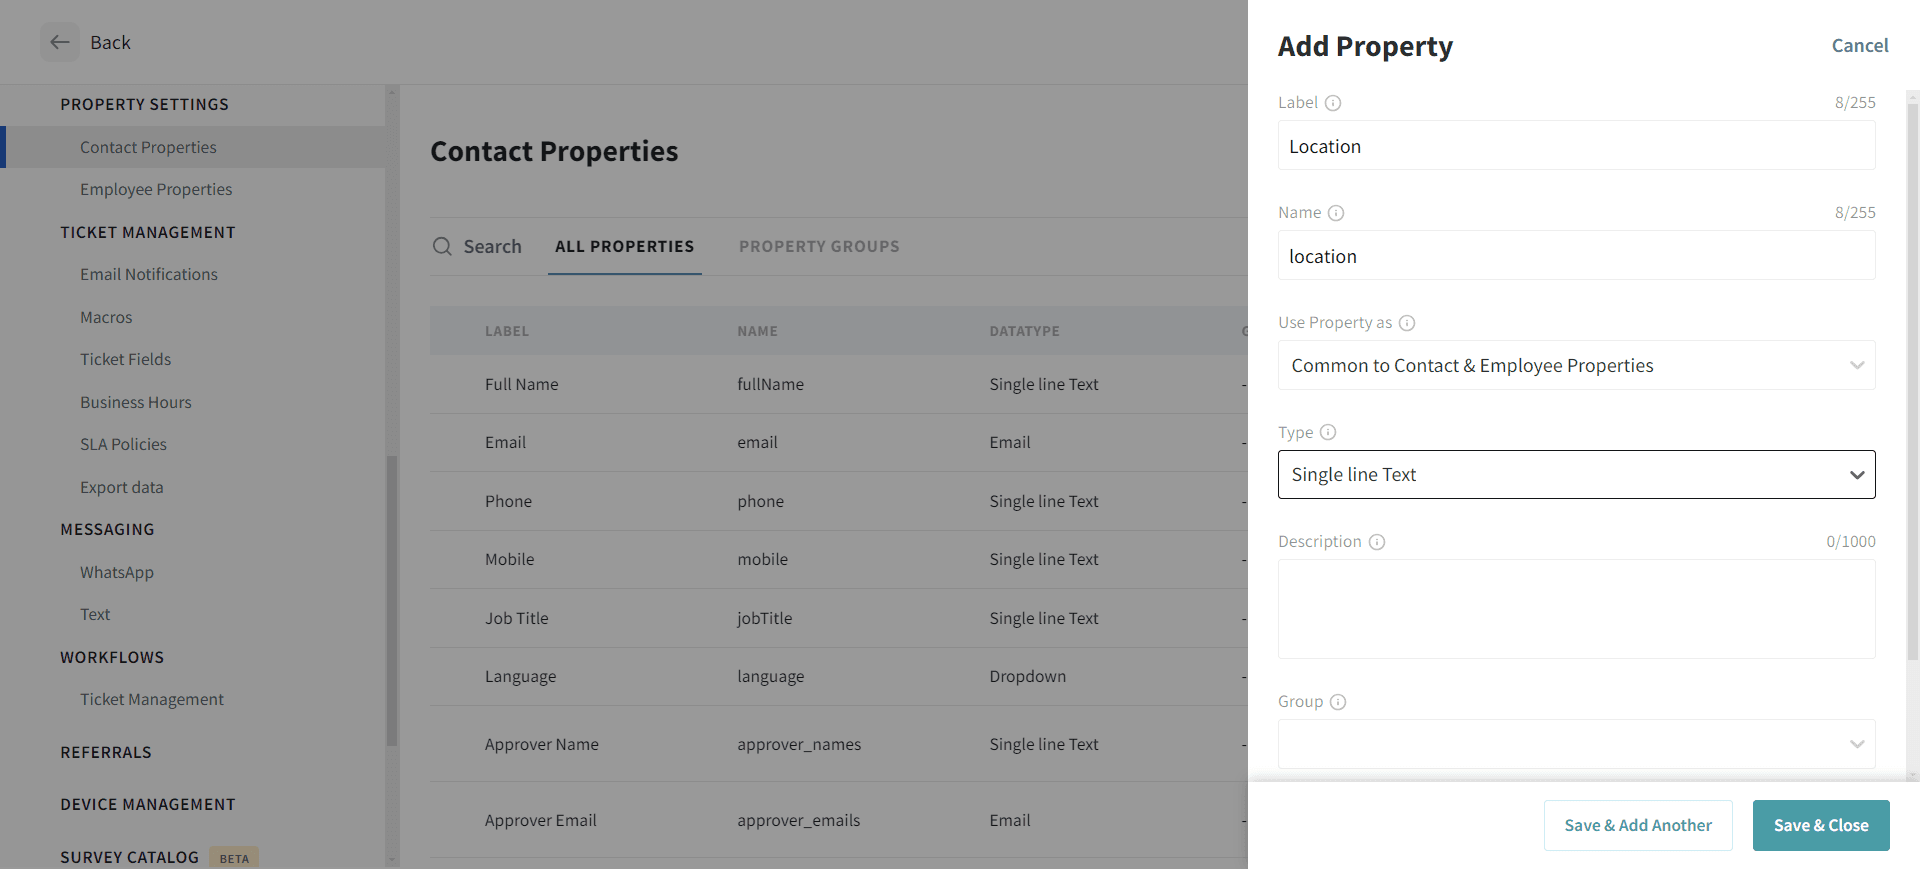
3. Specify the property name and the type of data the custom property will store. Click Save.
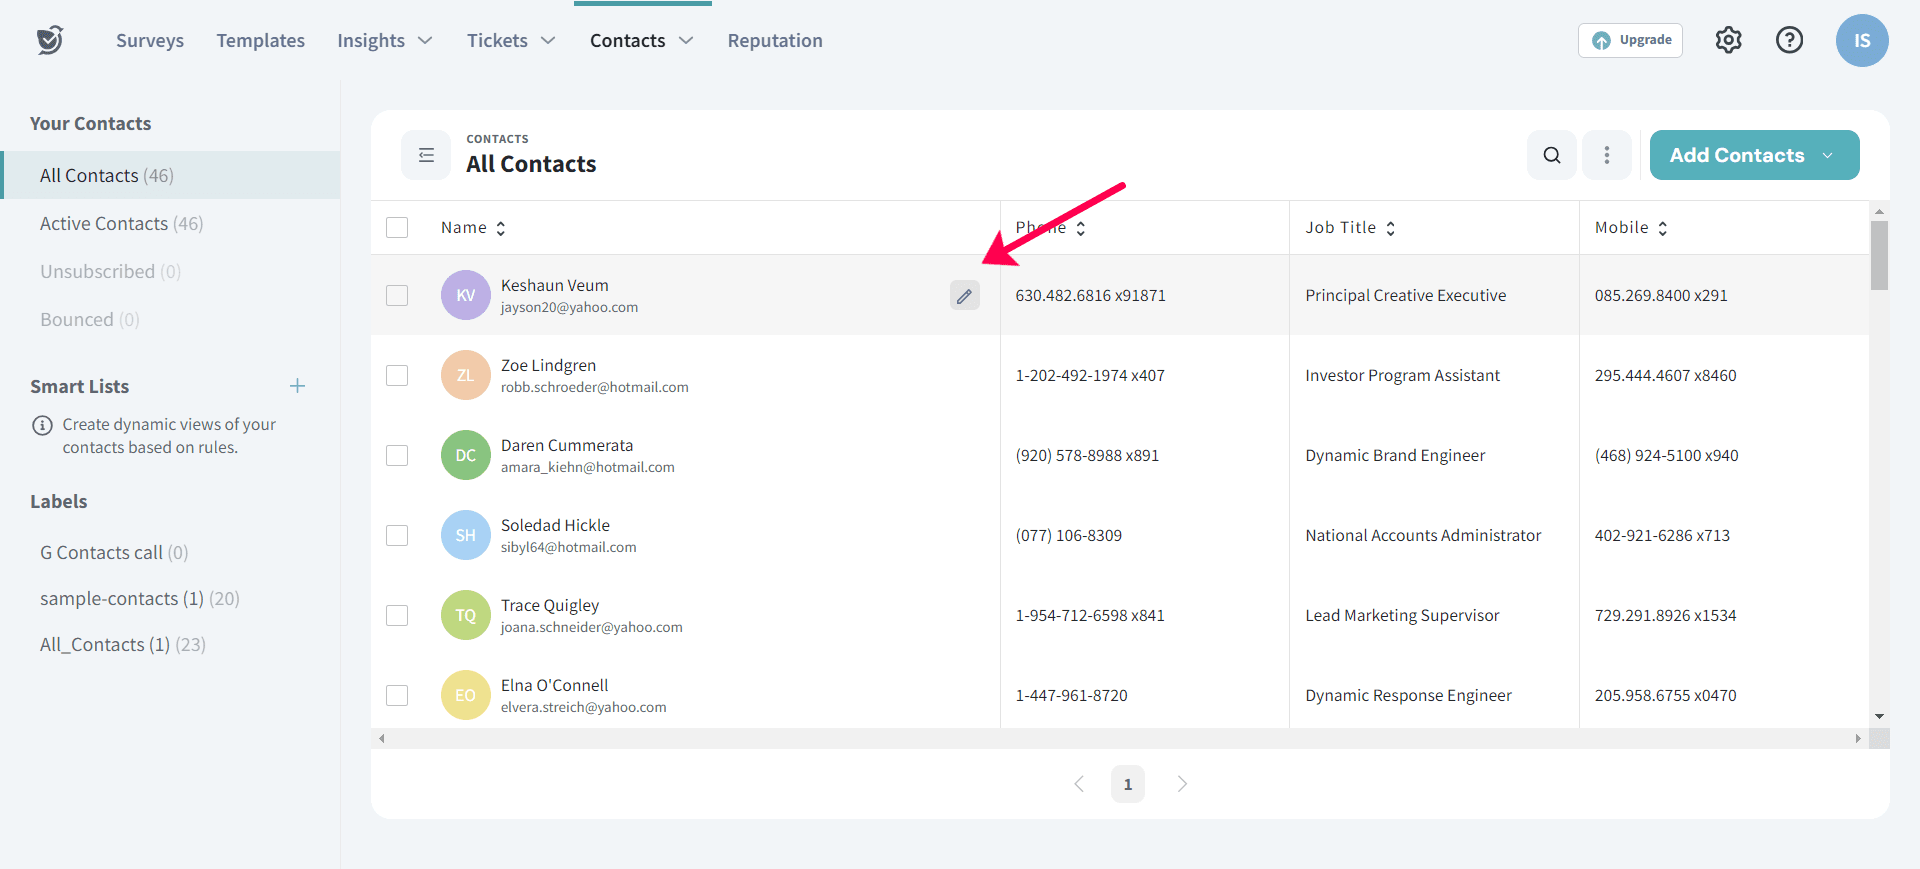
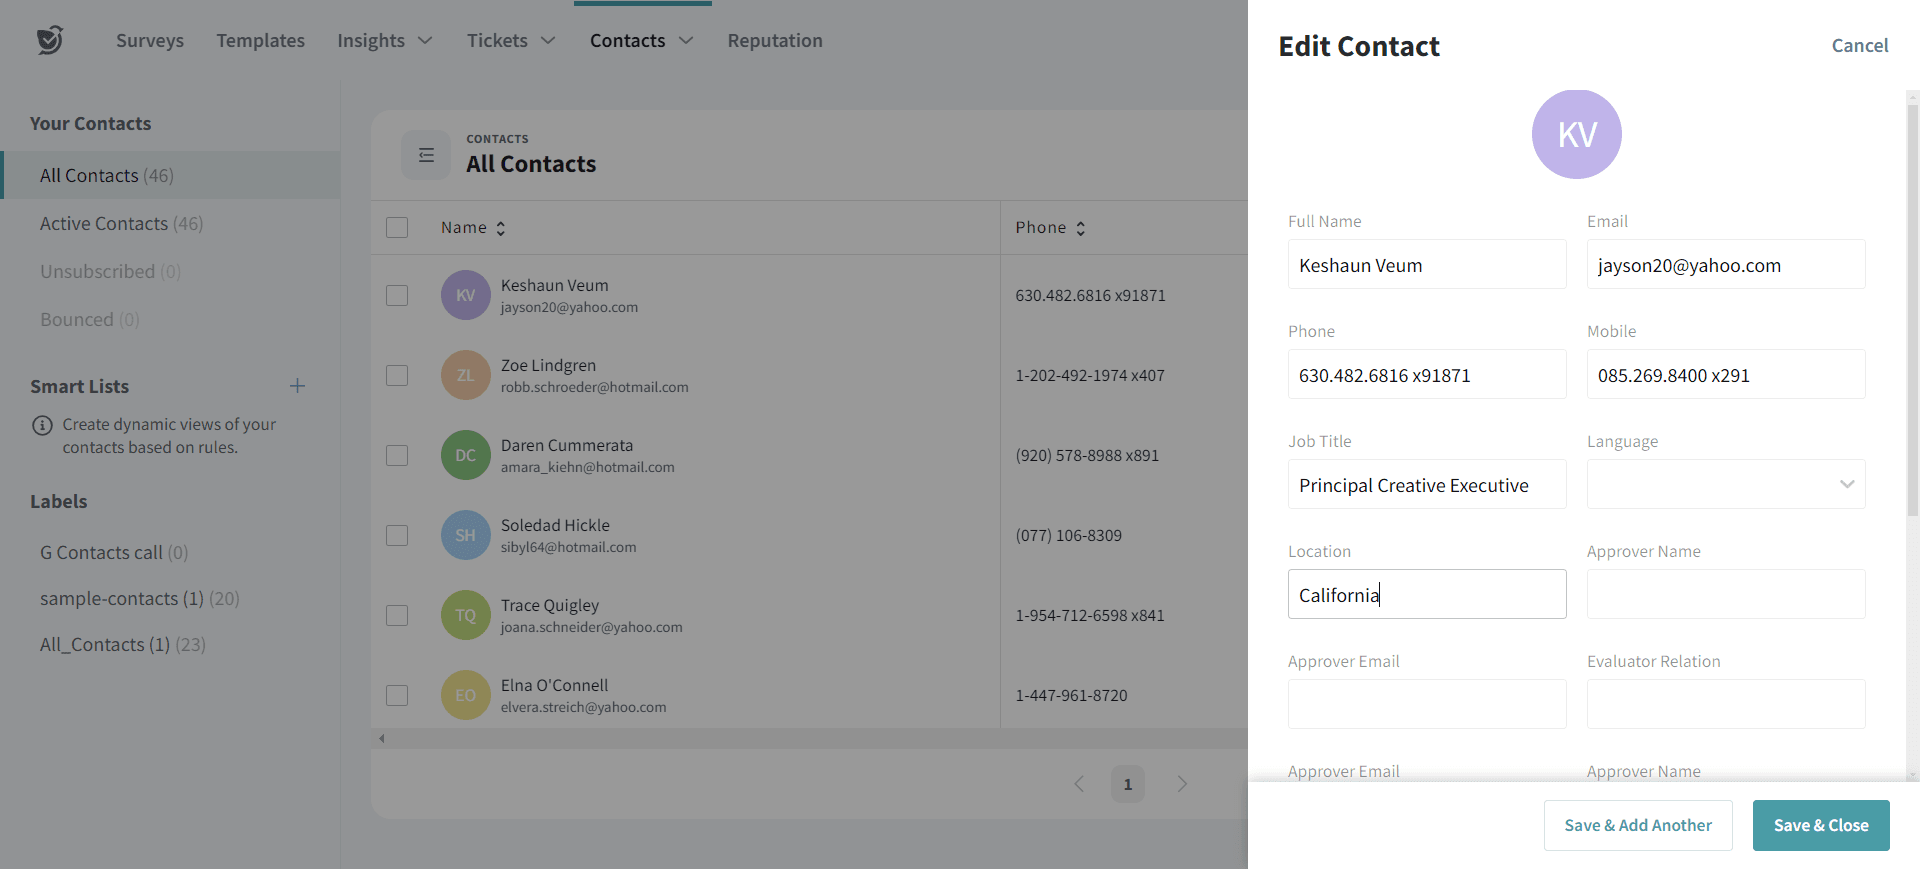
4. Go back to the contacts page and hover over your contacts to find the edit icon at the end.
5. Go to the newly added property and fill in all the required details.
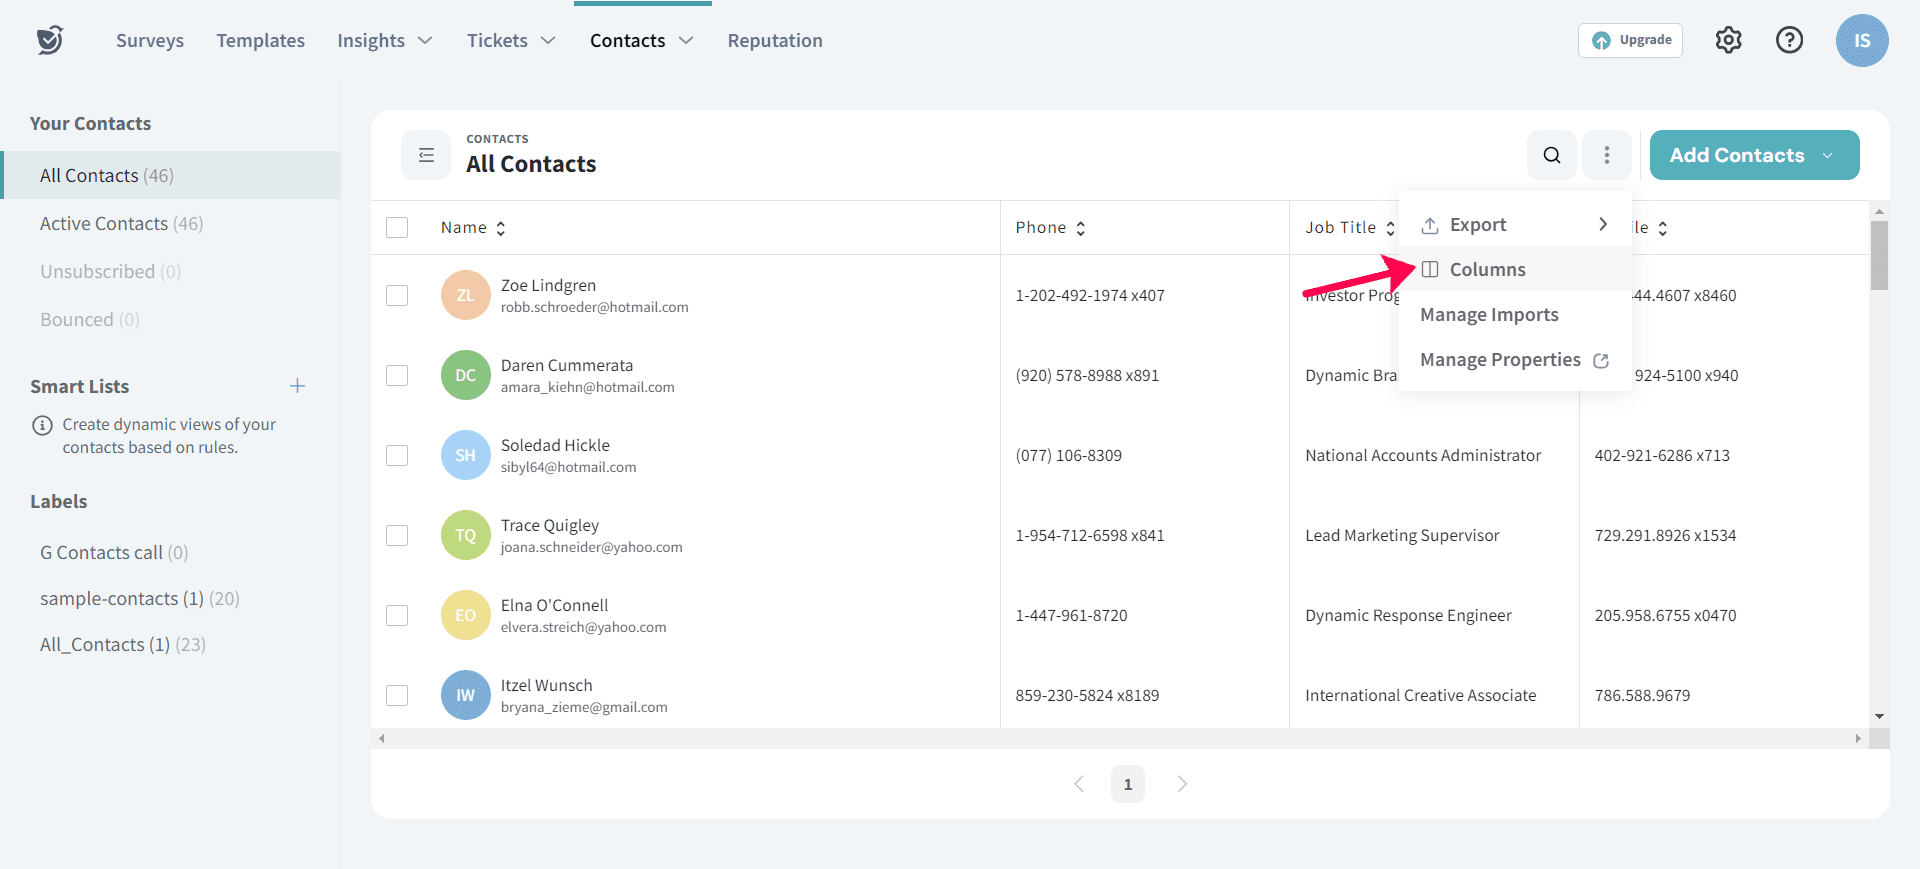
6. Once you have added the properties to each contact, click on Columns.
7. Select the contact properties that you want to show and proceed.
Please reach out to us if you have any questions. We are just a chat away!
Powered By SparrowDesk