Search
When you send out your survey by email, the default email address the survey is sent with has SurveySparrow's domain (For example, [email protected]). But, if you wish to have a custom domain for the email address instead, like [email protected] or [email protected], you can do it with ease.
By following the below steps, you can put across your organization's domain while sending out surveys offering a more personalized experience.
Steps to configure custom email address:
1. Sign in to your SurveySparrow account.
2. On your account home page, click Settings, and under Email Settings, go to Email.
3. Click New Email.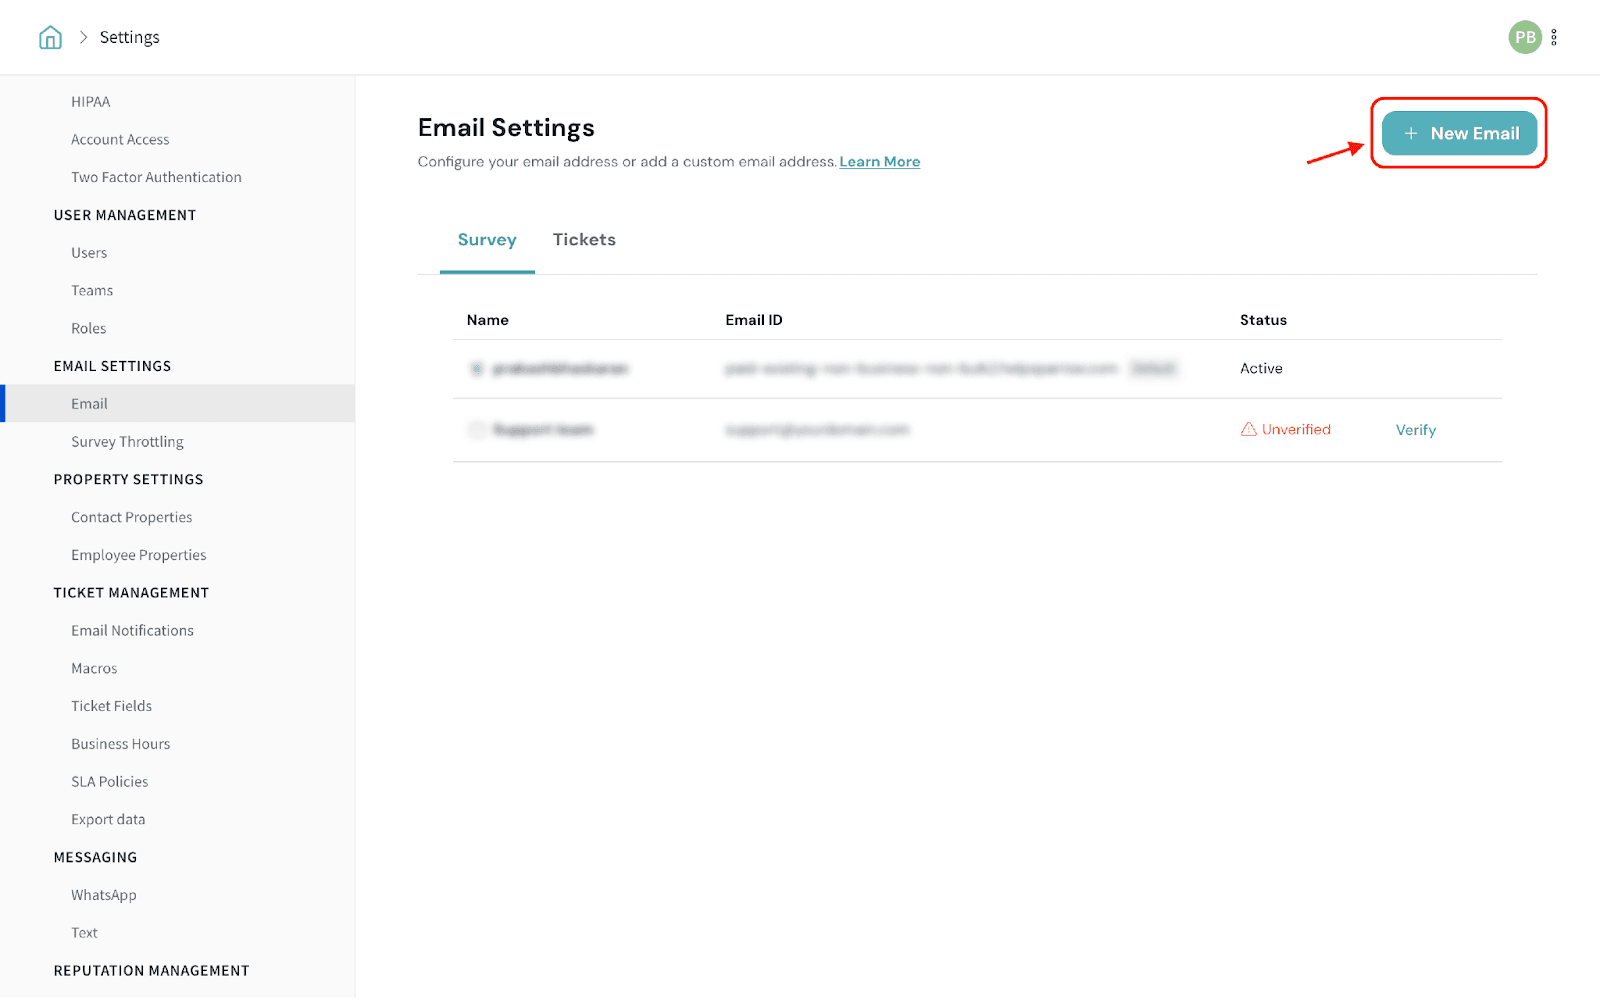
4. Choose the mode of adding your custom email address. At present, you can connect in the following ways:
To send emails through SurveySparrow, click Email via SurveySparrow.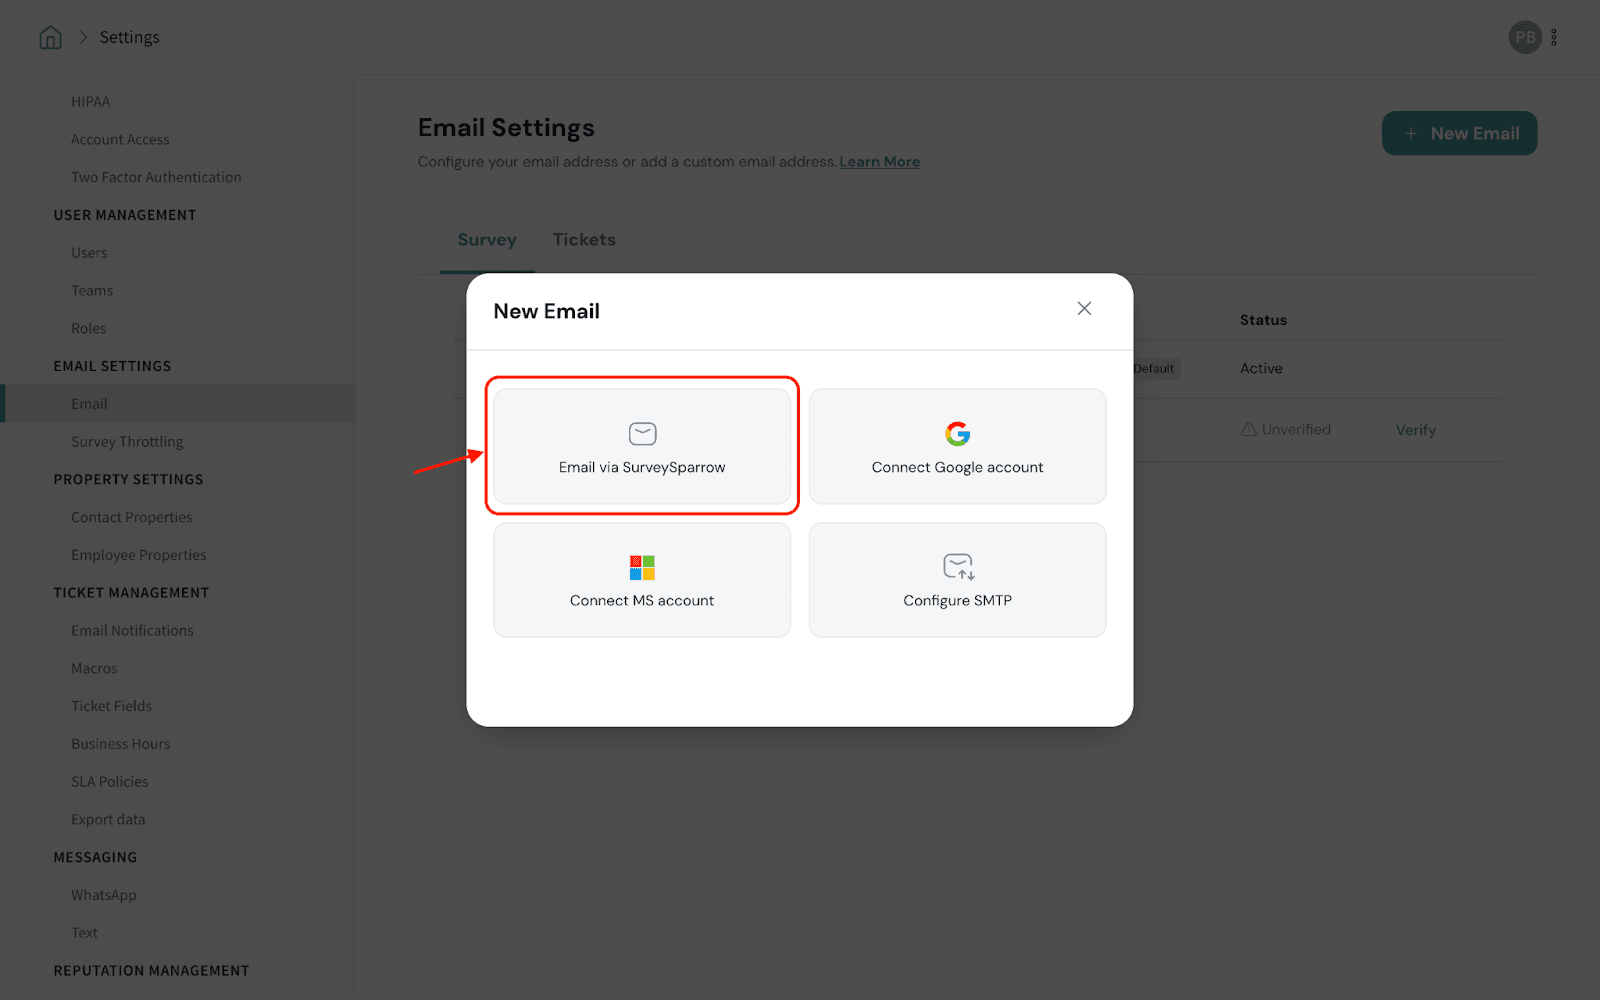
5. Enter the sender name and email.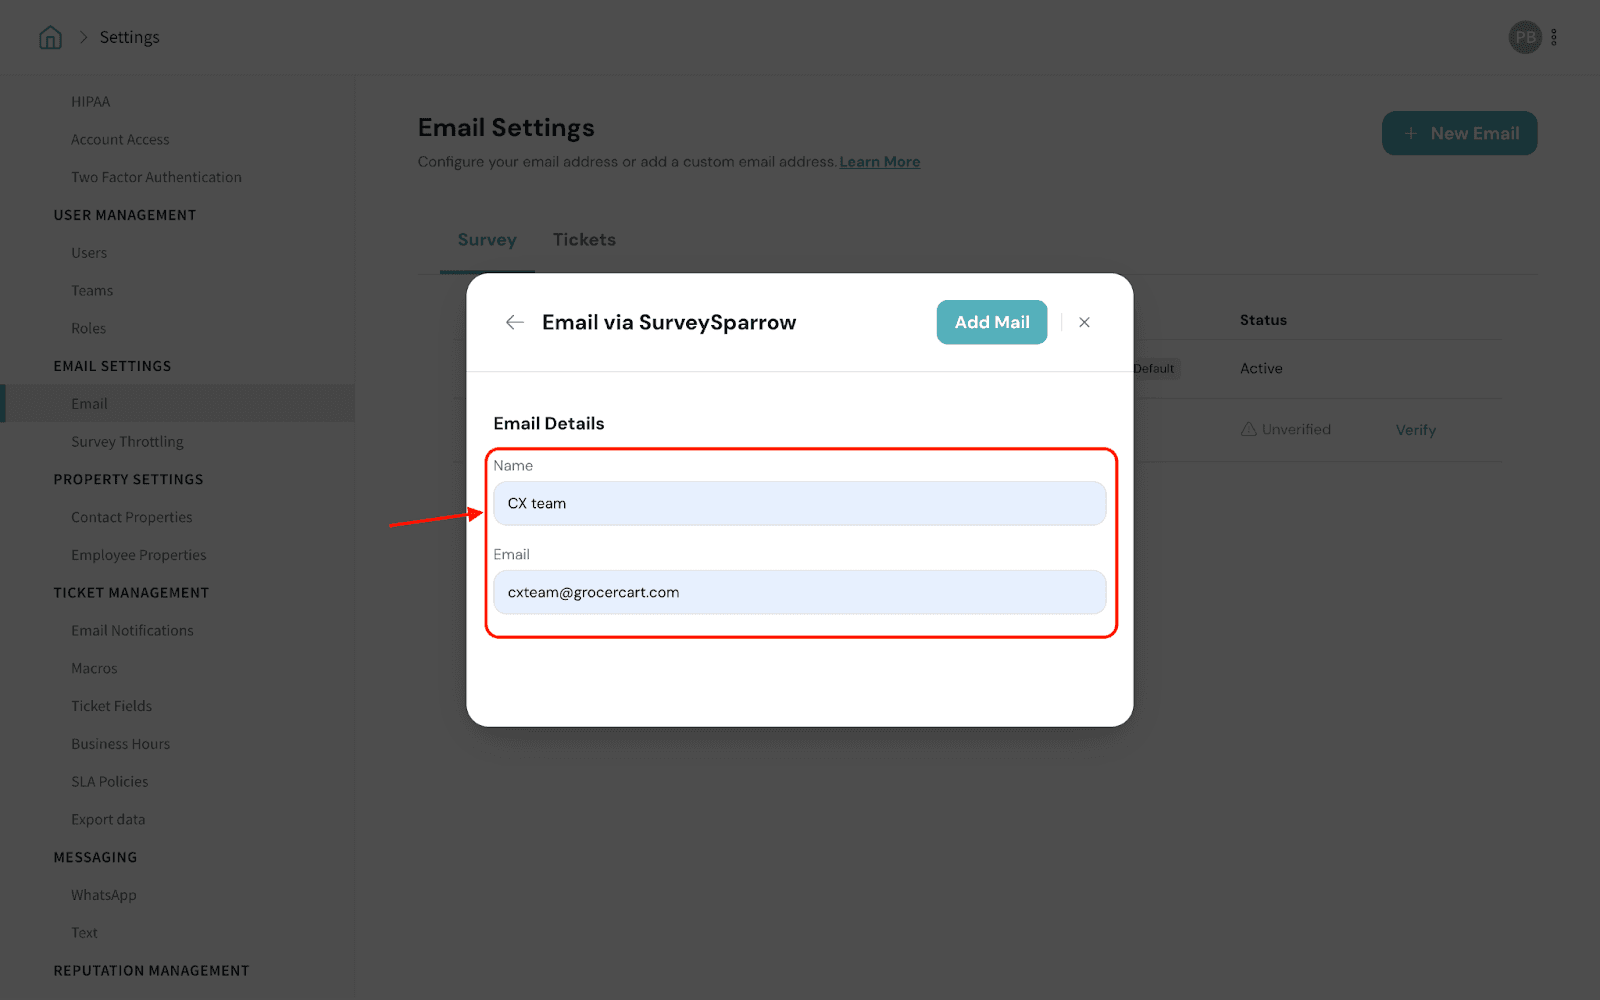
6. Click Add Mail.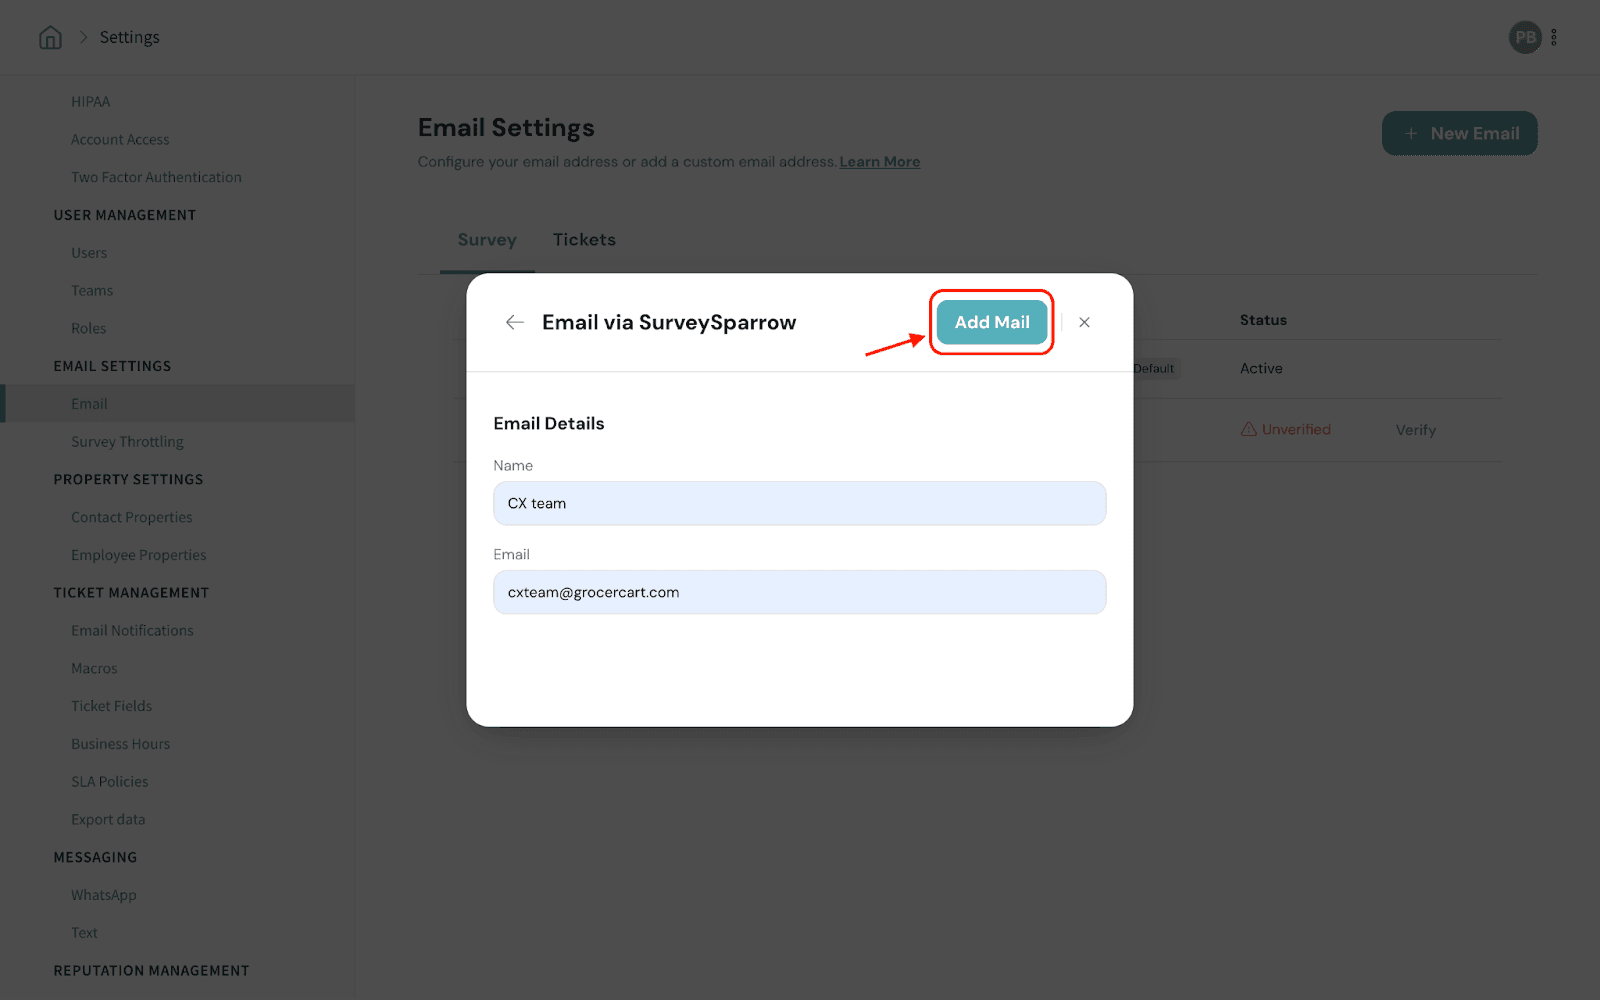
7. Click Send verification email and verify your custom email address from its inbox.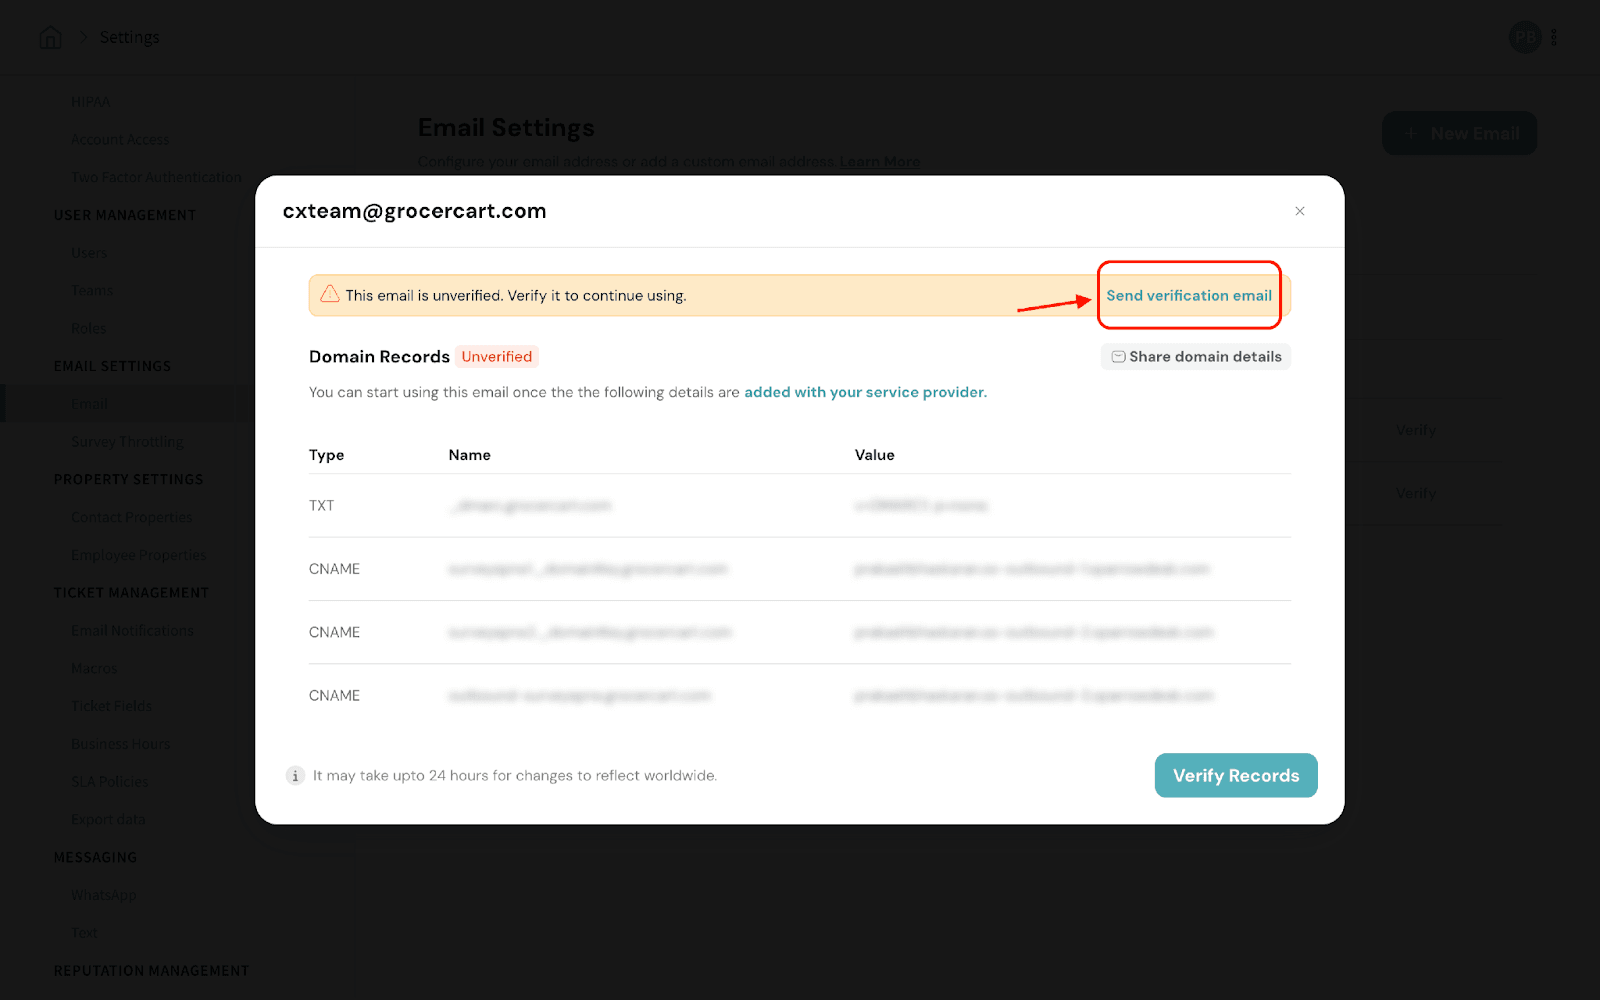
8. Proceed adding the DNS records for your customer email address. Click Share domain details.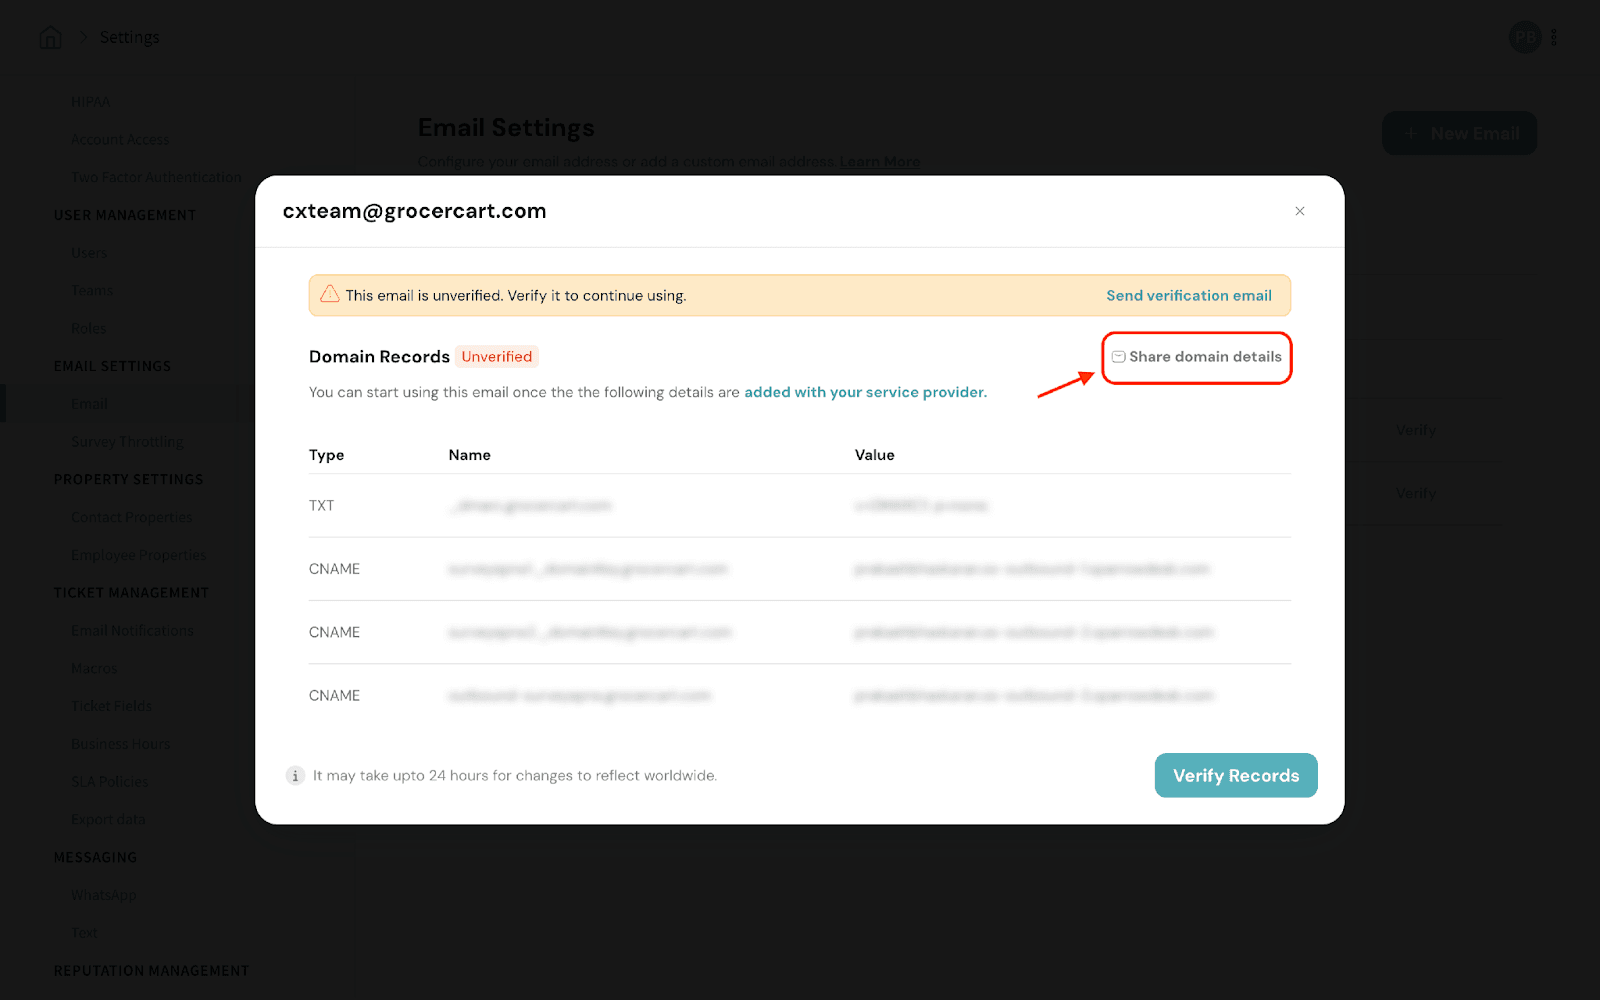
9. Enter the email address for your IT admin to send them the DNS records to be added.
10. Click Send.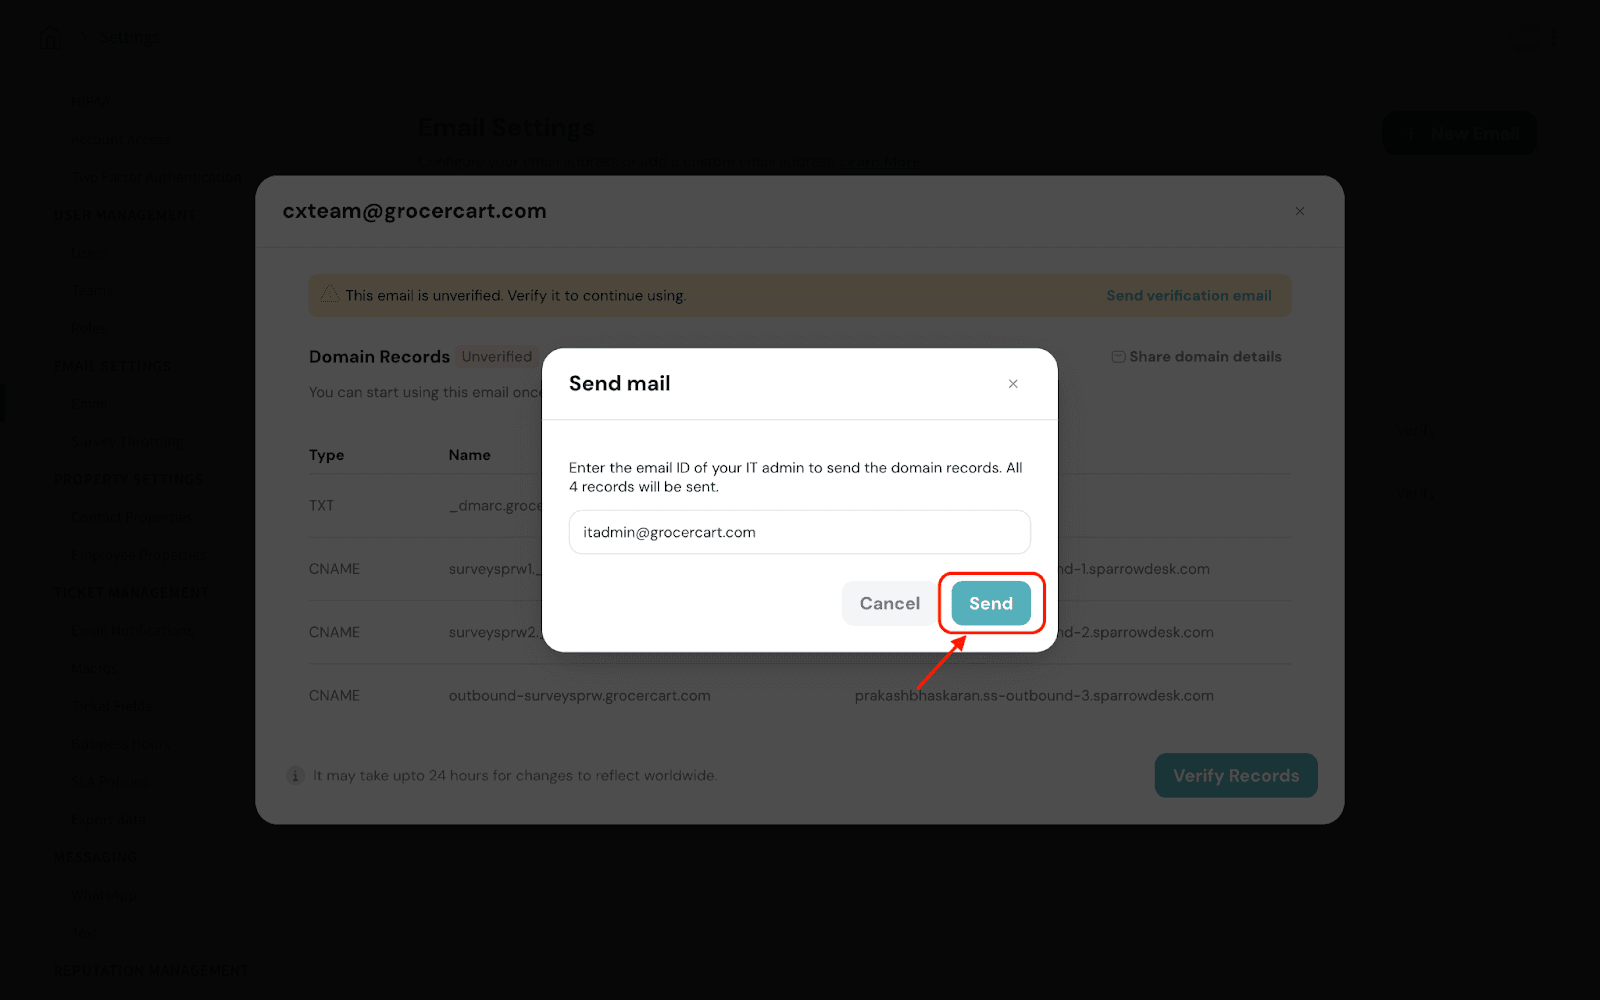
Now, reach out to your IT admin or the concerned team to add the domain records to your DNS.
1. Sign in to the domain provider account and open administrator tools.
2. Go to the DNS settings. Select Manage DNS to access your DNS records.
3. Under DNS management, there will be DNS records that are already available.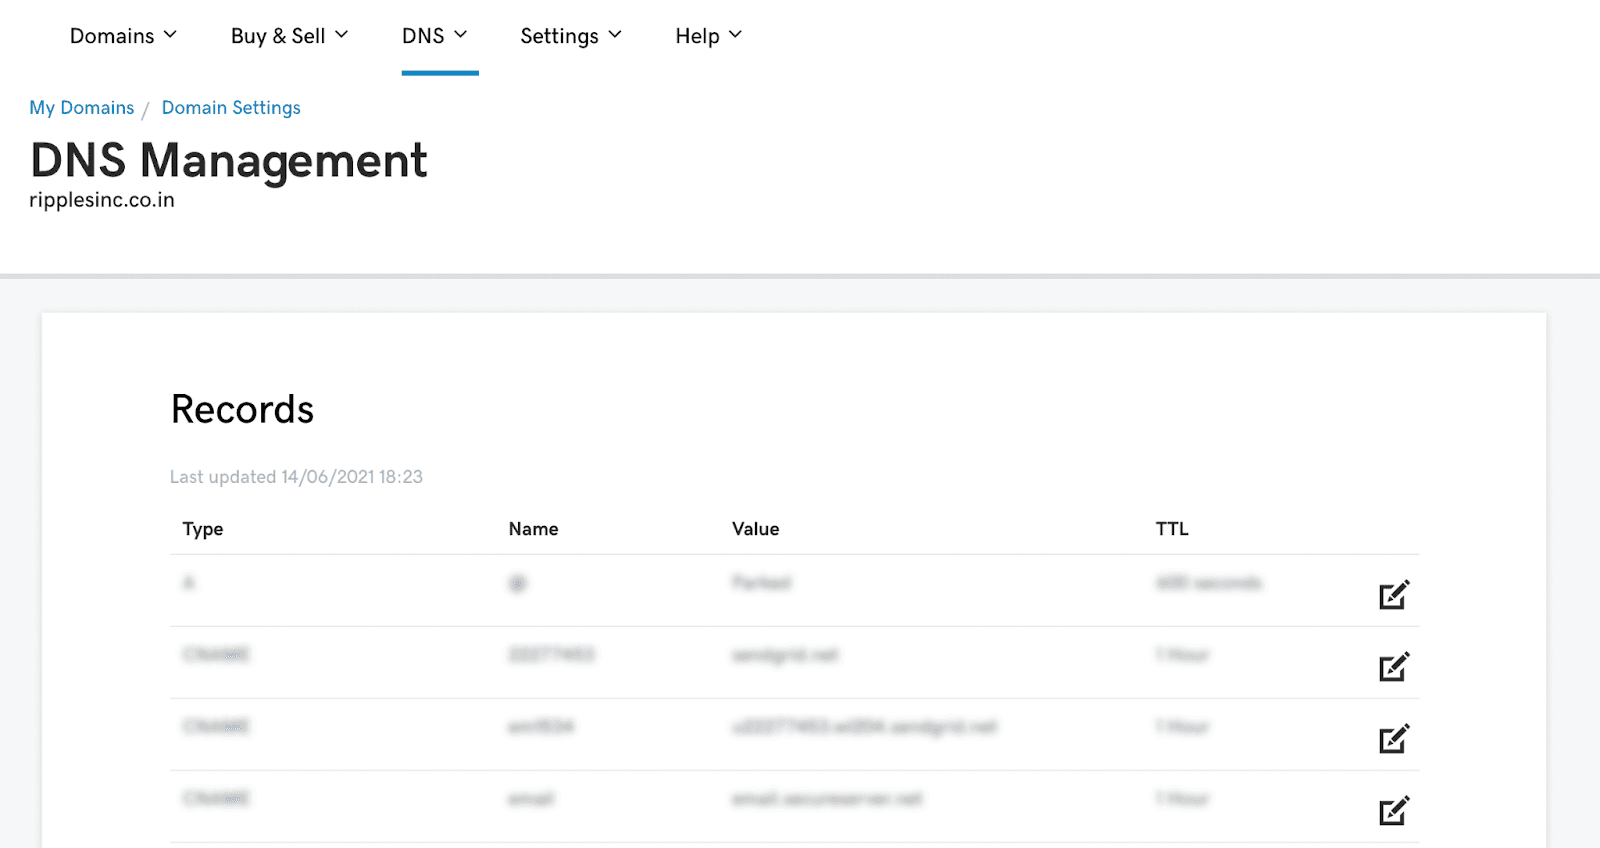
5. On your DNS, add a new record of the type as generated in SurveySparrow for your custom email address. Enter the Name and Value details copied from your SurveySparrow account on Record name/Host and Value, respectively.
6. Click Save.
1. Head back to your SurveySparrow account and navigate to your account’s Email Settings.
2. Click Verify against the added custom email address.
3. Click the 3-dot icon and select Set as Default to make the email address your default email for sharing surveys.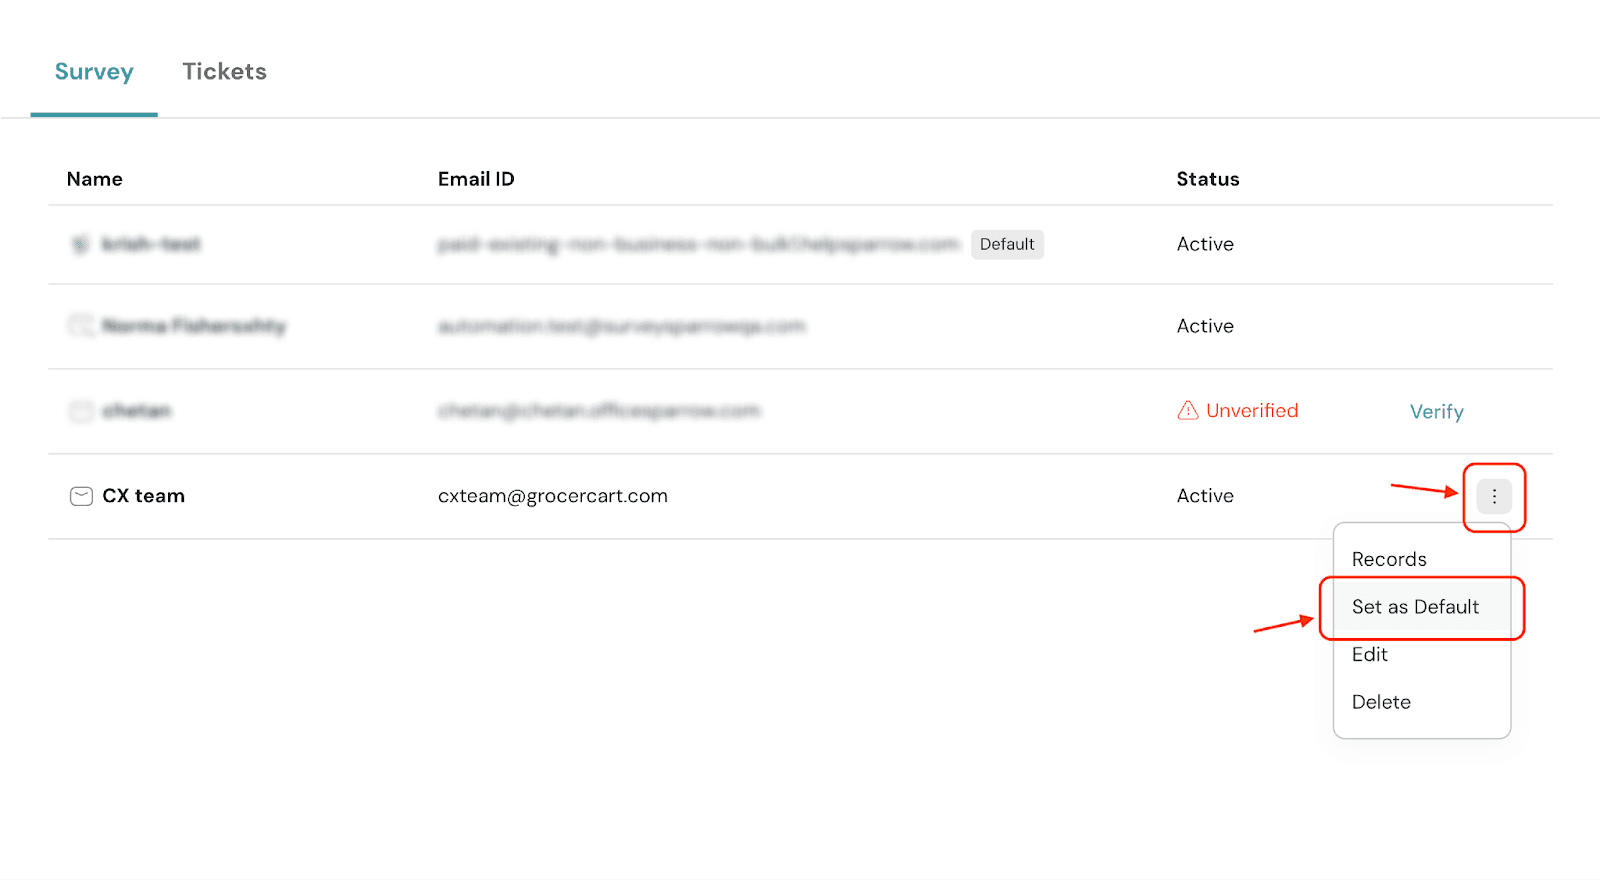
4. You can add multiple entries in this section in case of more than one custom mailbox.
5. After verifying the email and domain from the configured mailbox, the newly configured custom email addresses will reflect on your email shares on the Send From placeholder.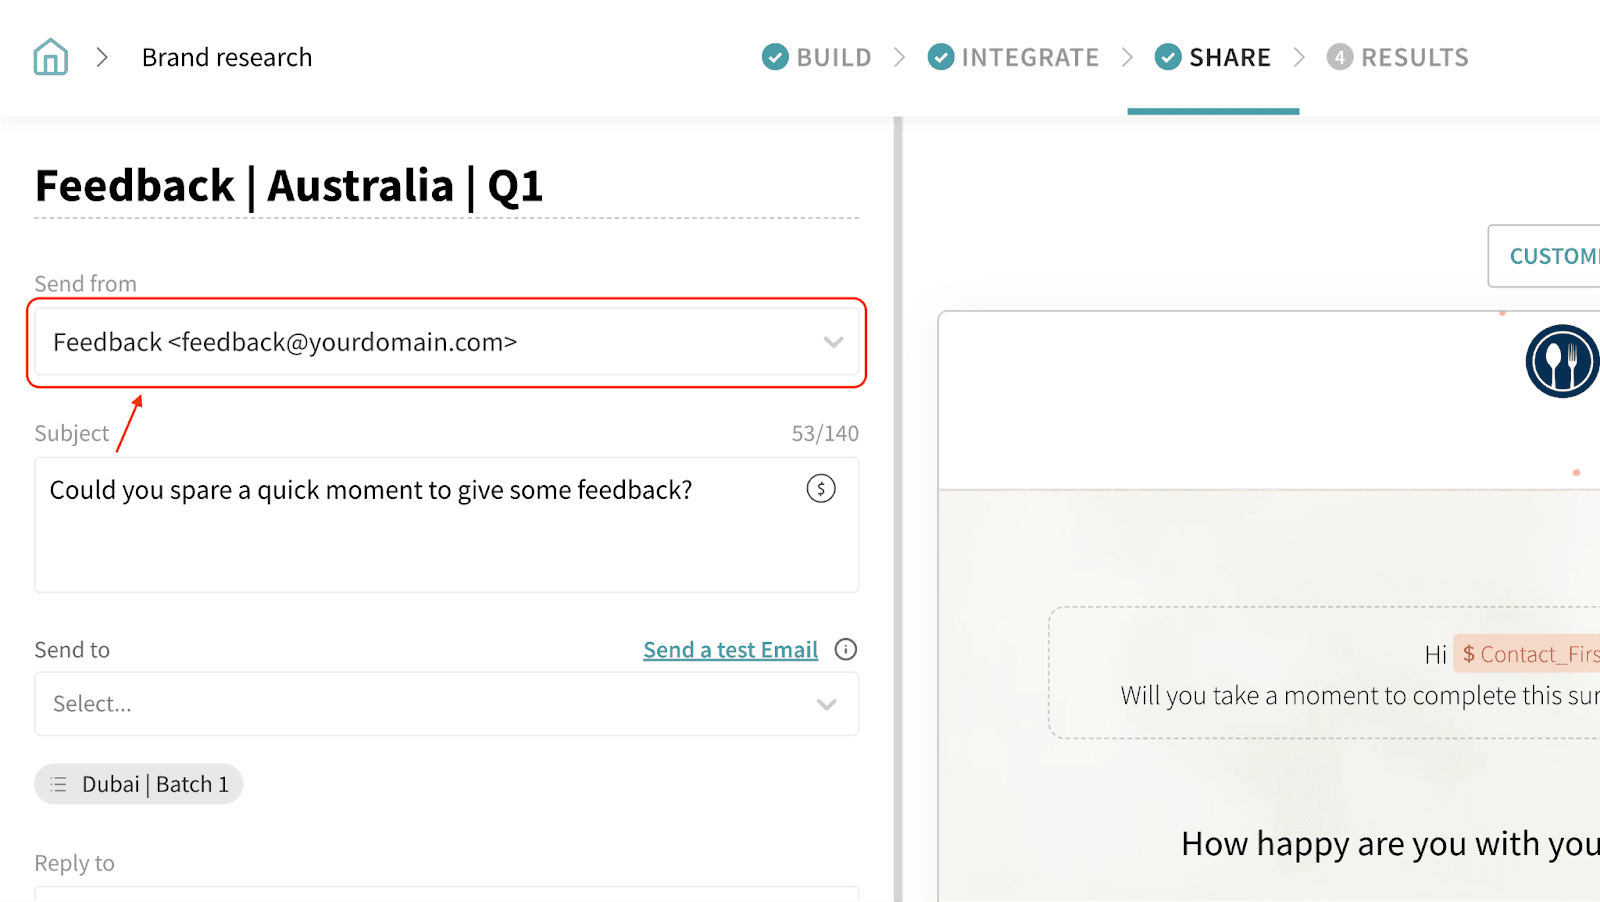
6. Now, you can send surveys from the custom email address of your choice!
Using this setup, you will have configured Send From email addresses to use in the email share based on a dropdown value. This will allow you to choose the best one when you have many support emails and employ your own email address to establish trust.
1. Navigate to your account’s email settings.
2. Click the 3-dot icon against the custom email address and click Records.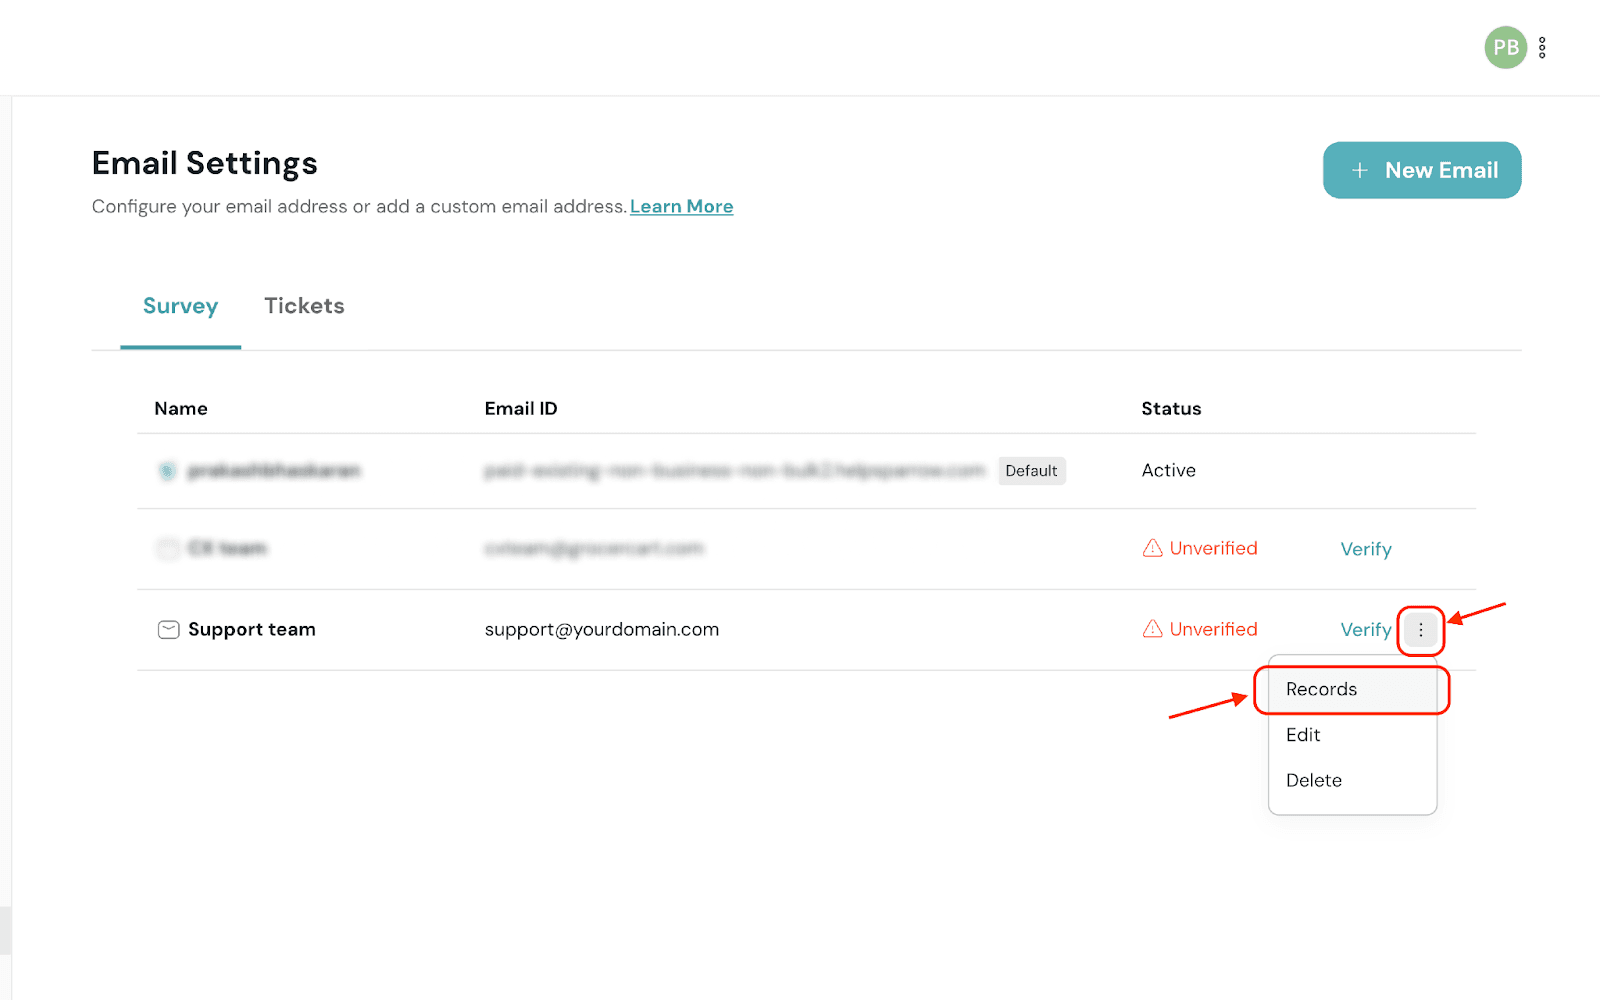
3. Click Share domain details.
4. Enter the email address for your IT admin to send them the updated DNS records to be added.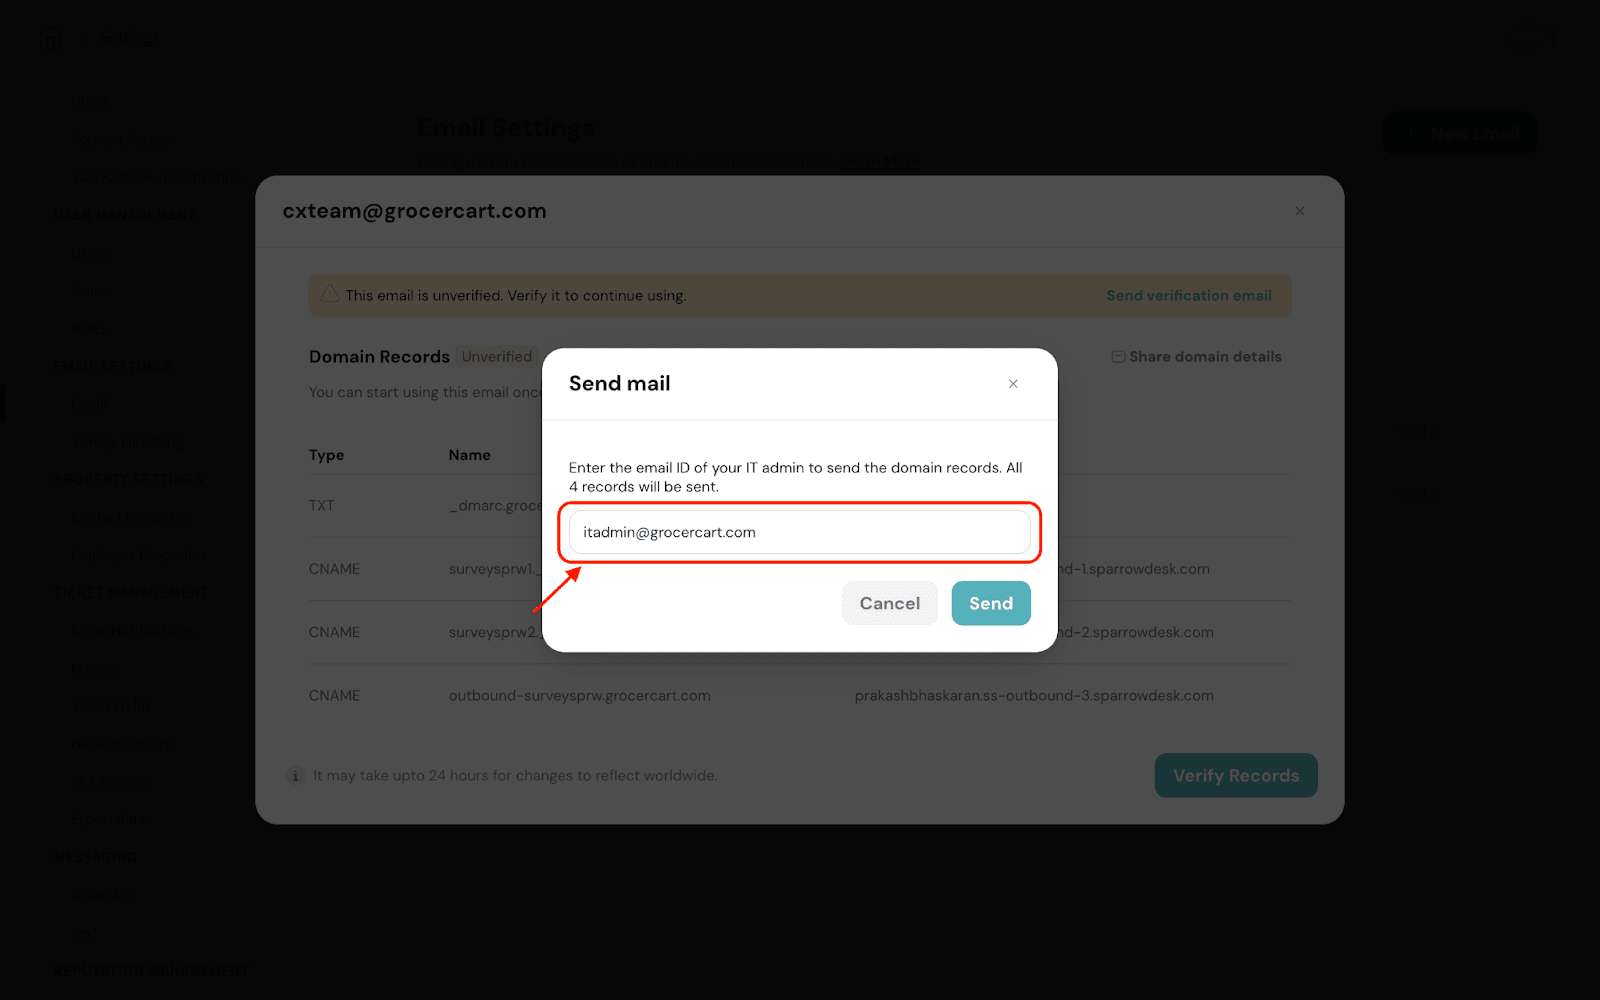
5. Click Send.
Now, proceed adding the DNS records as explained in this article.
That’s it! Feel free to reach out to our community if you have any questions. We’re always here to help
Powered By SparrowDesk