Search
Azure SQL Database is Microsoft’s fully managed relational PaaS database service (built on SQL Server) that automatically scales, handles high availability, and securely stores structured transactional data for fast operational queries.
Unlike Azure Synapse Analytics (with which SurveySparrow also integrates), Azure SQL Database is purpose-built for real-time OLTP workloads and application data rather than large-scale data warehousing and advanced analytics.
SurveySparrow’s integration automatically sends your survey responses straight into your Azure SQL Database—no manual CSV exports, no spreadsheets, and no custom coding required. To allow specific responses, you can create conditional filters, including date filters.
Once set up, every new response (or all your past responses) flows directly into a table you choose, exactly when you want it.
Some valuable use cases include:
In this article, we’ll walk you through connecting your SurveySparrow account to Azure SQL and setting up powerful response mappings from start to finish, specifically:
1. Inside your SurveySparrow account, click on the settings icon.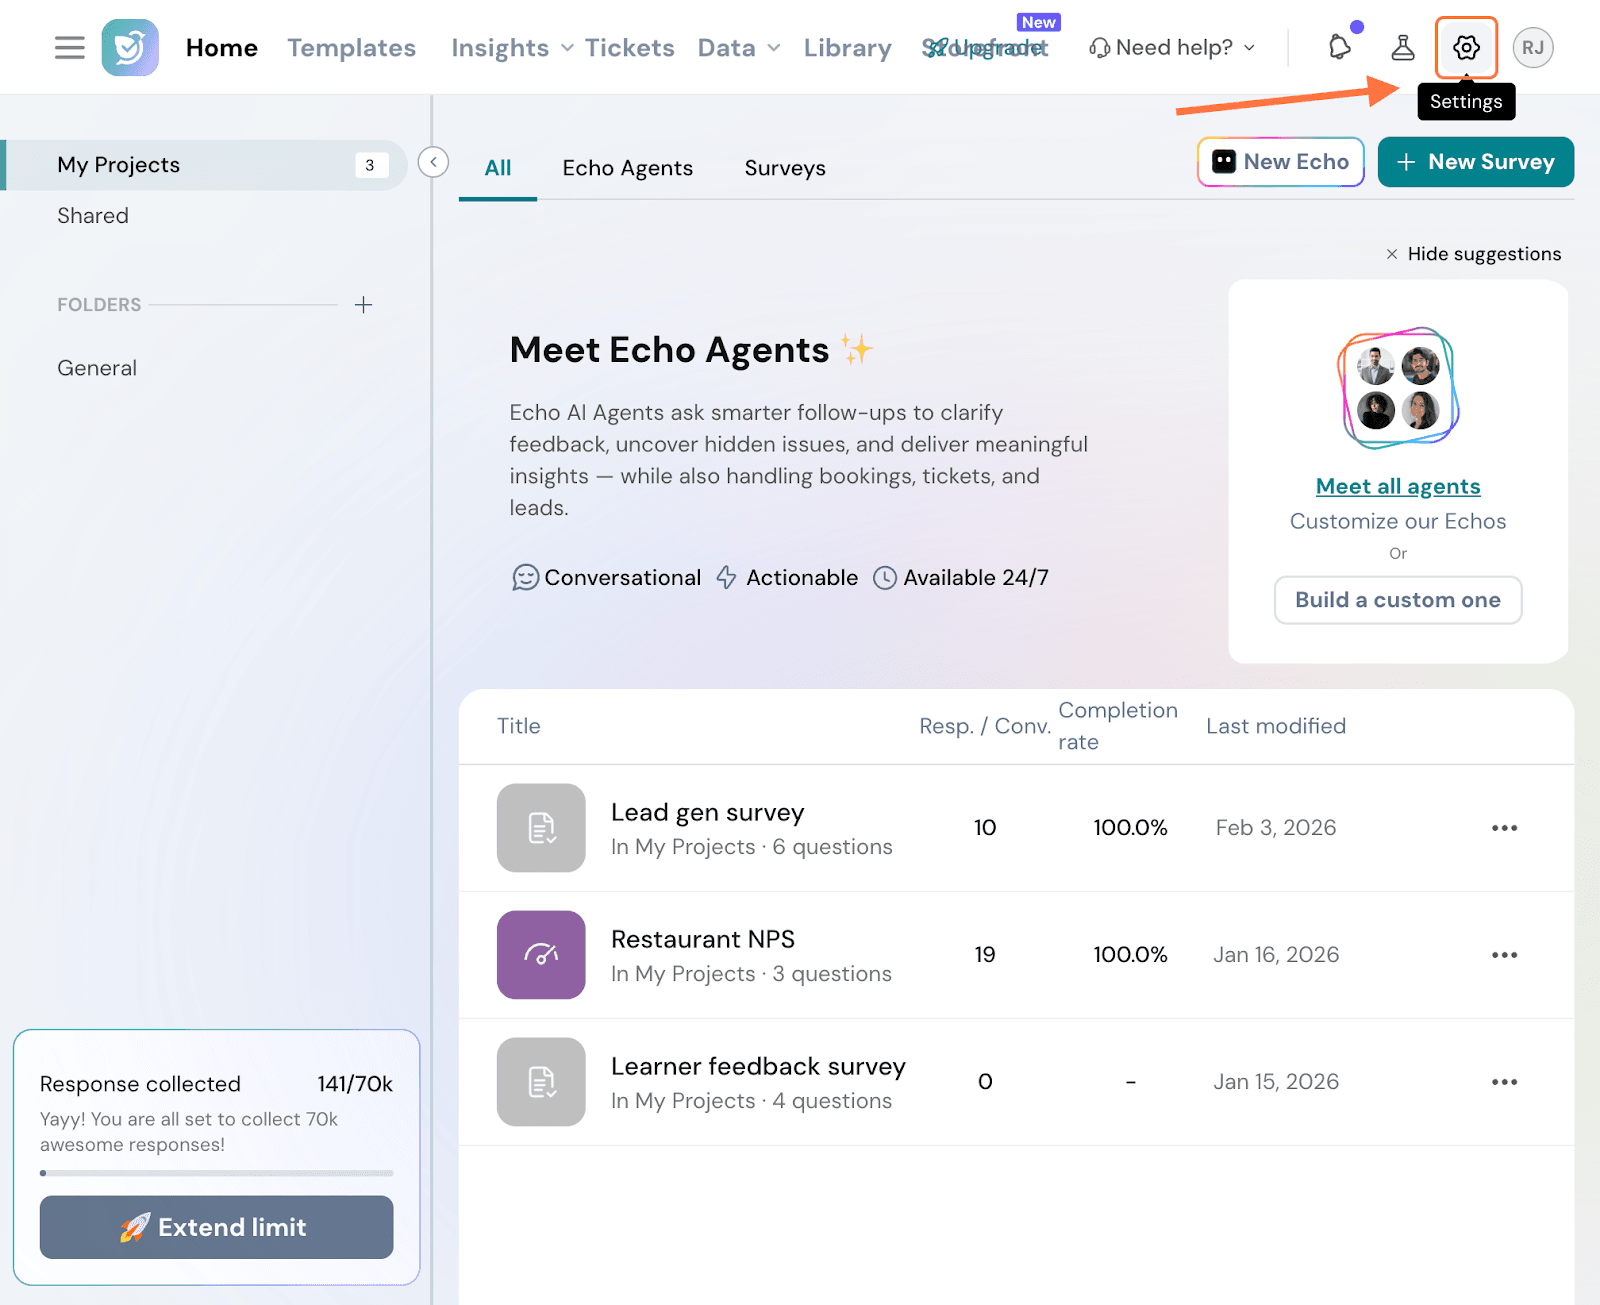
2. Scroll down the left panel in the settings page till you see the Apps and Integrations option, then click on it.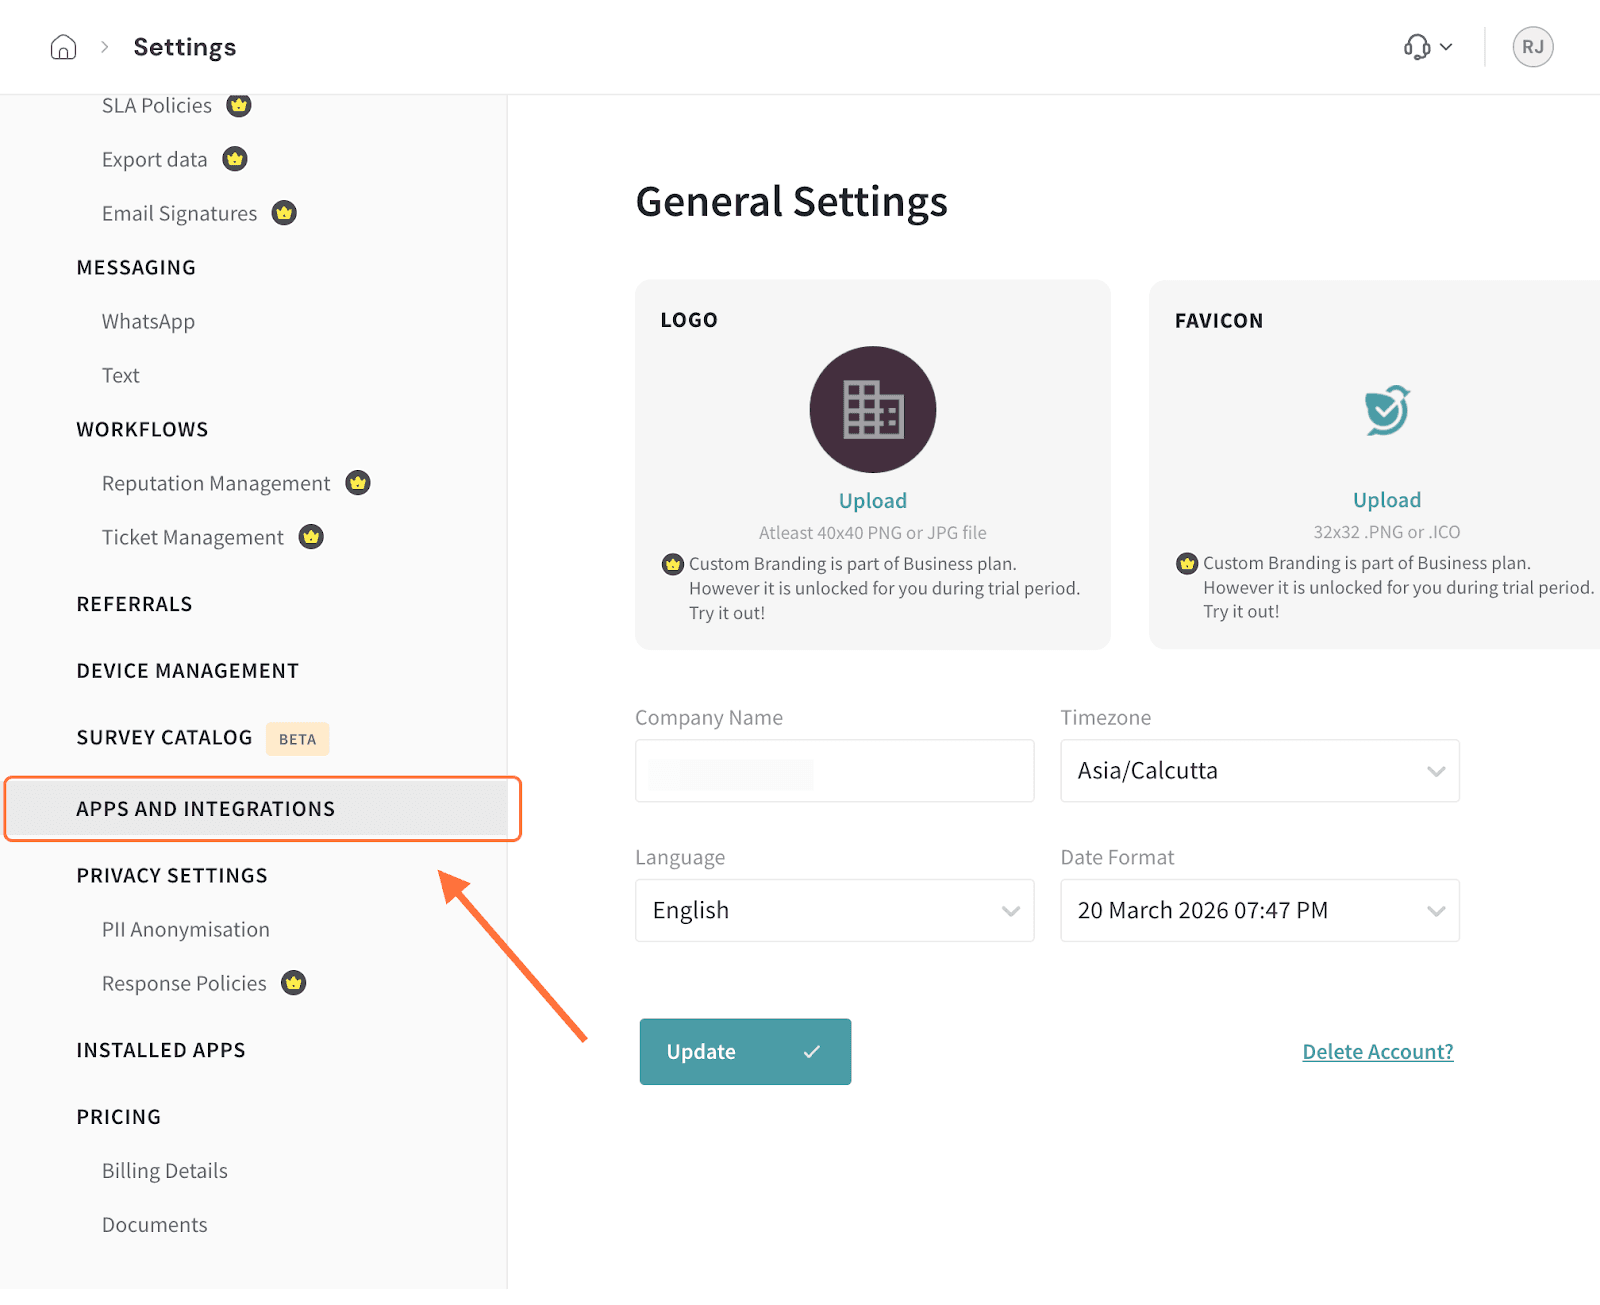
3. Search for the Azure SQL integration using the search box (or scrolling through the integrations), then click on the toggle when you see it.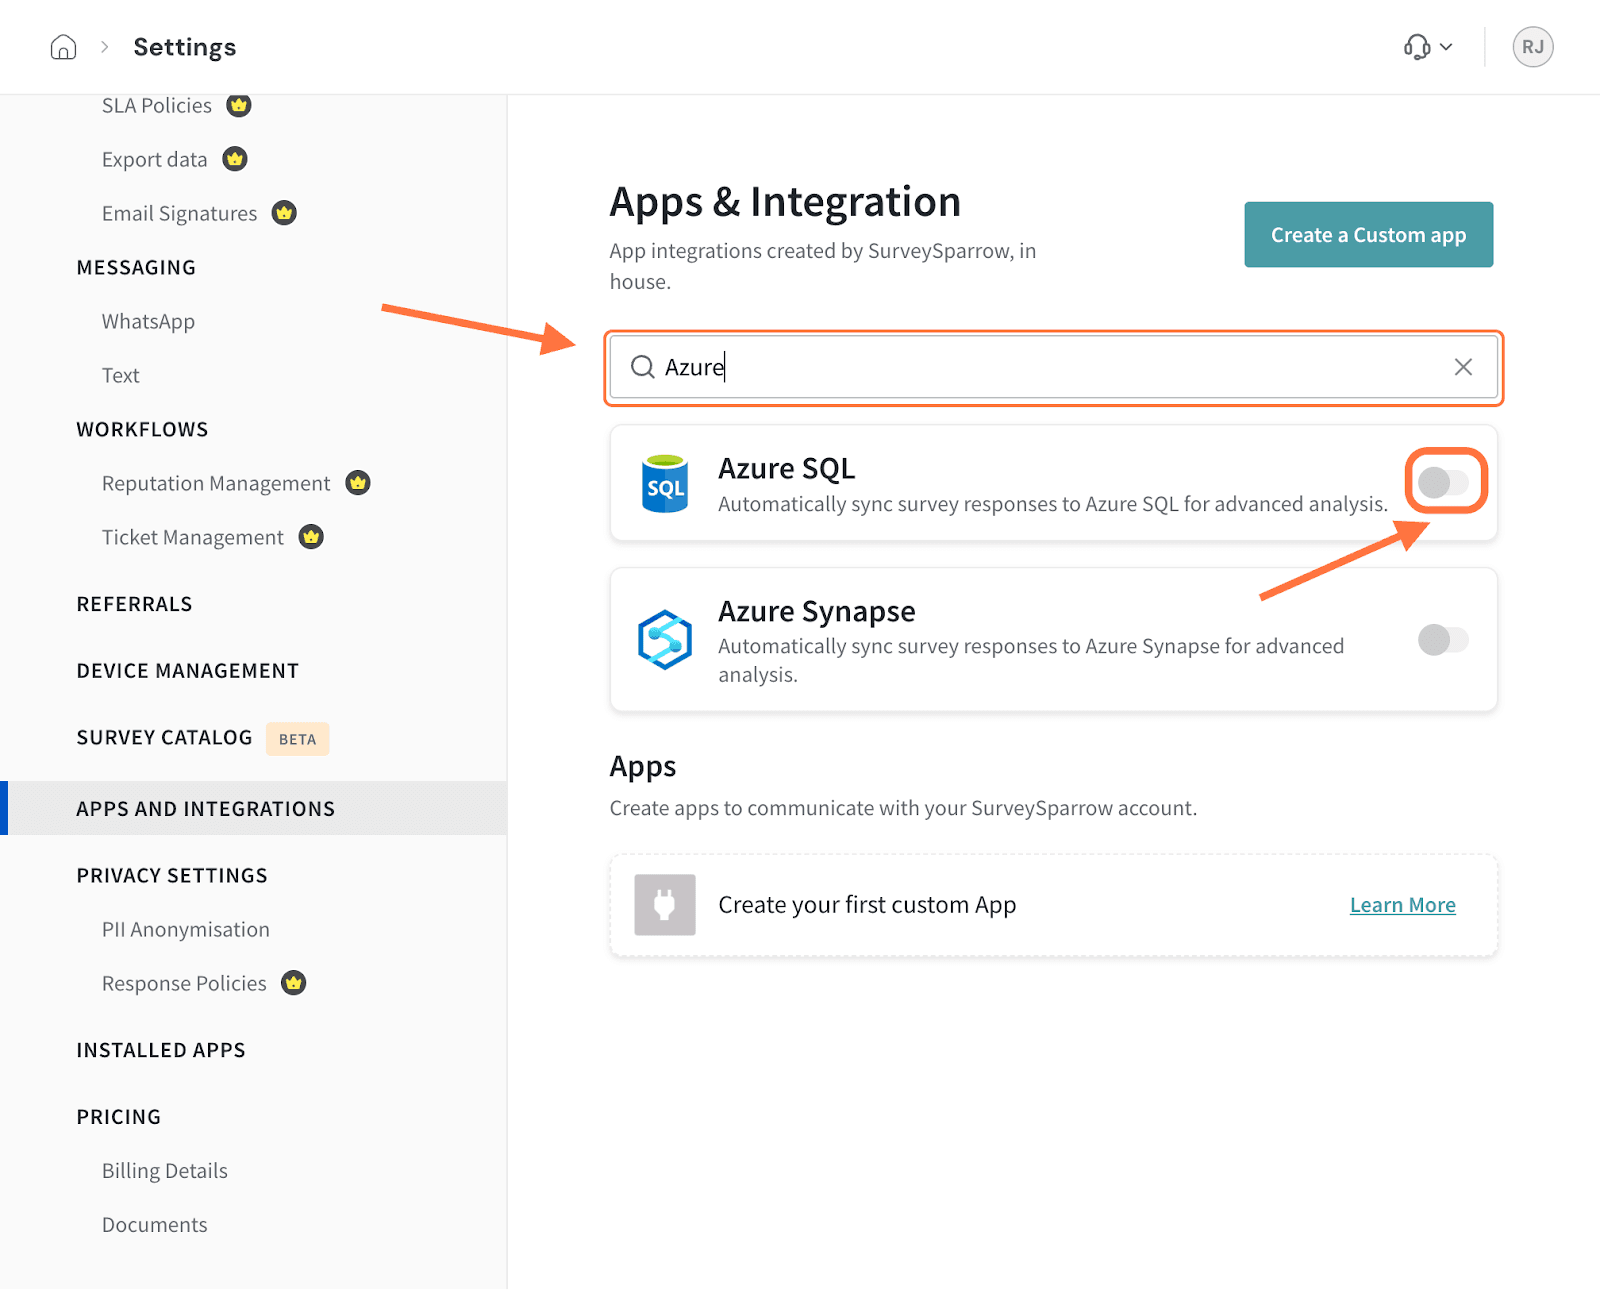
4. Next, in the setup screen you’ll need to enter your Tenant ID.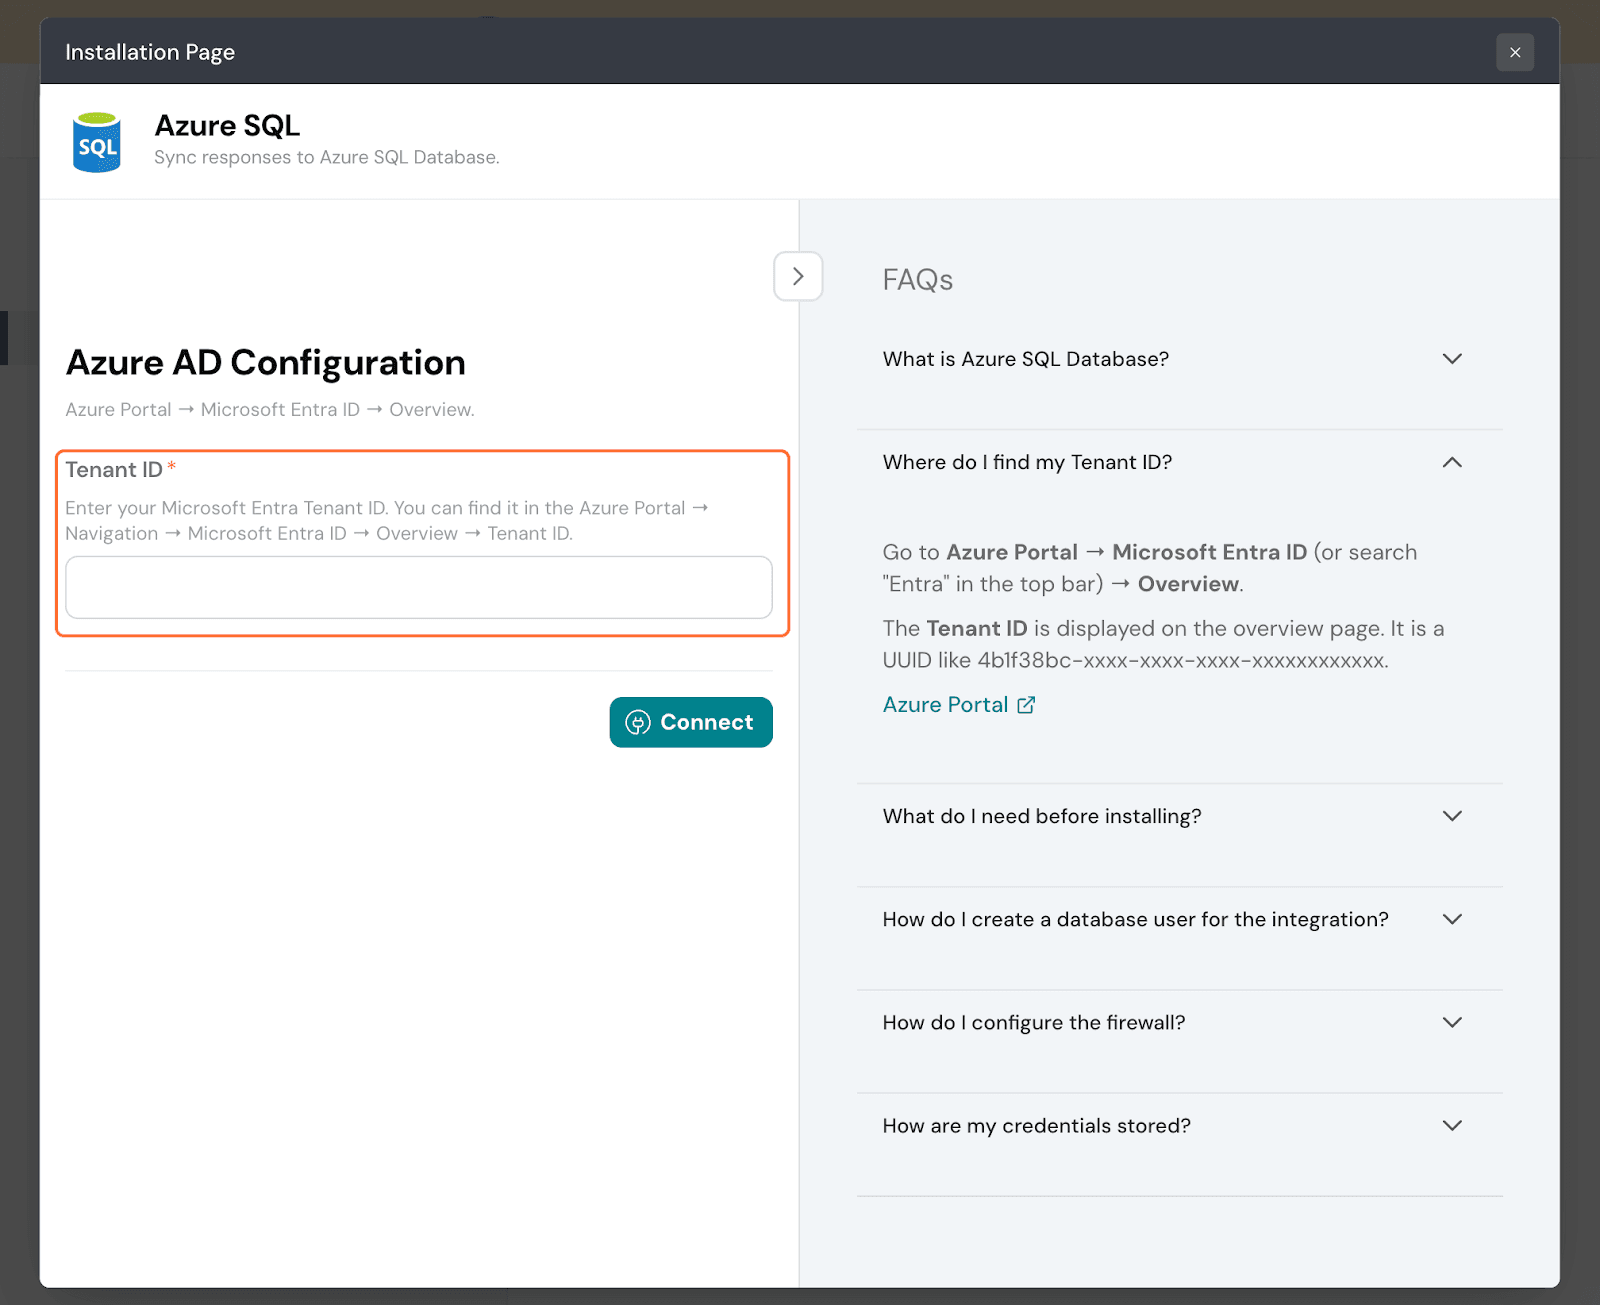
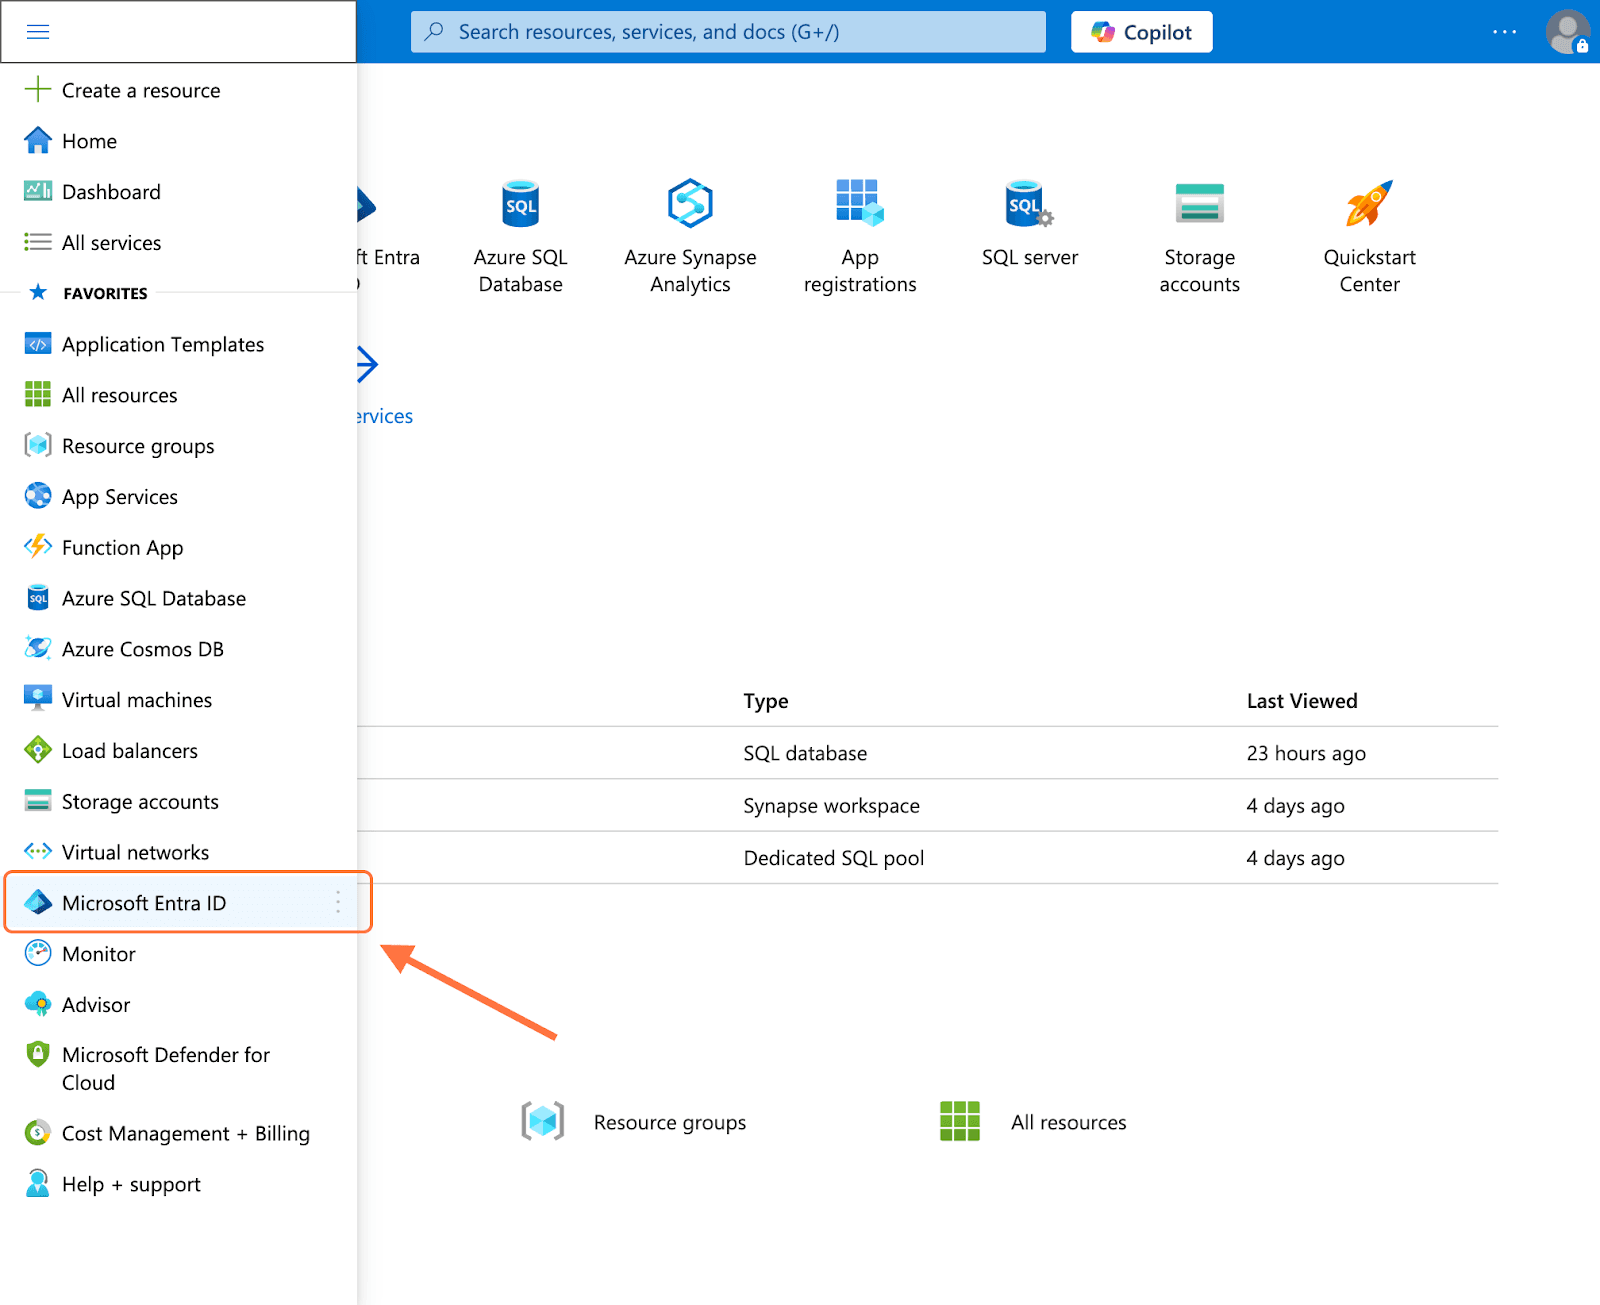
Note: To find the Tenant ID, go to your Azure account. Click on the hamburger menu in the left corner and select Microsoft Entra ID.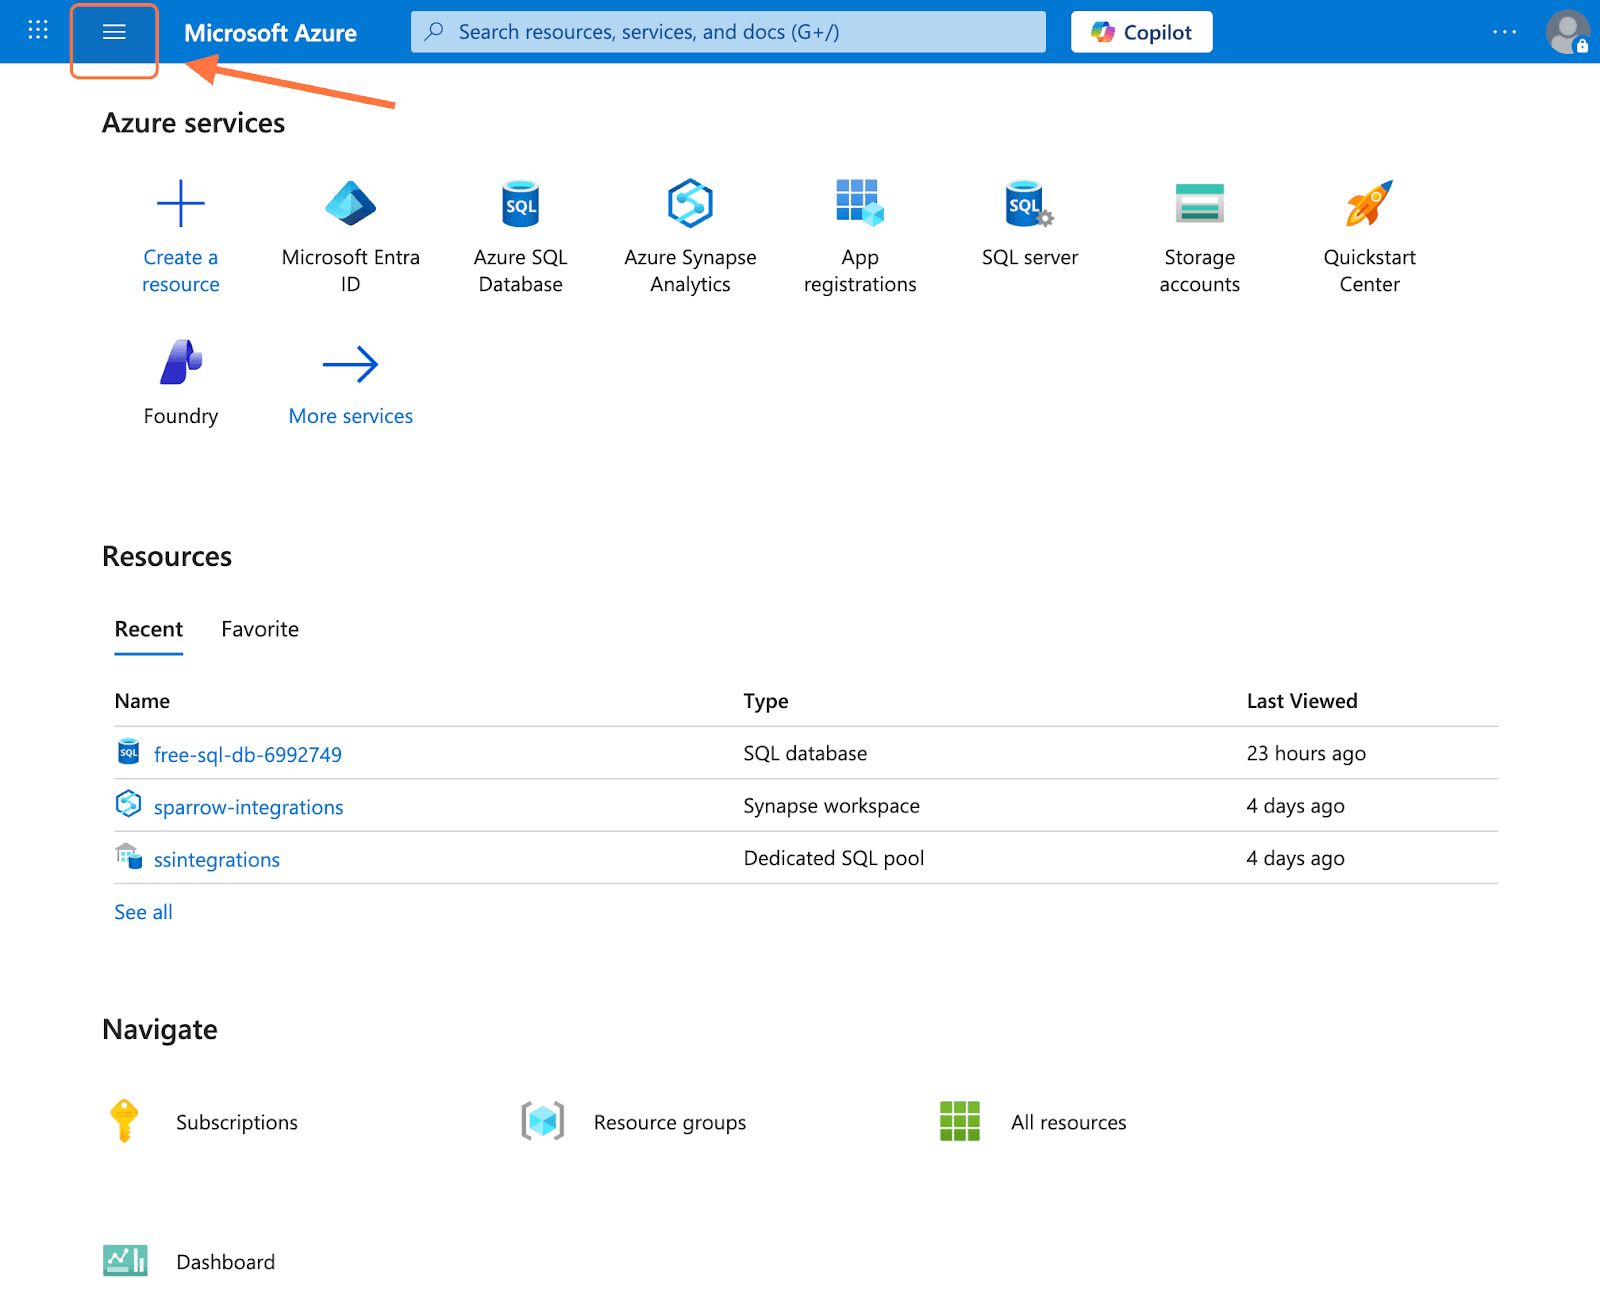
Inside the Overview section, you’ll see the Tenant ID. Hover over it and click on the copy icon.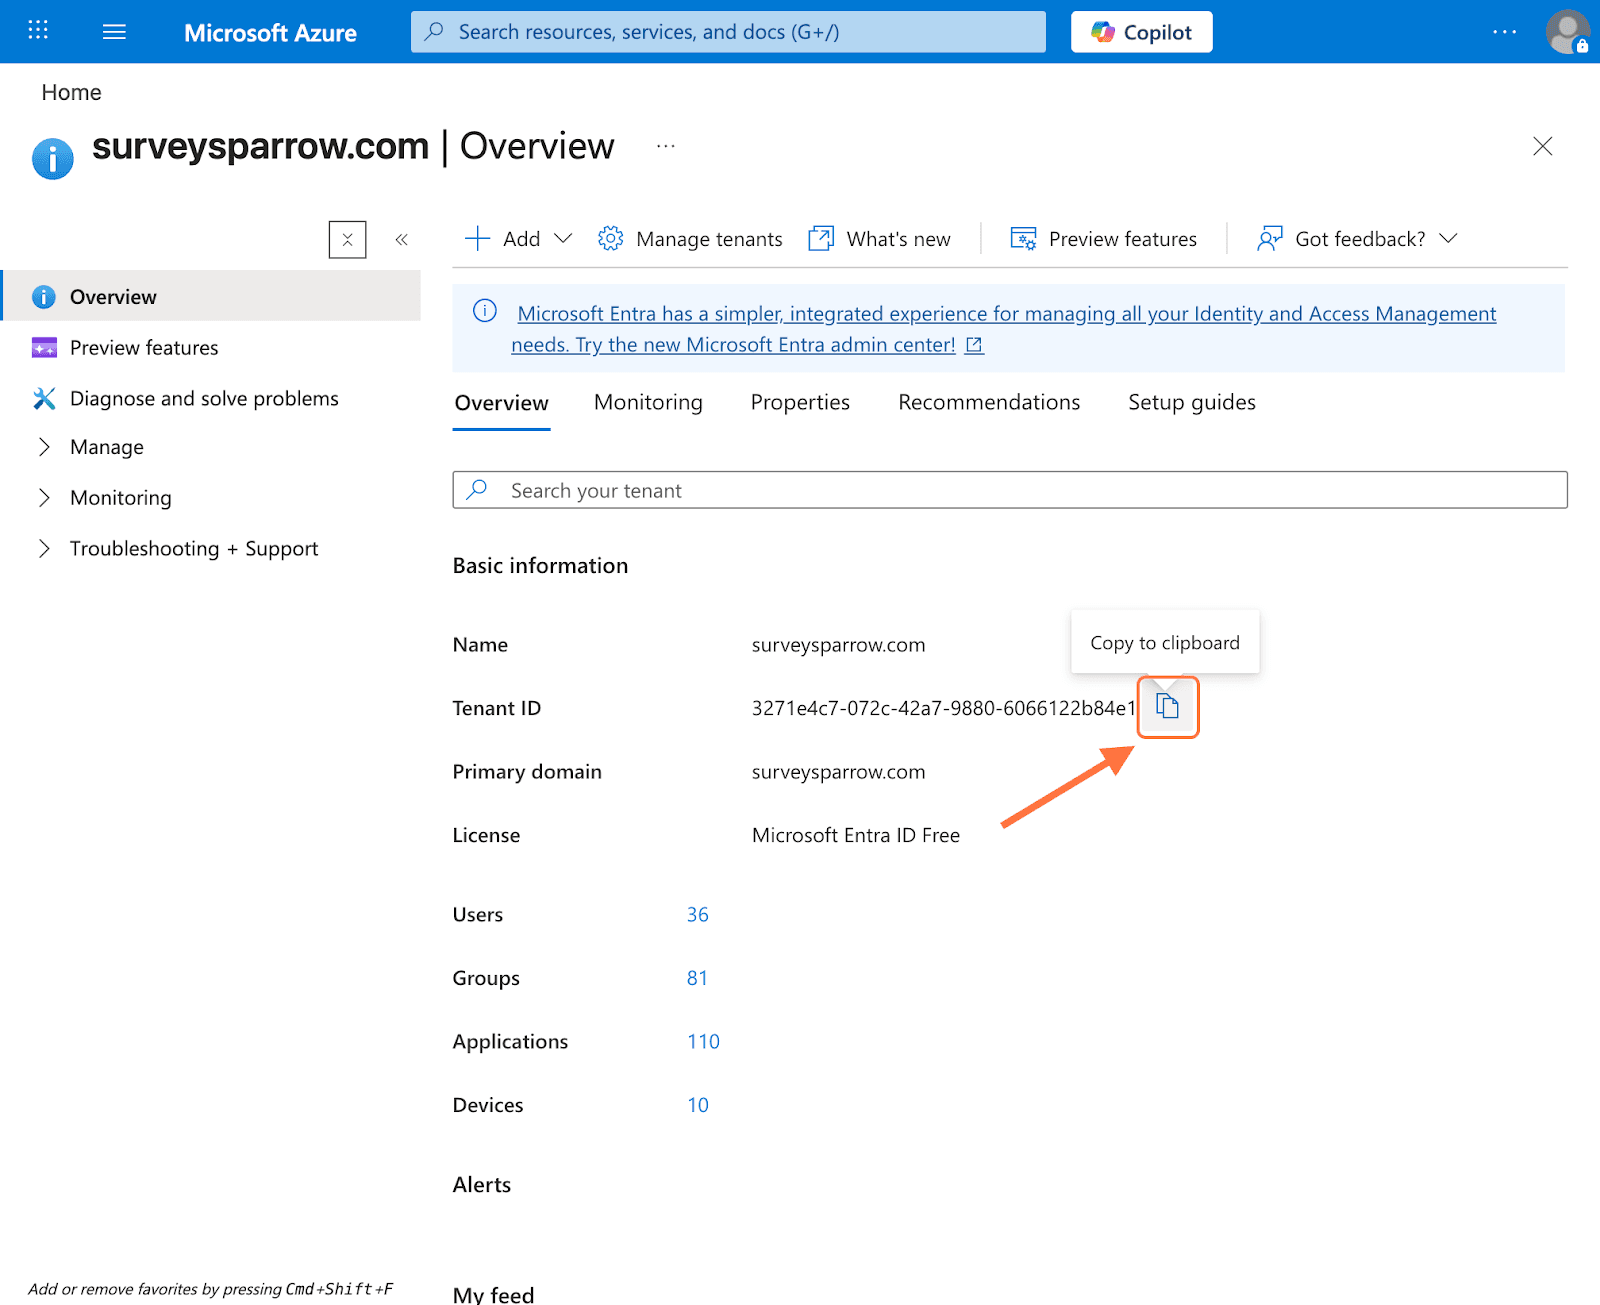
5. After entering the details back in SurveySparrow, click Connect.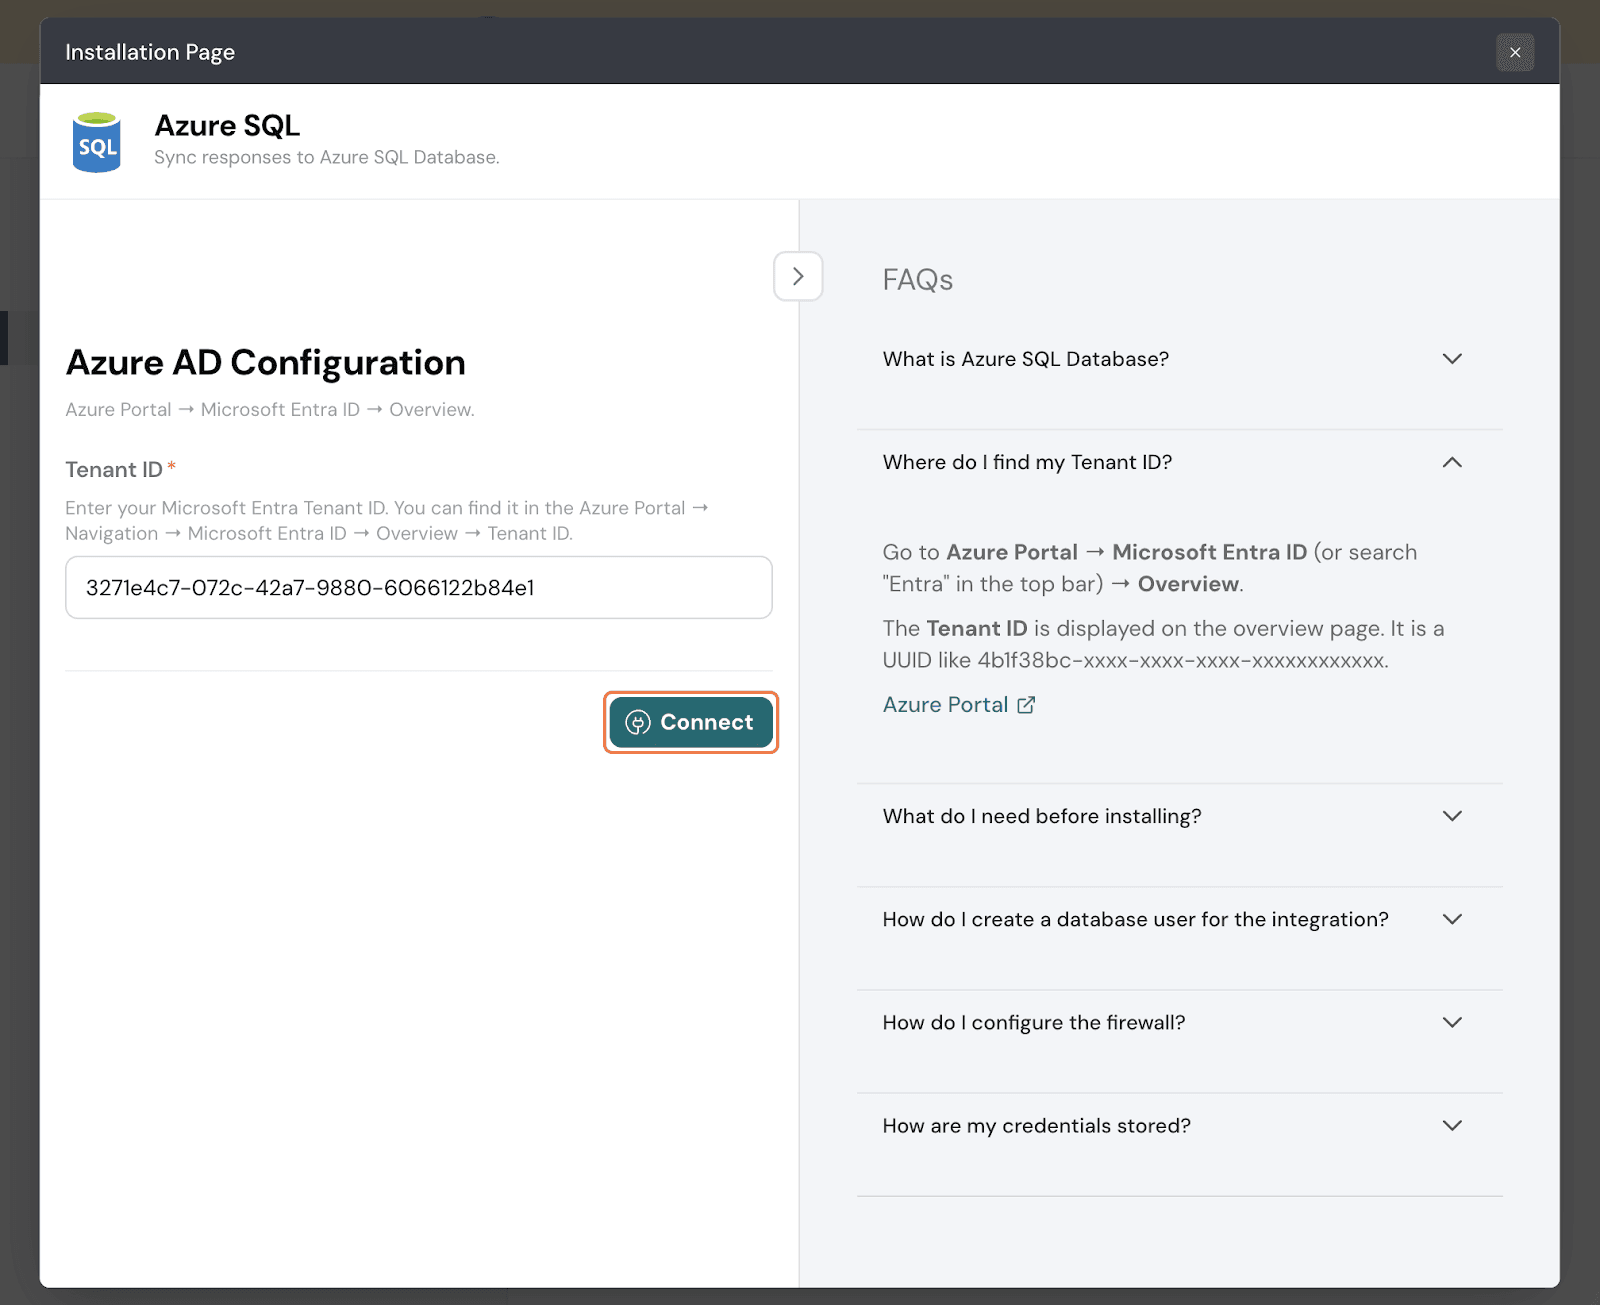
6. You will need to select a Microsoft account to complete authentication.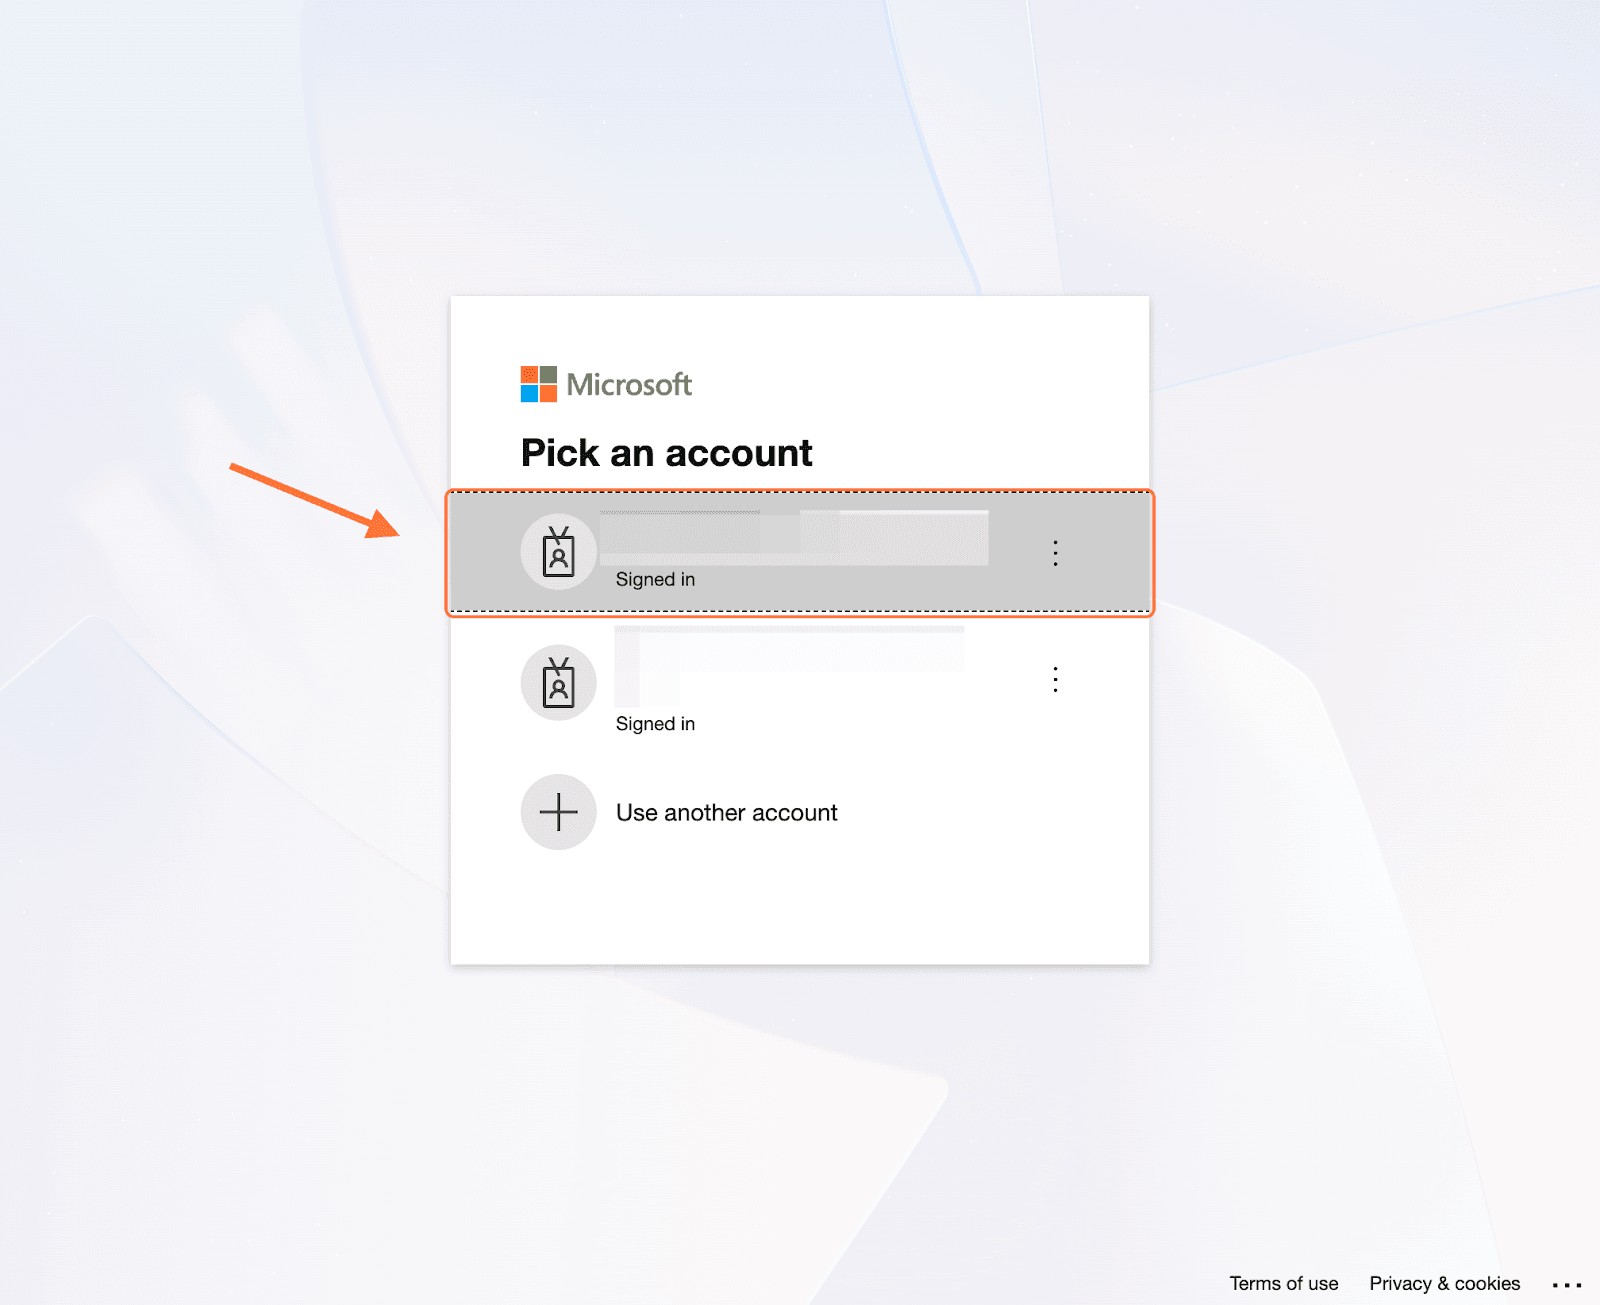
Before creating mappings, you need to run a script inside Azure SQL so that SurveySparrow can pass data. Follow these steps.
1. Inside the Azure Portal, search for Azure SQL Database and open it when it appears.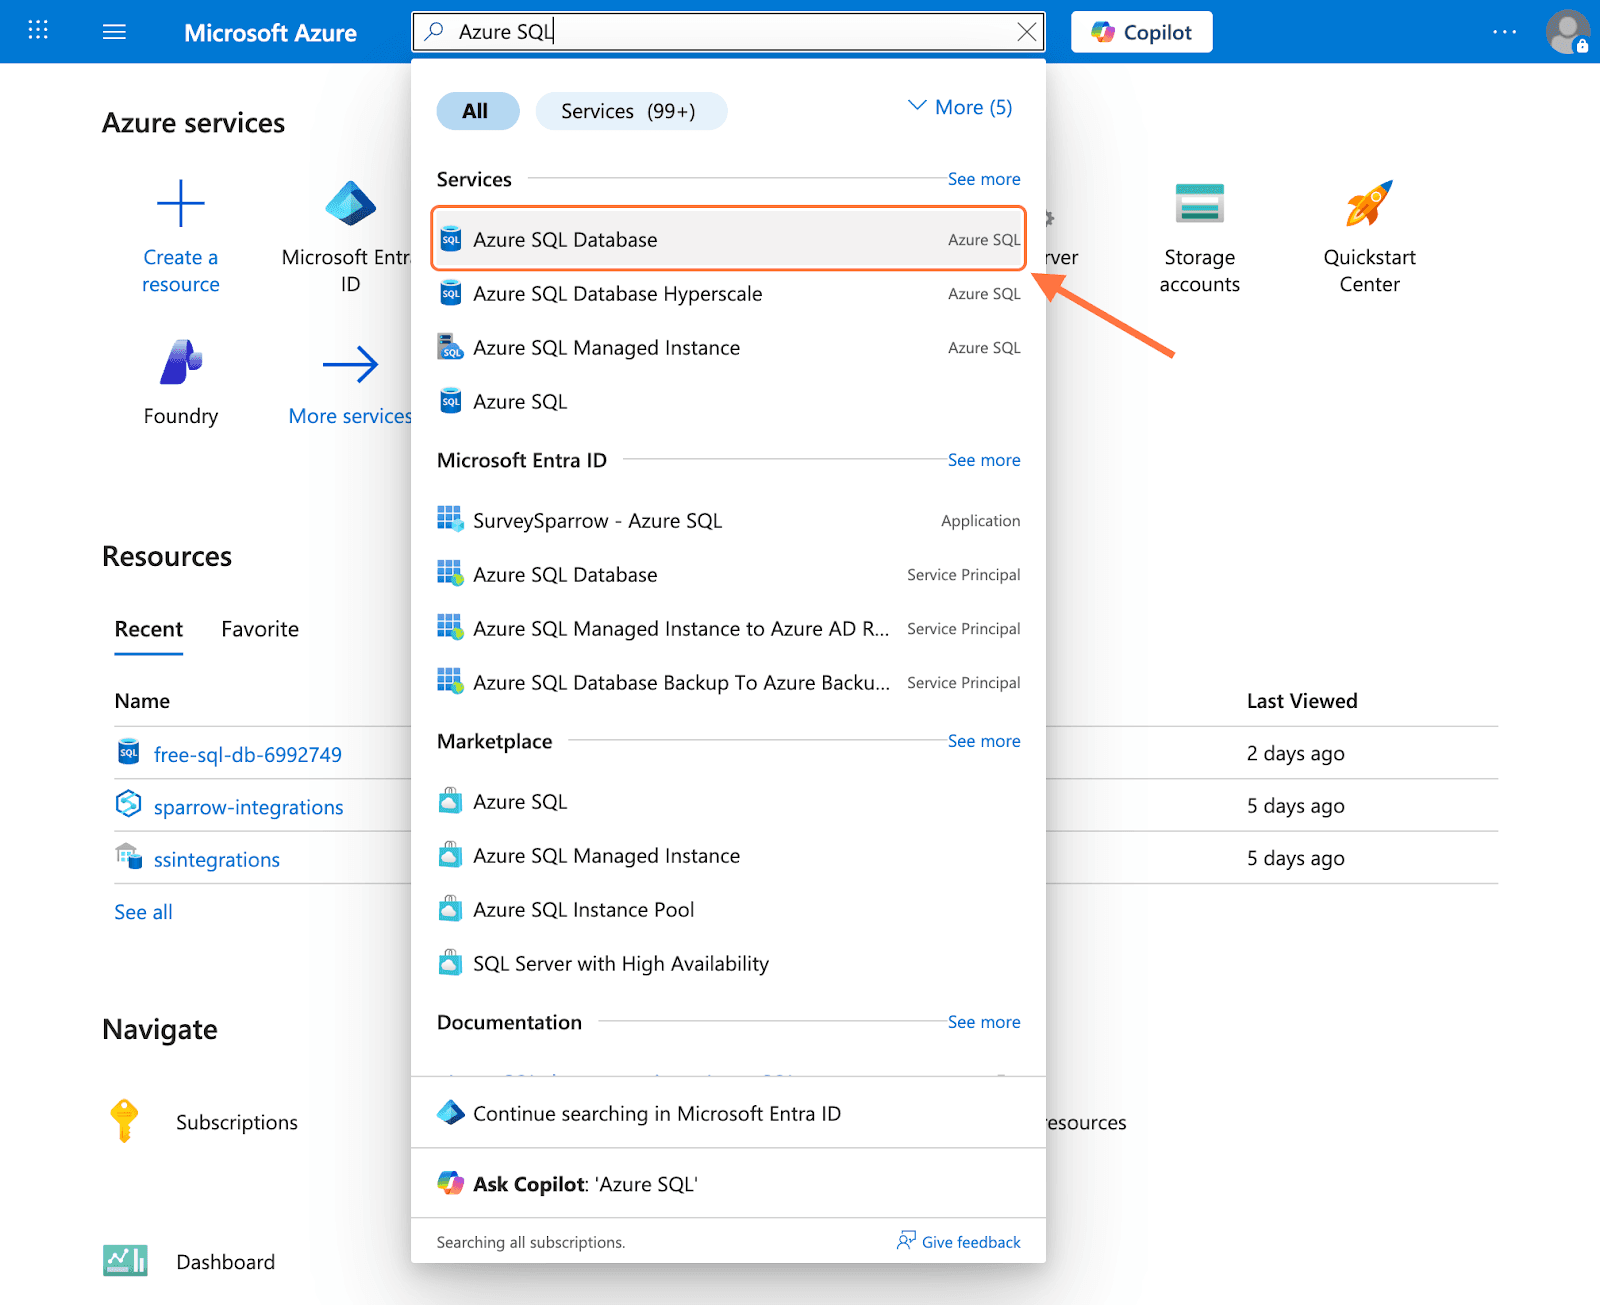
2. Open the intended database by clicking on the name.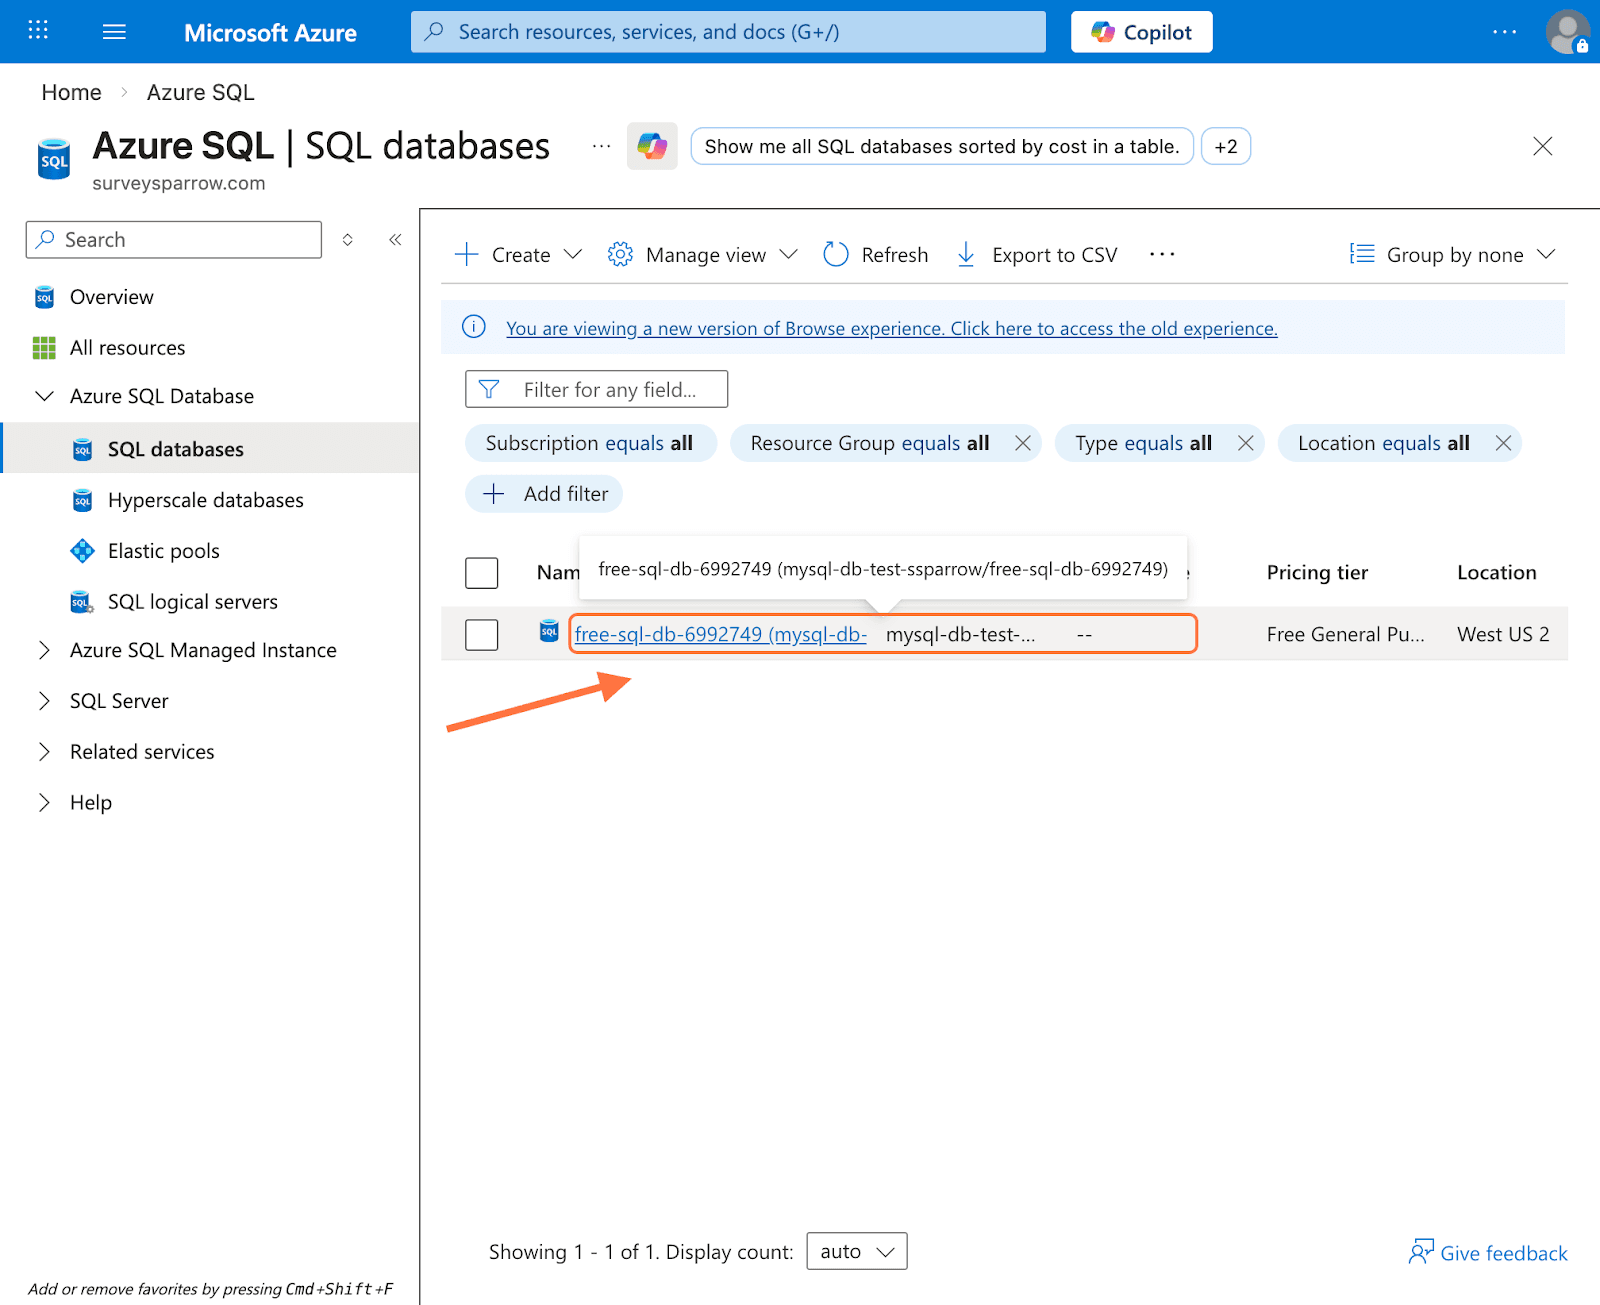
3. Click on Query editor in the left hand panel.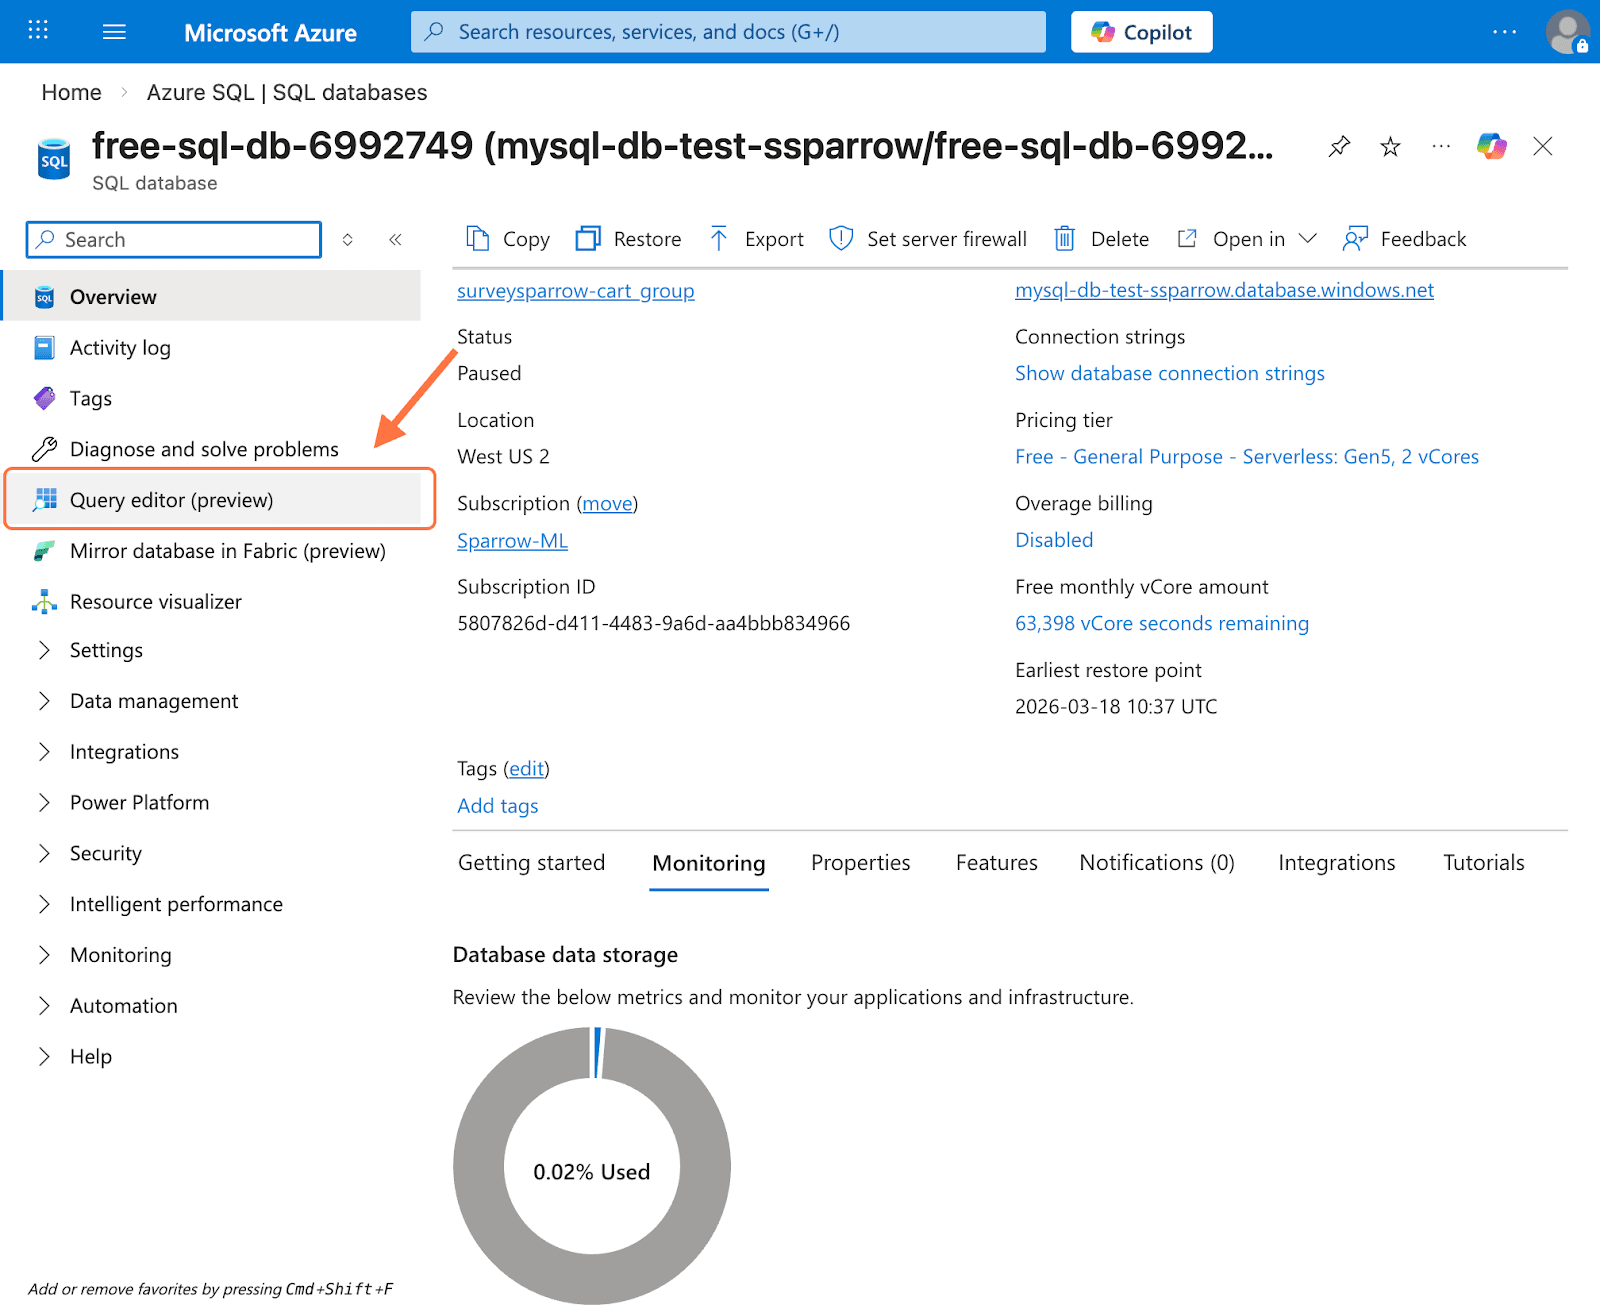
4. In the query editor, you’ll see a tab for Microsoft Entra. Click on Connect as…..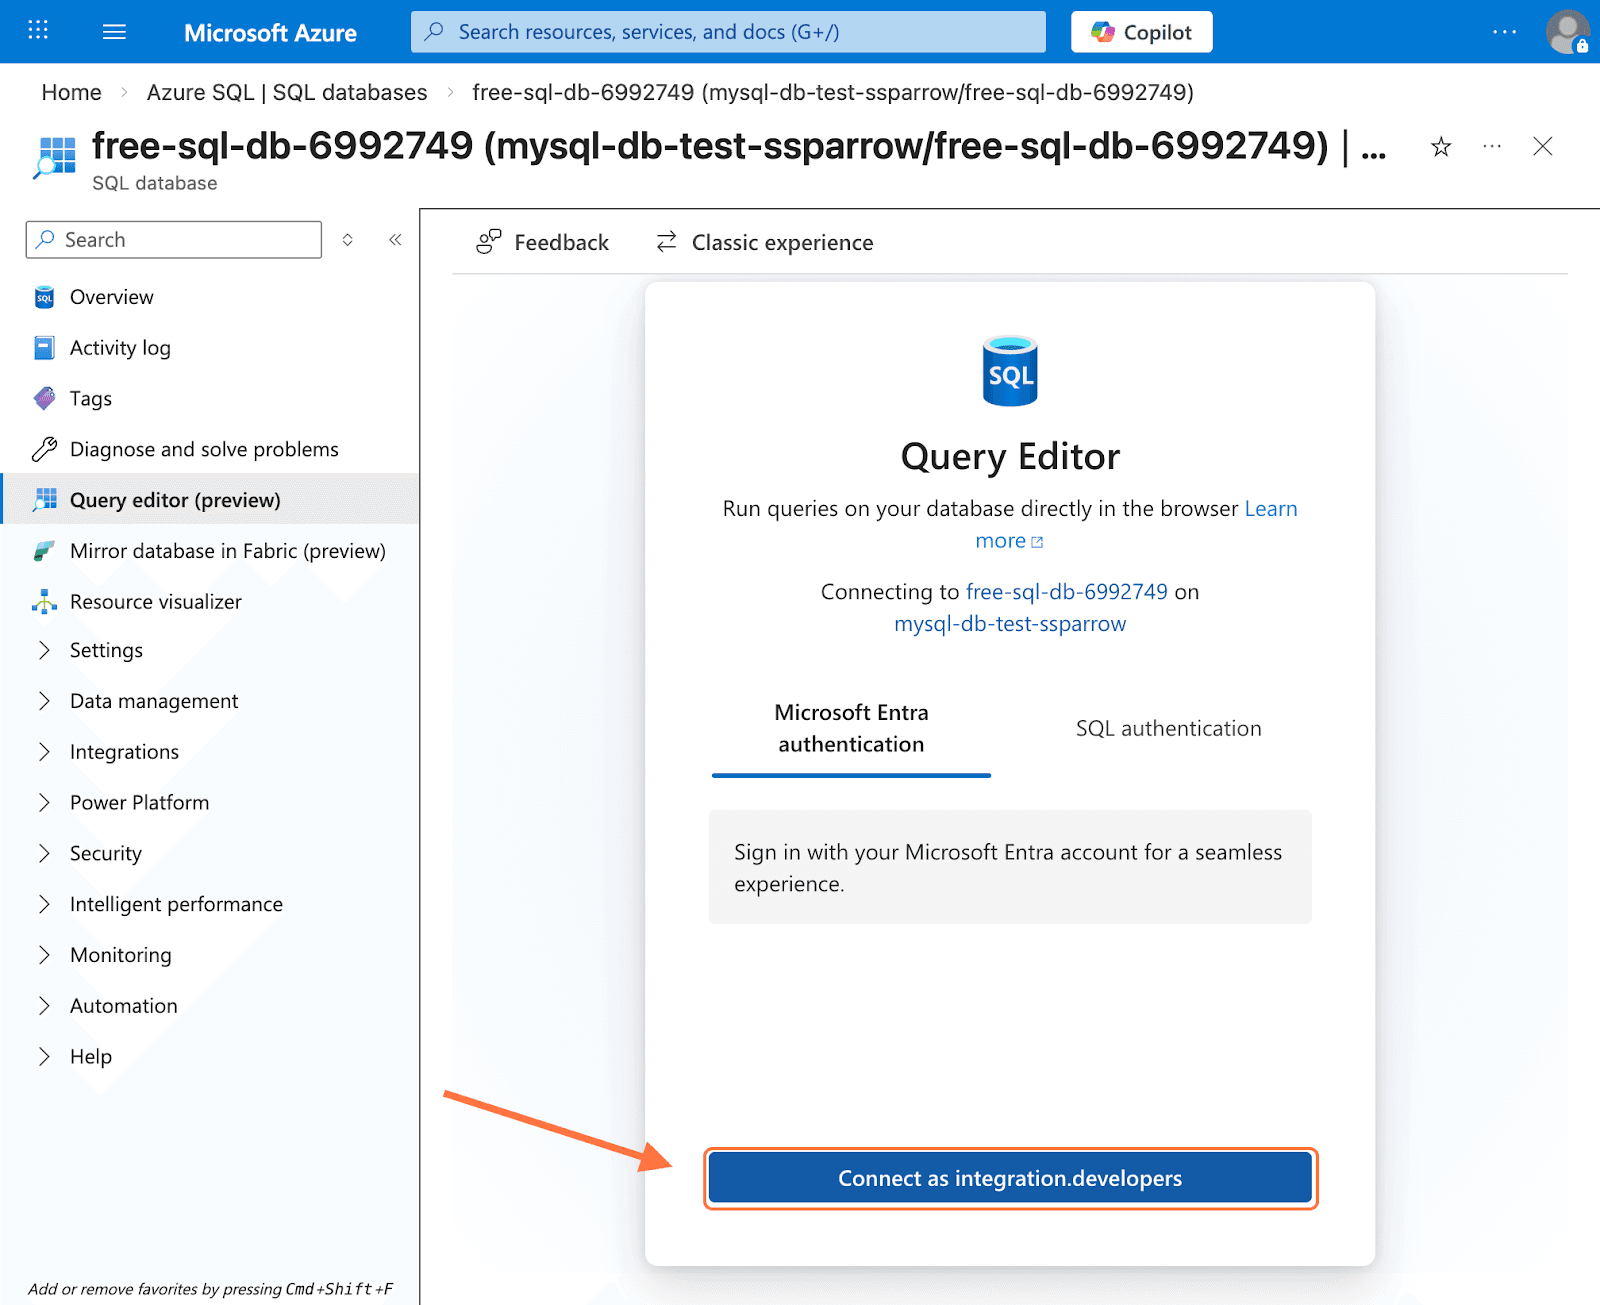
5. Your database is now open in the Query editor. Click on New Query.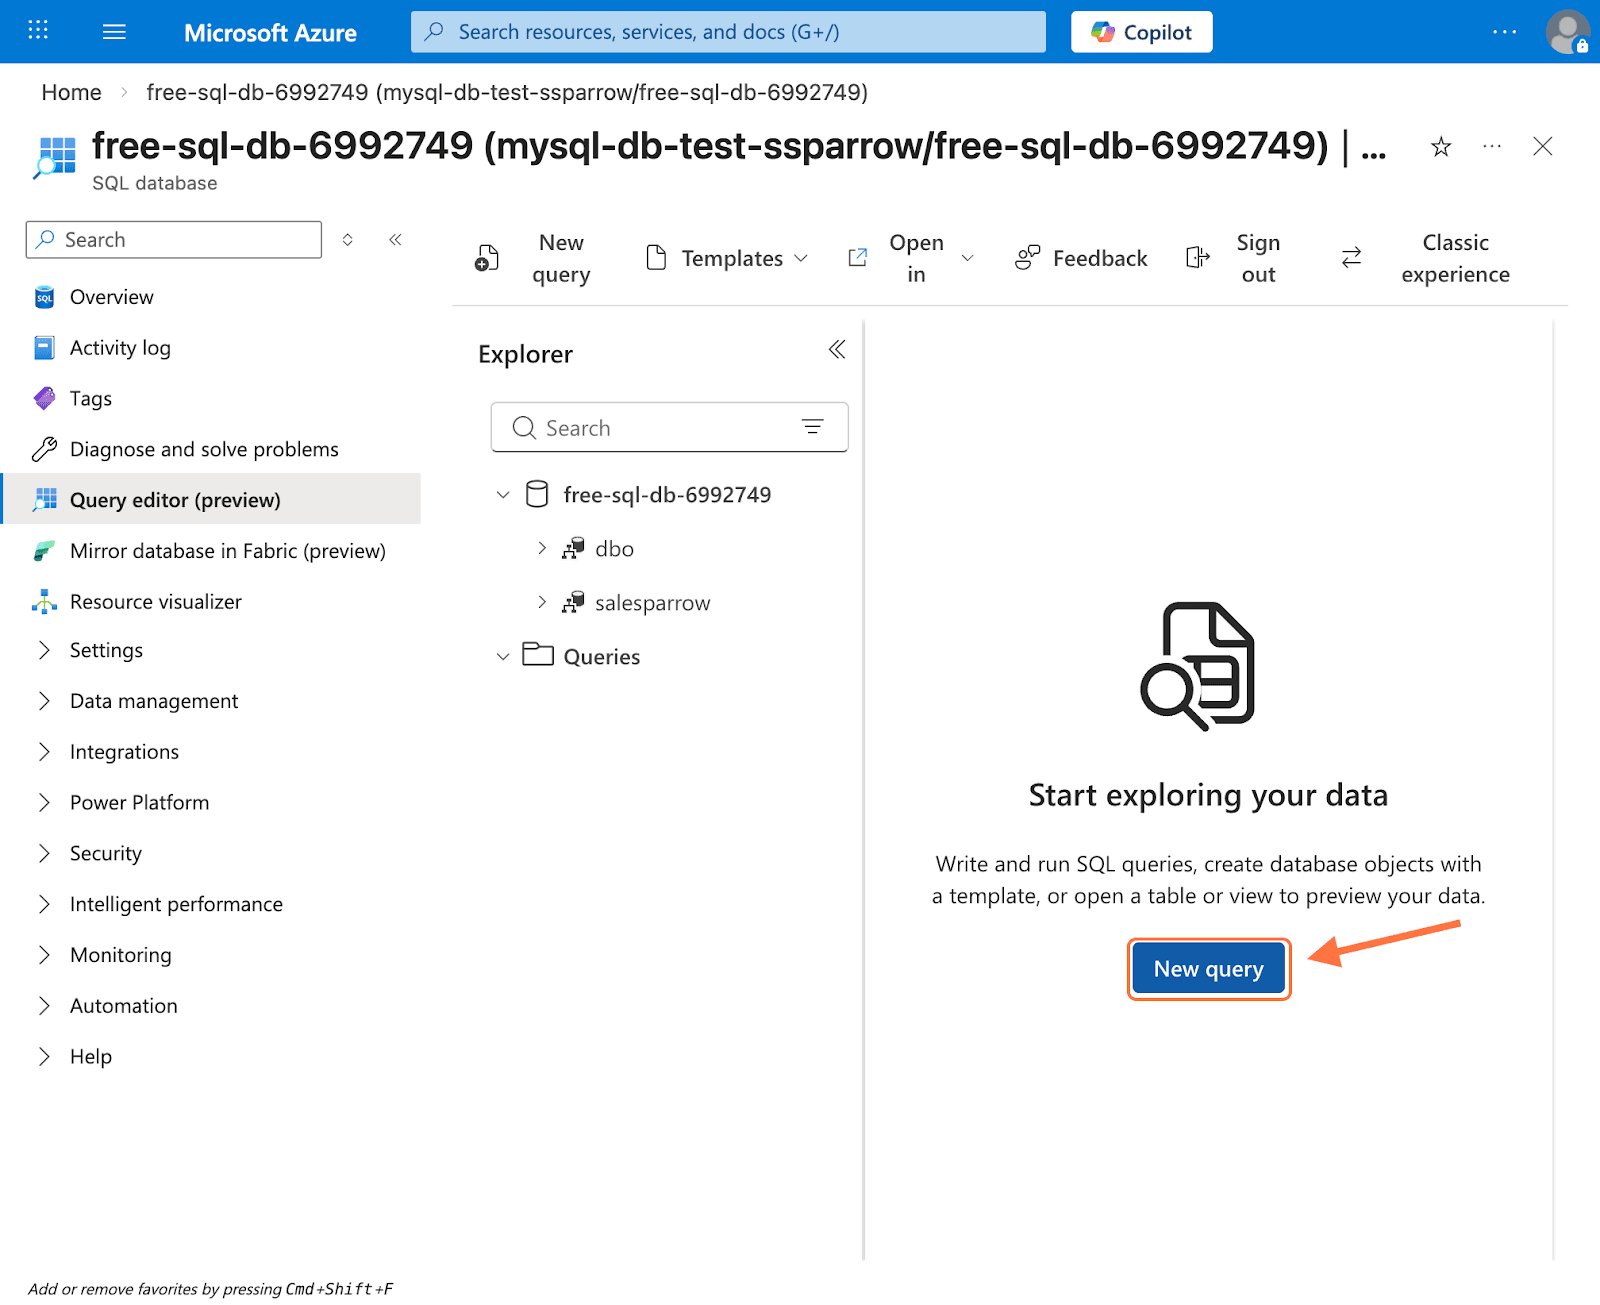
6. Copy the script below in the query editor and click on Run.
CREATE USER [SurveySparrow - Azure SQL] FROM EXTERNAL PROVIDER;
ALTER ROLE db_datareader ADD MEMBER [SurveySparrow - Azure SQL];
-- Write access (required)
ALTER ROLE db_datawriter ADD MEMBER [SurveySparrow - Azure SQL];
-- DDL access for creating/altering tables (required if the integration creates tables)
ALTER ROLE db_ddladmin ADD MEMBER [SurveySparrow - Azure SQL];
1. Open a survey and click on the Integrate/Configure tab.
2. Search for the Azure SQL integration using the search box (or by scrolling through the integrations). When it appears, click on the toggle.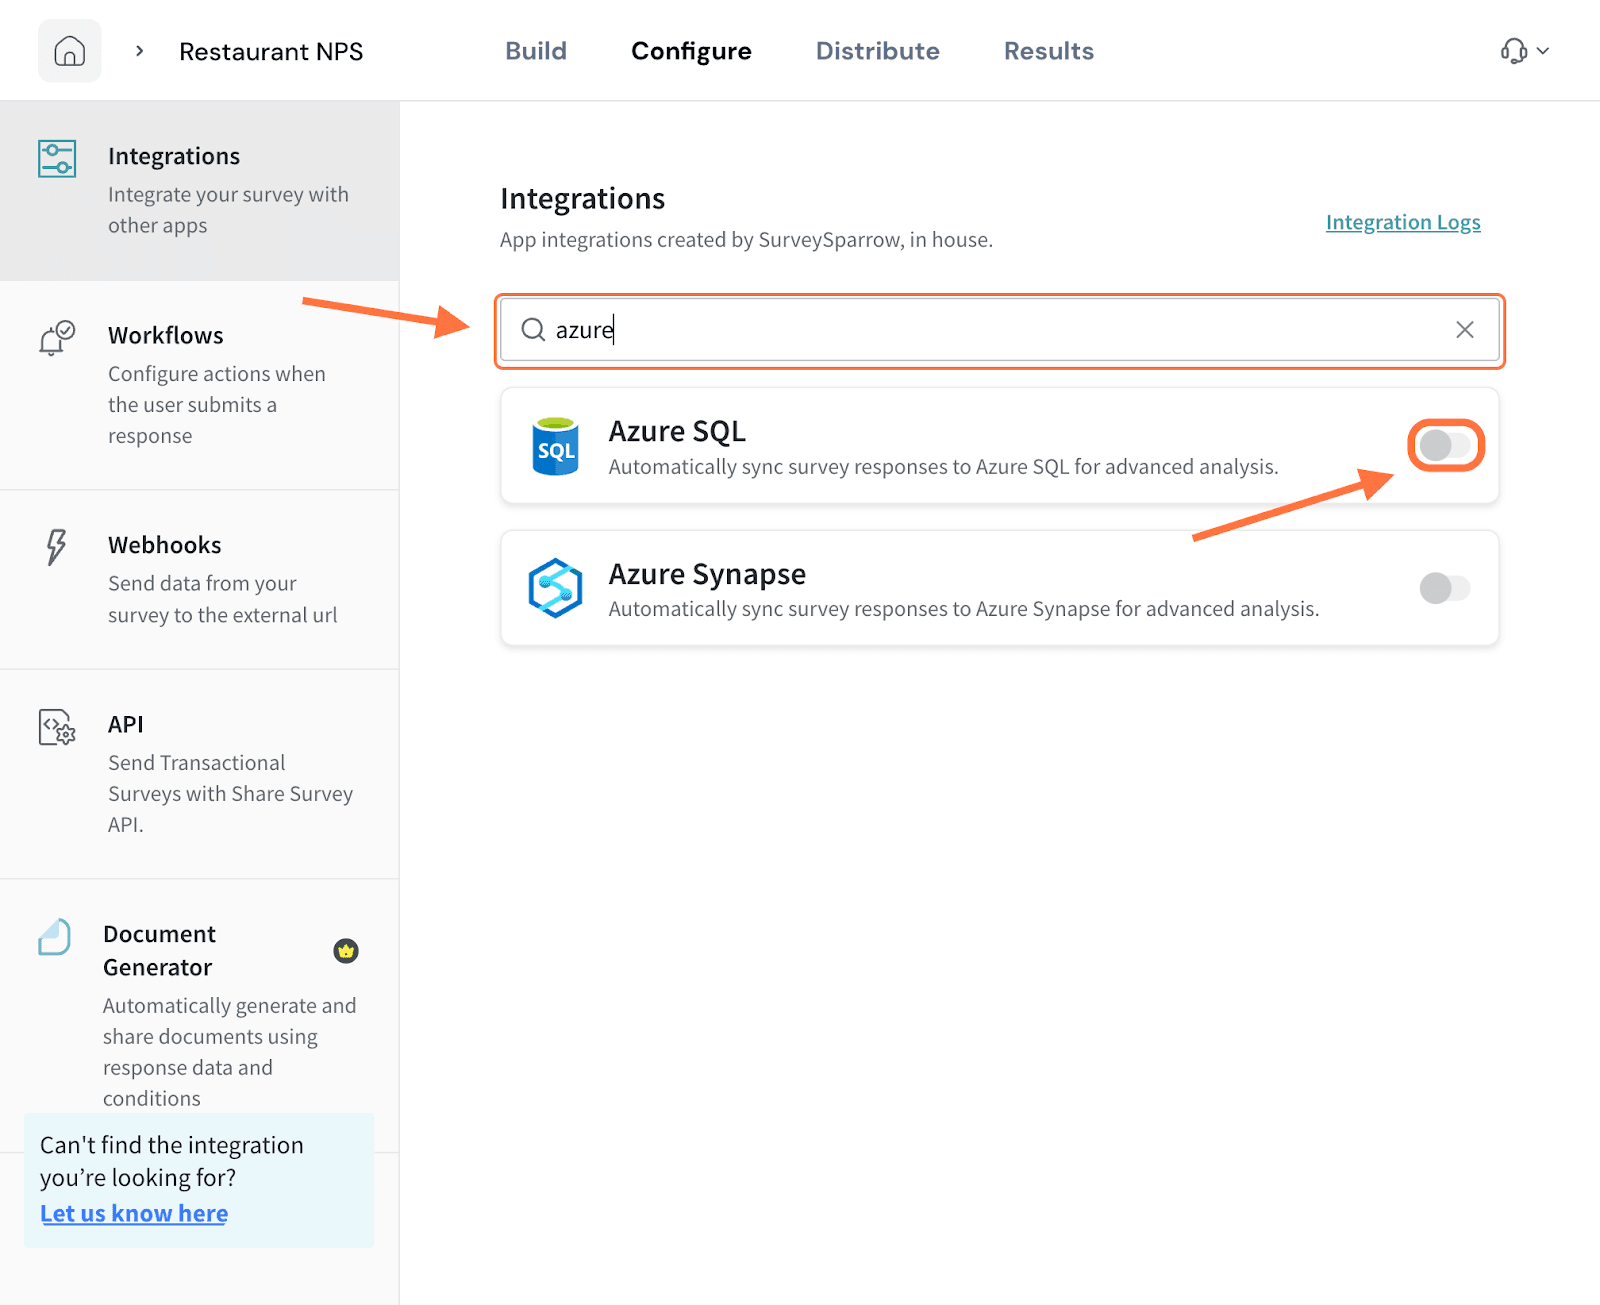
3. When the integration setup screen opens, you must first connect the destination database. You must start by entering the server name and database name.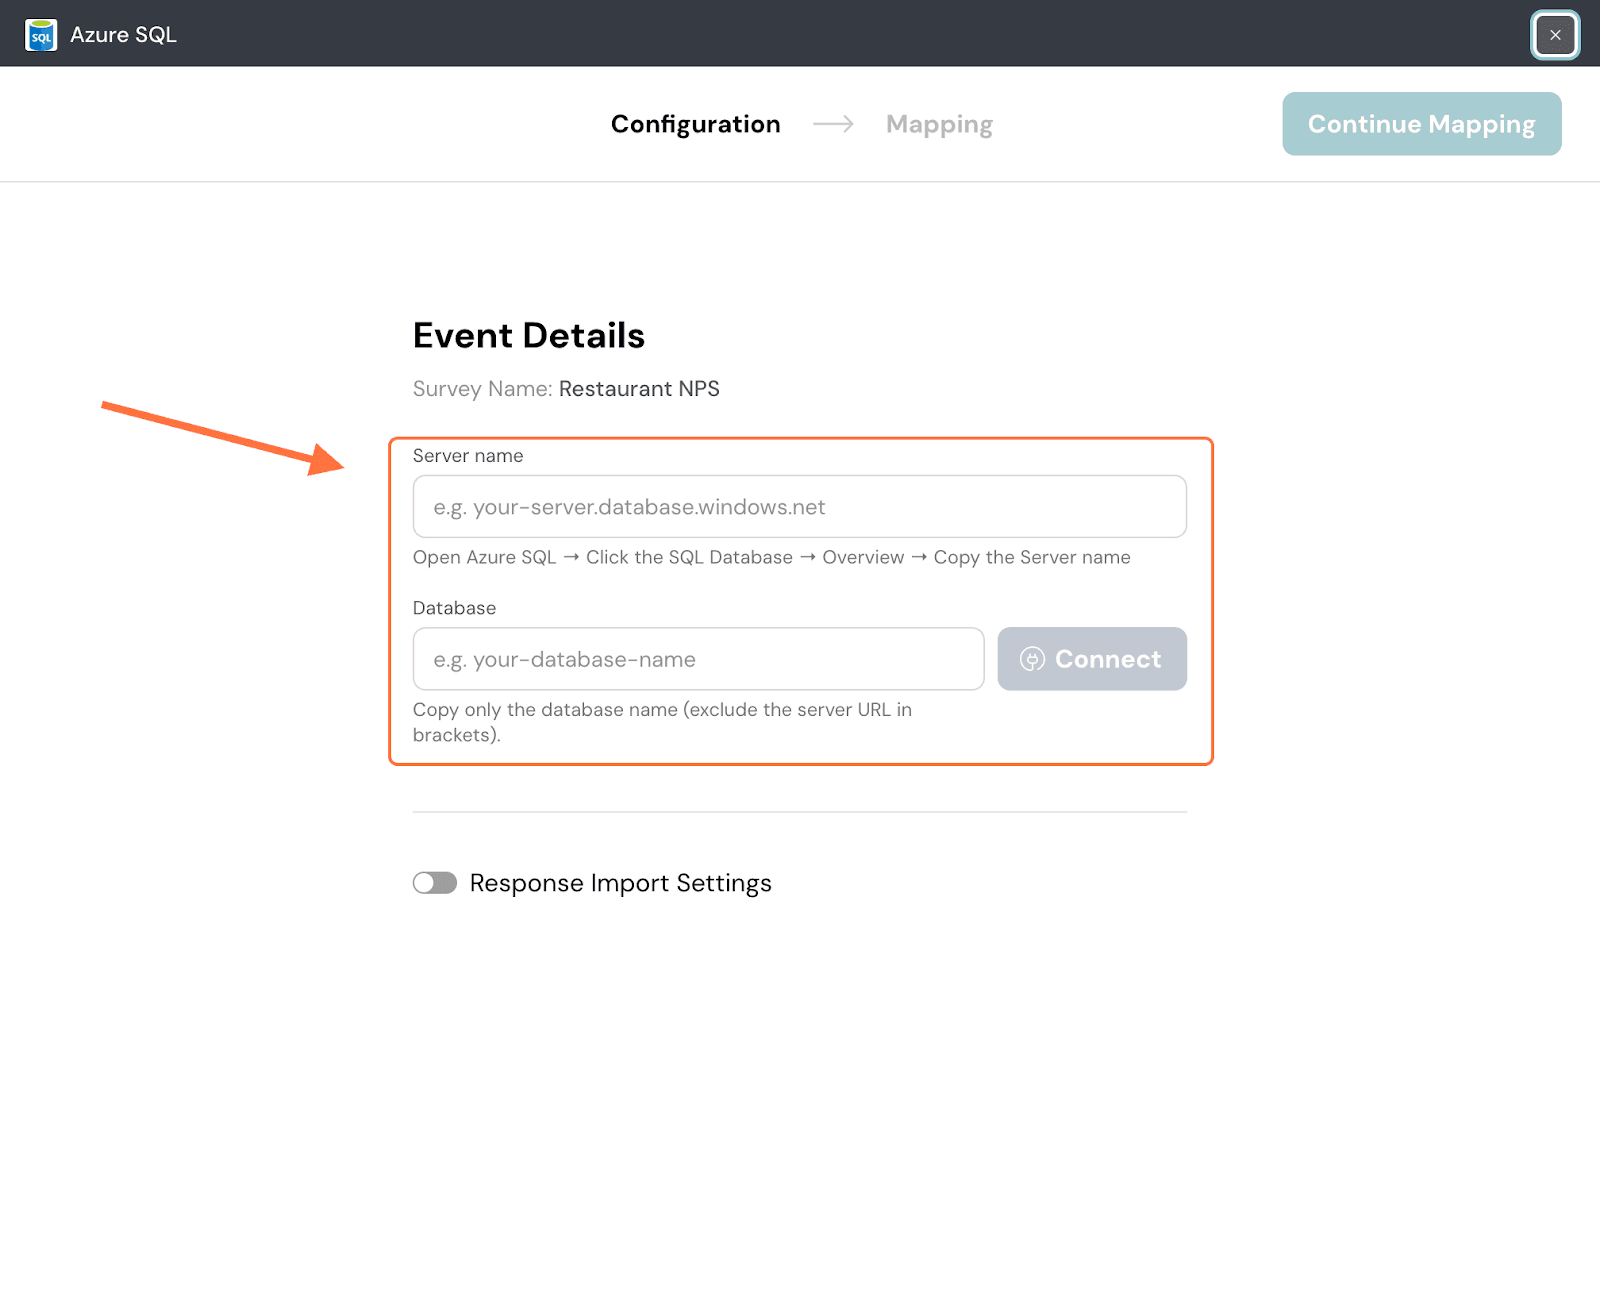
Note: You can find both items inside your Azure account, search for Azure SQL Database and click on it under Services.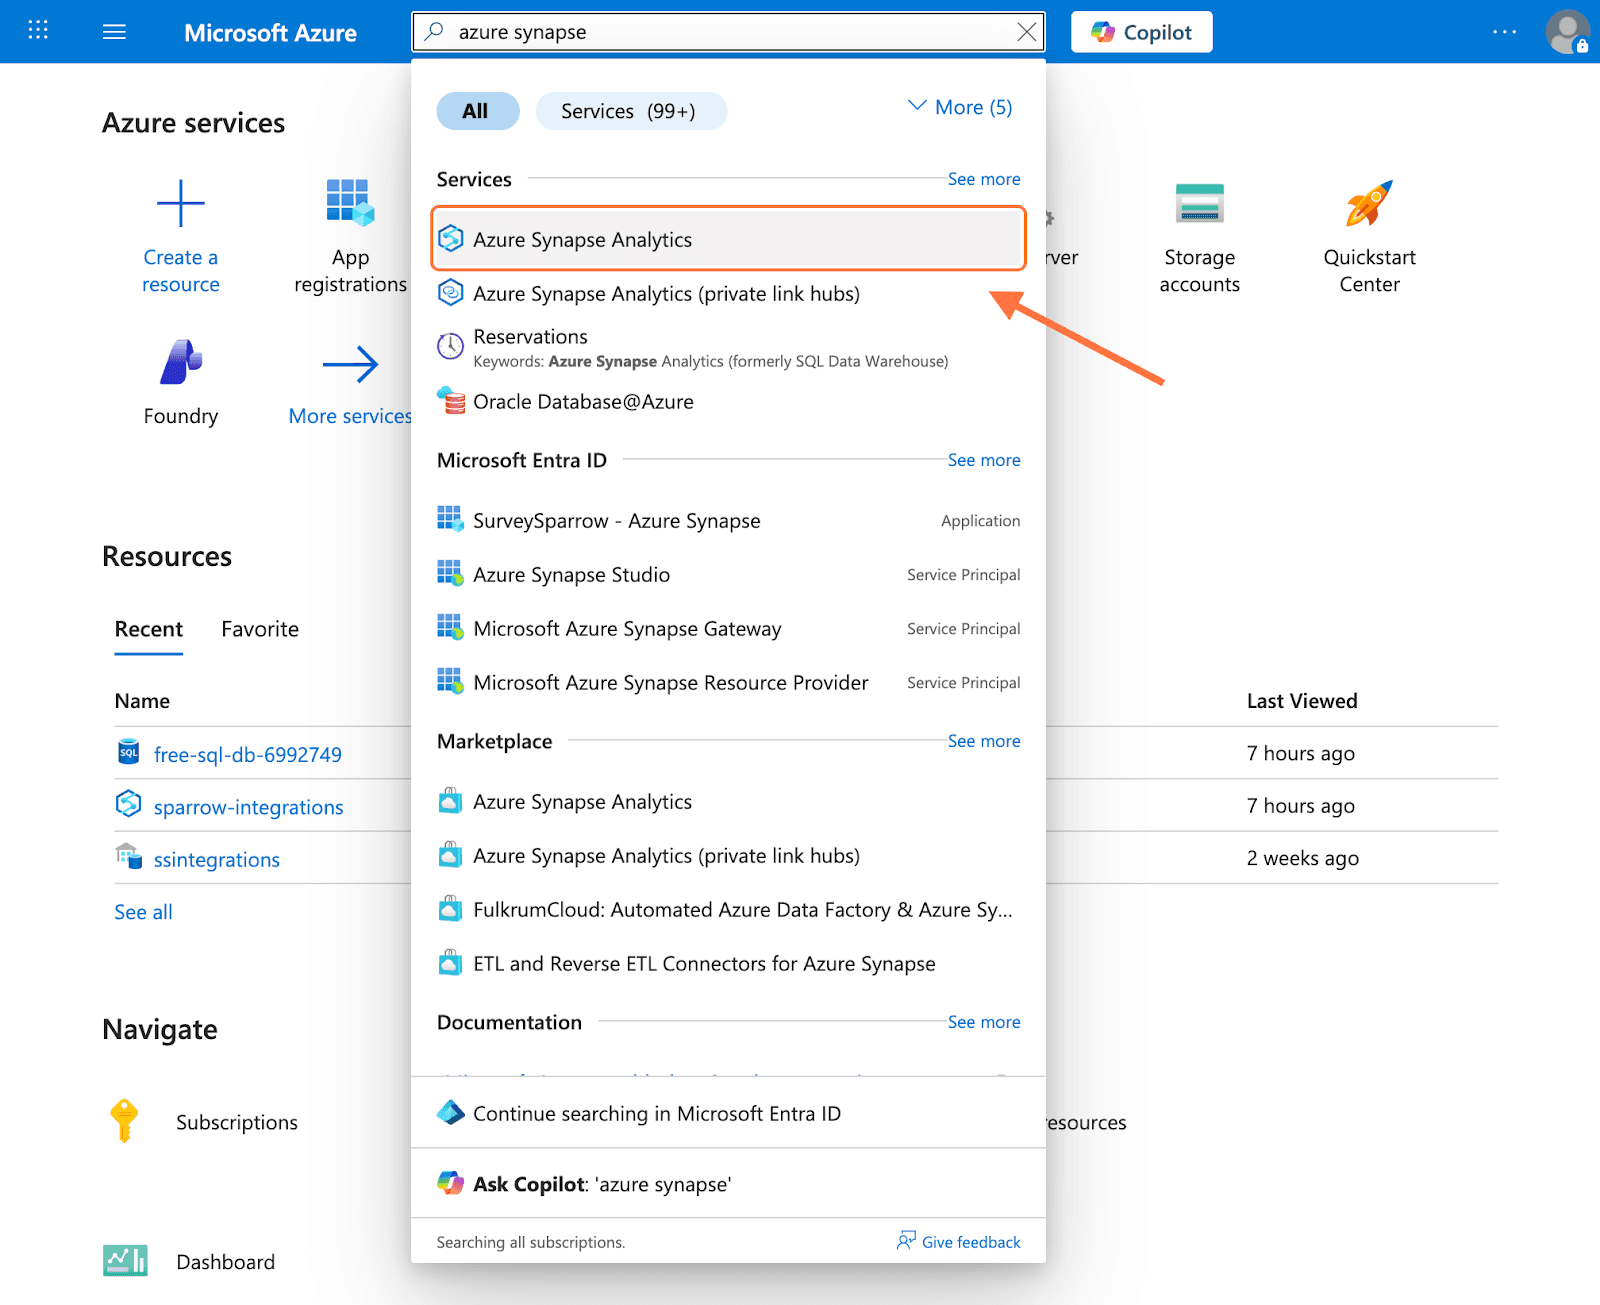
Click on the database to which you want to push responses.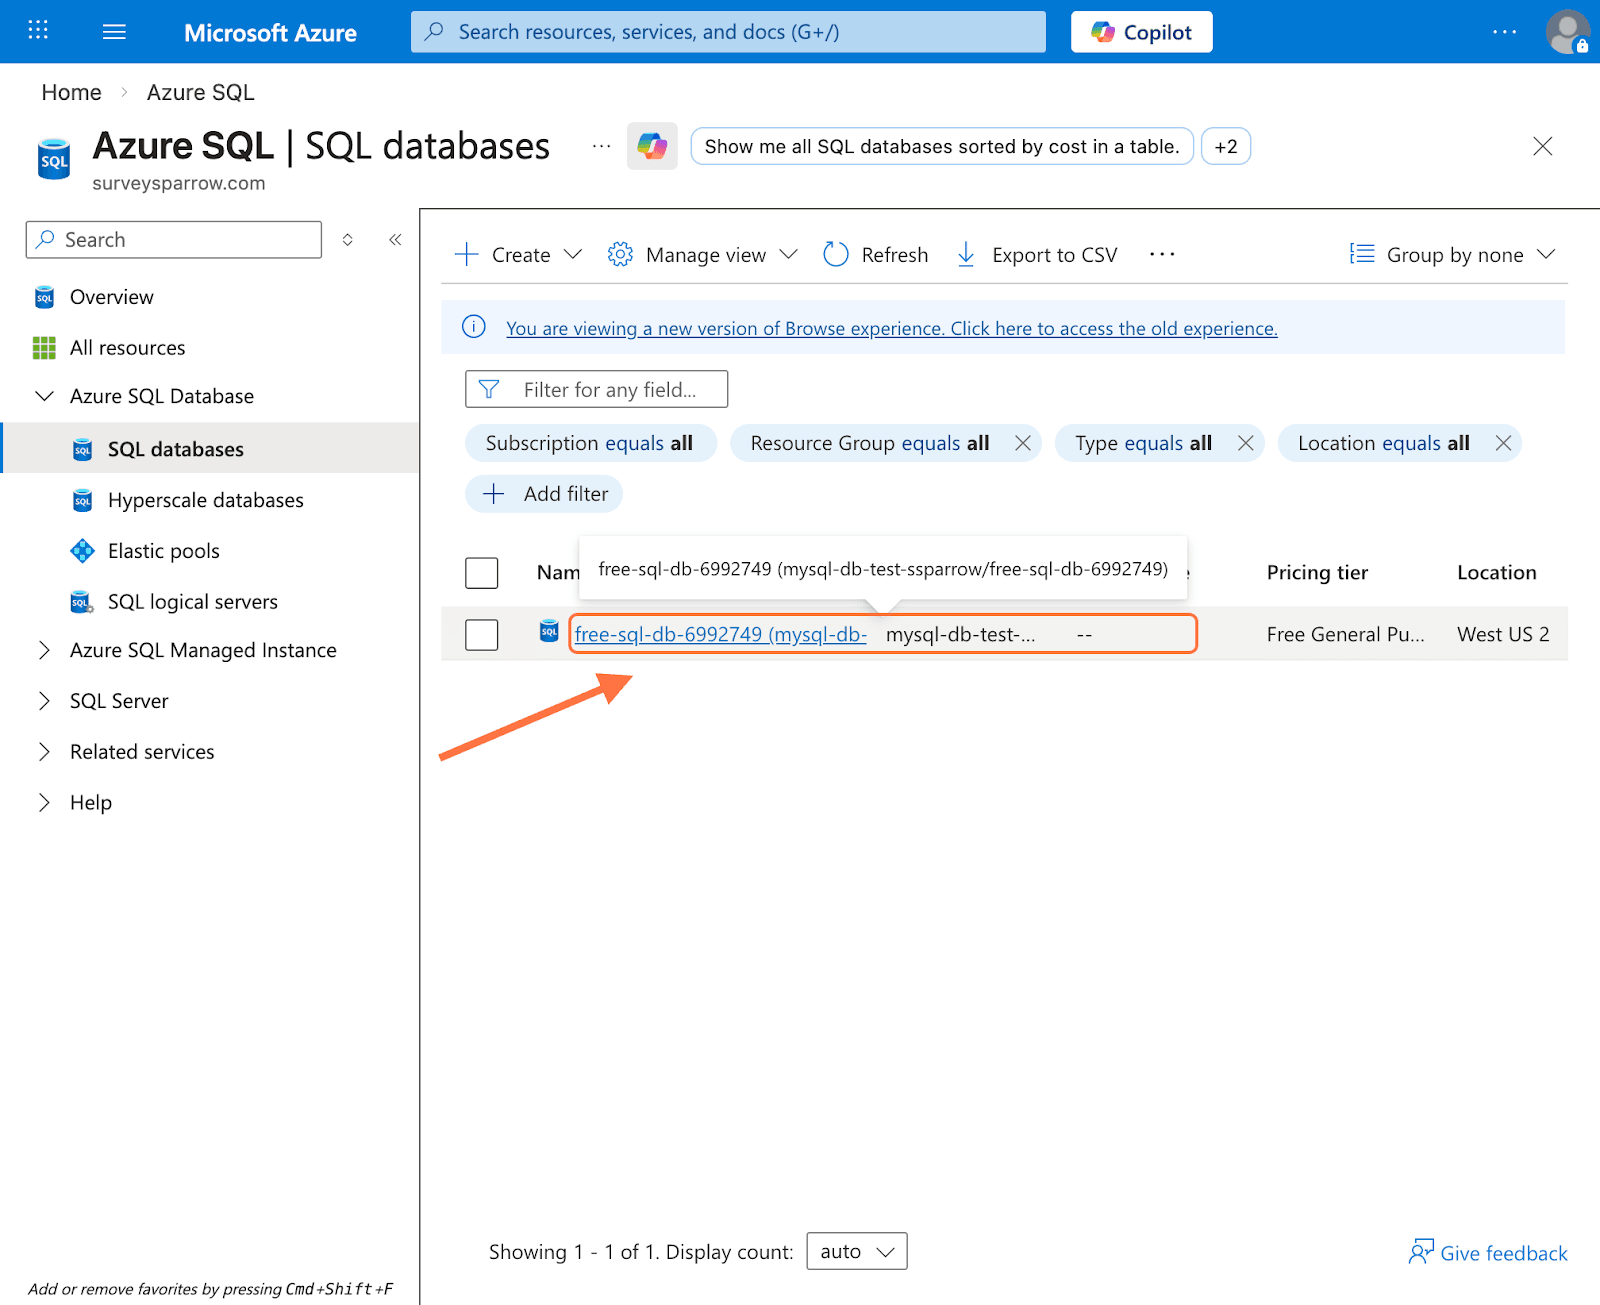
You’ll see the Server name, hover over it and click on the copy icon.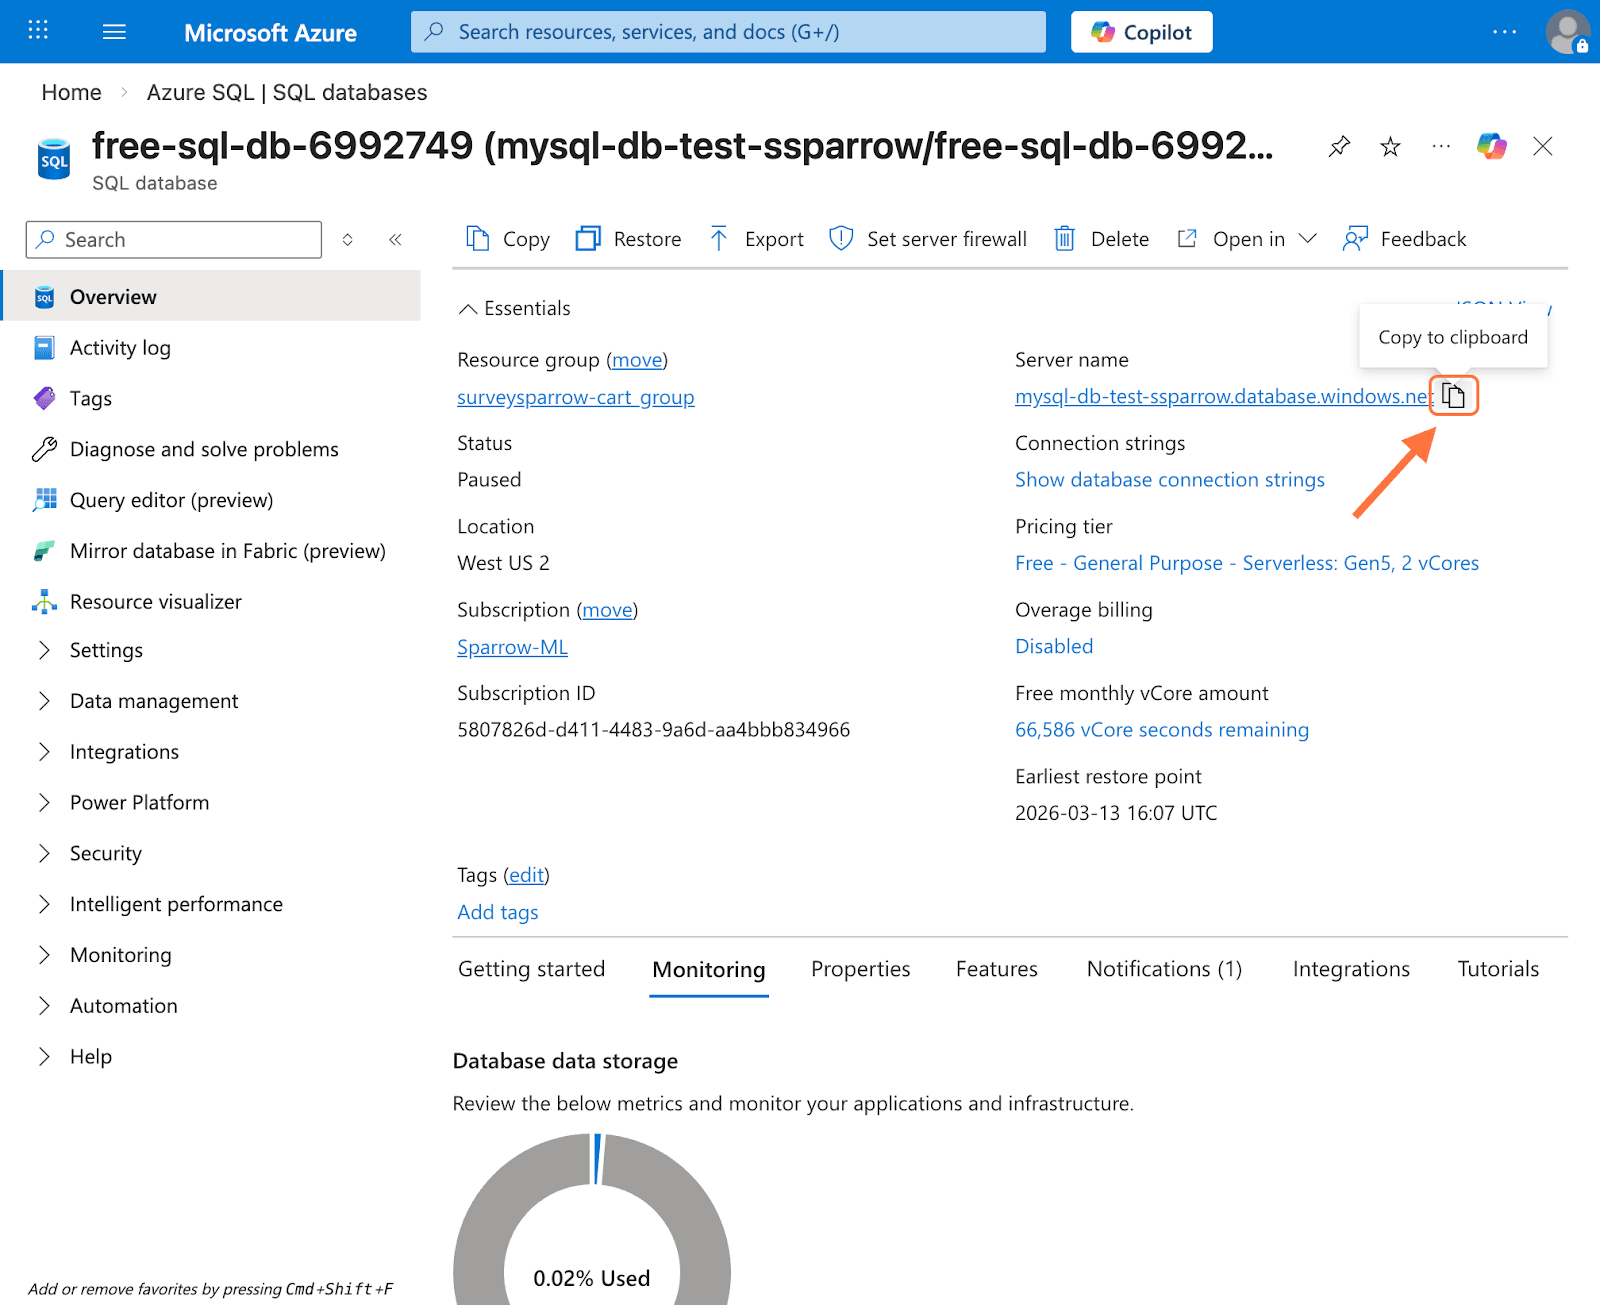
For the database name, copy it from the top.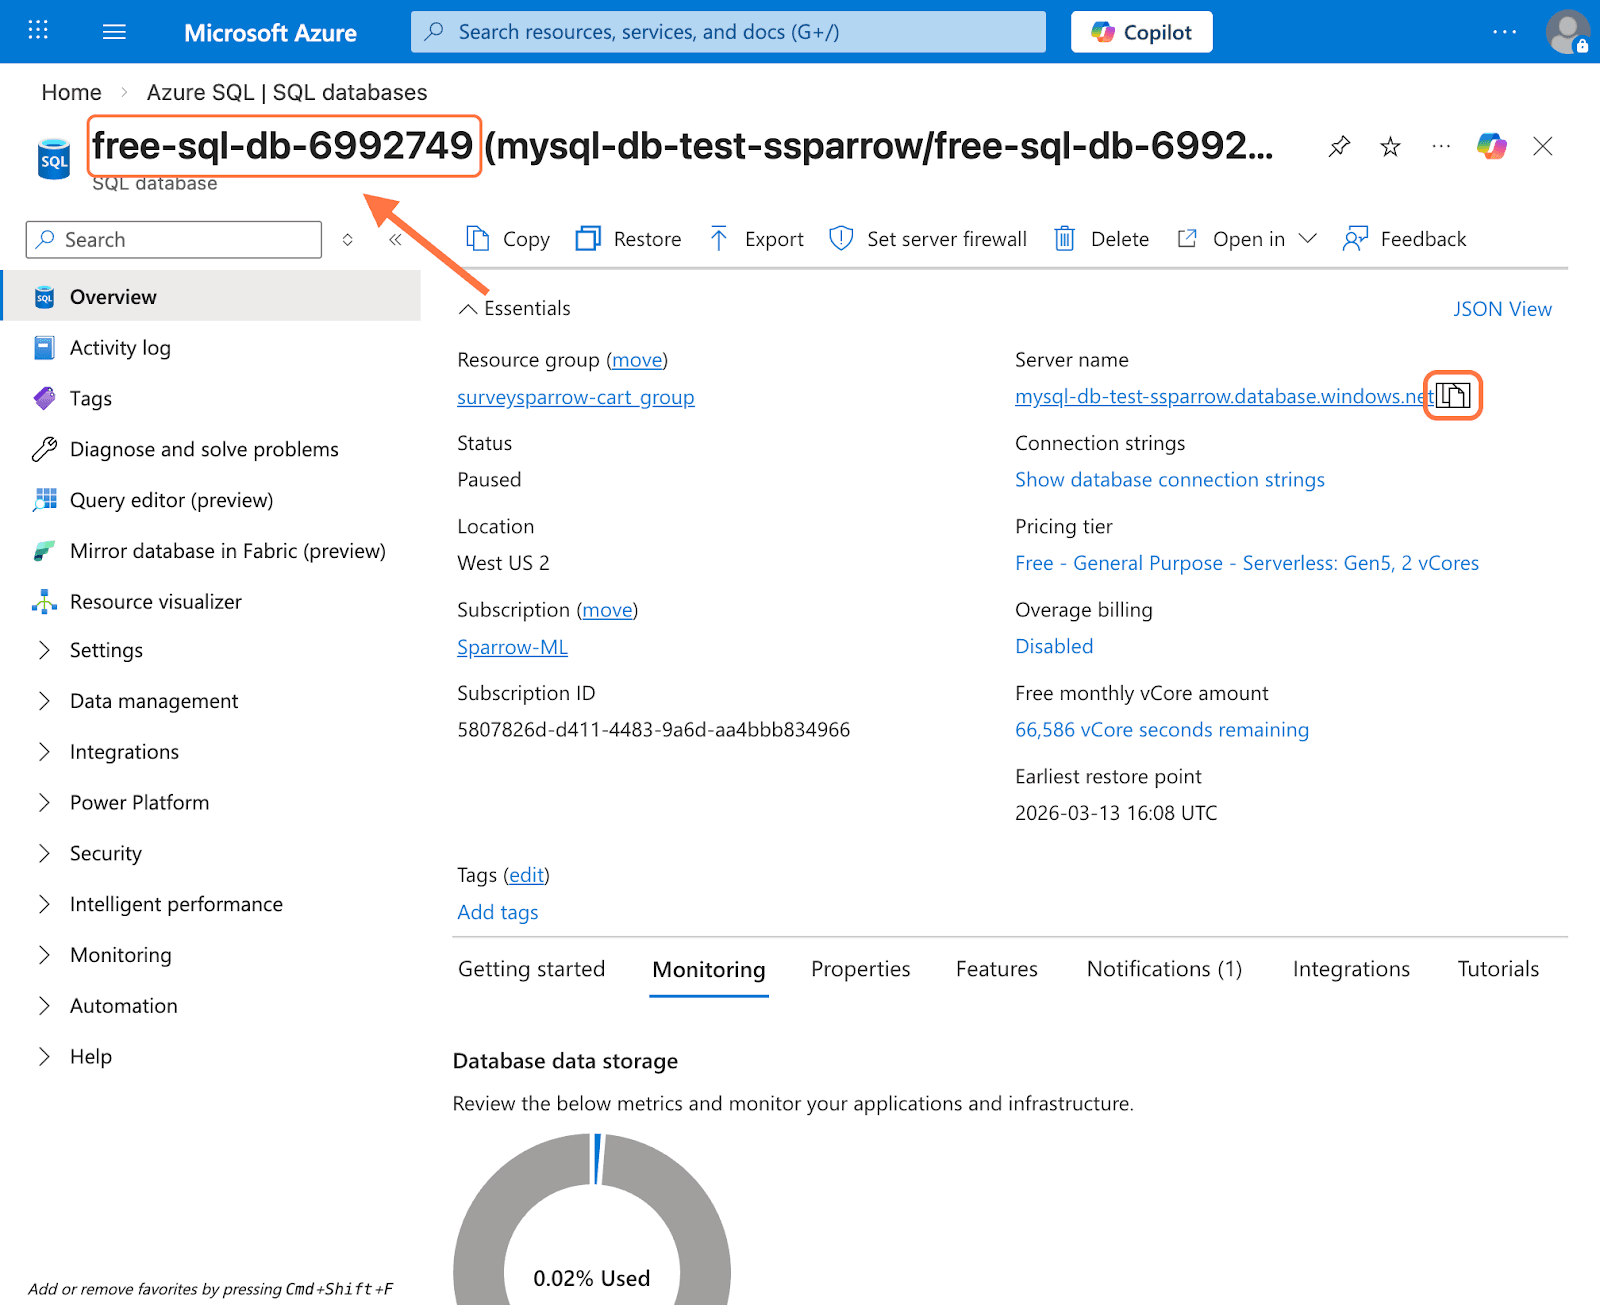
4. Once you’ve copied both details in the configuration screen, click on Connect.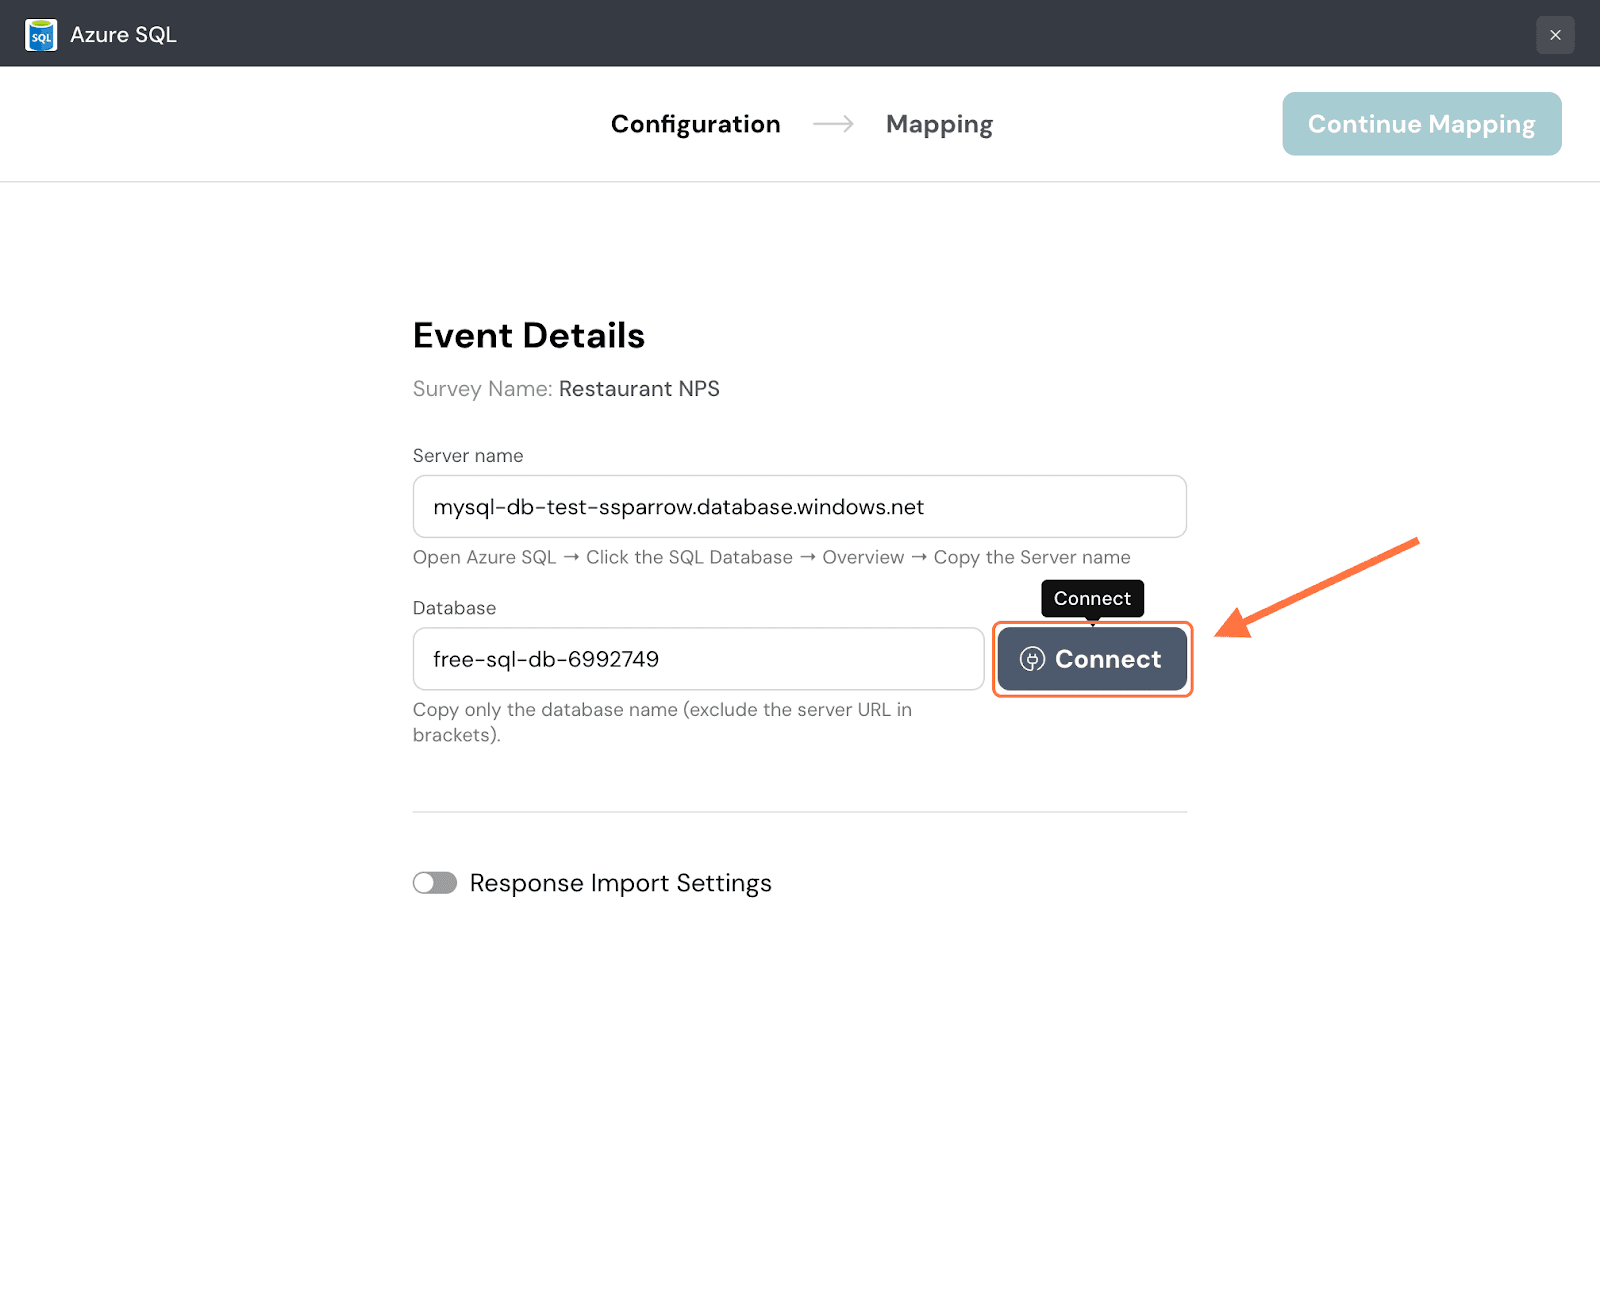
5. Click on the drop-down under Schema and choose from the options.
6. Now you must select the table to which you want to push the survey data. But you can either choose an existing table from the dataset or create a new one. Click on the dropdown under Action to decide. Both actions have different flows. We’ll first start with an existing table.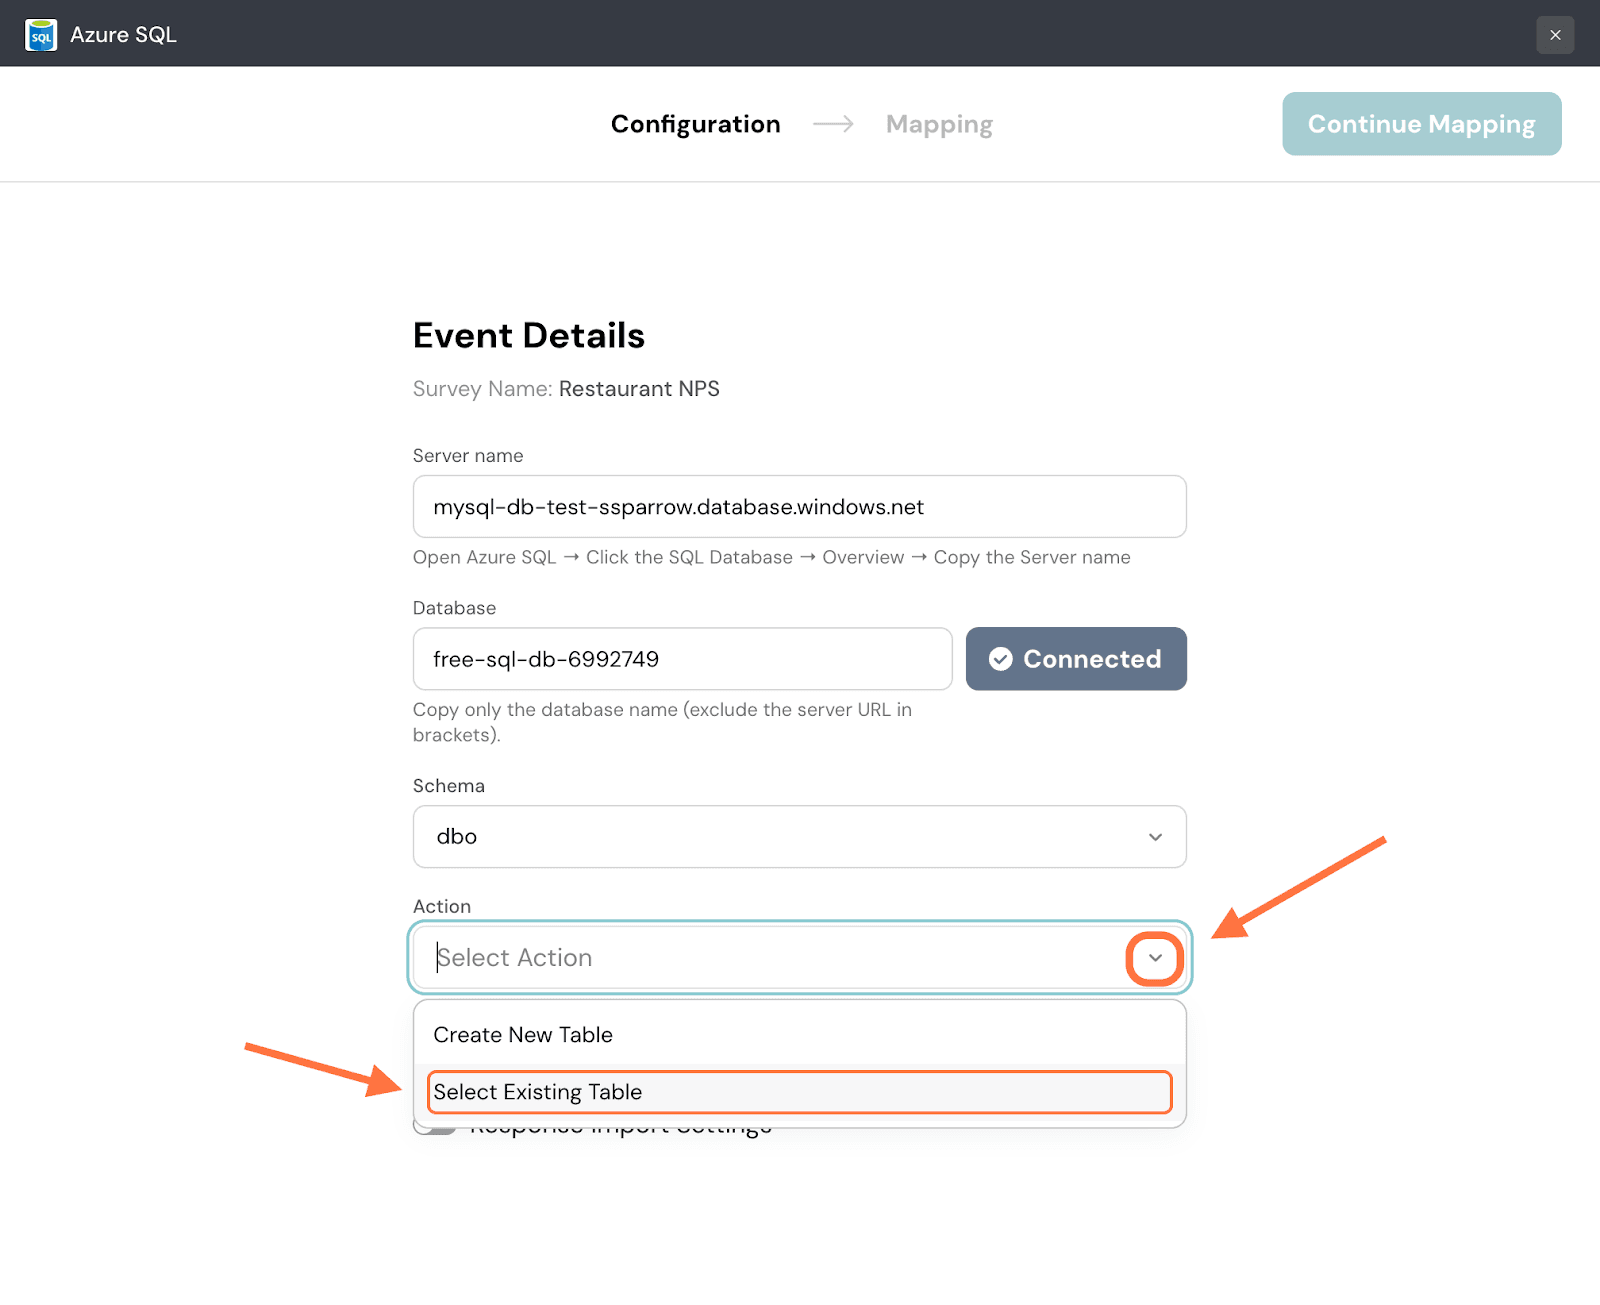
7. Next click on the drop-down button under Table and select from the options.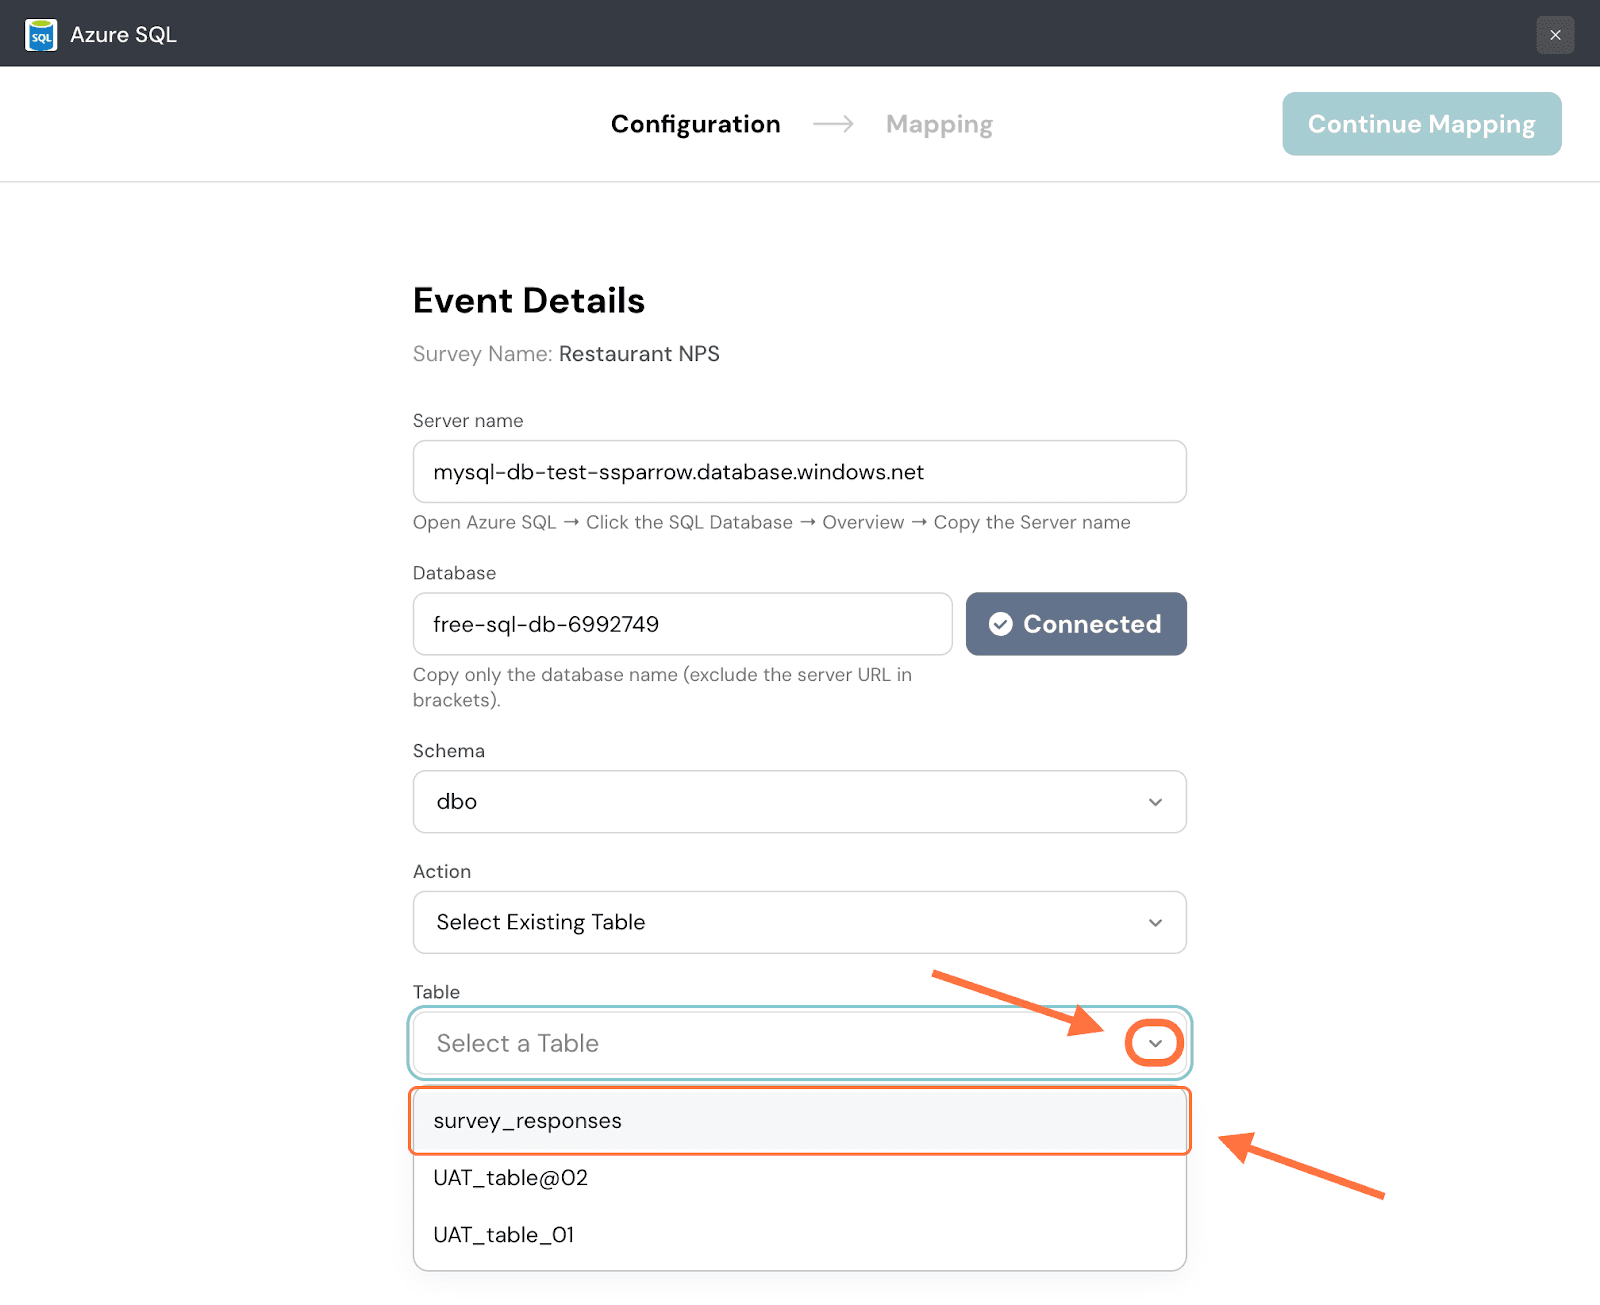
8. By default, only new responses are imported. If you want to only import responses from a specific date, click on the toggle next to Response Import Settings.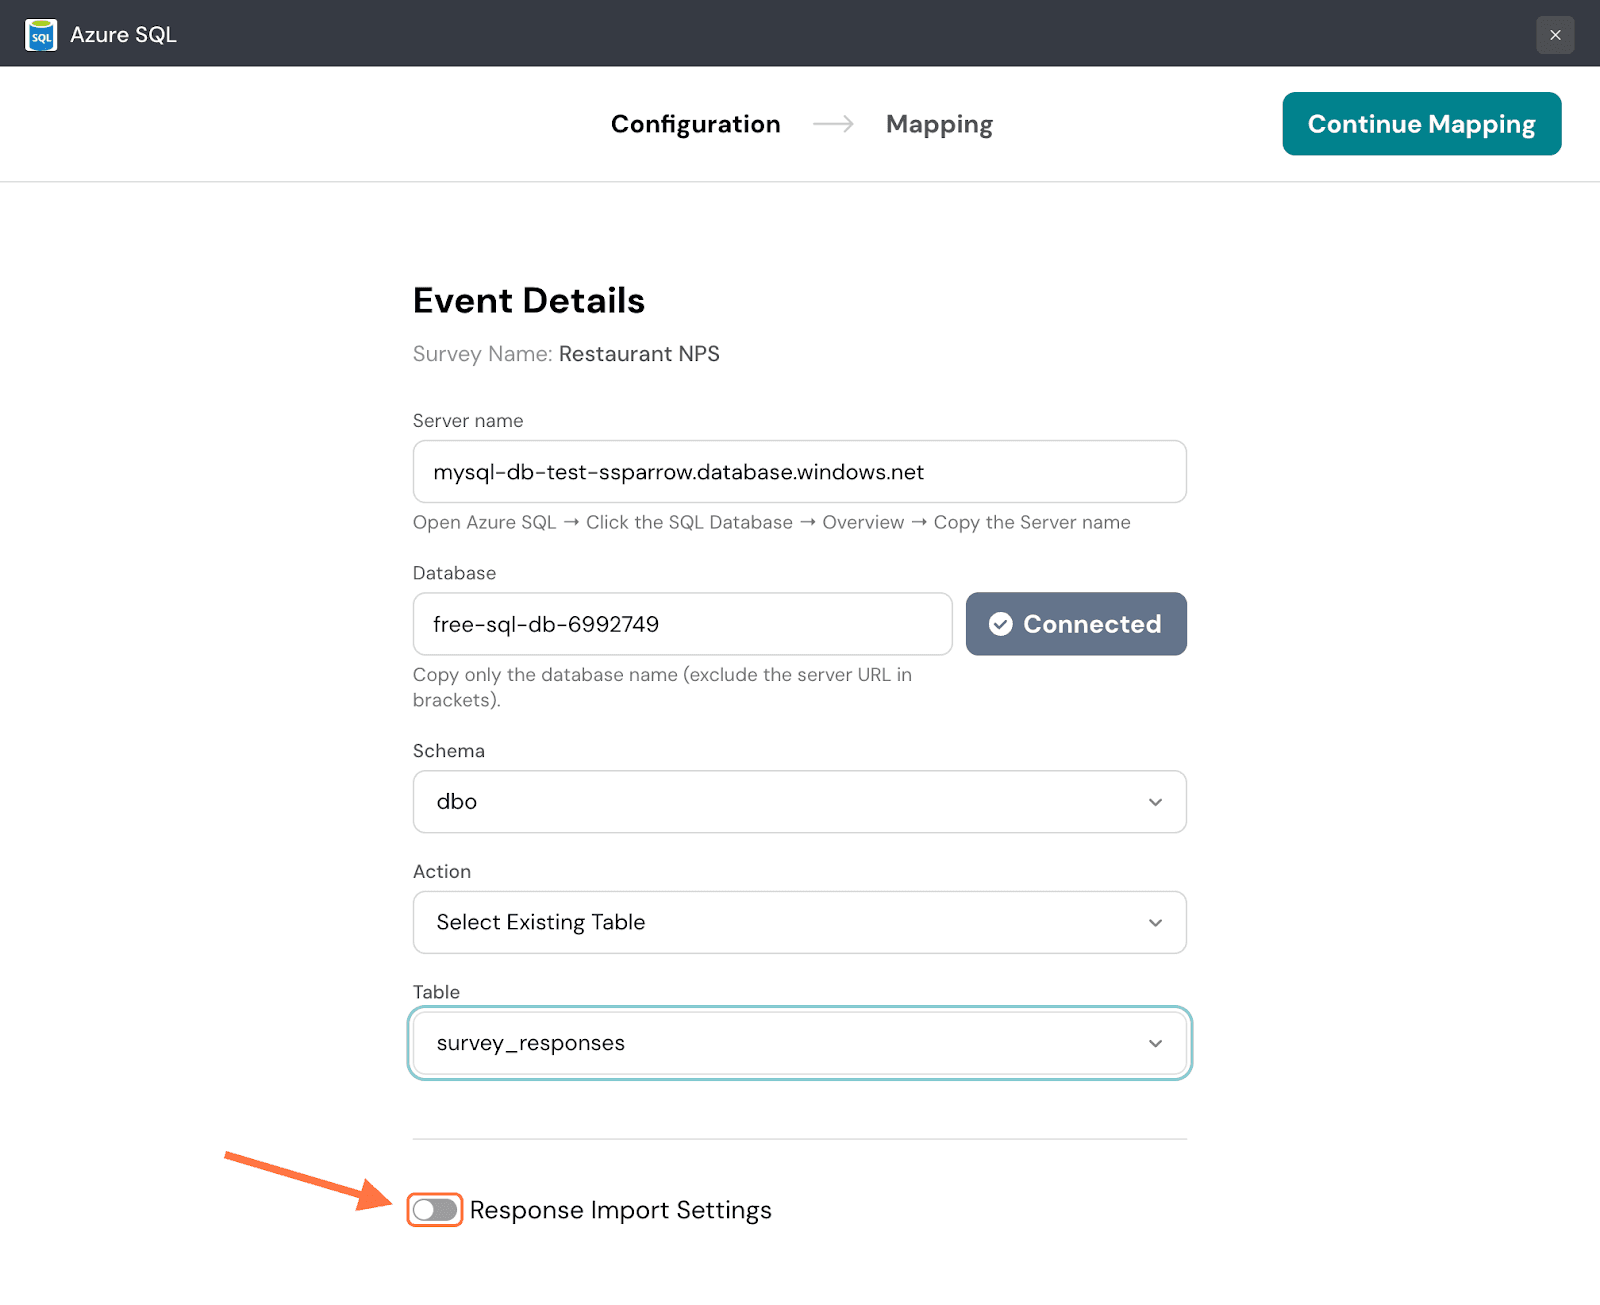
9. When you hover over the Specific Date option, a calendar will appear. Choose a date, then click on Apply.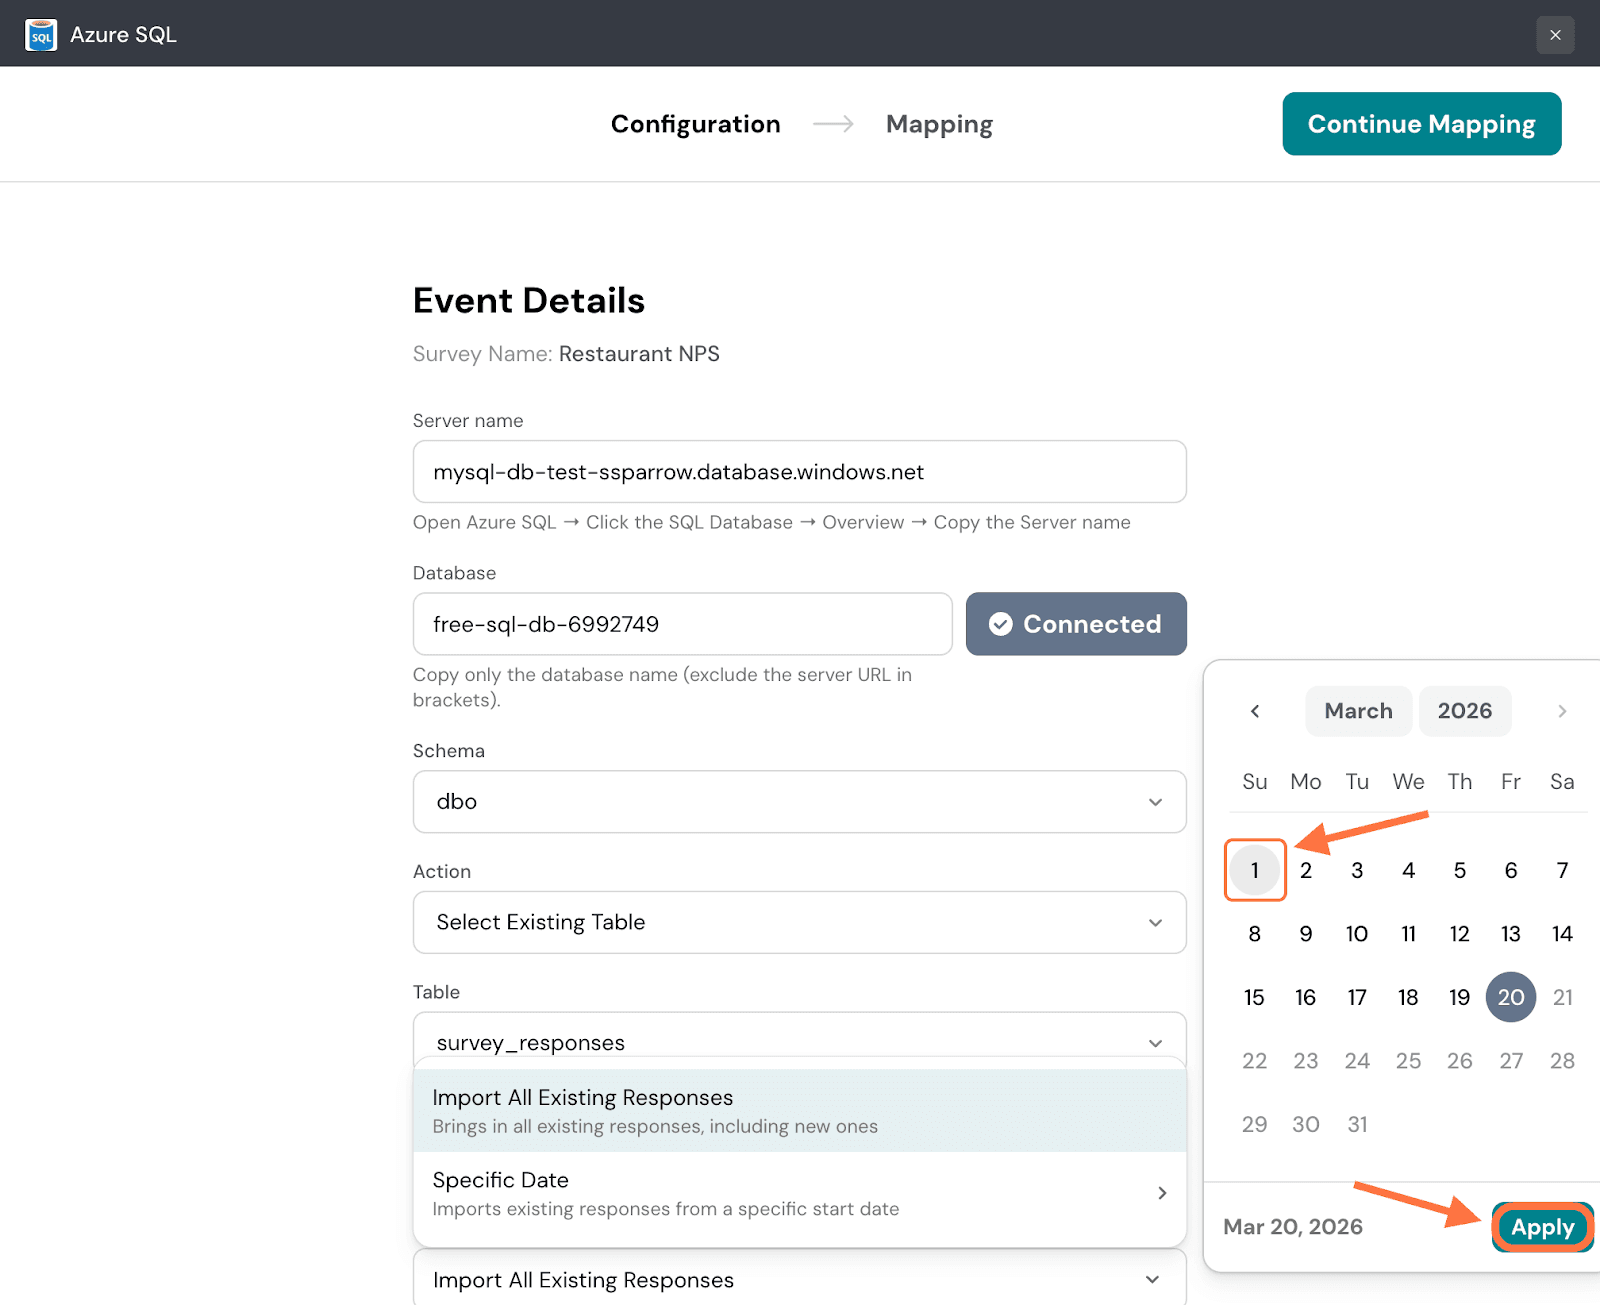
10. Click on Continue Mapping.
11. Now in the Mapping section, you need to configure which response properties are going to Azure SQL. First you can set conditions to decide which type of response gets synced to Azure SQL. Click on Set Conditions.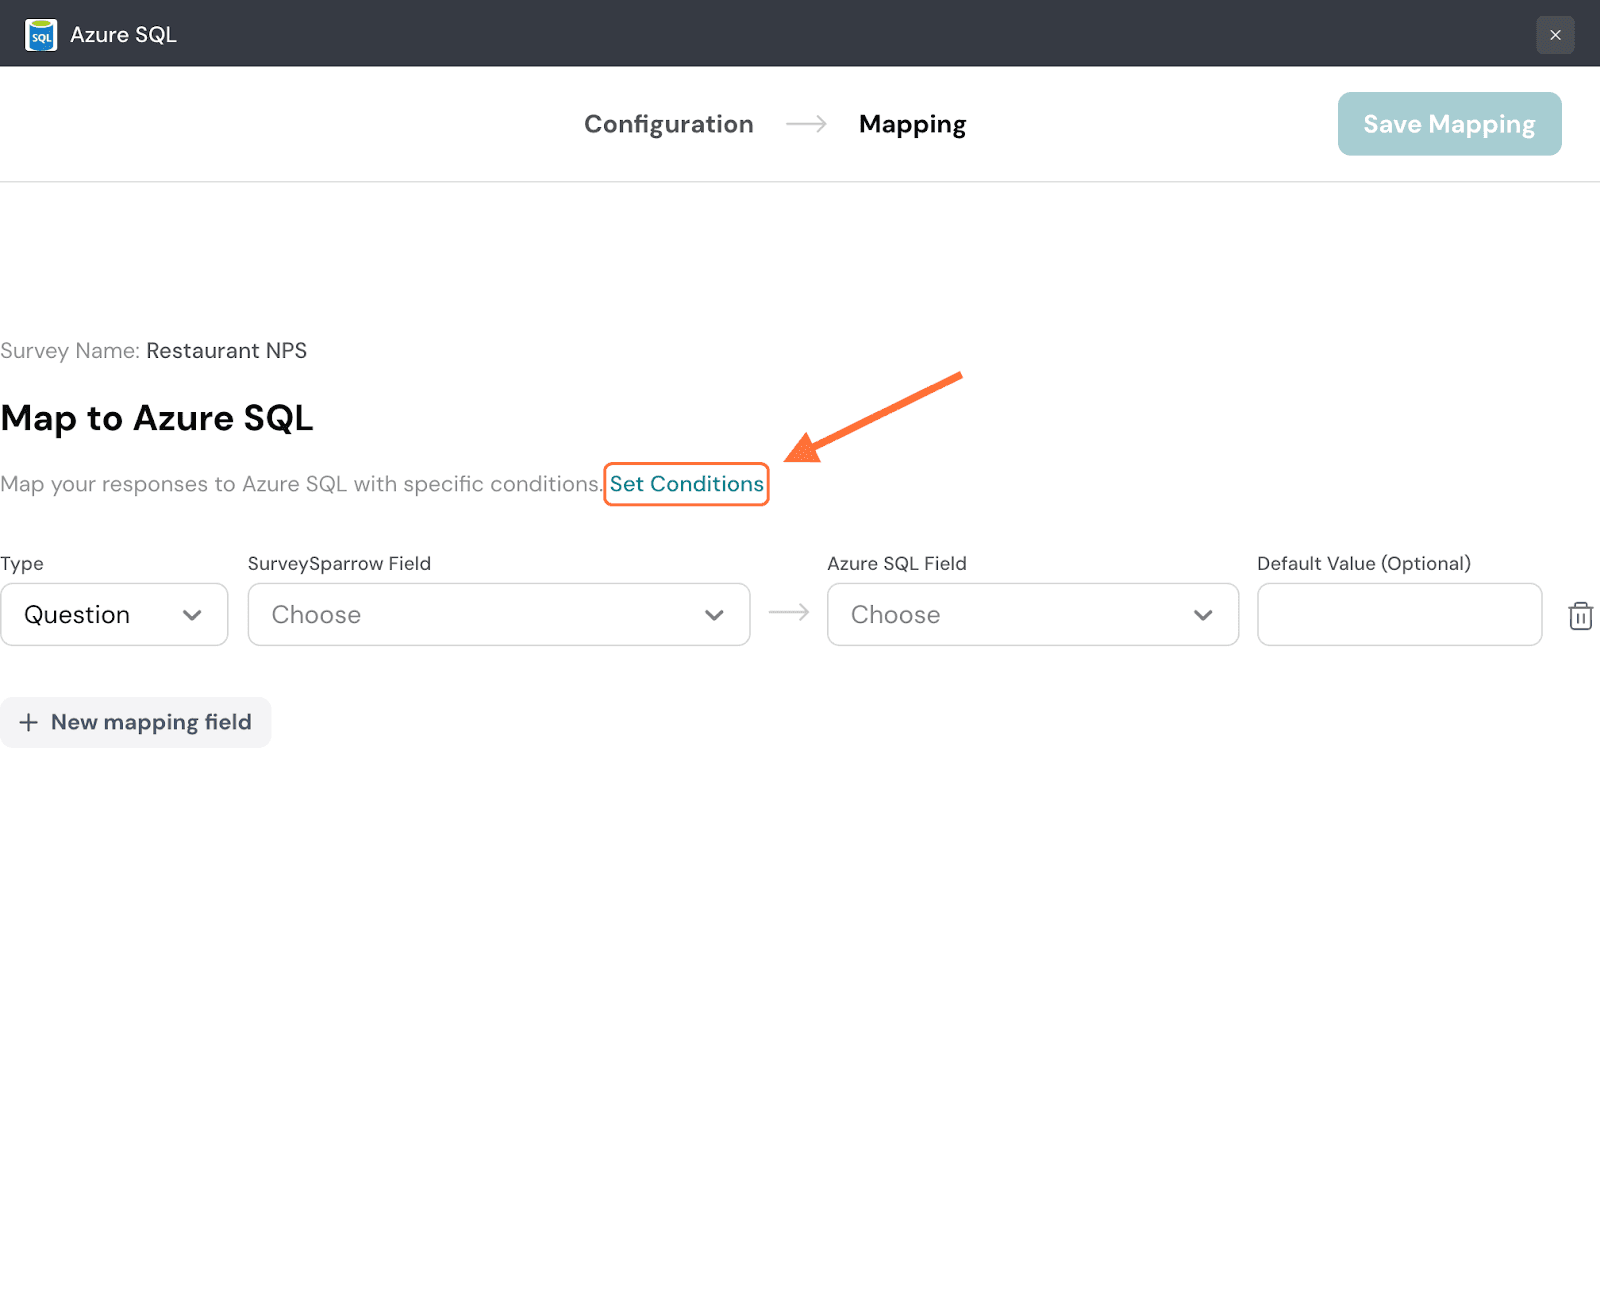
12. In the condition setting modal, you can set a conditional logic for the conditions: either any or all. The default setting is any, but if you’d like to change the logic, click on the drop-down next to it.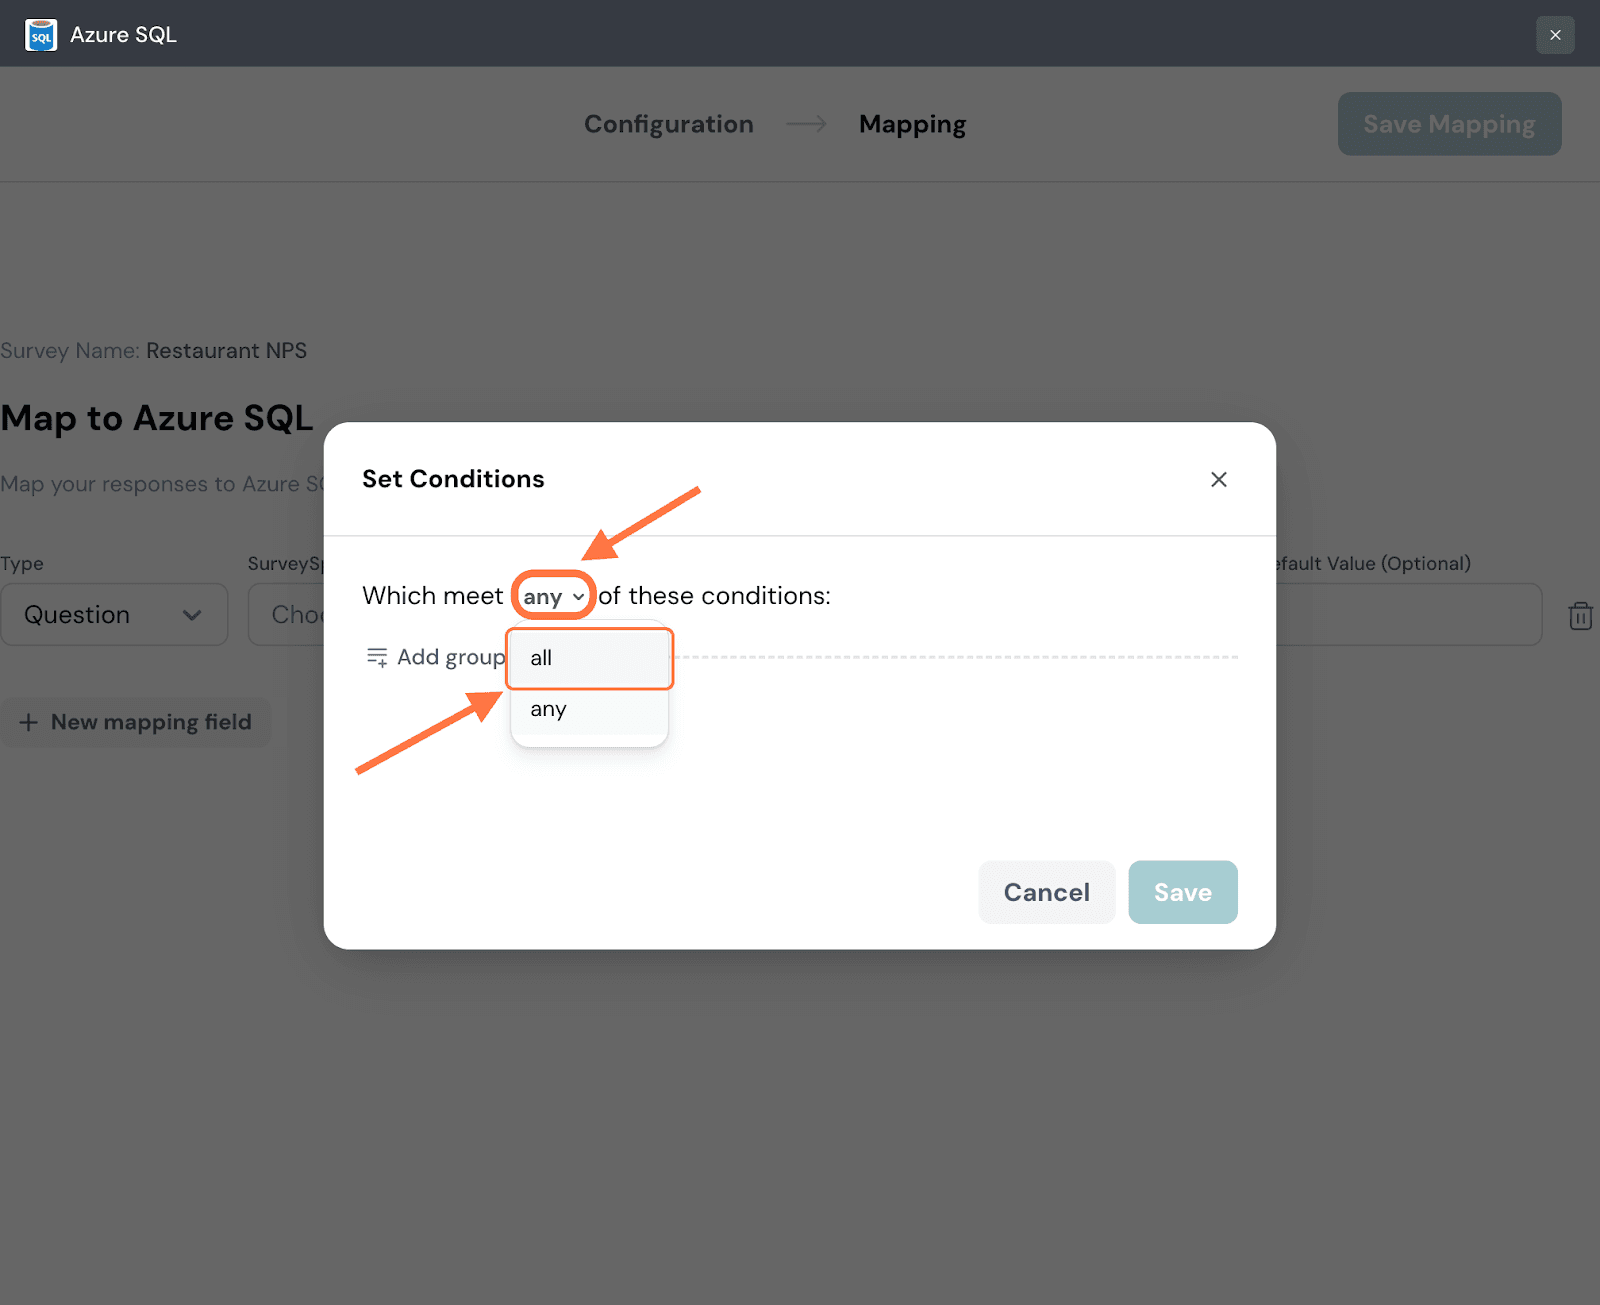
13. To add conditions, click on Add Group.
14. Choose a category of data from the drop-down menu to which the condition must apply. For this instance, let’s go with a question.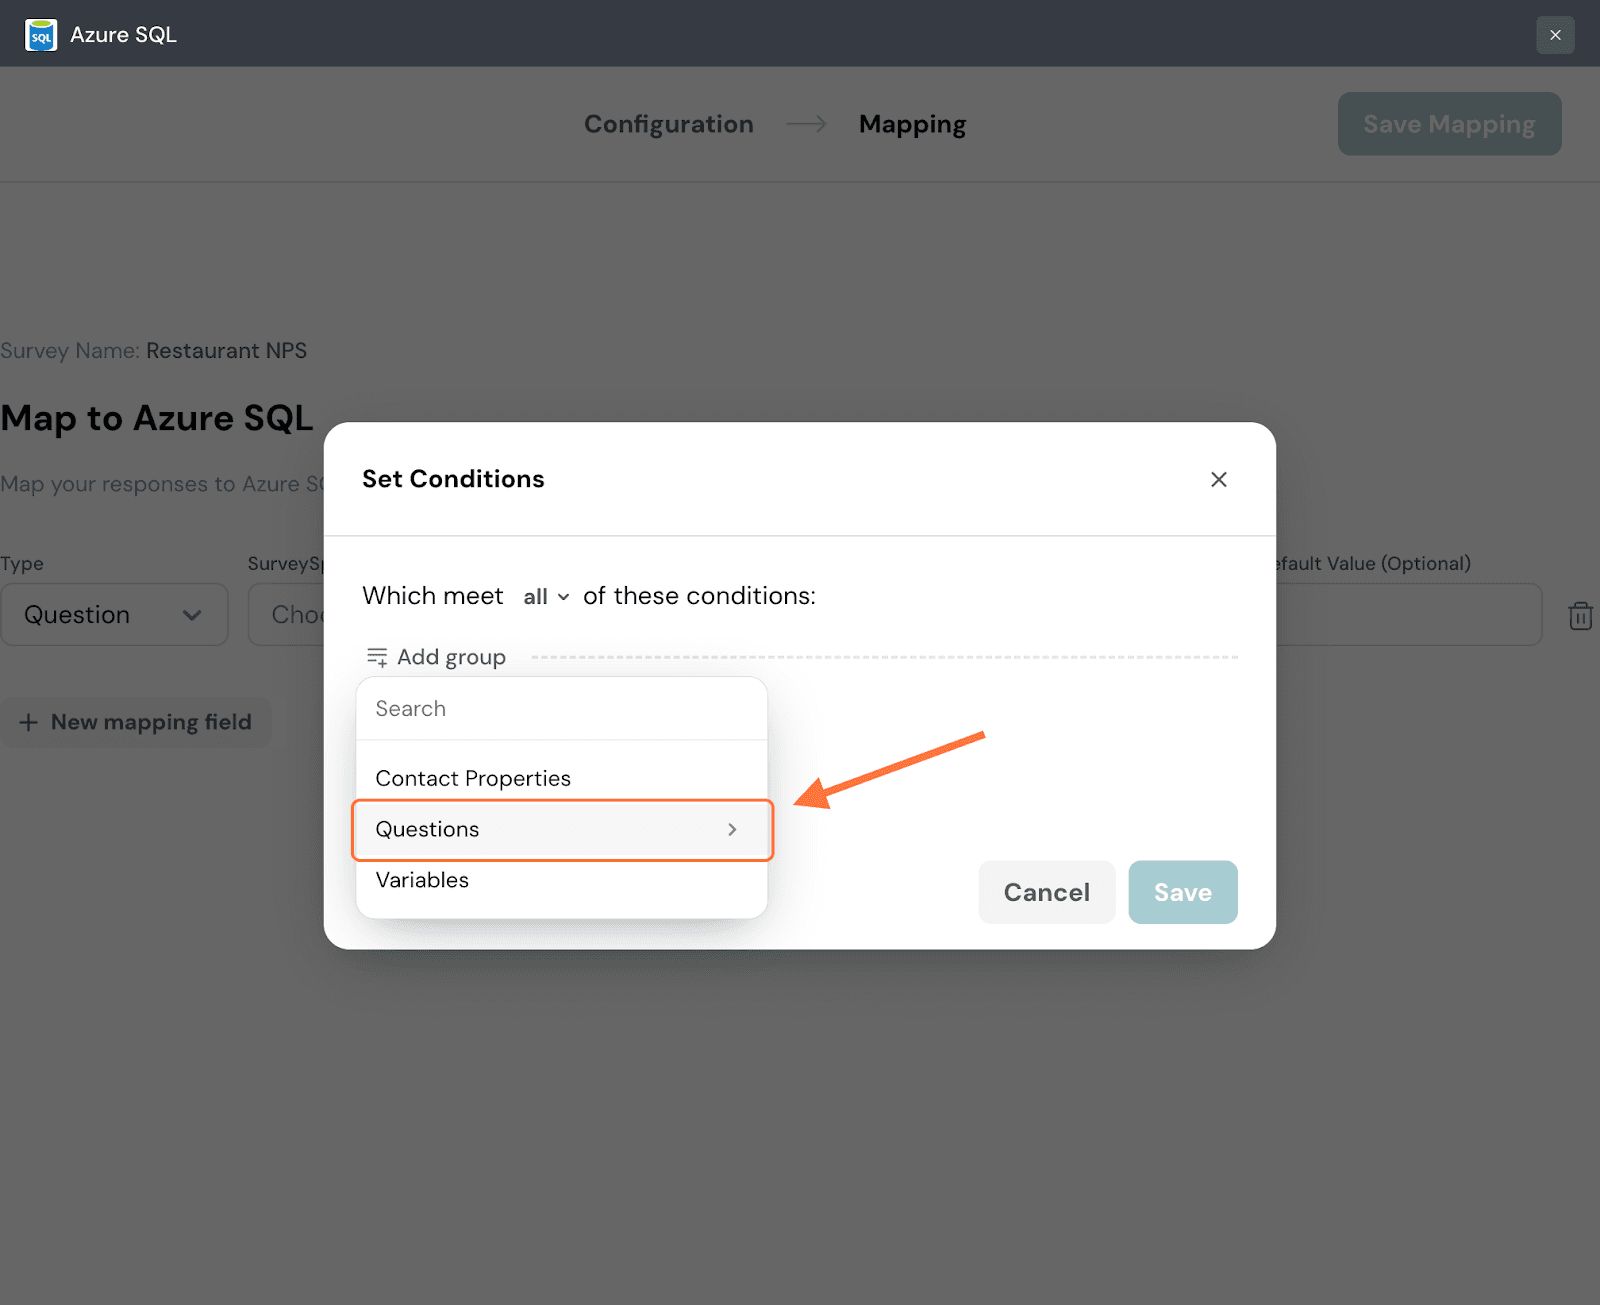
15. Choose a particular item from that category, in this instance a question.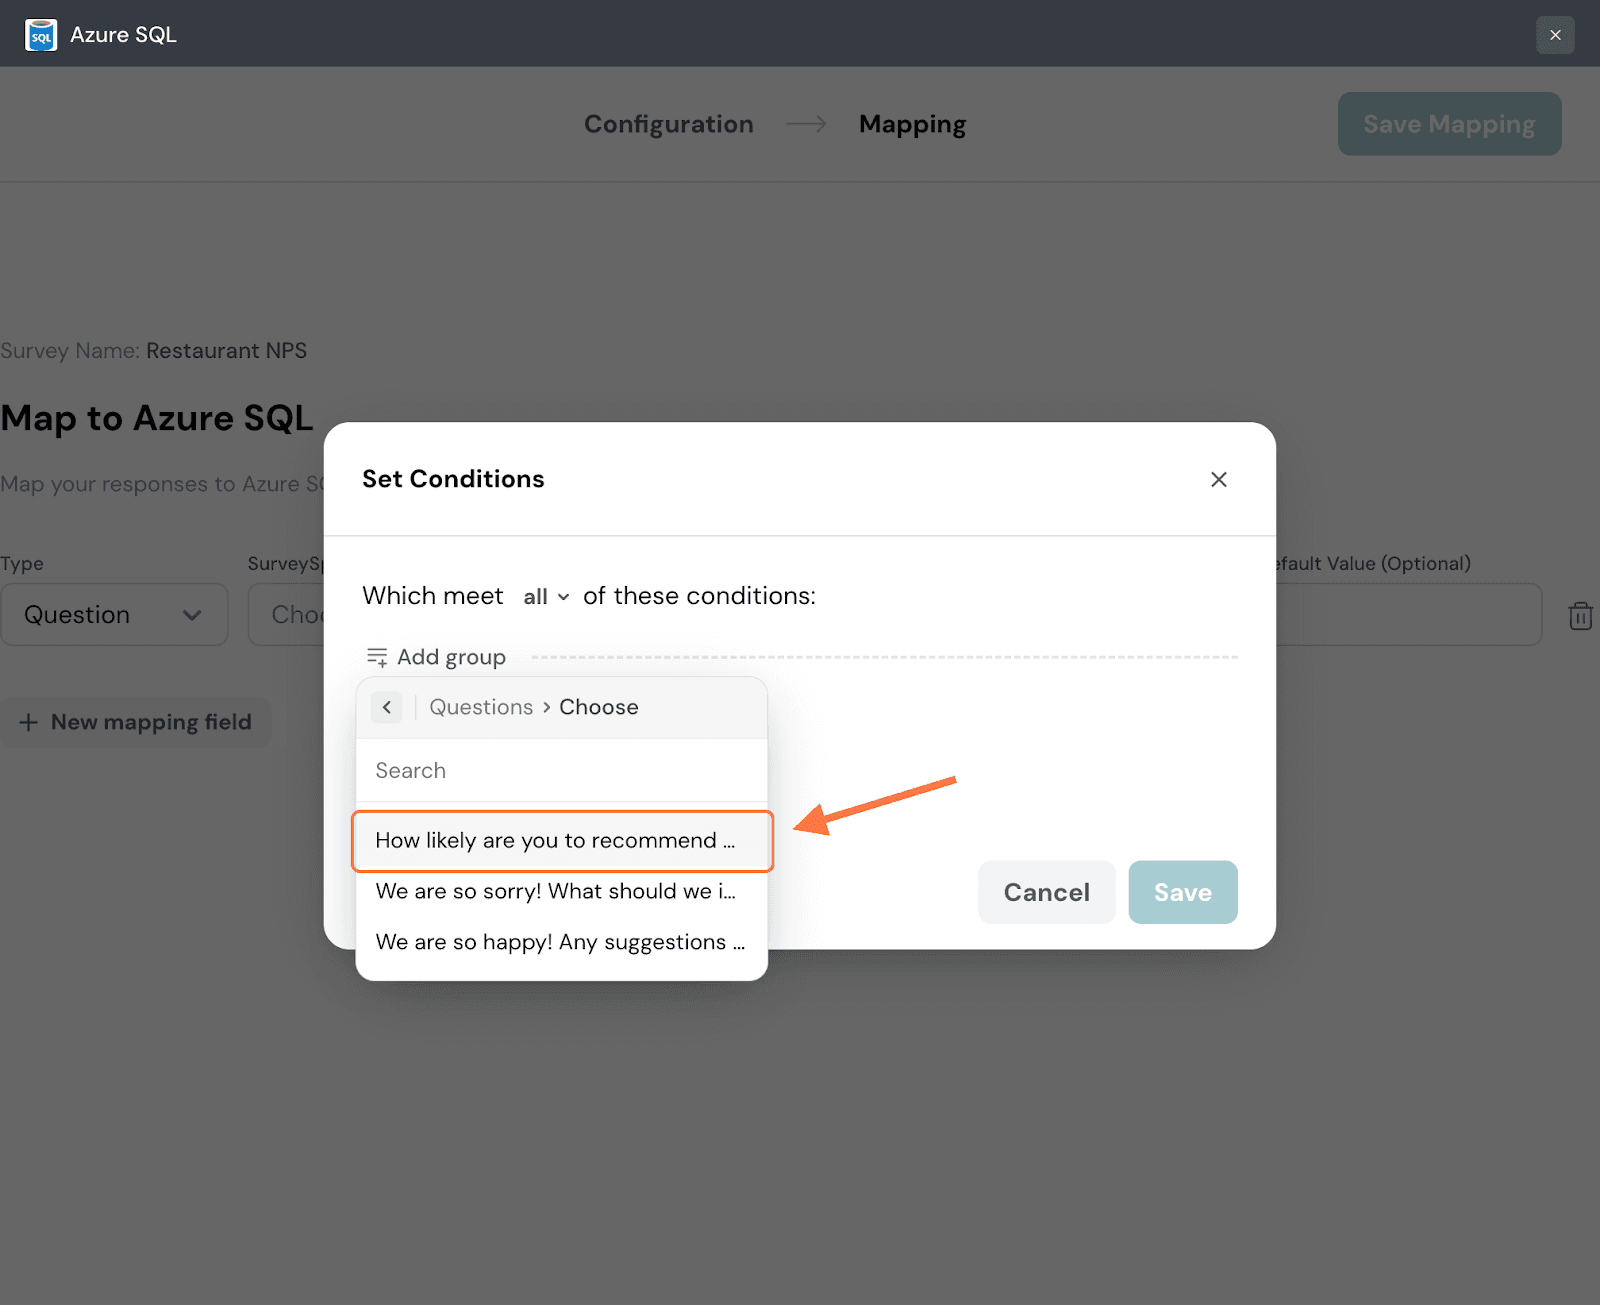
16. Click on Choose Condition to start defining the condition.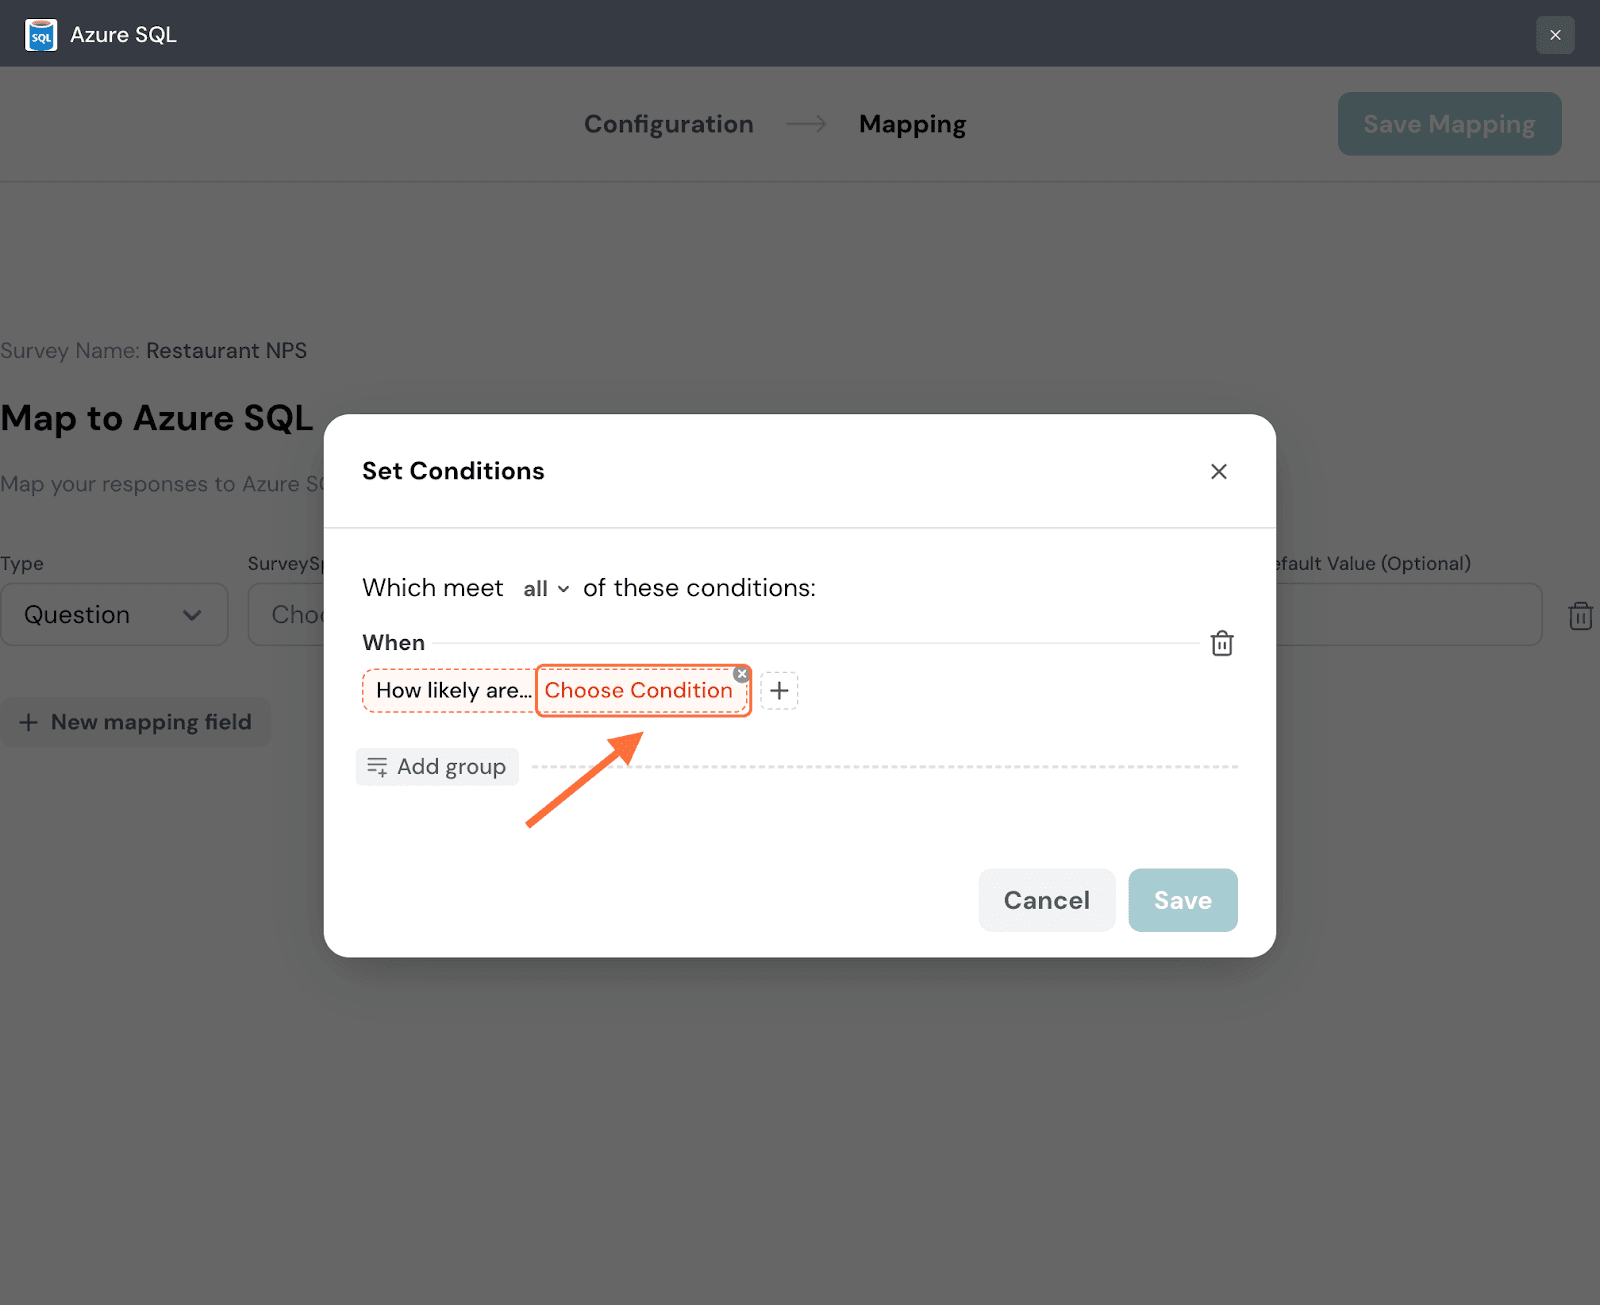
17. A list of comparison operators appears, choose one.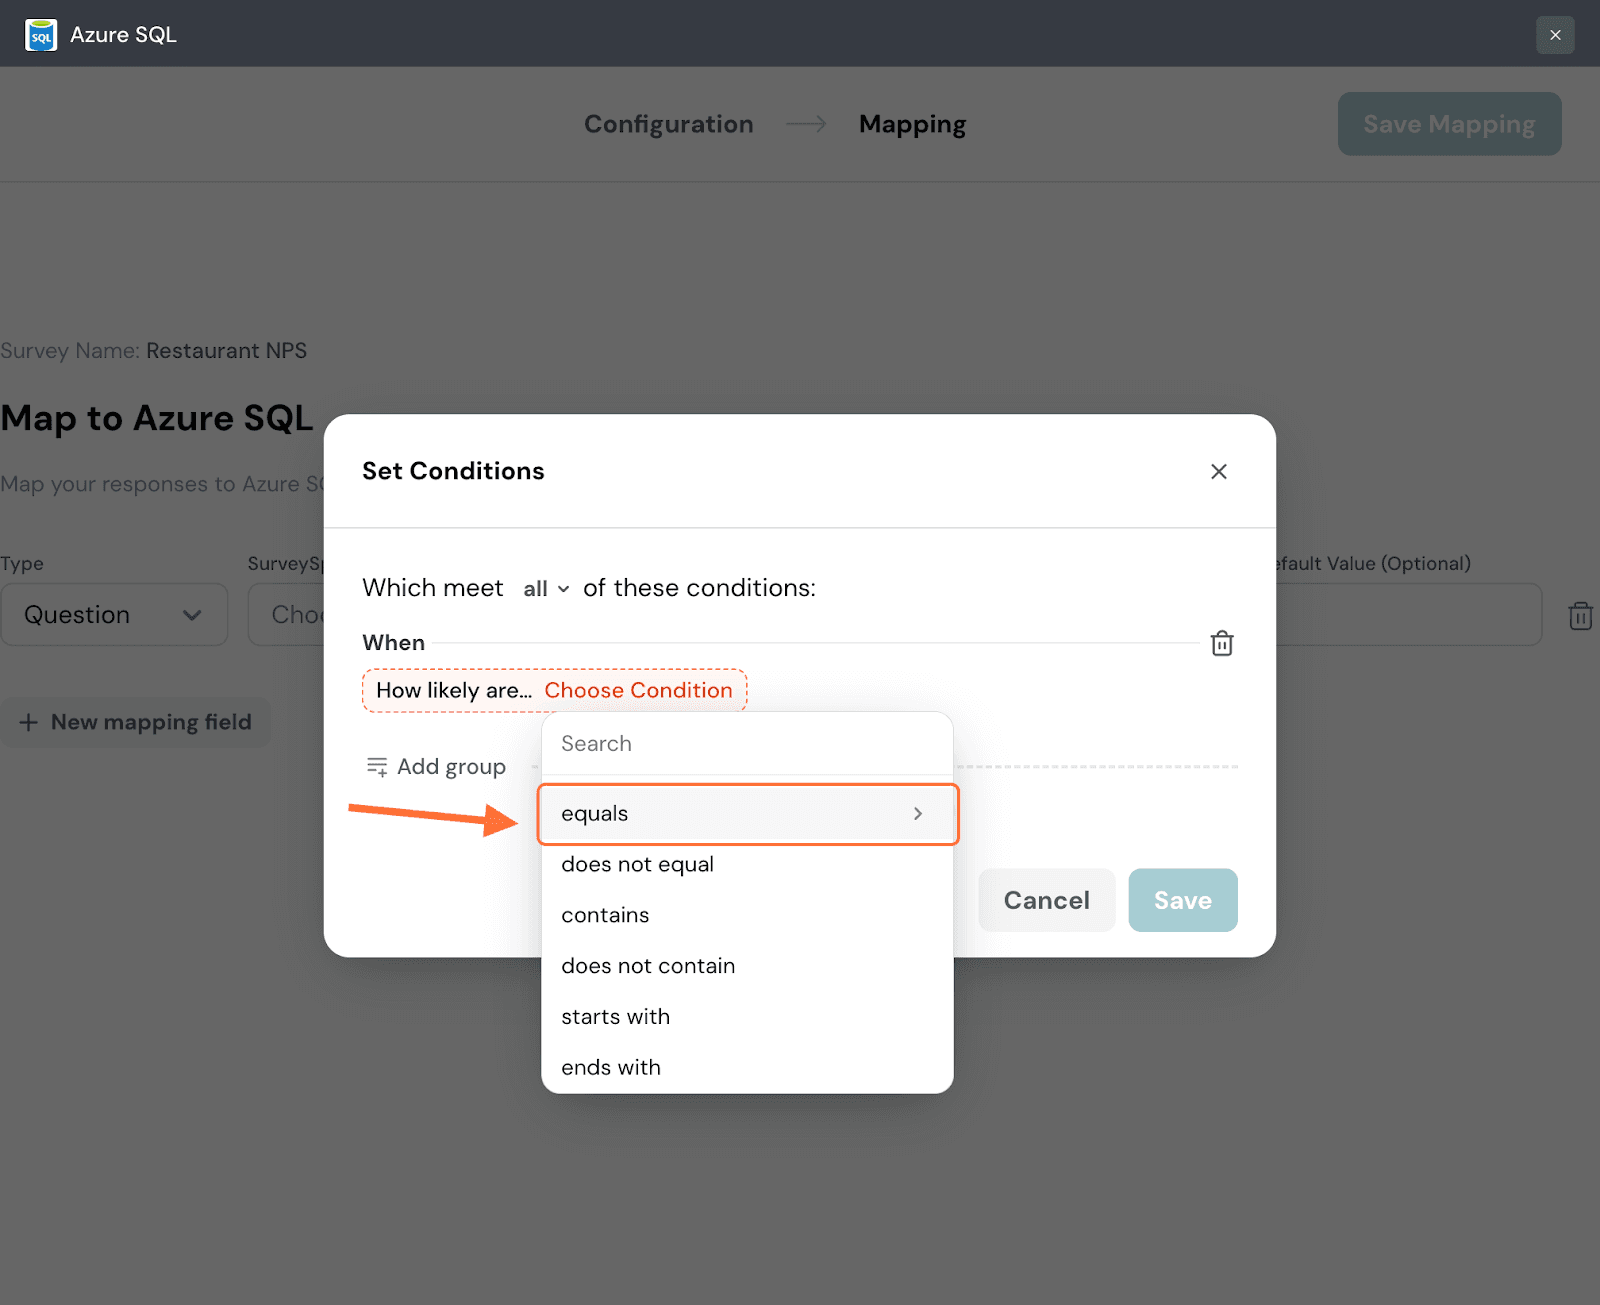
18. Input a value for the data to be tested against and then click Apply.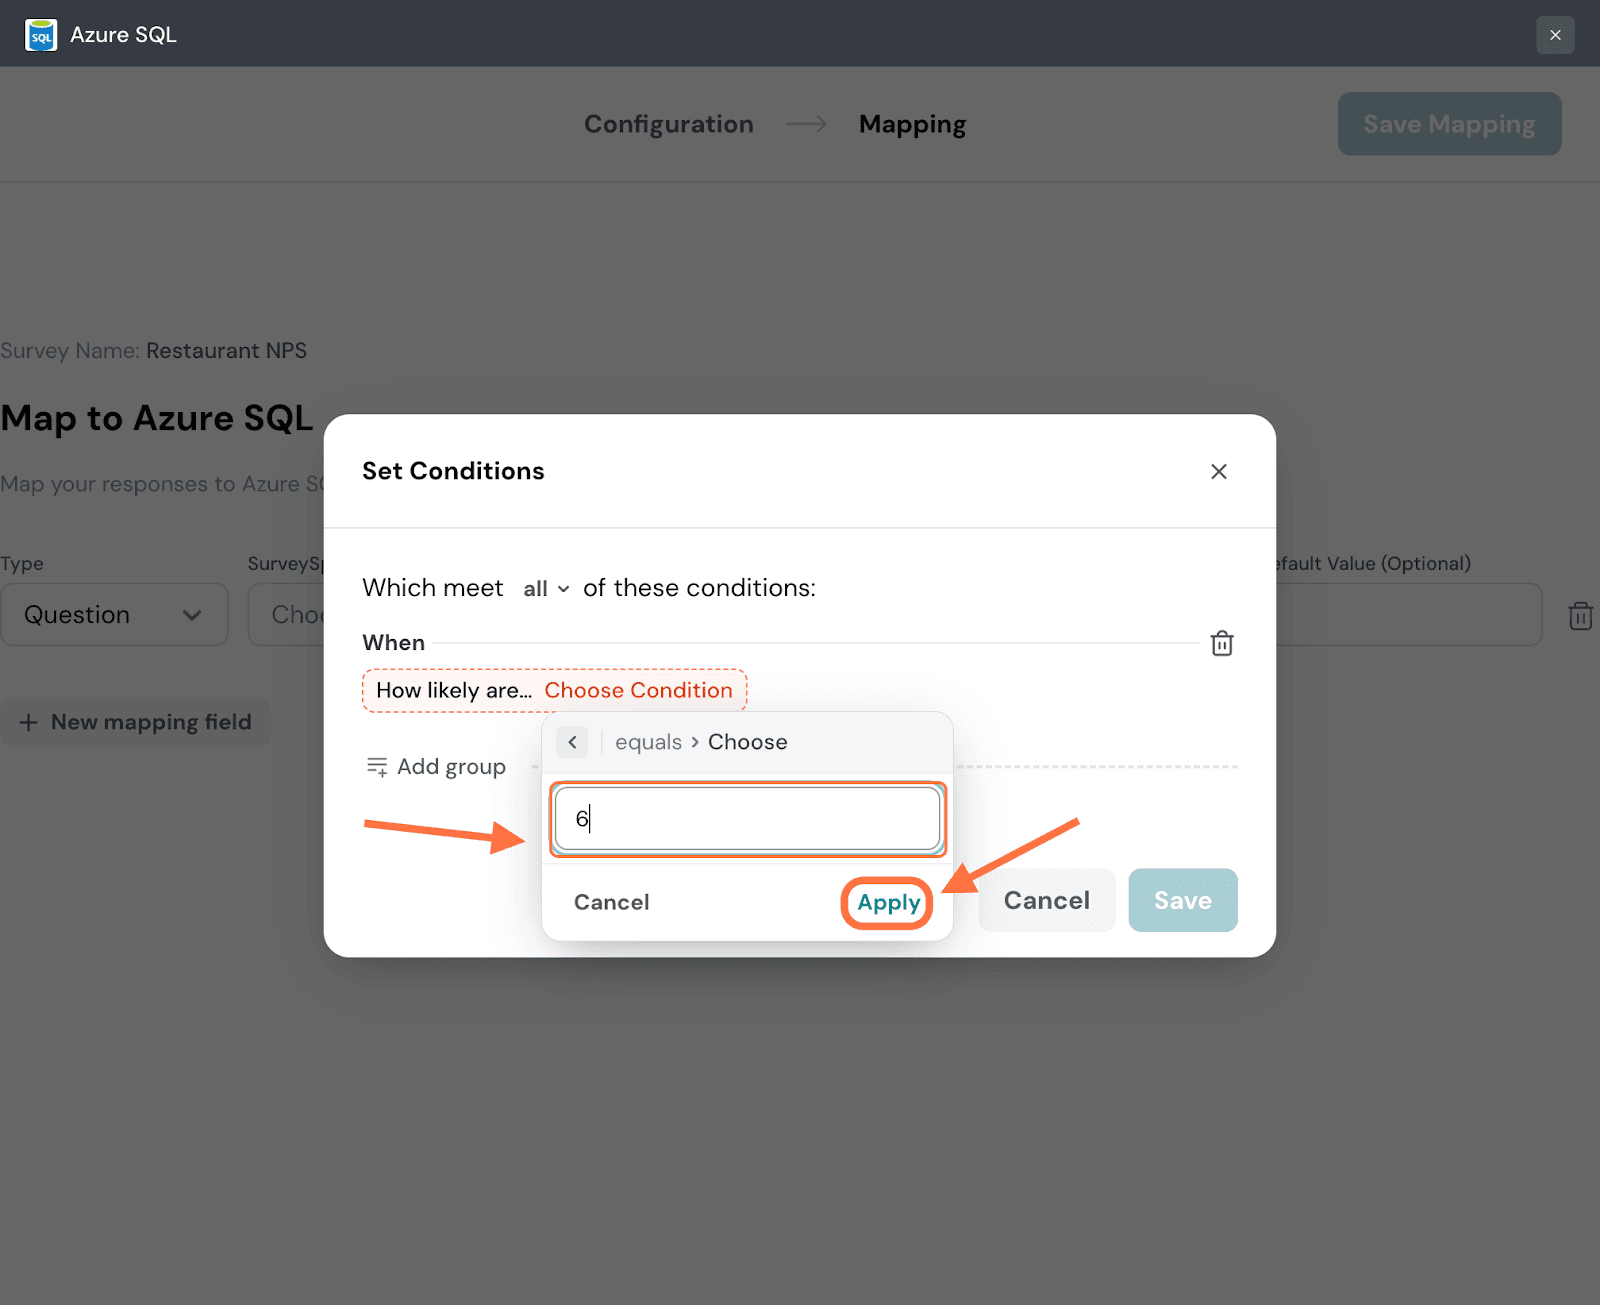
19. You can turn a condition into a group of conditions by hovering near it and then clicking on the plus icon that appears to the right. Repeat the same steps as above to create another condition.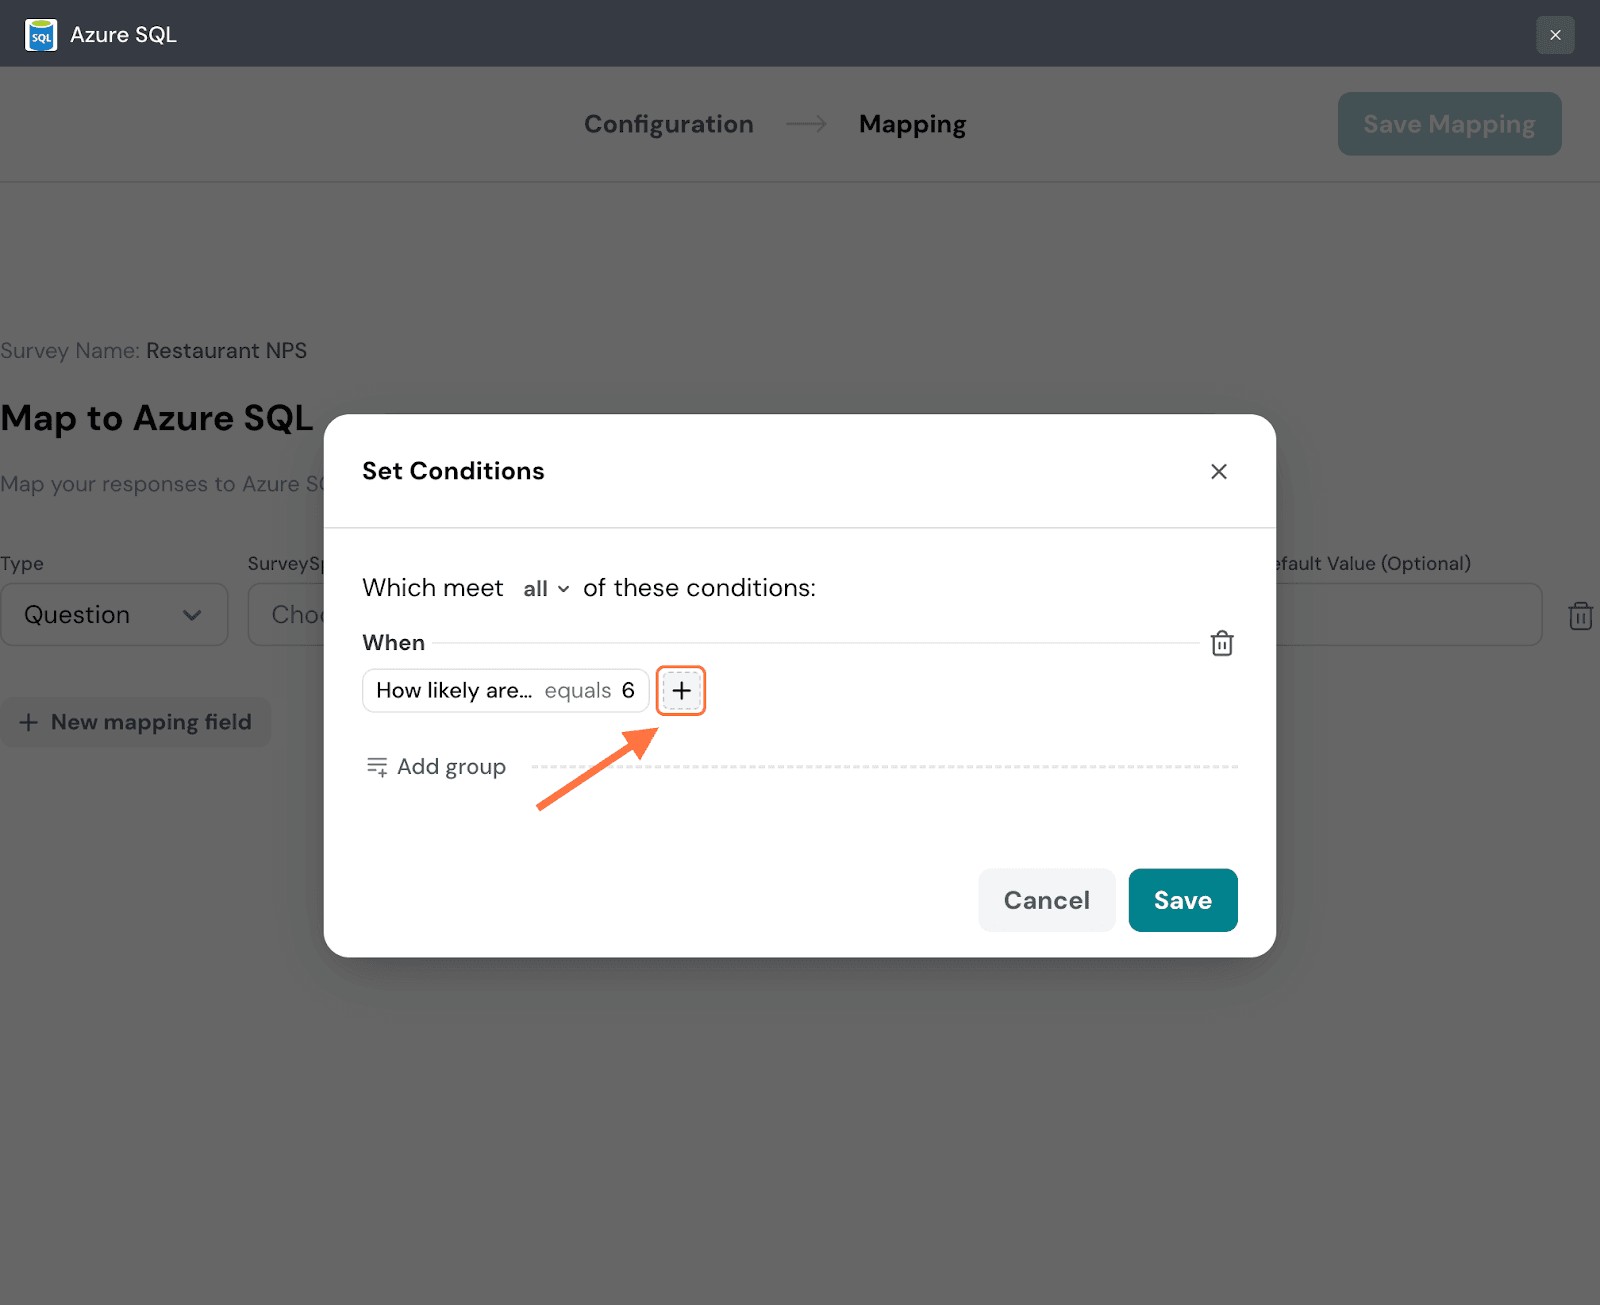
20. Within a group of conditions you can set conditional logic: and/or. The default is and, but if you’d like to change it, click on the drop-down.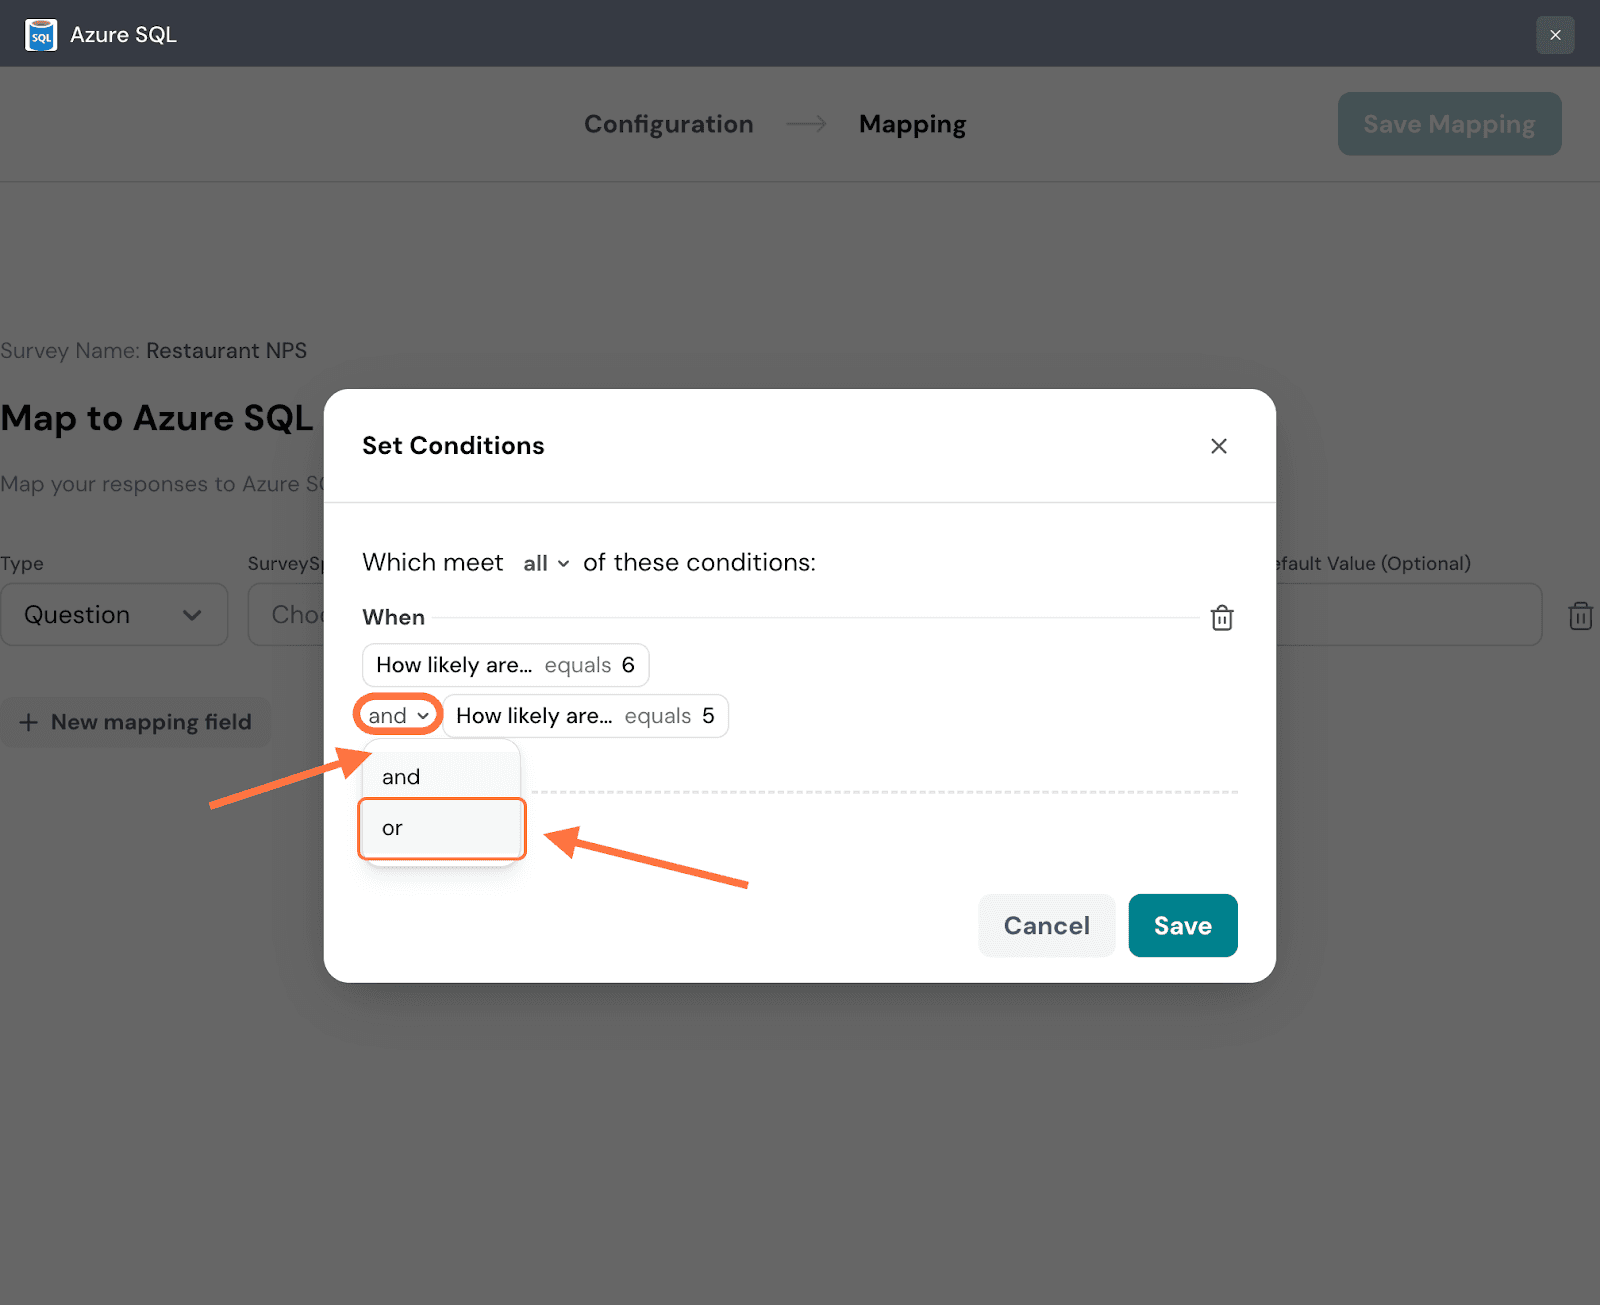
21. Click on Add Group to add more conditions/condition groups. When you’re done, click Save.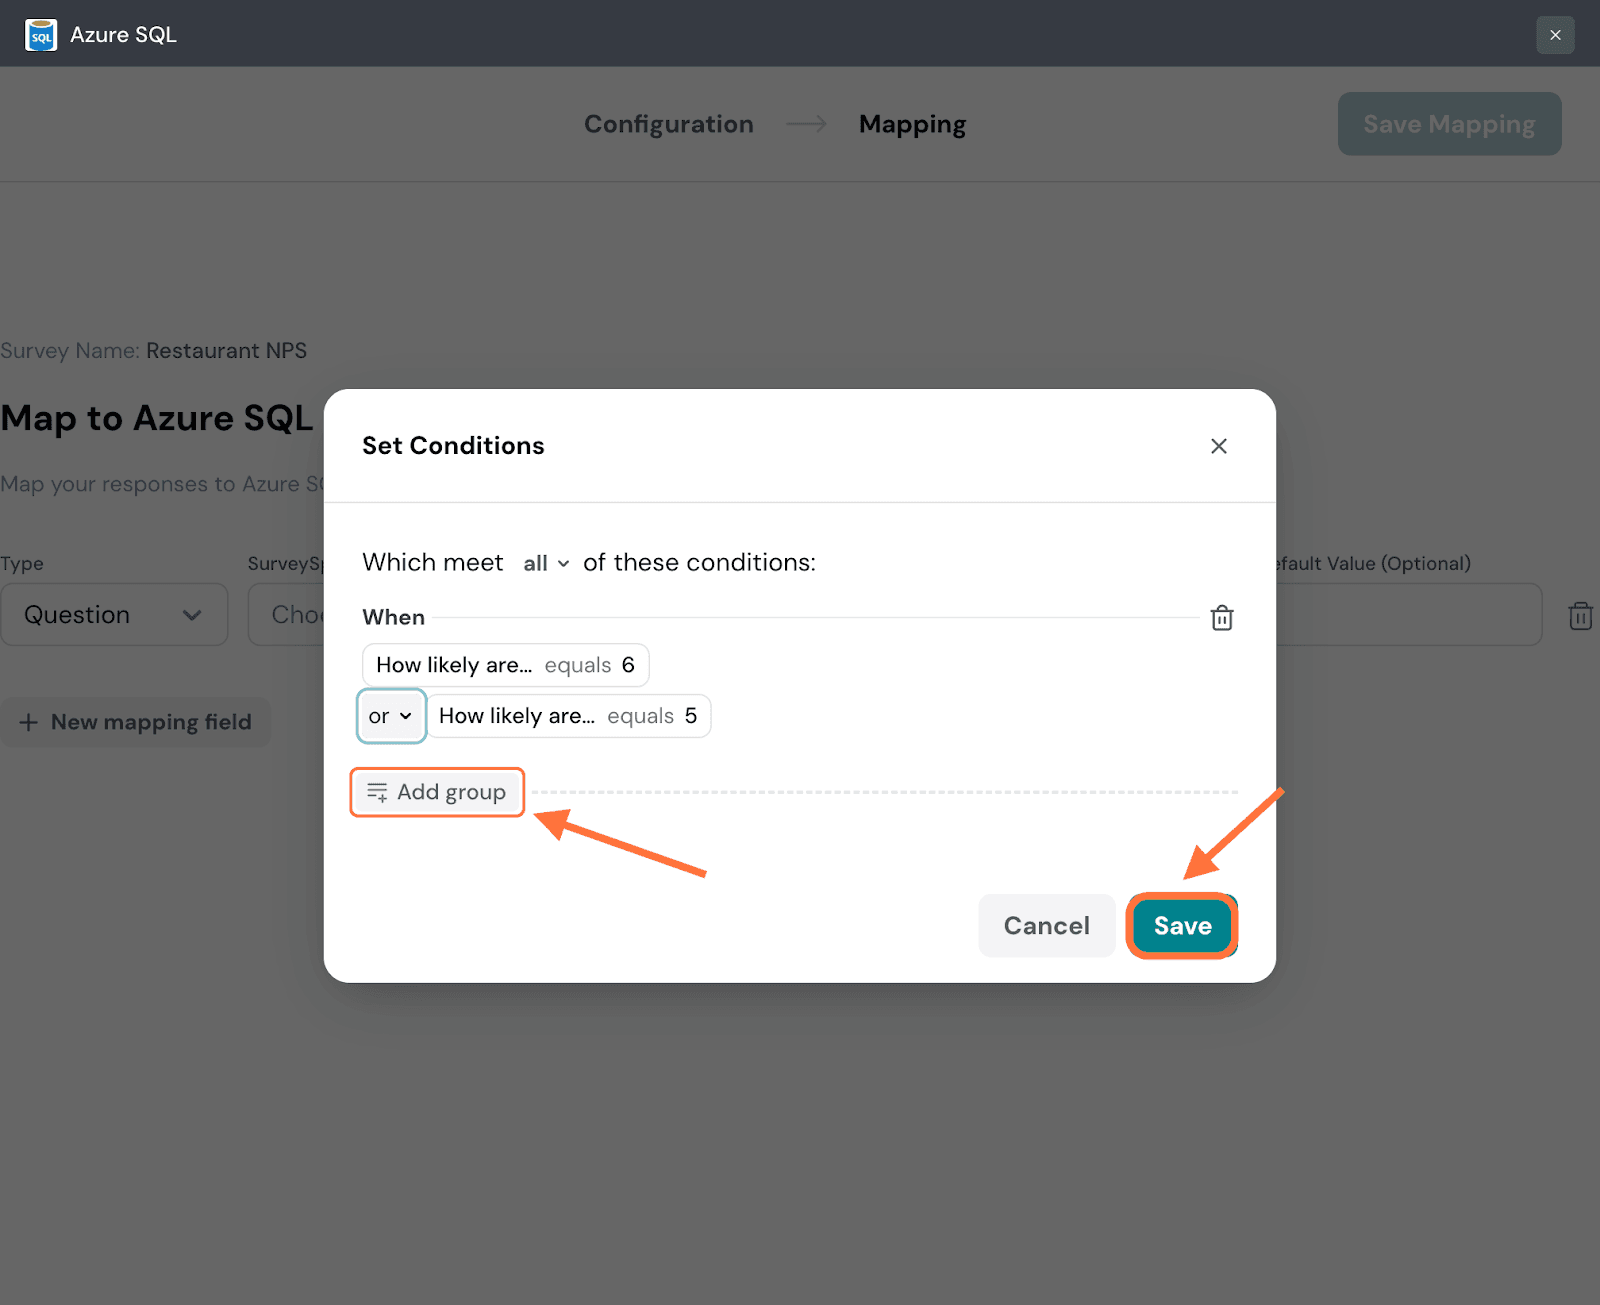
22. The first step of creating a mapping is to select a property type. The default property type is a question, but you can change it by clicking on the drop-down and choosing from the options.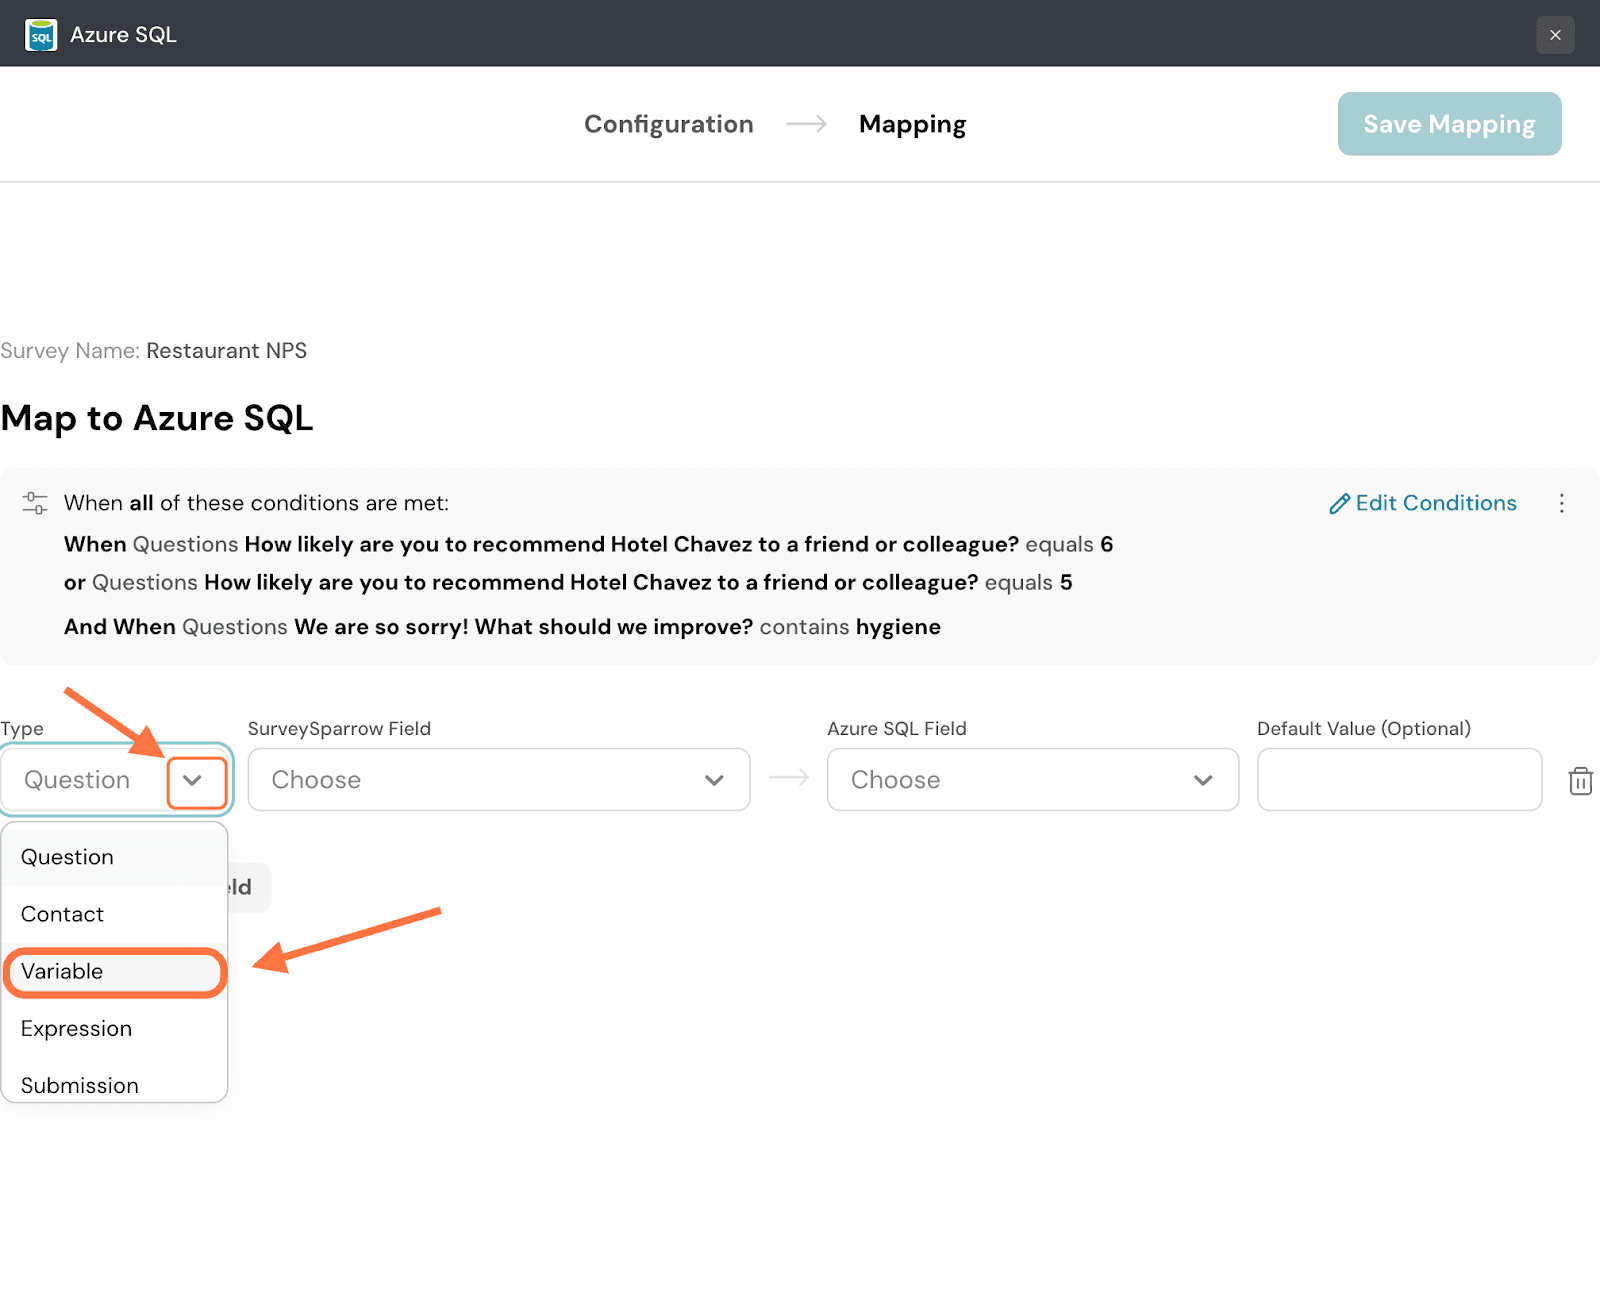
23. Next, you must choose a particular item of that property type that you’ve already created for the survey. Click on the drop-down menu under SurveySparrow Field and choose from the options.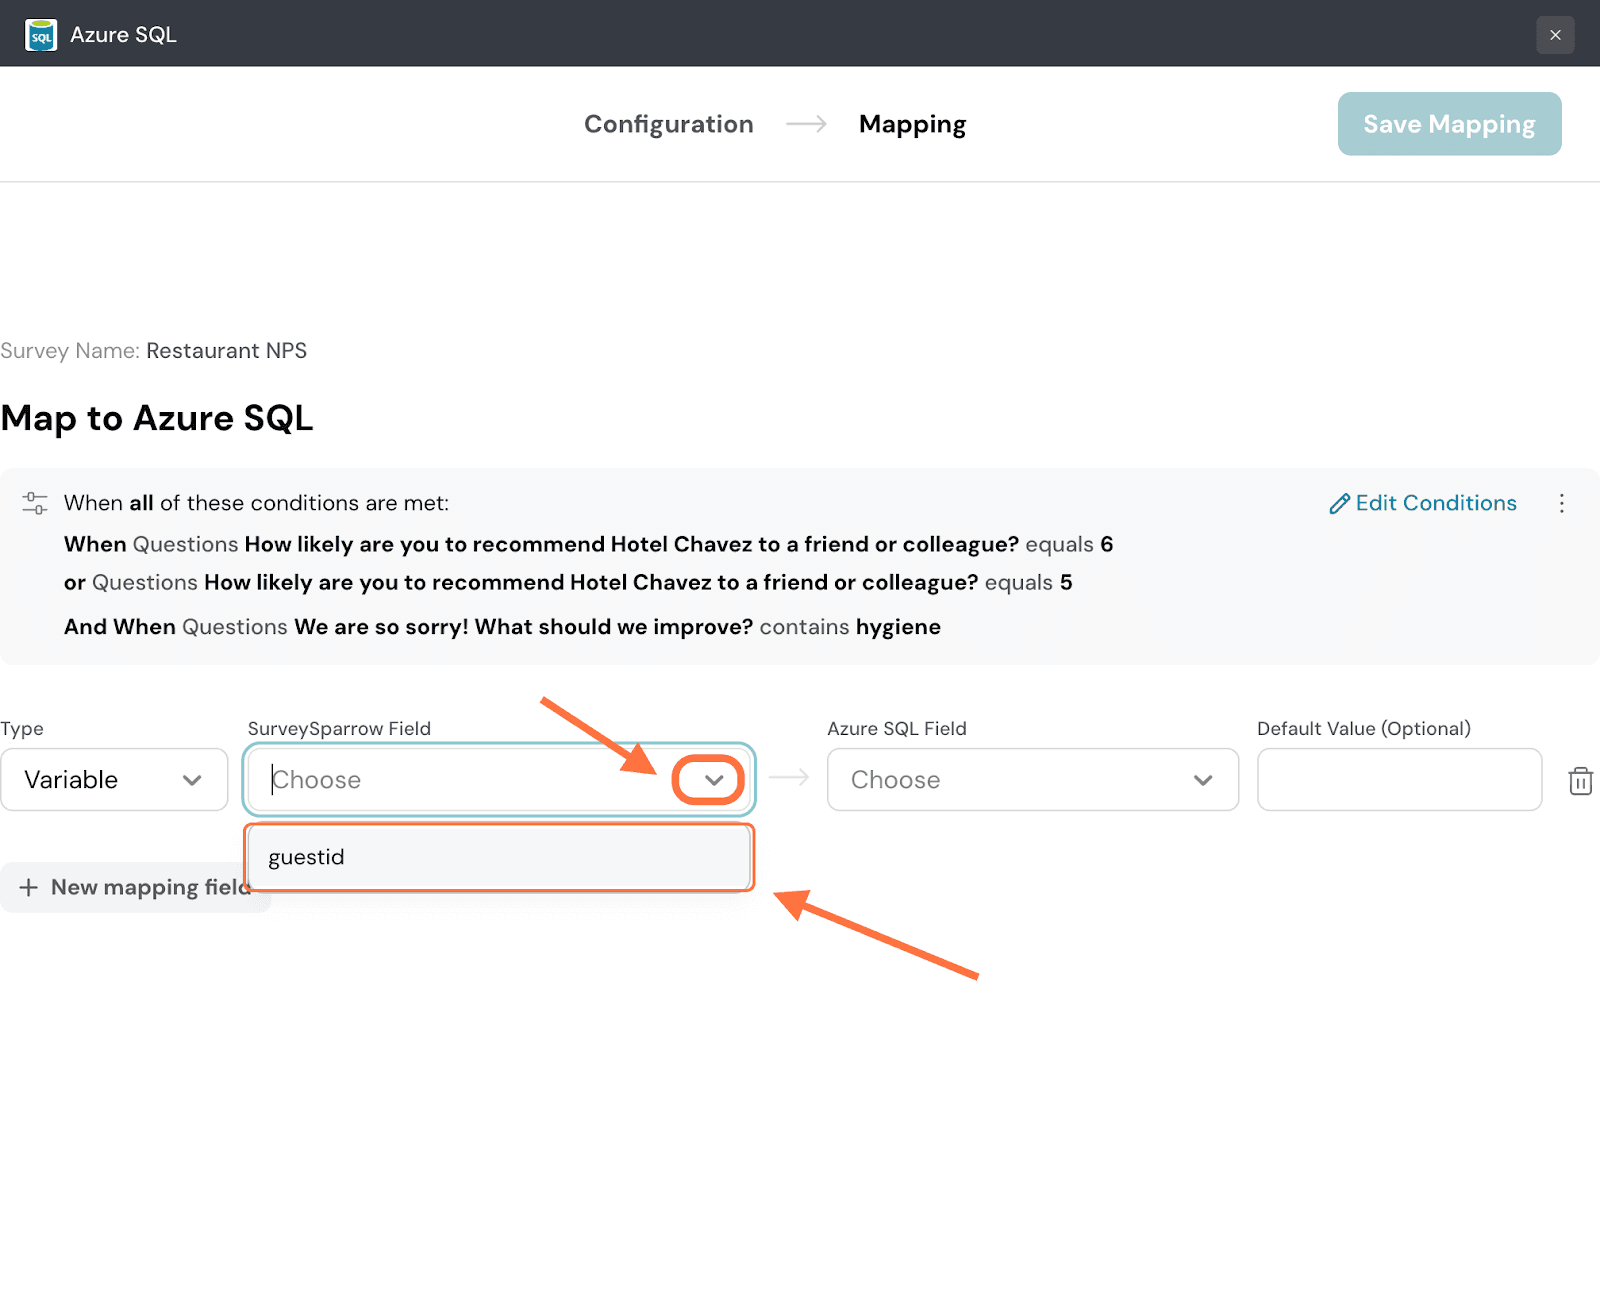
24. Select a field from the Azure SQL table where the data property should be mapped.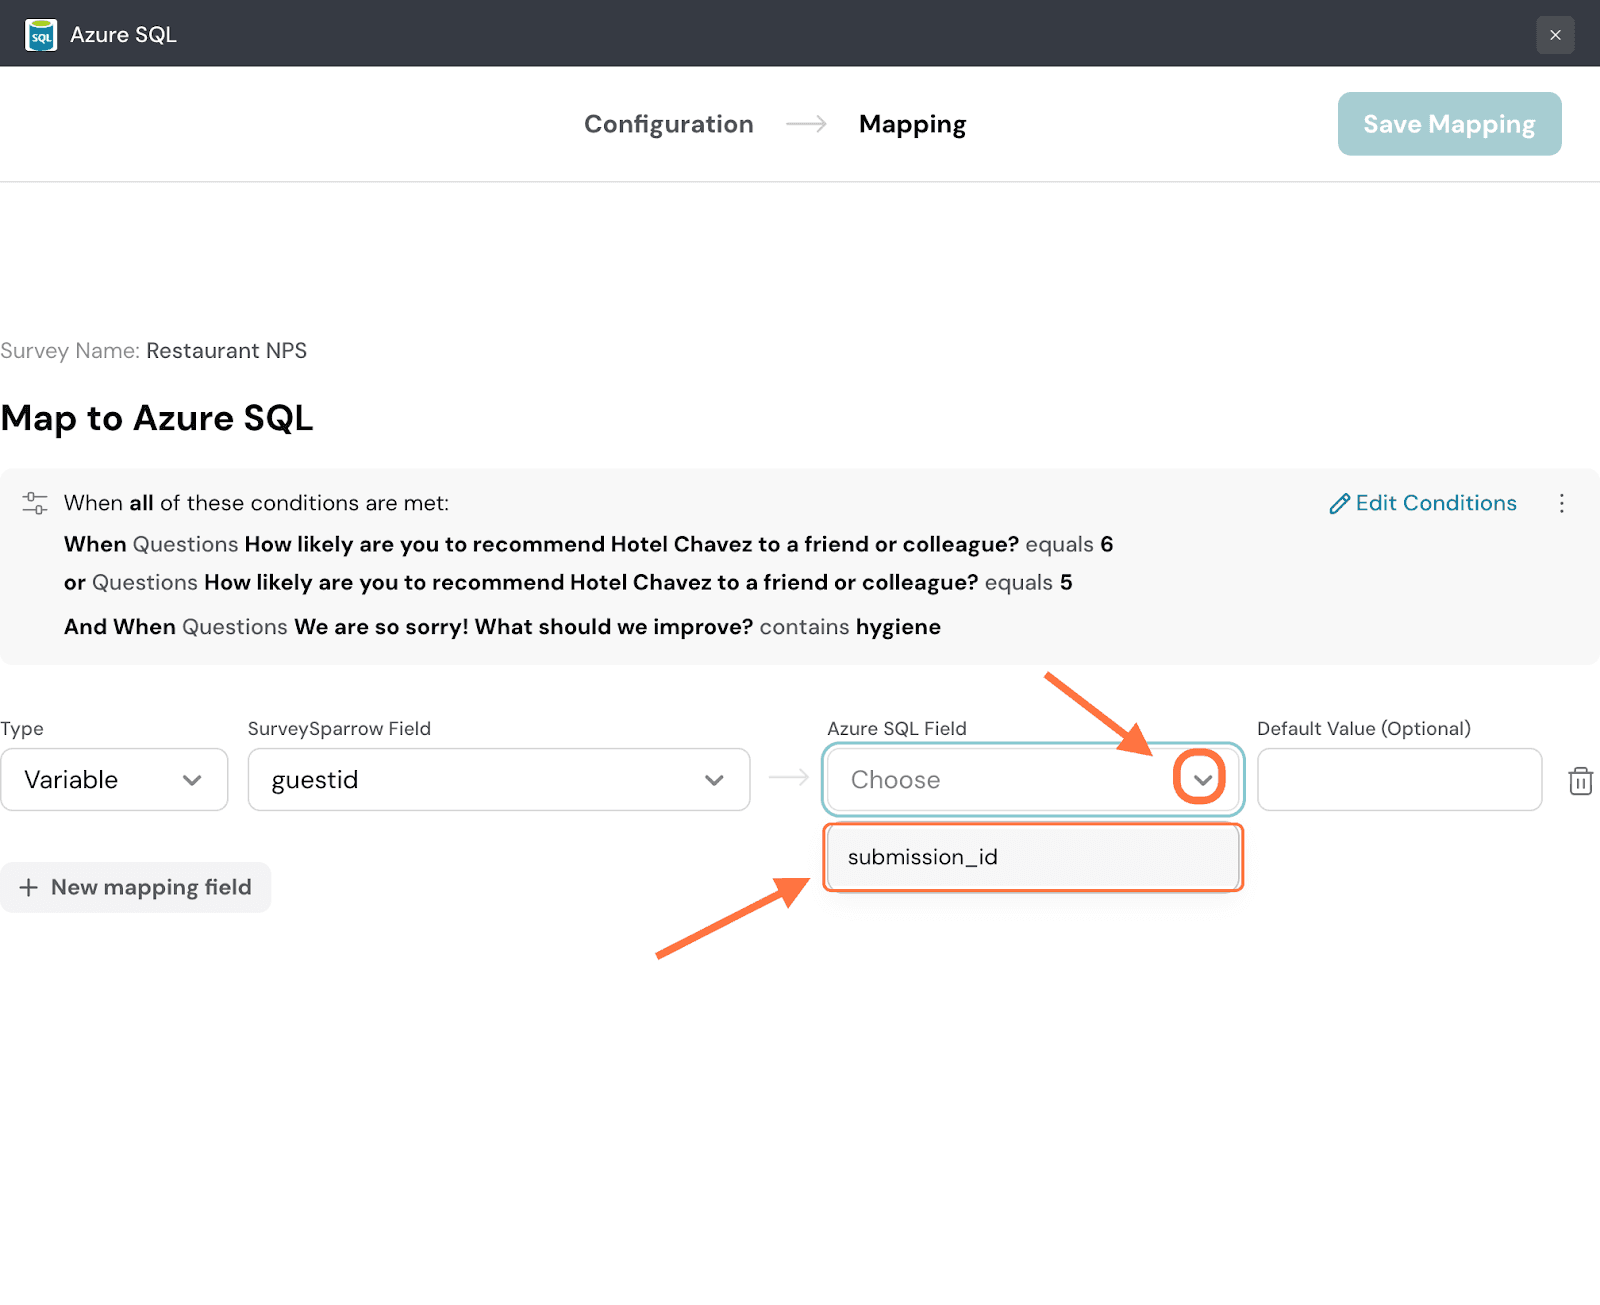
25. If a particular response has no data for the chosen property, the Azure SQL field will remain empty. But you can choose to fill in a default value that will be filled in as a substitute for such situations.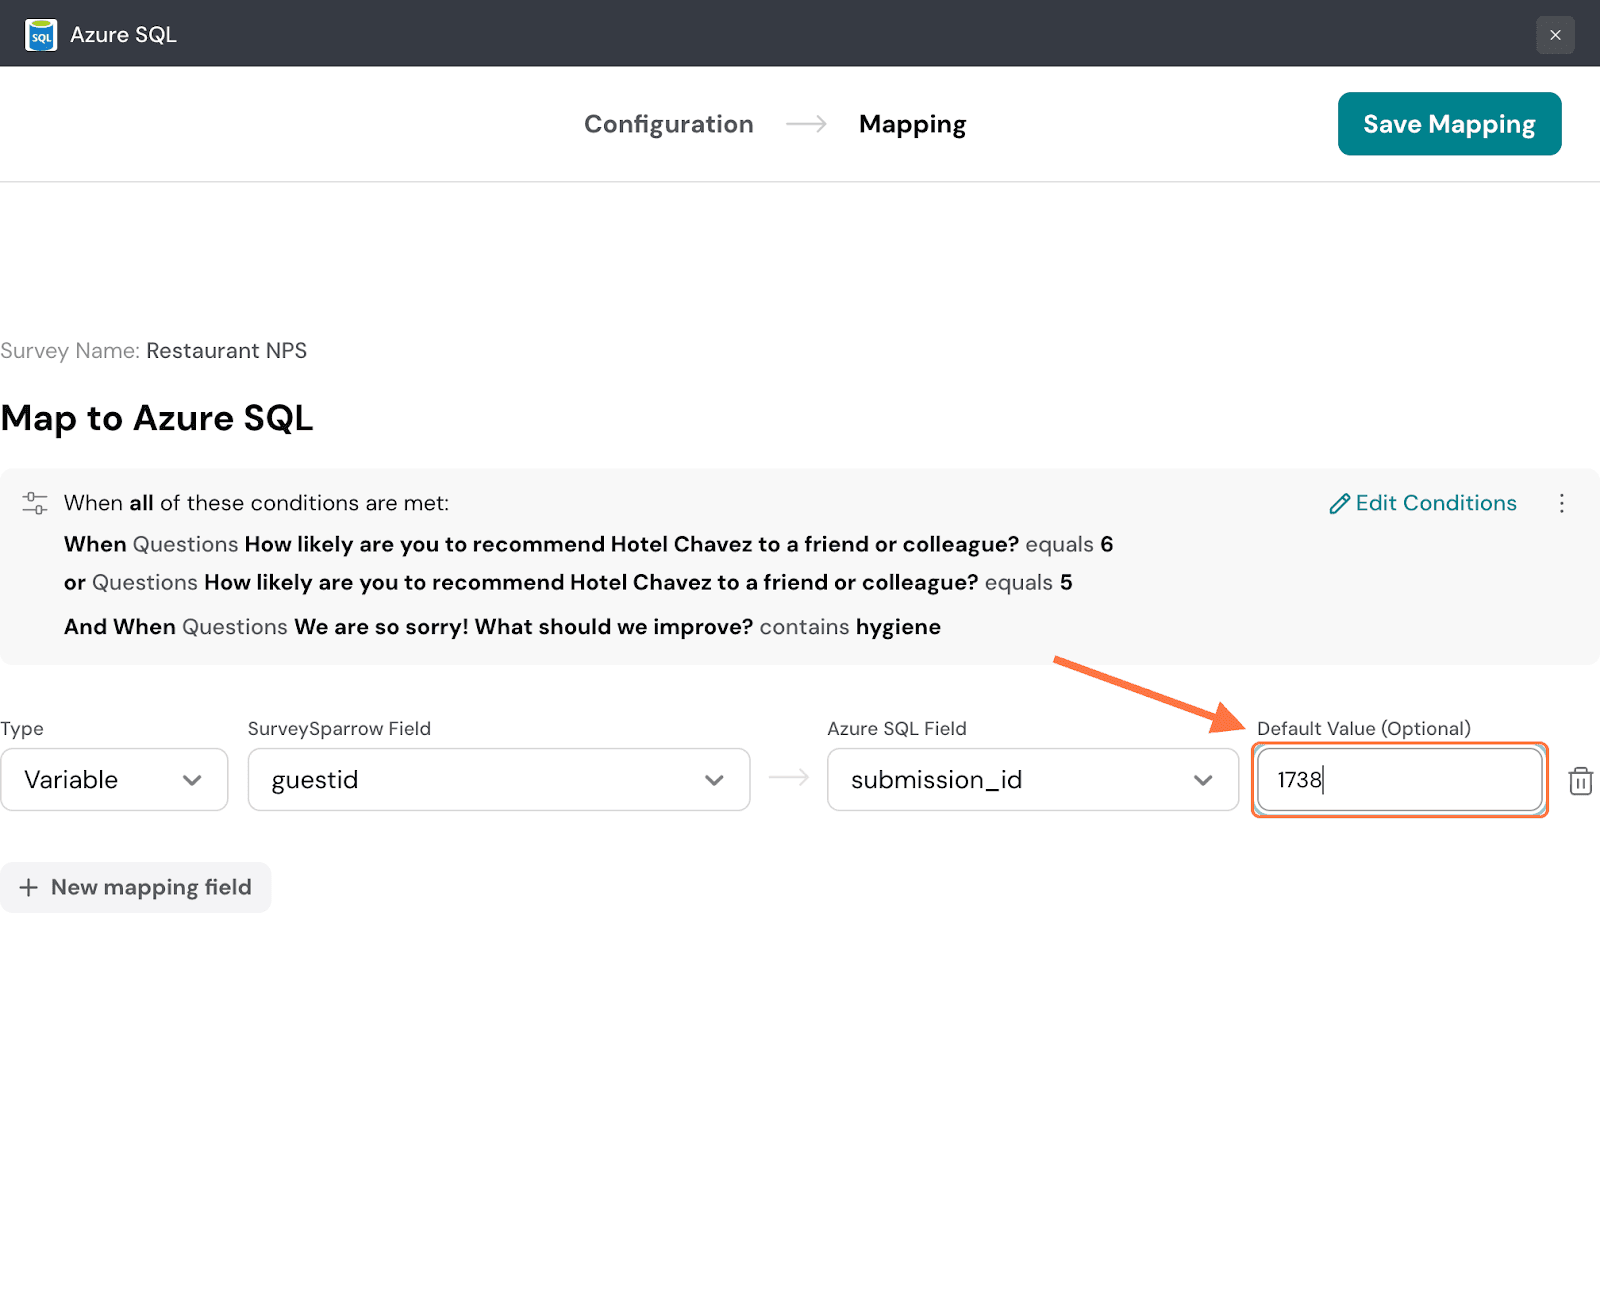
26. To add more mapping fields, click on New mapping field.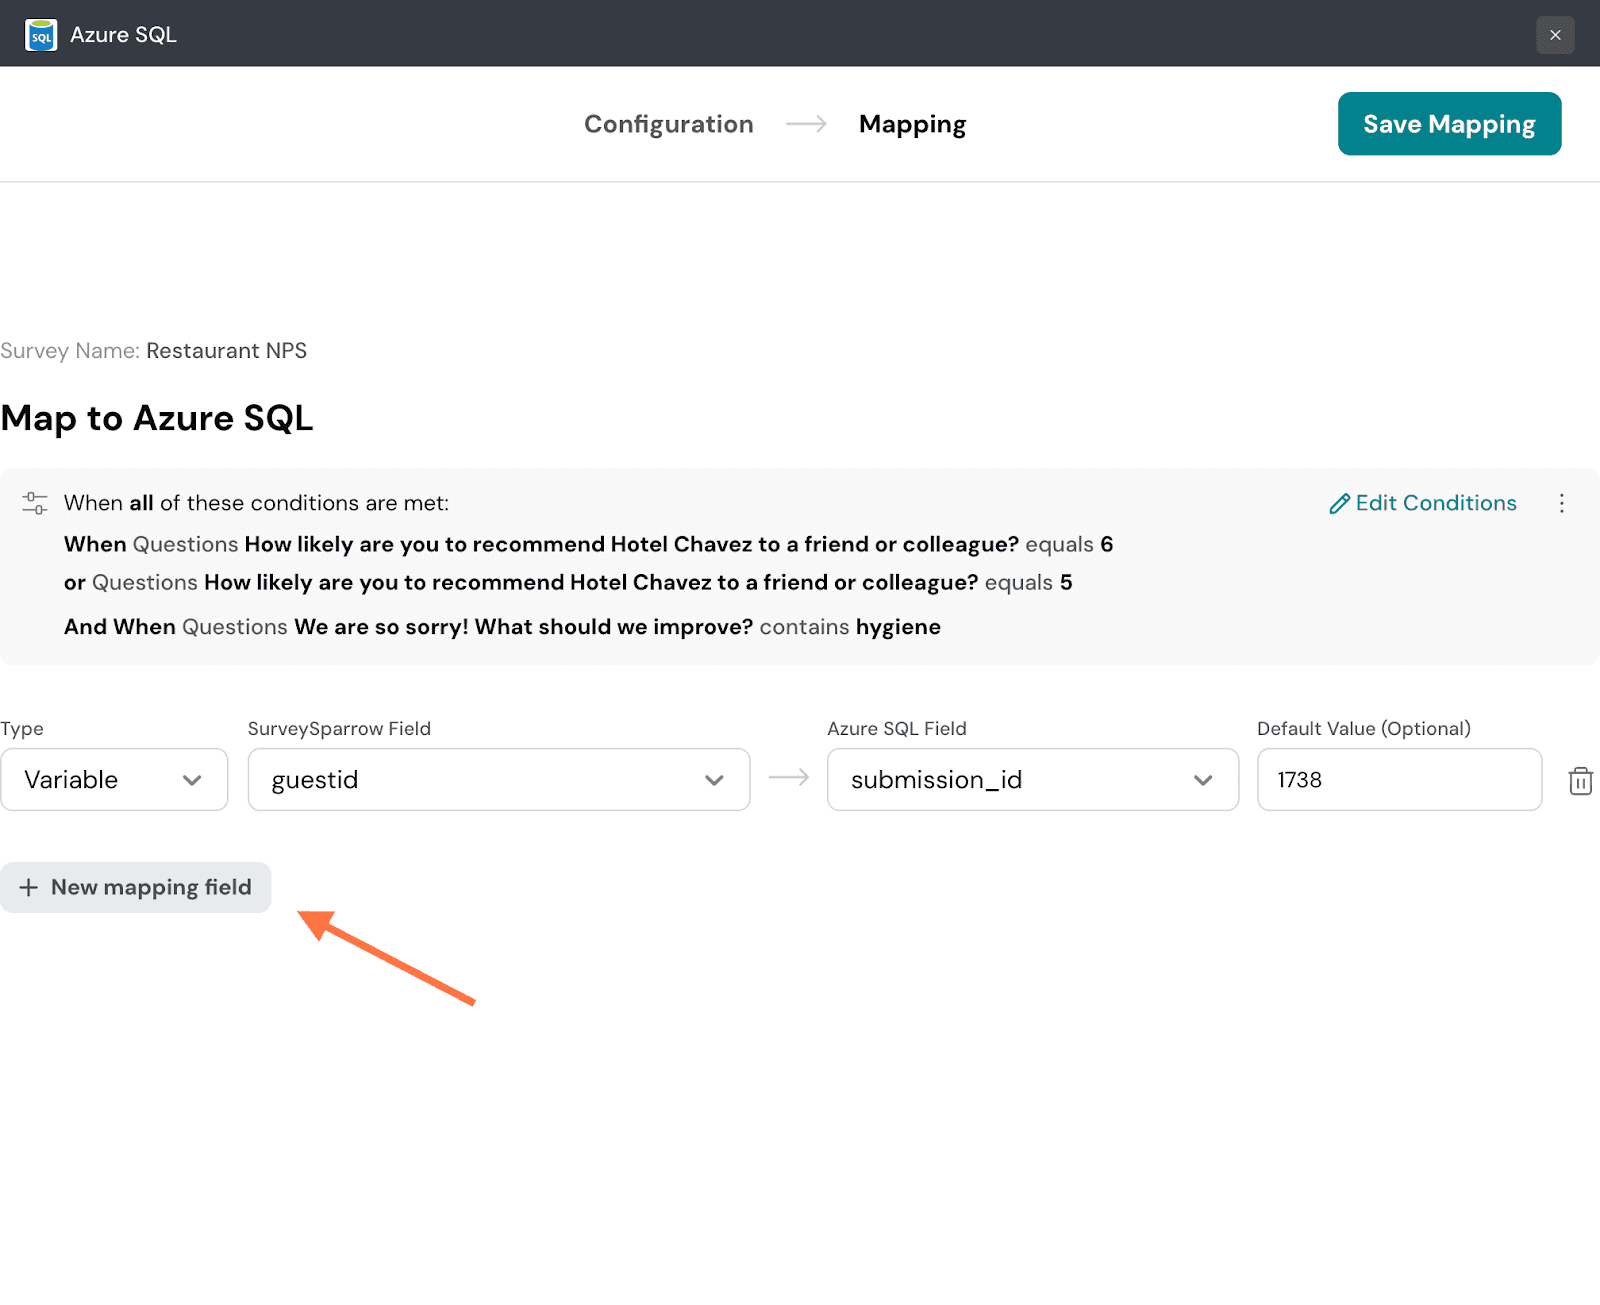
27. When you’re done, click on Save Mapping.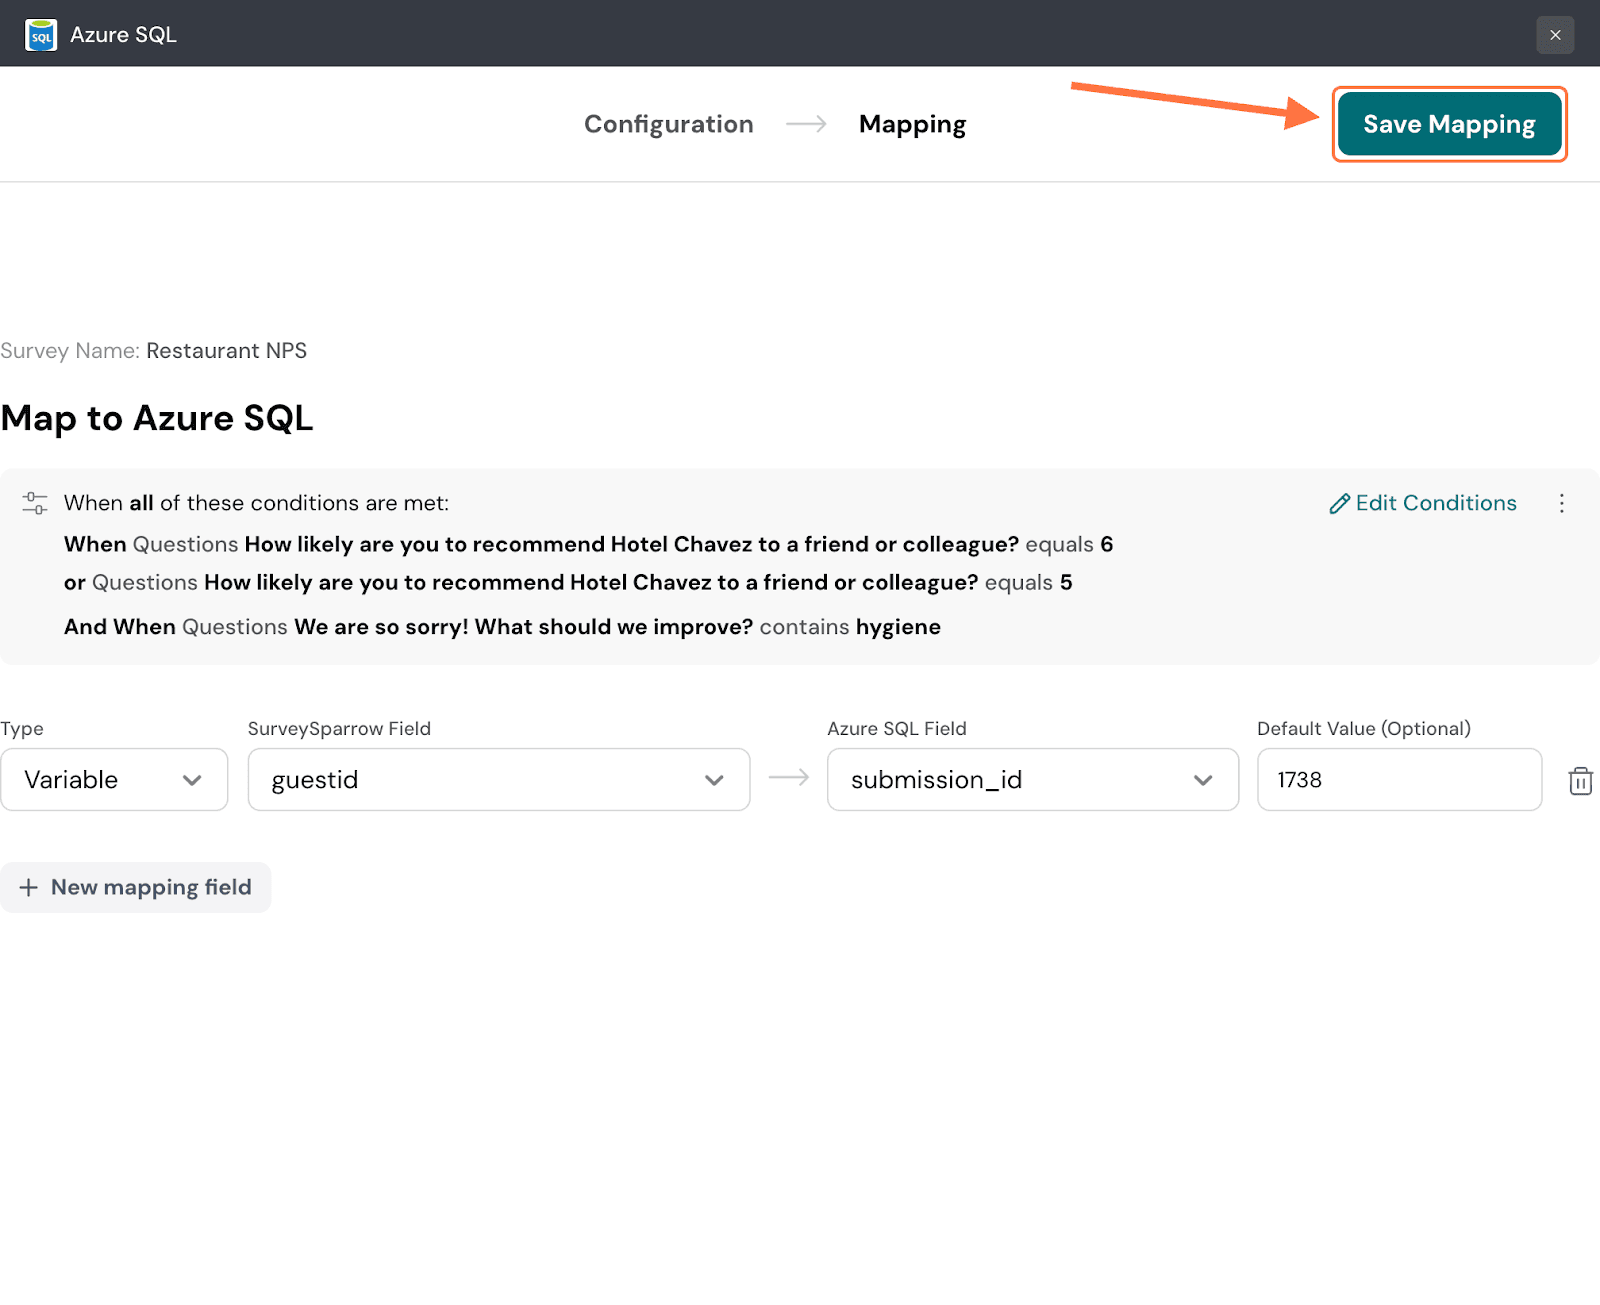
28. Create a name for the mapping, then click on Save Mapping.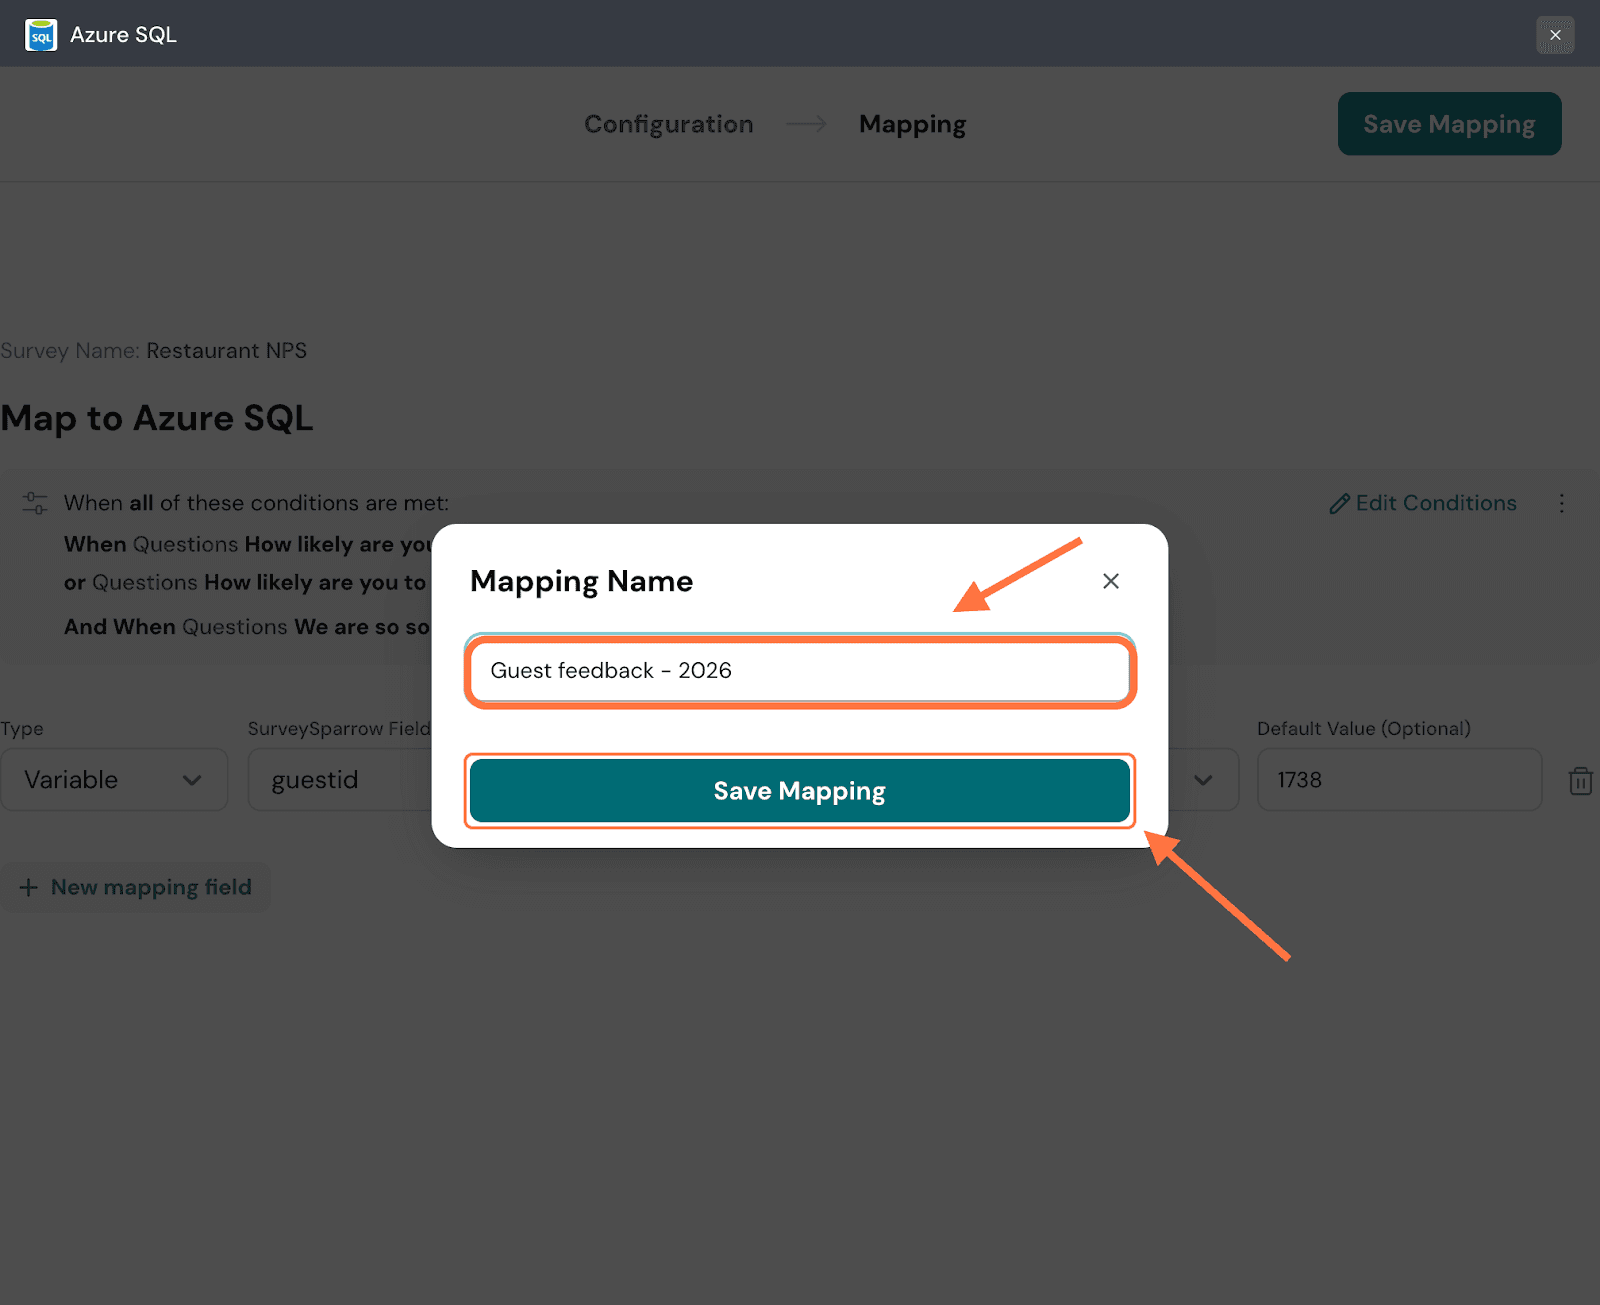
29. After the mapping is saved, you’ll be taken to a screen where you can access all saved mappings. To review the mapping configuration, click on the mapping.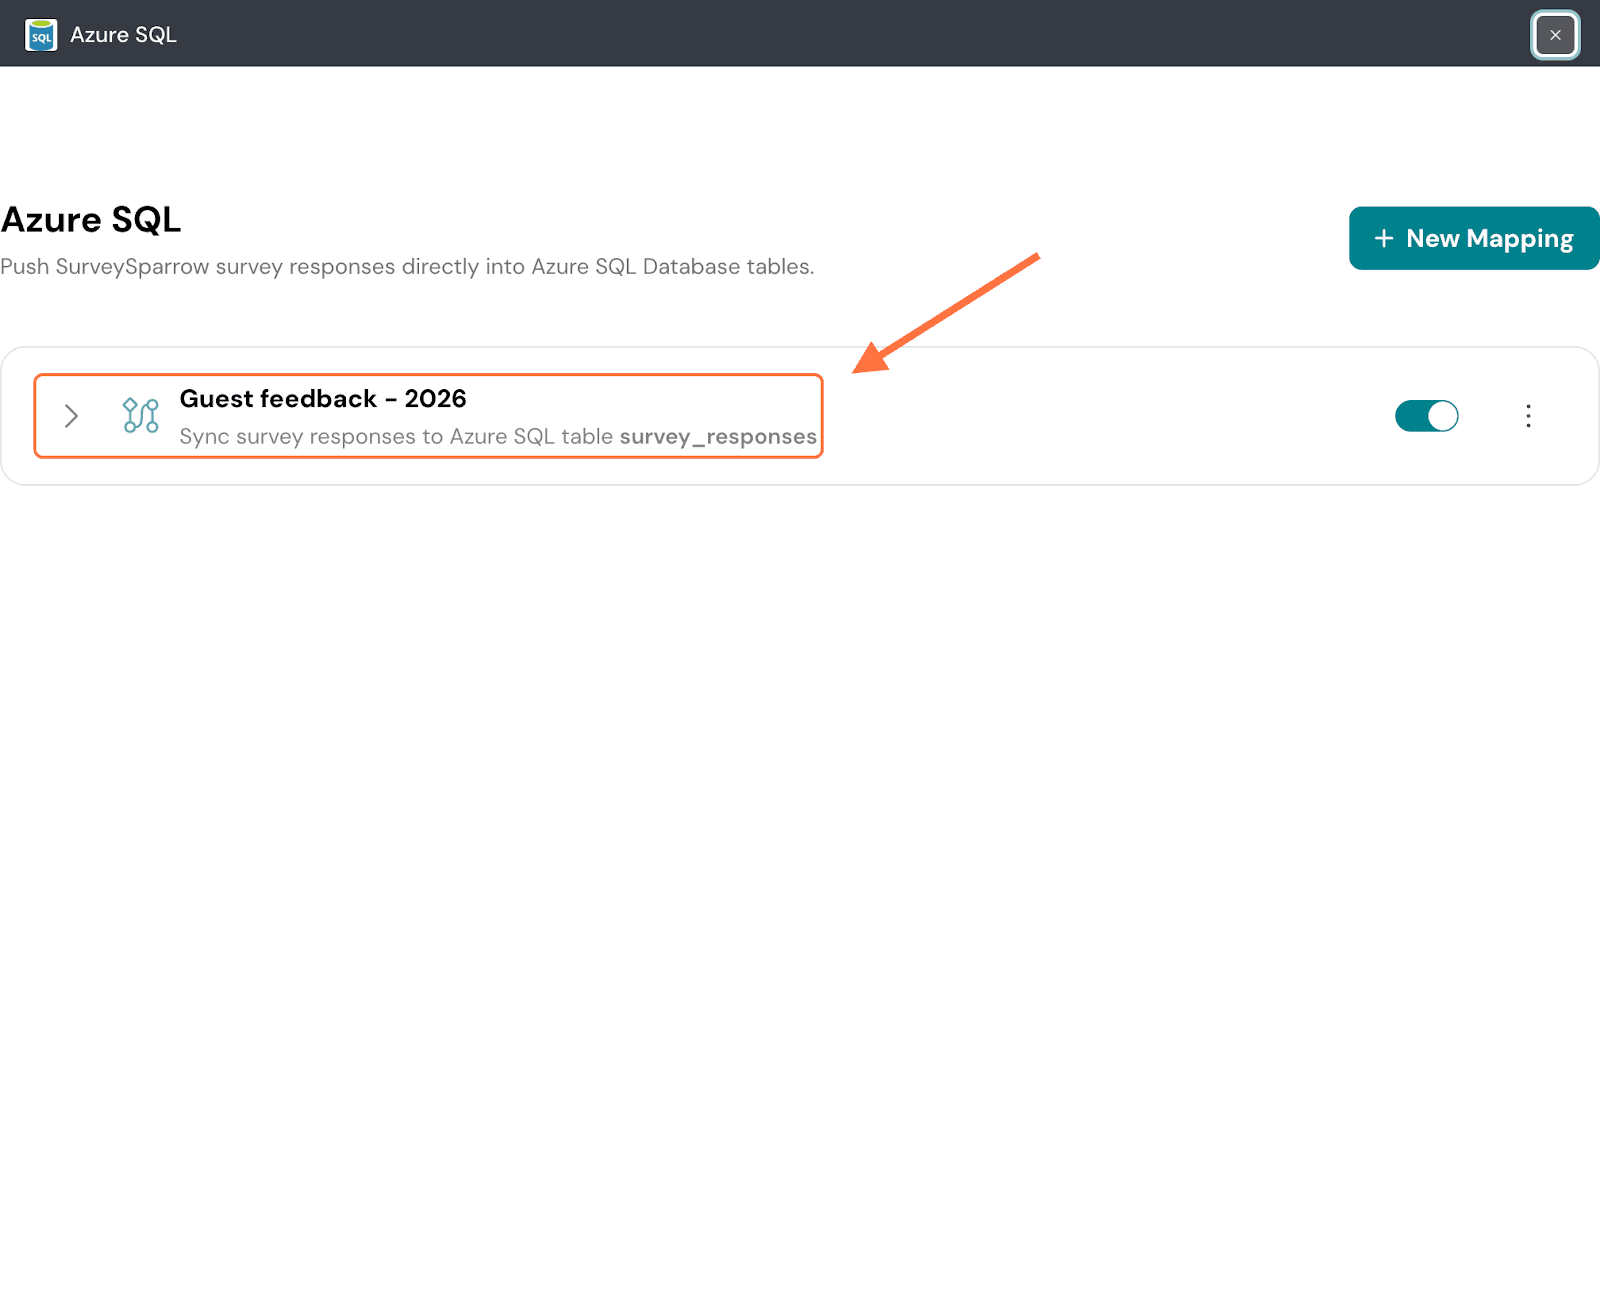
30. The mapping tab expands to show you its settings. If you’d like to modify it, click on the ‘Edit….’ button.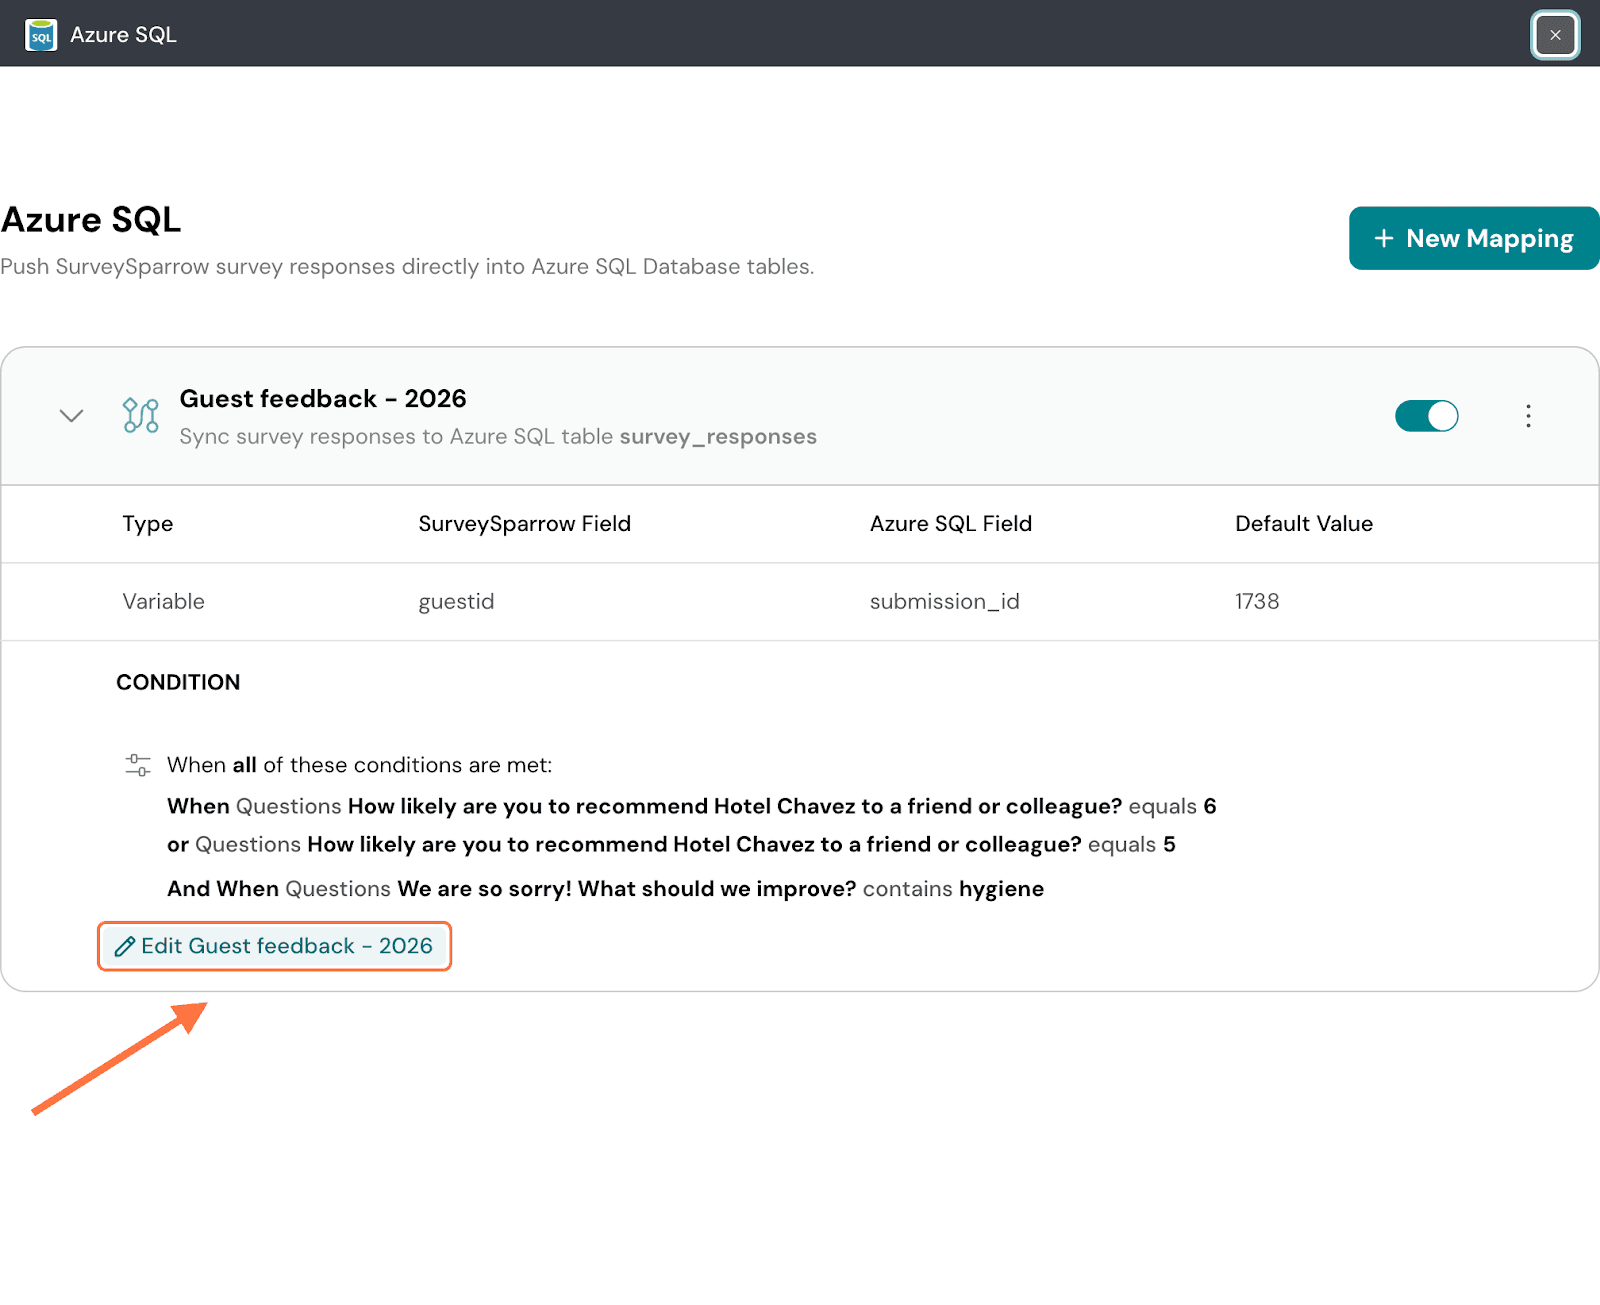
31. To pause the mapping, click on the green toggle button.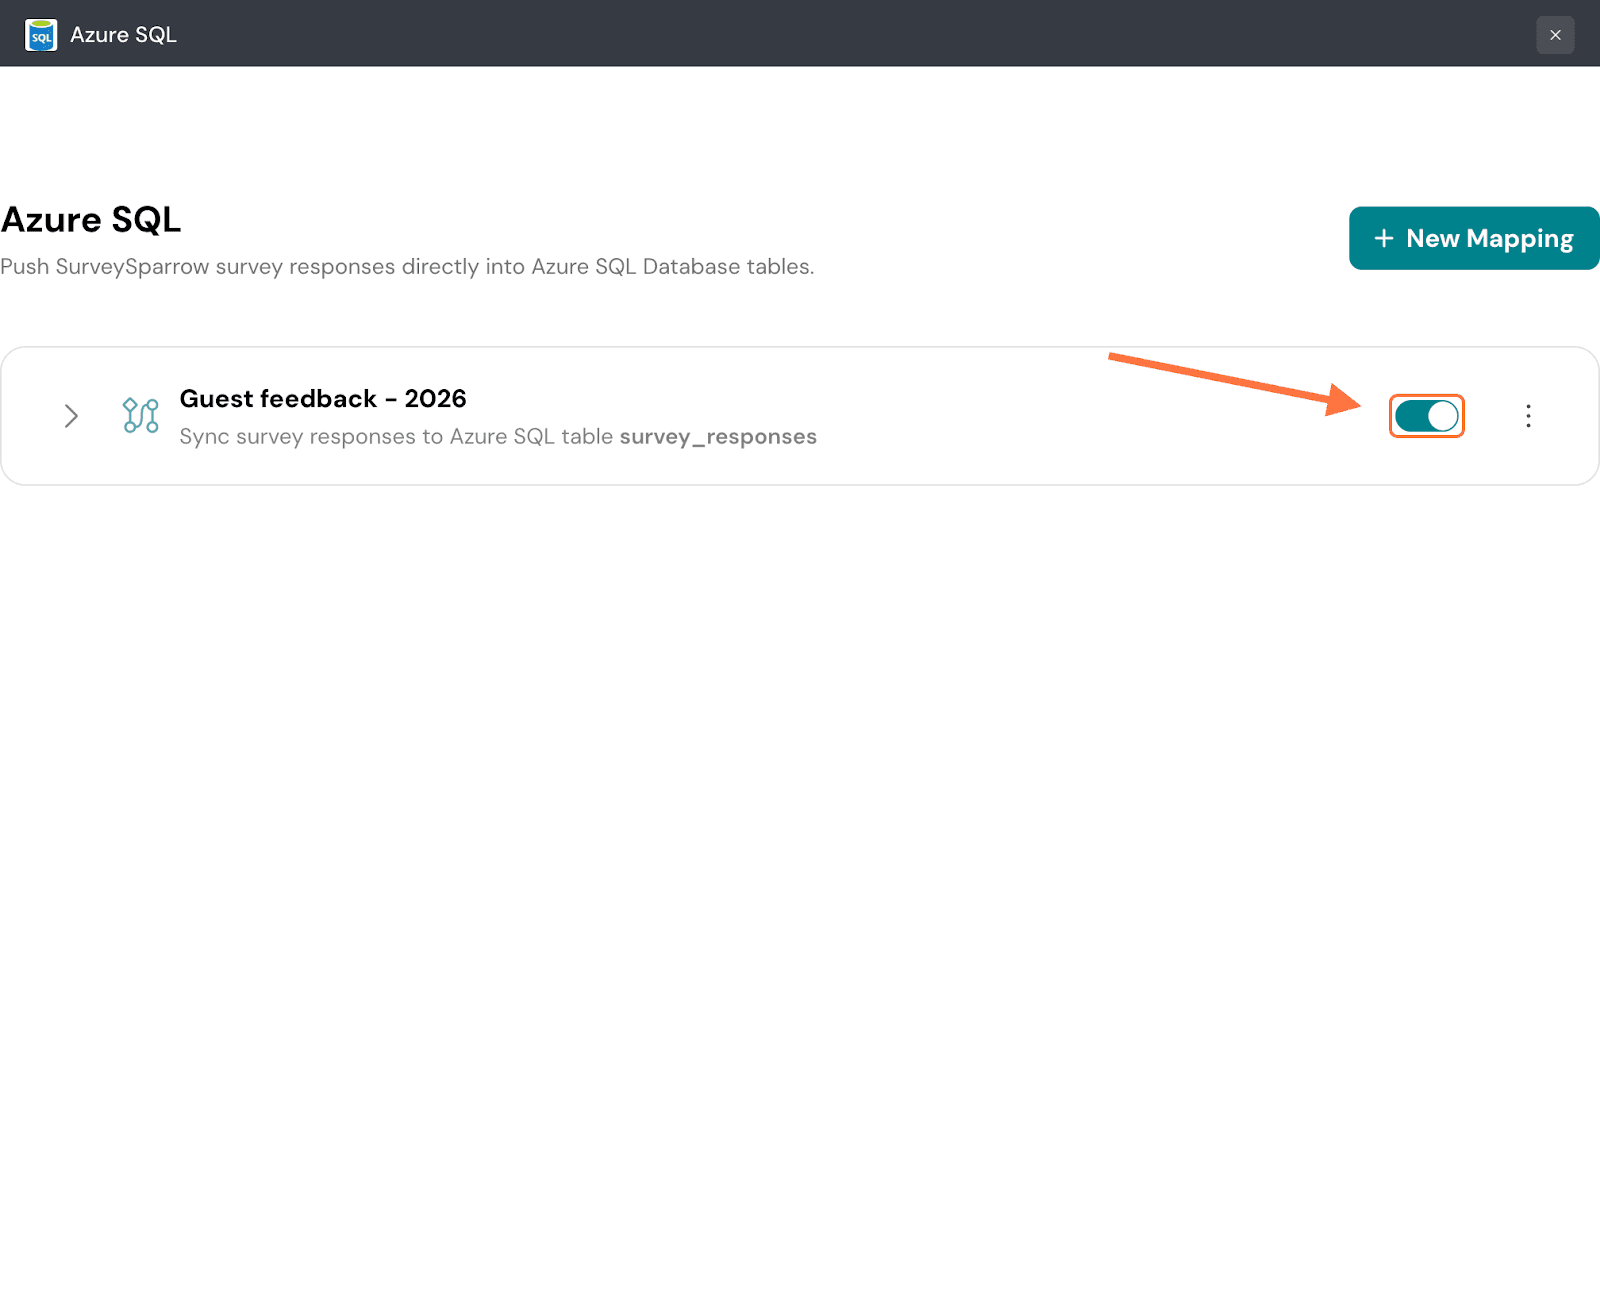
32. To delete the mapping, click on the vertical three-dot icon, then click on Delete.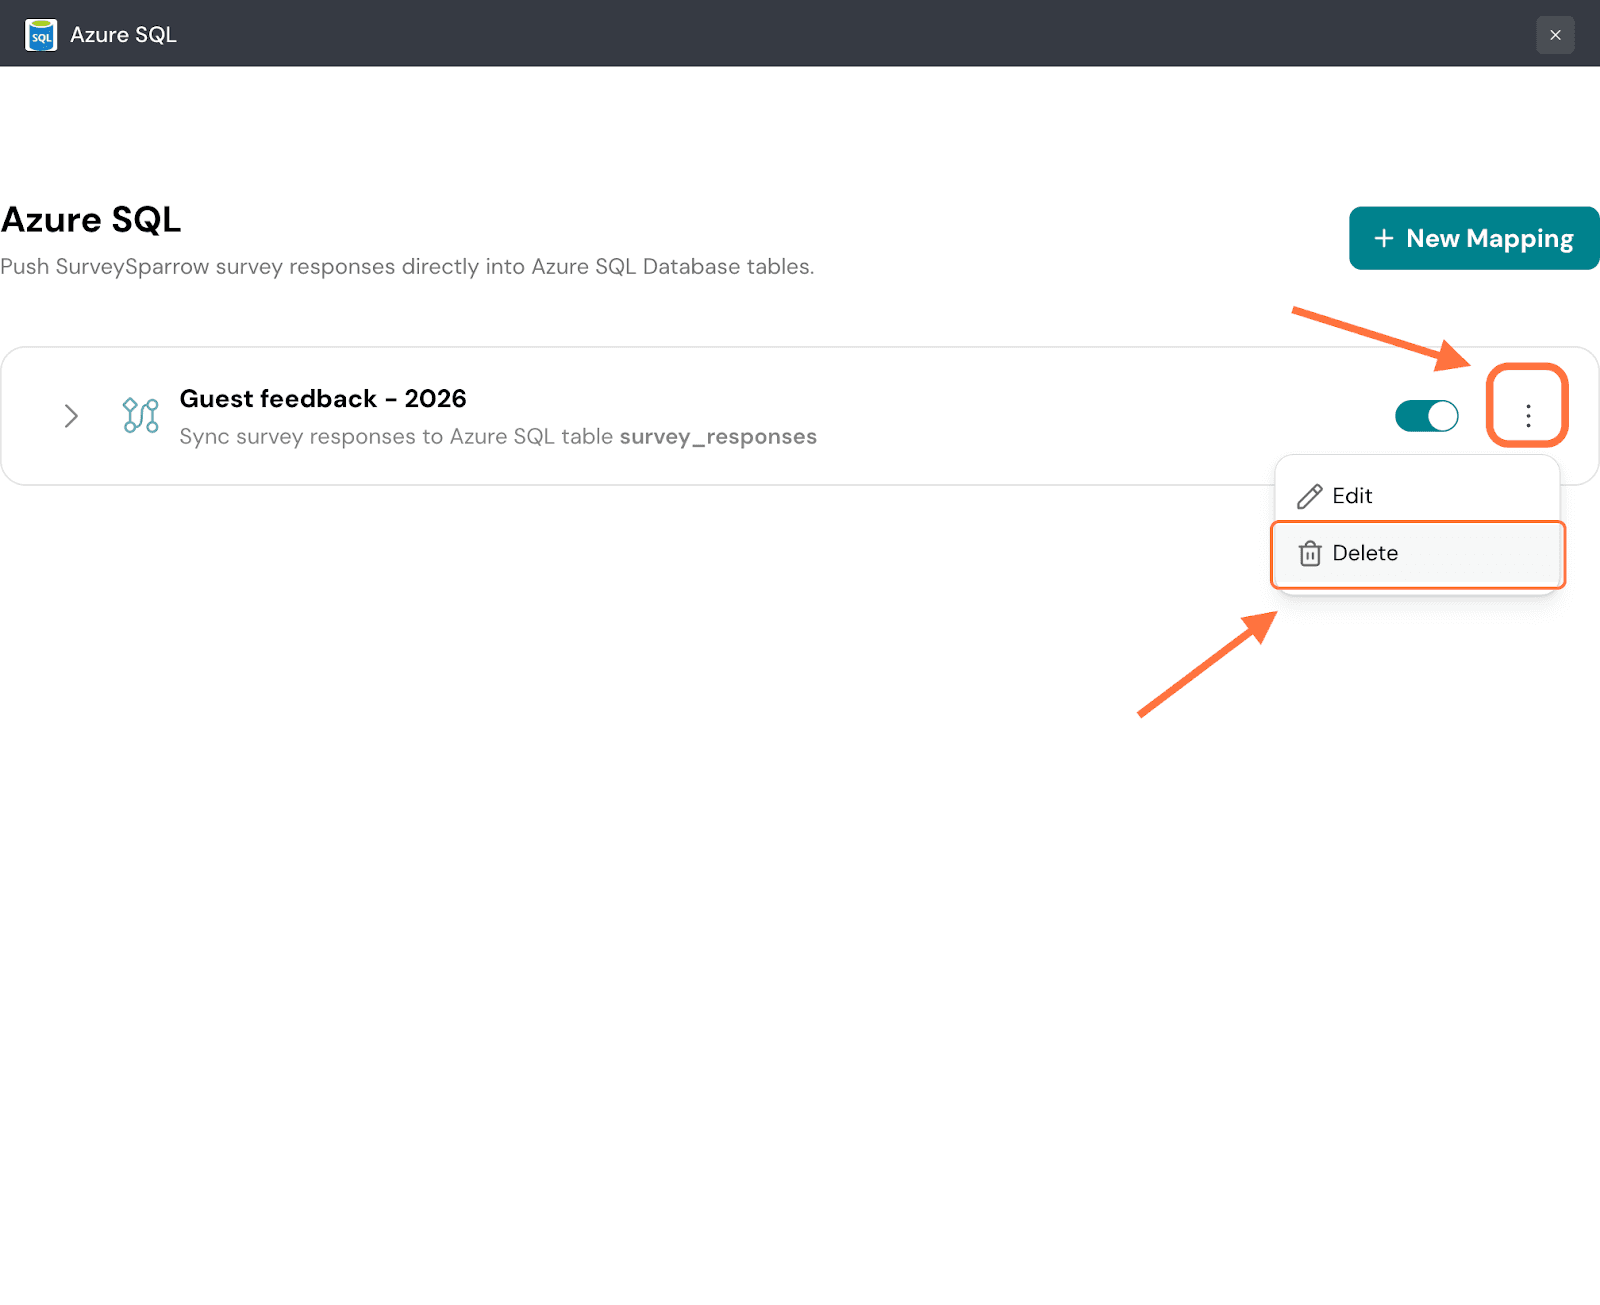
33. Click on Confirm to proceed.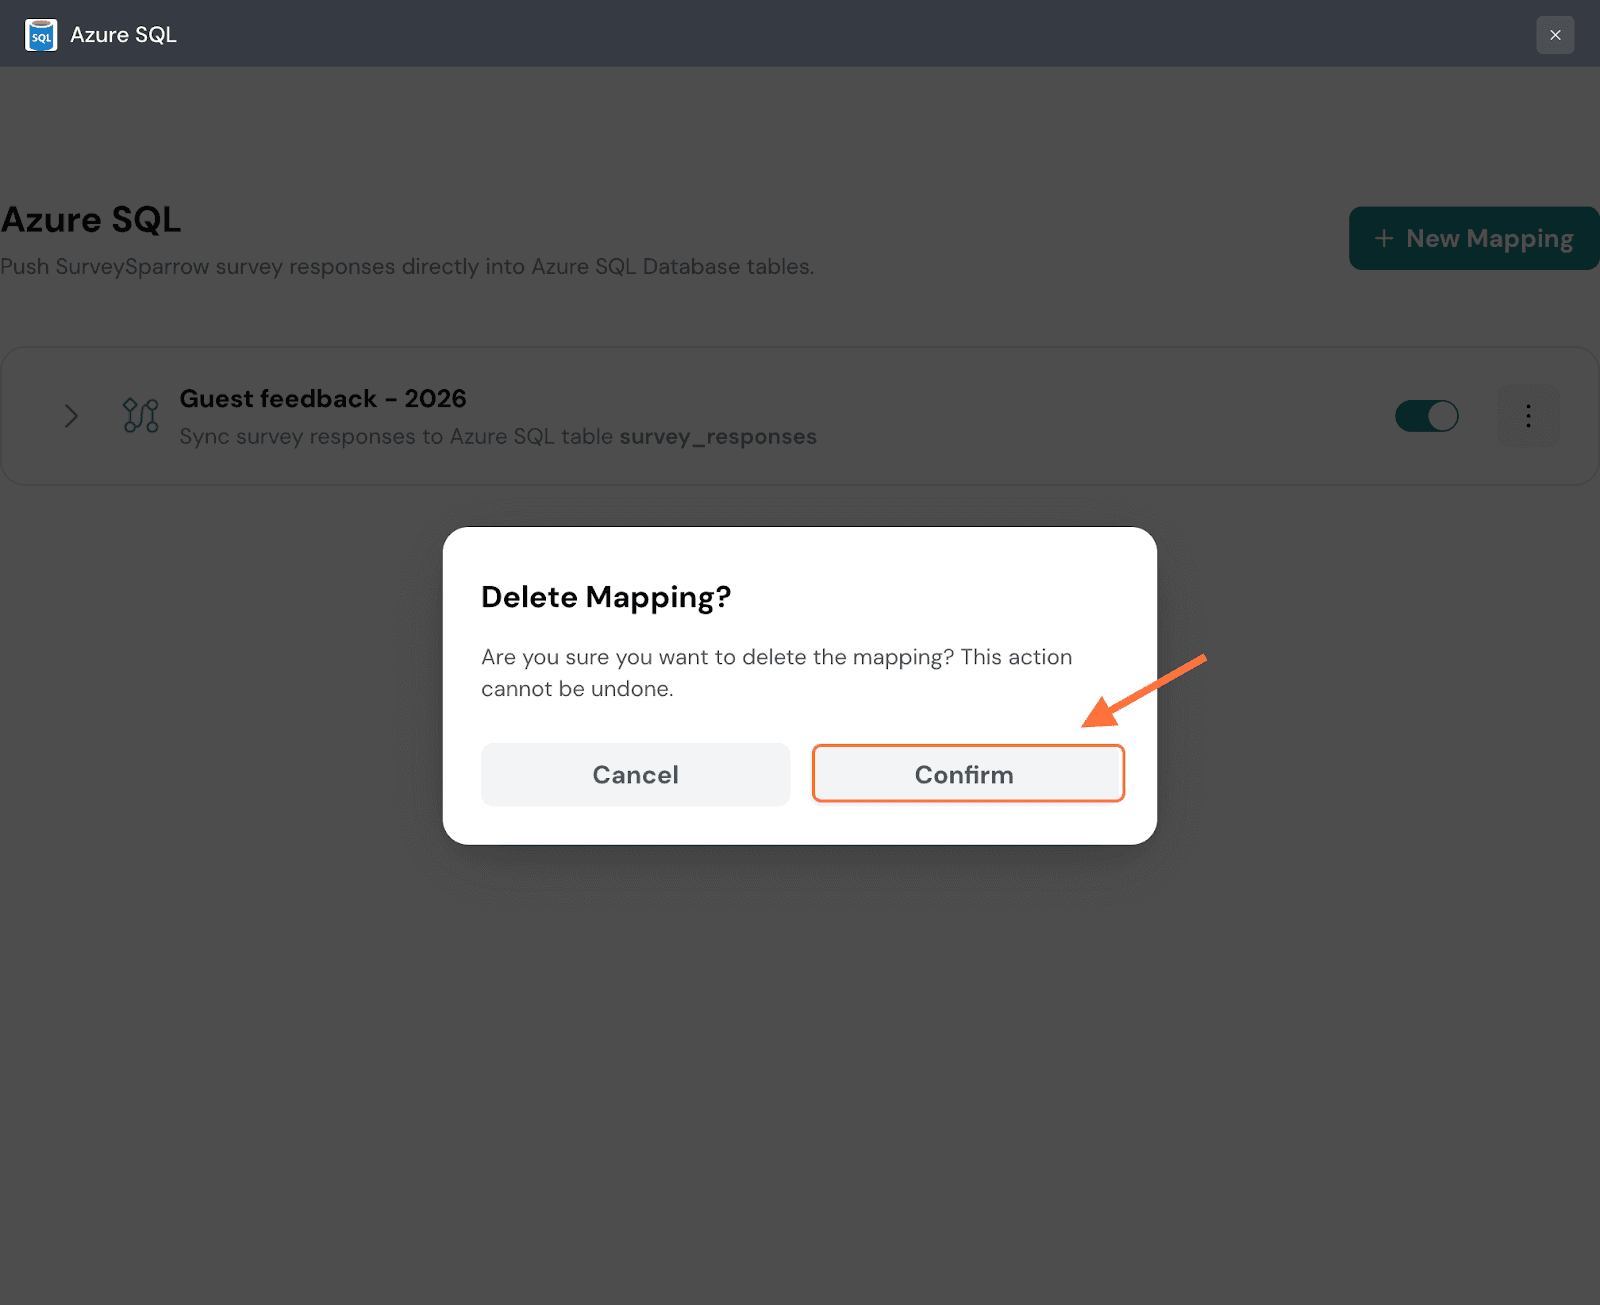
34. Click on New Mapping to add another mapping.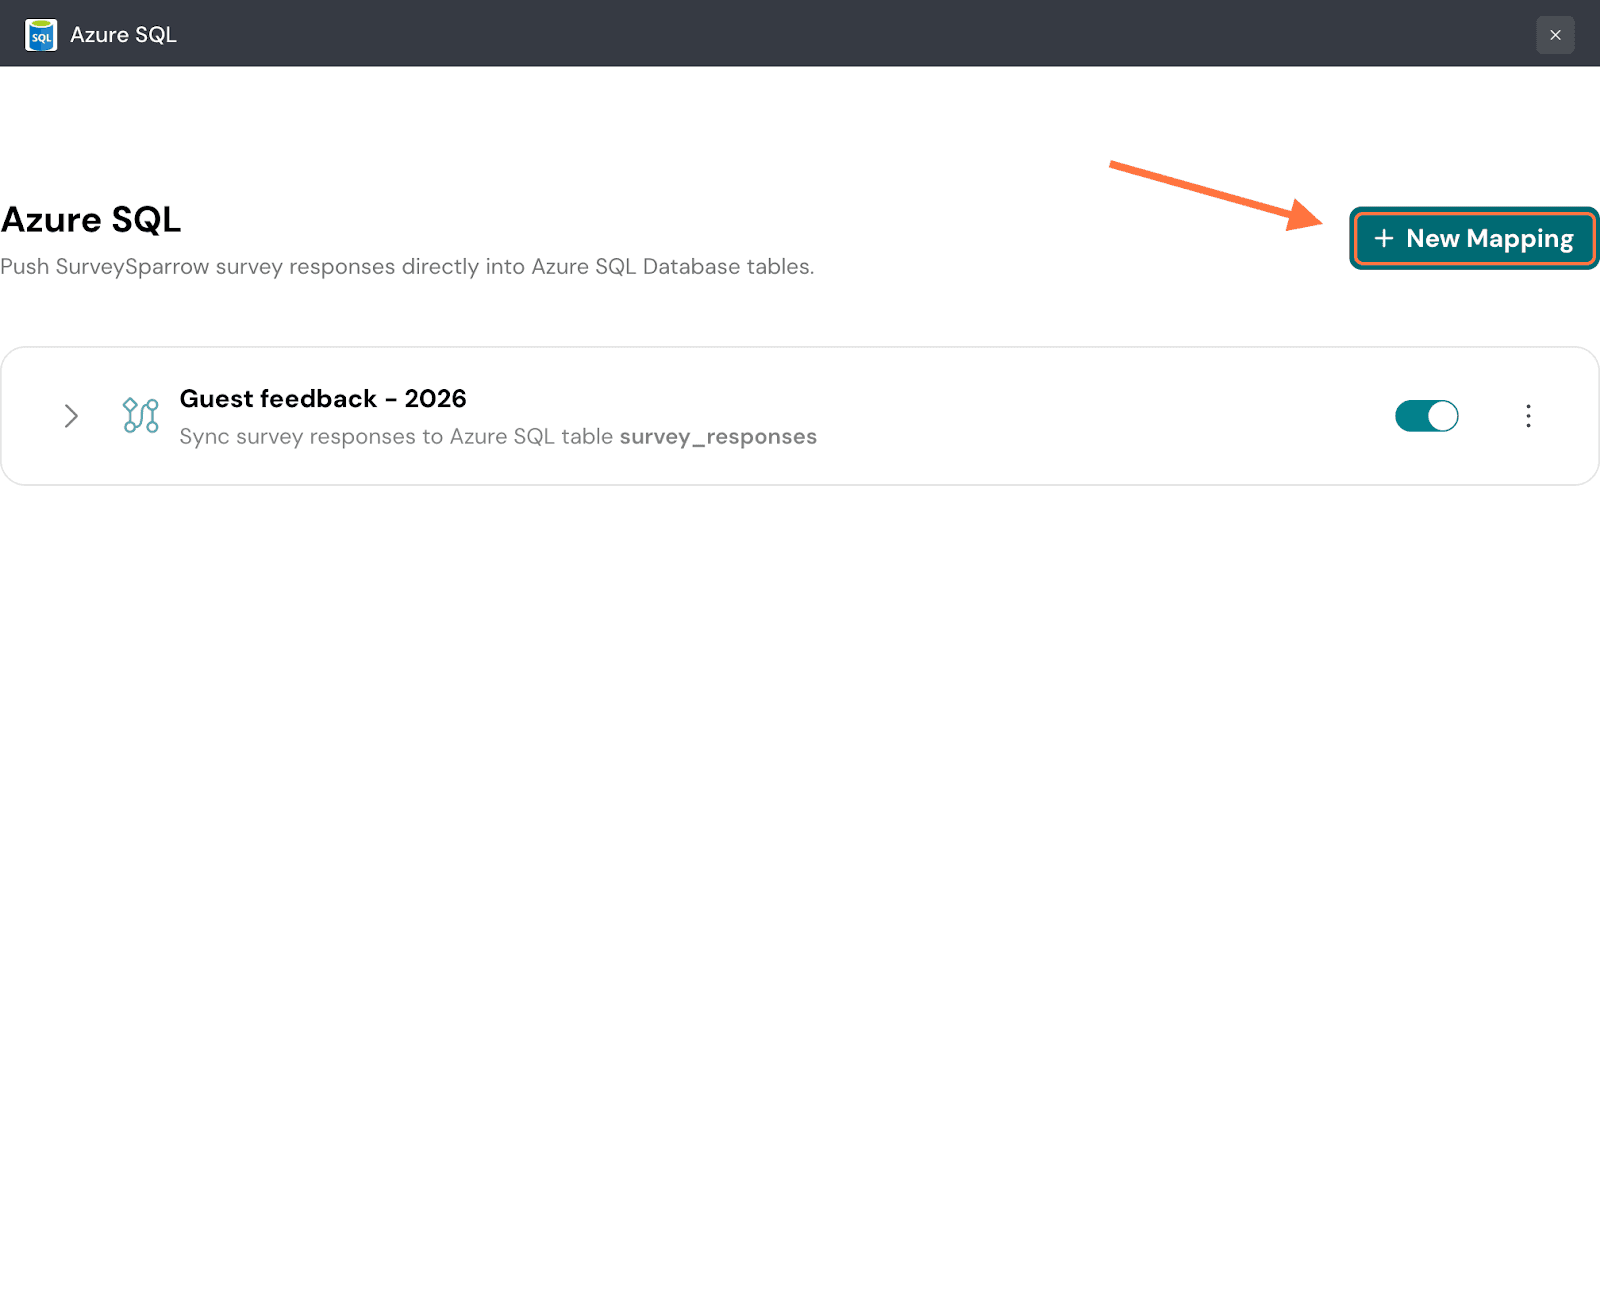
35. Now let’s explore the other set of steps to create a new table for mappings. Once you’re selected Create New Table as your action, enter a table name and click on Continue Mapping.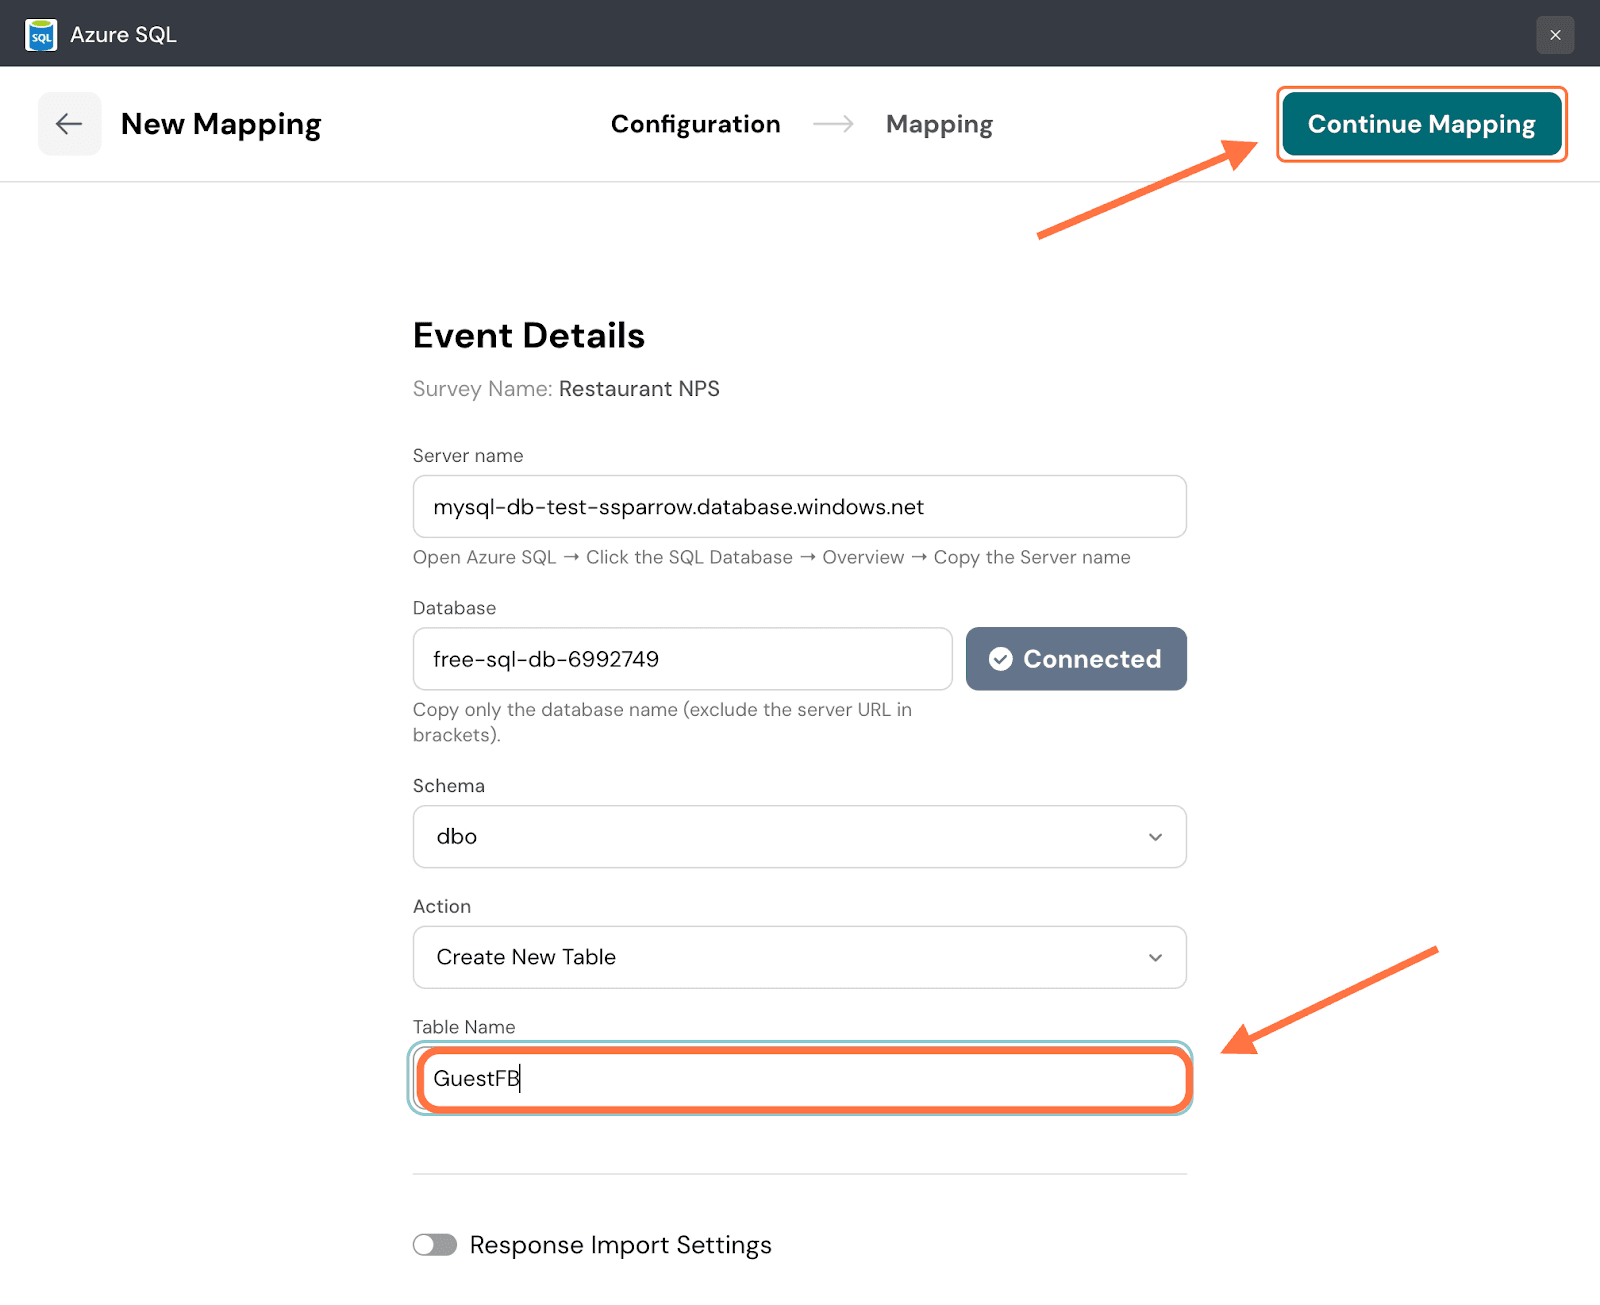
36. In the mapping section, the default option is to send all the response data. You can see all the response properties and their quantities. But if you want to be selective, click the button next to Send Selected data.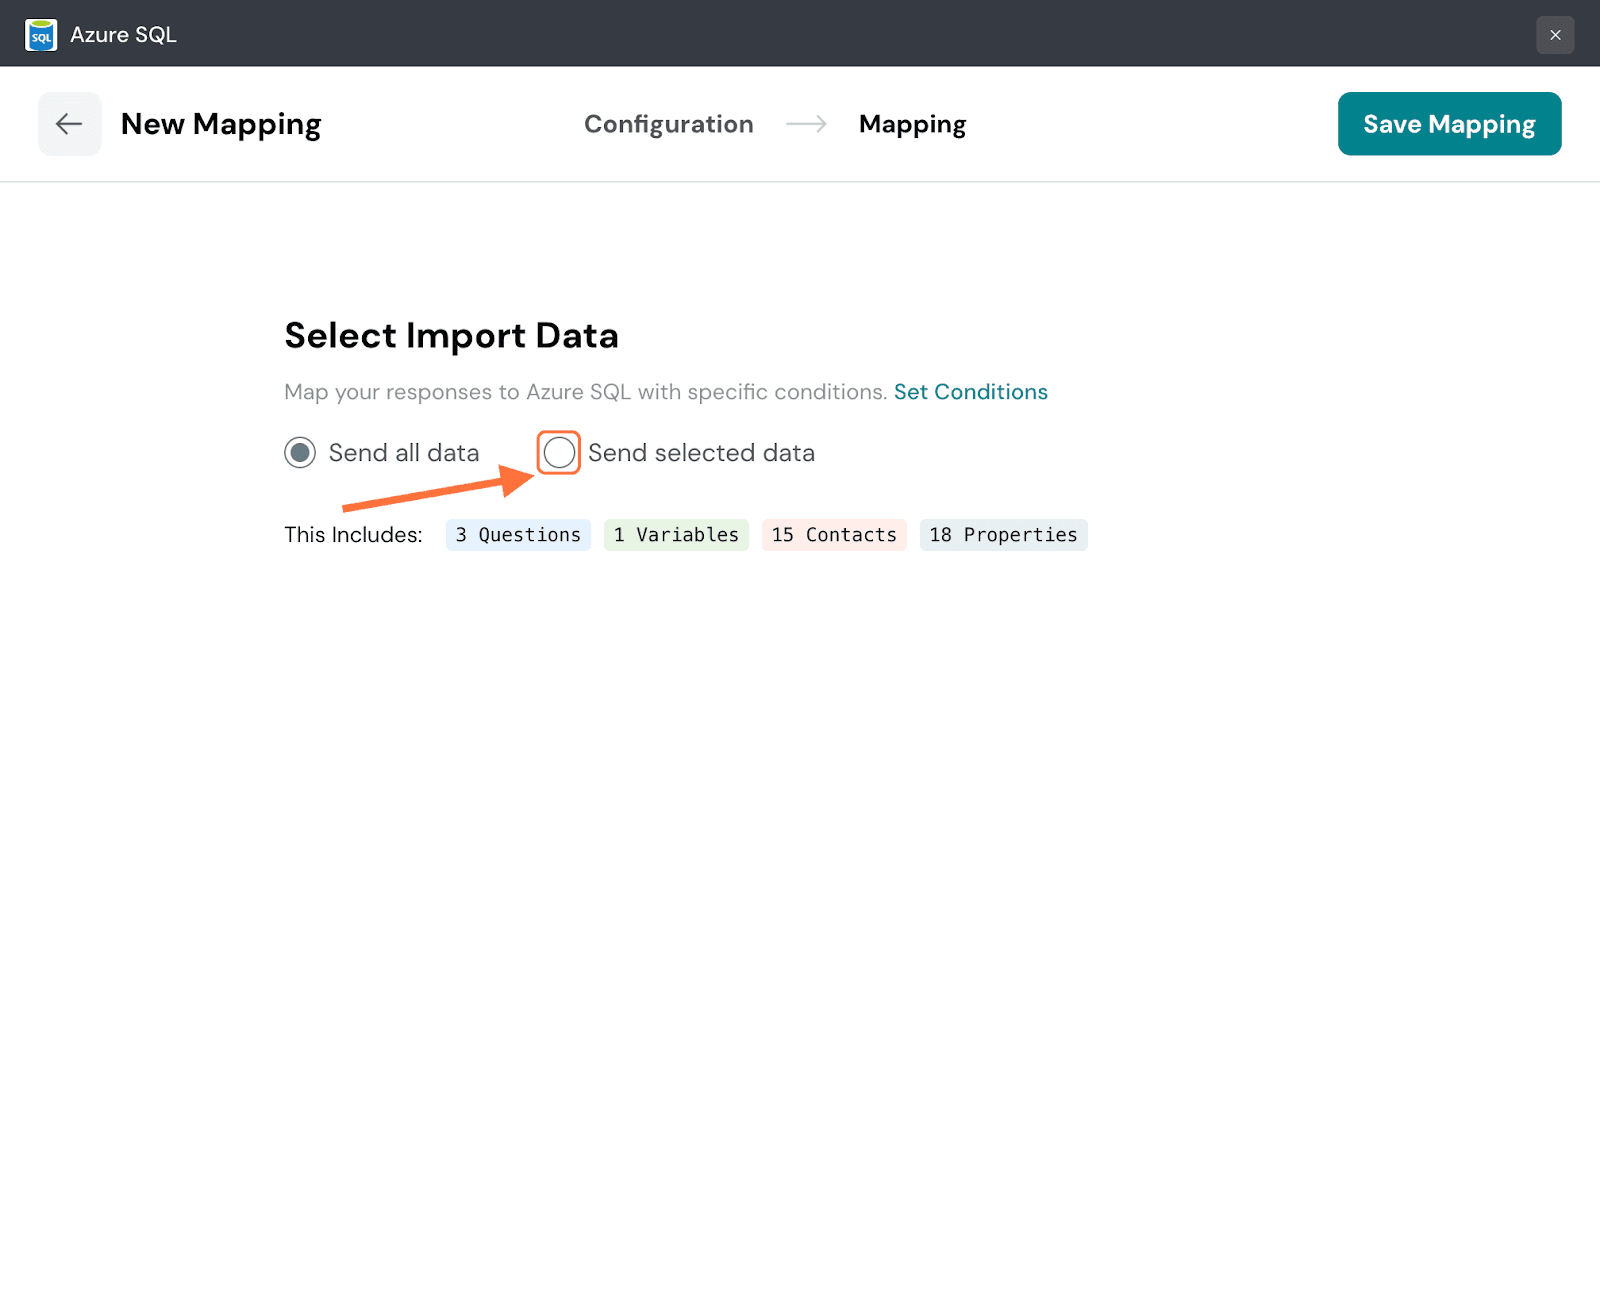
37. You will be shown a series of tabs for each response property. Each tab will have a list of items for that particular property. Click on the checkboxes of the items you want to import to Azure SQL. Navigate through the respective tabs and select the ones you want. You can also use the search box to find items.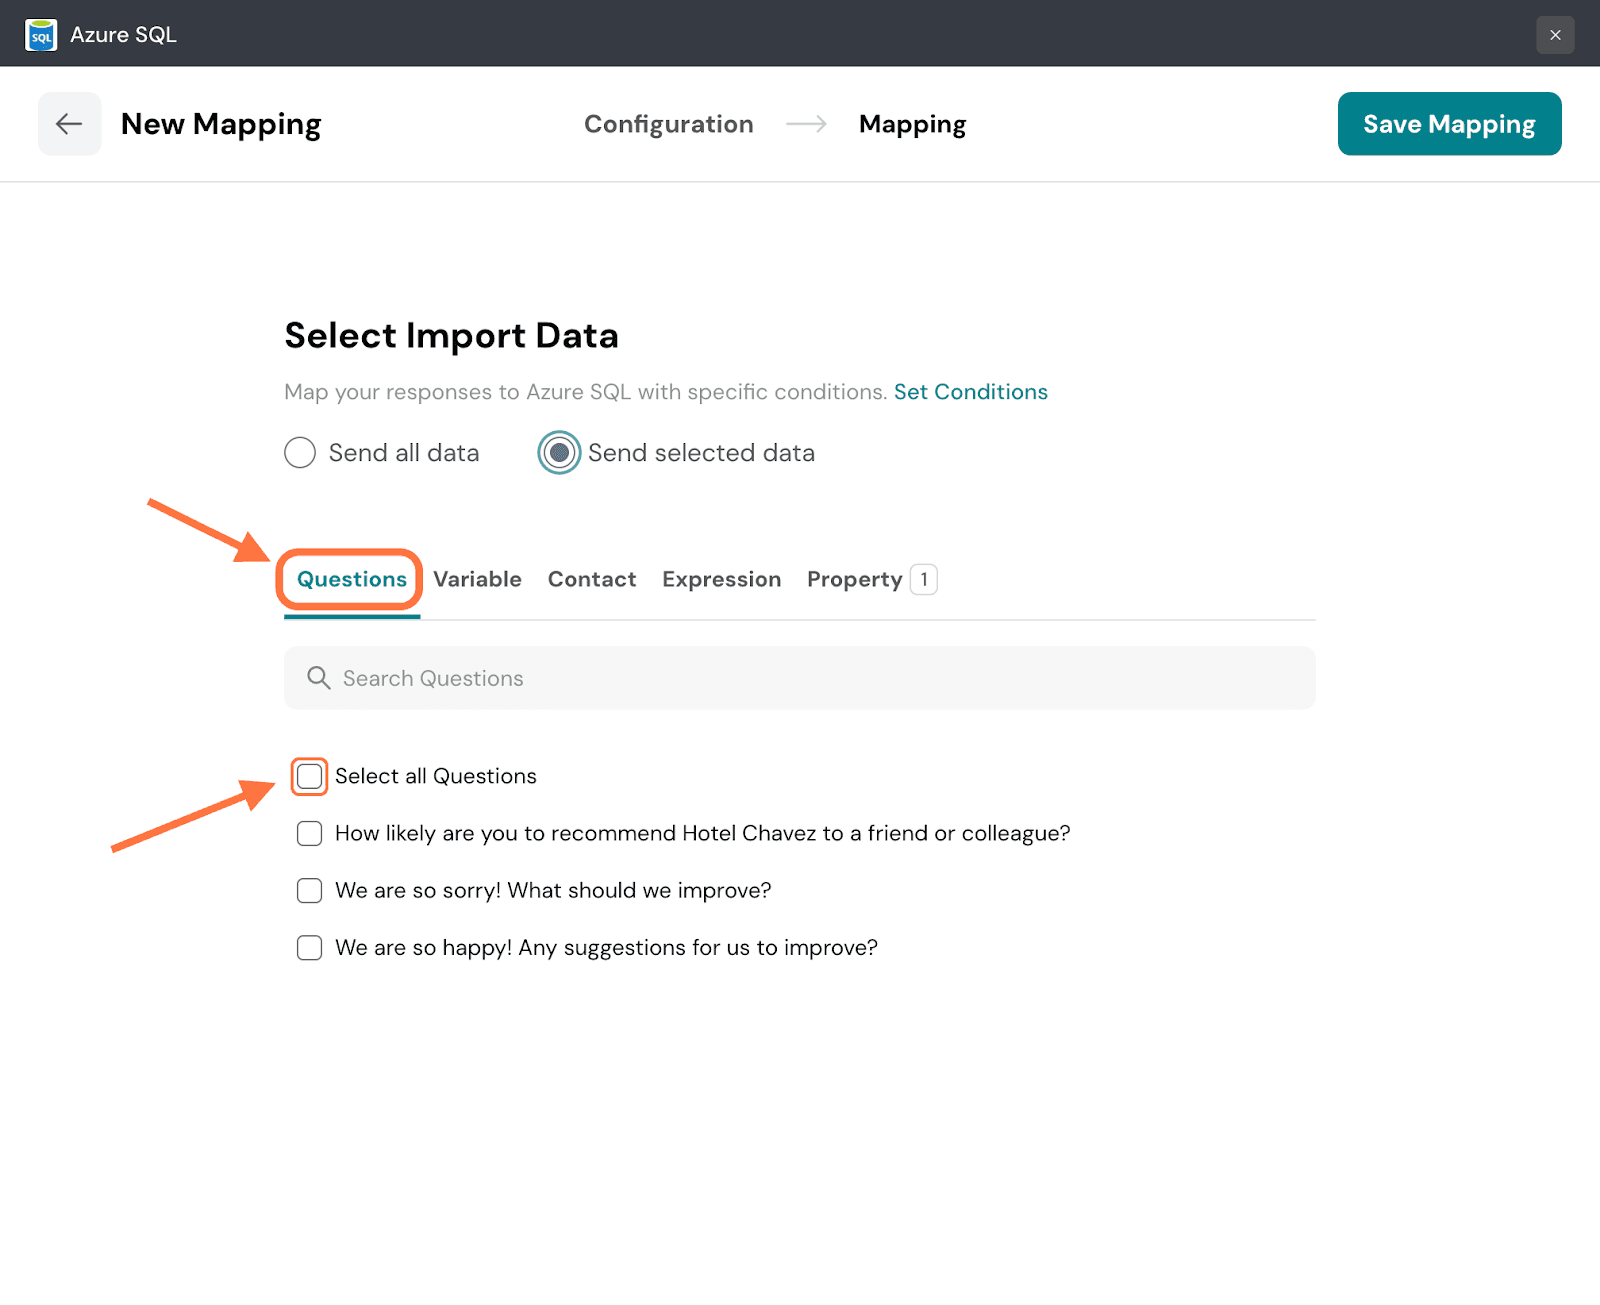
38. When you’re done, click on Save Mapping.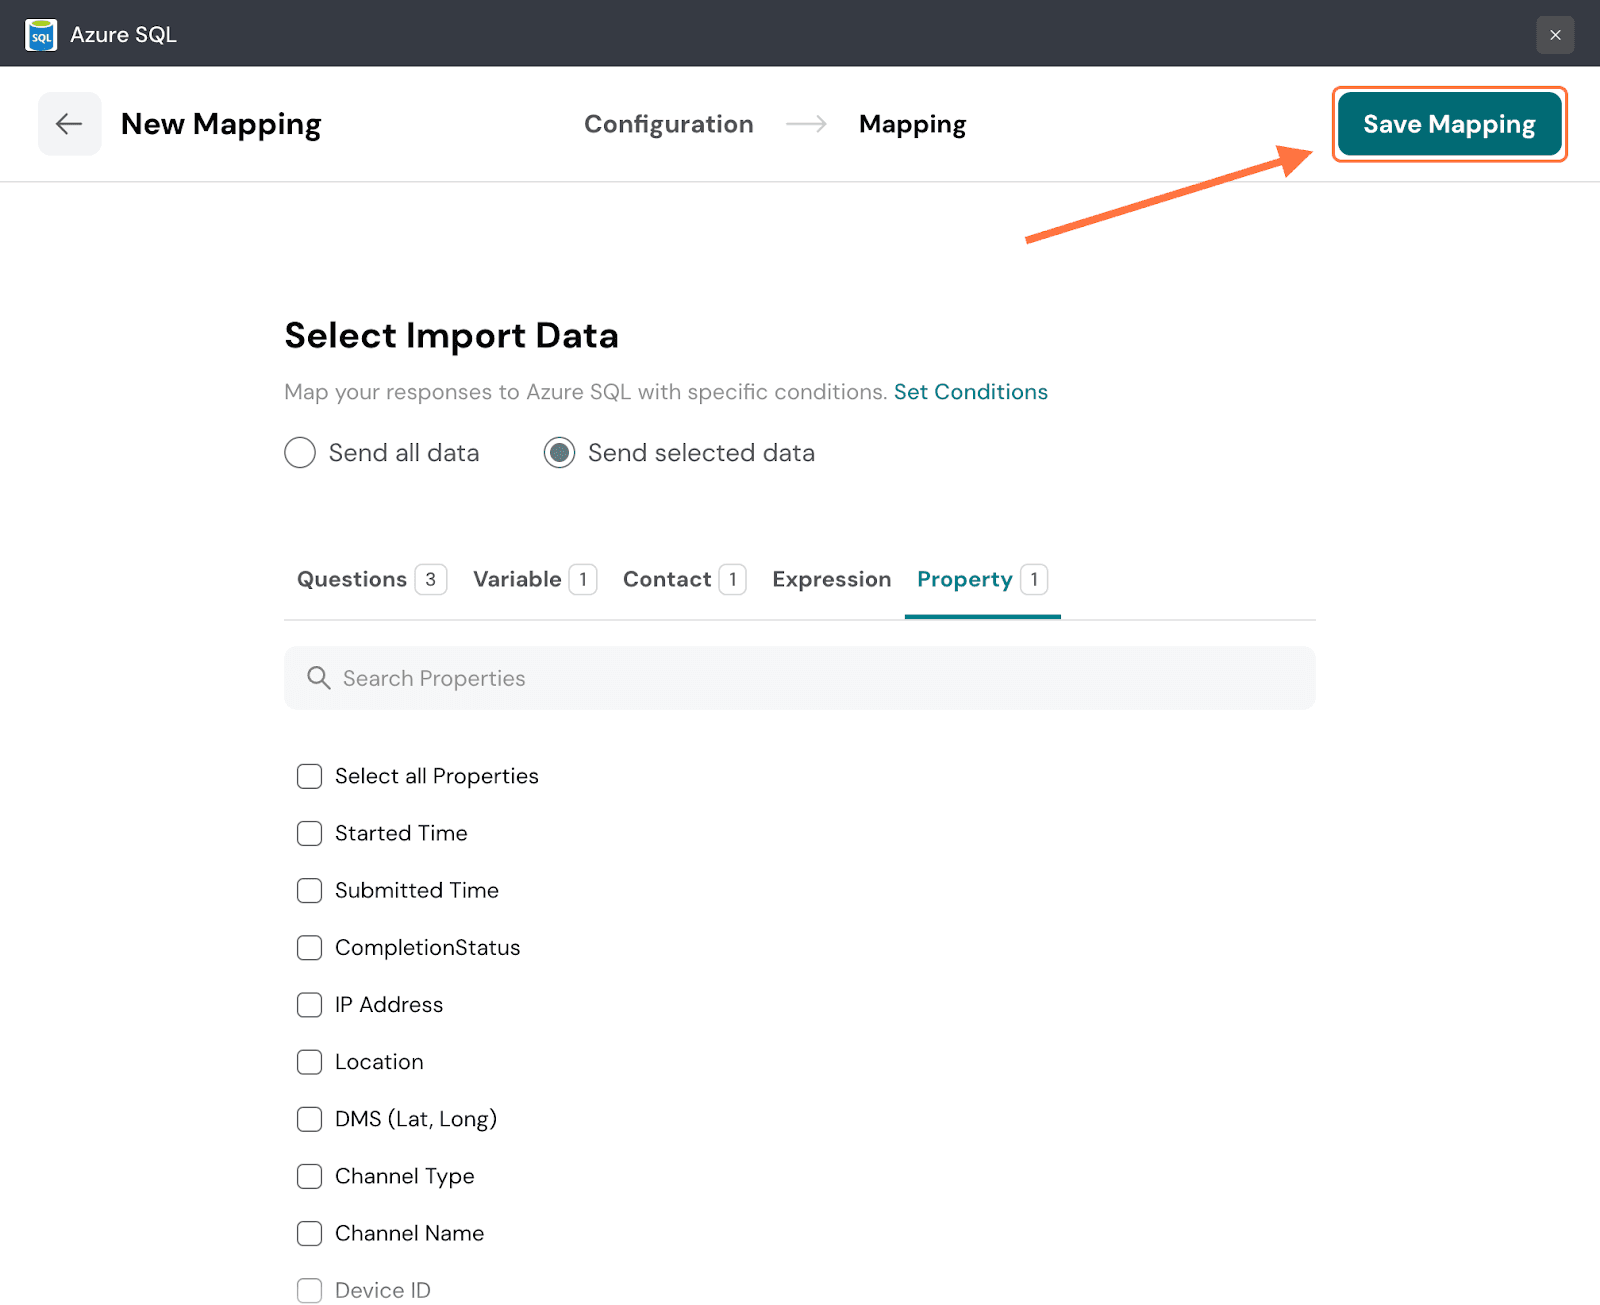
39. Create a name for the mapping and click on Save Mapping.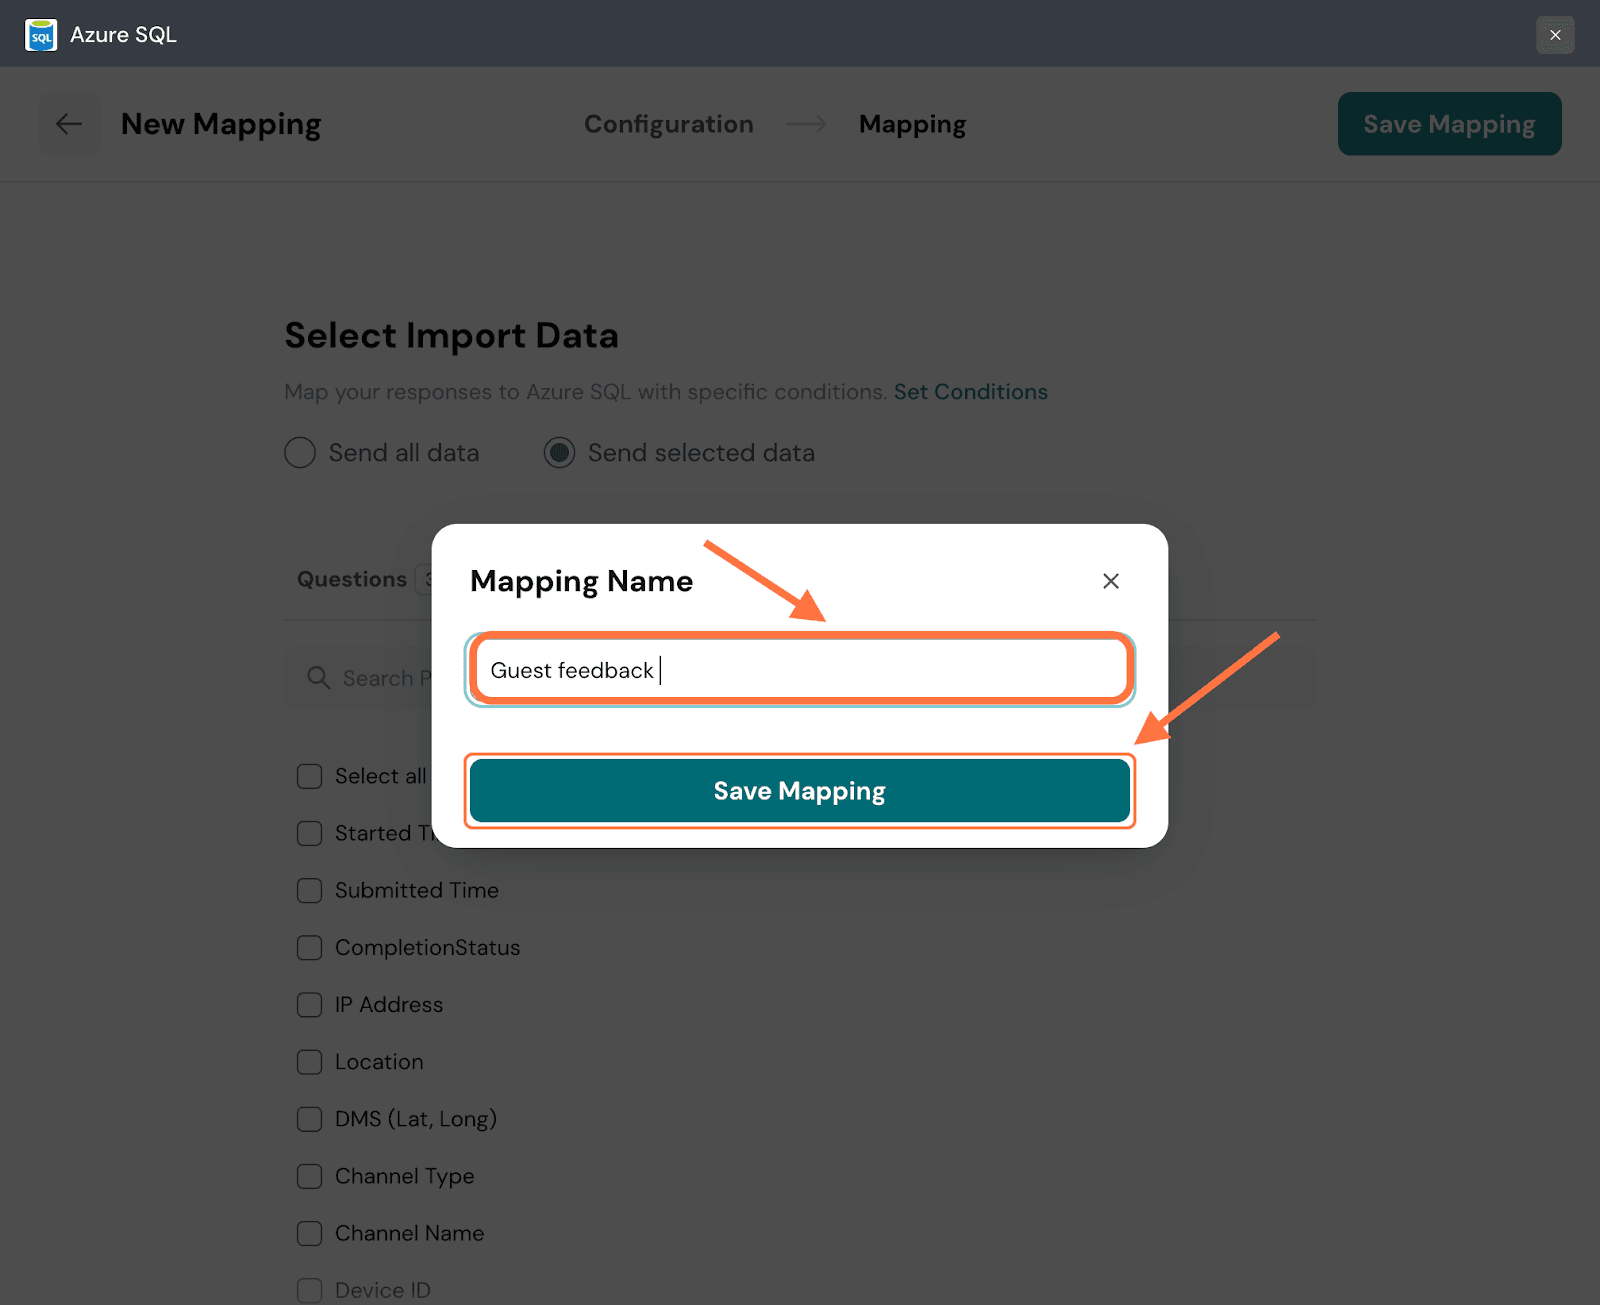
You’re now ready to integrate SurveySparrow and Azure SQL. You can automatically and securely push every survey response directly into your chosen table in real time — eliminating manual exports, spreadsheets, and custom coding.
With flexible conditional filters and support for both new and historical responses, the integration gives you a seamless, scalable way to store and analyze structured survey data alongside your other business information.
Start leveraging the power of automated data flow today and turn your survey insights into actionable intelligence instantly.
Feel free to reach out to our community, if you have any questions!
Powered By SparrowDesk