Search
SurveySparrow Go brings the full power of SurveySparrow to your mobile device, making it easy to design, share, and track surveys right from your phone. Whether you’re collecting customer feedback, running quick polls, or managing field research, the app helps you move from idea to insight faster—without ever needing a laptop.
In its online mode, SurveySparrow Go lets you create surveys using ready-made templates or generate them instantly with AI. You can add diverse question types, share your surveys through links, messaging apps, QR codes or offline mode, and watch responses come in live. Every interaction syncs automatically with your SurveySparrow account, keeping your data accurate and up to date.
You’ll find SurveySparrow Go especially useful when:
In this article, we’ll outline the processes of:
1. After installing the app from Google Play Store/Apple App Store, open the app and click through the introductory screens.

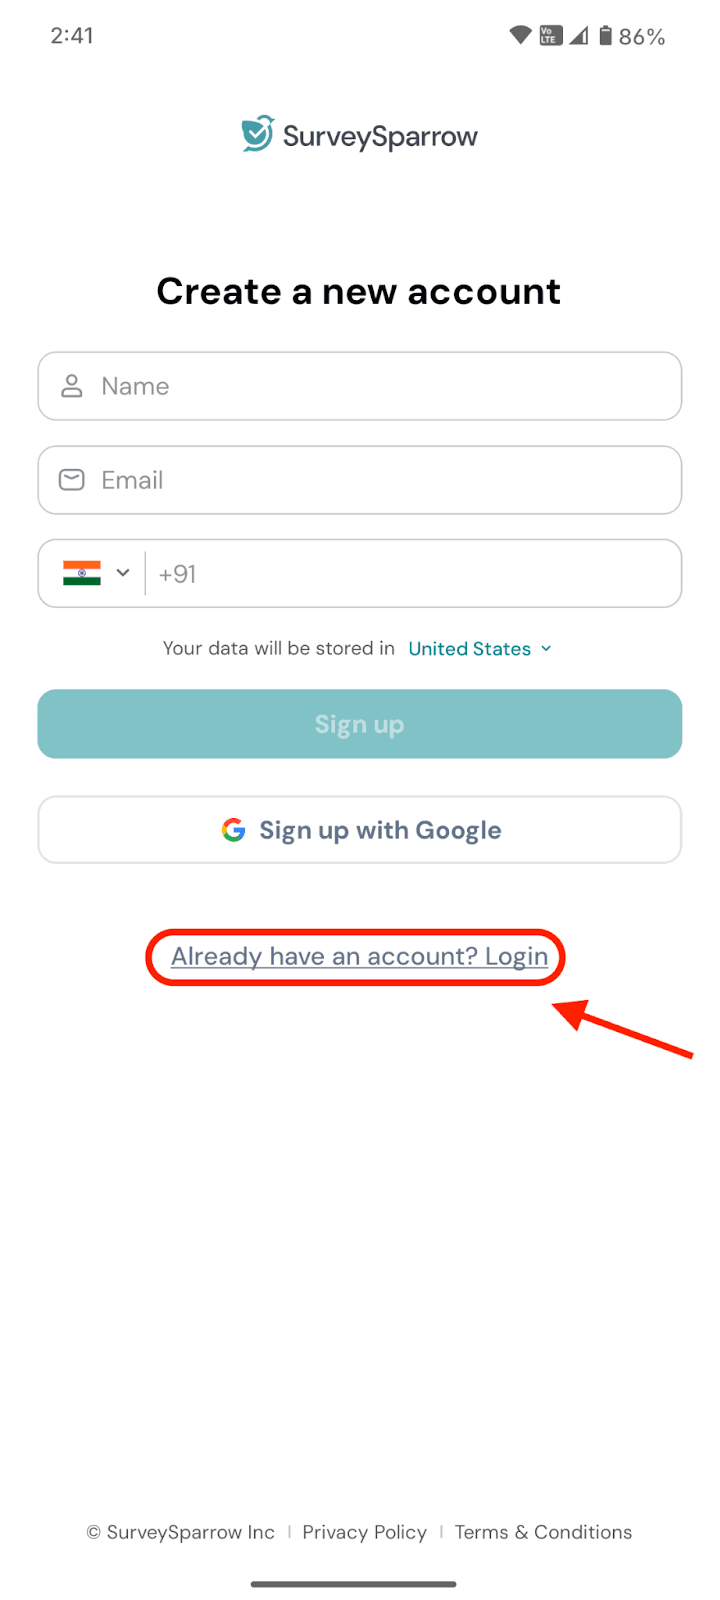
2. Next, you’ll reach the signup screen. If you already have an account, click on Already have an account? Login.
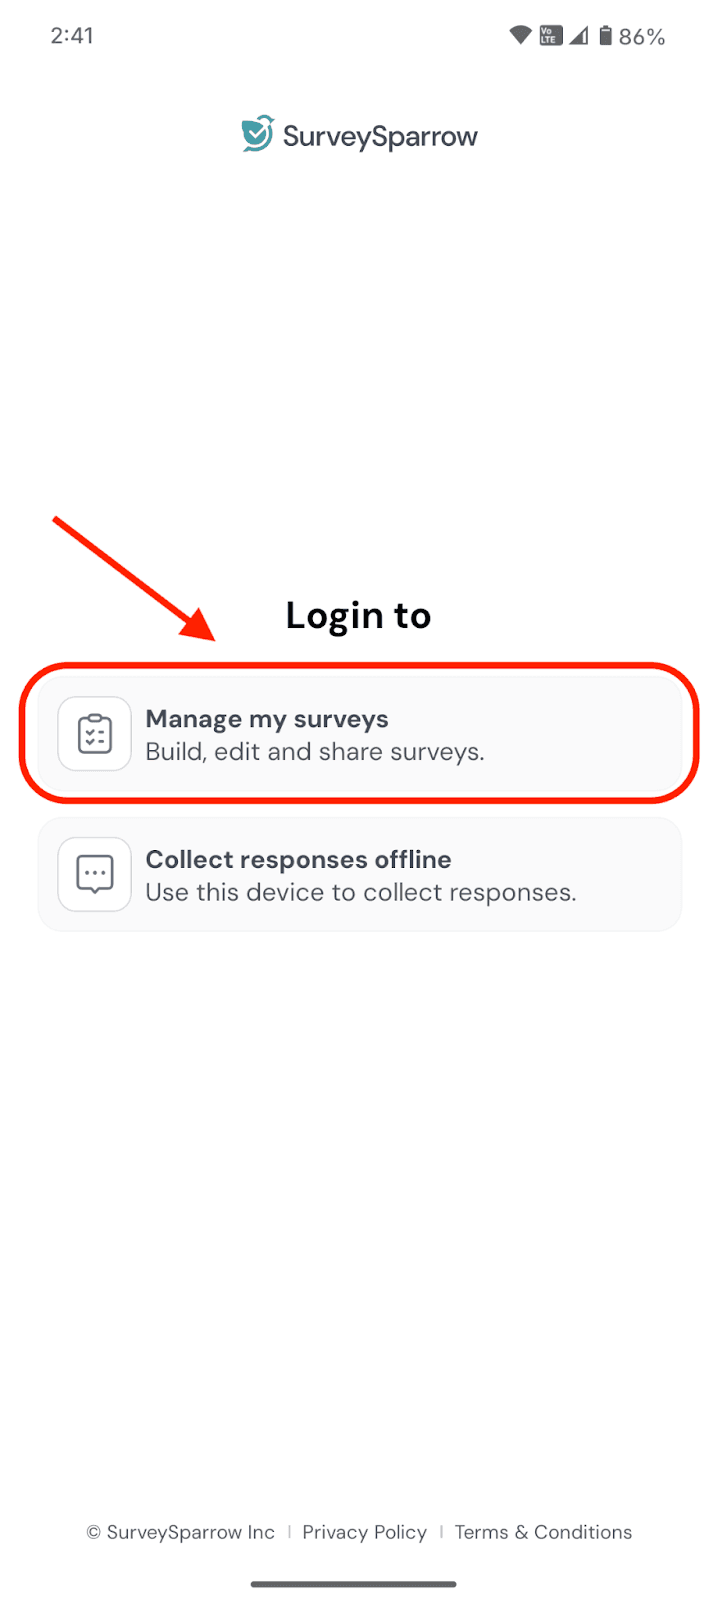
3. In the next screen you’ll have to choose the purpose of your login, which will accordingly determine the login process. If you want to start with creating online surveys and managing existing ones, click on Manage my surveys.
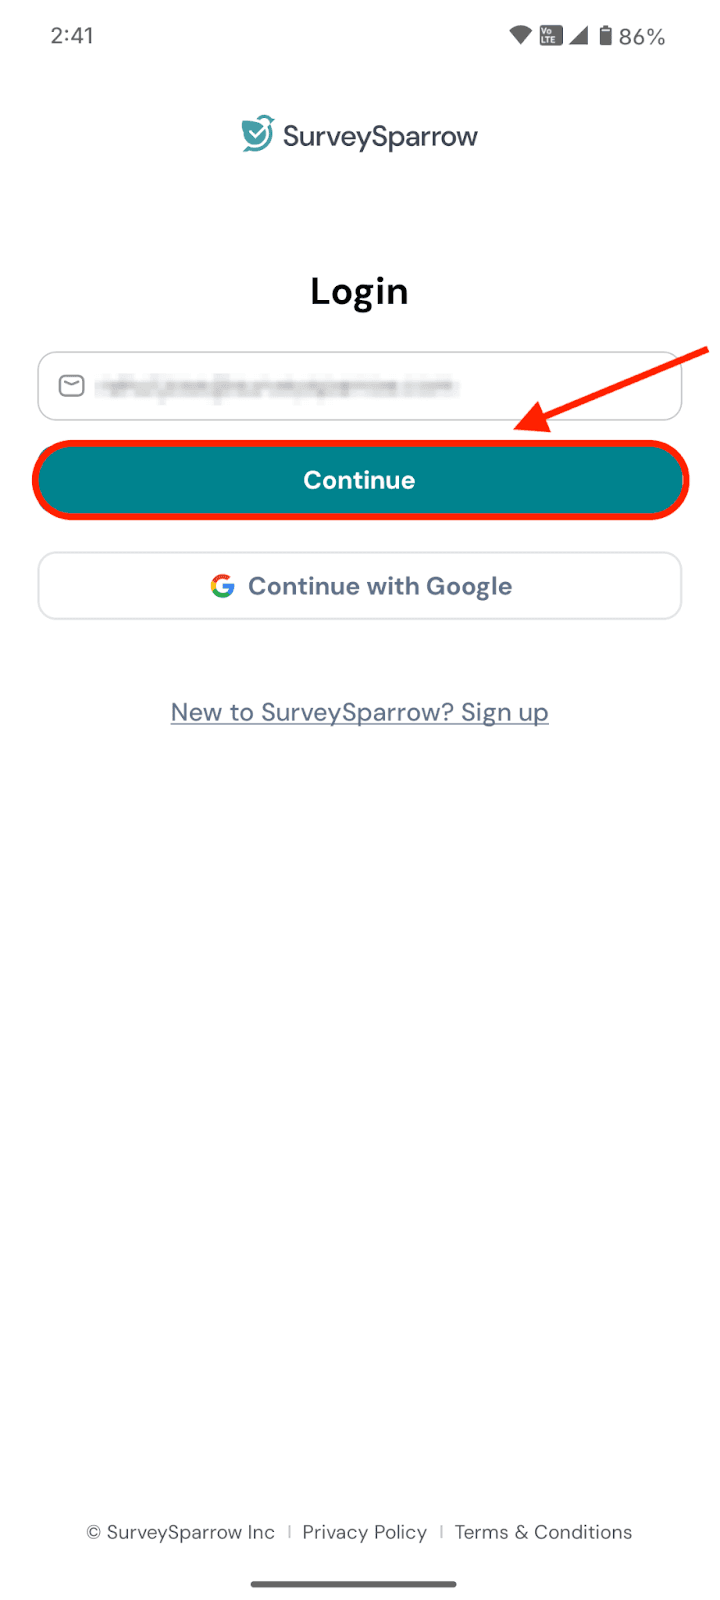
4. You’ll be asked to enter your email address tied to your SurveySparrow account. Then click Continue.
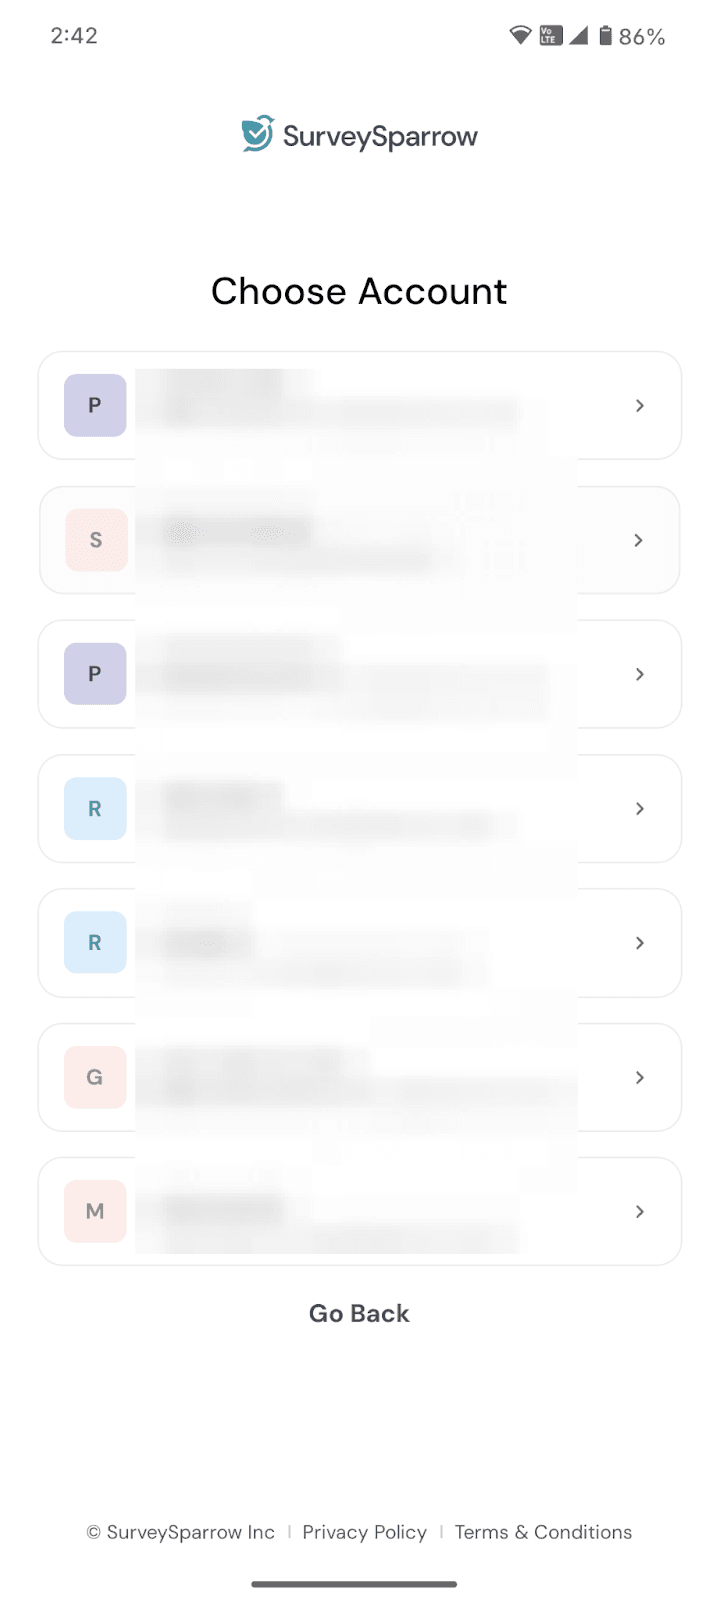
Note: If you have multiple SurveySparrow accounts connected to your email address, you must choose one.
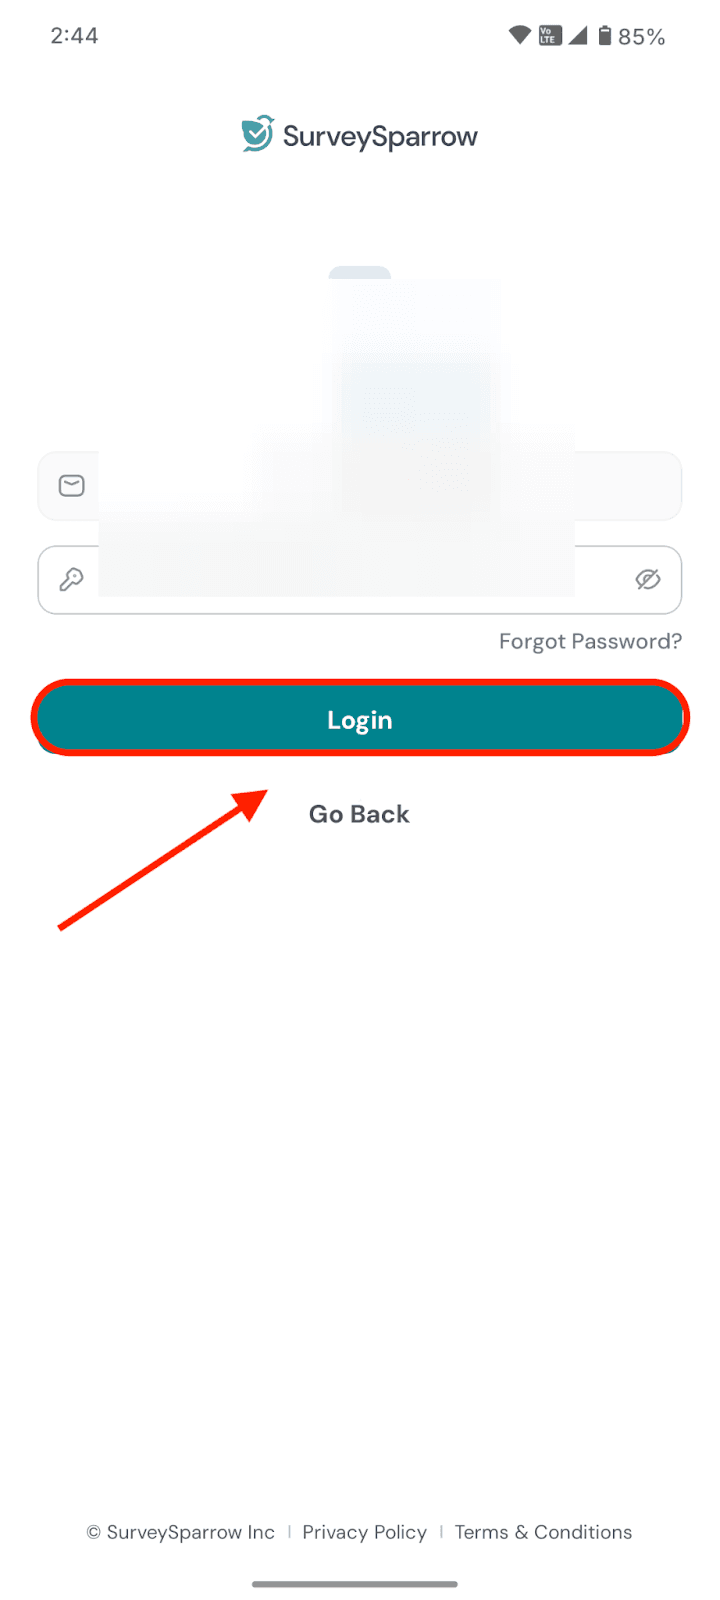
5. Next, enter your password and click Login.
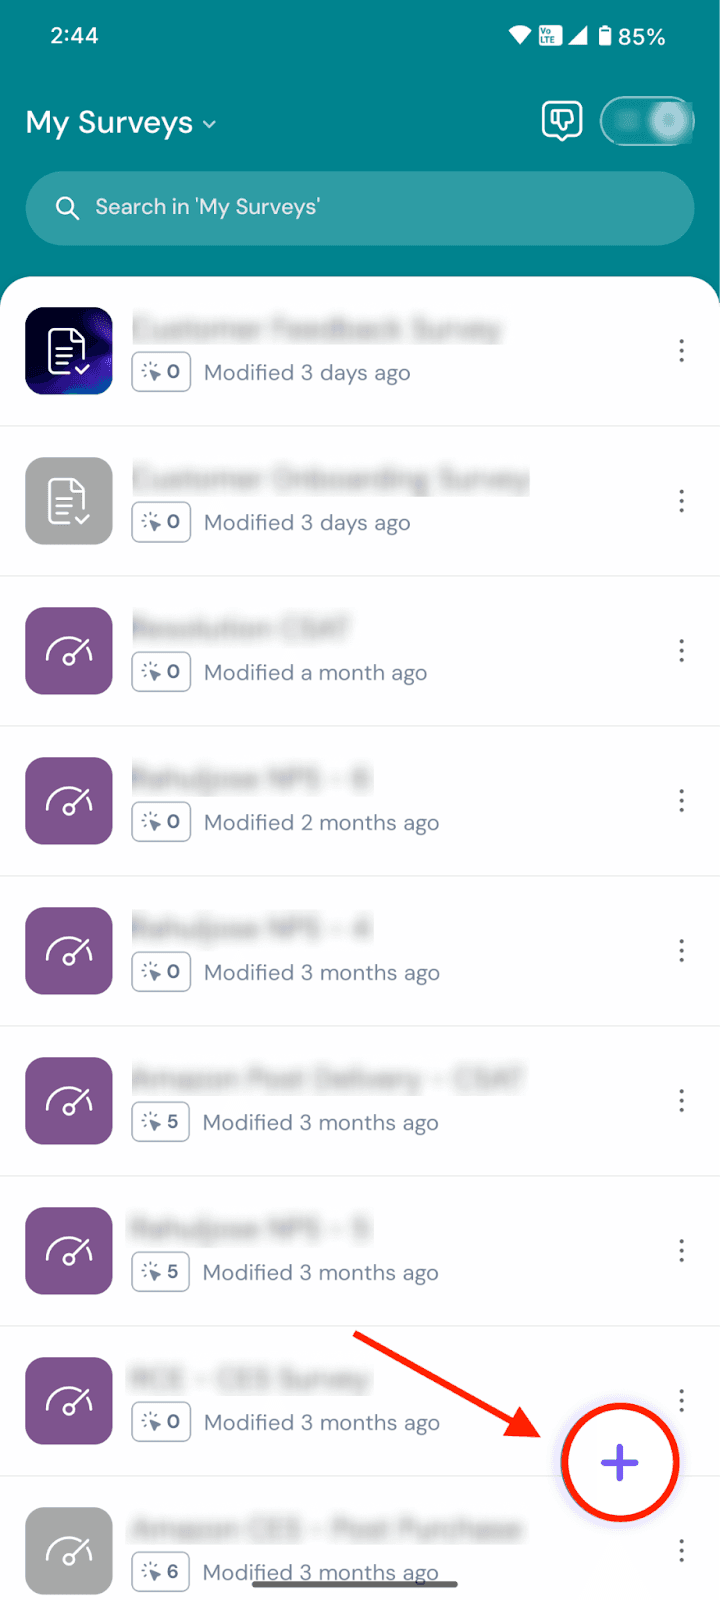
6. After this, you’ll enter the app’s online mode, with all your existing surveys visible. The default folder shown is My Surveys. To change the folder, click on it, then choose the folder from the drop-down menu.
1. To create a new survey, click on the plus icon.
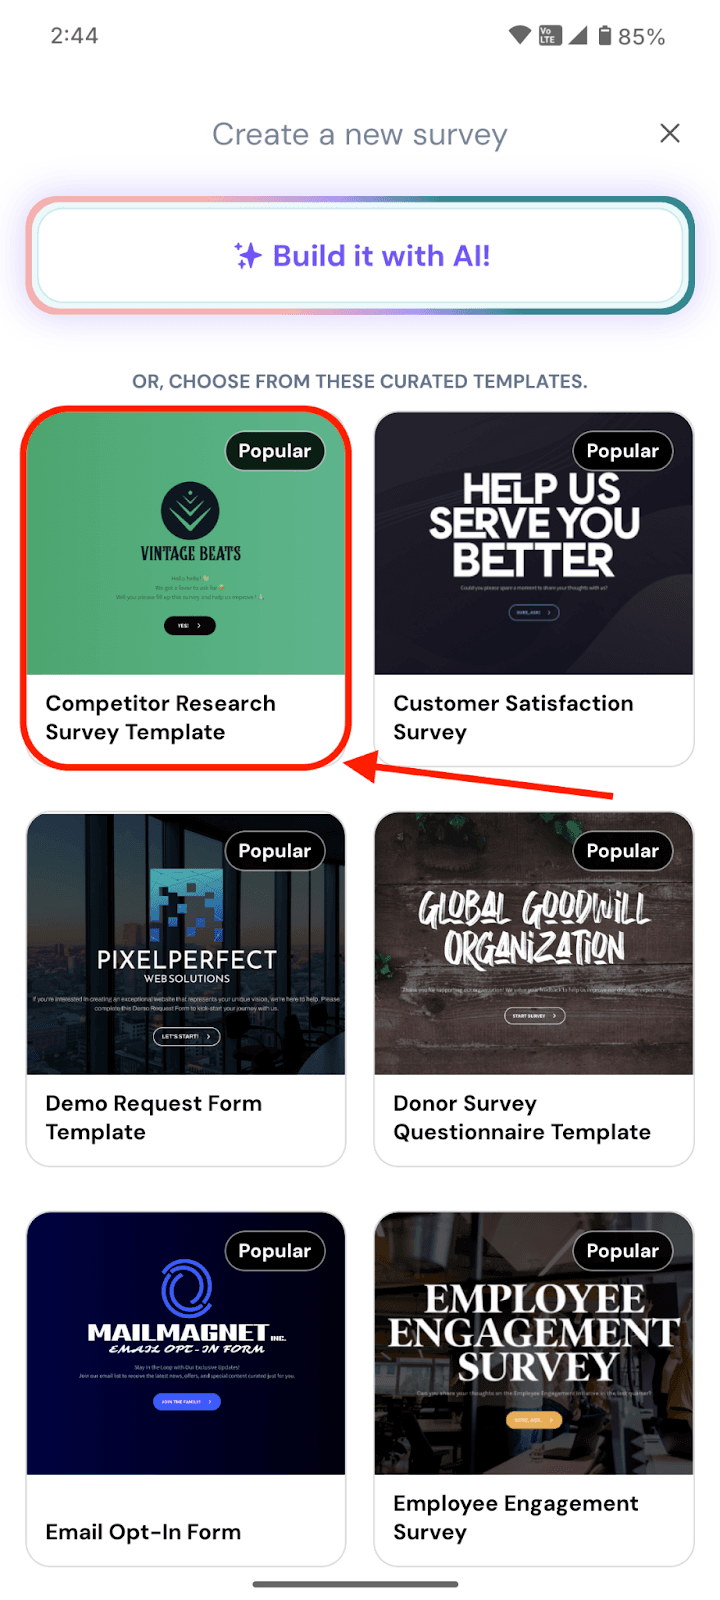
2. You can choose between using AI to generate a complete survey or using a template. Let’s quickly explore using templates. Scroll through the options available and tap on one.
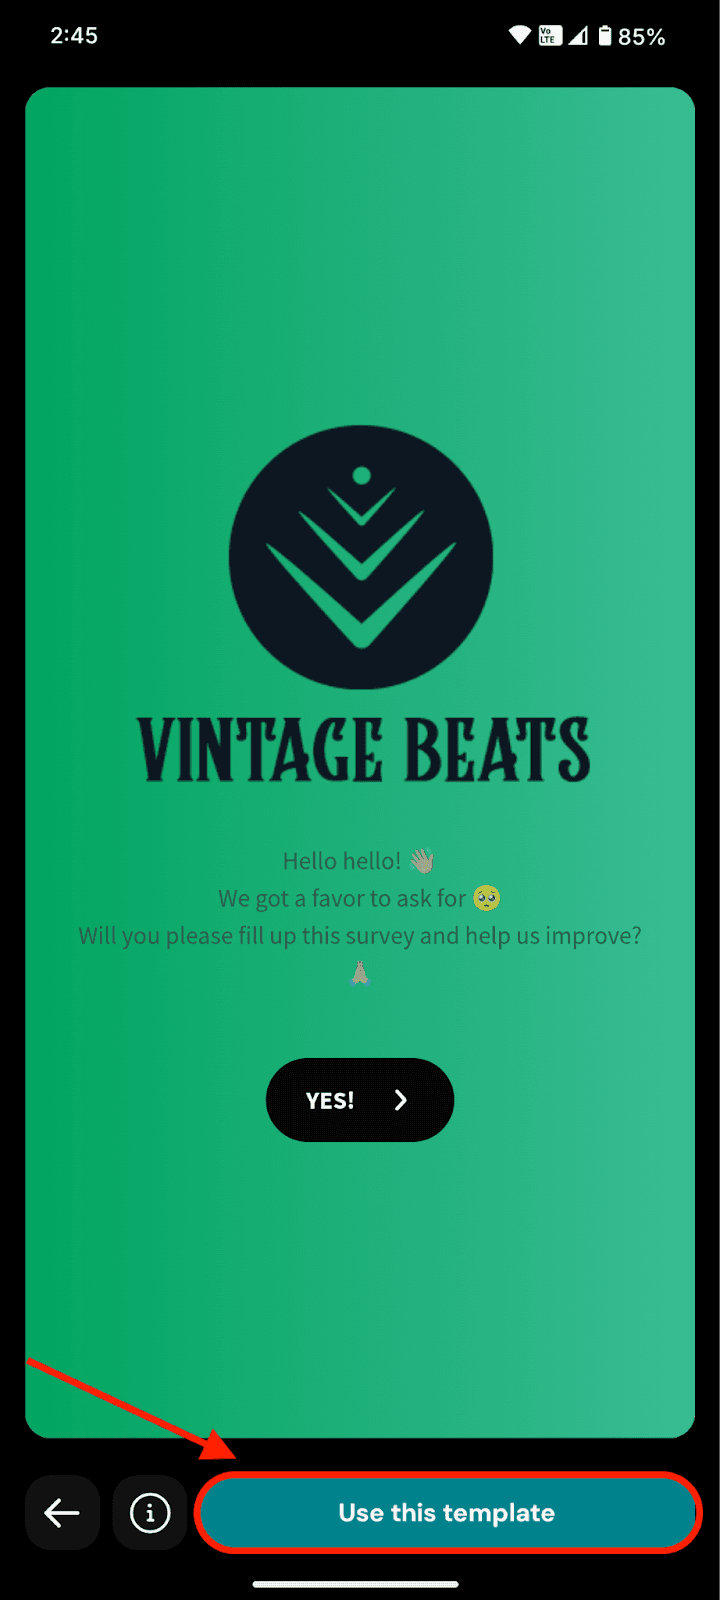
3. You can preview the survey by clicking on the buttons and filling it out. If you are ready to proceed, click on Use this template.
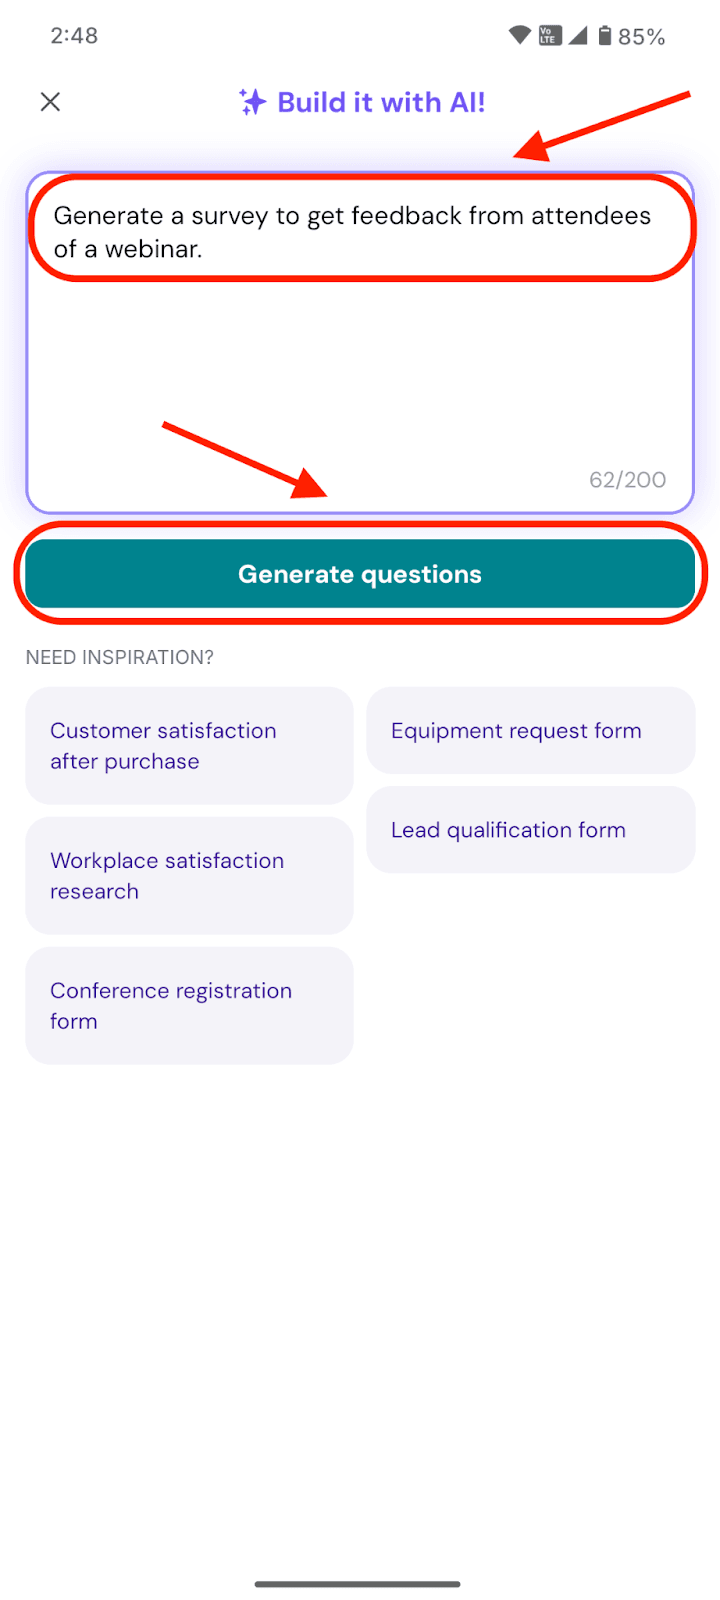
4. Now, let’s explore the AI mode. Back in the builder’s home screen, click on Build it with AI.

5. Type in the prompt you have in mind (or use any of the pre-built prompts below for inspiration), then click on Generate questions.
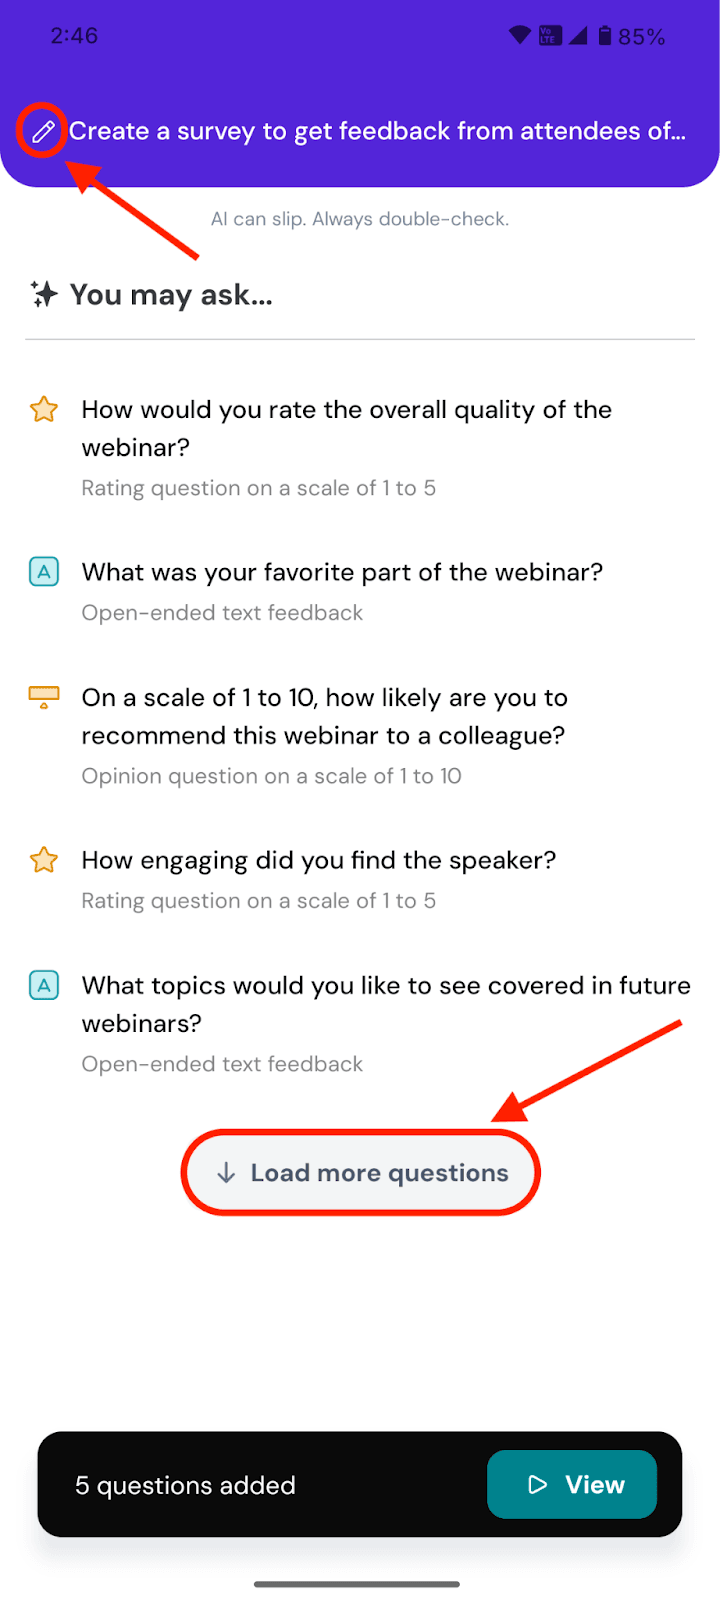
6. The AI then generates a sample list of questions. If you wish to edit the prompt for more specific questions, click on the pencil icon at the top of the screen. If you want the AI to generate more questions, click on Load more questions.
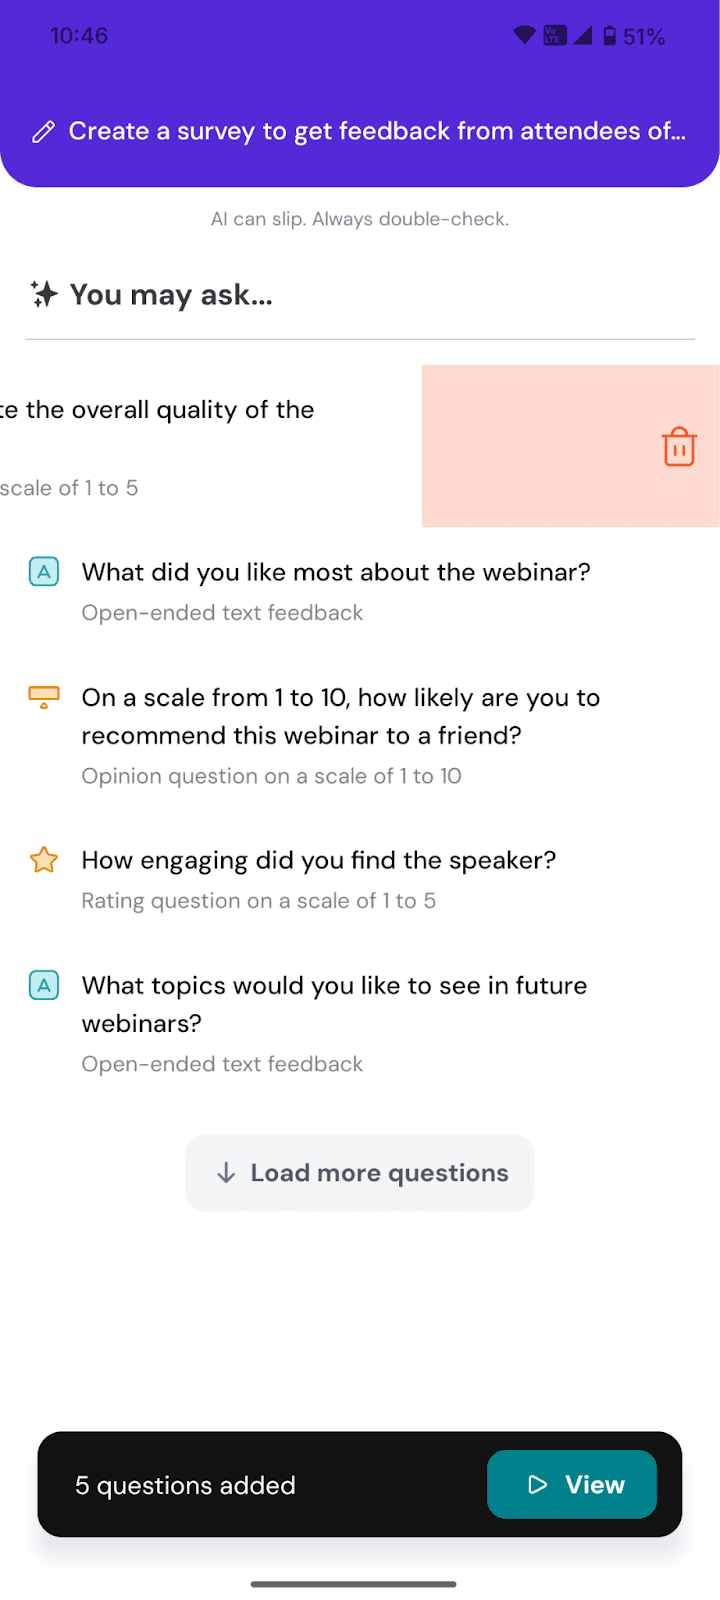
Note: If you want to remove a question, swipe all the way to the left. A red dustbin icon will appear on the right of the question, if done correctly.
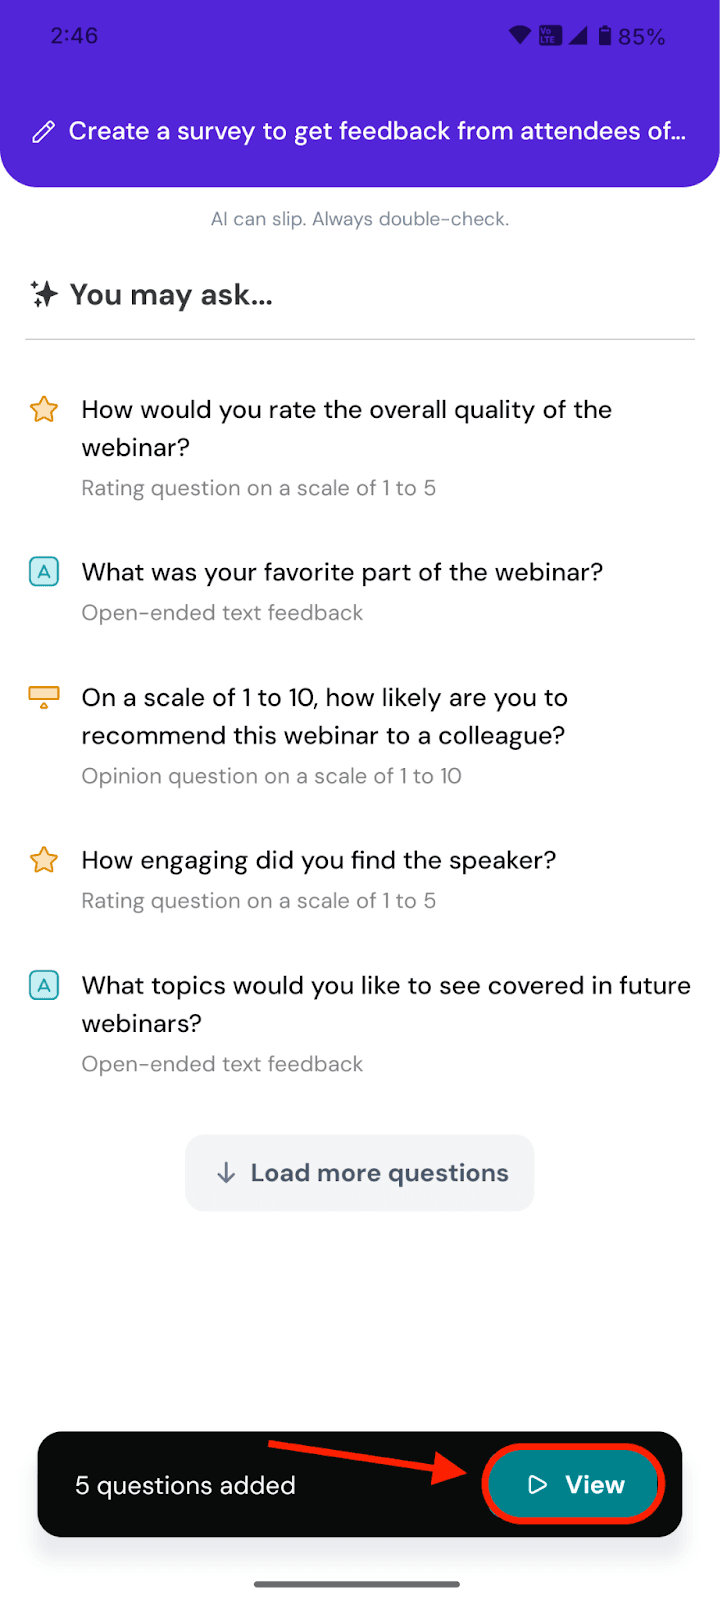
7. If you’re satisfied with the current set of questions, click on View.
8. You’ll get a preview of the survey. Click on the buttons and fill it out to get a feel of the respondent’s experience. If you wish to edit the survey’s theme, click on the rainbow icon below.
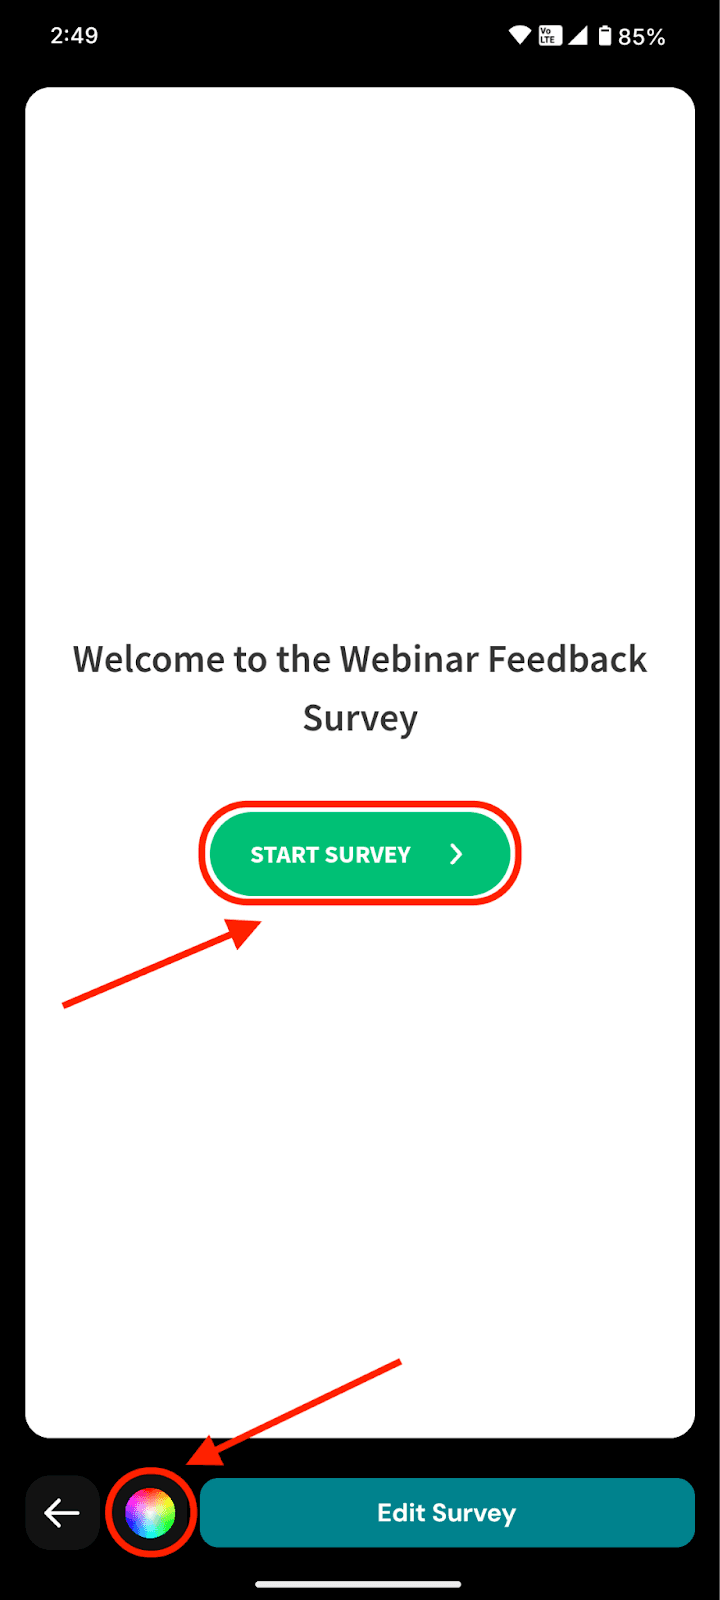
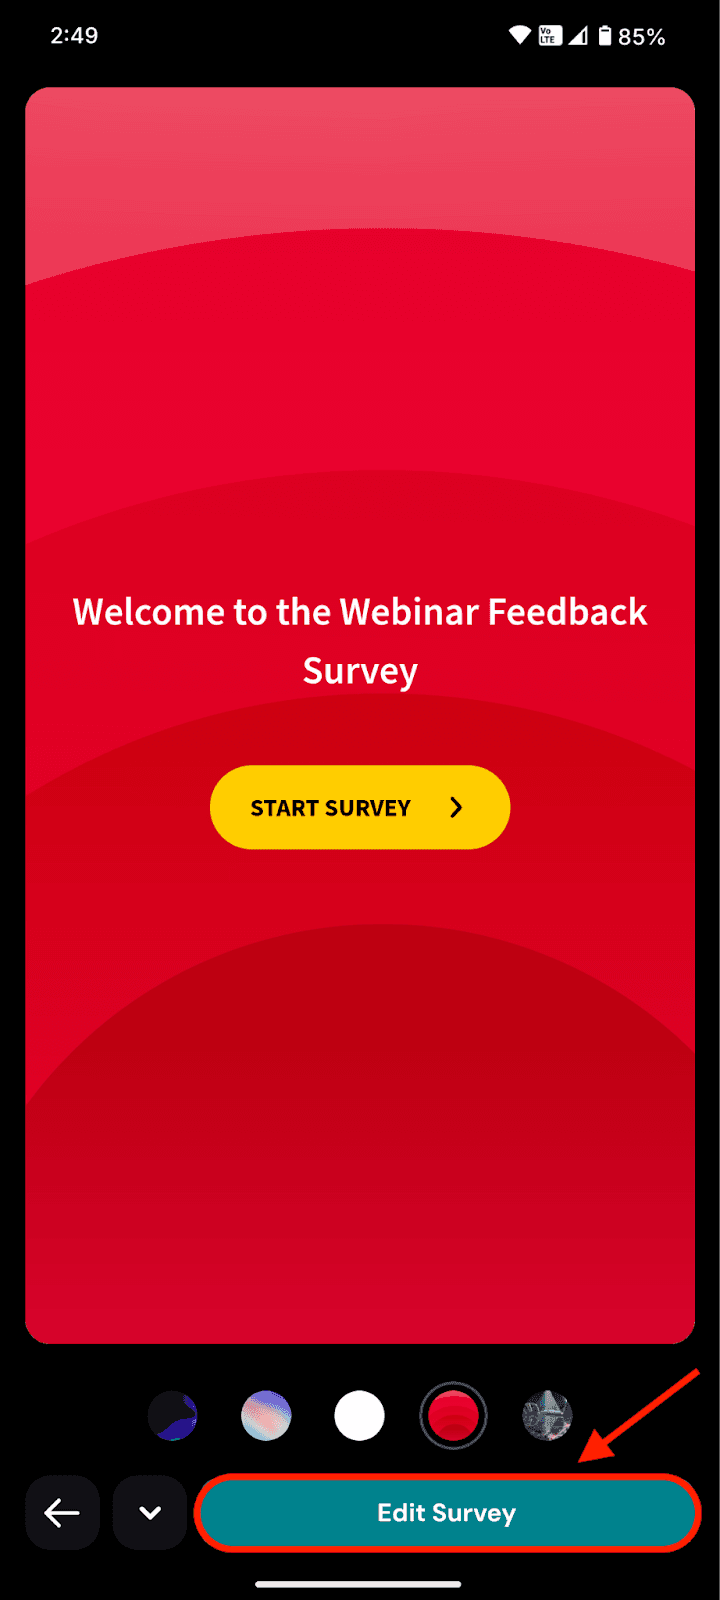
9. You’ll get a list of pre-set themes that you can try out. If you’re completely satisfied with the survey, click on Edit Survey.
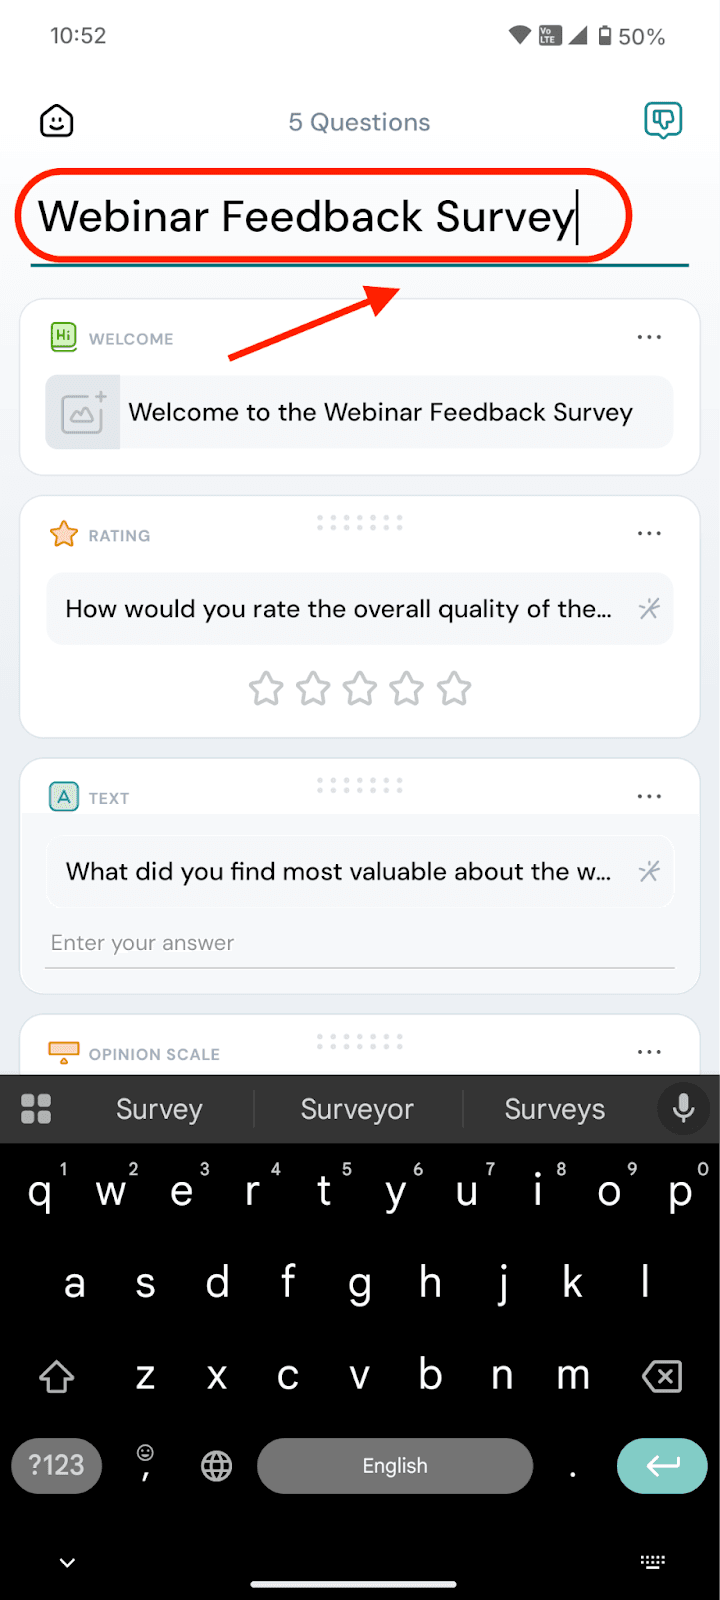
1. Now you’re inside the survey builder. Let’s look at the existing controls. To edit the name of the survey, click on the title.
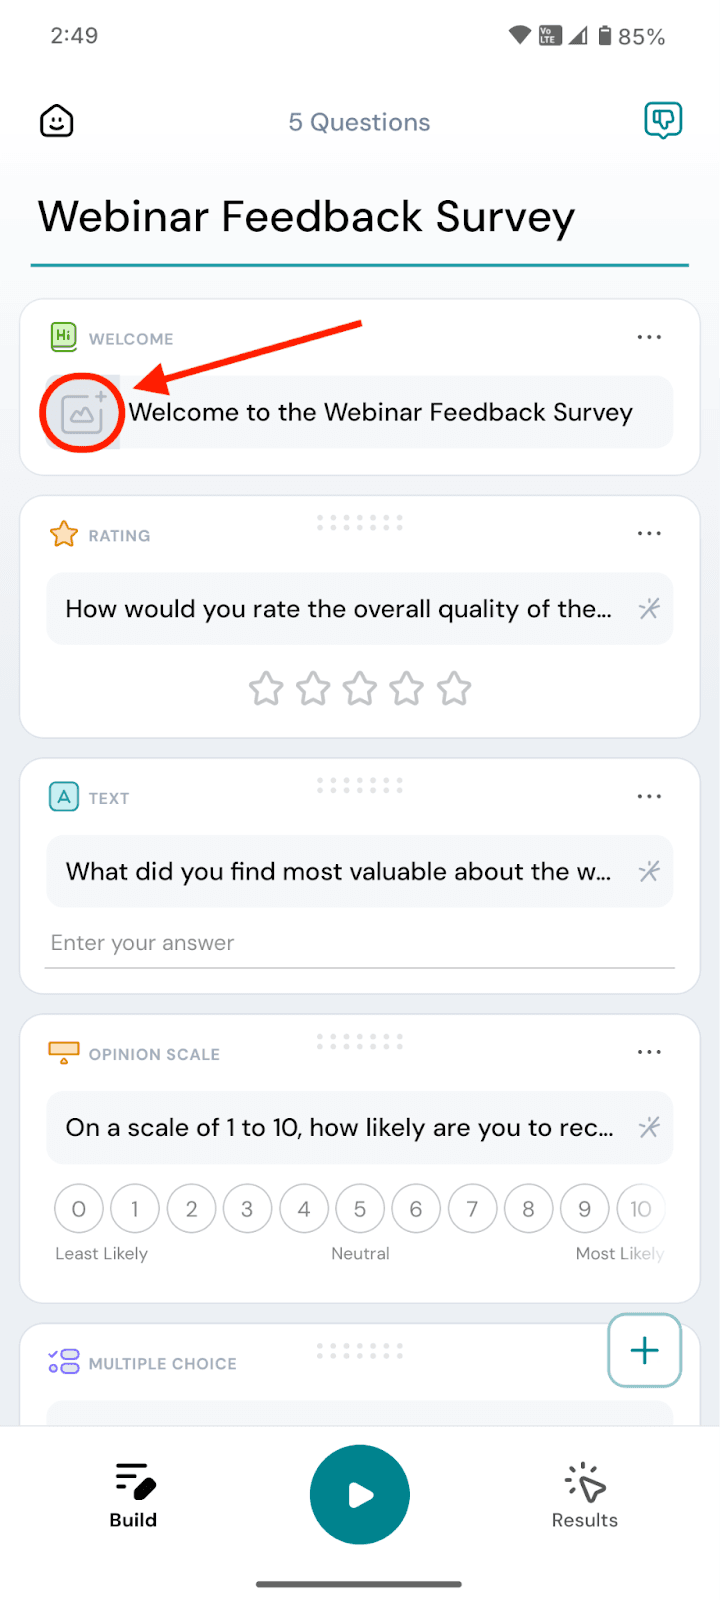
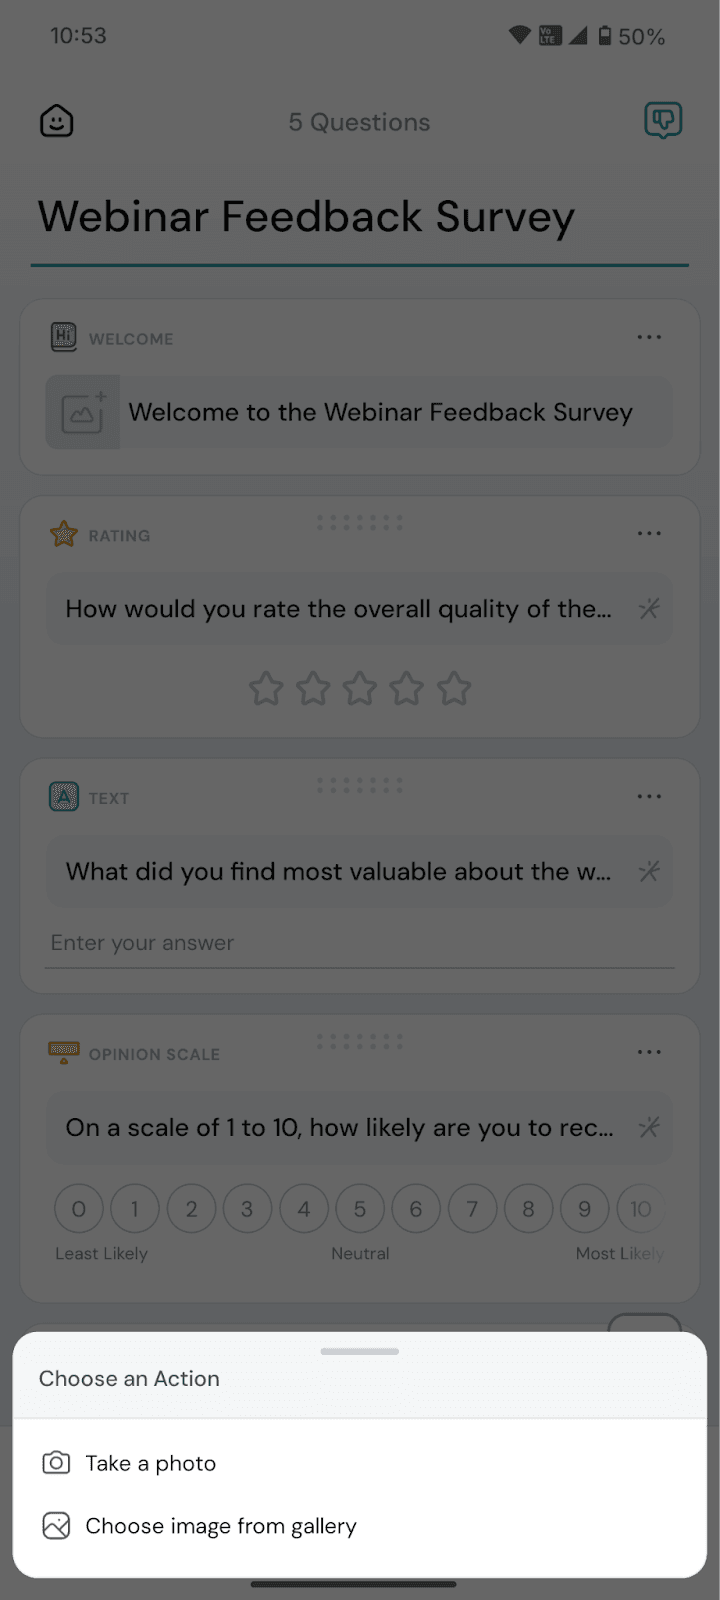
2. Note that every survey (created via AI or a template) will always have a welcome page at the start of the survey and a thank you page at the end. If you wish to add an image for either page, click on the image icon.
3. You’ll be asked to take a photo with your phone’s camera or choose an existing photo/image from your gallery.
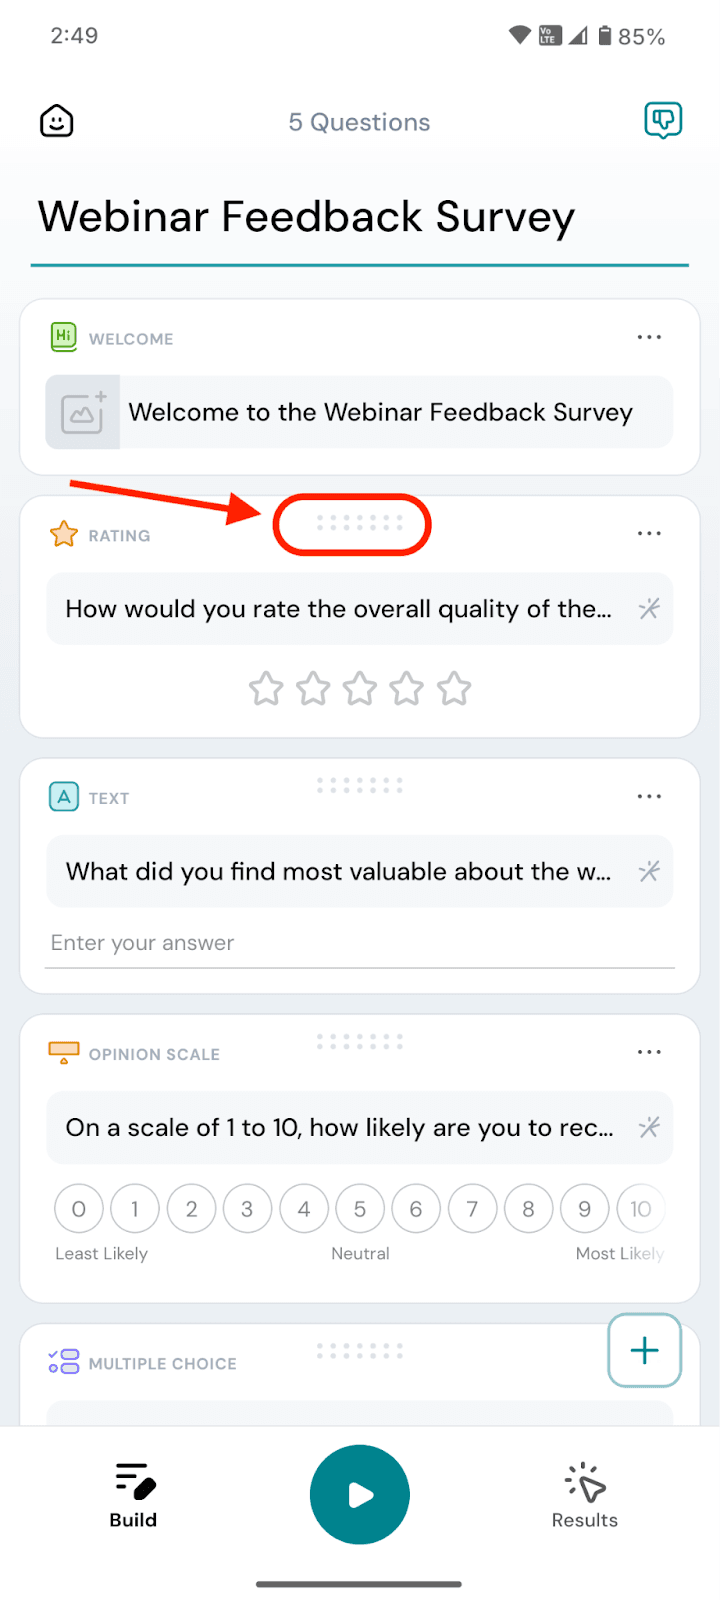
4. If you wish to change the order/placement of a question, click and long-press on the dot-grid at the top of a question, then drag it to whichever place you want it to be.
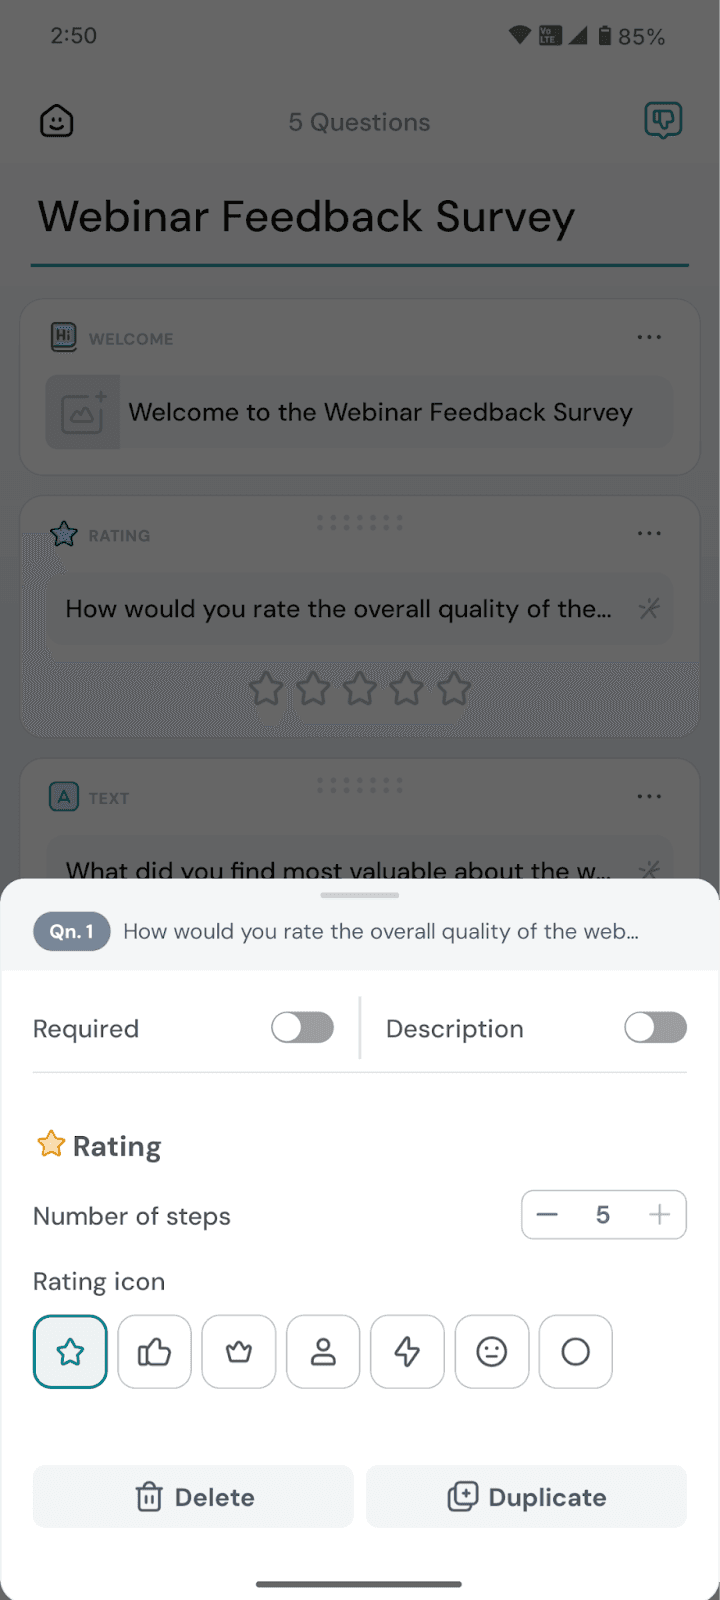
5. If you wish to make a question mandatory, click on the grey asterisk icon on the right side of a question. It will turn red.
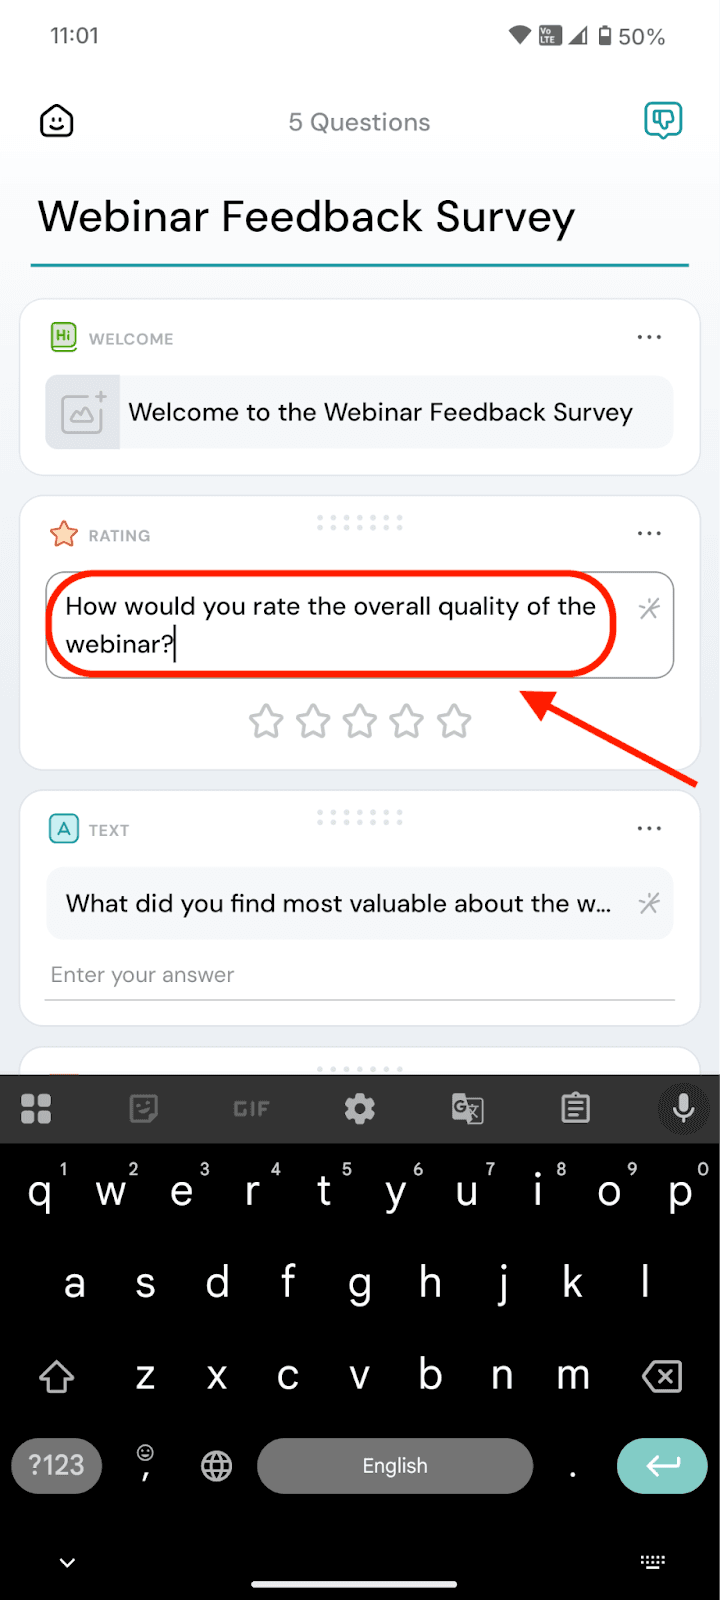
6. To edit a question’s text, click on the text box.
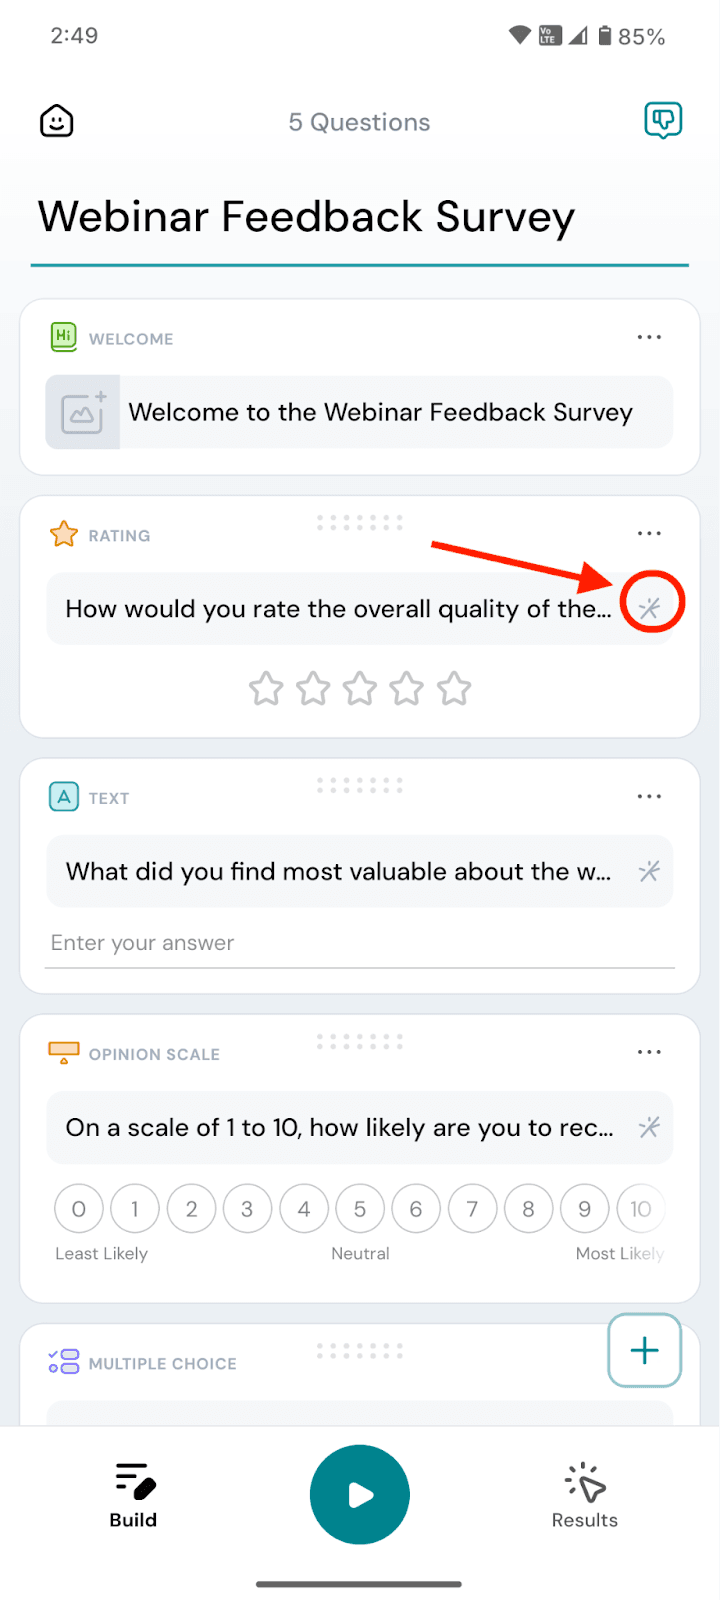
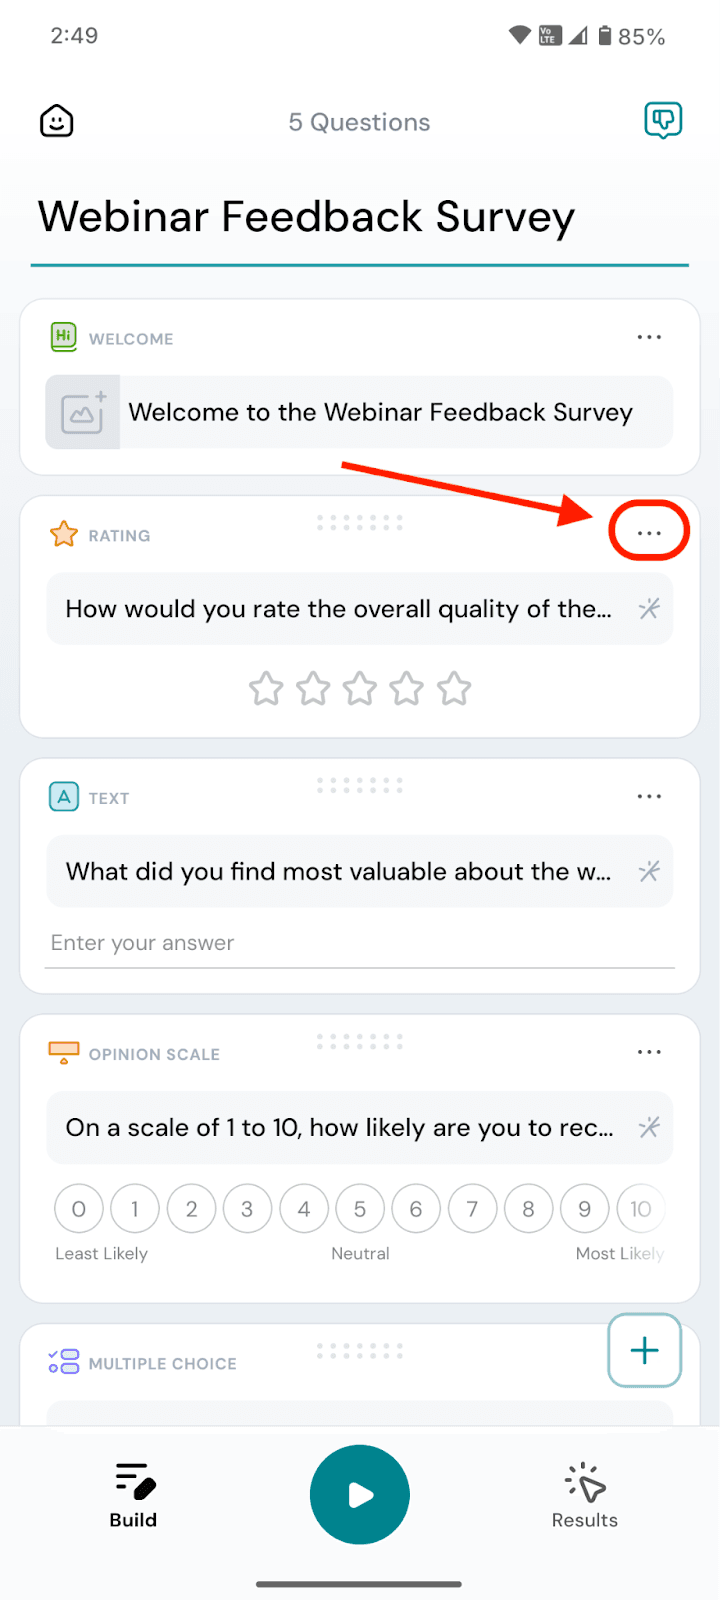
7. To edit a question further, click on the three-dot icon in the top right corner of a question.
8. The settings for a question will vary based on the question type, but these settings will always be present:
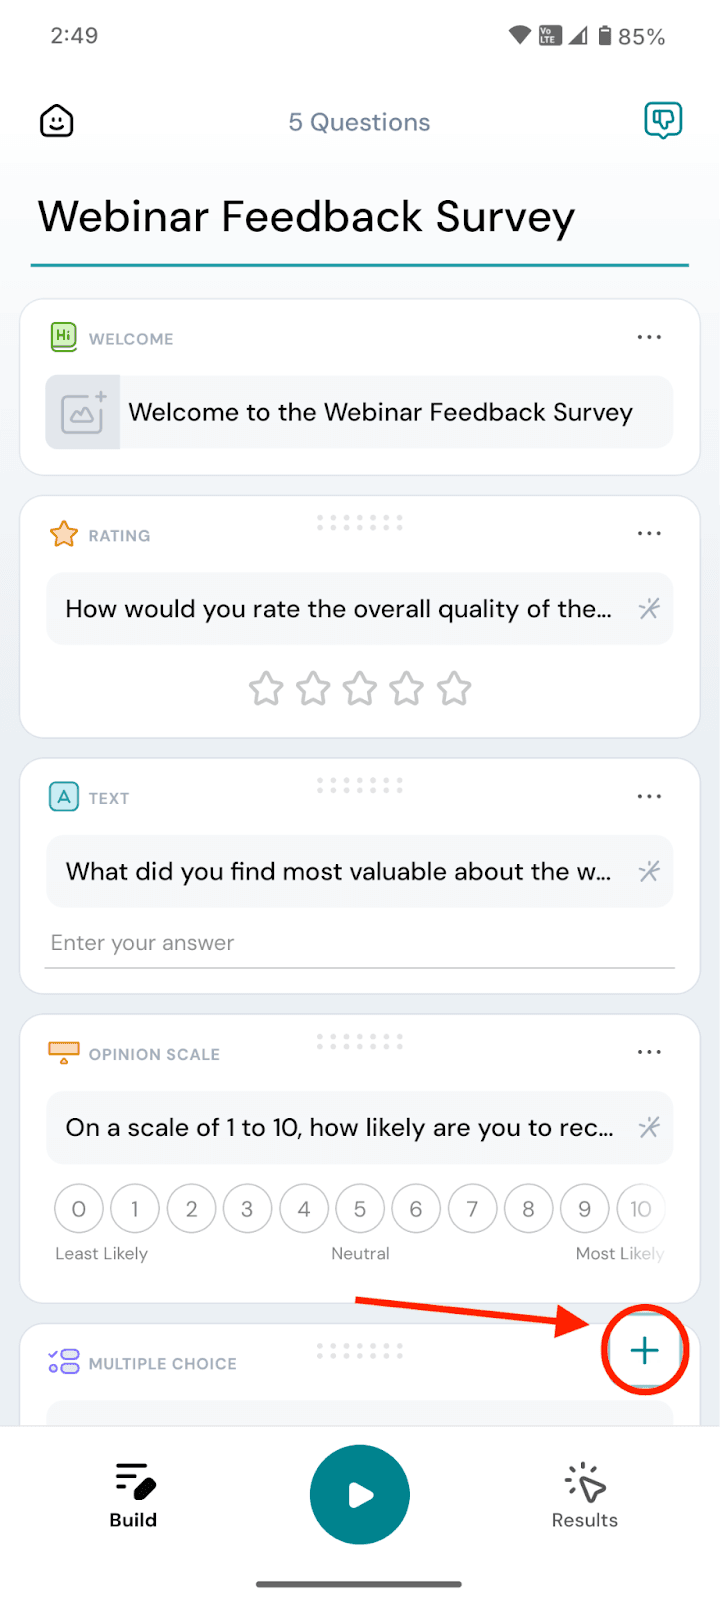
9. To add a new question, click on the plus icon.
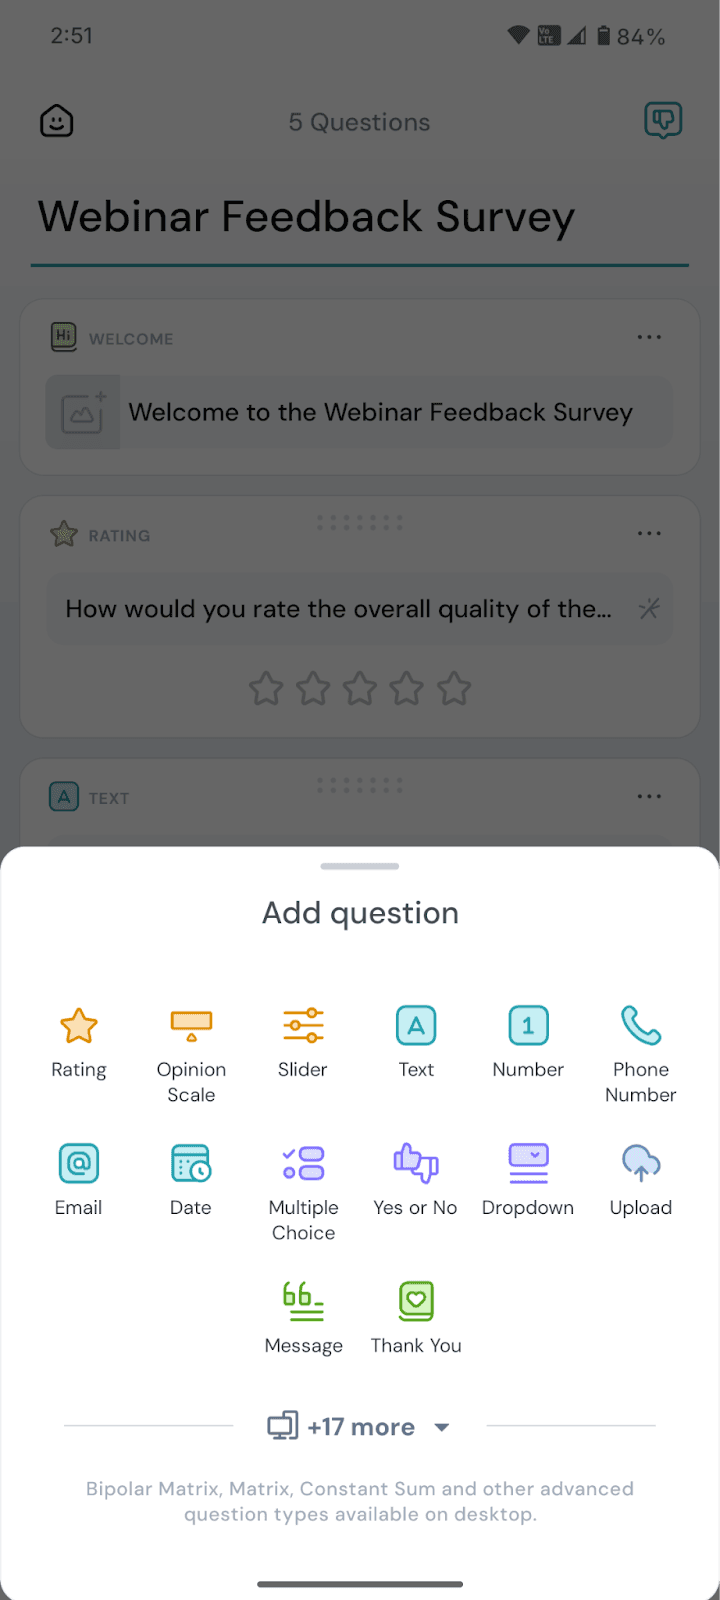
10. You can choose from 15+ question types. If you want the full range of questions to choose from, you will have to head to SurveySparrow’s desktop version and edit the survey.
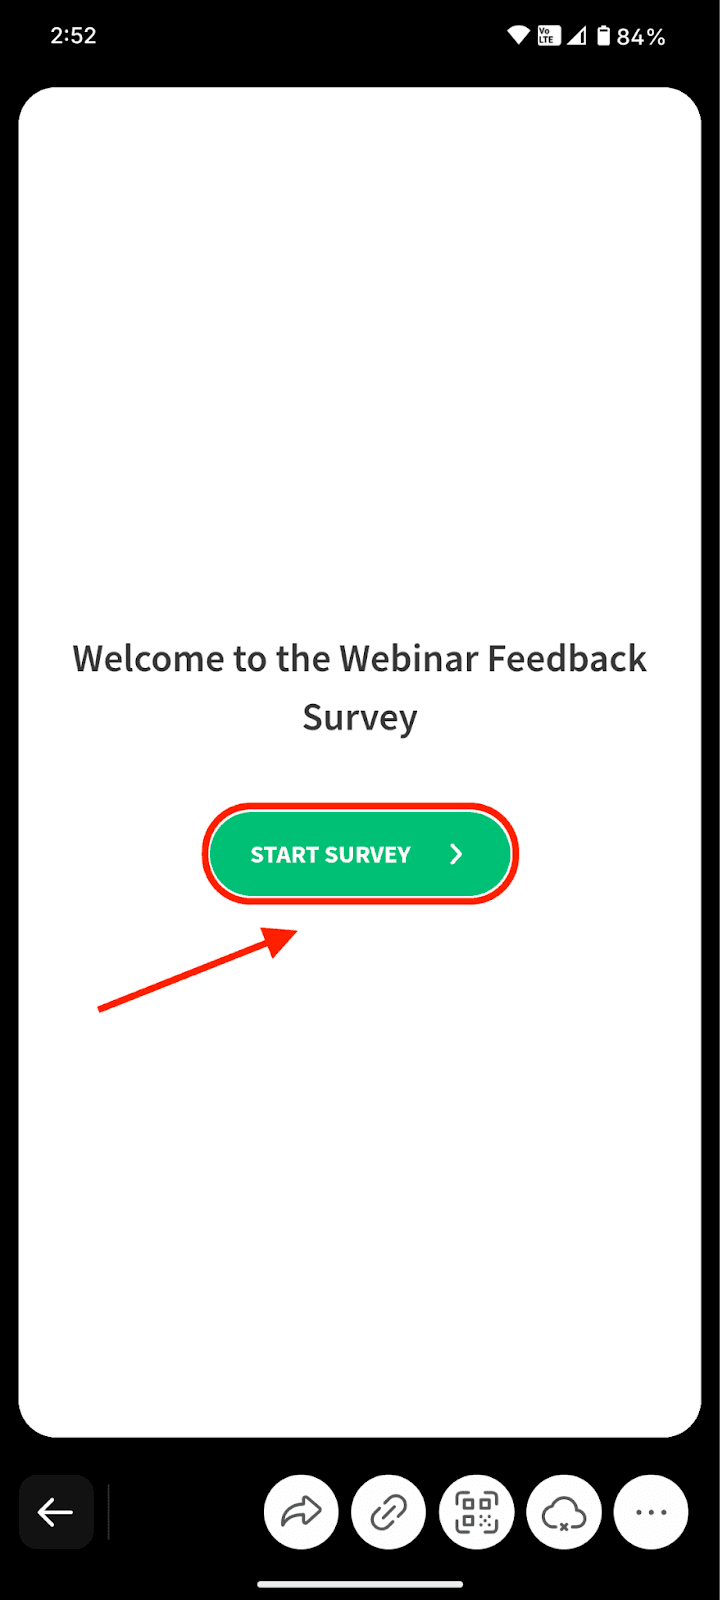
11. To proceed to share the survey, click on the green play icon in the bottom centre.

1. In the share section, you can preview the survey by clicking on the buttons and filling out the answers.
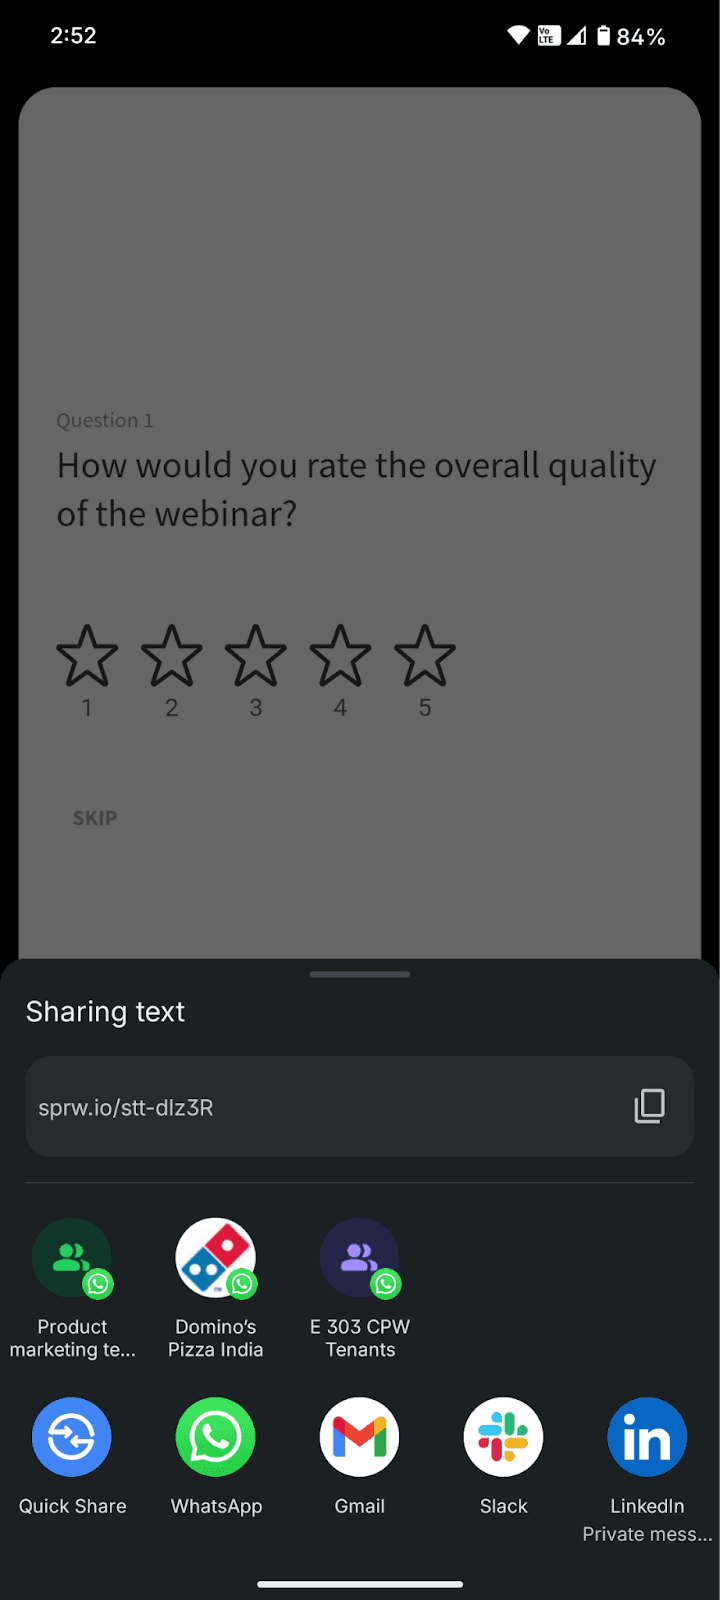
There are 4 share modes available. Let’s go through each of them one by one.
2. Sharing via installed apps: To access this mode, click on the forward icon.

3. You can choose from all existing apps (especially the most-used ones), or copy the link text to paste elsewhere.
4. Link share: To access this mode, click on the link icon. The link is automatically copied to your clipboard, and you can paste it anywhere you need.

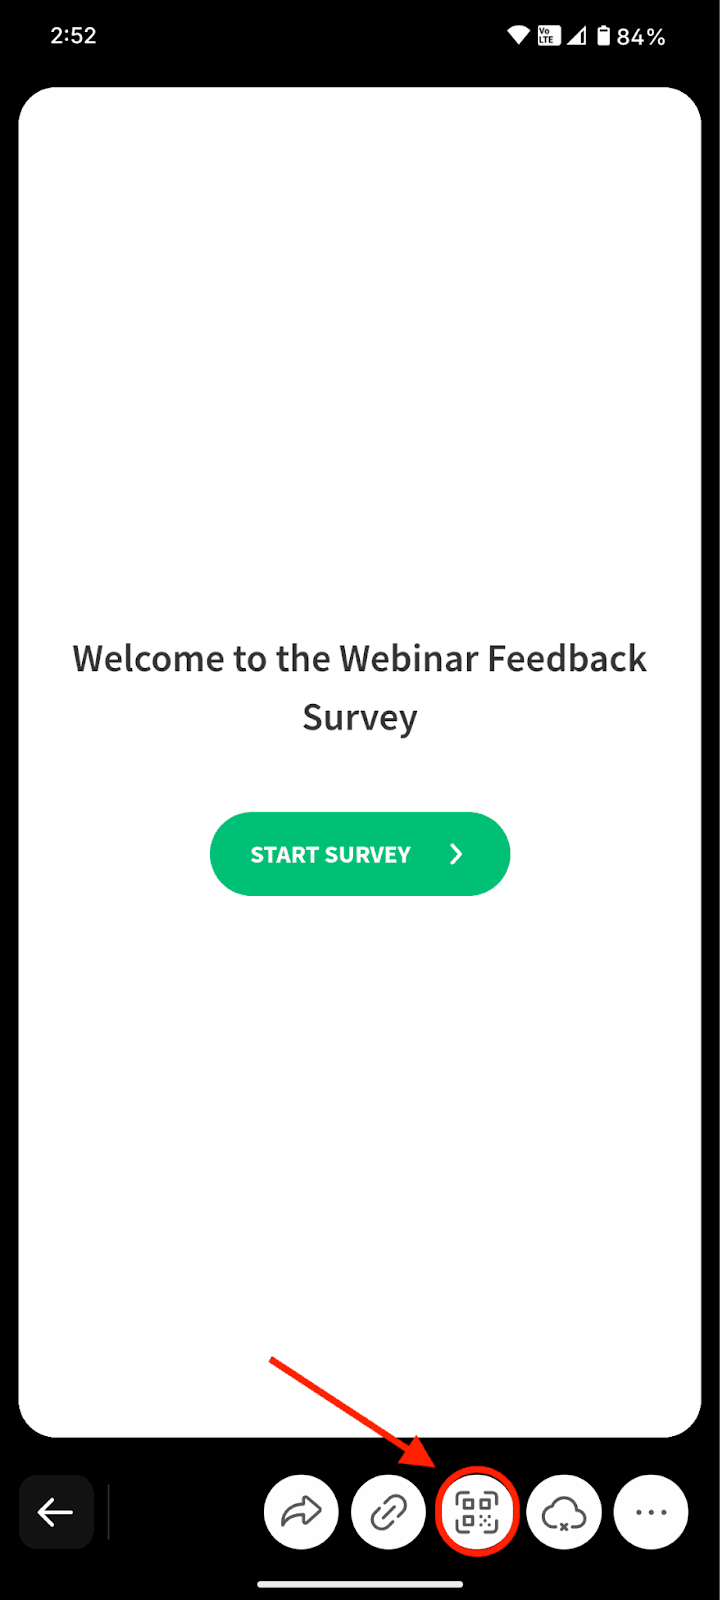
5. QR code share: To access this mode, click on the QR code icon.
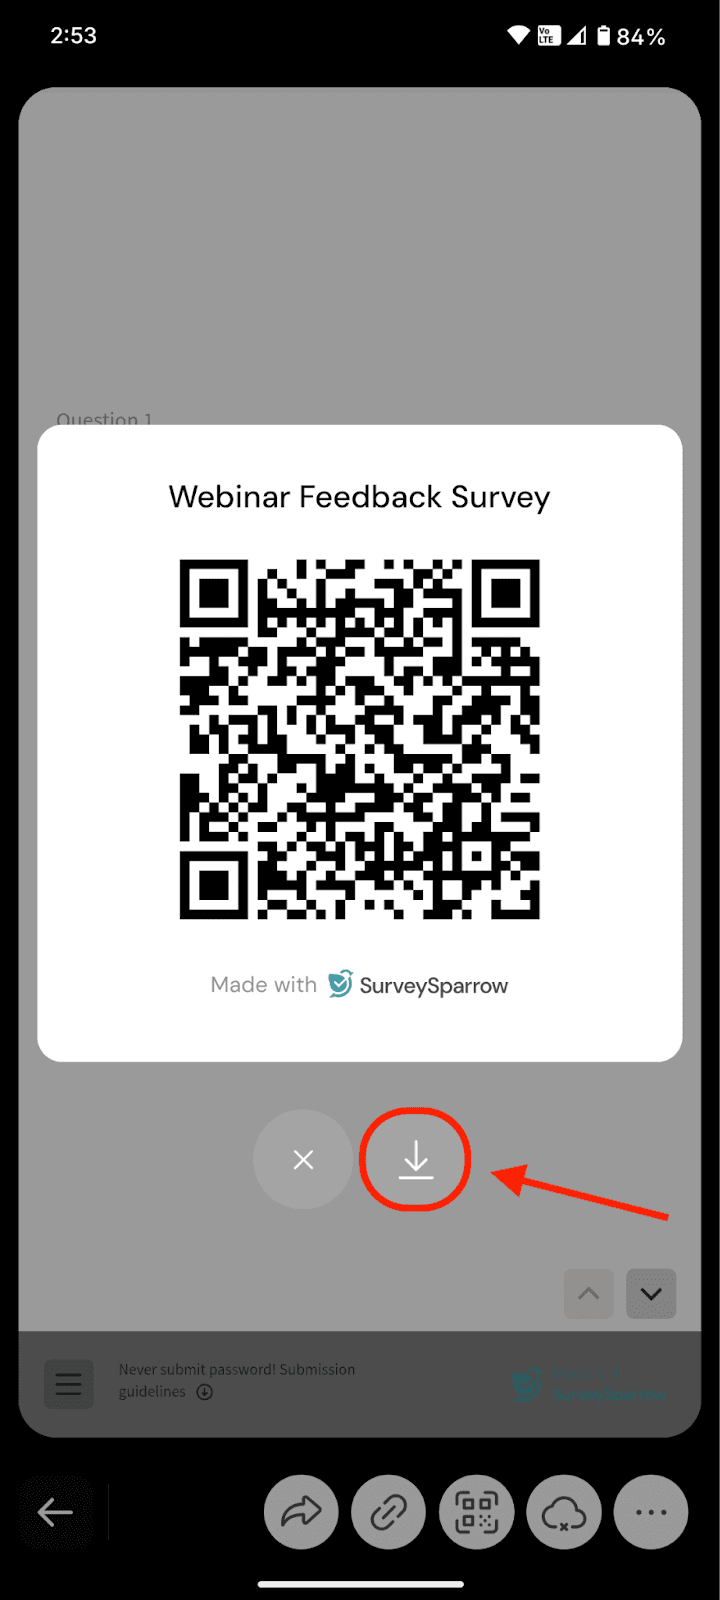
6. A QR code design appears. You can download this to print it or share elsewhere by clicking on the download icon.
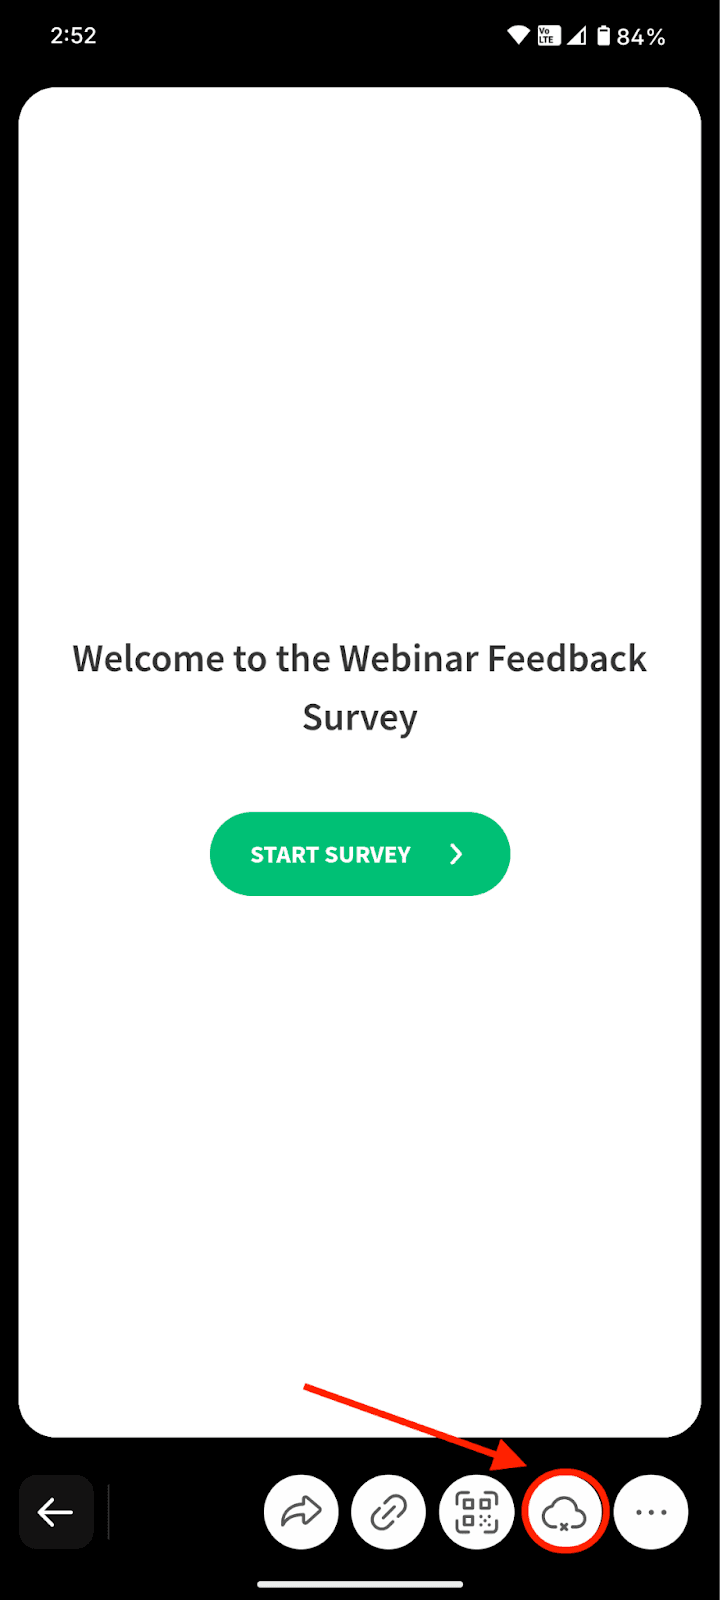
7. Offline share: To access this mode, click on the cloud icon.
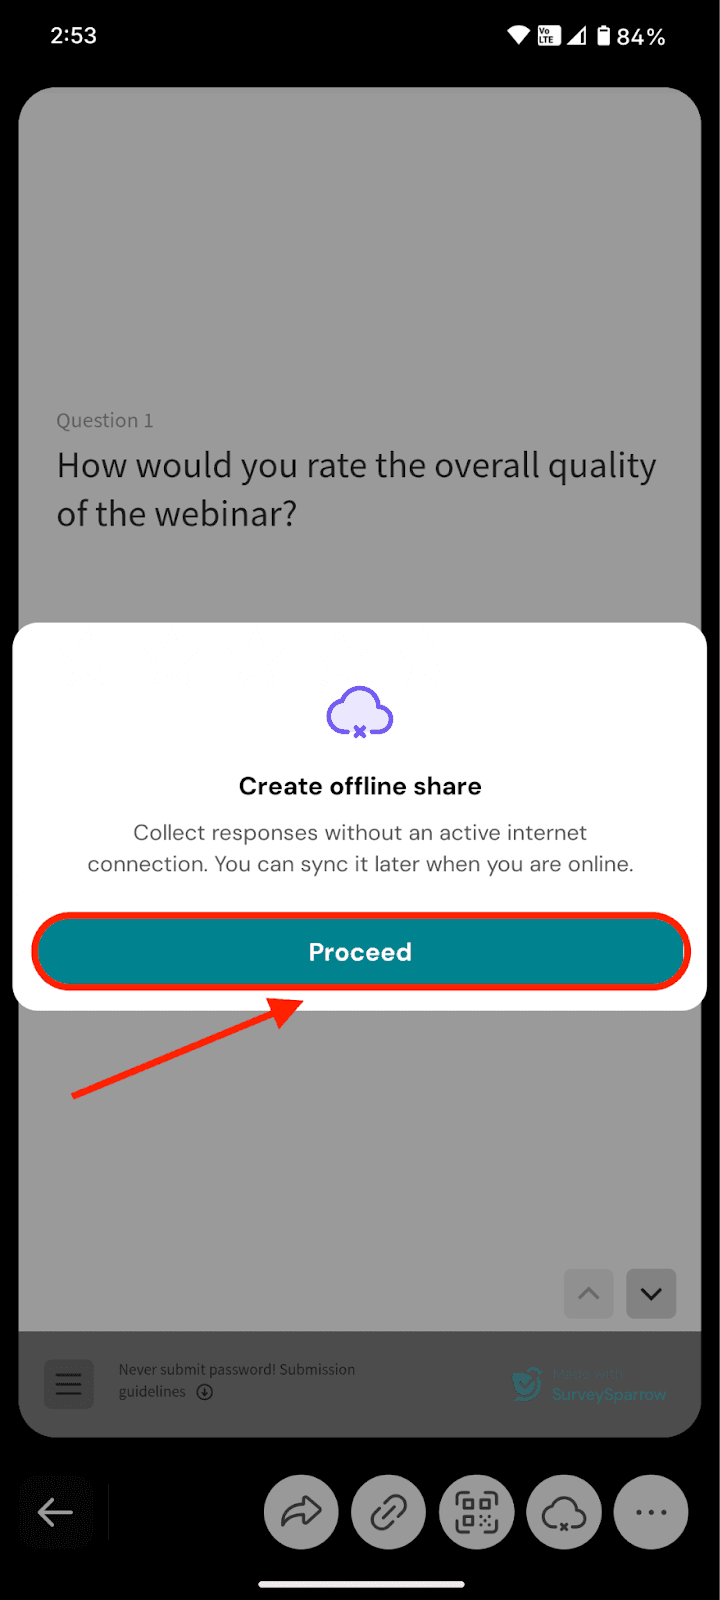
8. A confirmation prompt appears. Click on Proceed.
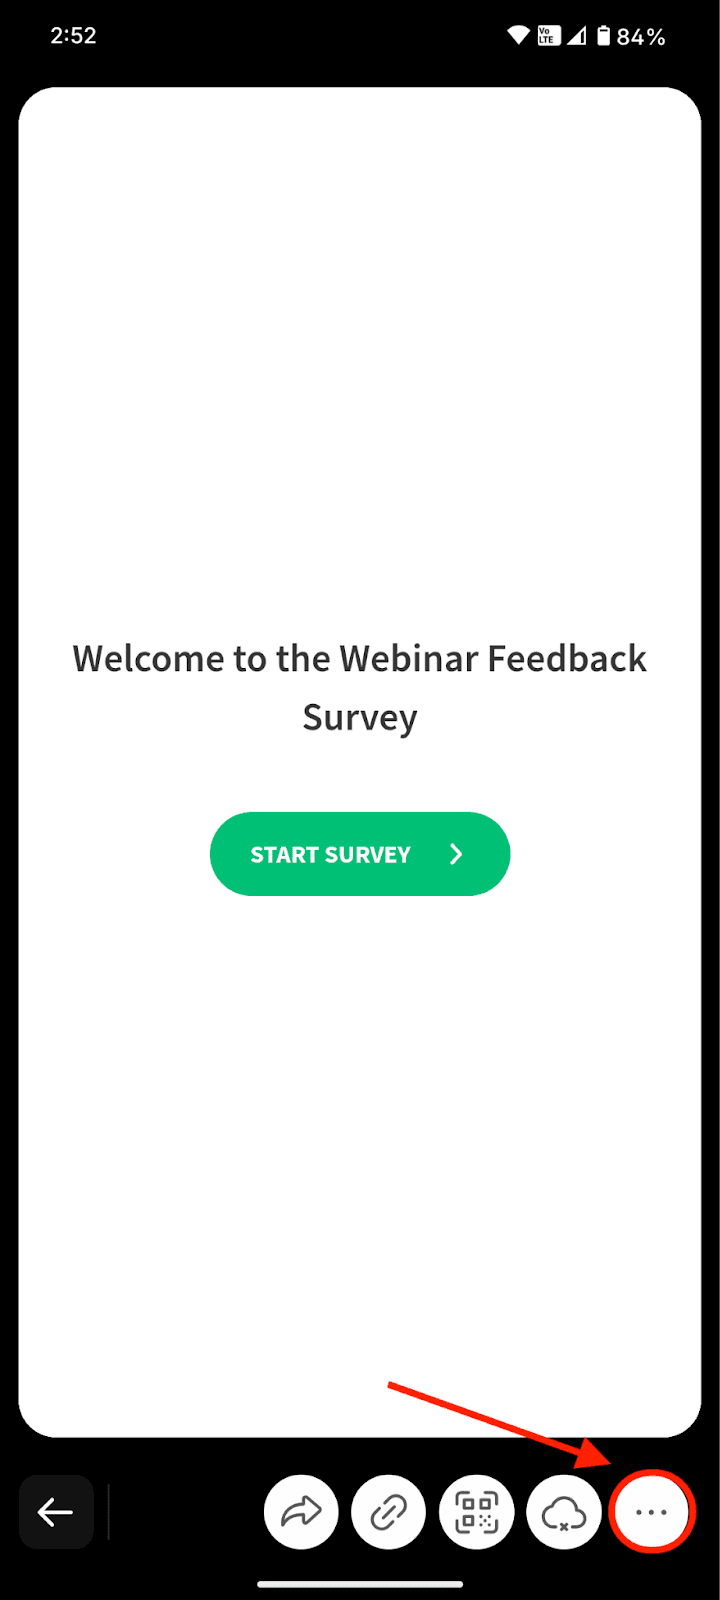
9. If you want to use some other share mode (Email, SpotChecks, etc), you will need to do it via SurveySparrow’s desktop version. To access it, click on the three dot icon at the end.
10. You’ll see a message about SurveySparrow’s desktop version. You can get the link to the share section of your survey through one of two ways: mailing the link to your email address or copying the link to your clipboard.

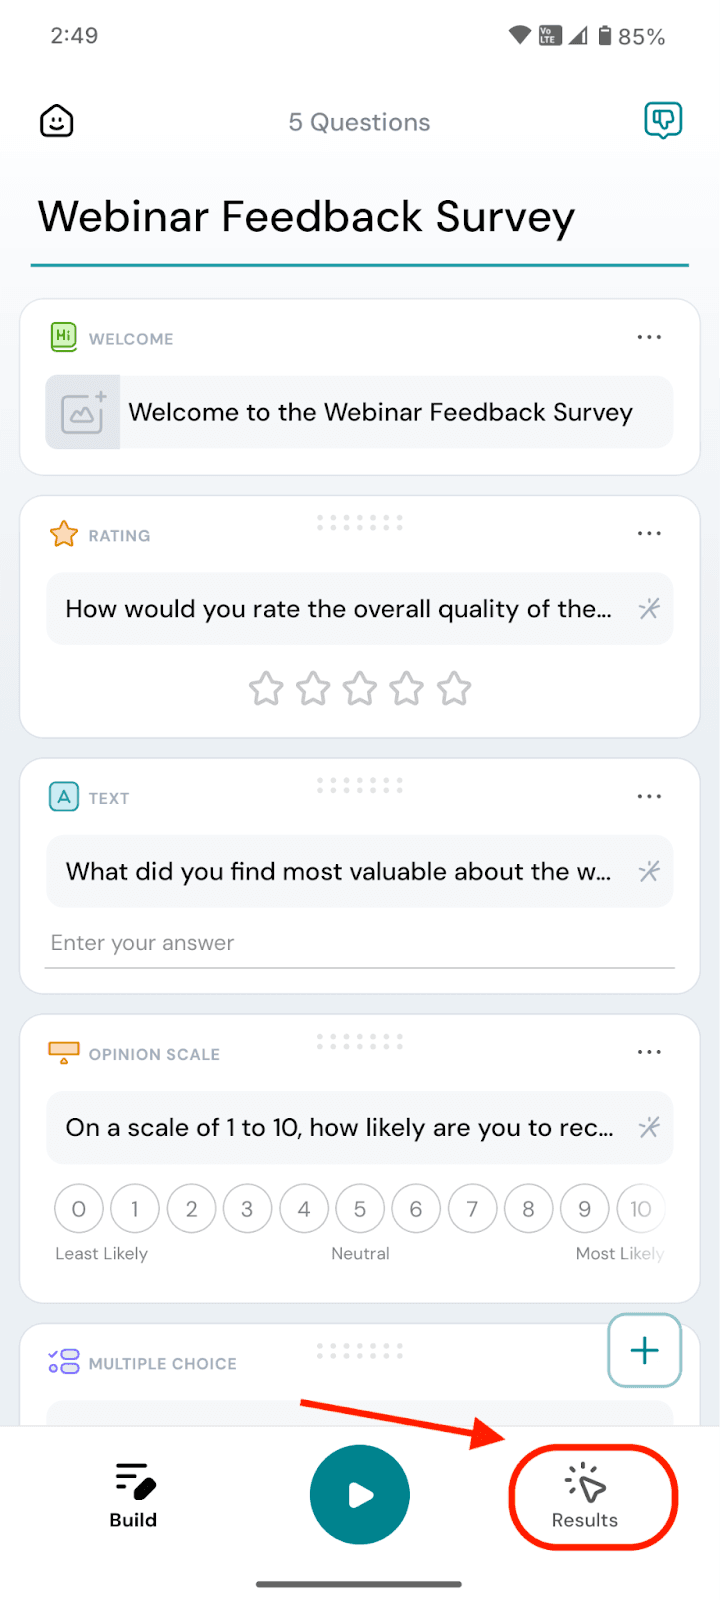
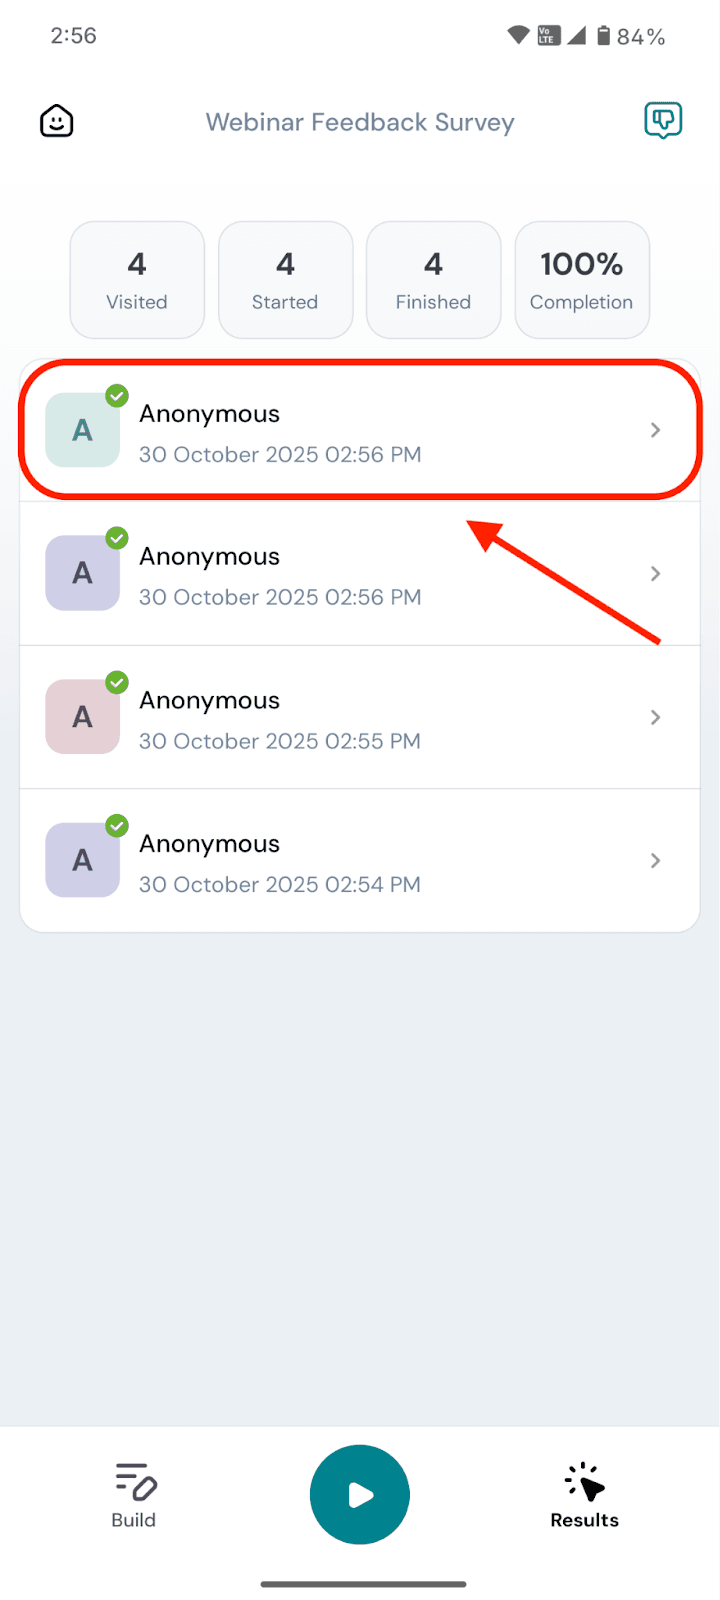
1. Within the survey builder, click on the Results icon at the bottom right corner of the screen.
2. Here you can see all the respondents, as well as the overall survey completion metrics. To view all the answers of a respondent, click on one of the respondents.
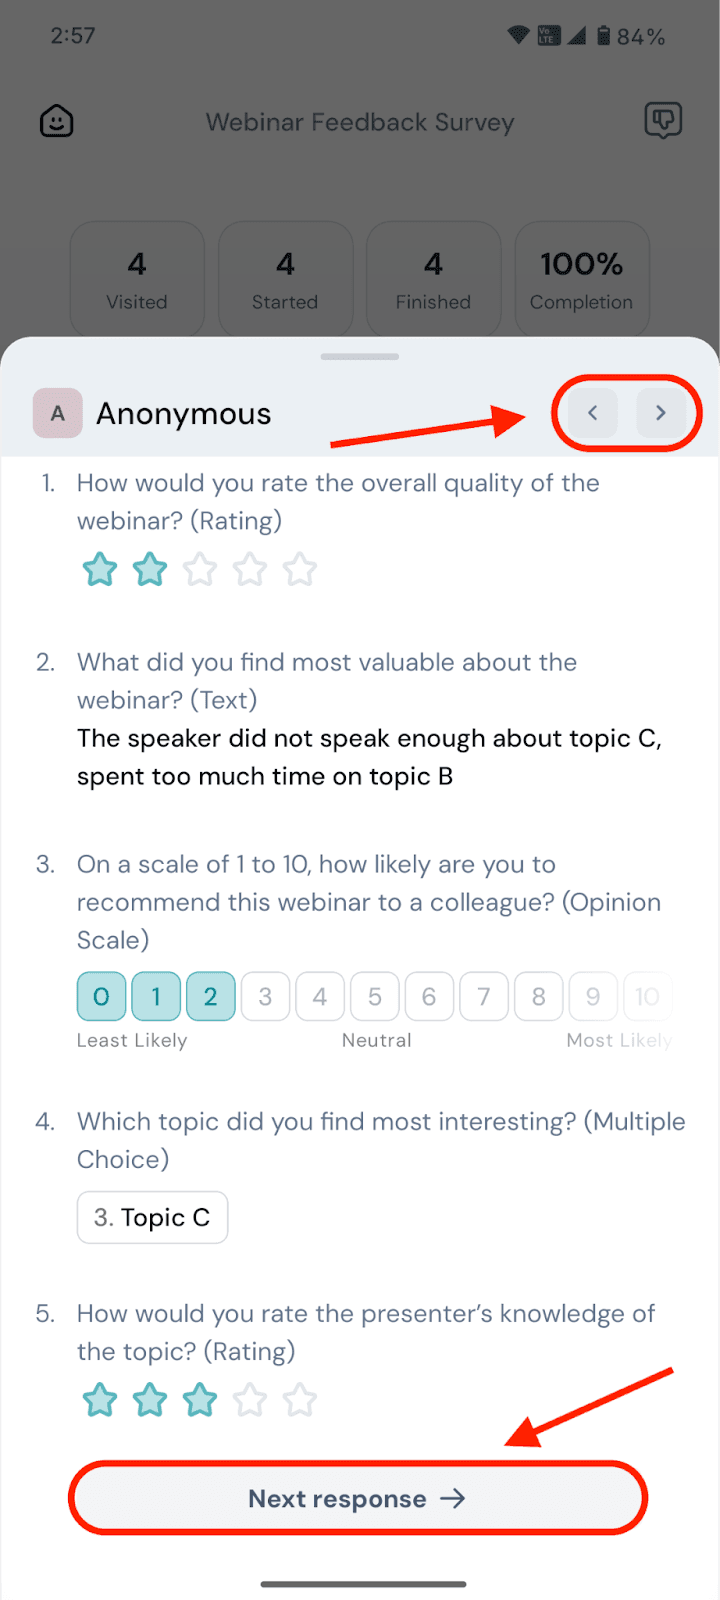
3. You can scroll through their responses to see what they’ve answered. To proceed to the next respondent, click on the < or > buttons or Next response at the bottom.
1. To open the survey settings, click on the tab in the top right corner.
2. A menu pops up. Here’s a quick overview of most of the settings:

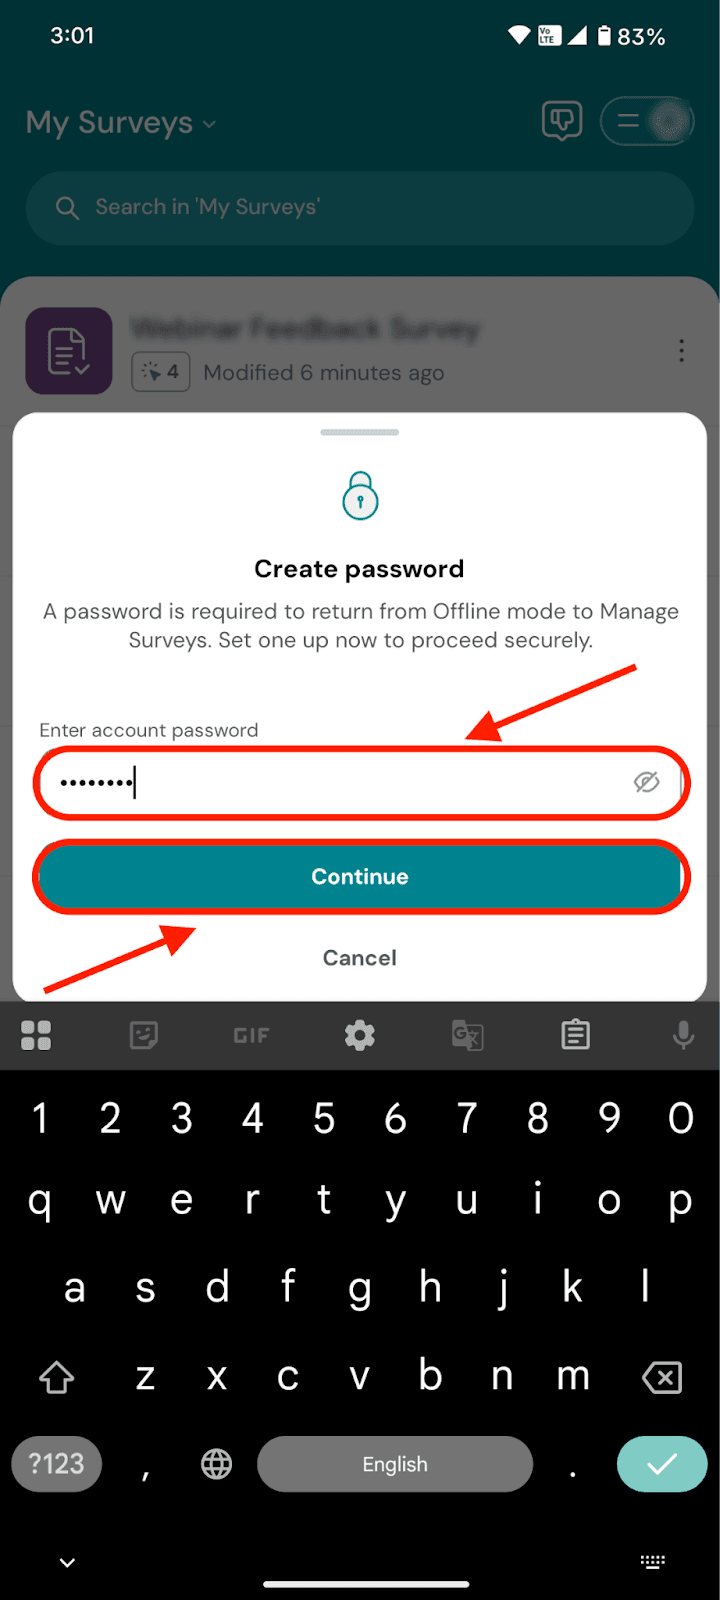
Note: When you click on Offline shares, you will be taken to offline mode only if you have an account password. If you sign up for SurveySparrow Go via Google/Apple, you don’t have to create an account password. But you will need it to navigate between offline mode and online mode. When such users click on Offline shares for the first time, they will be asked to create an account password. So type in the password and click Continue to create it.
3. Within your account settings, you can edit the general settings (time zone, language, etc), offline mode settings and account level settings (logout, activity log, account deletion).
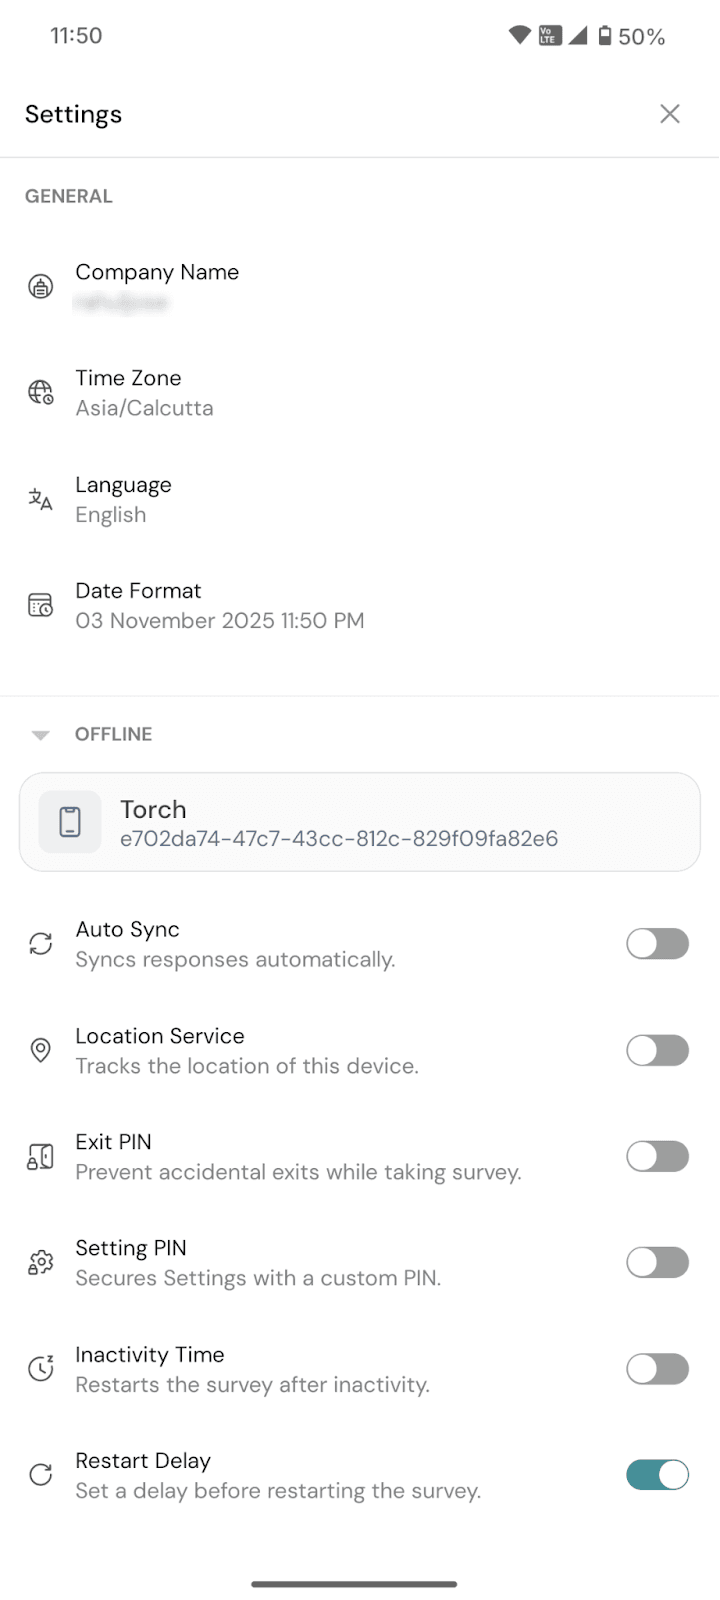
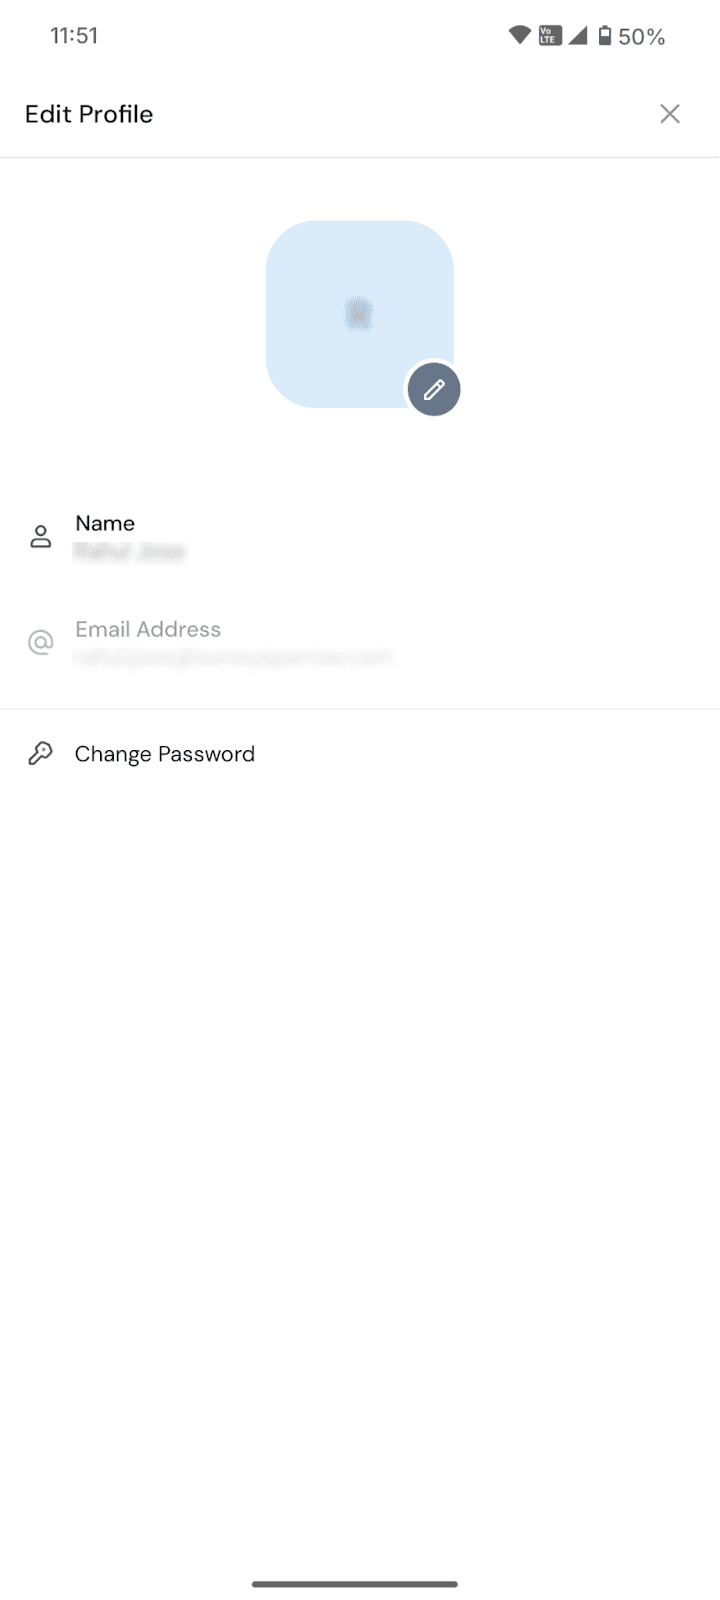
4. Within your profile settings, you can add a profile picture, change your user name and your password.
With that, you’re fully prepped to make full use of SurveySparrow Go’s online mode. Creating surveys is now as easy as a couple of clicks, and you can collect feedback anywhere, anytime. However, SurveySparrow Go also has a robust offline mode that lets you collect feedback even without the internet. Click here to learn more about it.
Feel free to reach out to our community, if you have any questions!
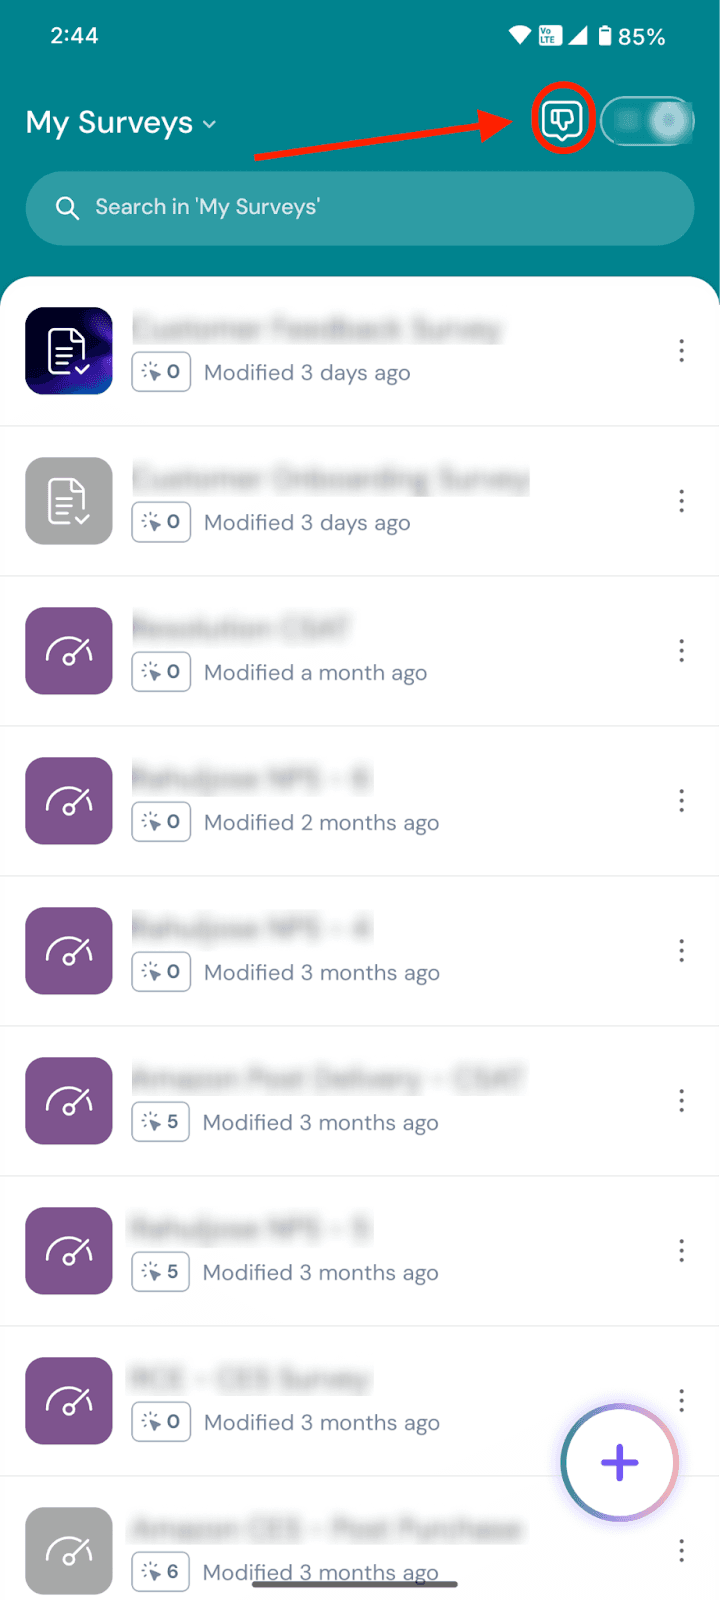
Note: If at any point you wish to provide feedback for the app, click on the thumbs-down icon. This feedback option can be availed within the builder, results section as well as offline mode.
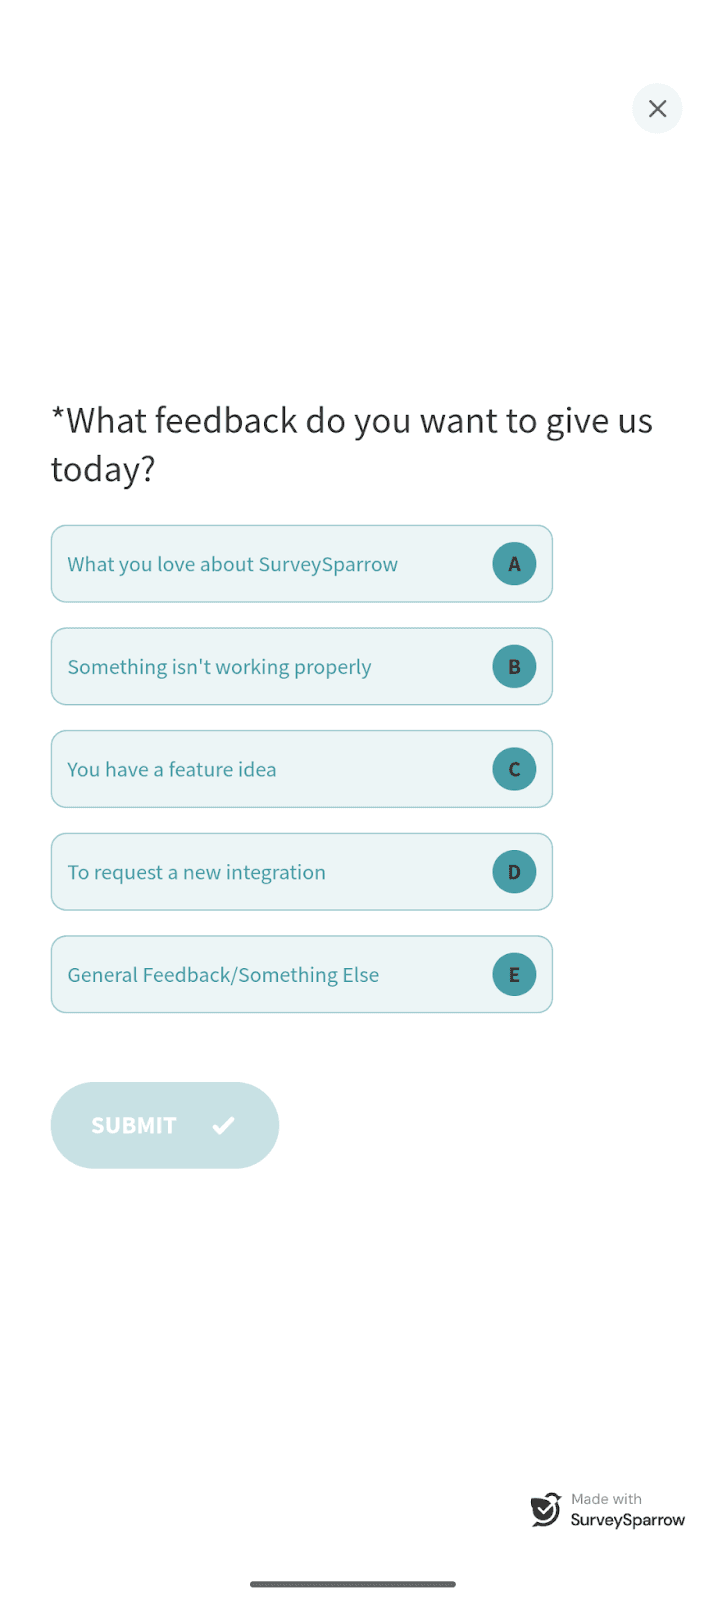
A feedback survey opens up.
Powered By SparrowDesk