Search
Managing and boosting your brand's reputation is essential for standing out in a crowded marketplace, and email campaigns offer an effective way to proactively improve it.
By regularly engaging with your audience through well-crafted email campaigns, you can reinforce positive brand messages, share customer success stories, and showcase your commitment to quality and service.
Review request emails help you reach out to your audience requesting them to drop a review for your product or service. This will enable the recipient to share their feedback by clicking on the review request link present in the email.
In this article we’ll be covering the following:
1. Under the Reputation tab, click Boost.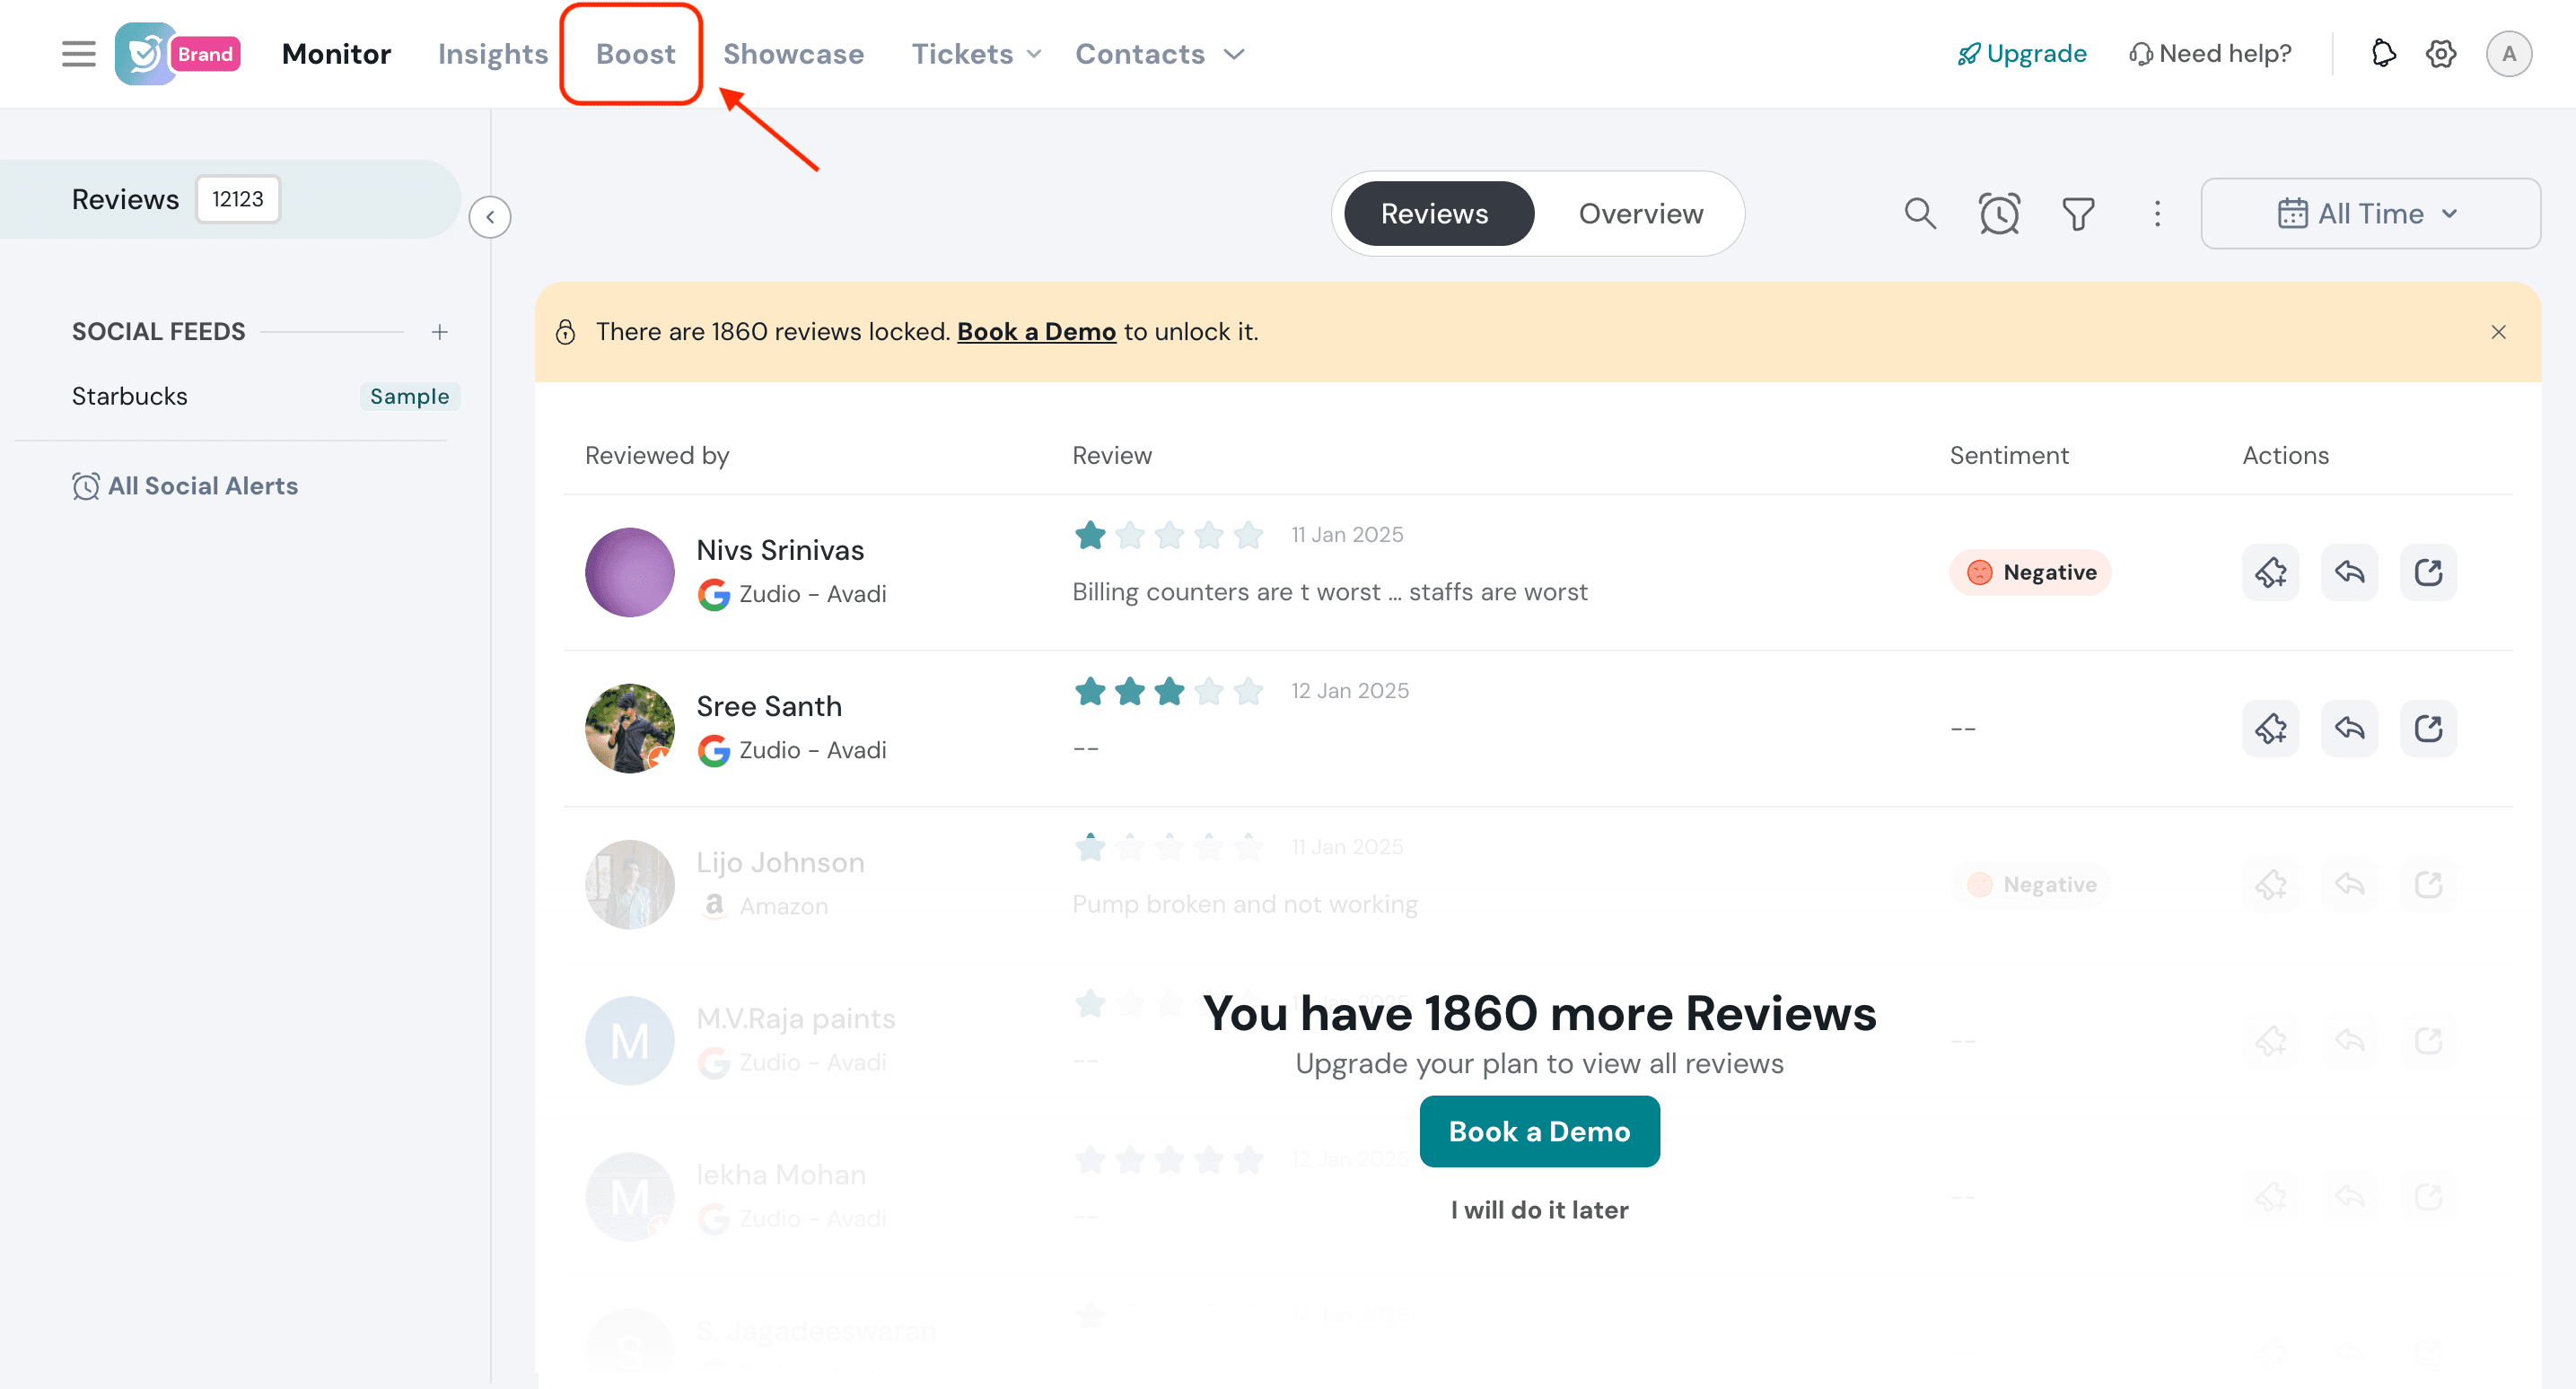
2. You can get started with the campaign in two ways. One, Based on the review data of added listings, we help you by presenting the listings that need a boost on high-priority.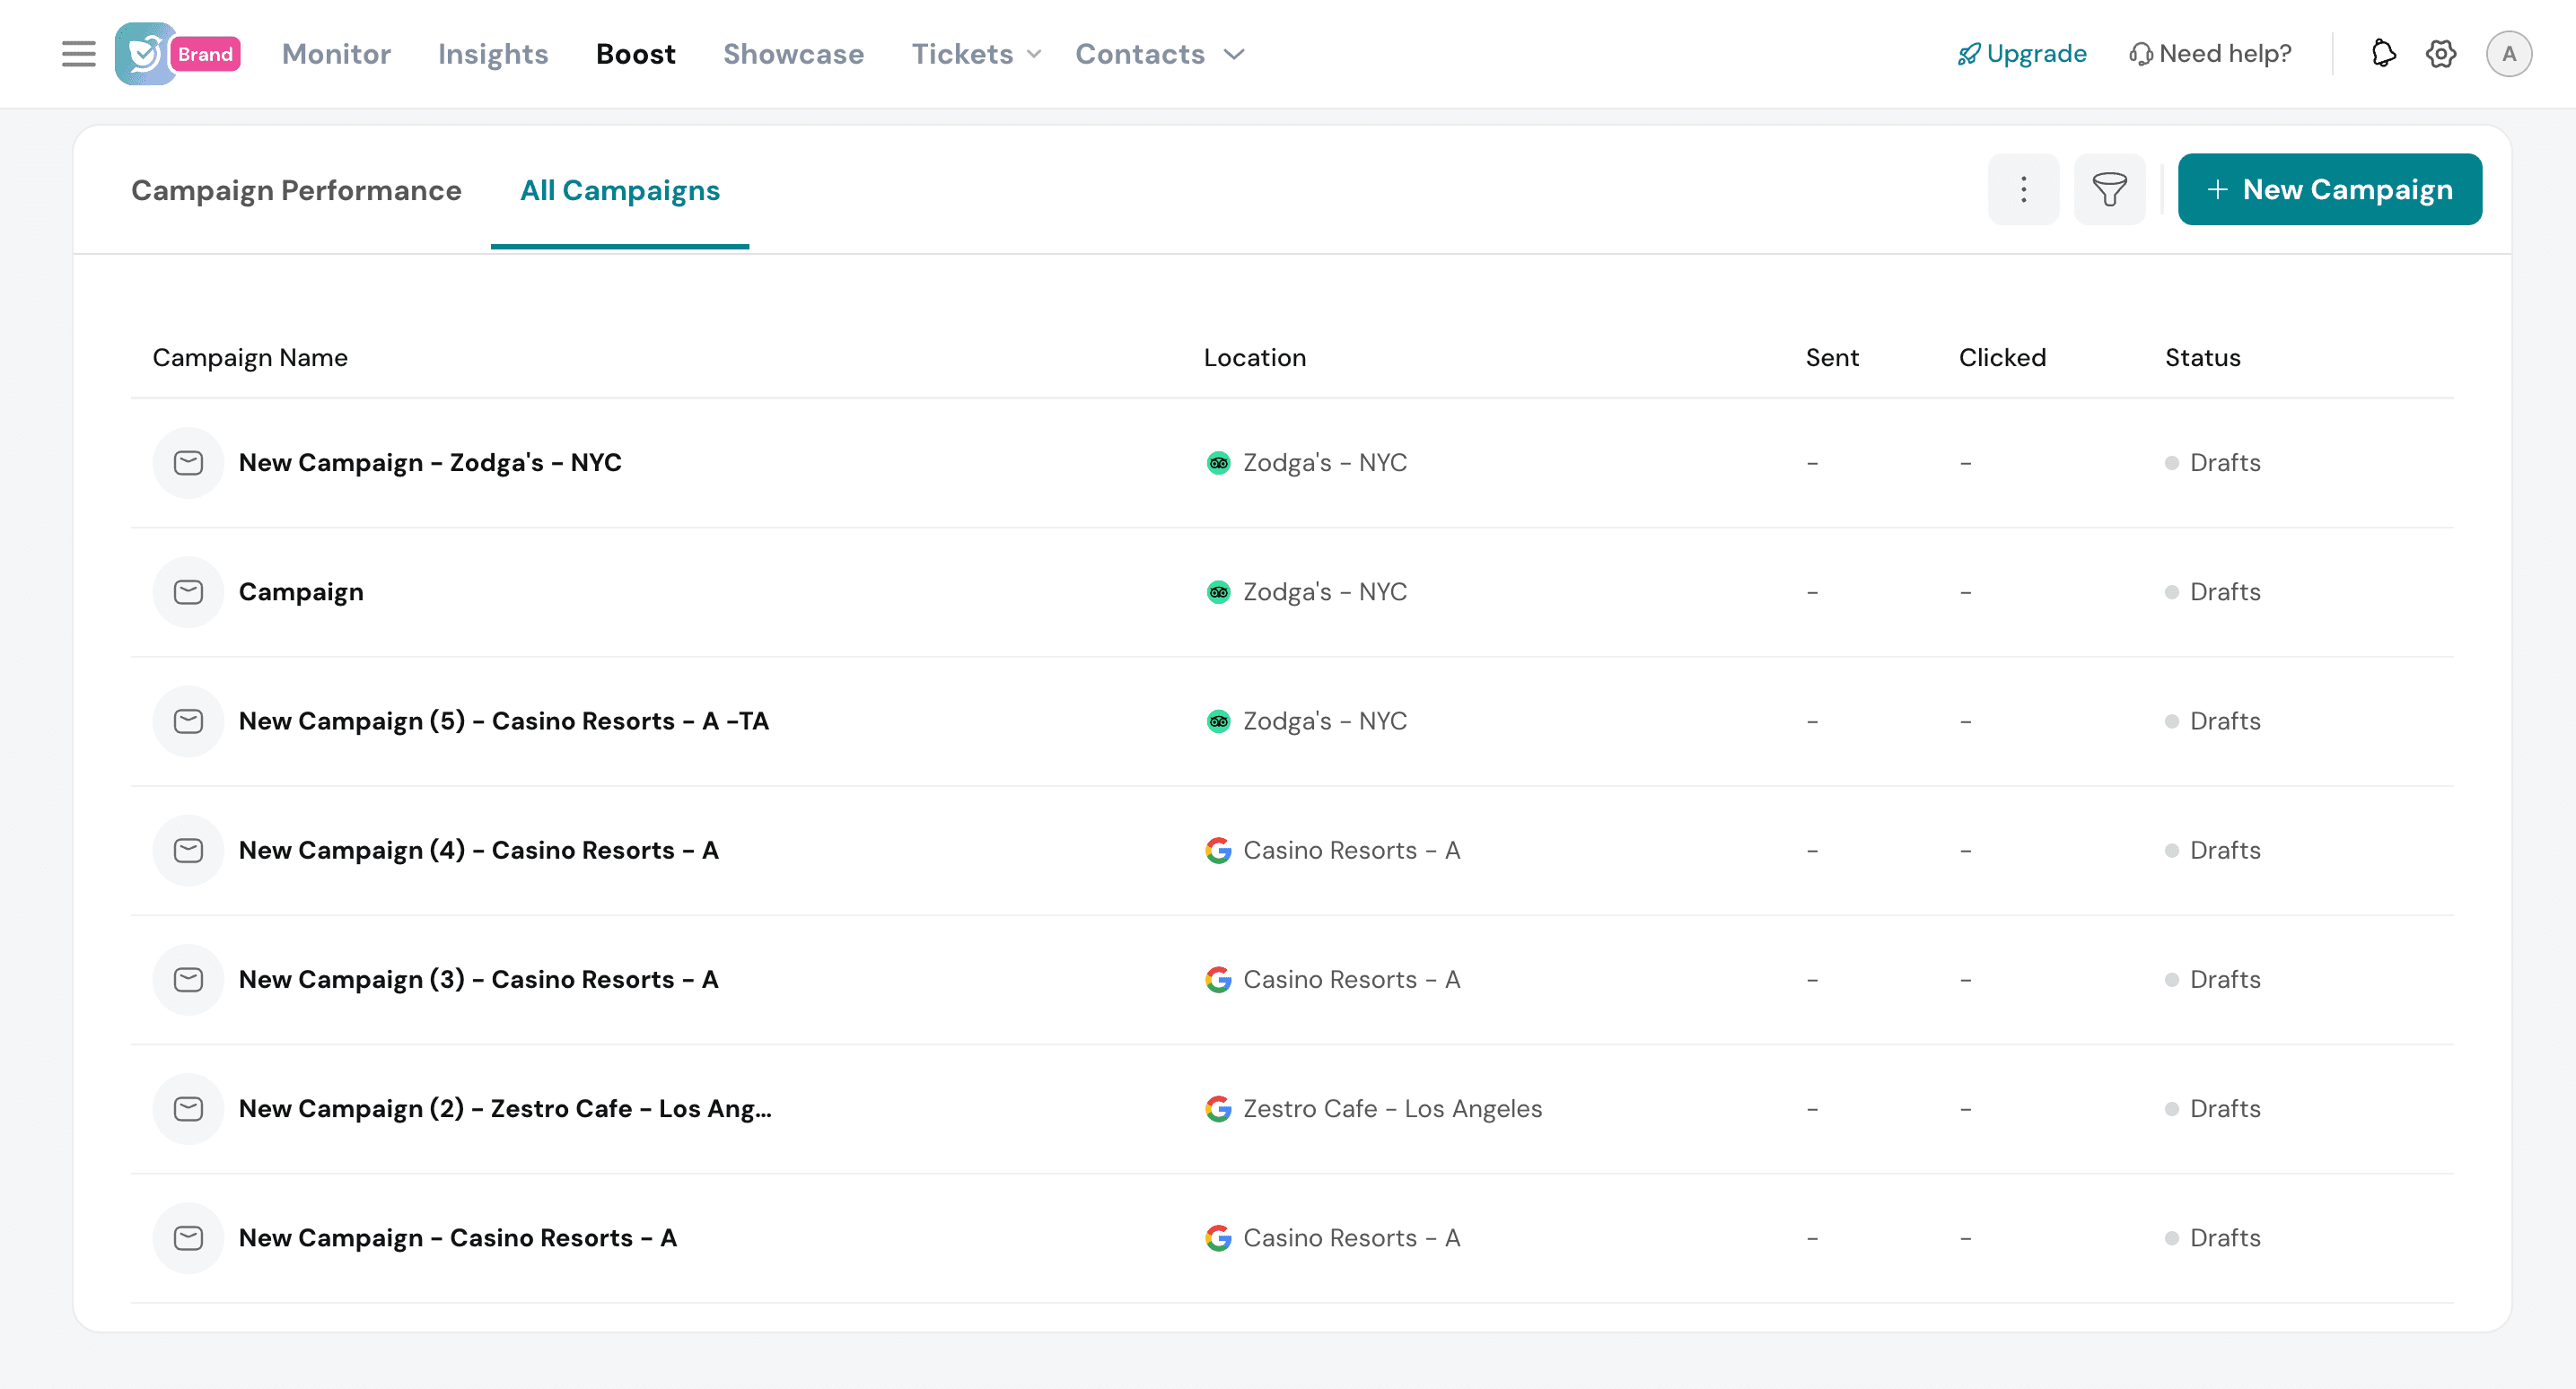
Or, you can click New Campaign to proceed with choosing a business listing to boost the reviews.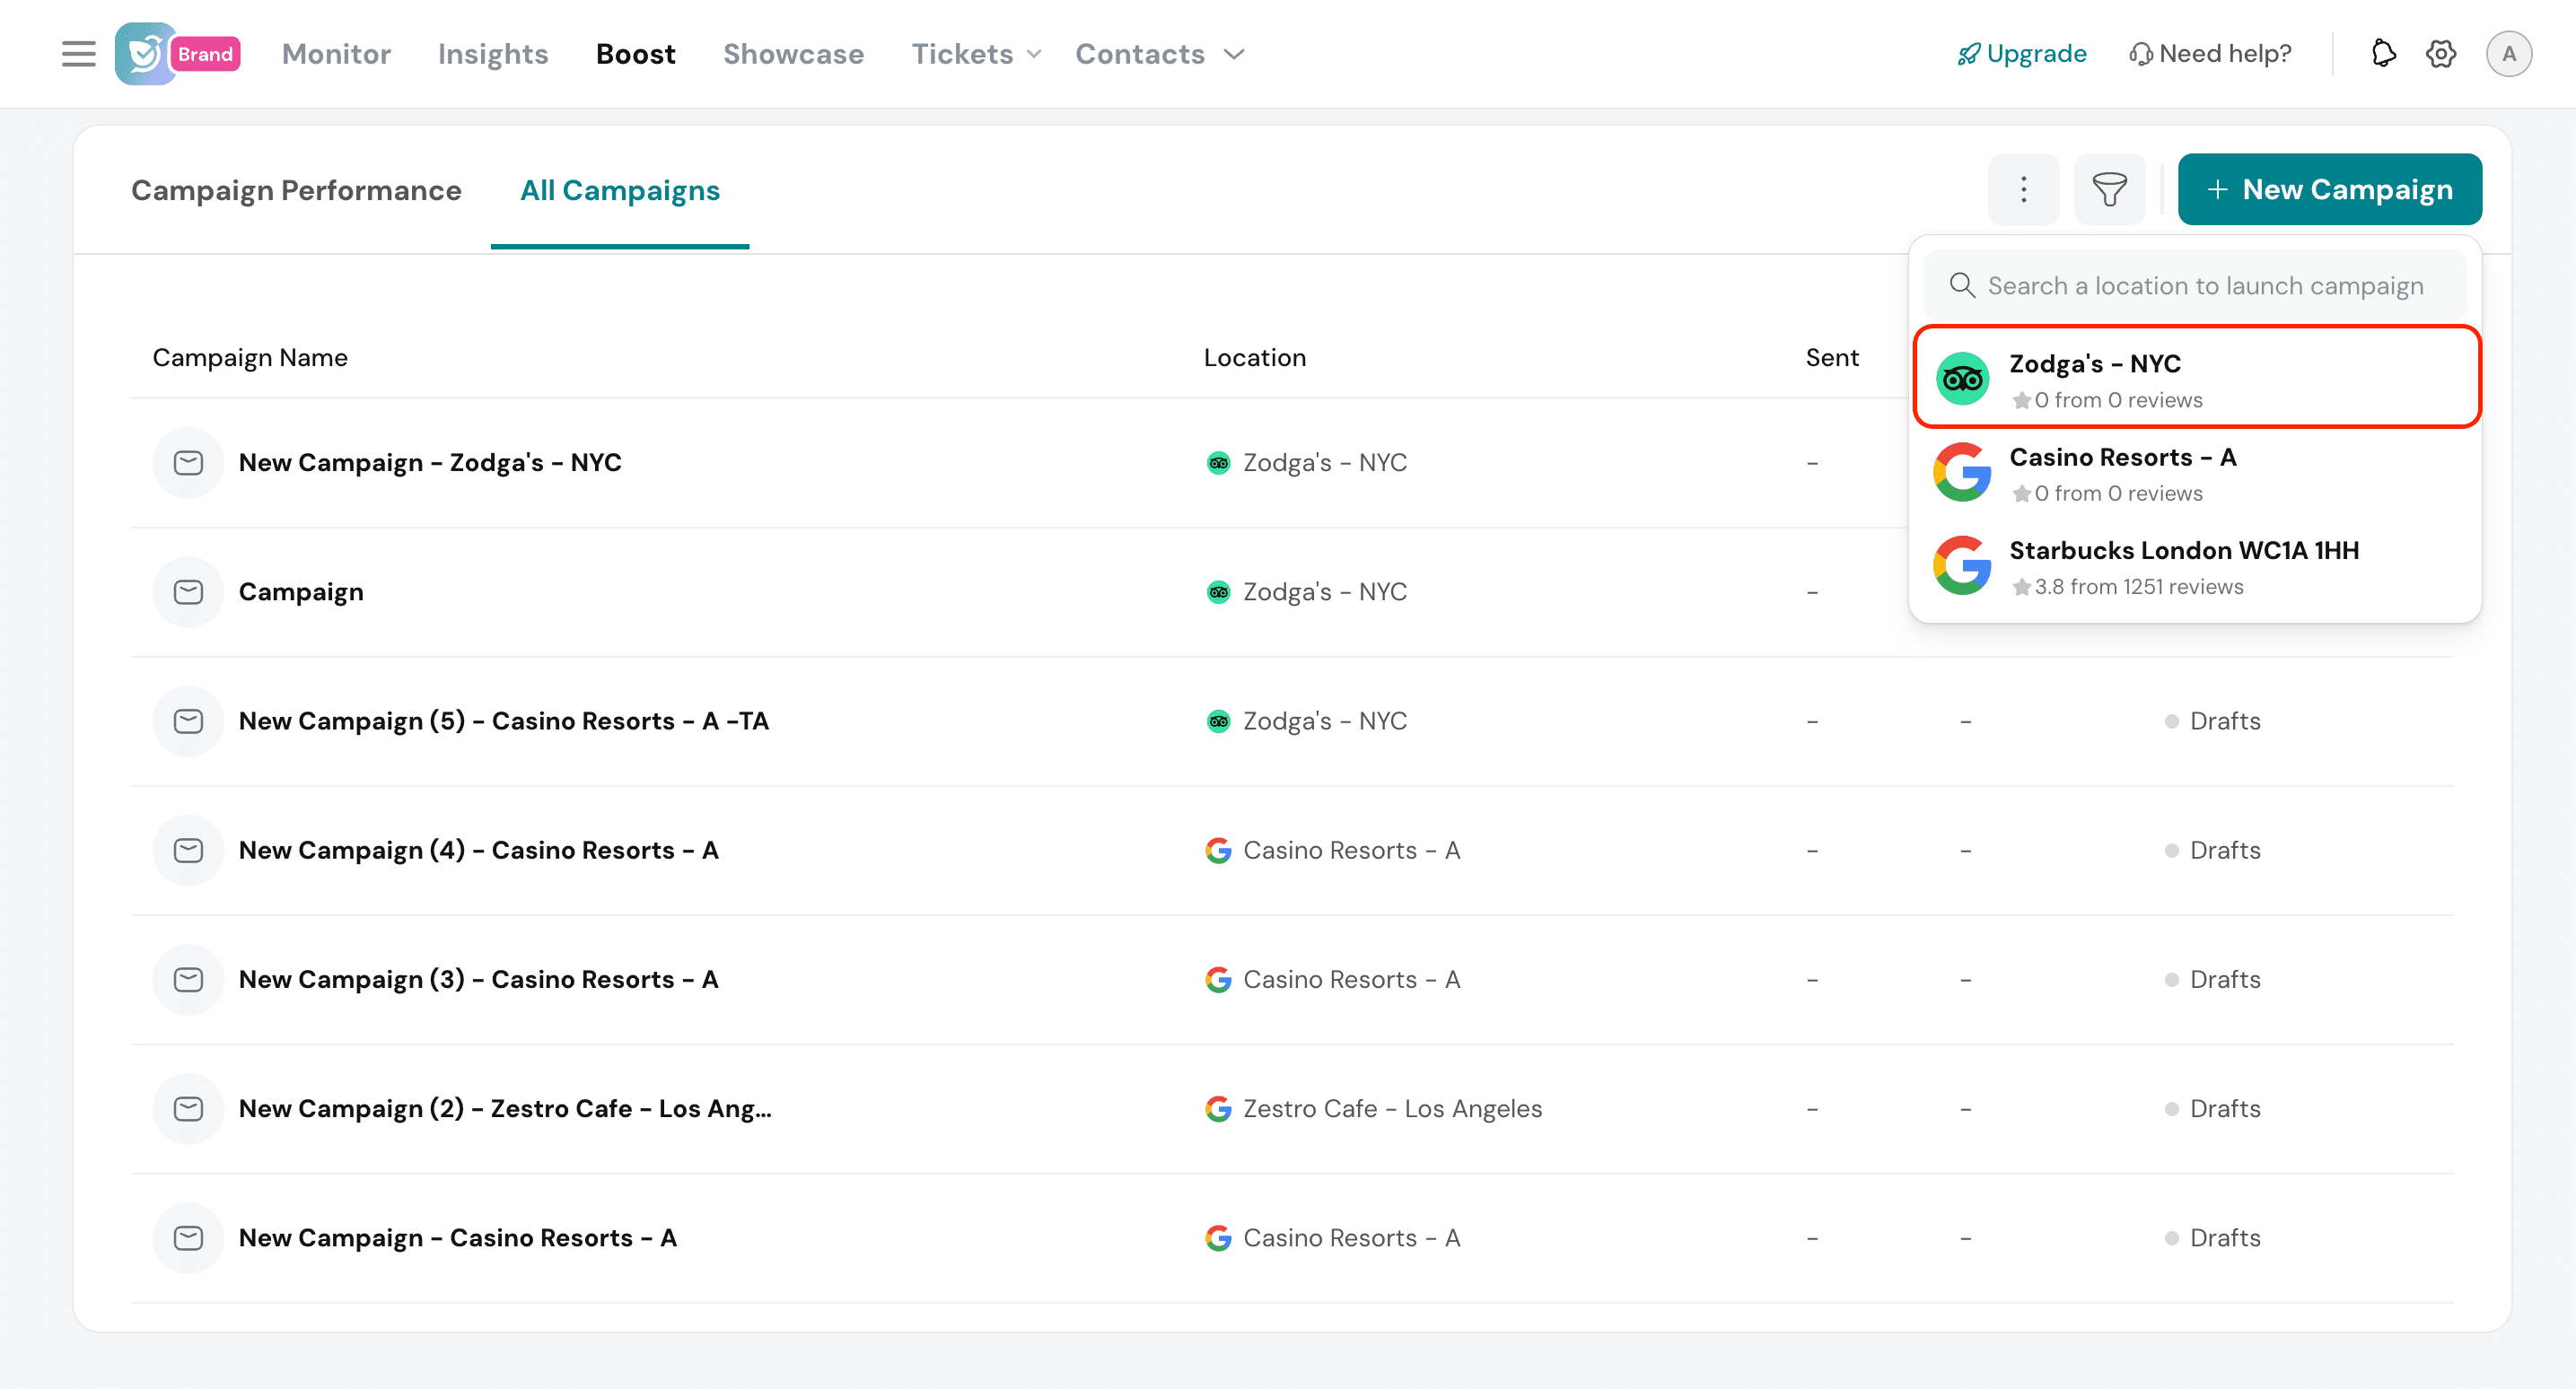
3. Enter the campaign name for your reference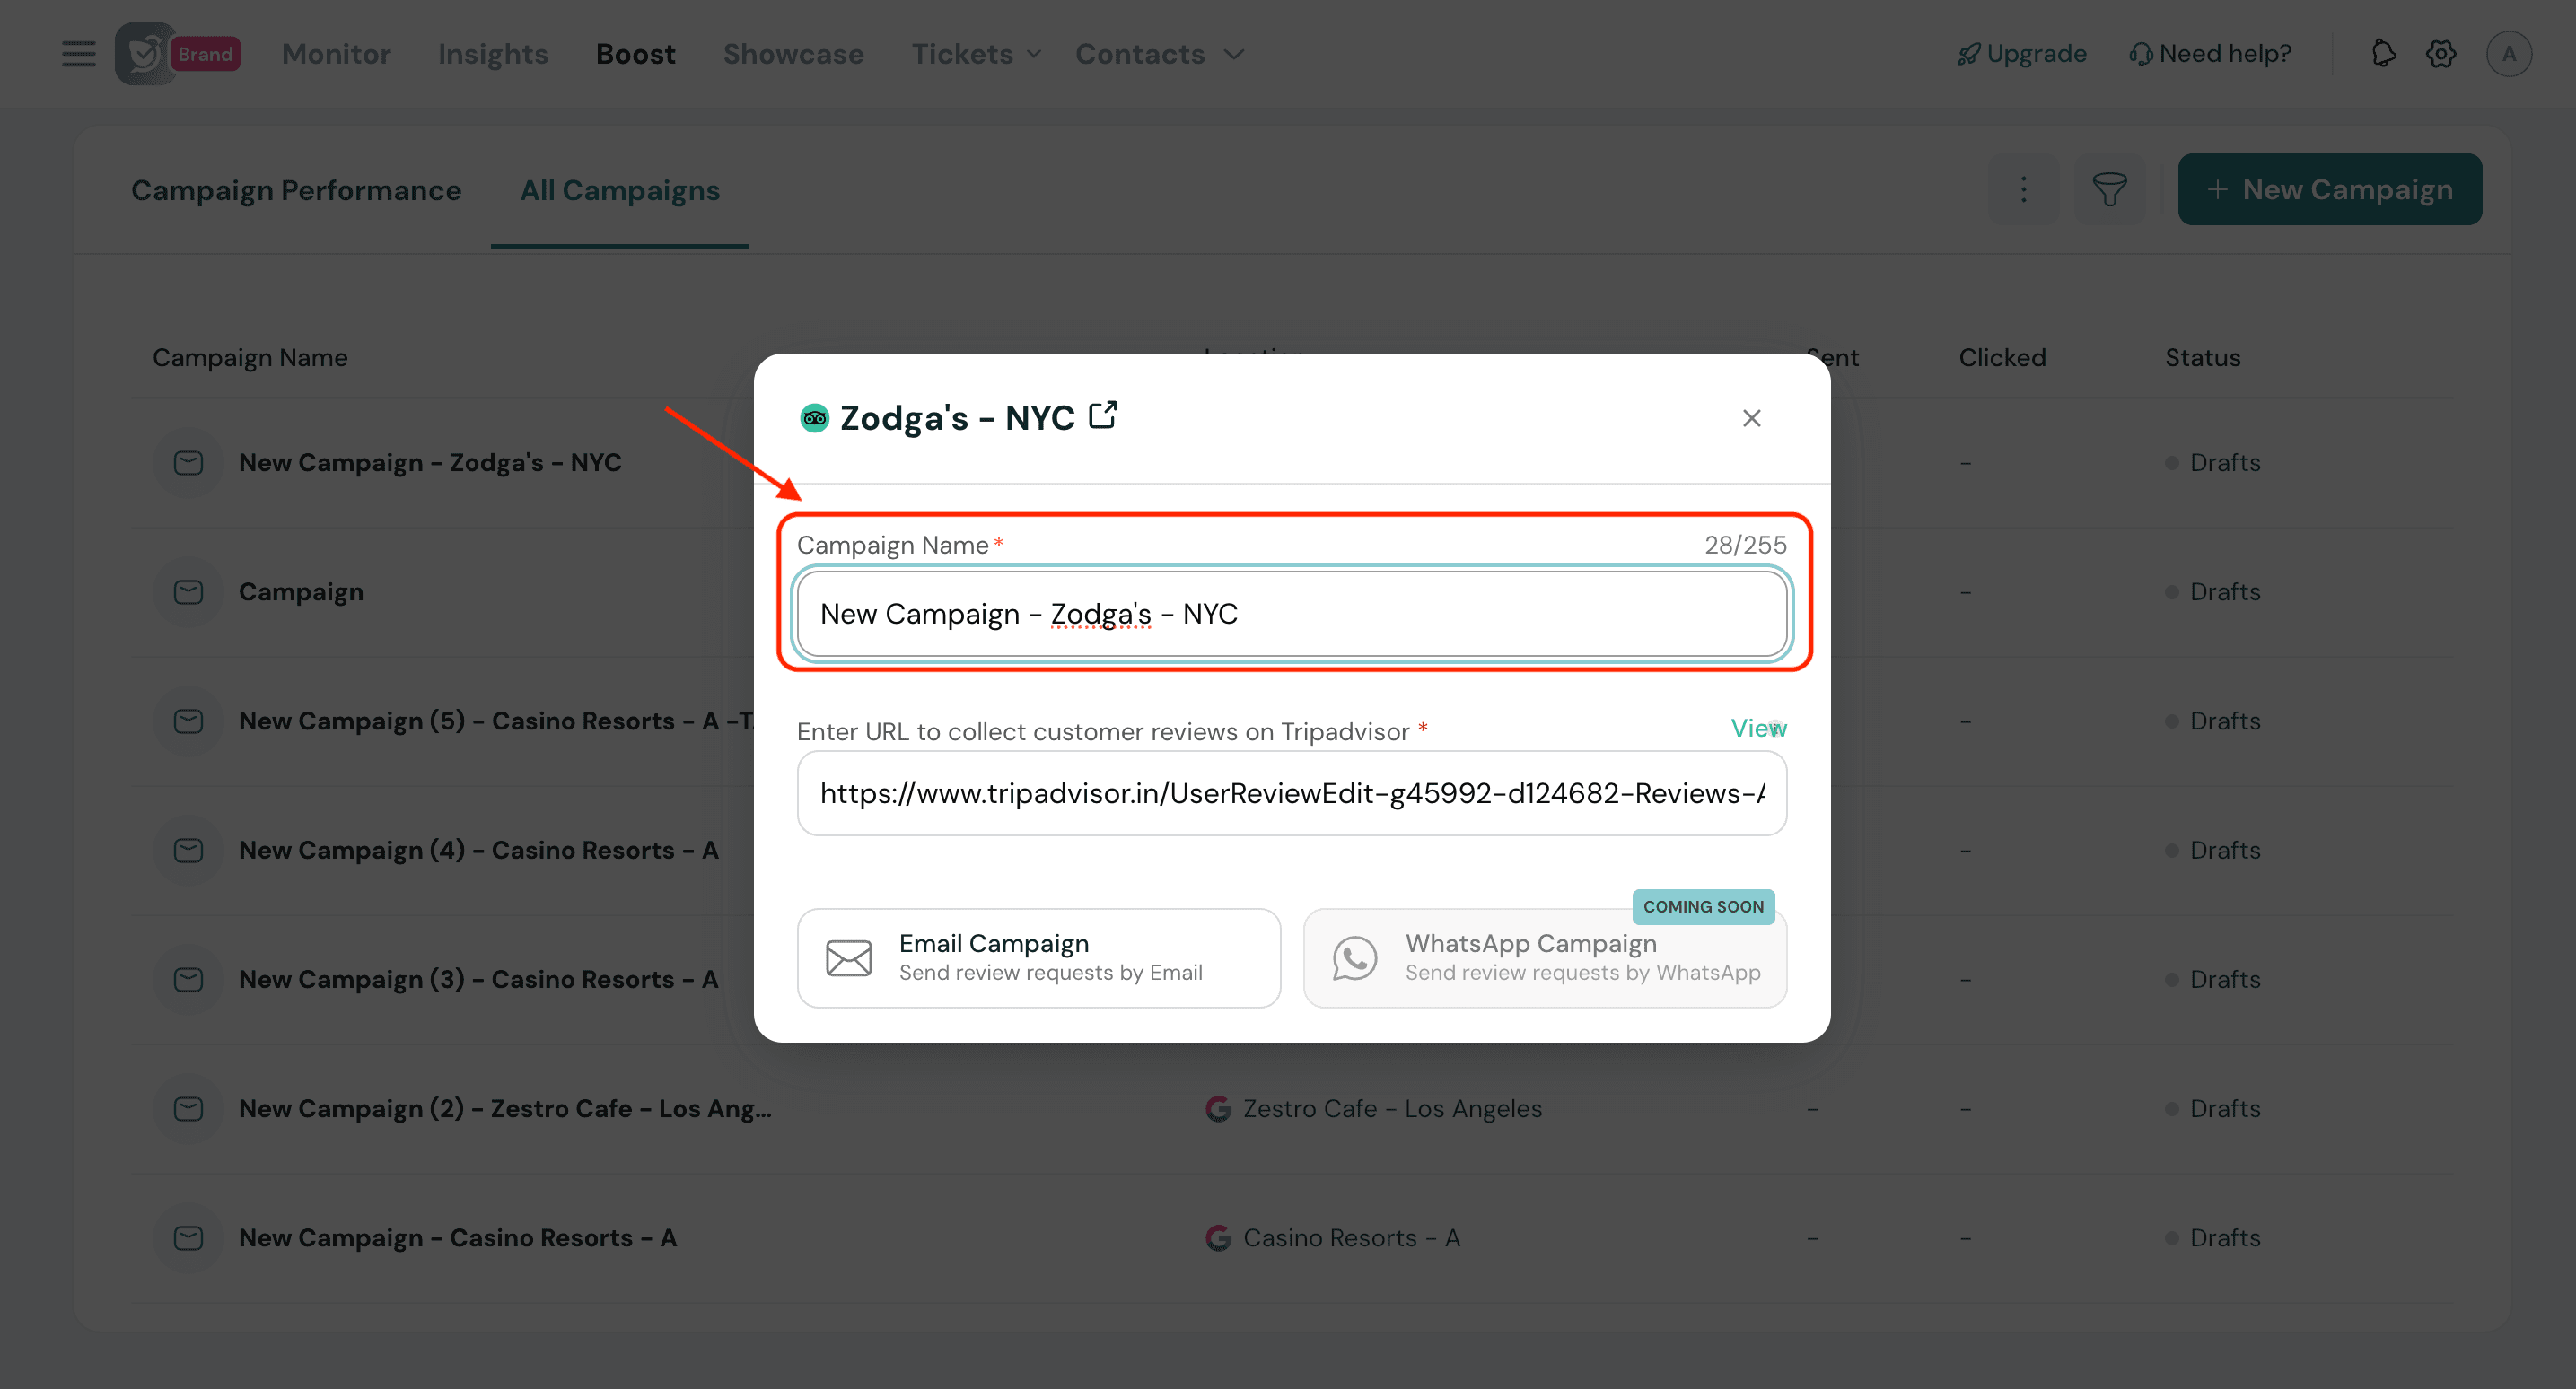
4. By default, the review request URL will be populated. If not, enter the review request URL to collect customer reviews.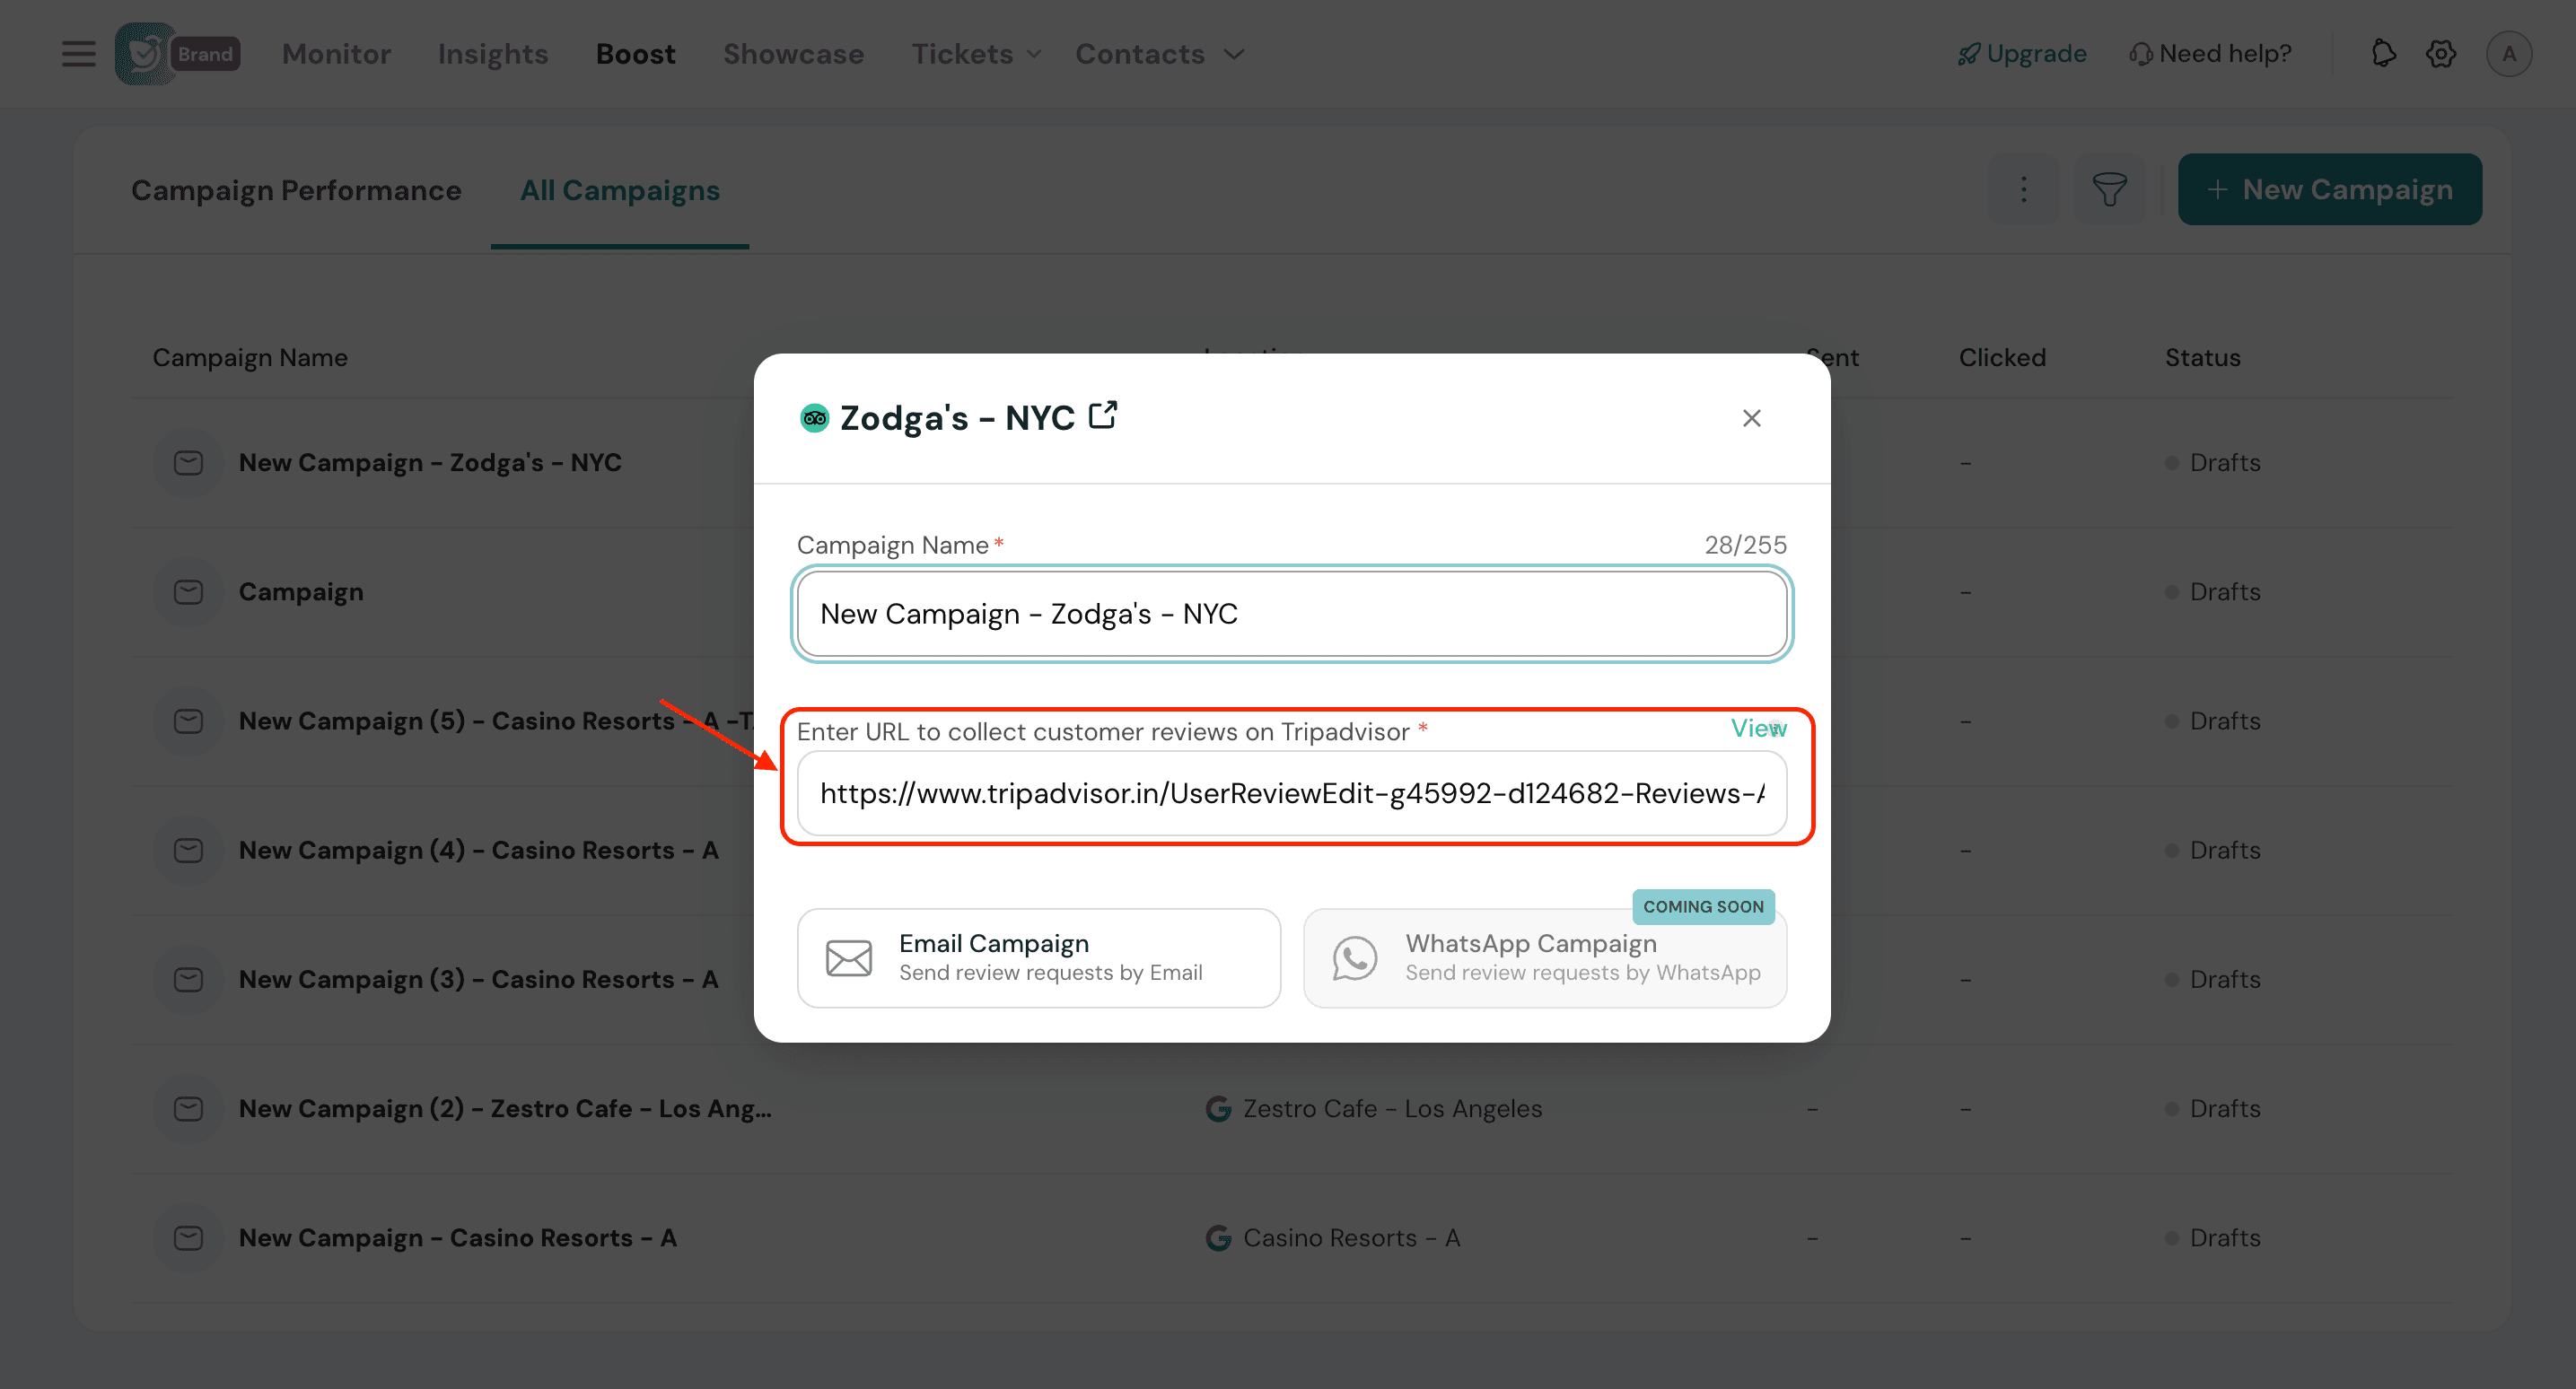
Click View to ensure that the review request URL works perfectly.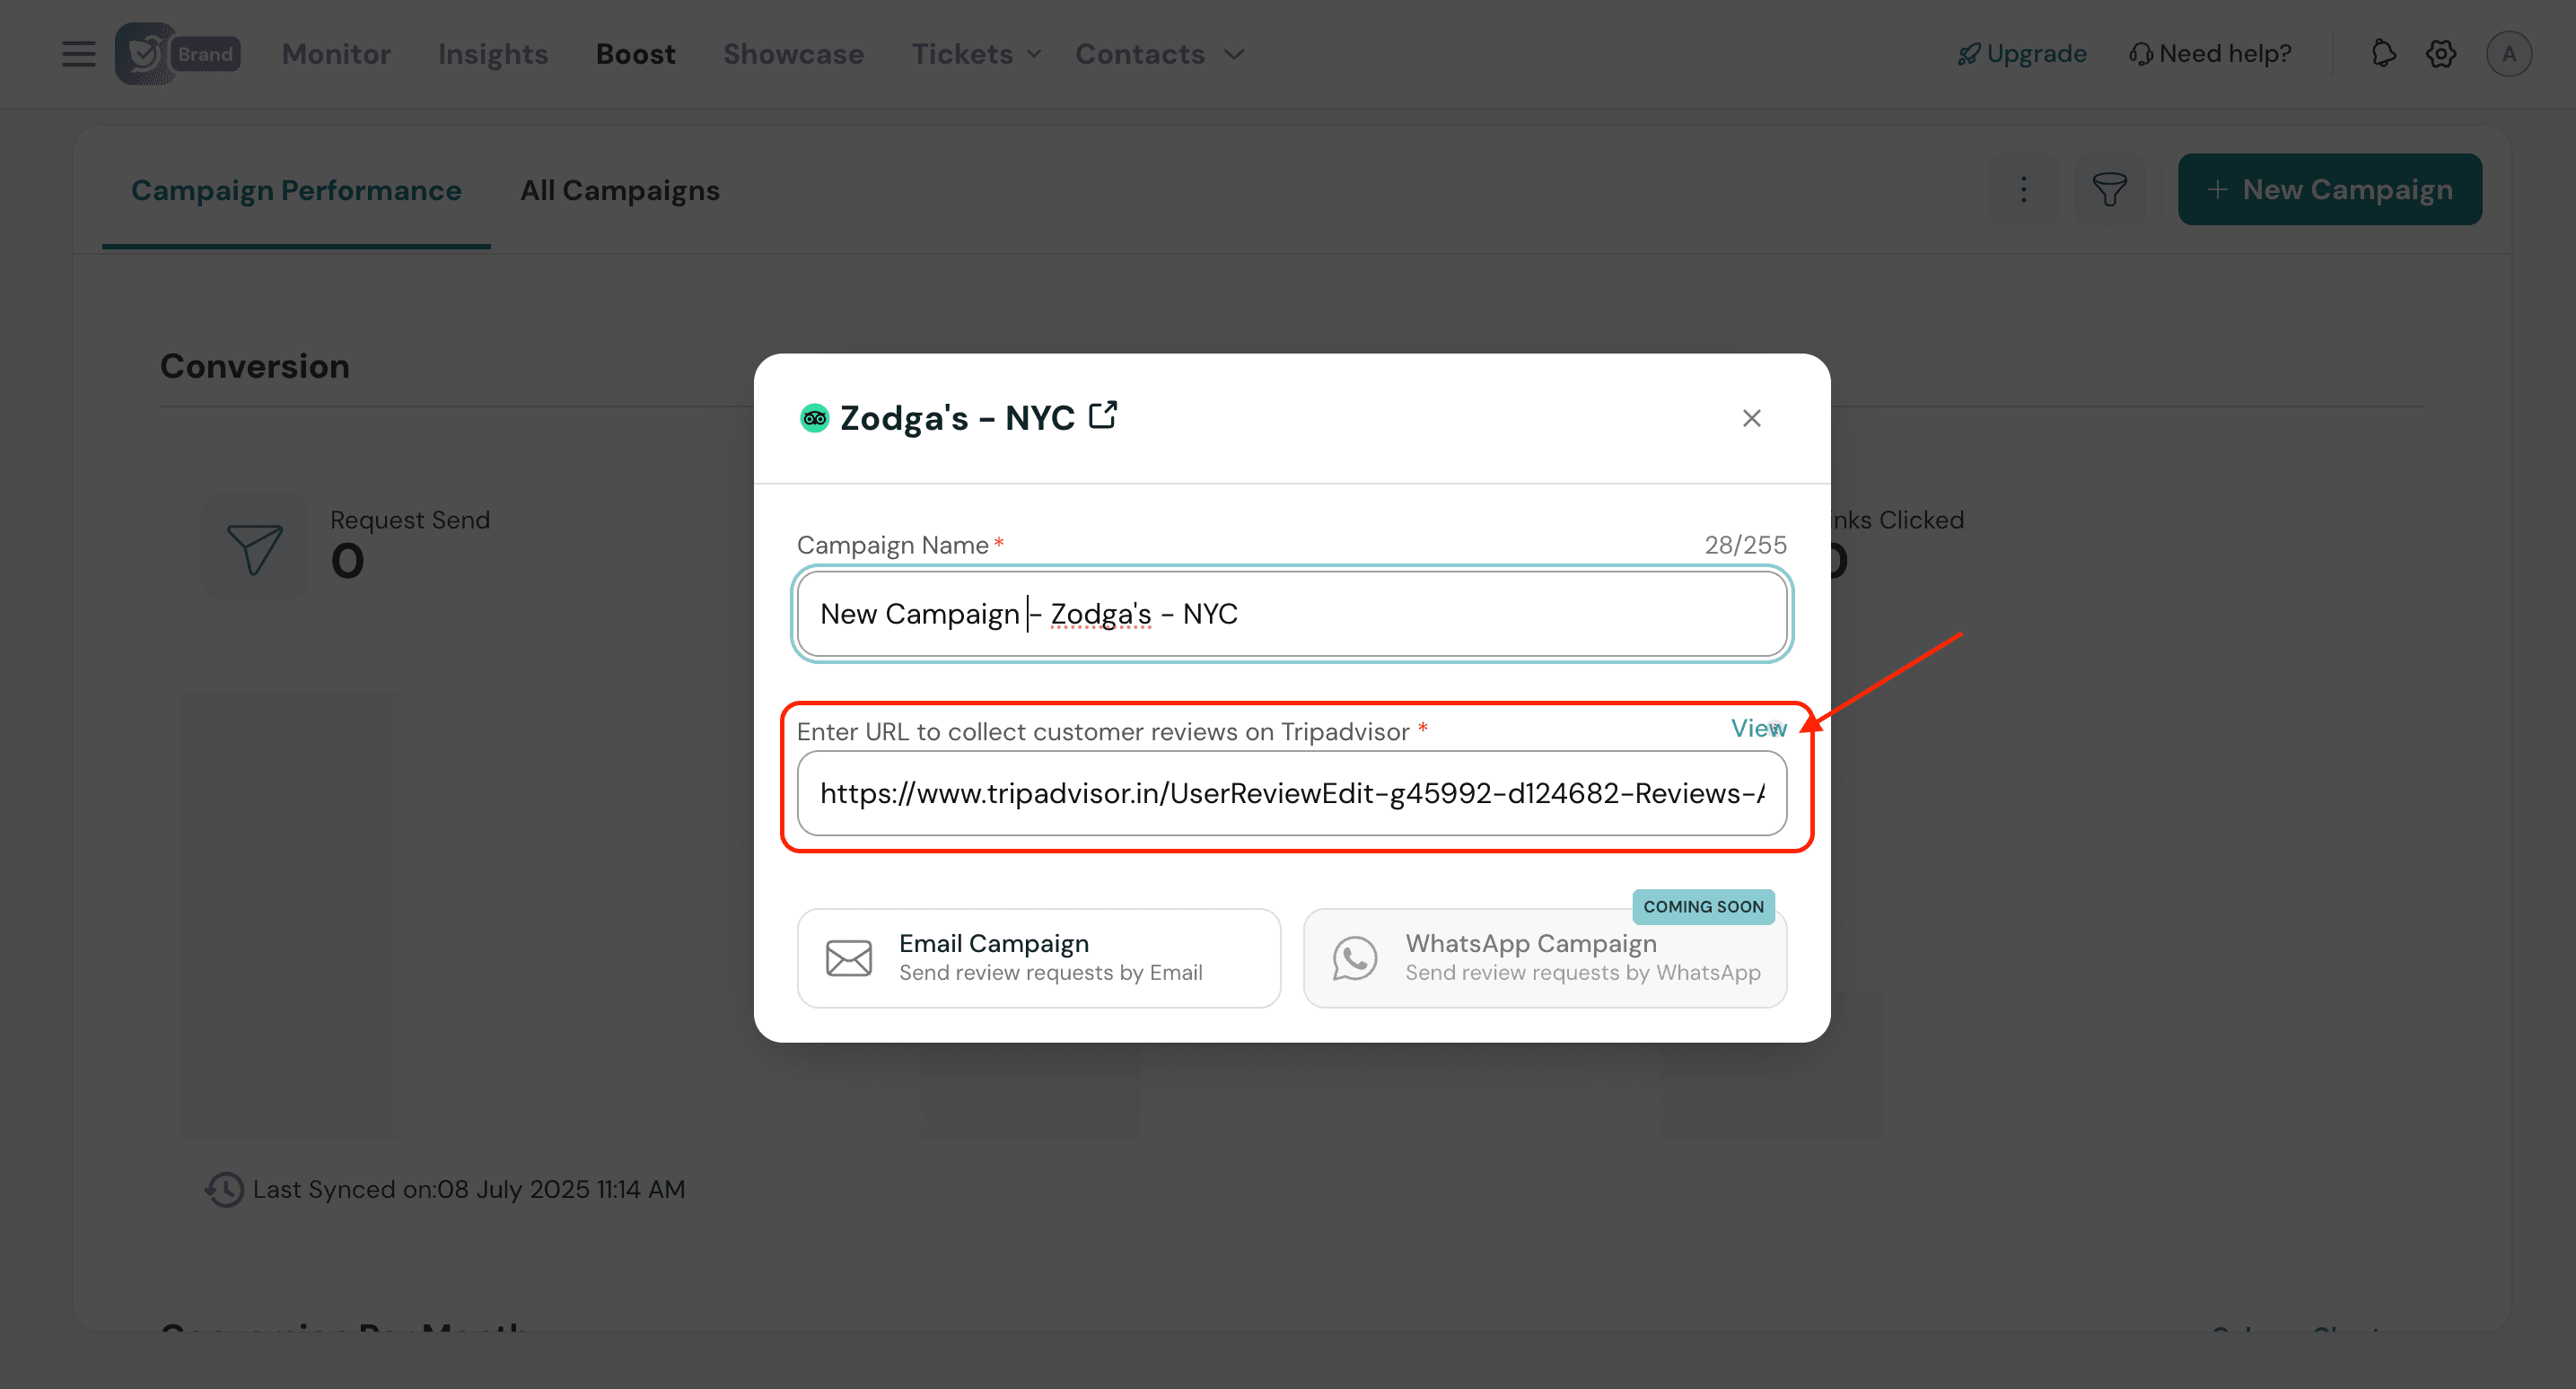
5. Select Email Campaign.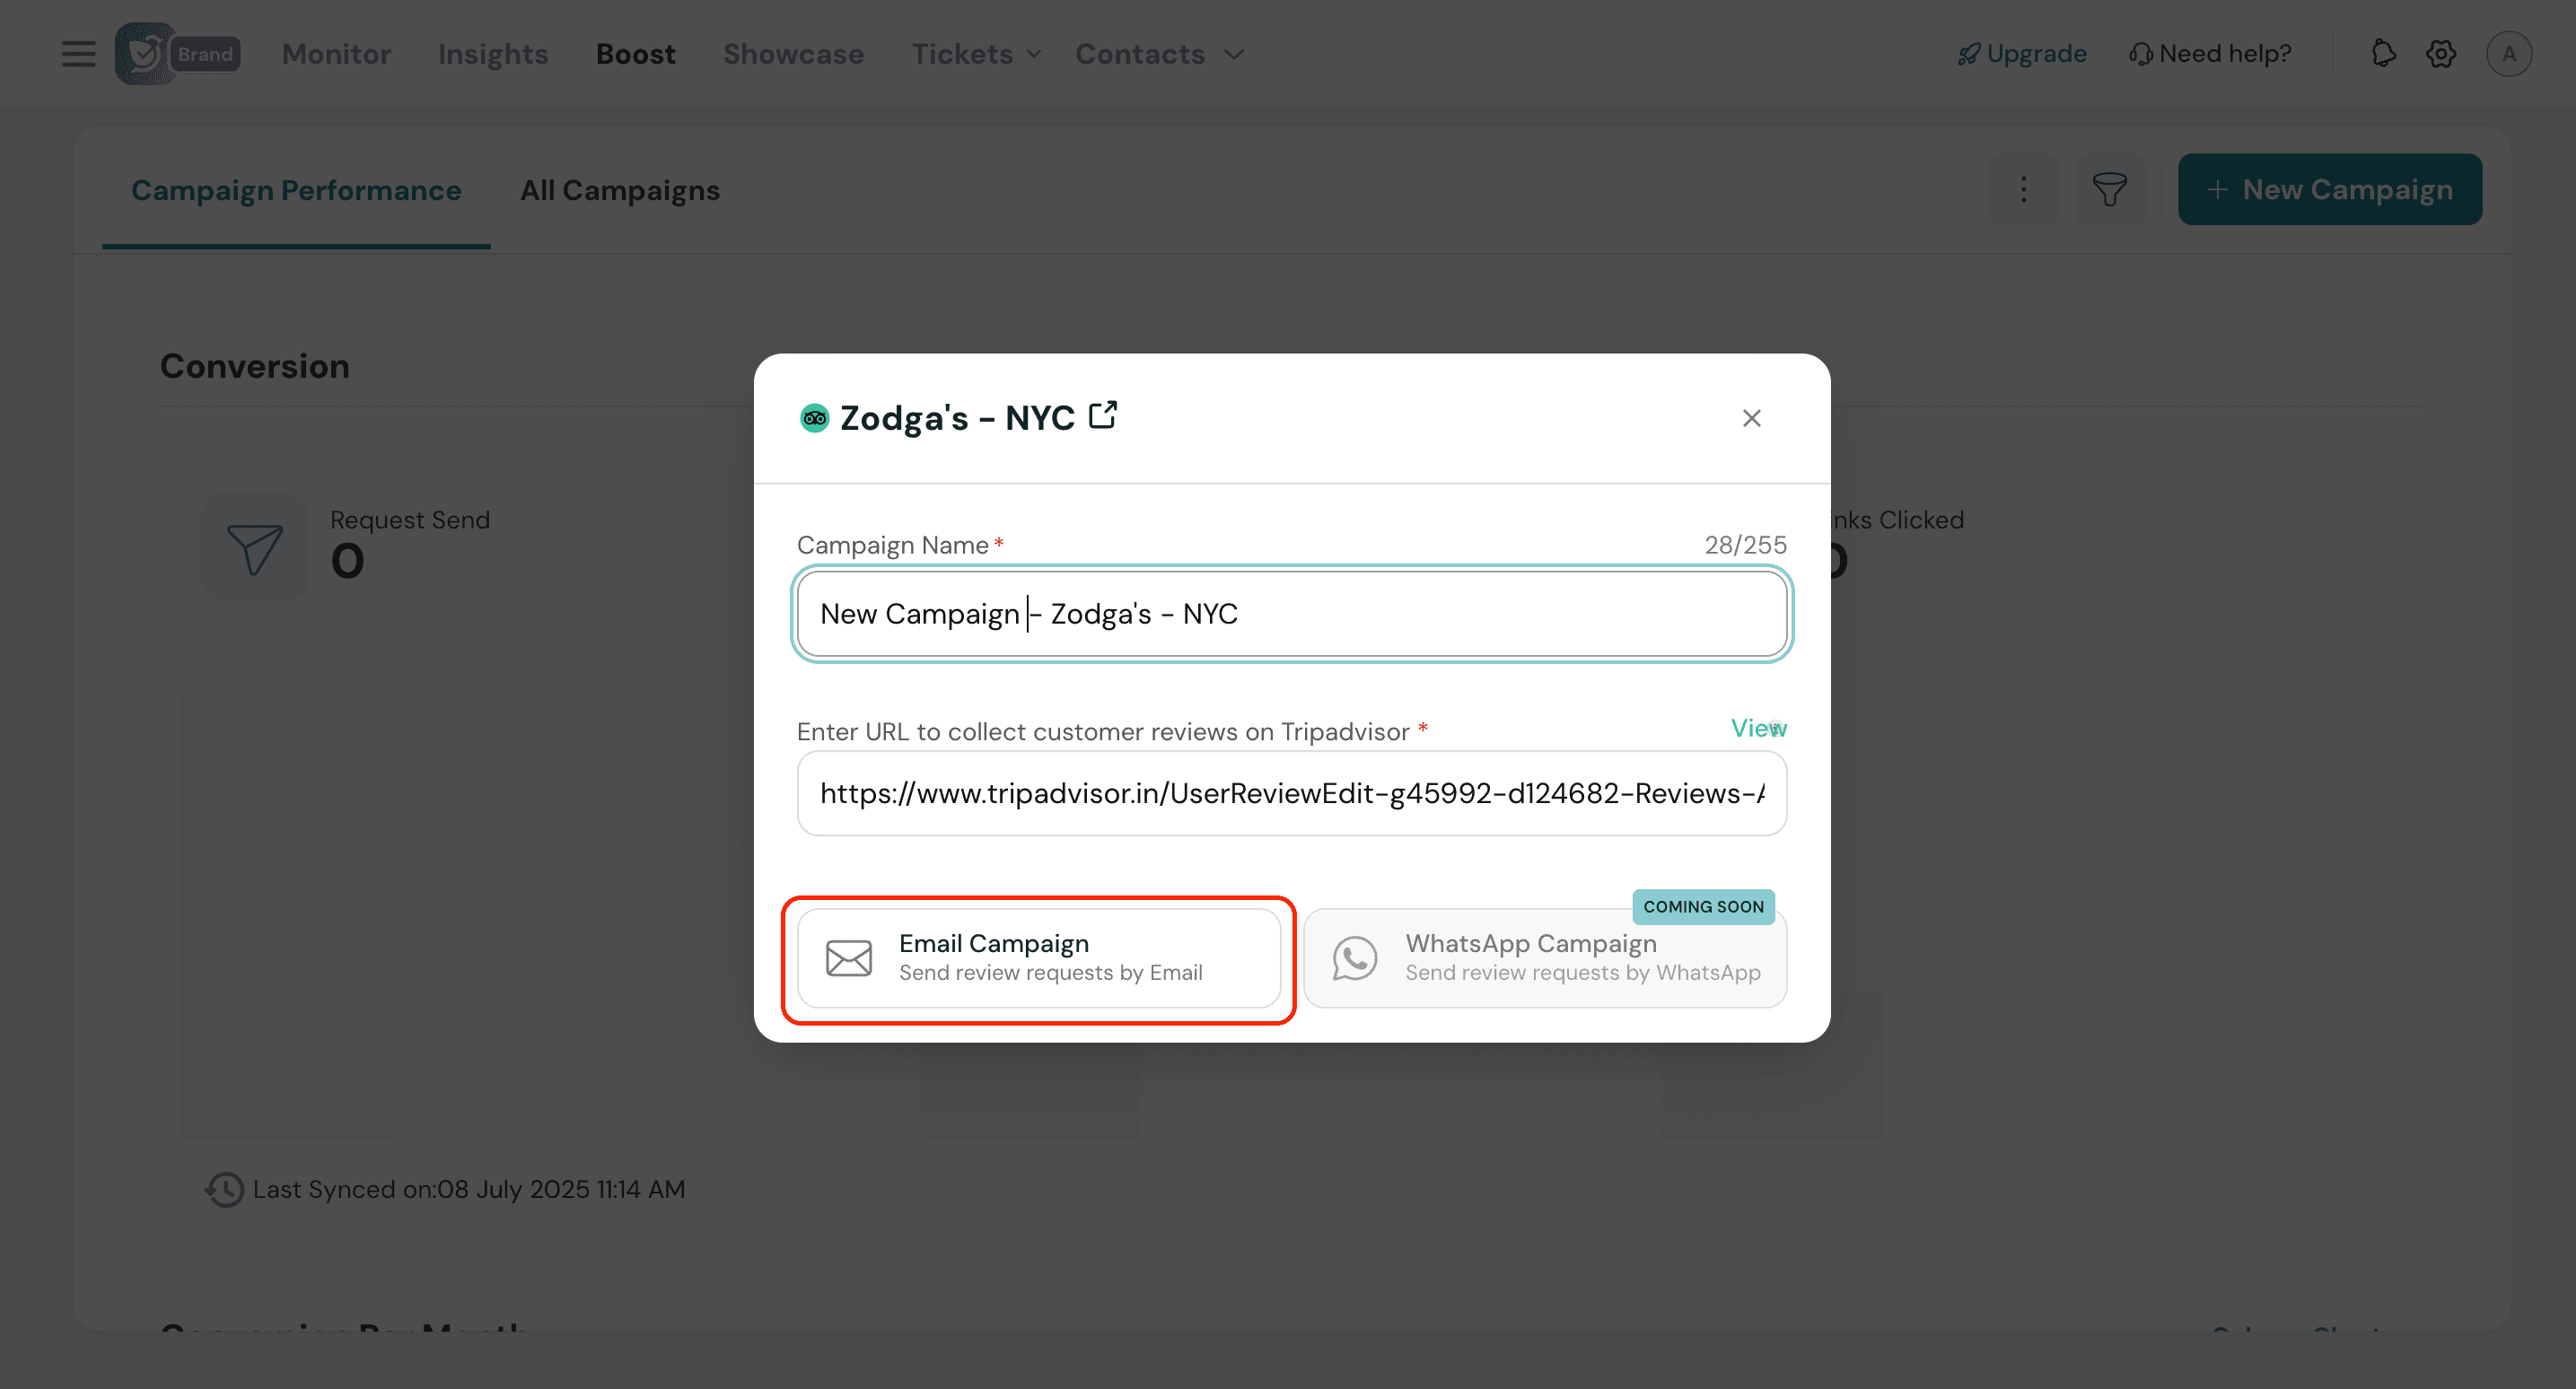
1. Select the sender’s email address.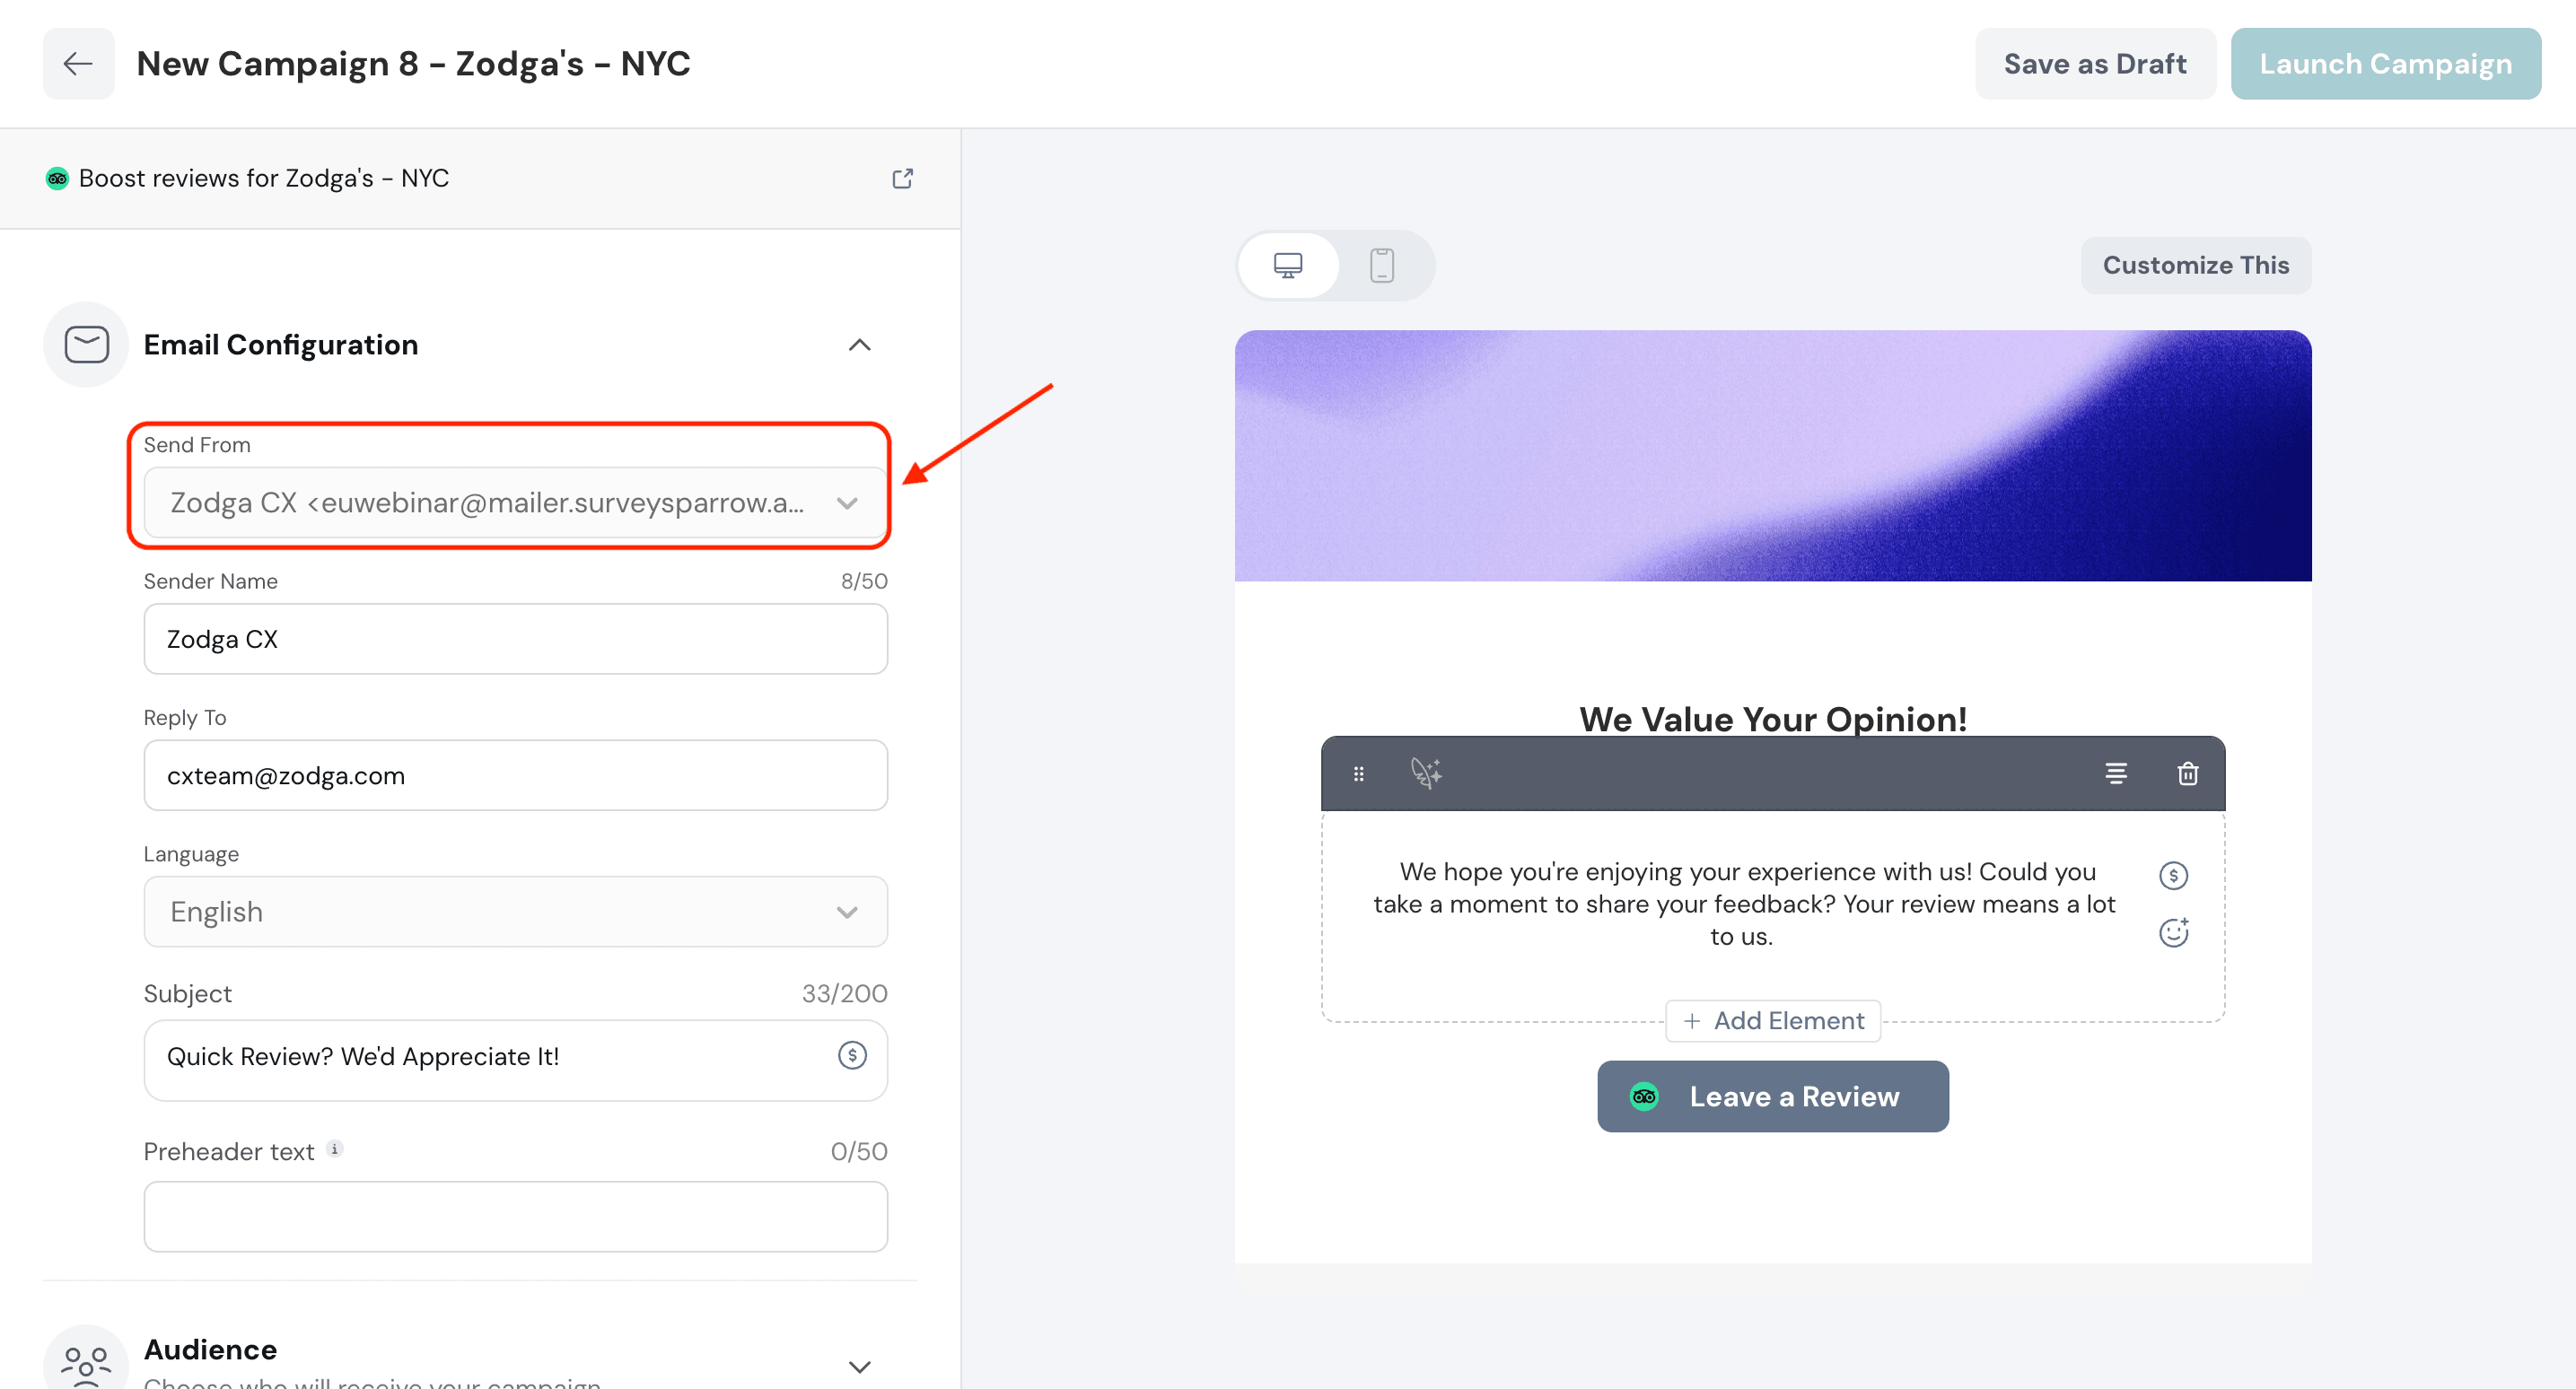
2. Enter the sender’s name.
3. Choose the email of the team that’ll handle the replies to the review request email.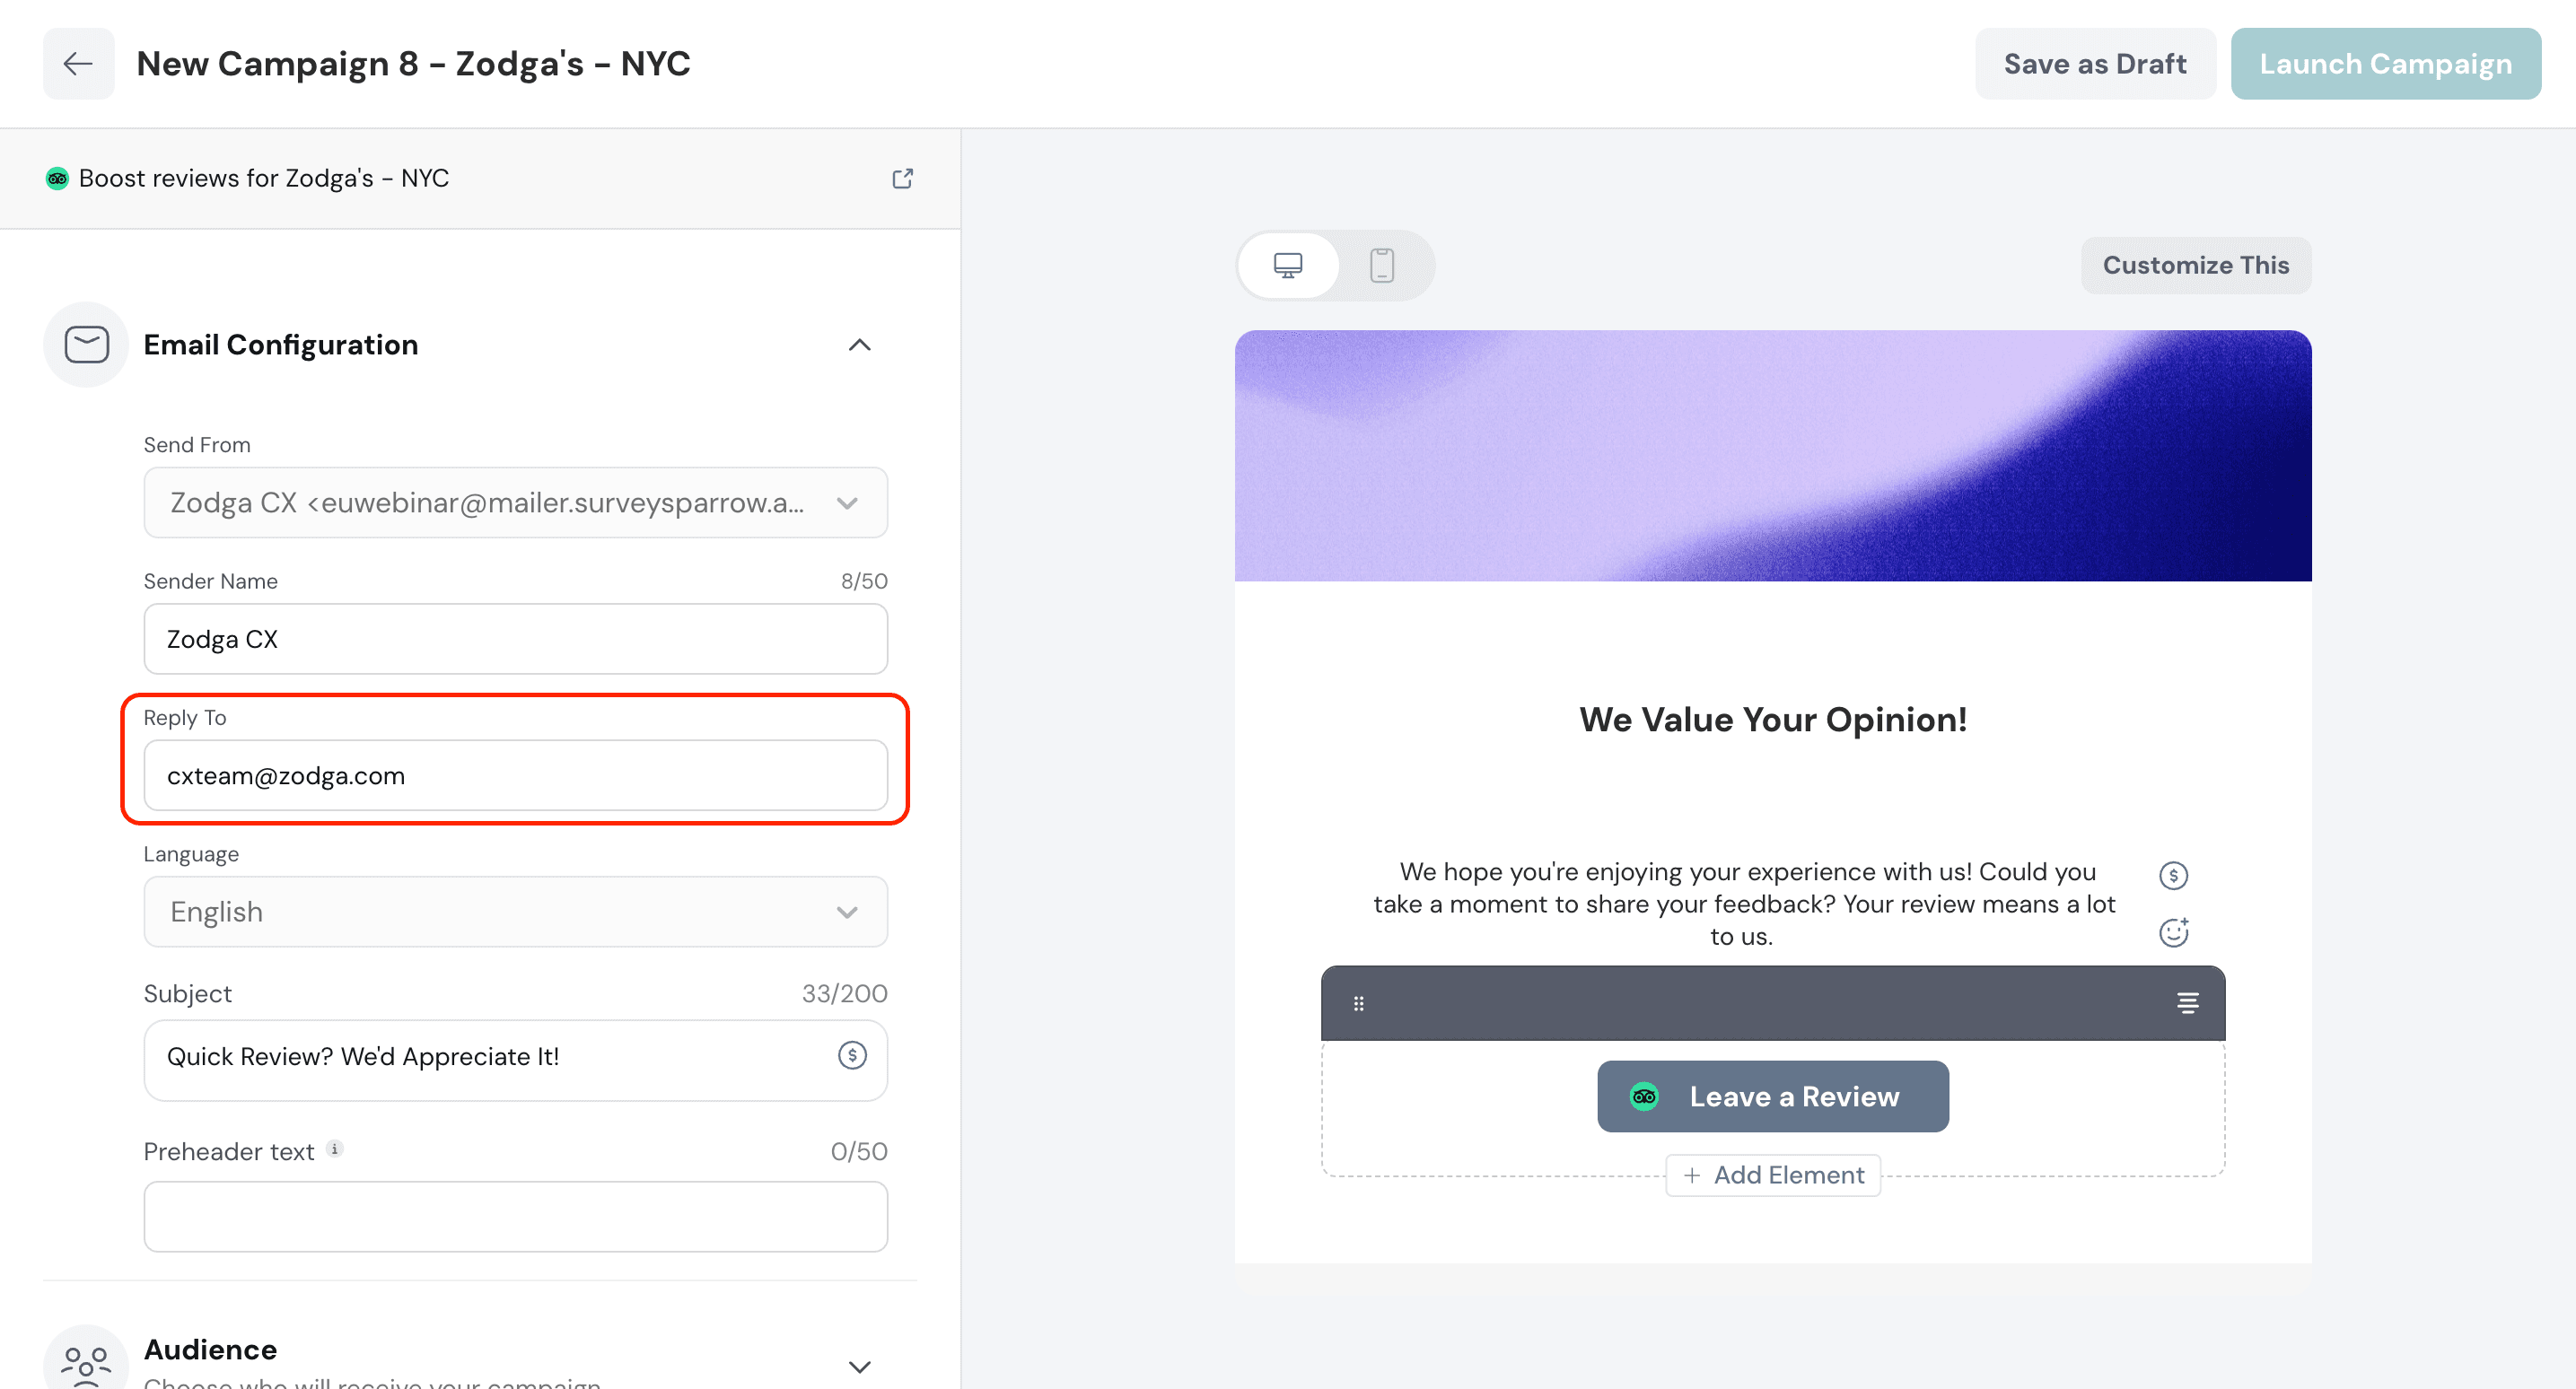
4. Choose the language and enter the subject for the email.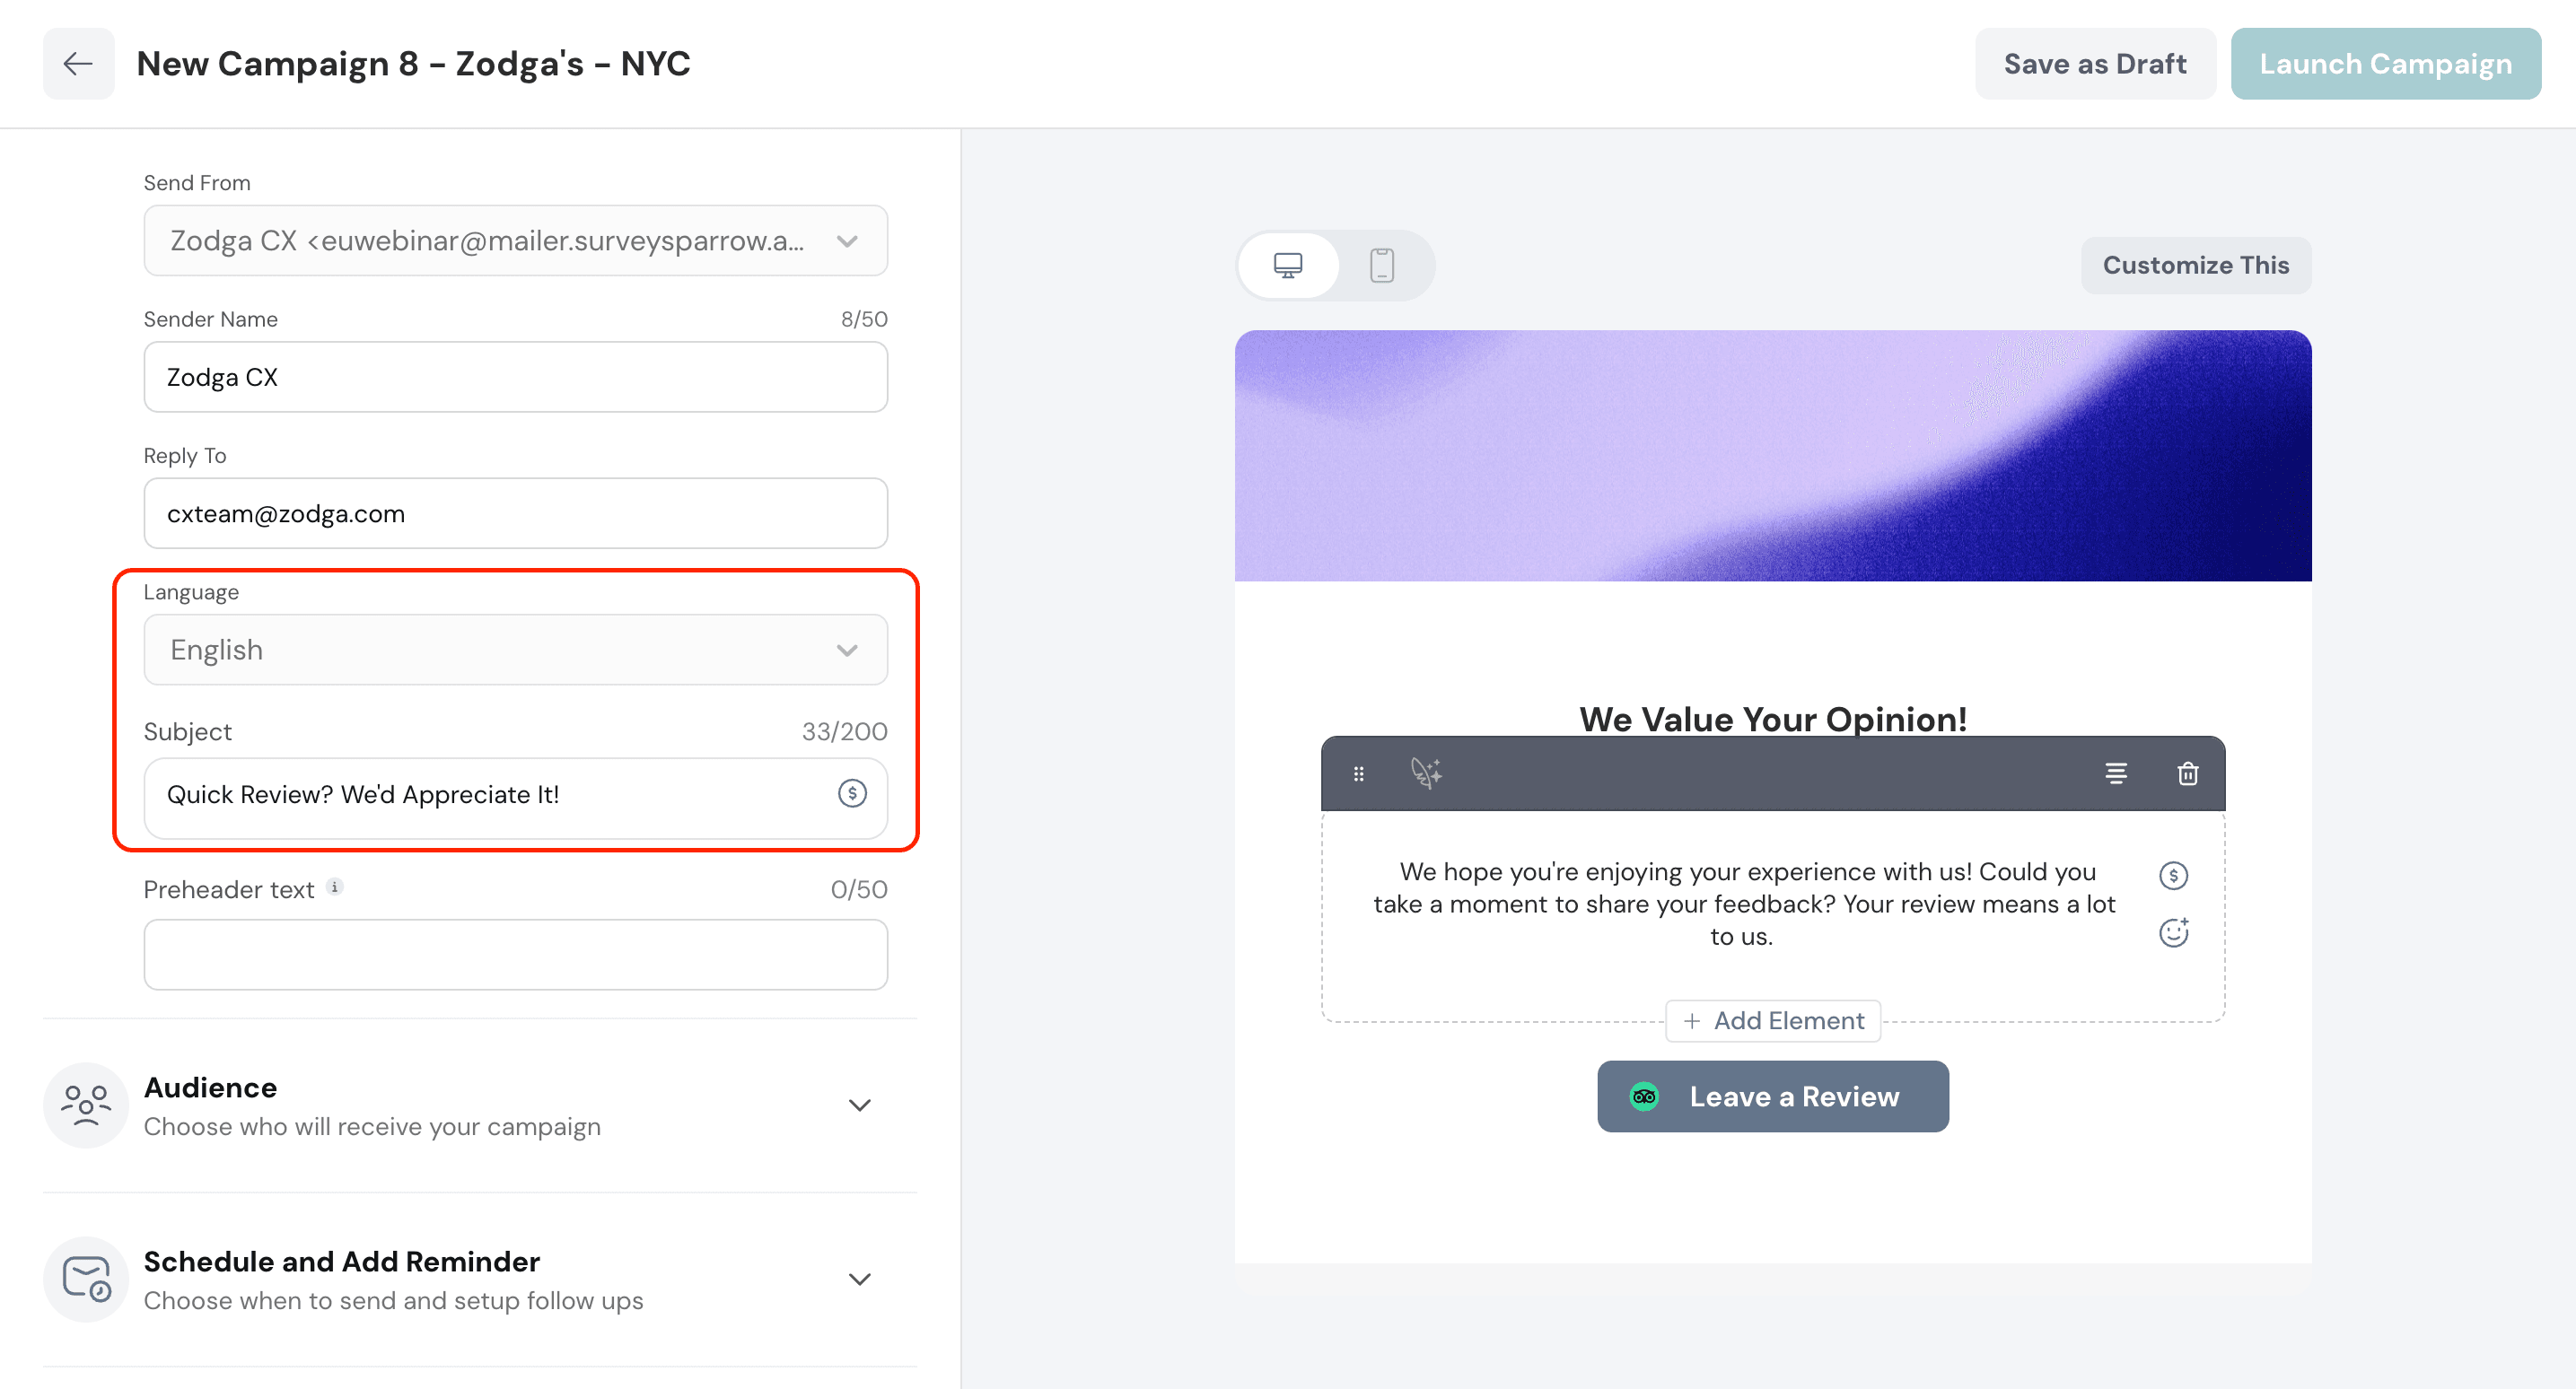
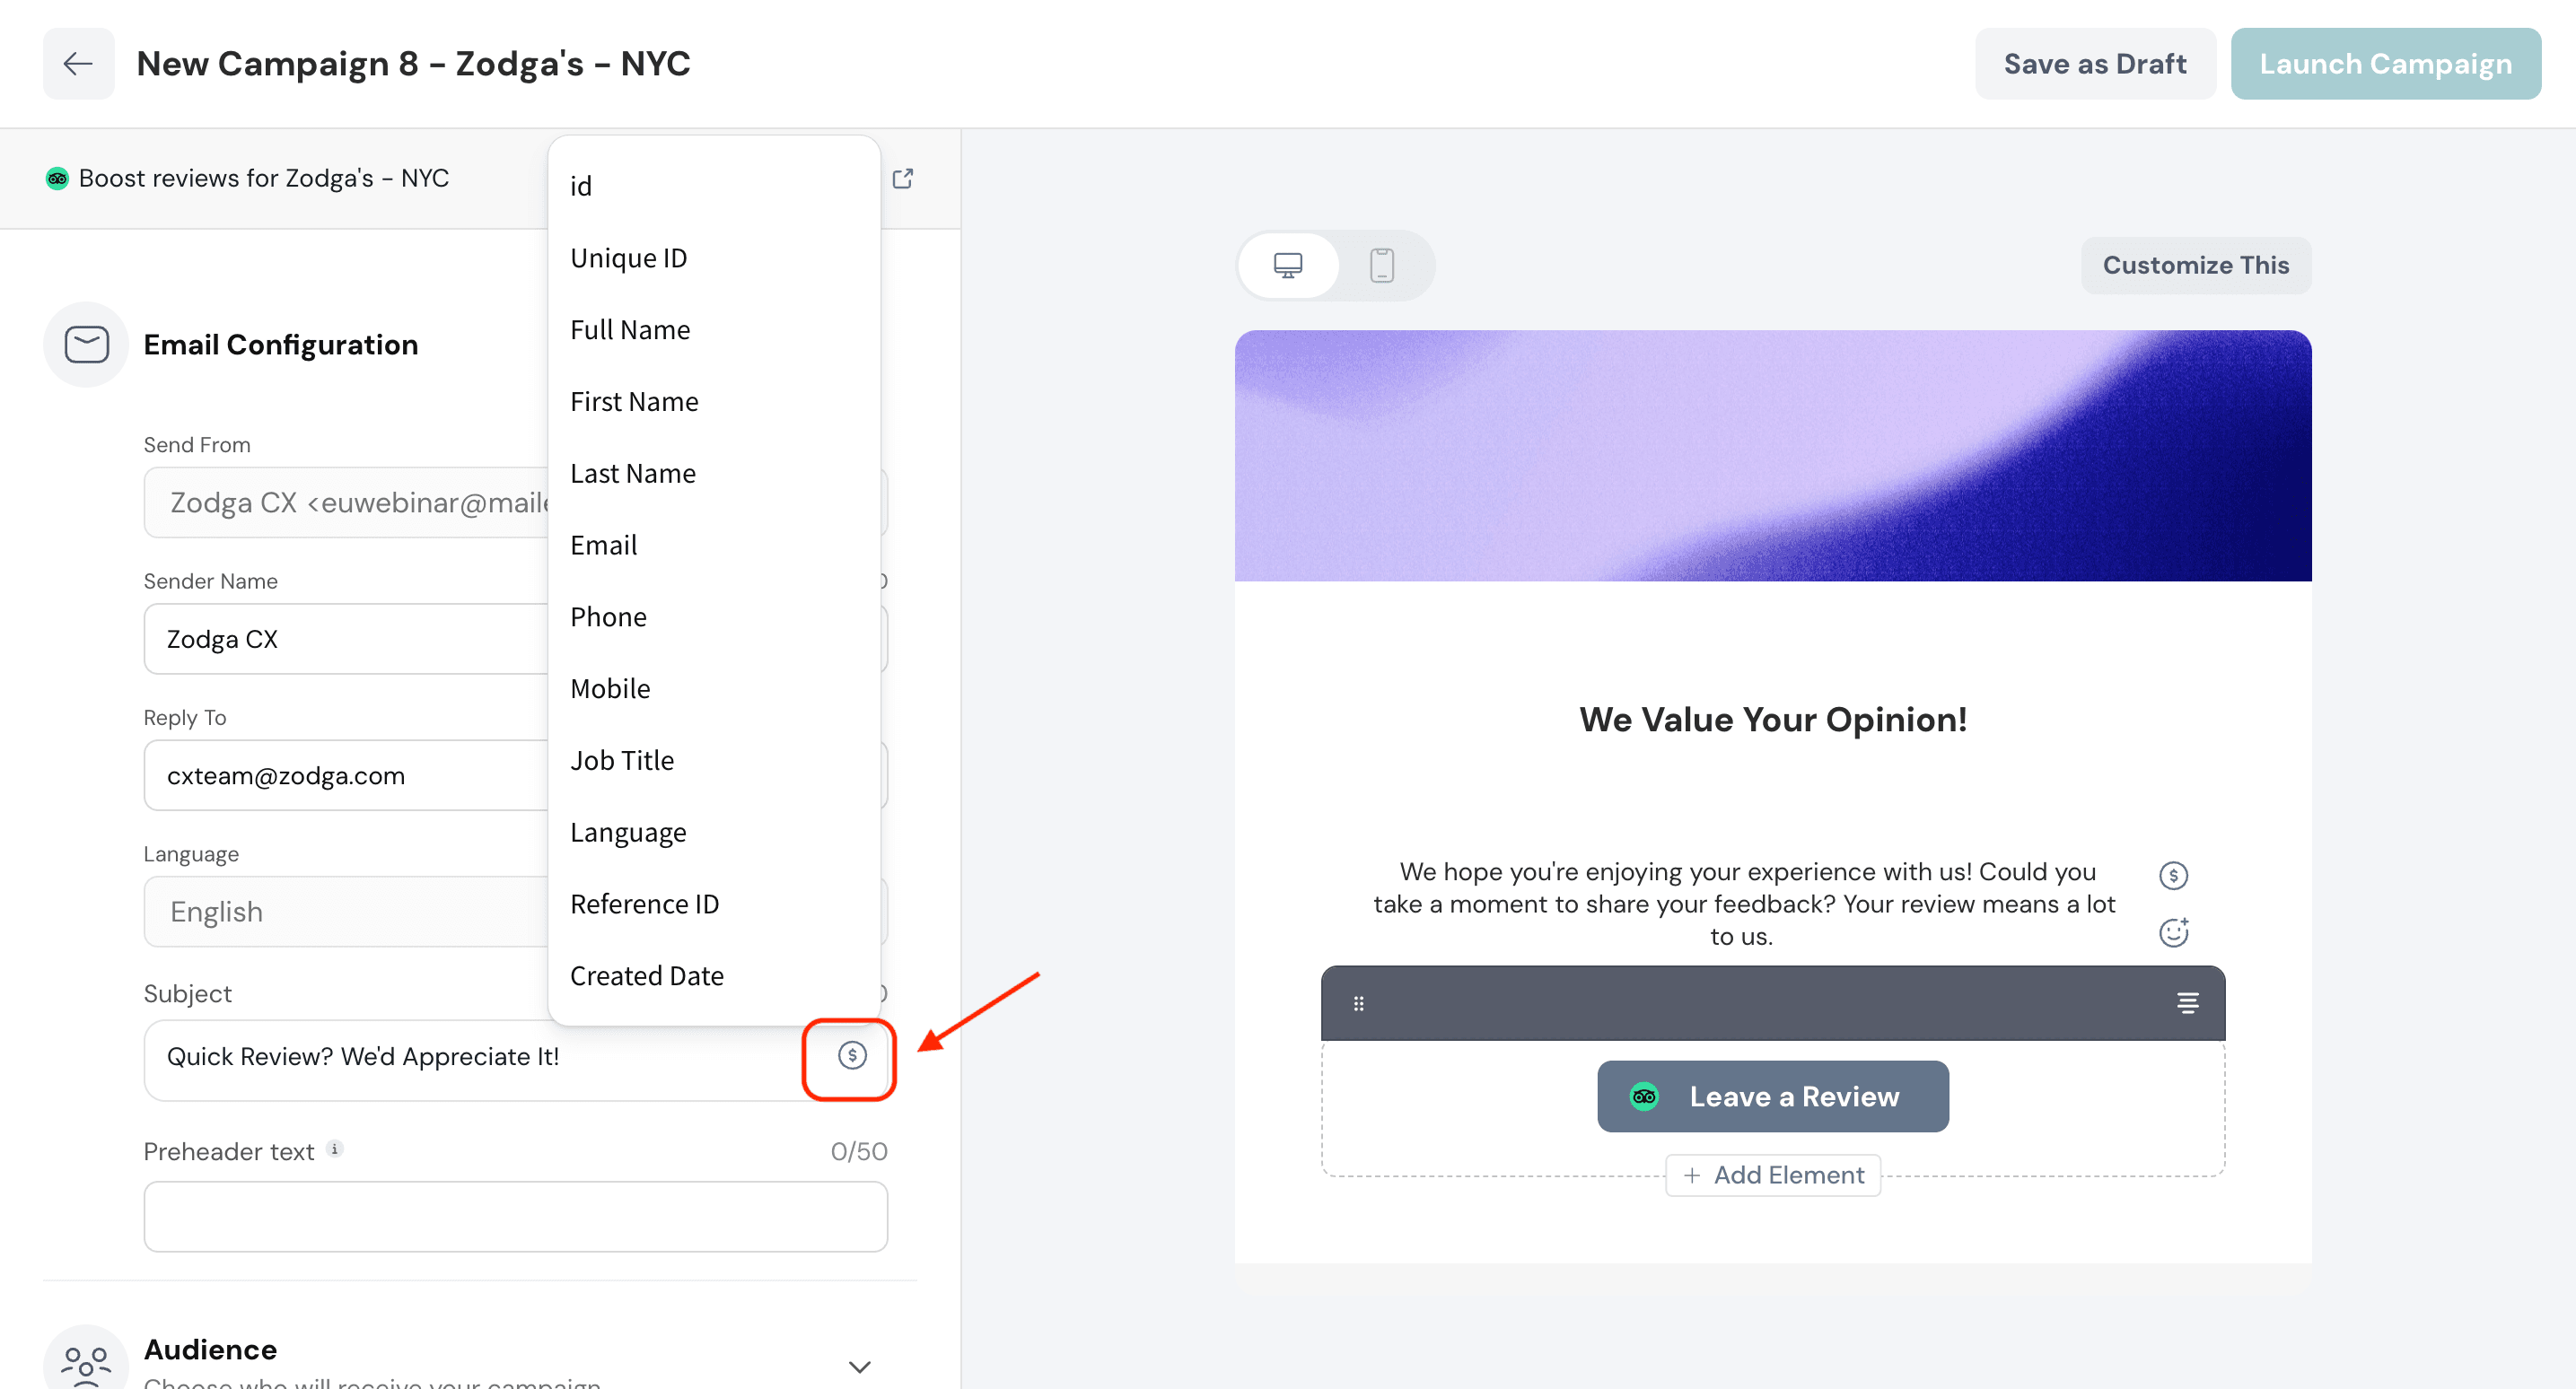
Click $ to personalize the email subject with the recipient’s data.
5. Enter a relevant preheader text to comply with the standards set by the email clients.
6. Draft the review request email. You can choose to add or remove elements according to your requirements.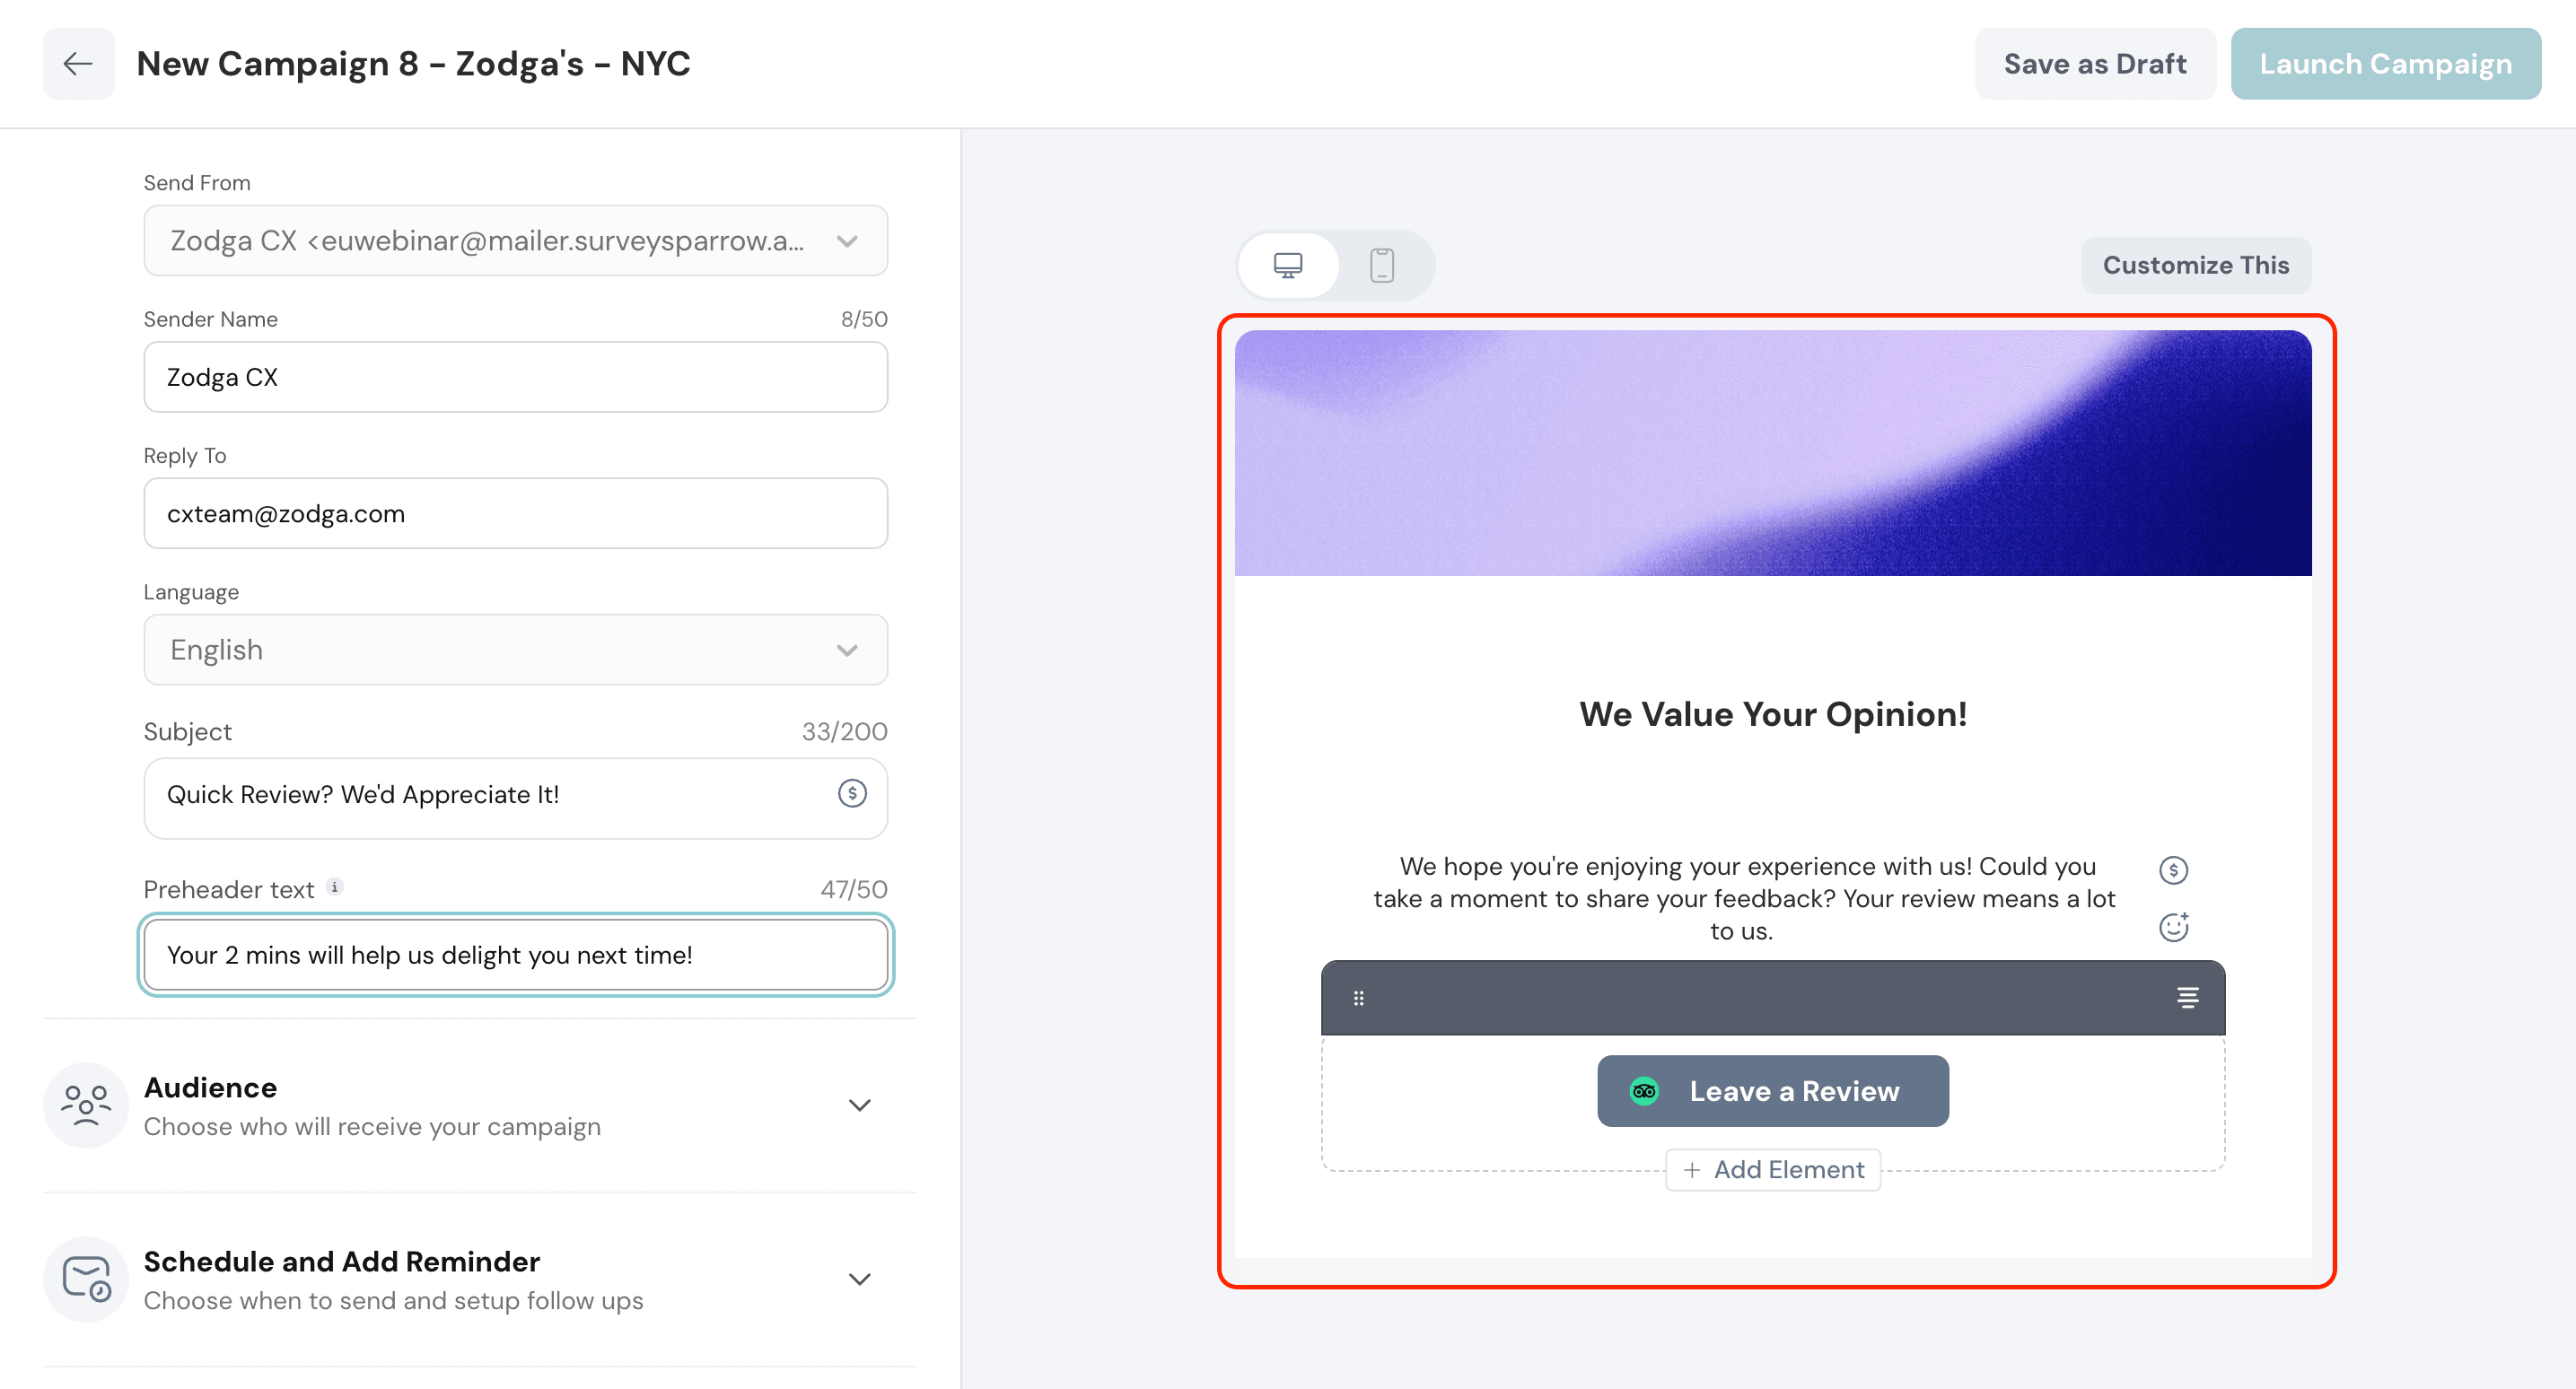
7. Click Customize this to design the email to your brand guidelines.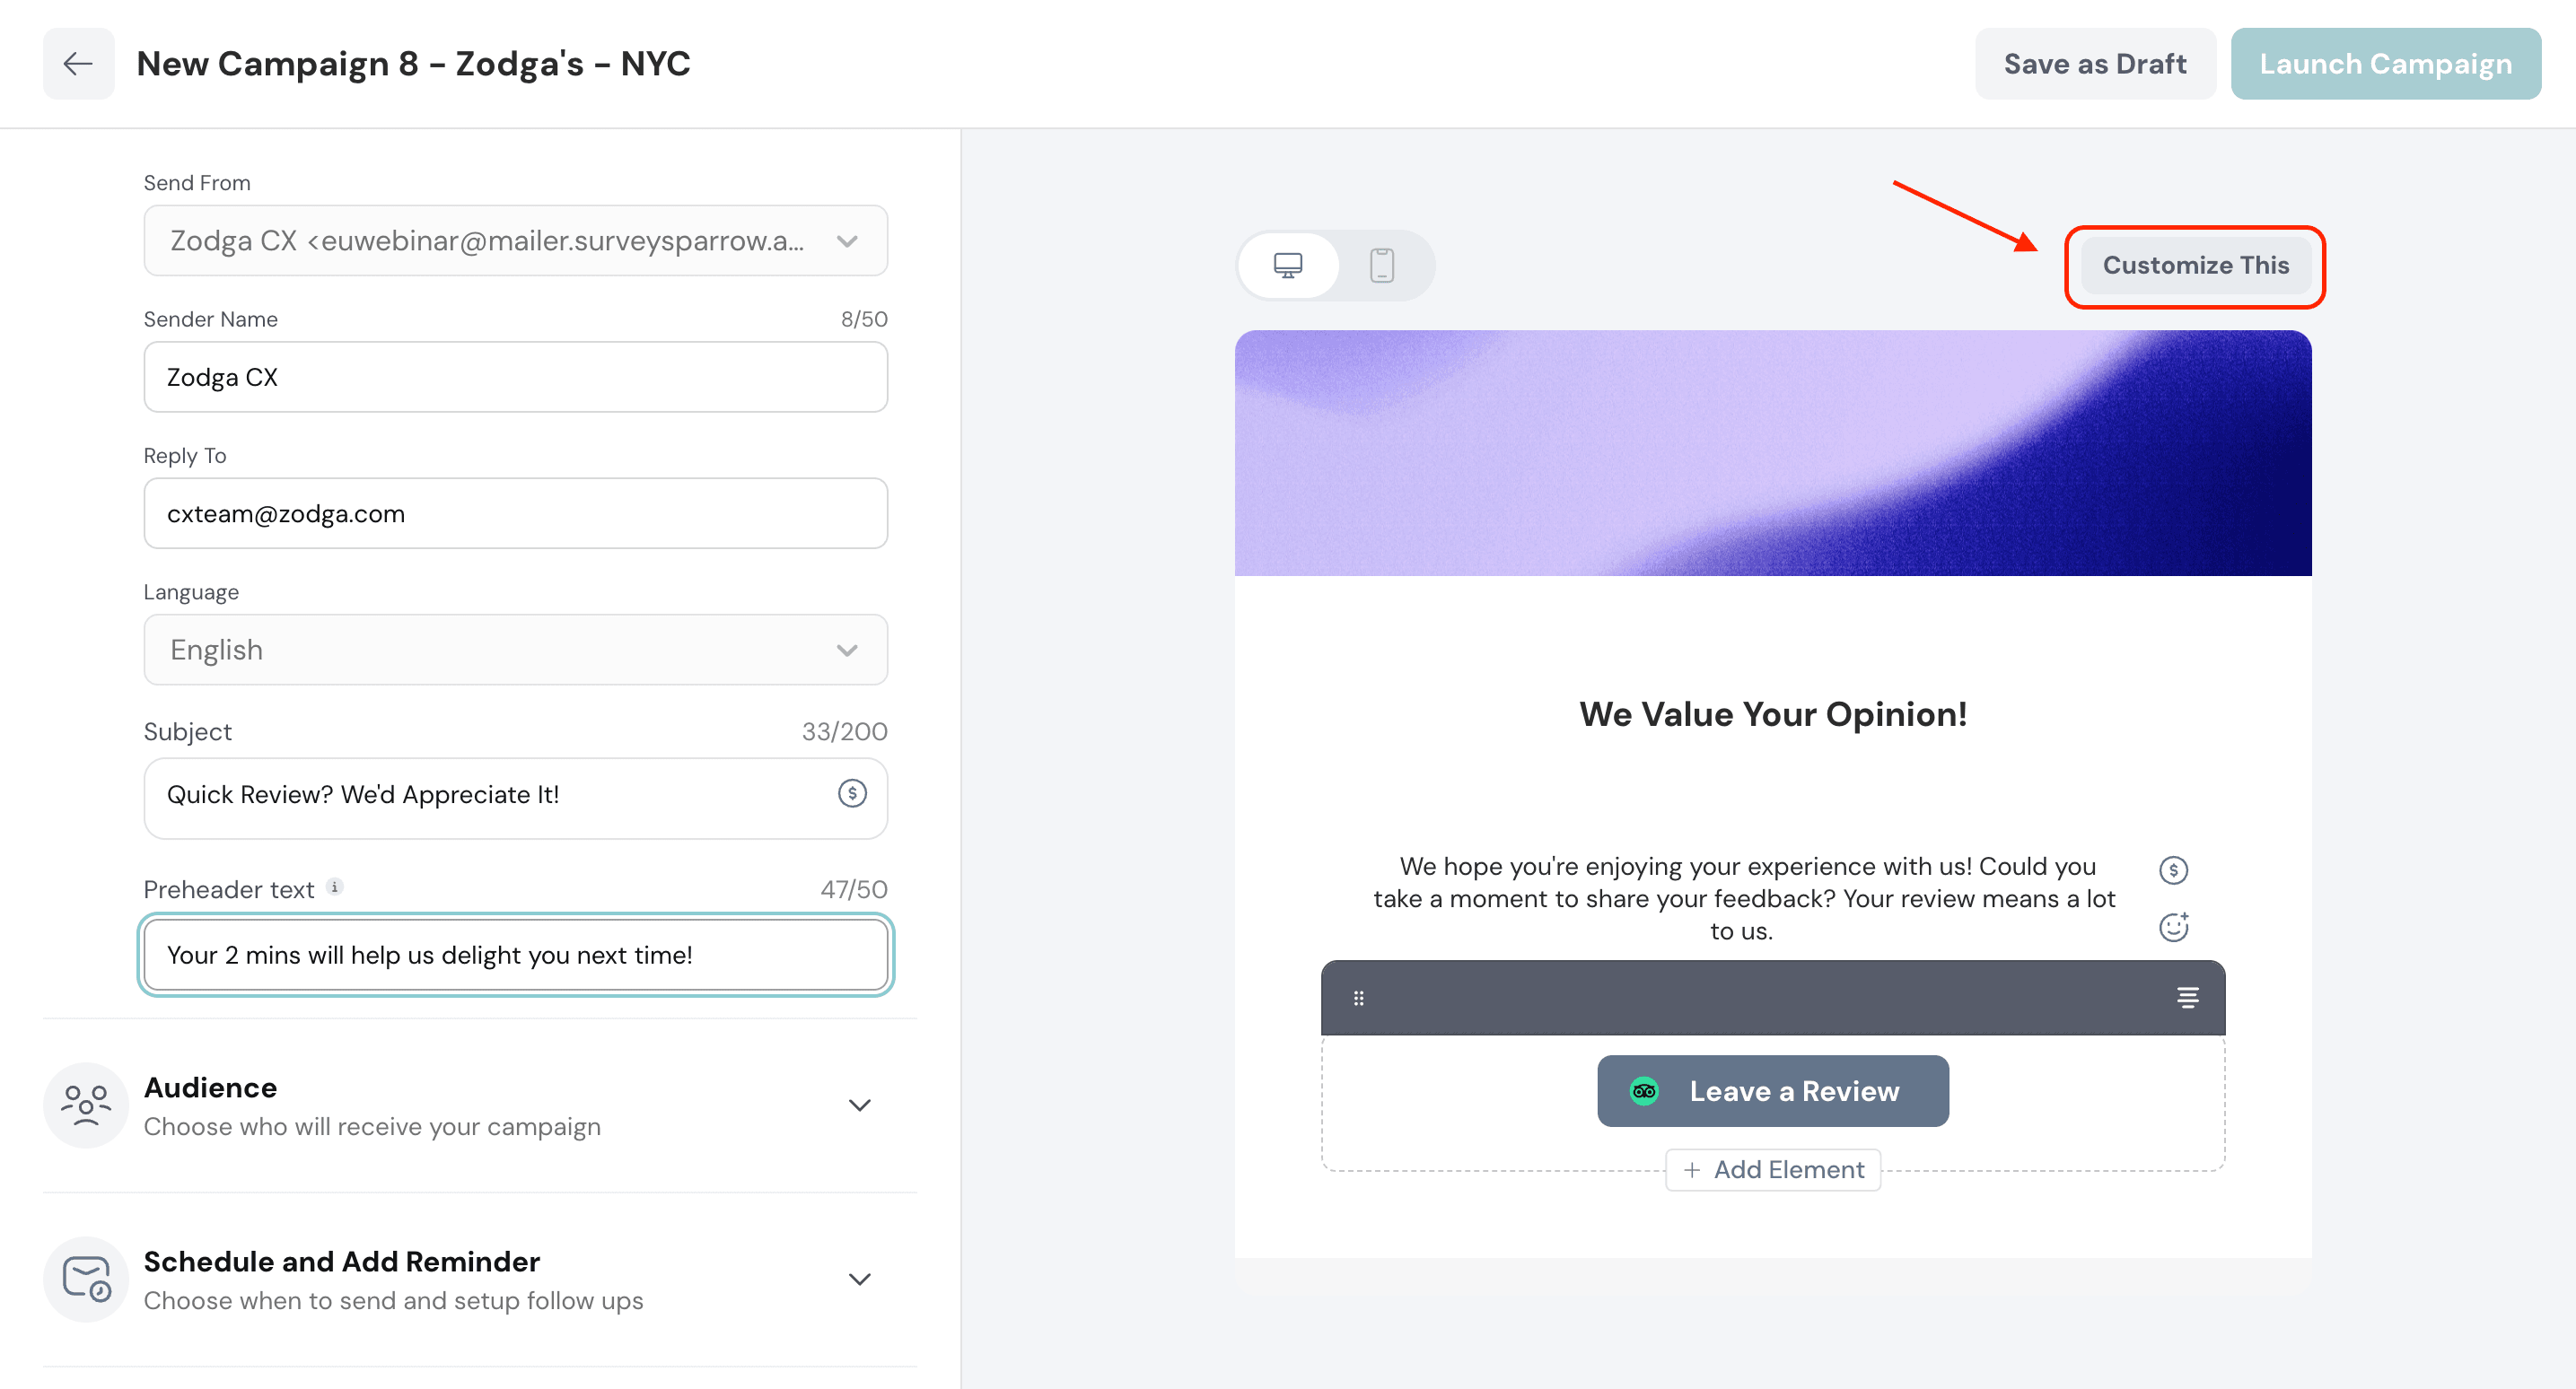
1. After finishing with the review request email content, click Audience.
2. You can choose to import contacts or select from existing contact lists.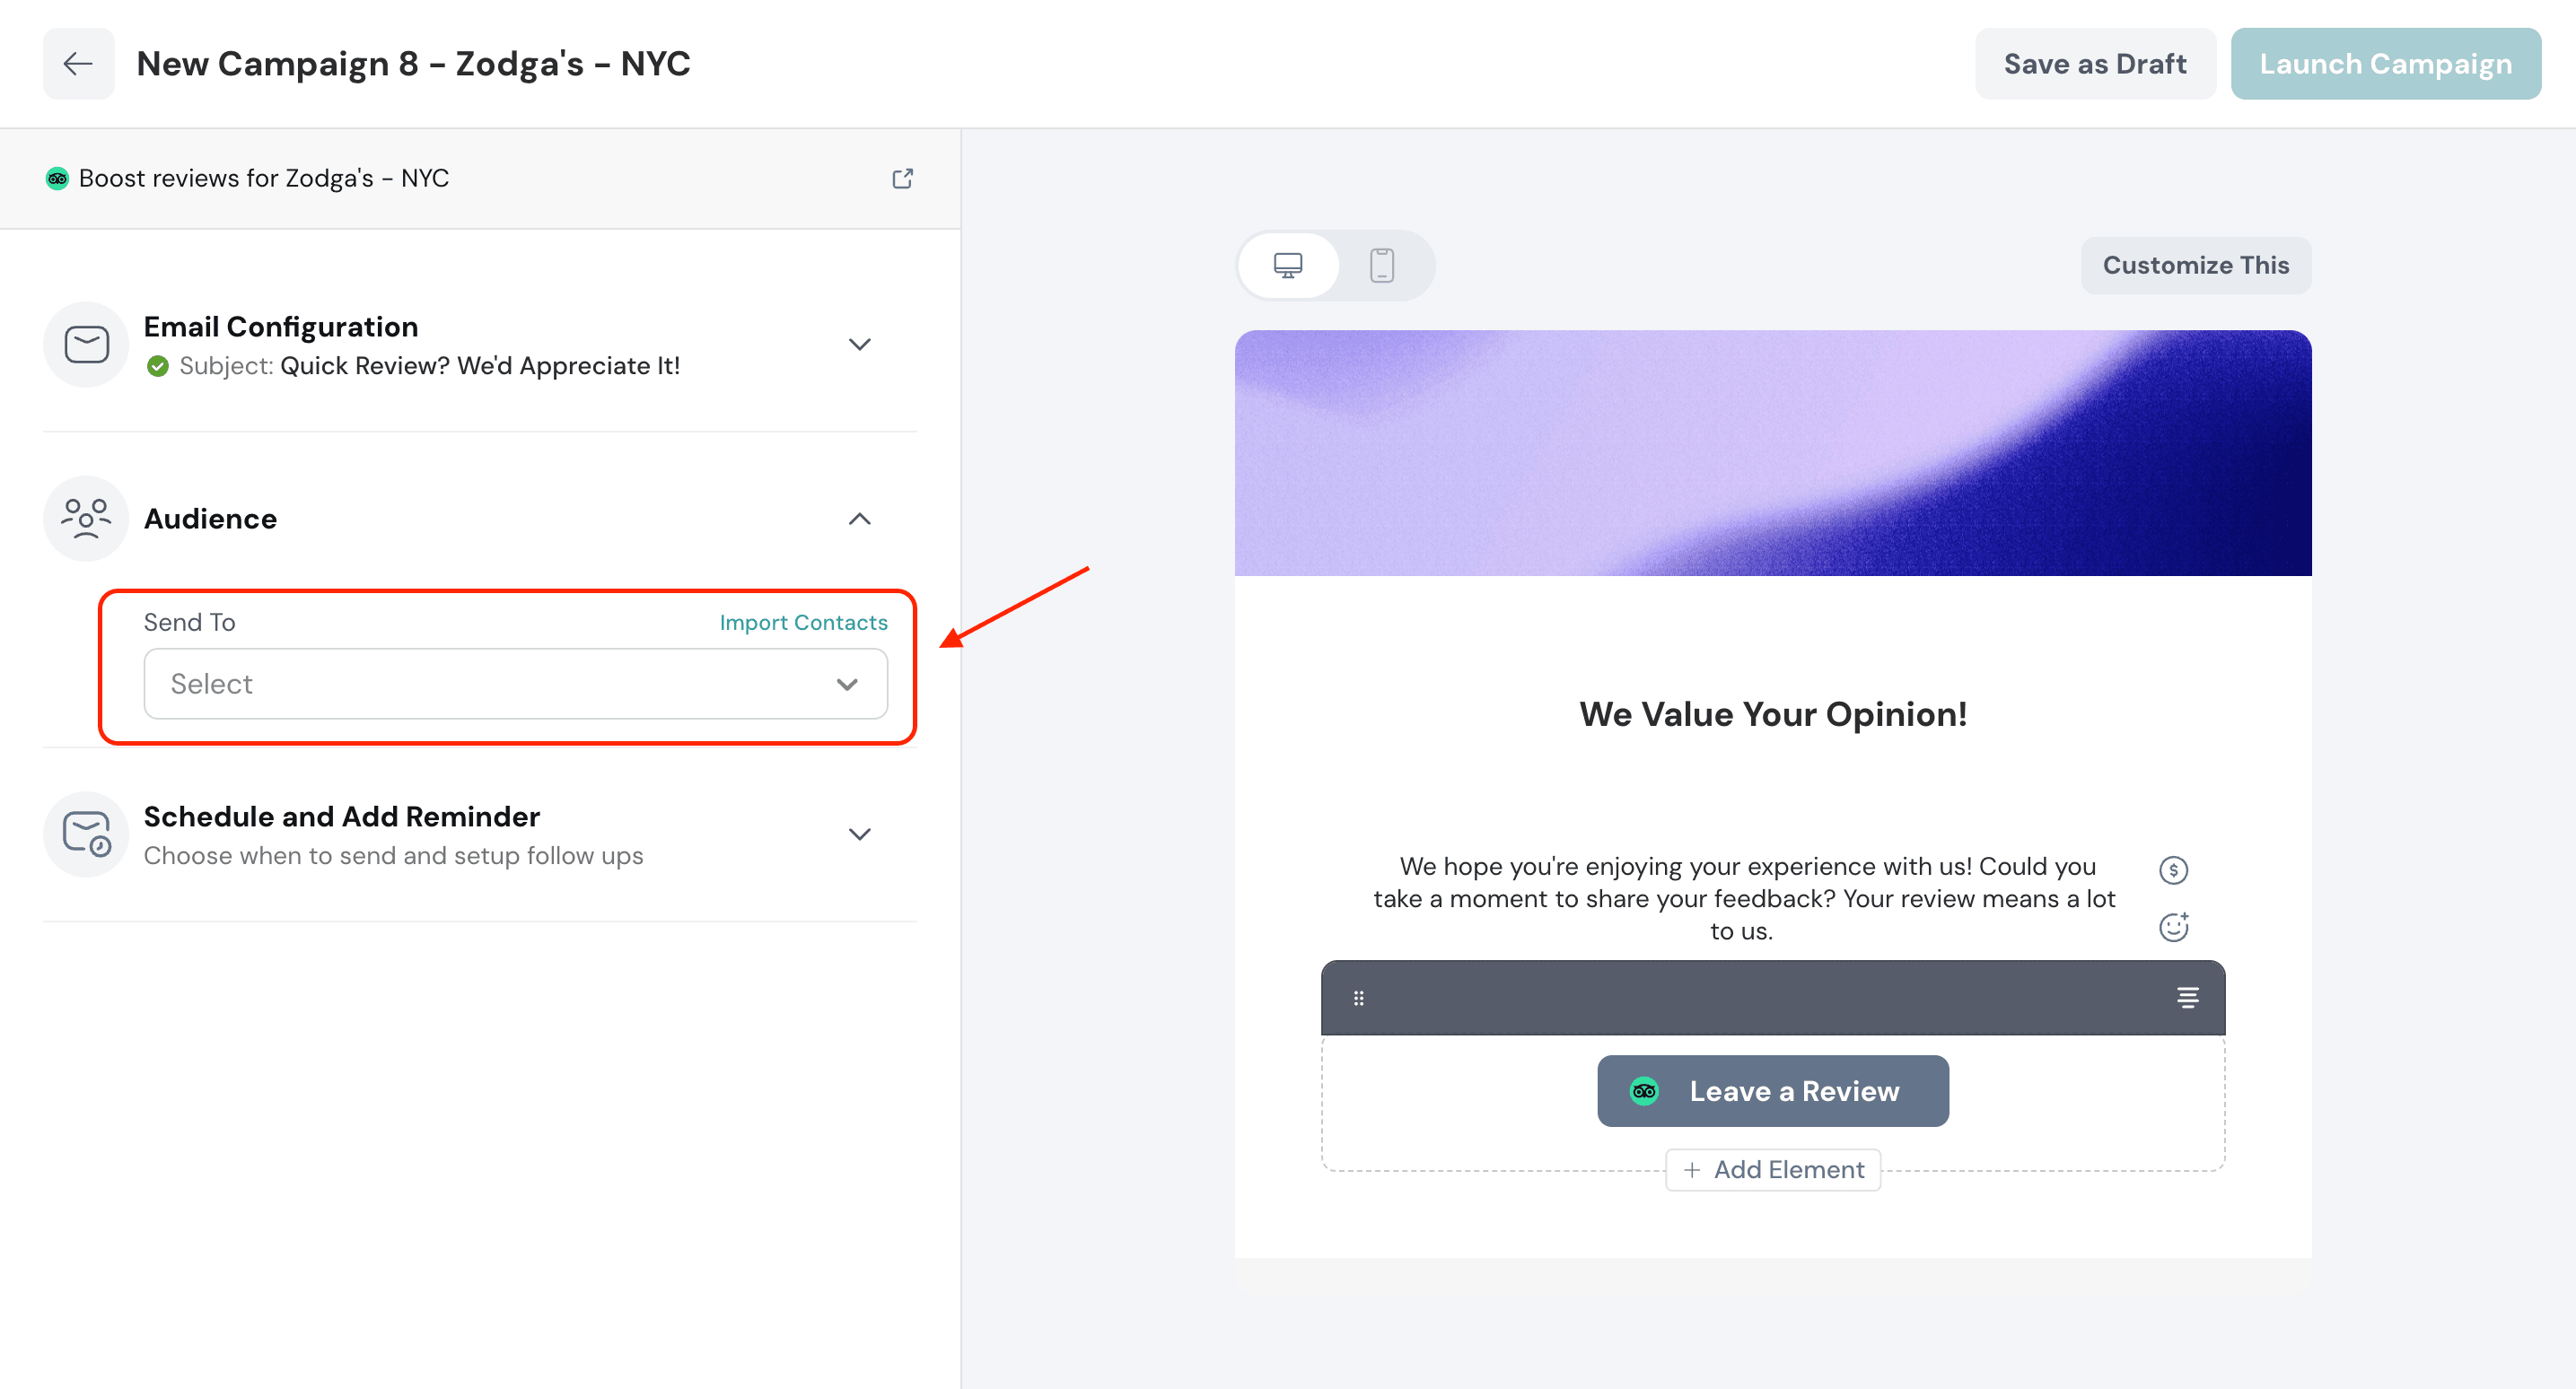
1. Once the recipient list is added, click Schedule and Add Reminder.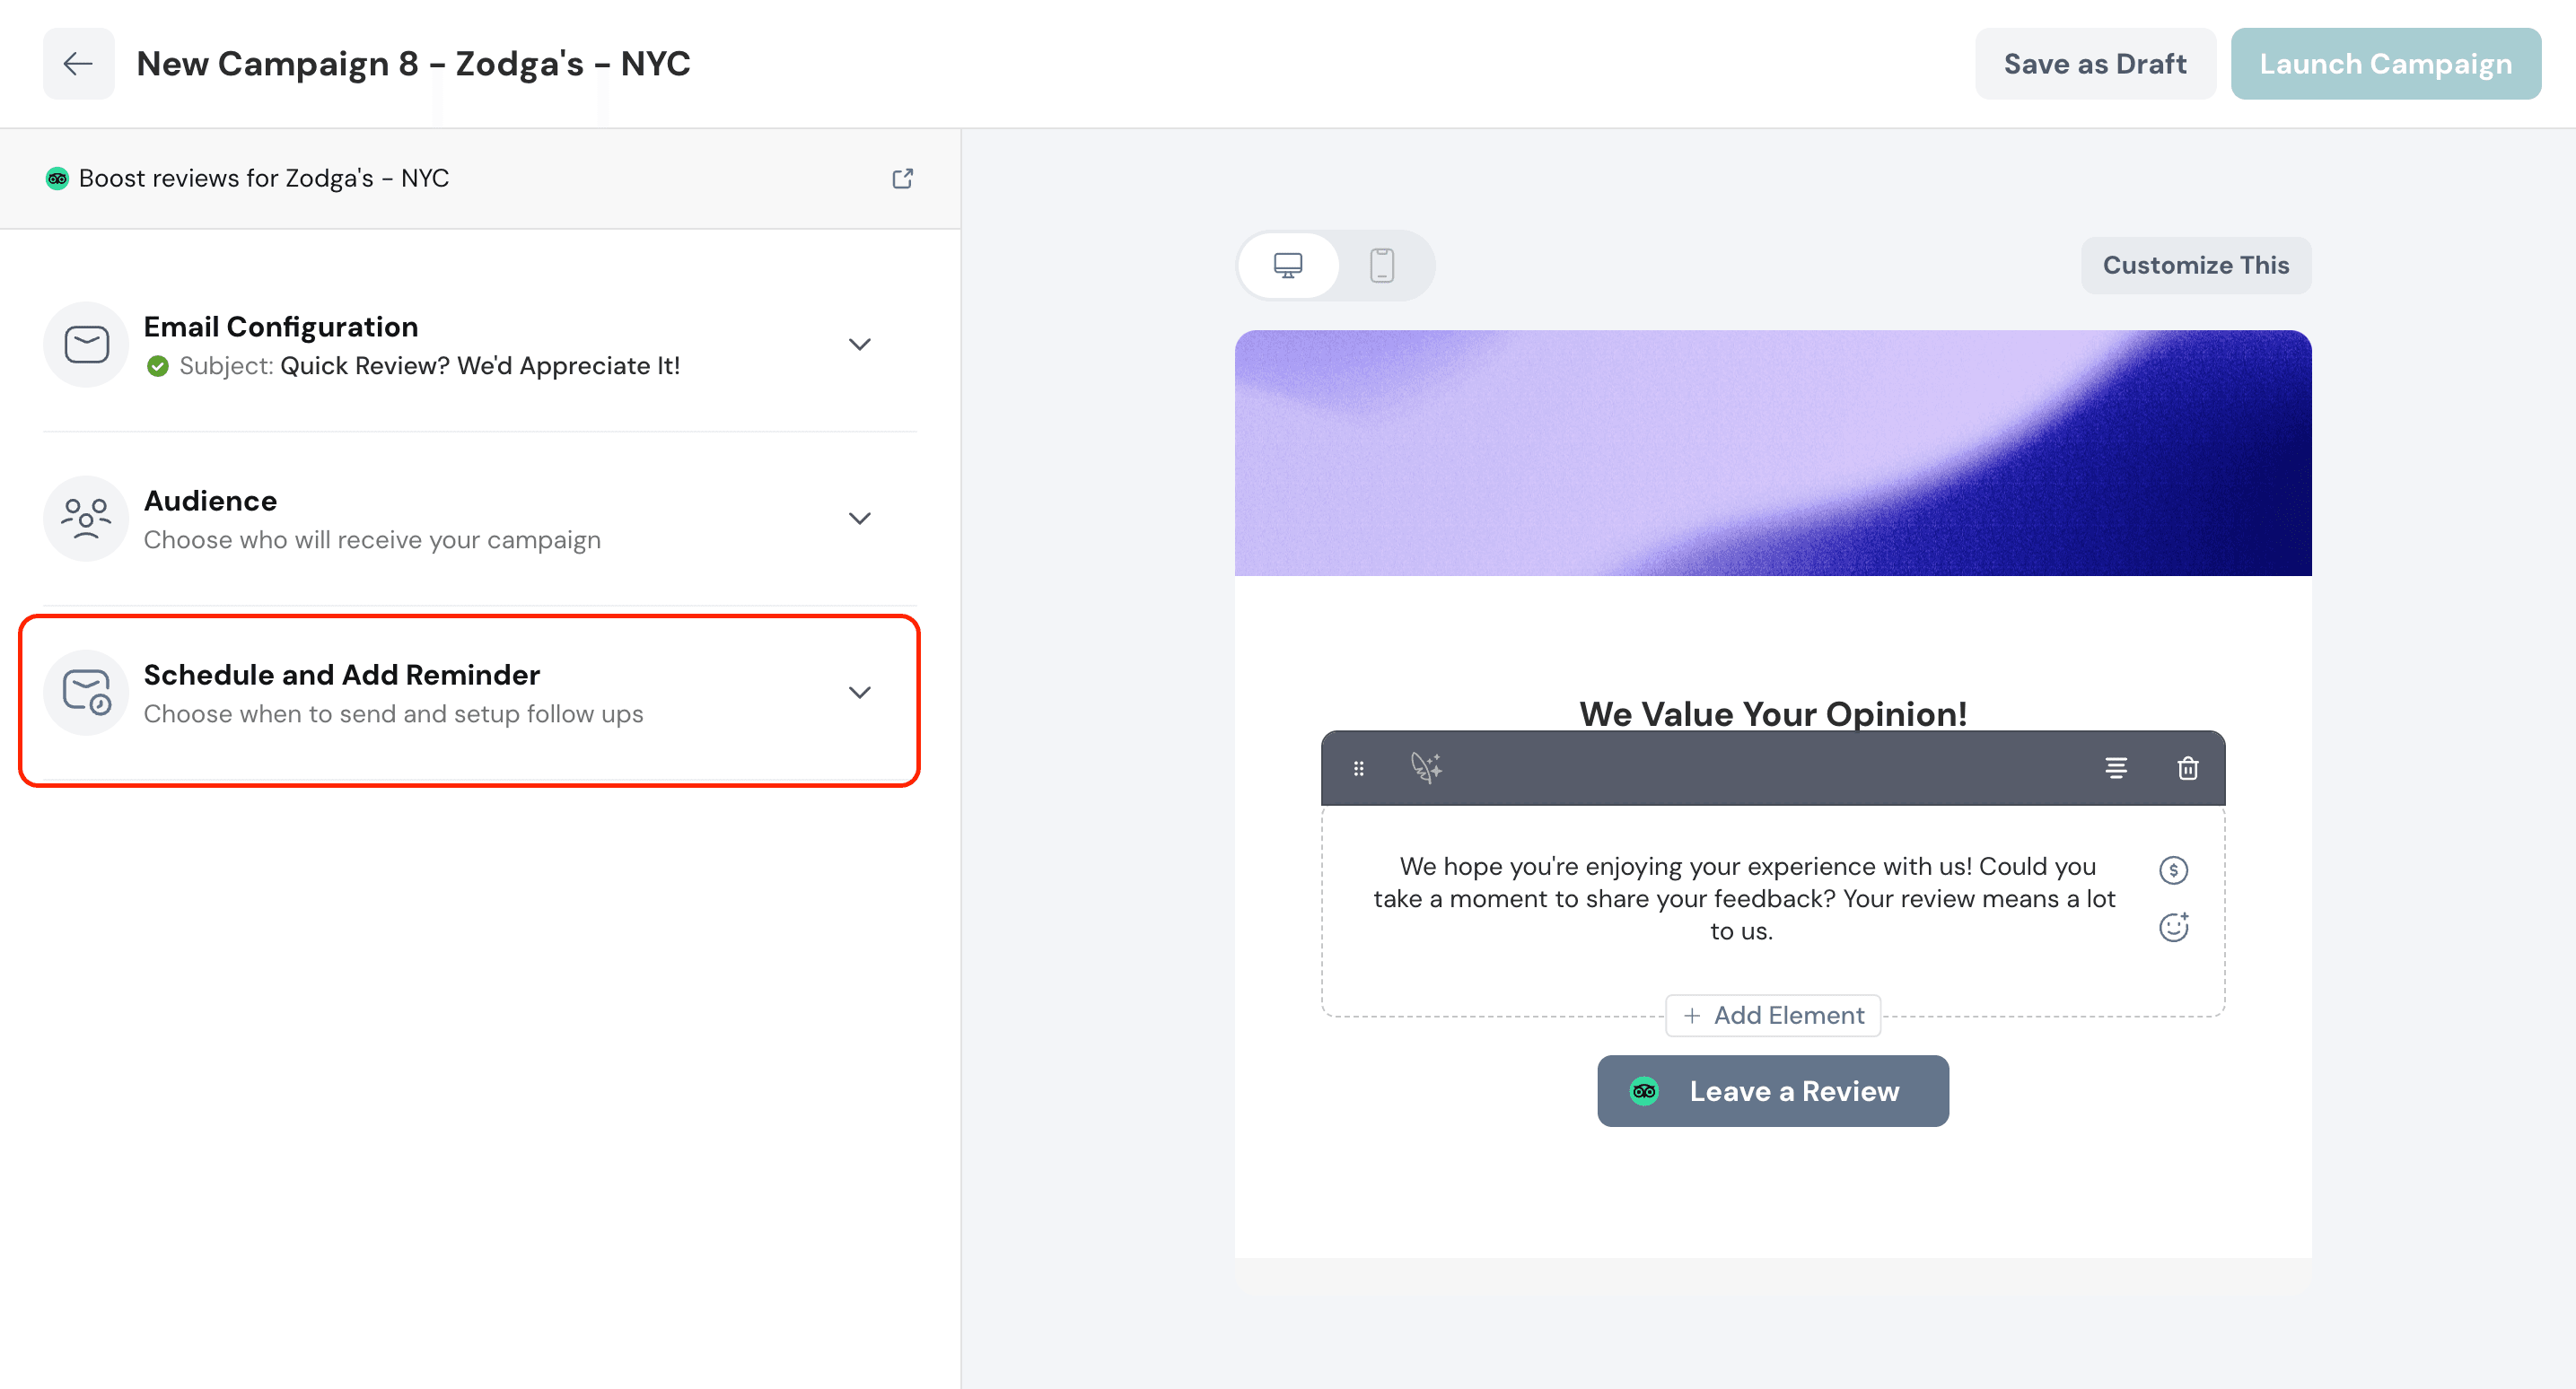
2. You can choose to send the email immediately or schedule it for later.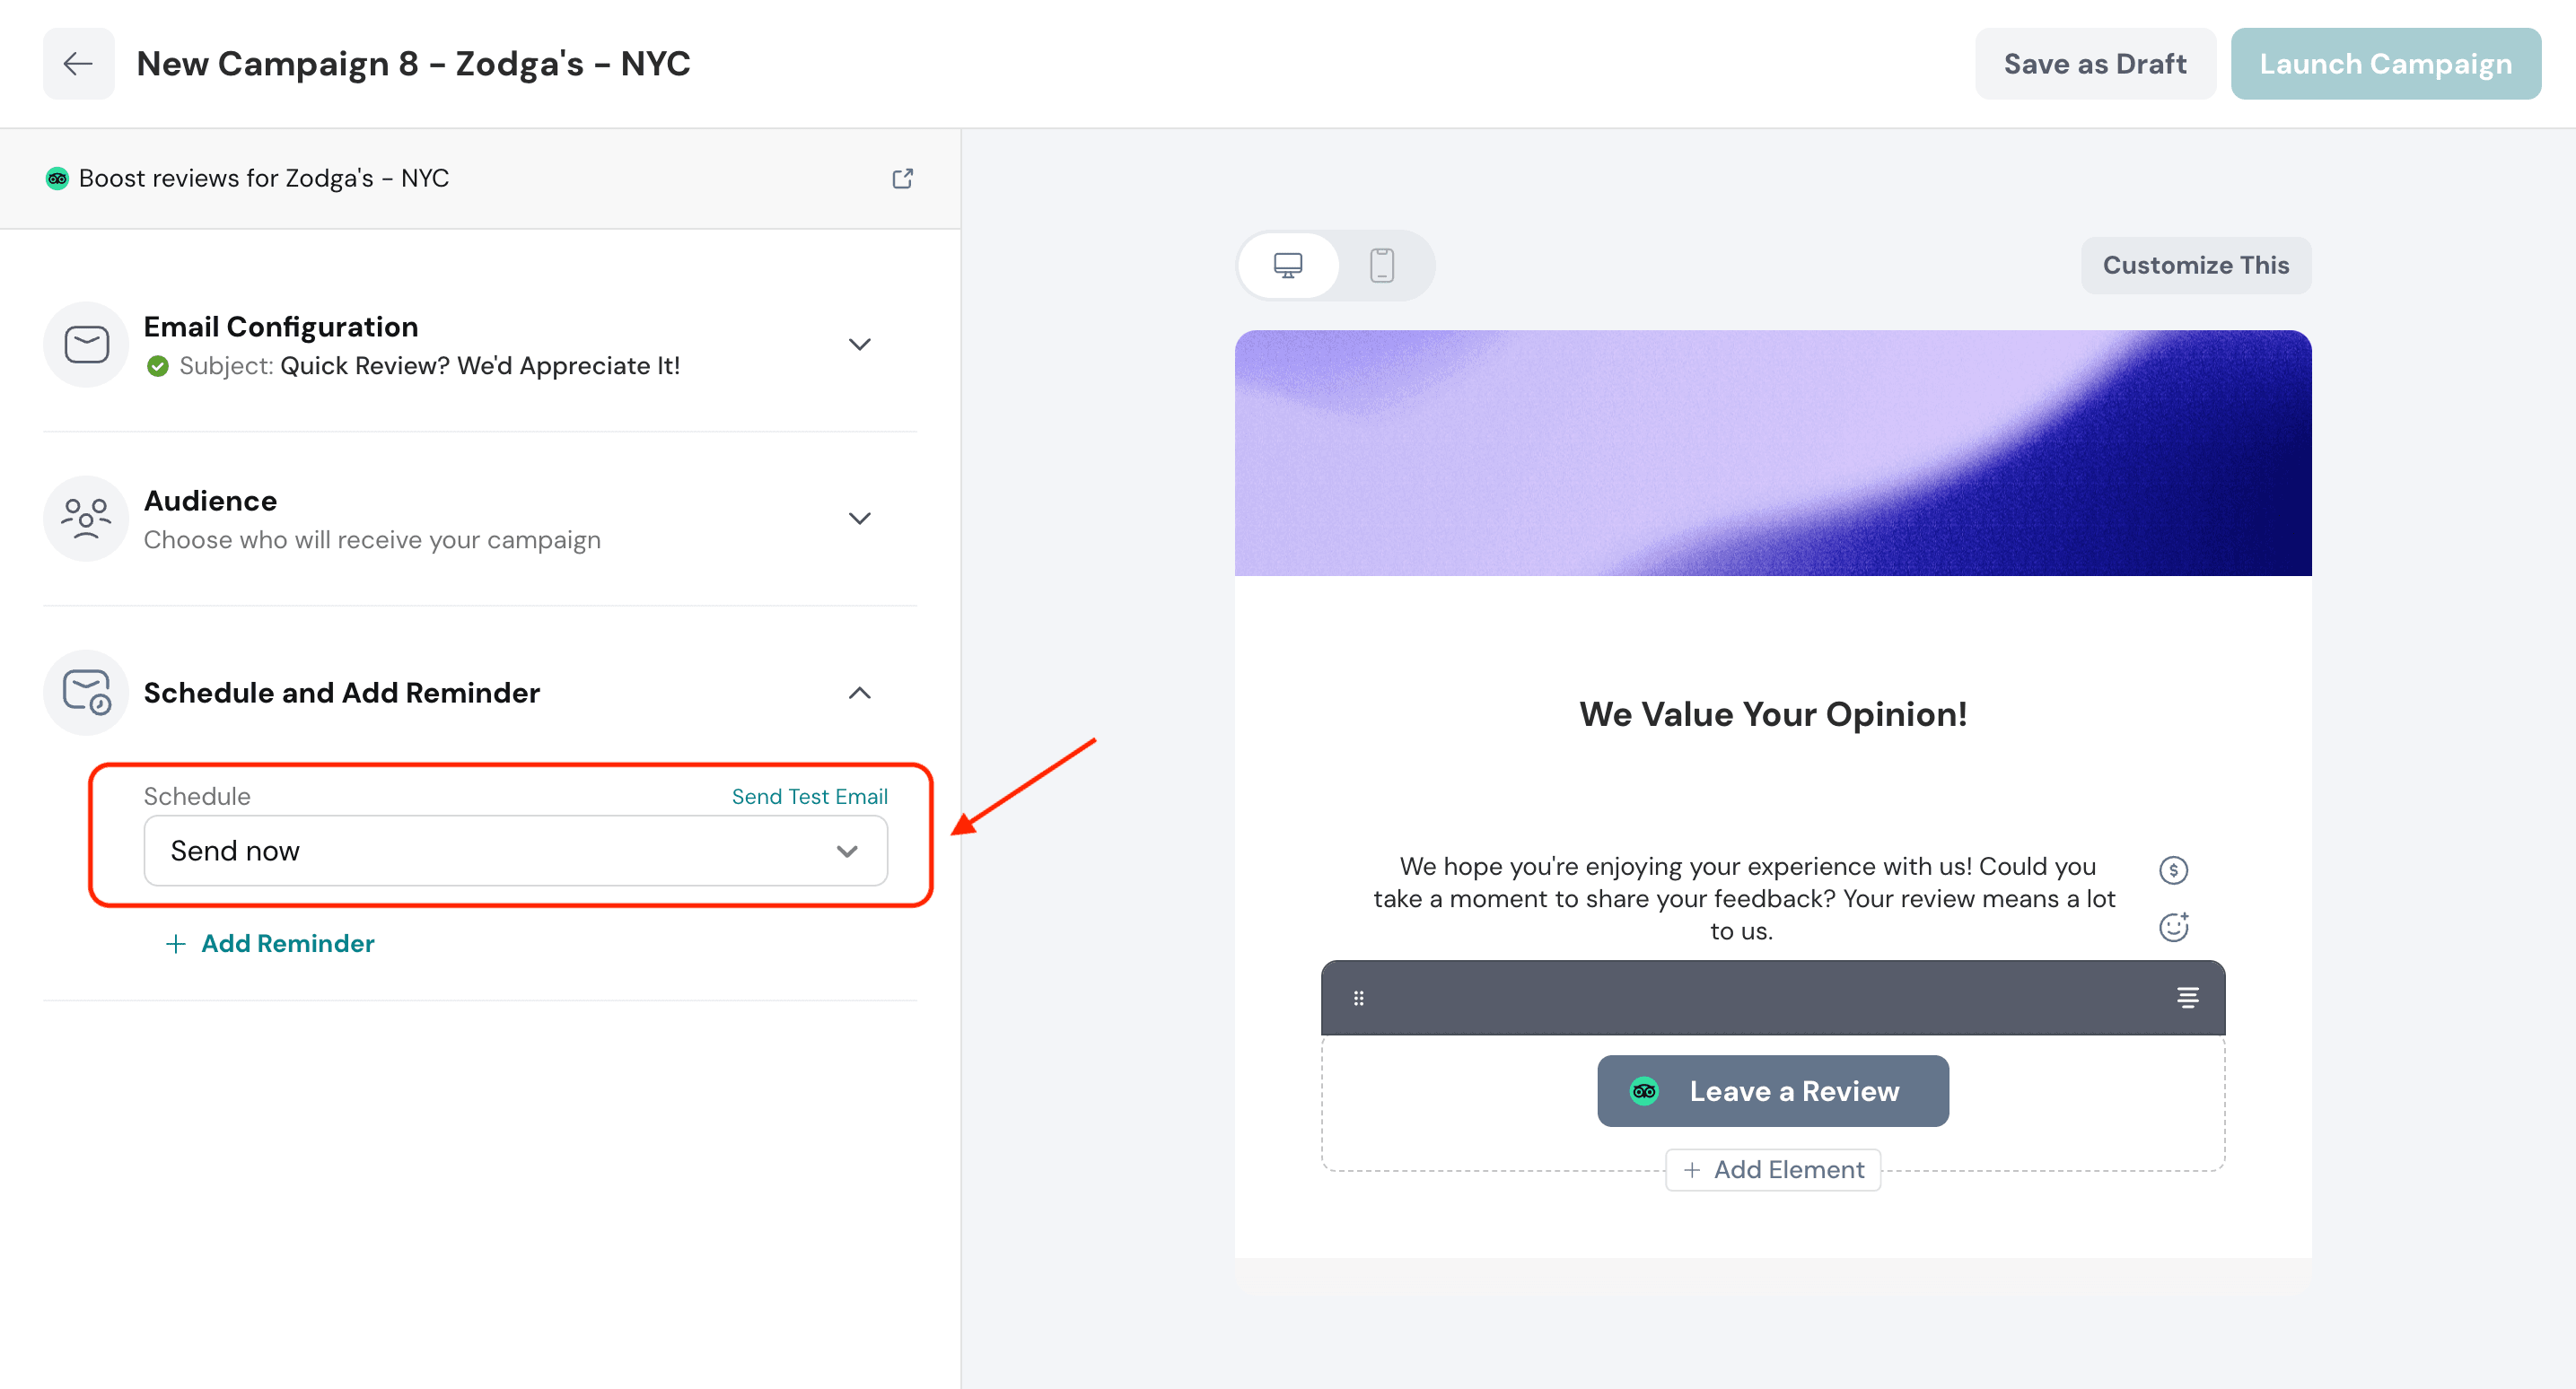
3. For scheduling the email for later, click the calendar icon, and select the date and time.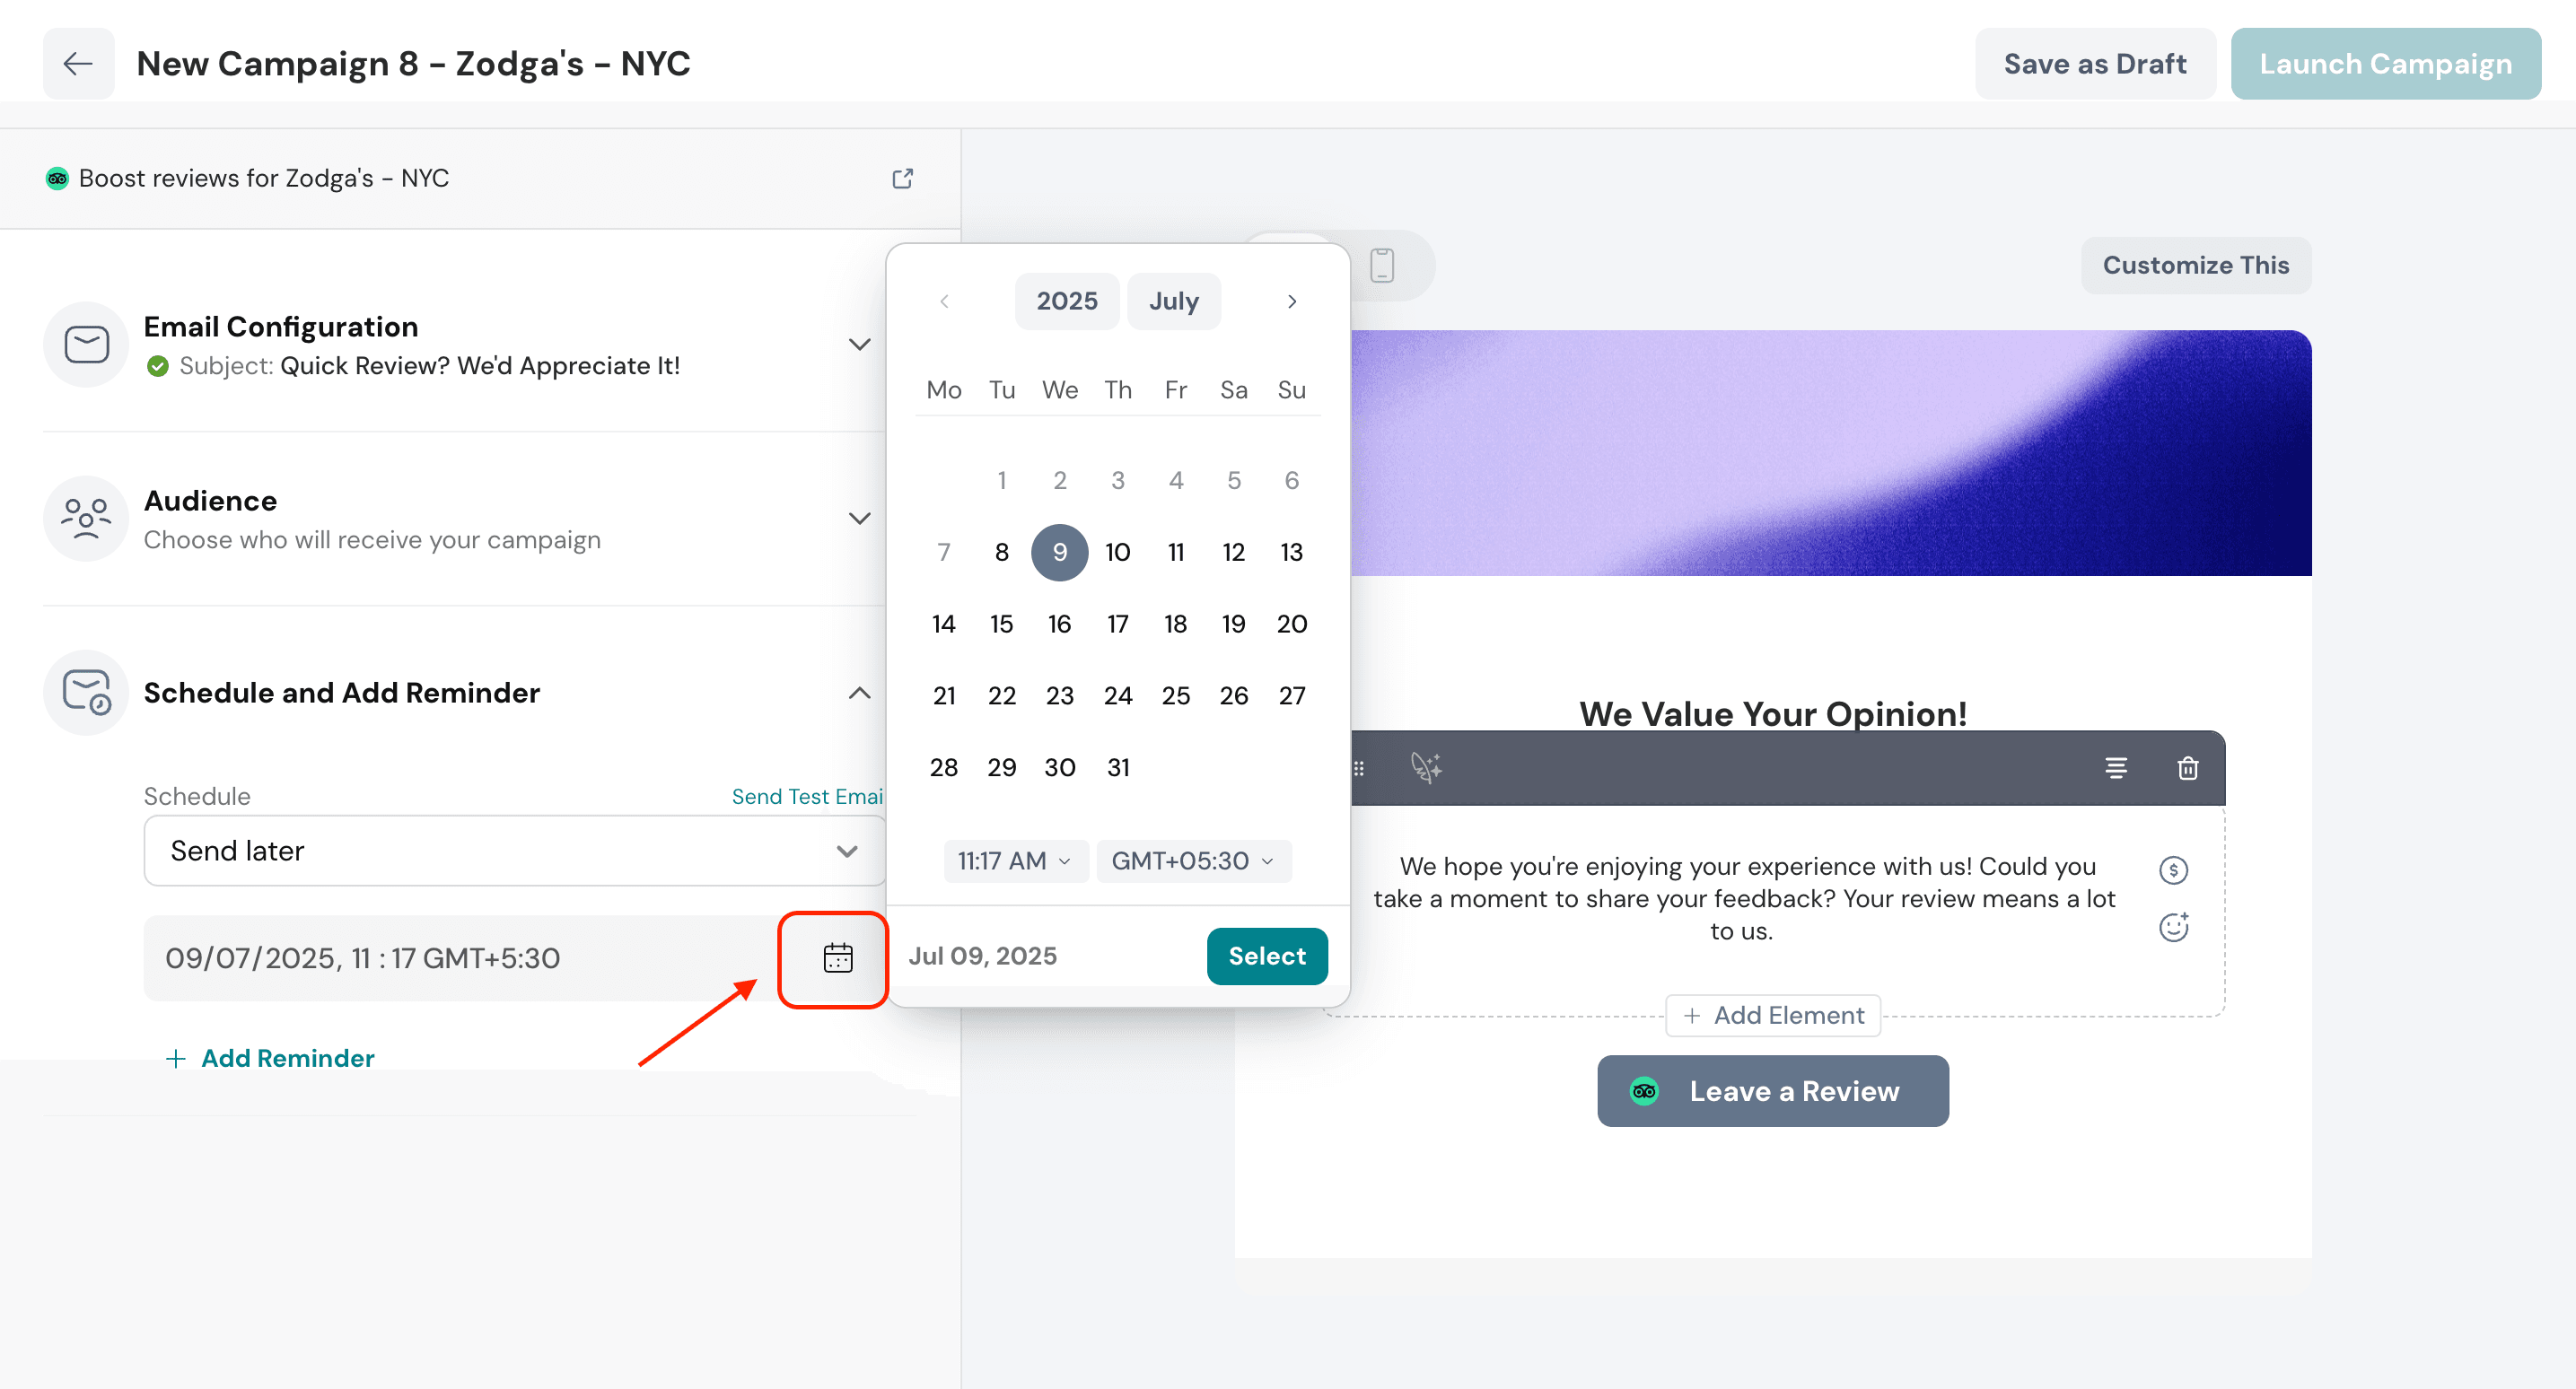
1. After setting up the email, click Add Reminder to remind the recipient to drop a review if they haven’t responded to the initial email.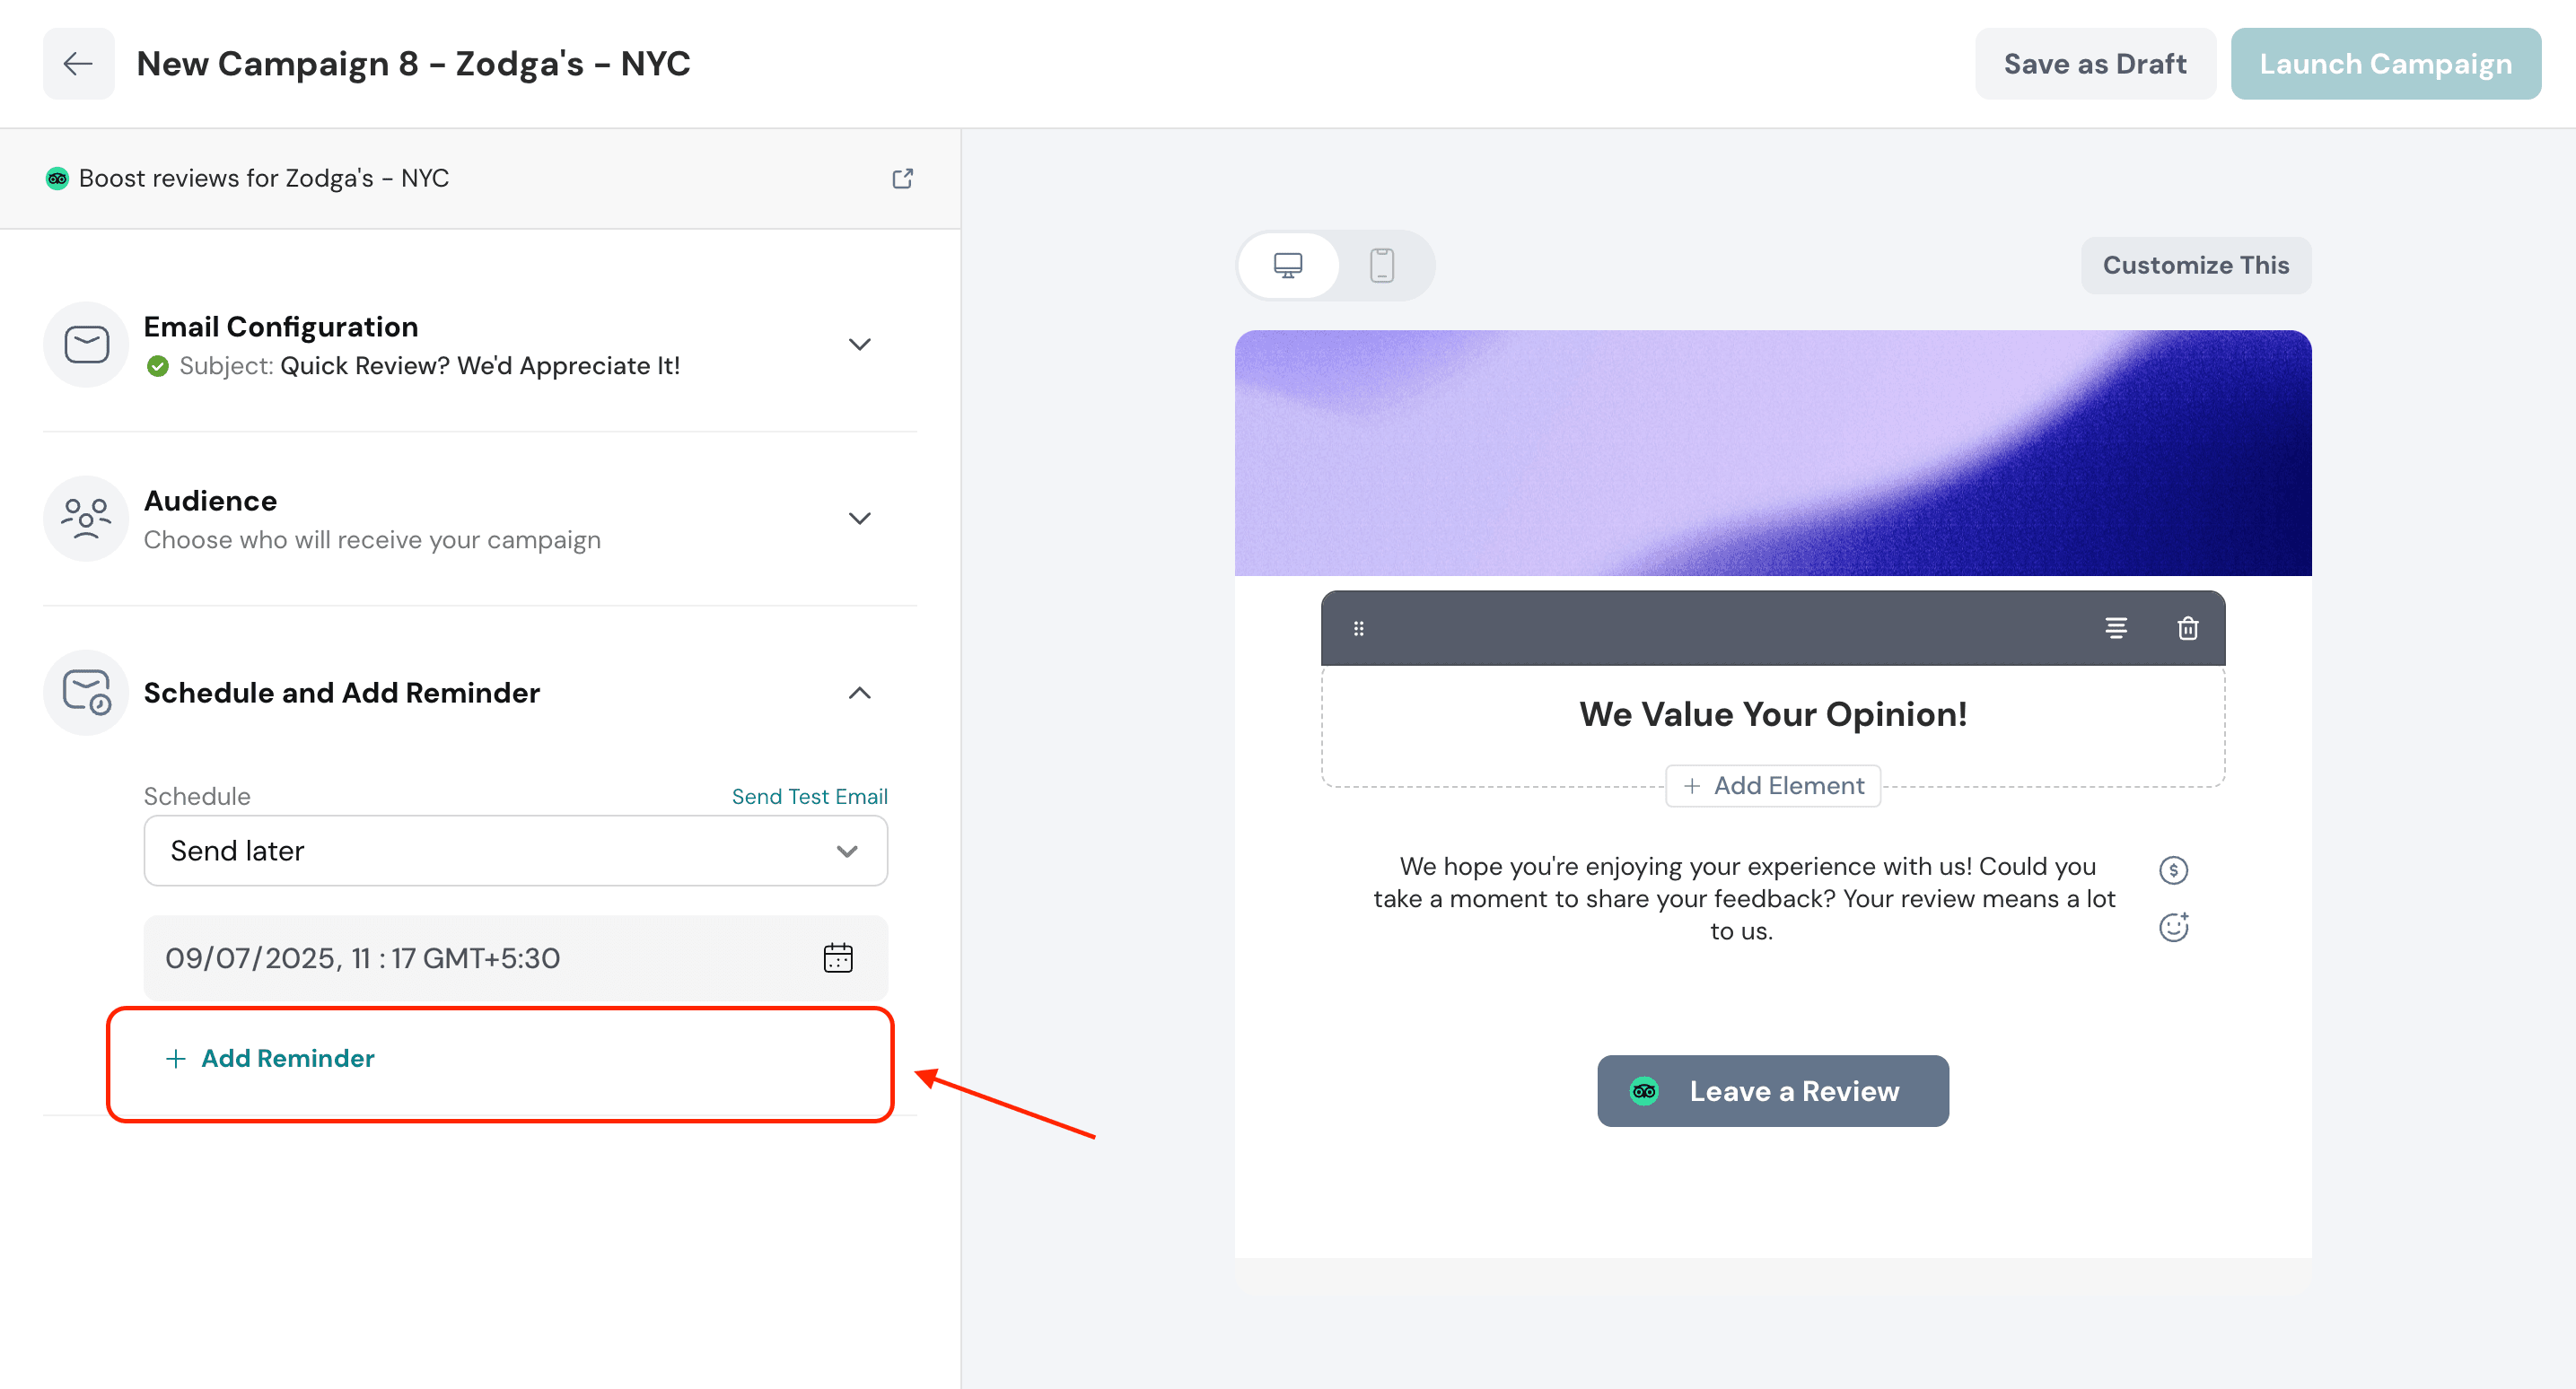
2. Configure the reminder email similar to how it was done for the initial review request email.
3. Now, select the condition based on which the reminder email should be triggered.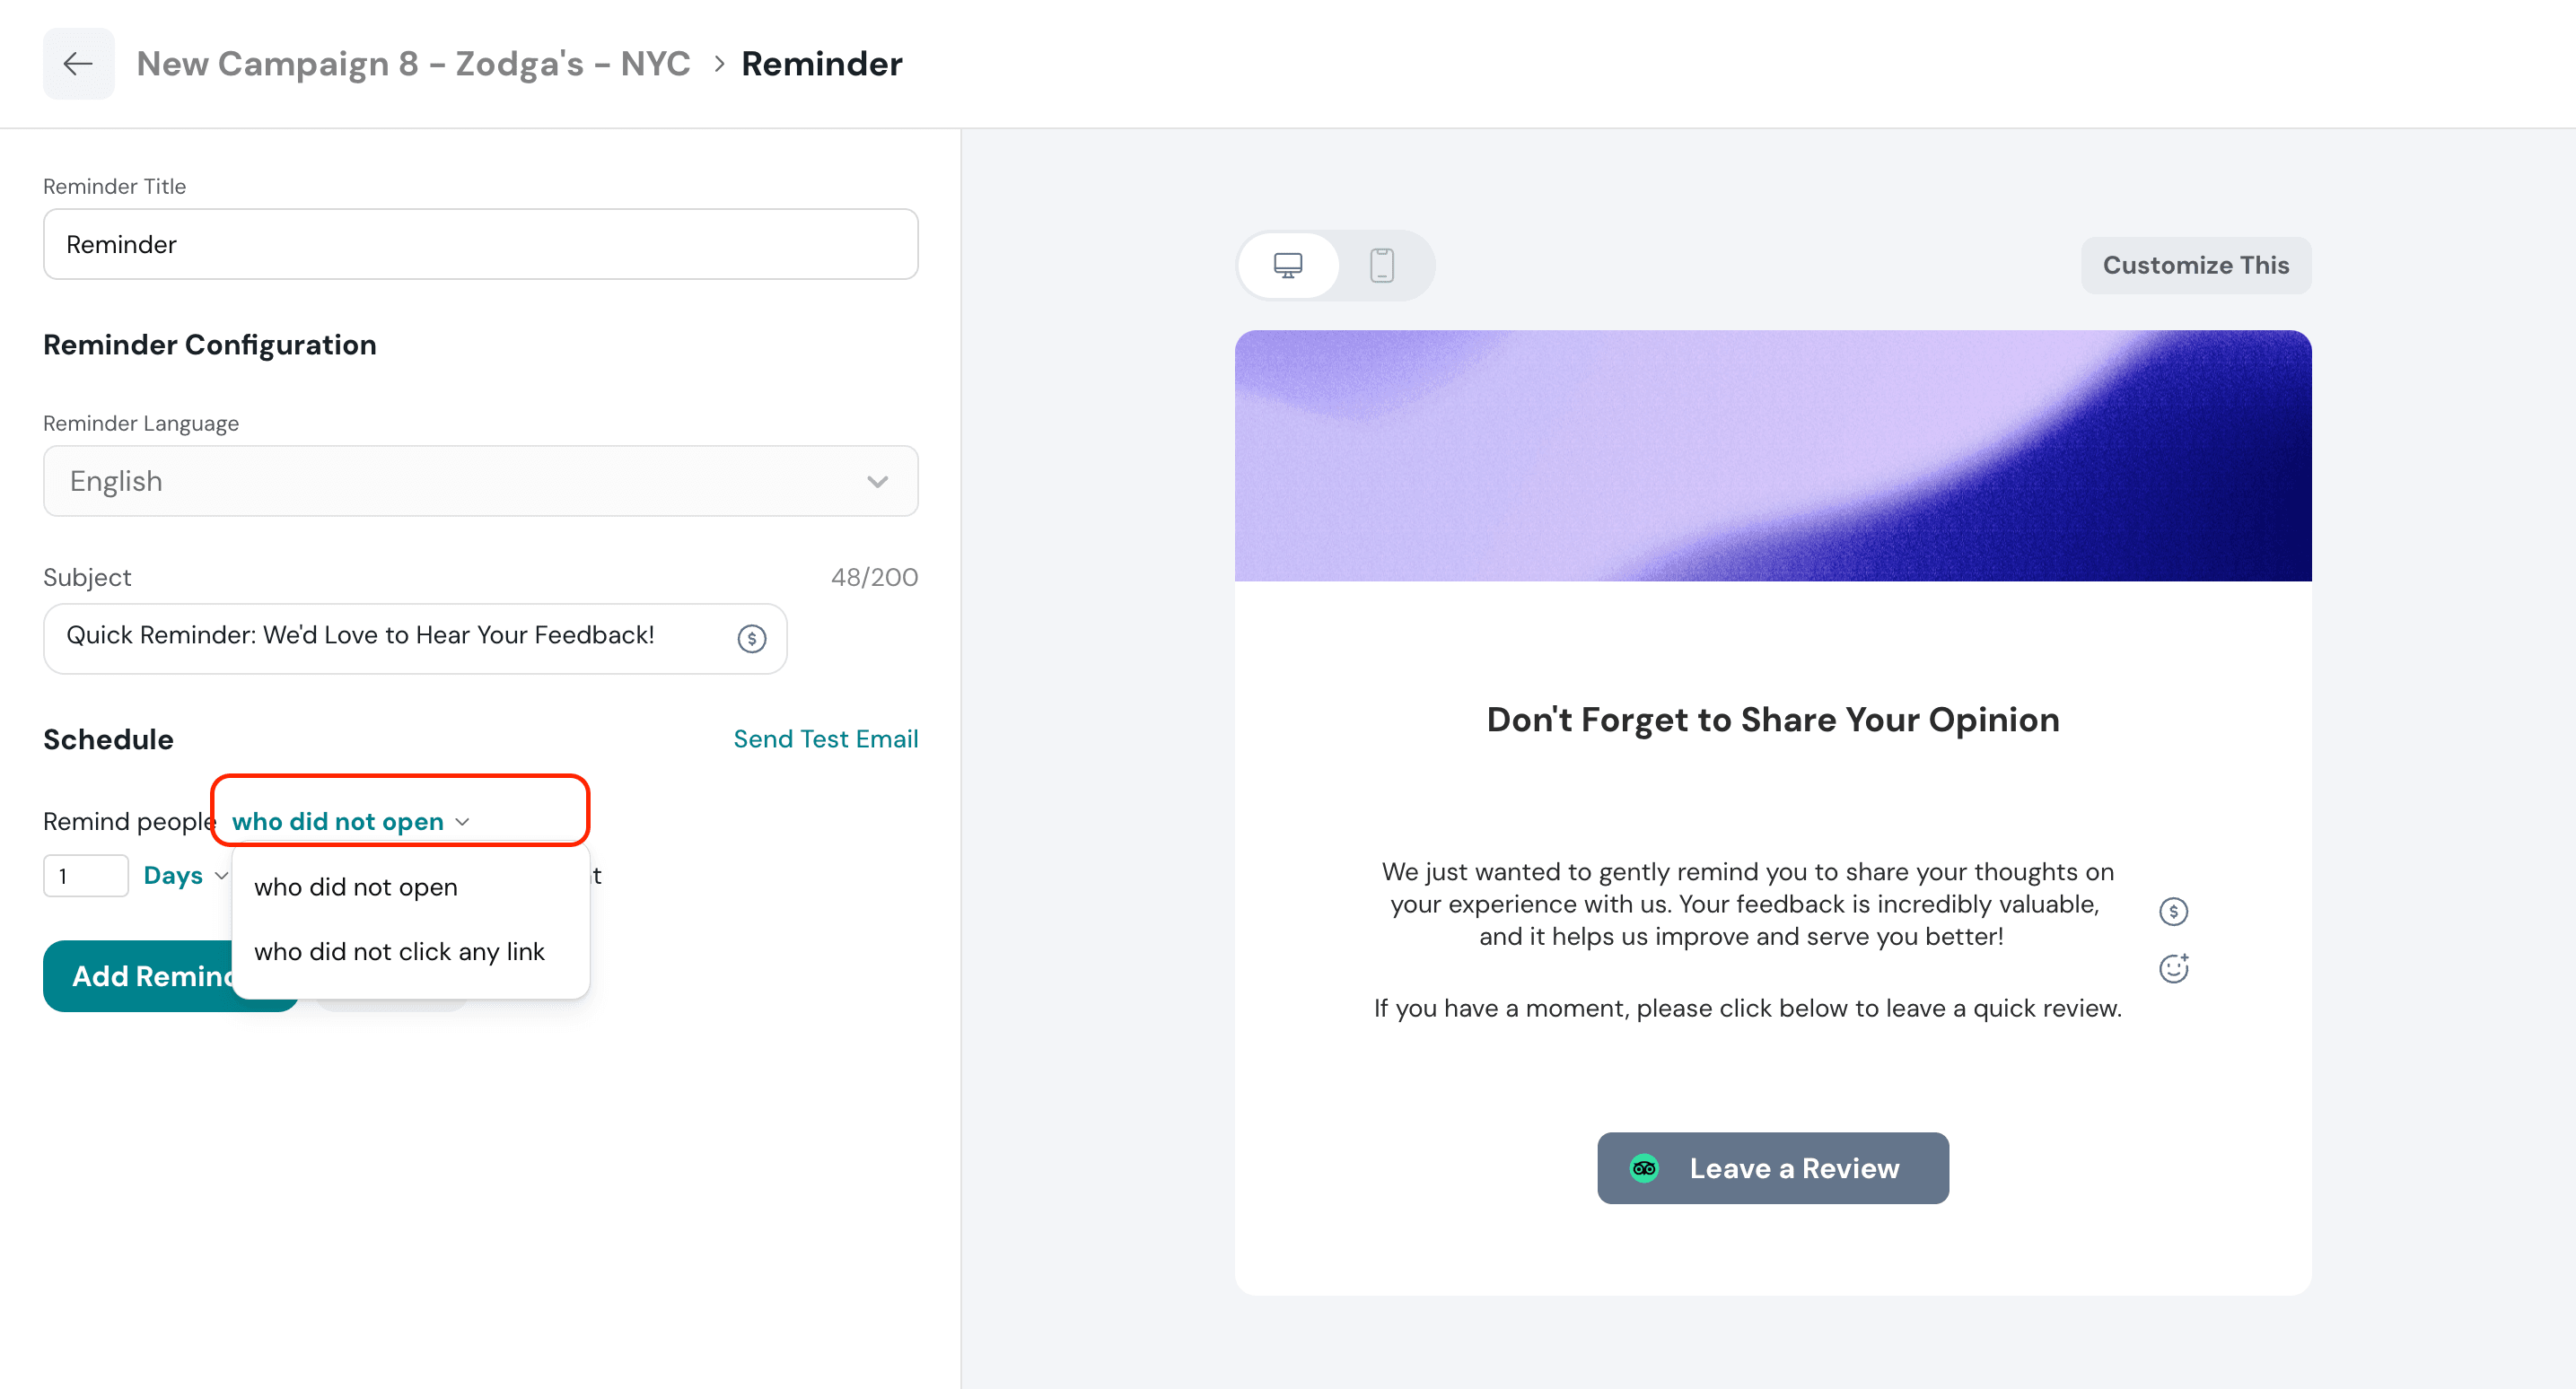
4. Configure the time gap after which the reminder email should trigger.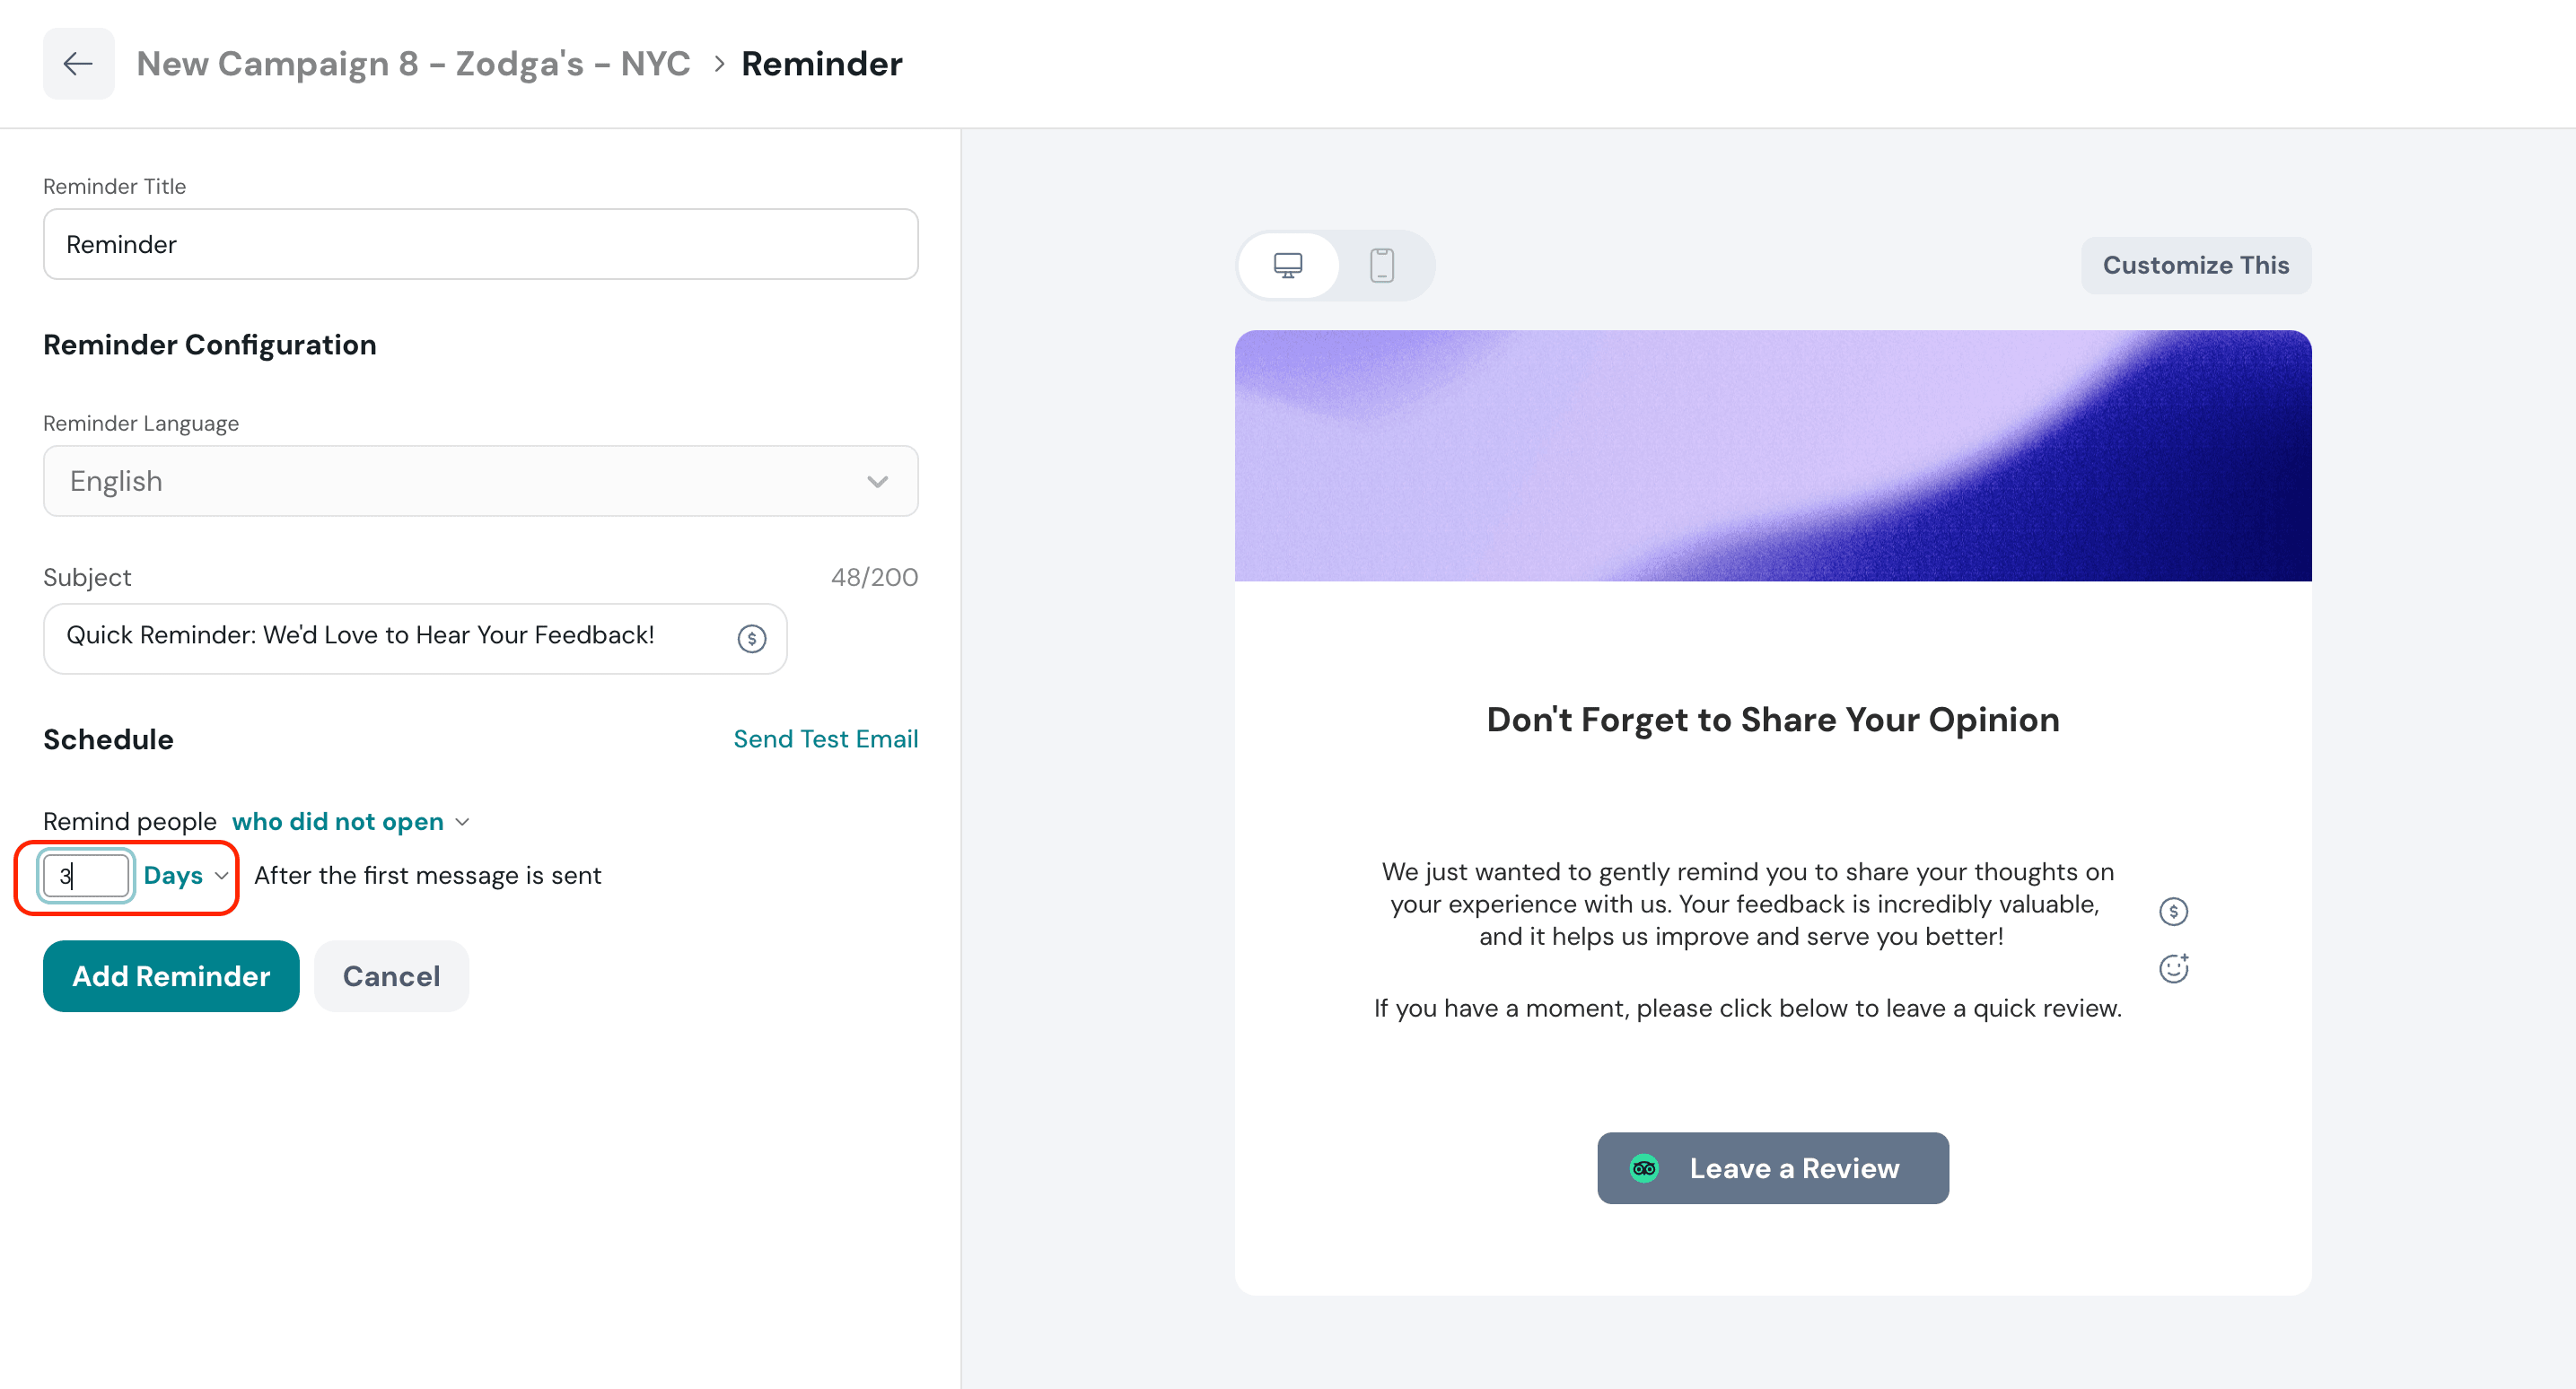
5. Once done, click Add Reminder.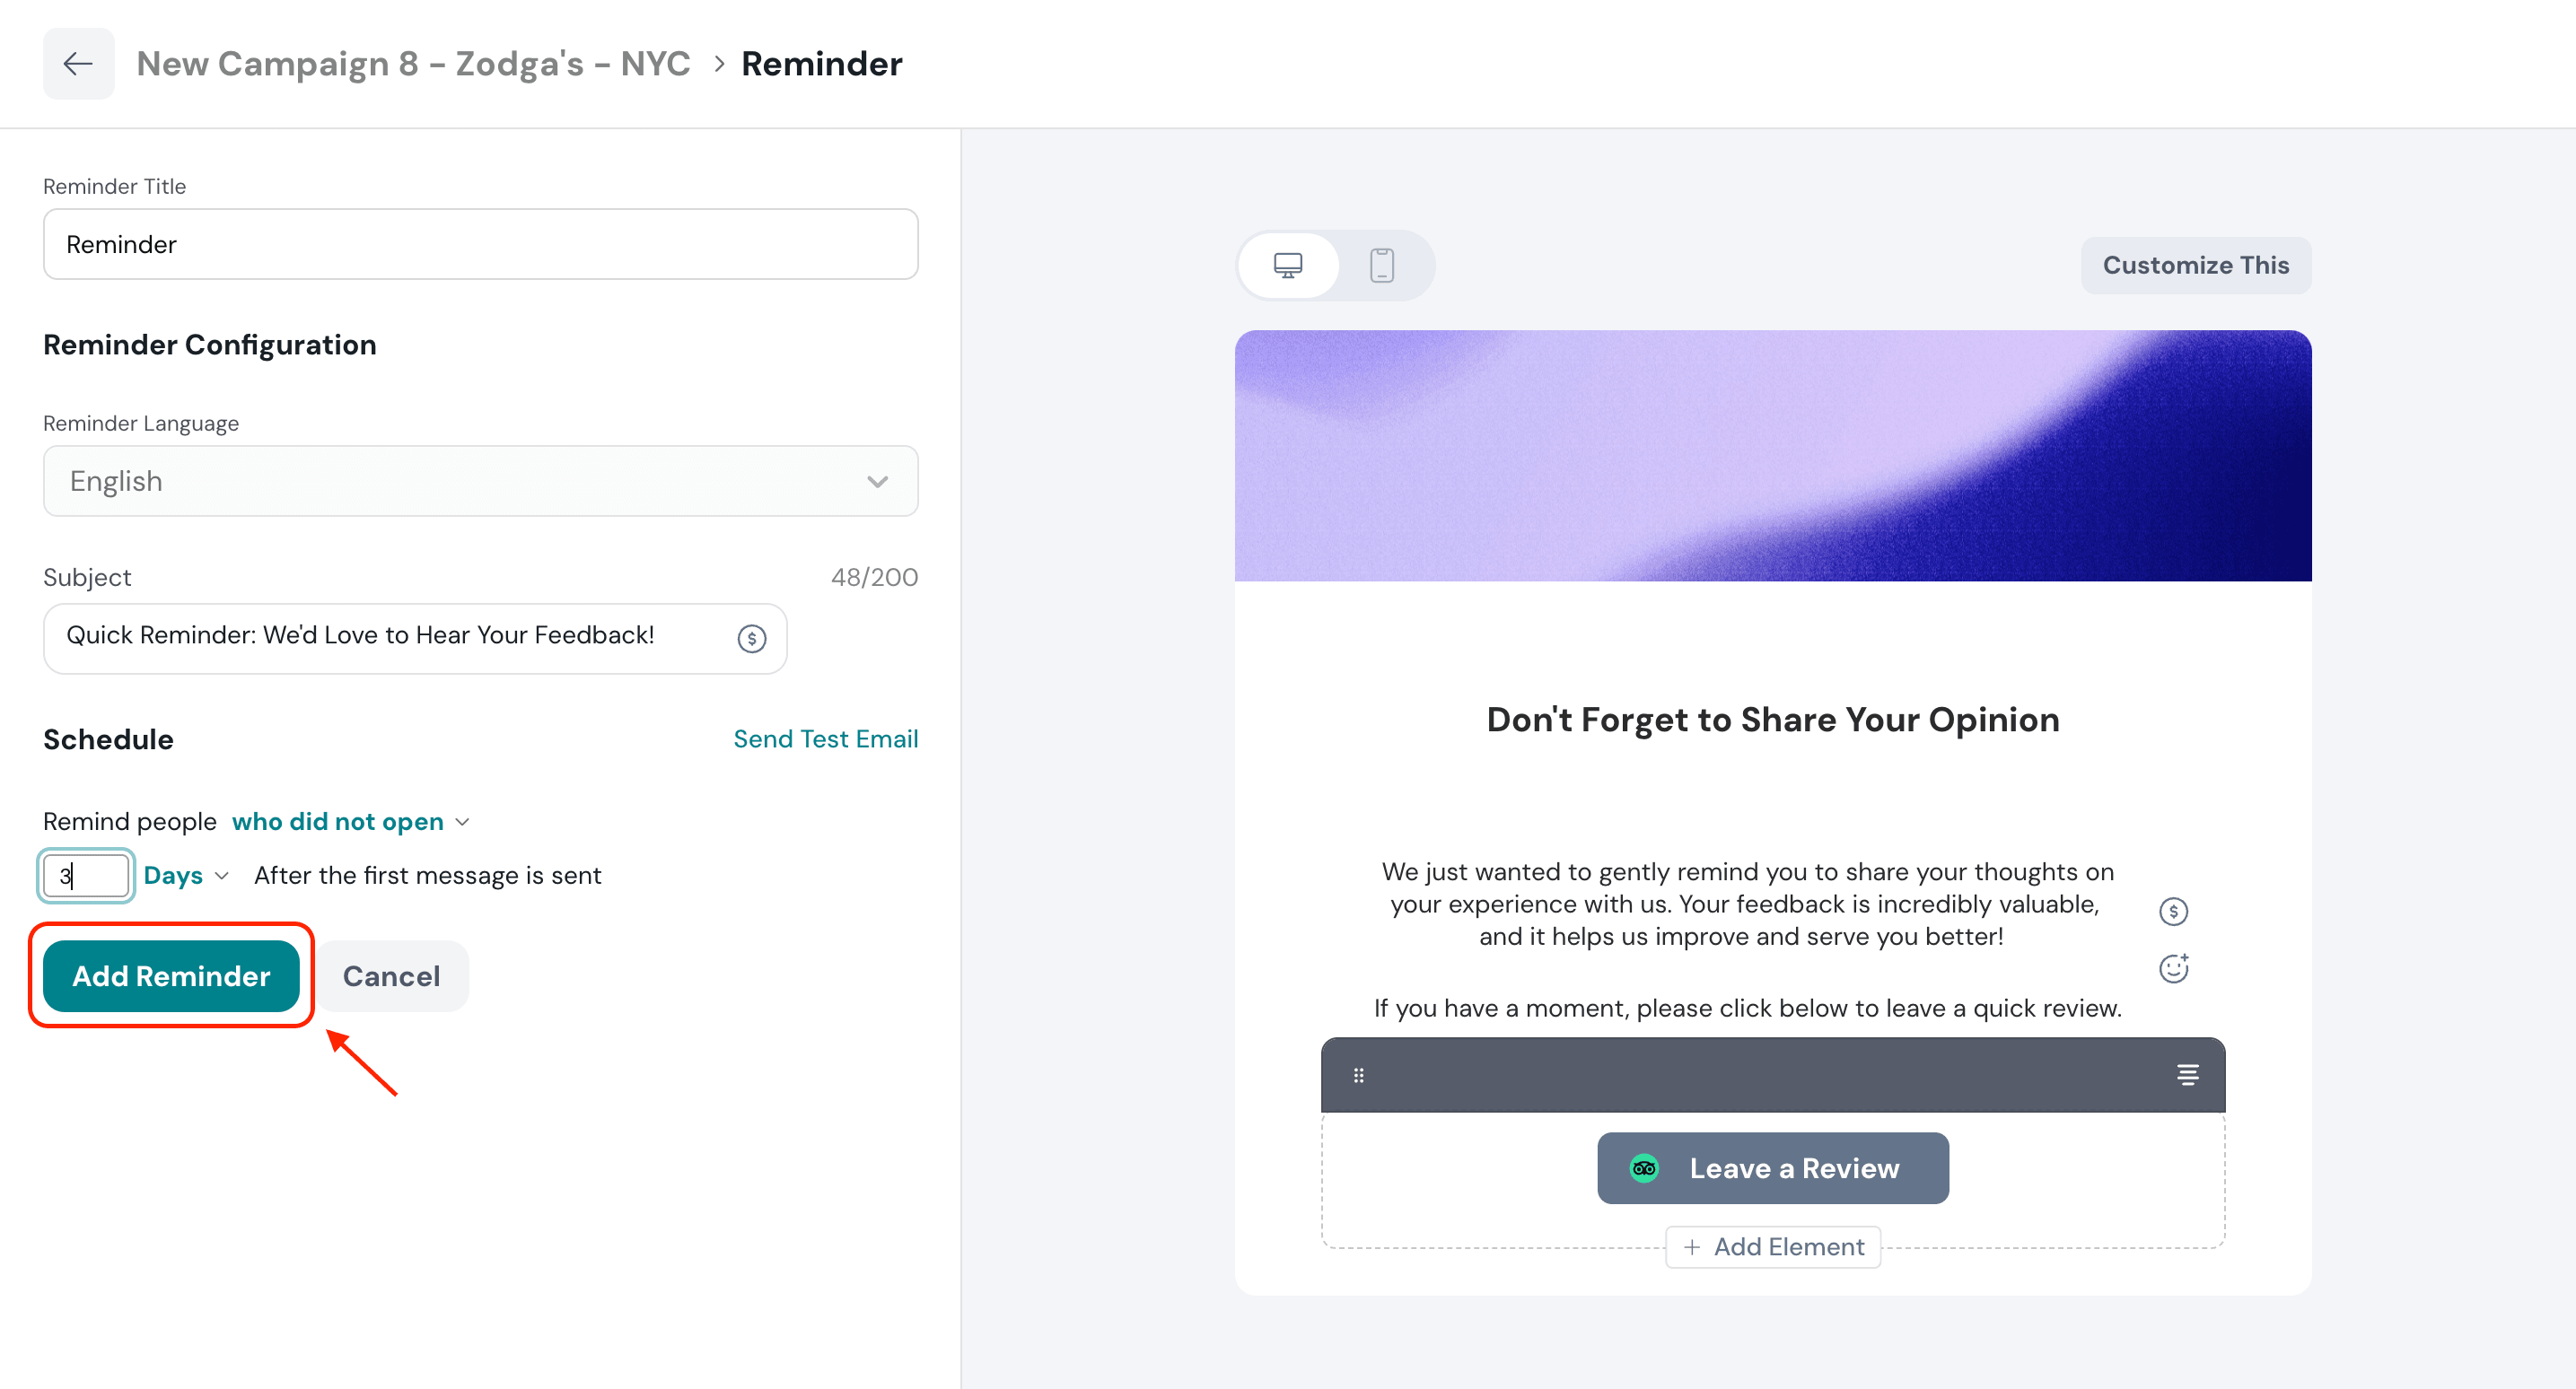
You can choose to add multiple reminder emails for the review request email.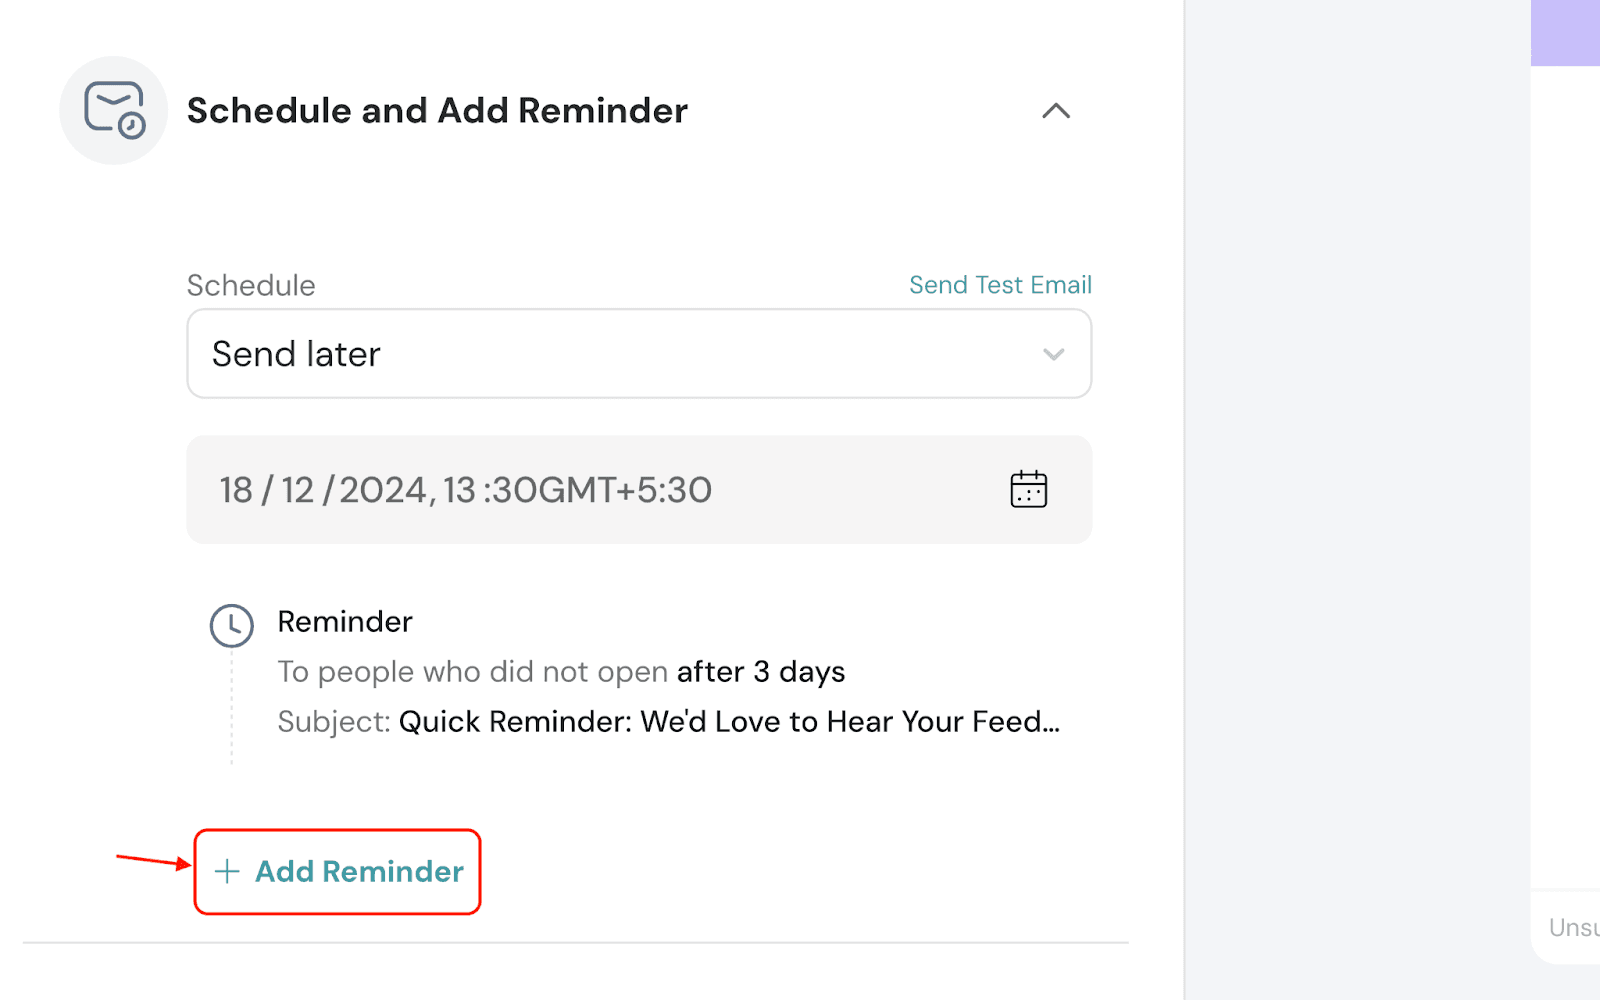
Click Launch Campaign to get the email campaign live.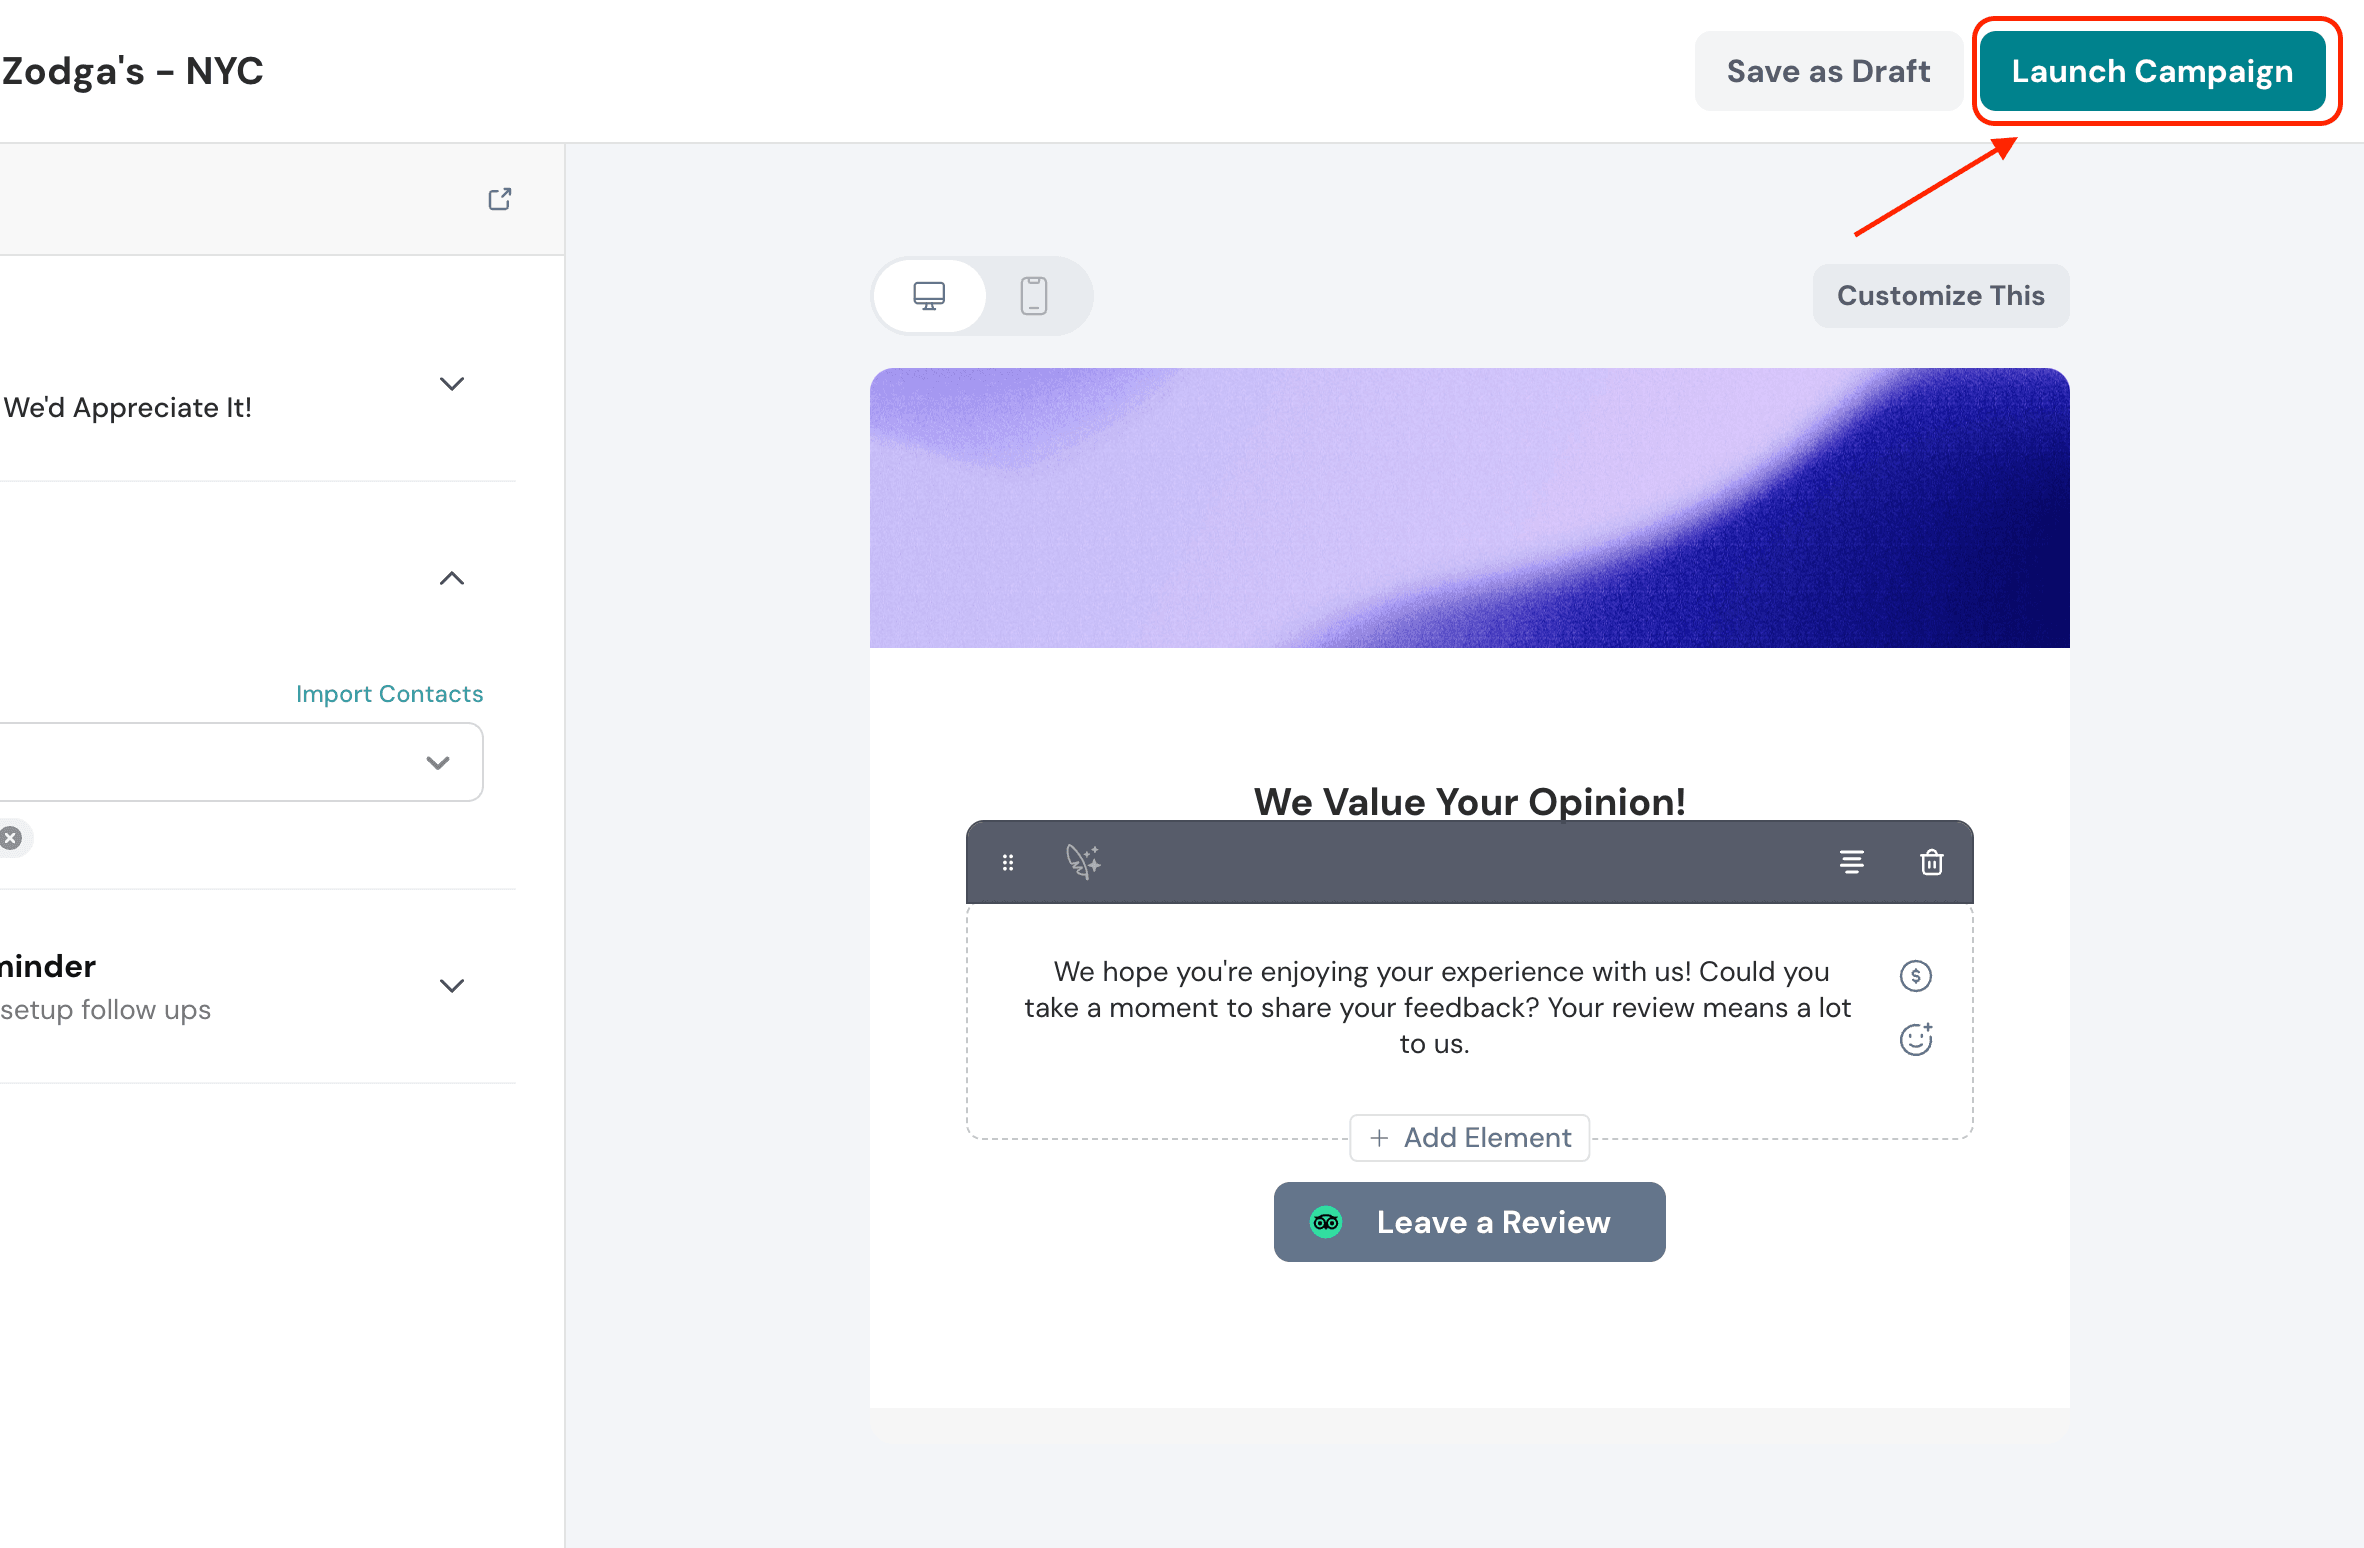
You’ve launched the review request email successfully!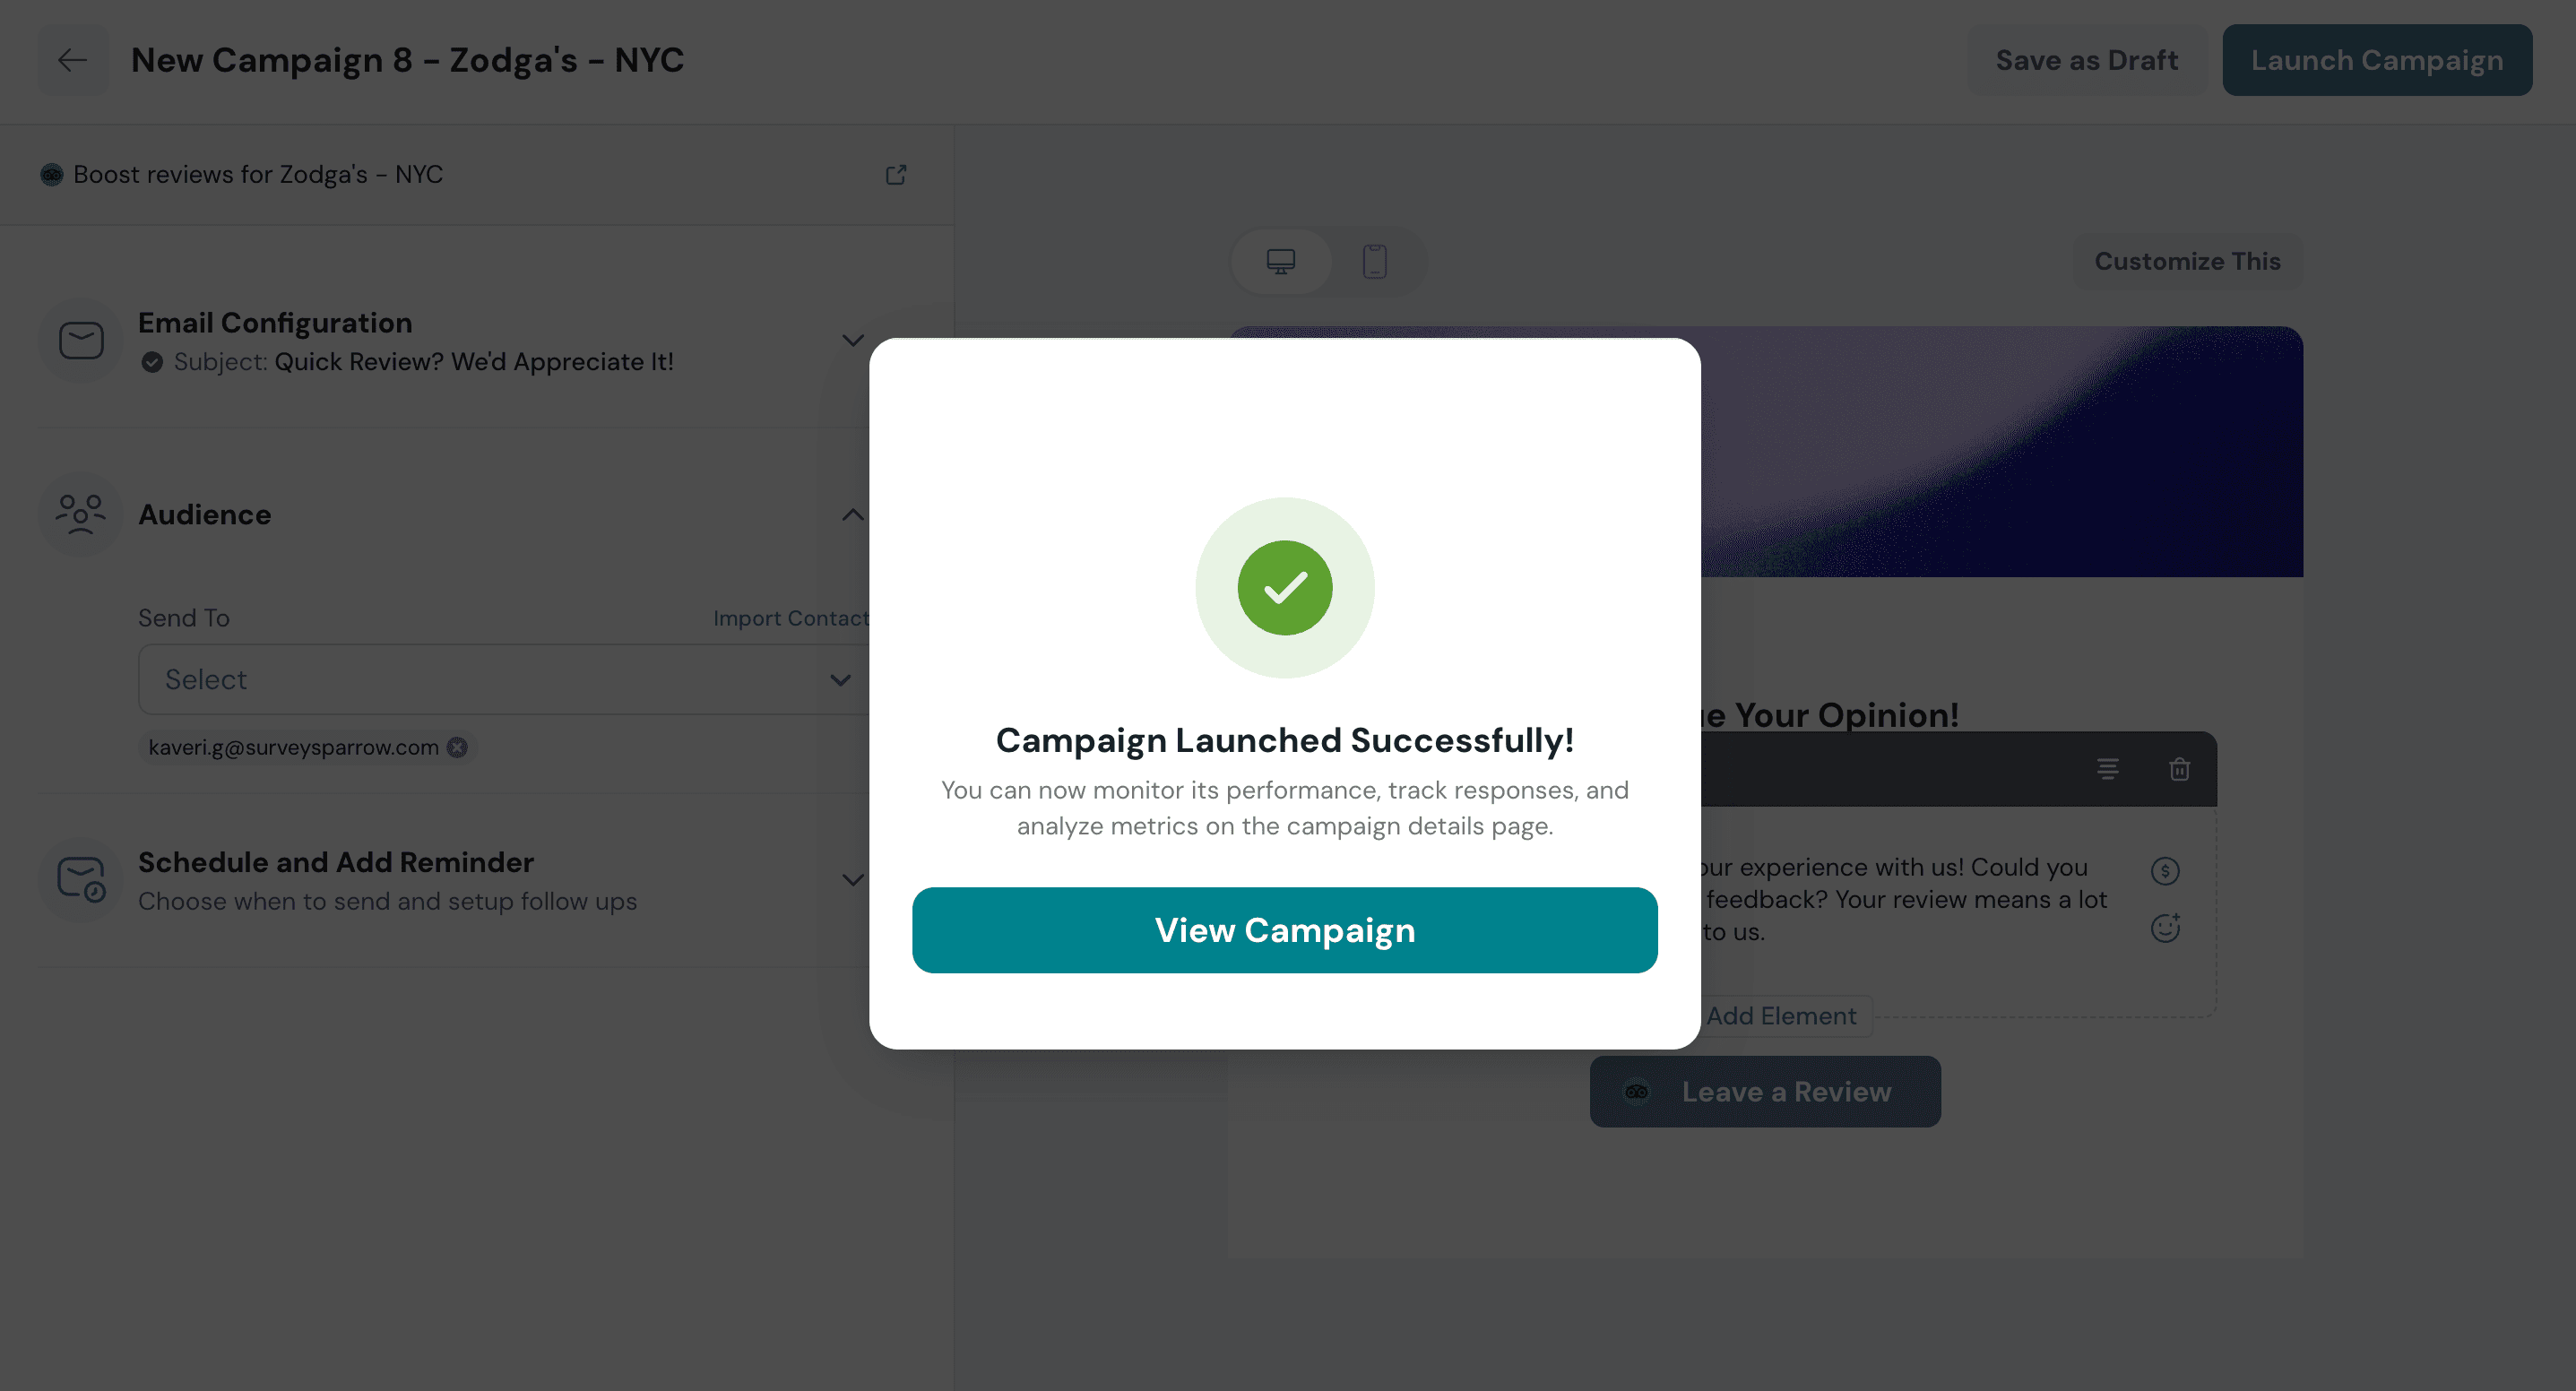
Under the Boost module of Reputation, navigate to the All Campaigns section to view your campaign details.
Click the 3-dot icon to edit, pause, clone, or delete the campaign by choosing the corresponding option.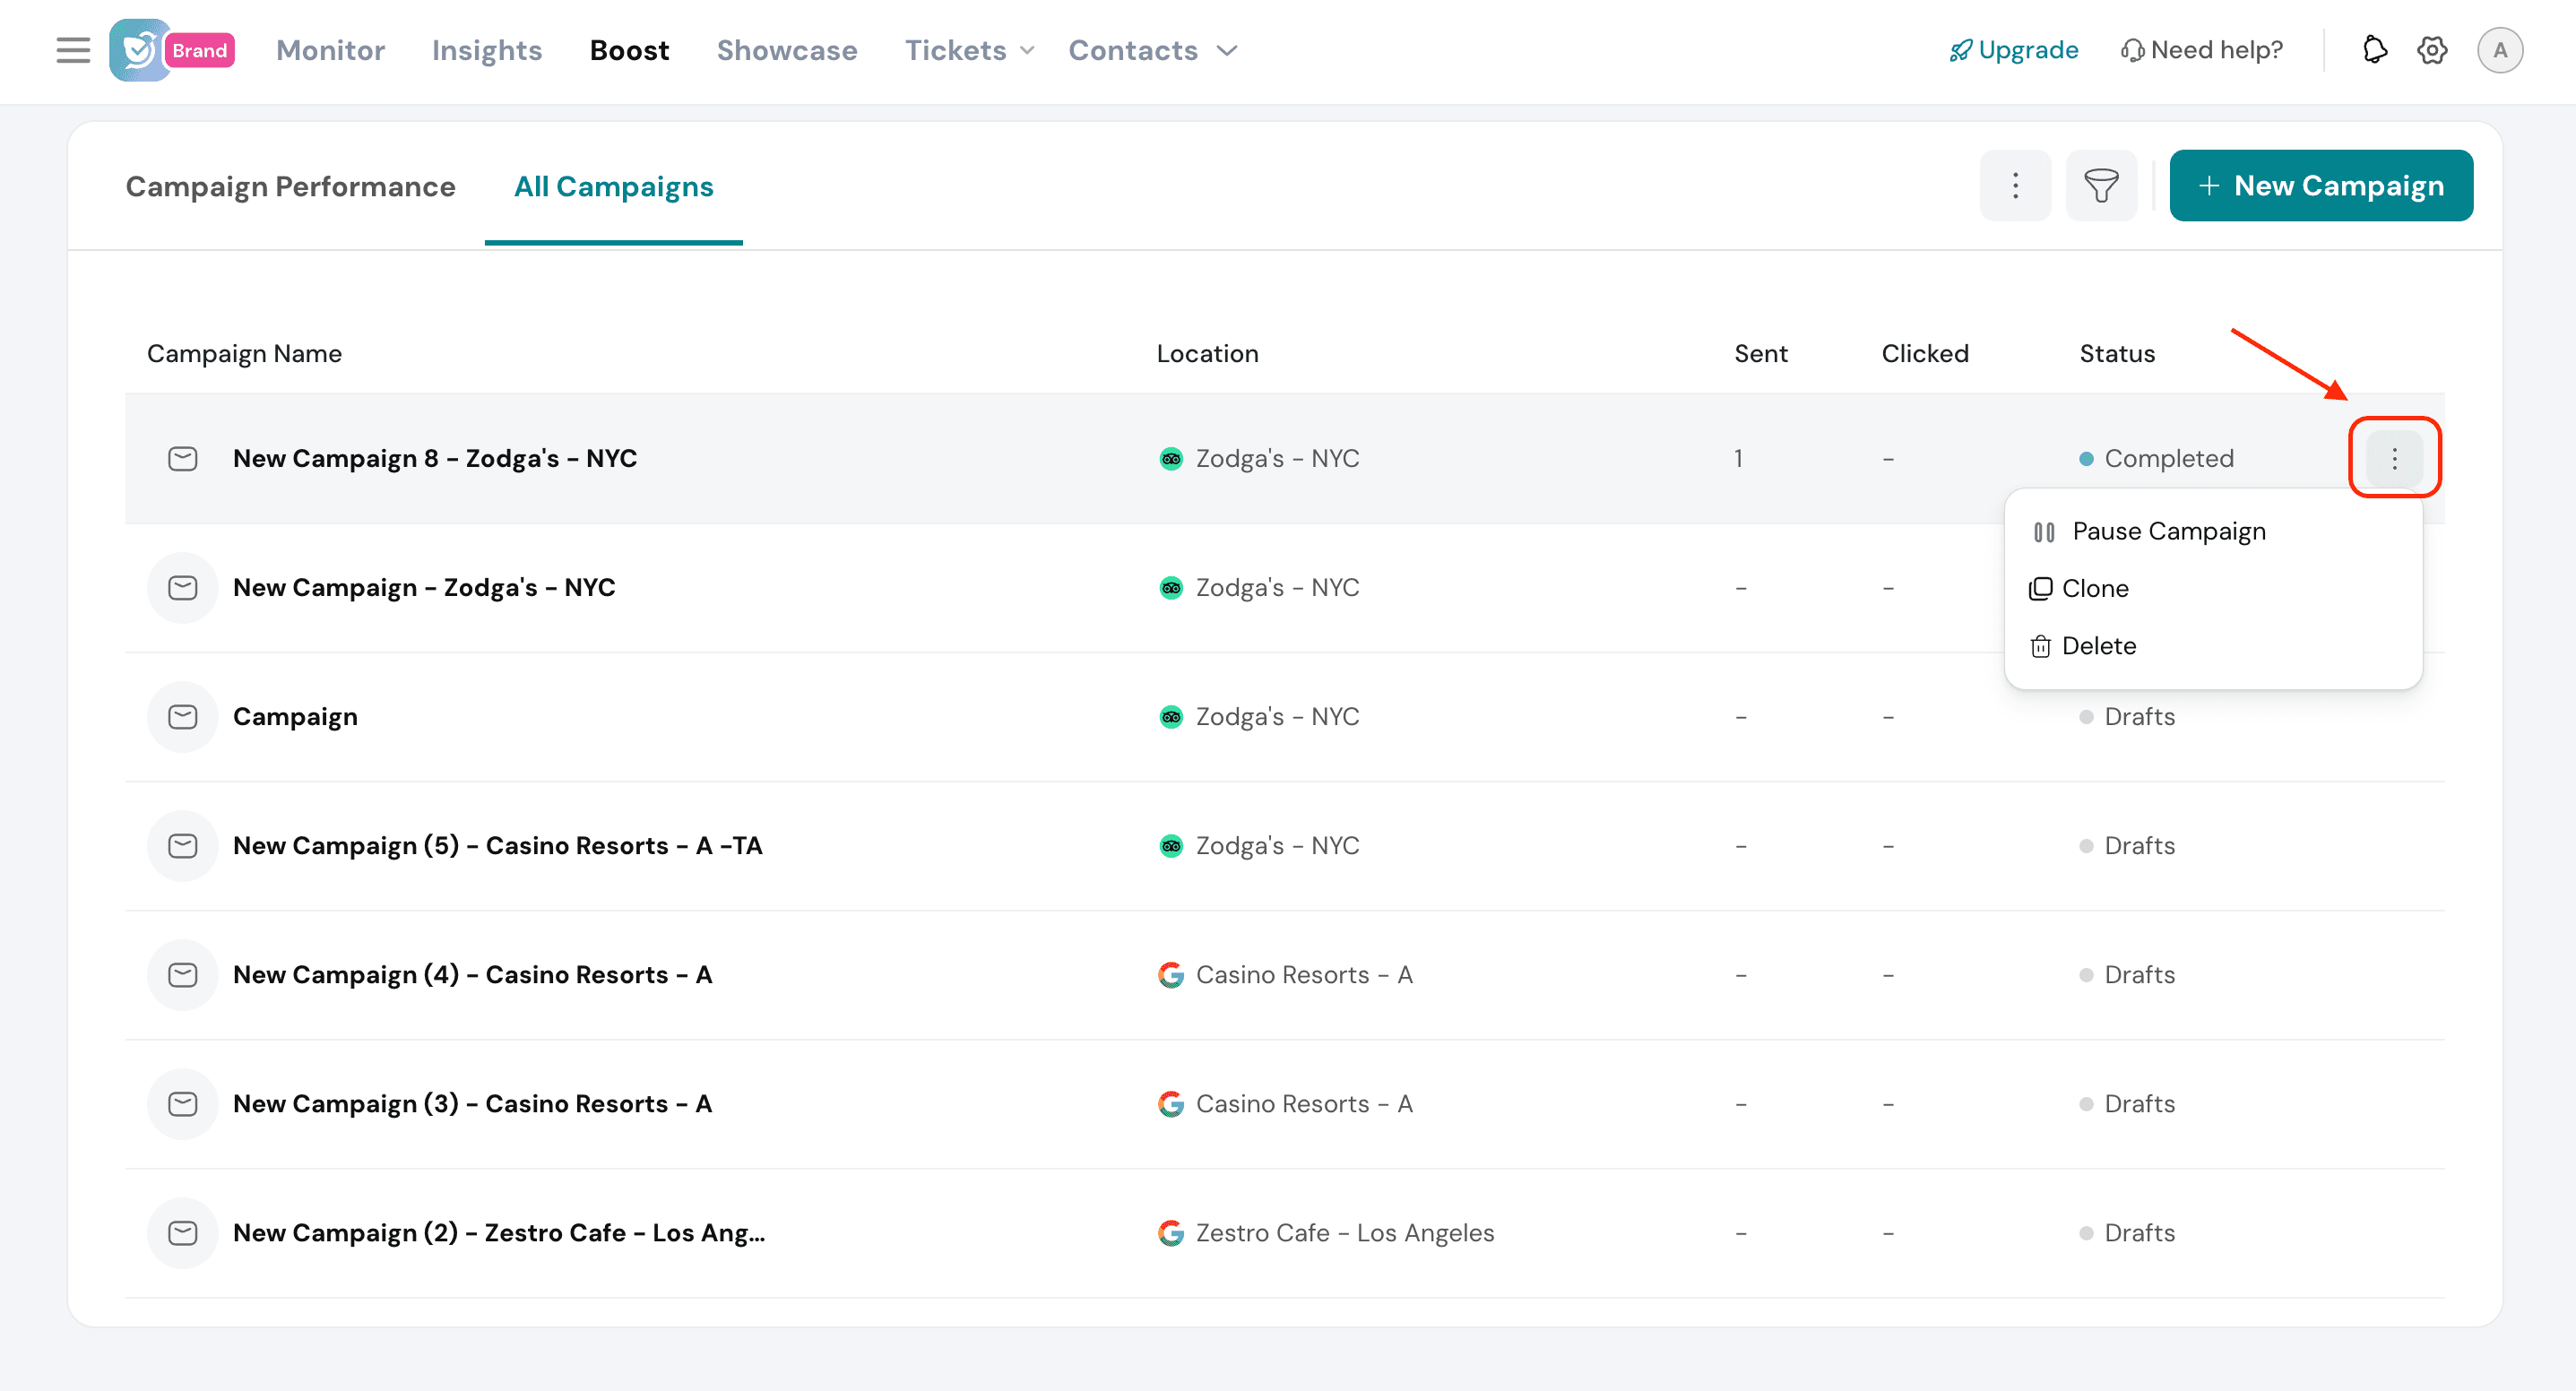
Click on a live email campaign to get an overview of its performance.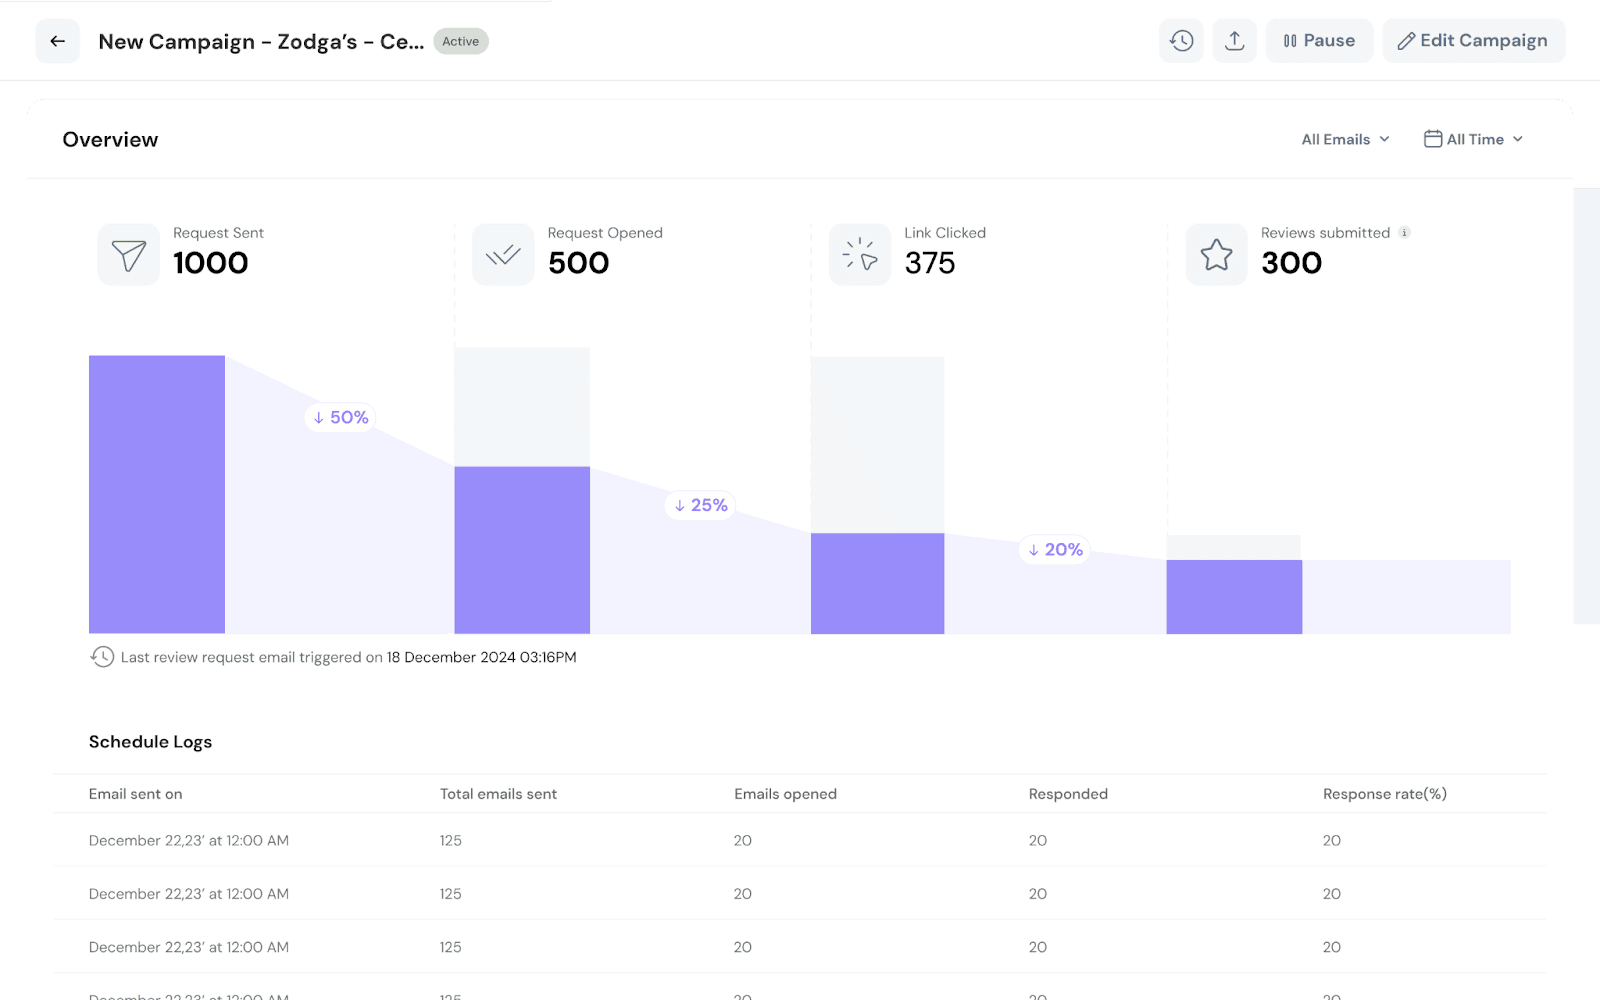
And that’s how you run email campaigns to boost your reputation. Every review that gets added to your business listing instills trust in your prospects and customers.
Please feel free to reach out to us if you have any questions.
Powered By SparrowDesk