Search
Enrich is an AI-powered feature that automatically generates new columns from your existing survey responses, directly within the Responses page. These columns enrich your data with instant, actionable insights, eliminating the need for manual exports, formulas, or third-party tools.
By analyzing your response data in real time, Enrich helps you uncover trends, organize qualitative feedback, and drive automation—all without extra effort or technical setup.
They help you make sense of open-ended feedback, highlight key themes, and drive faster decision-making, all while staying within your existing workflow.
Here’s how Enrich helps:
Let’s look at an example to better understand.
An e-commerce brand wants to improve its product ratings based on customer feedback collected after each purchase. The survey asks customers to rate the product and share any comments about their experience. While the team receives thousands of responses each week, analyzing feedback manually is time-consuming and inconsistent.
In this case, here’s how Enrich can help:
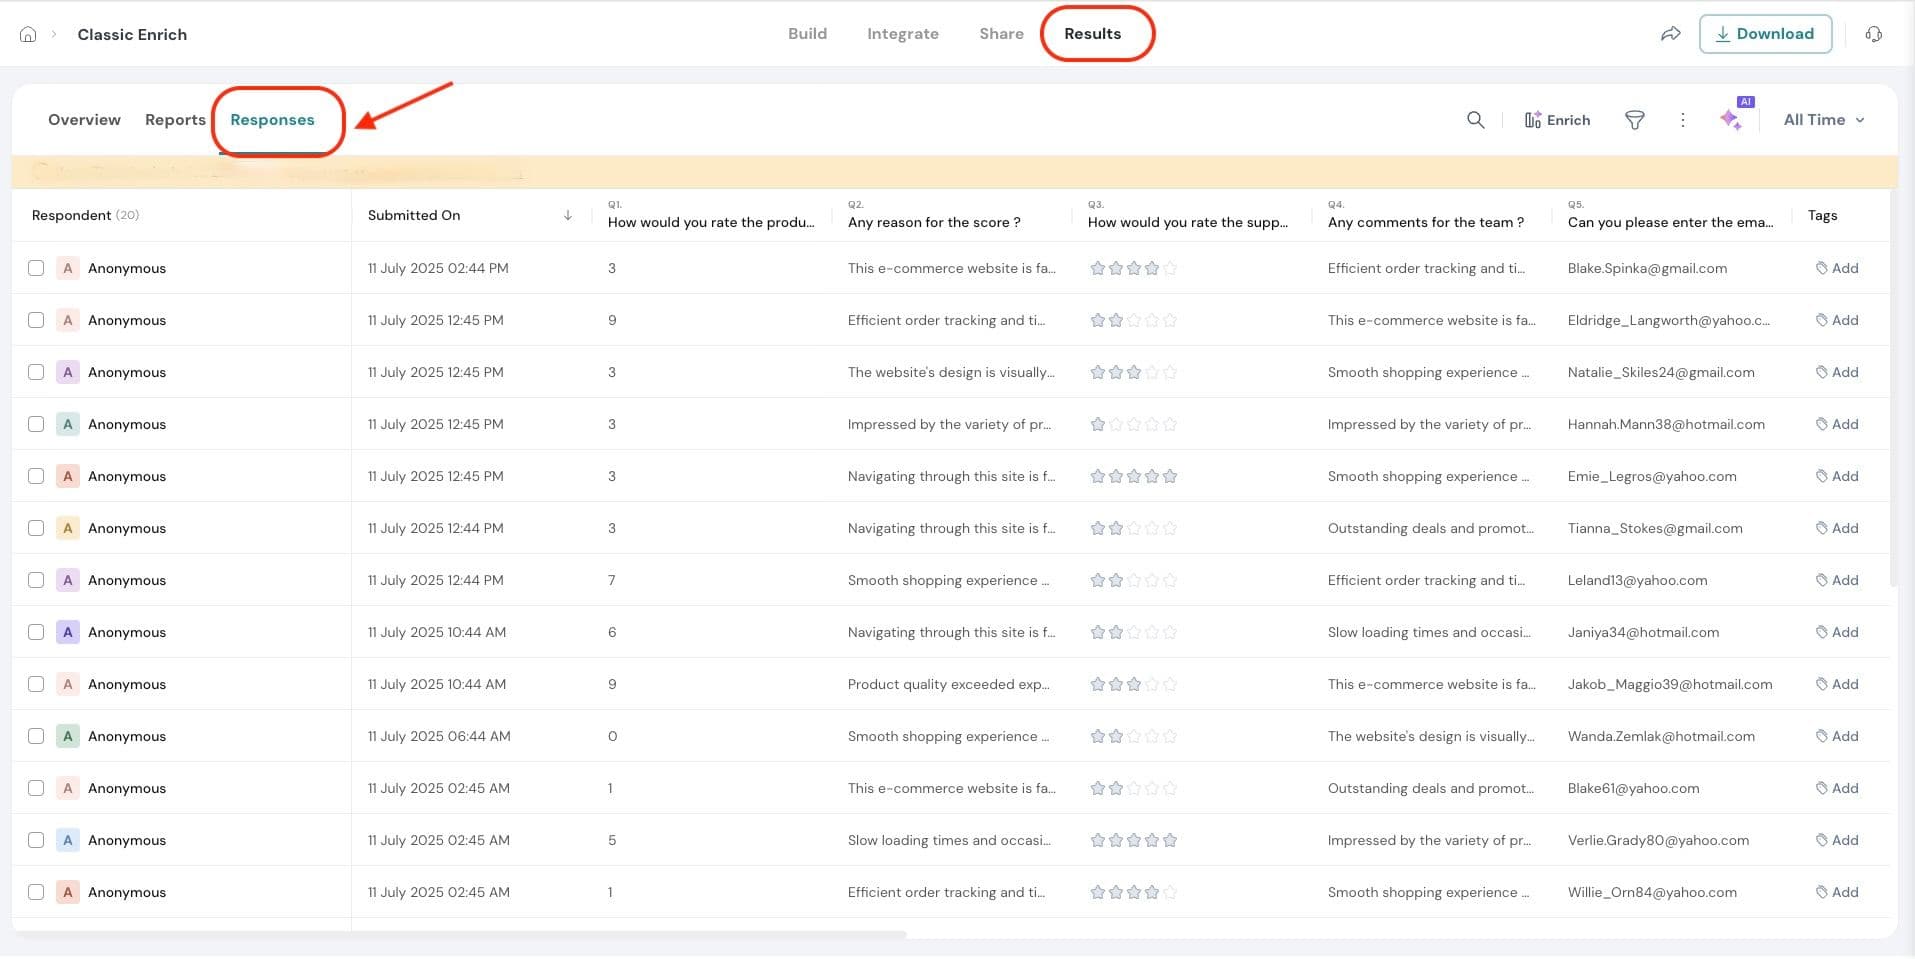
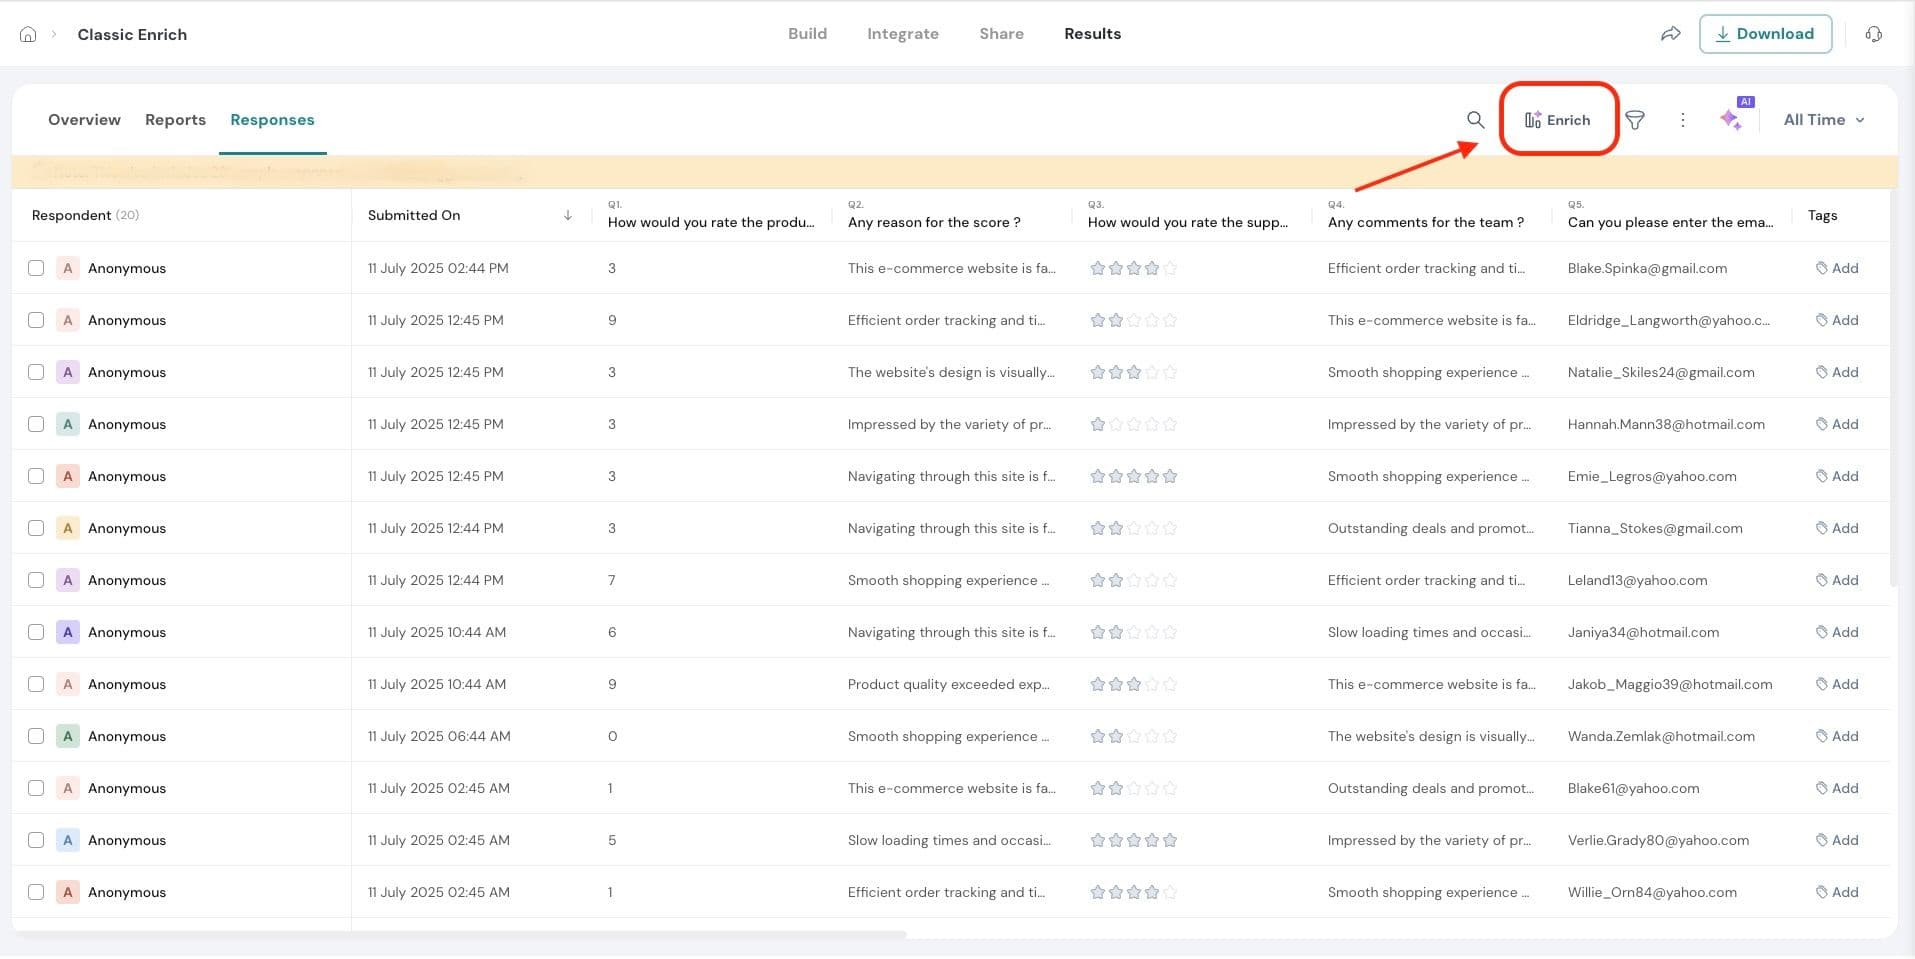
Lets see how to use Enrich
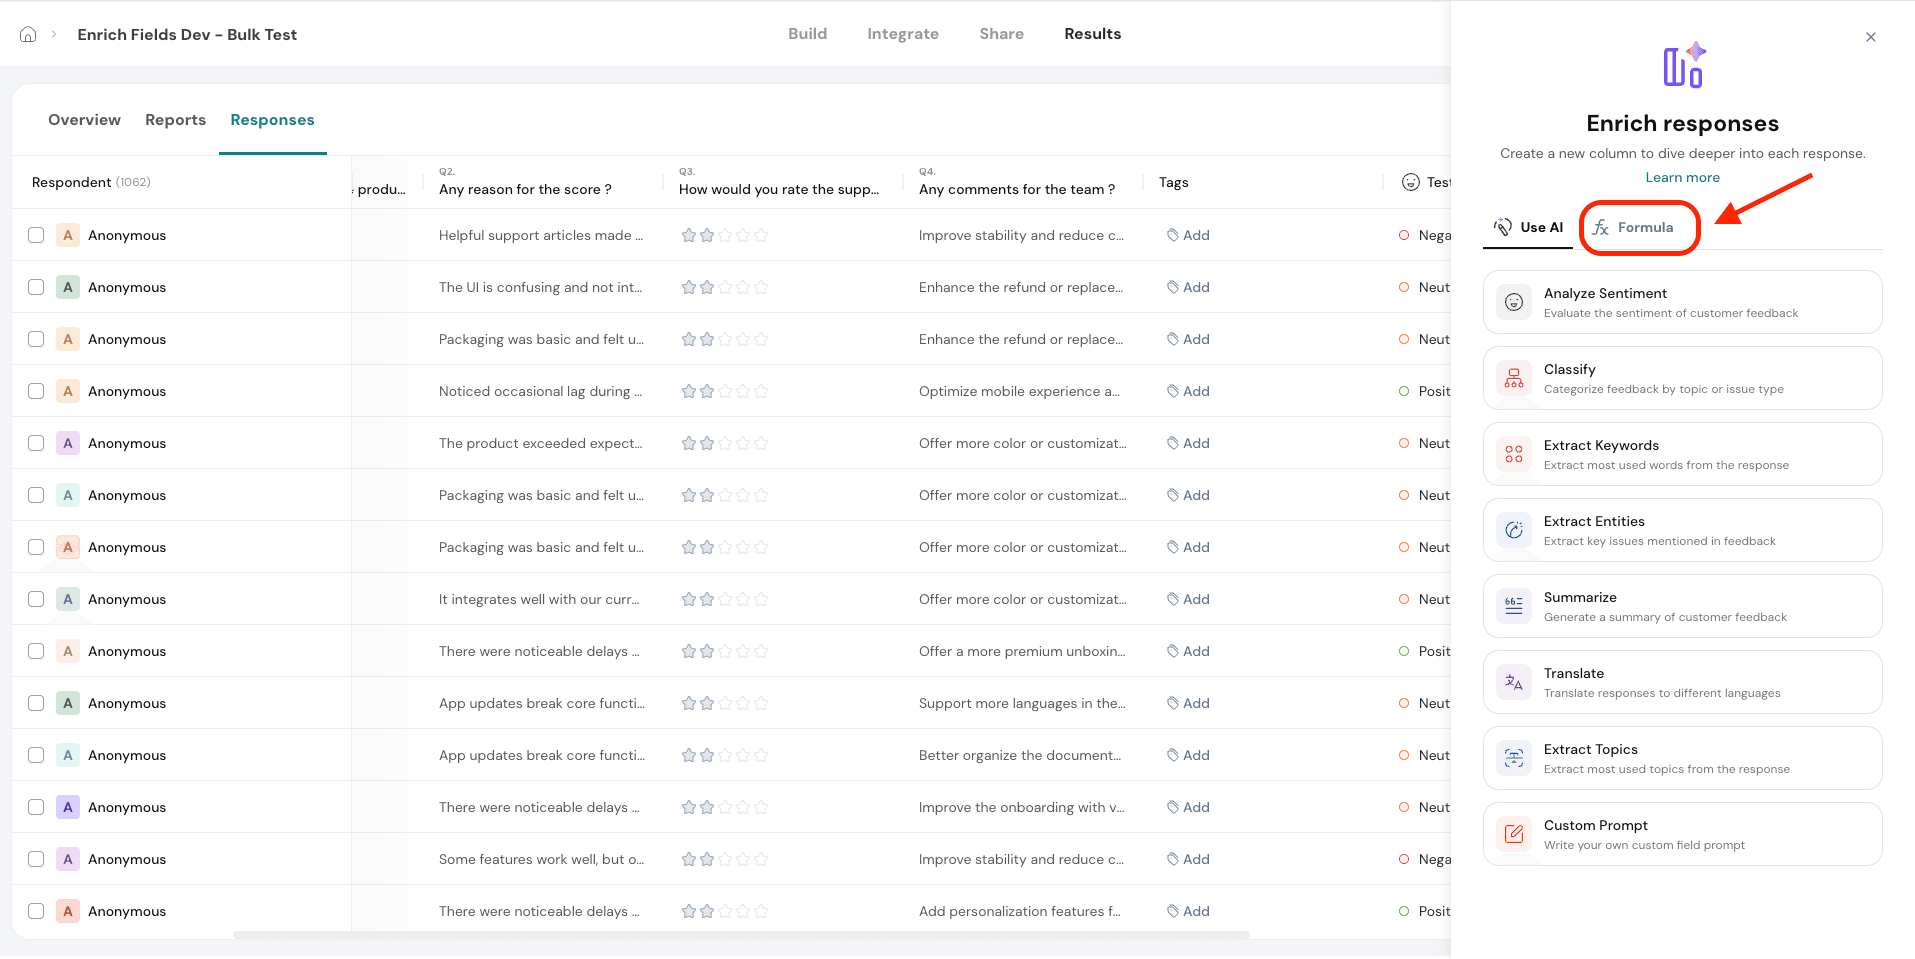
3. You’ll see two options: Use AI and Formula.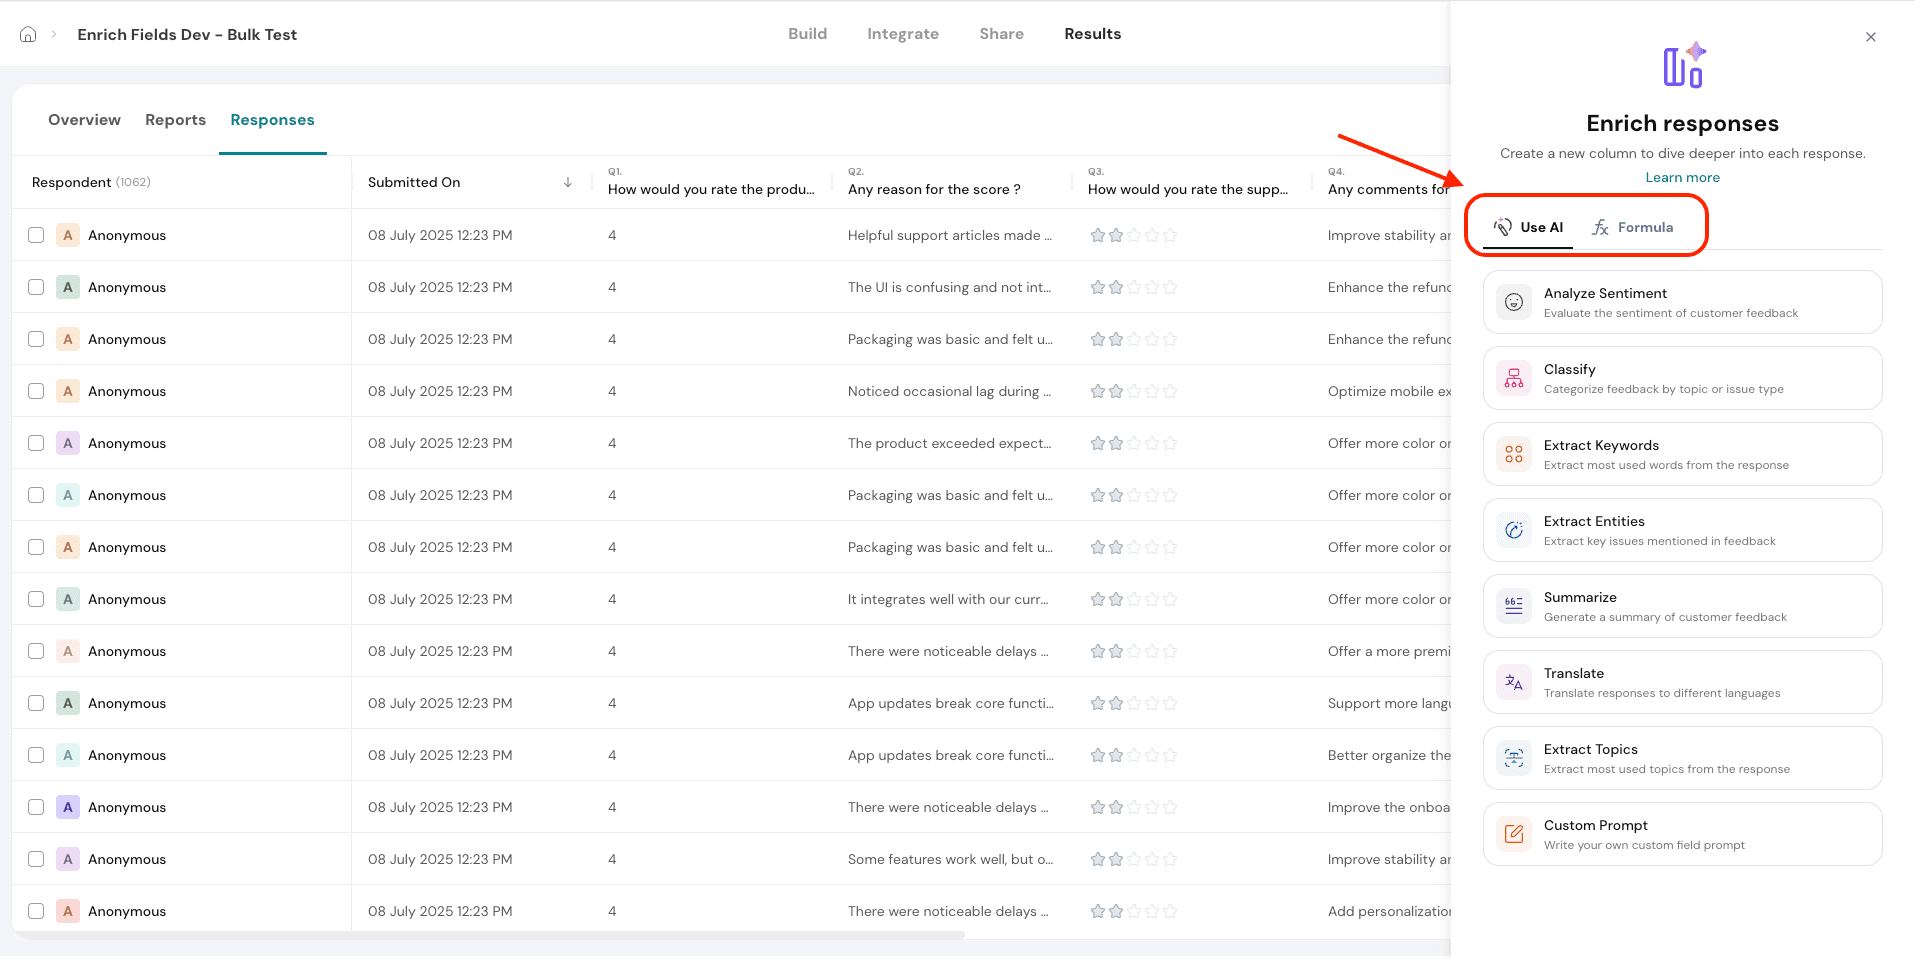 Let’s first take a closer look at Use AI.
Use AI
This feature allows you to generate new columns using prebuilt AI models that analyze response data. With just a few clicks, you can apply capabilities like sentiment analysis, keyword extraction, topic classification, and more without writing any code or leaving the platform.
These AI-generated columns help transform open-ended feedback into structured, actionable insights. Whether you're identifying patterns, tagging responses, or surfacing key themes, the Use AI feature enables intelligent analysis at scale, directly within the Responses page.
Under Use AI we have the following.
4. Analyze Sentiment- This evaluates the tone of each response and classifies it as Positive, Neutral, or Negative. It provides a clear view of how customers feel, helping you quickly identify praise, dissatisfaction, or mixed feedback across your survey responses.
4.1. Click on Source to select the question you want to analyze for sentiment. You will only be able to choose open-ended questions for sentiment analysis.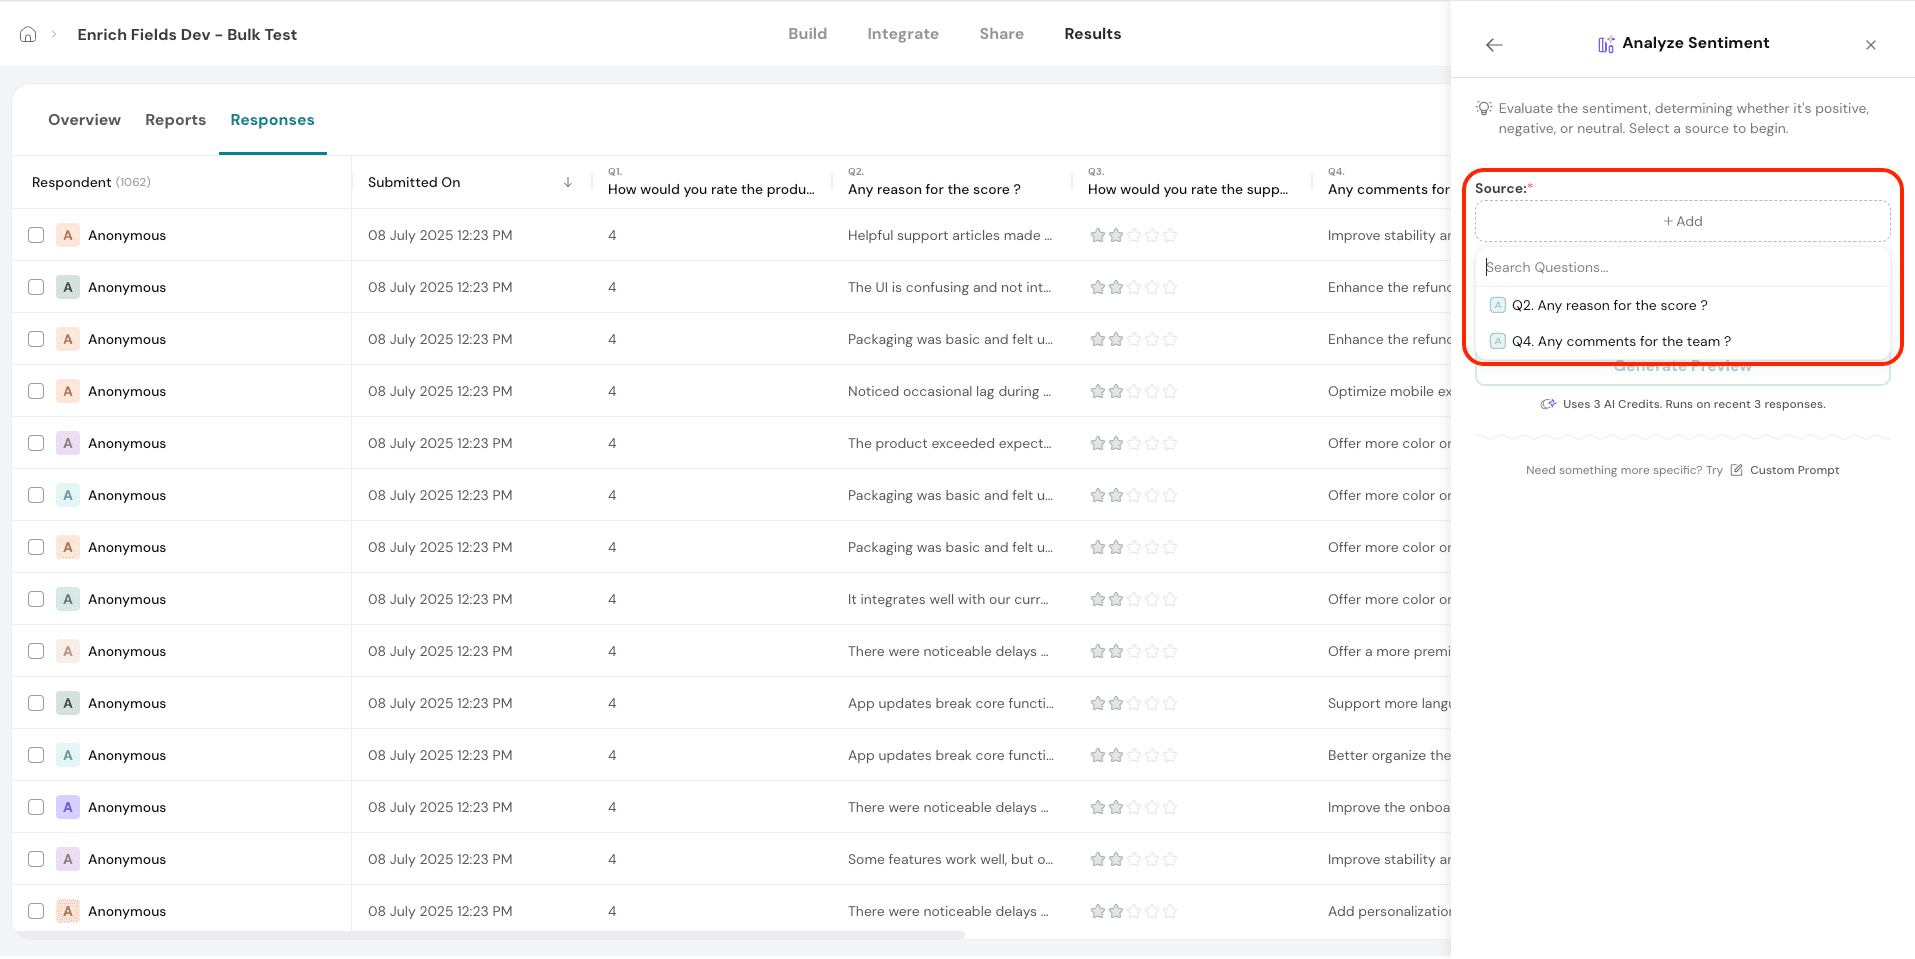
4.2. You can add a custom name for the column, but this is optional. If no name is provided, AI will automatically assign one.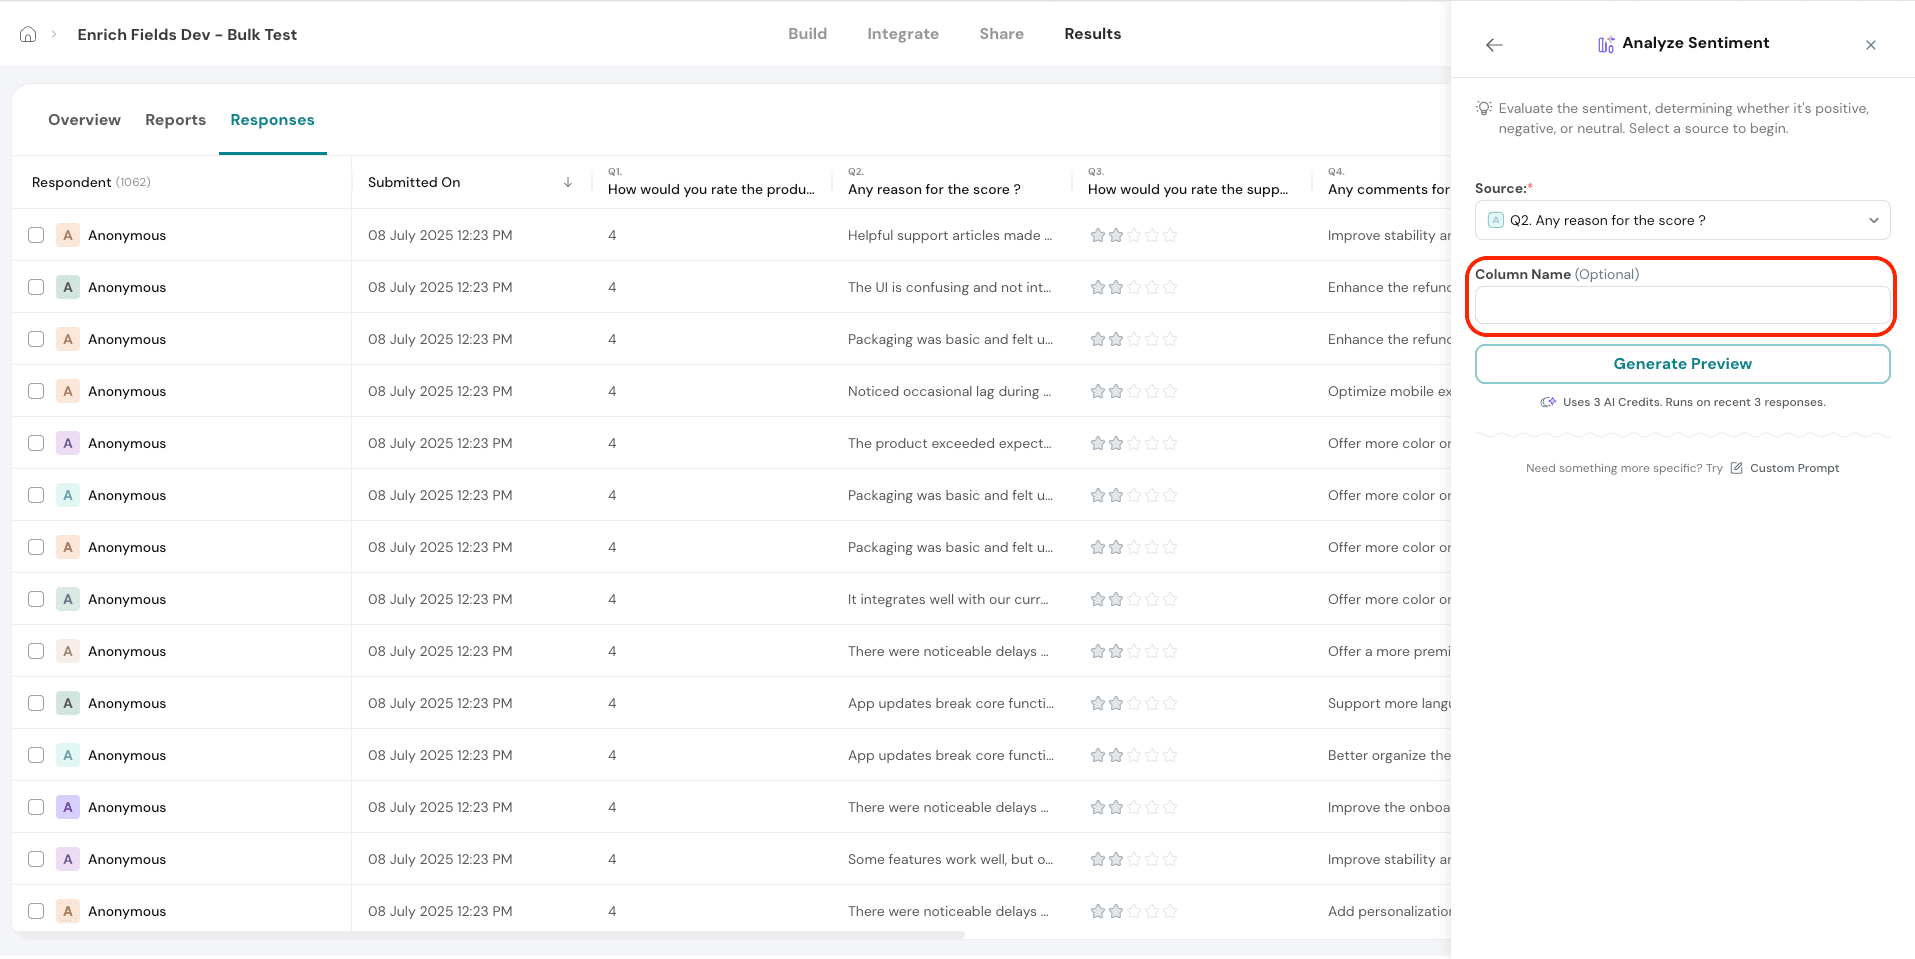
4.3. Once you’ve selected the question and added a heading, click on Generate Preview to view AI-generated sentiment for three sample responses. 
4.4. The preview will display sentiment analysis based on the most recent three responses.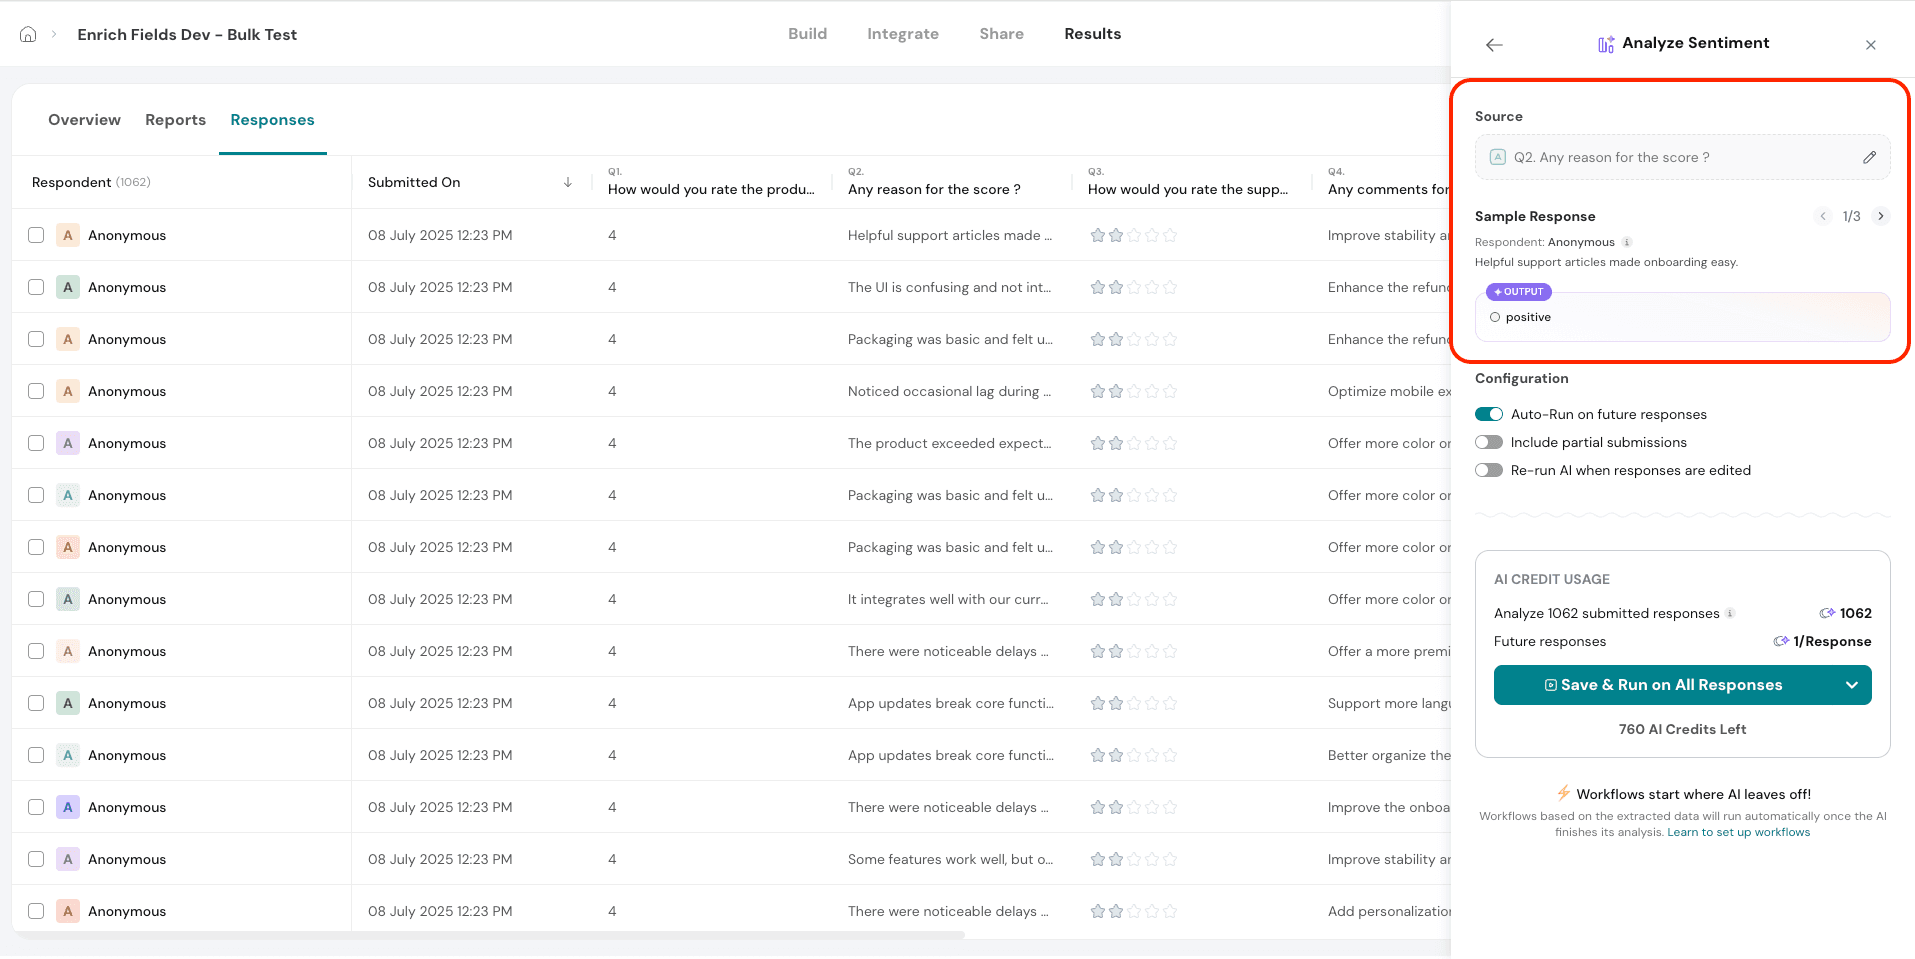
4.5. Configuration Options
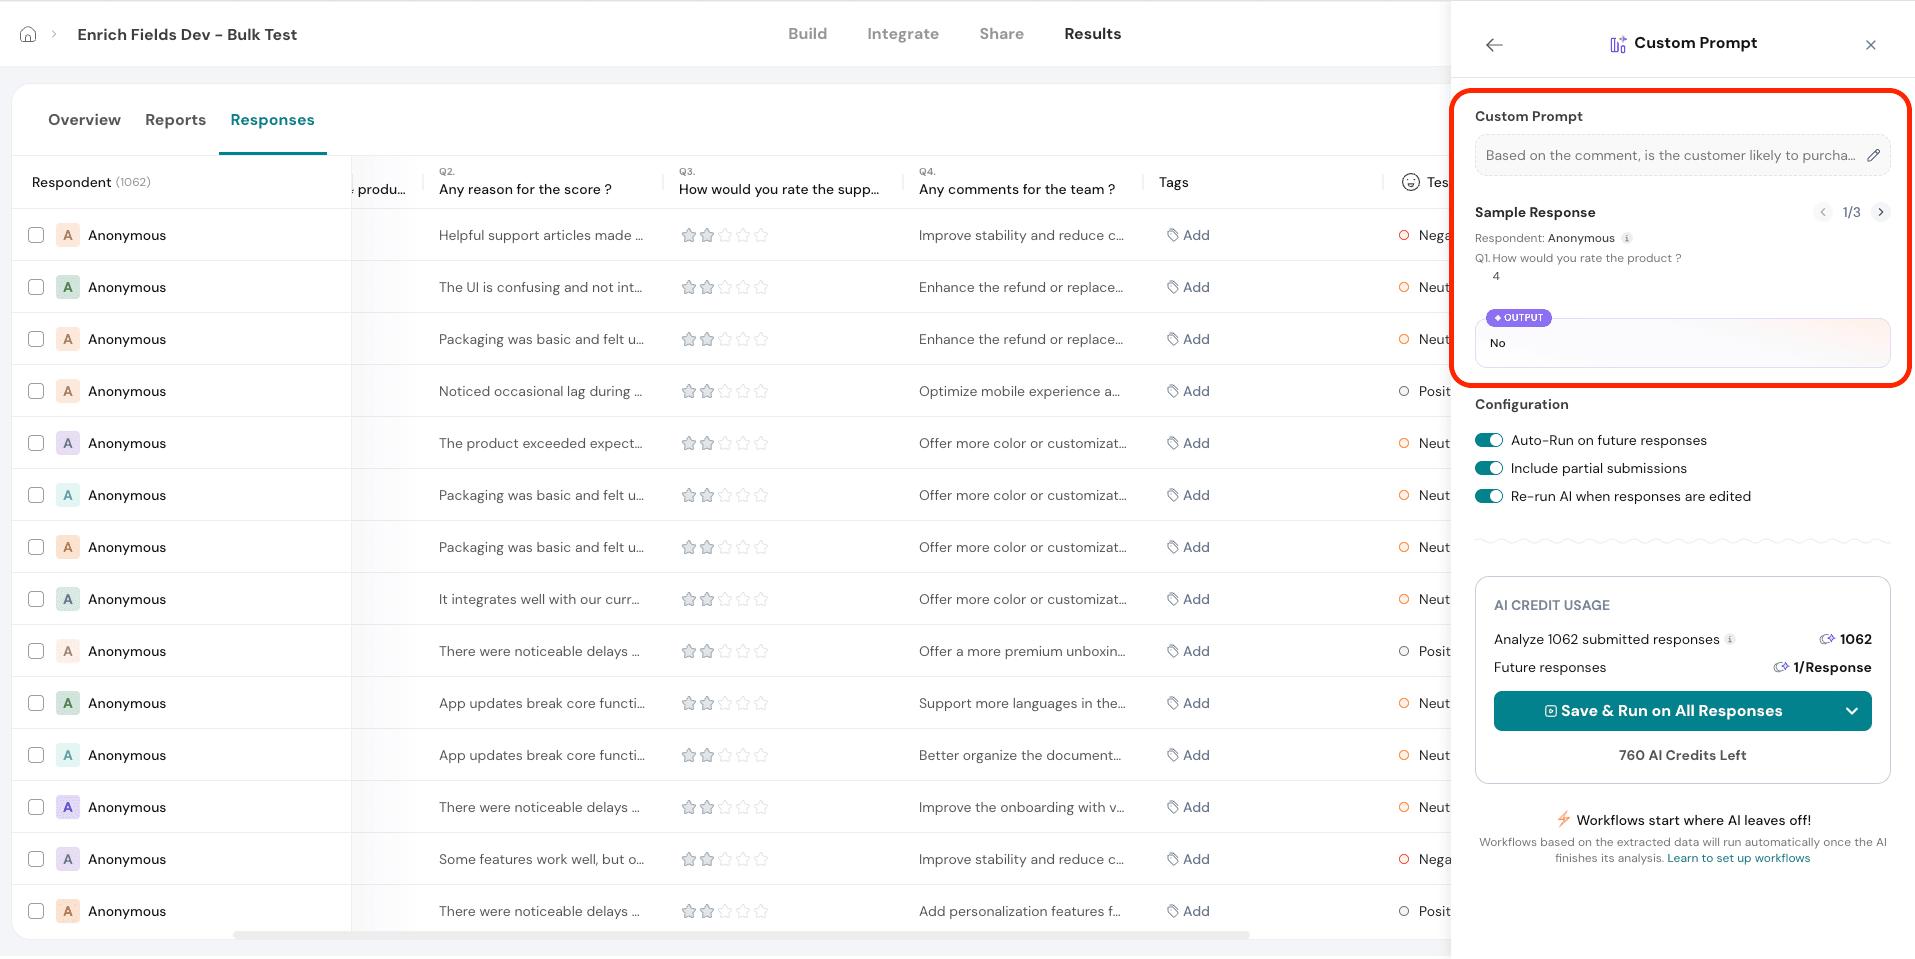
These apply across all AI features and allow you to control when and how AI processes response data. You will see three configuration options:
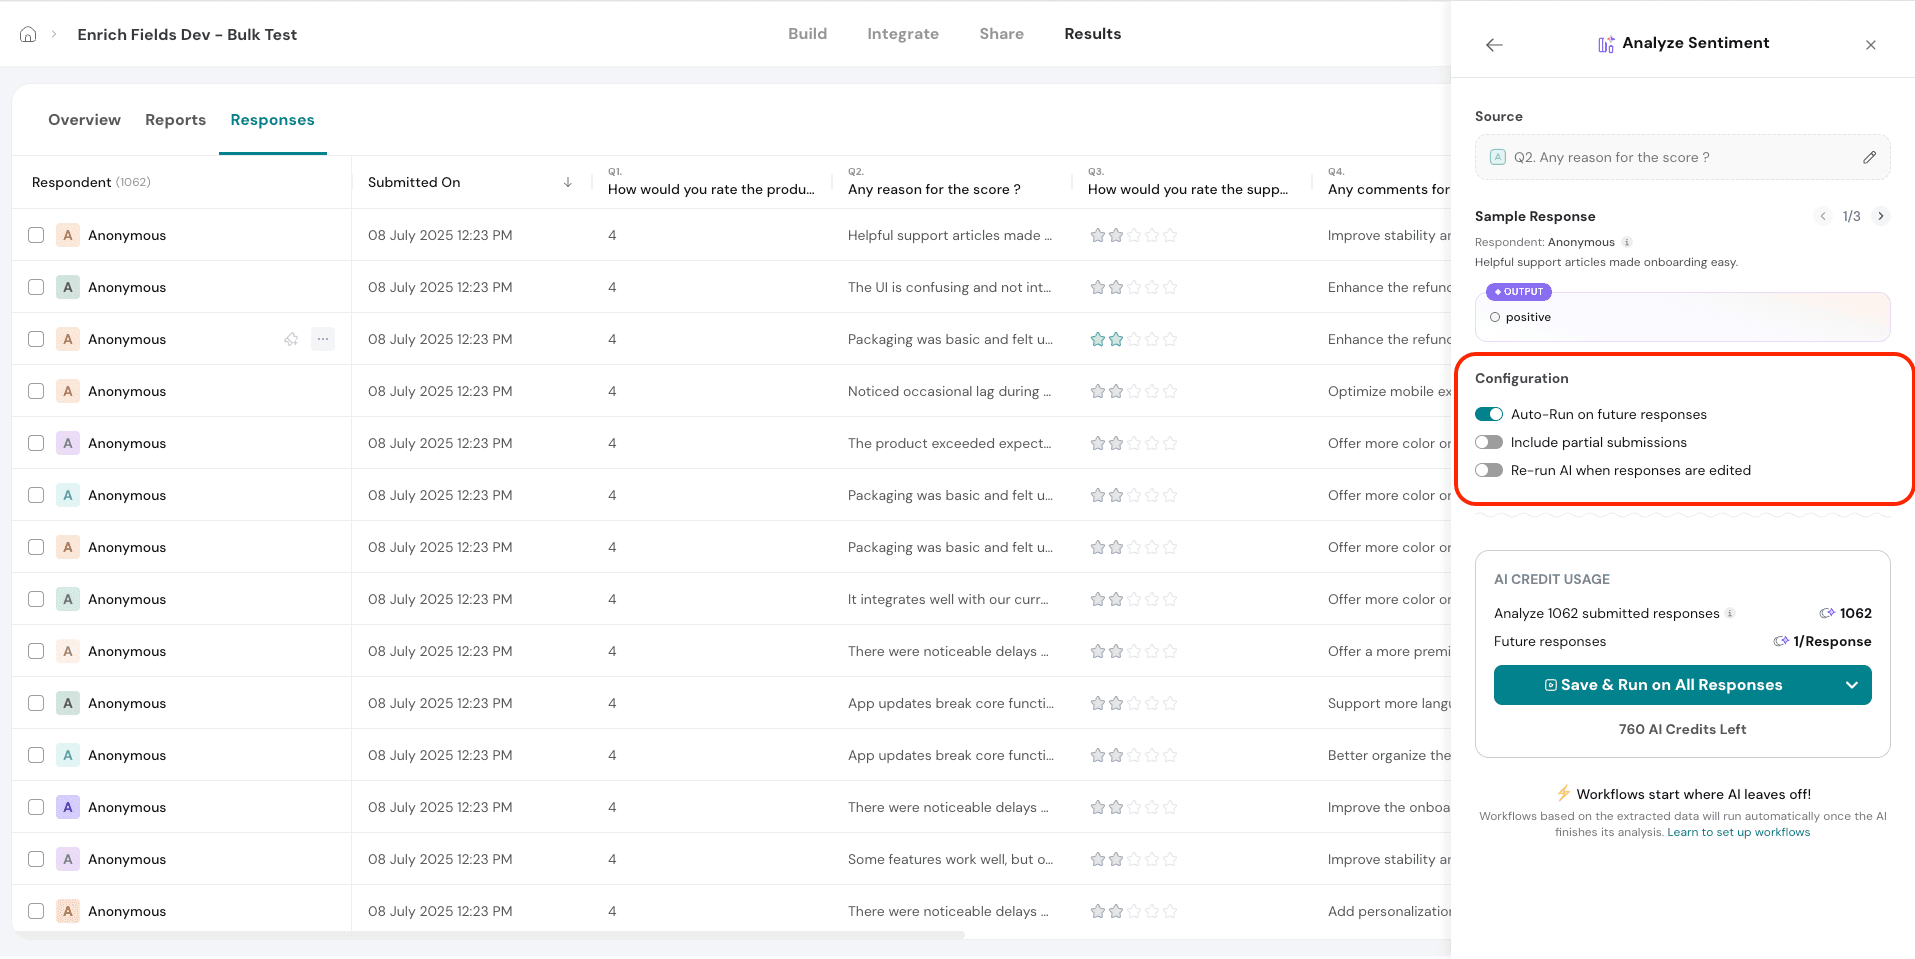
Here’s how the Analyze Sentiment column will appear once applied
5. Classify- This allows you to categorize responses based on predefined labels, making it easier to organize and analyze open-ended feedback at scale.
5.1. Under Source, select the question you want to classify. You will only be able to choose open-ended questions for classification.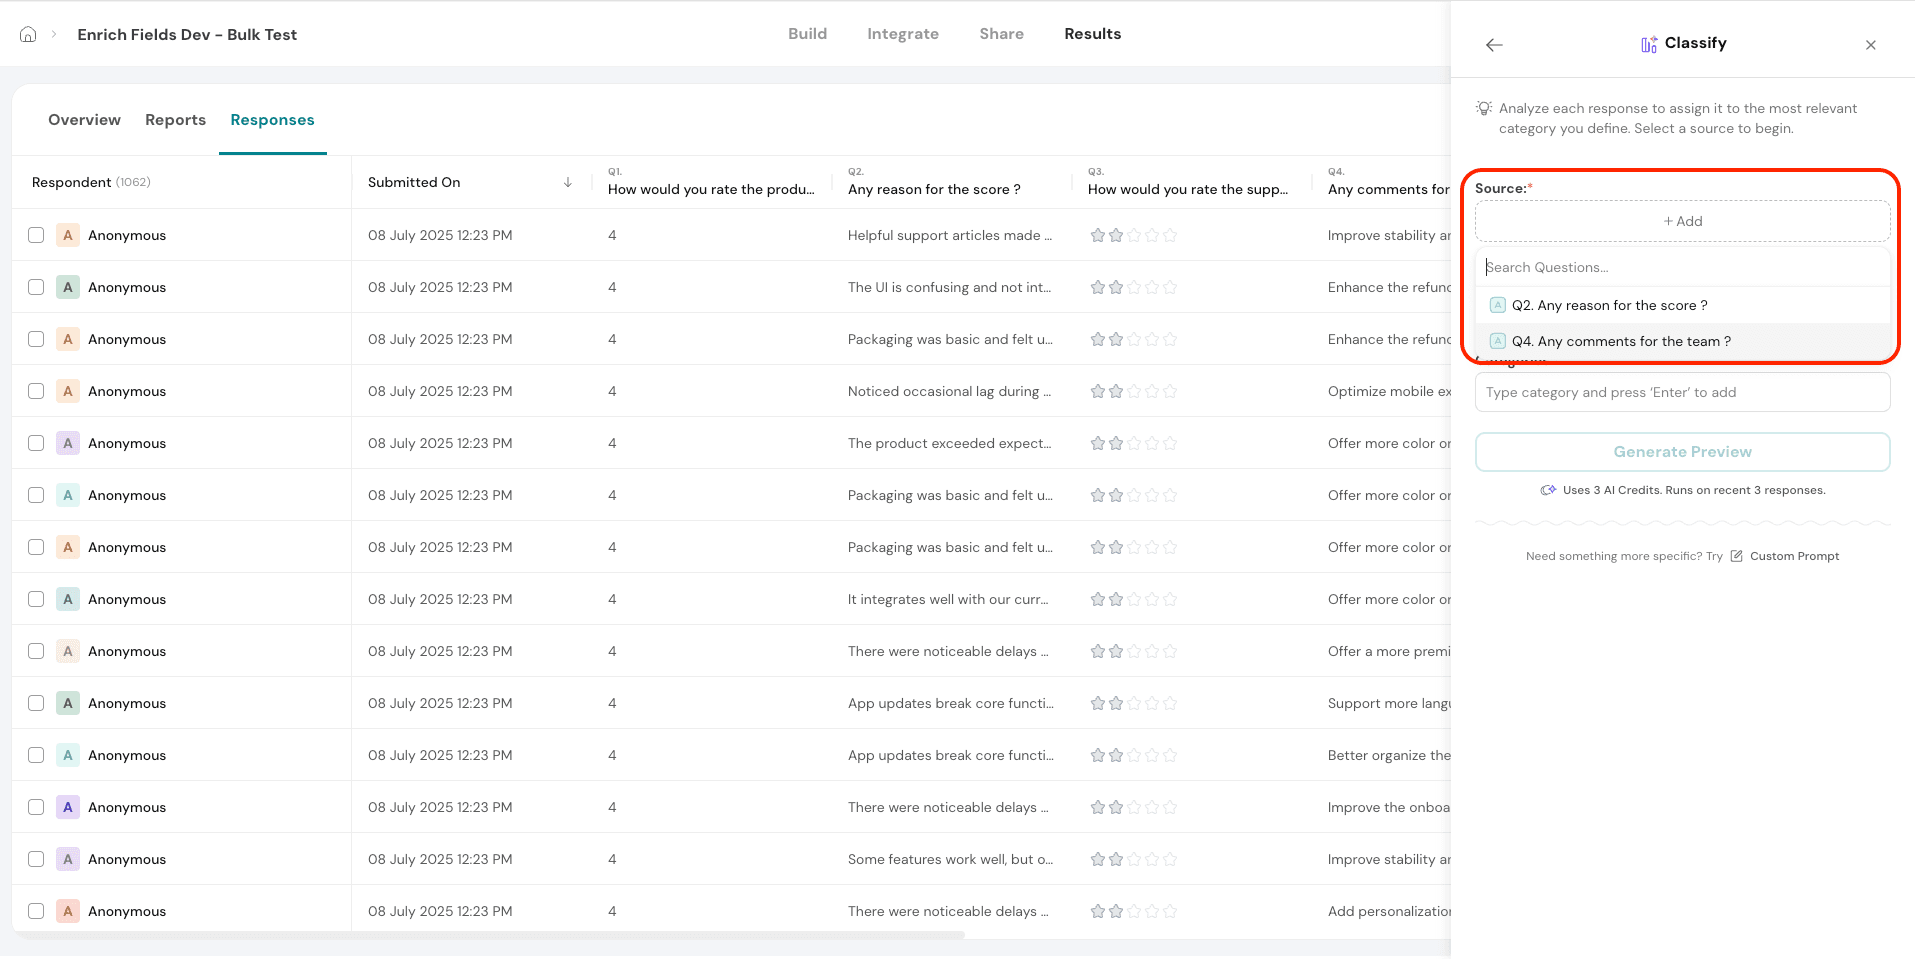
5.2. You can add a custom name for the column. This is optional and if left blank, AI will automatically assign a name.
5.3. Add the Categories you want to use to classify the responses.
In this example, you could use categories such as Delivery Experience, Product Quality, and Customer Support.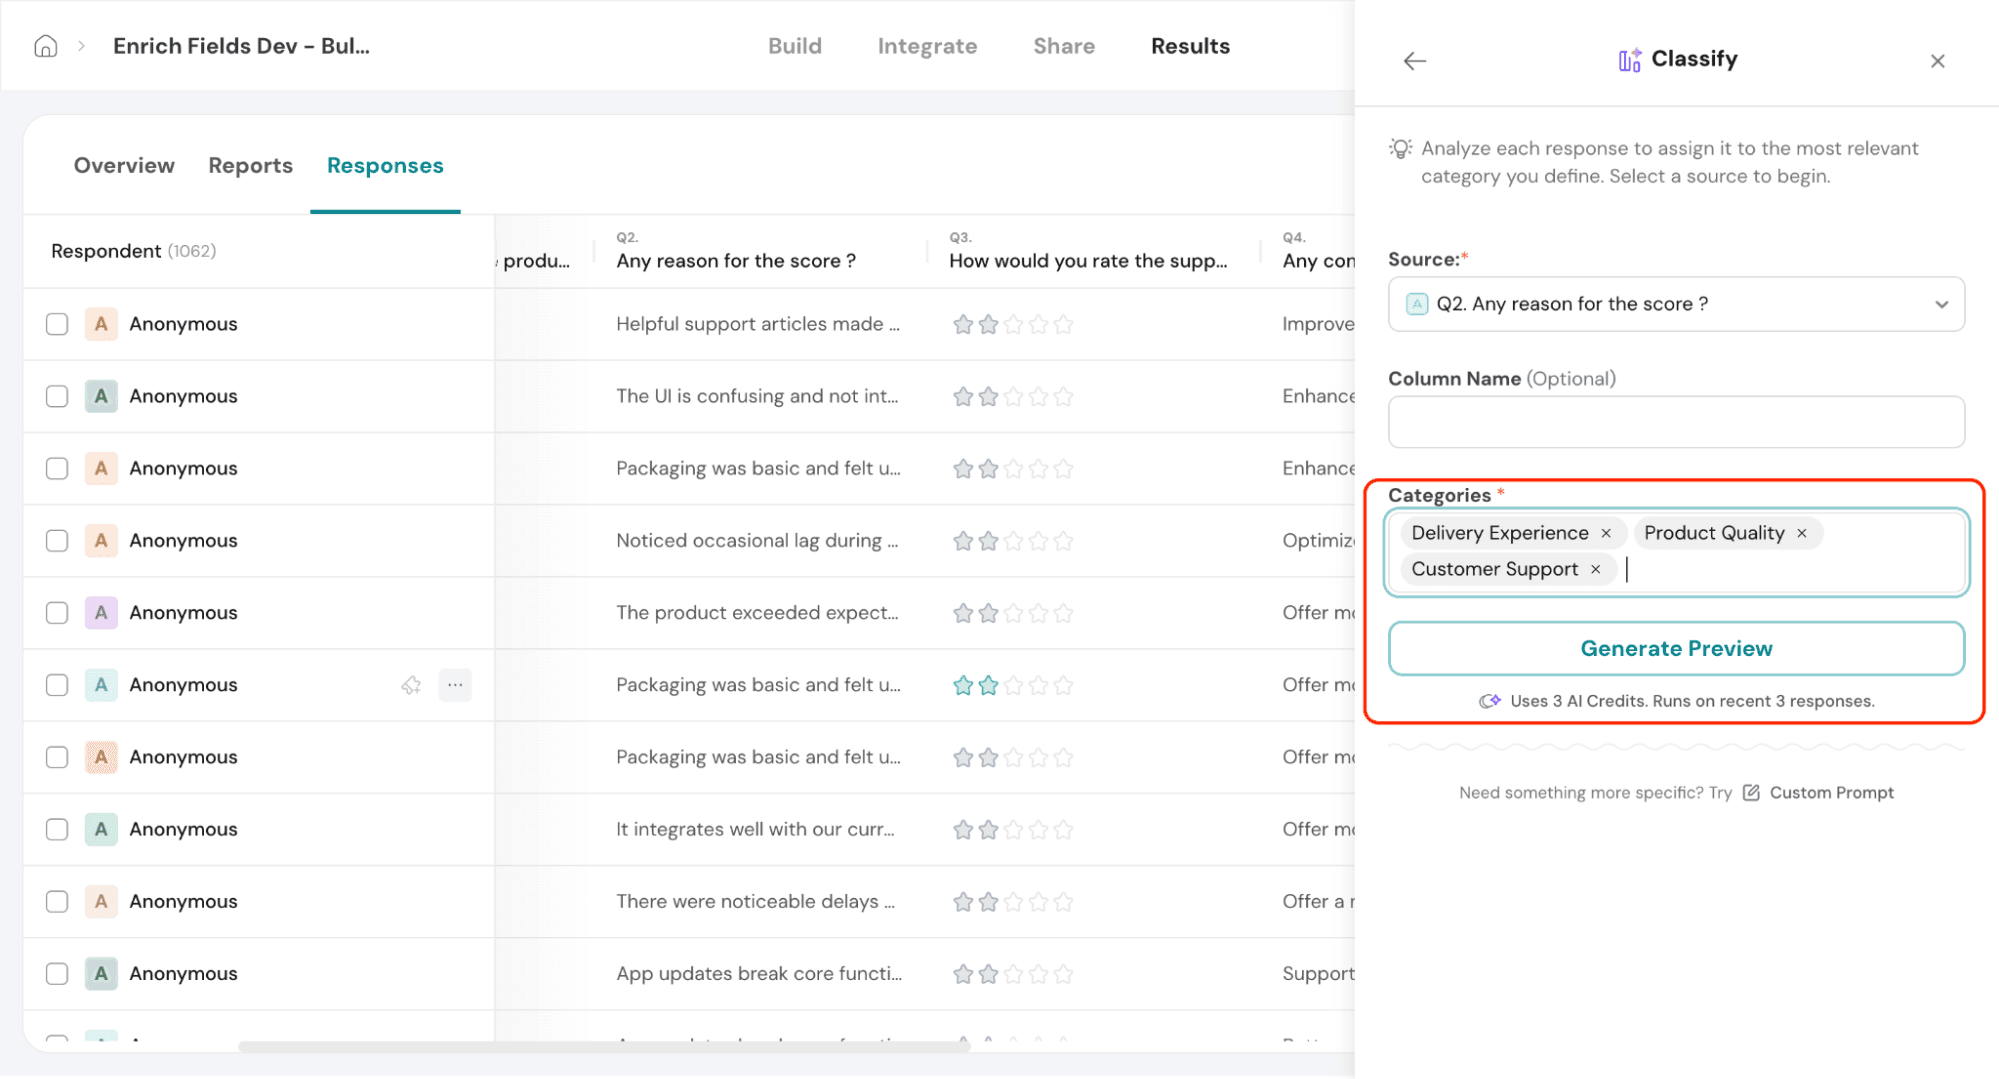
5.4. Press Enter after entering each category name to add it to the list.
5.5. Click on Generate Preview to see how responses will be classified based on the categories you’ve defined.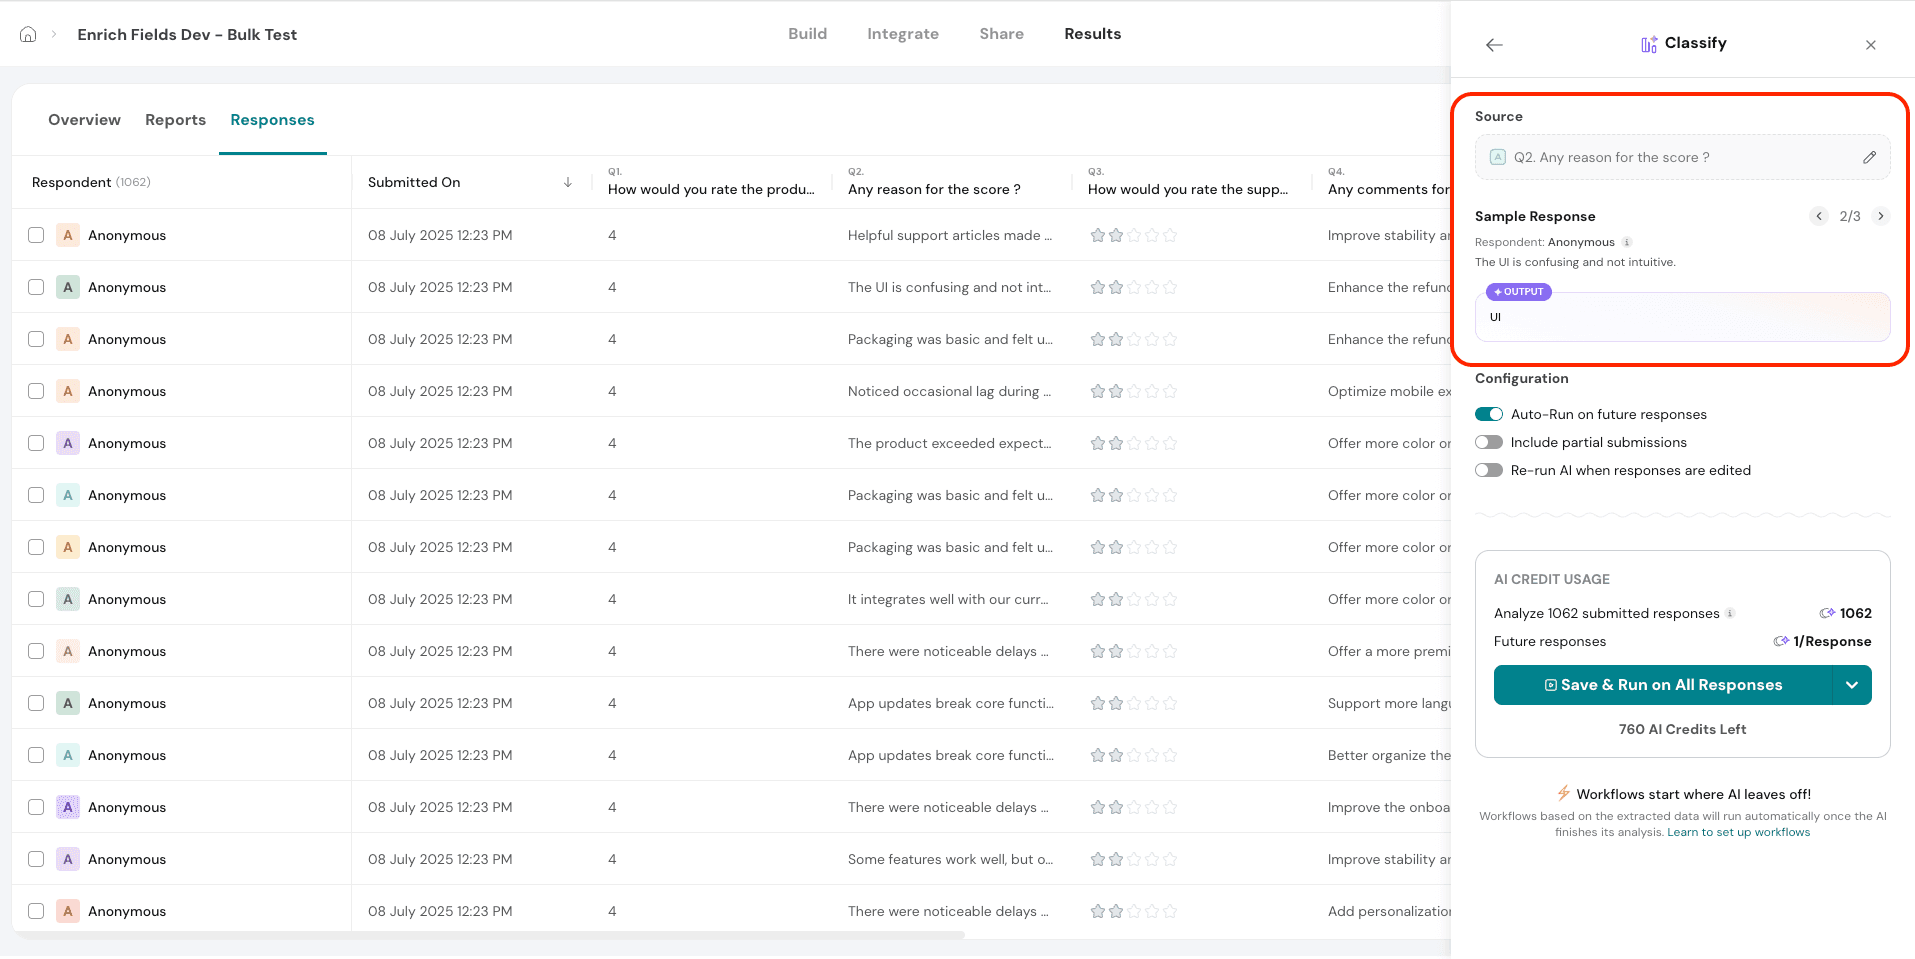 5.6. The configuration options are the same as those discussed earlier, including Auto-Run on future responses, Include Partial Submissions, and Re-run AI when responses are edited.
6. Extract Keywords- This helps you extract key recurring words and phrases from open-ended responses. It allows you to identify common themes, track frequently mentioned topics, and uncover patterns in customer feedback. You’ll be able to see which words appear most often across responses.
6.1. Under Source, select the open-ended question you want to analyze for keywords. Only open-ended questions are supported for this feature.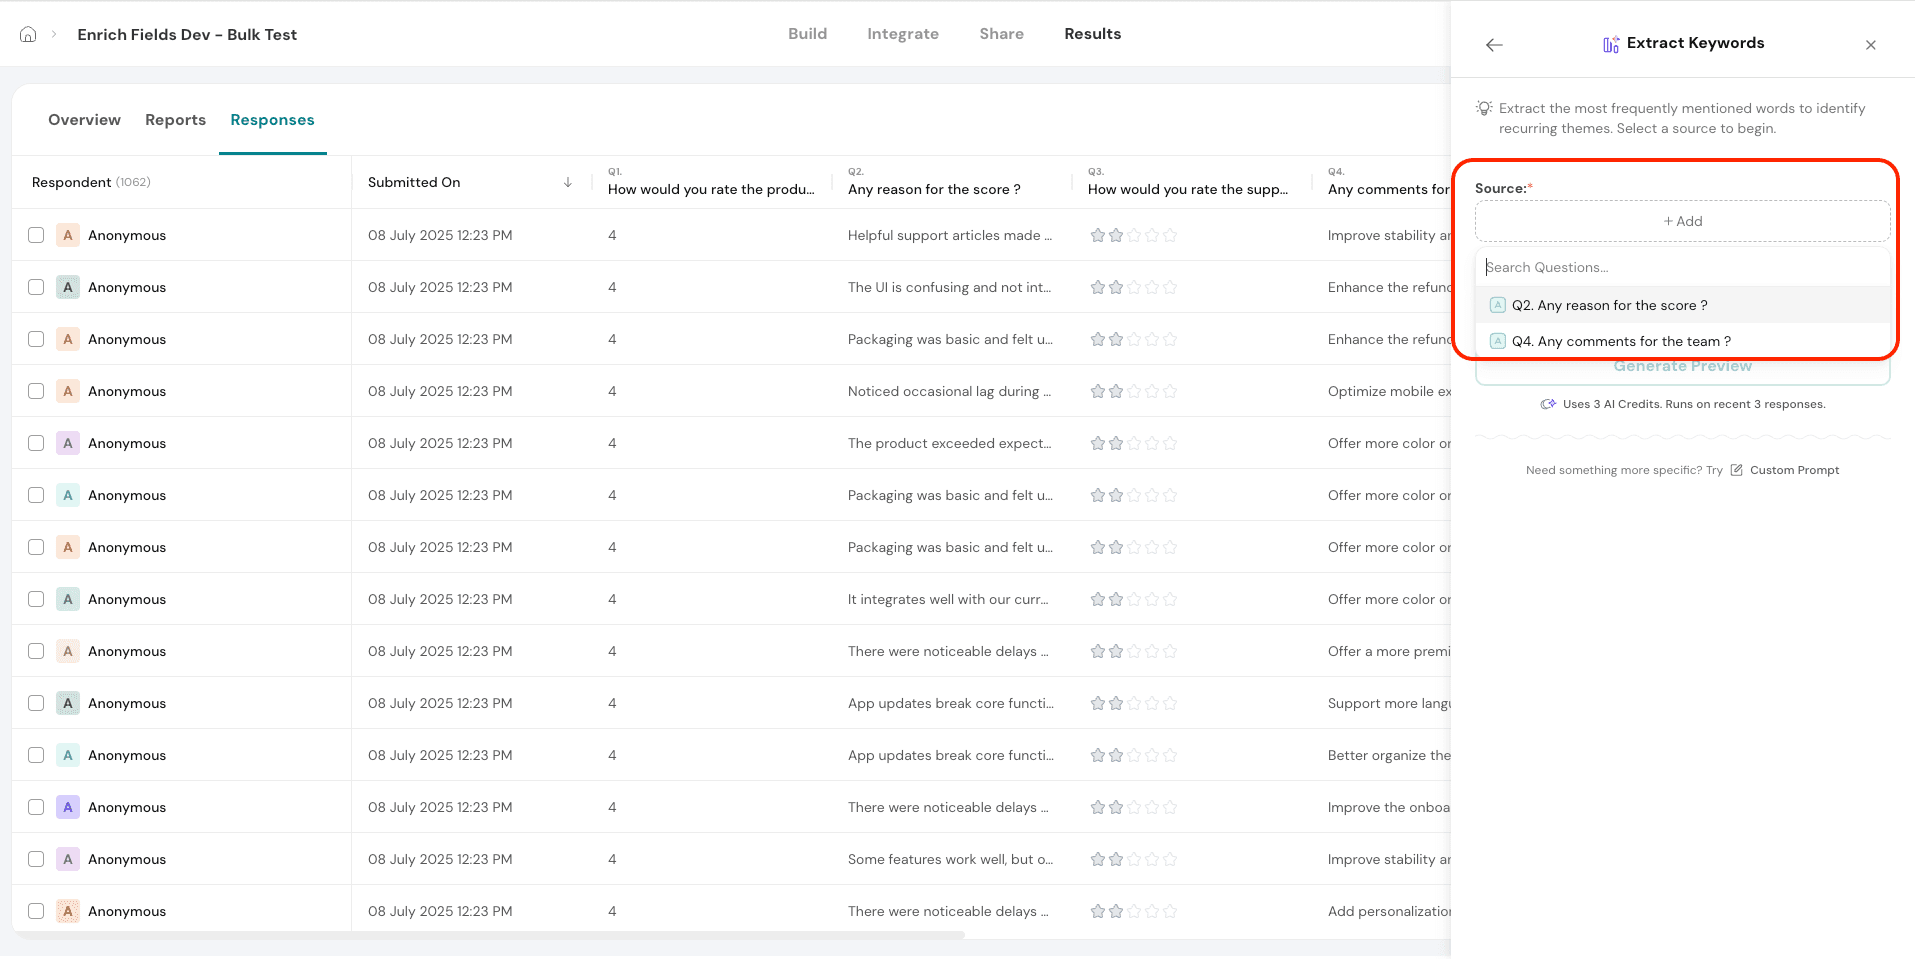
6.2. Once you’ve selected the question and added a heading, click on Generate Preview to view AI-generated keywords for three recent responses. This allows you to review the output before applying it to the full dataset.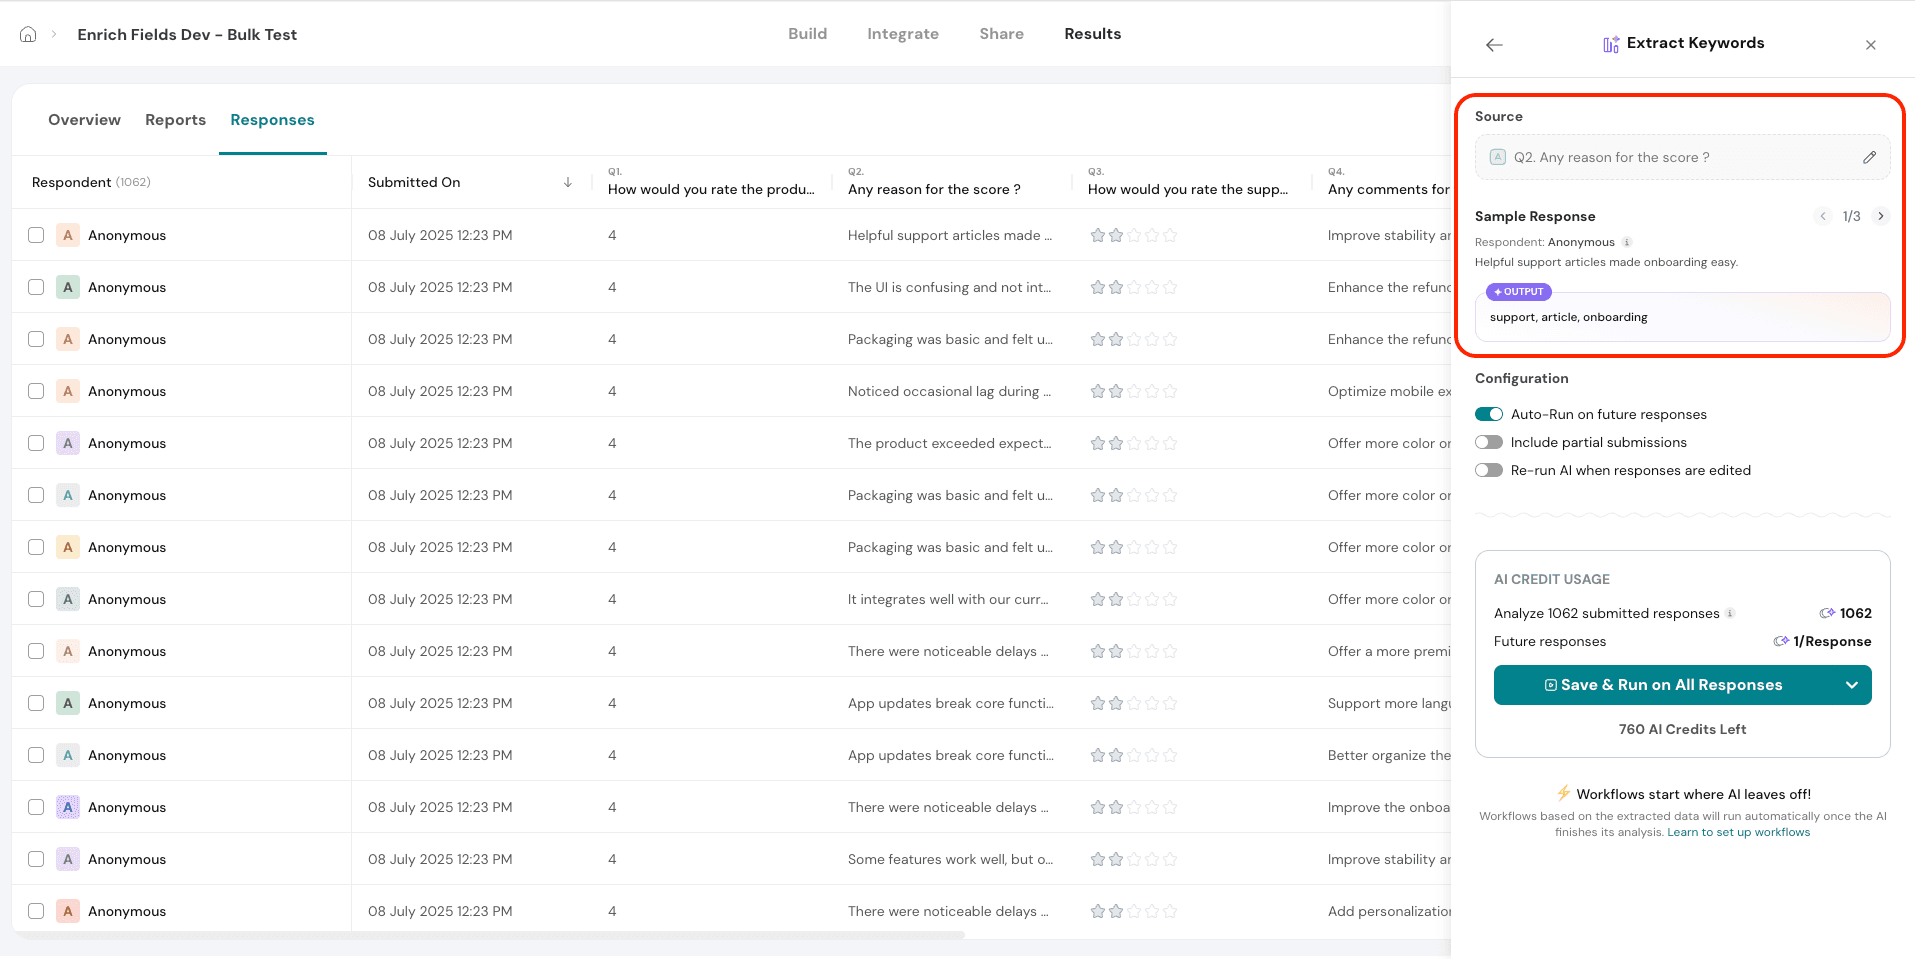
7. Extract Entities- This identifies specific entities mentioned in open-ended responses, such as product names, store locations, or exact issues. It helps you capture precise details from feedback, making it easier to pinpoint what customers are referring to.
7.1. Under Source, select the open-ended question you want to analyze for exact entities. Only open-ended questions are supported for this feature.

7.2. Entity Types – Enter the types of entities you want to extract. These could include things like names, locations, product names, or specific issues mentioned in the responses.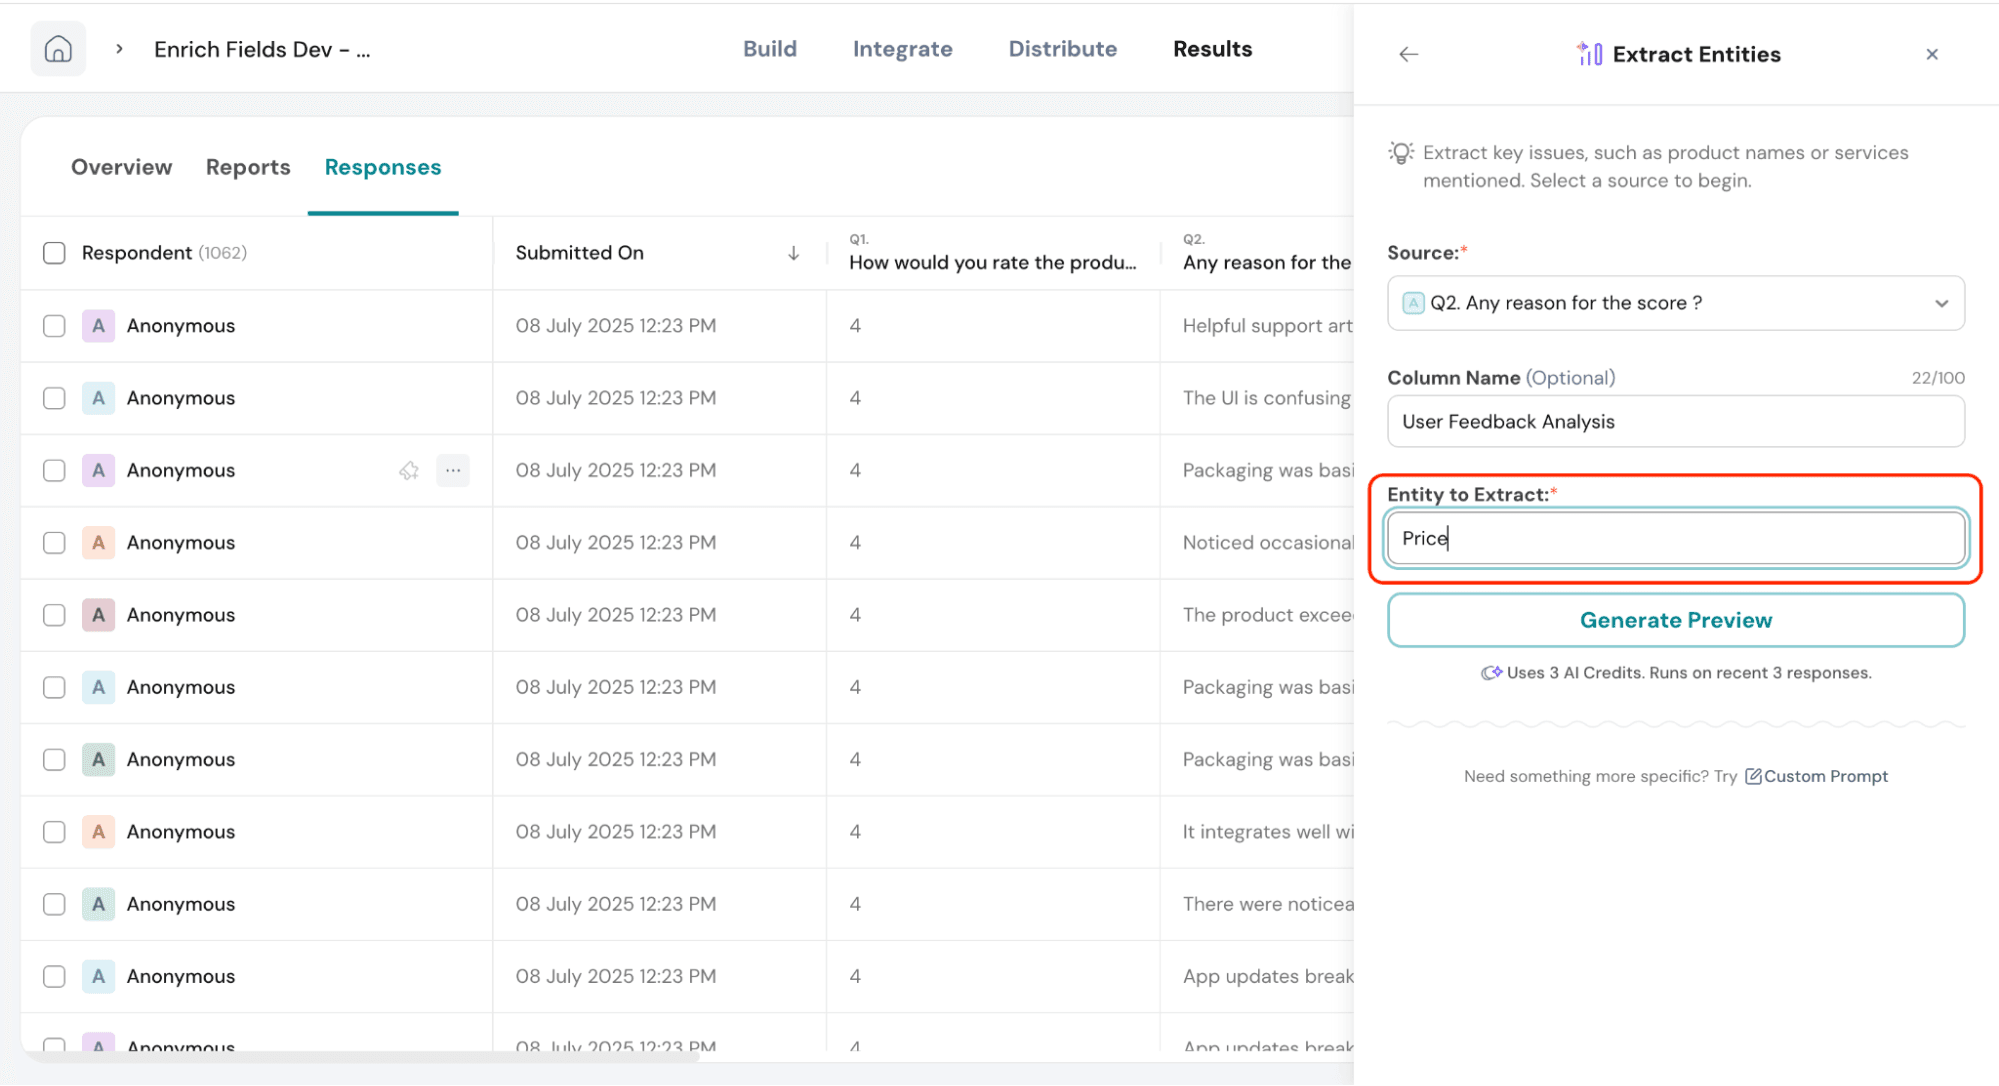
7.3. Once you’ve selected the question and added a heading, click on Generate Preview to view AI-generated entities for three recent responses. This allows you to review the output before applying it to the full dataset.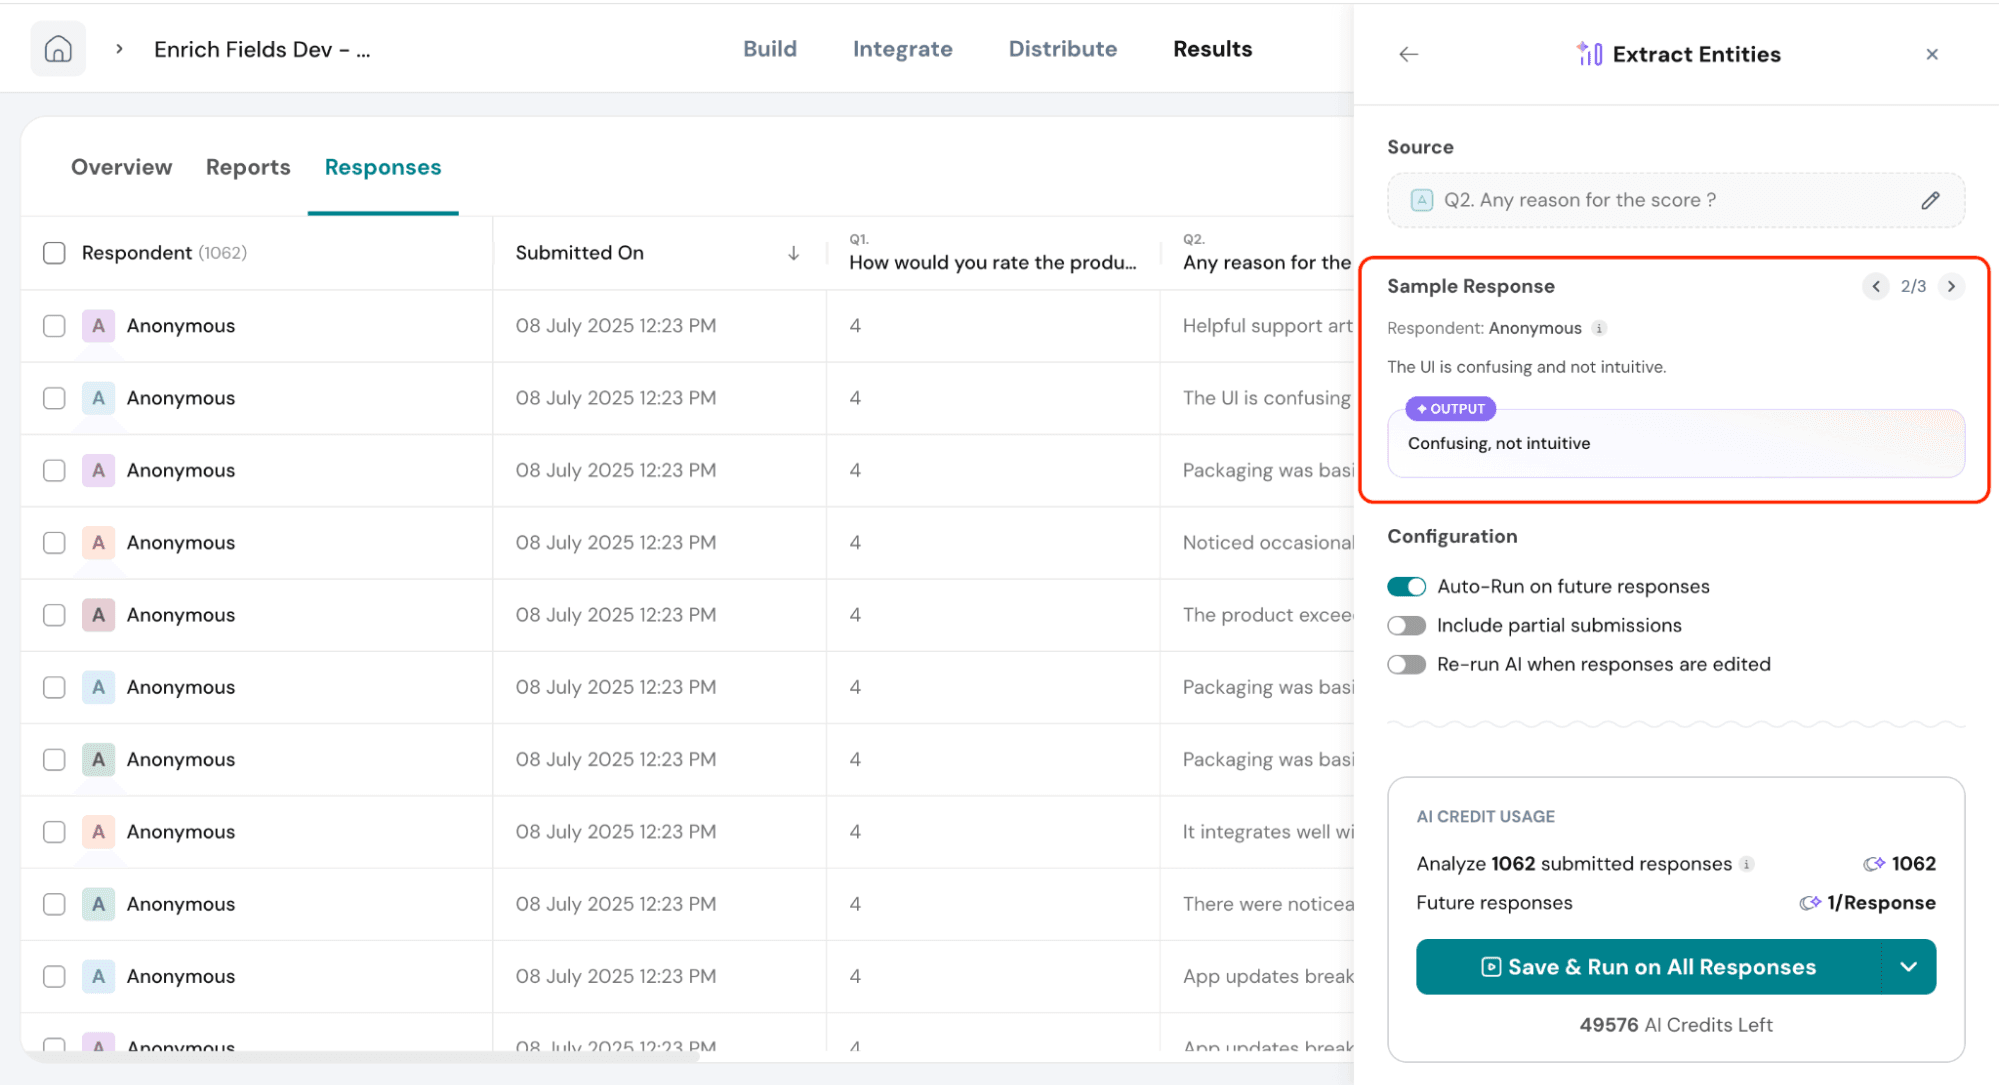
7.4. The configuration options are the same as previously discussed, including Auto-Run on future responses, Include Partial Submissions, and Re-run AI when responses are edited.
8. Summarize-This generates a concise summary for each open-ended response. It analyzes the content to highlight the key insights, allowing you to quickly understand the essence of what was shared, without reading every word. The result is a streamlined, readable version of all responses.
8.1. Since this feature summarizes entire responses, the Source is set to All questions by default and cannot be changed.
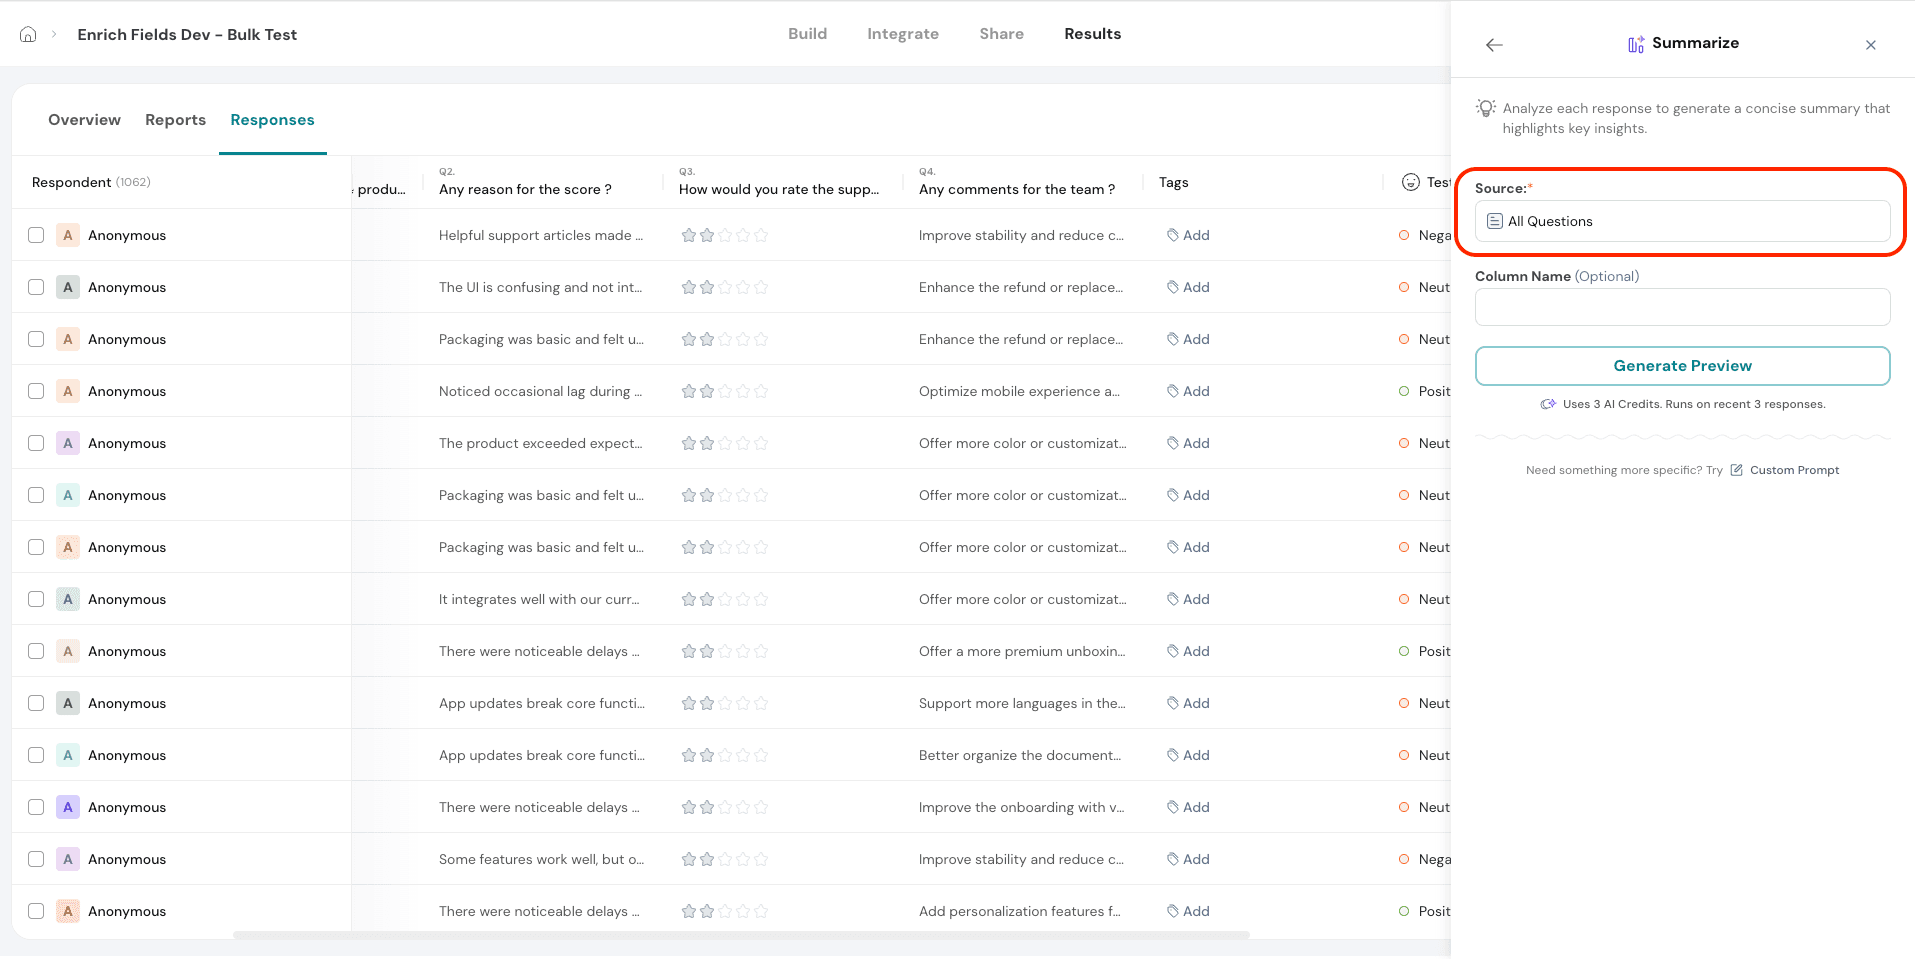
8.2. Once you’ve selected the question and added a heading, click on Generate Preview to view the AI-generated summary of the responses. This allows you to review the output before applying it to the full dataset.
8.3. The configuration options are the same as previously discussed, including Auto-Run on future responses, Include Partial Submissions, and Re-run AI when responses are edited.
9. Translate- This allows you to translate open-ended response text into a language of your choice. It helps you unify multilingual feedback into a single
9.1. Select the Source question you want to translate.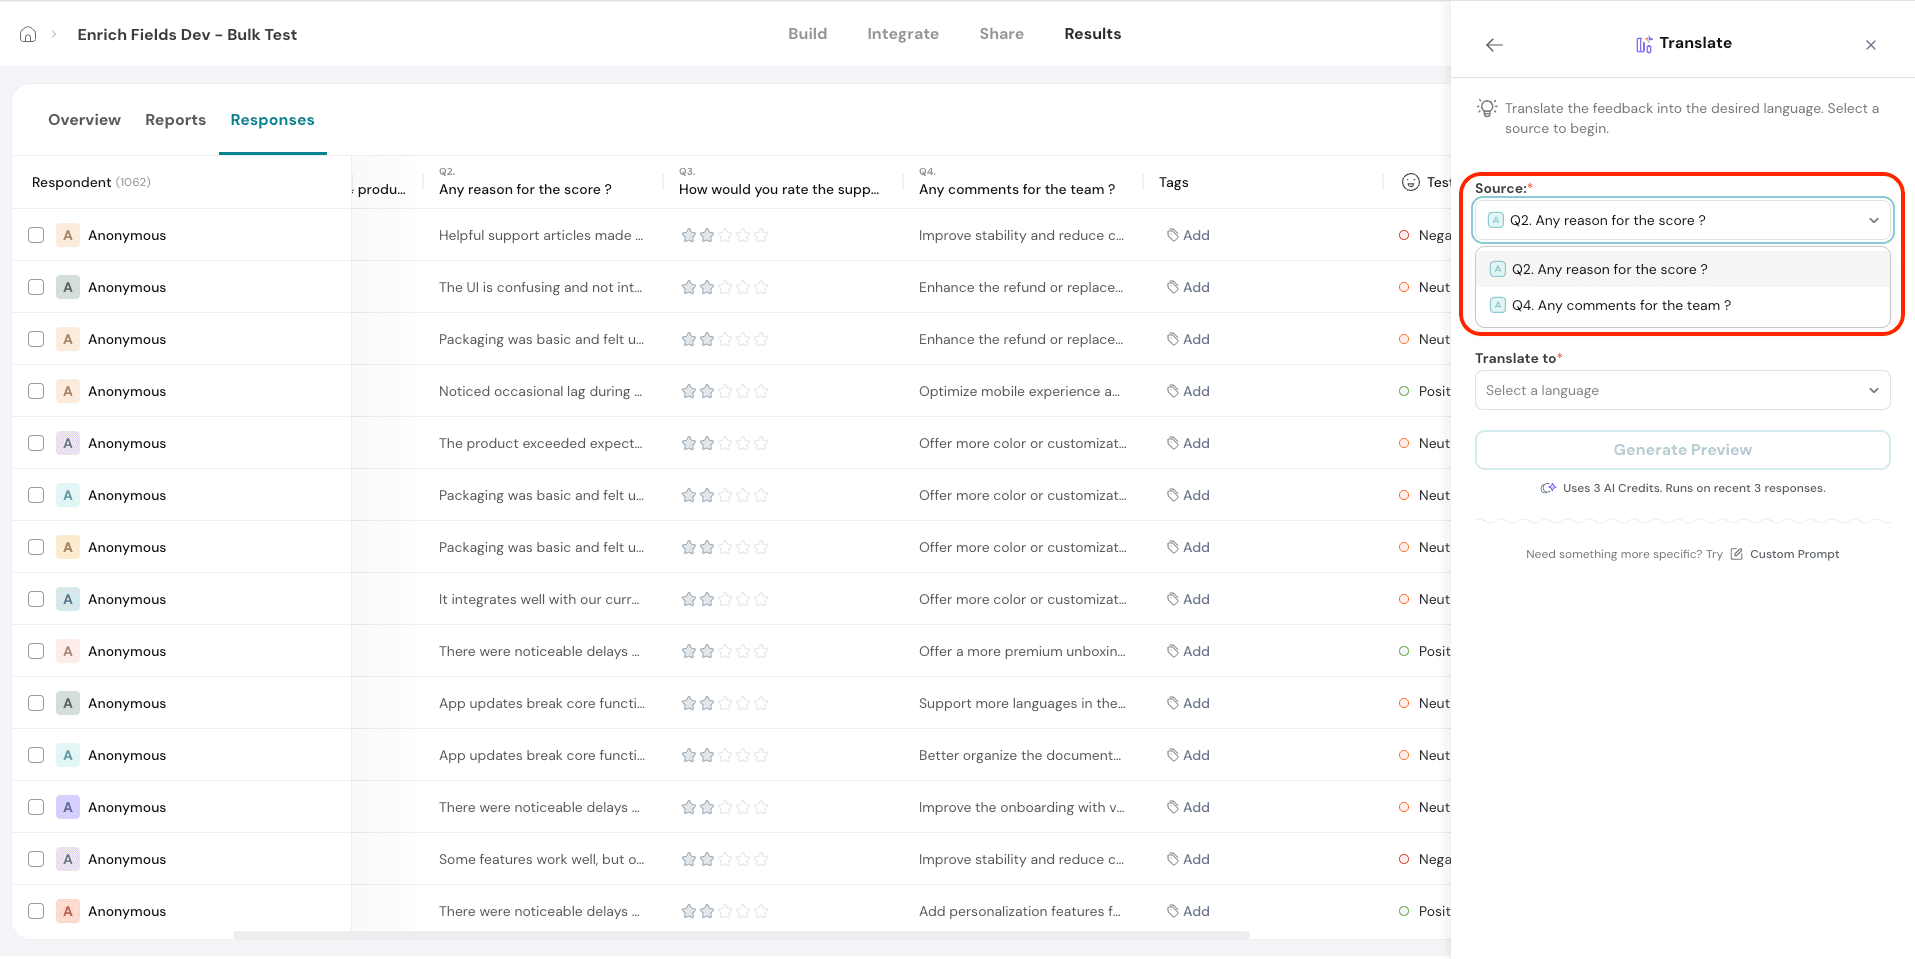
9.2. Under Translate to, choose the target language you want the responses to be translated into.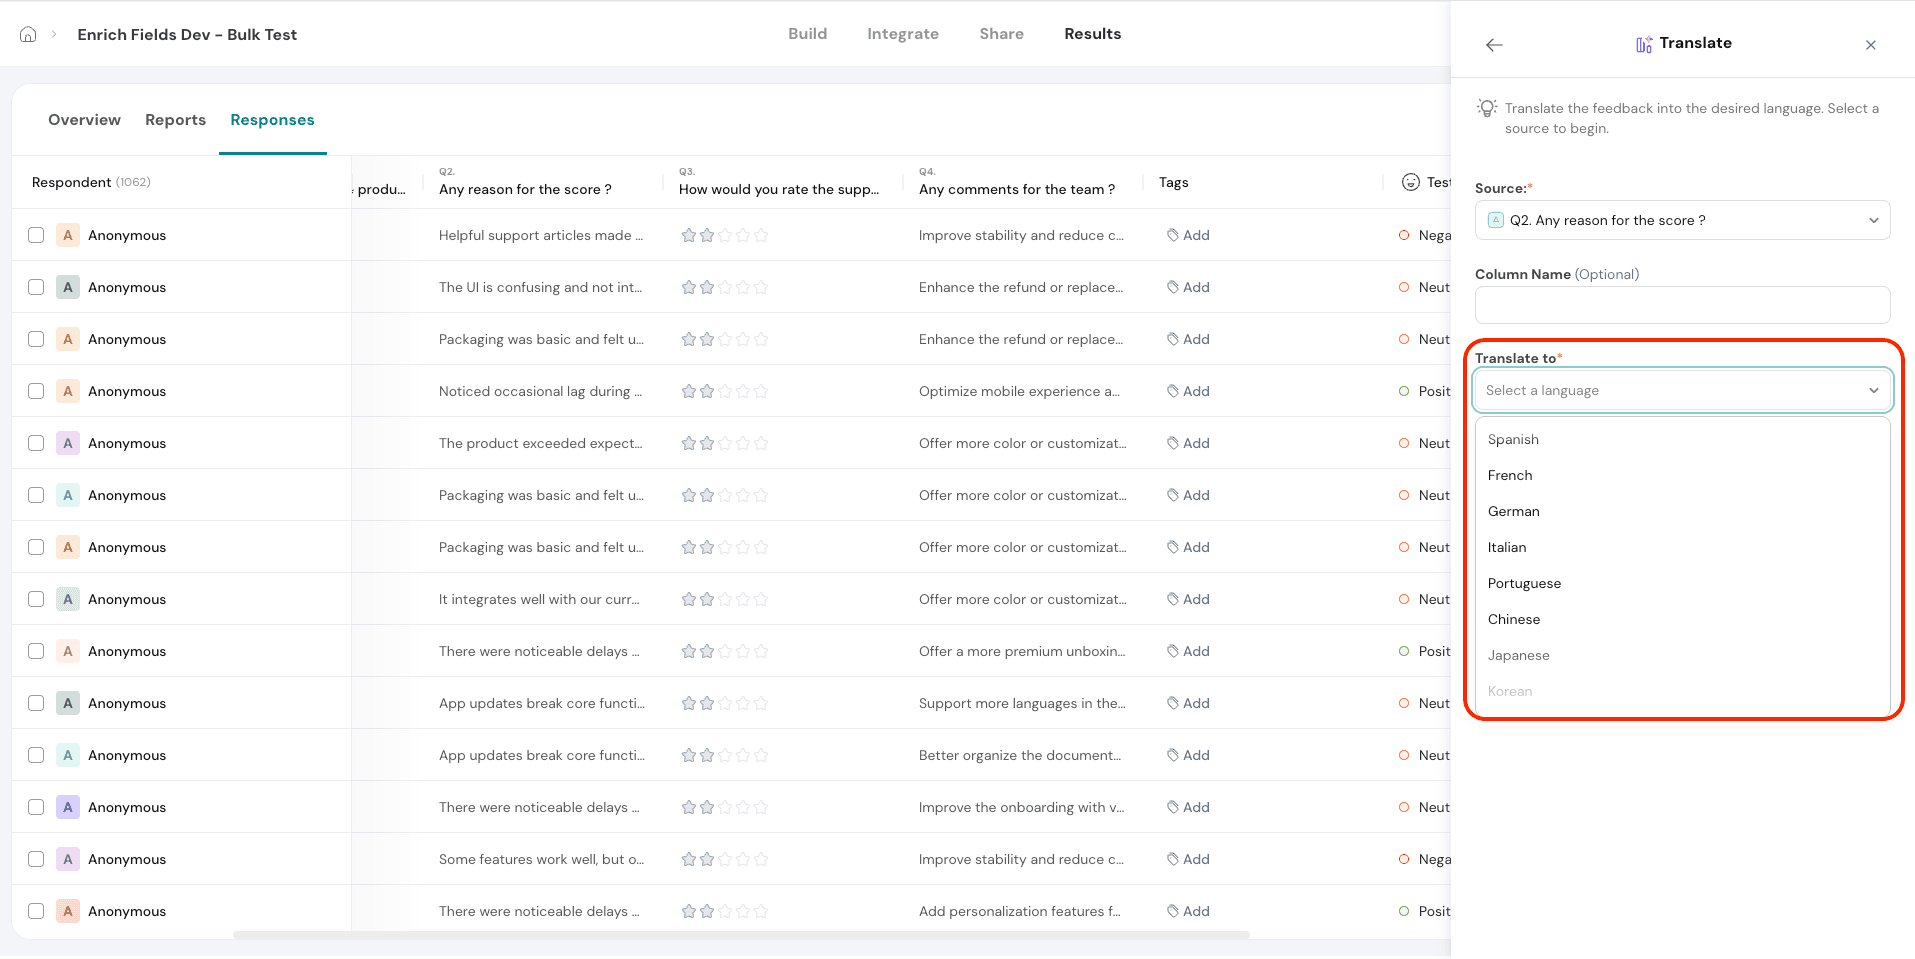
9.3. . Once you’ve selected the question and added a heading, click on Generate Preview to view the AI-generated translation of the responses. This allows you to review the output before applying it to the full dataset.
9.4. The configuration options are the same as previously discussed, including Auto-Run on future responses, Include Partial Submissions, and Re-run AI when responses are edited.
10. Extract Topics- This maps responses to predefined themes and identifies the most common topics mentioned across all open-ended feedback. It helps surface key areas of focus without the need for manual tagging.
10.1. Under Source, select the open-ended question you want to analyze for topics.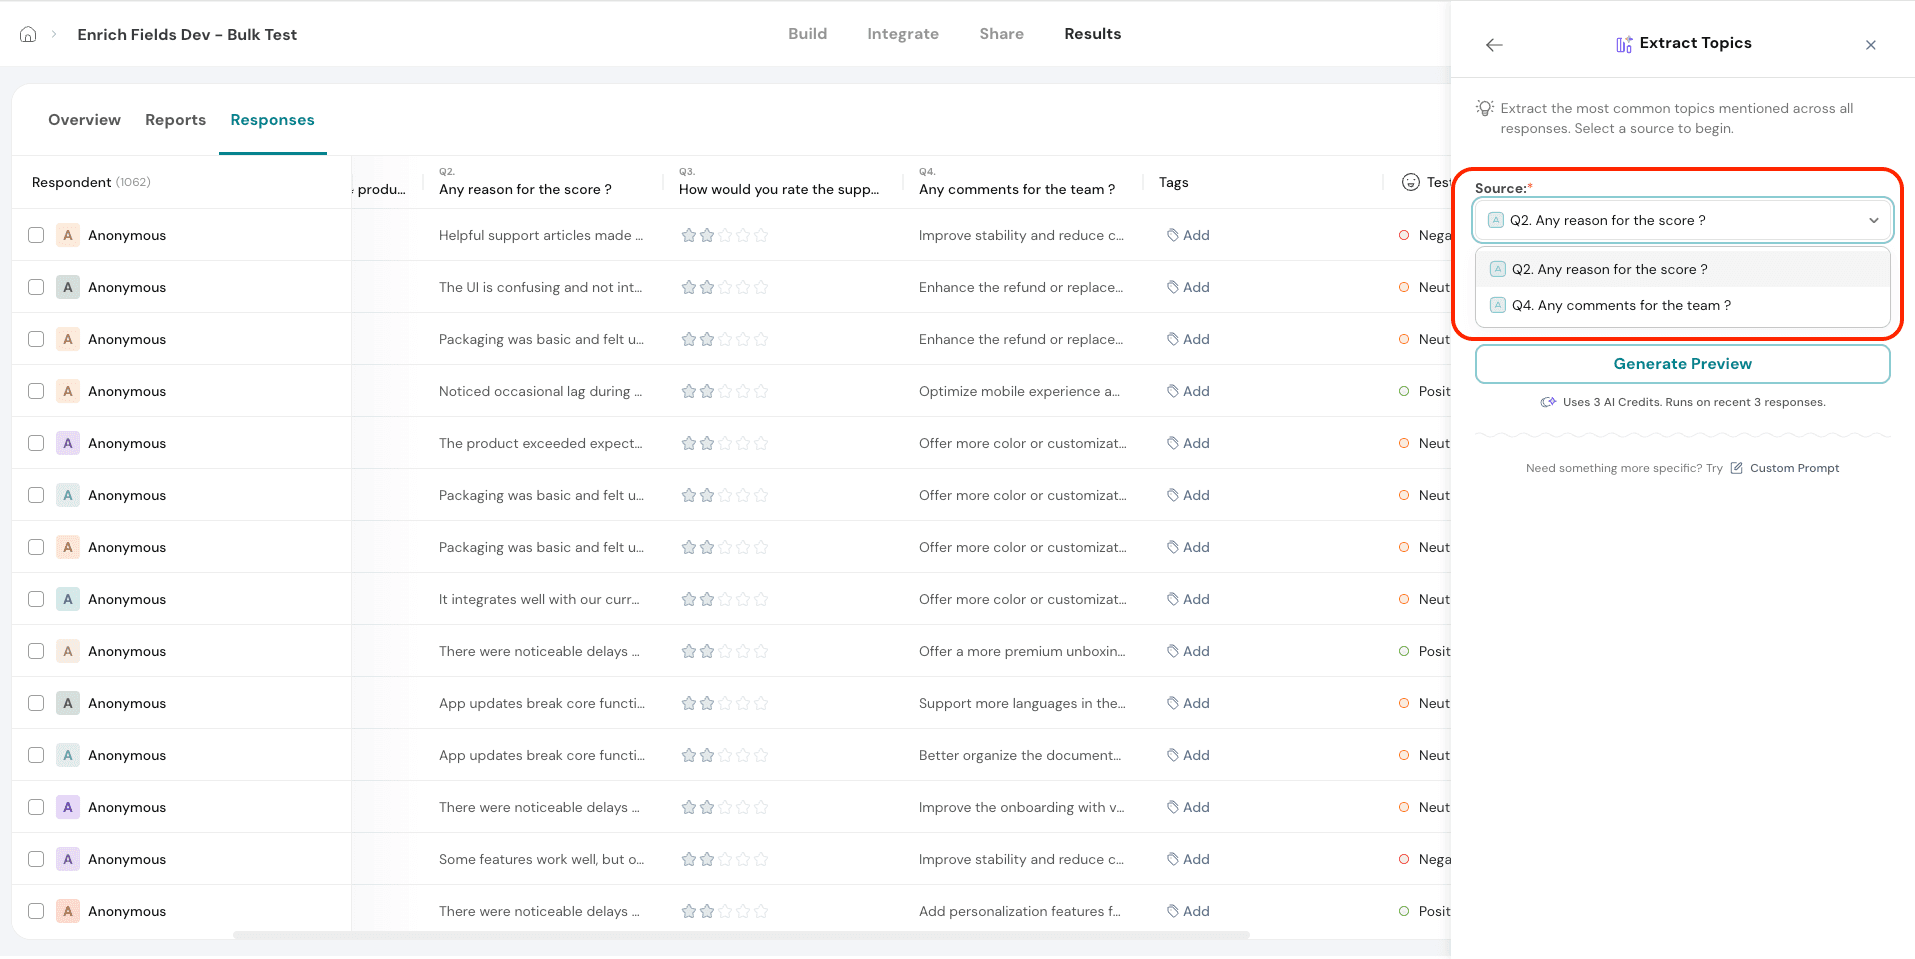
10.2. Once you’ve selected the question and added a heading, click on Generate Preview to view AI-generated topics for three recent responses. The preview will show the most relevant topics based on the latest data before applying it to the full set.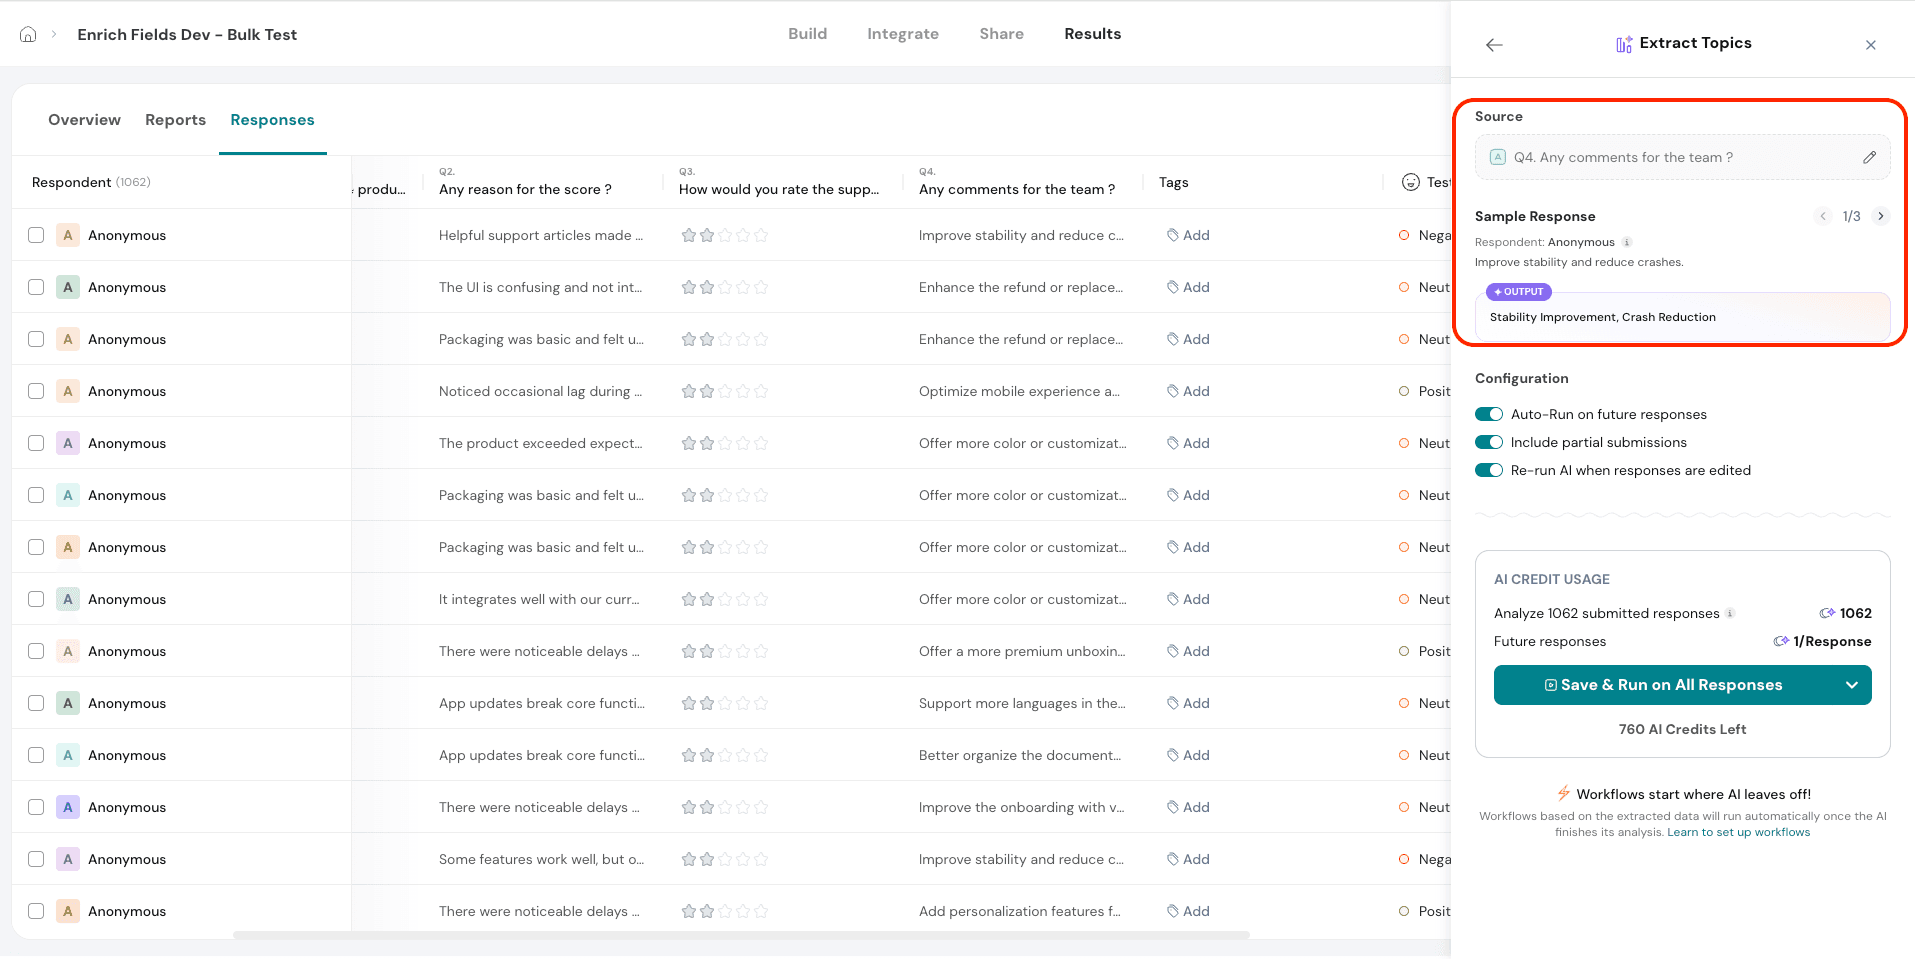
11. Custom Prompt- This feature allows you to create user-defined AI outputs by writing your own custom prompt. It gives you full flexibility to generate a new column based on your specific requirements, using AI to return exactly the kind of data you need.
For example:
In our e-commerce use case, you could write a prompt like:
"Based on the comment, is the customer likely to purchase again? Answer Yes or No."
This would create a new column with a simple Yes or No value, helping the team quickly gauge customer loyalty based on their feedback.
11.1. Enter the prompt for the column you want to create. You will also see a few suggested prompts listed below for inspiration.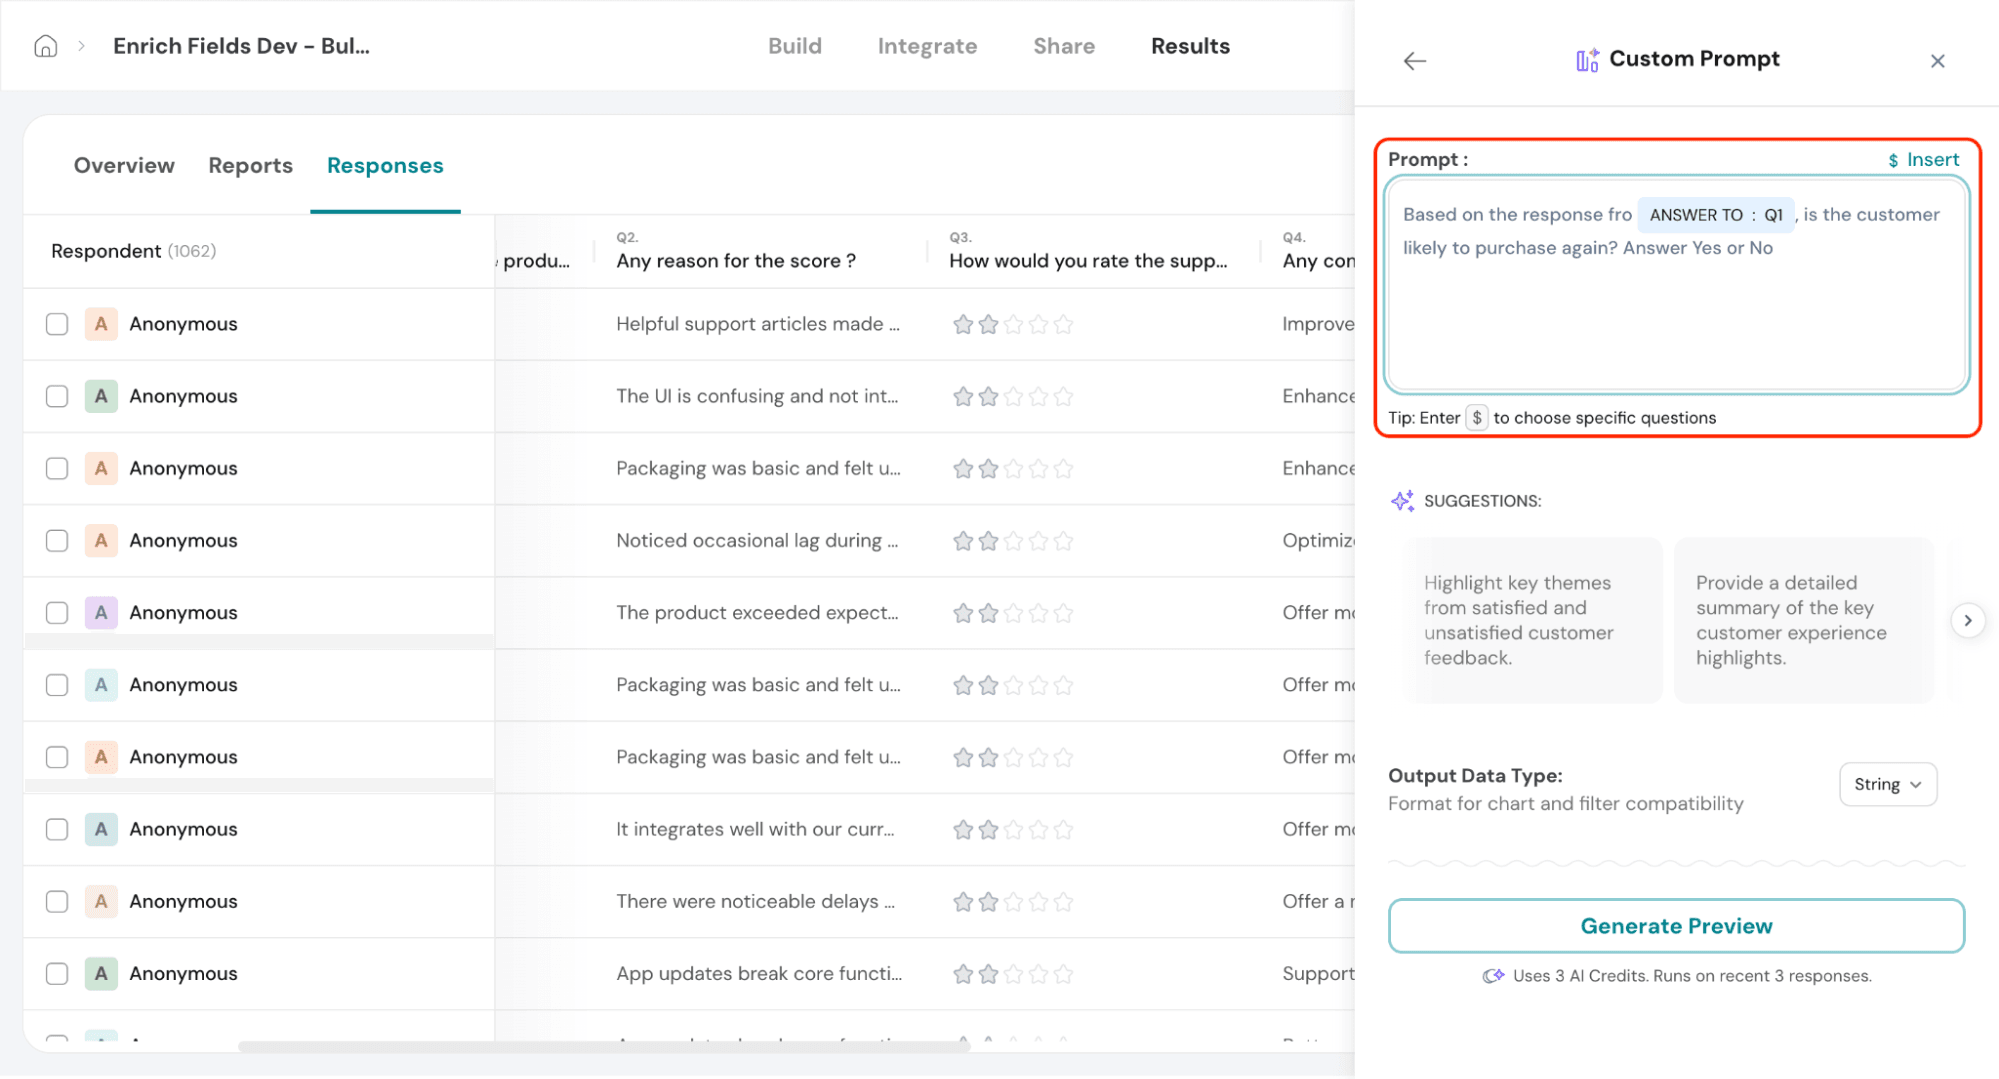
Note: You can choose specific open-ended questions that the prompt should apply to. To do this type $ or choose Insert.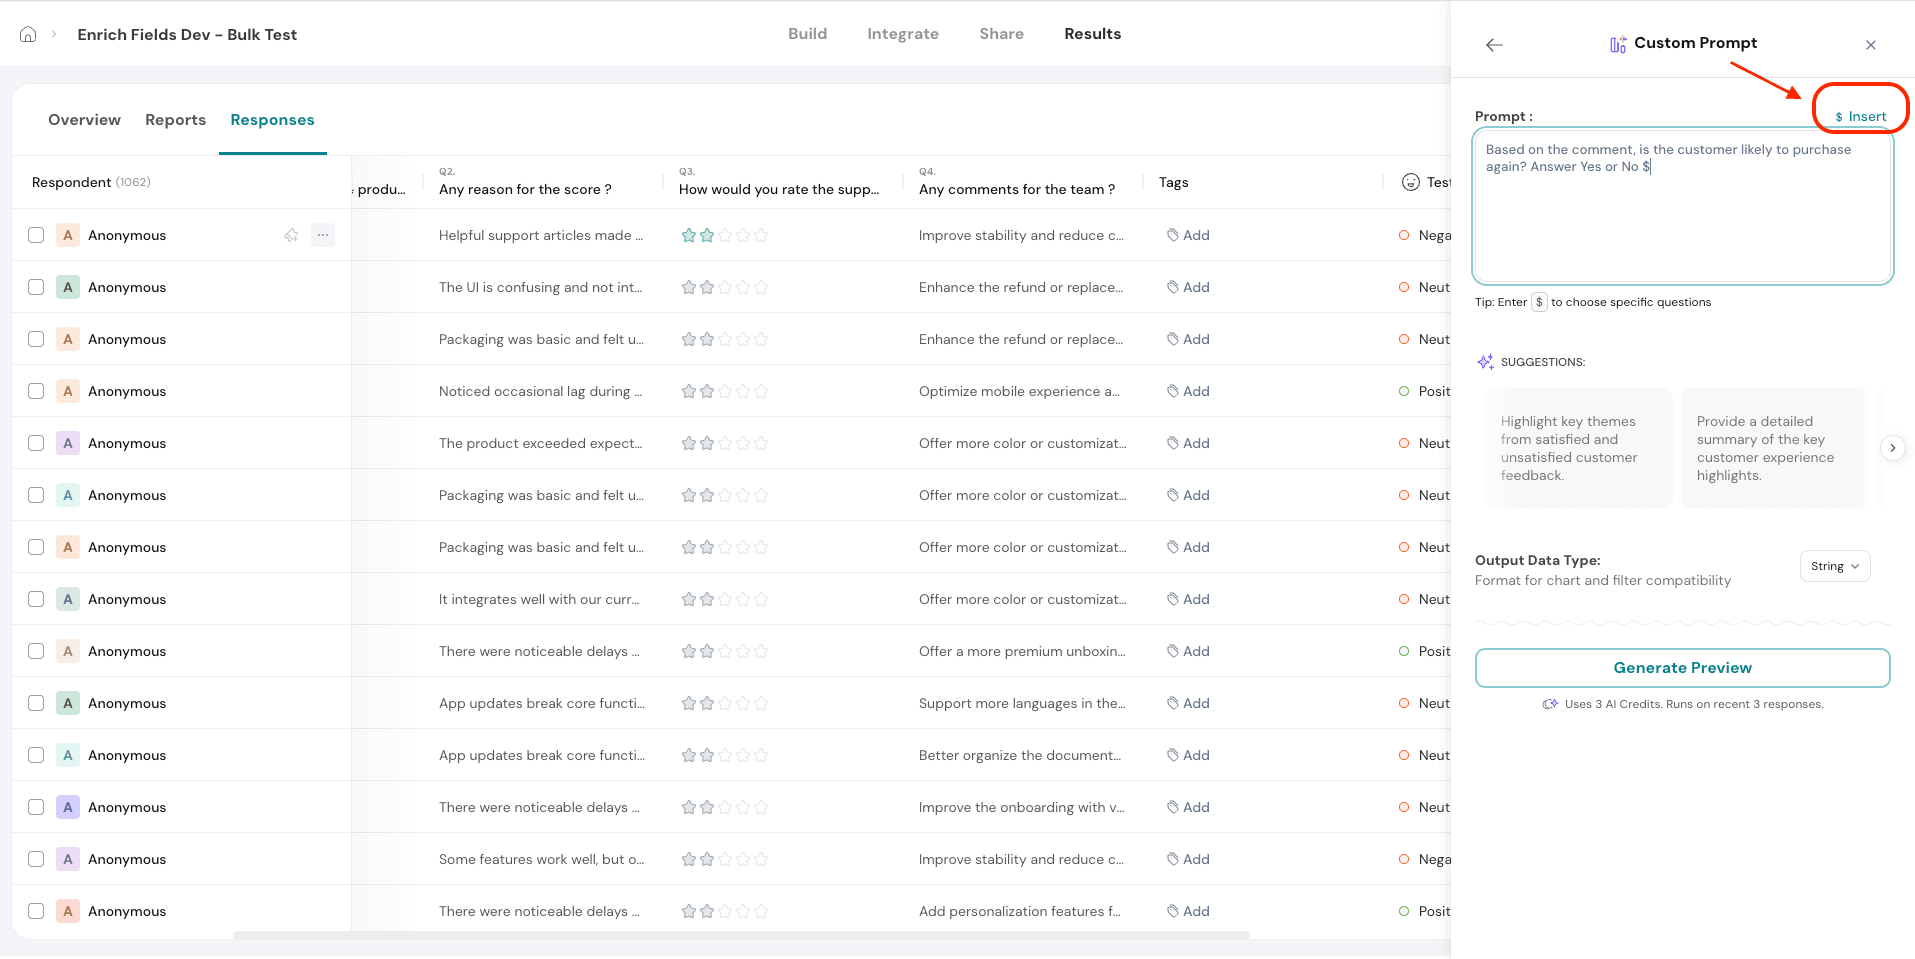
11.2. Select the format in which you want the output to appear. You can choose from String, Number, or Boolean depending on the type of data you want to generate.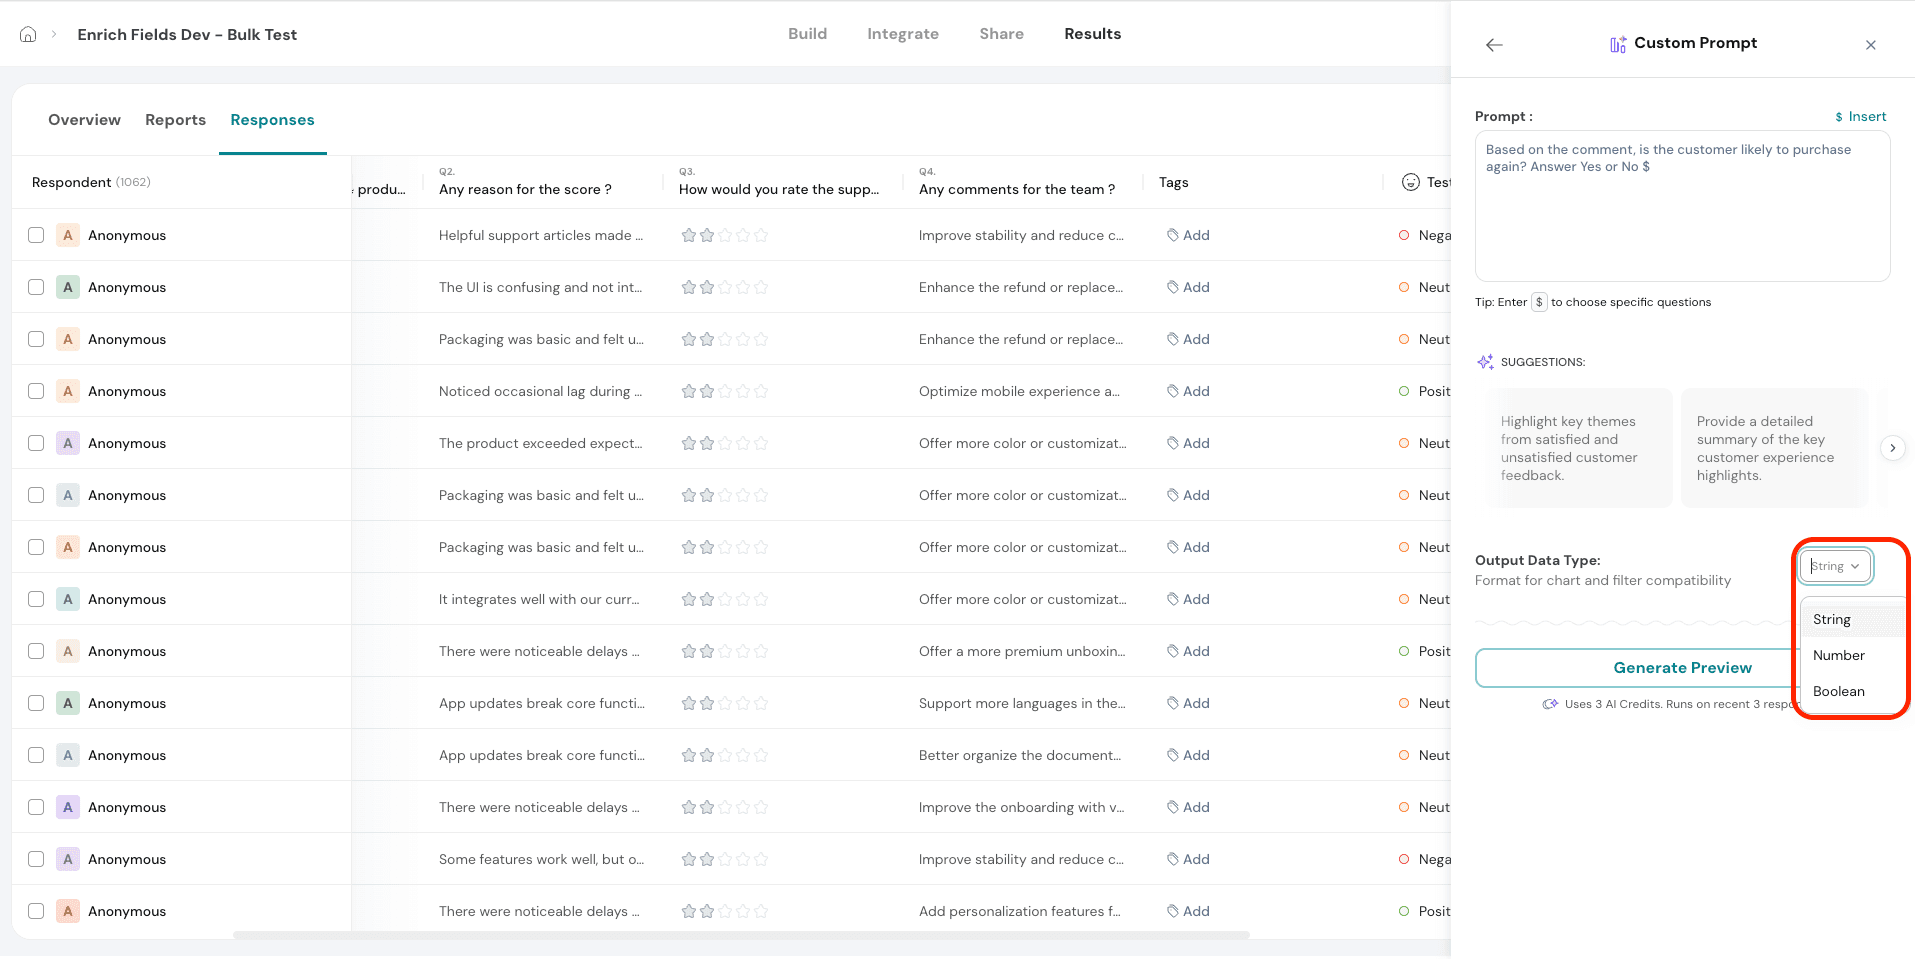
11.3. Once you’ve entered your prompt and selected the type of output you want to generate, click on Generate Preview to view the custom prompt.
Save and Run
Save and Run applies the selected AI feature such as sentiment analysis, classification, or topic extraction to your existing responses based on the configurations you've set. This action will consume AI credits.
Save and Don’t Run saves your configuration without applying it immediately. You can run it later when you're ready.
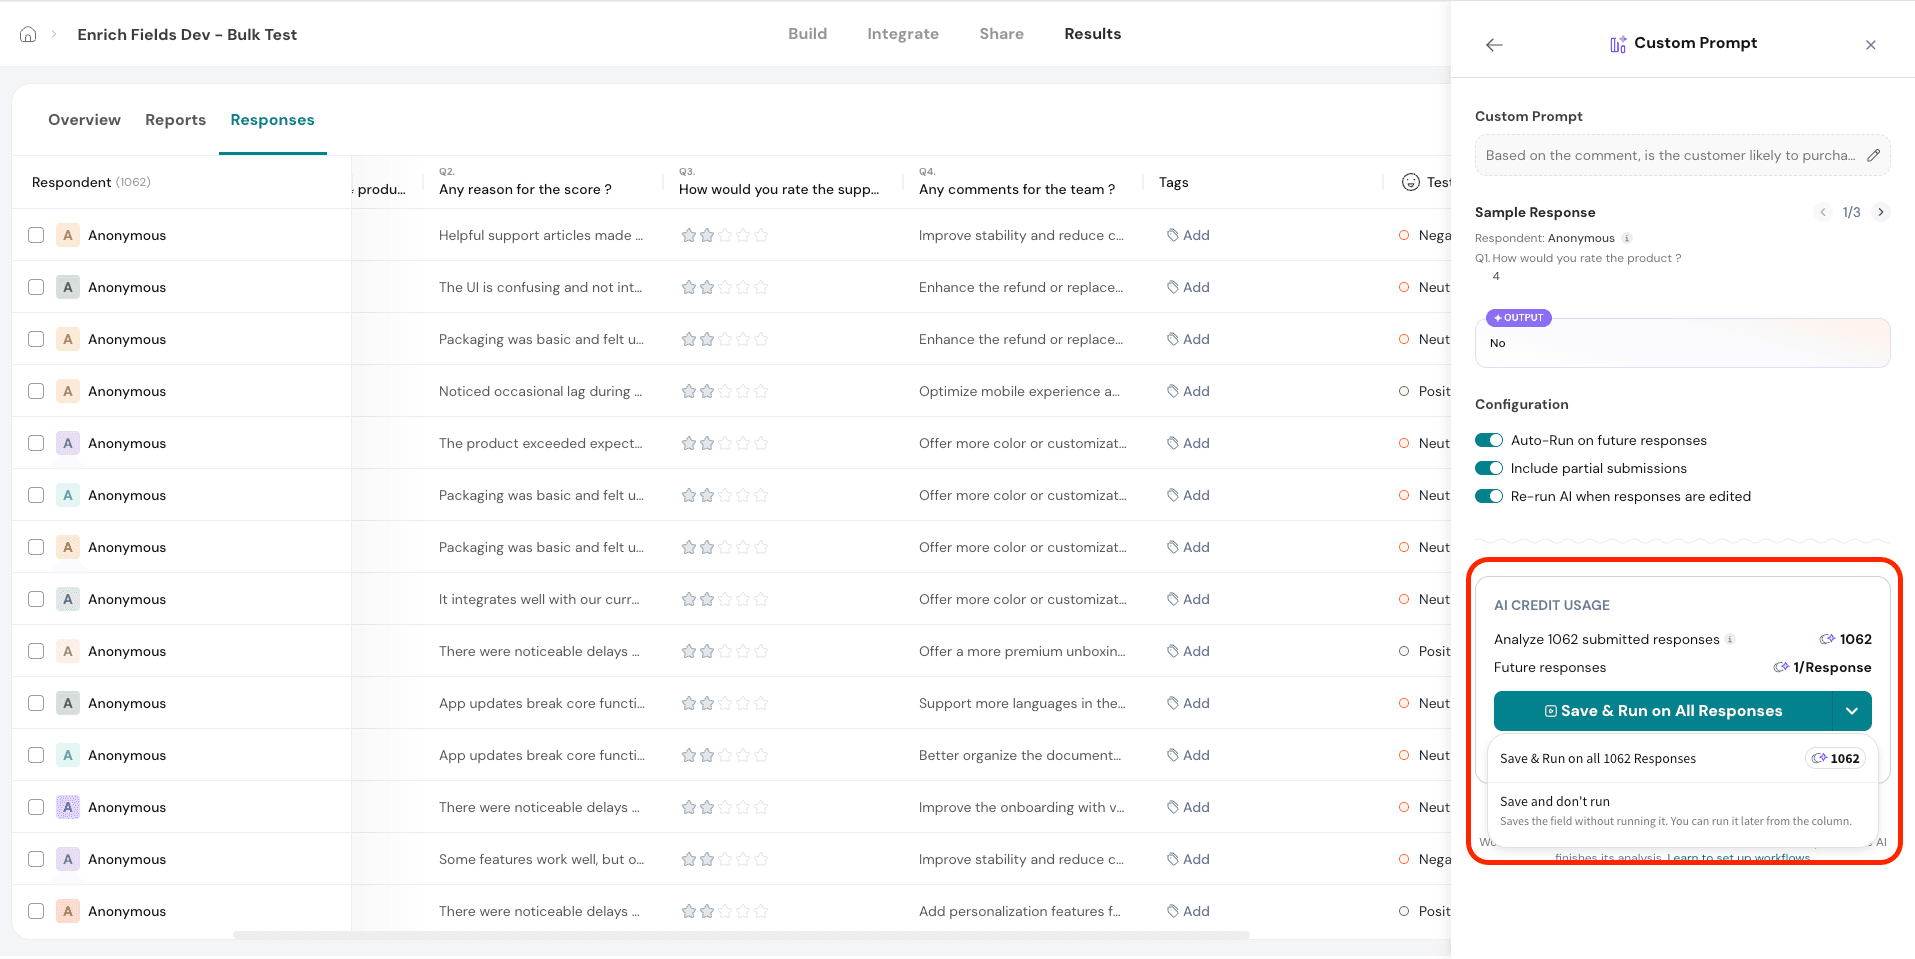
Each AI-generated column consumes 1 credit per response. This means that for every response processed by an Enrich column 1 credit is used. If multiple Enrich columns are applied, credits are consumed for each.
Example:
If your survey has 100 responses and you apply 3 Enrich columns (e.g., Sentiment, Summary, and Keywords),
you'll use: 100 responses × 3 columns = 300 credits
Credits are deducted as responses are processed, allowing you to monitor usage and estimate your AI consumption accurately.
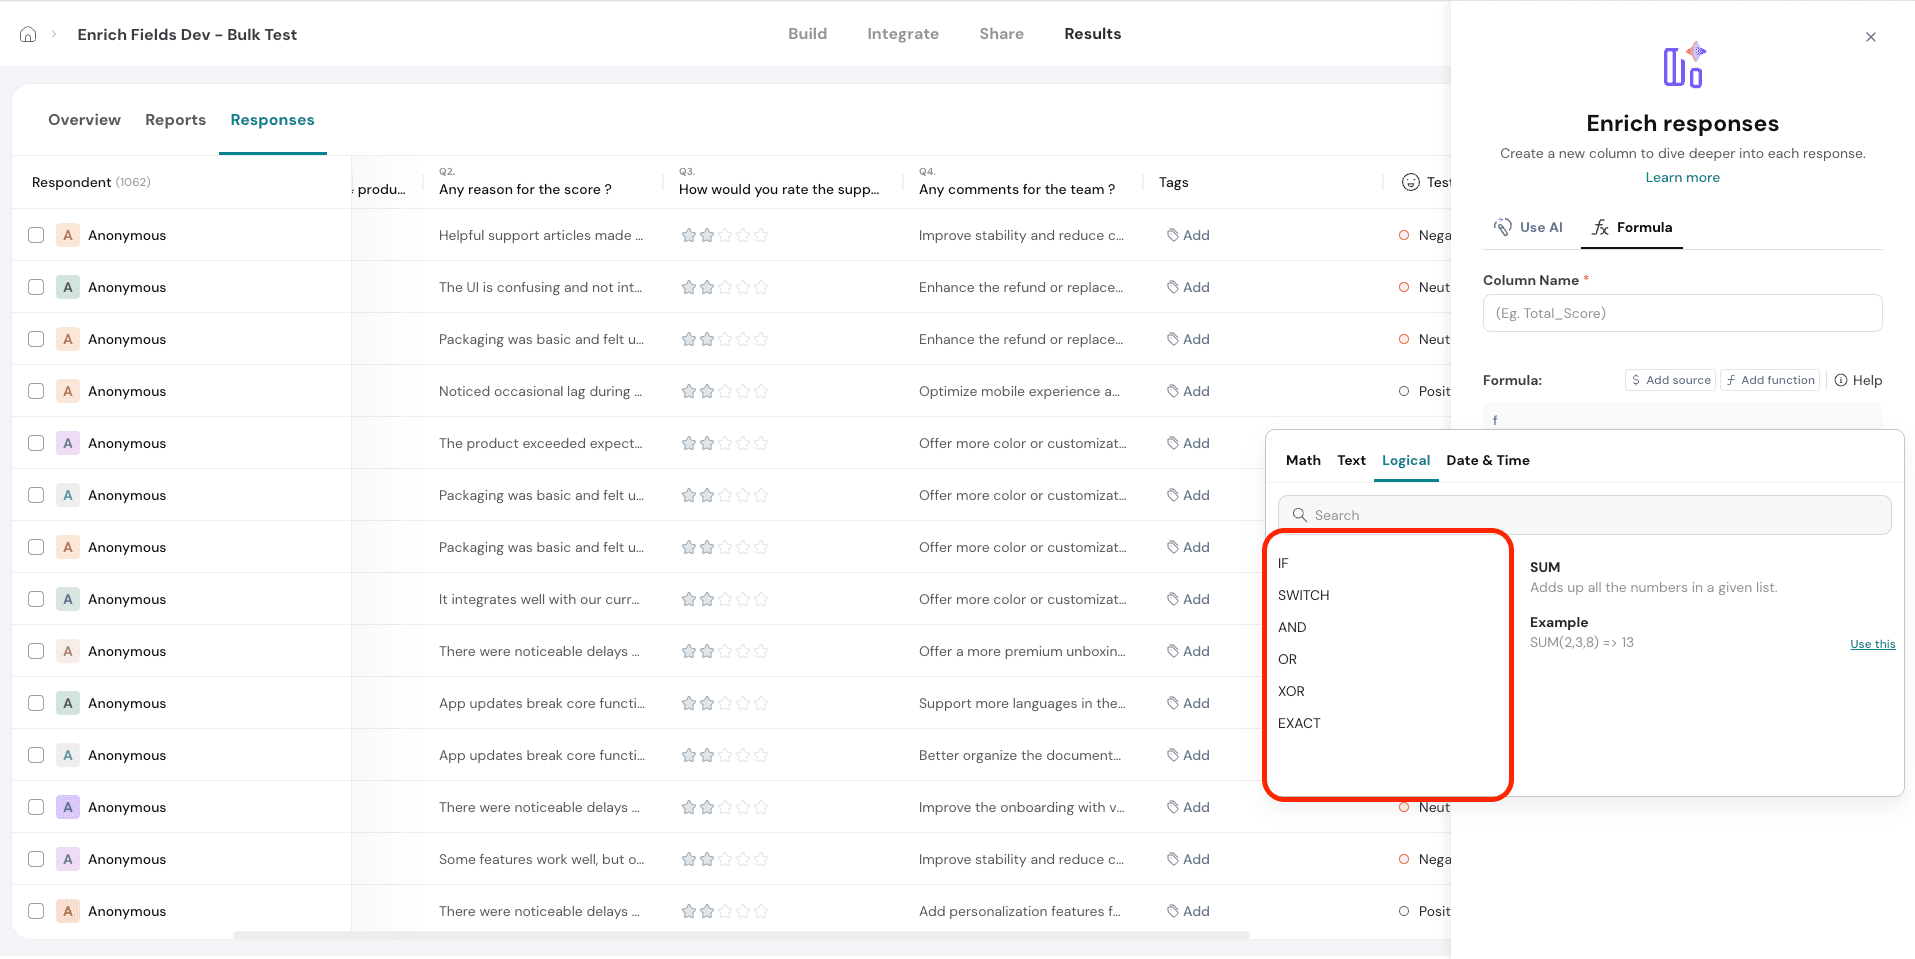
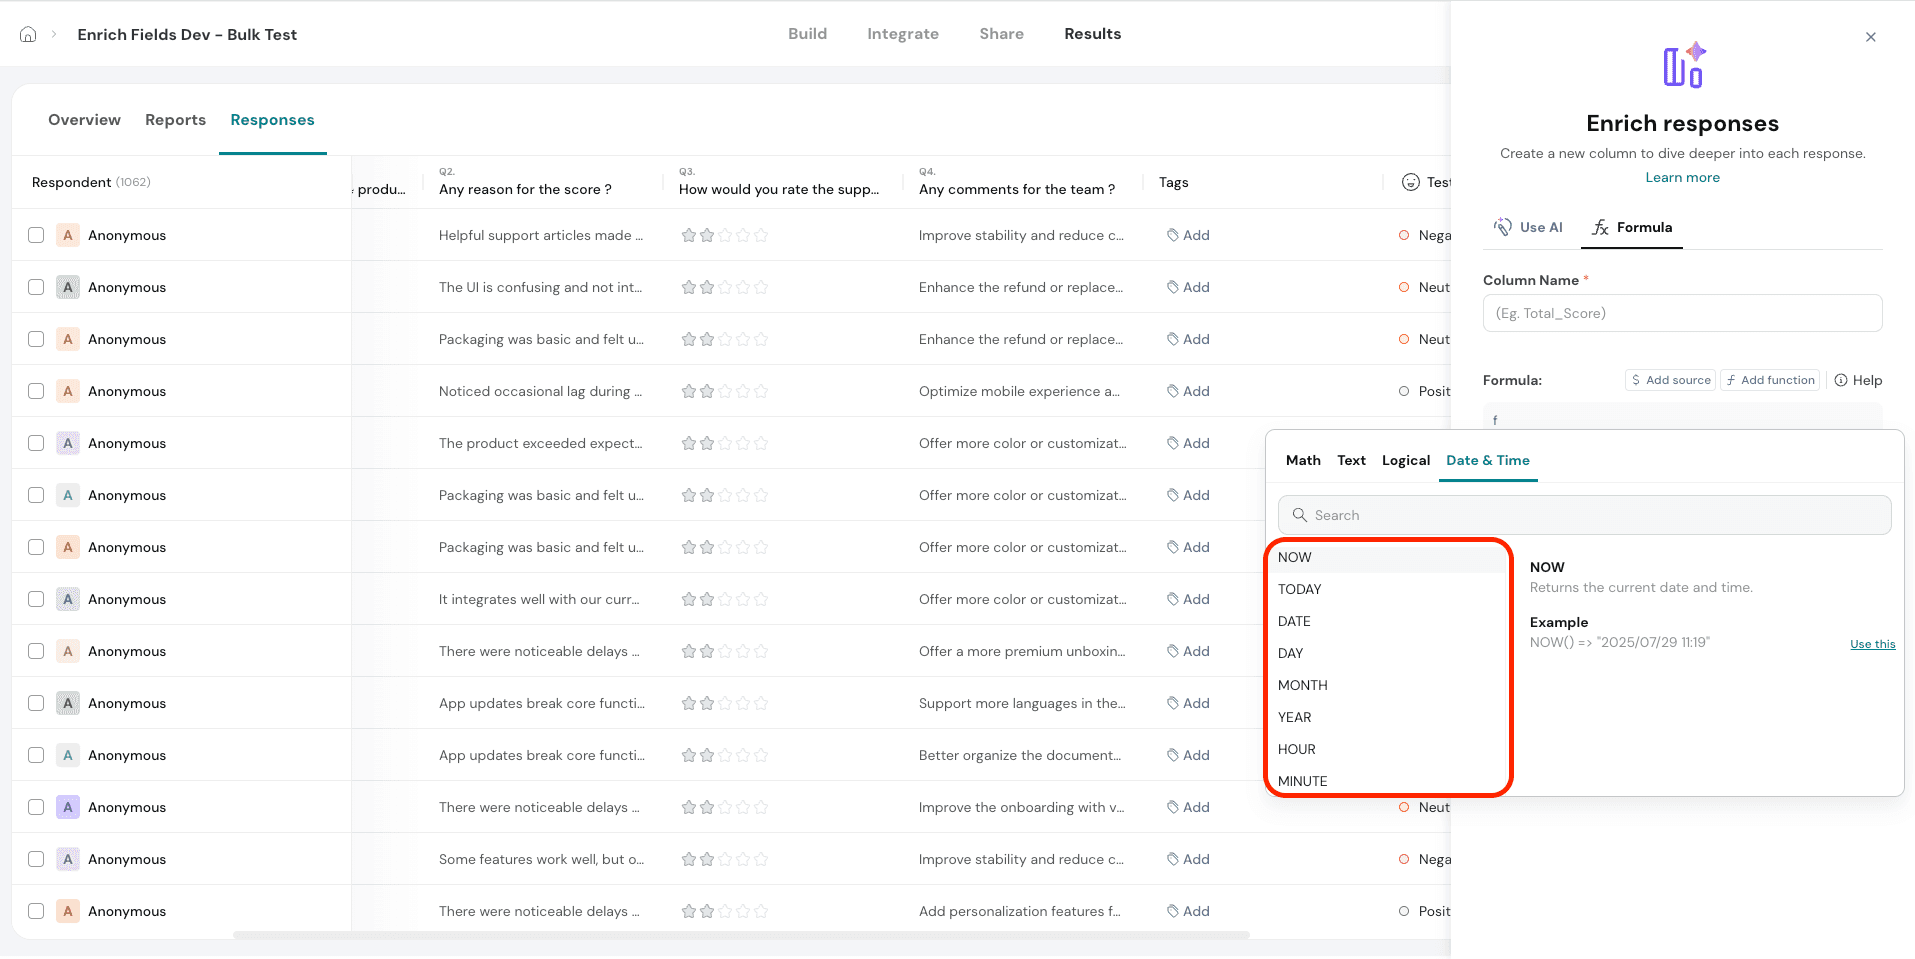
Formula
This feature allows you to create a new column by applying custom formulas to existing response data. This is useful when you want to perform calculations, combine values, or generate derived metrics all within the Responses page, without needing to export data.
With Formula, you can work directly with data collected in your survey, including numeric responses, dates, and AI-generated fields. Whether you’re calculating a score, flagging responses based on thresholds, or creating custom labels, this feature gives you the flexibility to dive deeper into each response and extract even more value.
Let’s see how this works
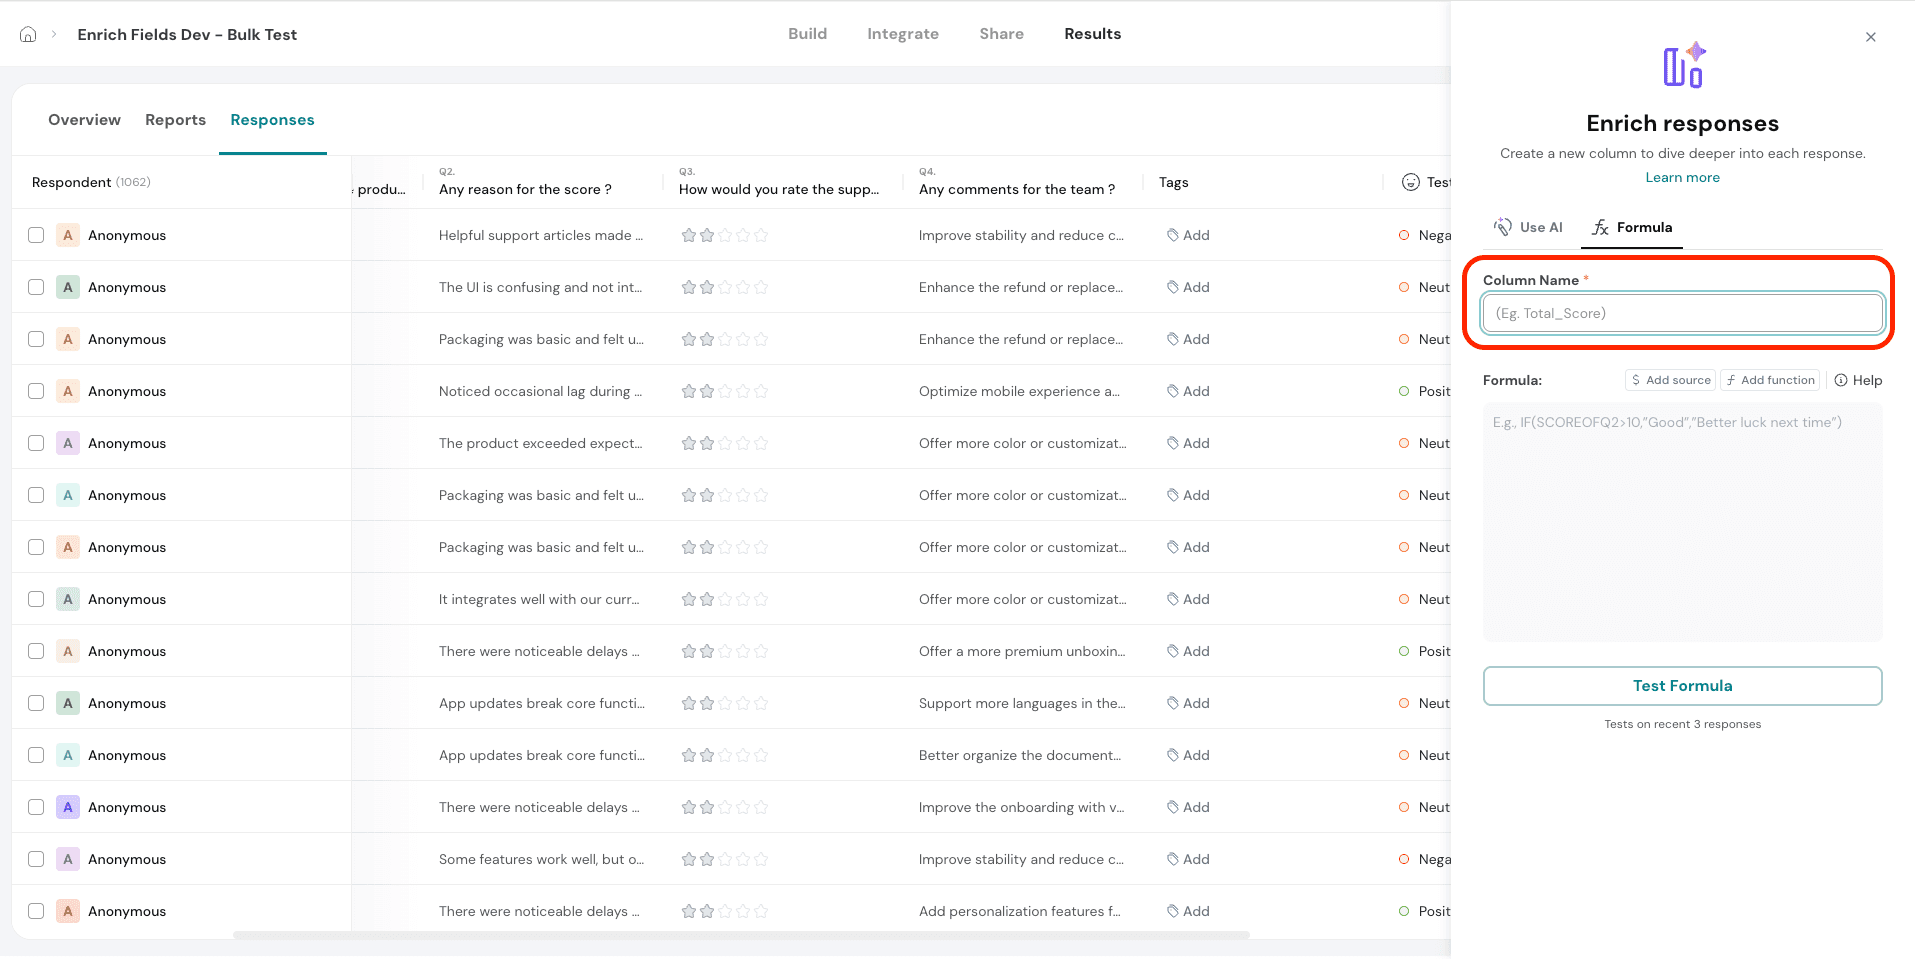
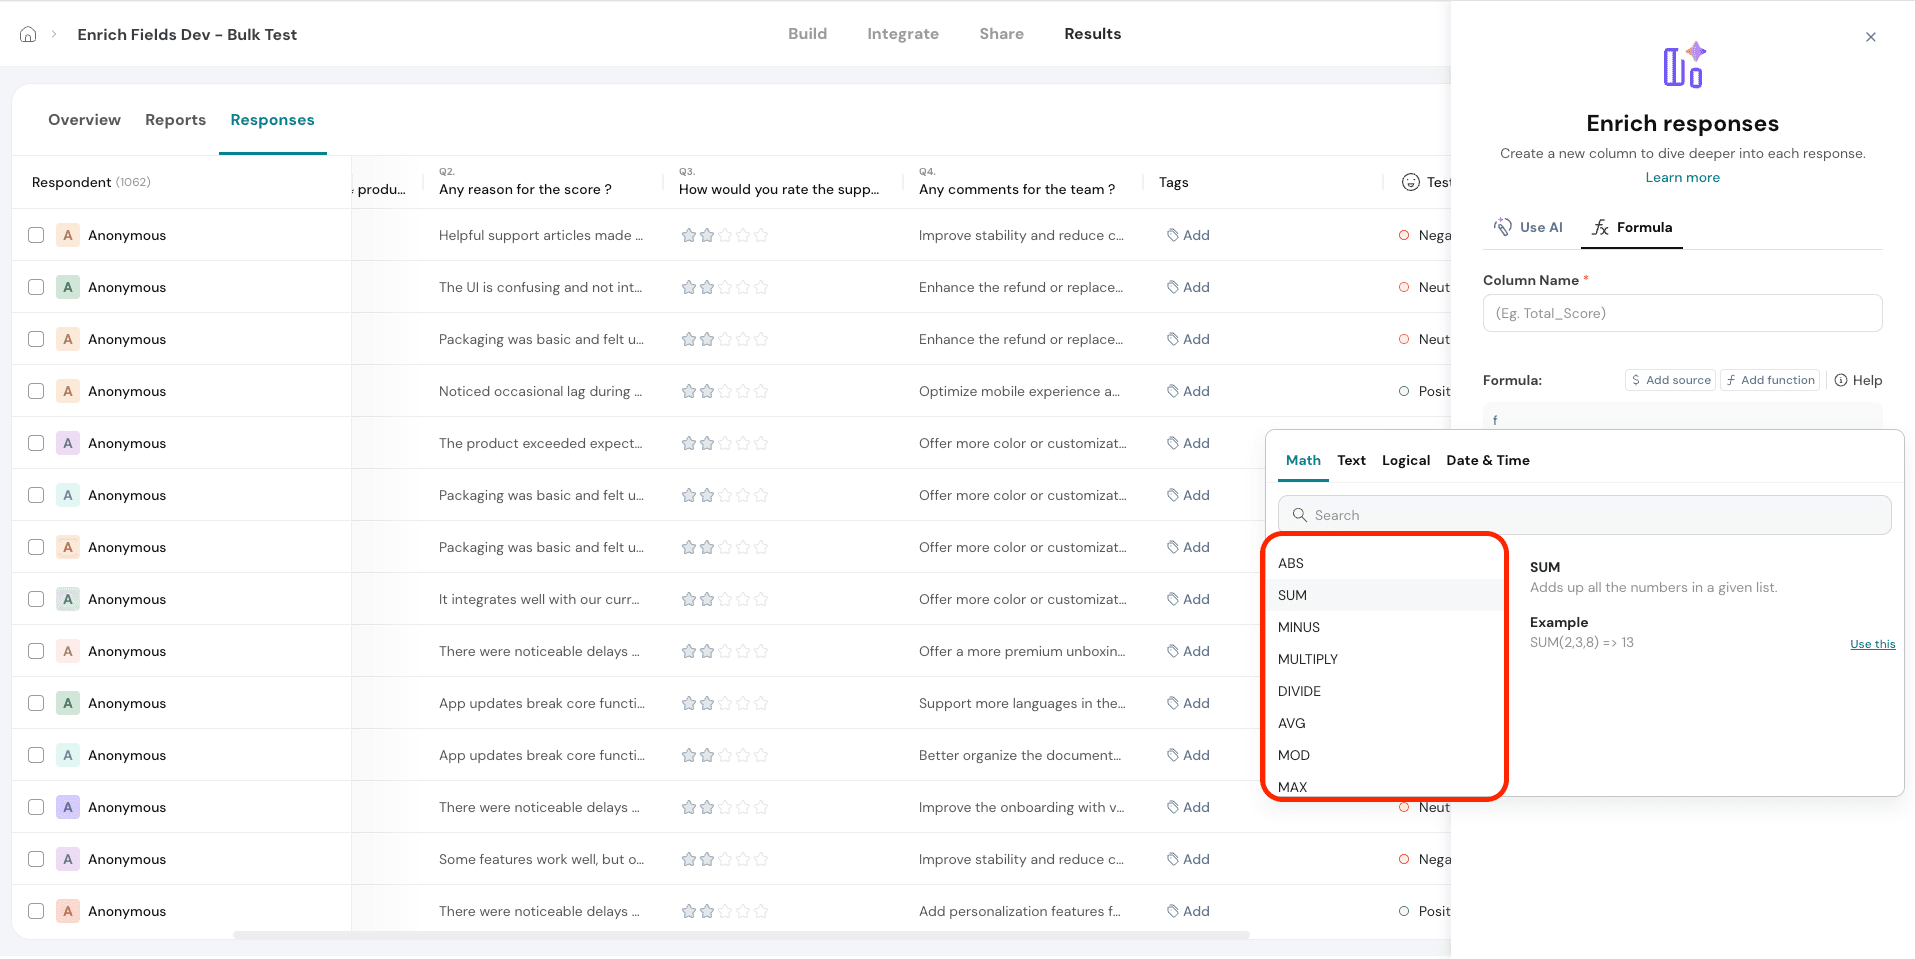
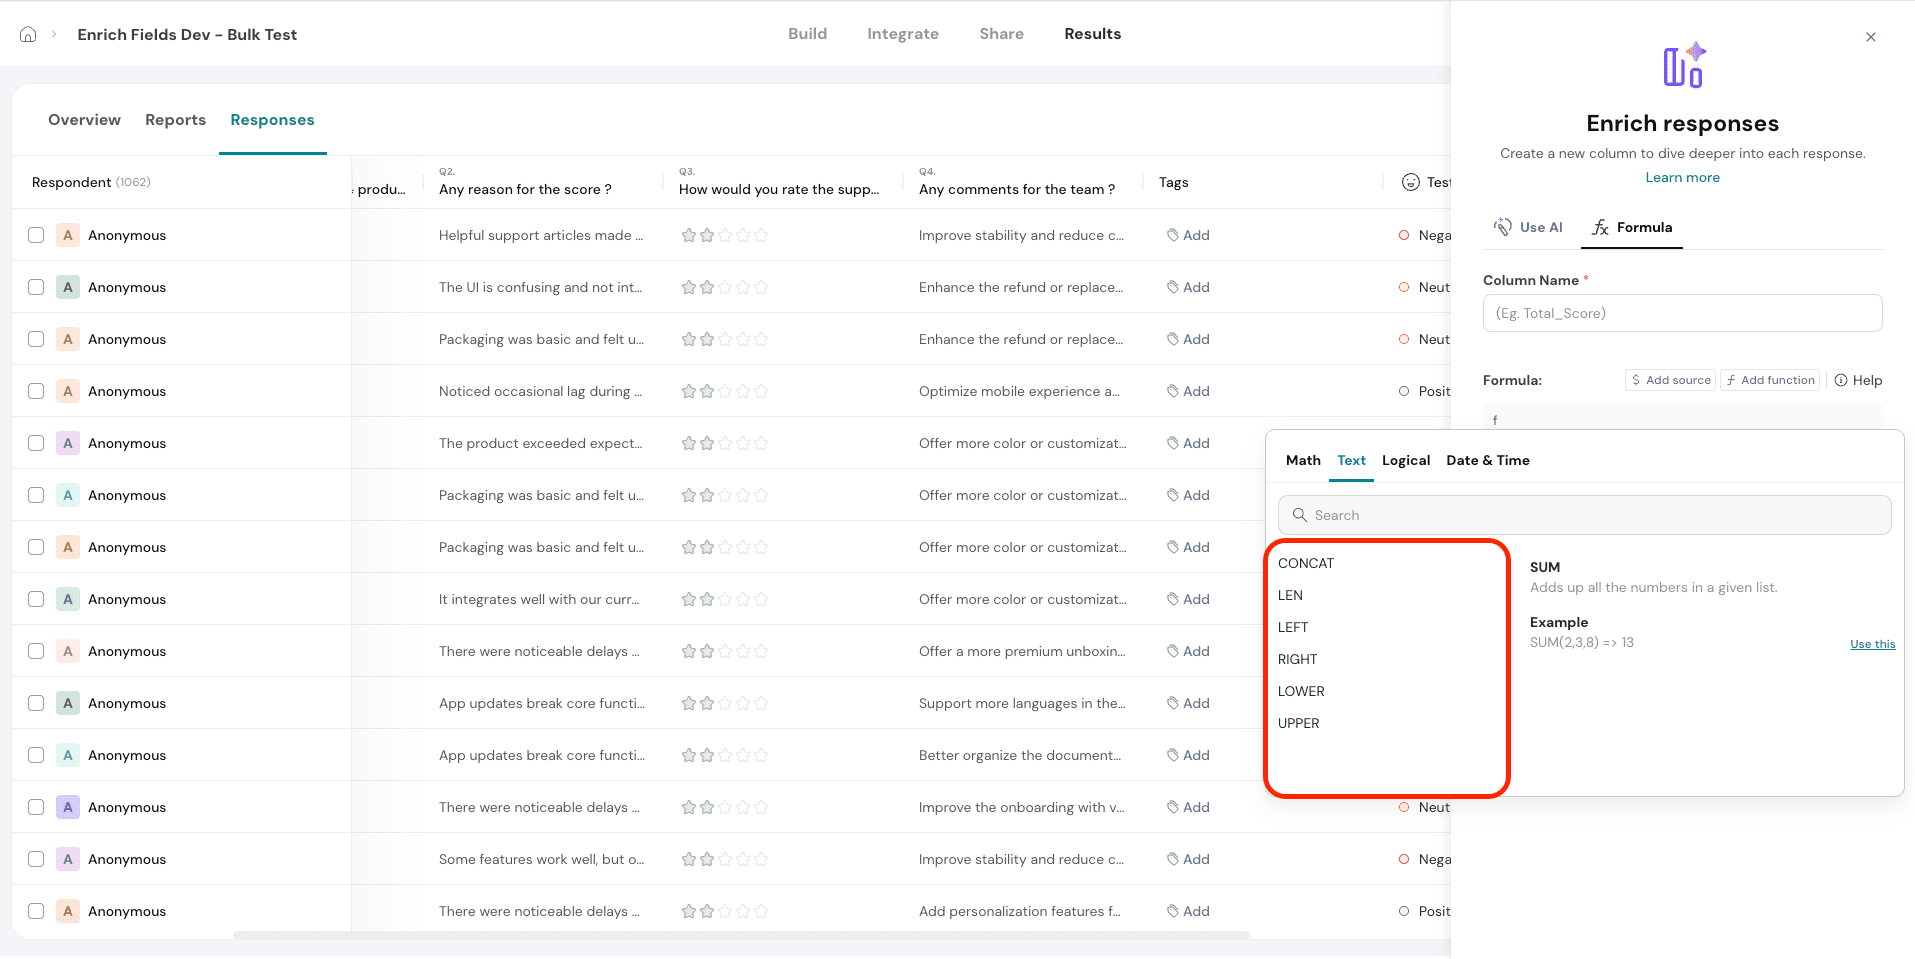
3. Type $ or click on Add Source to select the question(s) you want to use in your formula.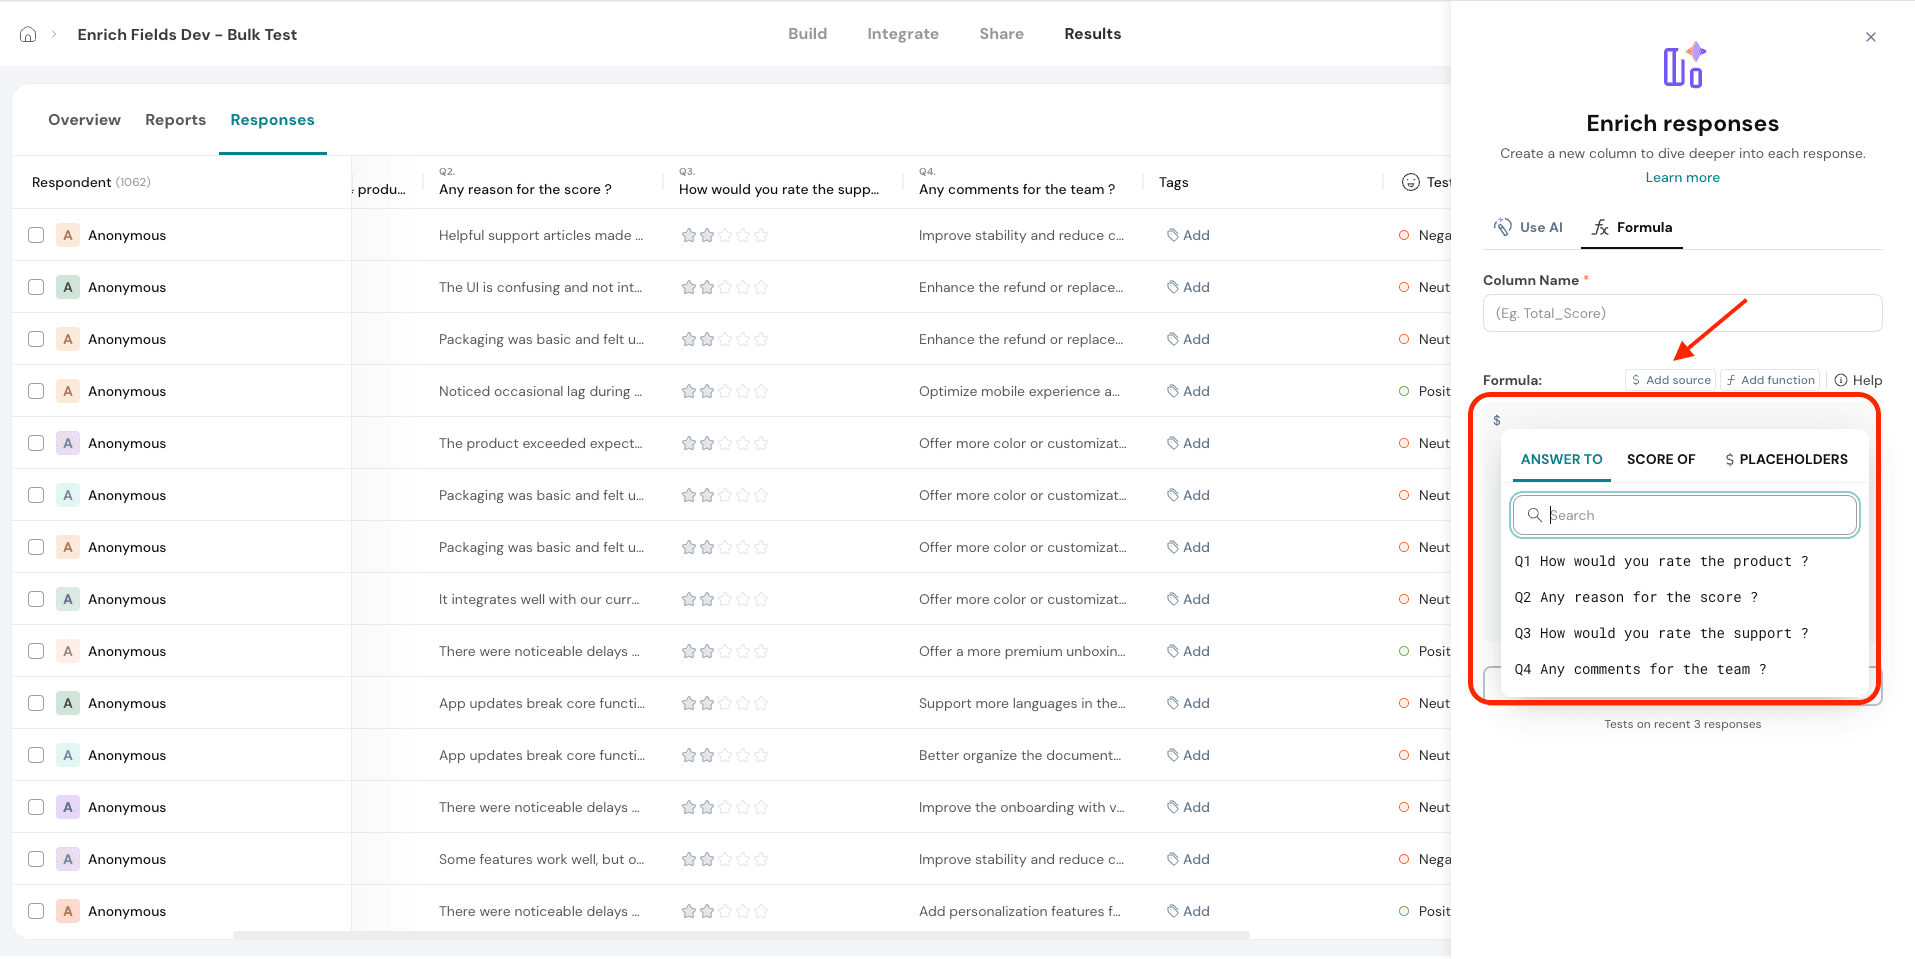
4. Once your formula is ready, you can test it to preview how it will apply to sample responses and verify the output.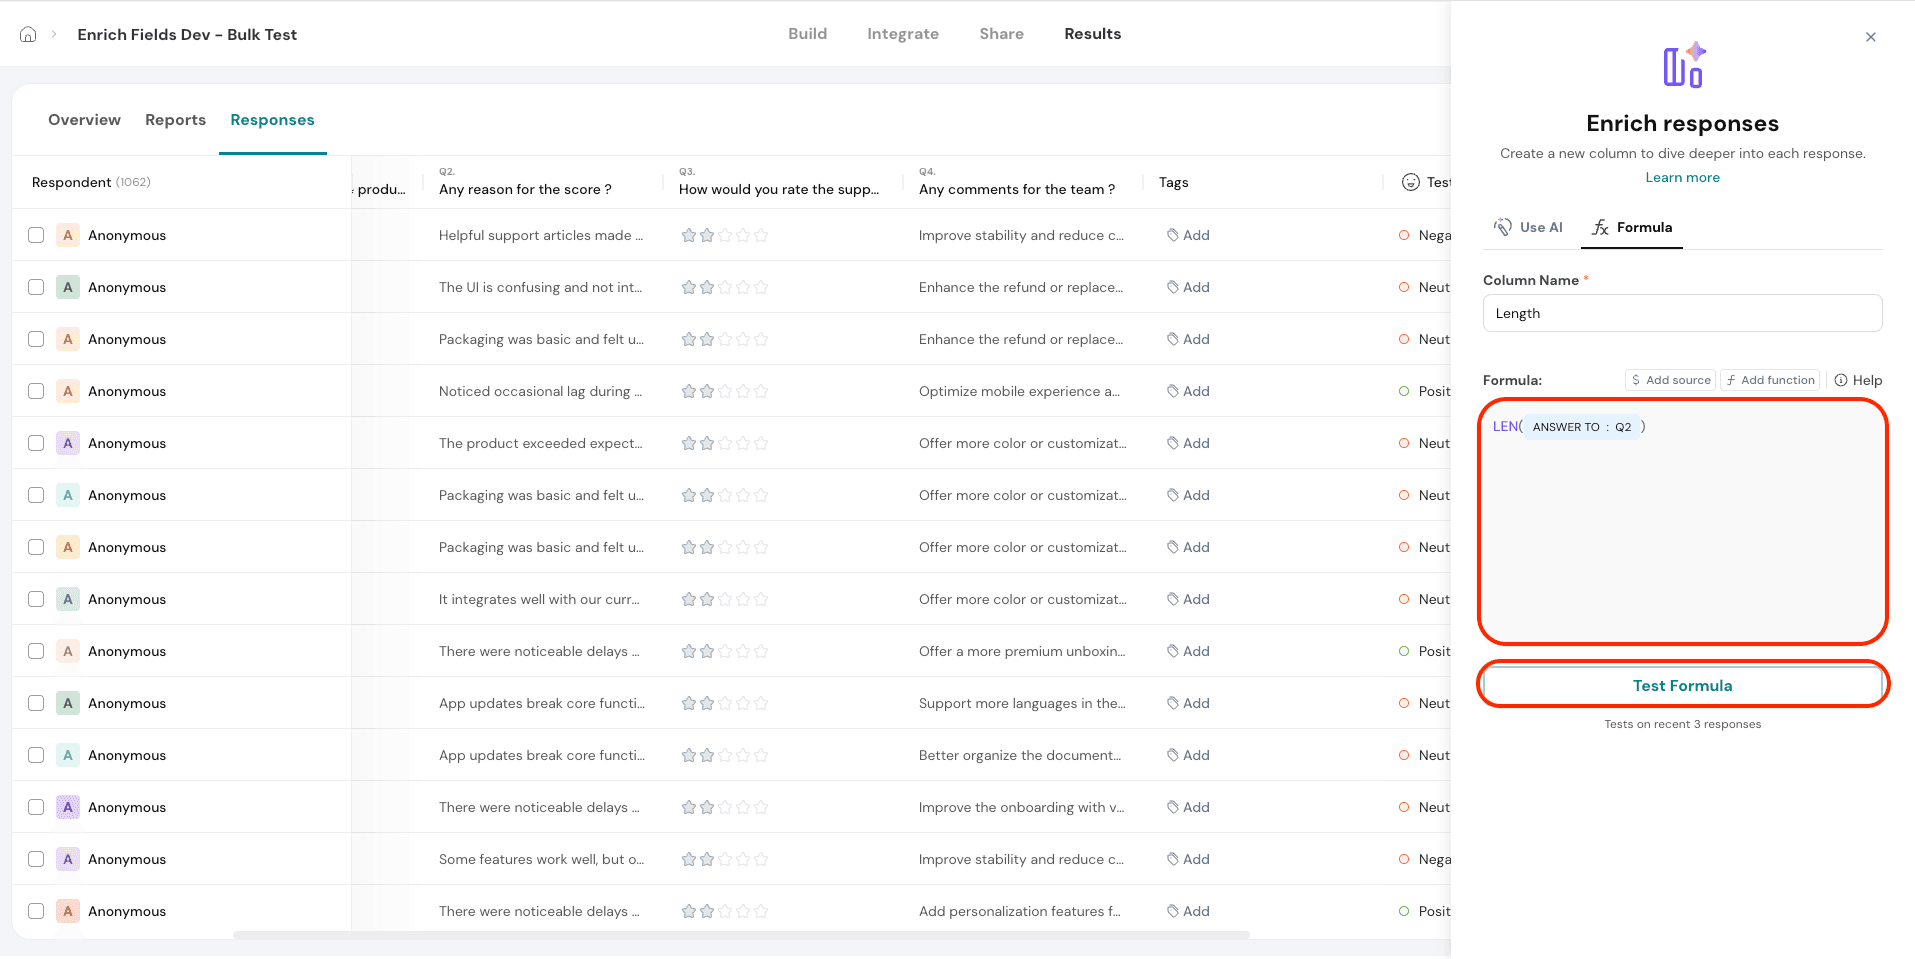
5. When you're satisfied, click Save and Run to apply the formula to all responses. This will generate a new column with the calculated values based on your defined logic.
Powered By SparrowDesk