
Stripe Integration with SurveySparrow
Integrating SurveySparrow with Stripe
The Stripe integration with SurveySparrow lets you collect payments via credit/debit cards through your forms. With this integration, you can respond to a form and make a payment, all on a single platform.
For instance, let’s say you want to collect donations for your charity organization. With the Stripe integration, you can collect donations via forms.
Note: We do not disclose or save your credit/debit card information. All payments are handled by Stripe.
Make seamless transactions and experience automation at its finest with Stripe Payment integration: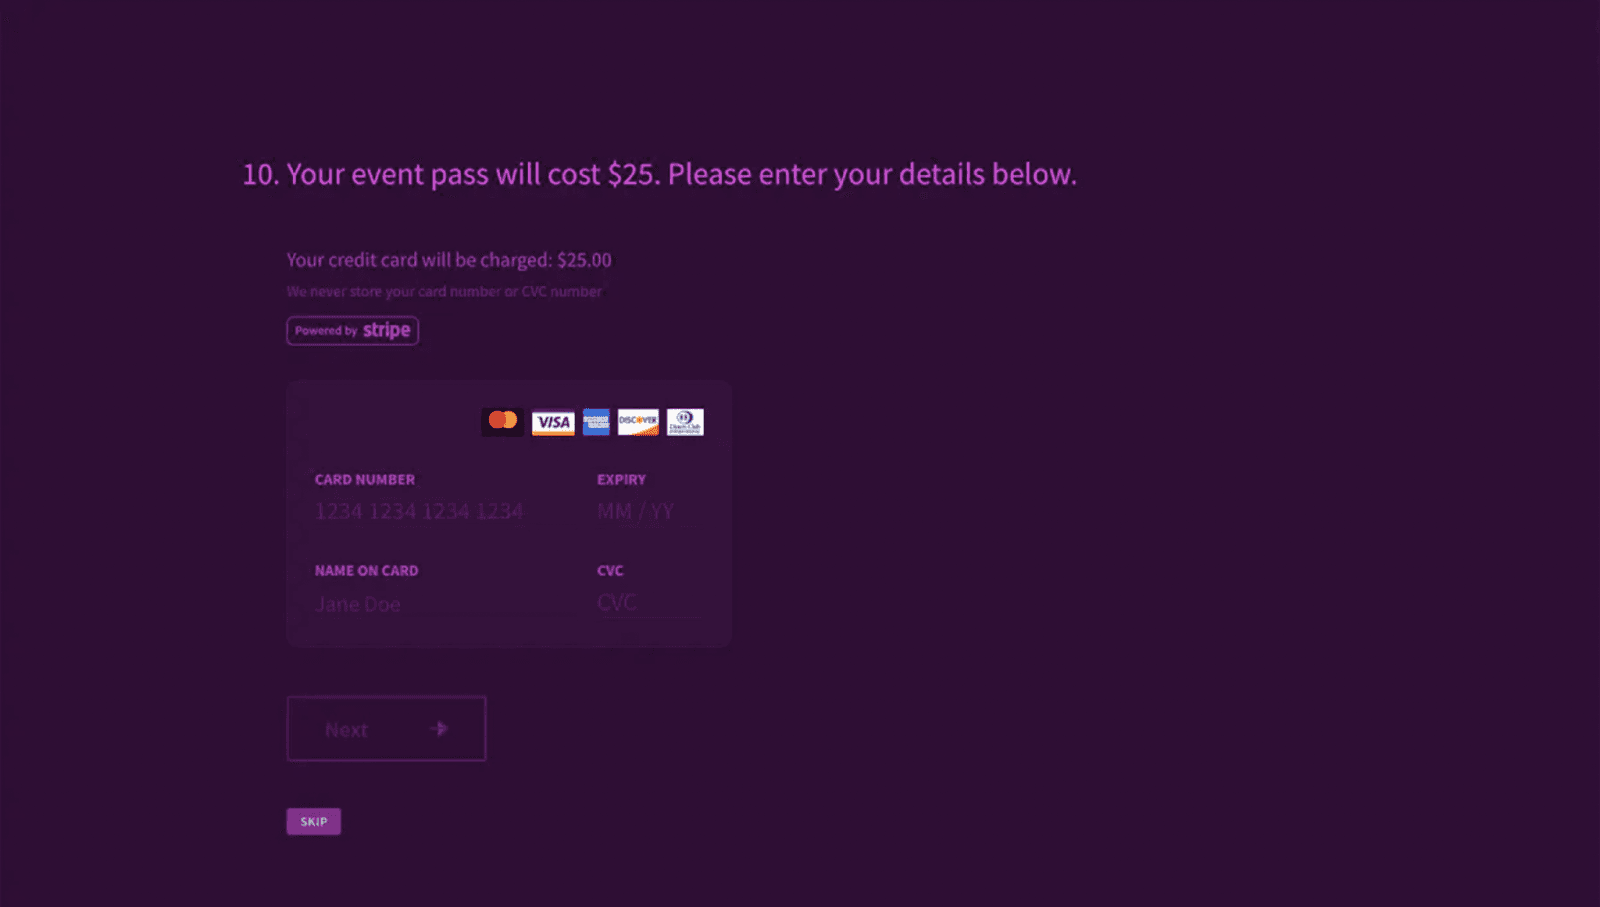


Let your respondents avail of discount coupons:

It’s that easy!
Let’s see how it works:
1. After creating your form, select the Payment question type from the Question Type Panel.
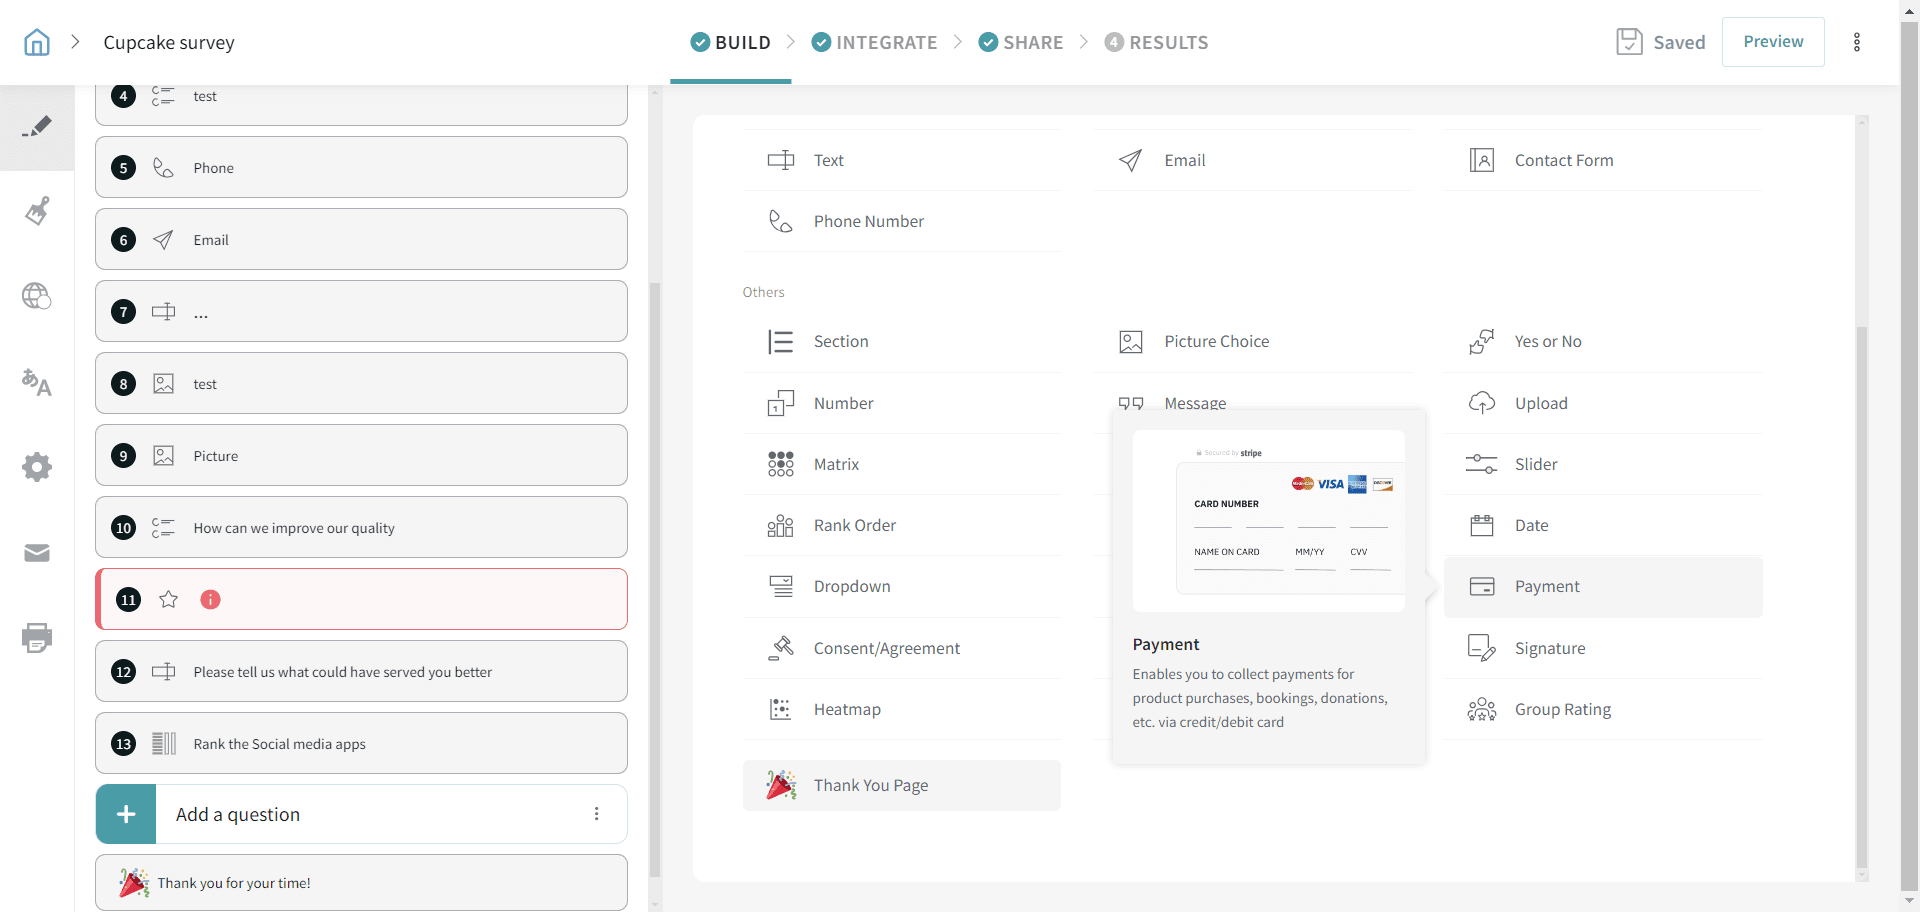
2. You'll get the following screen:
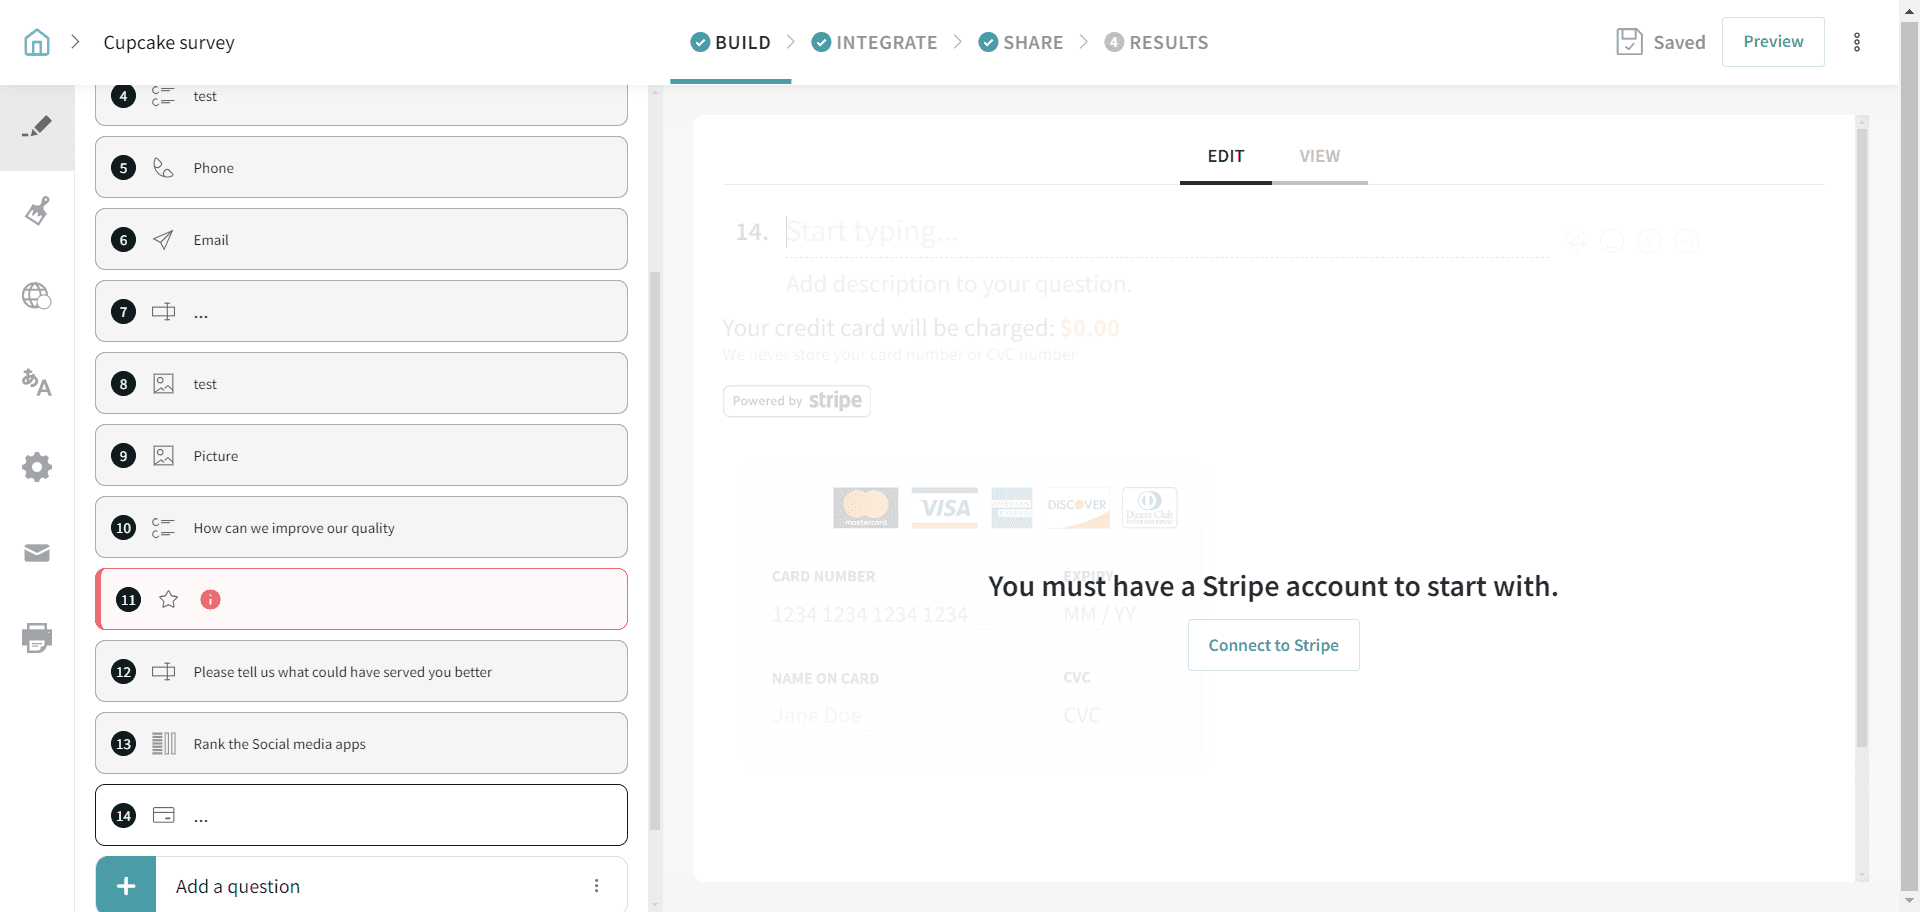
Click on ‘Connect to Stripe’.
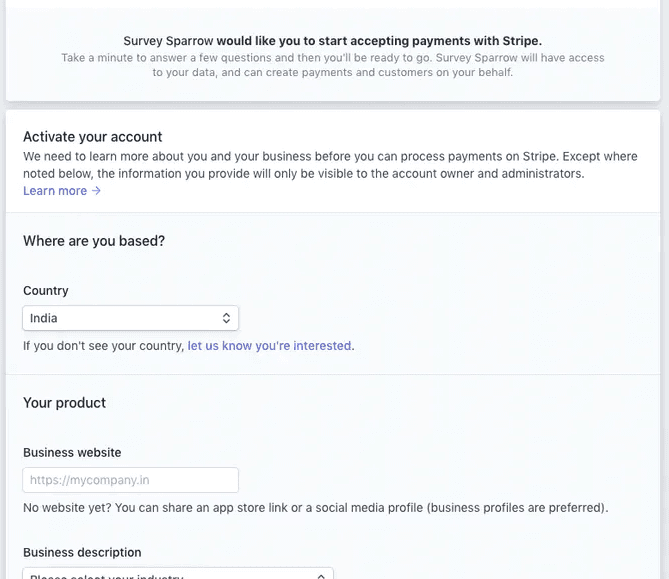
3. Enter the required details and authorize access to your Stripe account.
4. Once you’ve authorized access, you will be redirected back to your form.
5. You can either enter the price manually or use Expressions to calculate the final amount. If you have used Expressions in your form, you can enable the ‘Use Expressions’ option to display the final amount in your question.
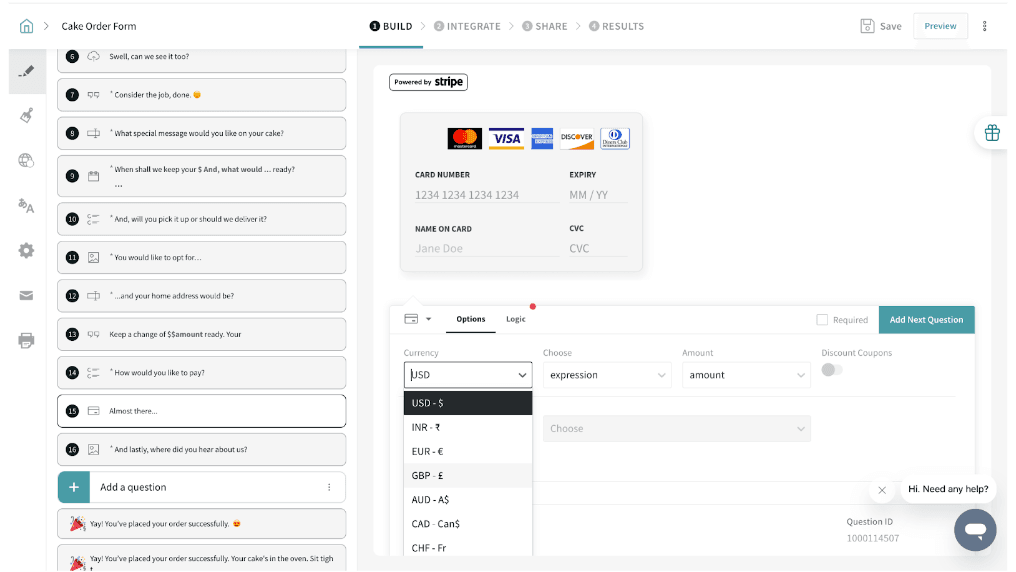
You can also pick the currency from the given dropdown list. There are 15 different currencies to choose from. We have recently added SGD - S$ and RON - lei.
Using Discount Coupons
With Stripe integration, you can also provide discount codes to your respondents.
Here’s how it works:
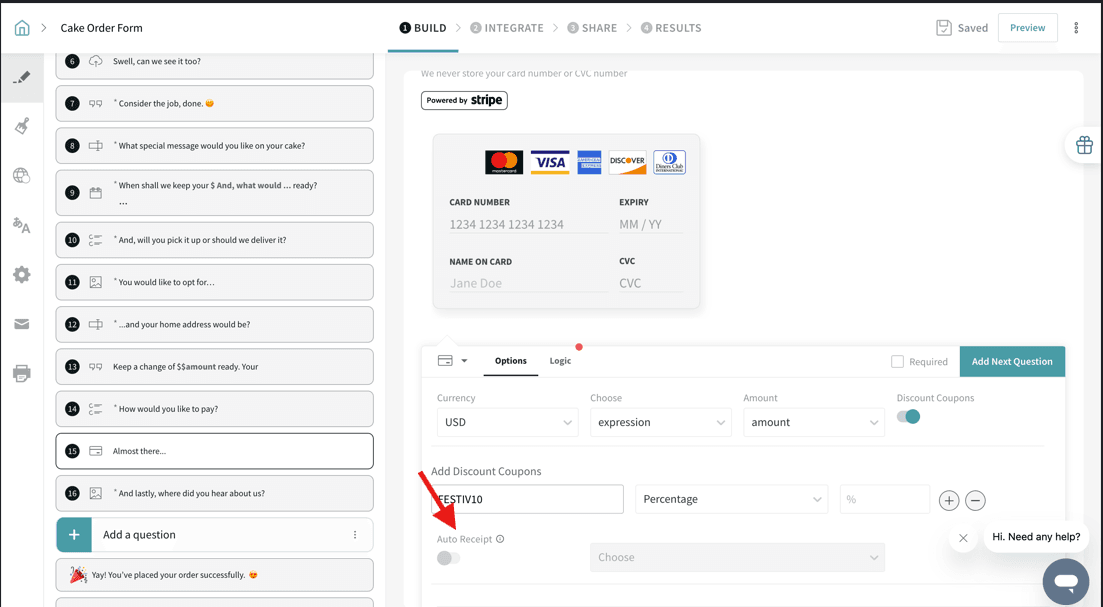
- Enable the Discount Coupons option.
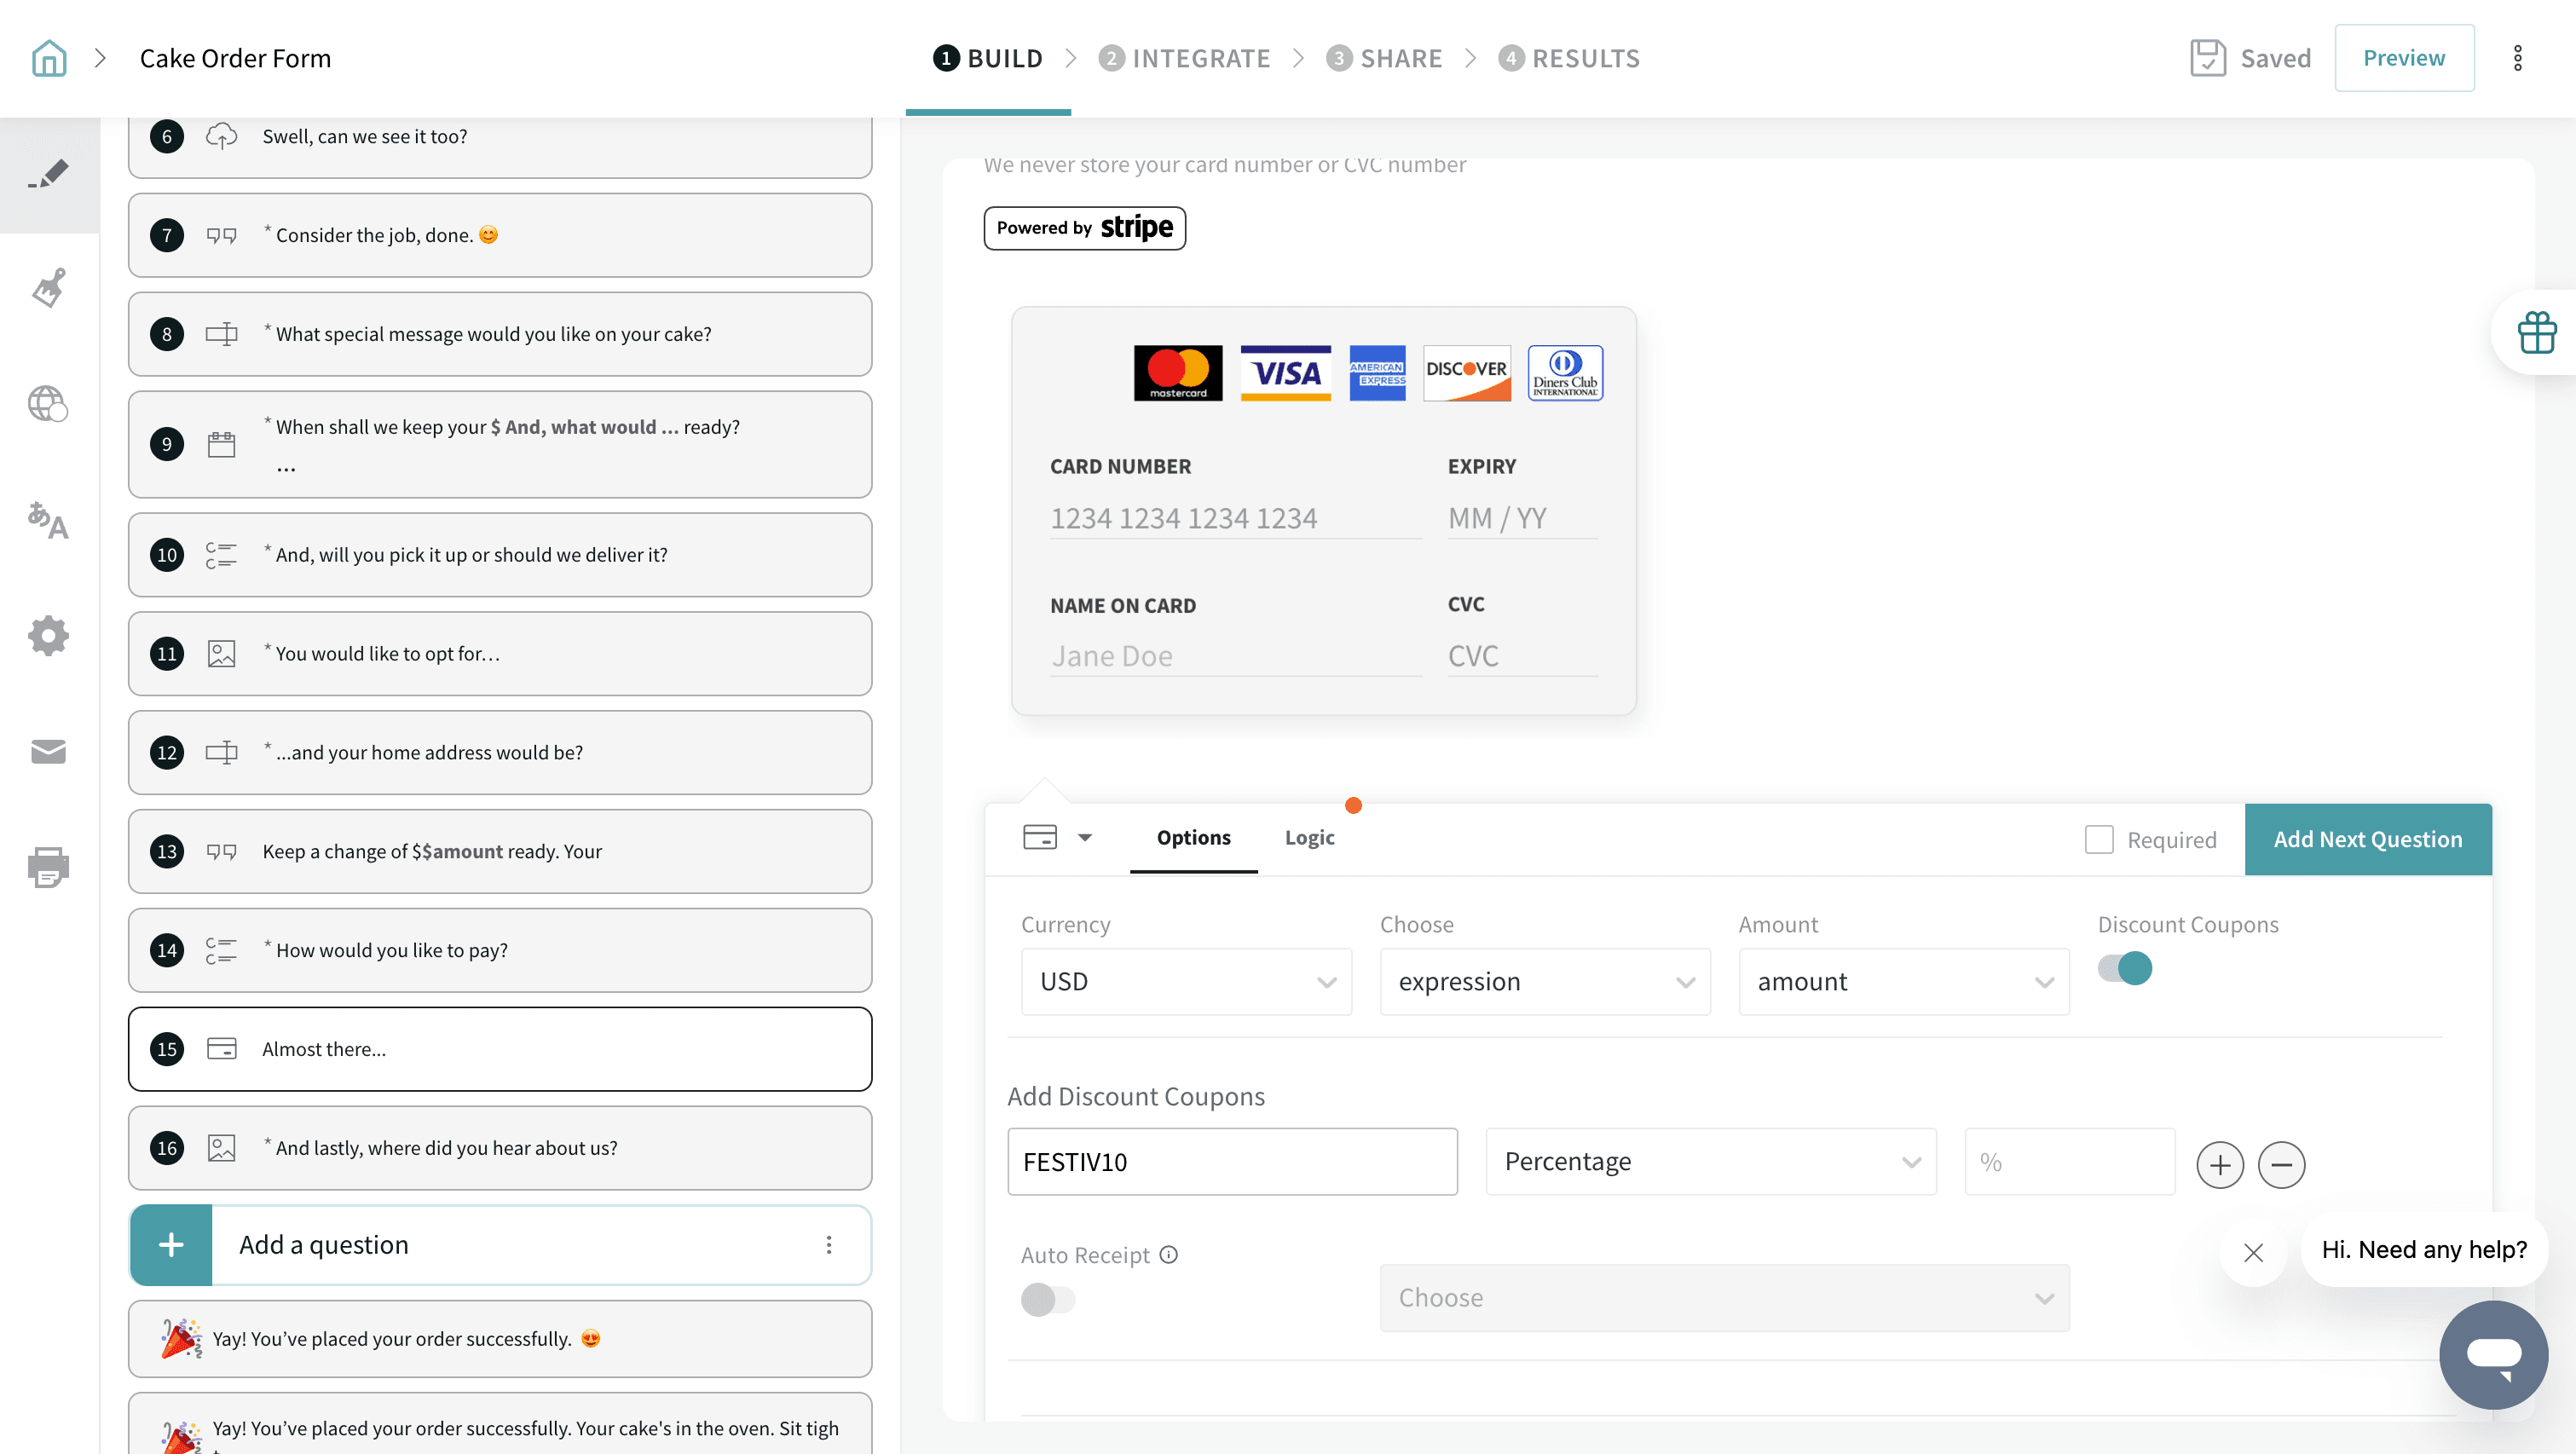
- Enter your coupon code and select whether you want to provide a discount by percentage or amount.
- You can use the + and - icons to add and delete a coupon, respectively.
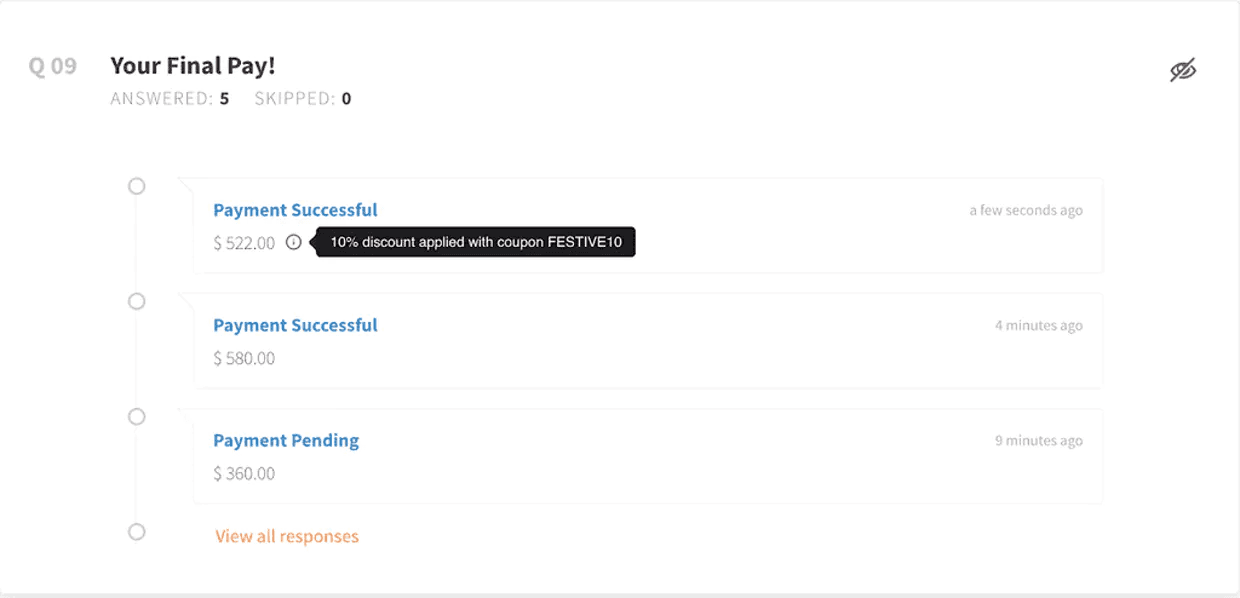
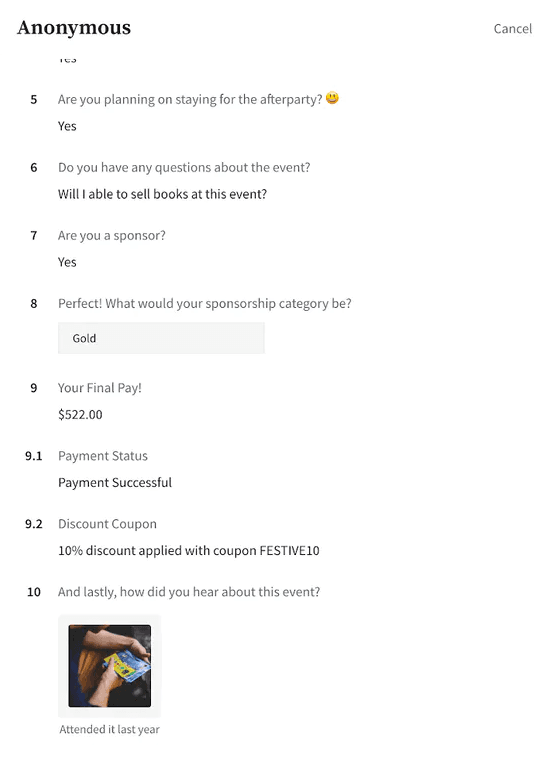
- You can also see the applied discount coupon(s) in your Reports and Responses.
6. Finish creating your form and proceed to Design.
7. Now while a respondent is filling up your form, they can enter their credit/debit card details to complete their payments. Once the respondent clicks Submit(on the last page of the survey), the transaction takes place.
If your payment is unsuccessful, after clicking on ‘Submit’, you will be directed back to the payment question with the respective error message displayed. On the other hand, if the payment question was made Optional and if you skip the same, you can still submit the form without making the payment, and the payment status will be displayed as ‘Payment Skipped’.
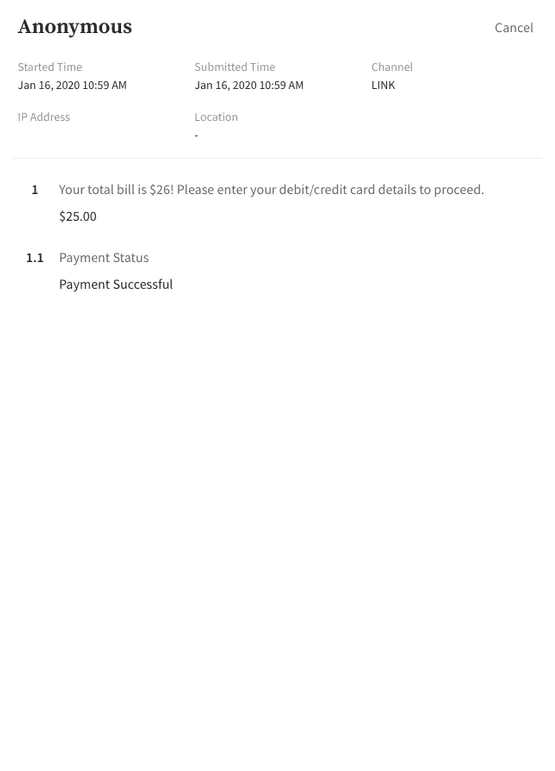
8. You can view your payment status in the Responses section.
9. Once the payment has been completed, you can view all the information about the payment in your Stripe account.
Enable Auto-Receipts and generate Invoices
You can now send payment invoices and receipts directly to your customers’ email ID using the Stripe auto-receipt feature.
Here’s how it works:
1. Enable the Auto Receipt toggle in the payment question type.
2. Choose the customer’s email address by selecting the email question type, from the dropdown list.
3. Go to your Stripe account, from Settings -> Emails, enable “Successful Payments” toggle, and Save.
4. Post-purchase, your customers will receive the invoices directly in their inbox, hassle-free.
5. Our Newest release of Stripe lets you pass the payment in three different types - Amount, Expression, Variable.
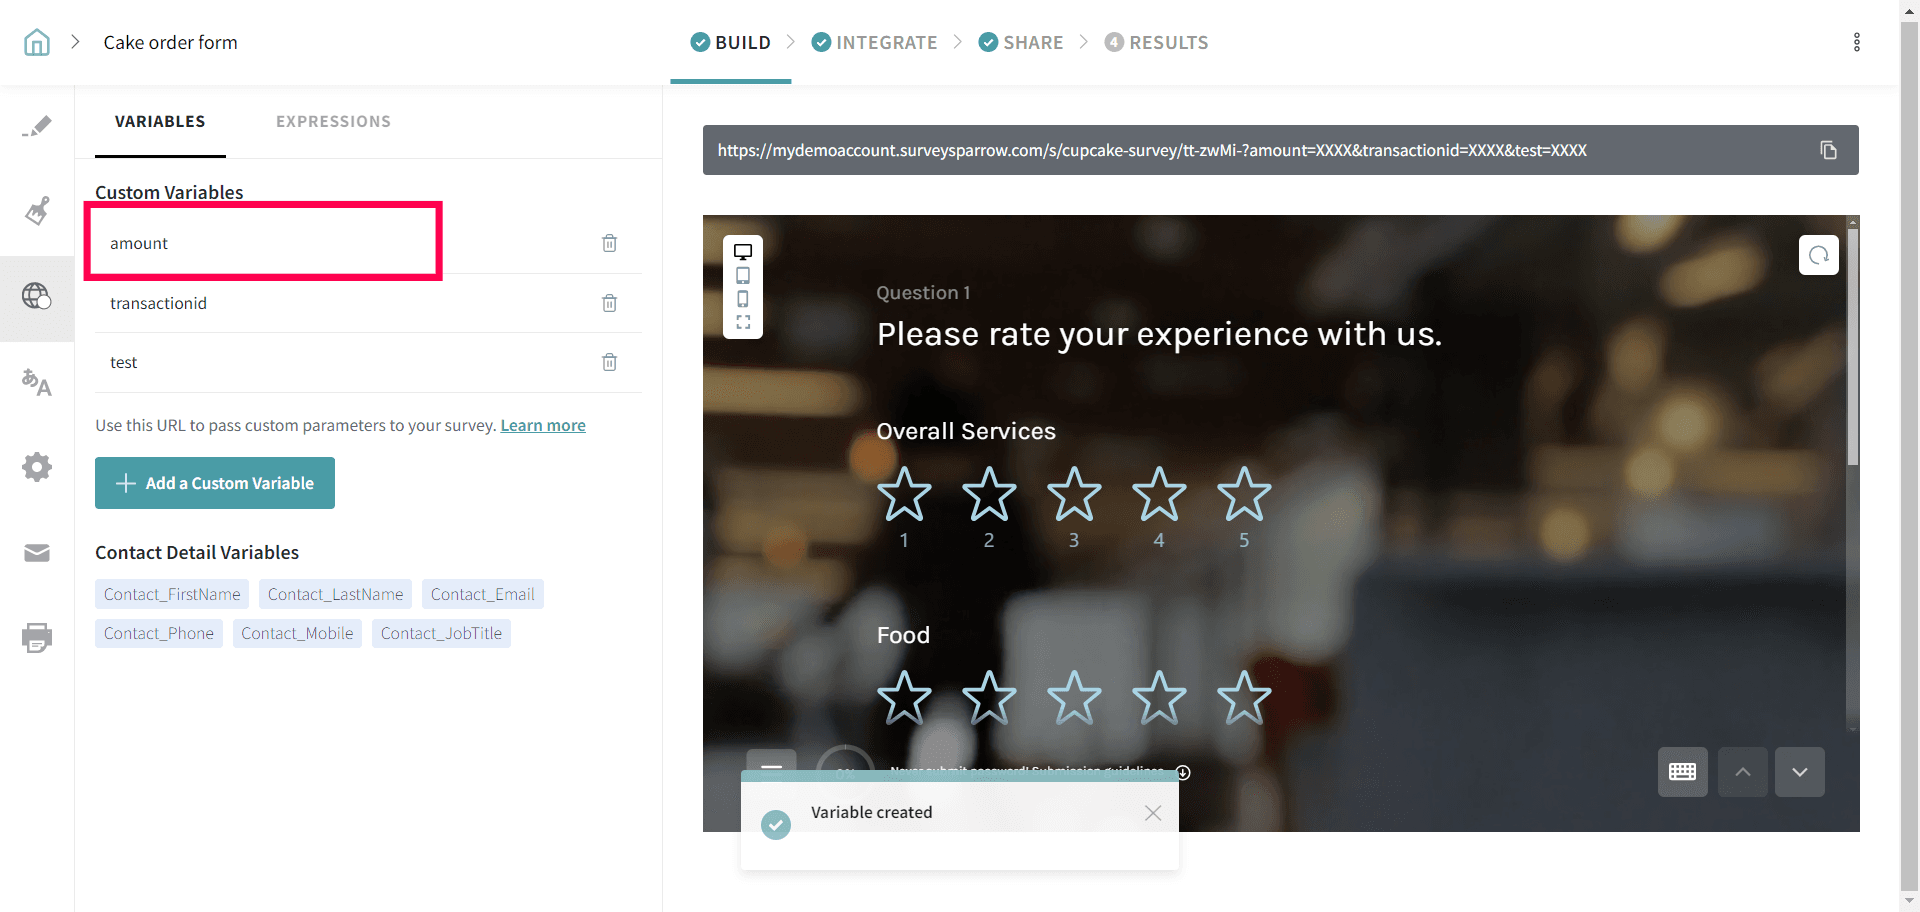
6. If you are passing the payment as a Variable or as an Expression, you'll have to create the corresponding custom variables and expressions on the Global Variables Section of your Survey builder.
Passing the payment as a Variable
1. While passing the payment as a Variable, choose Variable from the dropdown and select the custom variable which you created for this survey.
Click here to read more about creating Custom Variables.

2. Come back to the Global Variables section of your survey builder, and copy the survey URL which is highlighted in a box.
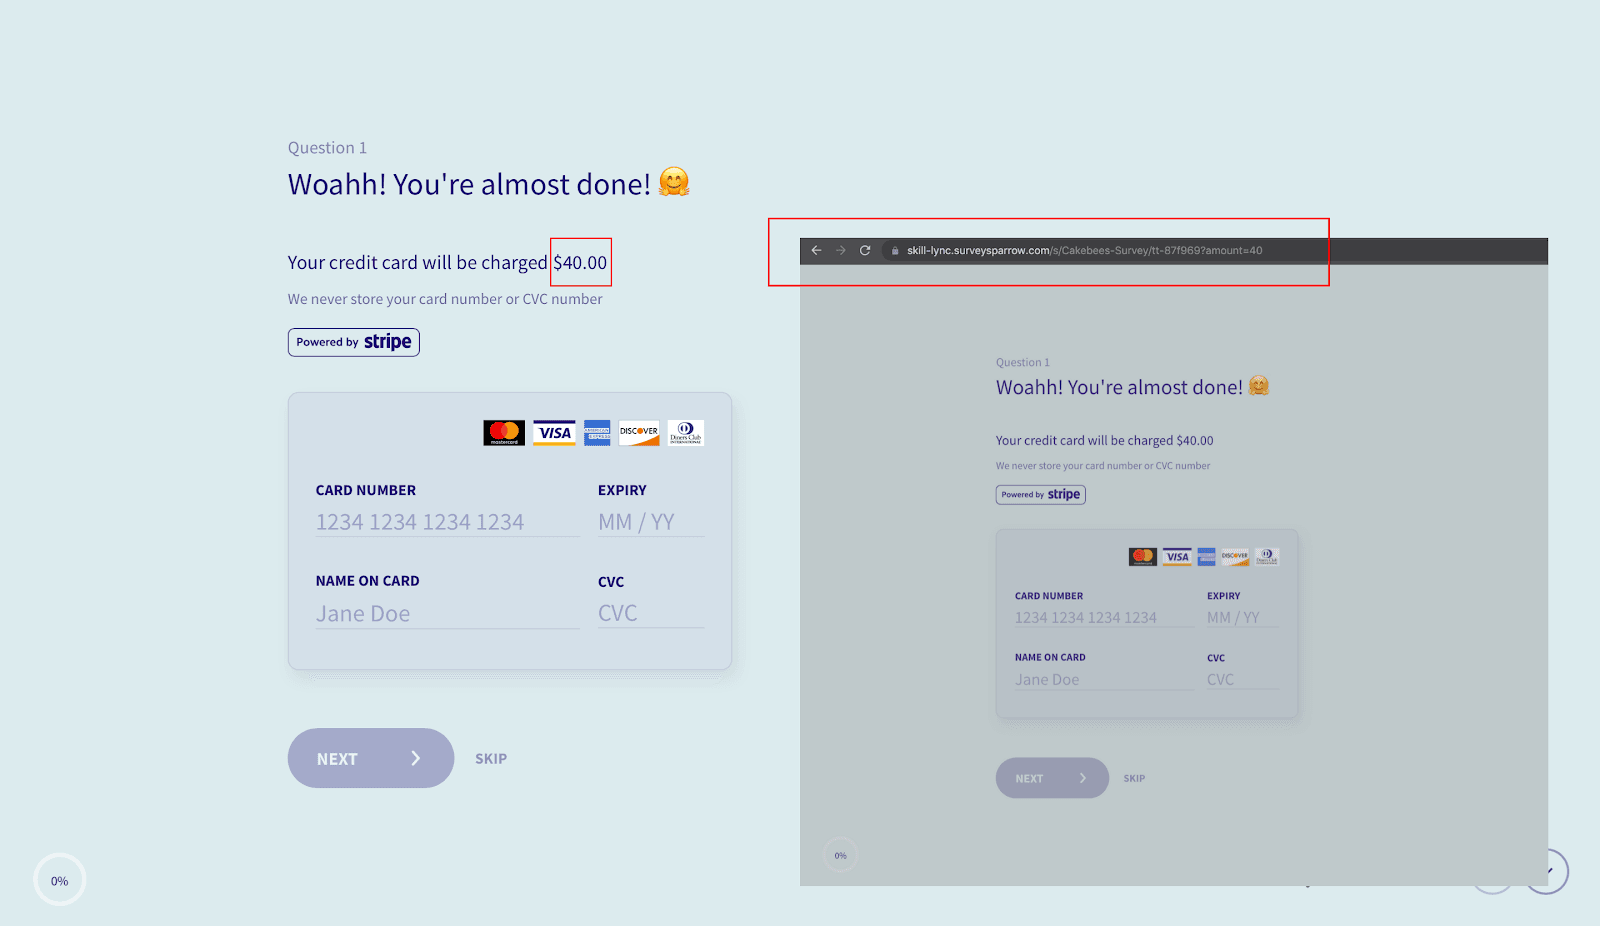
3. For example, if I'm requesting $40 from my survey respondent, the survey URL which I should pass will look something like this.
https://<subdomain>.surveysparrow.com/s/<surveyname>/tt-11ssd?amount=40
Please refer to the screenshot below to know how exactly you should pass the survey URL appended with a Variable.
Passing the amount as an Expression
1. We will explain Step by Step with a small example to make you understand the concept of Expressions better. In our use case, we’re trying to collect information about the Cake that the customer prefers to order.
2. The first question can be the type of Cake that the customer wants to order - Vanilla, Strawberry, Butterscotch, or any flavor.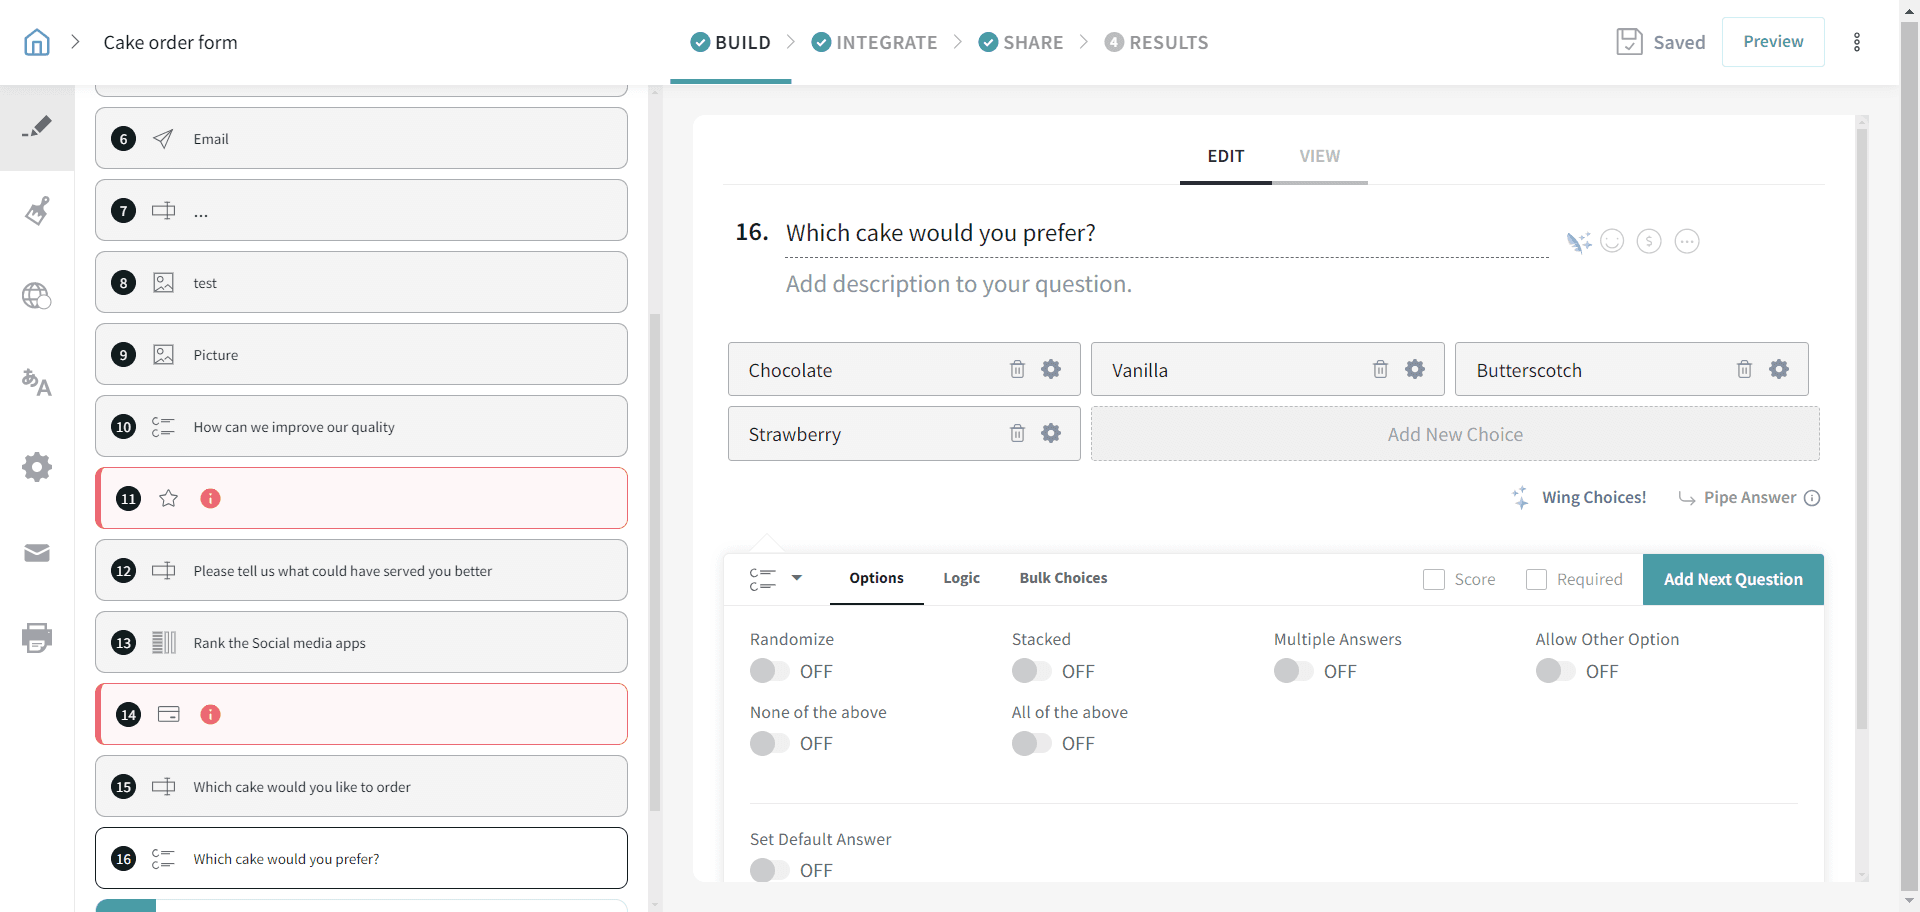
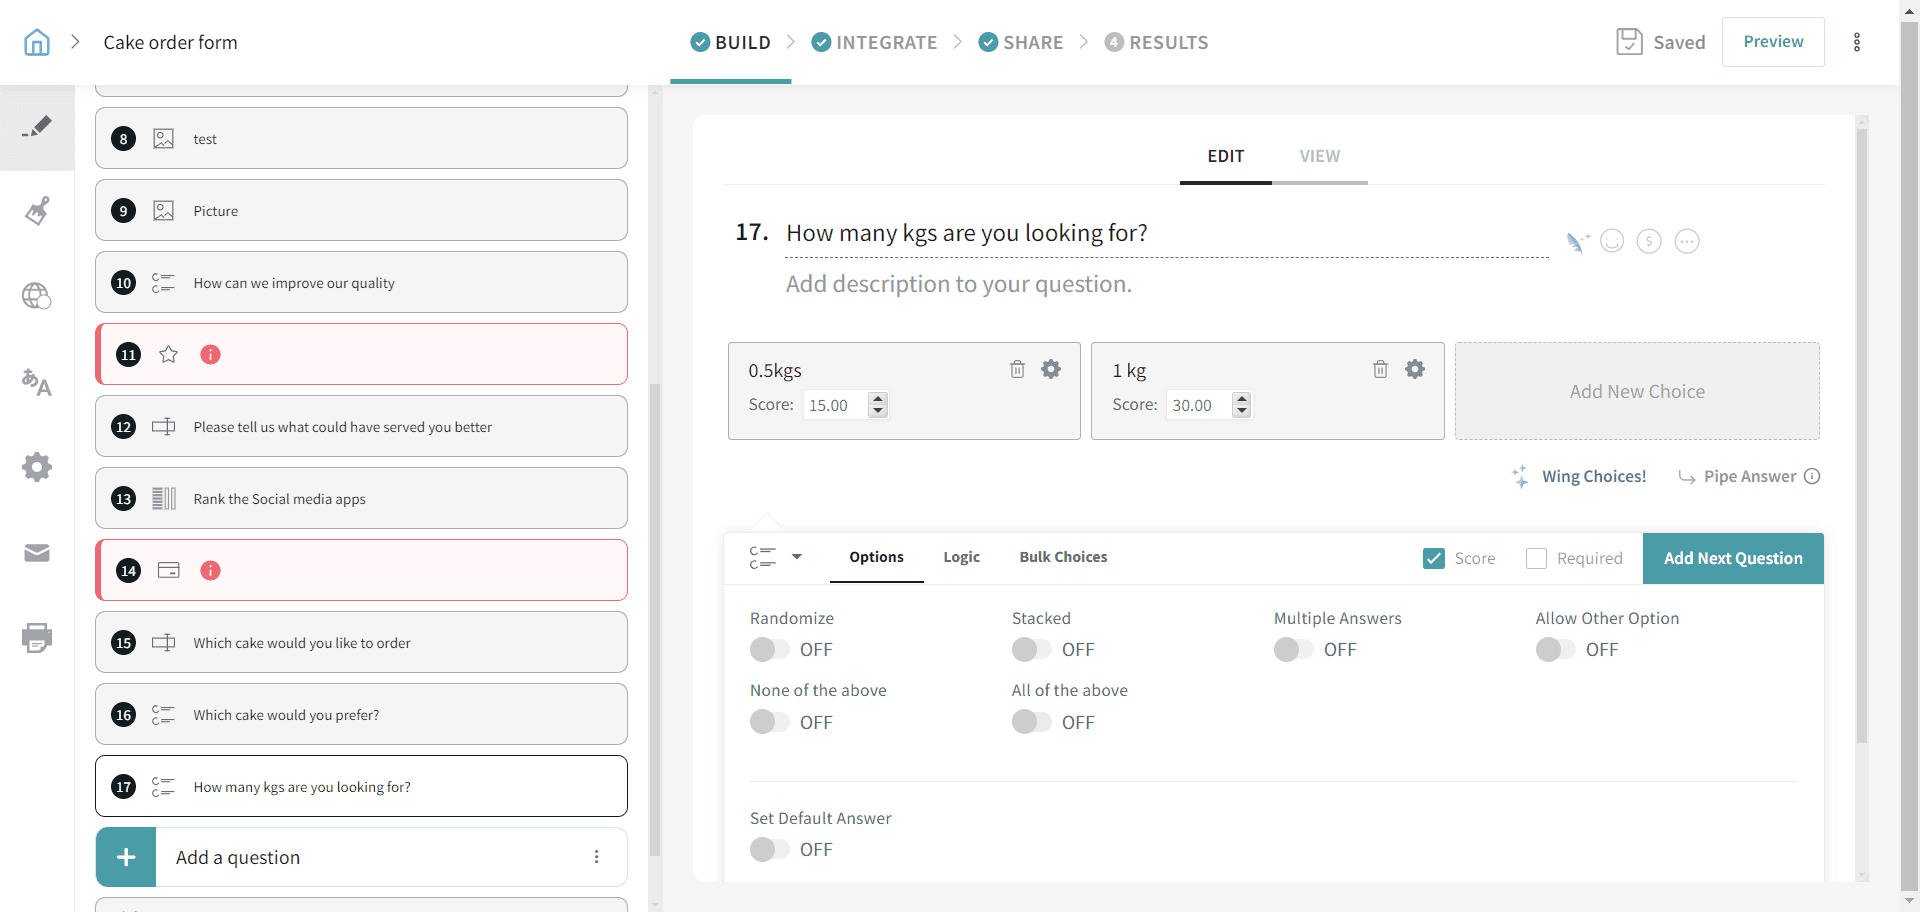
3. Now that we know the cake type, we should also know the cake quantity. However, the price is the same for all the cakes -0.5 kg is $15 & 1 kg is $30.
4. The price only varies when the quantity goes high.
5. So in this case, the second question can be a Multiple choice question with Scoring enabled.
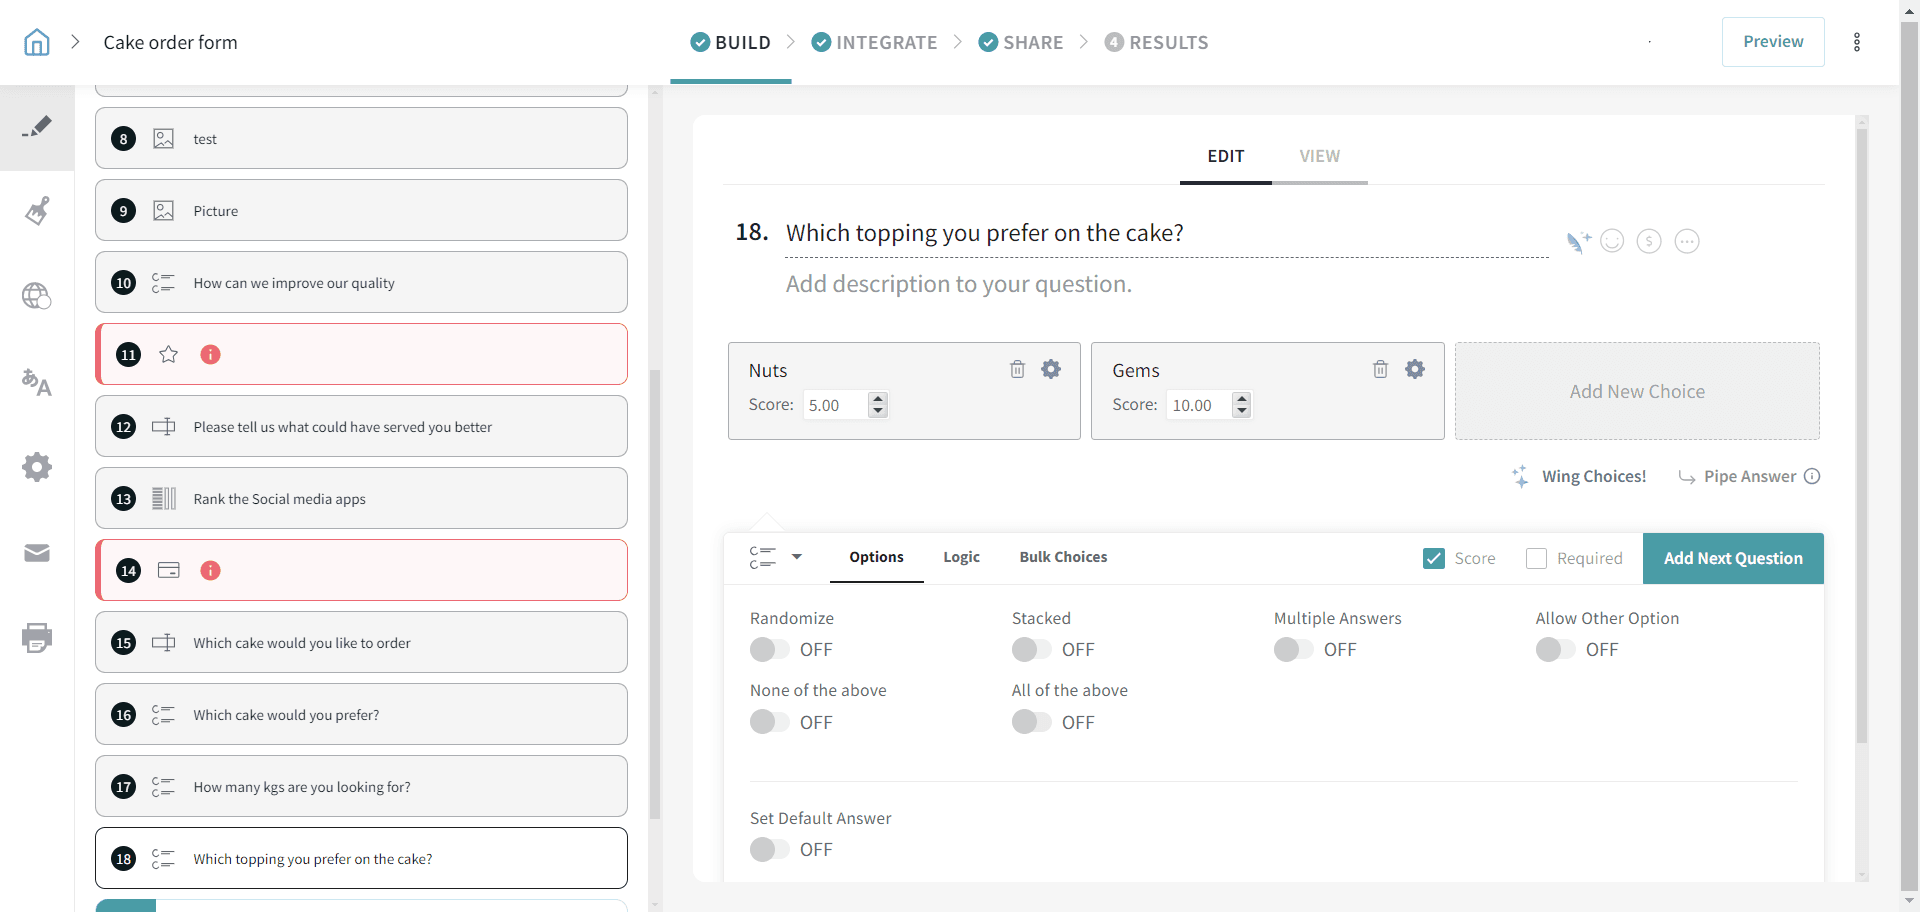
6. The third question is to know what kind of toppings they prefer on the cake. This can again be achieved with a multiple choice question with Scoring enabled.
The prices for the toppings are:
- For Nuts topping the price is $5
- For Gems topping the price is $10
Note: The price of the Toppings should be added along with the cost of the cake, which is why we use Expressions.
7. Now that the questions are created, we should also create the corresponding Expression to add all the prices correctly.
Let’s see how to do that:
- Go to the Global Variables sections.
- Navigate to Expressions.
- Create an Expression and name it.
- Validate it after adding the conditions and save the Expression.
- That’s it! You’ve successfully created an expression.
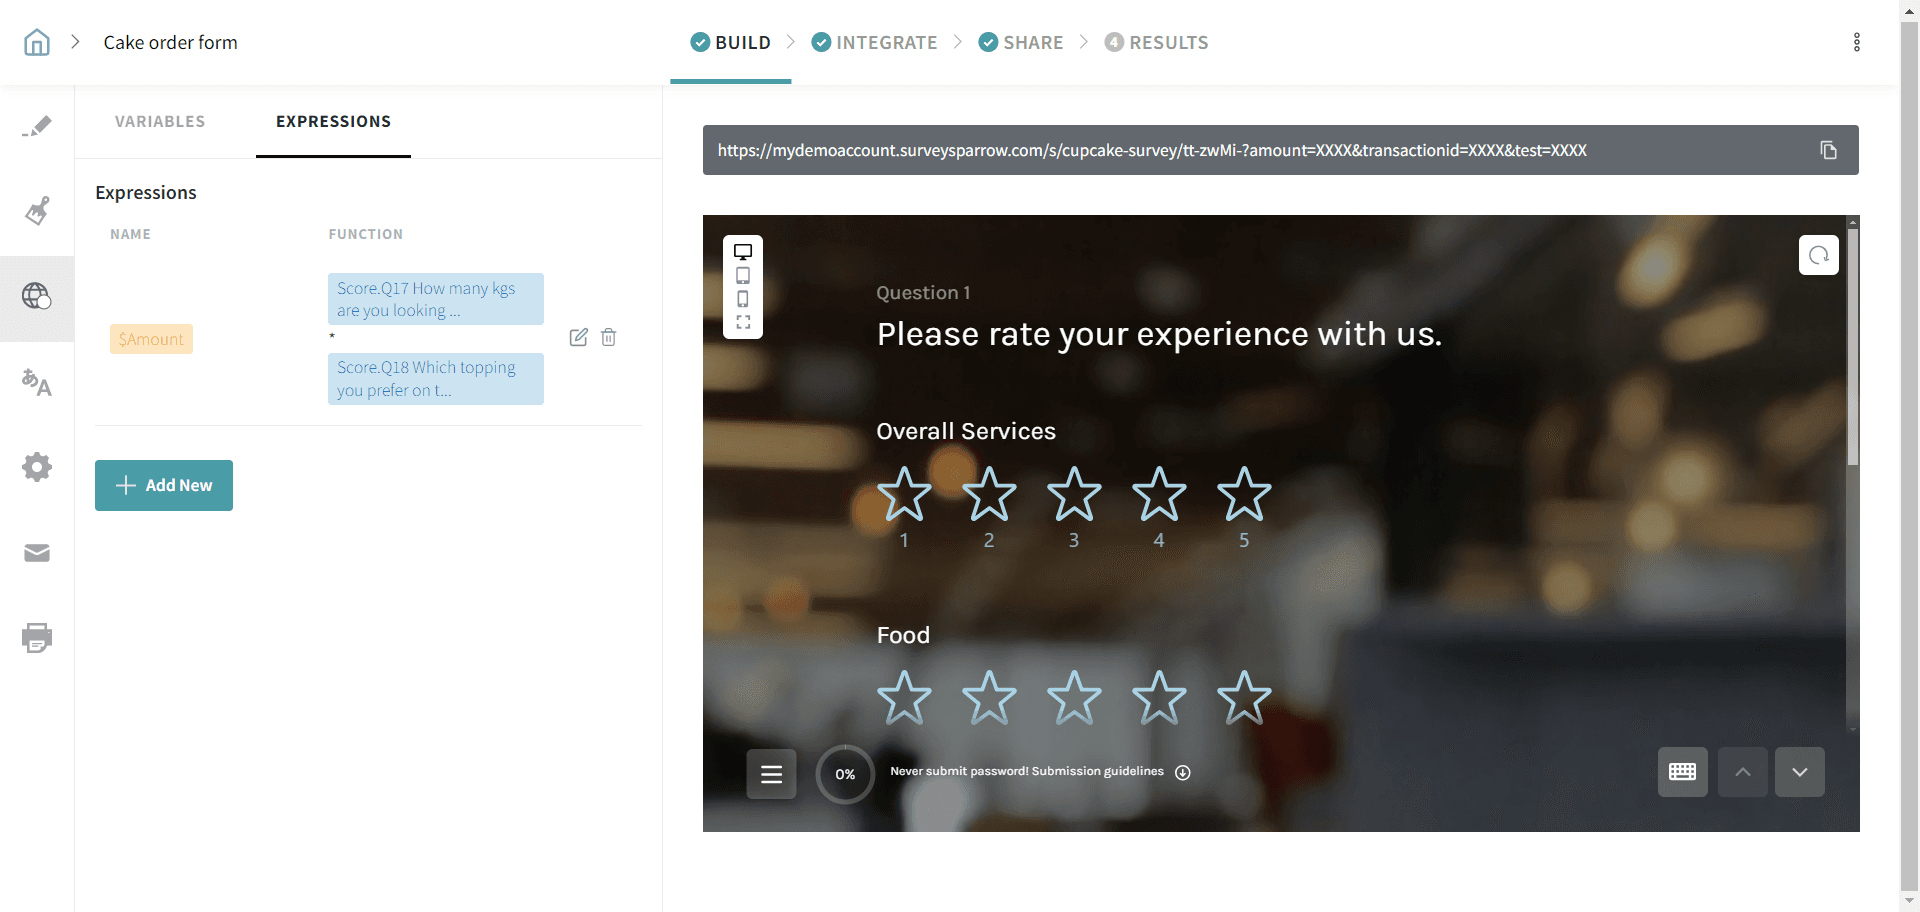
E.g. The Expression which we've created is
$amount = Score Q2 (Kgs of Cake they chose) + Score Q3 (The cost of toppings)
8. Now we should make sure of three things.
- To make sure if the currency is chosen rightly.
- To make sure if the Expression is selected as the payment method.
- To make sure if the valid Expression is selected from the dropdown (In case if we have created multiple expressions)
9. Now we’re good to go. When we share our survey and let’s say a customer wants 0.5 kg of Vanilla cake with gems topping, the total amount that the customer has to pay will be $25, which will be displayed on the payment page.
If you would like to know more about how Stripe handles payments, please visit https://stripe.com/docs.
Possible Use Cases
Collect Payments from your Cake Order Form
Collect Payments for Event Registrations
Possible Error Messages
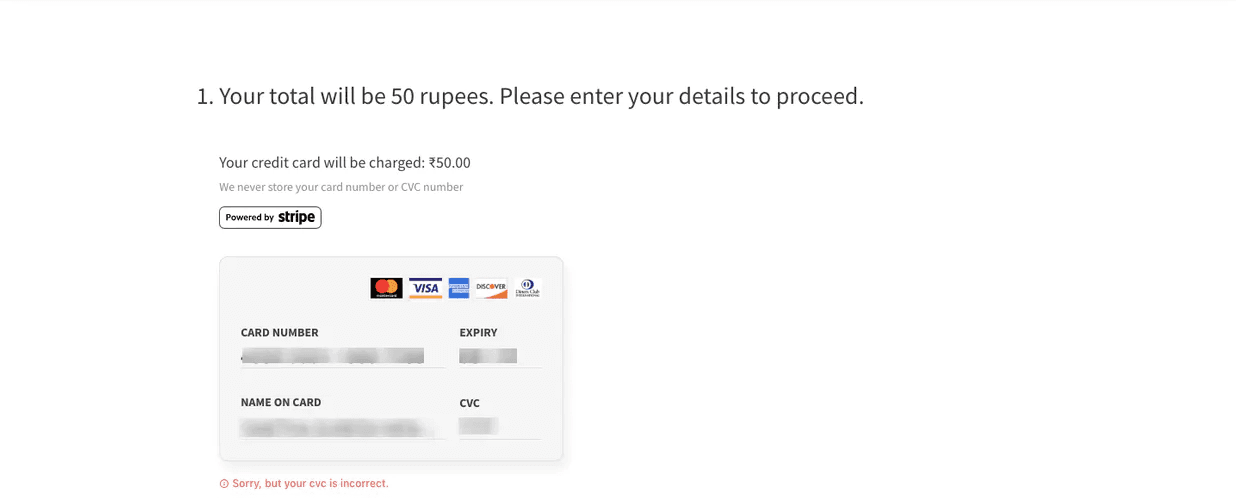
When this occurs, the charge will be declined and no amount will be deducted from your account. Please check that the CVC code you have entered is correct.
Please reach out to us if you have any questions. We are just a chat away!