
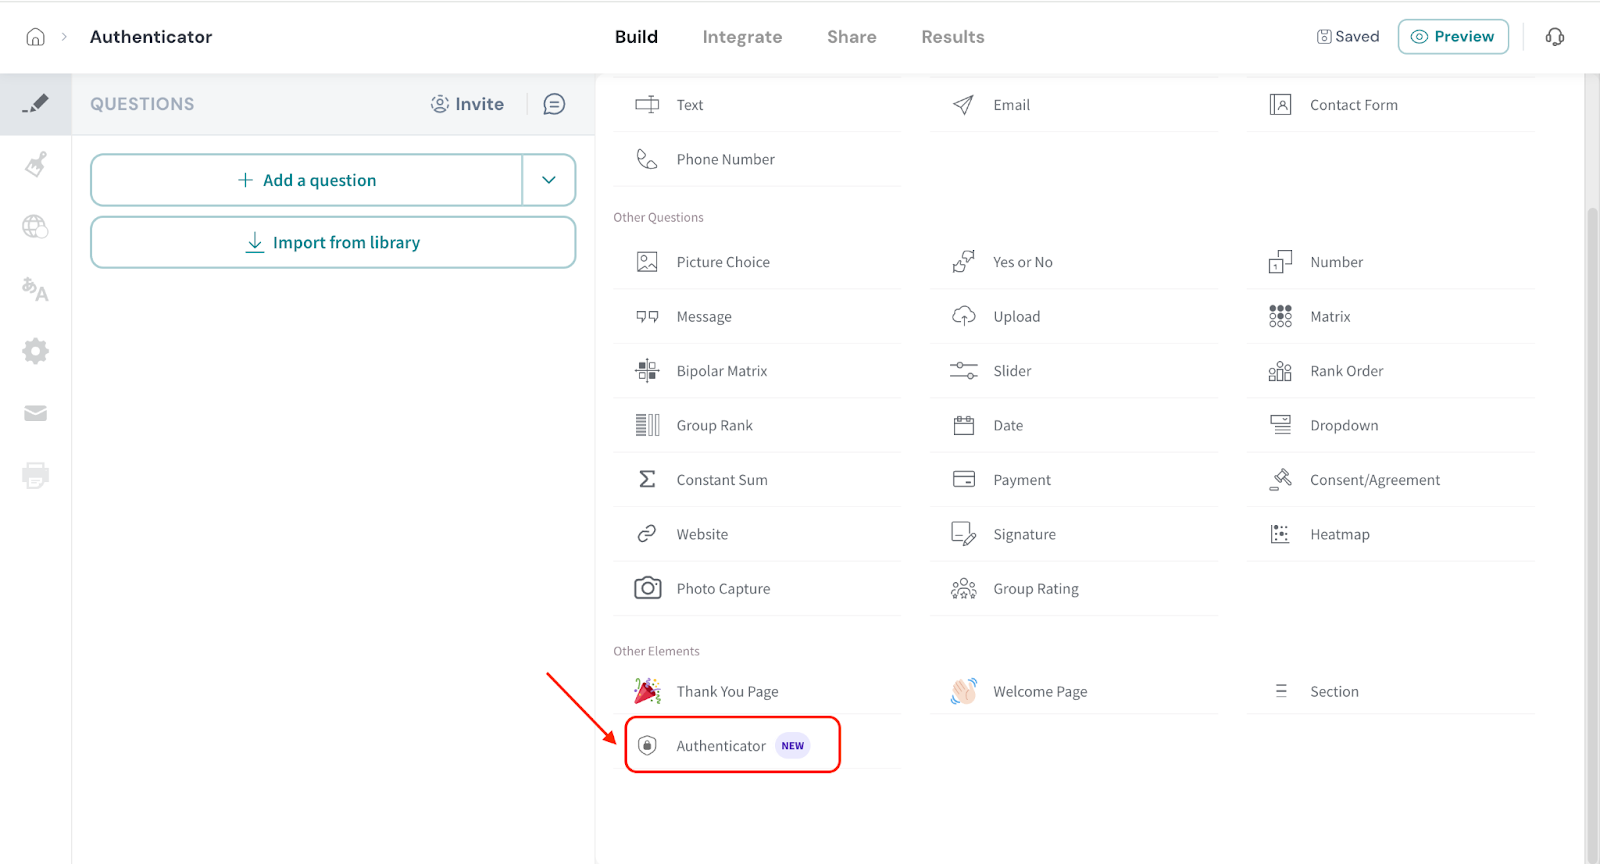
Search
The Authenticator is a security and identification feature to validate survey respondents and ensure secure access even when using anonymous weblink surveys. It provides a way to authenticate users based on unique identifiers, enforce two-factor authentication (2FA), and support social logins, without relying solely on traditional identifiers like emails or phone numbers.
Authenticator helps to secure sensitive sections, identify users without compromising anonymity, and let respondents resume partially completed surveys seamlessly.
Here’s how Athenticator helps:
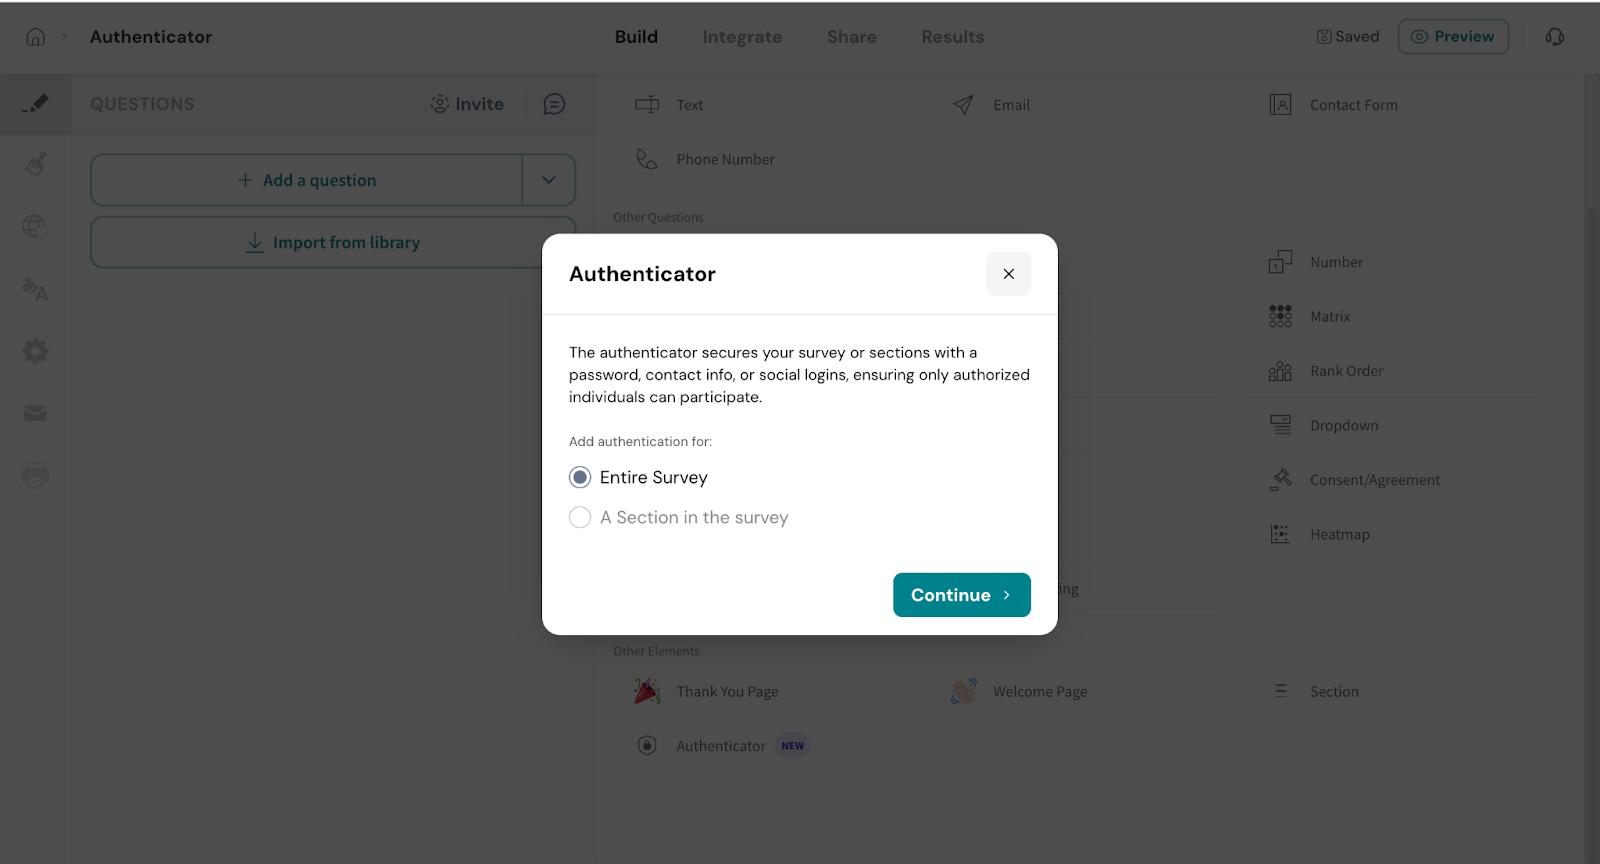
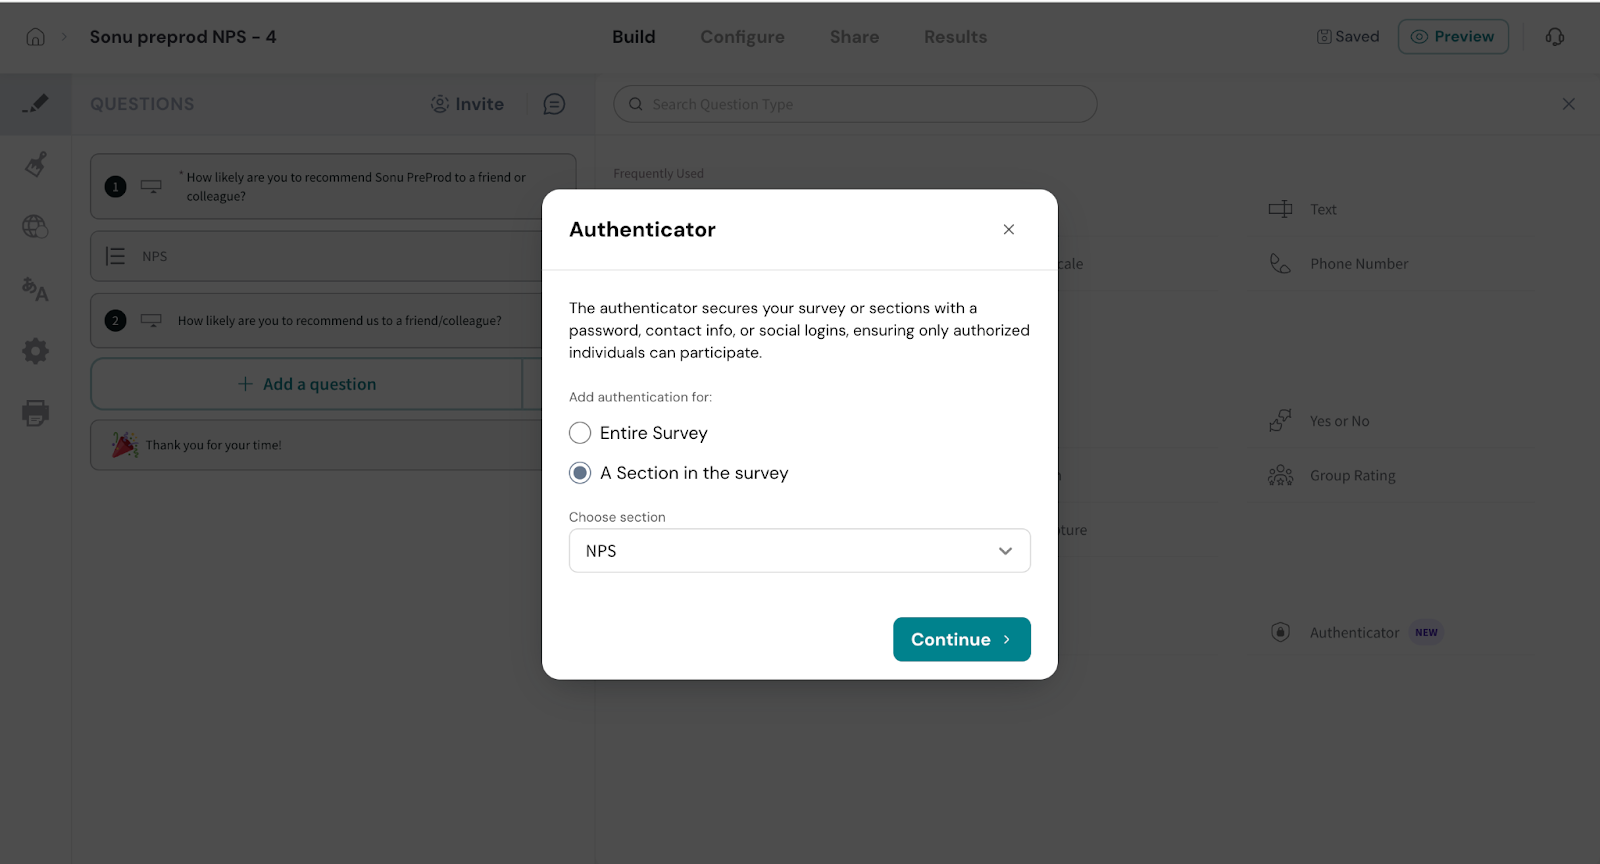
Survey Level -You can authenticate the entire survey. When users open the survey link, they’ll be required to pass the authentication step before accessing the survey.
Section Level – This option allows you to restrict access to specific sections of the survey. If enabled, only authenticated users will be able to view and respond to that section, while the rest of the survey remains accessible to everyone.
This option is especially useful for identifying respondents even when using anonymous weblink surveys, as long as they enter valid contact field values.
Note: Contact fields are available only on the Enterprise plans.
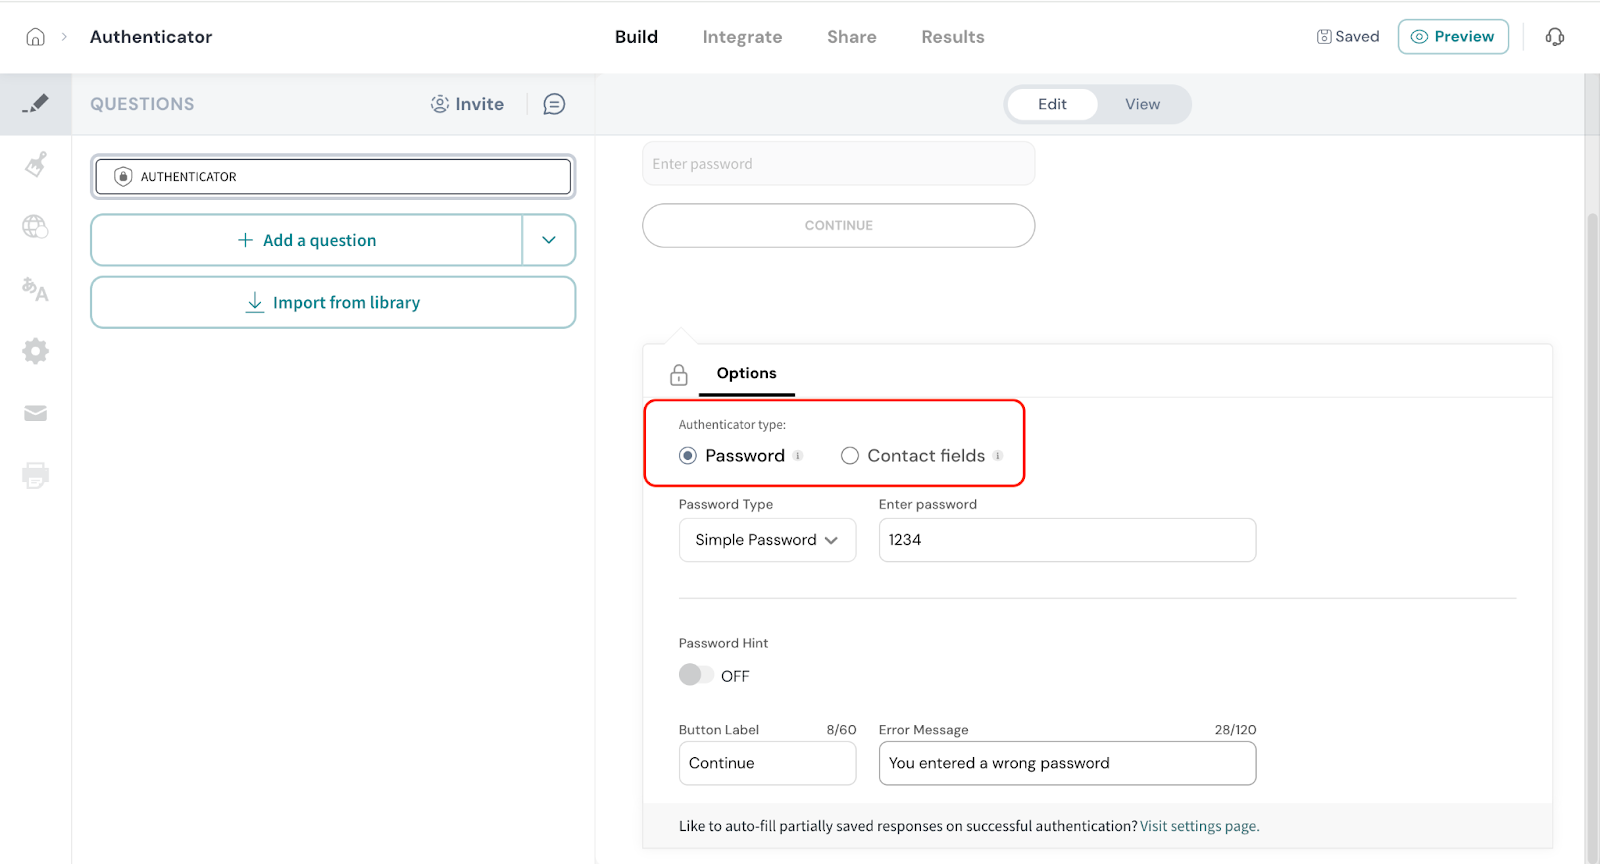
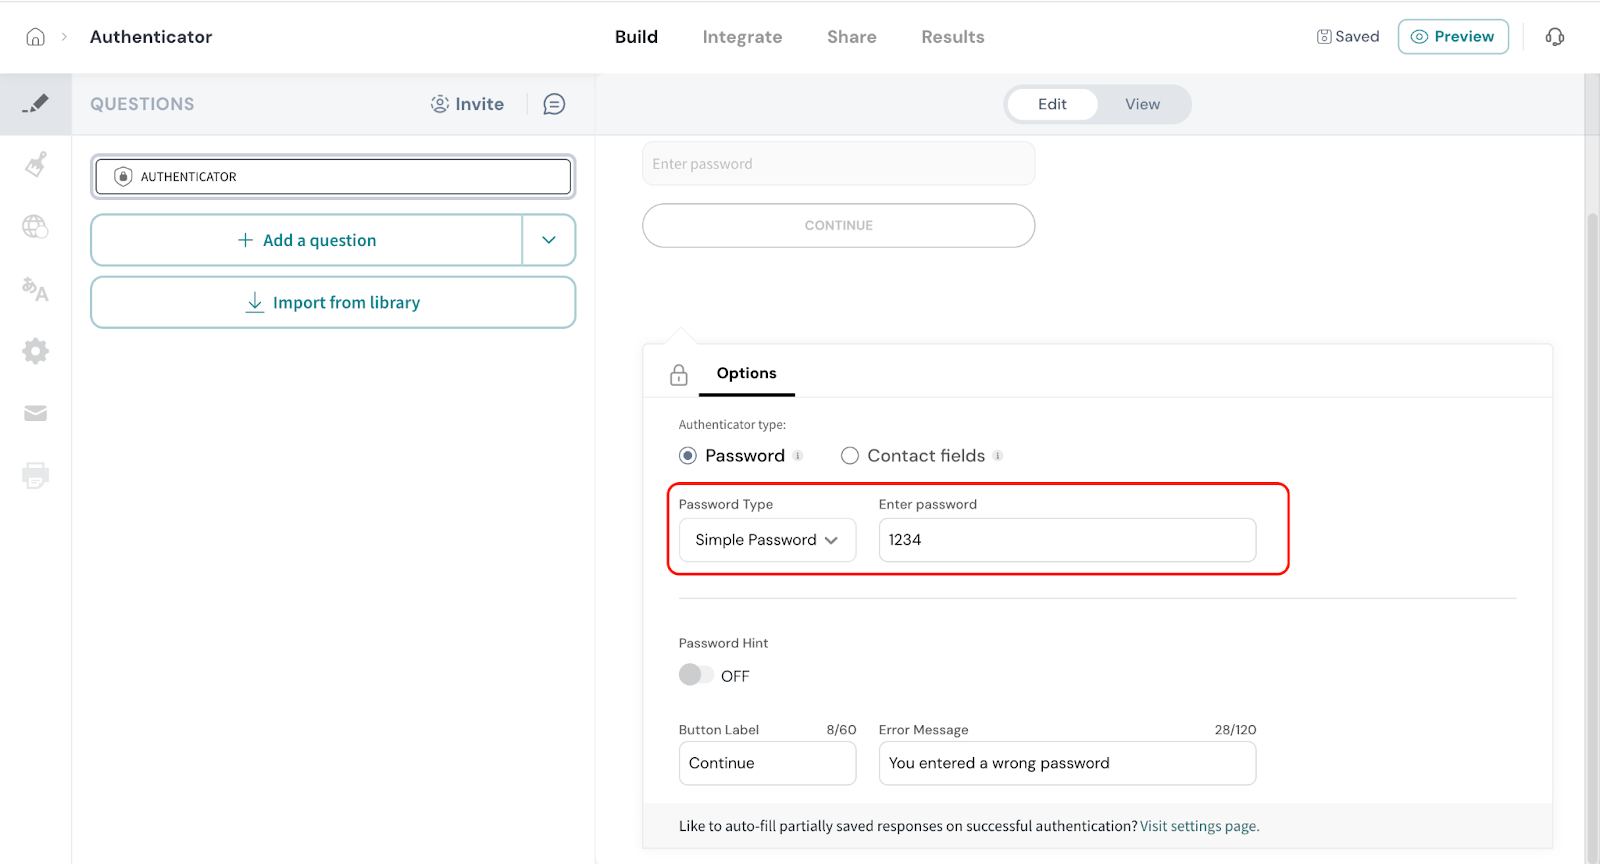
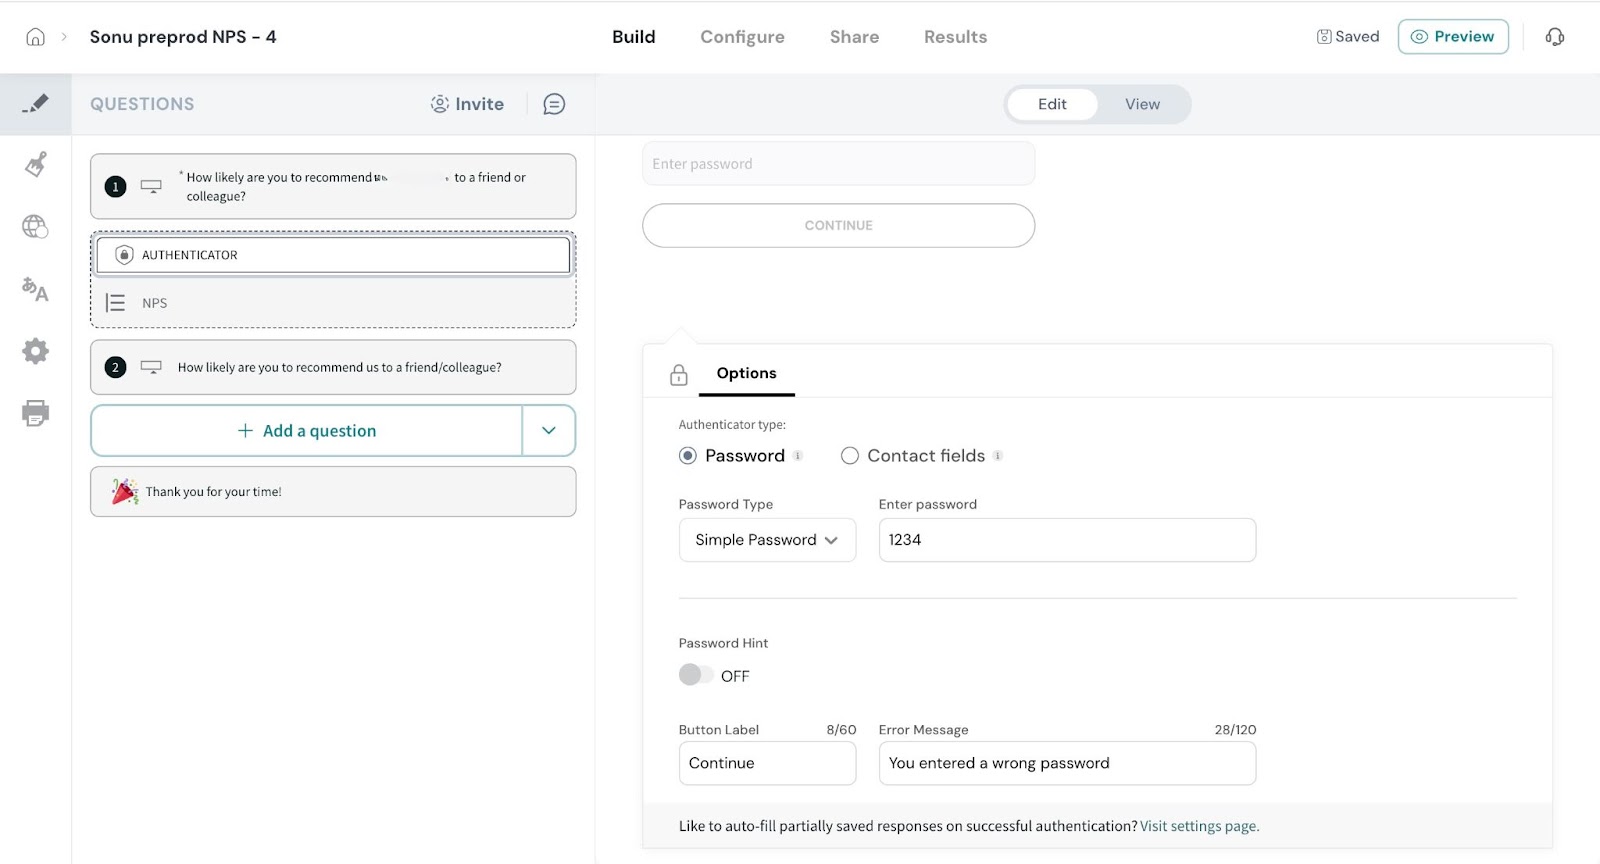
Let’s first take a closer look at the Password option.
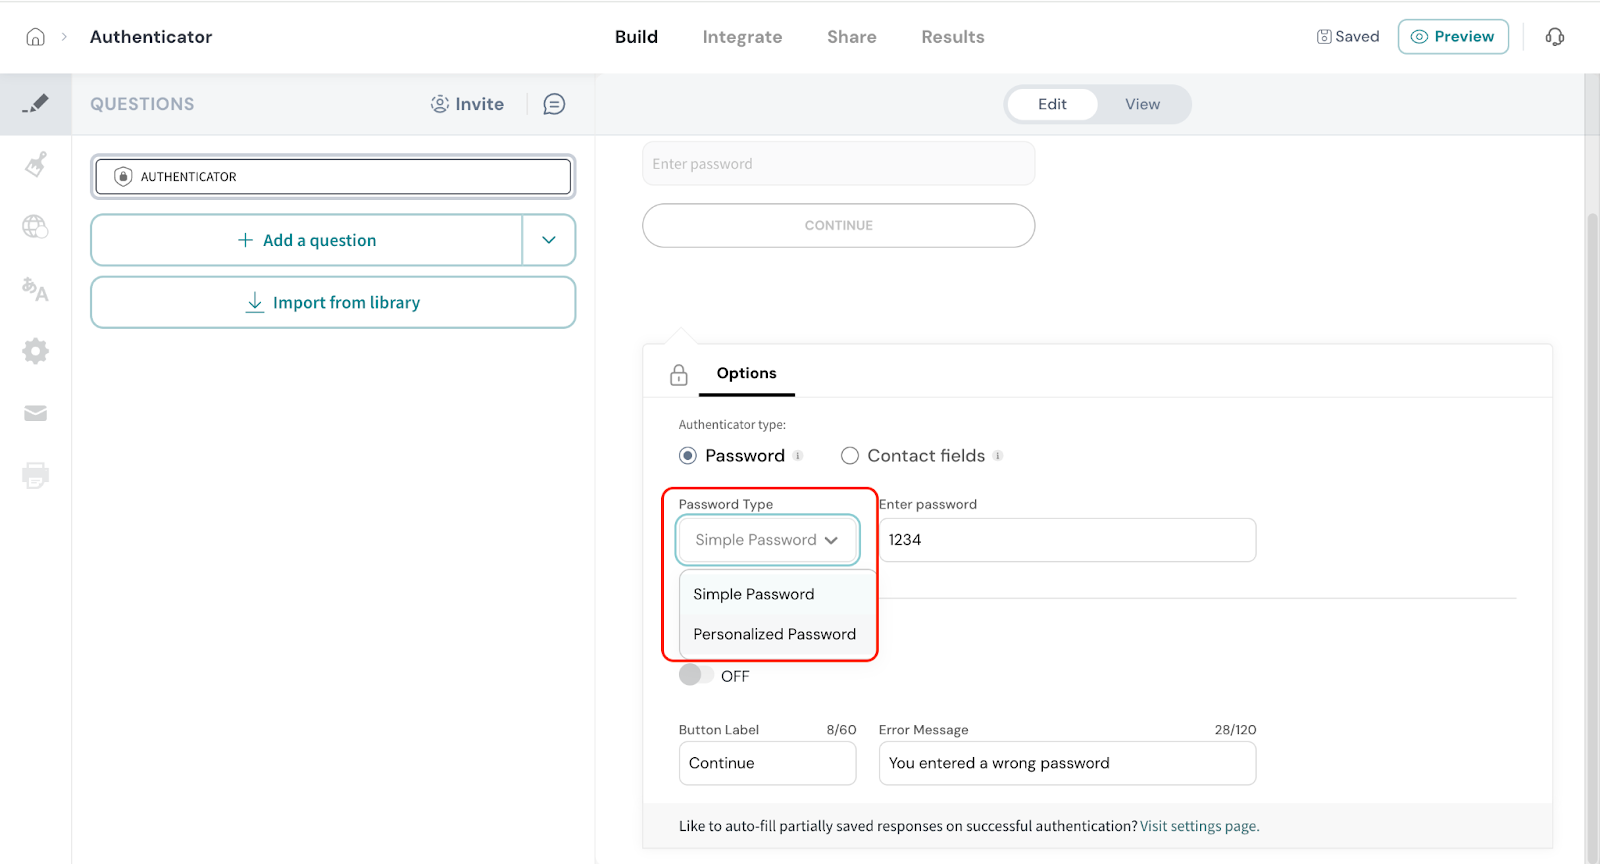
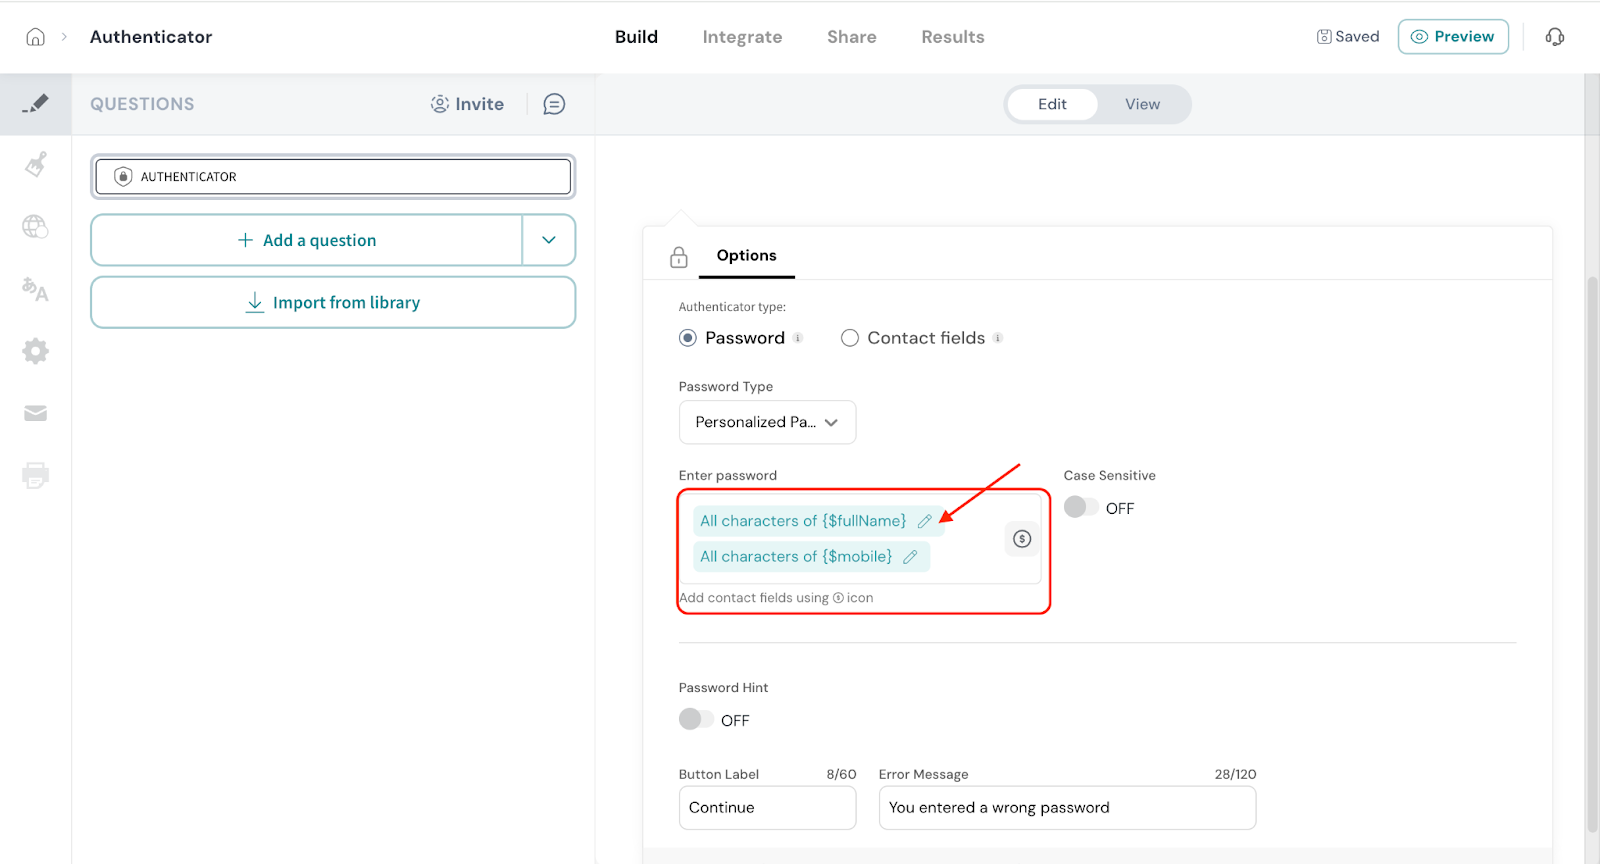
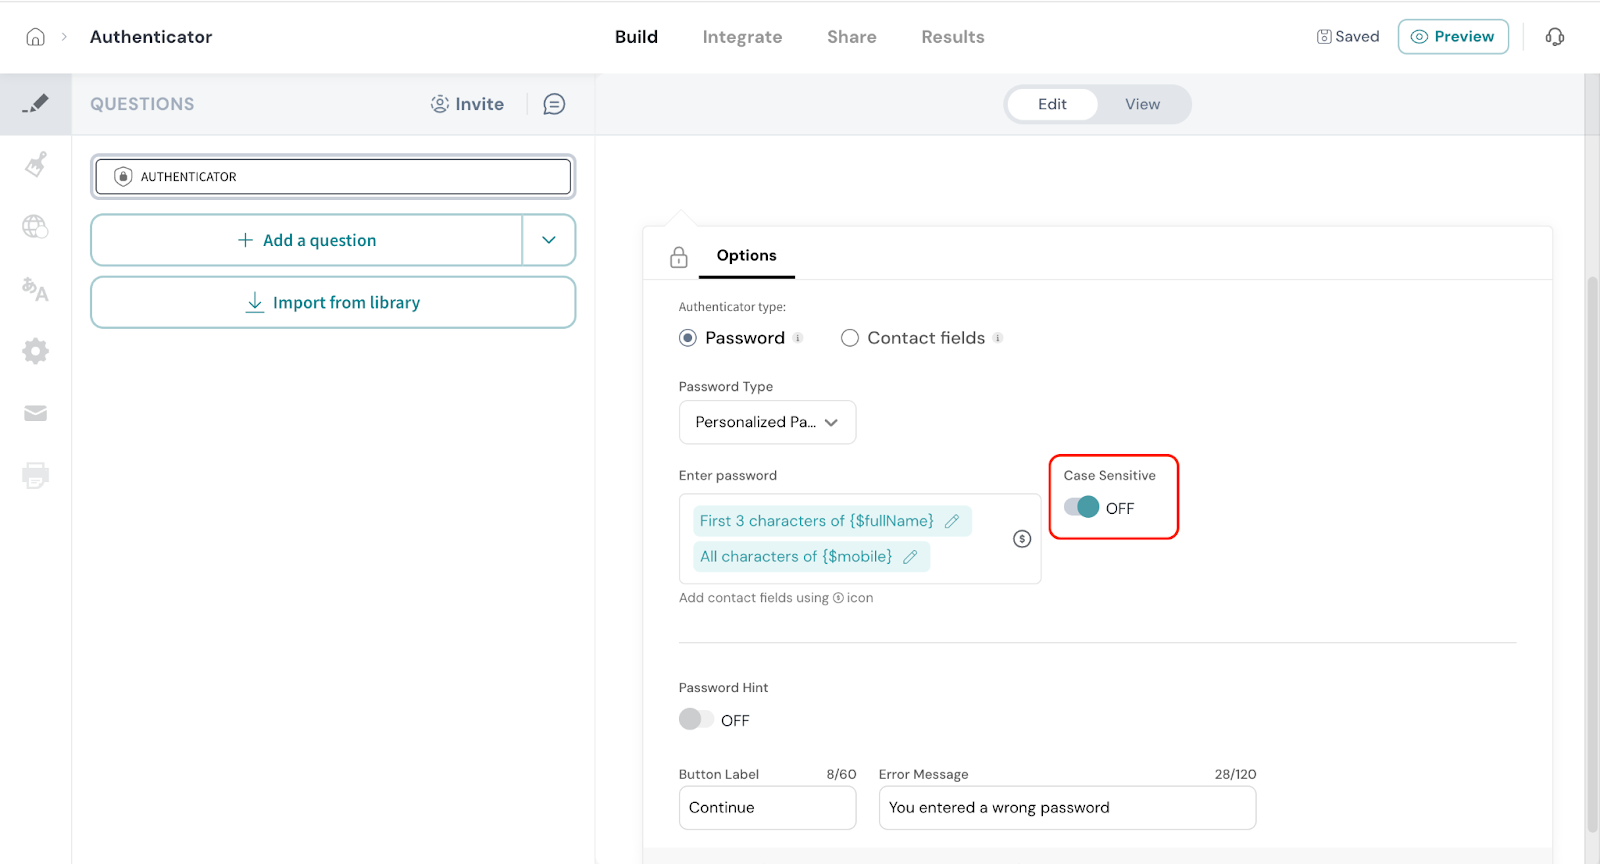
Example: You can set a password format where the respondent must enter the first three letters of their name, followed by their date of birth, and then the last three digits of their mobile number. Each respondent’s password will be generated based on their individual contact details.
Use the Edit icon to specify the number of characters for each.

Note: You can also make the password case sensitive if needed.
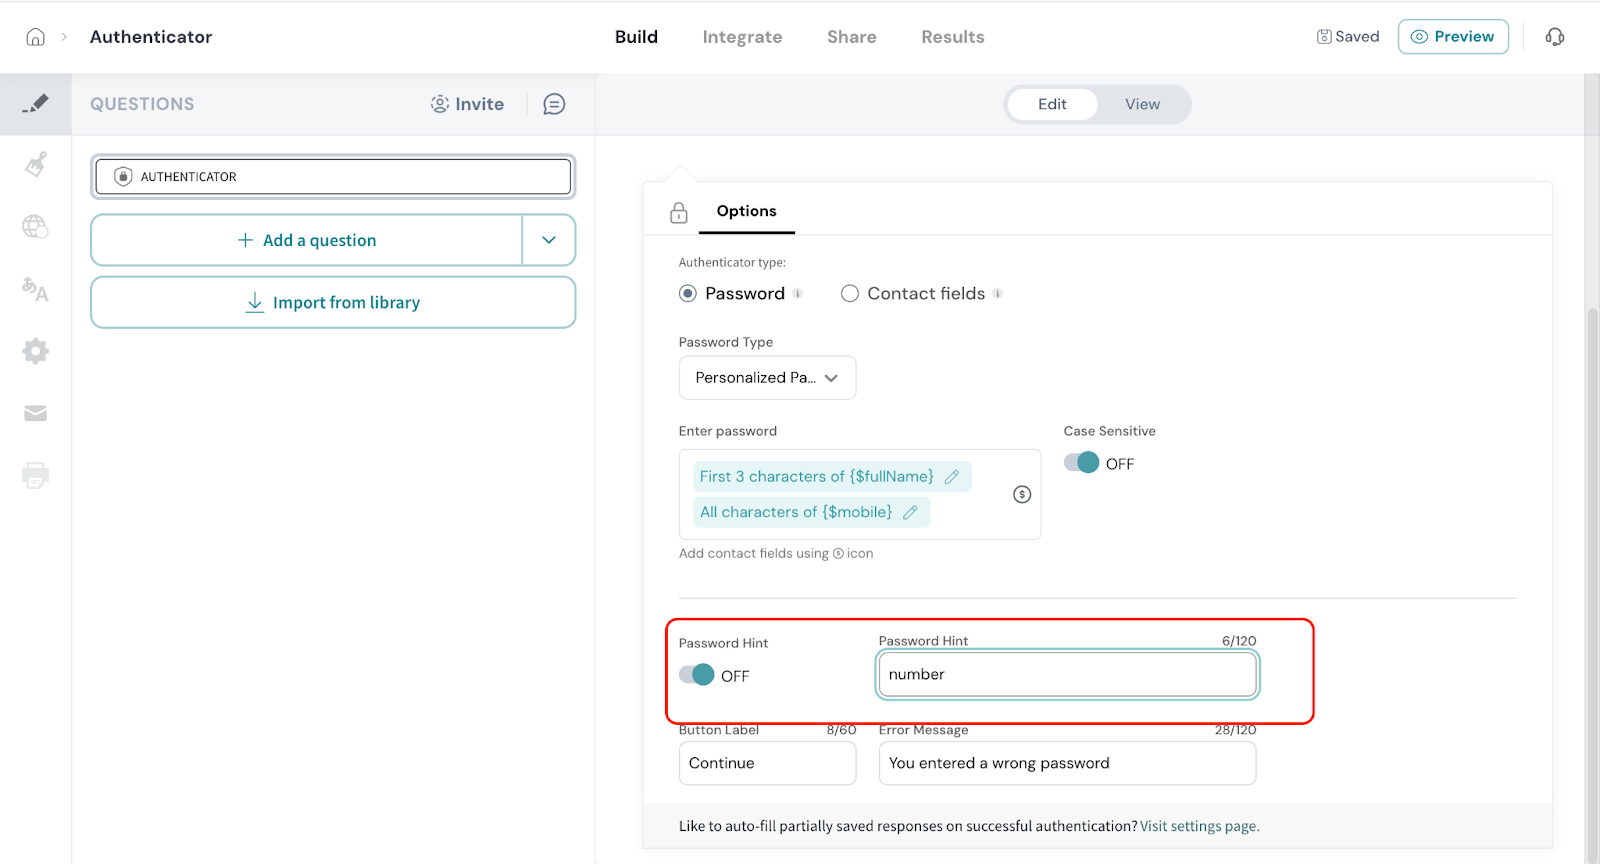

8. Error Message: If a respondent enters the wrong password, an error message will appear. You can edit this message to display it in your preferred wording.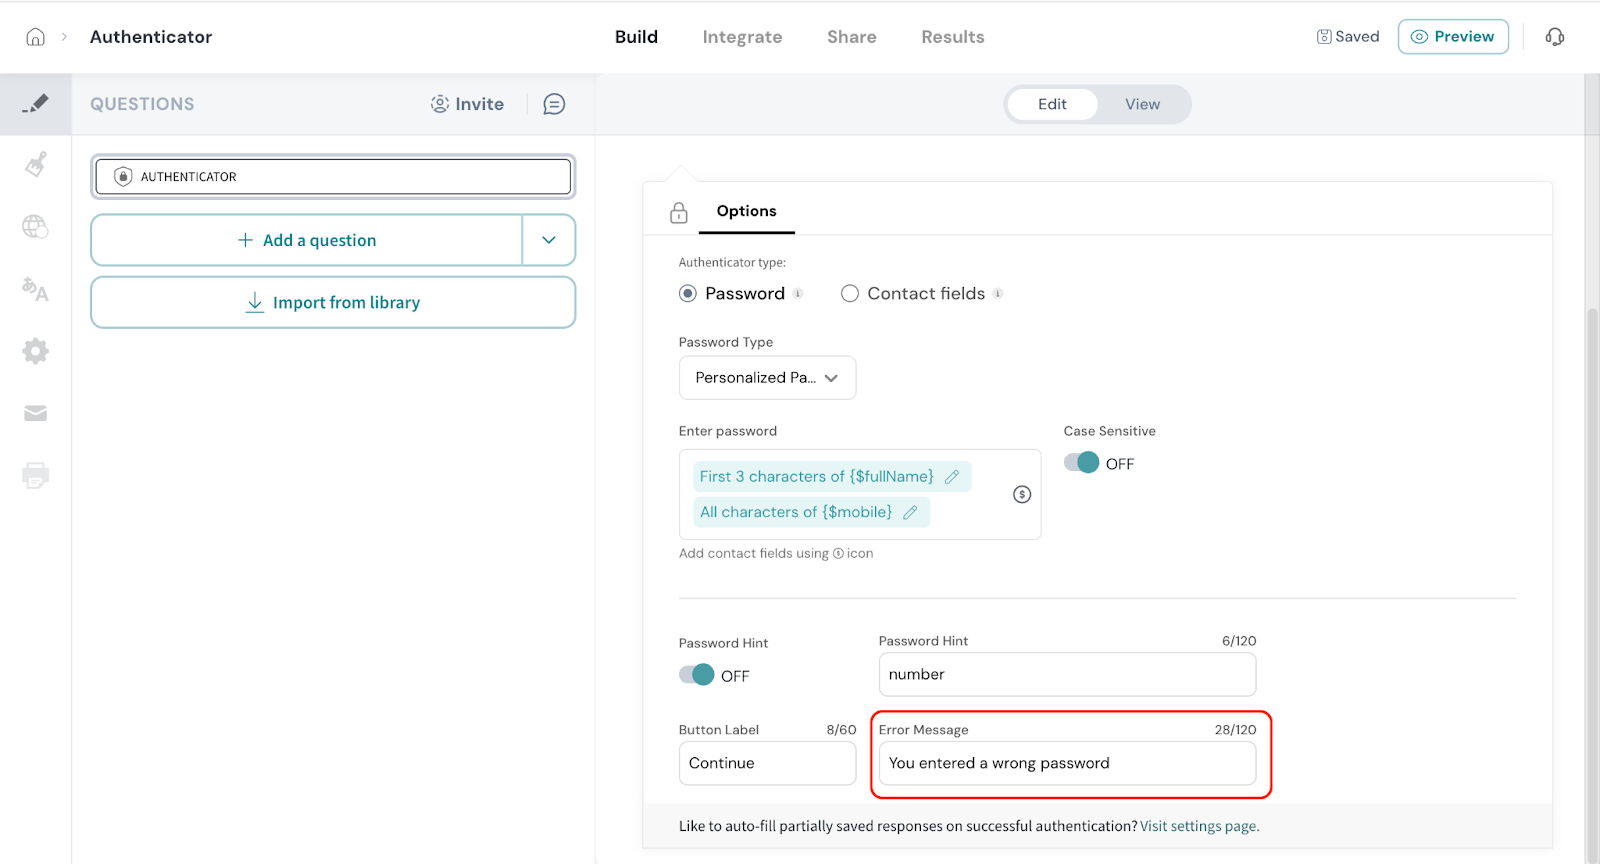
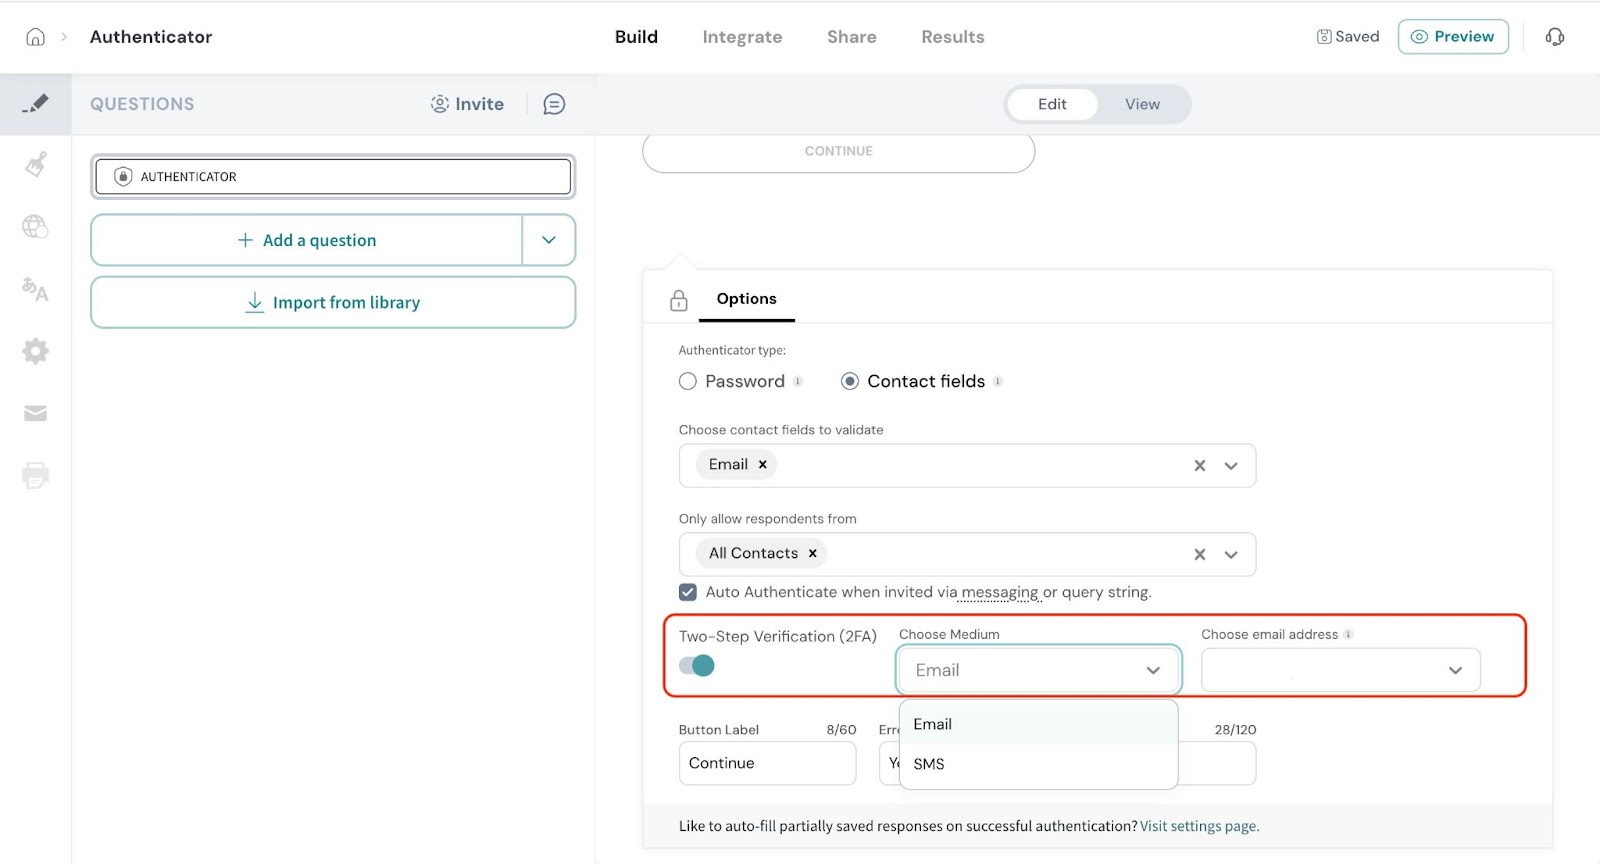
Now let’s look at Contact Fields.
You can choose which contact fields you want to use for authentication such as Email, Unique ID, or Mobile Number.
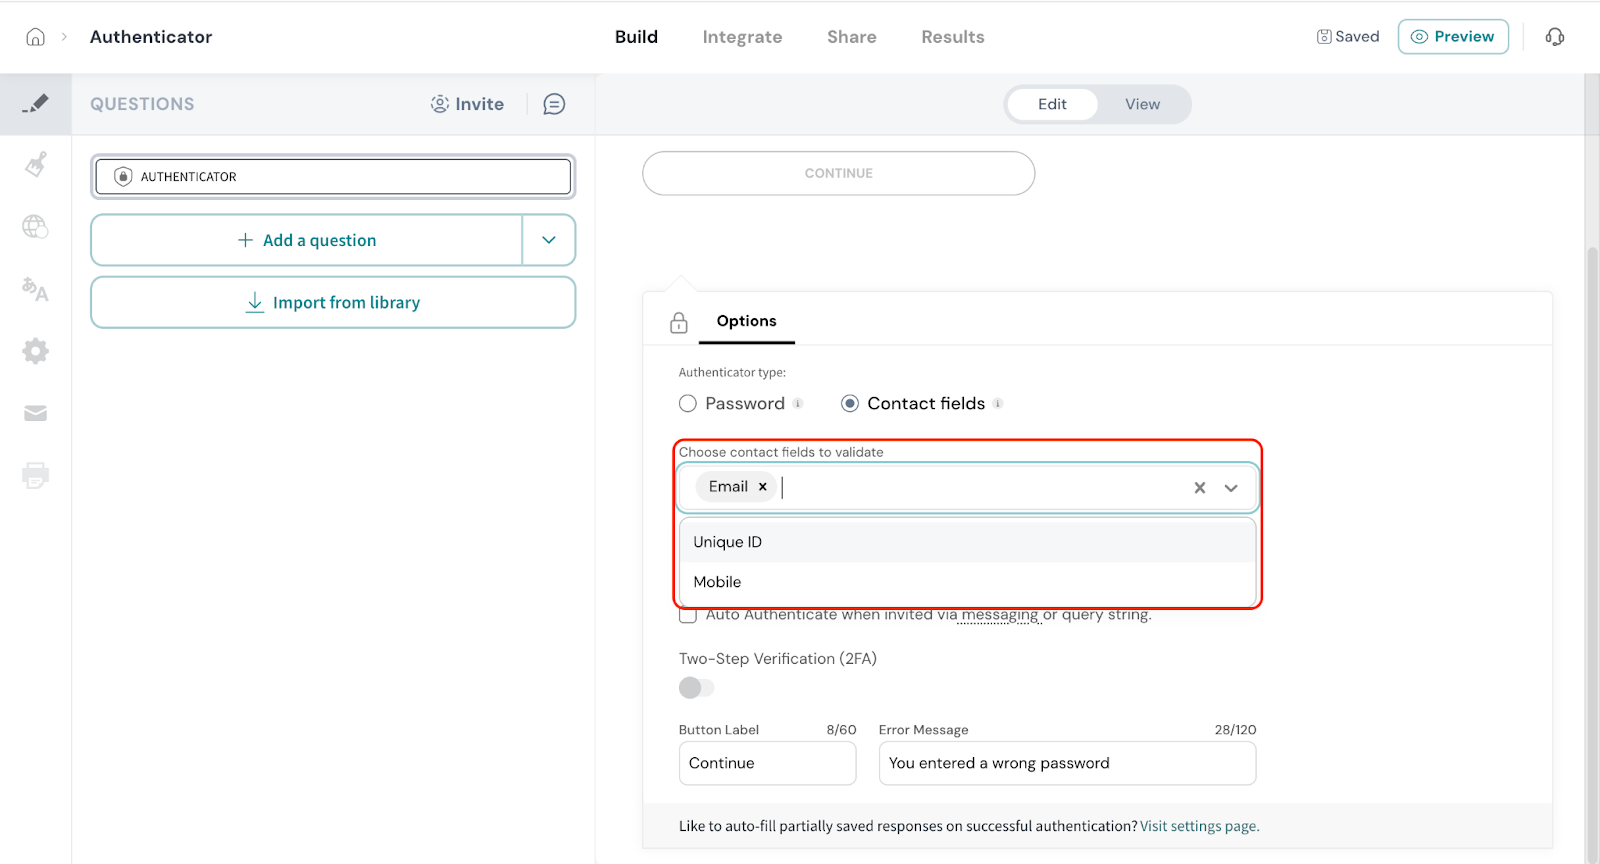
Respondents will need to enter the corresponding information from their contact record to access the survey. Only those whose details match will be able to access the survey.
You can choose to allow only respondents from a specific contact list by selecting the desired list from the dropdown menu.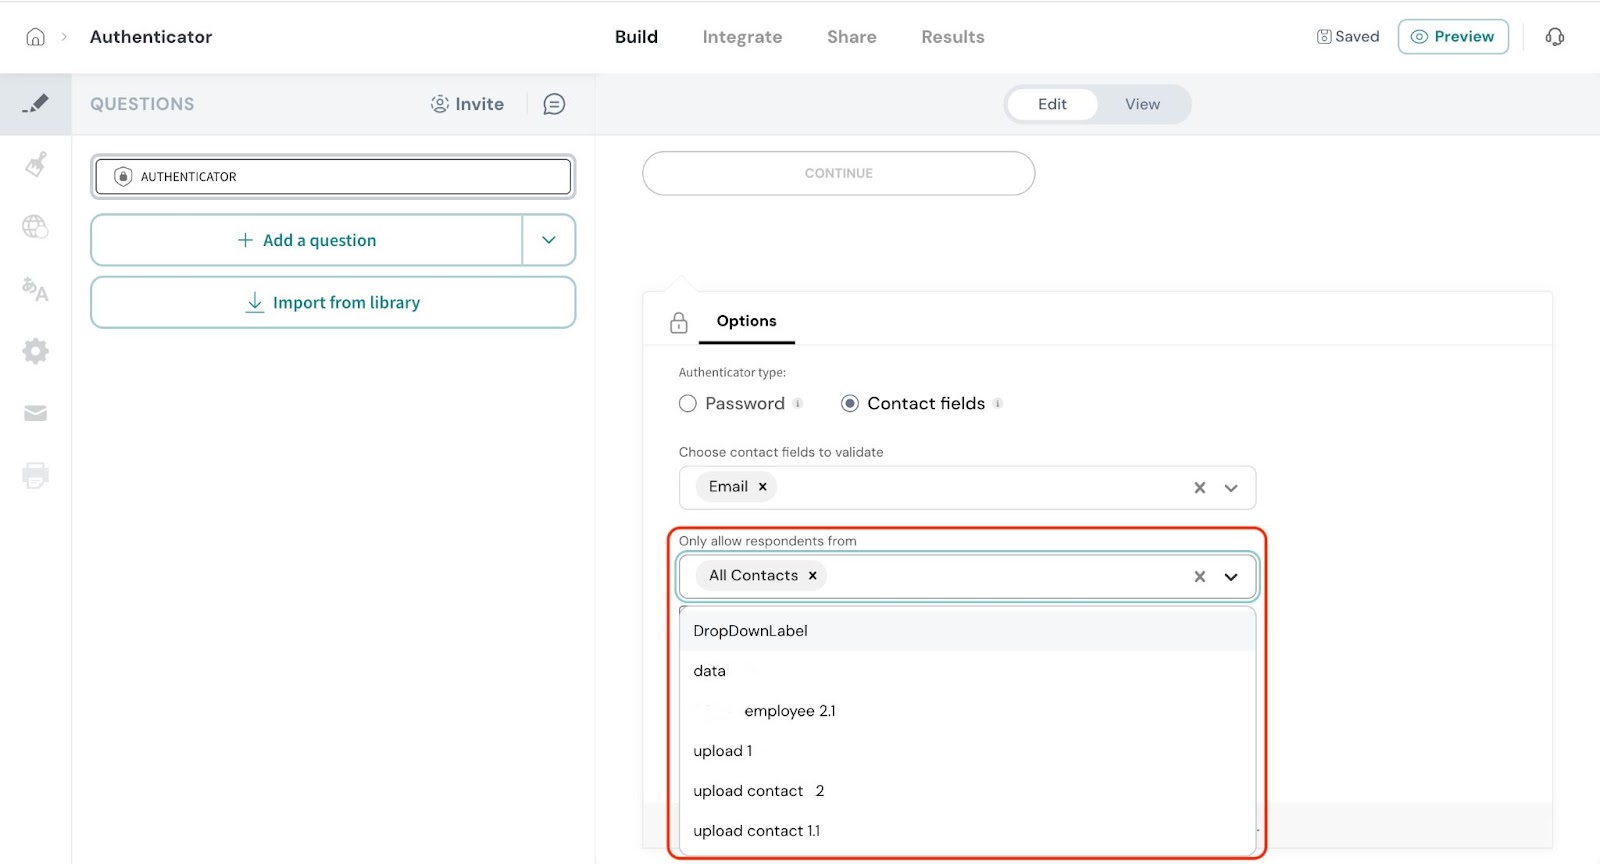
You can also enable Auto Authentication when the survey is shared via messaging channels (like Email, SMS, or WhatsApp) or by passing contact field ( email, mobile number and unique ID)values through the survey URL as query parameters.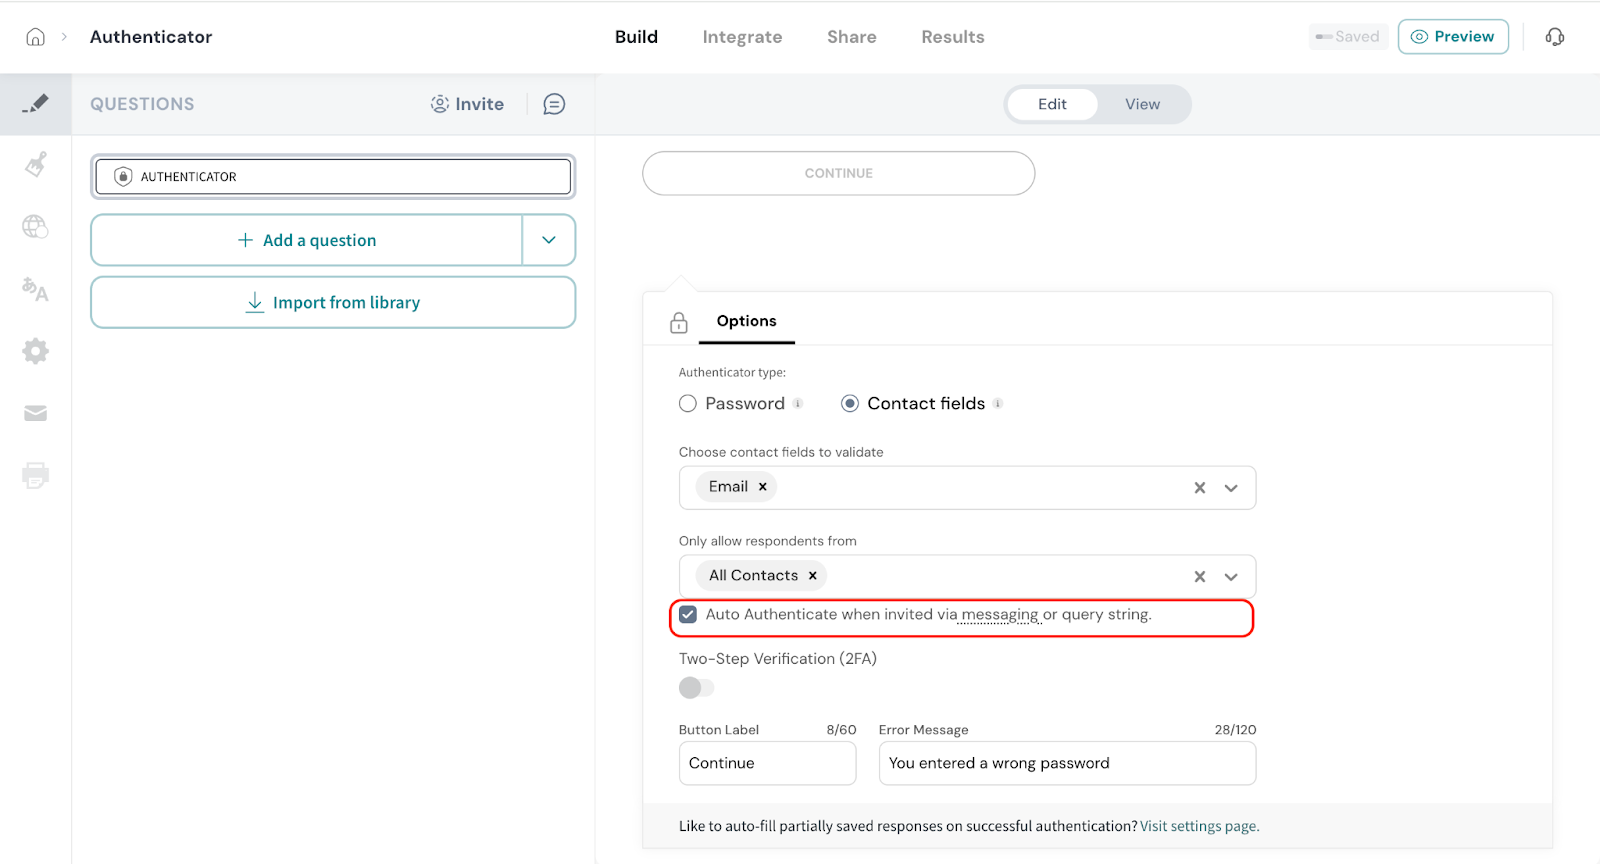
Additionally, you can set up Two-Step Authentication (2FA) for added security. Simply choose whether you want to send the verification code via Email or SMS, and select the appropriate contact field (email address or phone number) to deliver the code.Note: To send the code via SMS, you need to be connected to an SMS provider. You can refer to this article to setup an SMS provider.
Section wise authentication
Note: Section authentication can be done only in the Classic Survey and is not supported in Chat survey.
Powered By SparrowDesk