
Search
PII Anonymization is a data security method that protects sensitive information such as names, phone numbers, and other personal identifiers. This process ensures that private data of customers is not stored and remains secure.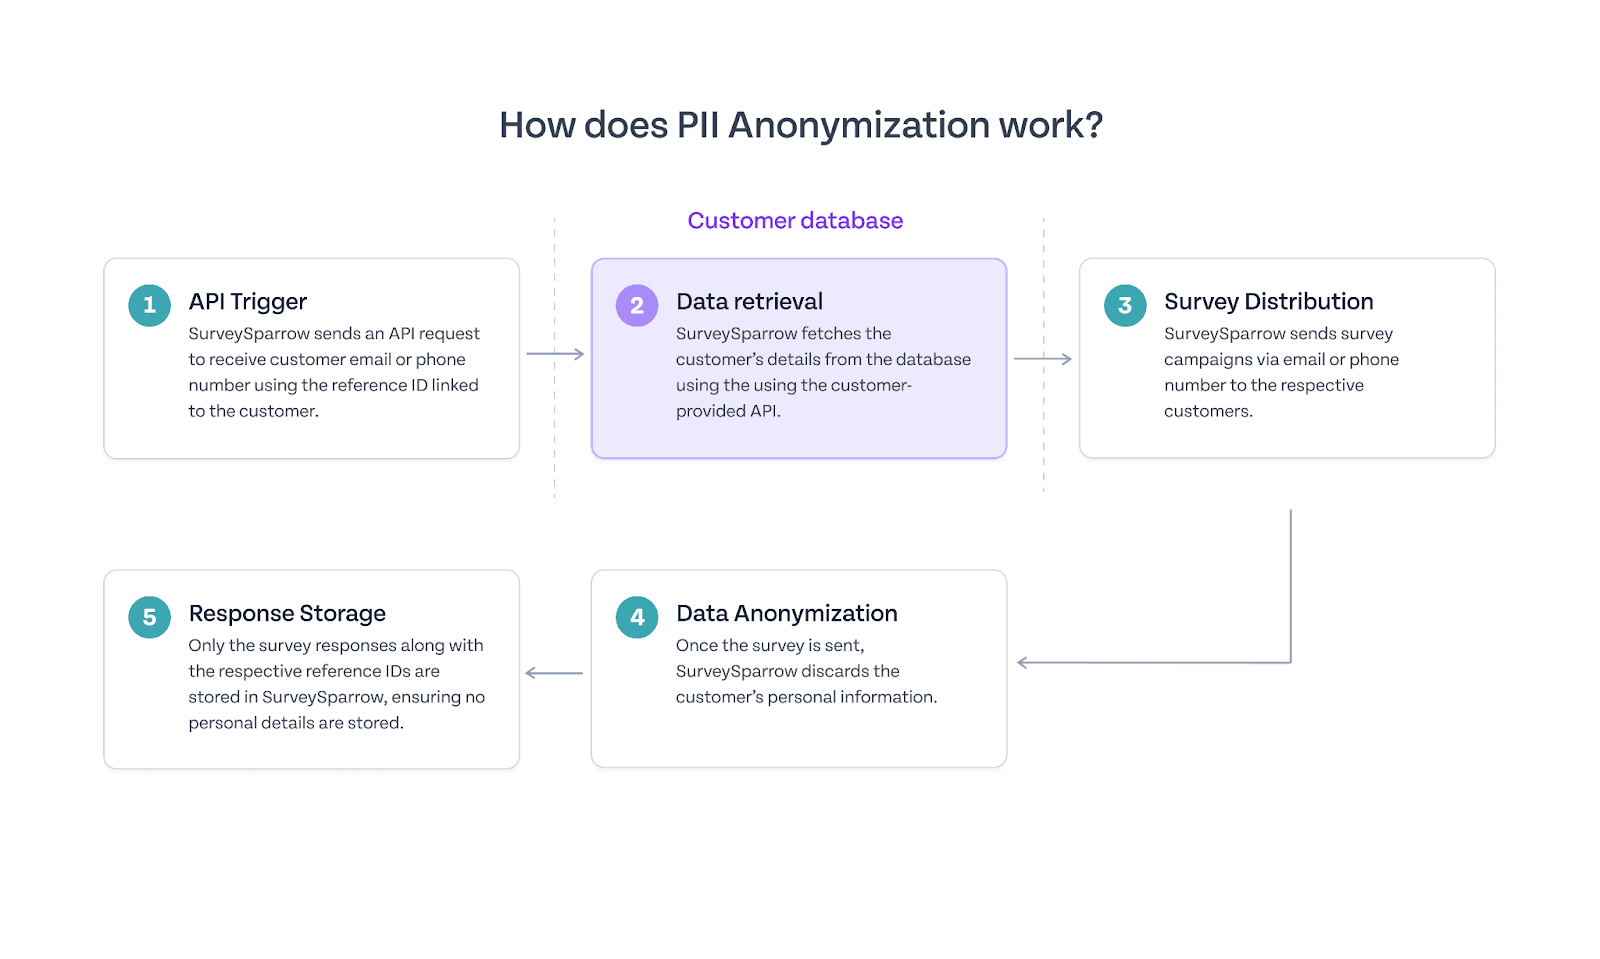
How does it help?
Ensuring that contact information is secure and inaccessible to external systems is crucial in order to:
Before getting started, ensure
How to set up?
1. Under settings, choose PII Anonymization.
There are 2 types of anonymisations.
Email ID: Through API configurations, the email id can be anonymised and can be replaced with a unique identifier.
Phone Number: The phone number can be anonymised by substituting it with a pseudonym.
In this example, we will deep dive into the configuration for Email ID anonymisation.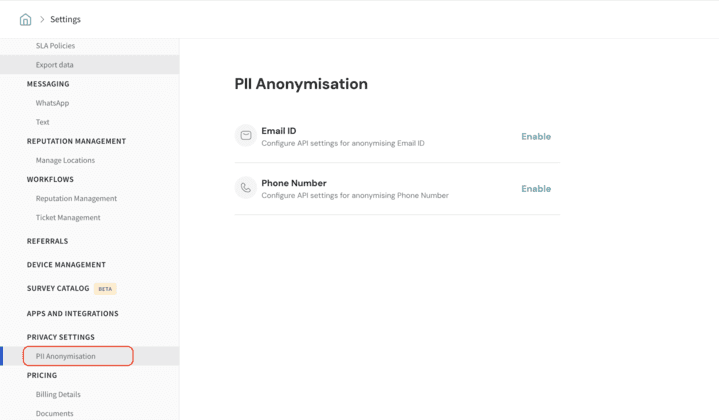
2. For Request URL - the request URL/ endpoint URL should be provided by the customer
Under the Request URL, there are two types: GET and POST. Choose the appropriate method based on your requirement.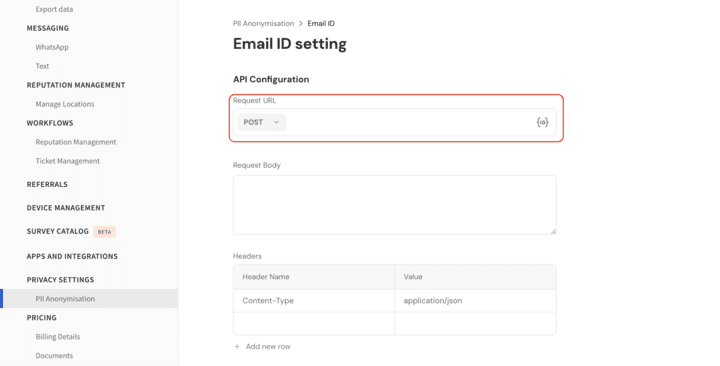
Request Body- Enter the specific Reference Id to get the details of the particular customer to whom the survey should be sent.
NOTE: The request body is required only for the POST method.

3. You will receive the details associated with the specified Reference ID. The survey email will be automatically triggered to the contact linked to this ID.
4. Auth Type- The authentication type will depend on specific use case, data sensitivity, and access requirements.
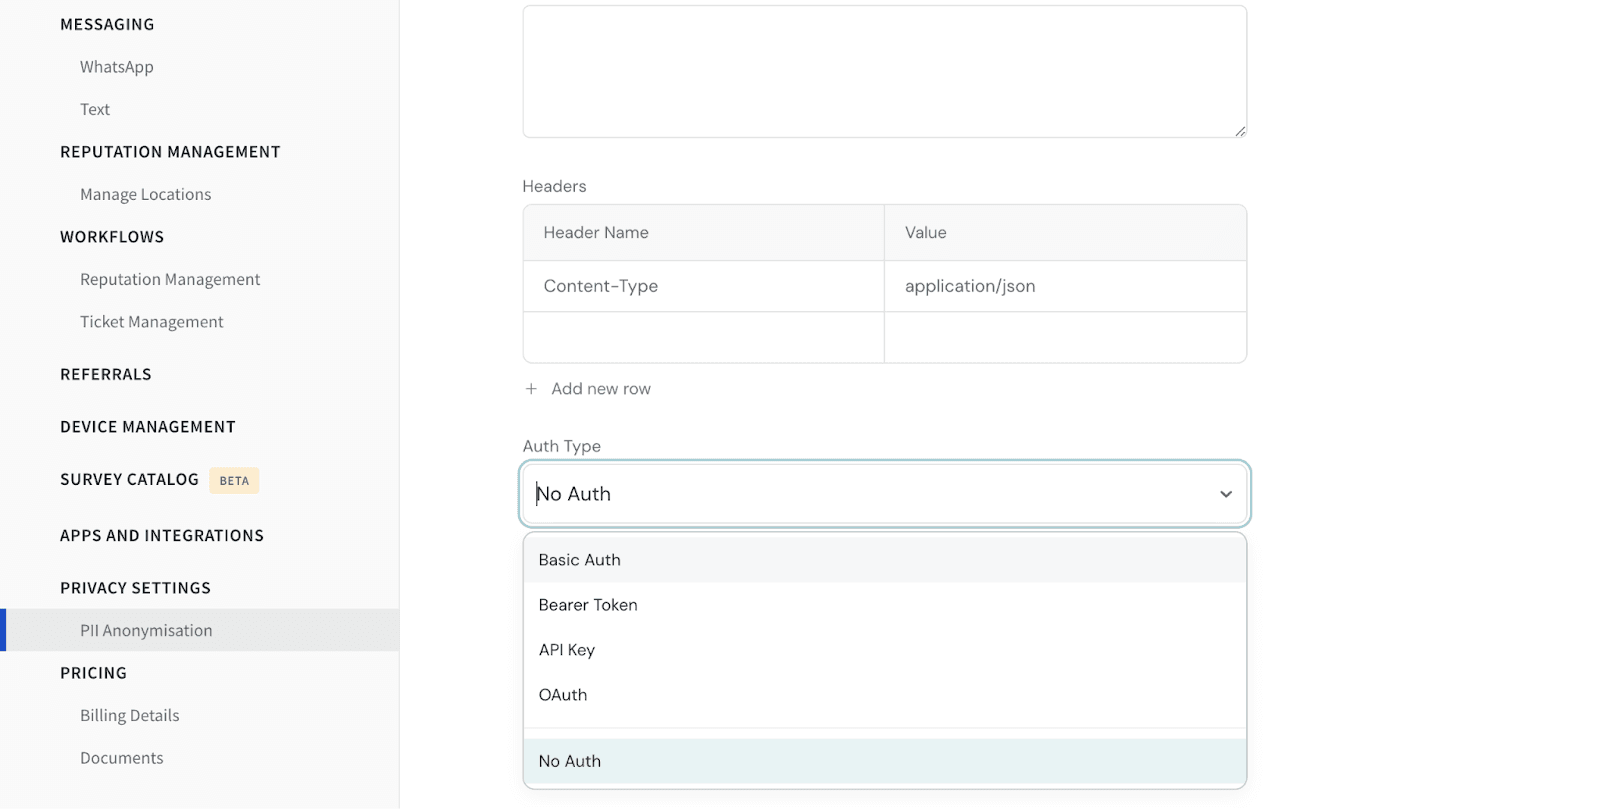
The following are the different types of Authentication:
Basic Auth: Uses a username and password. These credentials are encoded and sent with each API request for verification.
Bearer Token: Uses an already encrypted token in the request header to verify access and is used in authentication to grant API access. The server verifies the token to authorize the request.
API Key: Uses a unique key issued to a user or application to authenticate API requests. The key is included in the request headers or URLs, and the server validates it to verify access.
No Auth: Does not require authentication, allowing unrestricted access to resources. Typically used for public or non-sensitive data.
OAuth: A secure framework that uses temporary tokens to grant controlled access to resources without exposing user credentials. It supports varying levels of access and token expiration.
5. In this example, let's use OAuth authentication and generate a token.
An endpoint URL is required to generate a token. Provide the URL along with all necessary headers for the request. The response will include the token needed to proceed.
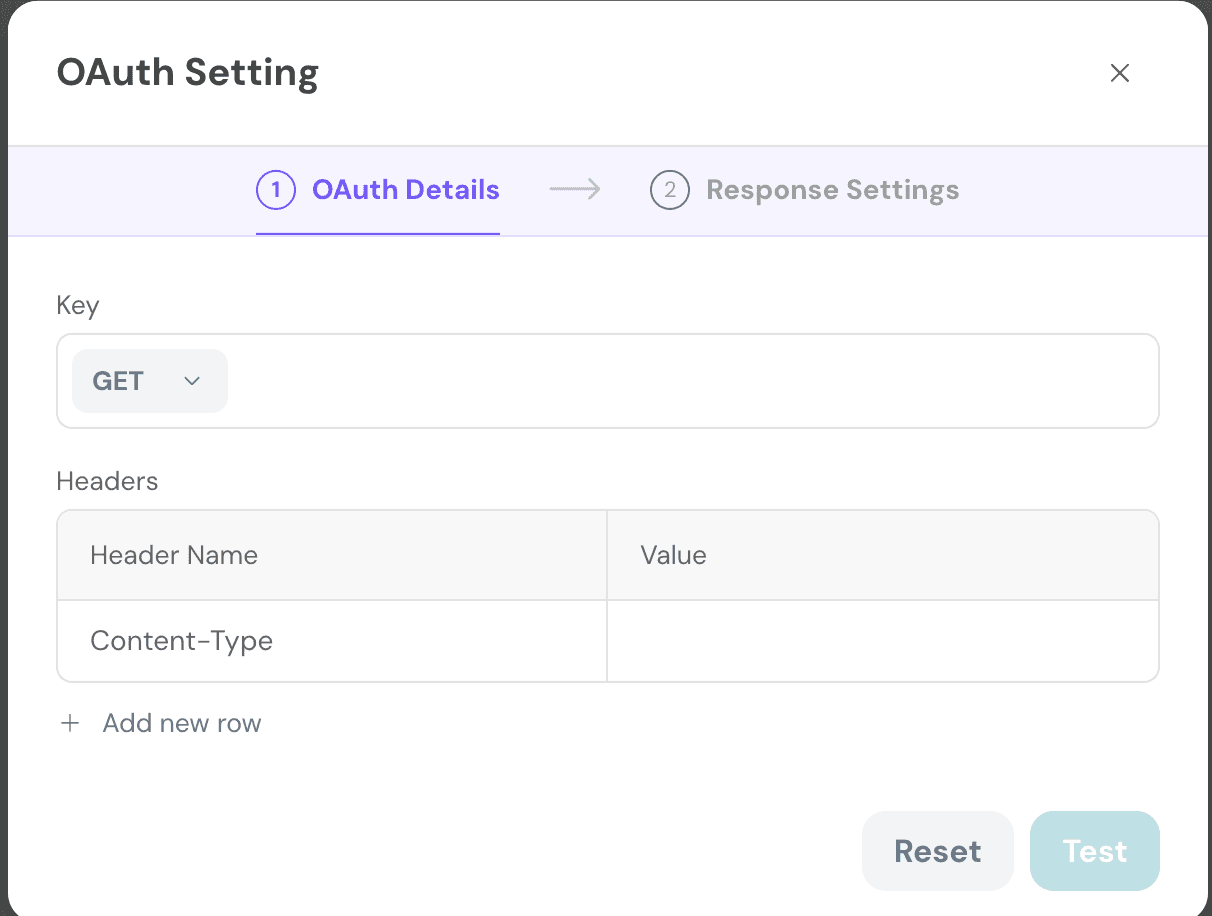
6. Under Response Settings, select the specific access token and define the expiration time. Once the configured time elapses, the token will automatically expire, ensuring enhanced security by limiting the validity period of the token. This approach mitigates risks associated with prolonged token usage, safeguarding sensitive operations and data.

7. Test the configuration by entering the reference ID to verify that it is set up correct
Post the PII Anonymisation has been enabled and set up, we can see that
In the Contact section, the email address will not be stored or displayed, and only the reference number associated with the contact will be visible. Emails will be automatically sent to the details associated with this reference number.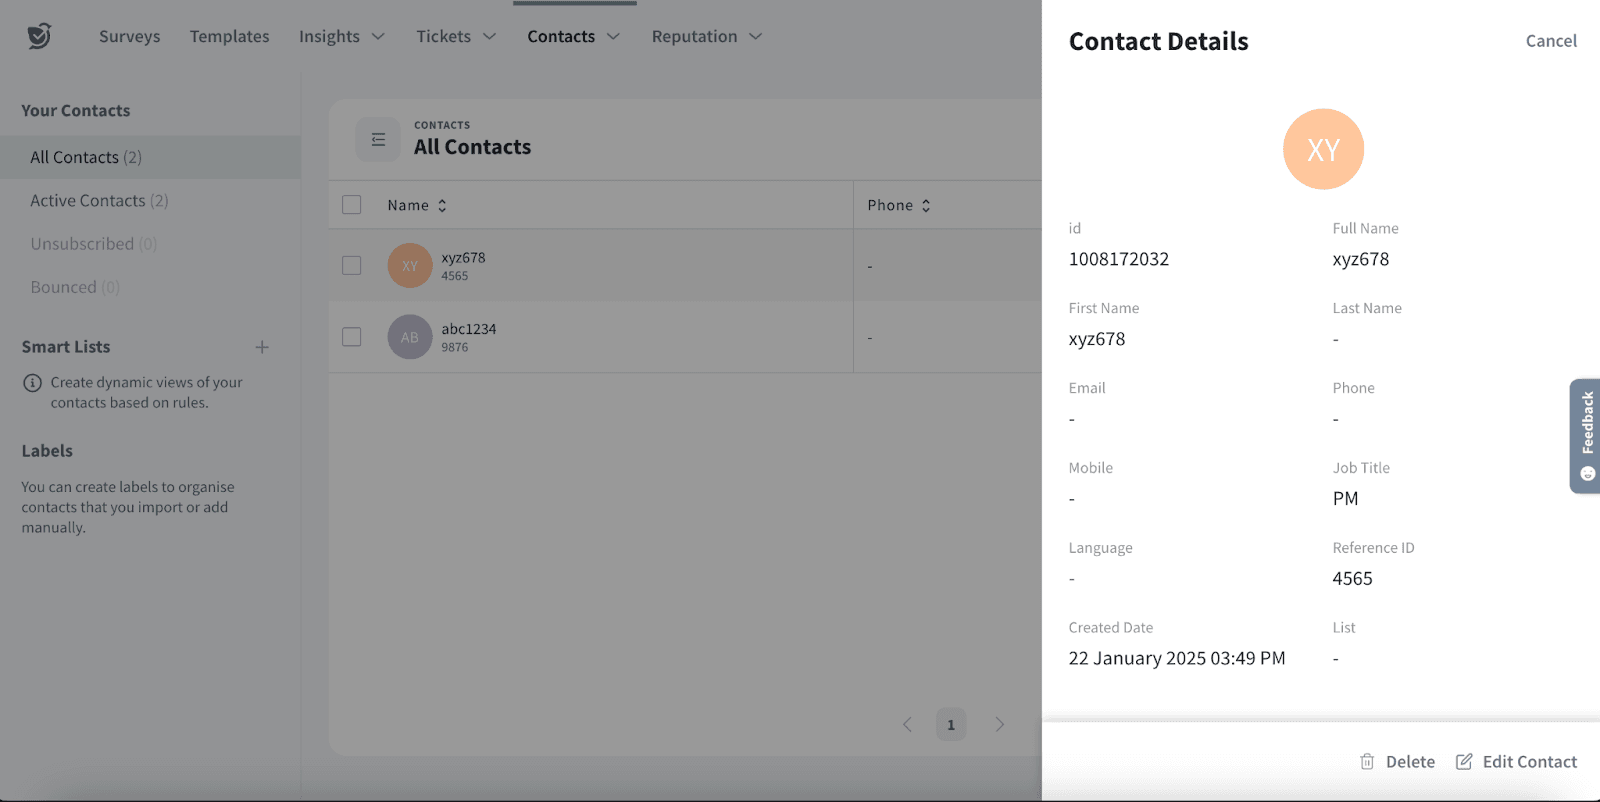
The above steps can be followed to anonymise phone numbers as well.
That’s all about PII Anonymization.
Feel free to reach out to our community if you have questions.
Powered By SparrowDesk