
Exporting your survey responses through SFTP
The Secure File Transfer Protocol (SFTP) is a network protocol that enables secure 1-1 file transfer and access, at large volumes. With inbuilt data encryption, SFTP safeguards sensitive information against unauthorized access. It’s a go-to solution for highly regulated industries that deal with huge amounts of sensitive information, like healthcare and finance.
SurveySparrow has native support for SFTP, allowing users to:
- Import contact lists from a remote server (one-time or scheduled): click here to learn how.
- Import employee lists into SurveySparrow: click here to learn how.
- Share email surveys: click here to learn how.
In this article, we’ll explain how you can export your survey responses to an SFTP server, on a one-time or recurring basis.
1. Open the survey whose responses you wish to export. The Results section appears by default. Then click on the Responses tab.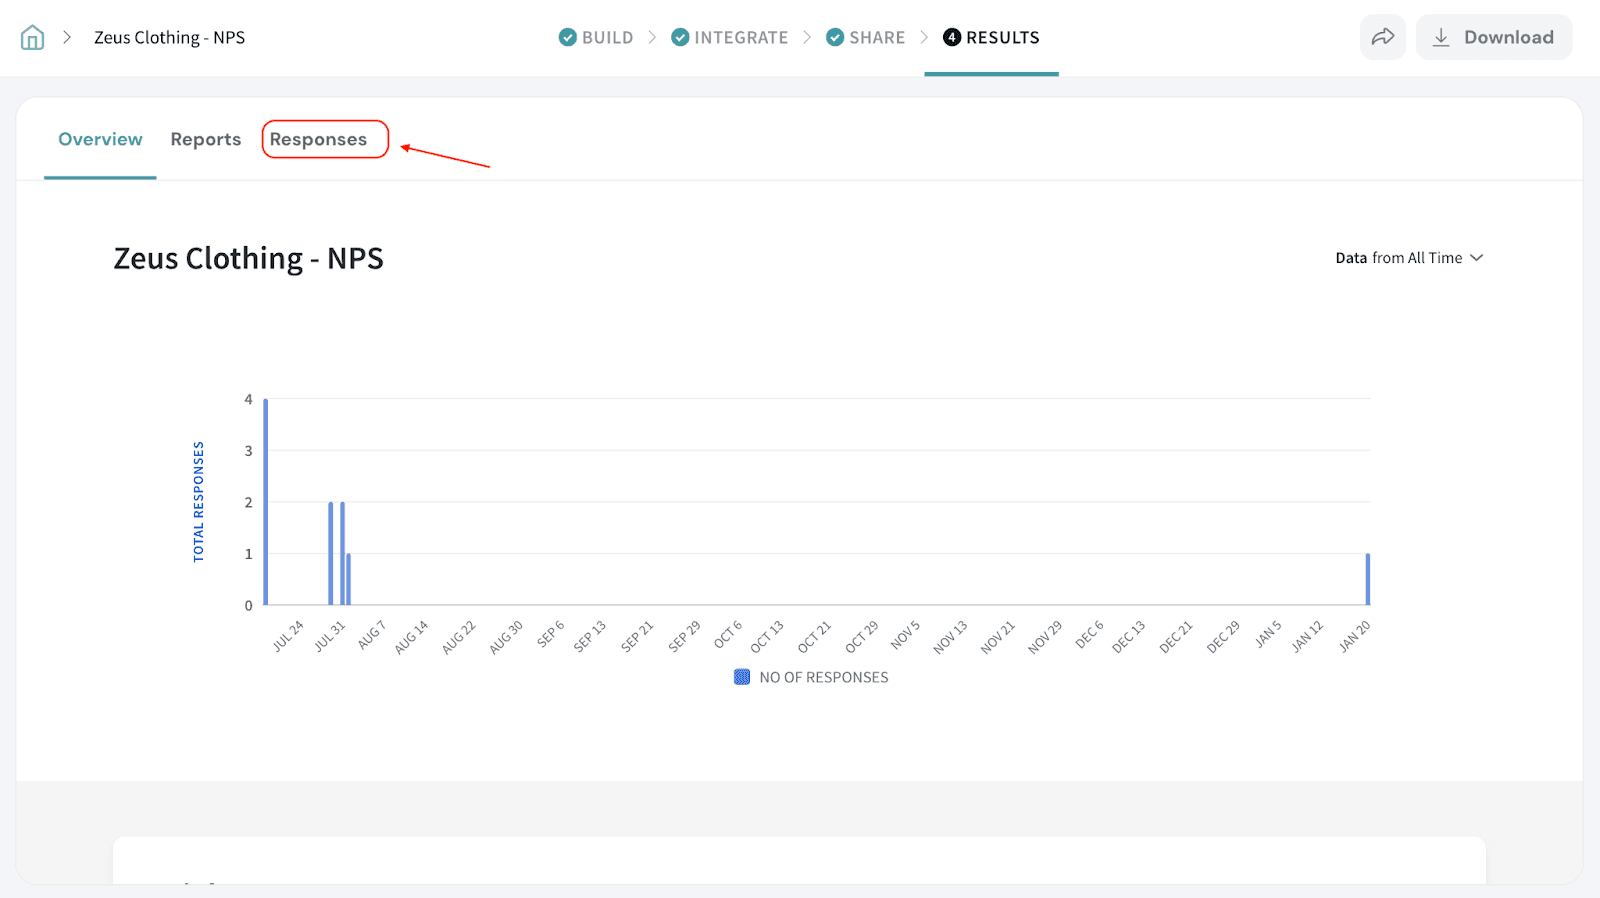
2. Click the Share button in the upper right part of the page.
3. When the Share Options panel opens from the right, click on SFTP under More ways to export responses at the bottom.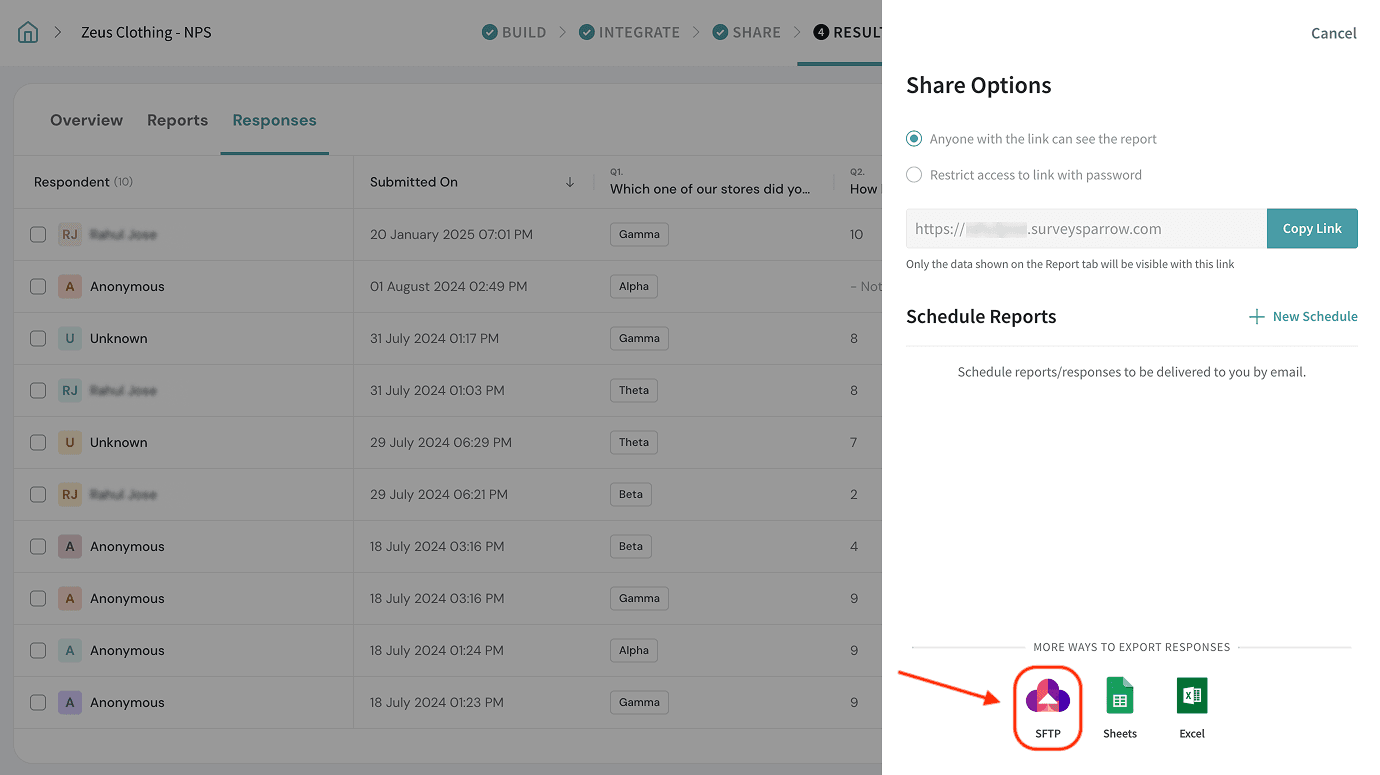
4. The Create new export page opens, where you’ll have to configure the export conditions. Let’s start with Export Frequency. If you want to export responses just once, stick to the default One time option. If you want to set up a repeating export, click on Recurring.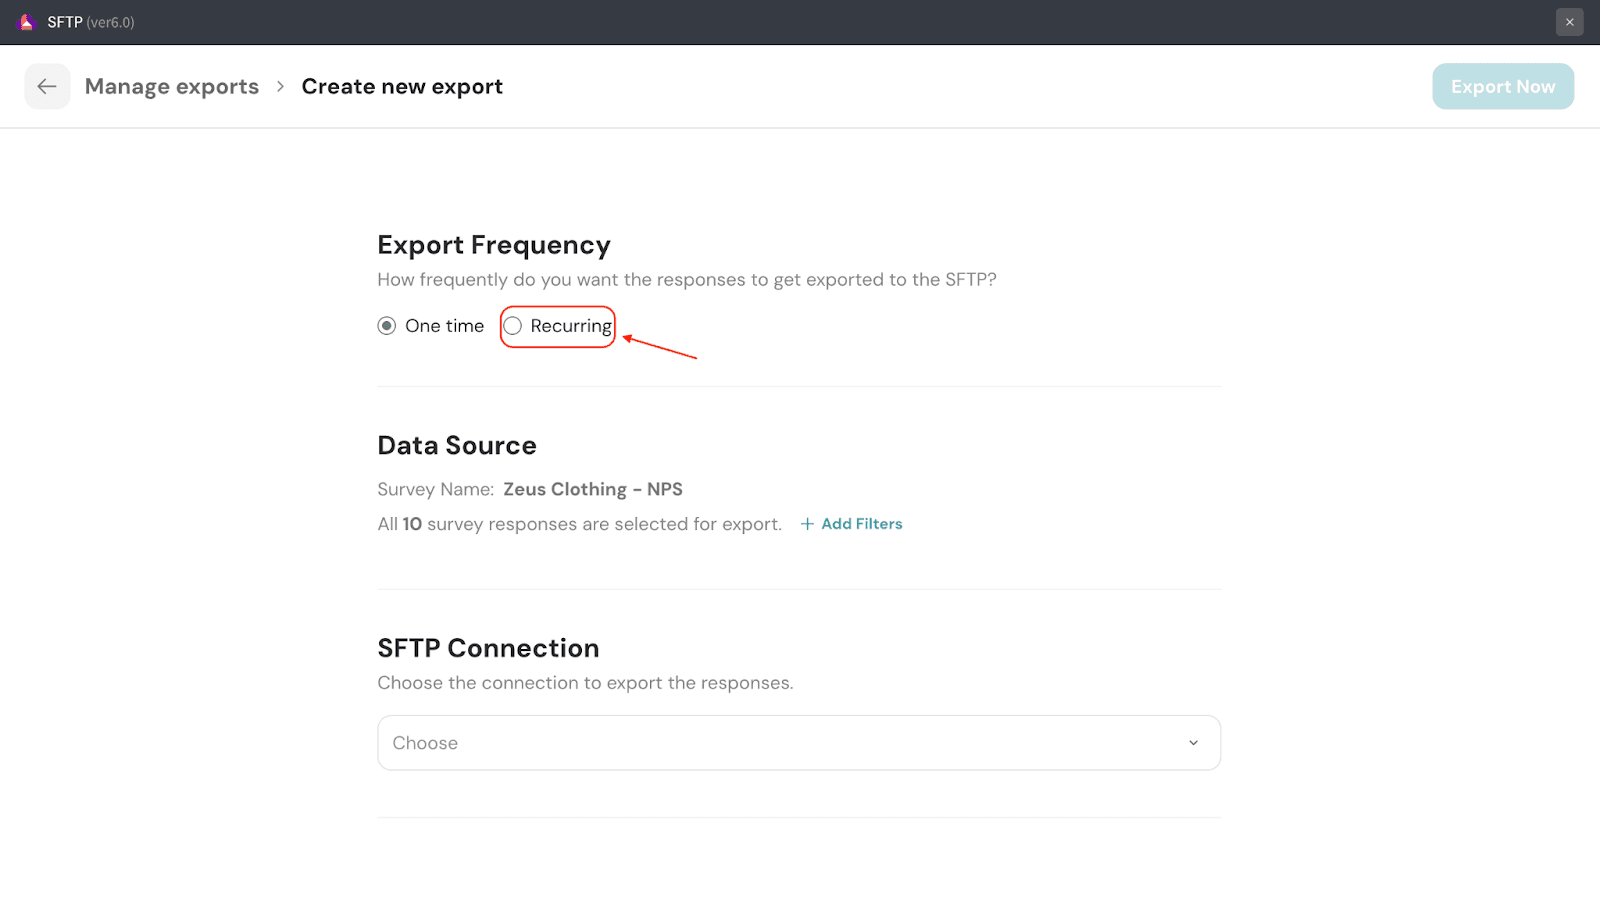
5. Then, select the export cadence (daily/weekly/monthly), and fix the time and timezone.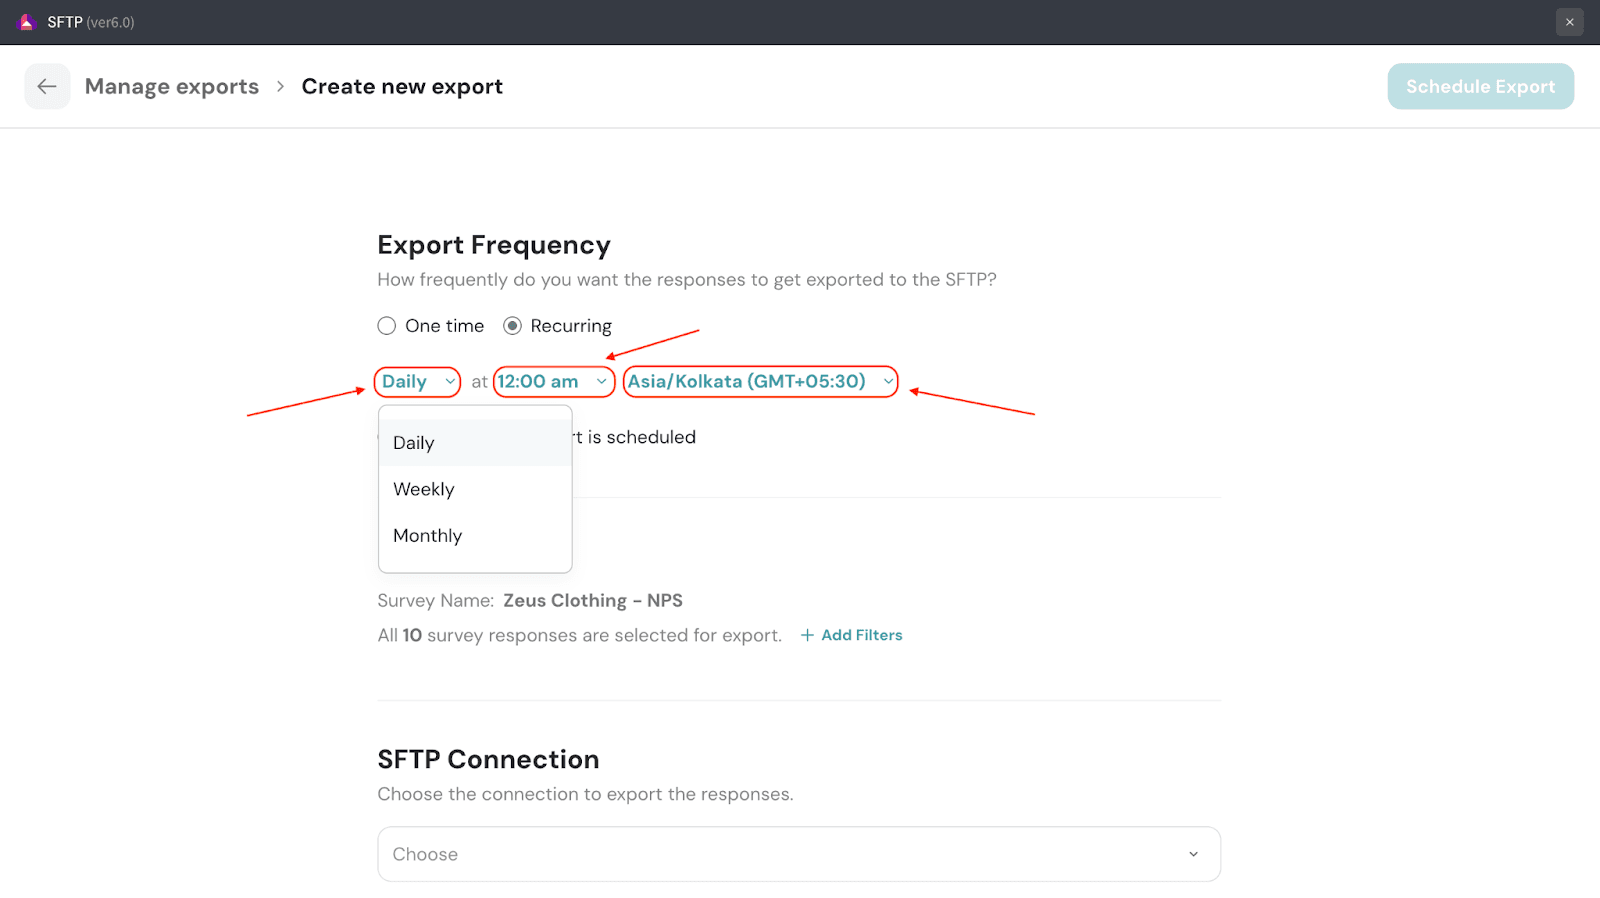
6. If you wish to have someone in your organization notified about the export, click the toggle next to Notify when export is scheduled. Then type in their email address.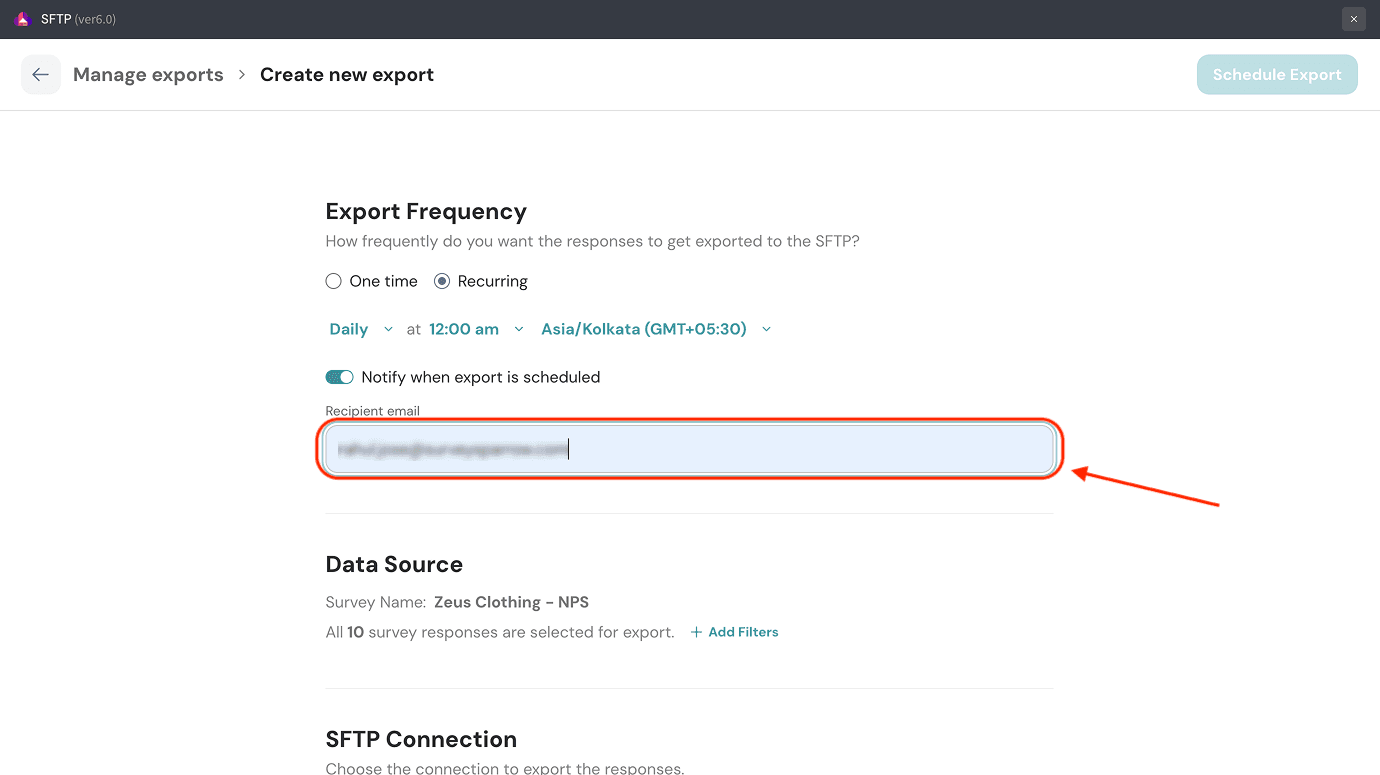
7. By default, all of your responses will be exported. However, if you wish to set criteria to export a specific set of responses, click on Add Filters. You can choose from 3 types of filters: Status, Share Channel and Questions. Let’s explore each filter briefly.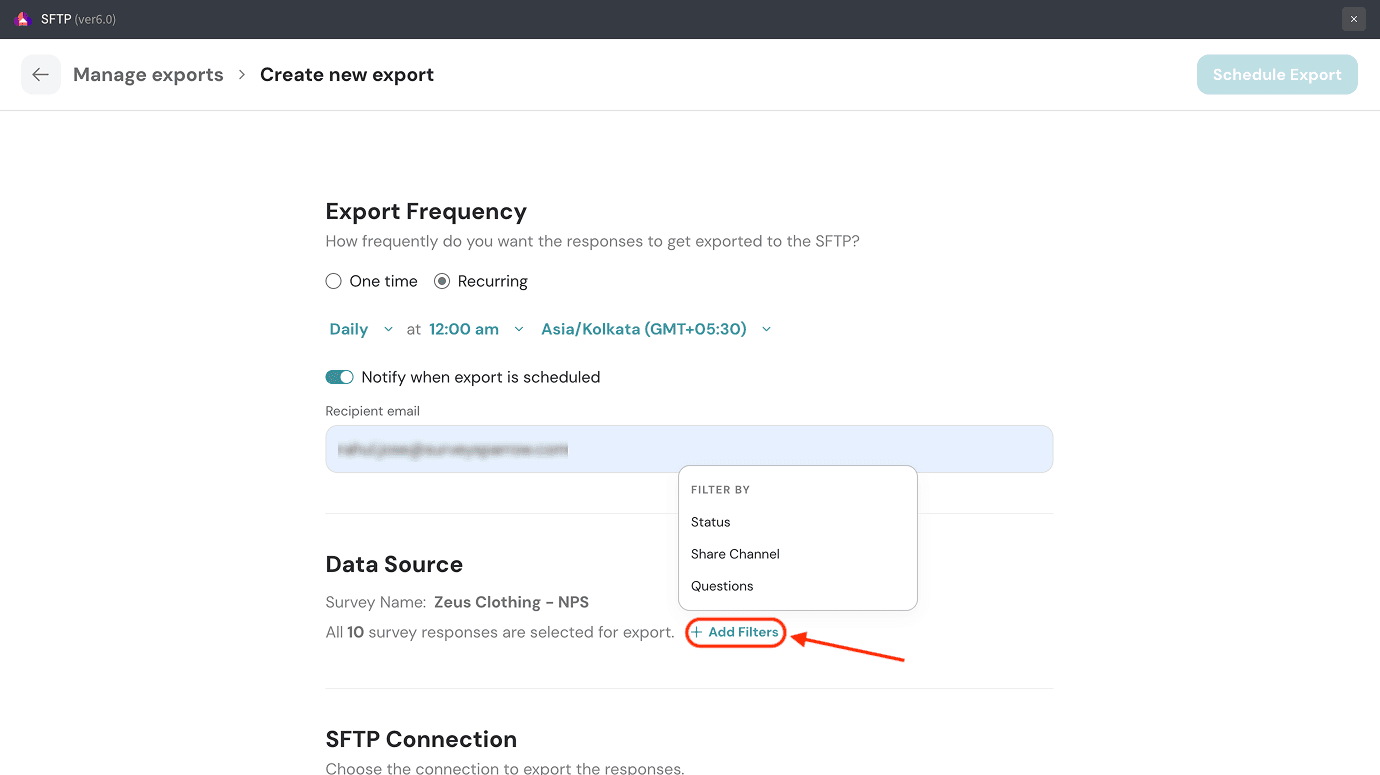
8. In the status filter, you can choose either Completed or Partially Completed responses.
9. In the share channel filter, you can choose between 9 options.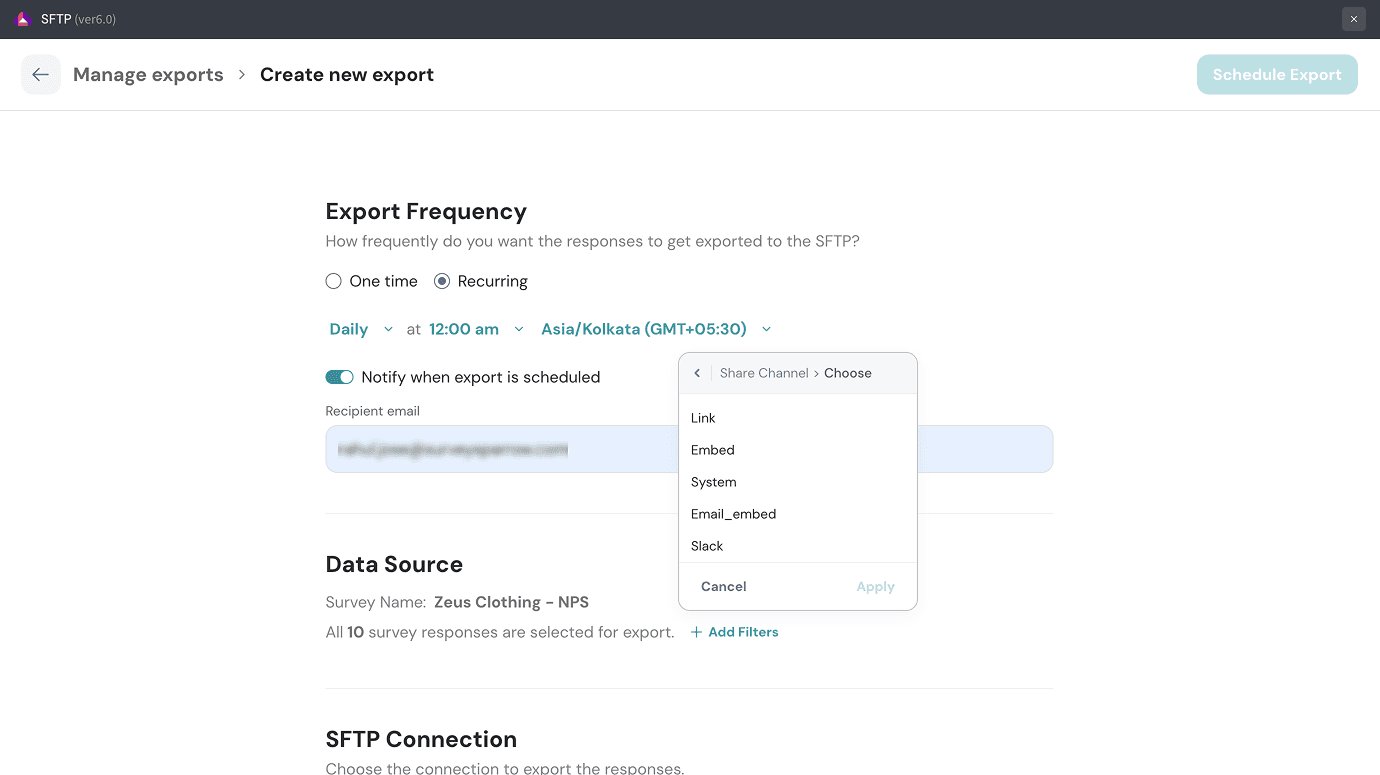
Note: The supported channels are:
- Link share
- Embed share
- System share
- Email embed share
- Slack share
- Facebook share
- Email share
- SMS share
- Twitter share
Note: There’s no limit to the number of versions of a share channel that can be added as filters.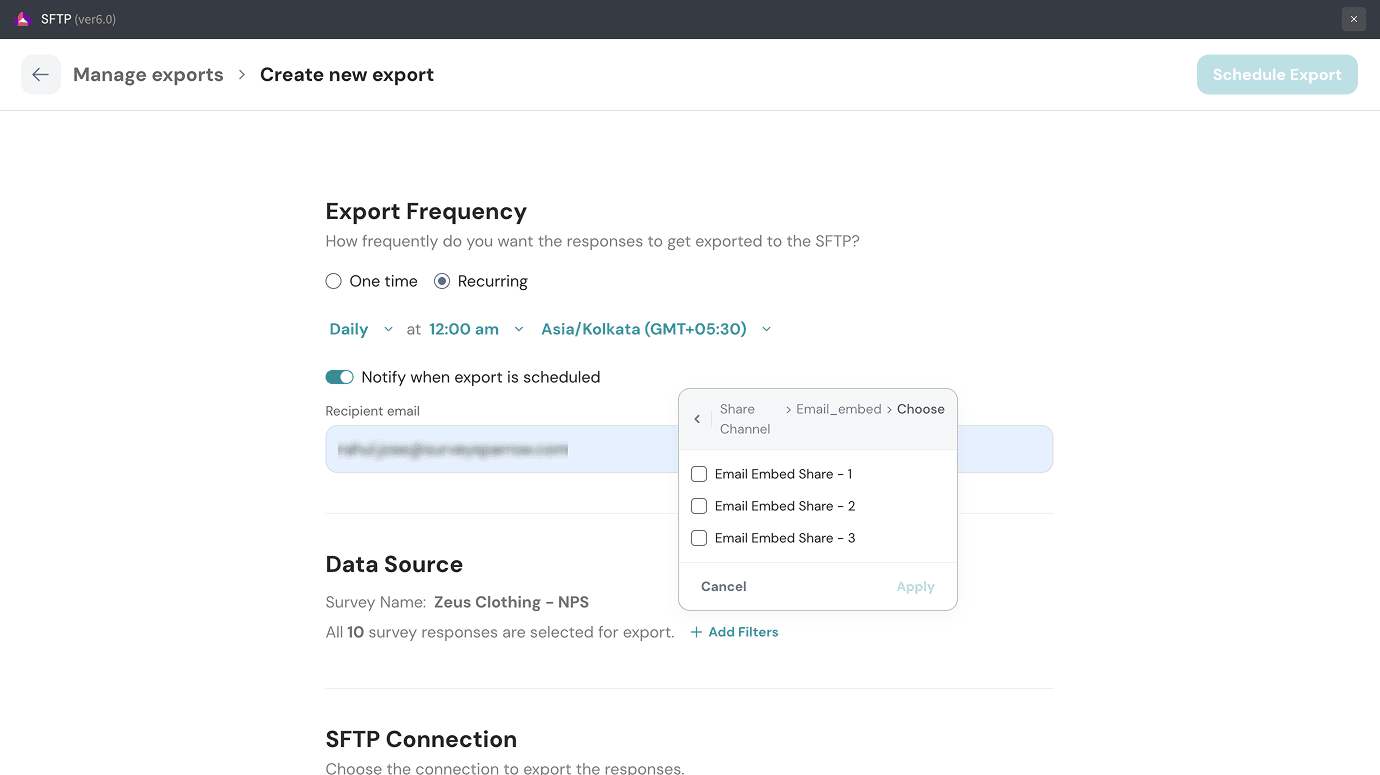
10. In the question filter, you can choose 1 or more of the survey questions.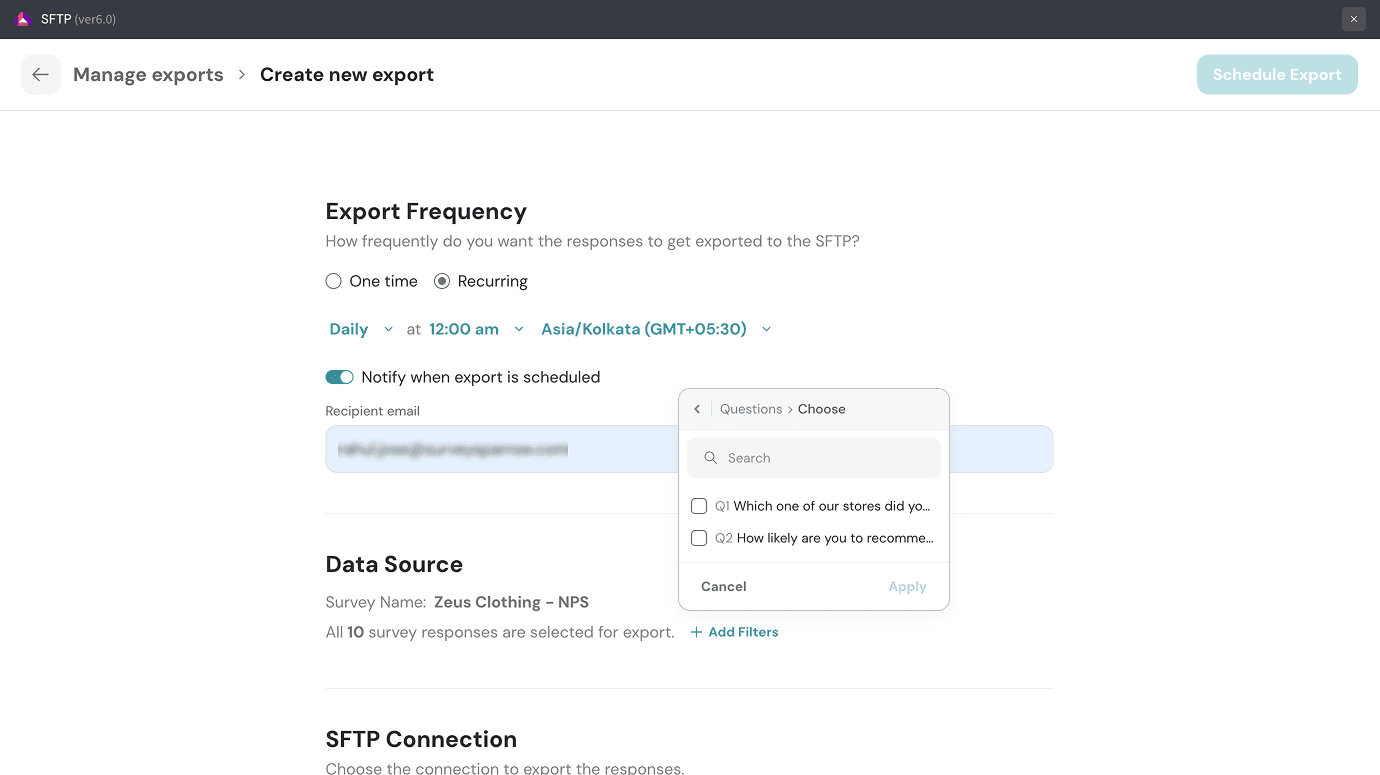
11. After setting up your filters, you have to create the SFTP Connection. Click on Choose under SFTP Connection. If you have already created a connection, it will appear in the drop-down menu. If not, click Create a new connection.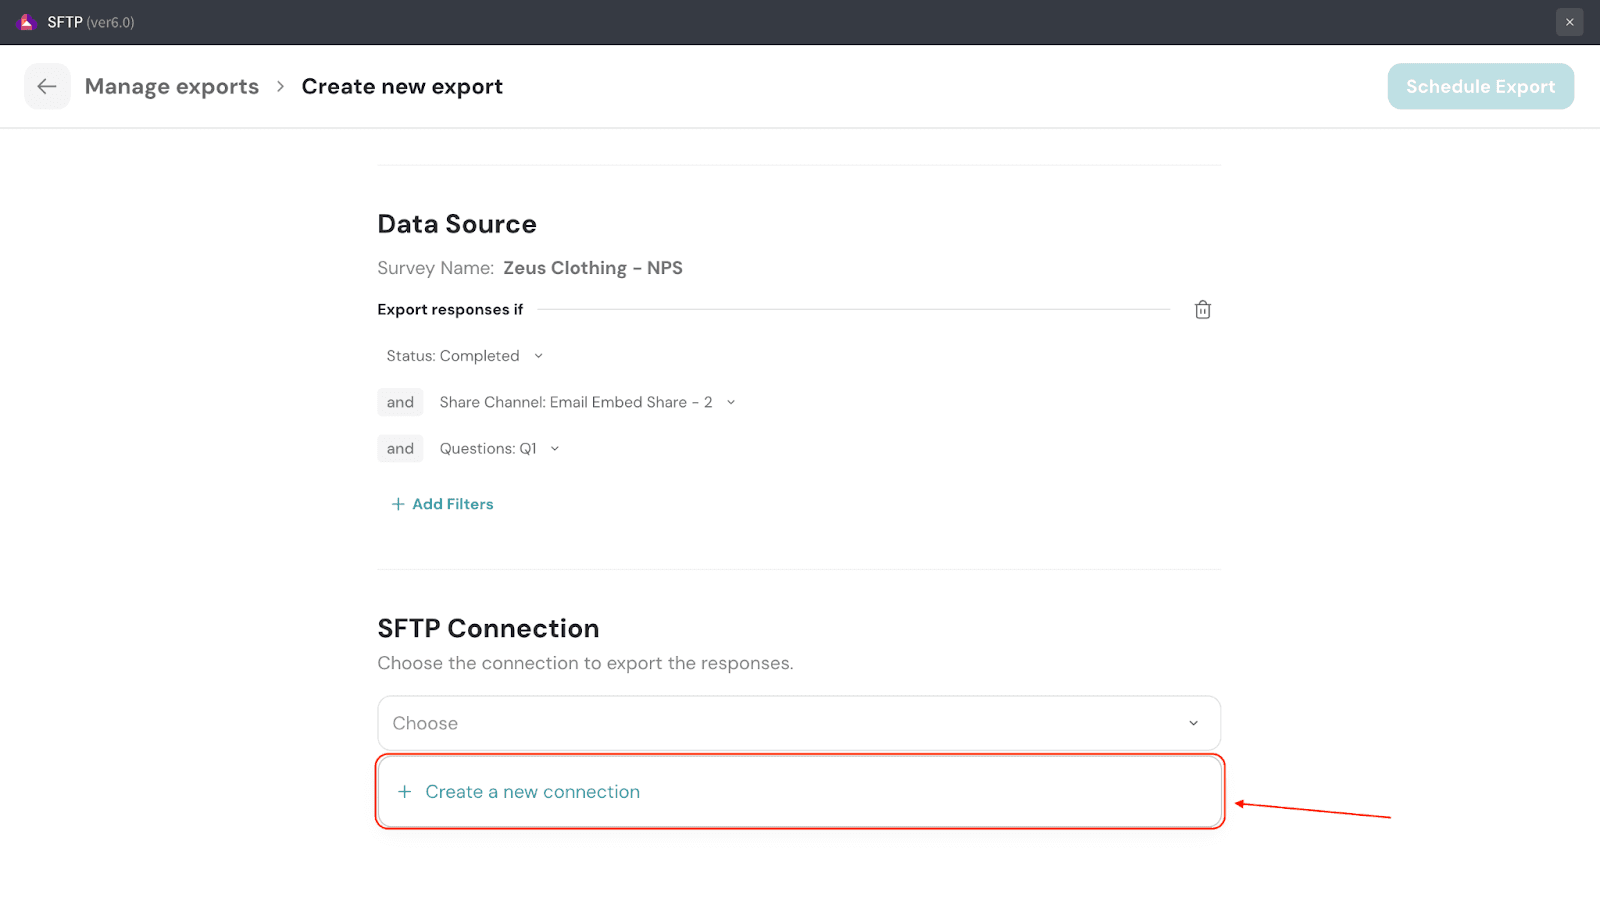
12. Add the details of the connection, then click on Save connection.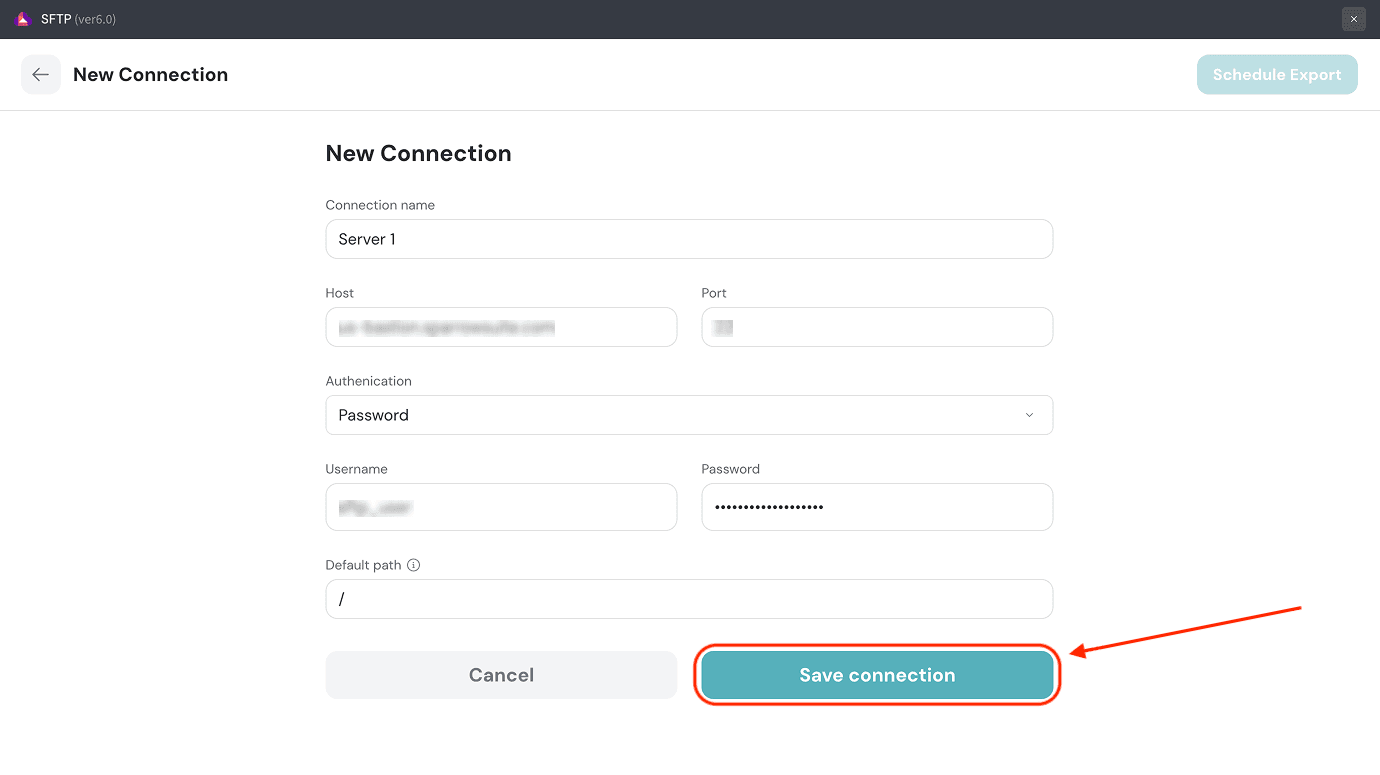
Note: If you already know the destination folder to store the responses, you can add the folder path in the Default path field. After setting up the SFTP connection, you will only have access to the contents of that folder. Otherwise, the default path is /, which represents the server directory as a whole.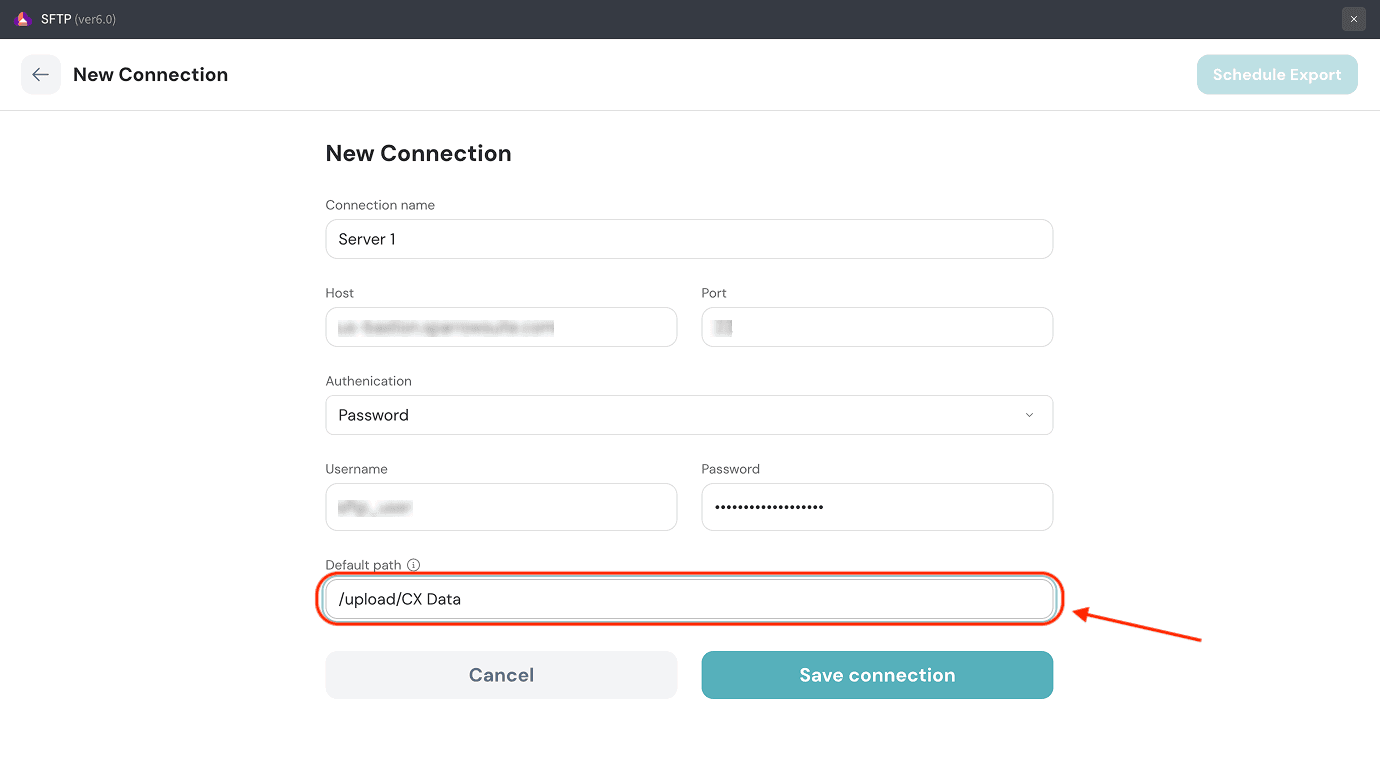
13. After the connection is ready, you need a folder in the server to store the response export. You can choose an existing folder or create a new folder. Let’s learn how to use an existing folder. Start by clicking on Choose folder.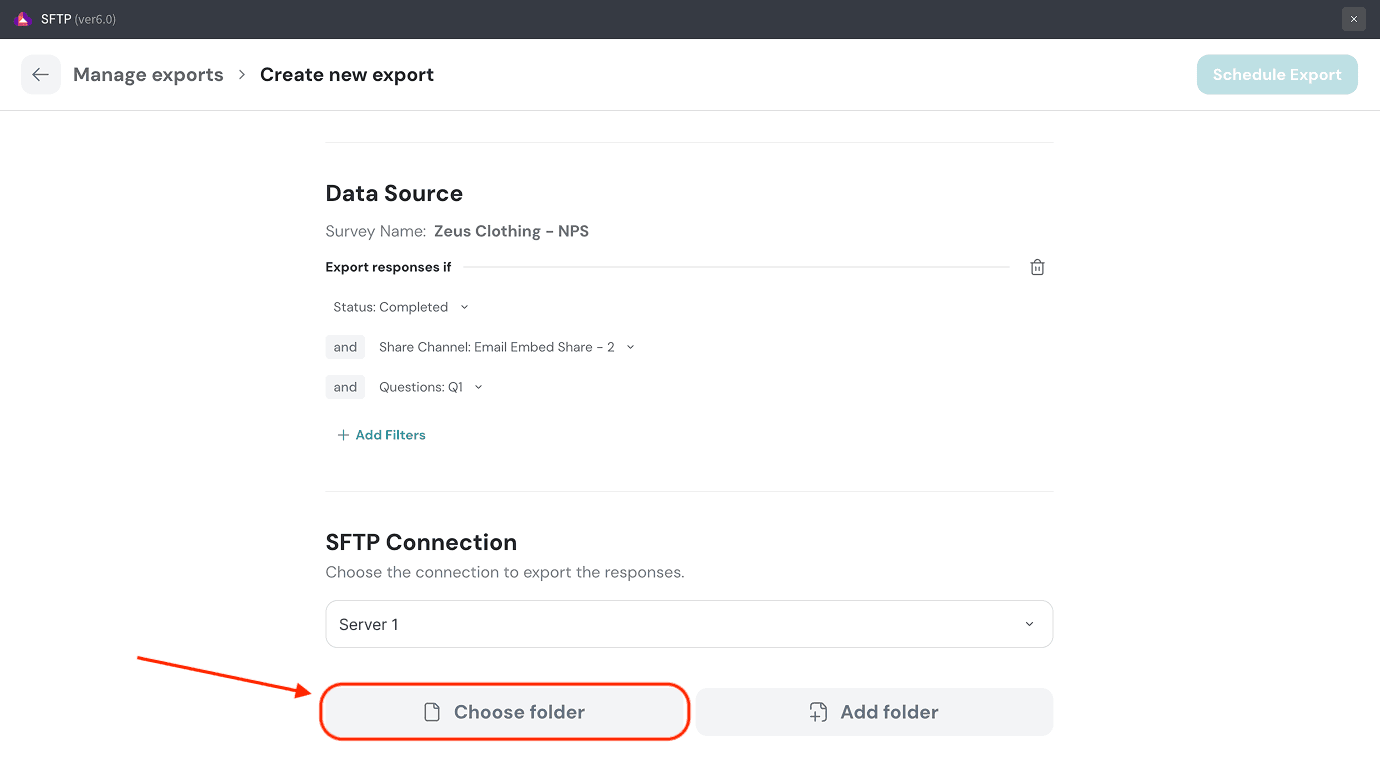
14. You will see the folders inside the server. If you wish to see the inner folders and sub-folders, click on the plus icon to the left of its name. You can also use type in the search box to find the required folder.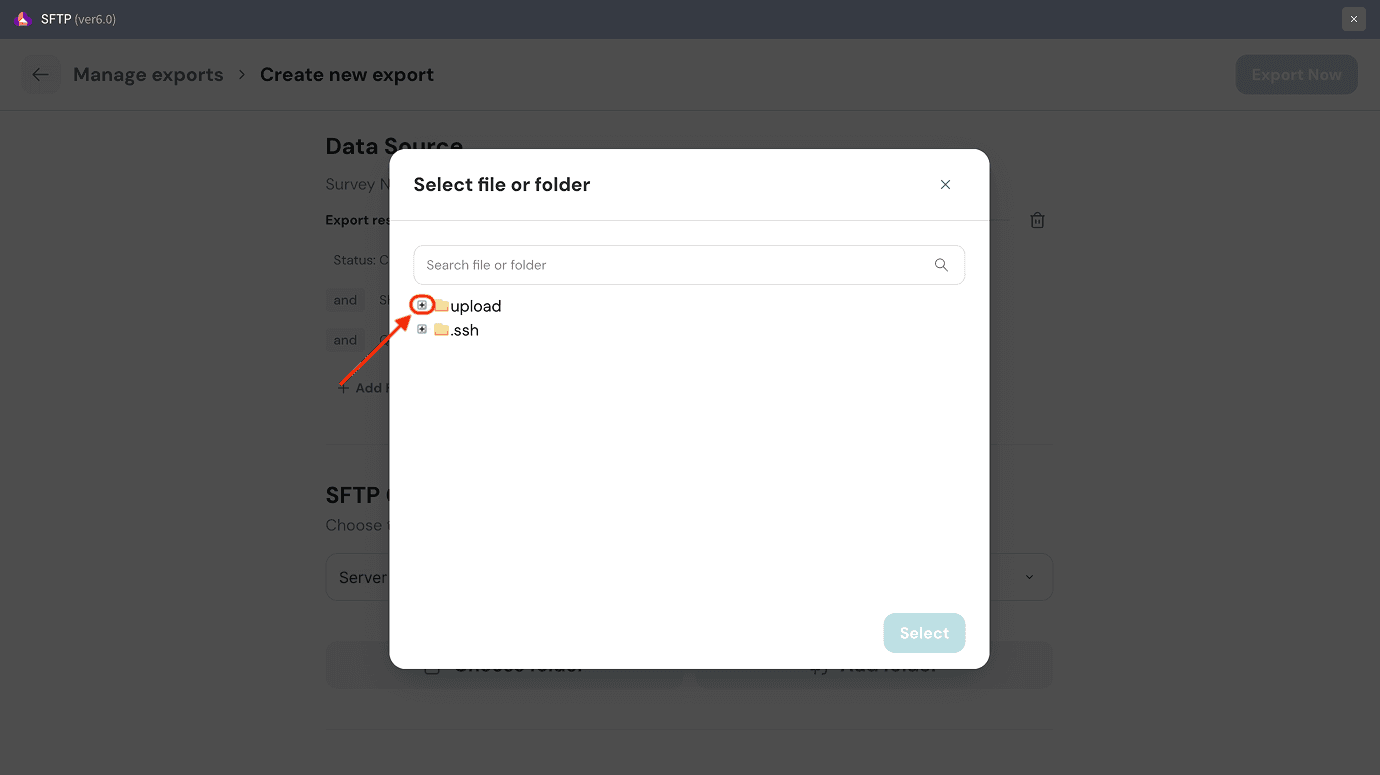
15. Once you’ve chosen the folder to export responses to, click on it, then click Select.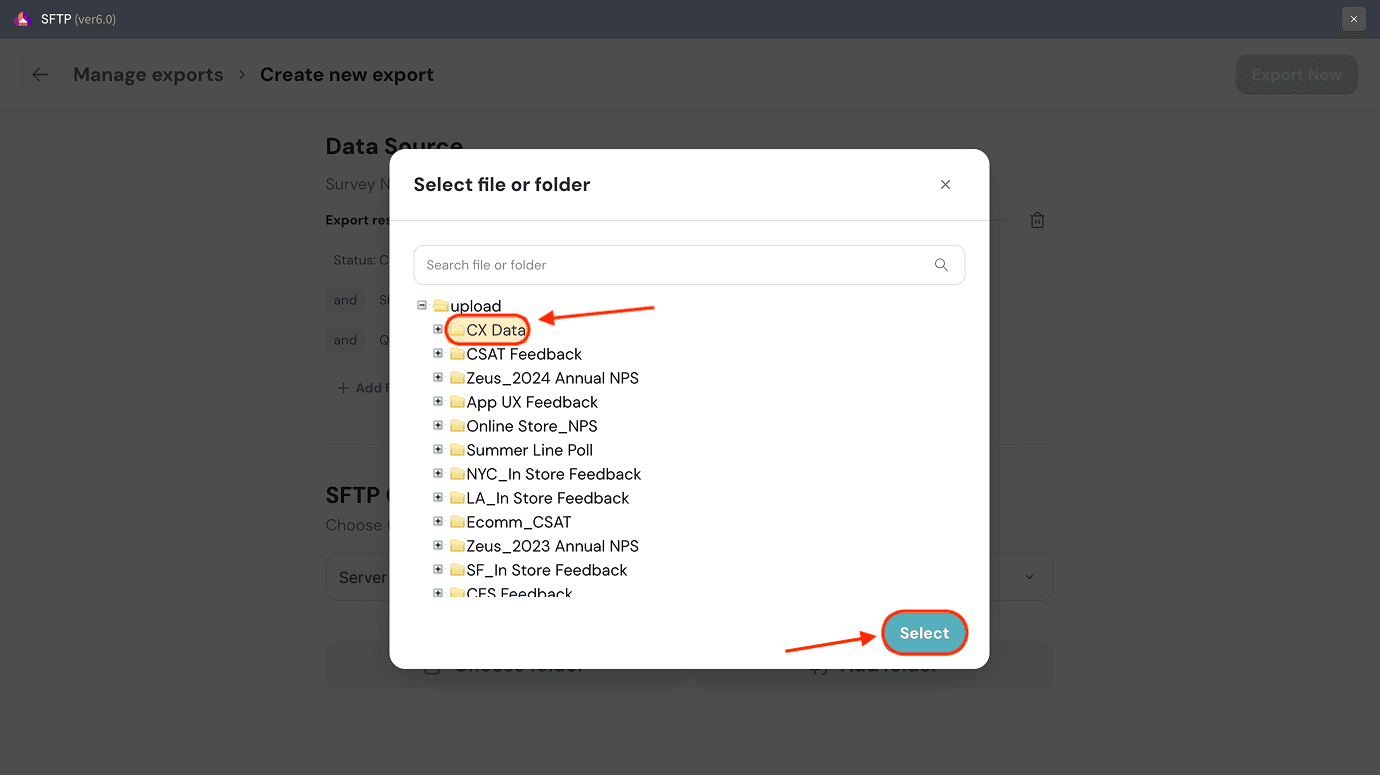
16. If you would like to create a new folder instead, click on Add folder.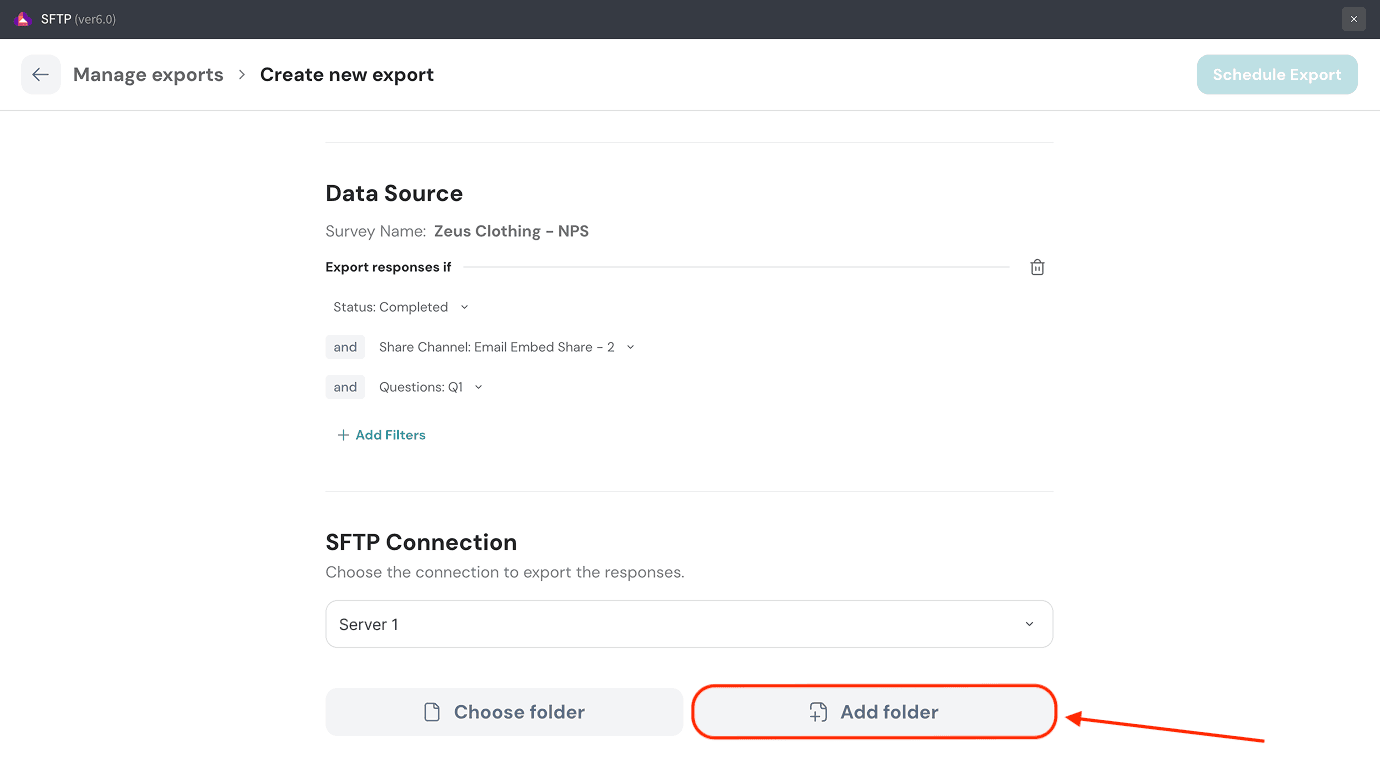
17. You will see the main folders inside the server. To create your folder alongside them, select Add folder.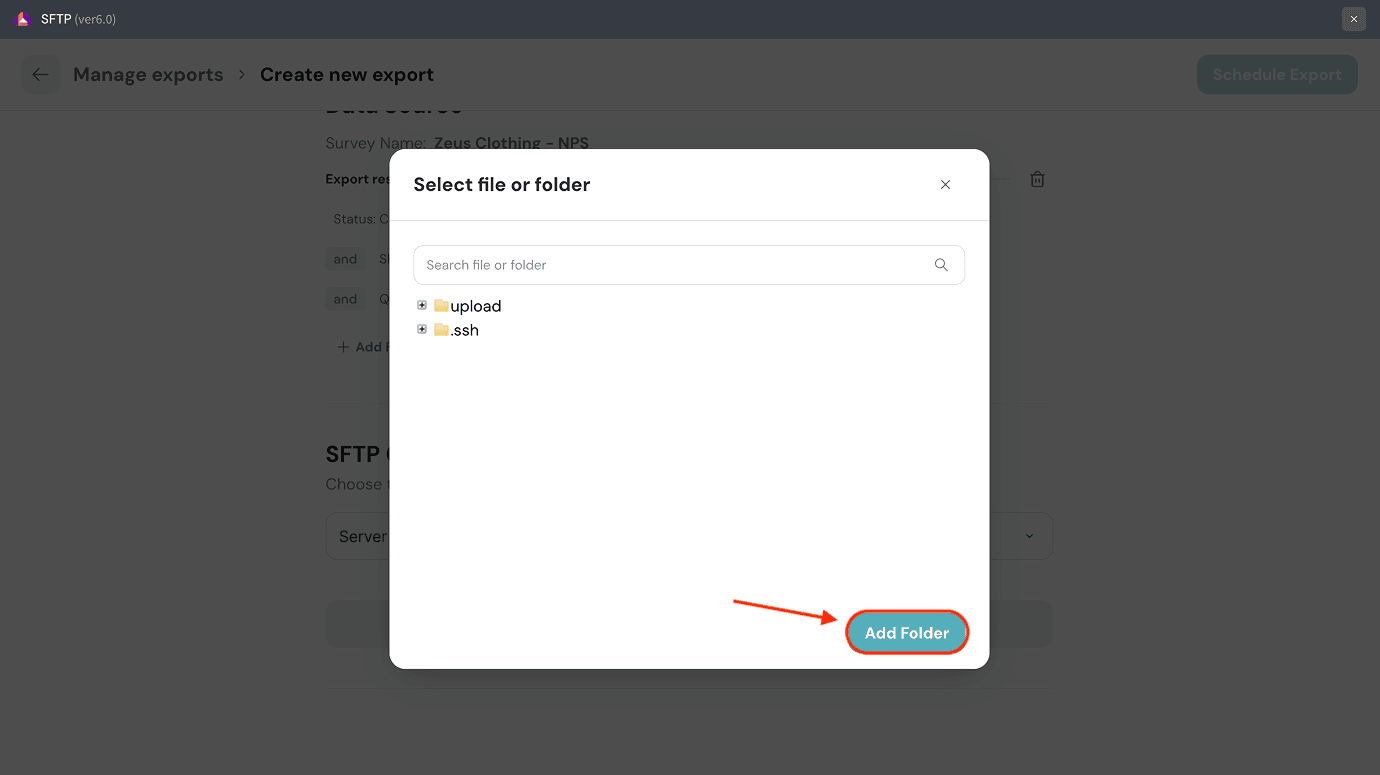
Note: If you want to create a folder inside any of the main folders, click on it, then click on it, and select Add Folder. If you wish to create a folder inside the sub-folders of a main folder, click on the plus icon and repeat the steps described here.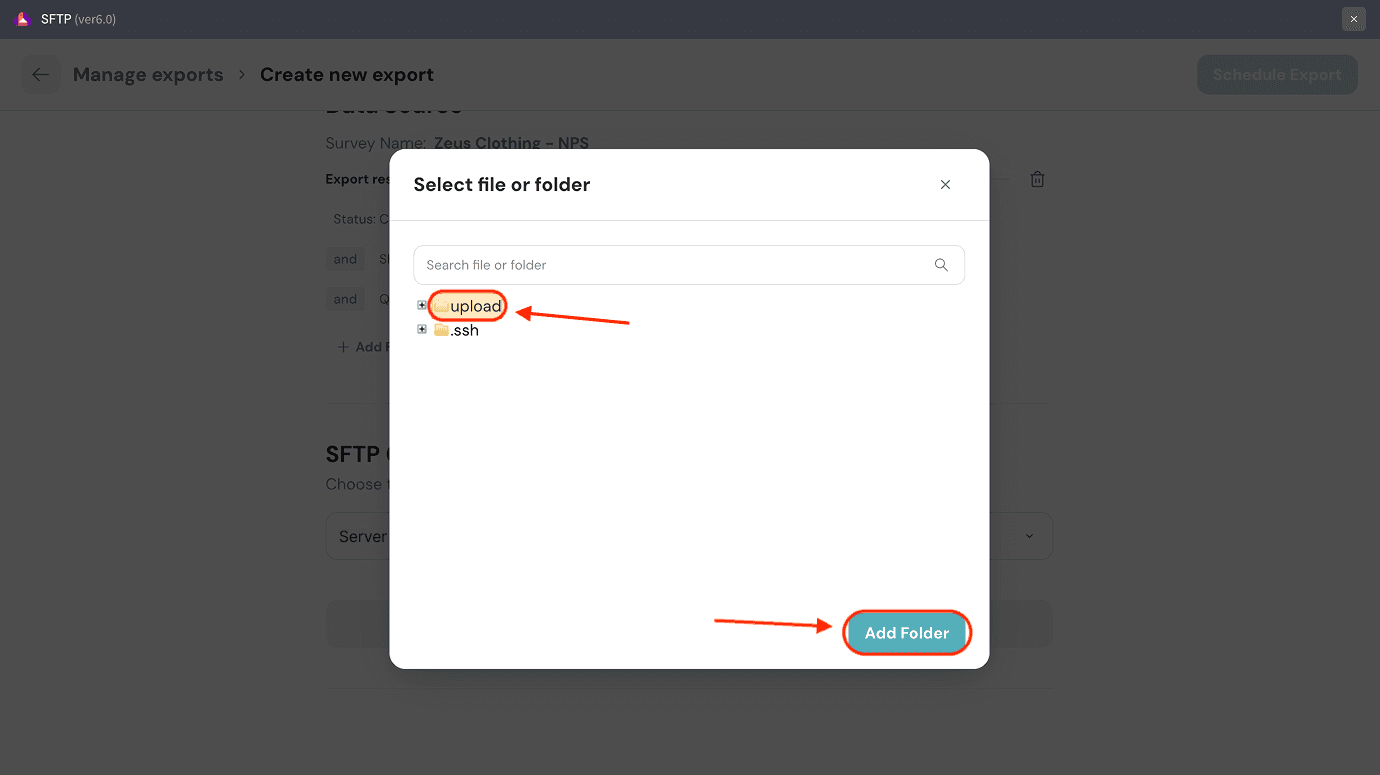
18. Then type in the name of the new folder and click on Save. The new folder is ready!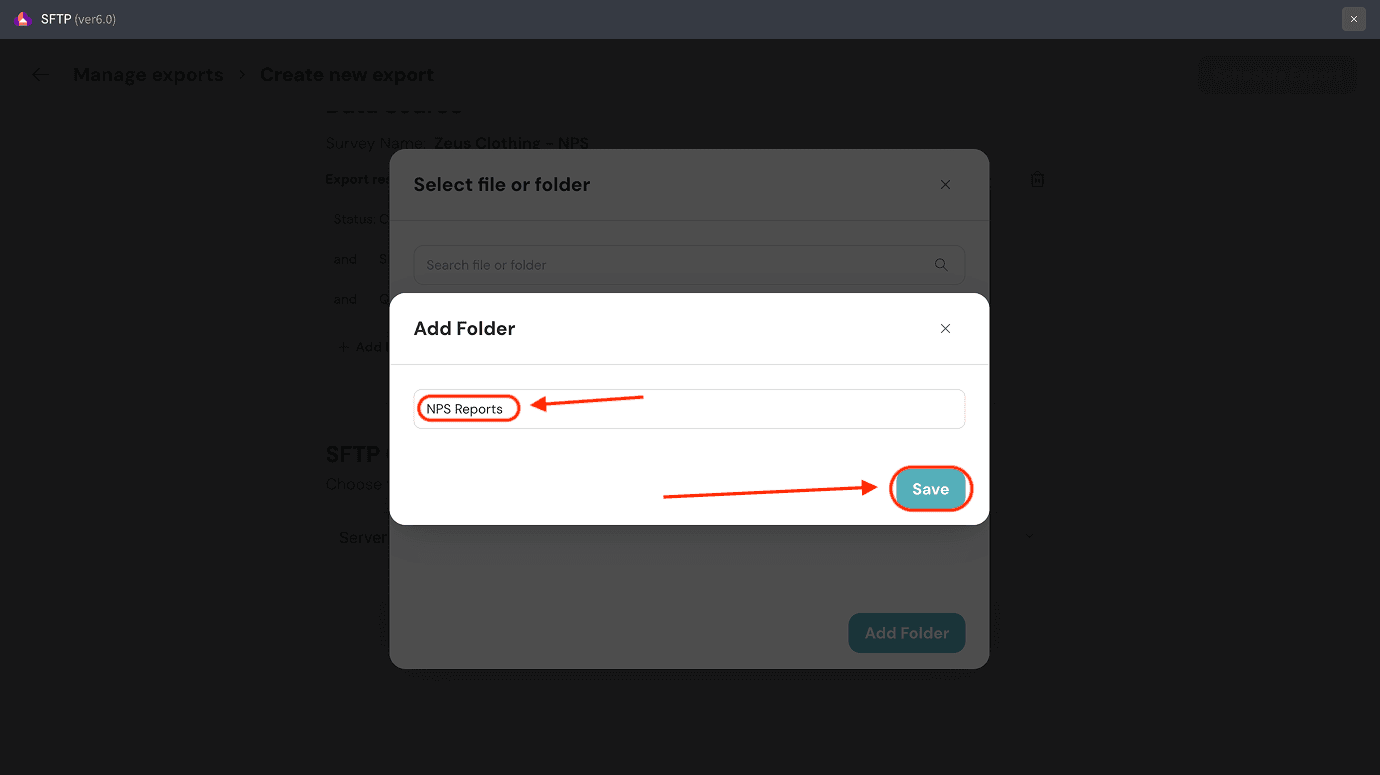
19. The default naming convention of an export is date_survey name, where the date follows the order dd-mm-yyyy. If you would like to change the date format, click on the date variable under File name and choose from the options in the drop-down.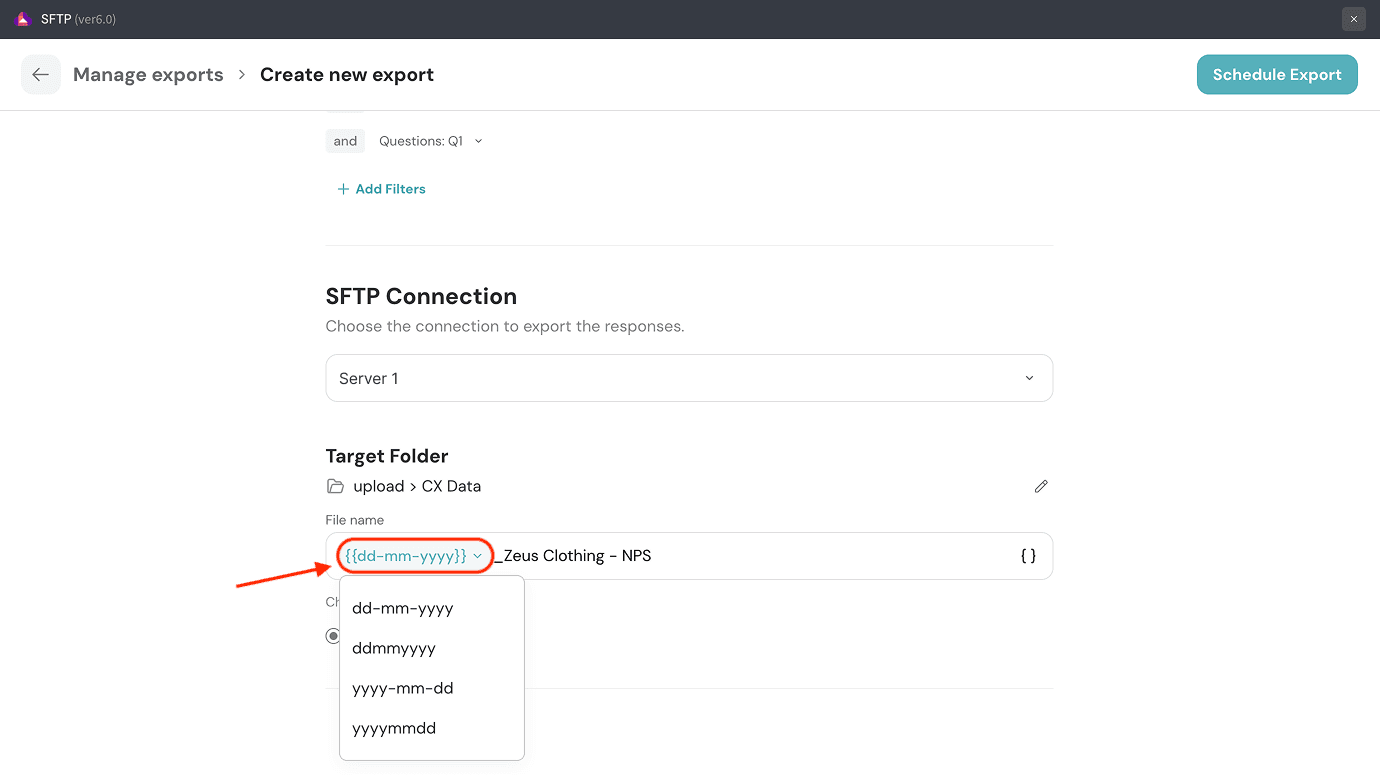
Tip: The File name field is an editable text box, allowing you to completely change the name as per your liking. However, we recommend that you keep the date variable, since it will allow you to distinguish between different export files.
20. The final configuration step is to choose your file format, either CSV or JSON. Once confirmed, click on Schedule Export.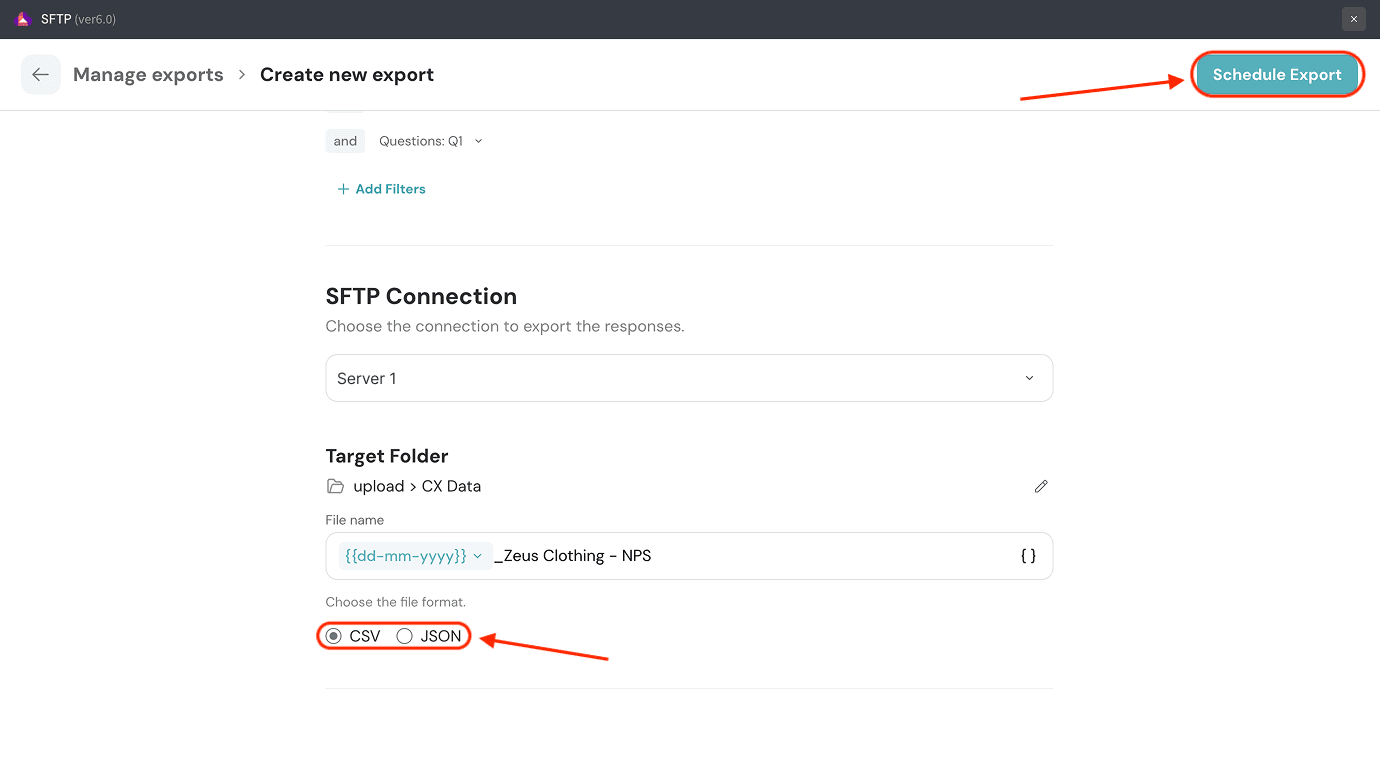
21. You will enter the Manage Exports page, where you can see your export scheduled. To pause it, turn off the toggle at the left end.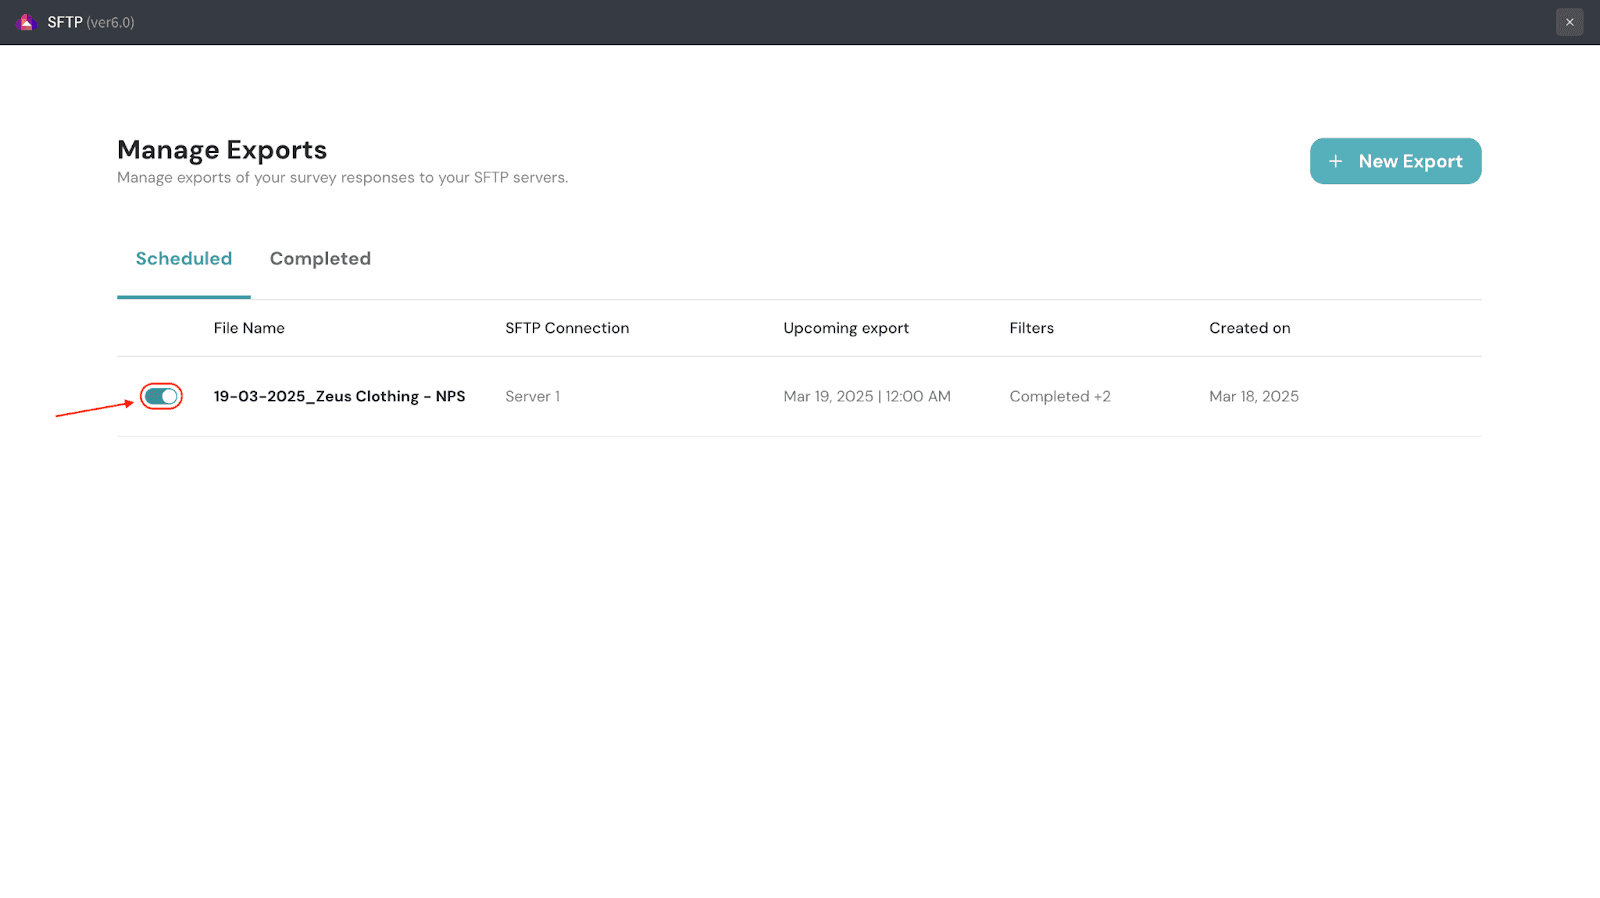
22. If you wish to edit it or delete it altogether, click on the 3-dot icon at the right end and choose from the menu.
23. If you wish to repeat the process, click on New Export in the top right corner.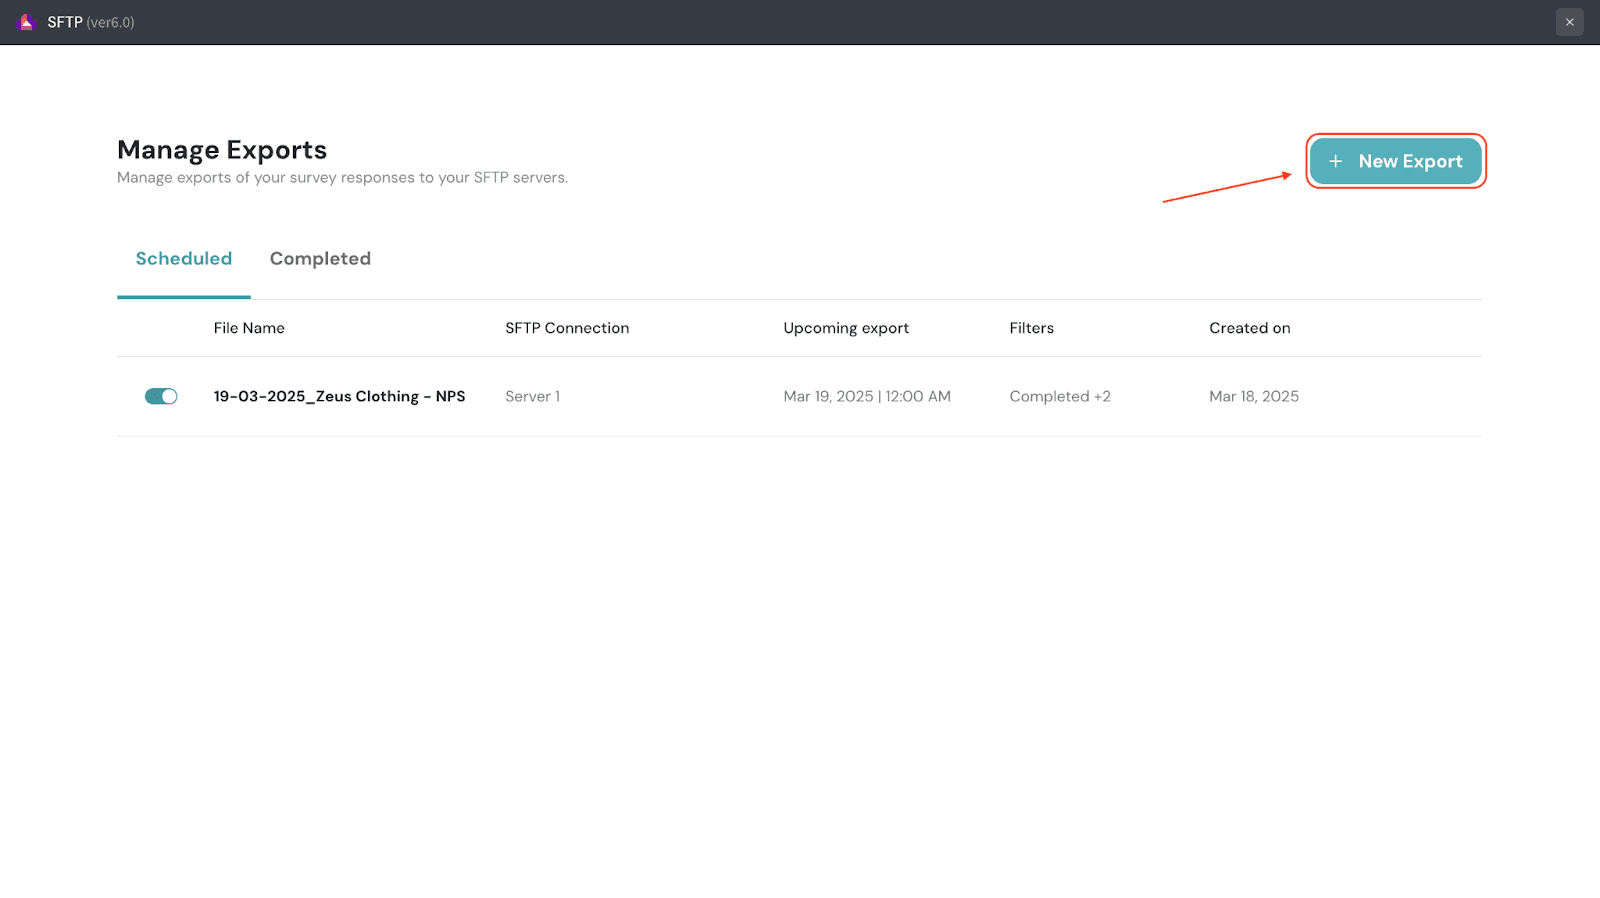
24. To view previous exports, you can click on the Completed tab.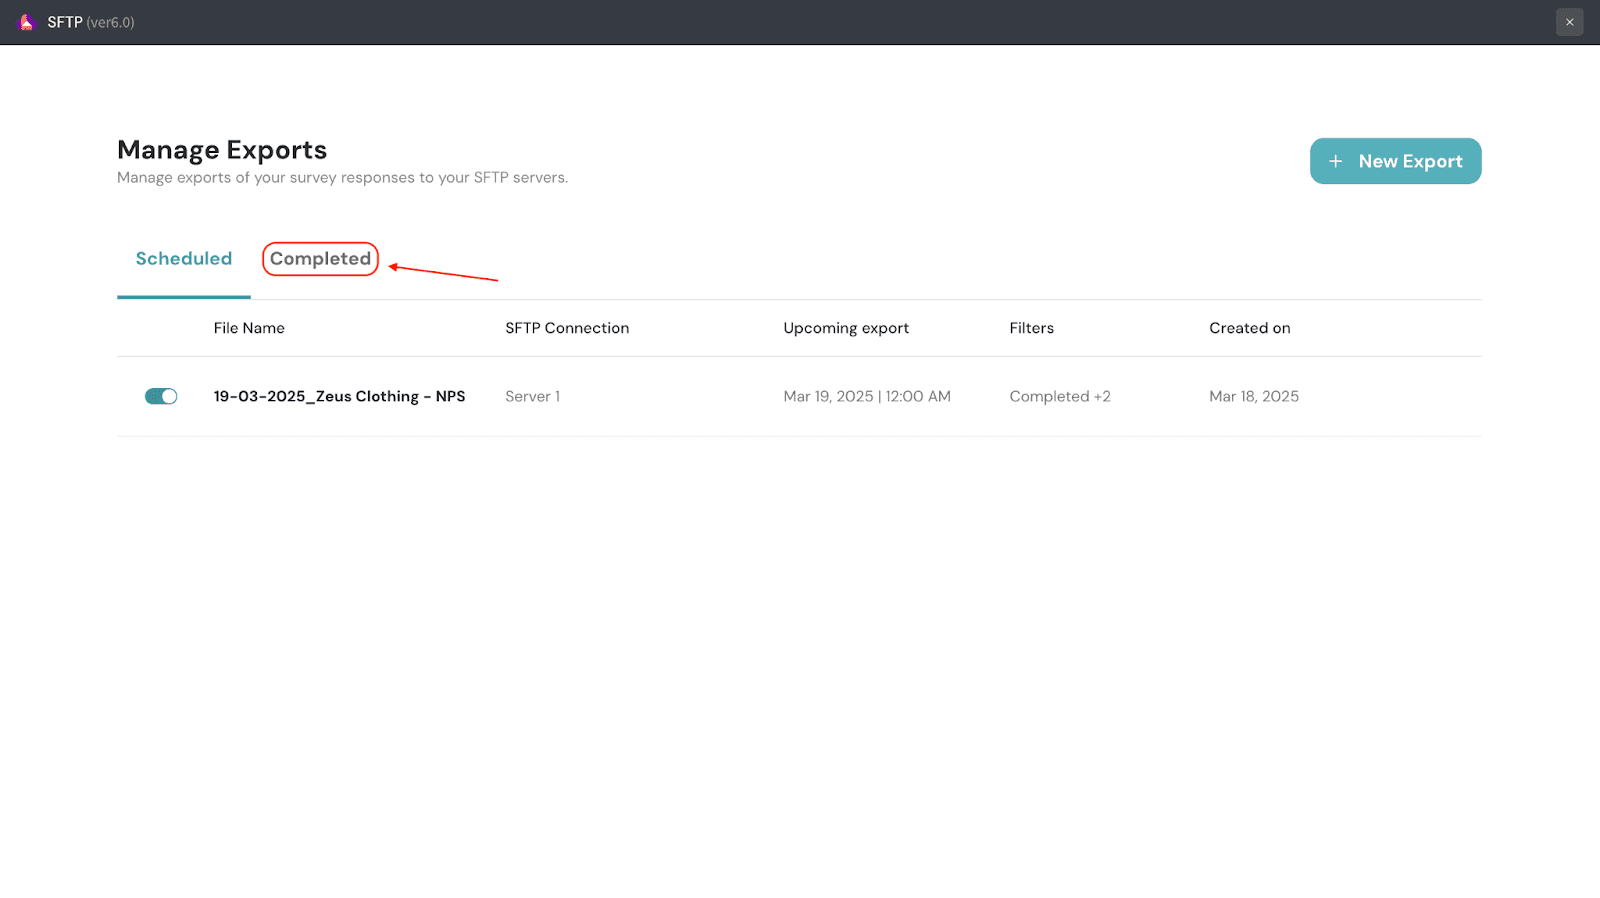
Using SFTP, you can store your survey responses with complete safety and efficiency. Automate exports and keep your data fresh and accessible, without compromising on security.
Feel free to reach out to our community, if you have any questions.