Search
Personalize communication with customized documents
Document generator helps create customized document templates that can be sent when a respondent submits a form or survey. Sending patient reports, documents or tickets as attachments empowers businesses to provide a more personalized and efficient customer experience.
By creating multiple downloadable document attachments, the Document Generator saves a ton of time with templatization. This, in turn, increases operational efficiency and enhances the customer experience.
The following are the topics covered in this article:
Now, let’s get started on how to use the Document Generator to create a document template.
1. Navigate to the Configure section of a survey.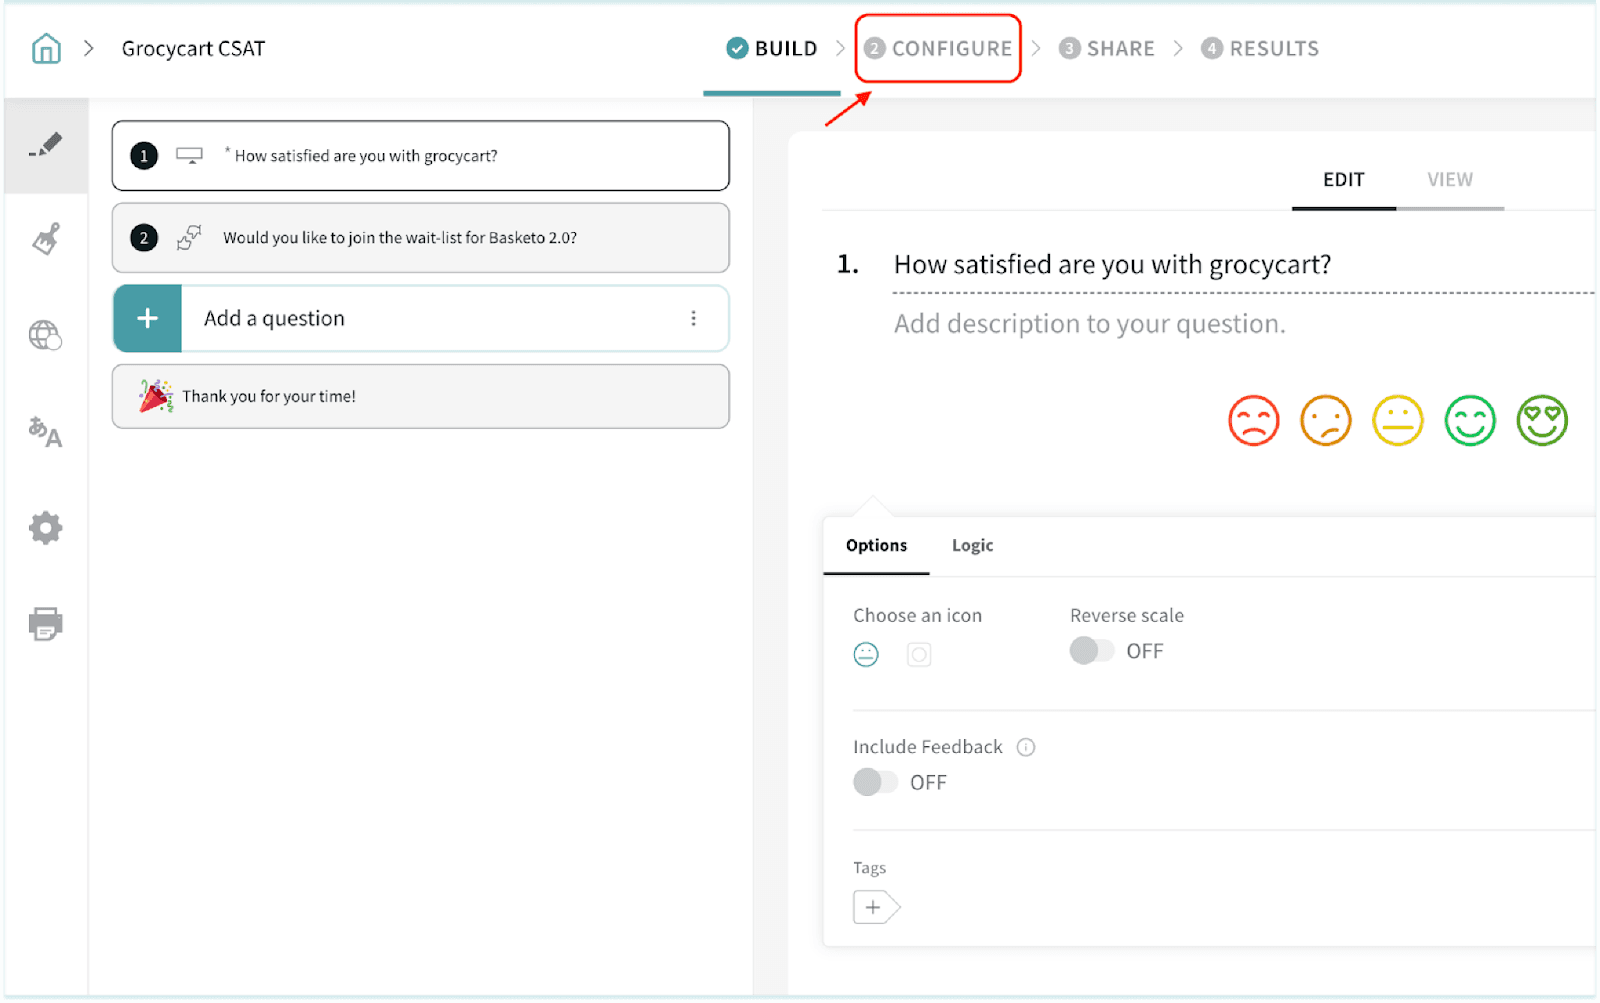
2. Click Document Generator.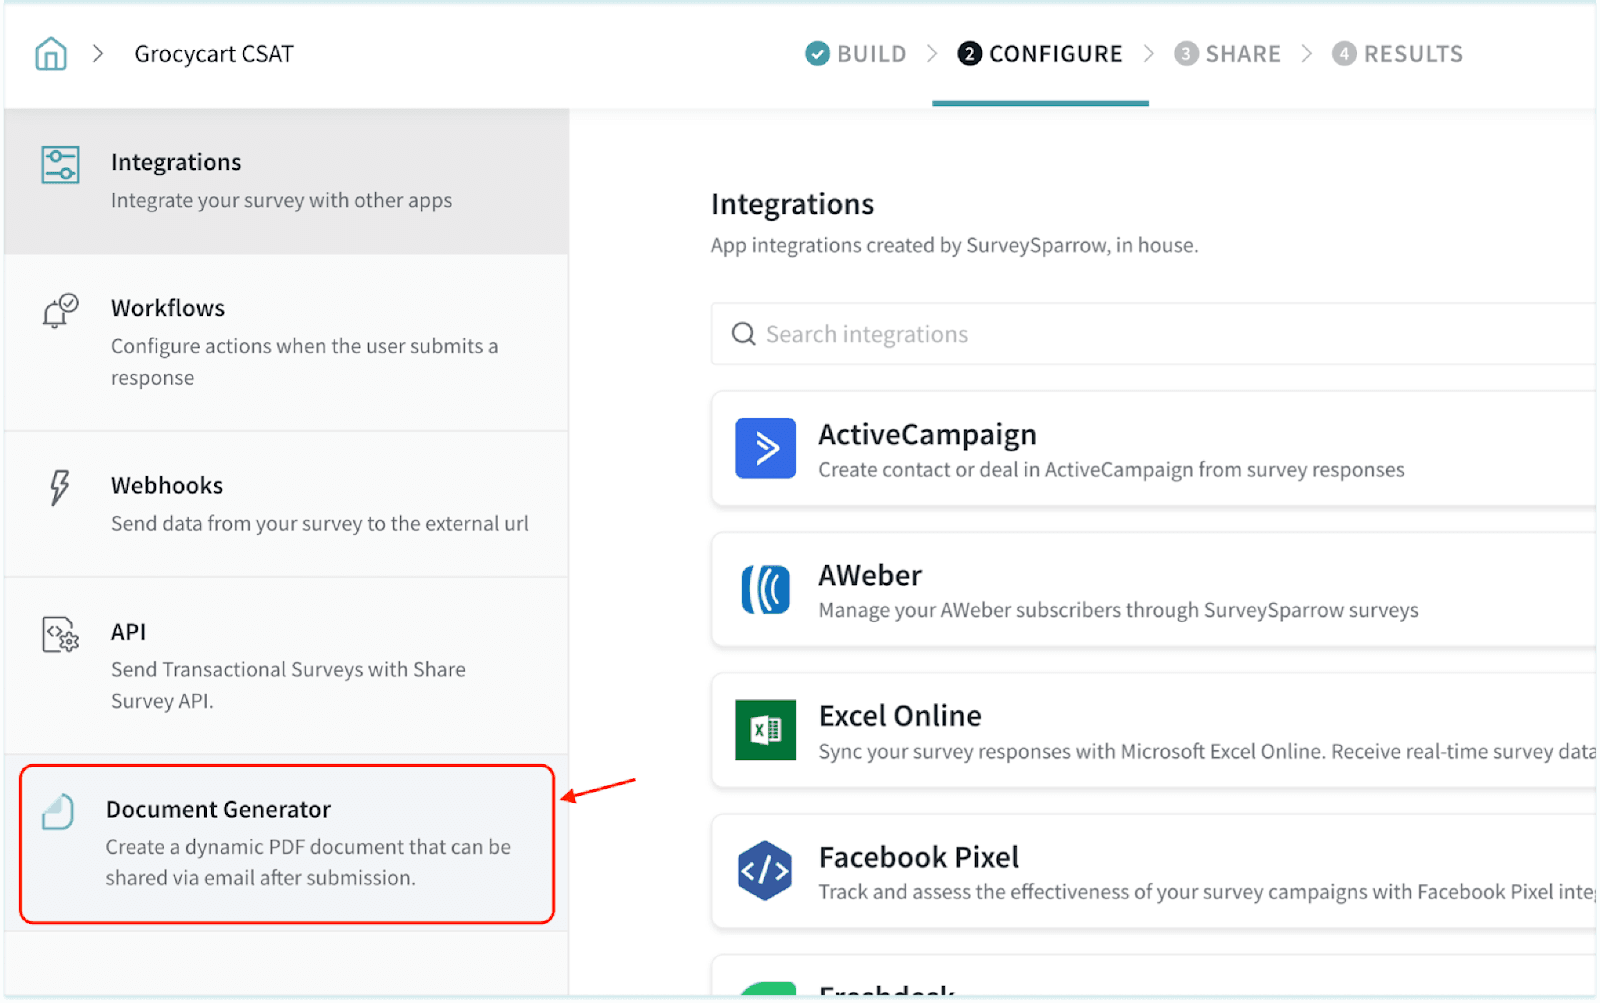
3. Click Create document.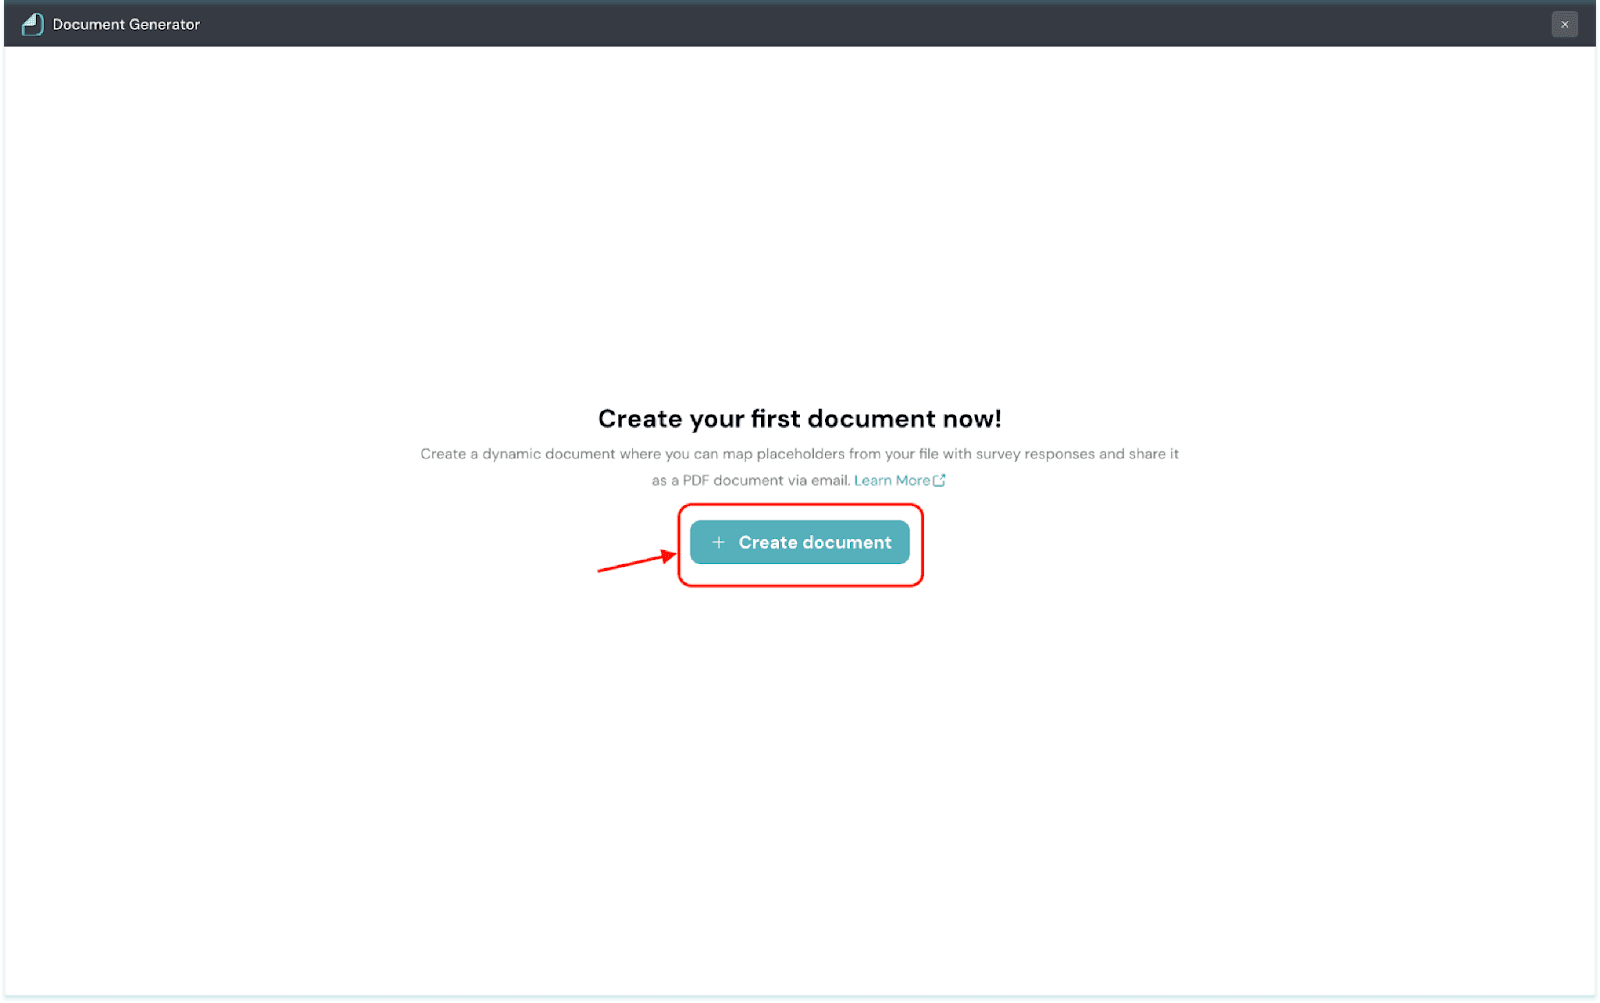
4. Name the document for your reference and click Save.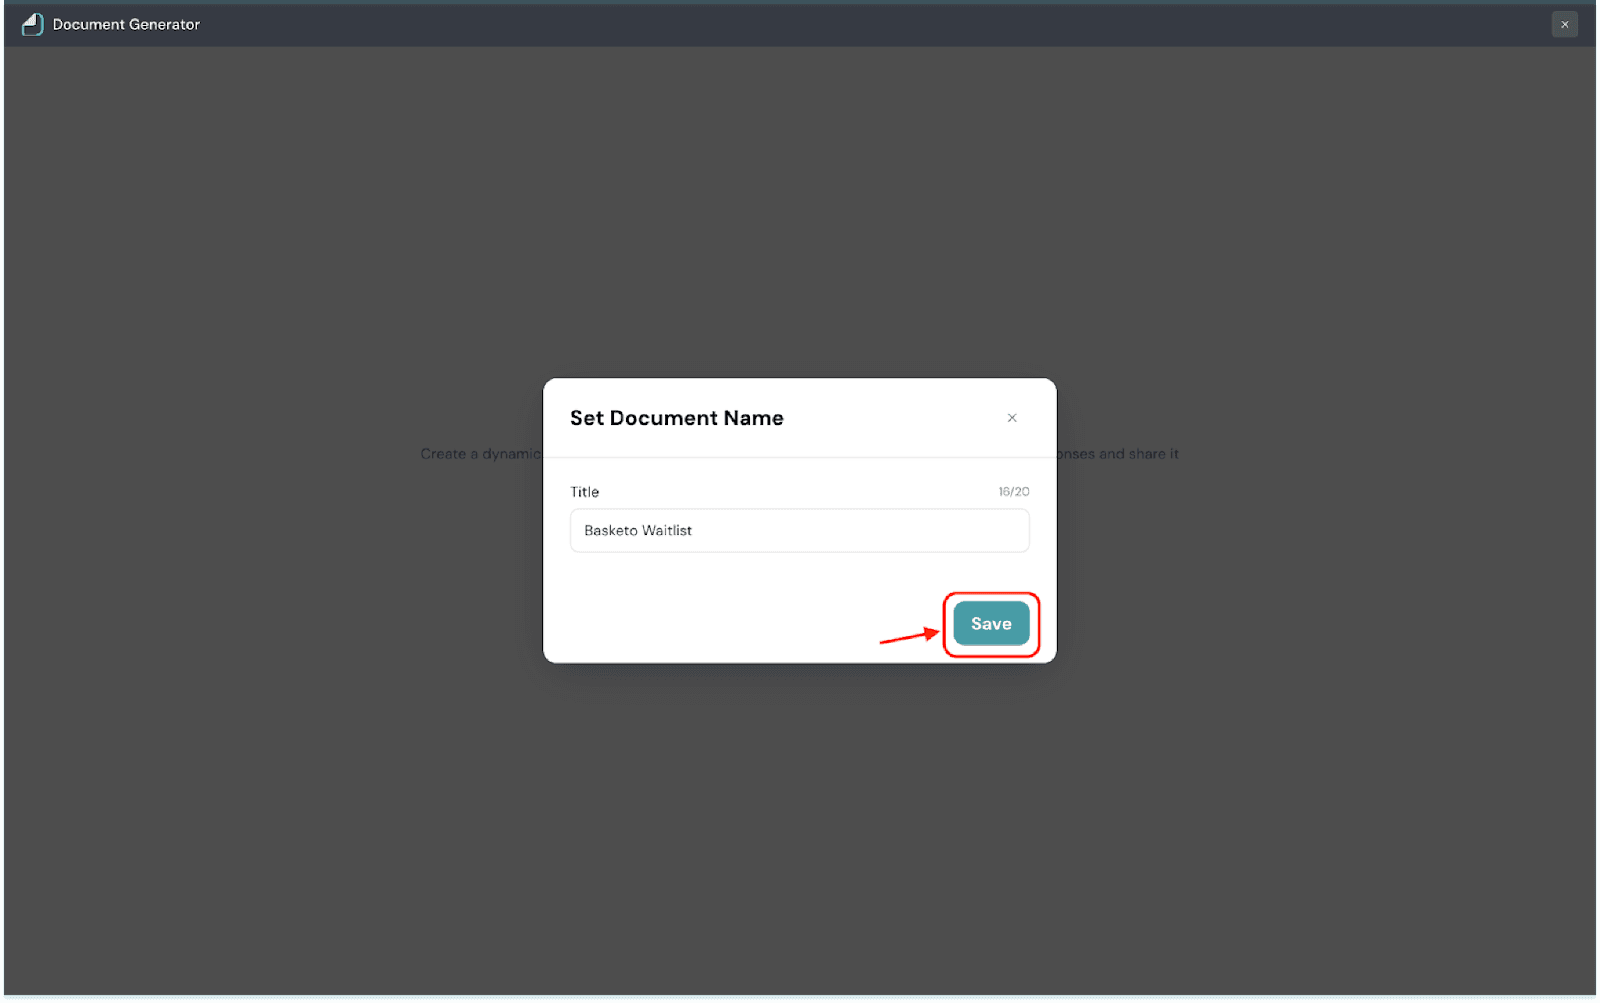
You can now start editing your document.
5. Click the $ sign to add placeholders to the document. Or, you can simply enter ‘/’ to access the placeholders.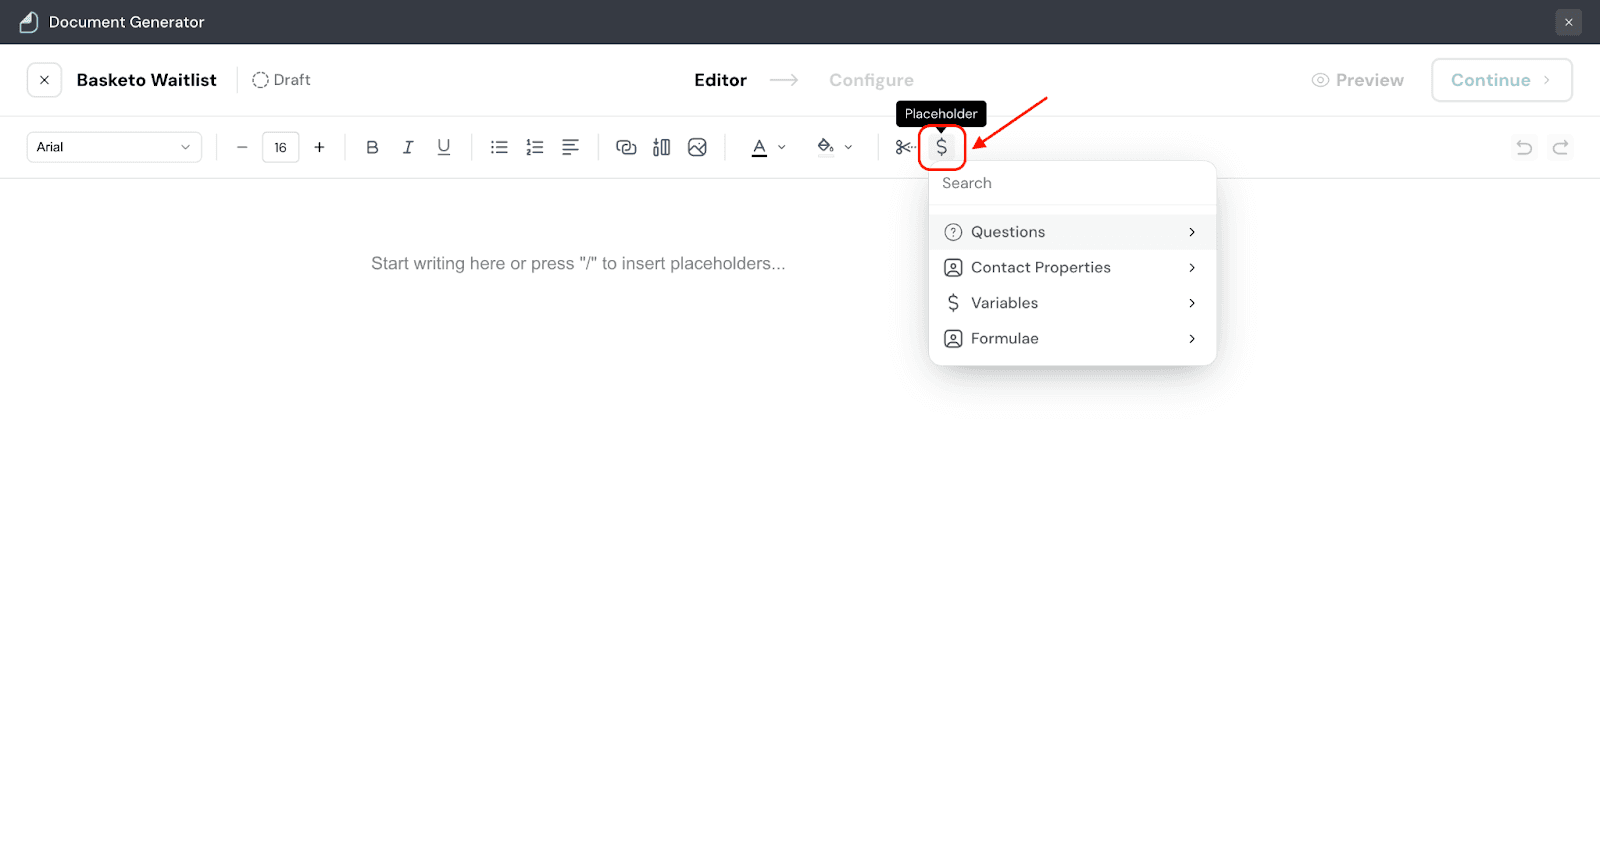
6. Adhere to your brand guidelines and format the document. Choose font style, font size, make your text Bold, Italics, or Underline. You can add numbered lists or bulleted lists to your document. Select an alignment to indent the document.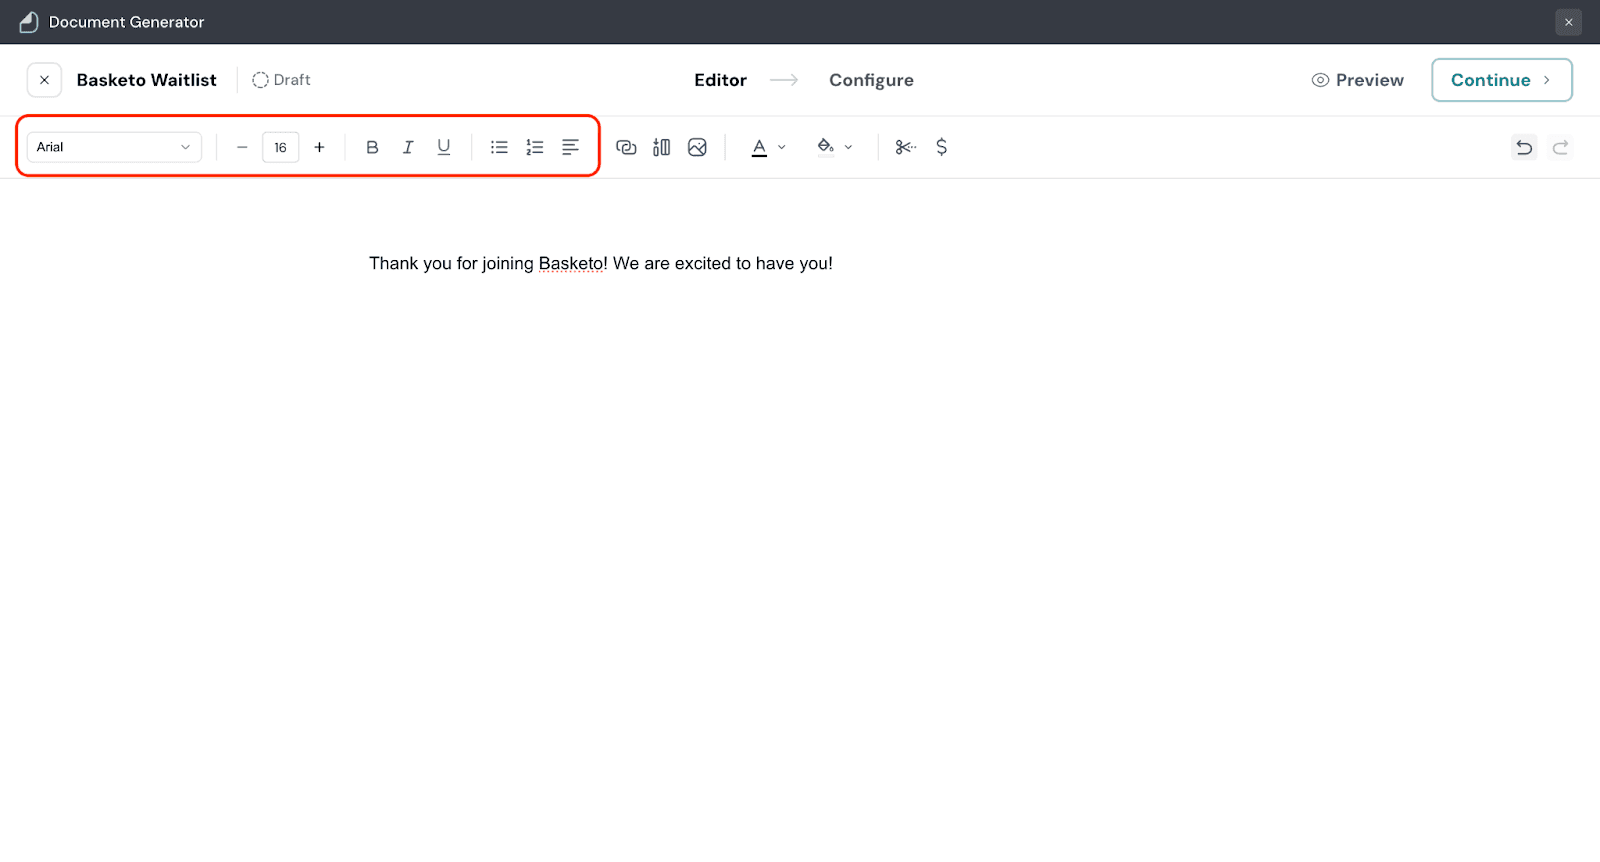
7. Make your document more engaging by adding relevant links, tables, and images. Choose to modify your text color and text highlight color. Add a page break according to your needs.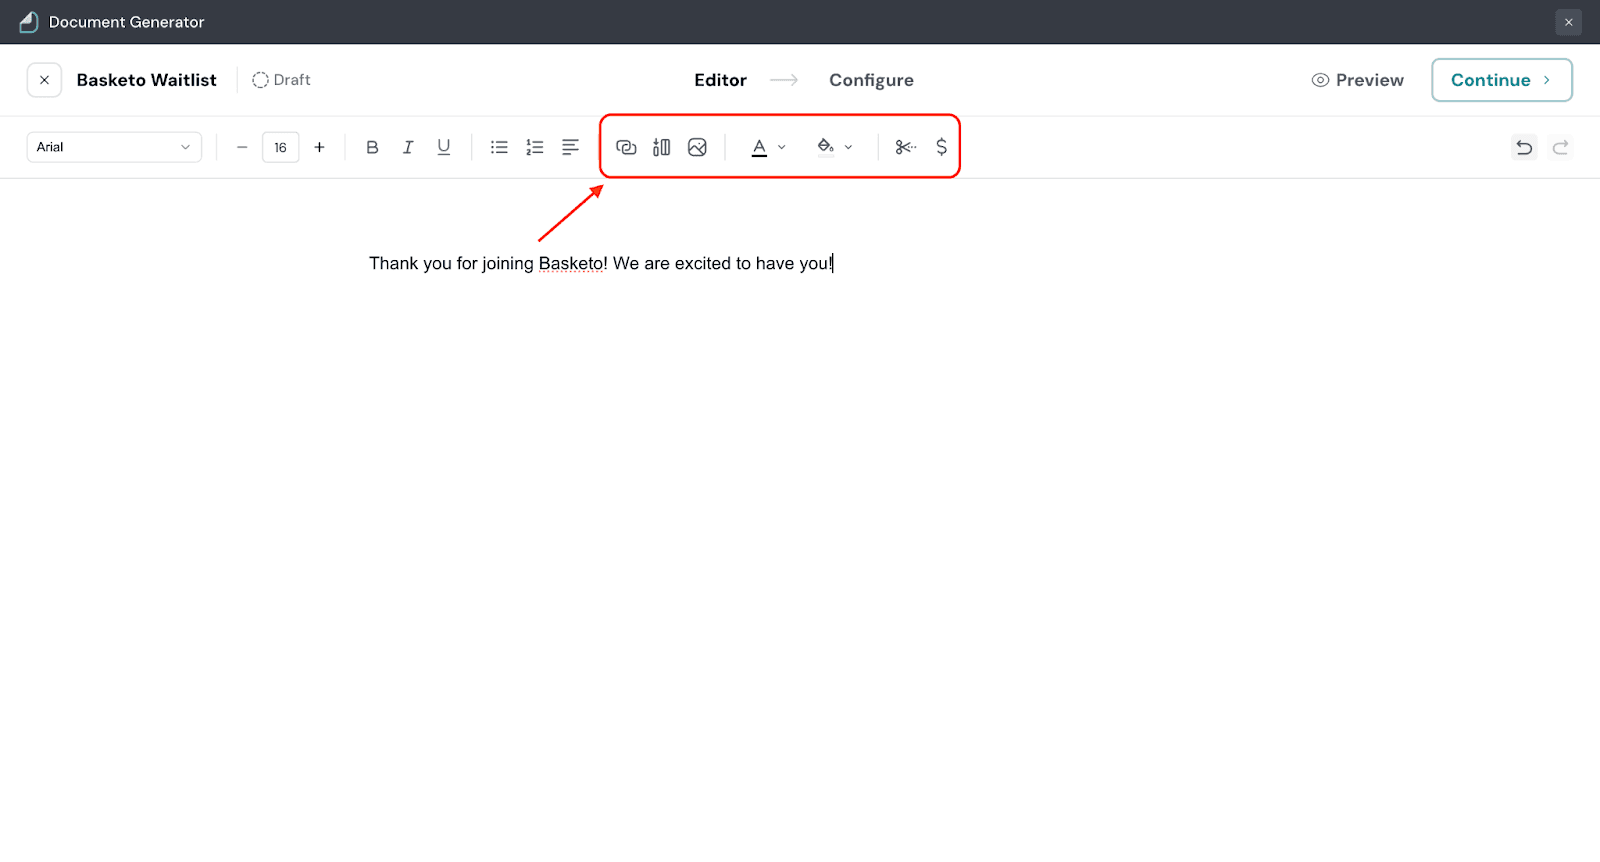
1. Click the Insert table icon.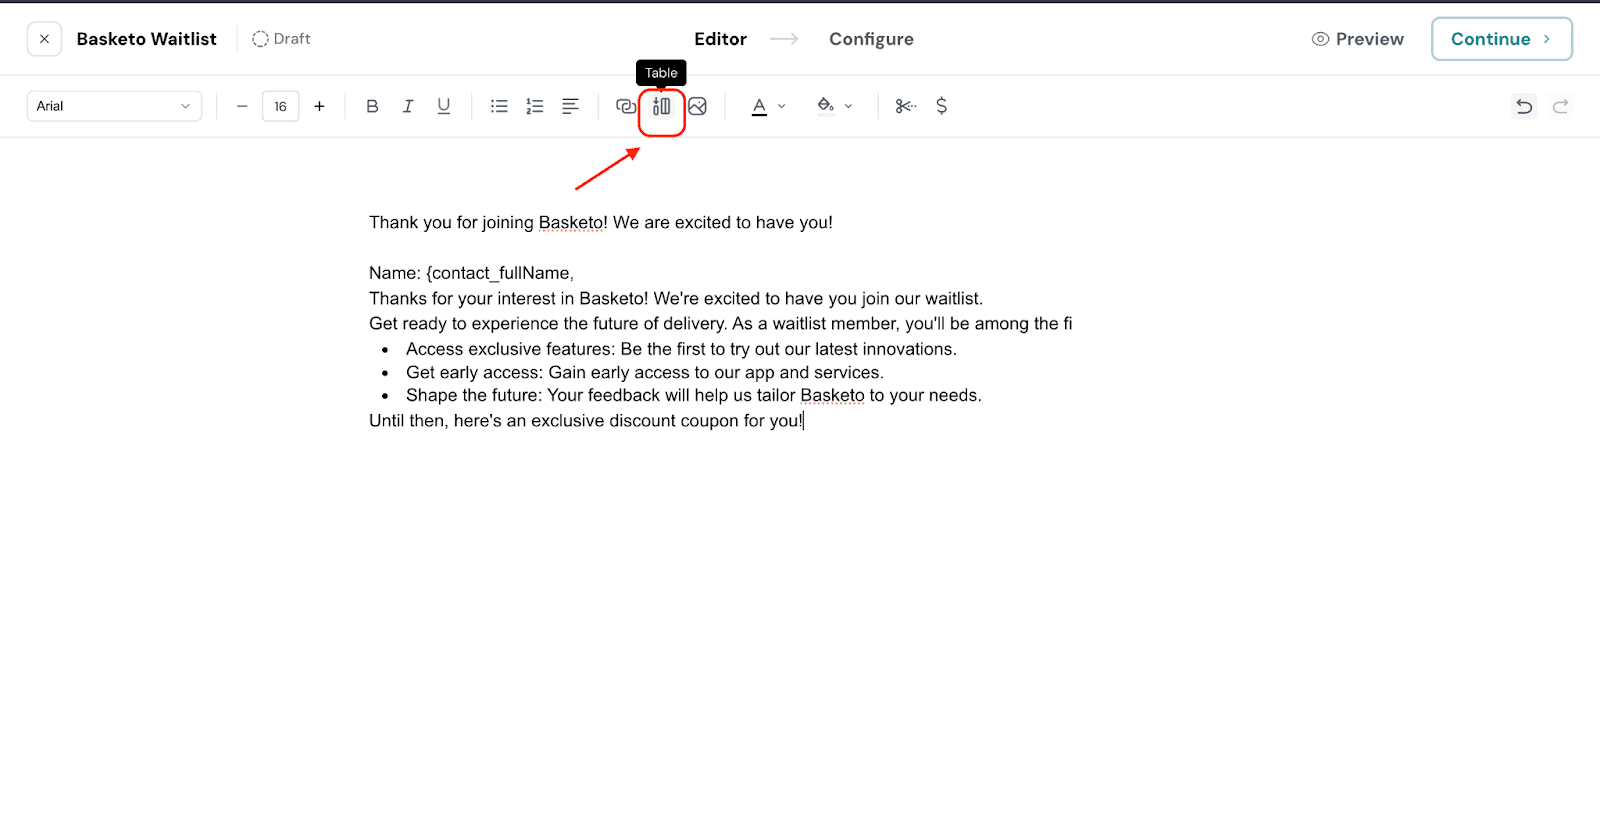
2. Enter the number of rows and columns you need for your table.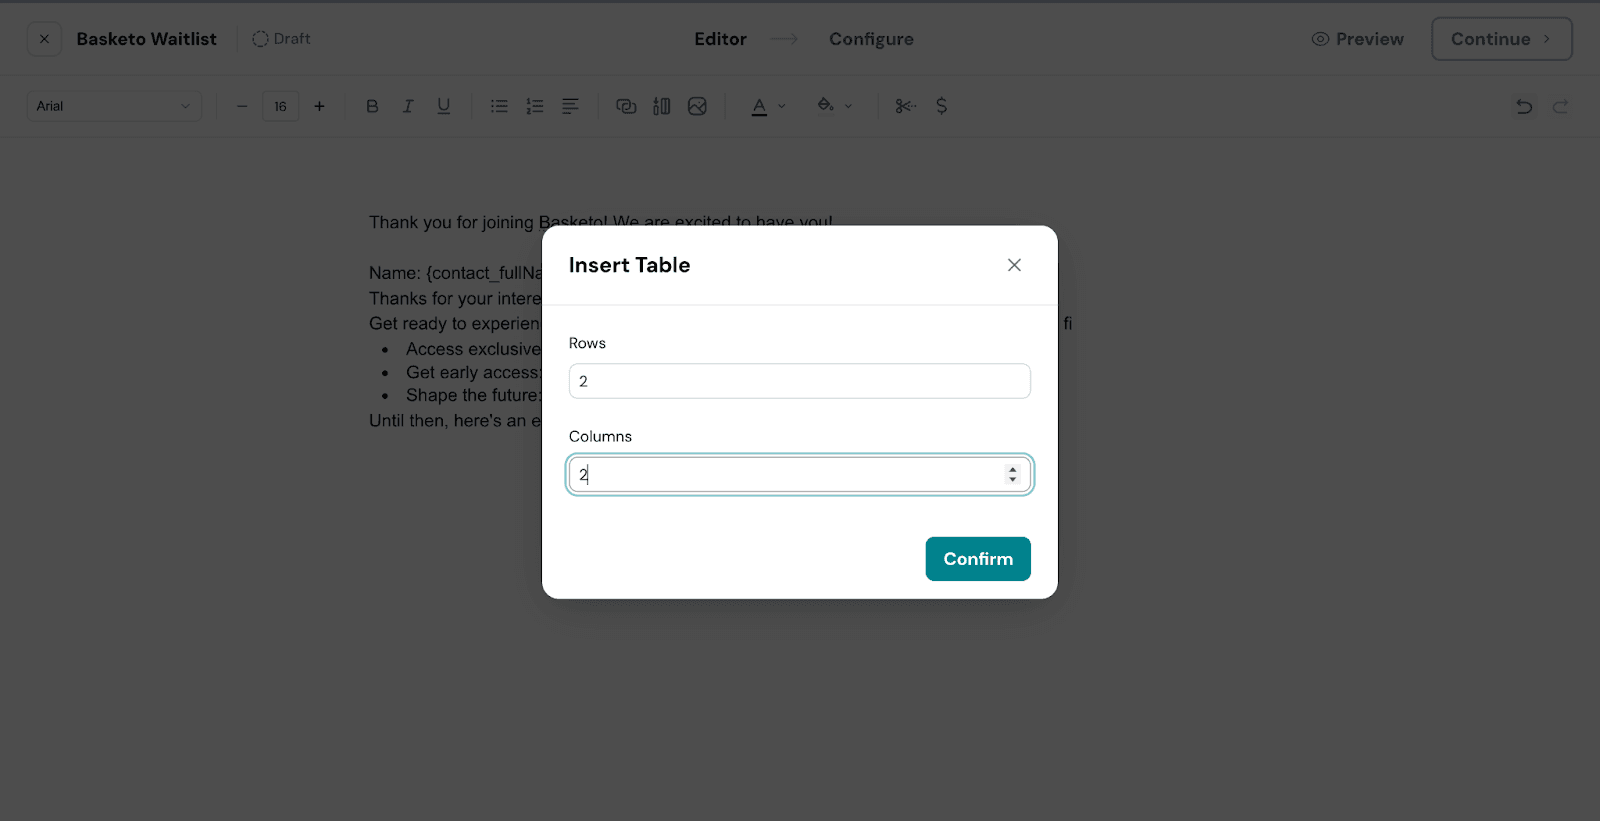
3. Click Confirm.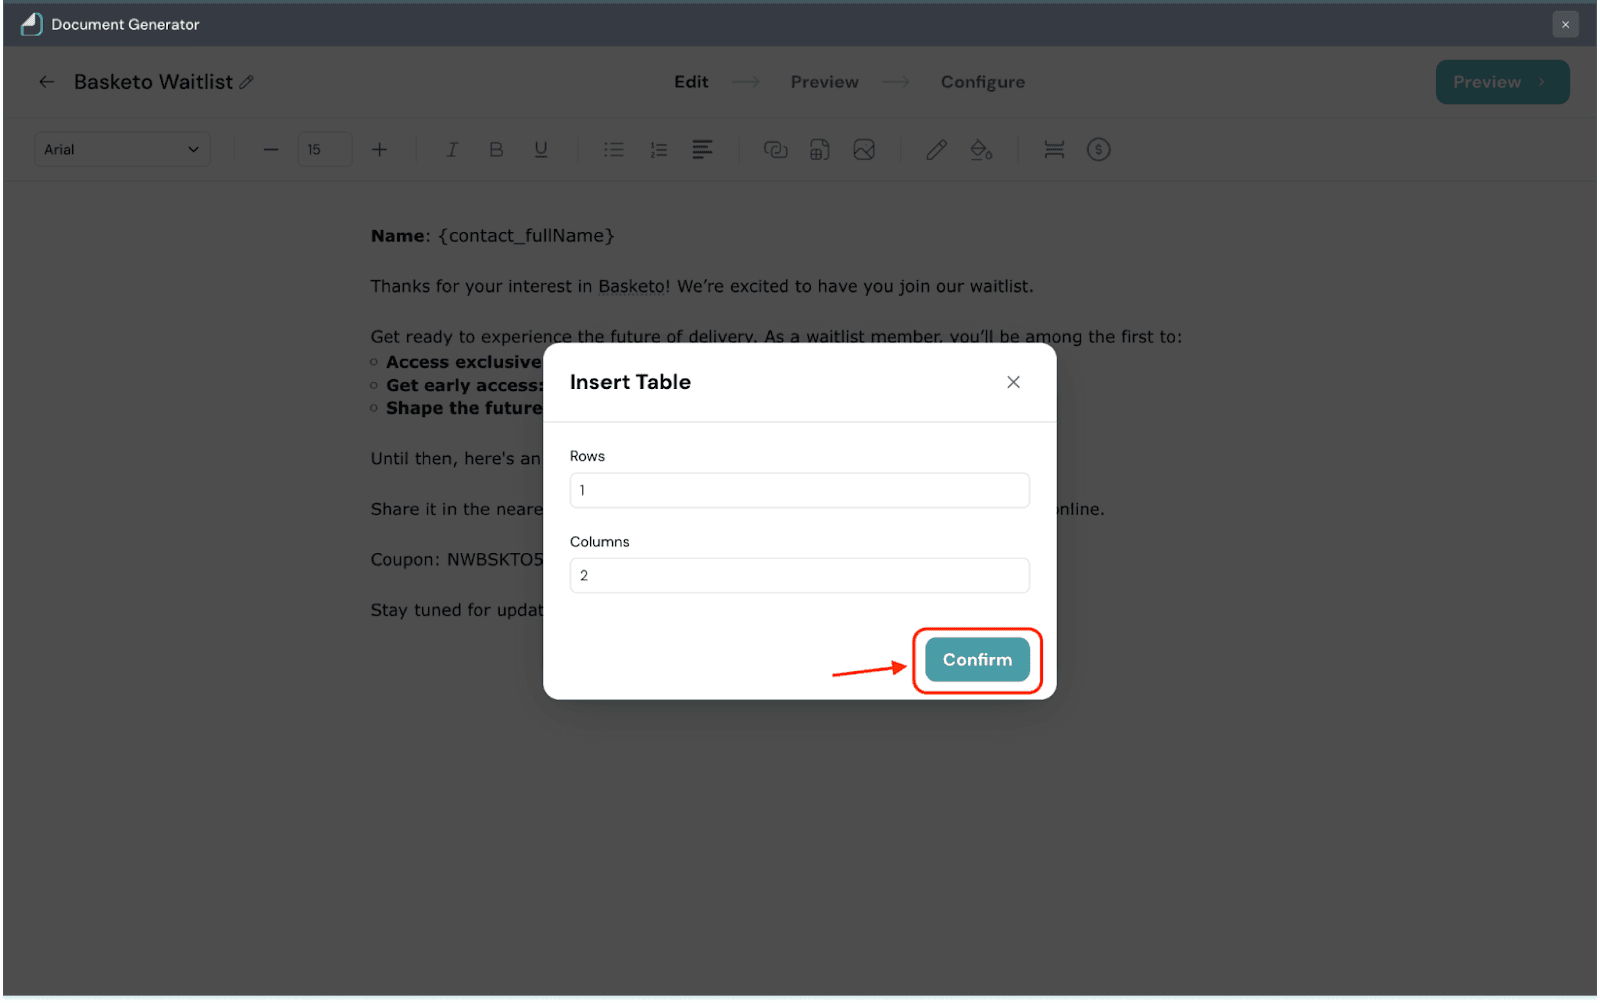
Once you add the table, proceed to enter the data in the table.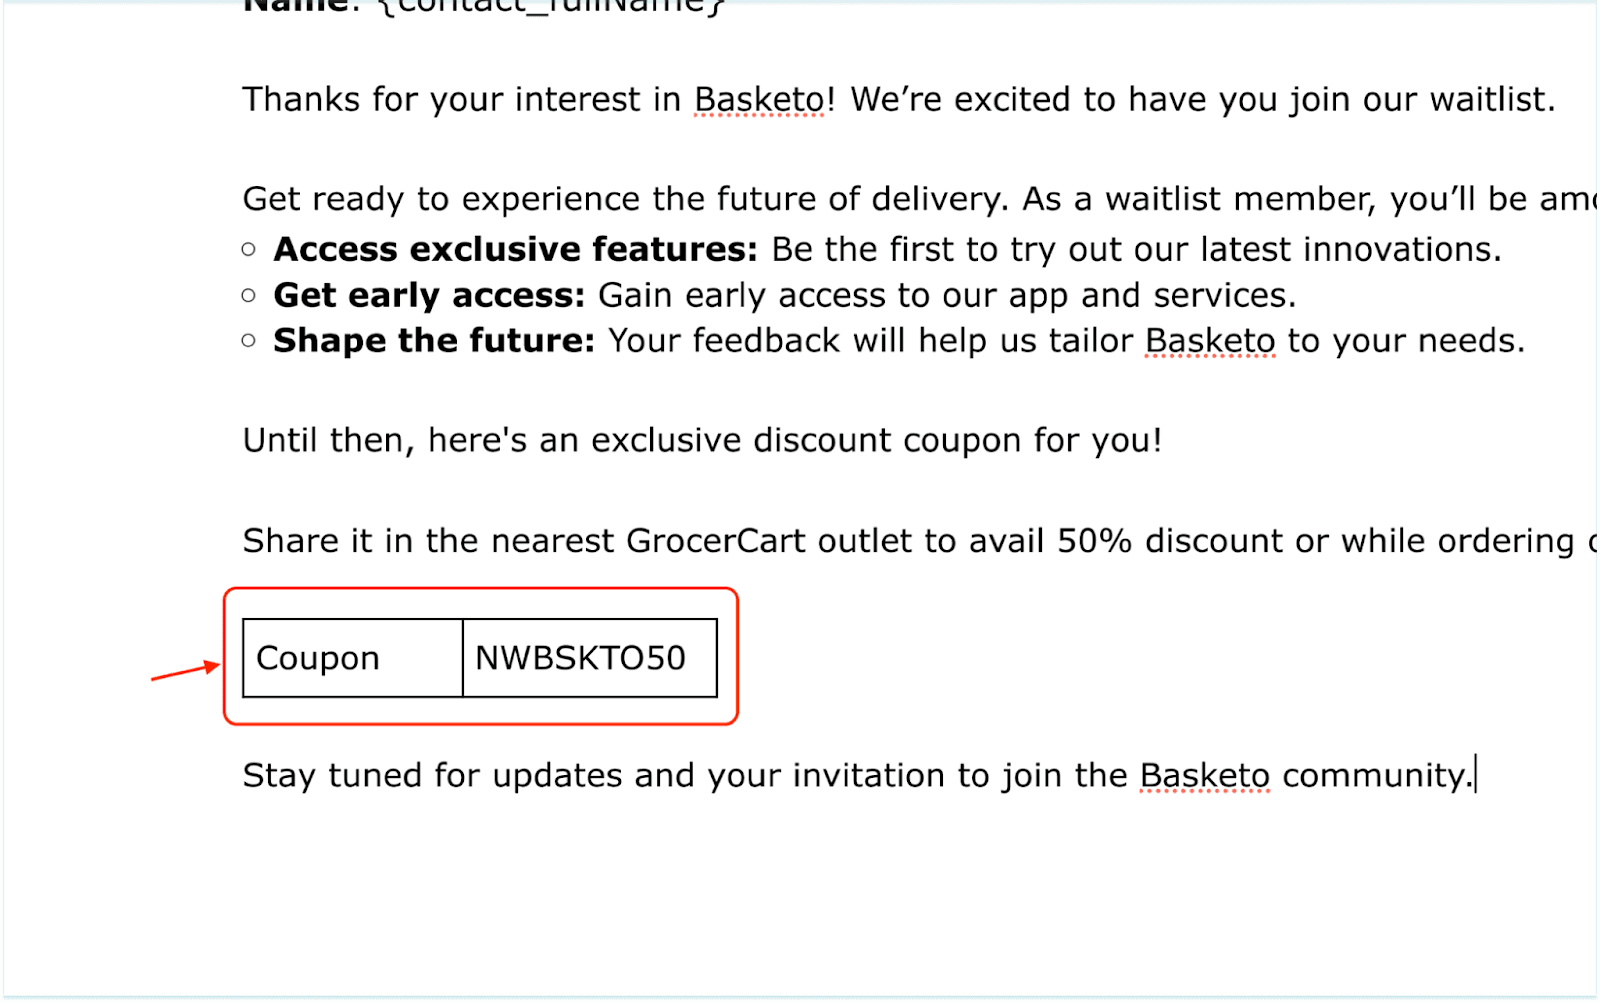
1. Click the Insert image icon.
2. Click Upload Image to choose an image from your system.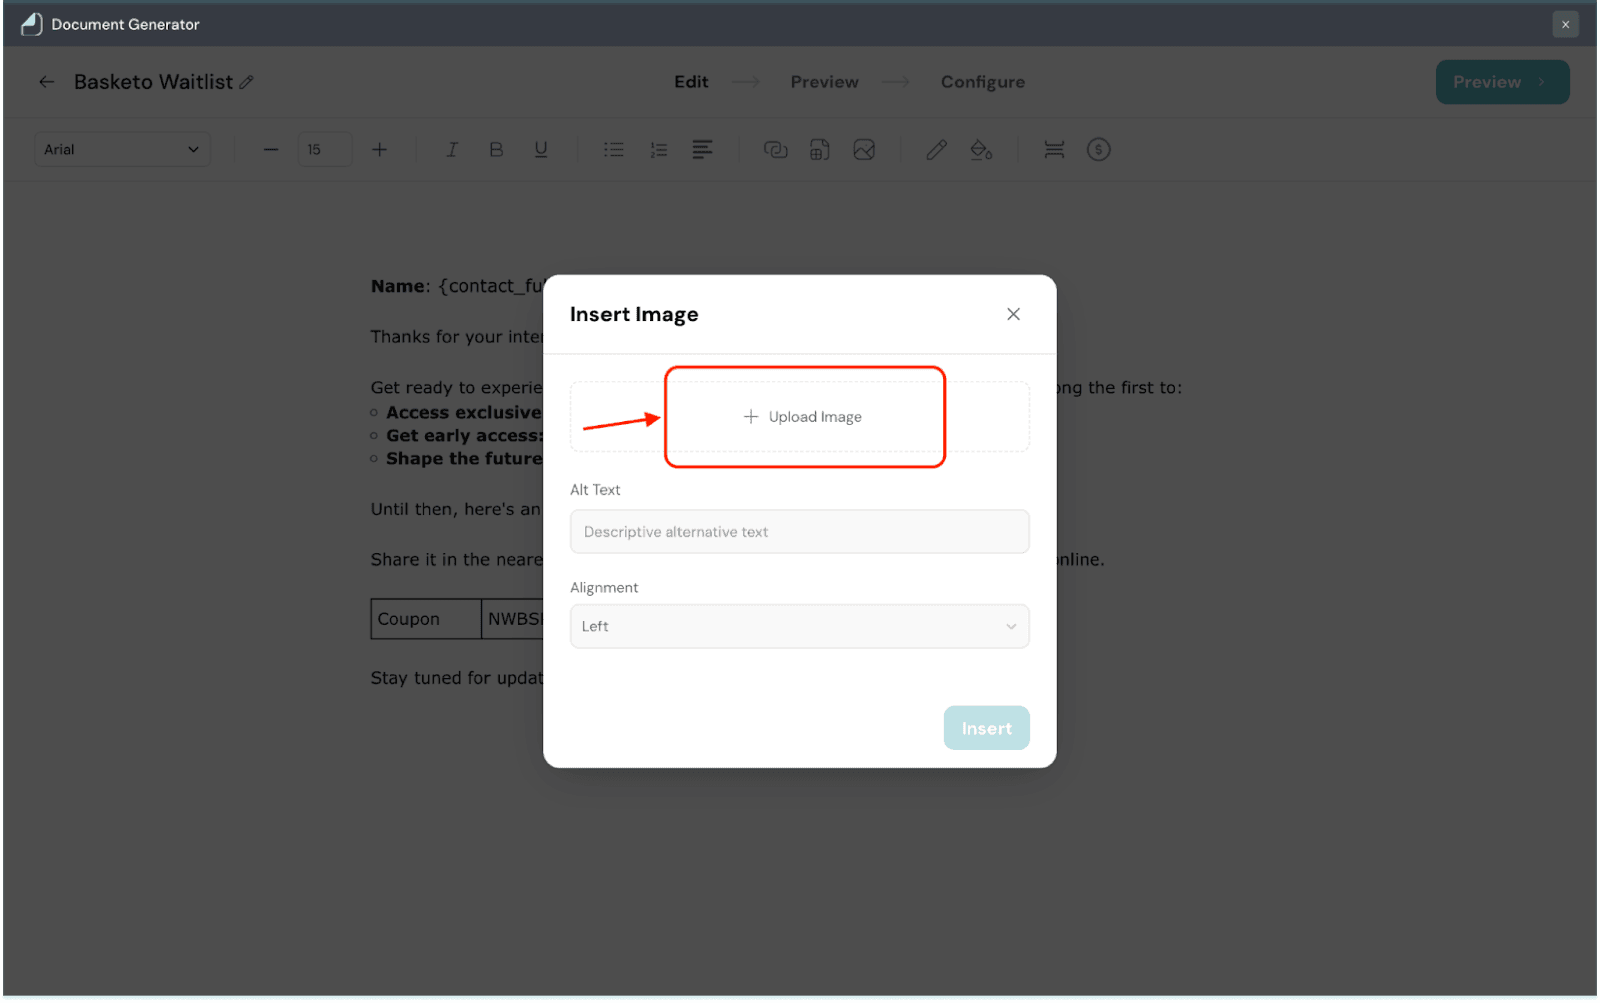
3. Enter the Alt Text for the image.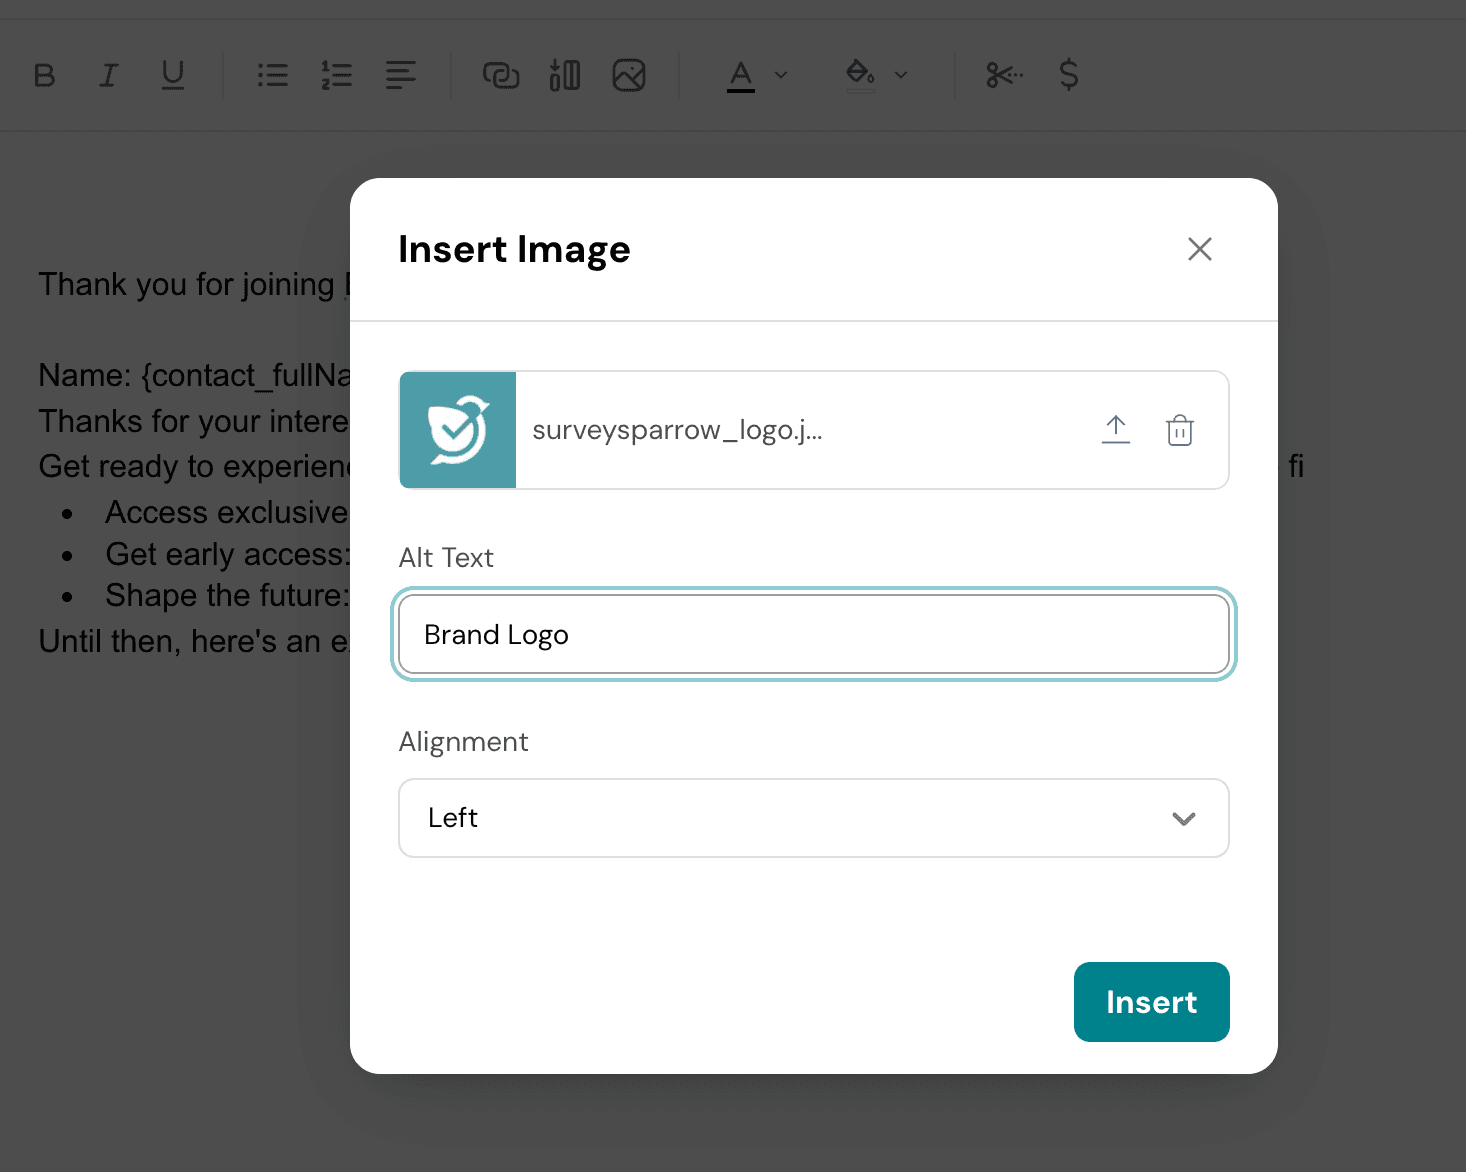
4. Choose the alignment for the image.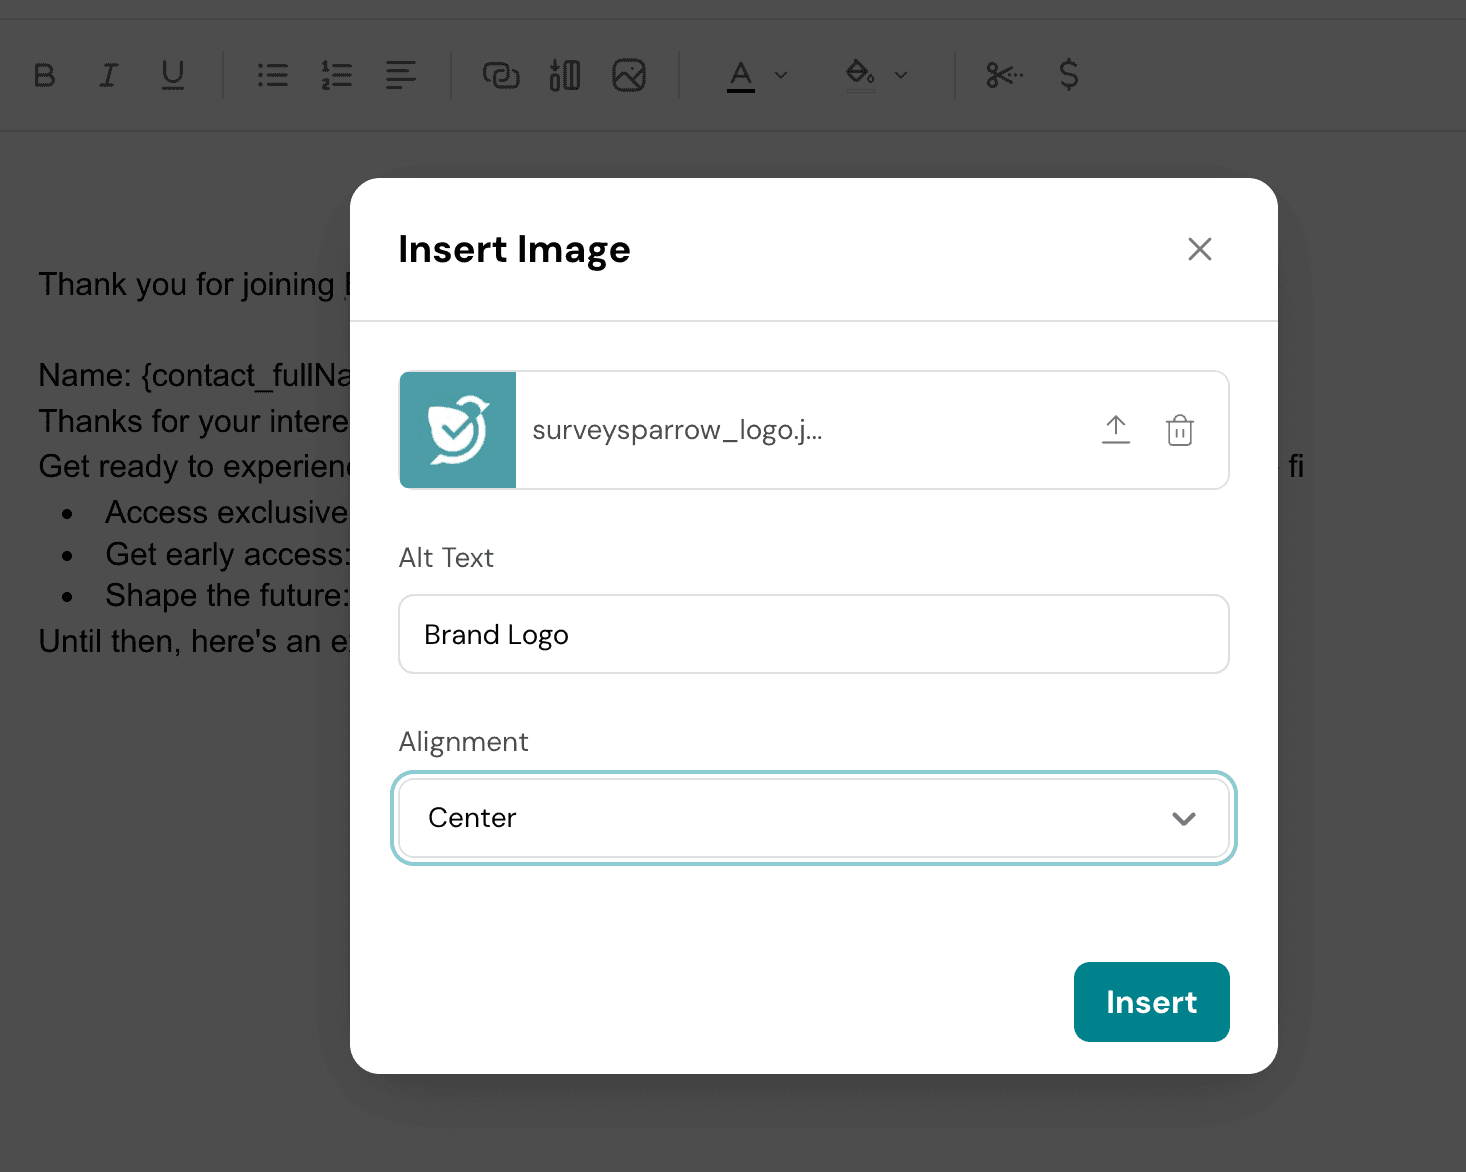
5. Once done, click Insert.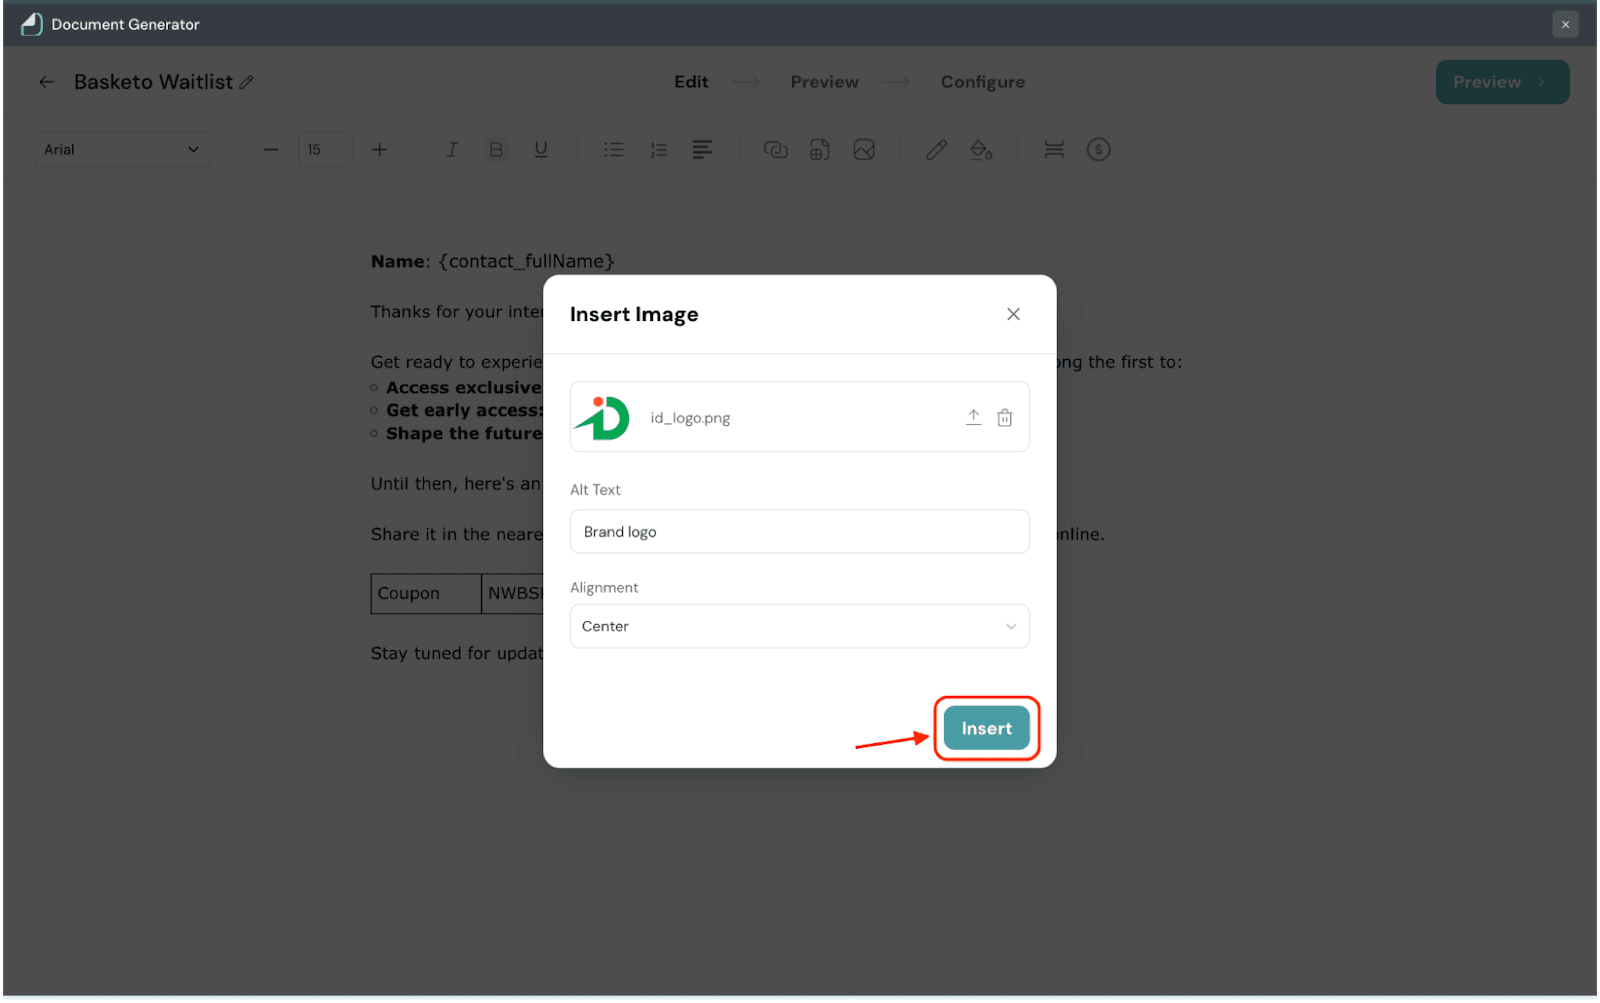
6. You can now view the image added to your document.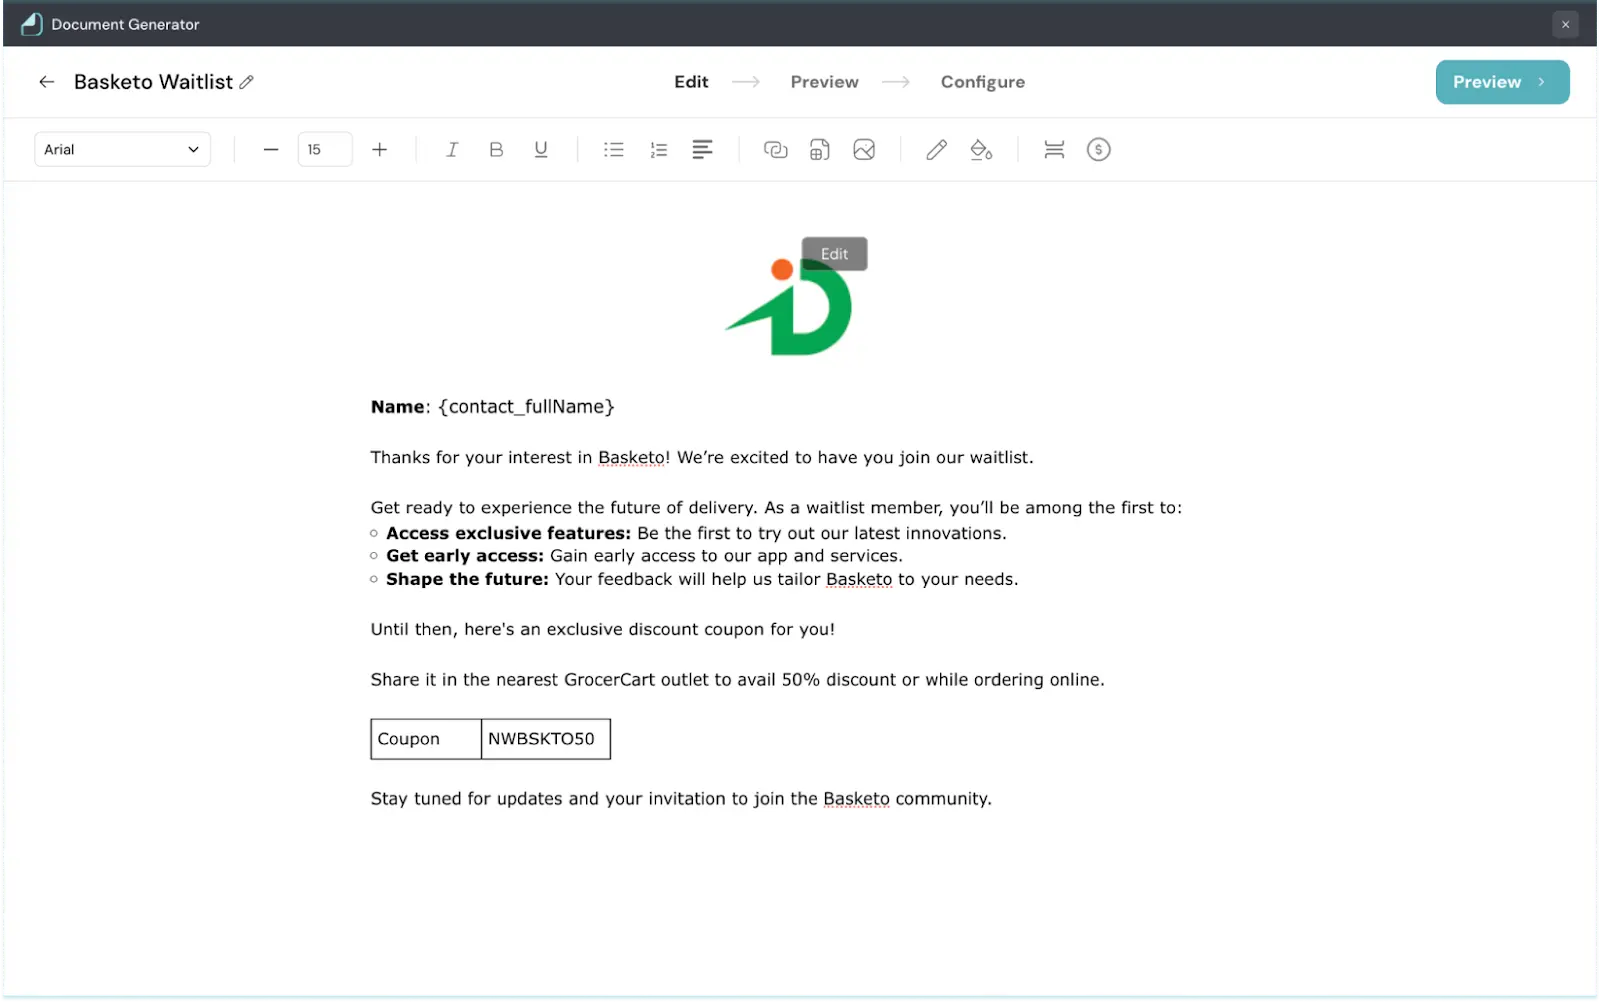
1. Once you finish editing your document, click Preview.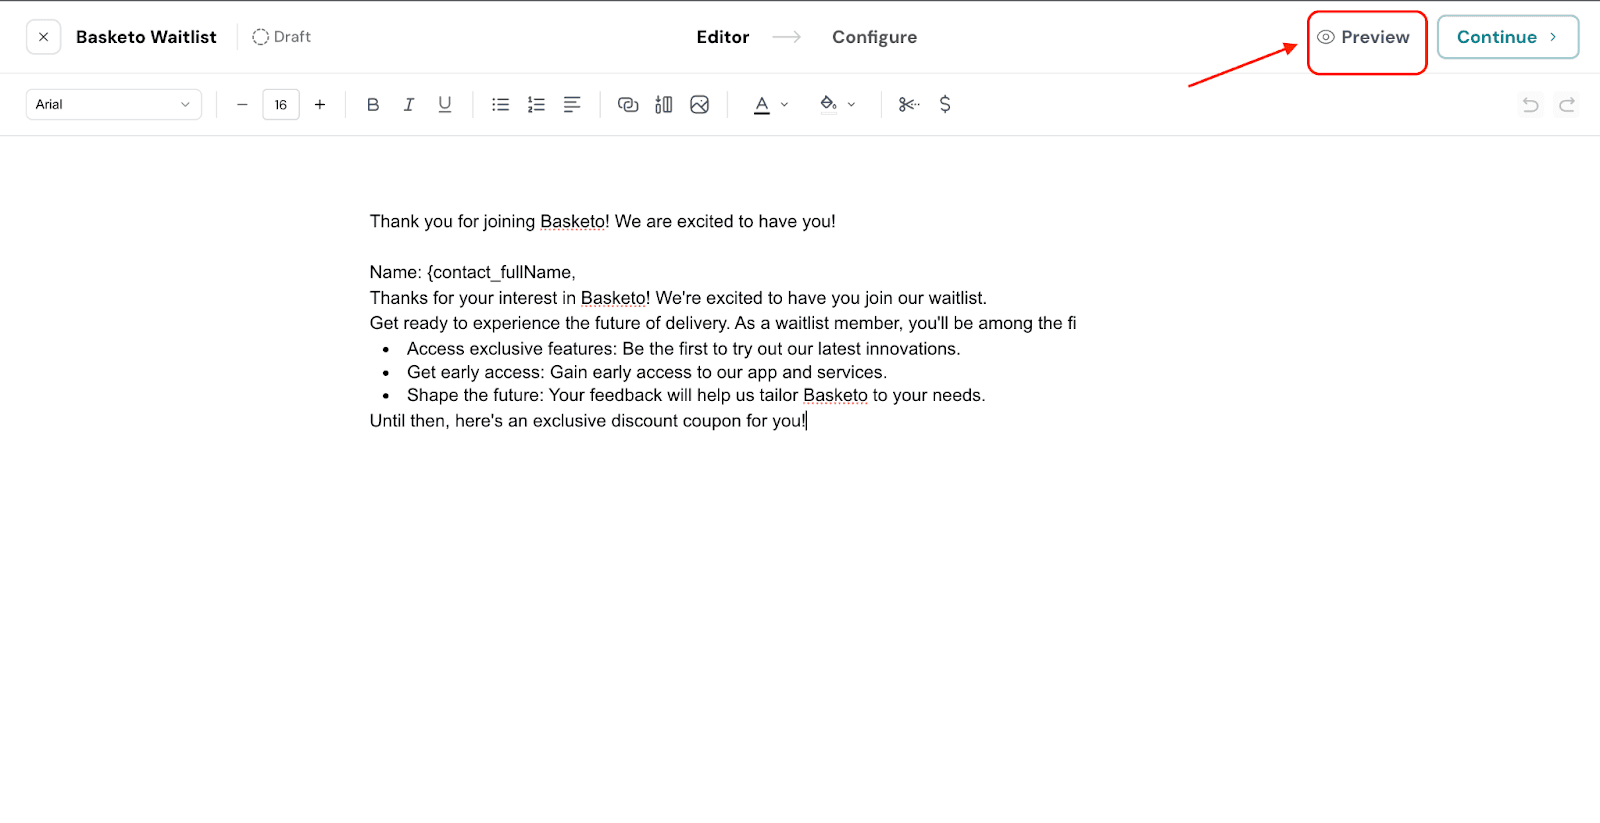
2. Choose a page orientation for the document.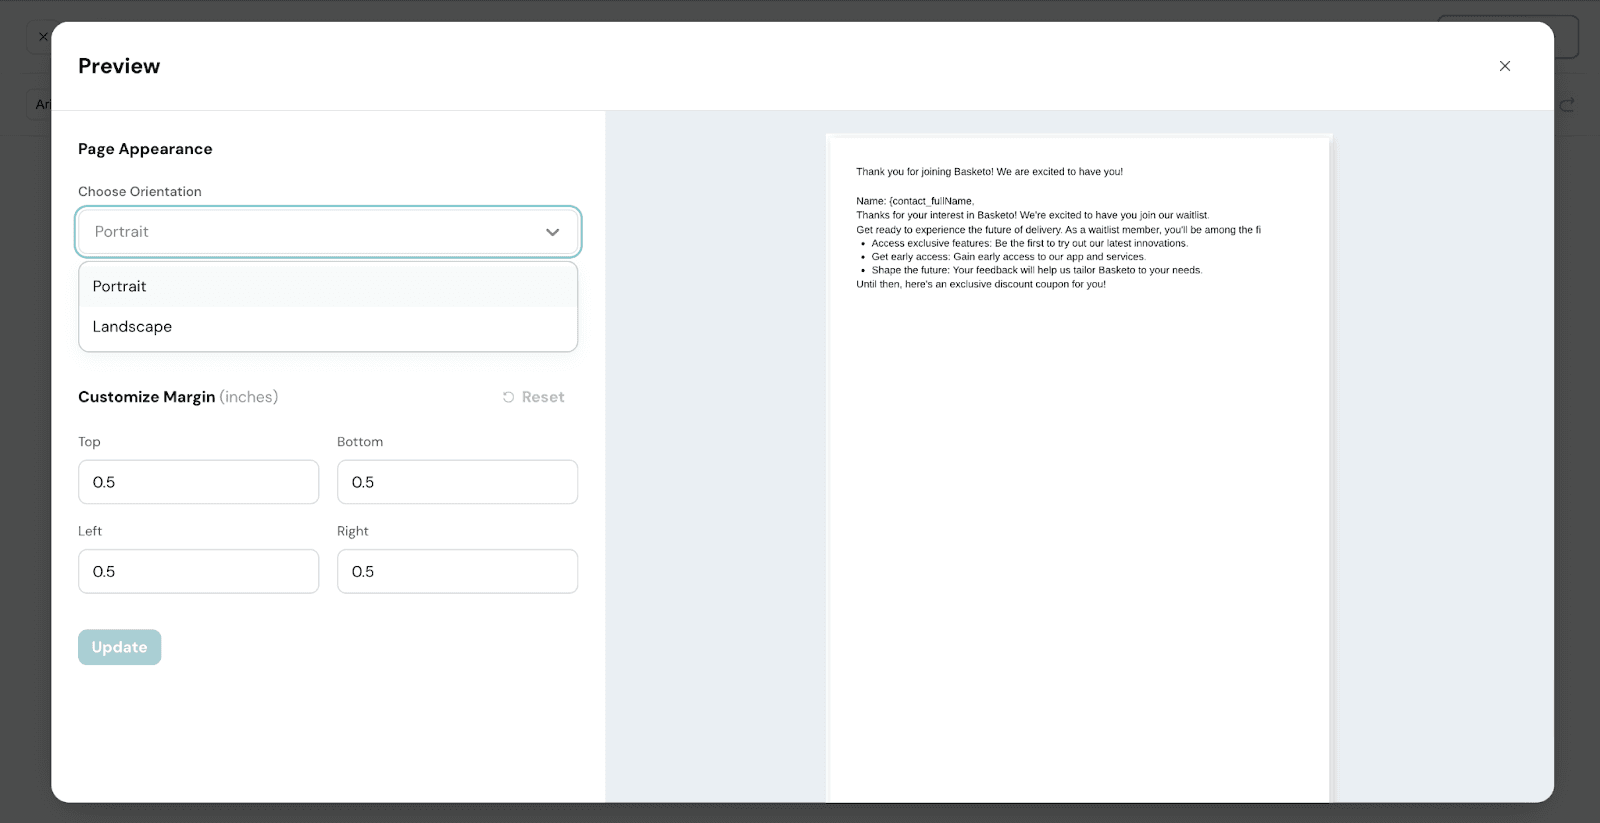
3. Select a paper size from the available options.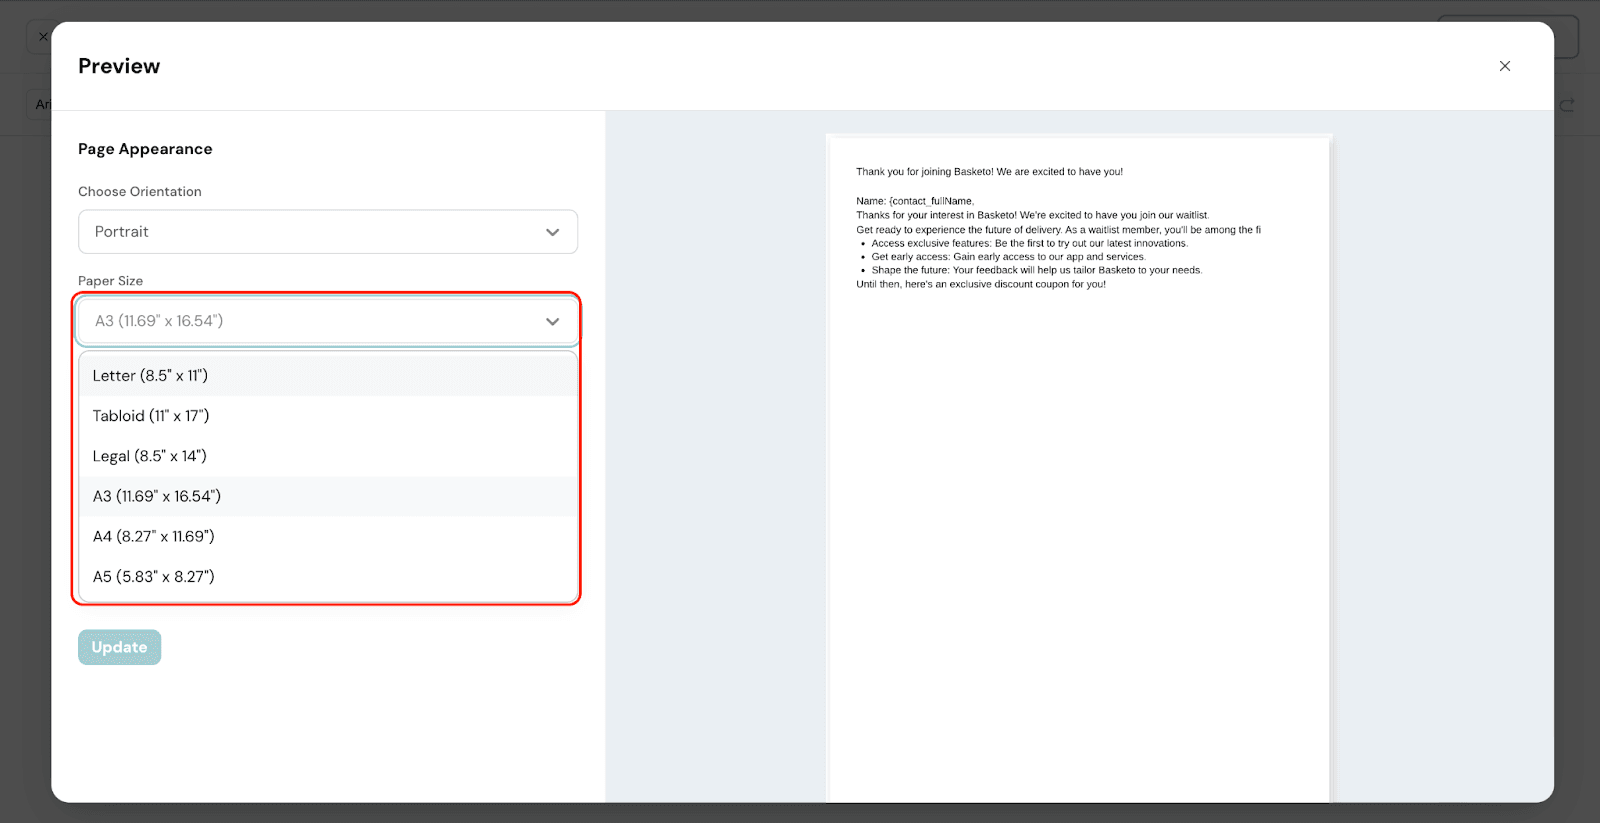
4. Customize the margins for your document.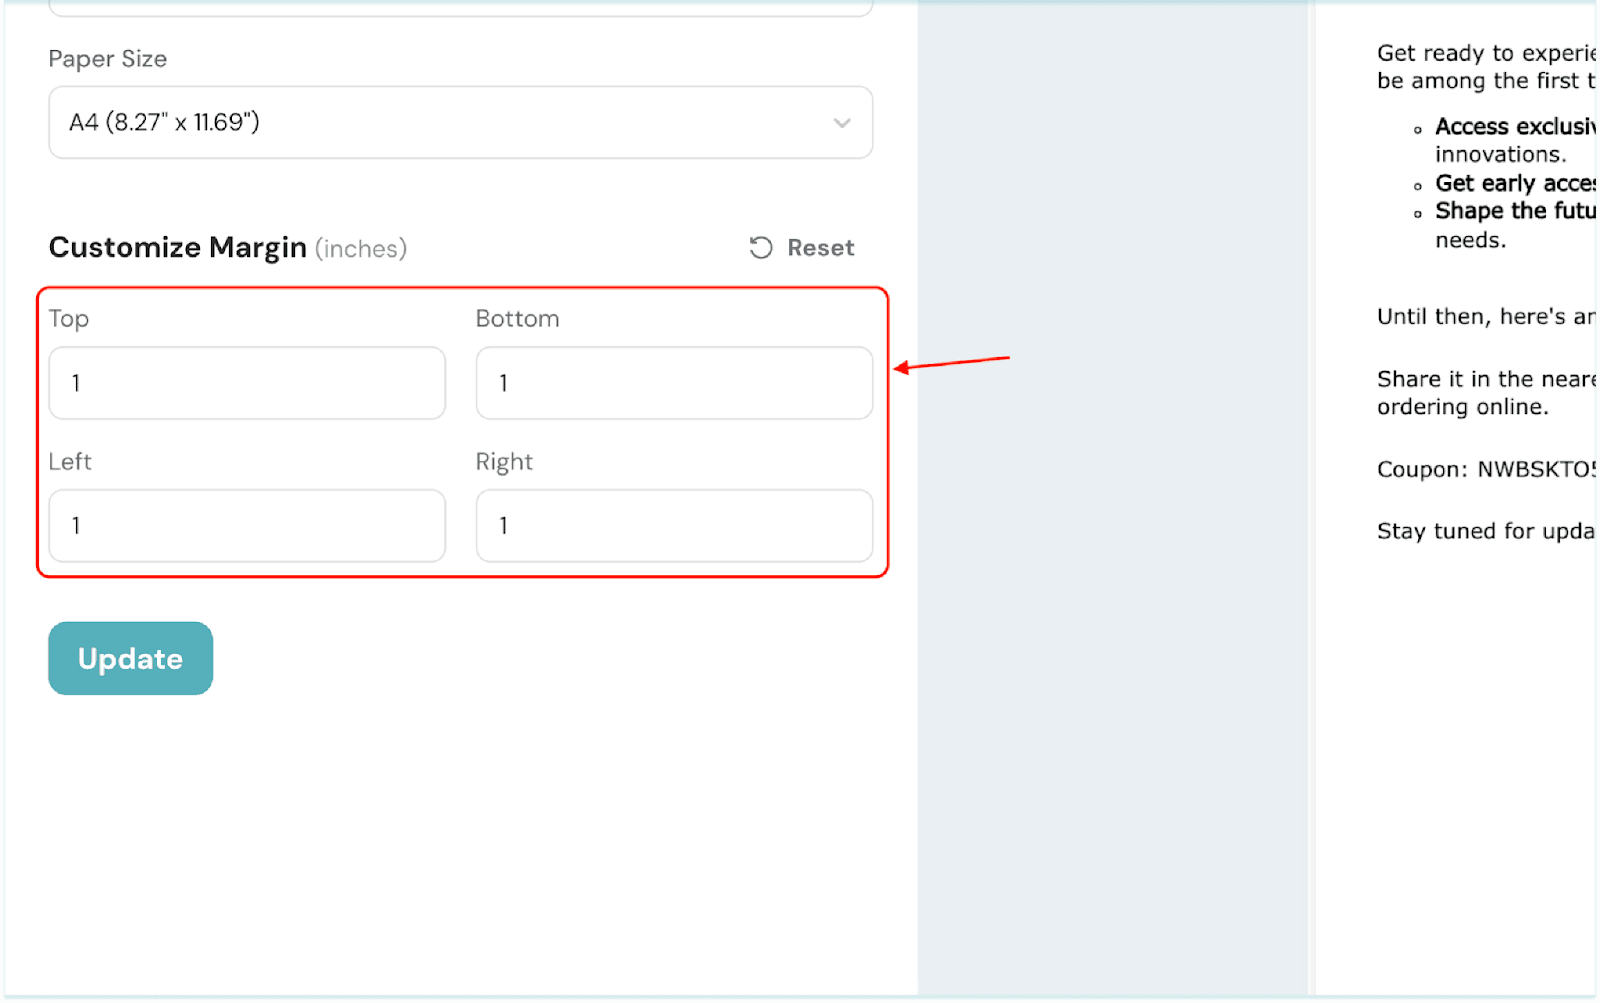
5. Once set, click Update.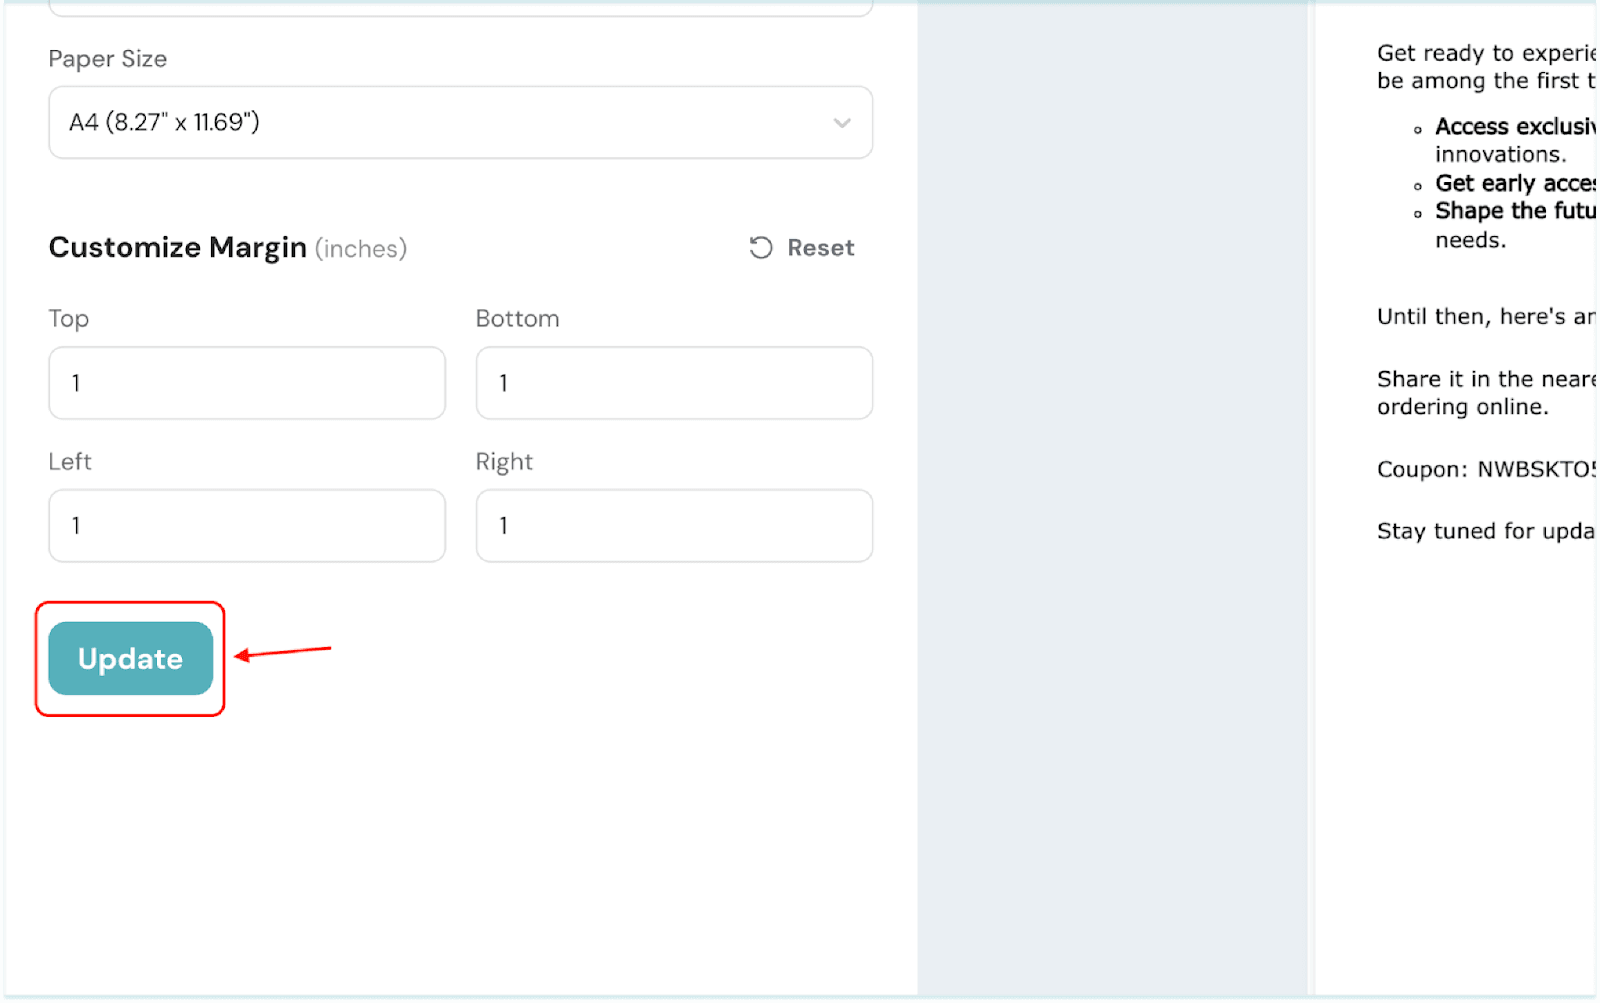
6. You can now preview the updated version of your document. Once you feel it’s good to go, click Continue.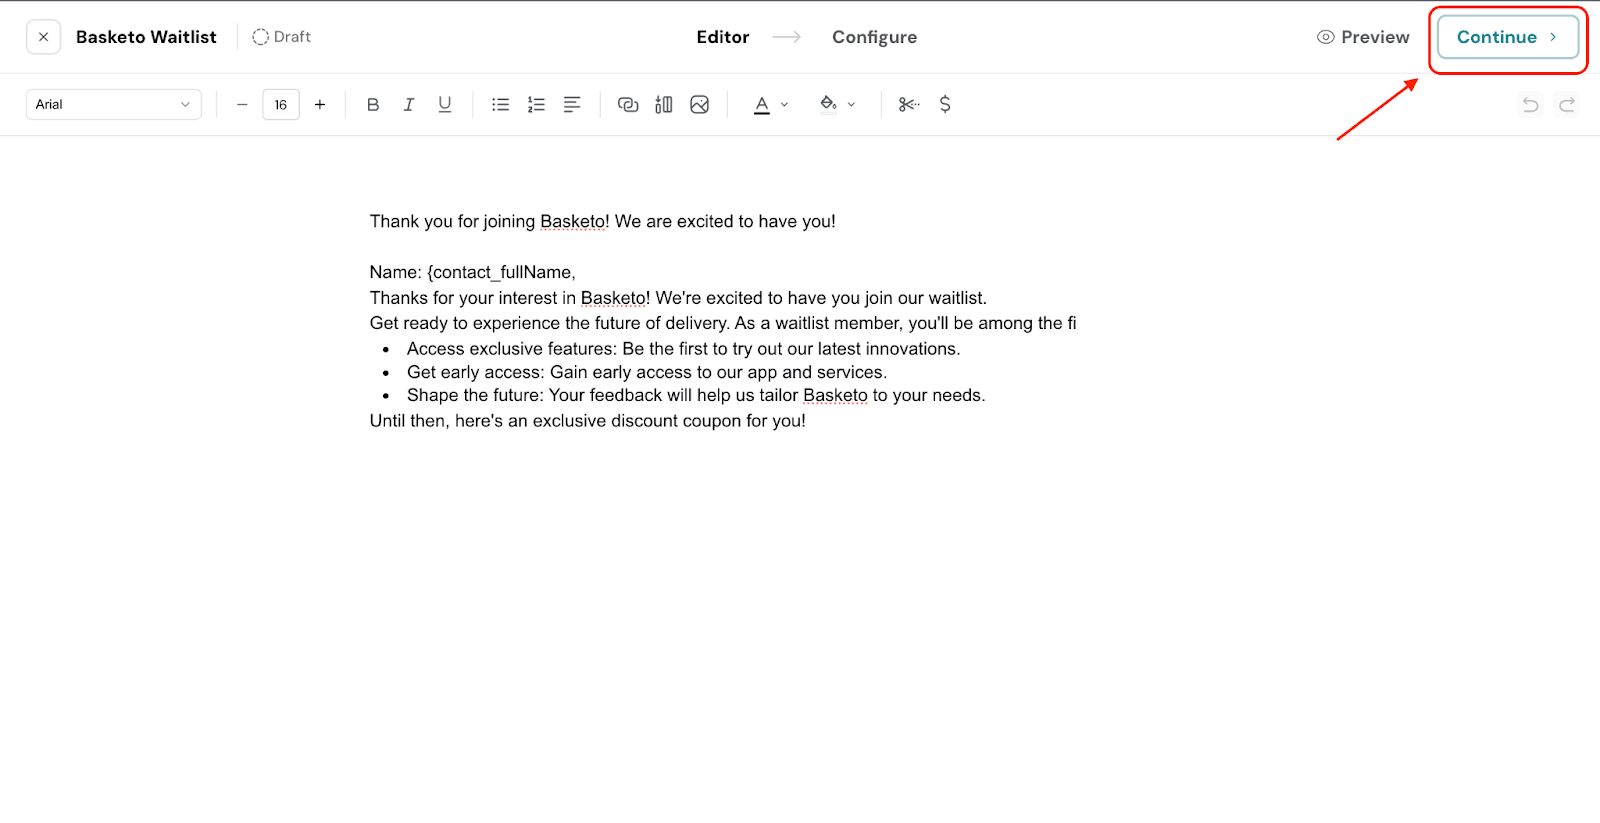
Once a submission is received, an email will be sent to the respondent with the document attached to it. Now let’s see how to configure it.
1. Select the email to which the document has to be sent. You can enter an email directly, choose from Questions(If you’ve added a question with Email question type, Contact Properties, or Custom Variables(If it’s added to the survey).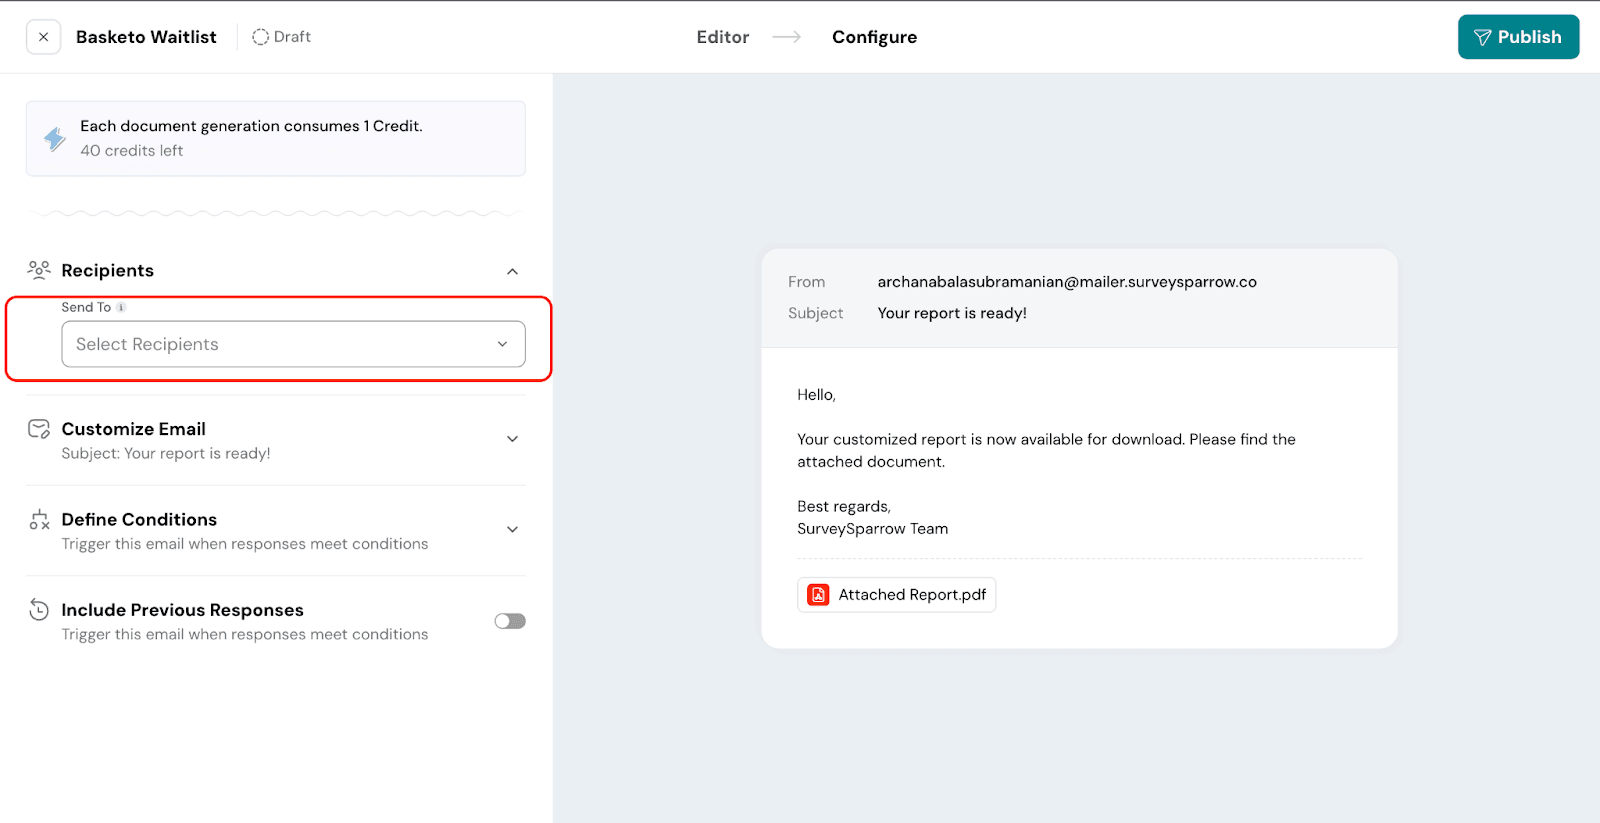
2. Select a From address from your connected emails.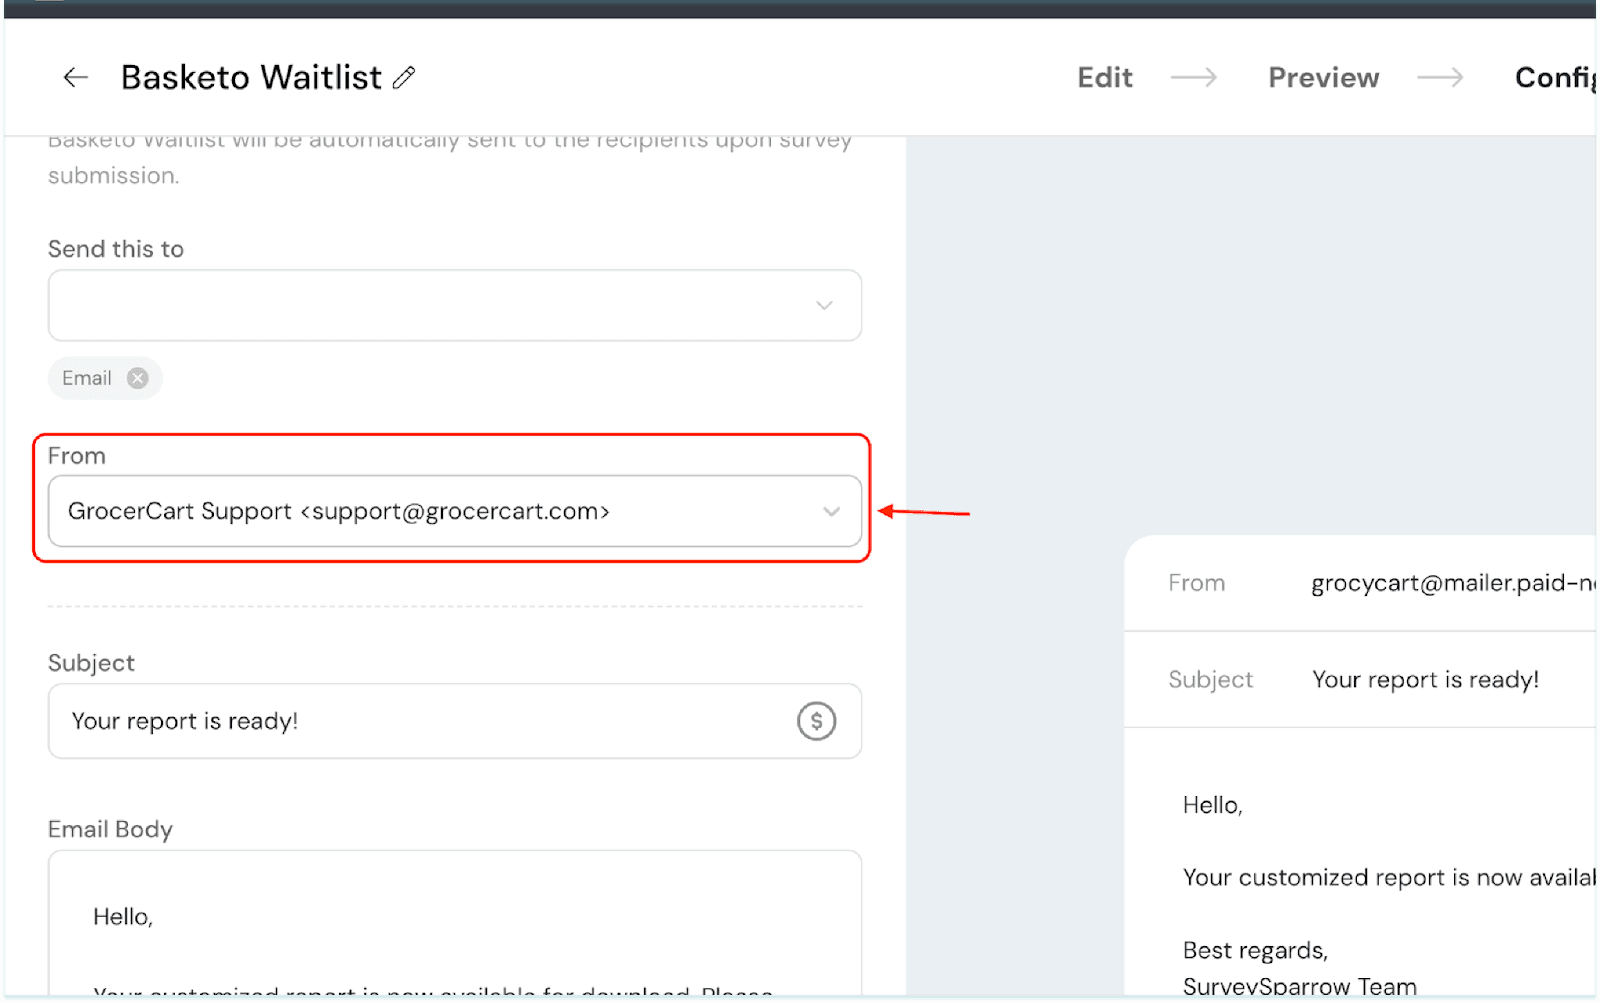
3. Add a relevant subject name and choose to personalize by clicking the $ icon. You can choose from Questions, Contact Properties, Custom Variables, and Expressions.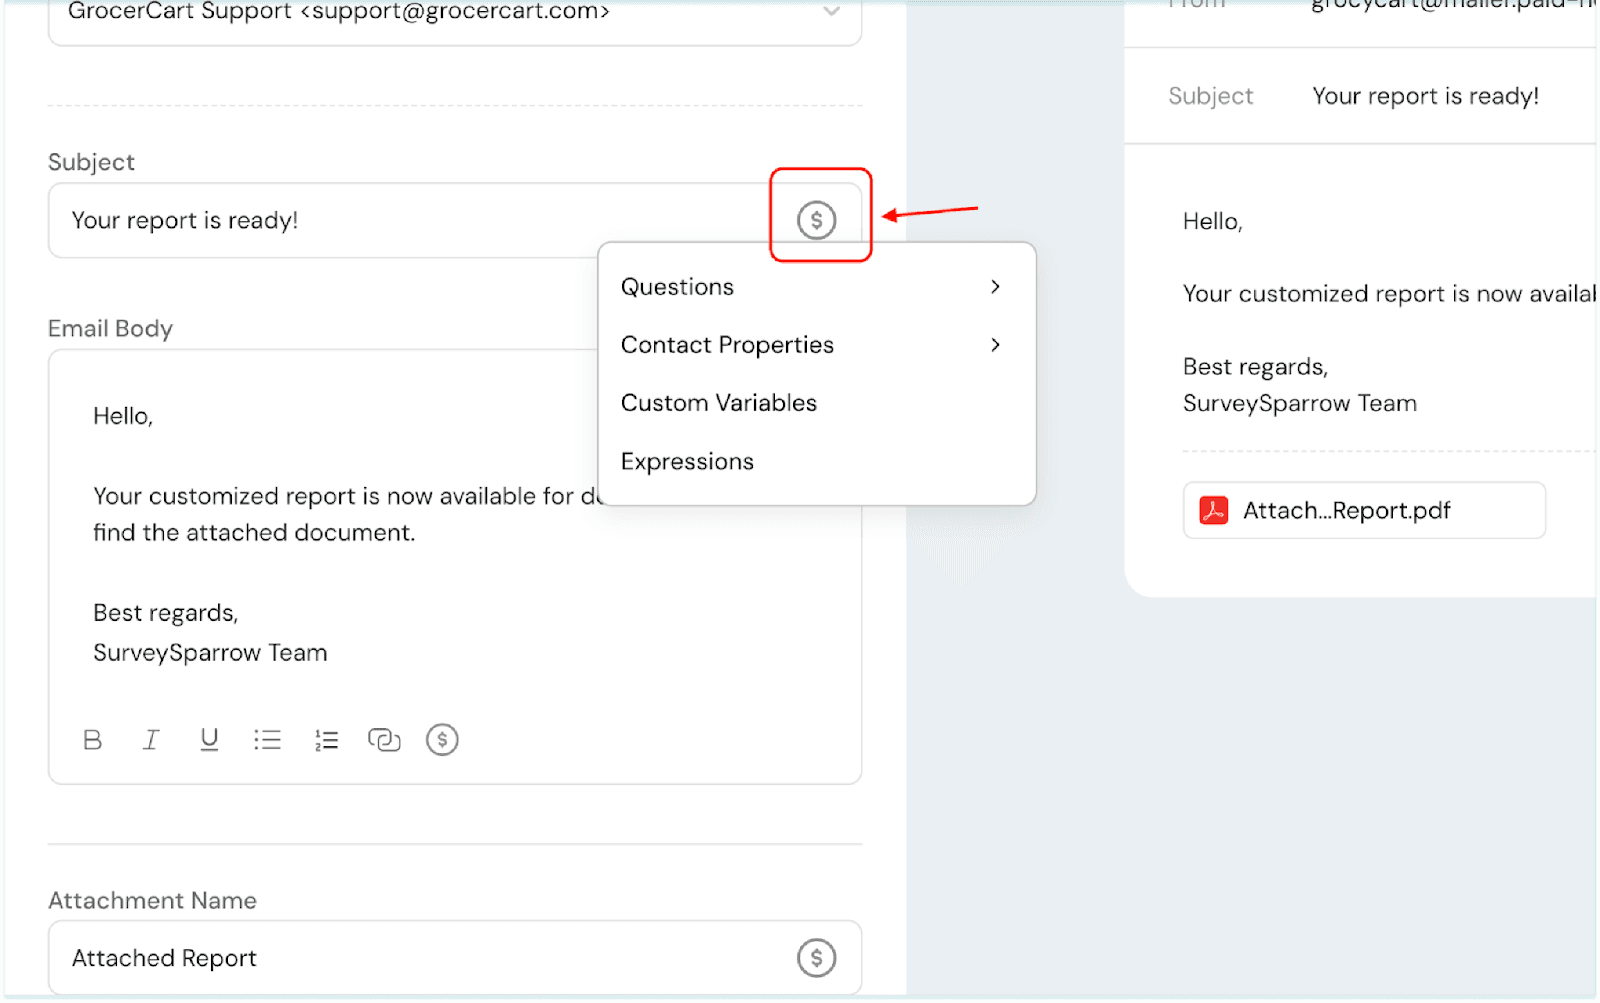
4. Now, edit the email body. Choose to format the text, add numbered/bulleted lists, add relevant links if needed, and click the $ to proceed with personalizing the email body.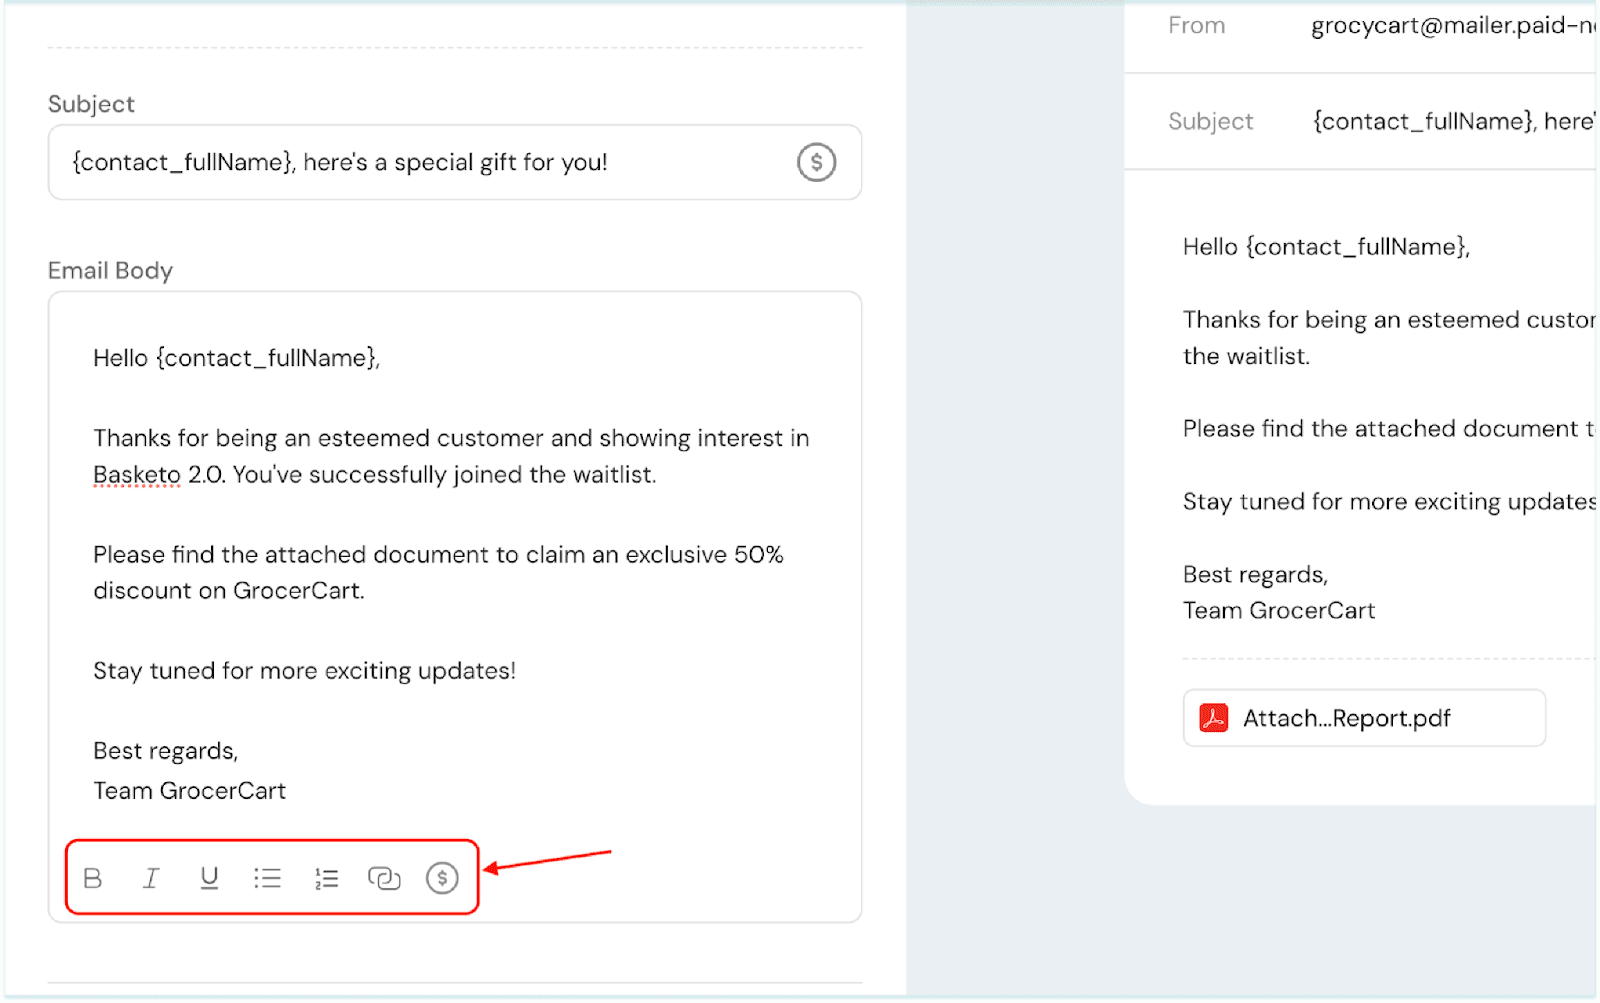
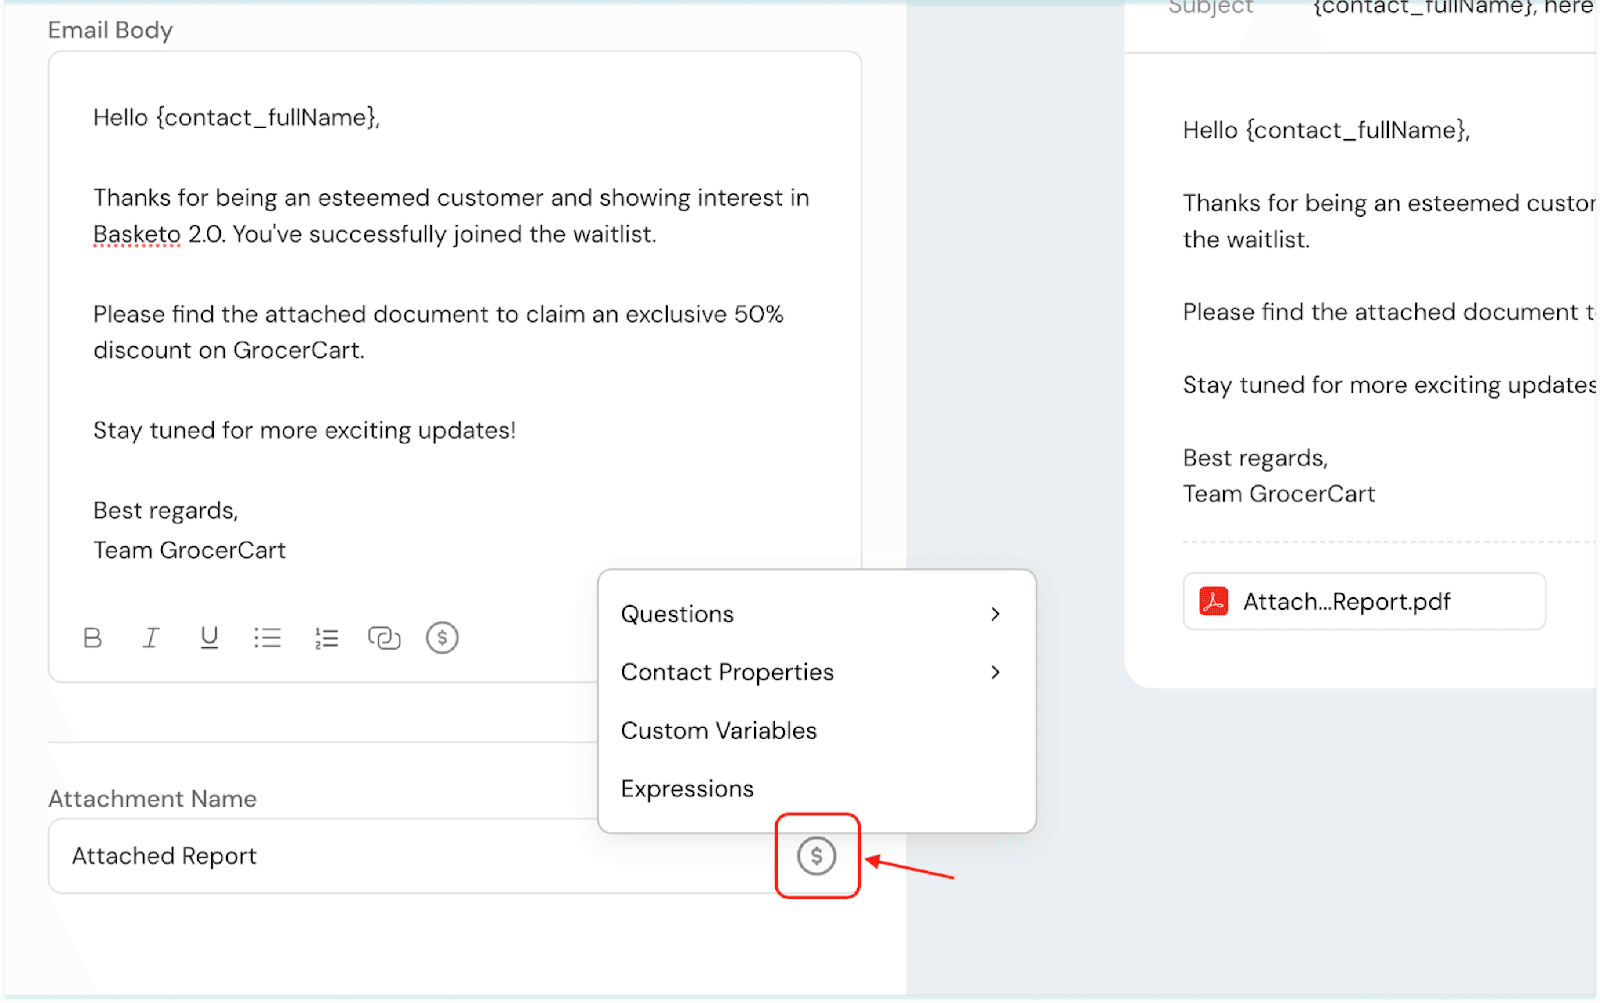
5. You can choose to keep the attachment’s name static or dynamic. Click the $ icon to add a personalized placeholder. You can choose from Questions, Contact Properties, Custom Variables(if added to the survey), and Expressions(if added to the survey).
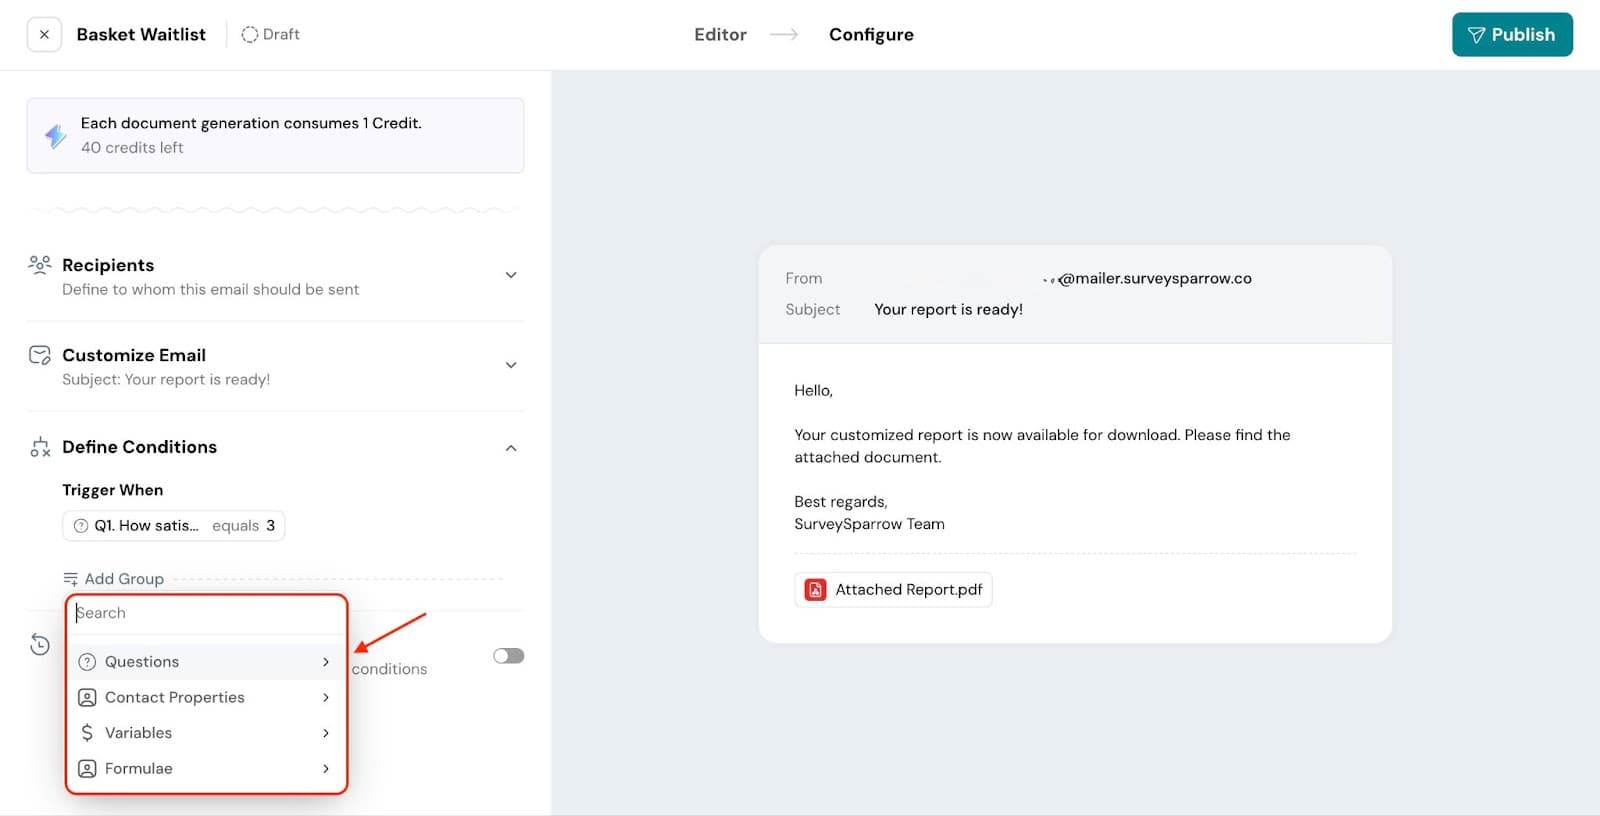
6. Define Conditions: Set rules to decide when a document should be sent. You can base these rules on answers to questions, contact details, variables, or formulas. Use AND/OR conditions to combine multiple rules and send documents only when they match your criteria.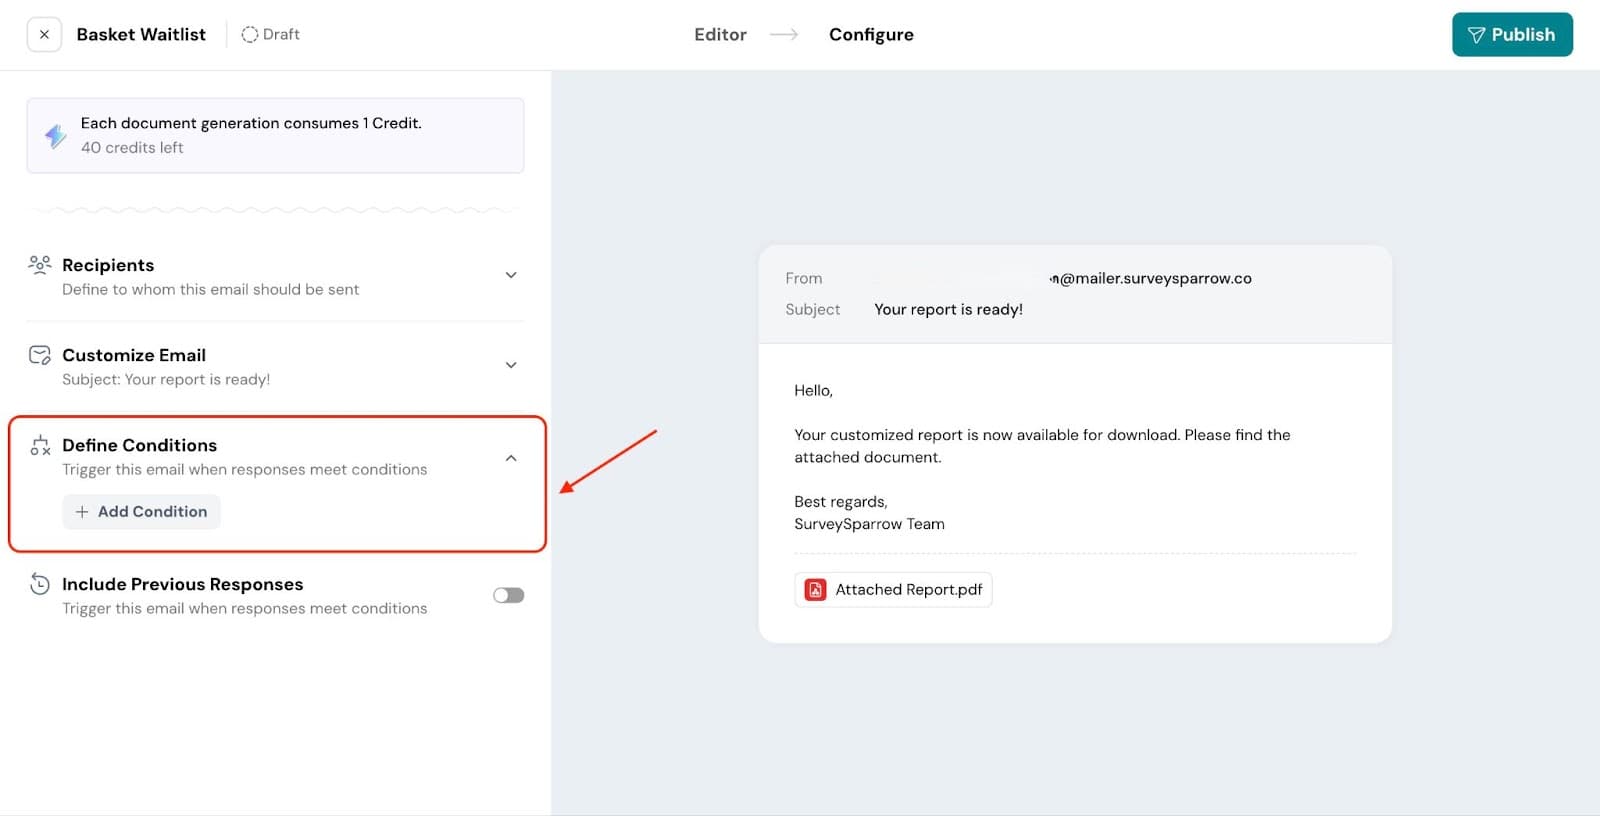
7. Include Previous Responses: Use this option to send the email for previous responses that meet the defined conditions. If the responses match, the email will be triggered even if they were submitted earlier.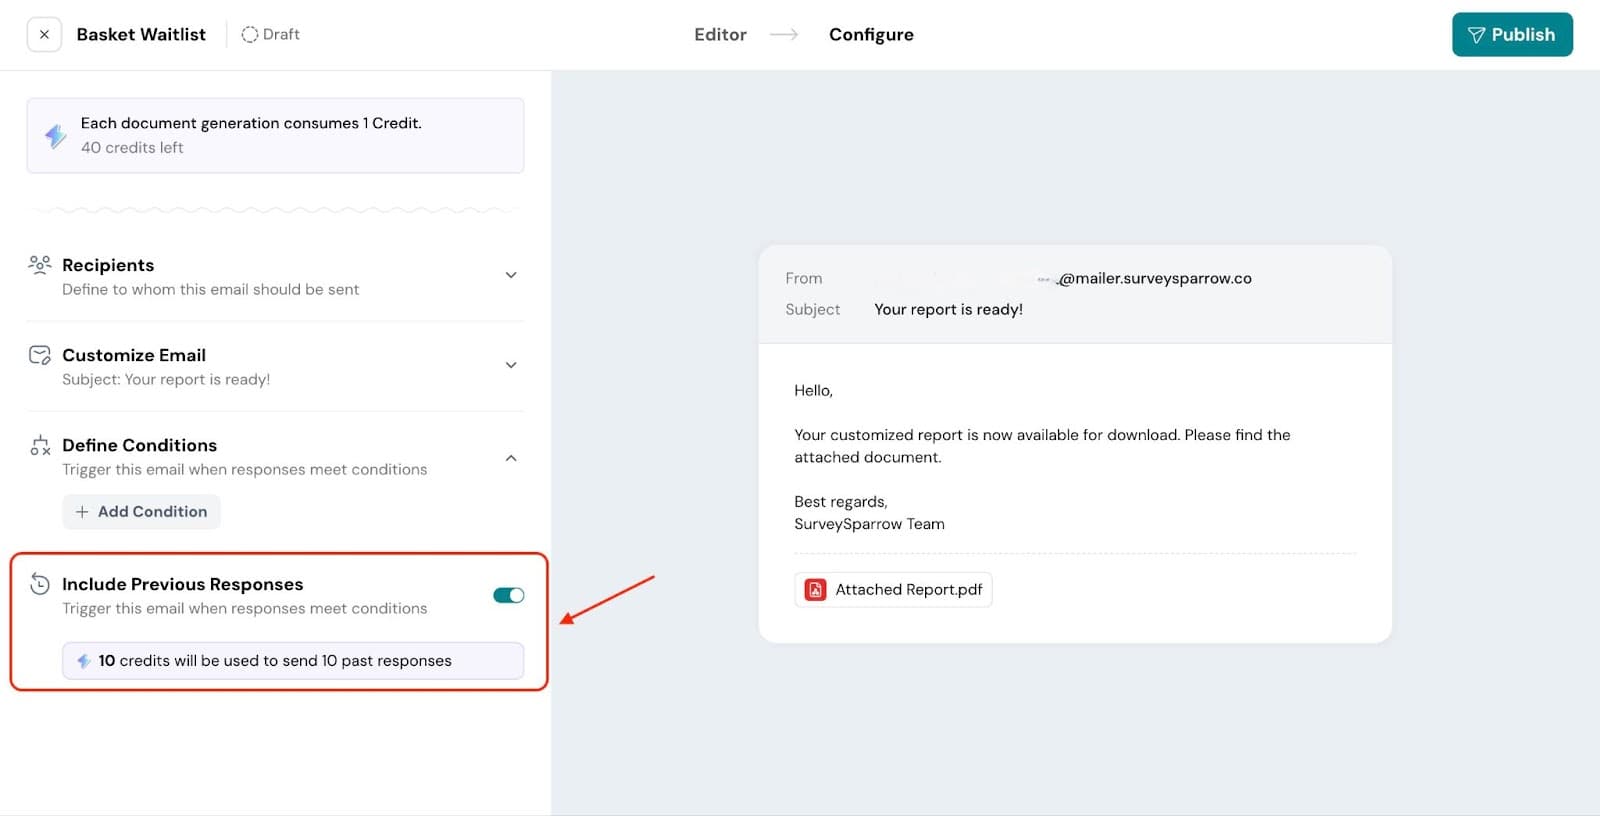
6. Once done, click Save Document.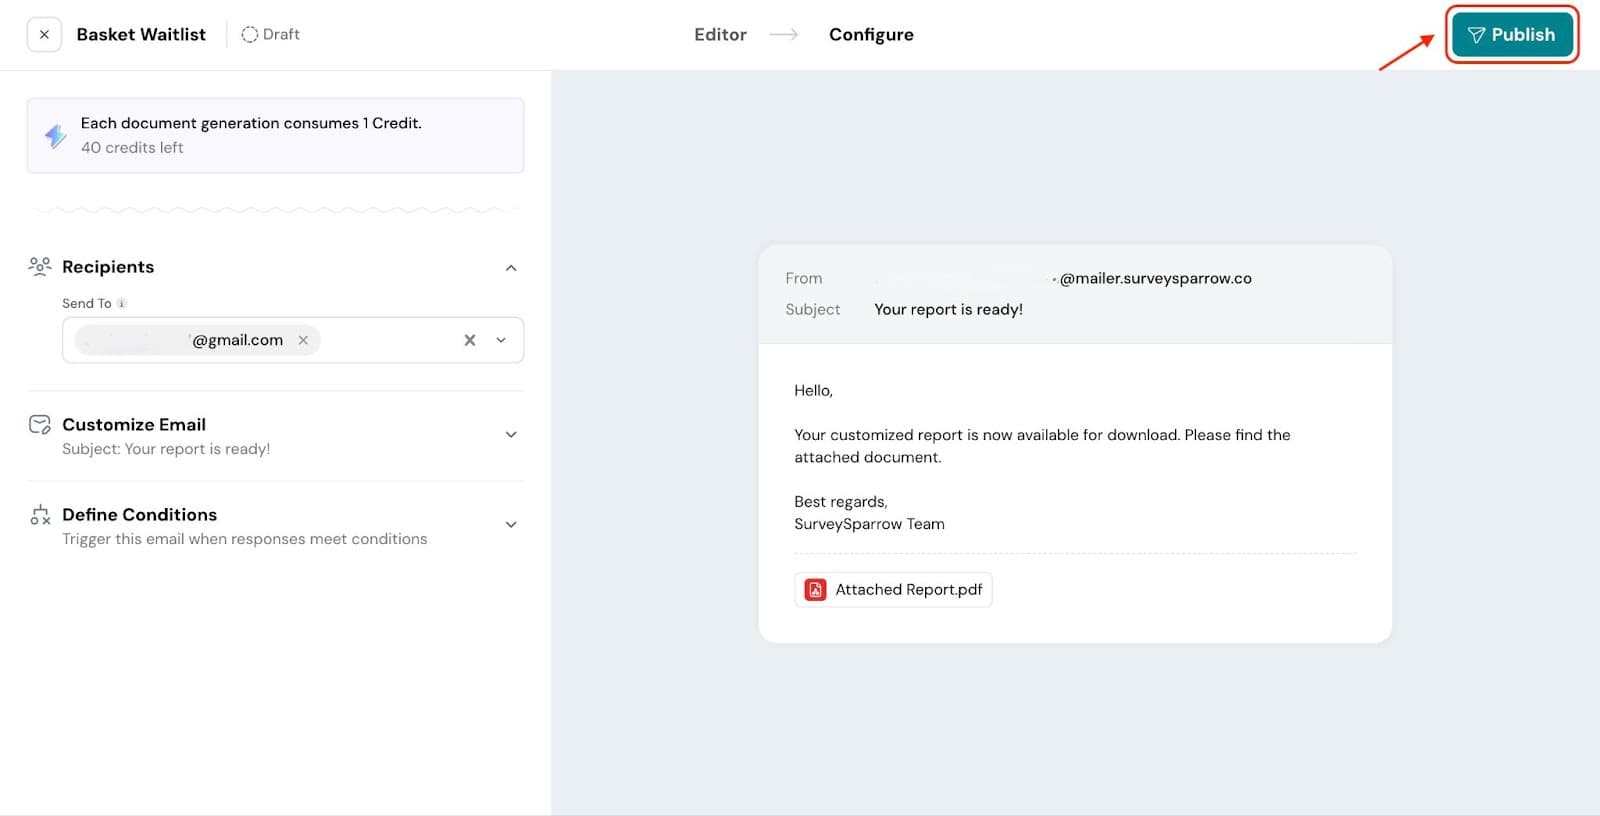
You can now view the documents generated. Use the toggle to enable or disable individual documents as needed.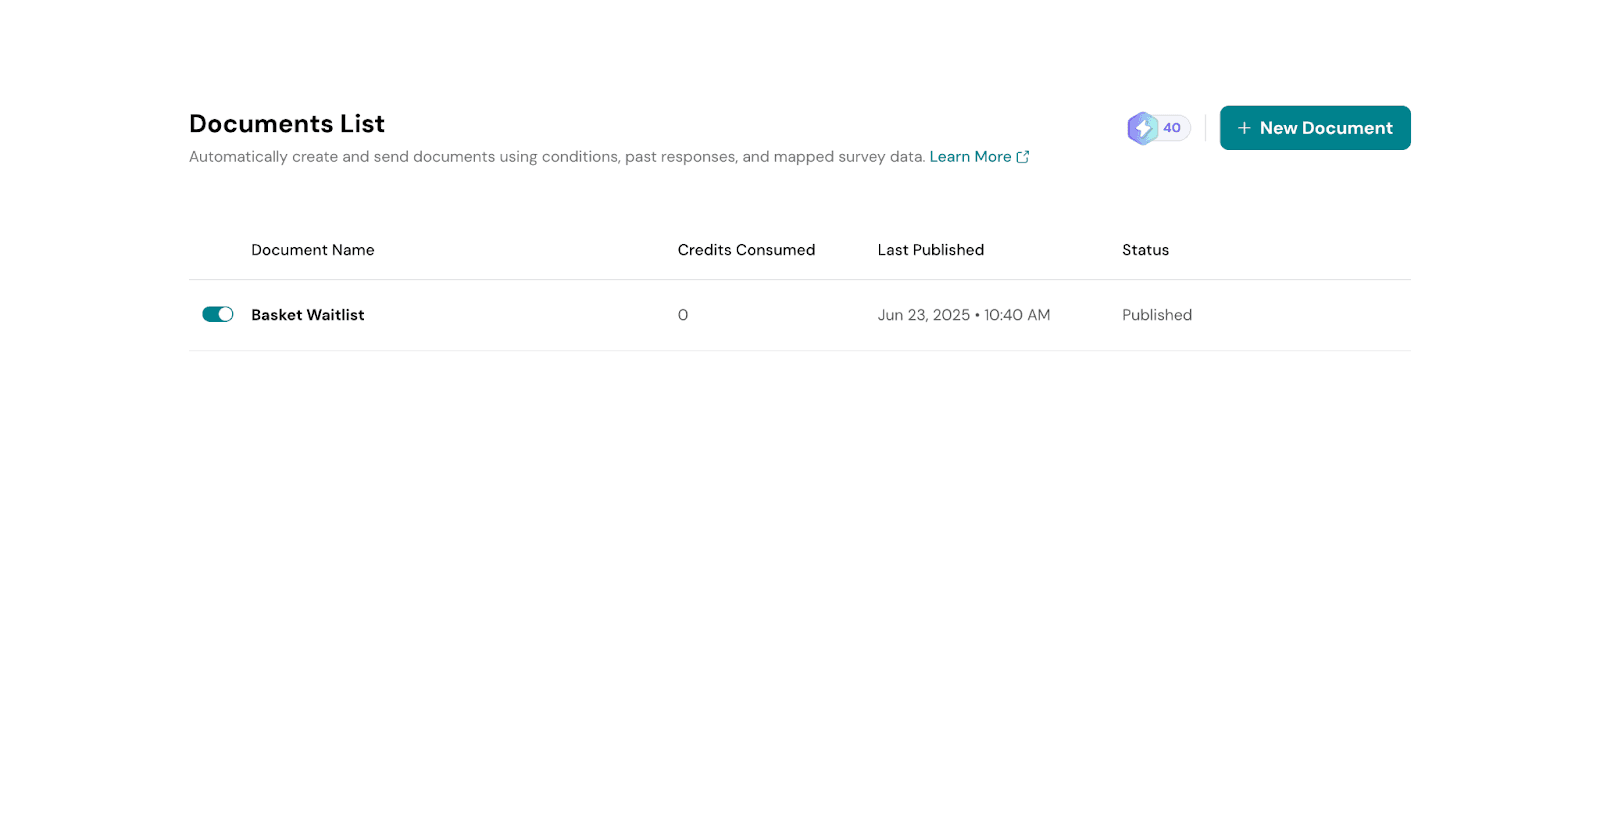
Click the 3-dot icon to proceed with editing, duplicating, or deleting the document by selecting the corresponding option.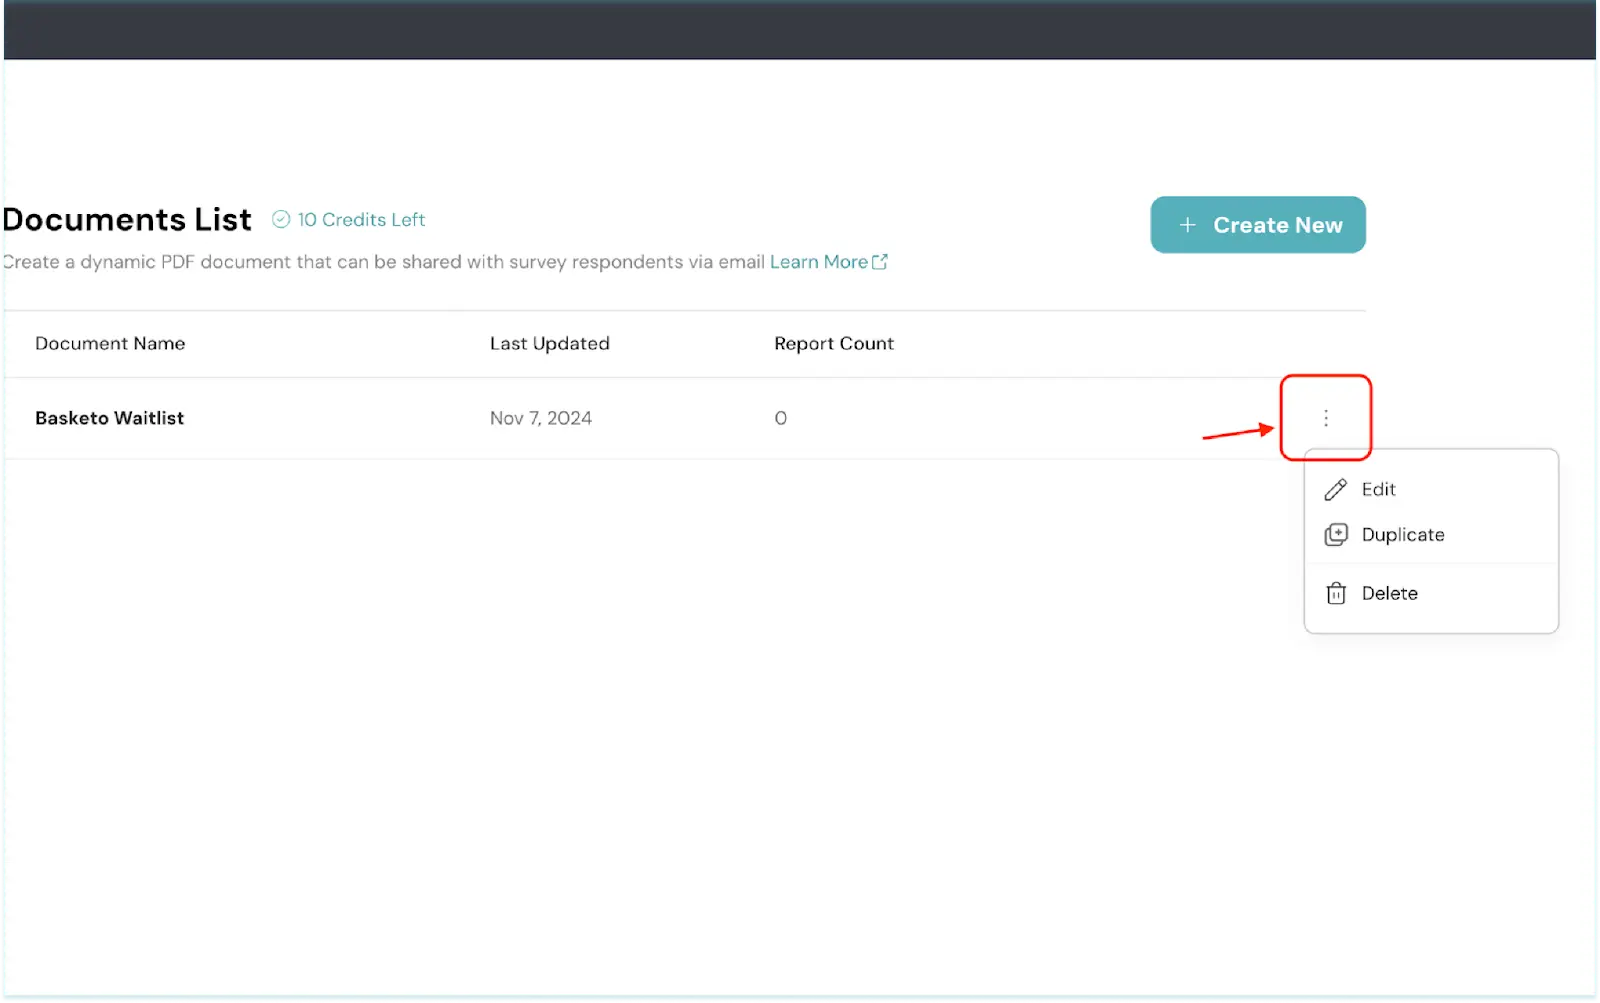
Now, when a respondent submits the survey, they’ll receive an email with the document attached to it.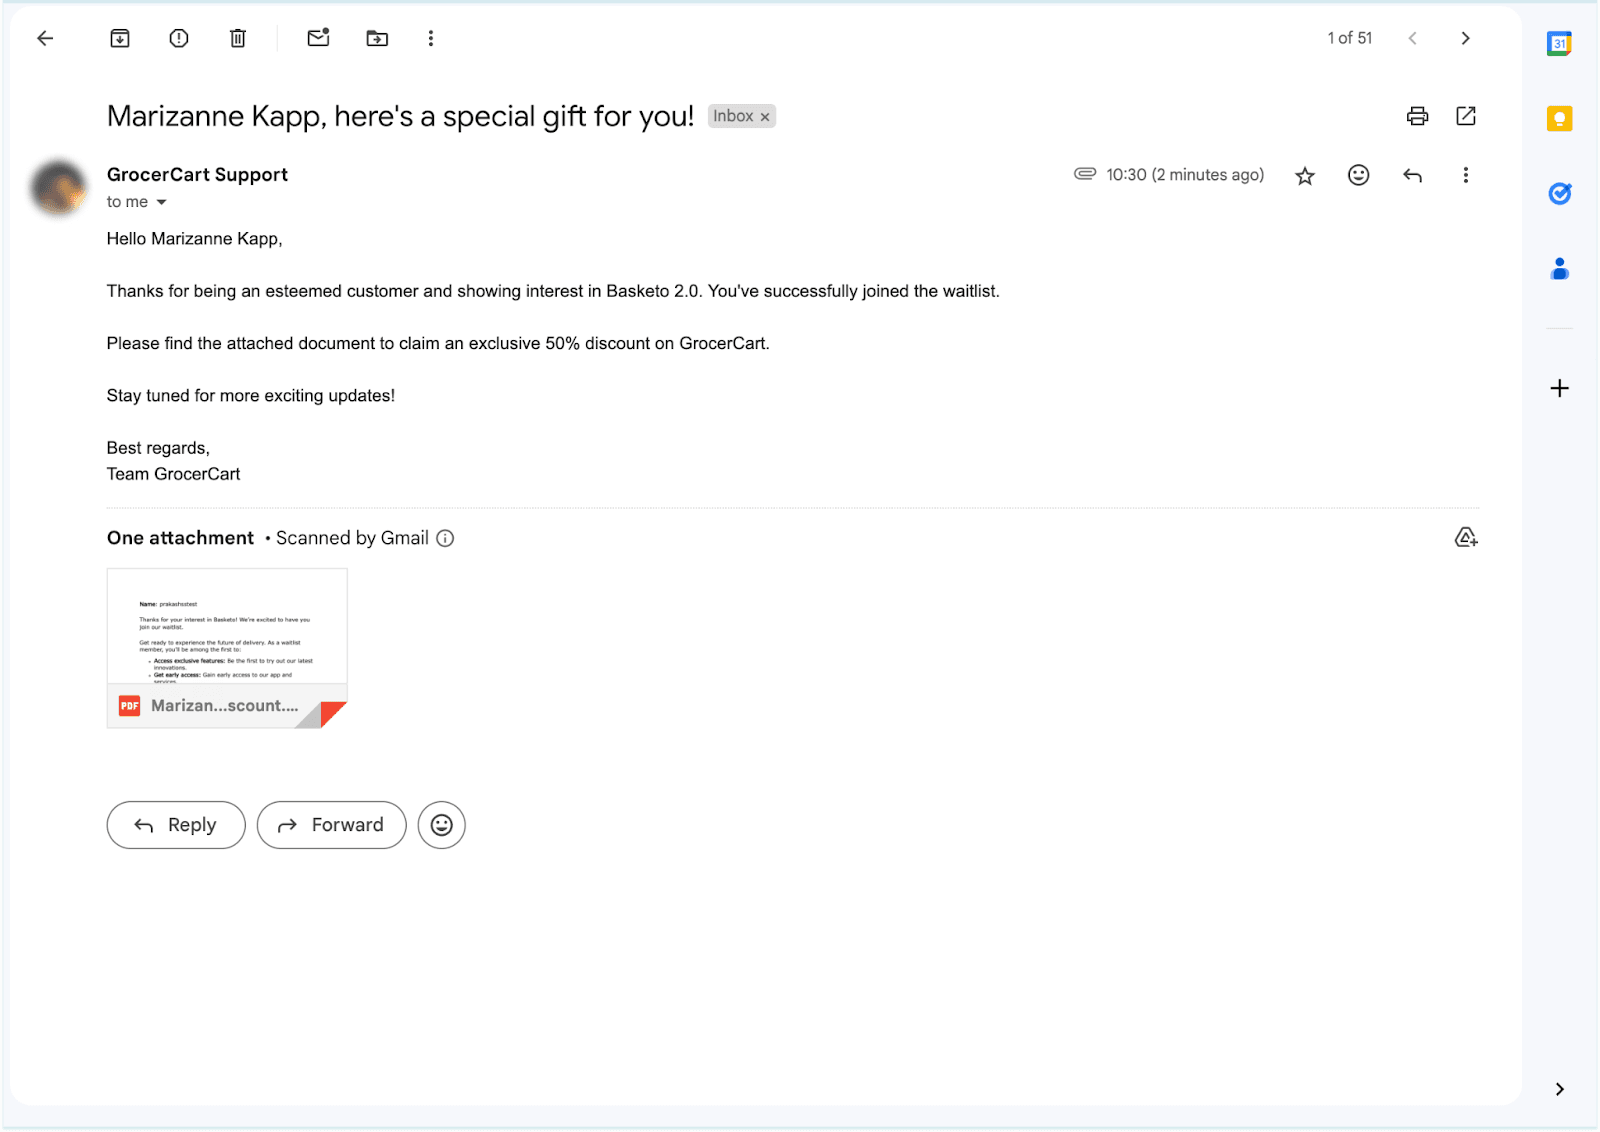
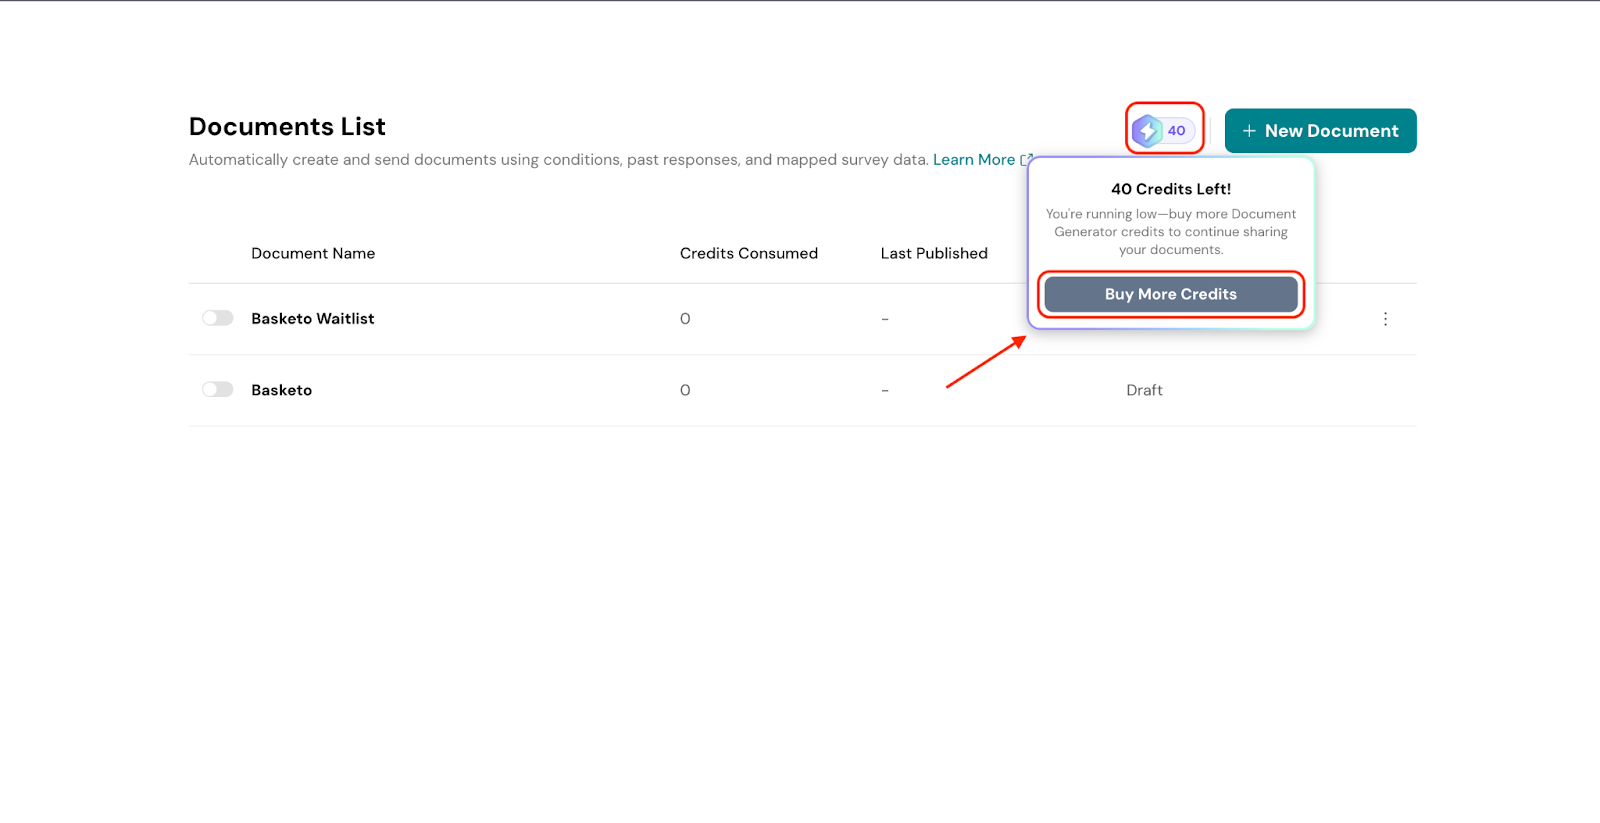
The document generation credits get consumed according to the Report Count. To purchase additional credits, hover over your credit limit and click Buy Credits to proceed with the purchase.
Note
At present, the document can be sent only in PDF format.
Feel free to reach out to our community if you have any questions.
Powered By SparrowDesk