
How to setup a CogniVue
CogniVue is your intelligent data analyst that transforms your unstructured text feedback into actionable insights, thus helping in making faster and more accurate decisions to craft exceptional CX. By meticulously extracting pertinent topics from customer discourse within your industry, it pinpoints the key drivers behind customer sentiment and the areas requiring attention to maximize impact on your CX metrics.
To learn more about CogniVue and its various widgets, check out our article here.
. Let’s explore how to setup a CogniVue.
First, be clear on your outcome. You can set up a CogniVue to understand why your metric has shifted and what is causing it.
Or, you can now setup a CogniVue to just do a thorough sentiment analysis on your feedback across sources. This means you do not need to have a scale question mandatory to set it up.
Let’s setup a CogniVue to monitor NPS now.
Click on Insights and select CogniVue.
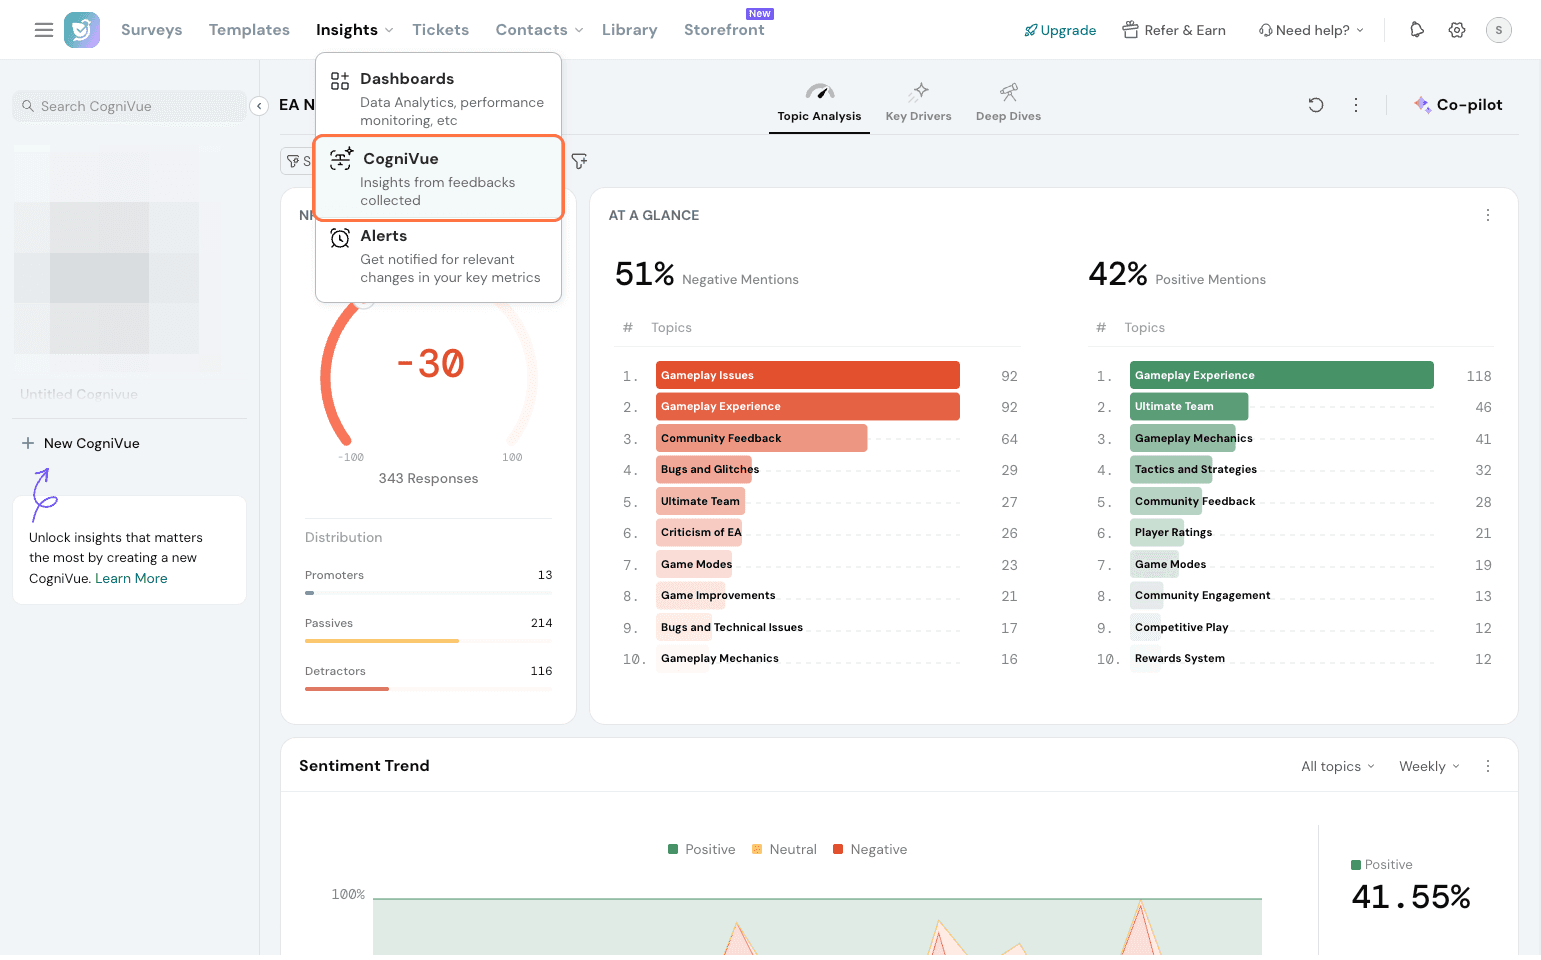
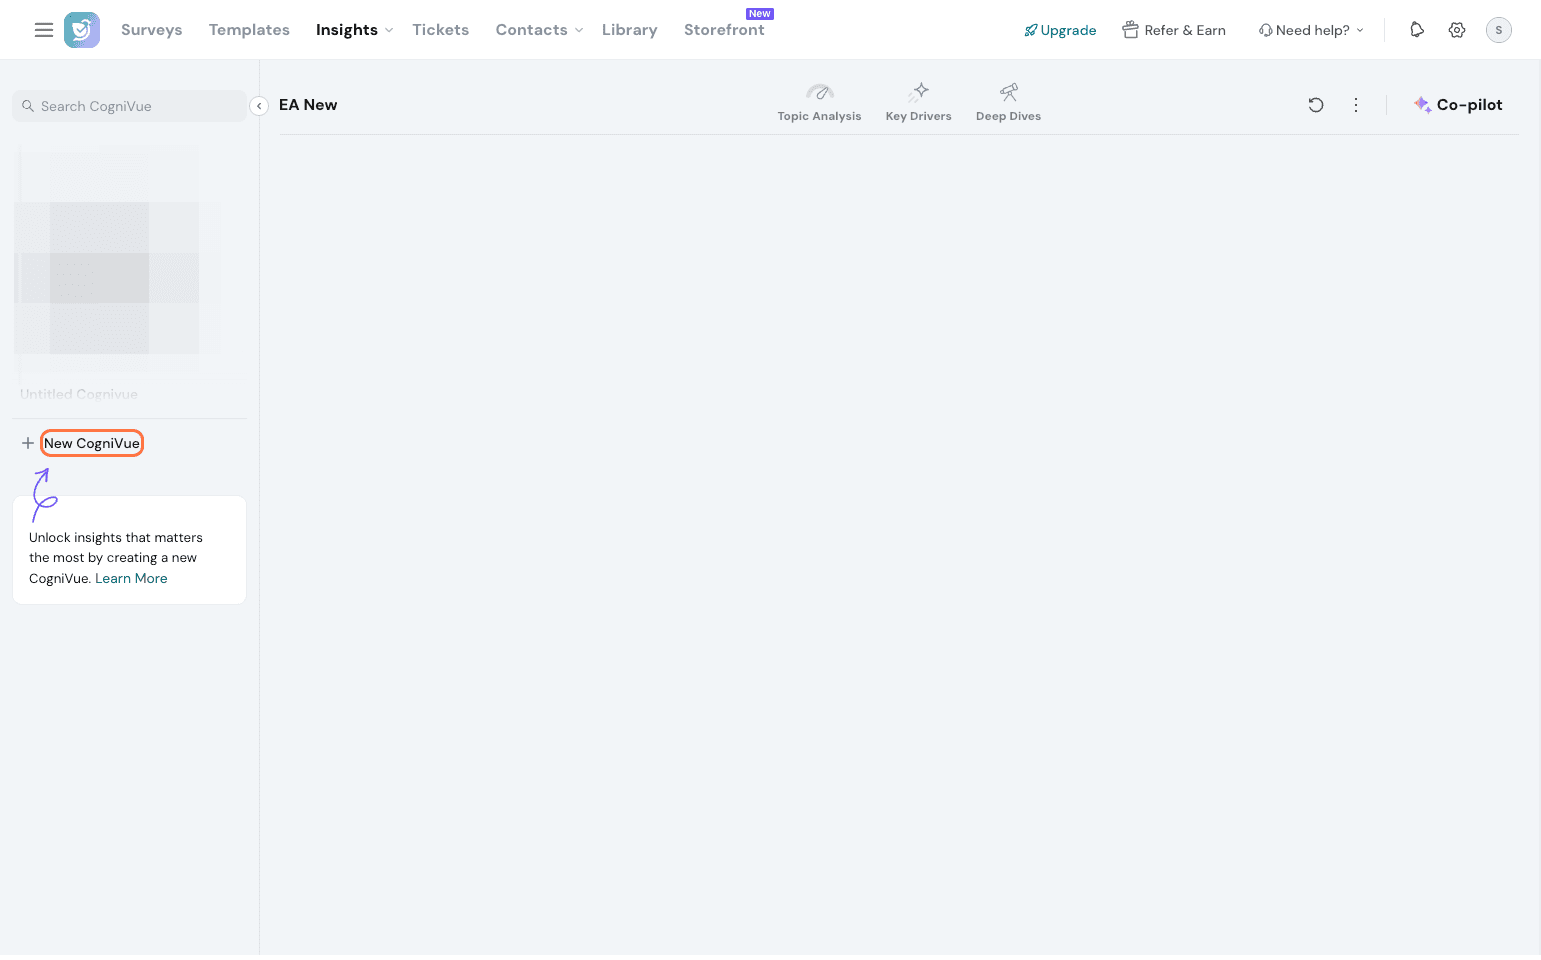
Click on New CogniVue to make your own.
So, in the first screen, you will be presented with 4 options.
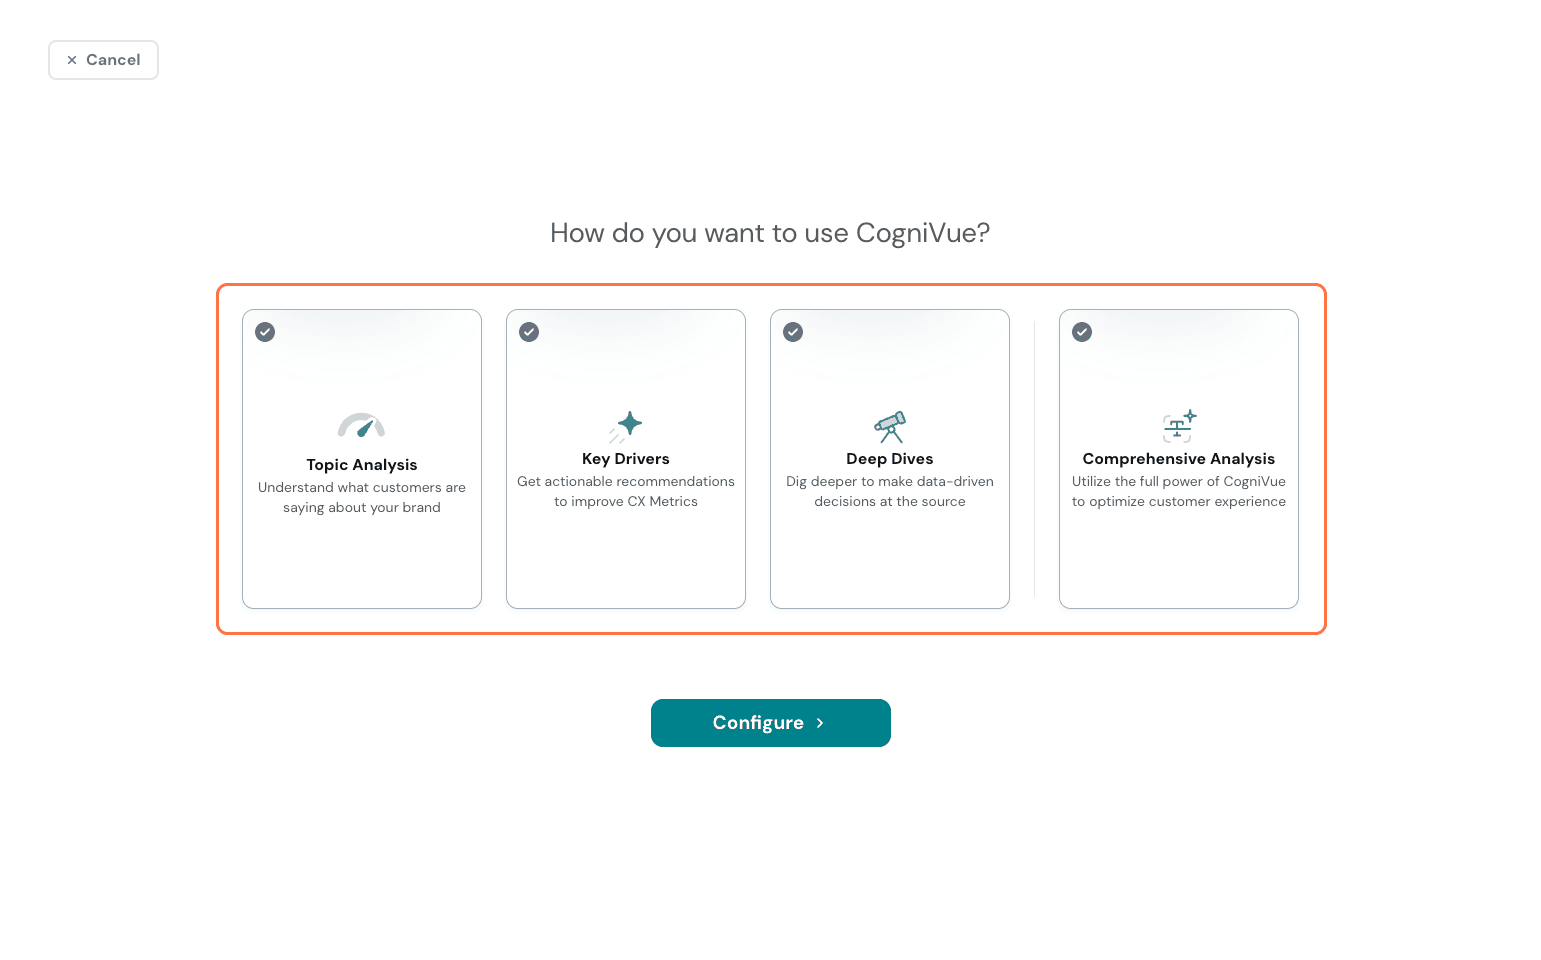
Depending on your aim, you can configure it by choosing the options as you see fit.
- Topic Analysis: This helps you do a thorough sentiment analysis and tells you which topic has a positive sentiment in your customers and which is negatively impacting customer feedback.
- Key Drivers: This does a statistical analysis to determine the drivers of your selected metric and gives you actionable recommendations to improve the metric.
- Deep Dives: This digs into the sentiments expressed about your brand and presents as a heatmap visualization of sentiment grouped by categories (variables, MCQs, locations, properties)
- Comprehensive Analysis: Unlocks the full power of CogniVue - gets all the above selected. This will be selected by default.
Note: You will mandatorily need to have a scale-type question in your survey source if you are configuring either Comprehensive Analysis or choosing Key Driver Analysis.
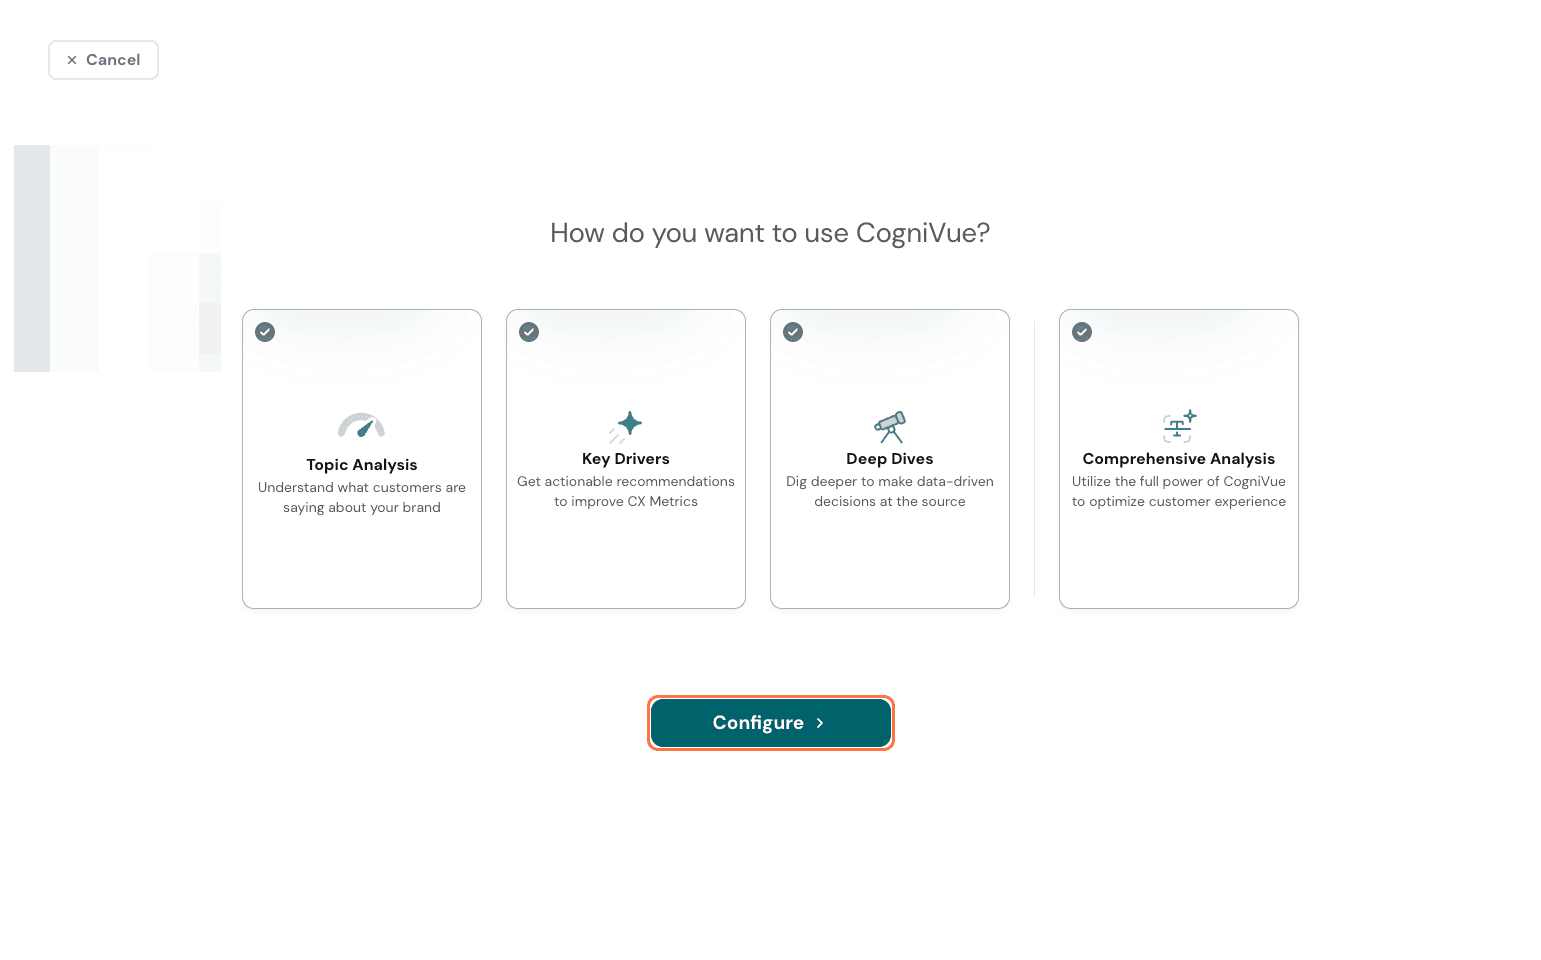
After choosing, click configure to proceed.
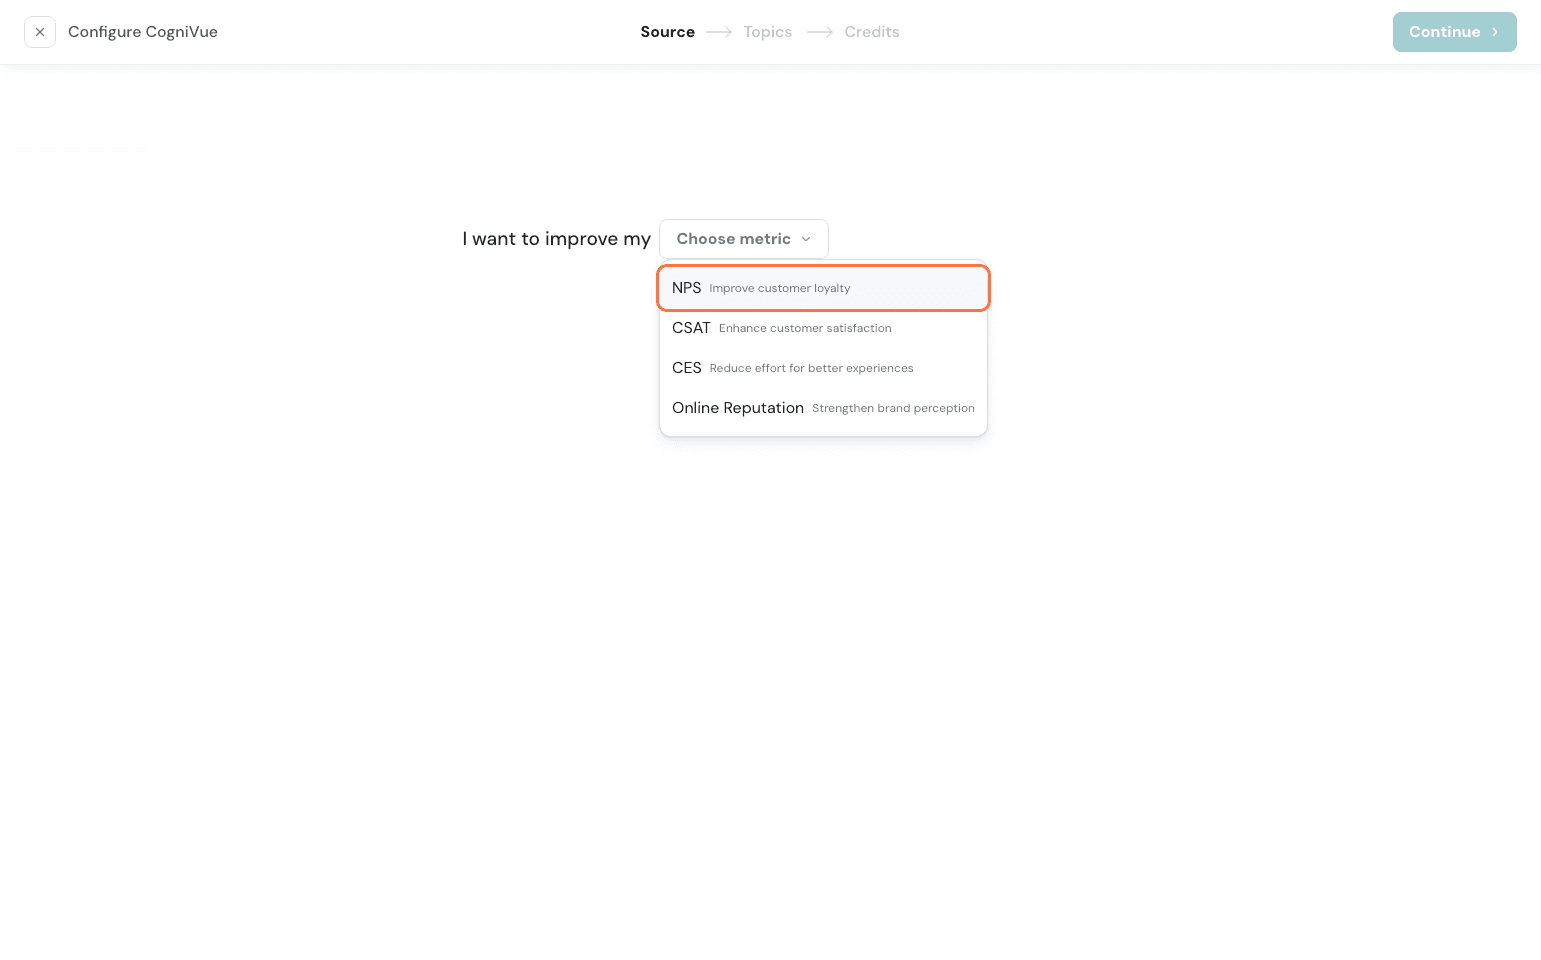
If you opt for Key Driver Analysis, you will next need to choose which metric you are configuring. It could be NPS, CSAT, CES, or your brand reputation as tracked across online platforms.
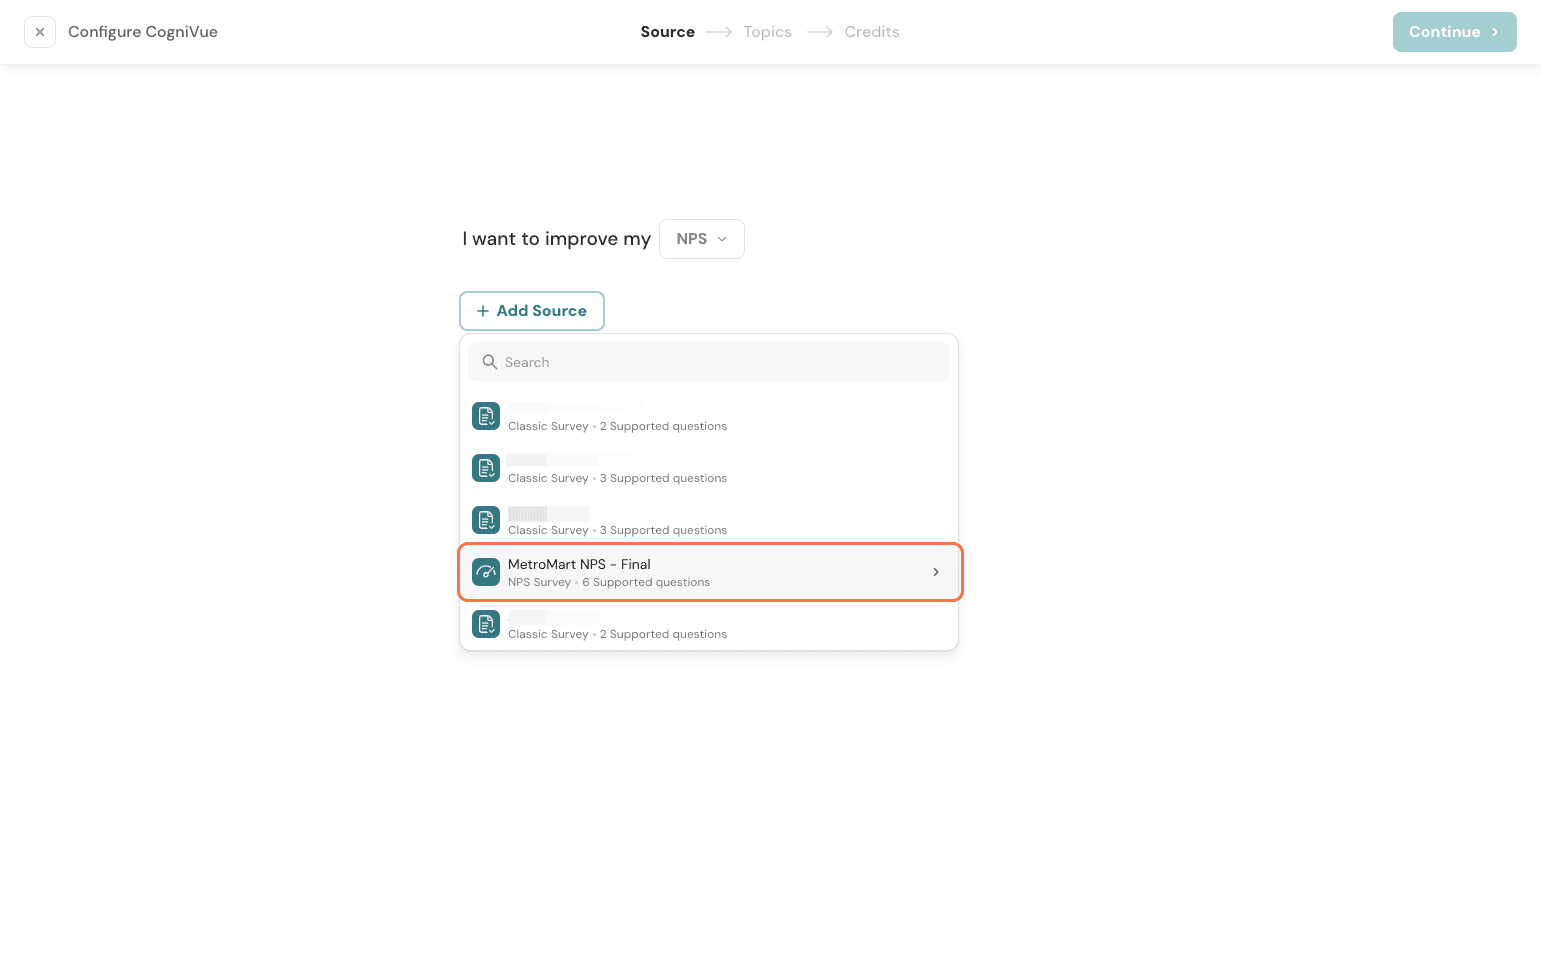
You next choose the source. Note that for Key Driver Analysis enabled, the CX Metrics (NPS, CSAT, CES) will need a survey source only. Reputation is a separate dropdown where only reviews can be configured.
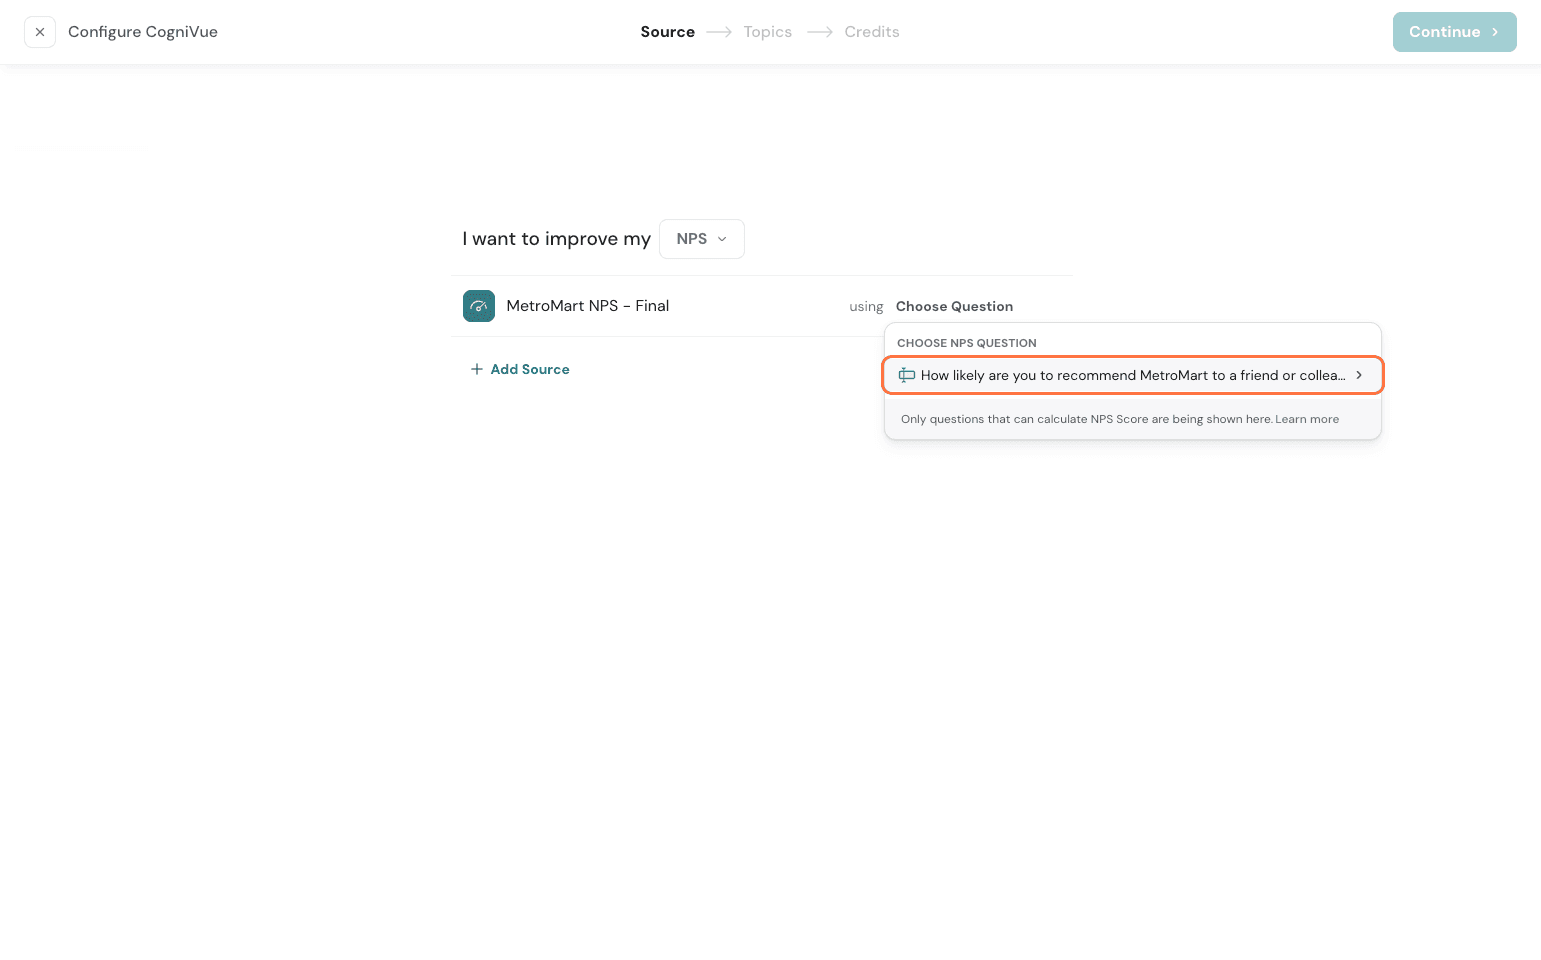
Now, select the metric scale question, in this case, the NPS question.
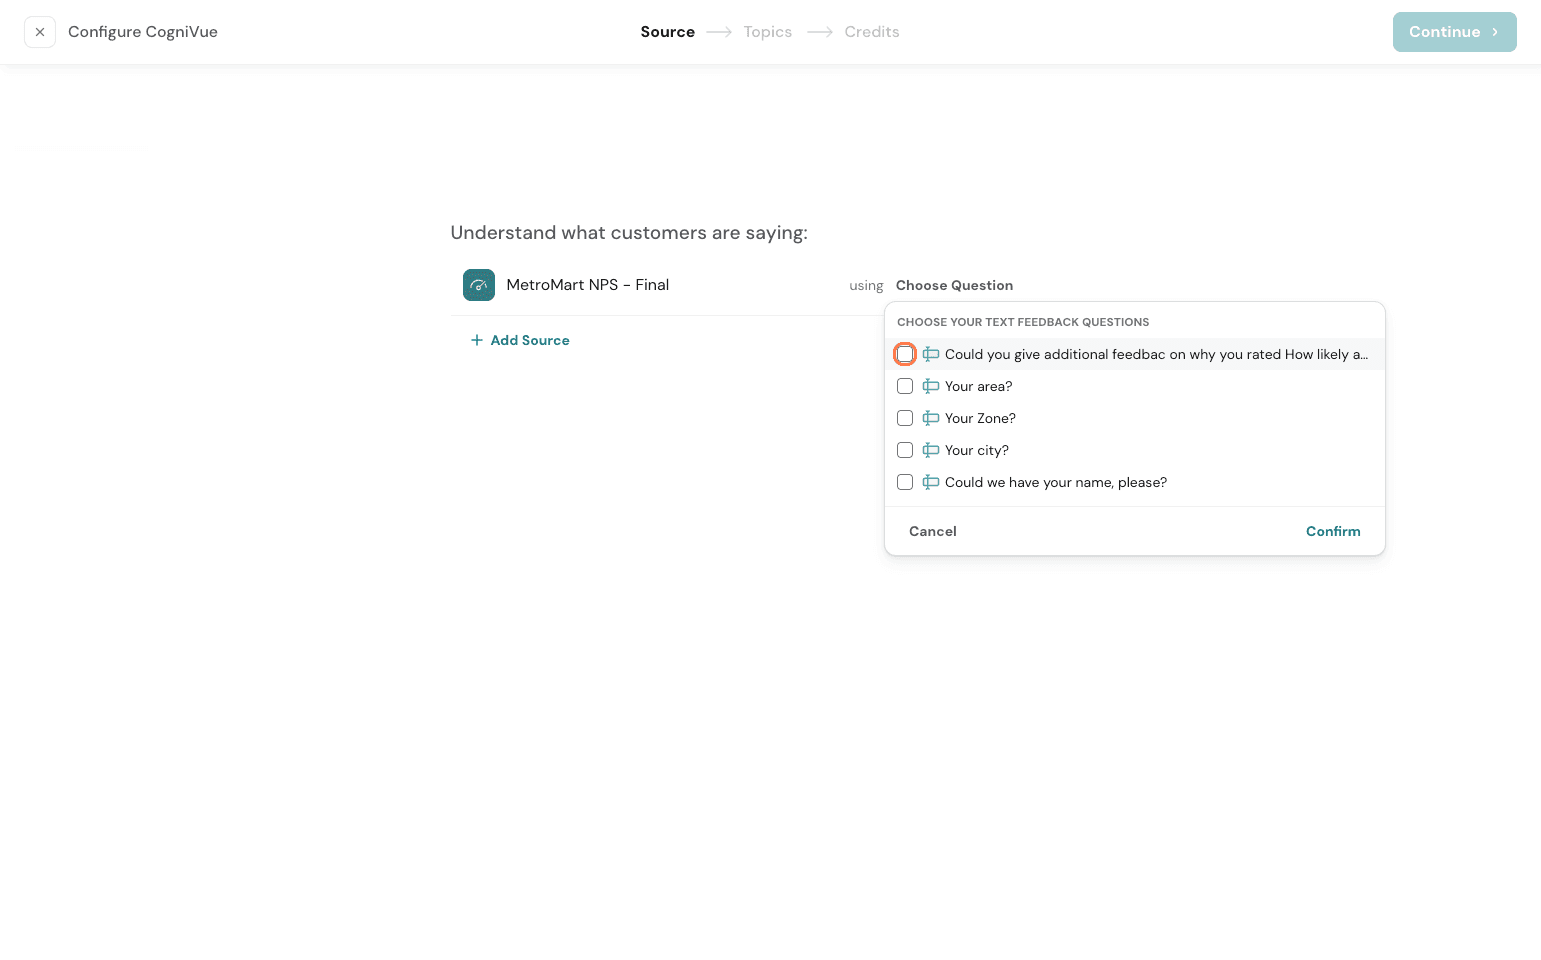
Select the text questions that directly correlate to your primary question and will help to state the ‘why’ behind the metric scores. Here, question types like text, MCQs, dropdown questions, and picture choice are supported.

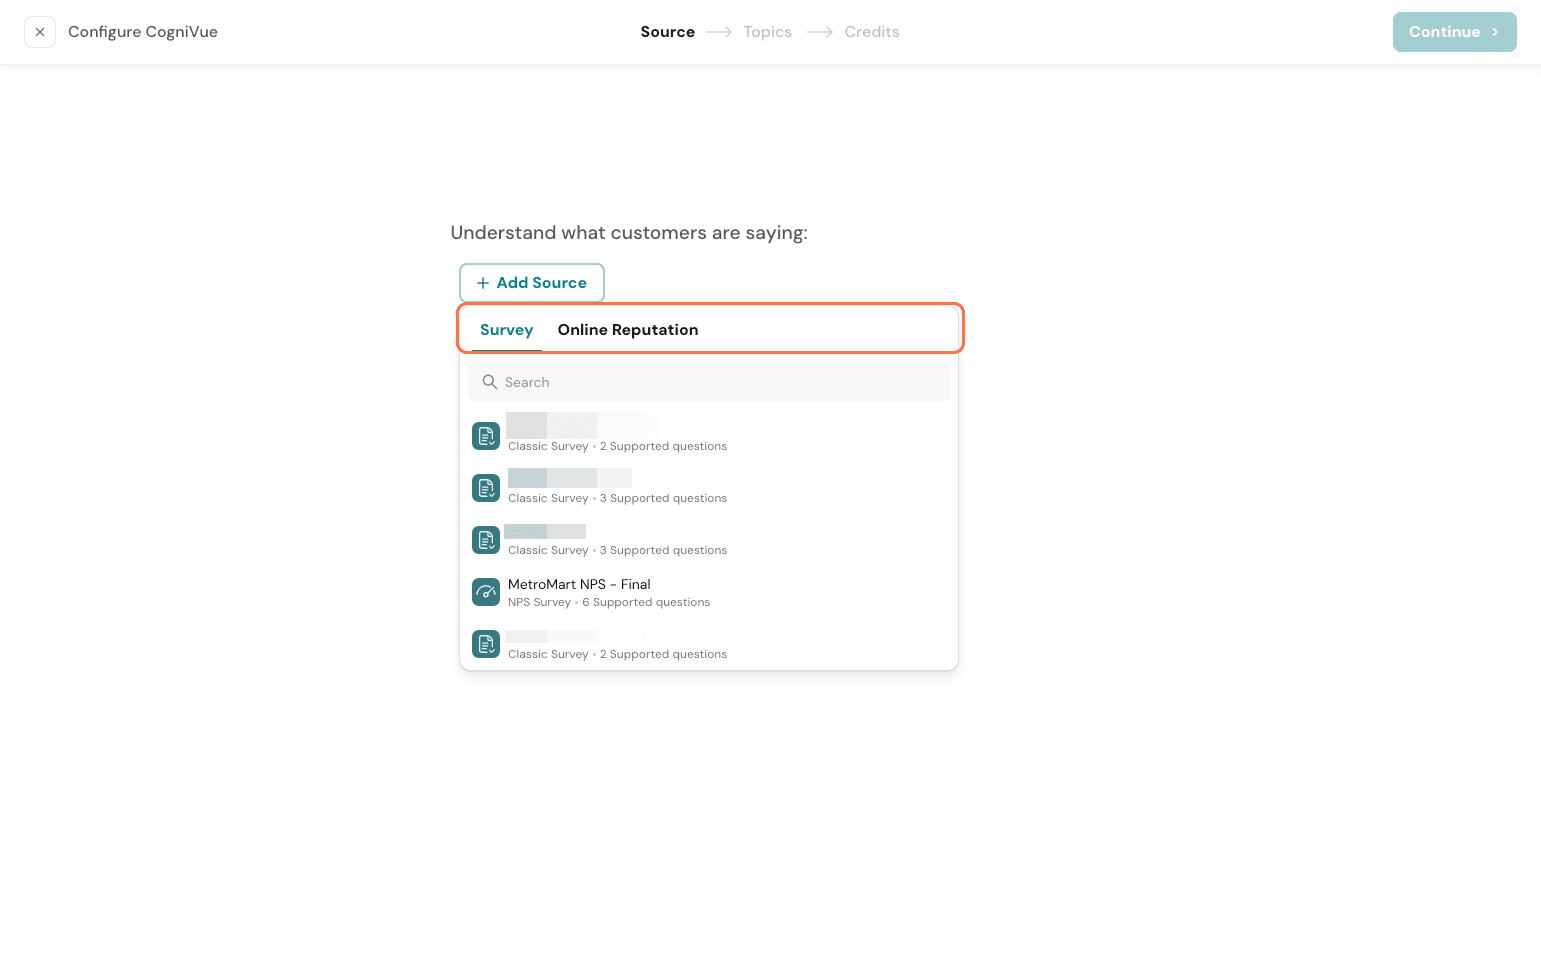
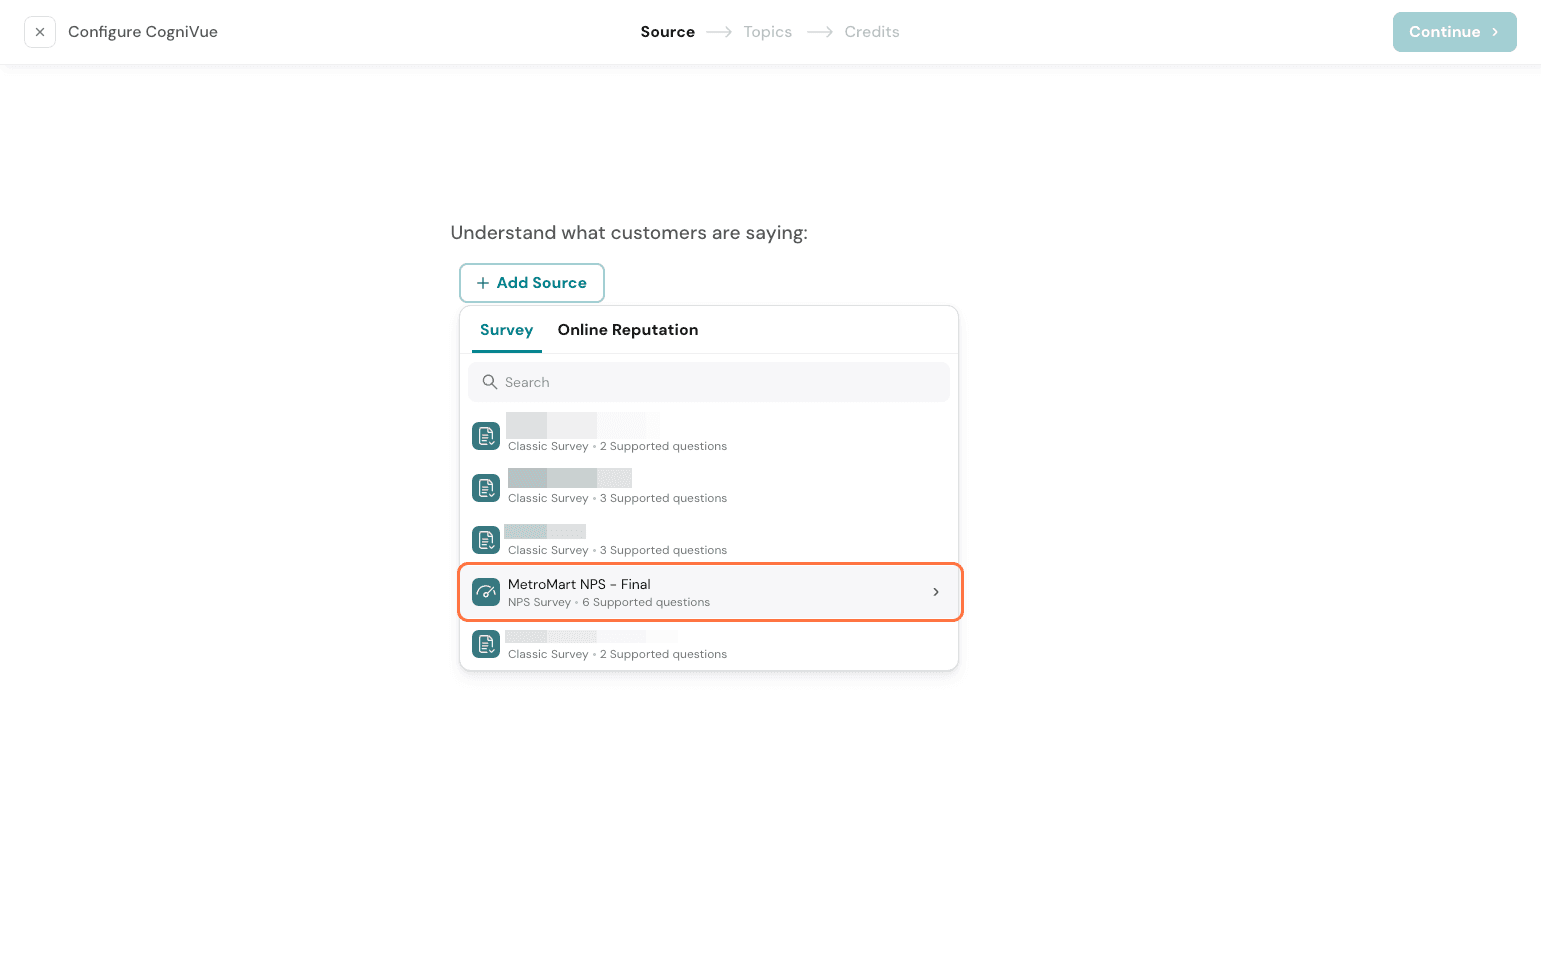
If you are opting for Deep Dives or Topic Analysis, you will be shown the screen below to choose your source. You can choose surveys or online platforms and build your CogniVue.
Note: If you opt to add a Key Driver after setting up your CogniVue and your existing source does not have a scale question, it would not be possible to add it.
Select the source from the list.
Pick the text questions to analyse the sentiment.
Once you have configured your source, click Continue.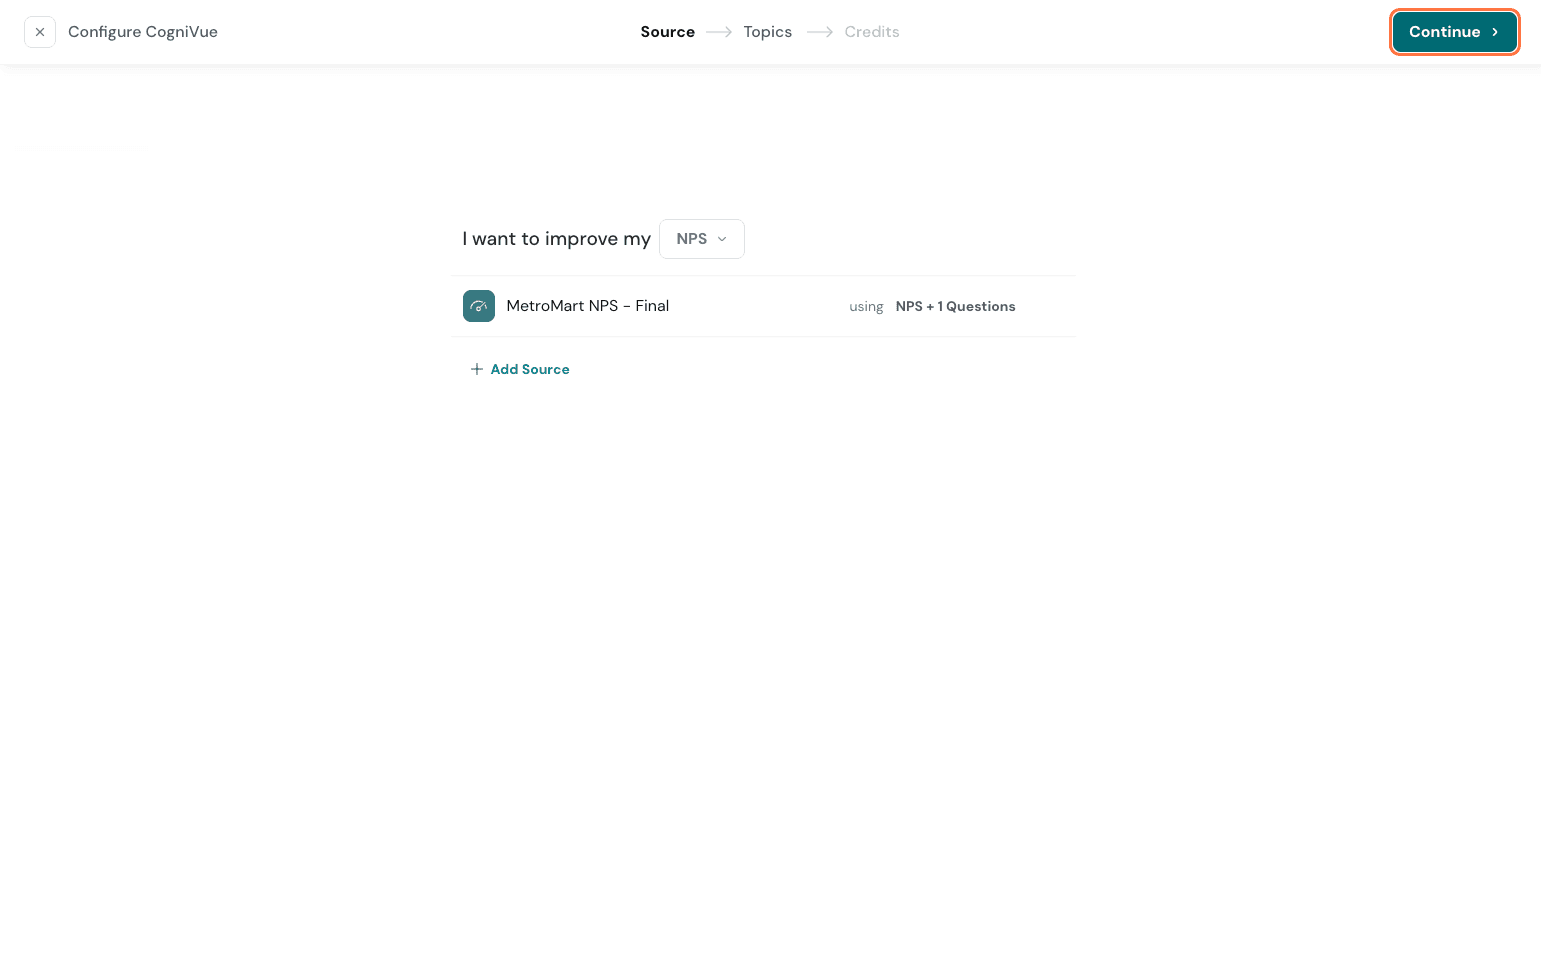
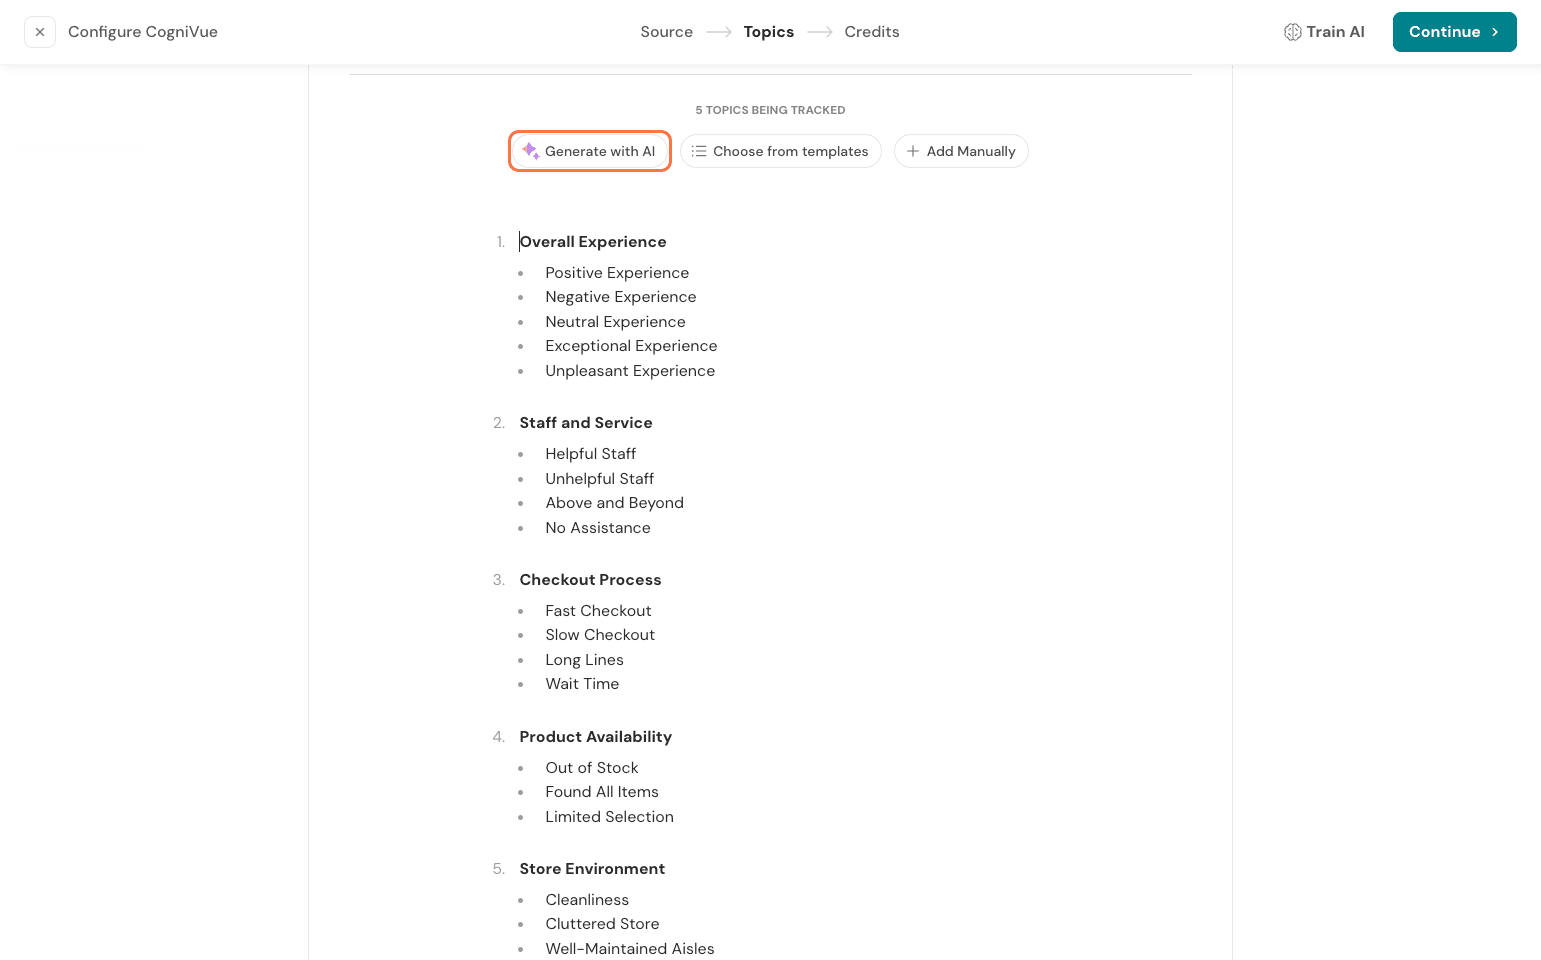
Our AI automatically fetches relevant topics by referencing the source. You can read through, edit, and add more if you need.
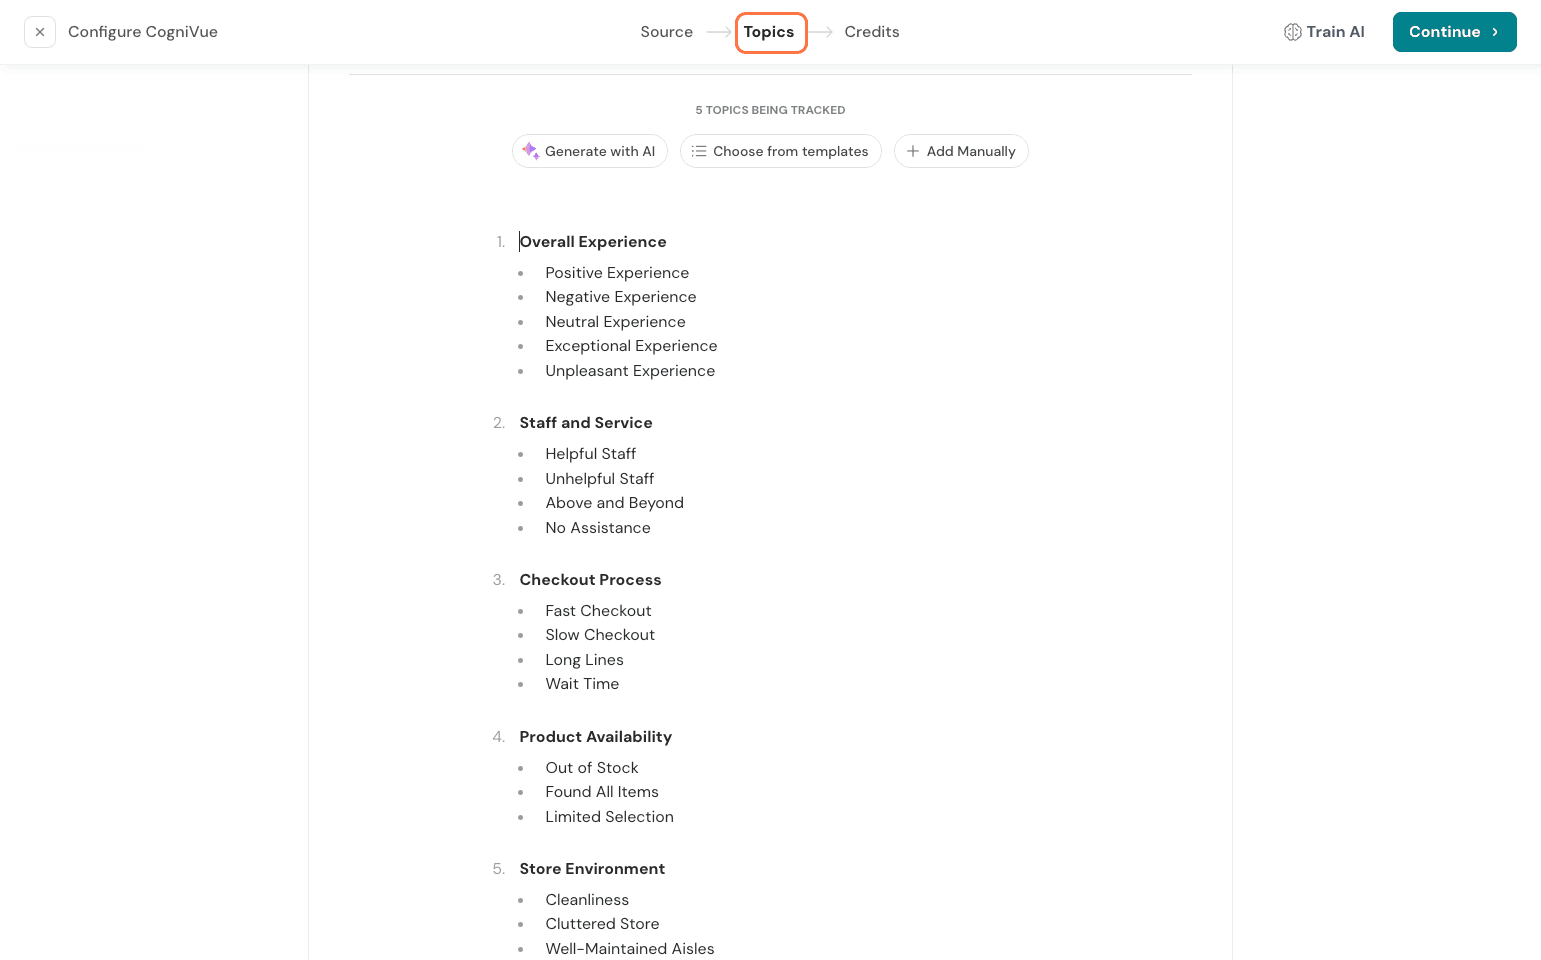
Note: You can only add a maximum of 15 topics and 10 sub-topics in a CogniVue.
Now, to refine the topics generated, you can do any of the following:
Refine with AI: You can prompt our AI by giving it more context on your business that may not be evident in the source. Based on your inputs, the topics would get updated to be more relevant.
Click on Generate with AI
Give the context for the AI to refine and generate better topics.
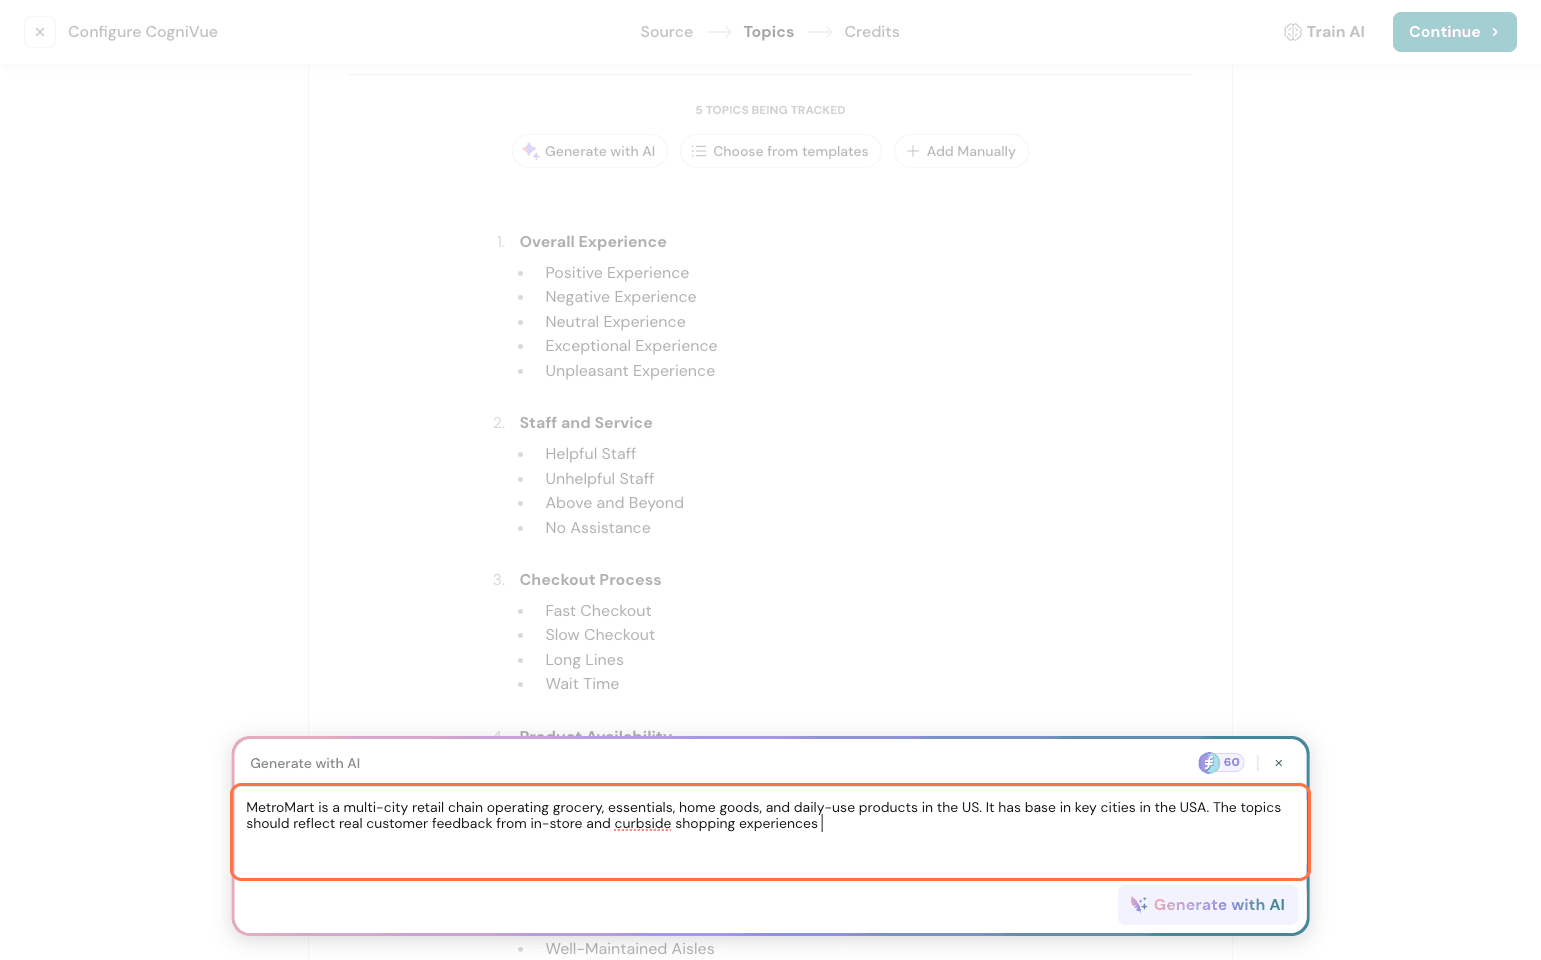
Note that this action consumes AI credits.
Choose from templates: You can choose from any of our pre-made templates for your industry and customise them on top of it.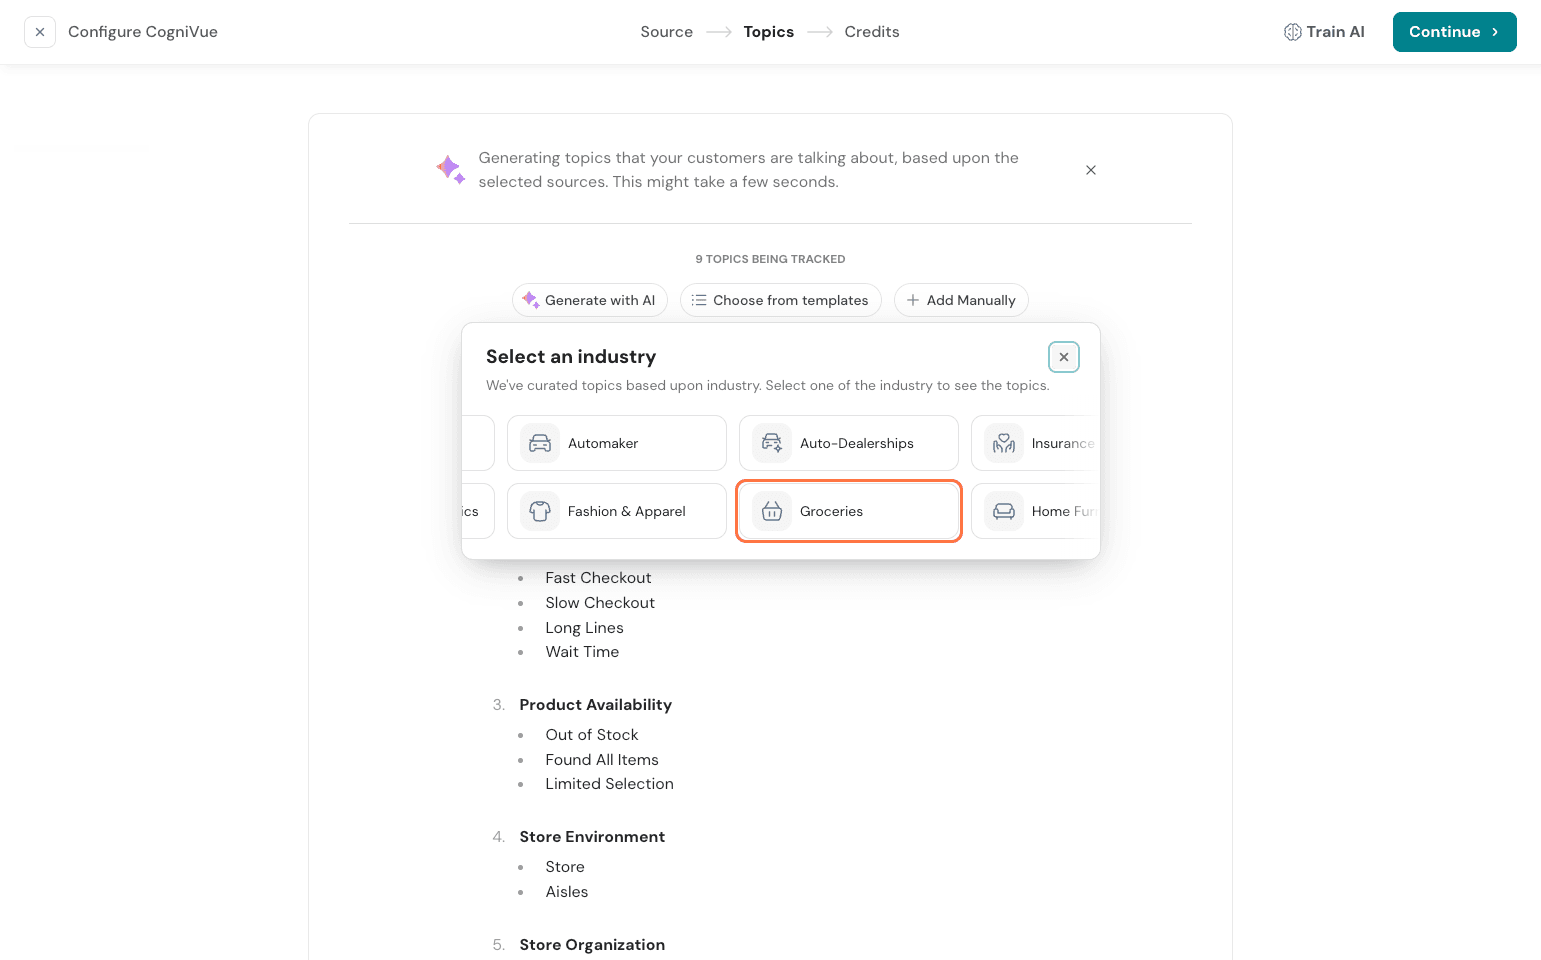
Add Manually: If you already have a firm idea of what topics need to be tracked, you can input them in the text field manually.
Click on Add Manually.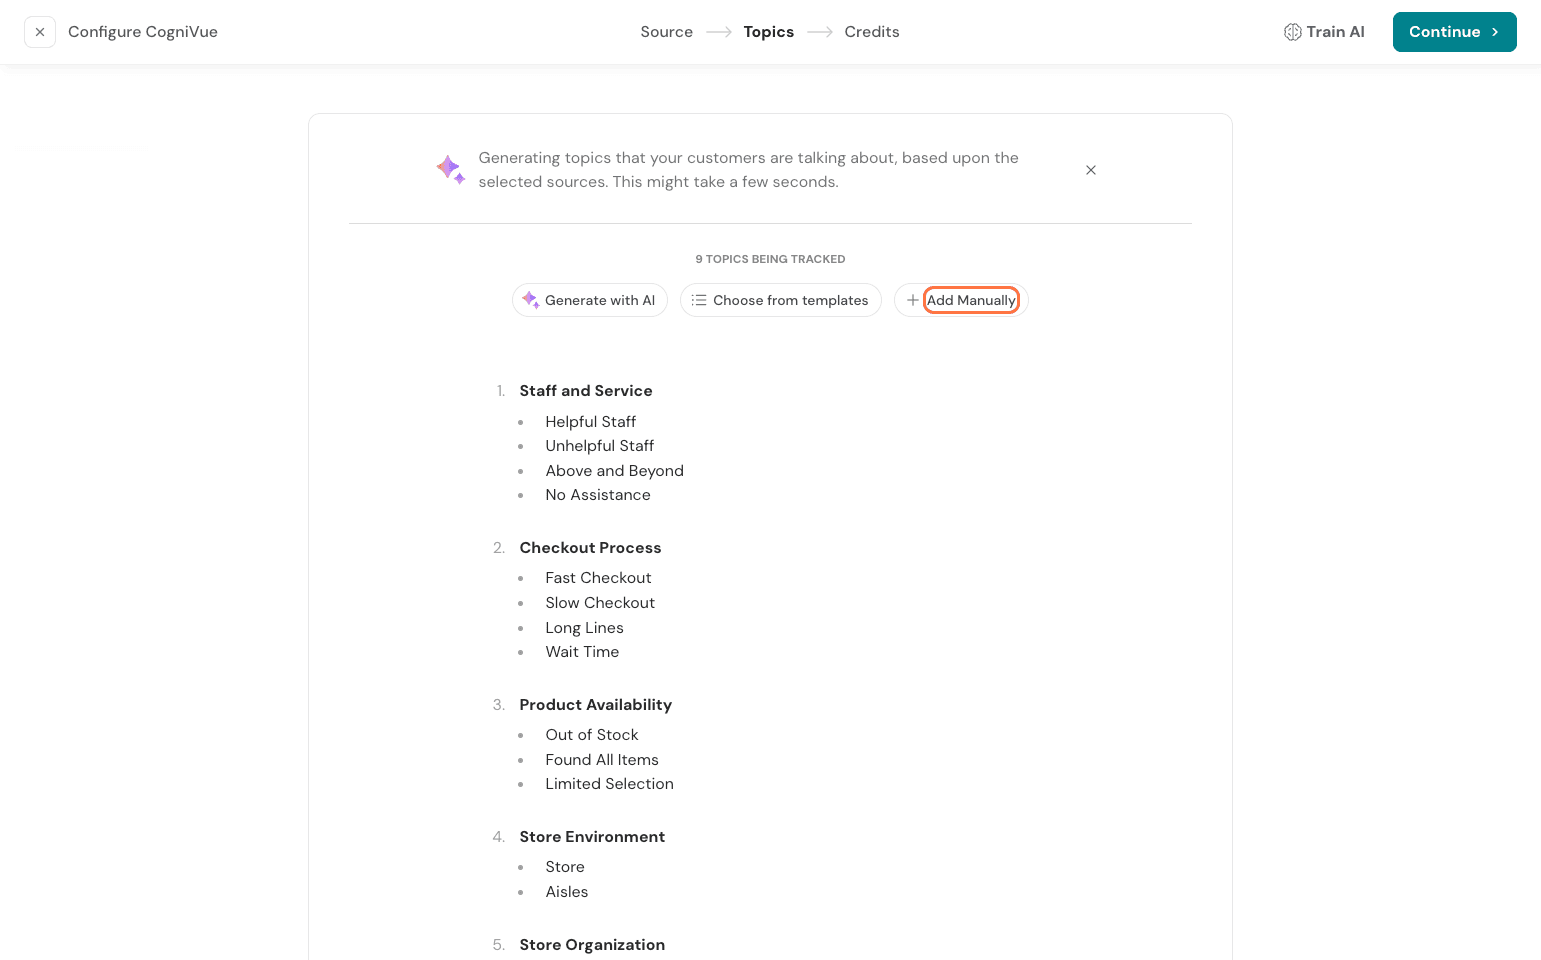
You get directly to the field and write in directly. You can also go to specific topics and edit them yourself.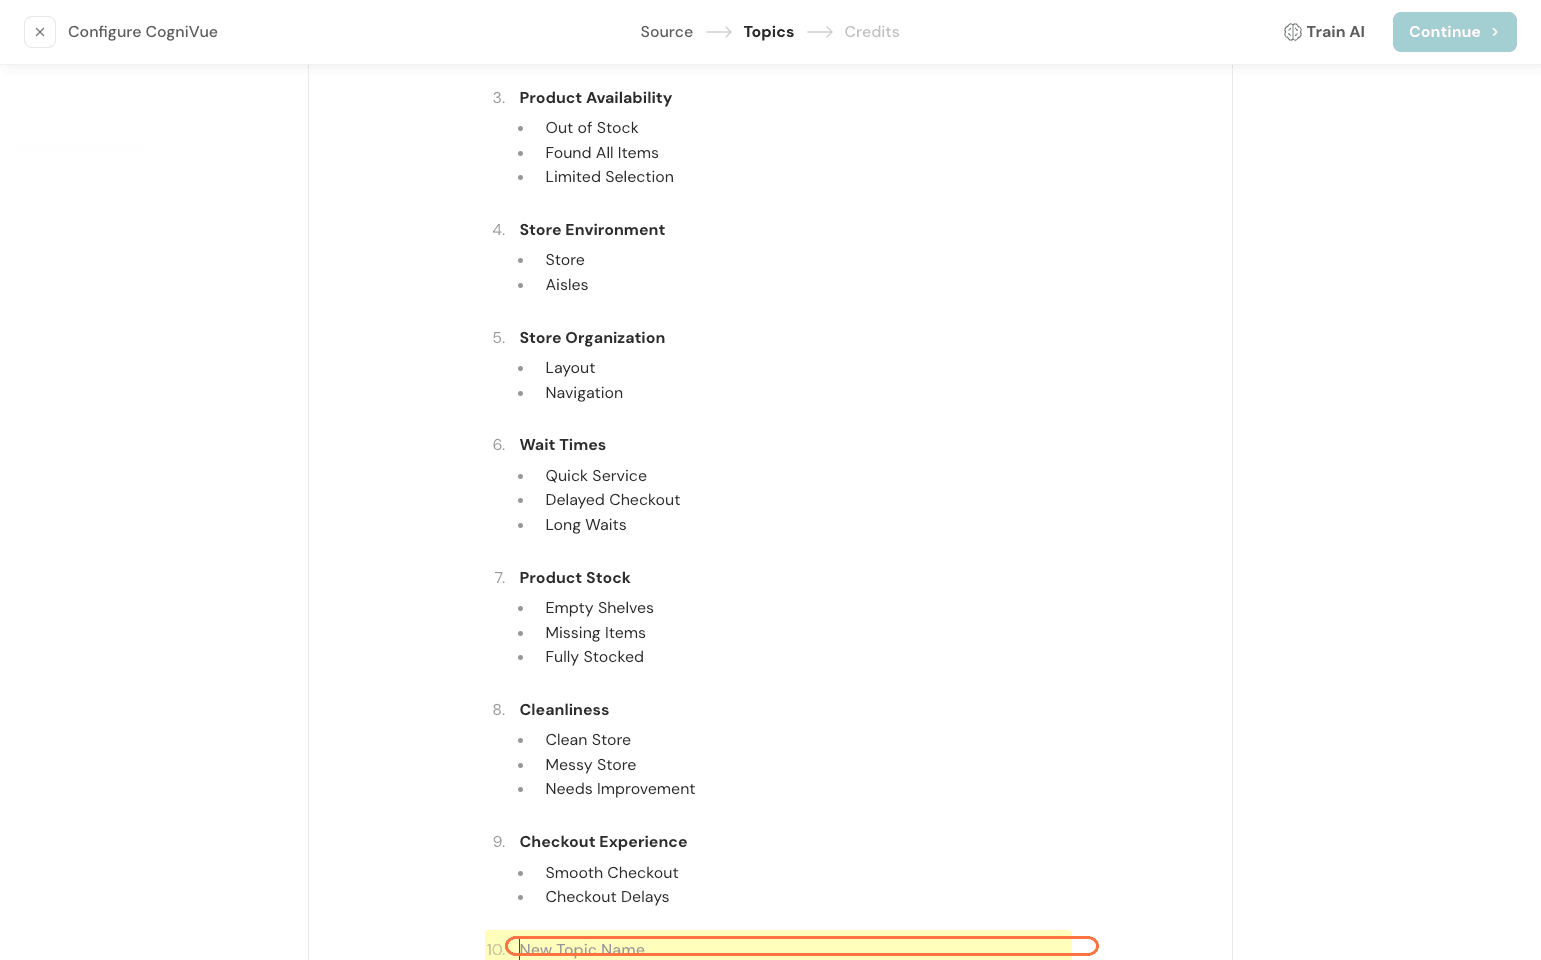
You also have an option on the side to train the AI. Click on Train AI.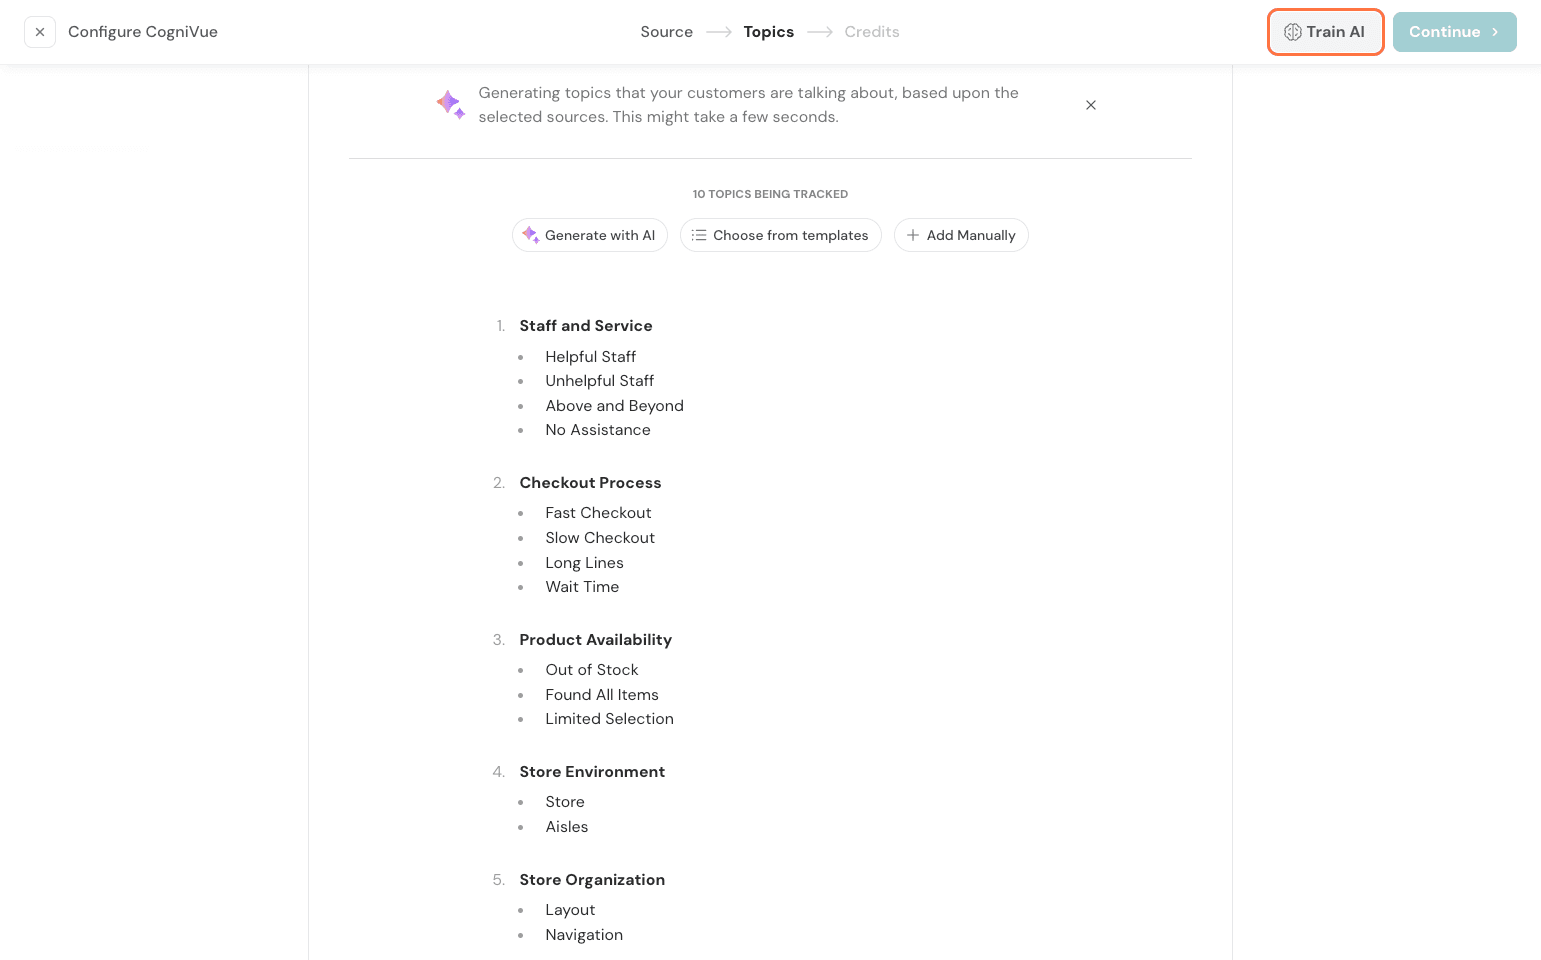
Click it to add more context on your business, the aim of the analysis, and a description for each topic.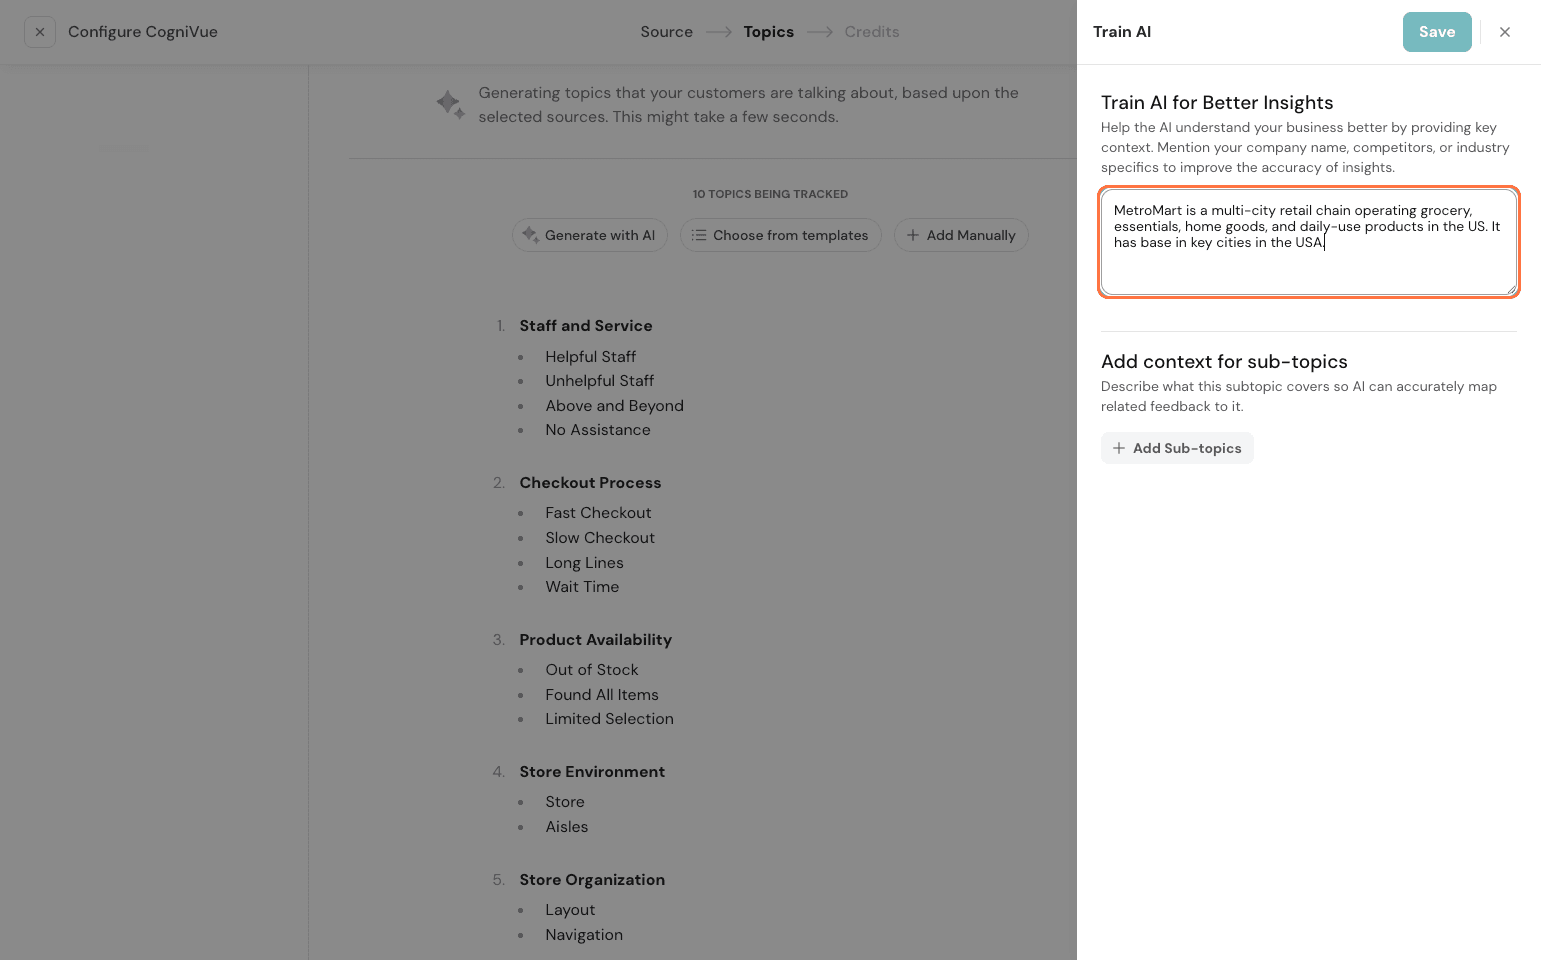
You can also click on specific subtopics and give context for those.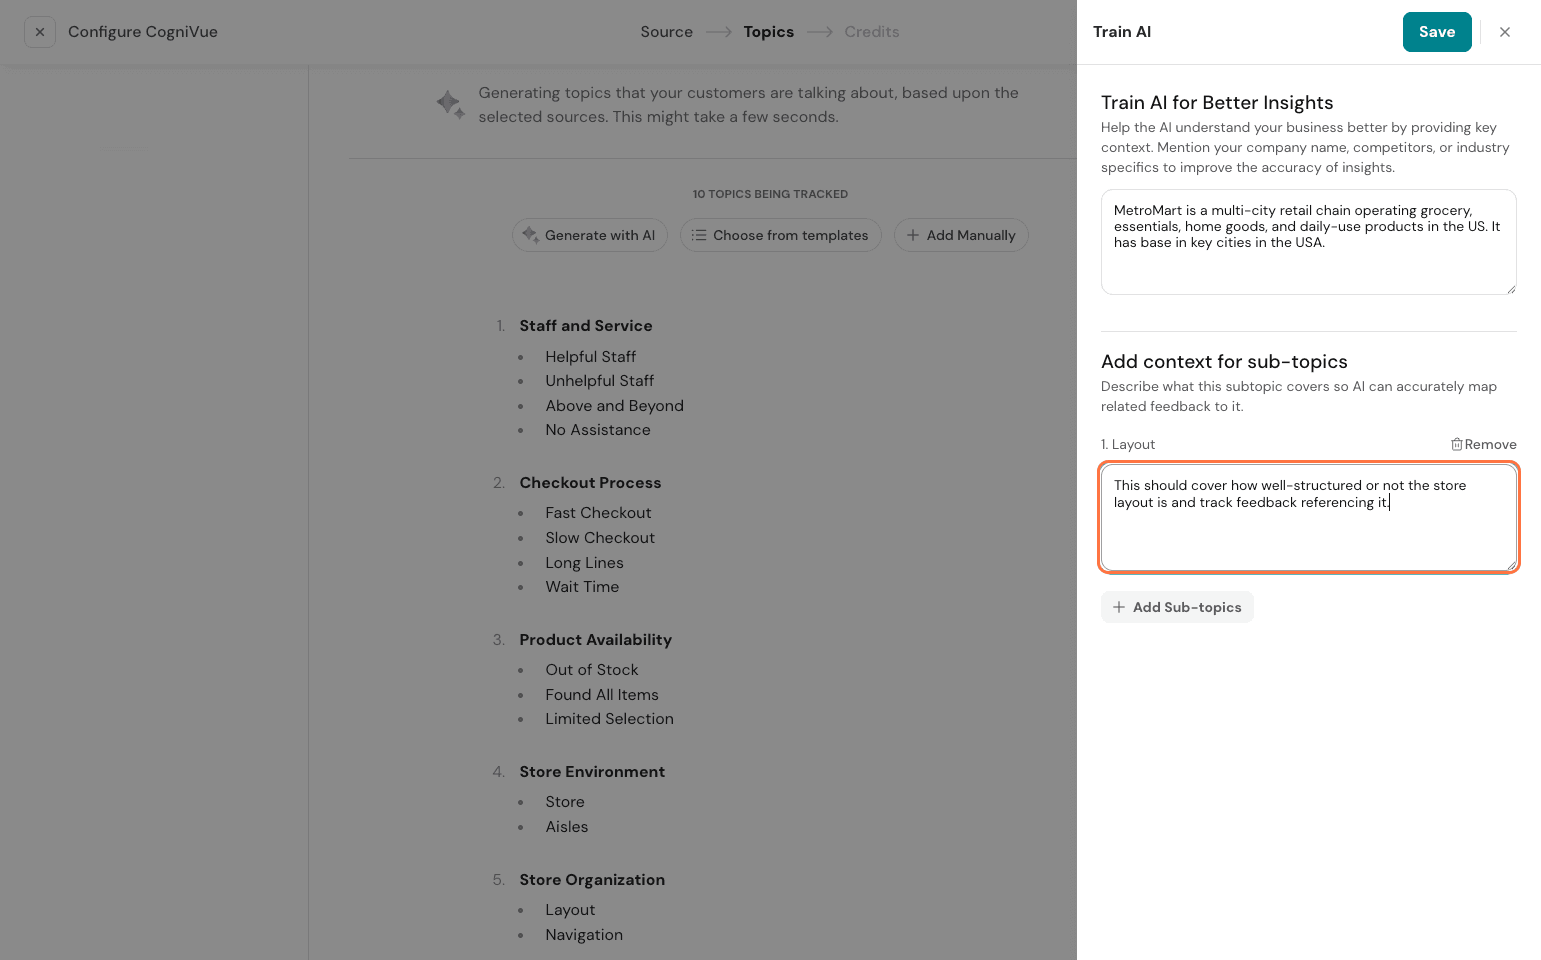
This helps the topics generated to be very accurate as it trains more on your business usecase.
Hit Save to proceed to the next stage.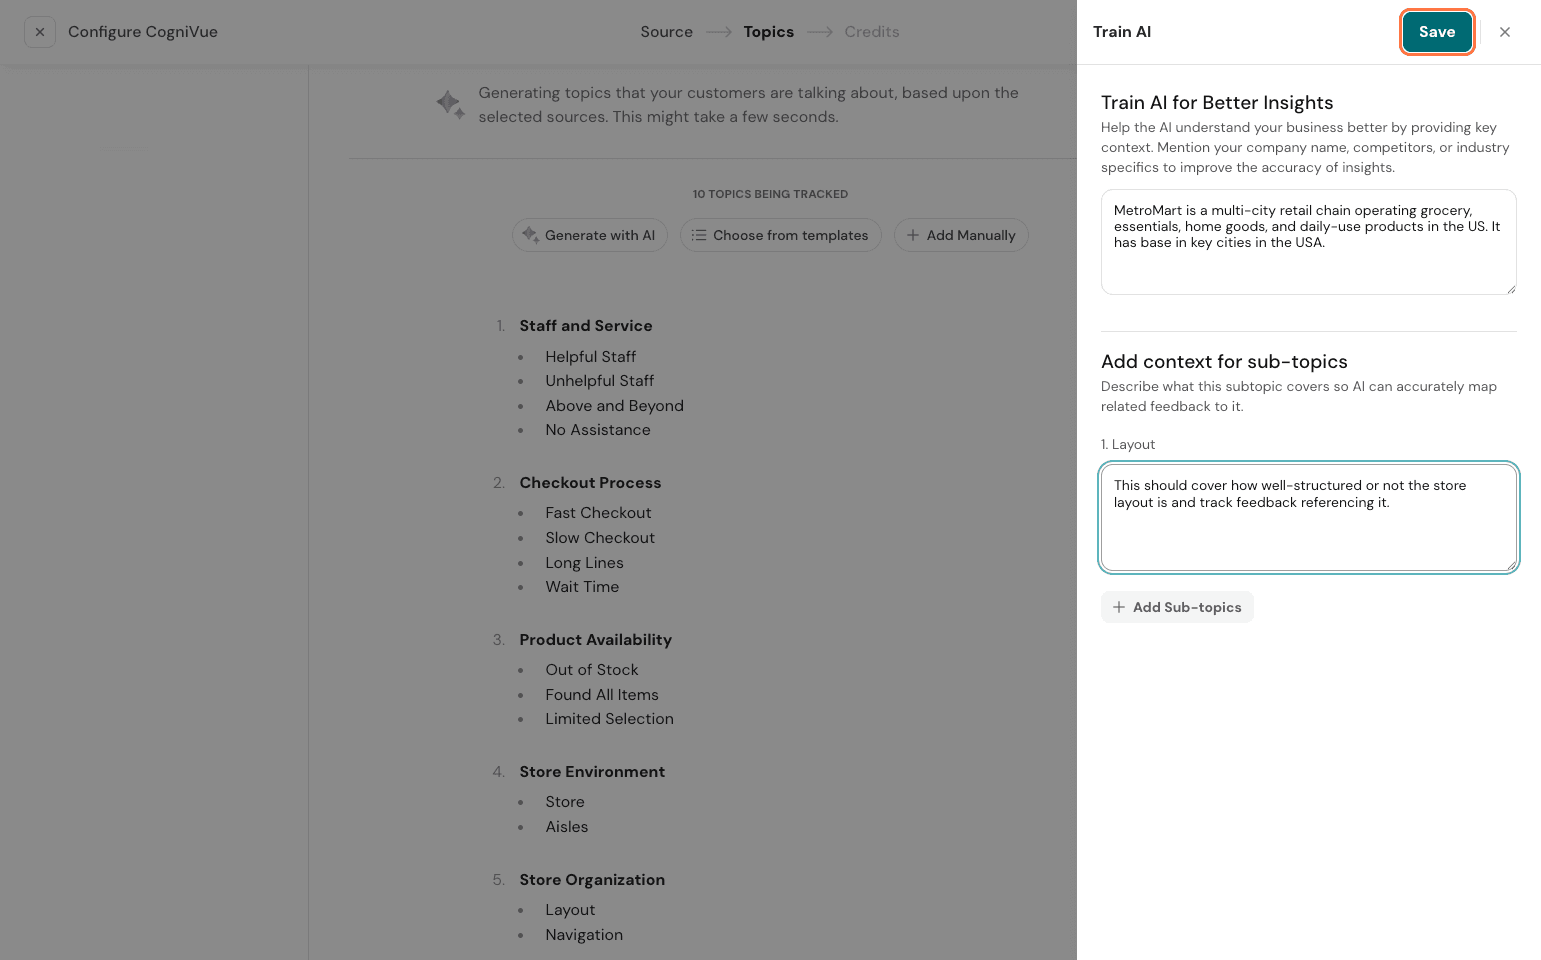
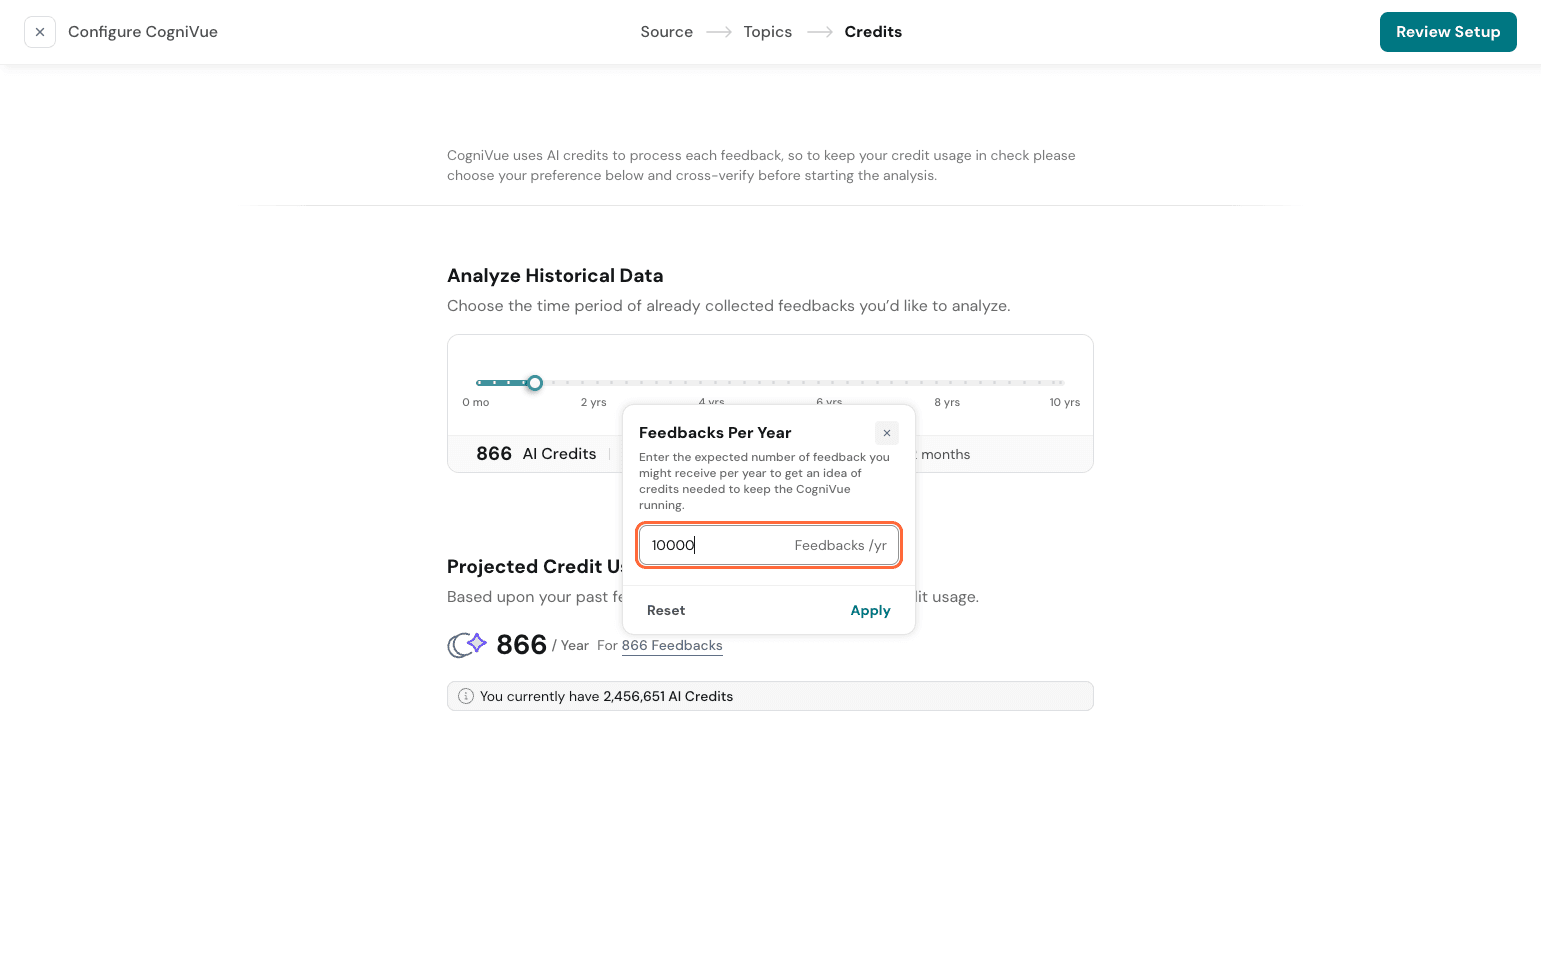
Now, you can choose how much historical data you need to be analyzed. You can choose up to 10 years of past data depending on your need.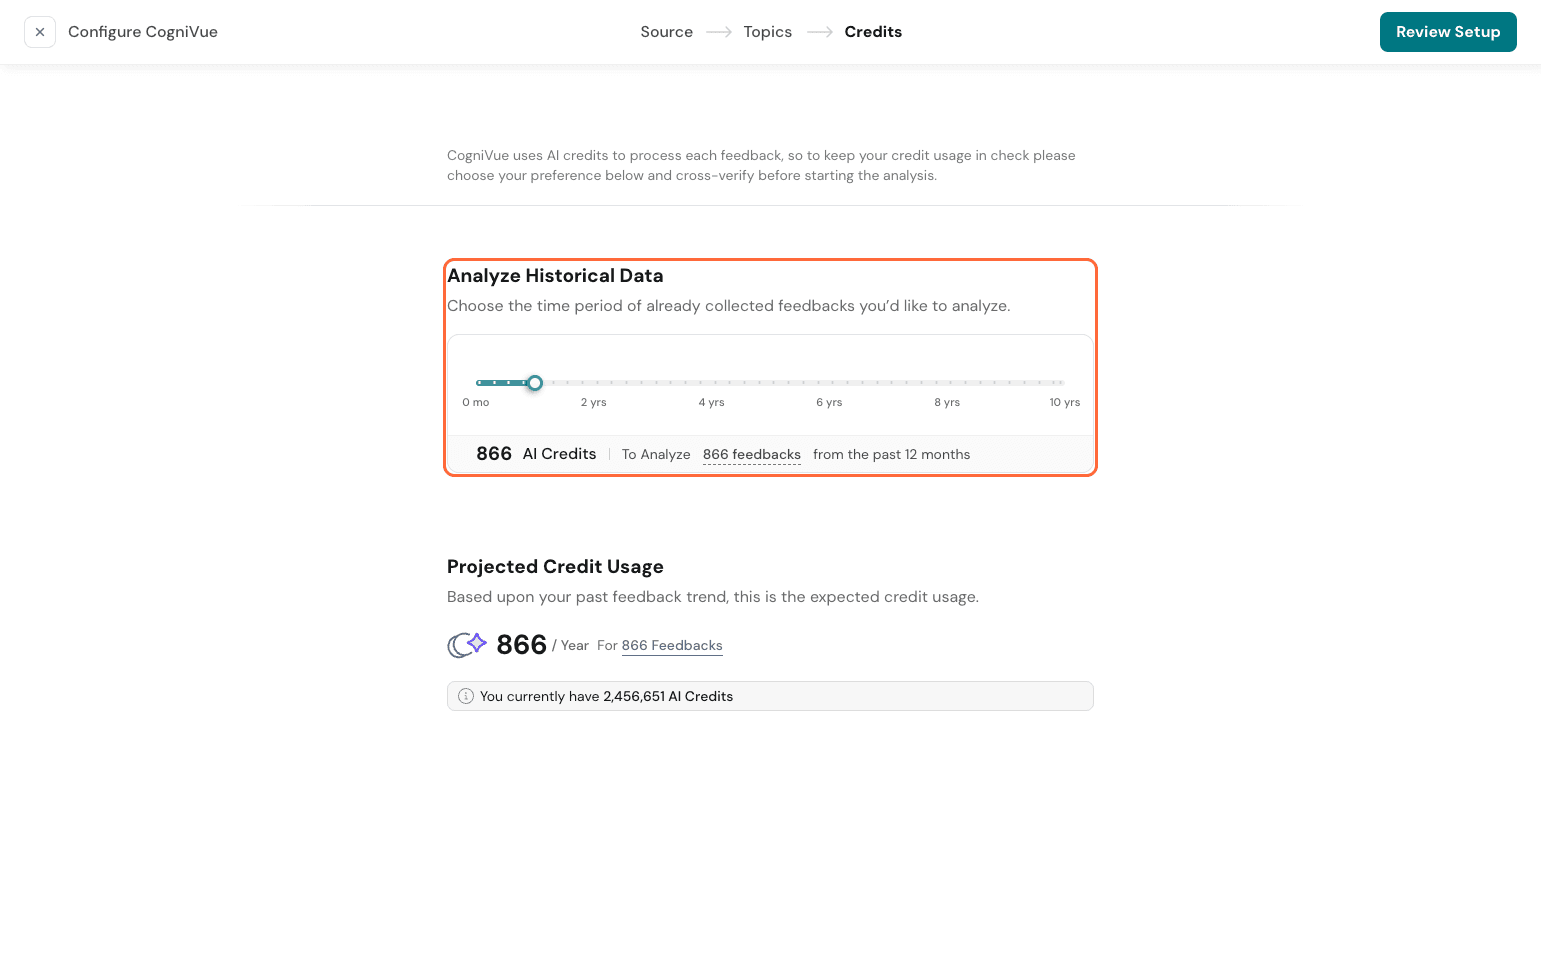
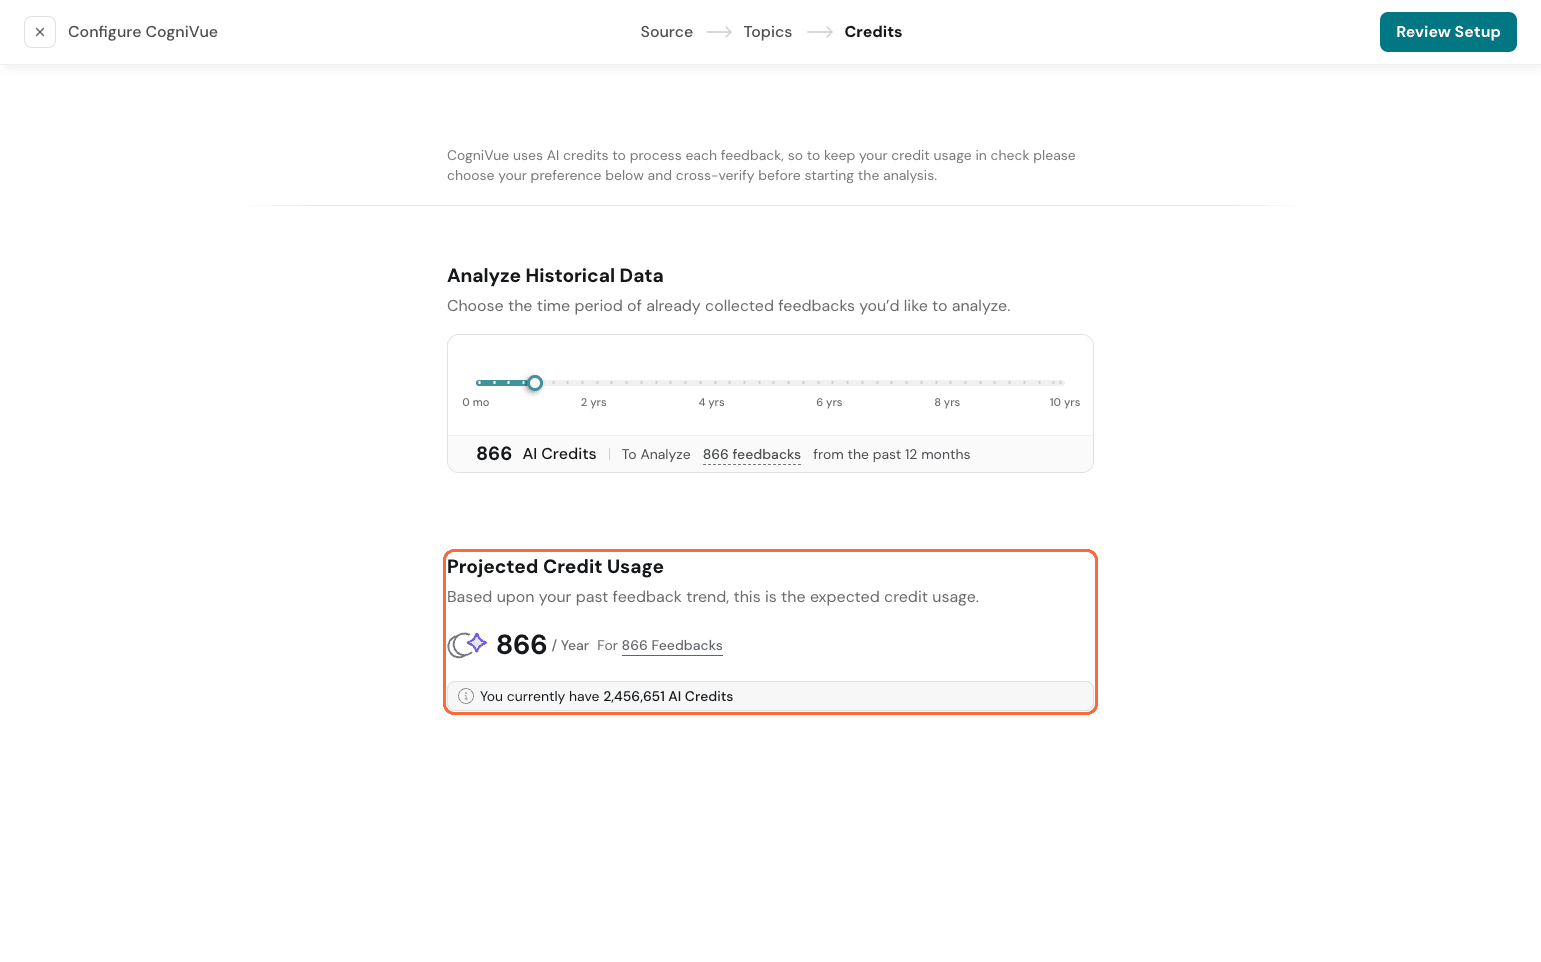
Based on the volume of feedback you select for analysis, you will get a projected credit usage.
If you wish to edit and amend the expected feedback, click on the feedback.
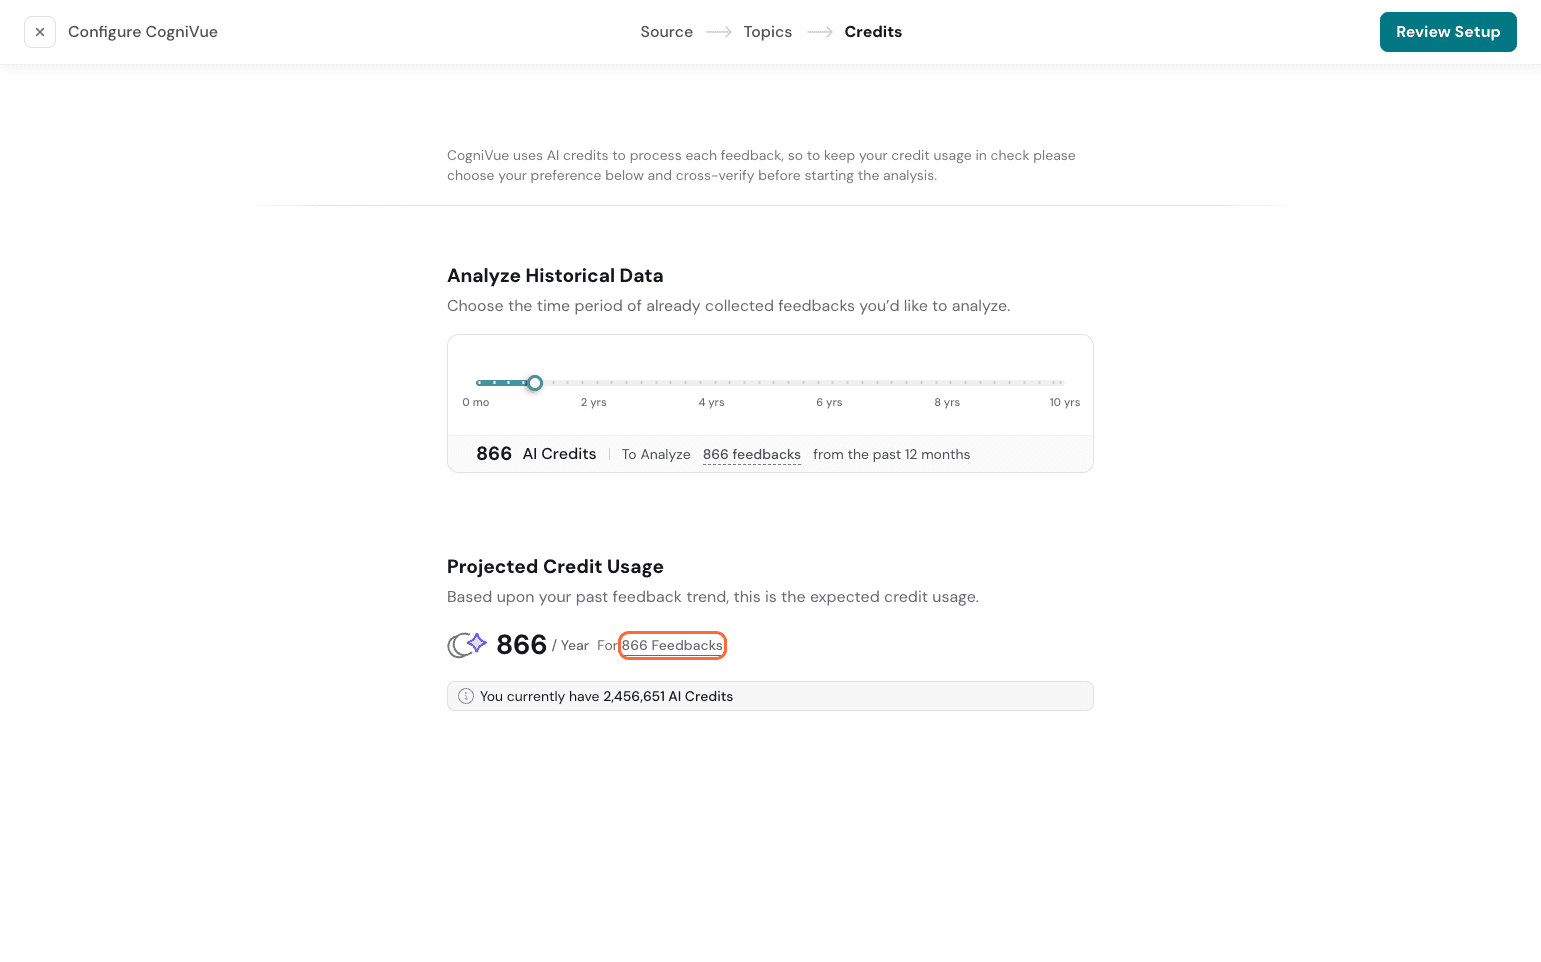
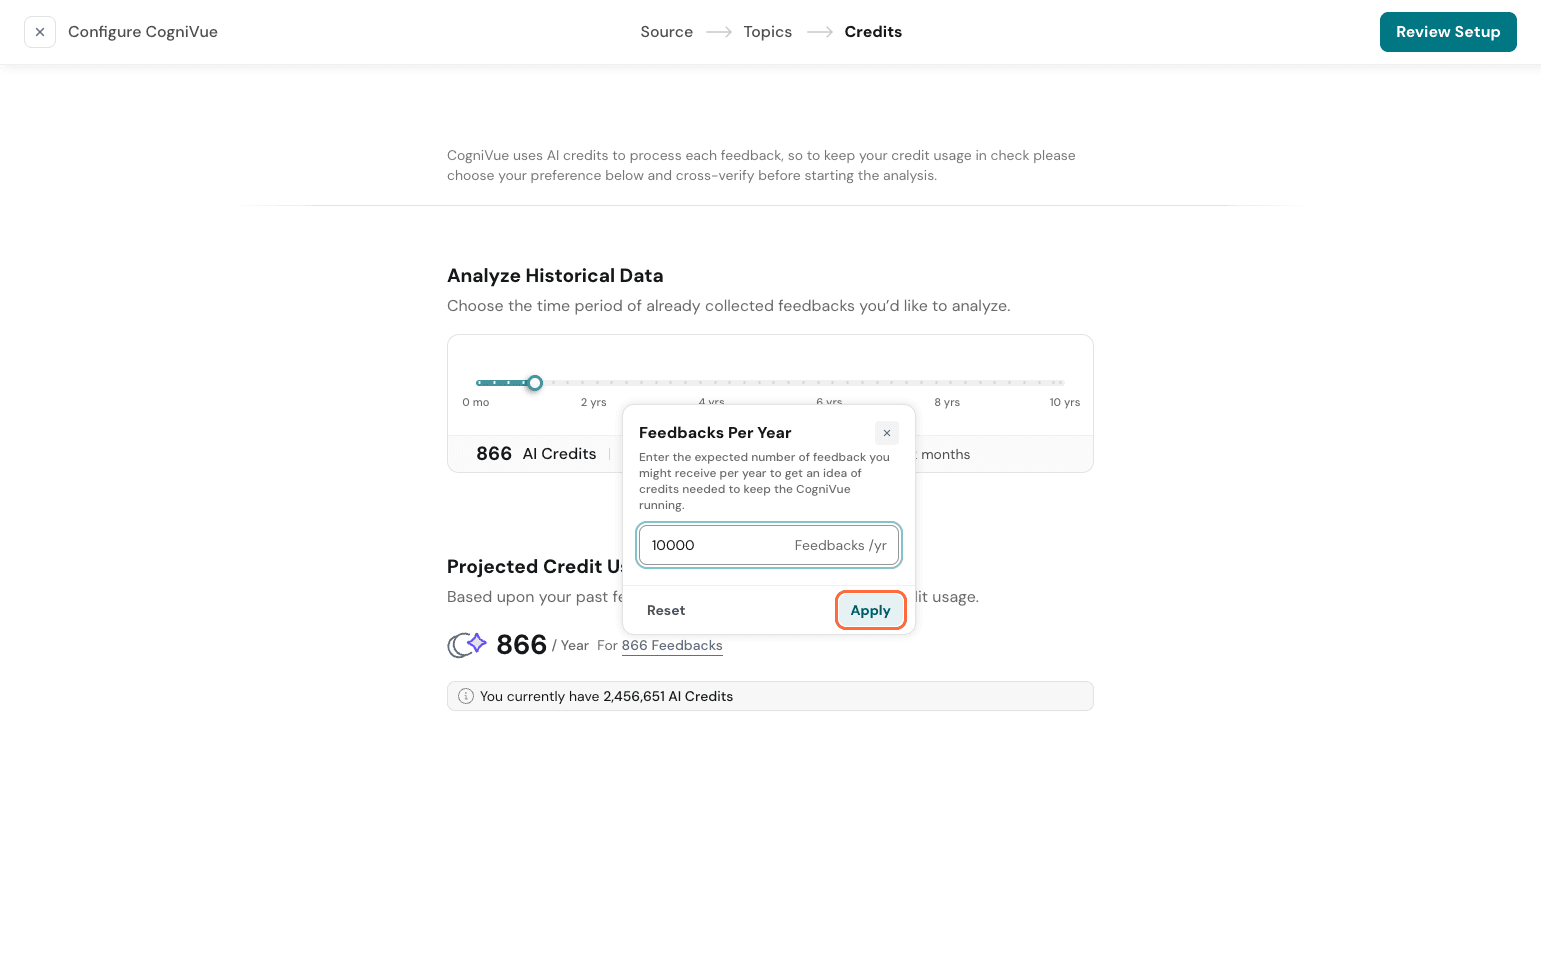
Edit and write a more realistic feedback volume expected per year.
Click Apply
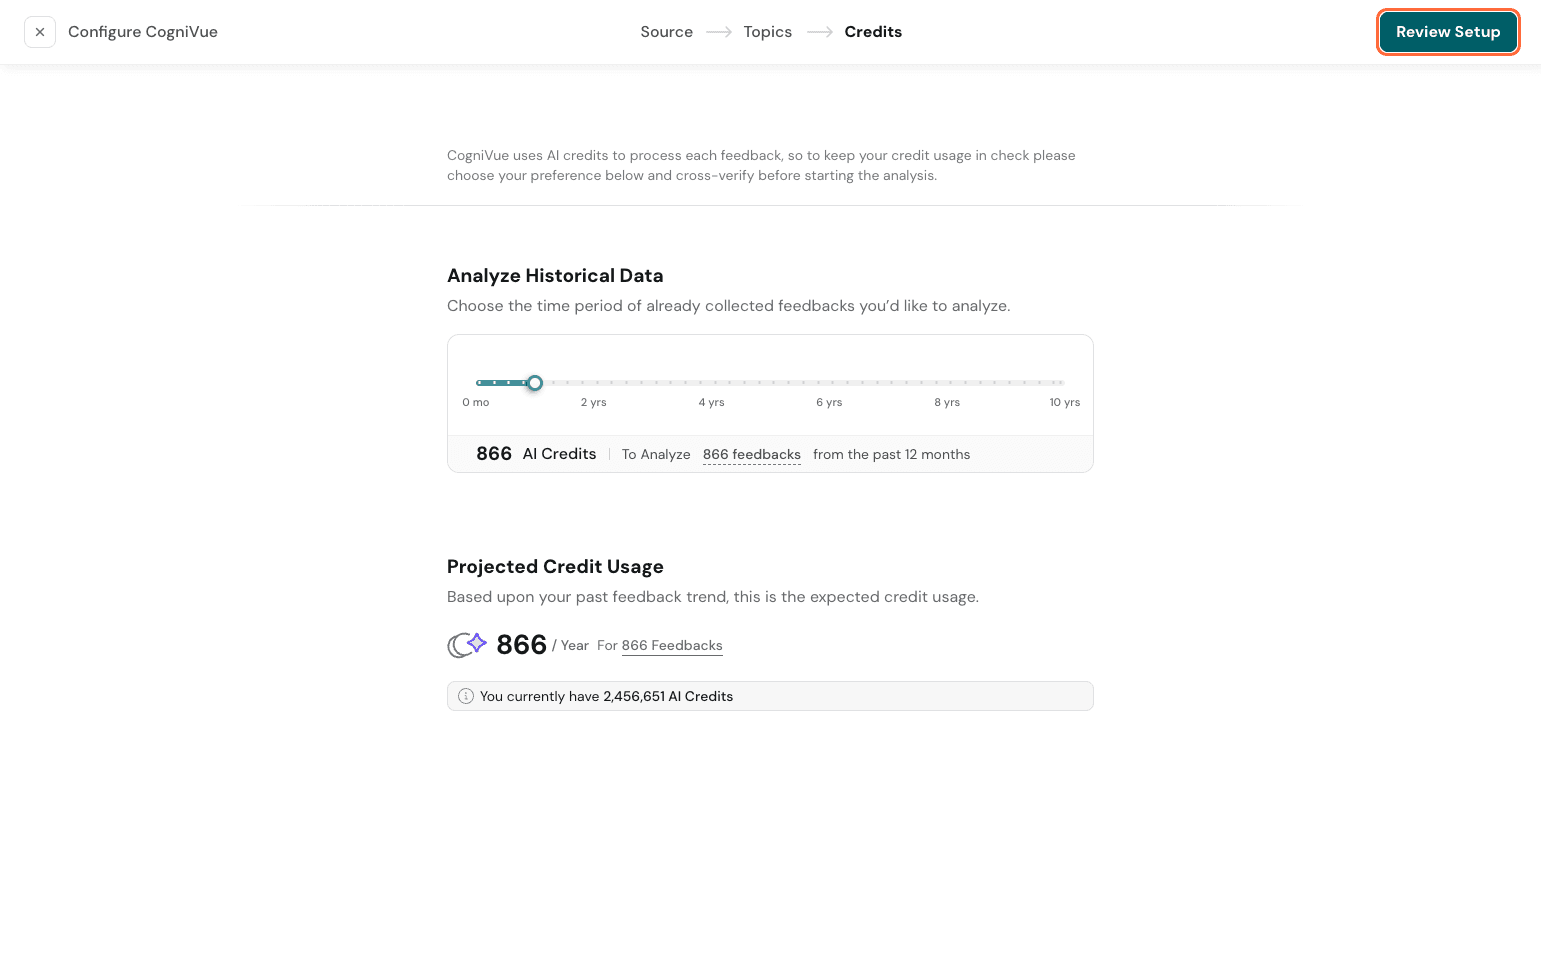
Once you’re satisfied, click on Review Setup
You will then get a screen to review your setup once before going ahead with generating your CogniVue.
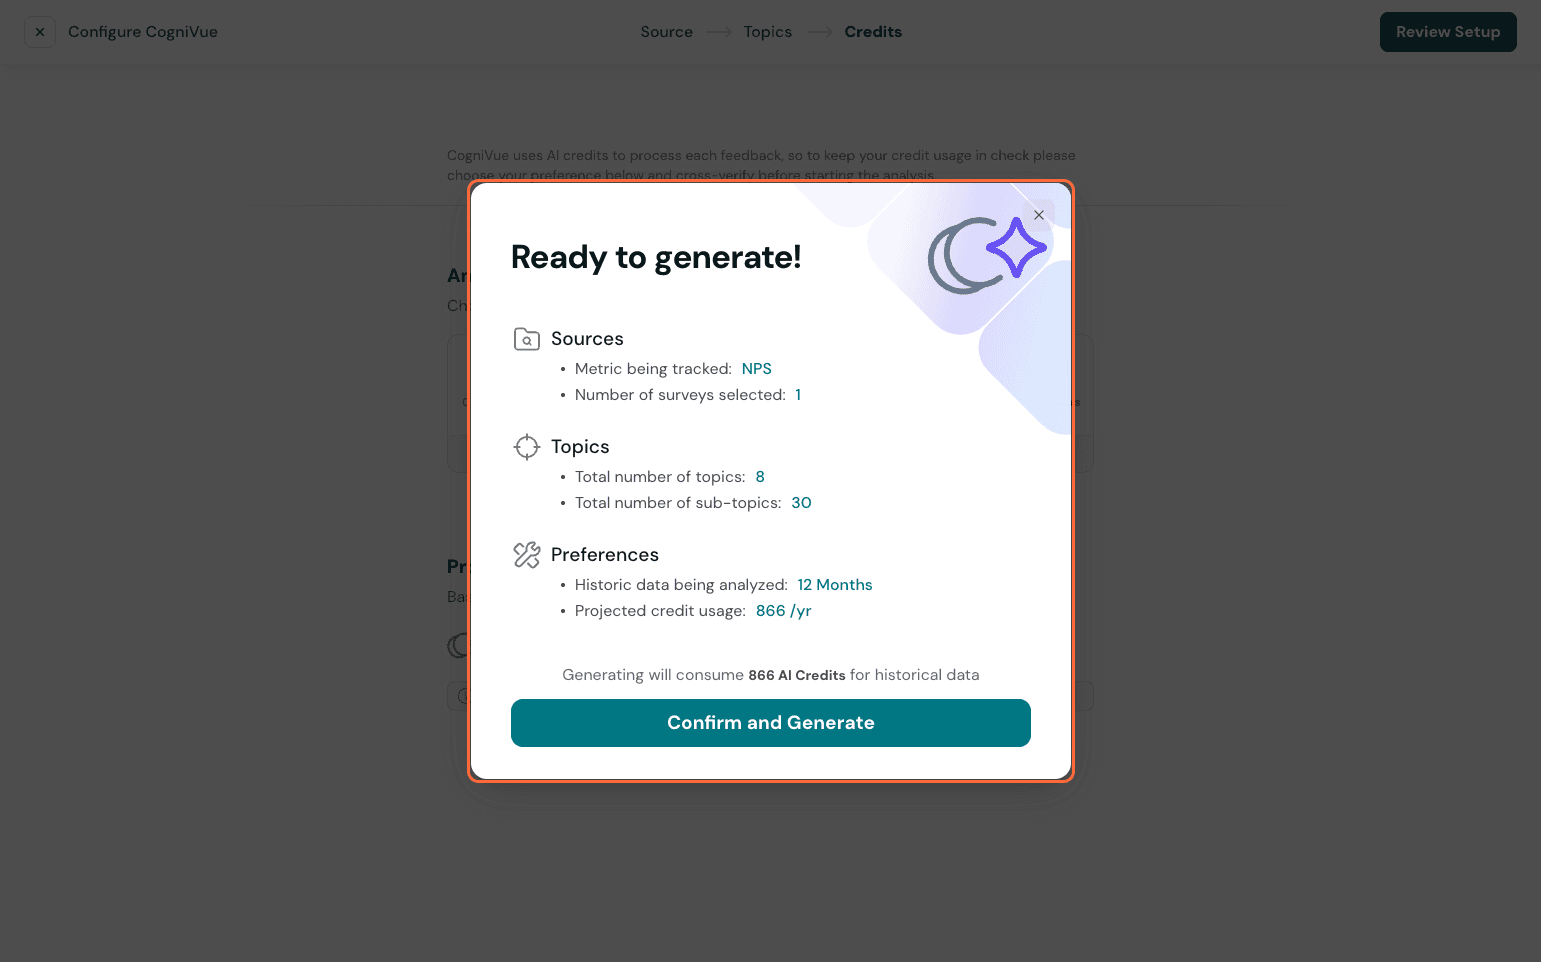
Once you hit confirm and generate, the CogniVue is generated.
That’s it on the setup!
Expect some time for the first-time setup while it finishes configuring your data. From the next time, CogniVue only takes a minute or two to load.