Macros: Simplifying repetitive ticket actions
Macro is a predefined automation that executes configured actions related to Ticket Management. When a ticket is created or updated, you can execute a canned response, add internal notes, assign a ticket to an agent, set ticket priority and more. With a one-time set-up, it just simplifies repetitive tasks.
Whenever a new comment or a task is to be done, instead of typing in a whole sentence or a paragraph, call a small shortcut, and your job is done!
Macros can perform tasks. For example:
- Add an internal note
- Assign team
- Assign agent
- Set priority to
- Set status to
These Macros can be set for personal use and for org-wide use too as the Macros are available for the following :
- Everyone
- Specific Team(s)
- Only me
Now let’s see a Macro in action!
1. From the home screen, navigate to the settings page and choose Macros under Ticket Management.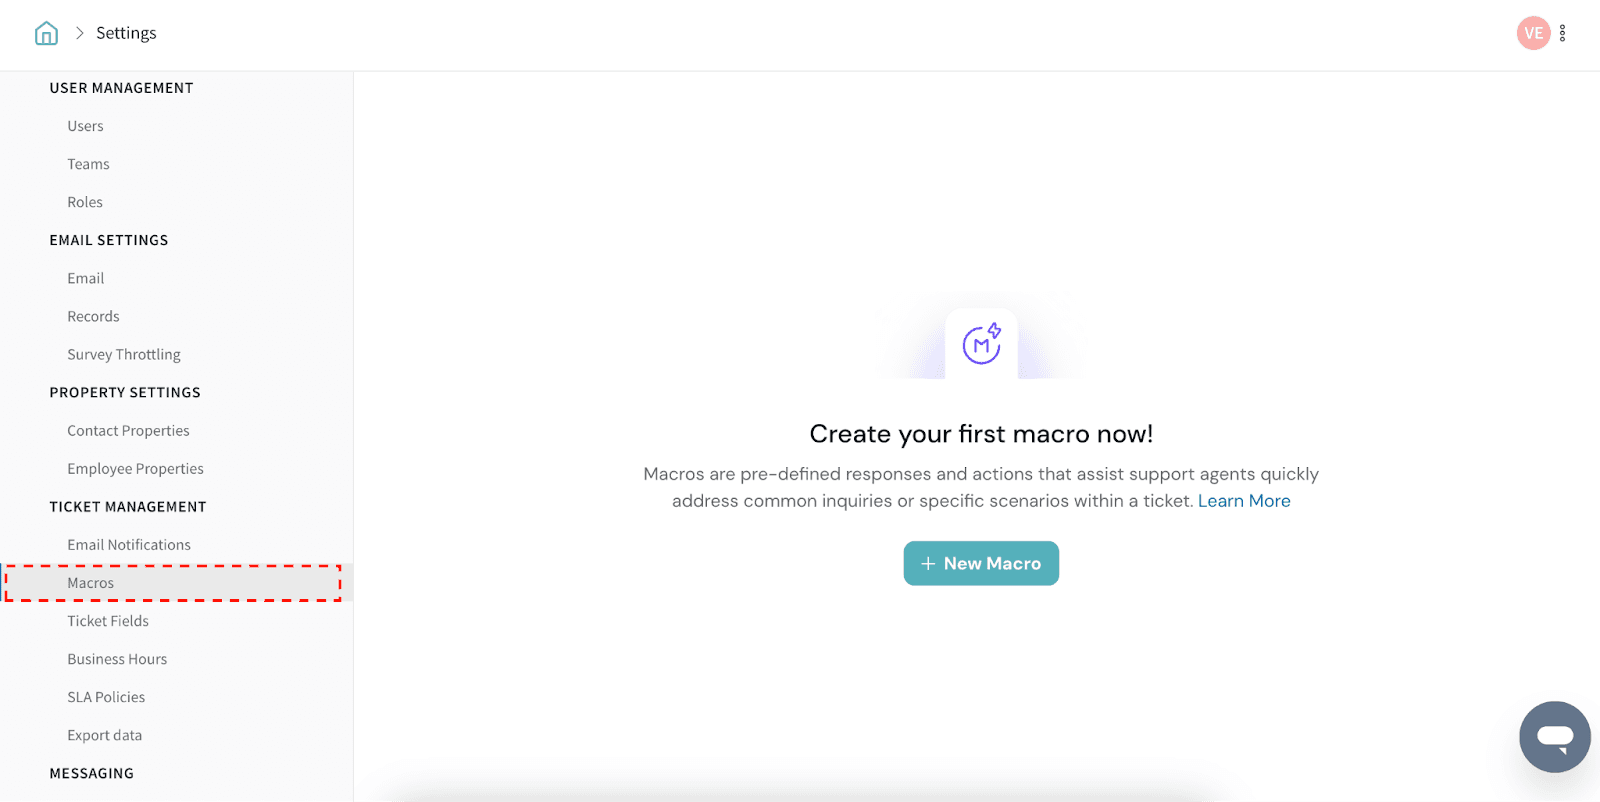
2. Now click + New Macro to get started. Upon clicking the button, name the macro, set its availability, and select the action to be performed.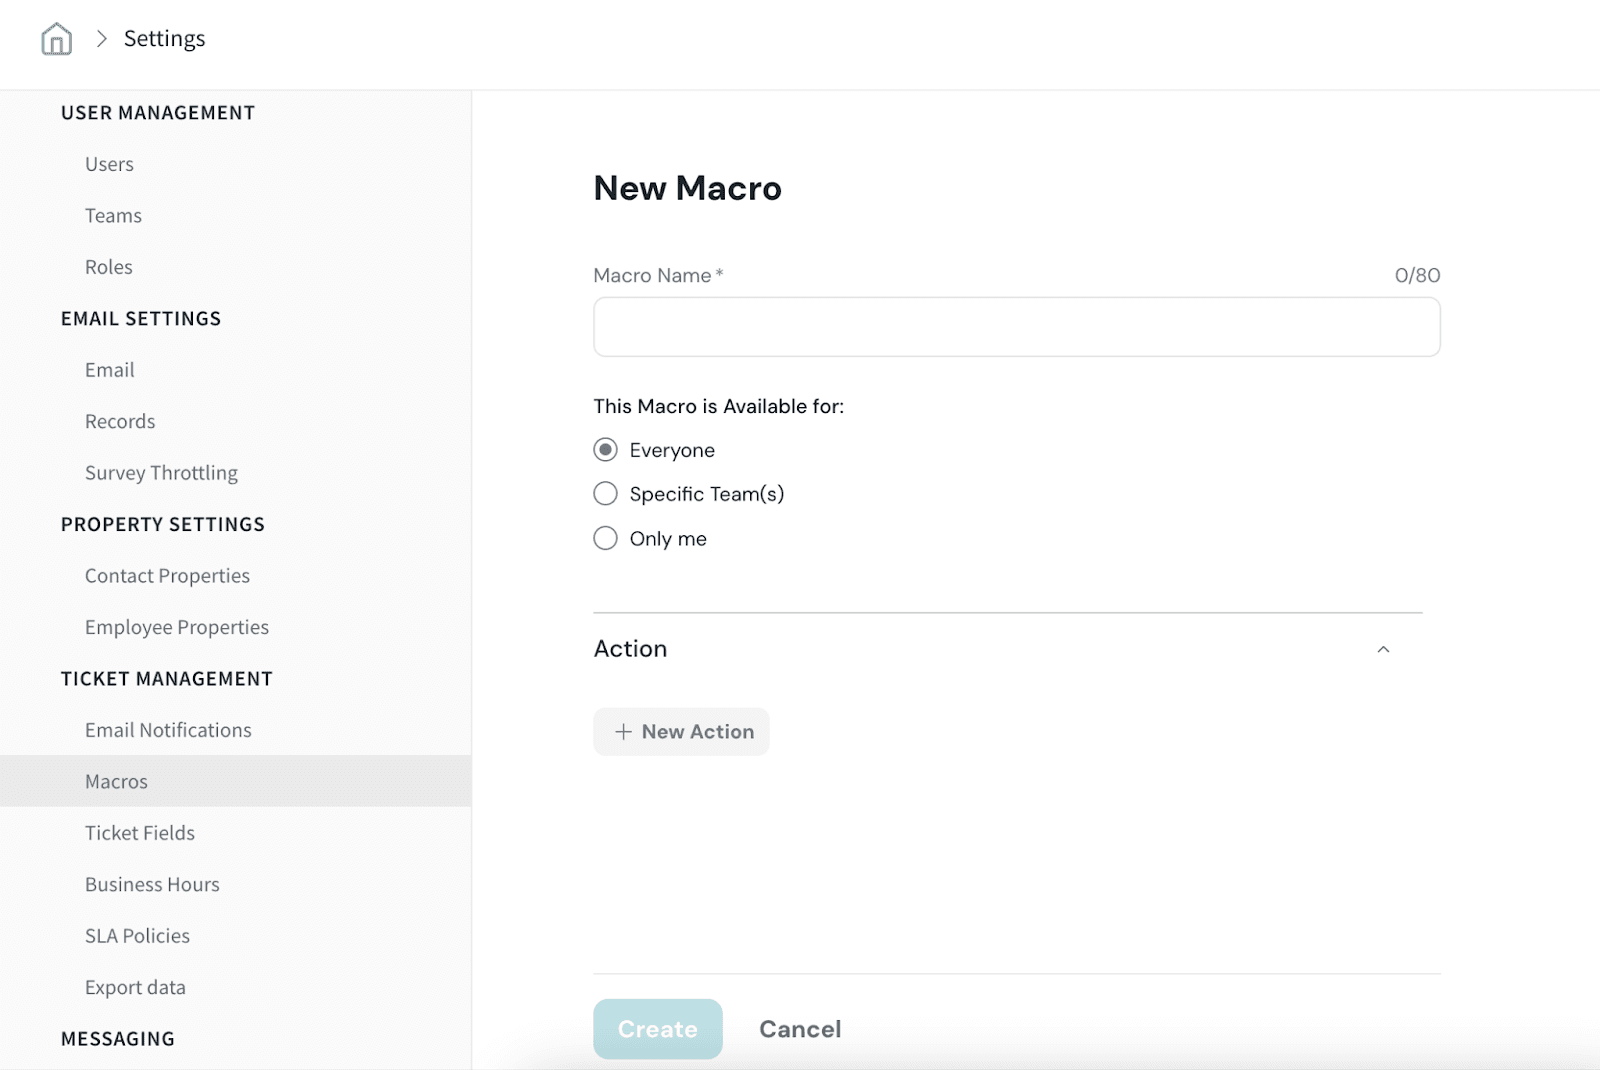
- For a Macro to be accessible to all, pick Everyone, and if you're setting up Macros just for yourself, go ahead and choose "Only me".
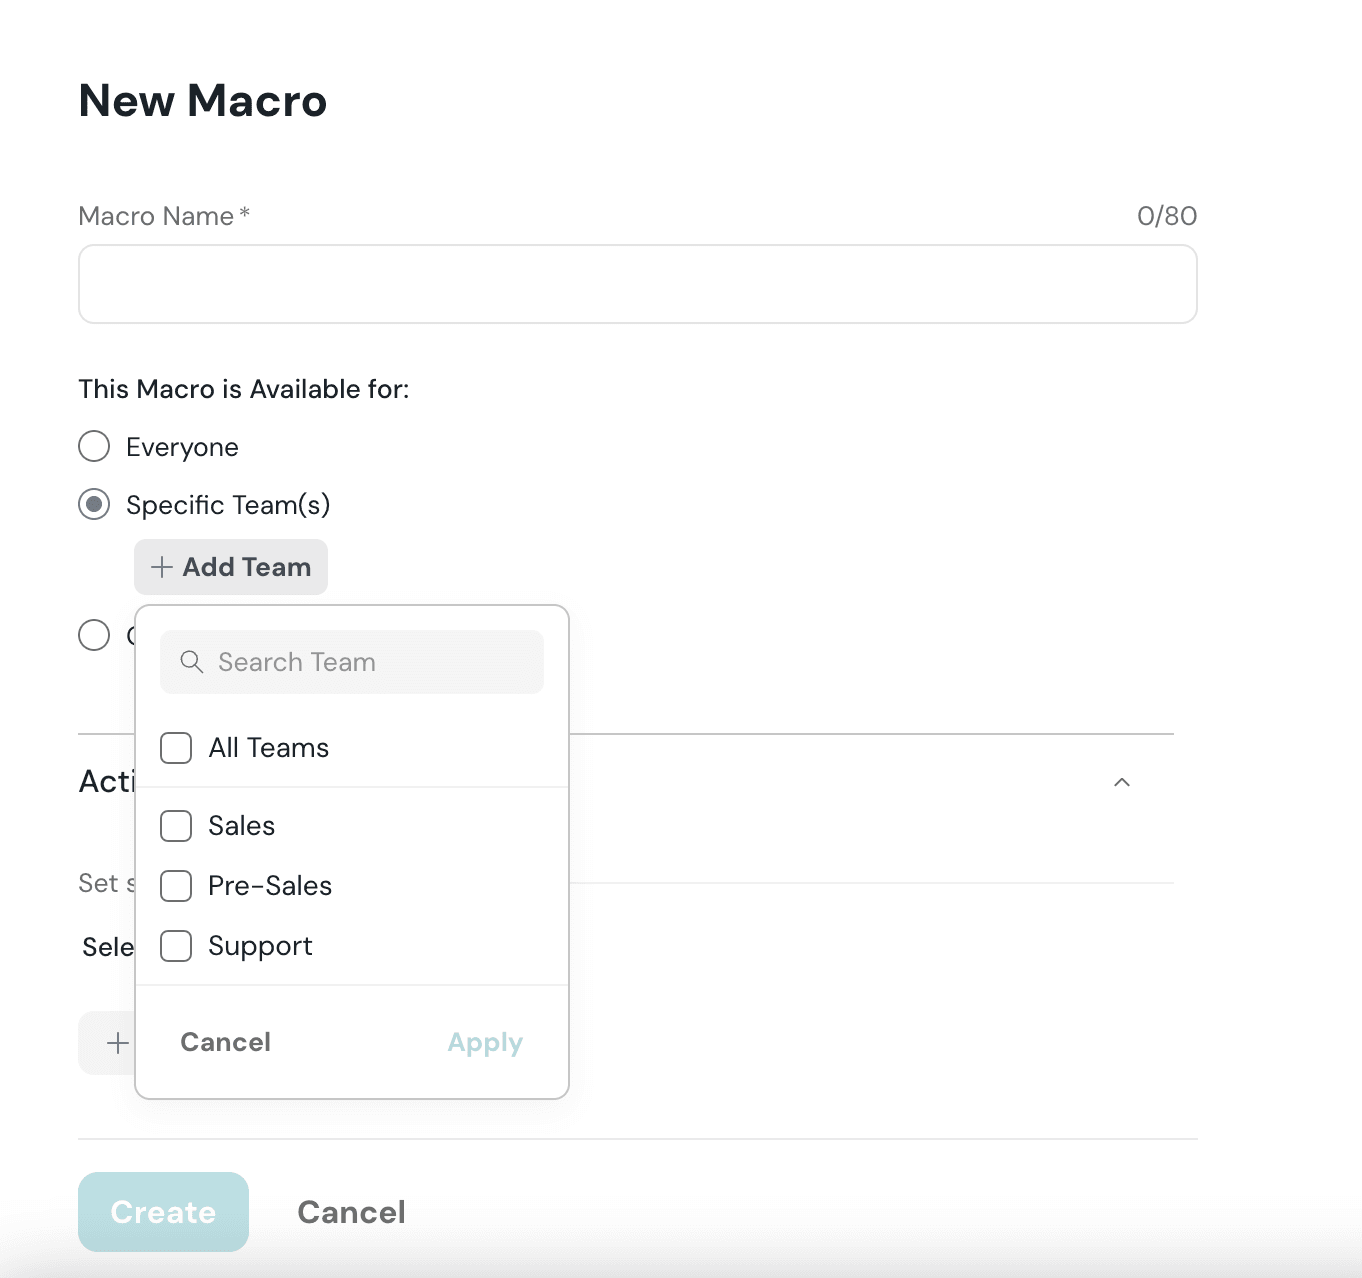
- If you are looking to create Macros specific to a team or to a group, choose the Specific Team(s) option and choose the corresponding teams from the drop-down menu. (Please follow this link if you are looking to add a team)
3. Once the availability is set, click + New Action to determine what the Macro has to perform. Keep reading to learn more about the actions.
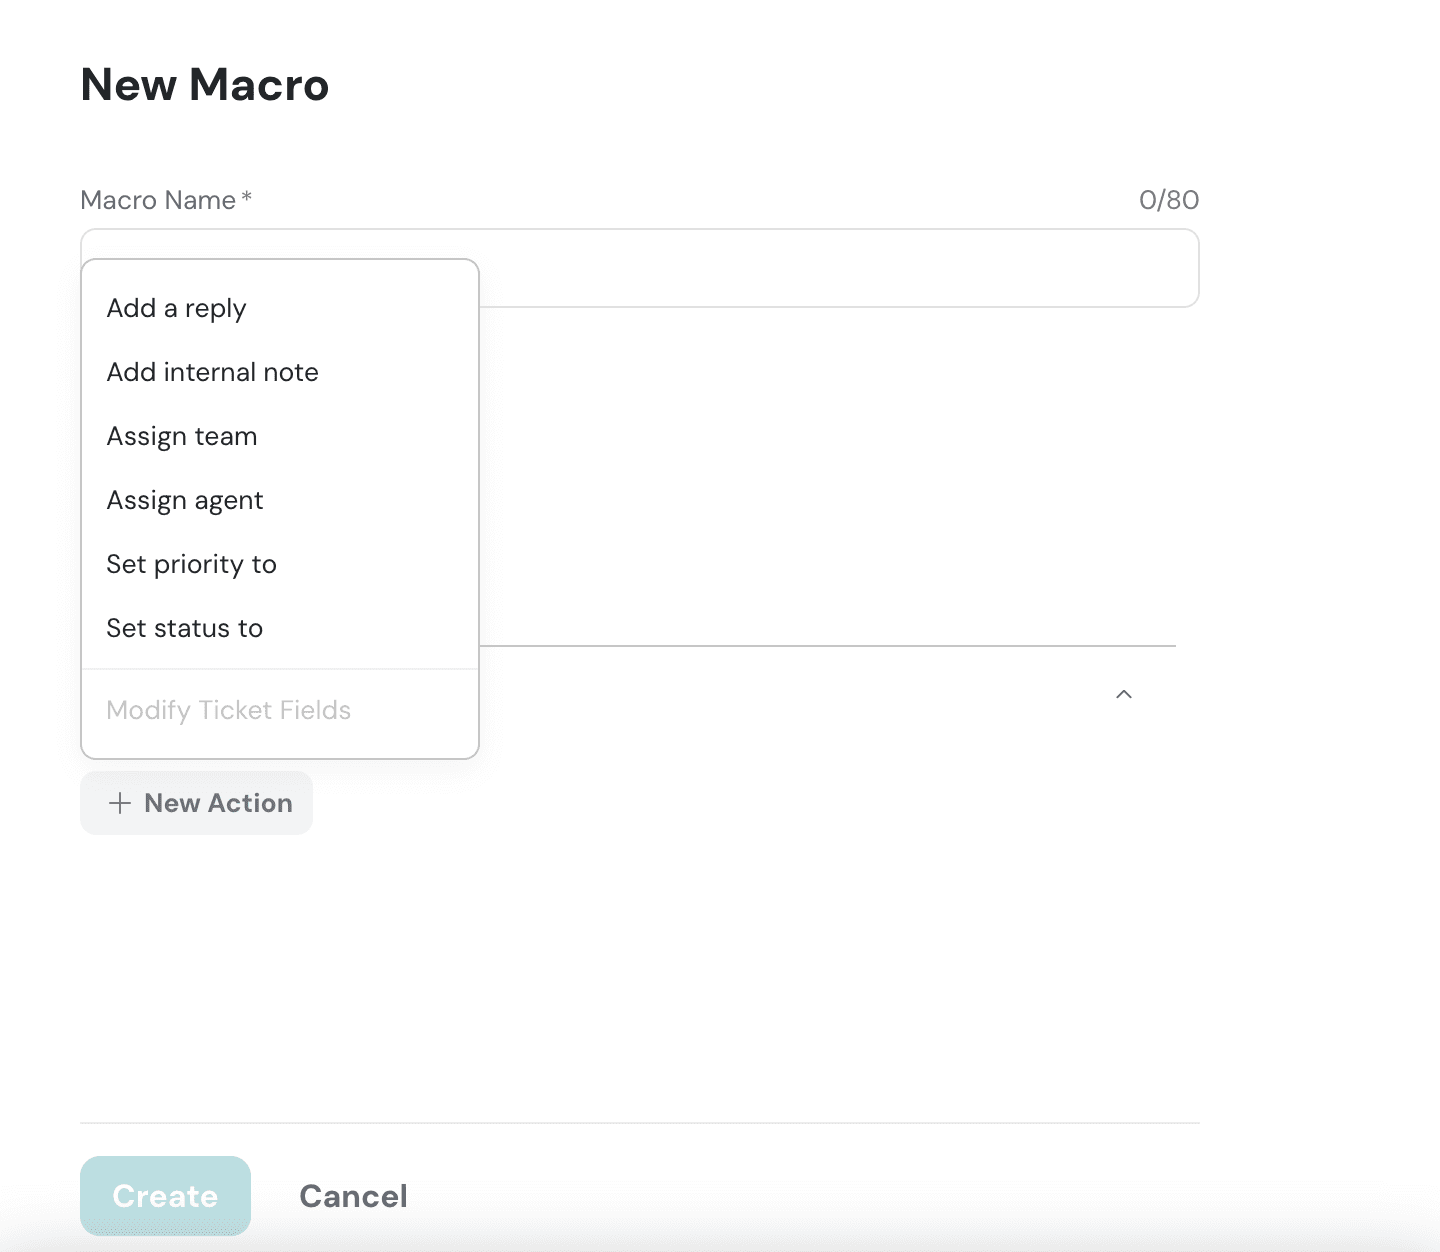
- Selecting Add a reply or Add an internal Note triggers a dialogue box to appear where you can type your intended message. To insert a placeholder, you can
either click on the icon or simply type "{{" to get started.
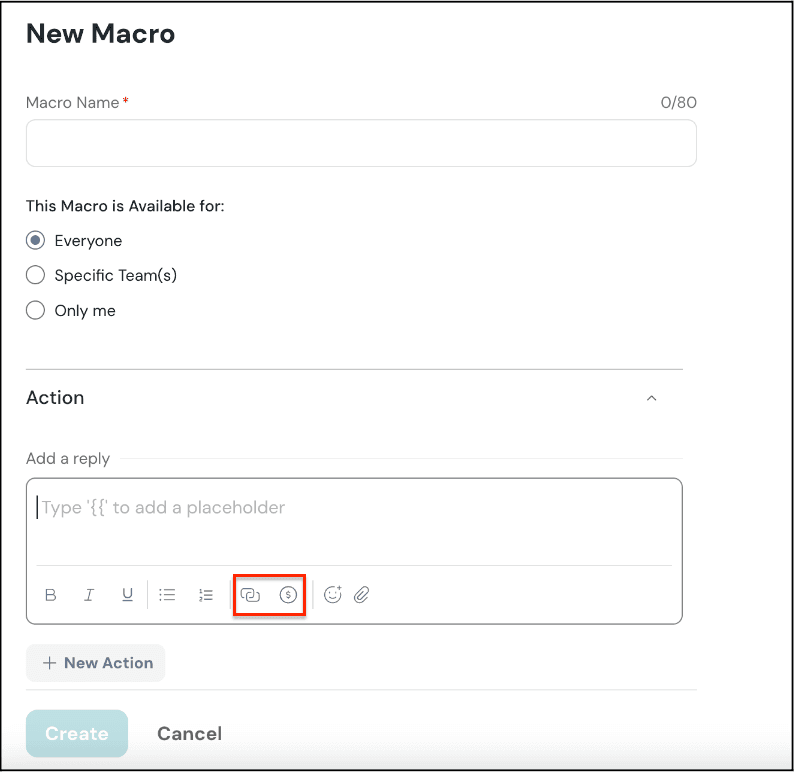
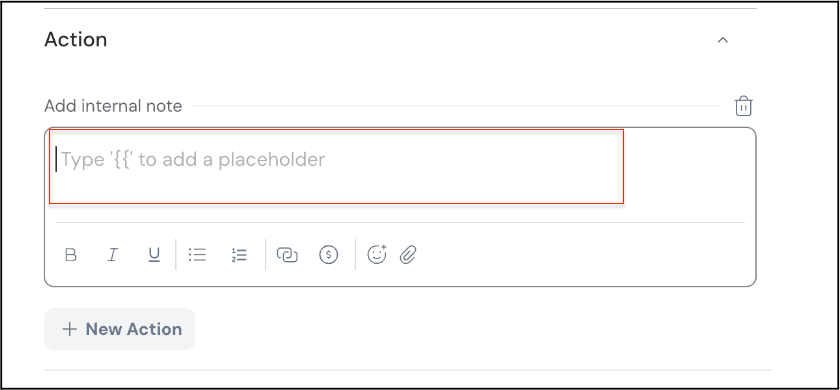
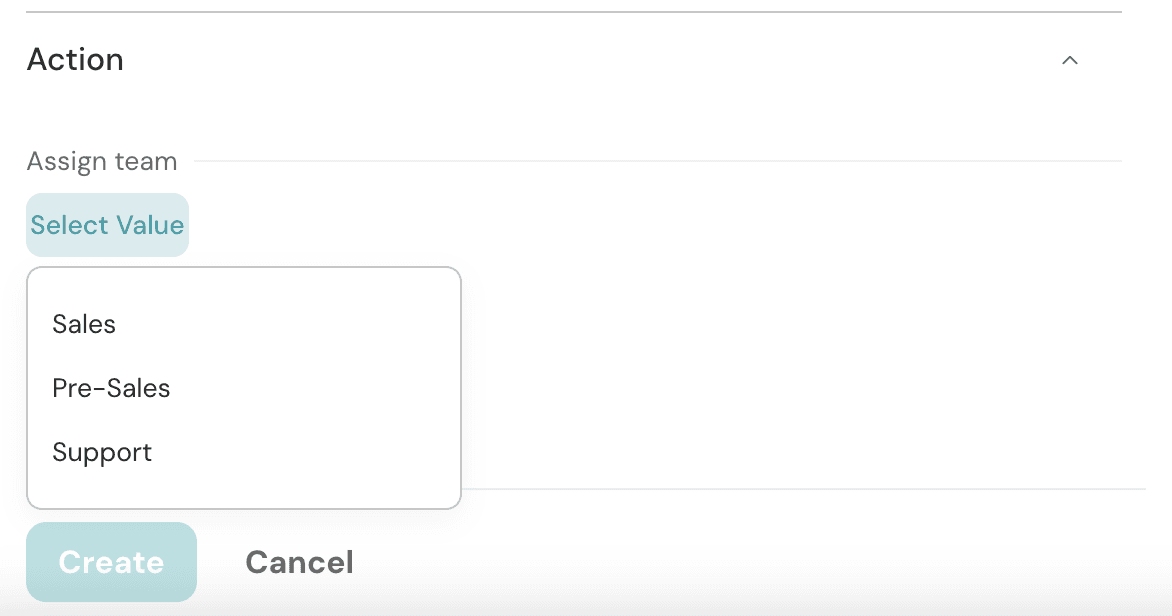
- Select the Assign team option to direct a ticket to a specific group. Choose a specific team from the drop-down menu and the ticket will be directly assigned to that team.
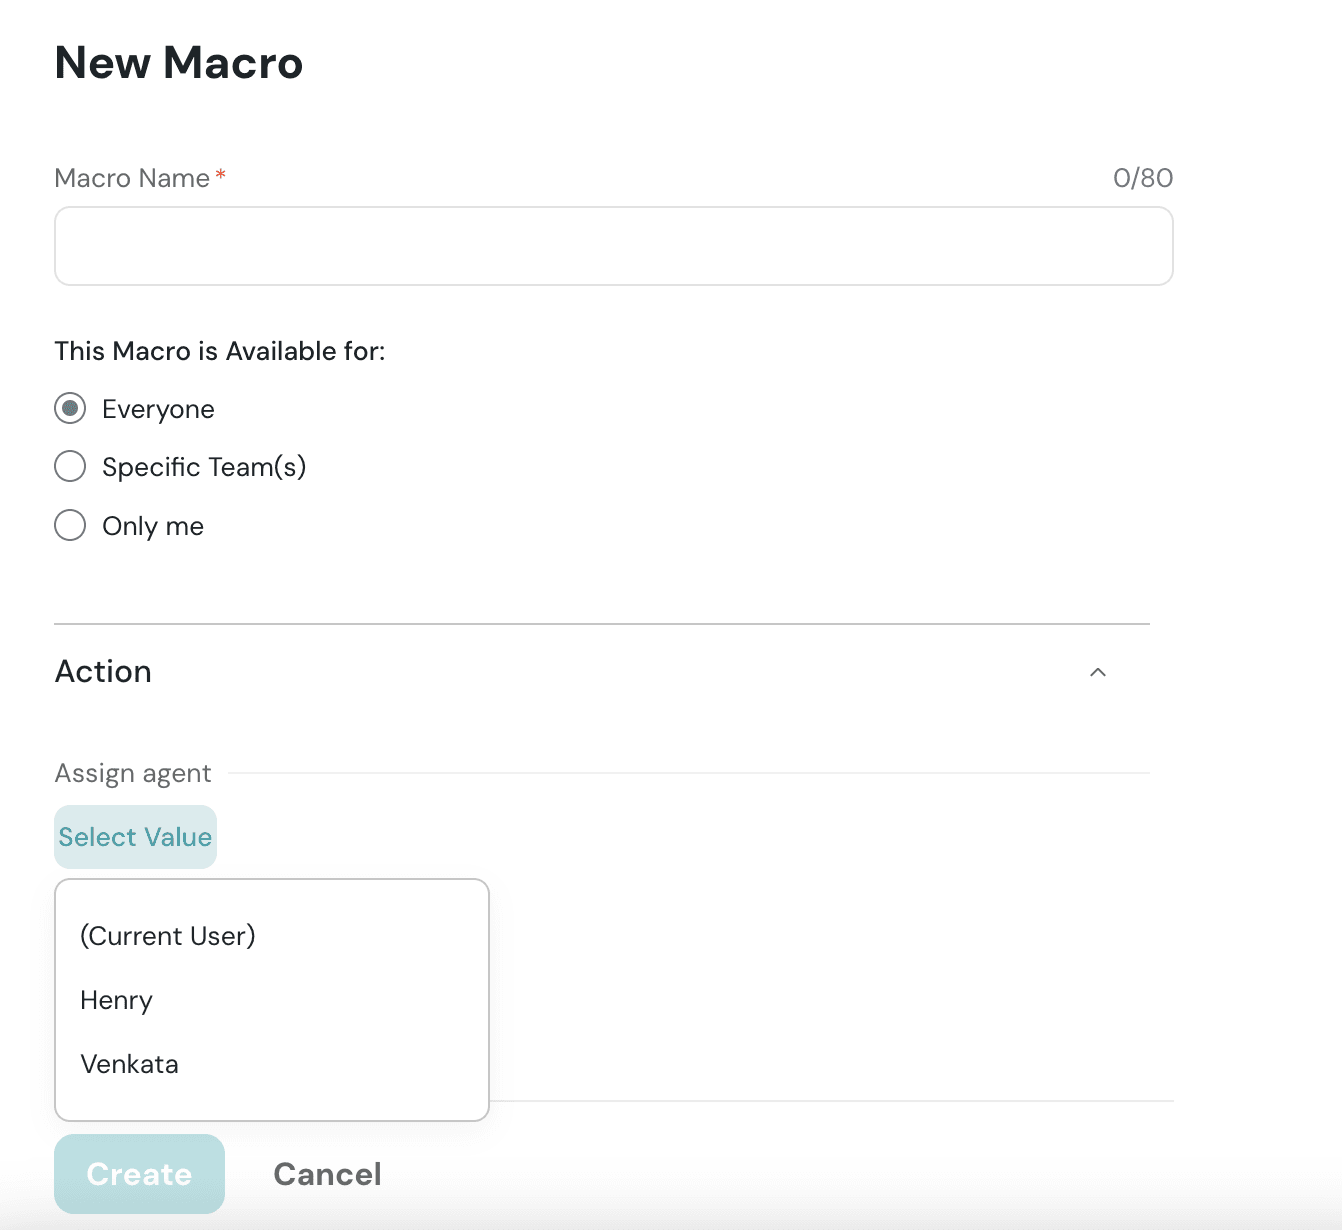
- Select Assign Agent from the dropdown menu and click on the name of the agent to assign a ticket to a specific agent. This action will create a Macro that, upon activation, automatically assigns the corresponding ticket to the selected agent.
- Click Set priority to. As the name suggests, this action enables you to adjust the urgency of a ticket. Simply set the priority level to ensure it gets the necessary attention.

- Select Set status to if you would like to update the current phase of a ticket, ensuring its progress is clearly marked and tracked.
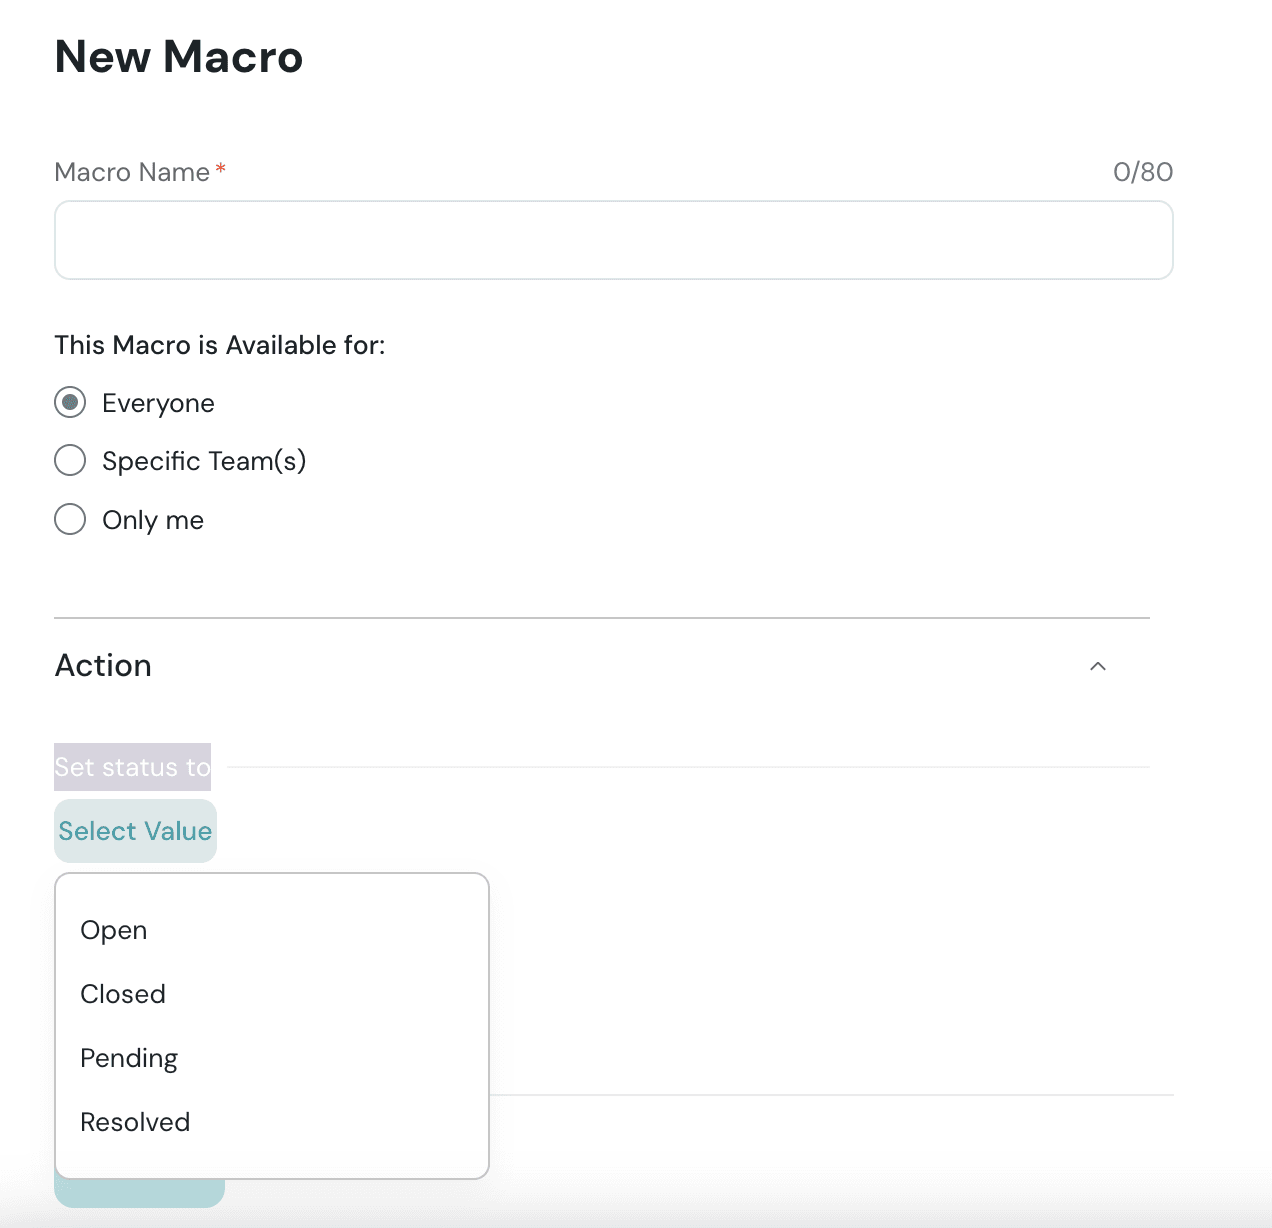
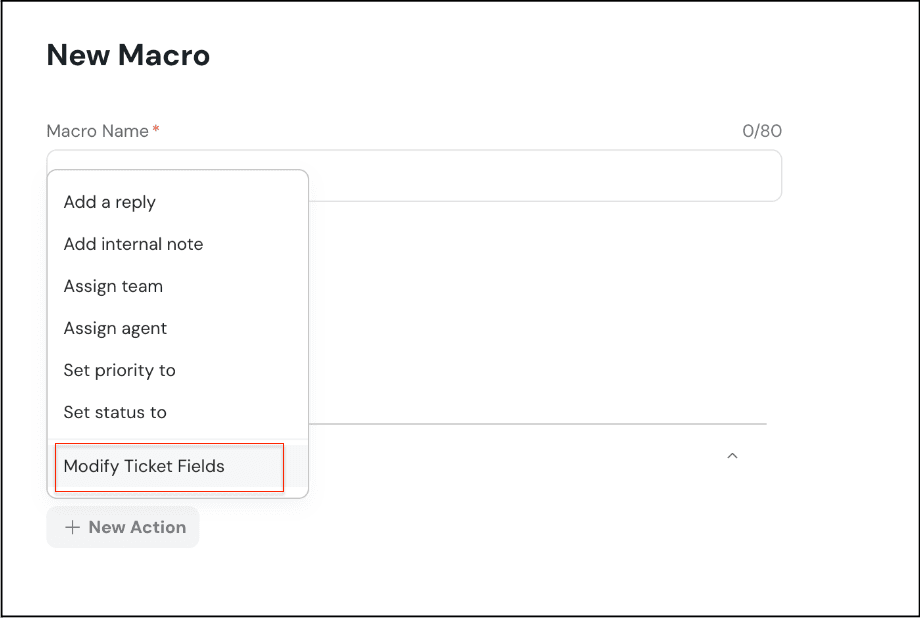
- Click on Modify Ticket Fields if you're employing custom fields to generate a Macro that caters to your specific ticket fields.
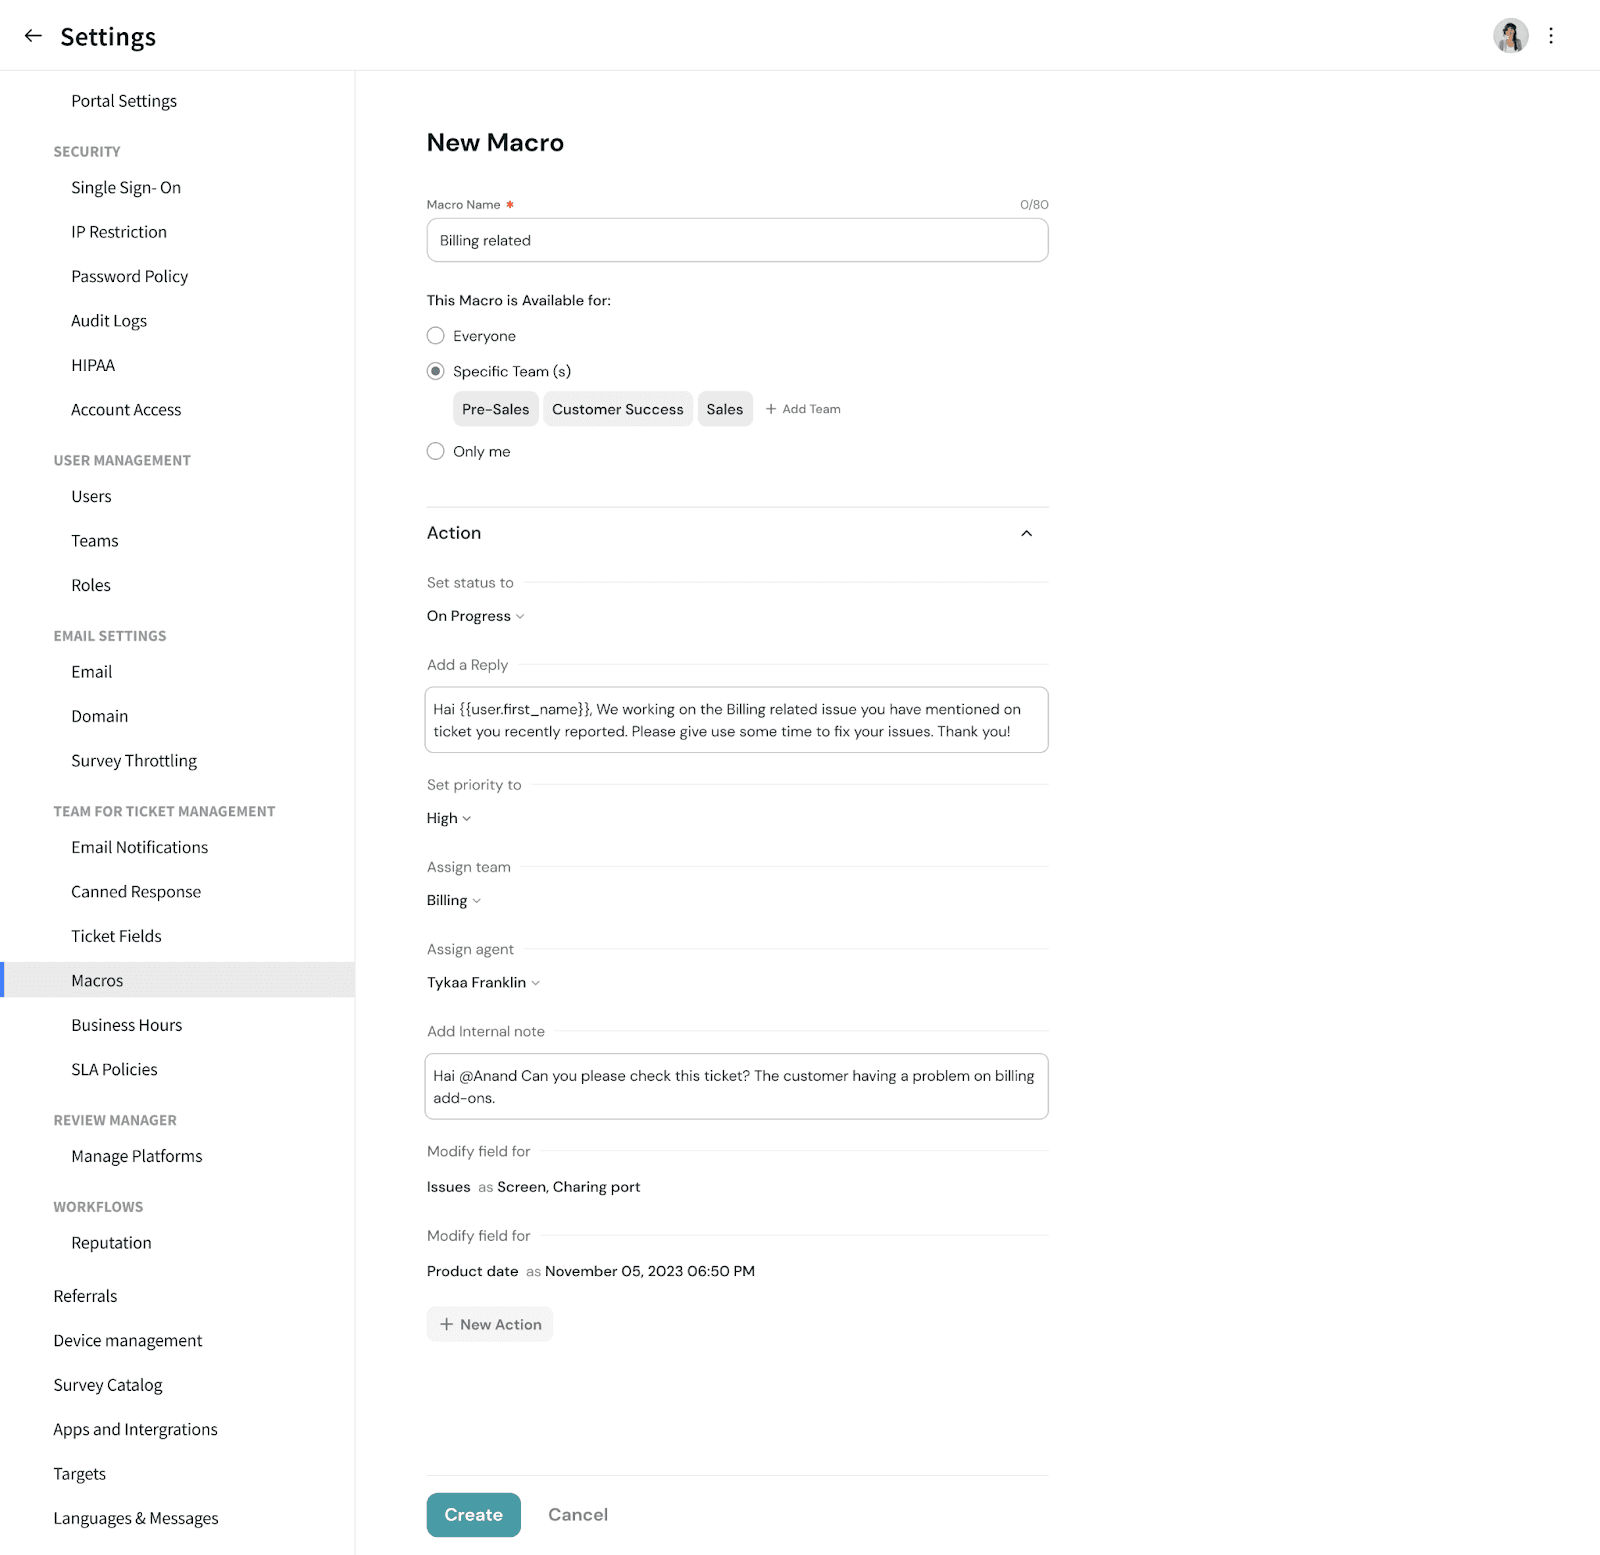
- Curious about whether a Macro can handle multiple actions? Absolutely, it can! Here's an example for you:
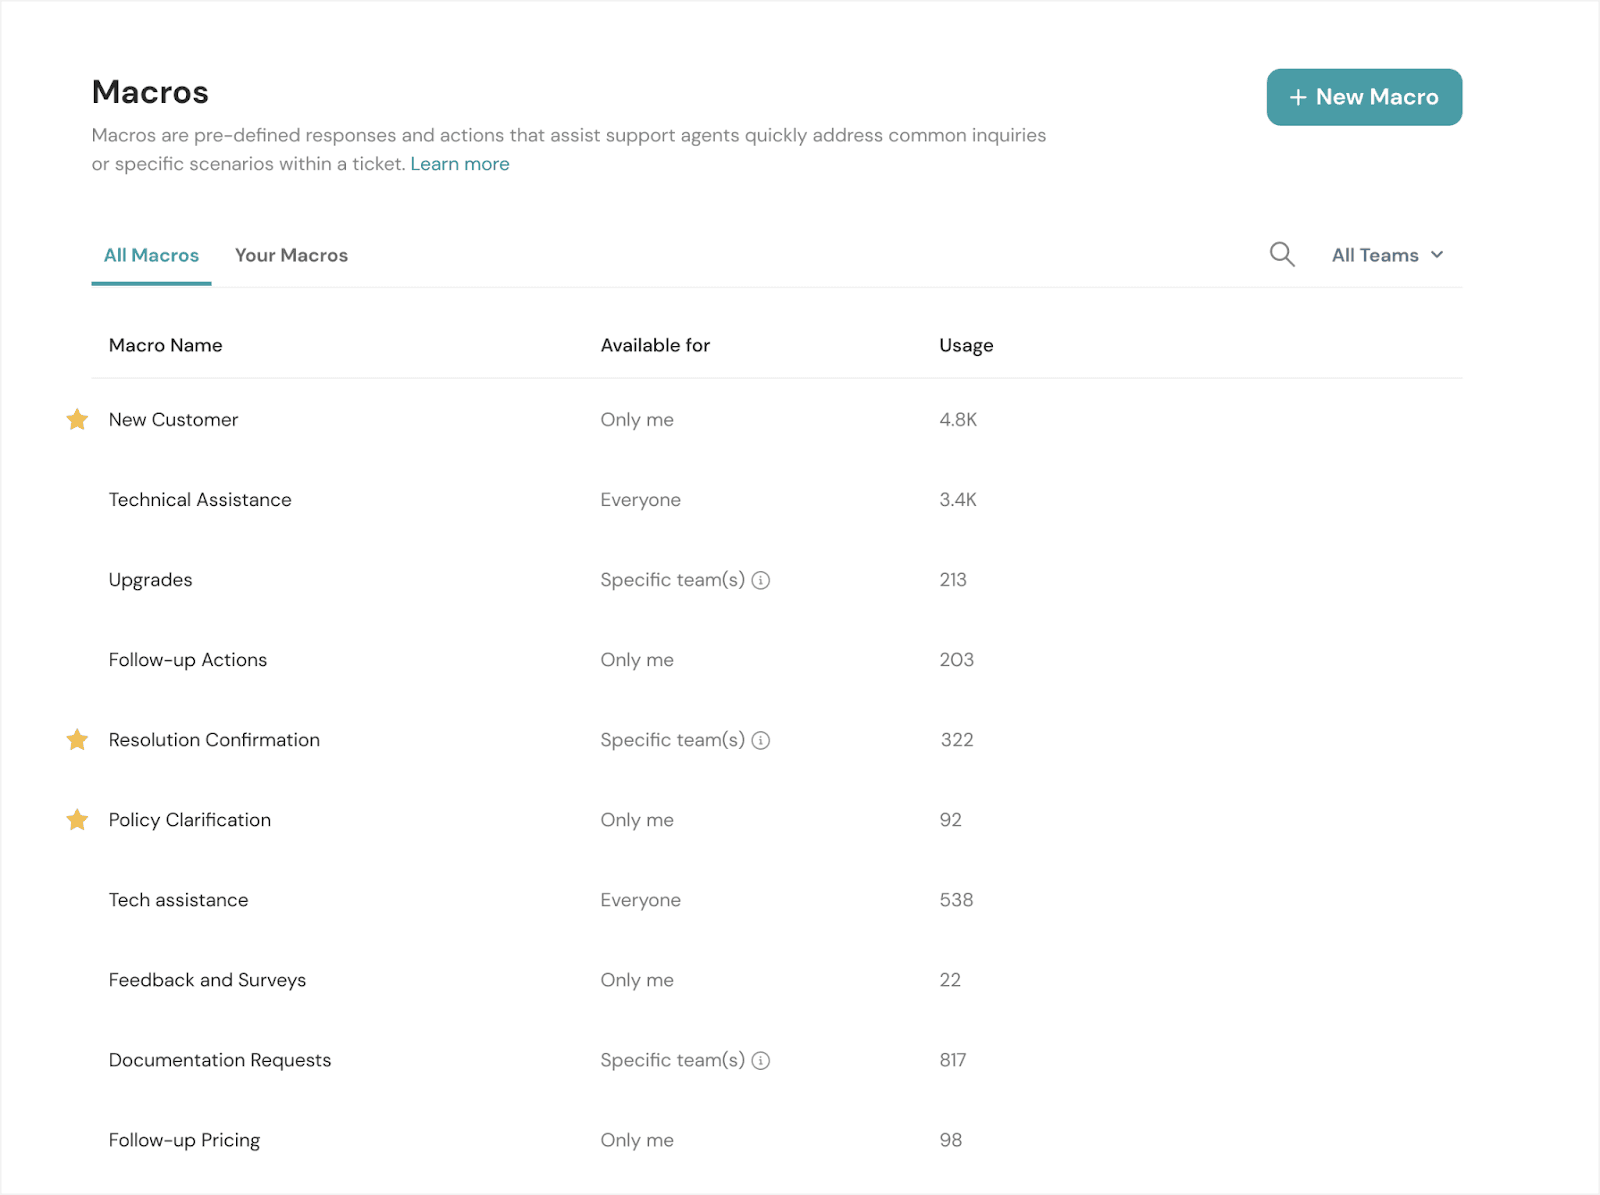
4. Macros display: Once you've set up all the Macros, you can choose your favourites by simply clicking on the star icon.
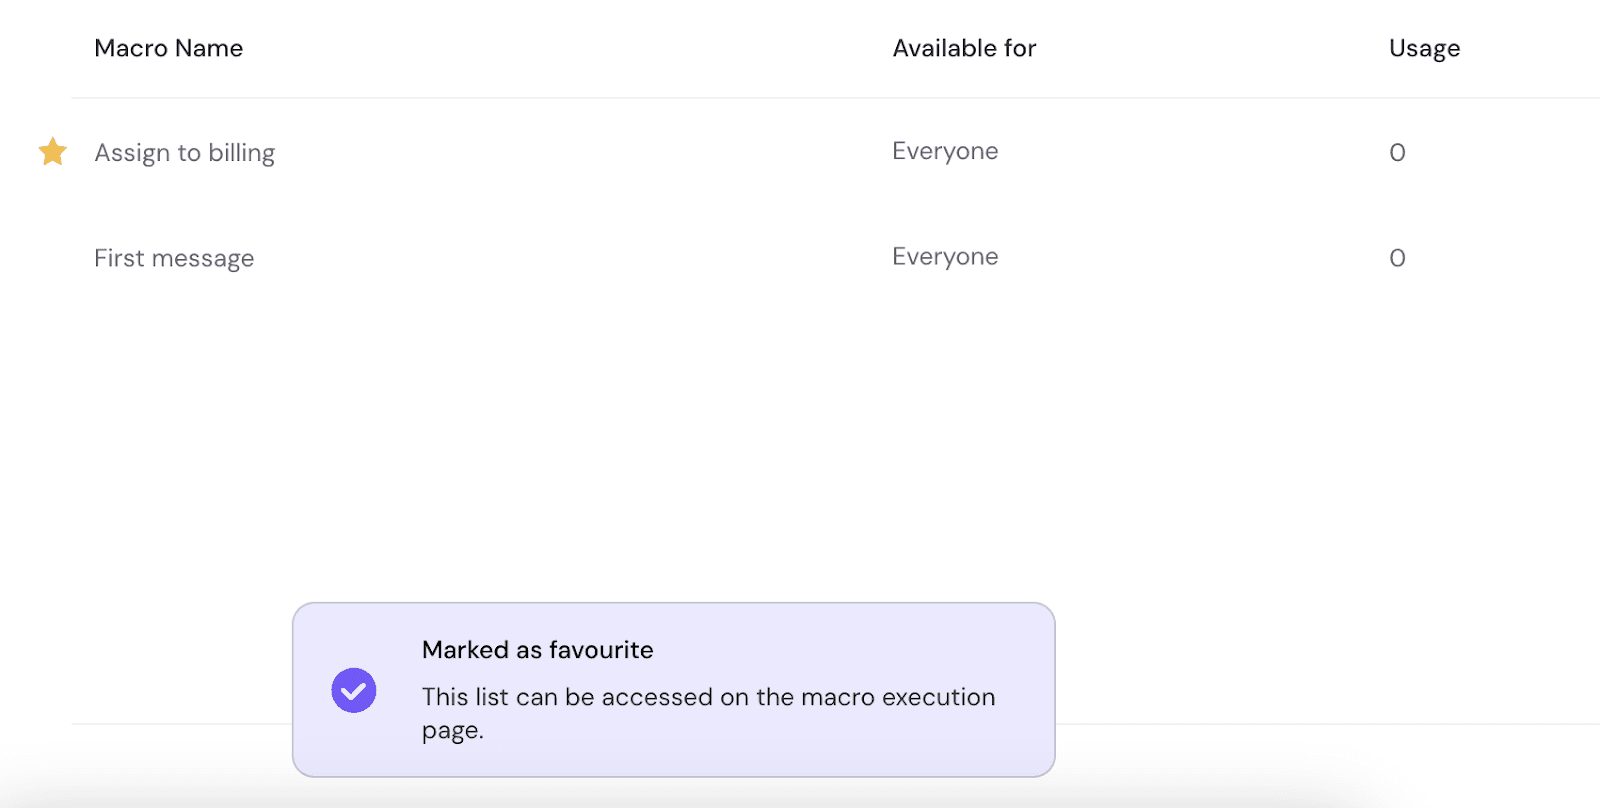
5. Once set, the screen will appear as follows:
6. Macros Execution: After all the Macros have been created and configured, it's time to put them to work.
- Navigate to the main screen – Tickets – Ticket View – Choose any one ticket.
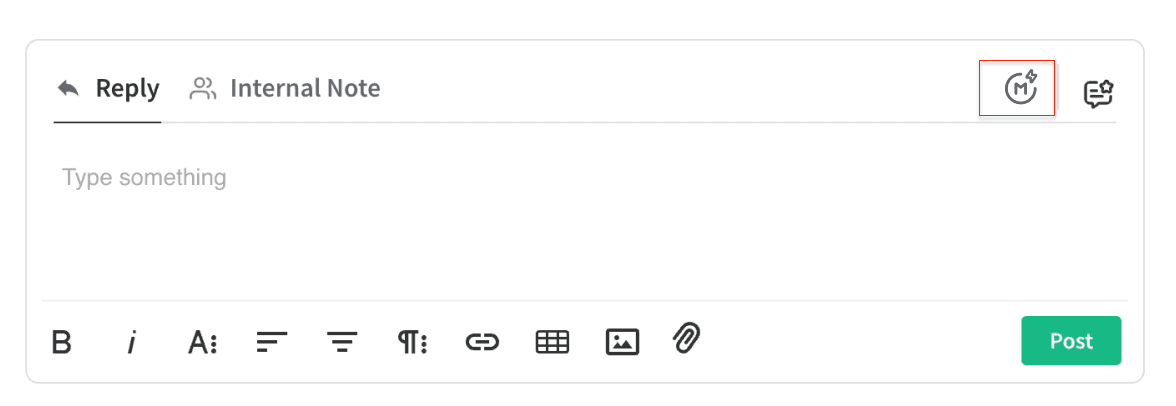
- Once done, click on
 which will take you to the Macro screen.
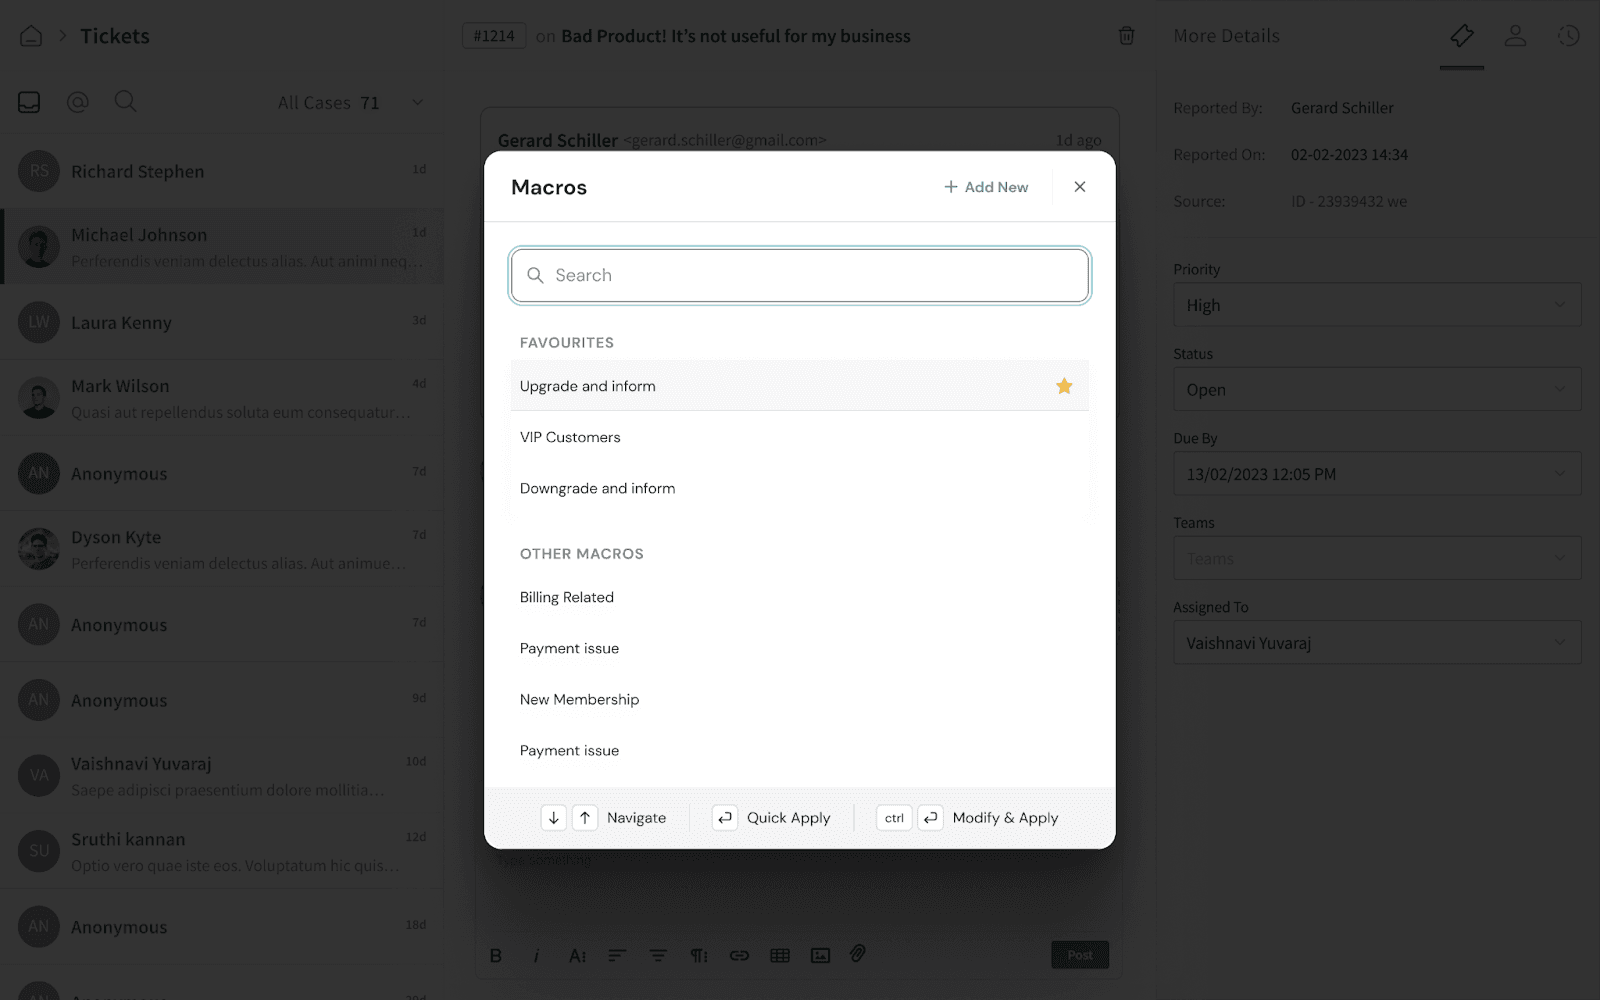
- Select the Macro you need, and see it in action.
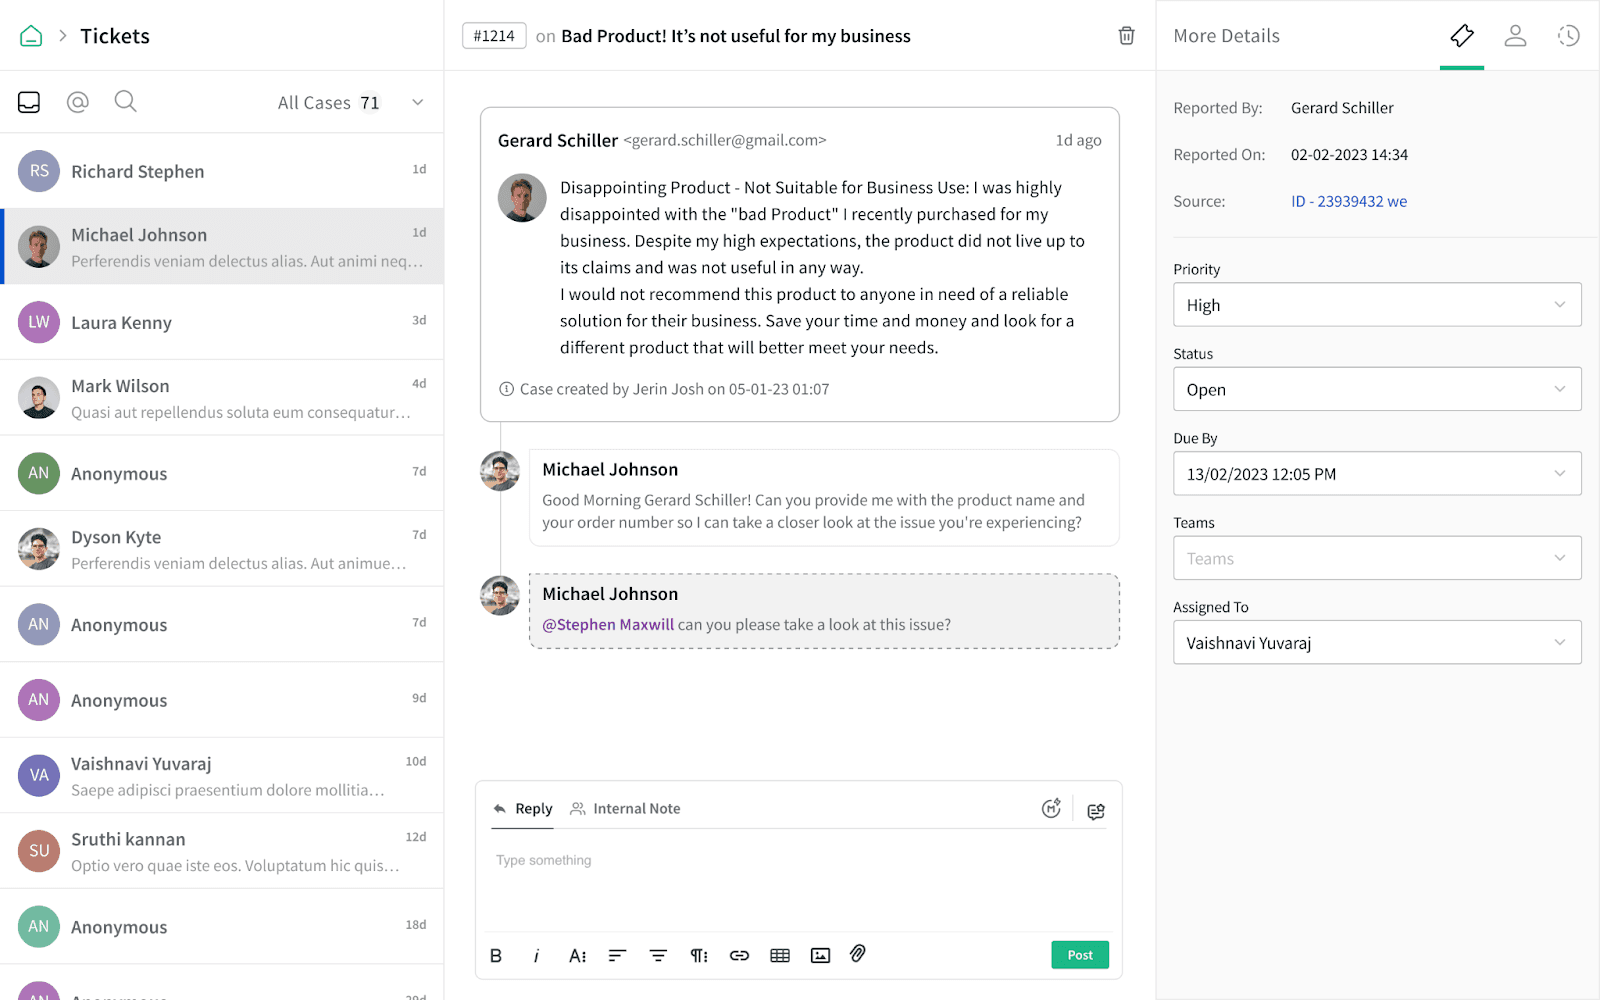
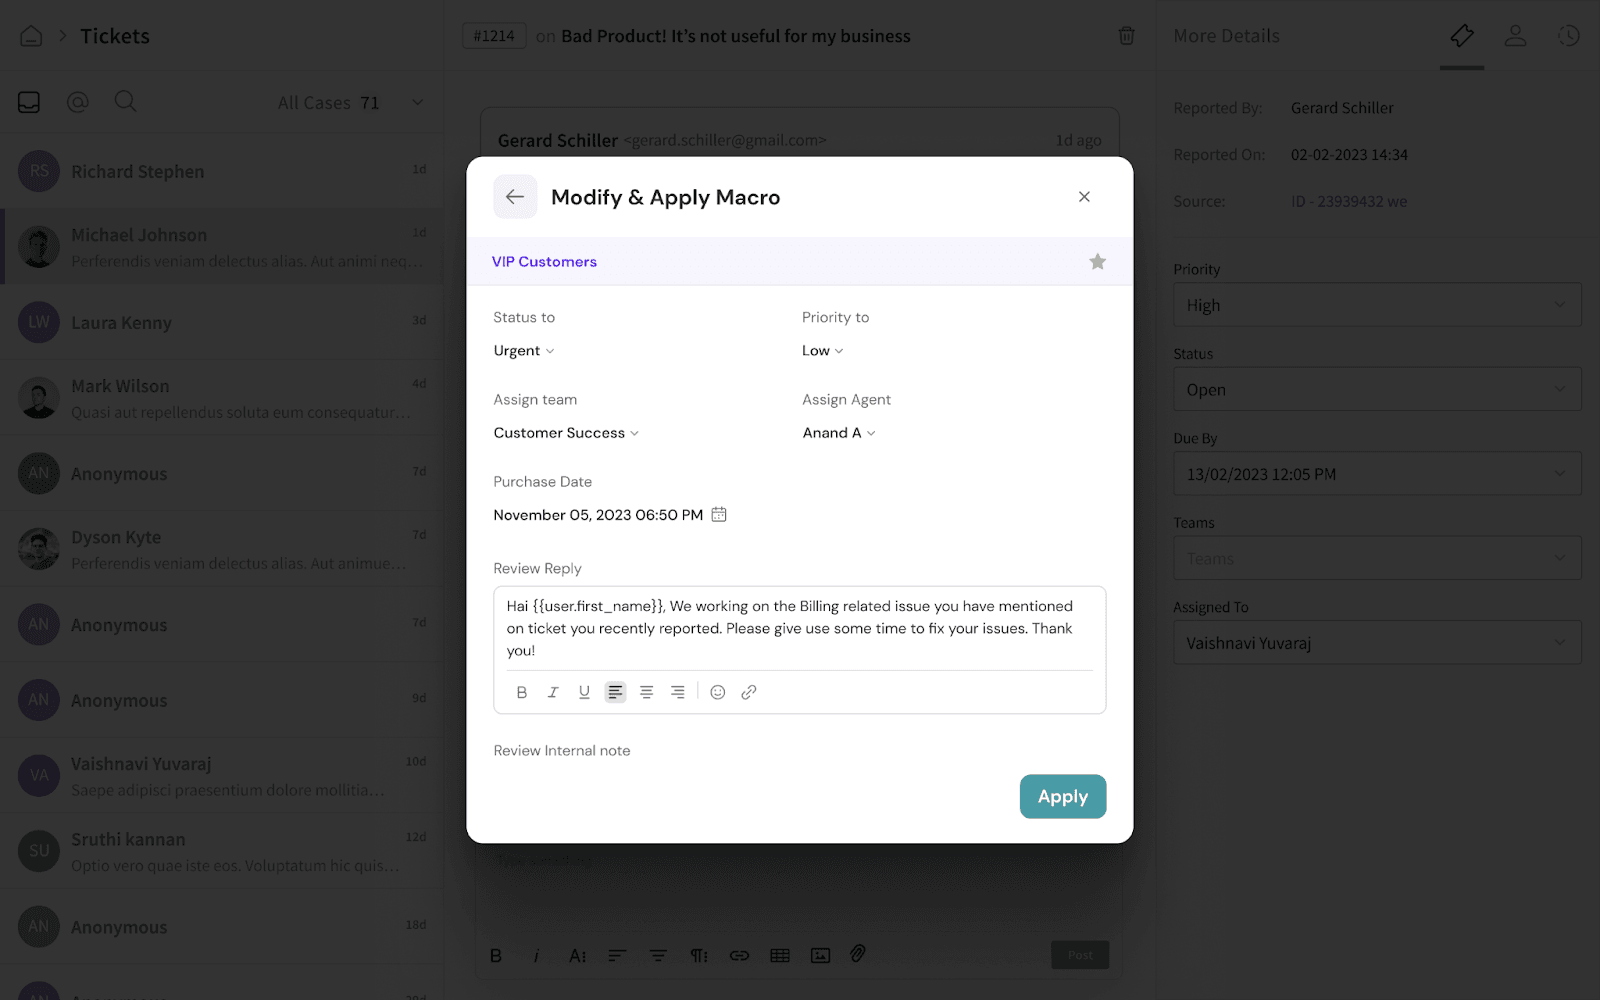
- If you want to modify the Macros before sending it, click Modify & Apply to make the necessary changes.
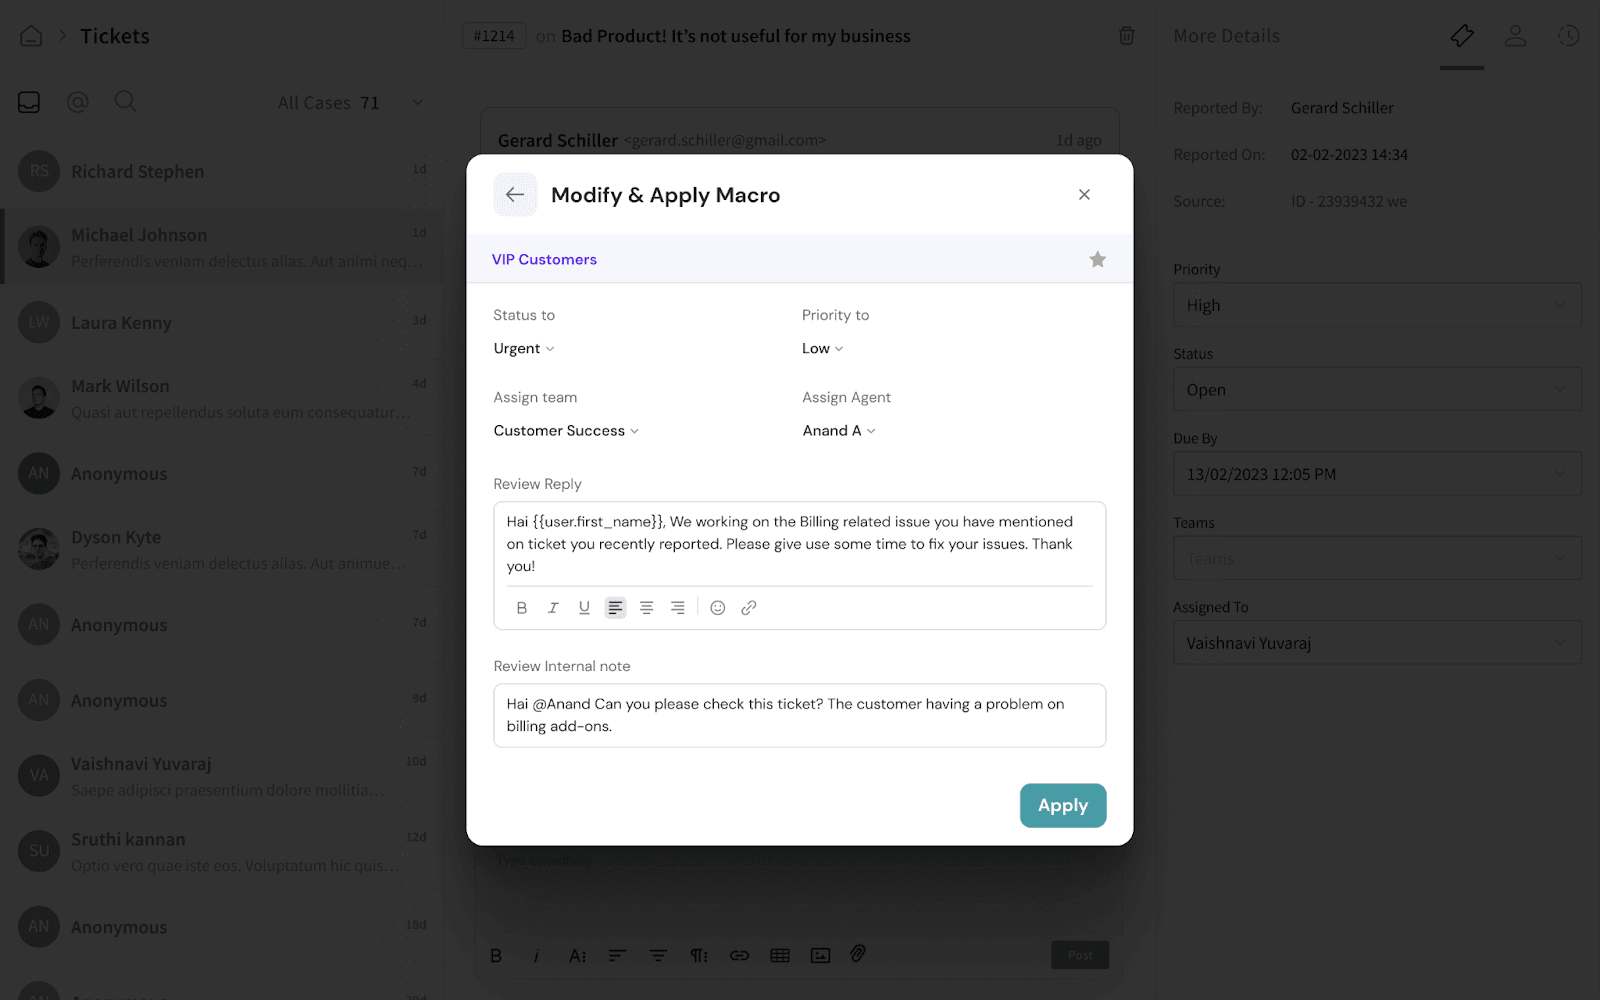
- Check out the simultaneous use of multiple Macros below with an example! You'll see the status, priority, team, agent, a custom date, and a reply all being applied in one action.
7. Managing Macro Creation Access
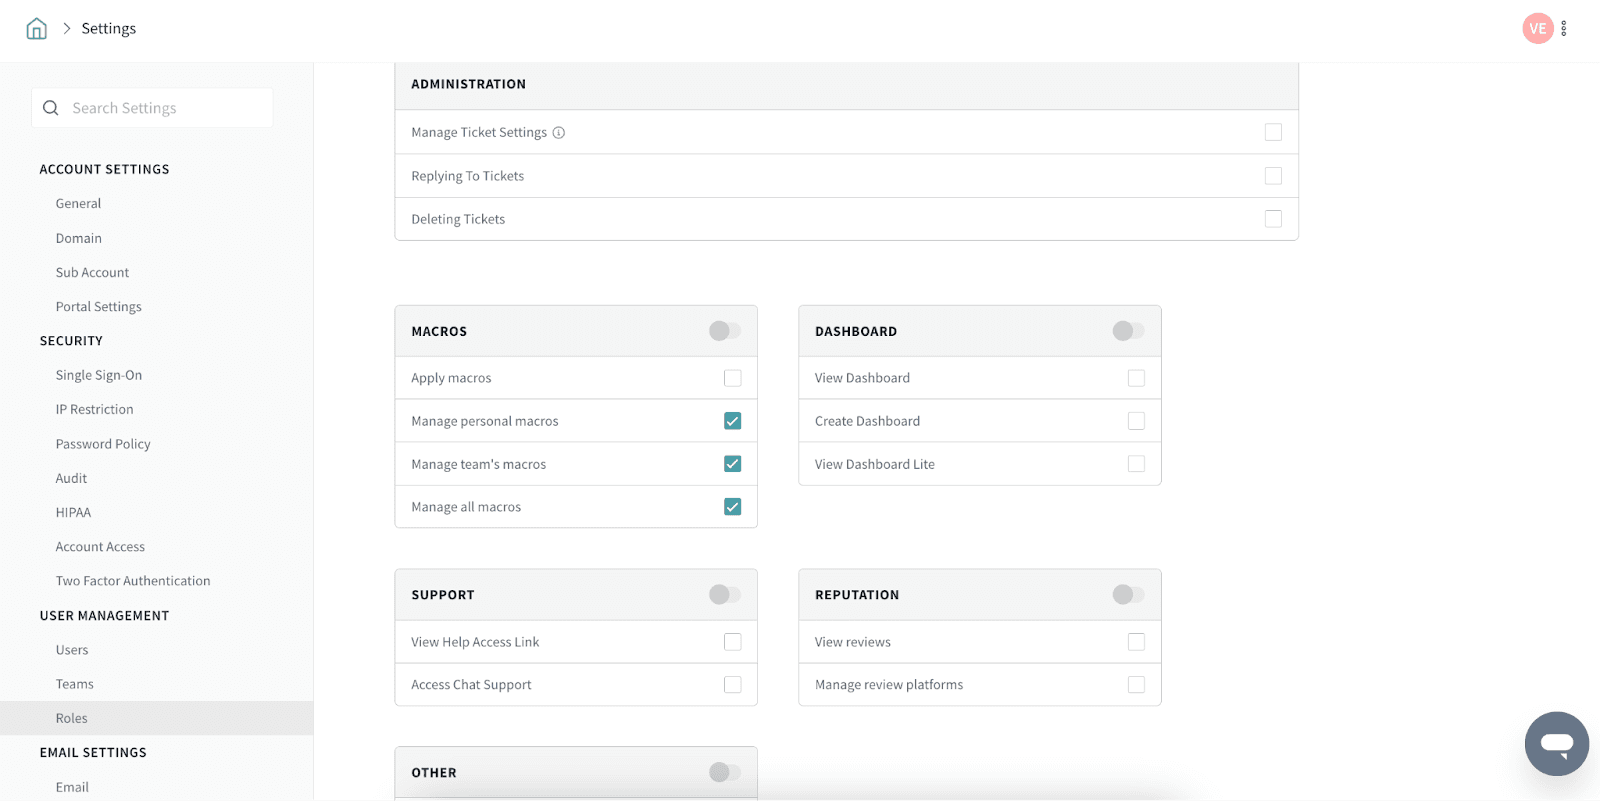
- If you prefer to restrict certain users from creating Macros, you can disable their creation access. Simply go to Settings, then User Management, and select Roles.
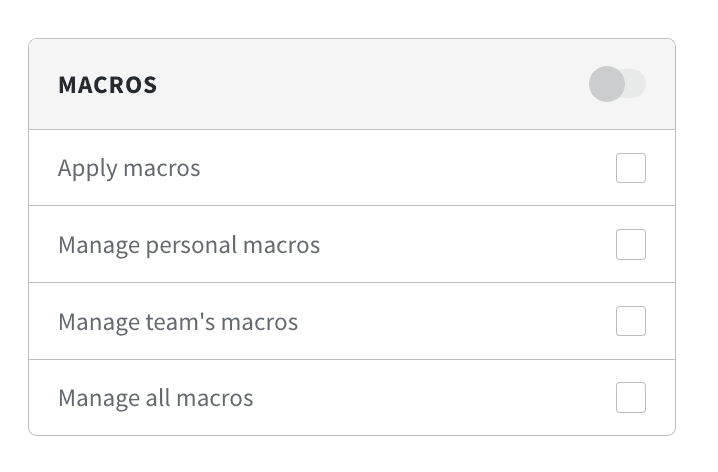
- You can either create a new custom role or modify existing privileges by clicking on the three dots in the top right corner. Scroll down to find the Macros access option.
And that's it! The Macros are successfully set up & you're good to go.
Please reach out to us if you have any questions. We are just a chat away!
![]()
![]()
![]()
![]()
![]()
![]()