Search
Every company has its own way of going about resolving customer requests and attending to feedback. The processes might vary for different industries. Here’s a proper solution to handle tickets your way.
Let’s get started on how to add custom fields for ticket management.
1. Log in to your SurveySparrow account and click the Settings icon.
2. Under Ticket Management, click Ticket Fields.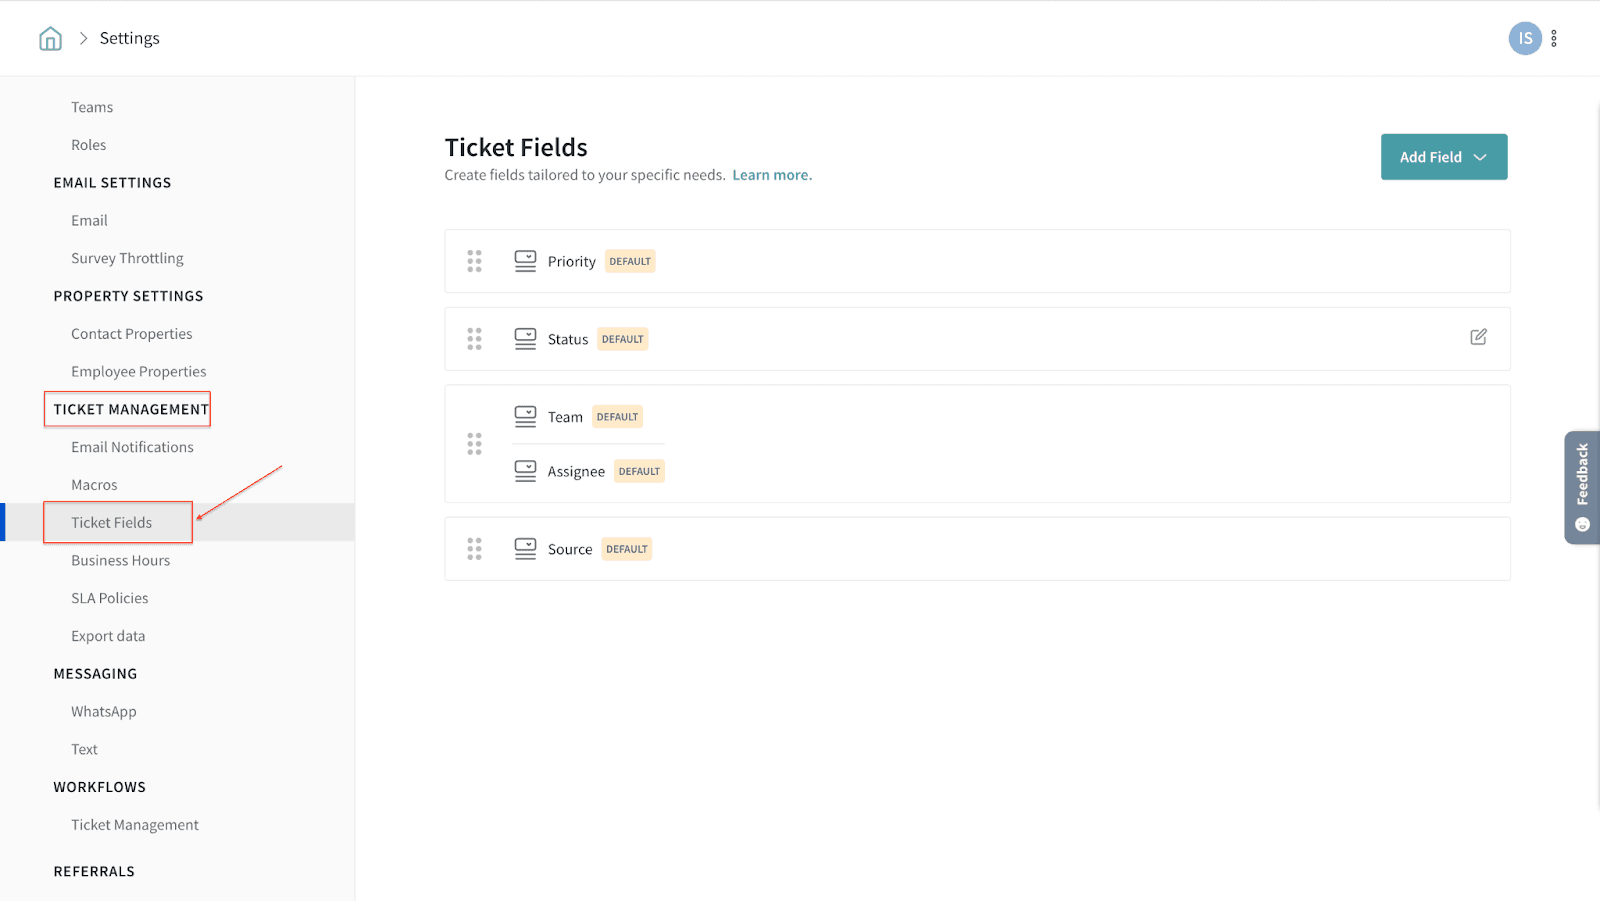
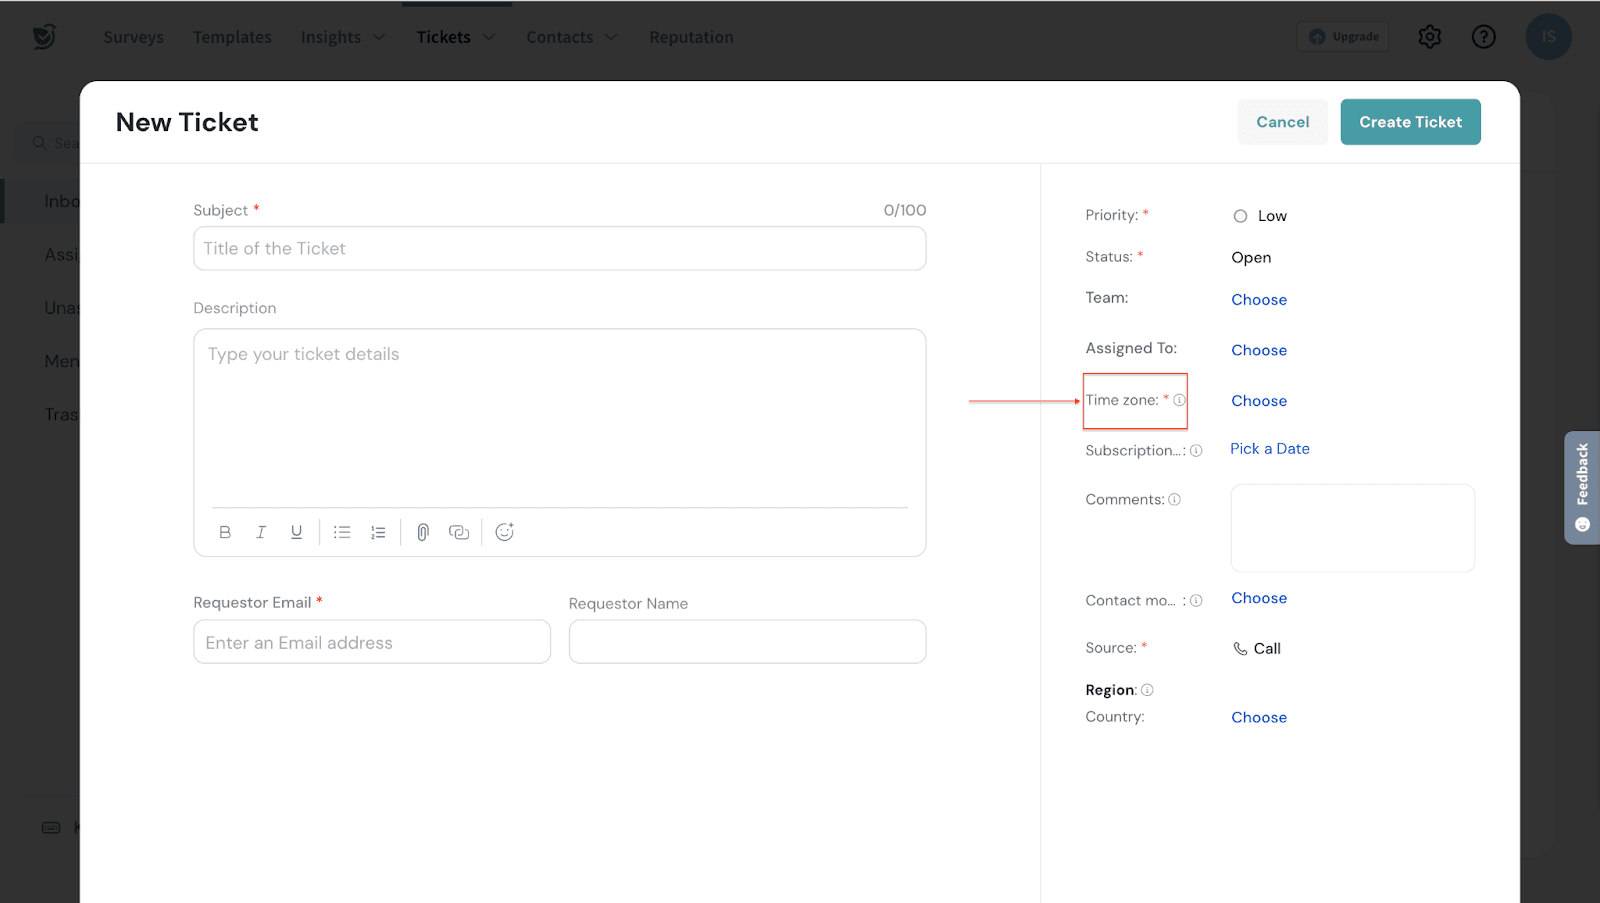
You can see the default ticket fields available for Ticket management.
3. Click Add Field to view the supported field types.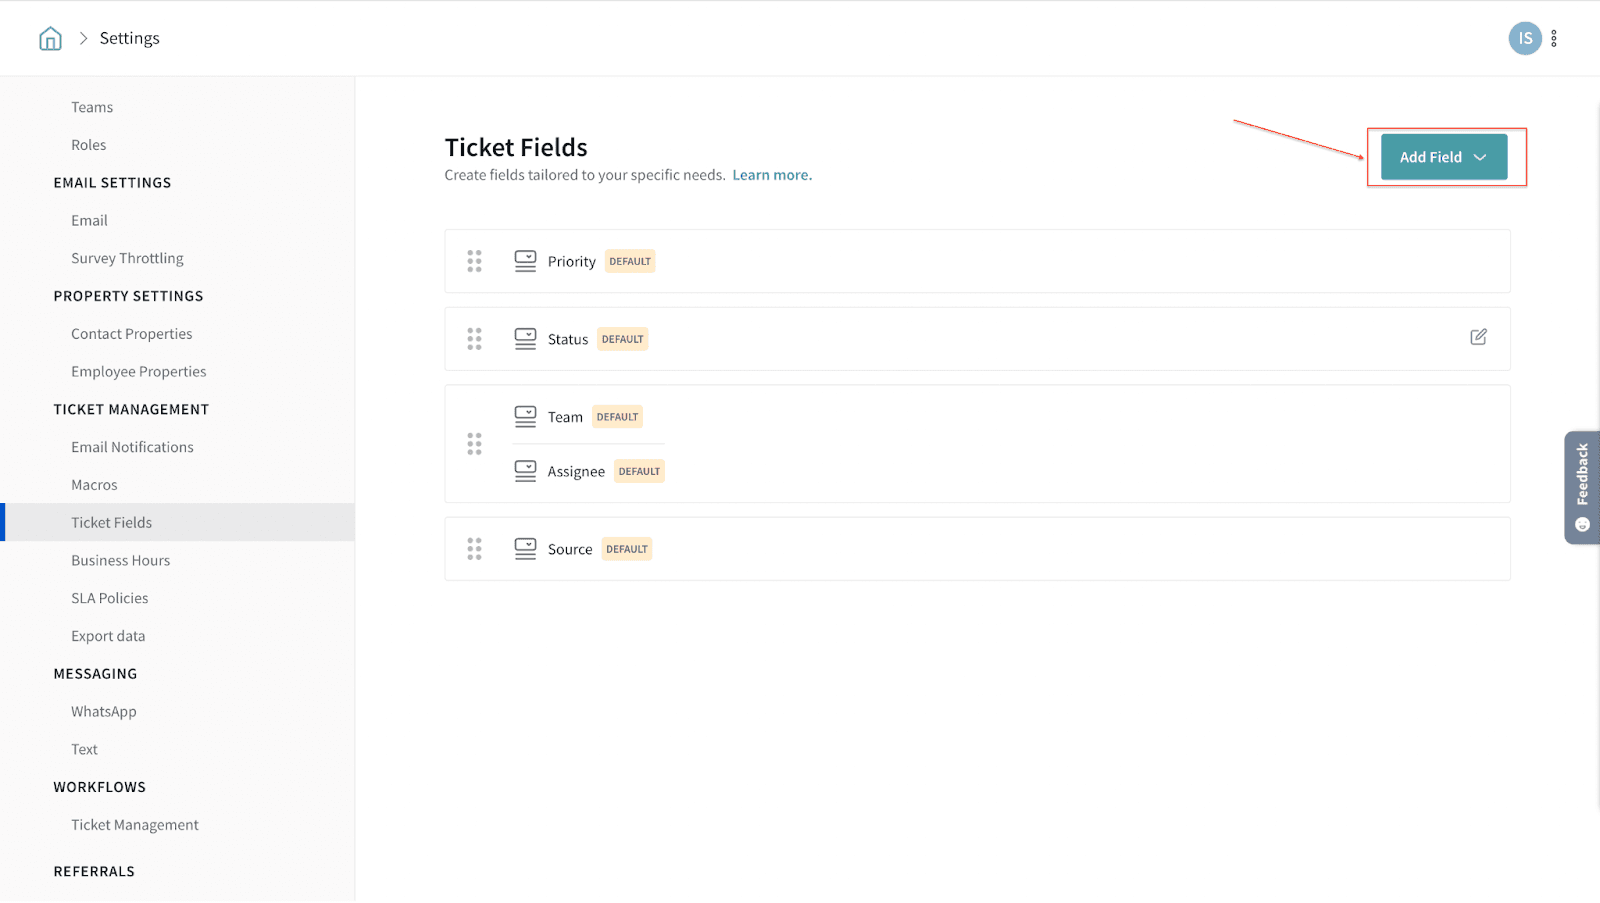
4. Choose a field type from the available list.
Now, let’s dive deeper to learn about how these fields function for you to choose the right field for your needs.
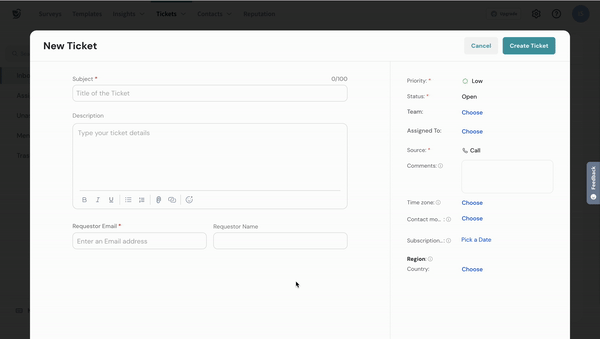
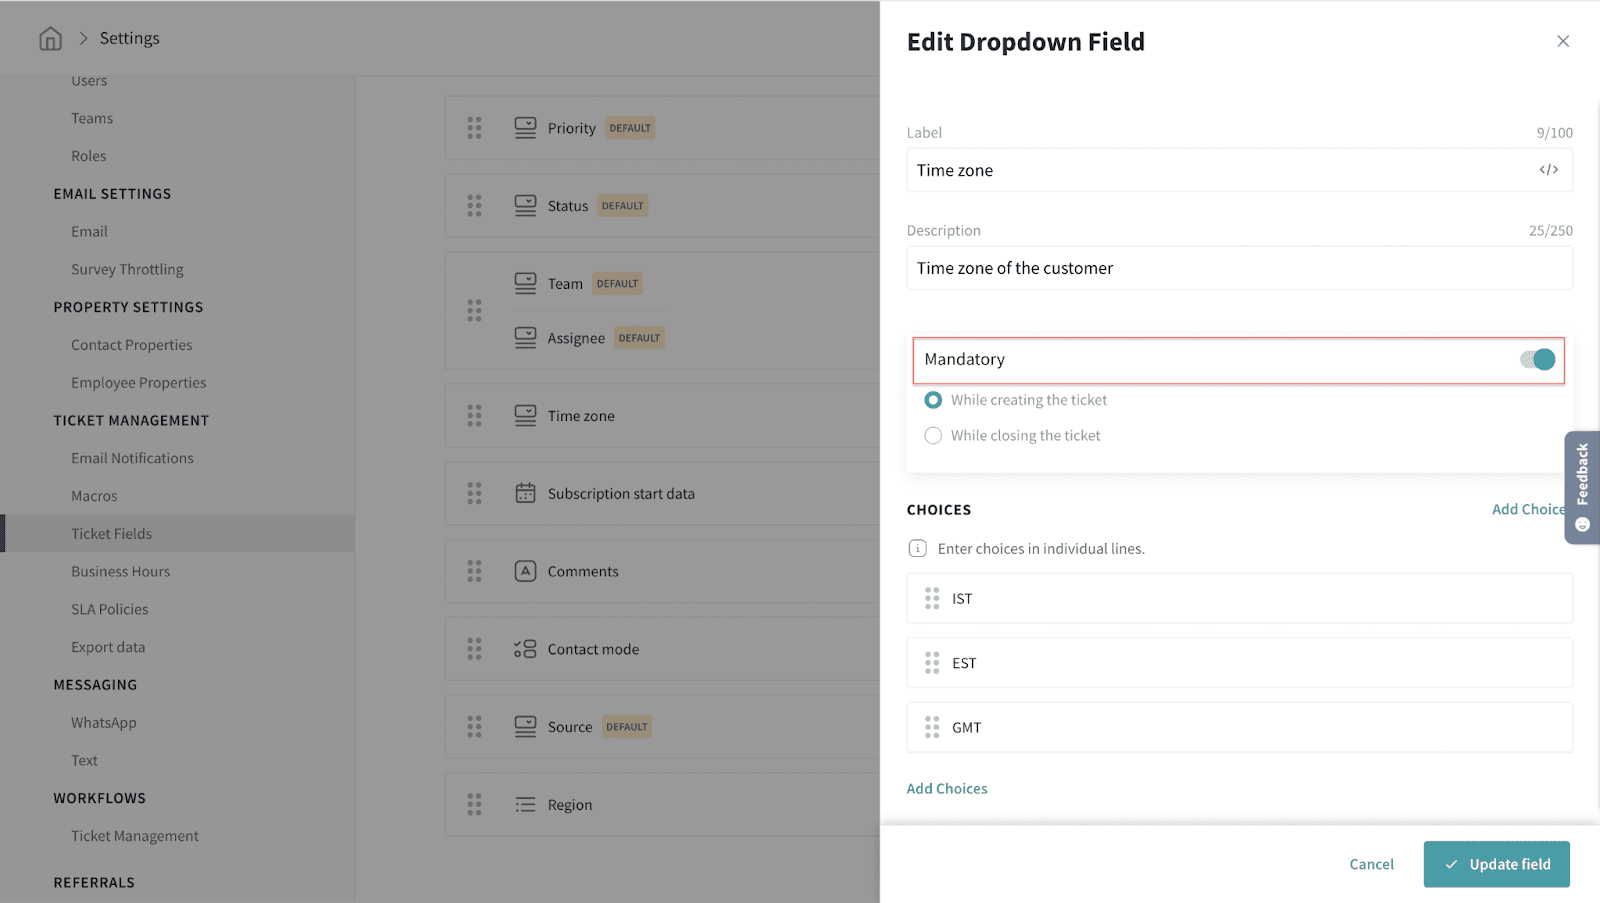
The text field will allow you to enter single-line or multiline texts. By default, the text field is configured to accept single-line text input.
To configure multiline text input, enable the “Support multiline text” toggle.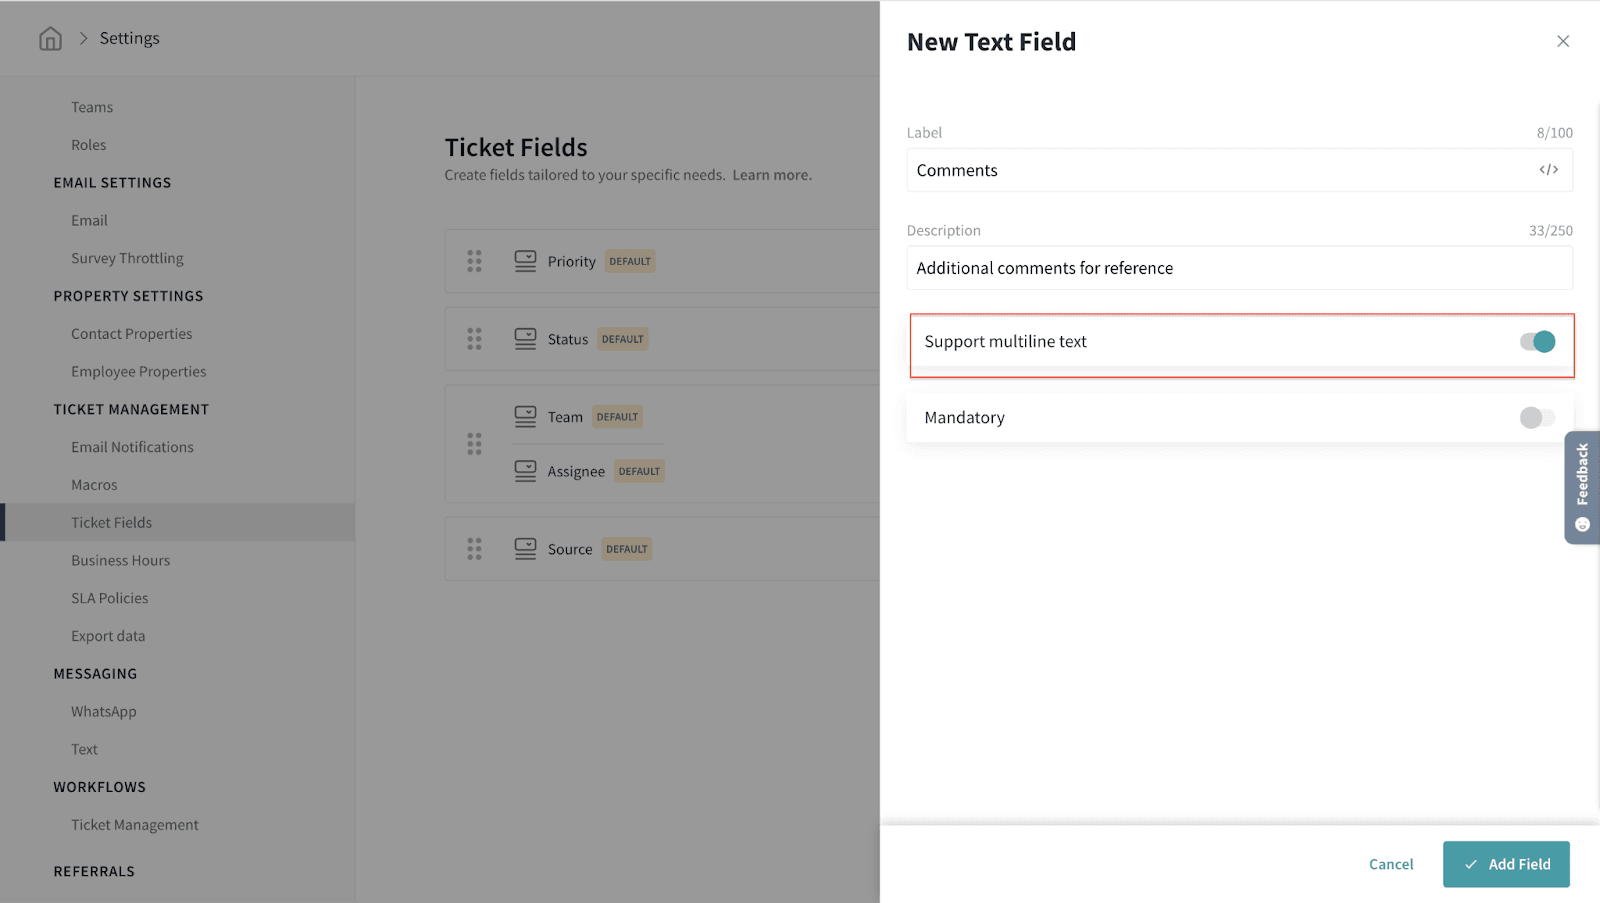
Sample screen while creating a ticket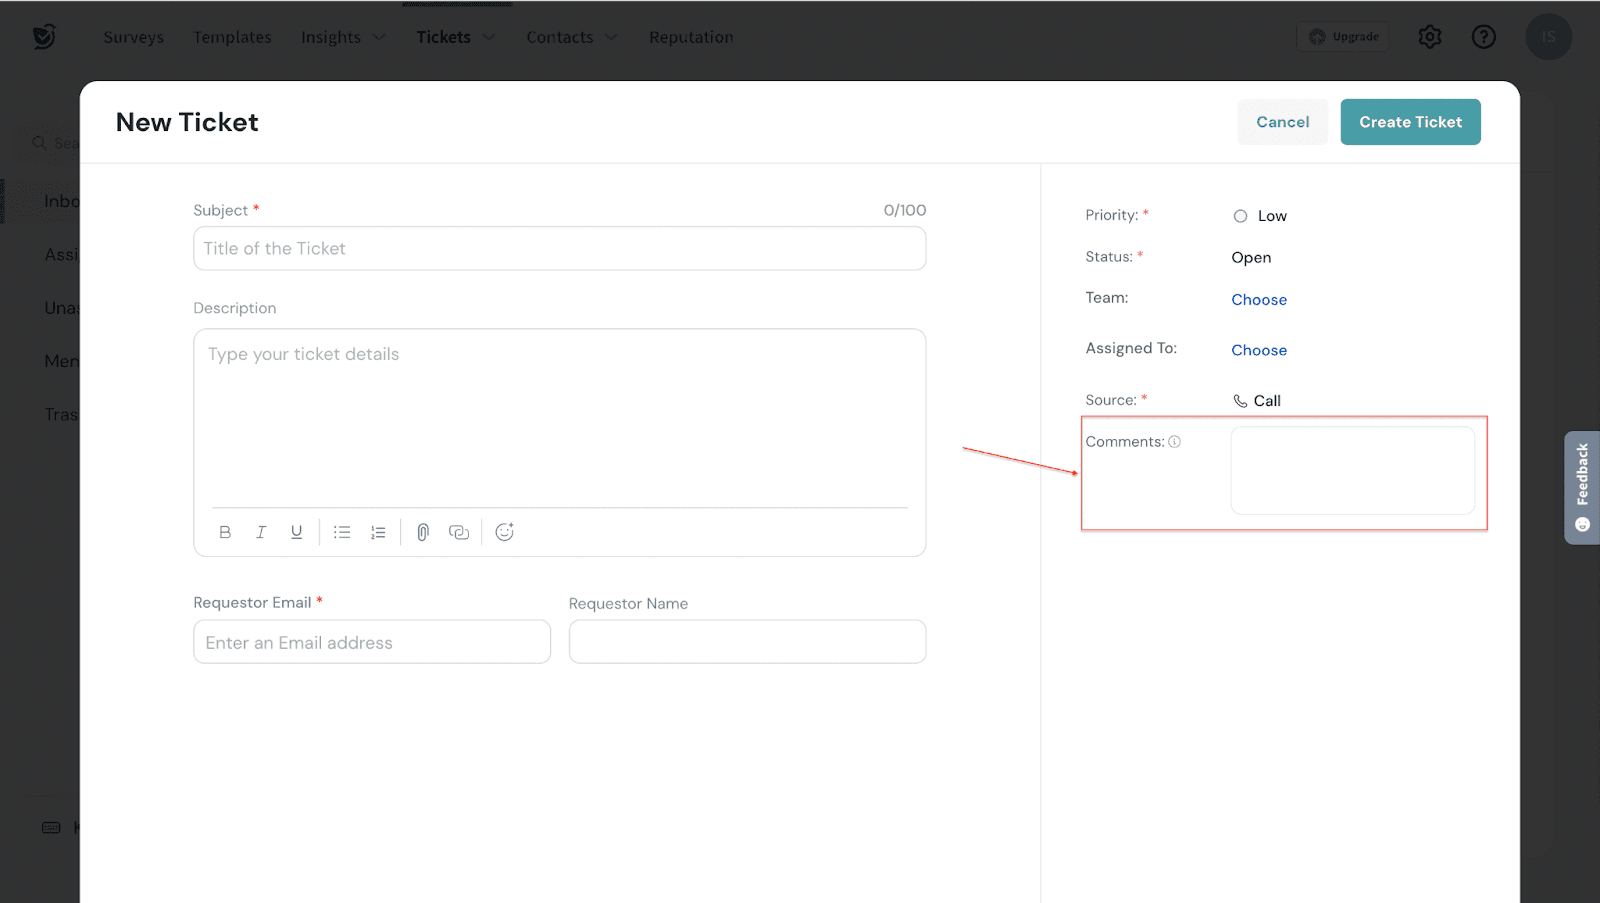
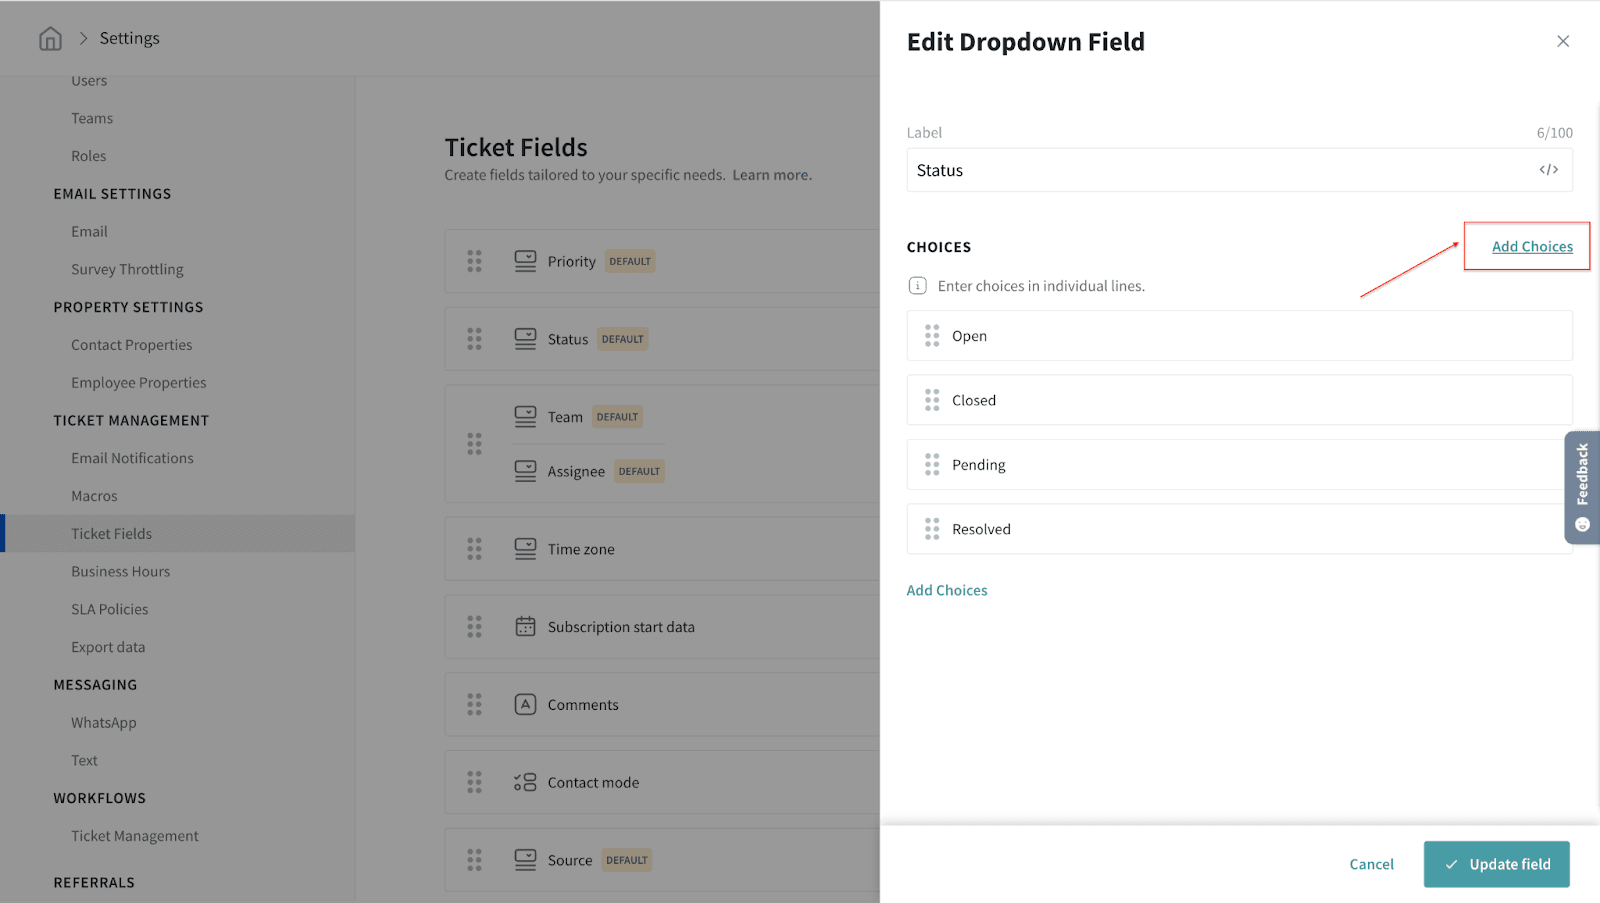
Dropdown field
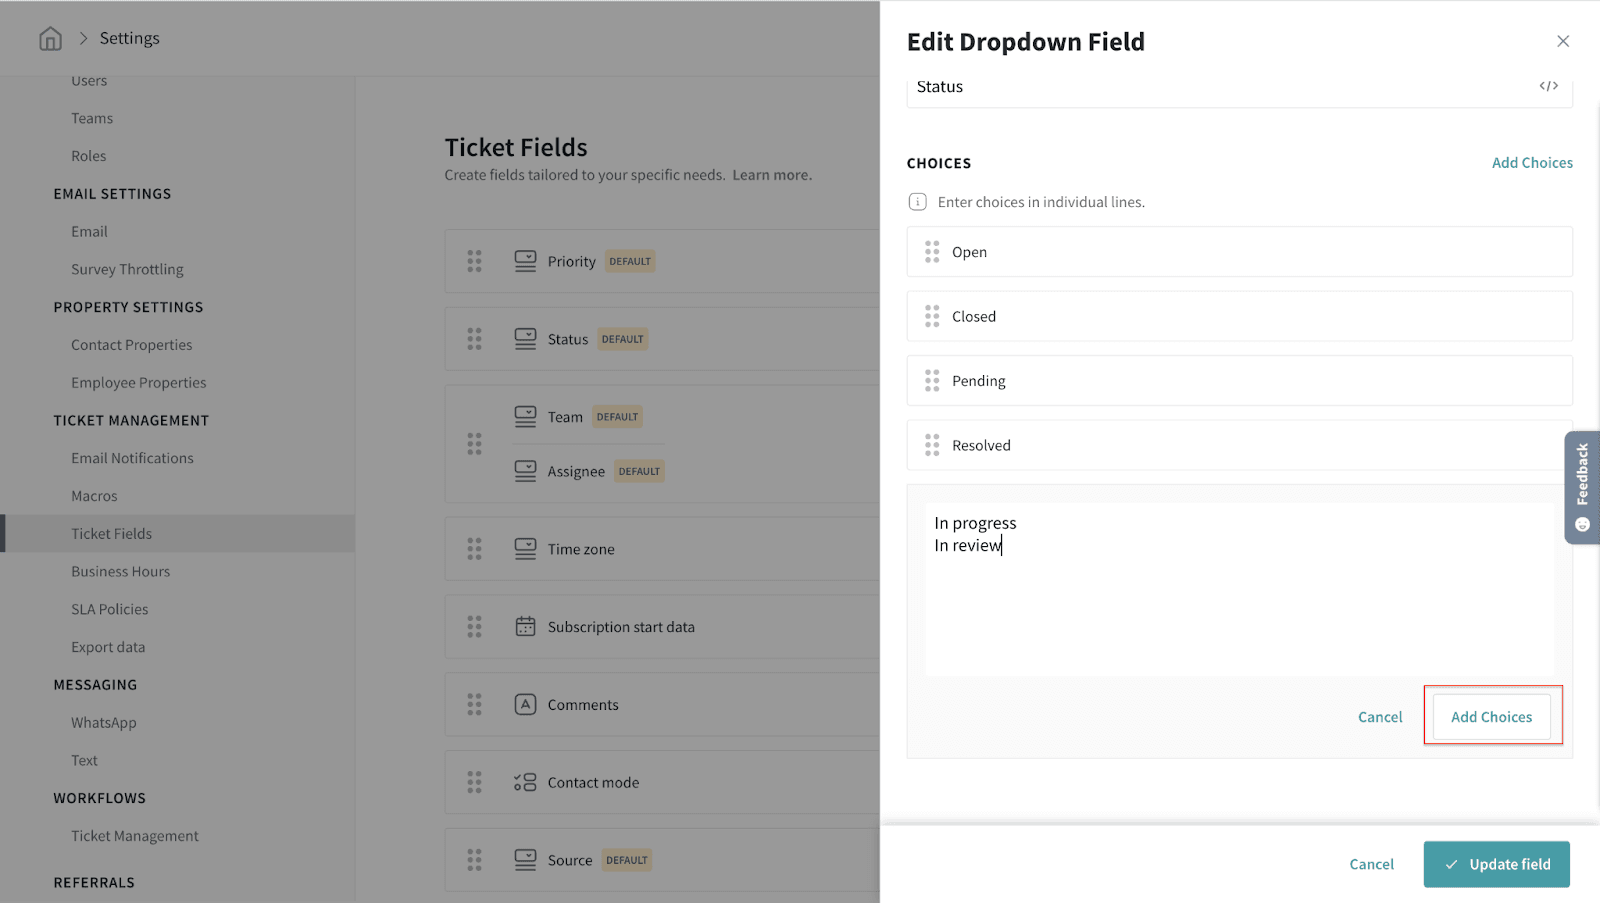
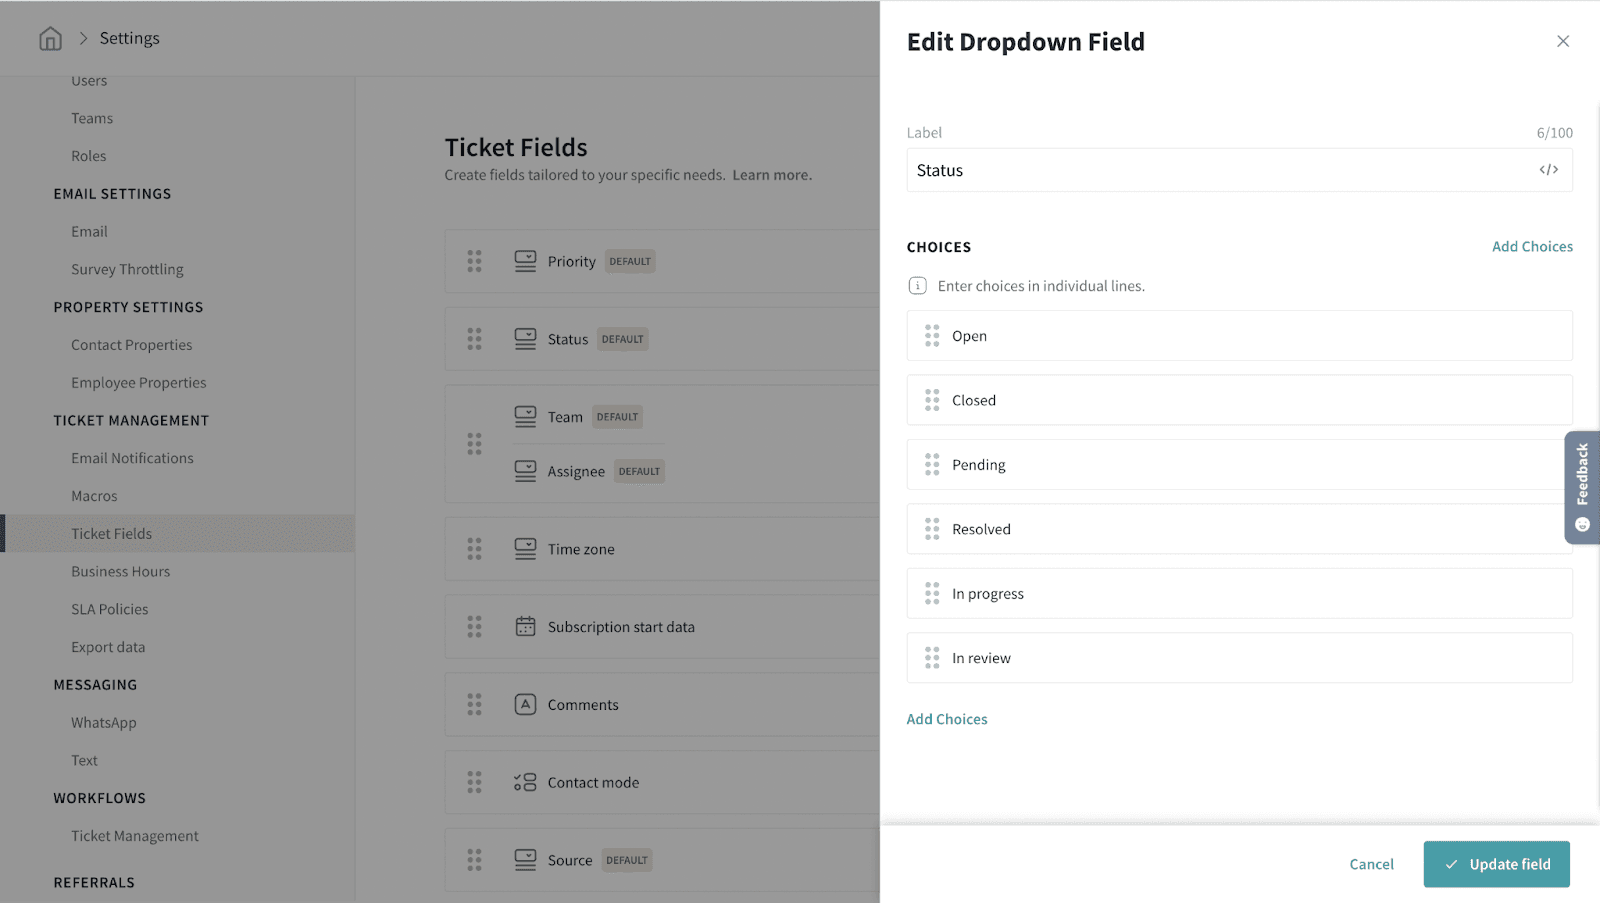
With the dropdown field, you can add a list of choices to choose from. Enter the choices, one on each line. Then, click Add Choices.
Once the choices are added you can drag and drop to rearrange them.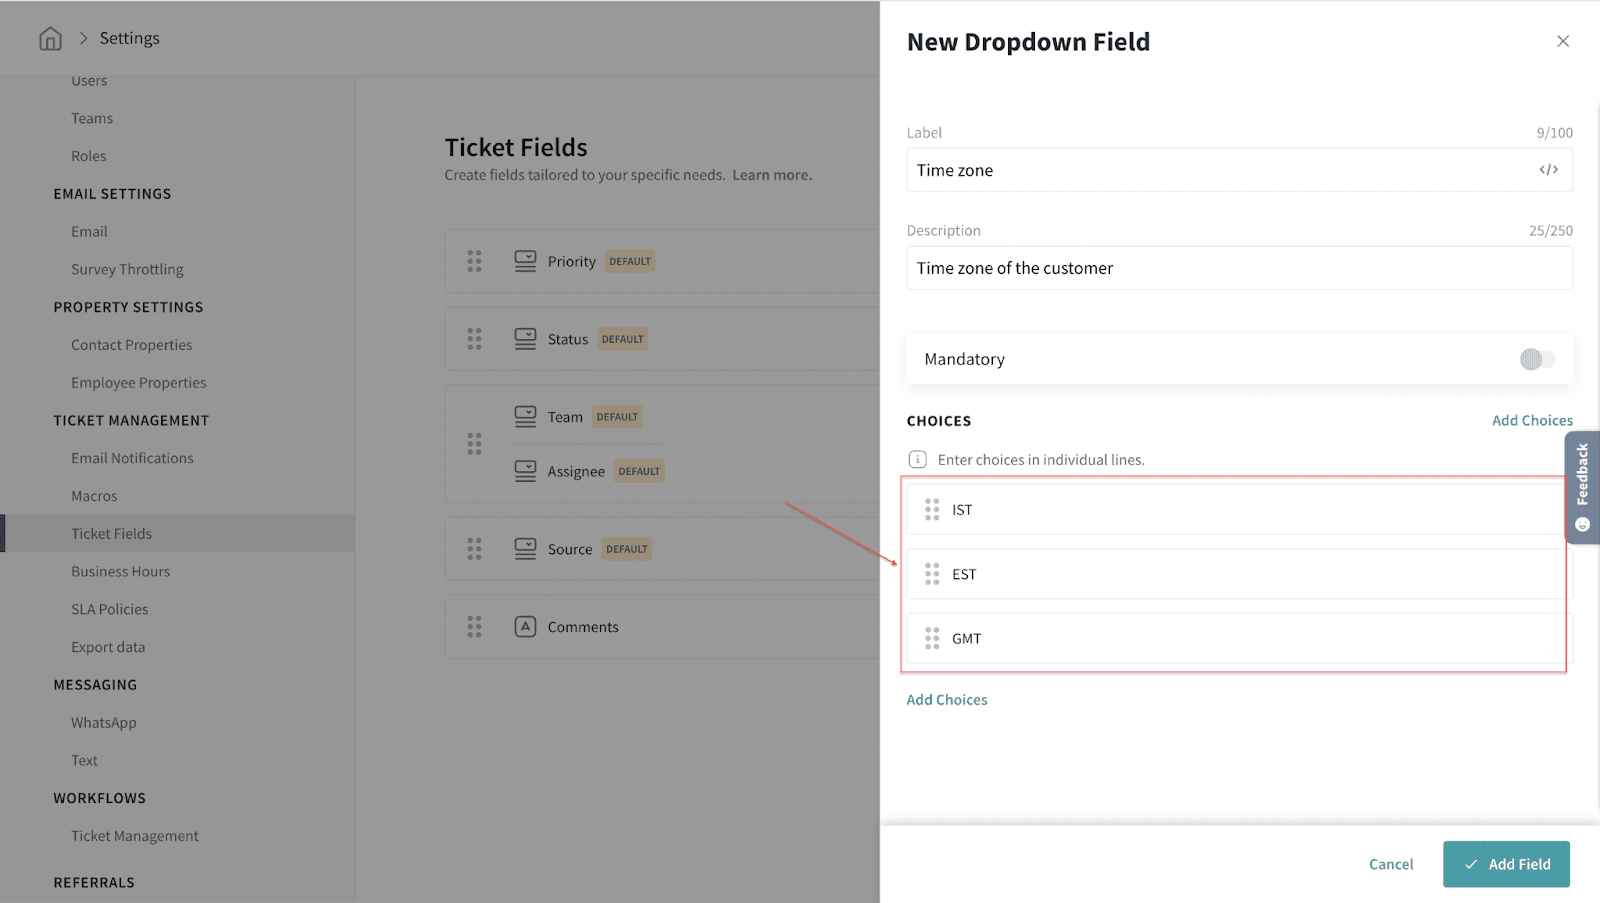
If you would like to delete a choice, you can hover over the corresponding choice and click the delete icon.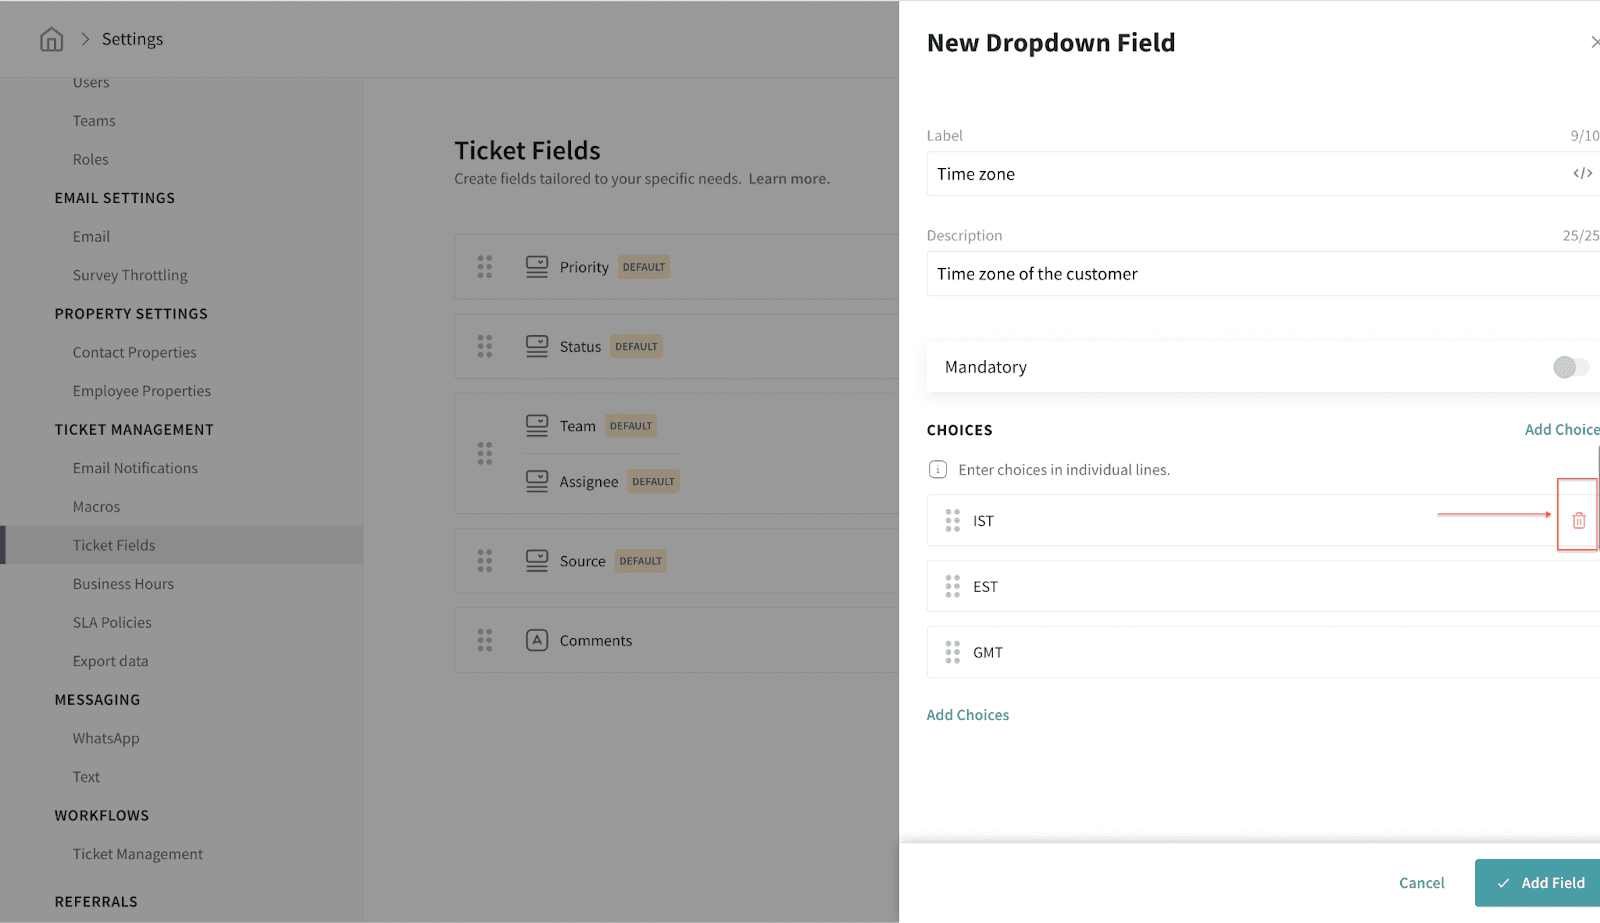
Sample screen while creating a ticket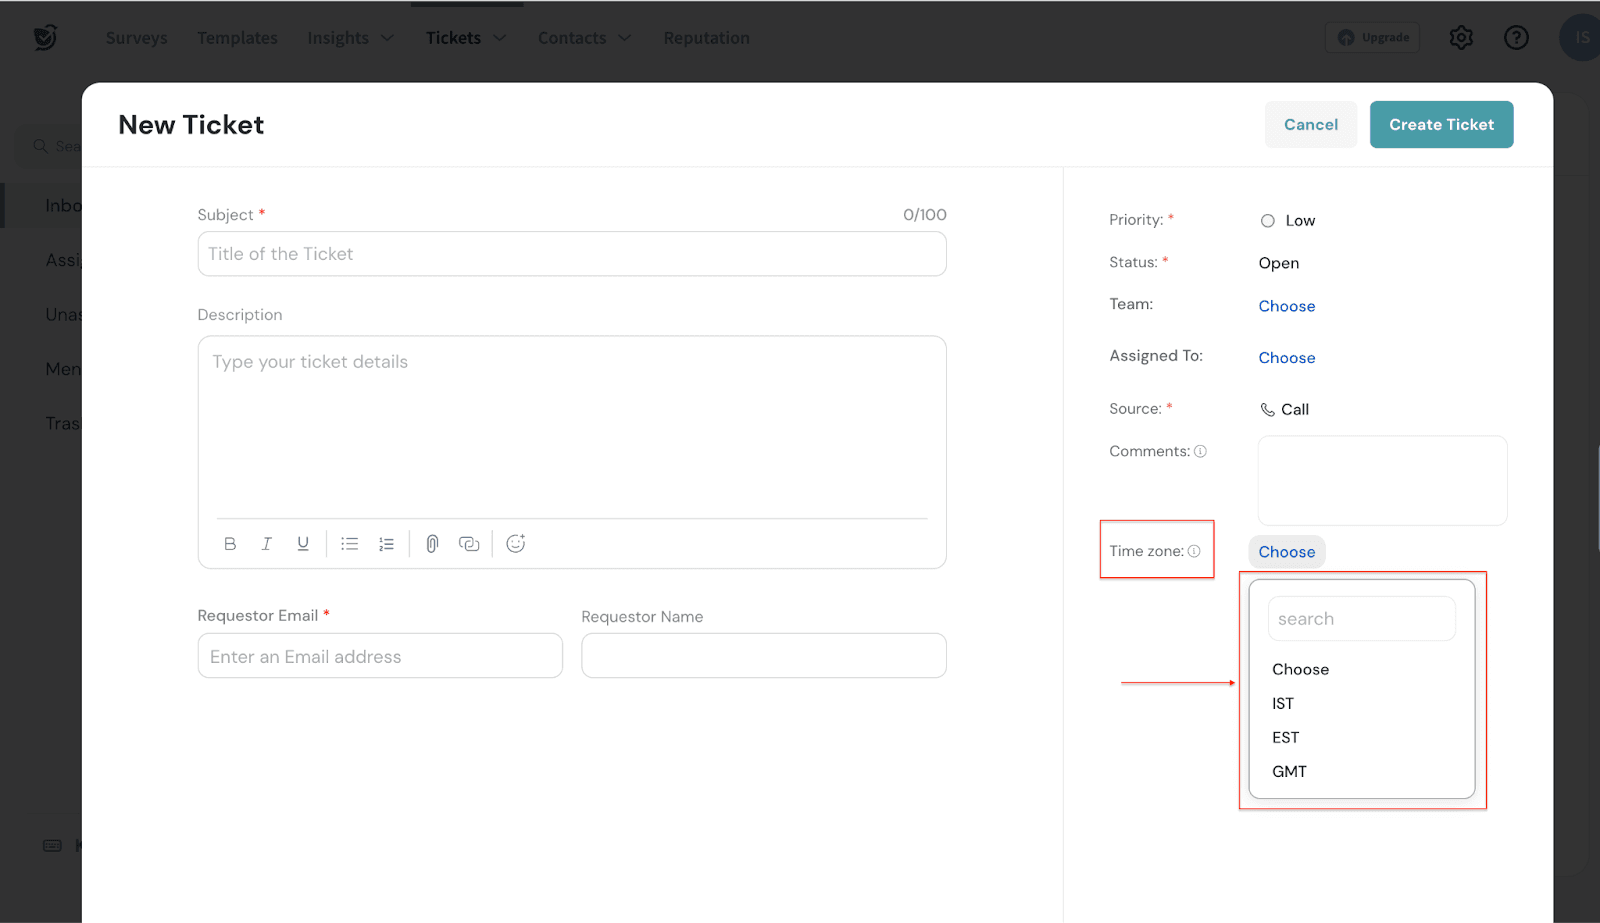
Multiselect field
The Multiselect field enables you to choose multiple choices from a list of available options. Similar to the dropdown field, add the choices one on each line and click Add Choices.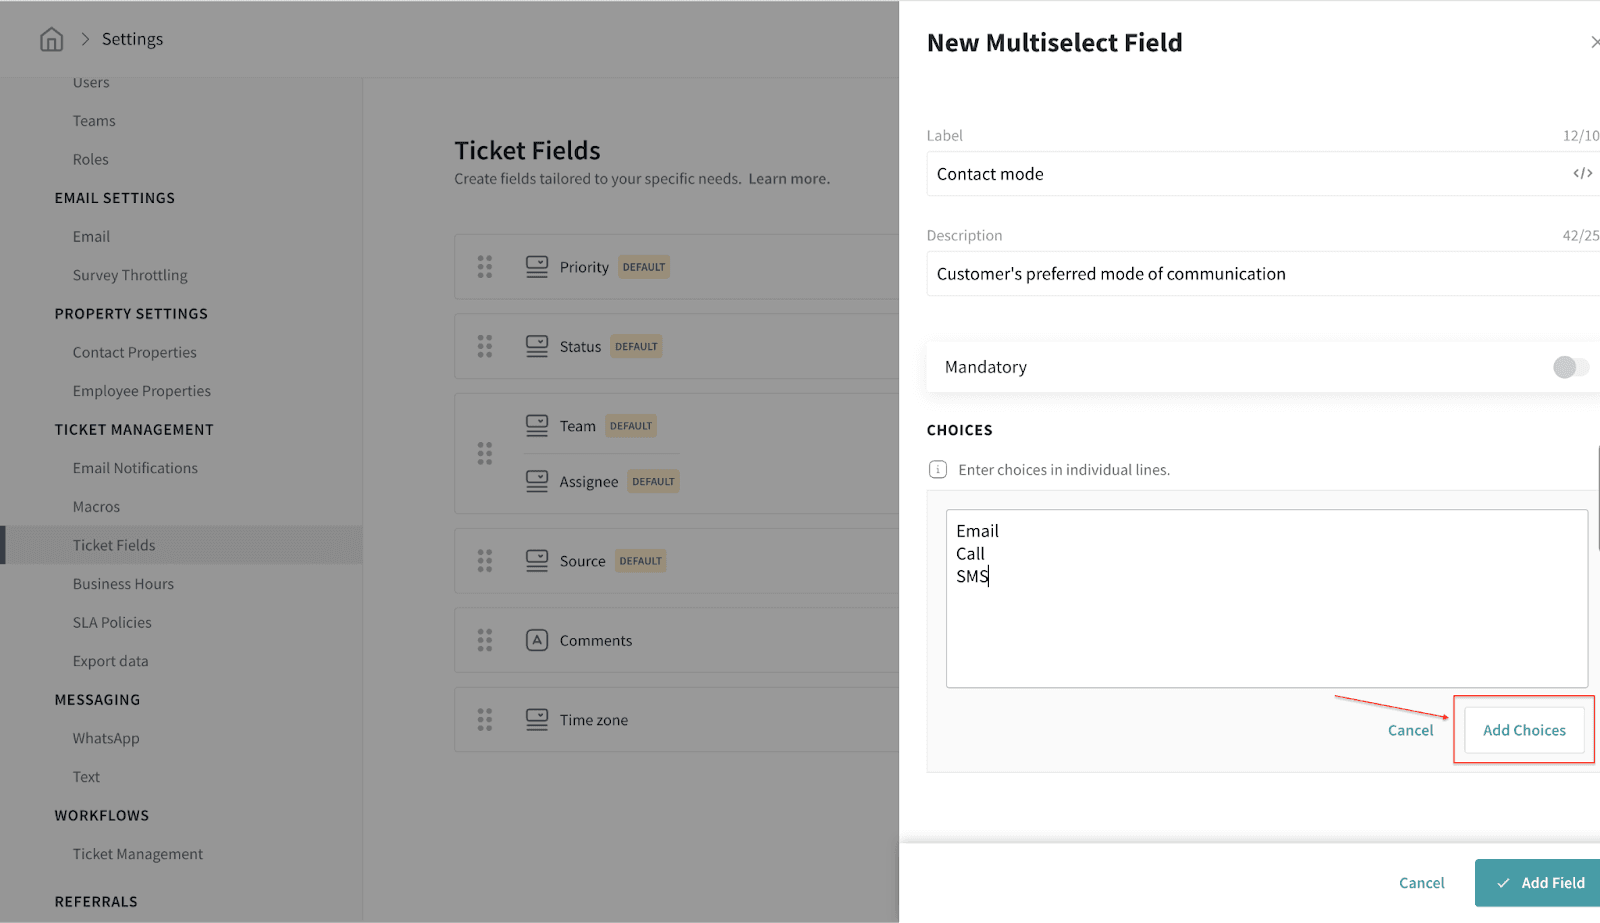
Once added, you can drag and drop the choices to rearrange them.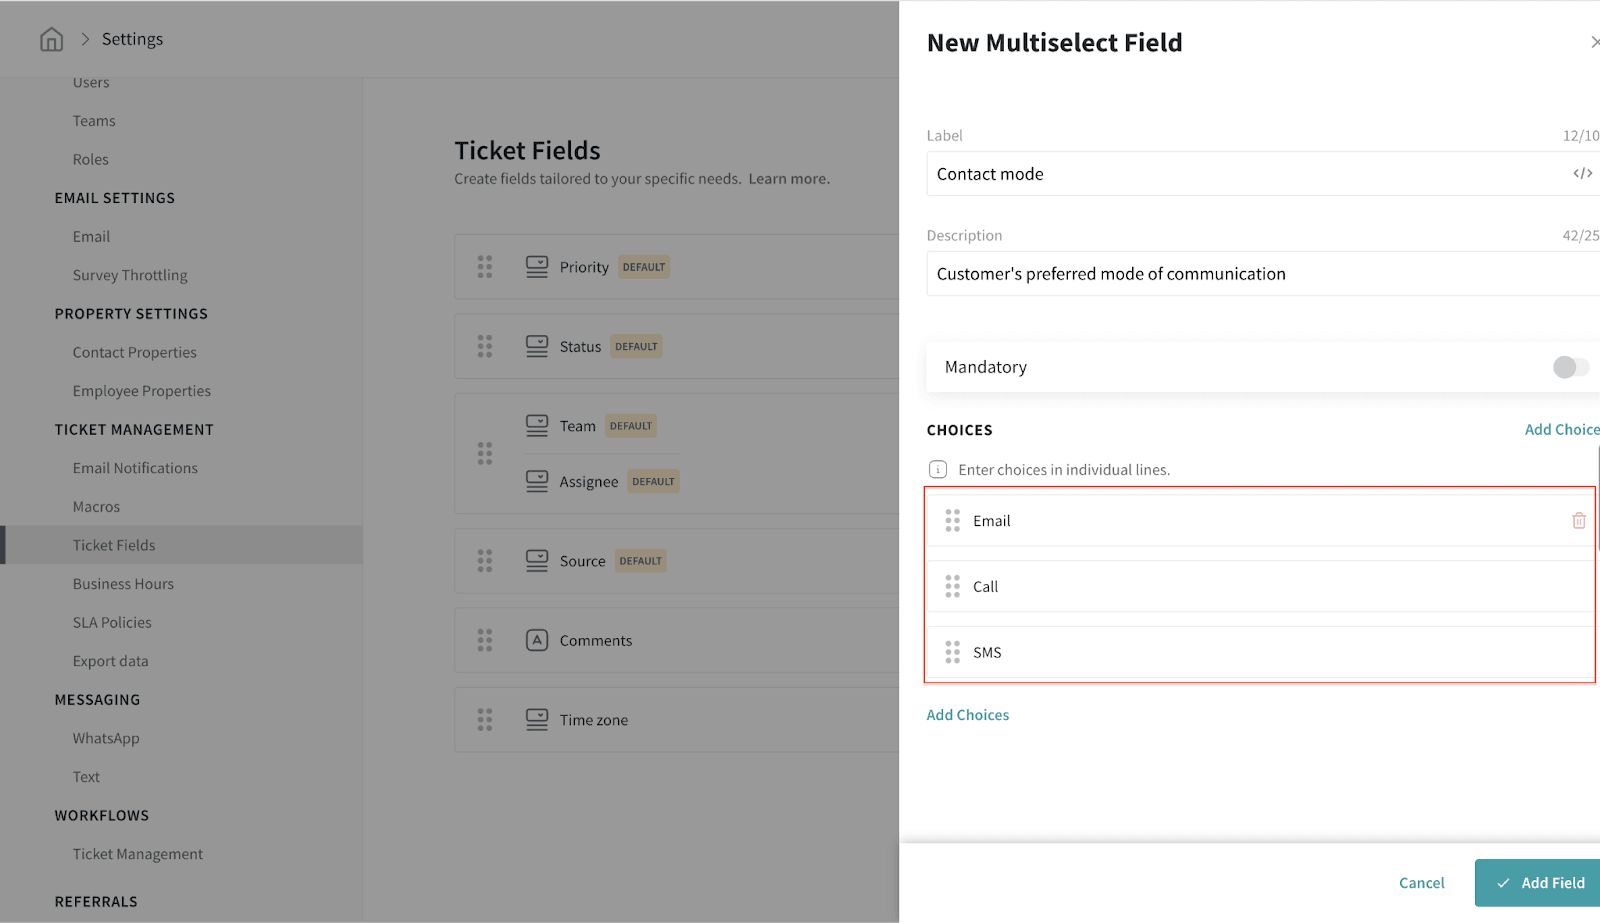
If you would like to delete a choice, you can hover over the corresponding choice and click the delete icon.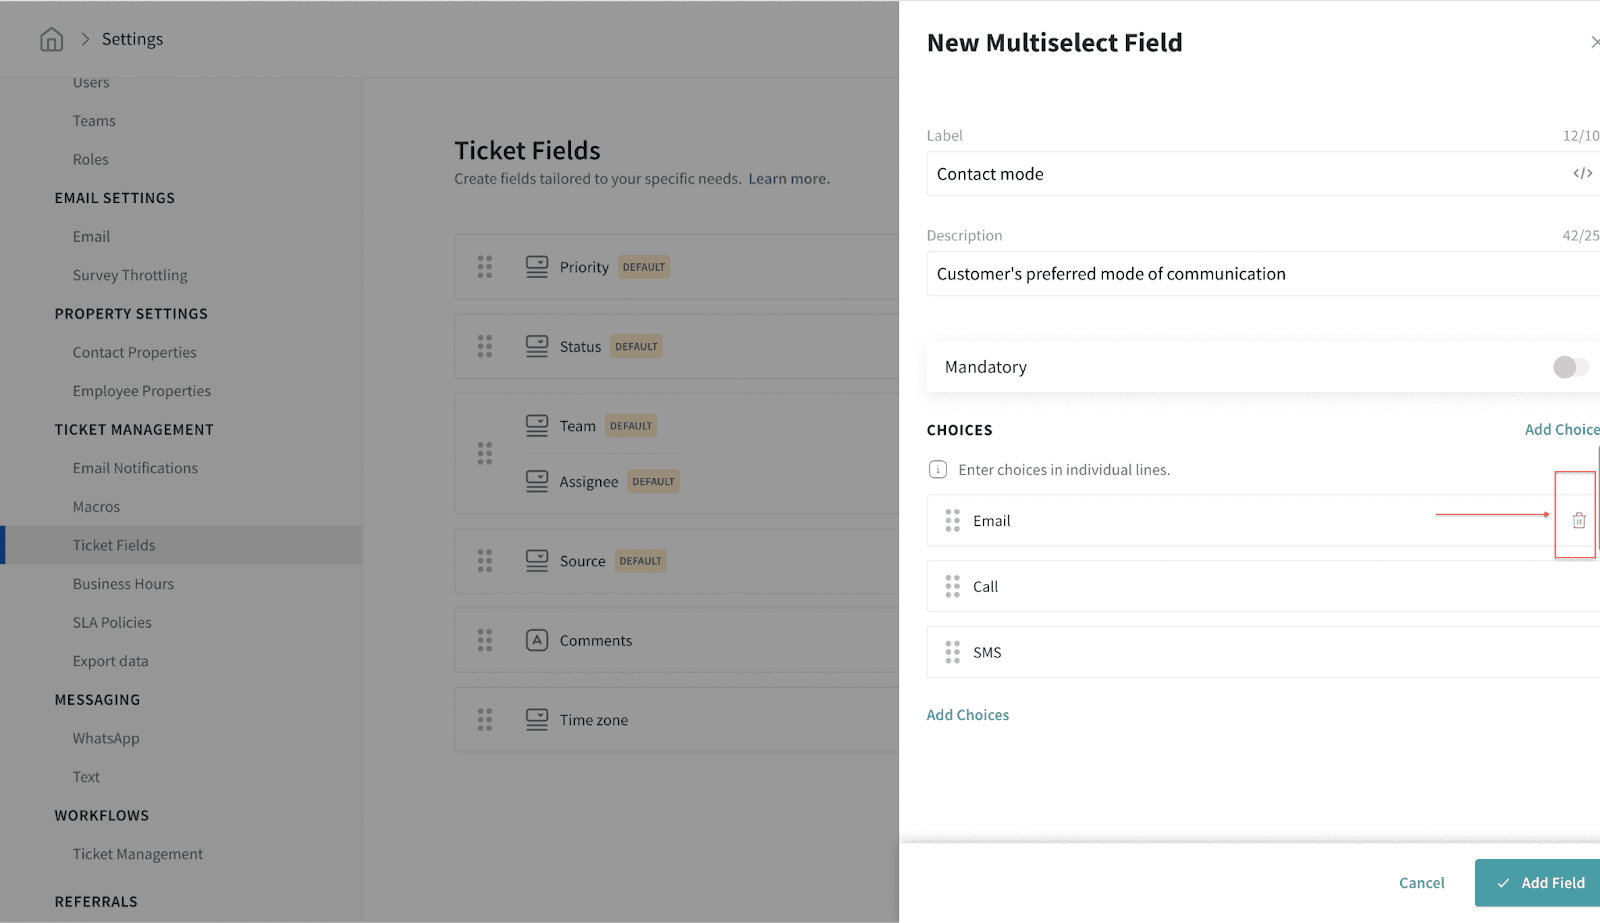
Sample screen while creating a ticket
Date field
The date field will allow you to select a date relevant to your requirement. You can choose a data format of your liking.
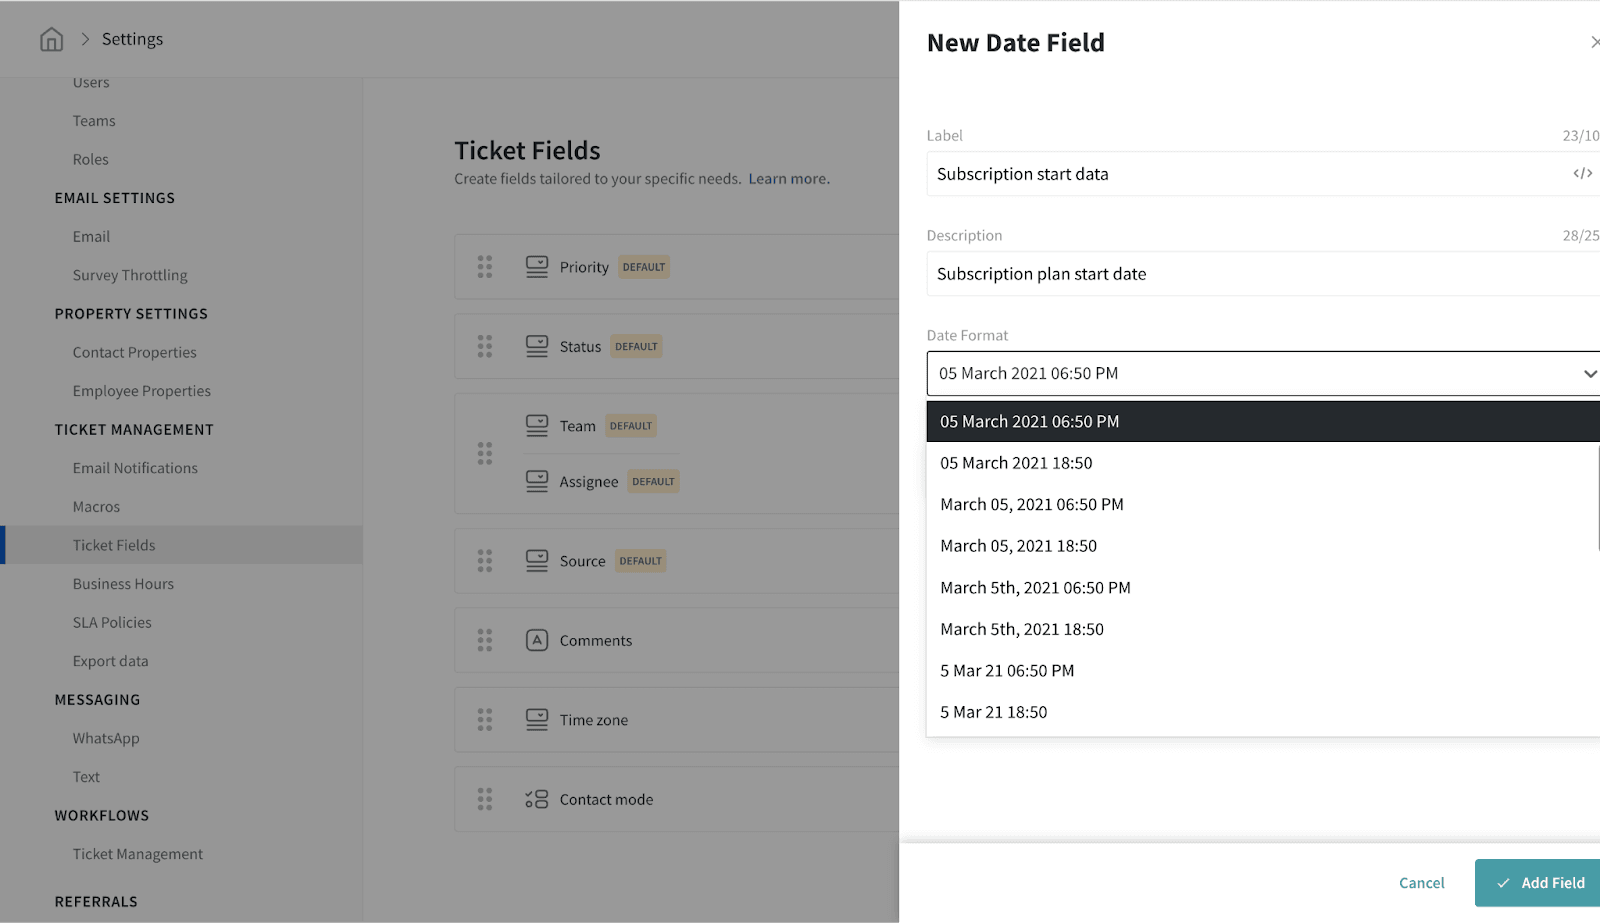
Once you choose a date format, click Add Field.
Sample screen while creating a ticket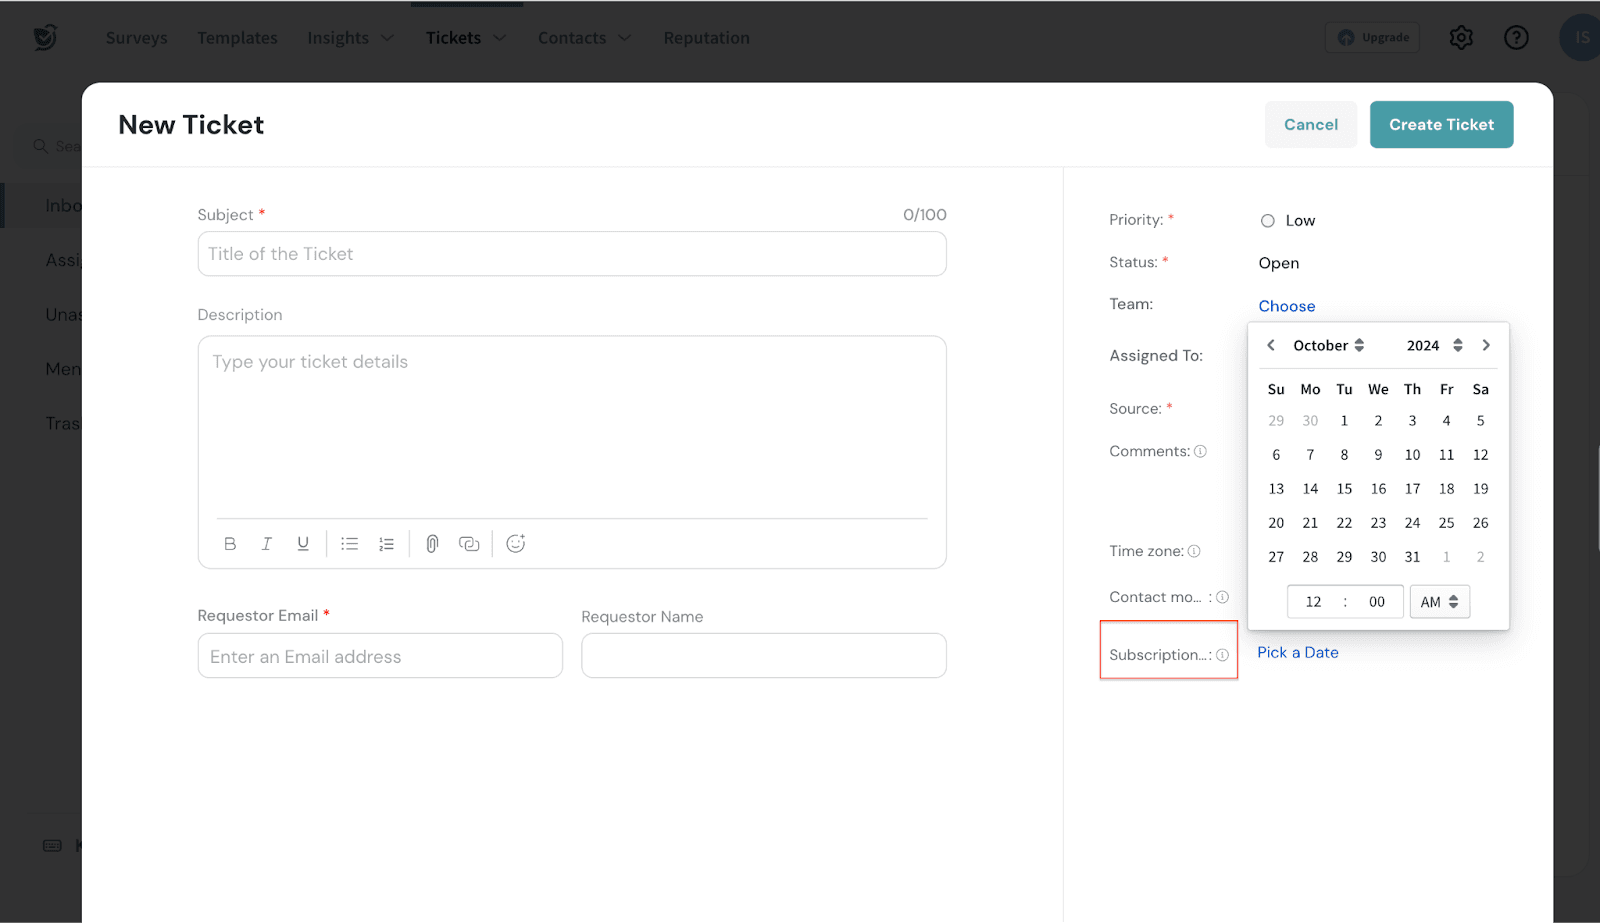
Nested field
Thinking of displaying choices based on a previous selection? Nested fields are here to help you out!
By default, you have two levels. Based on the choice selected in the first level, relevant choices will be shown next. If you need to have another level of choices to be shown, click Add Level.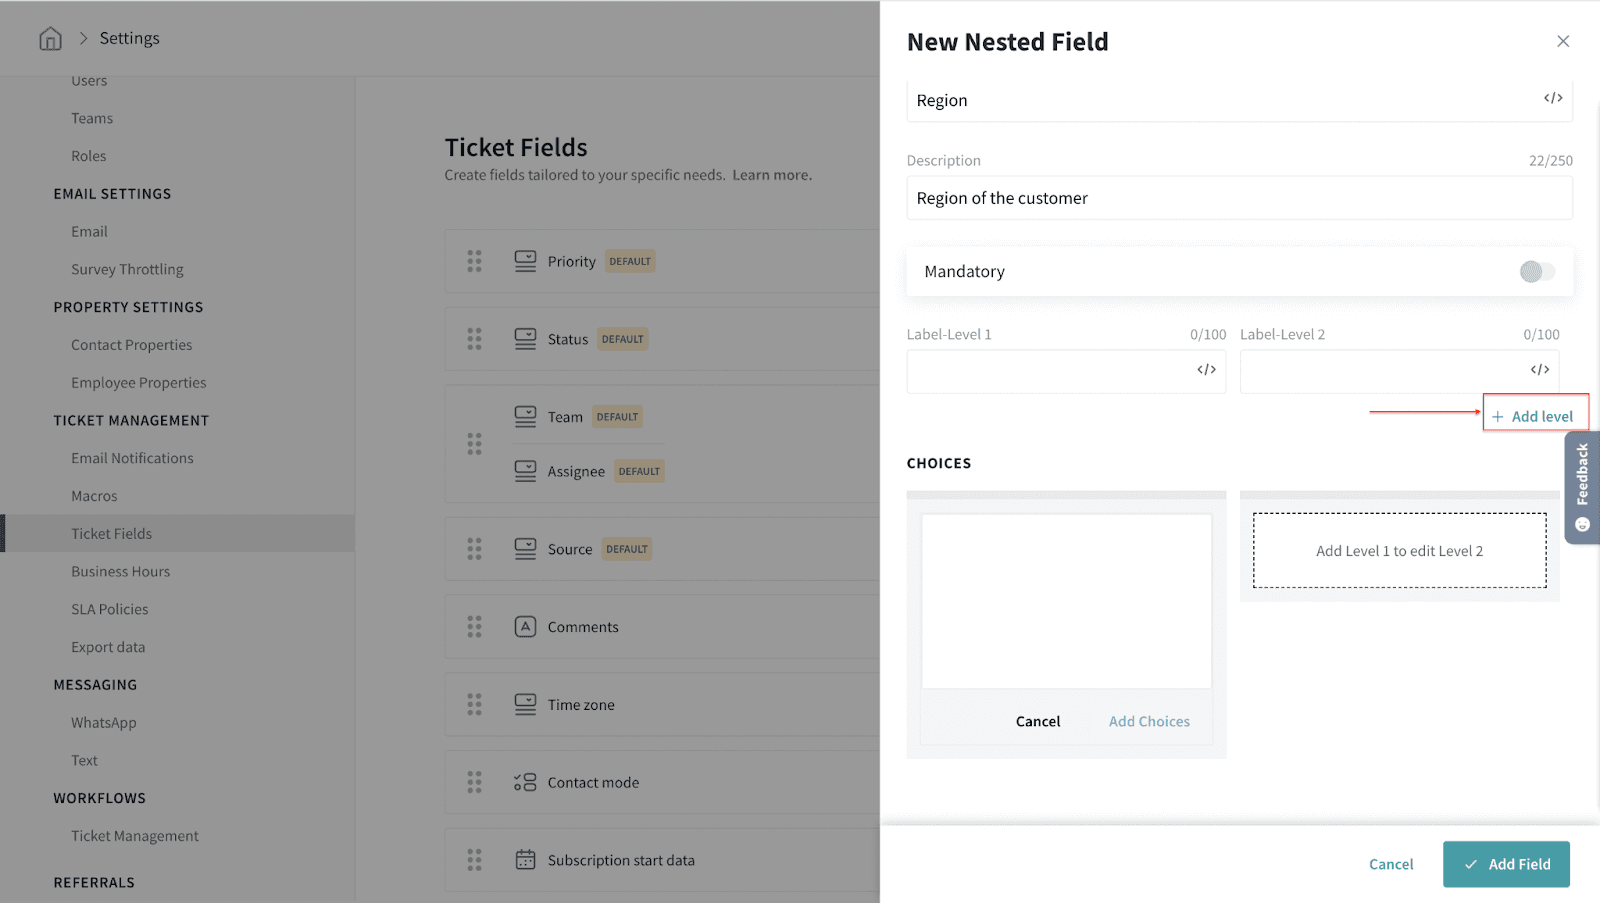
Add relevant label names to the fields for your best comprehension. The sequence of adding choices to different levels starts from Level 1. Add the choices to be displayed at Level 1 and click Add choices.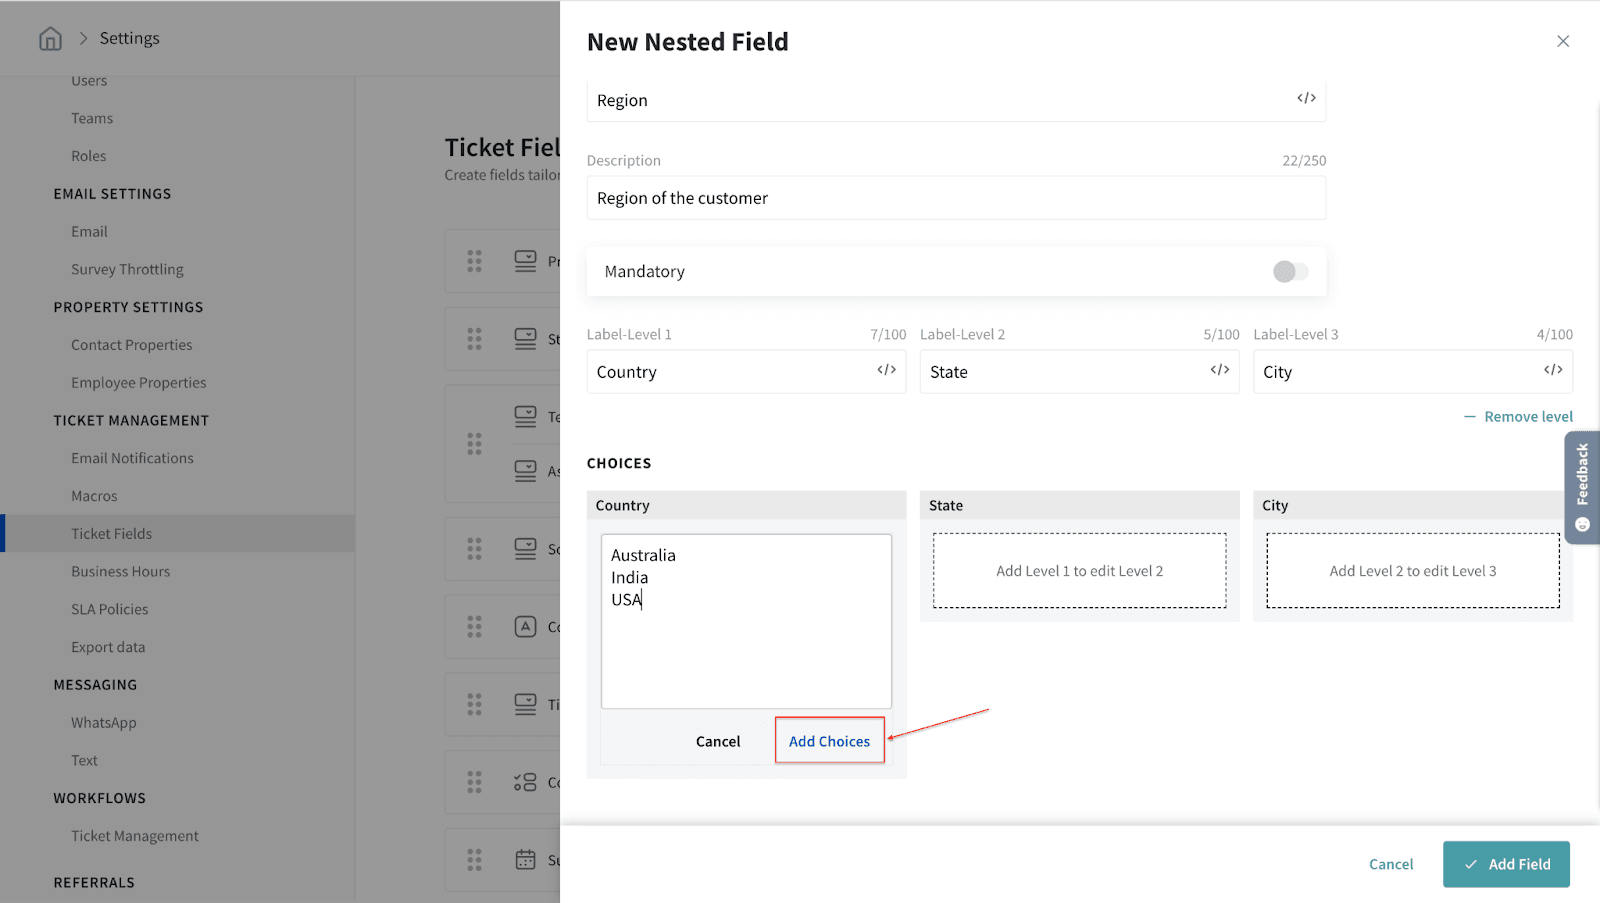
Select a choice on Level 1 to add its corresponding choices to Level 2.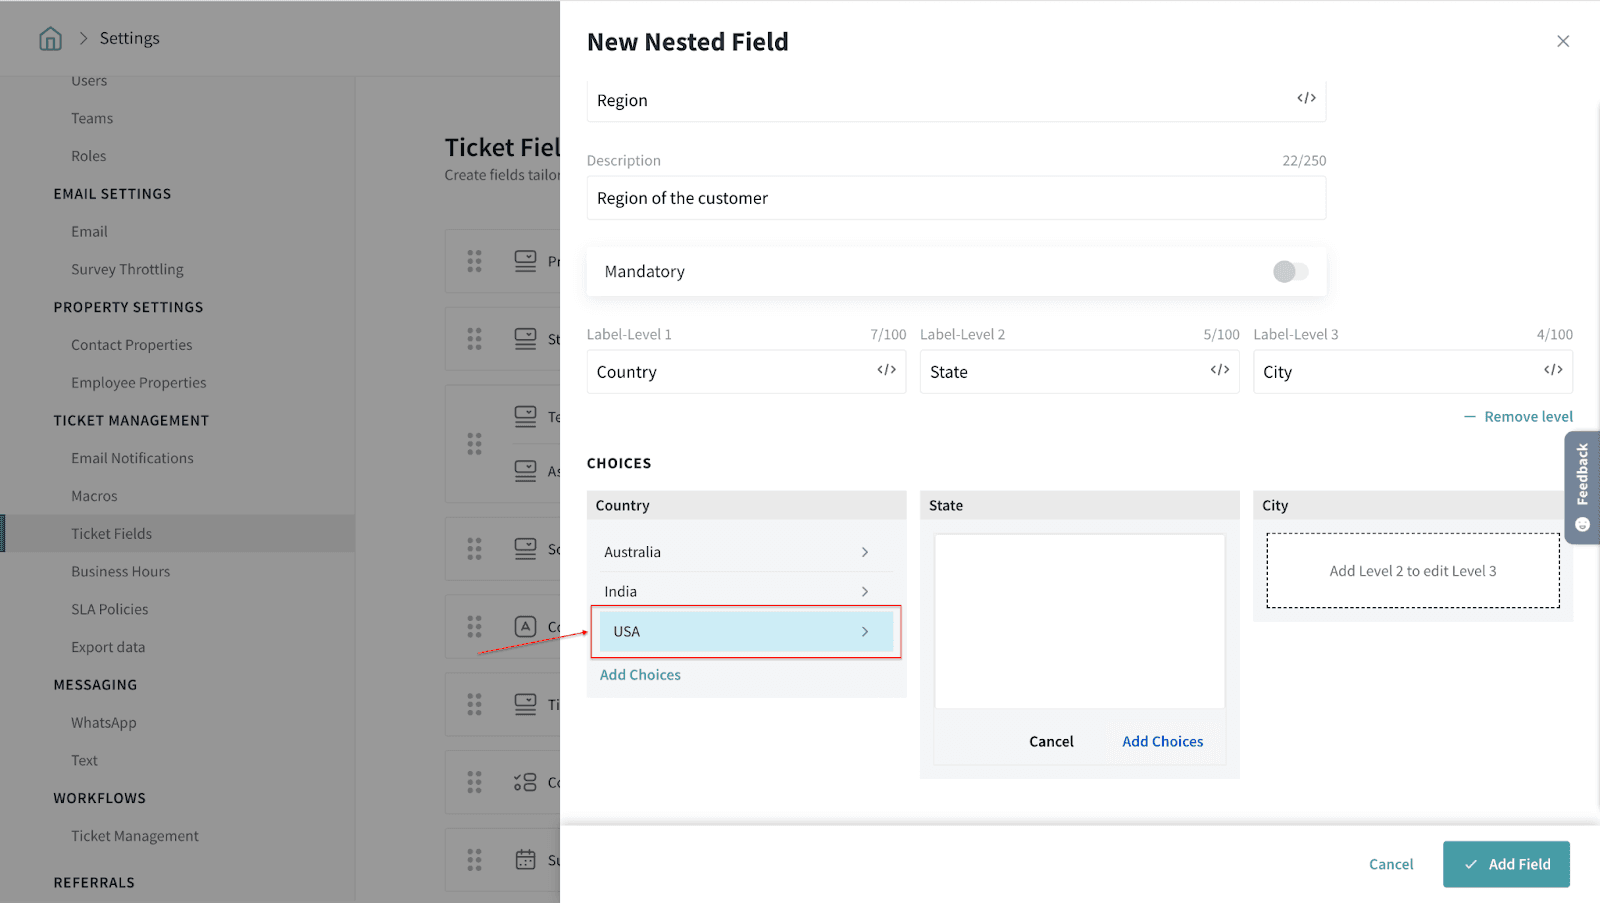
Add the choices one on each line. Once you complete adding choices to Level 2. click Add Choices.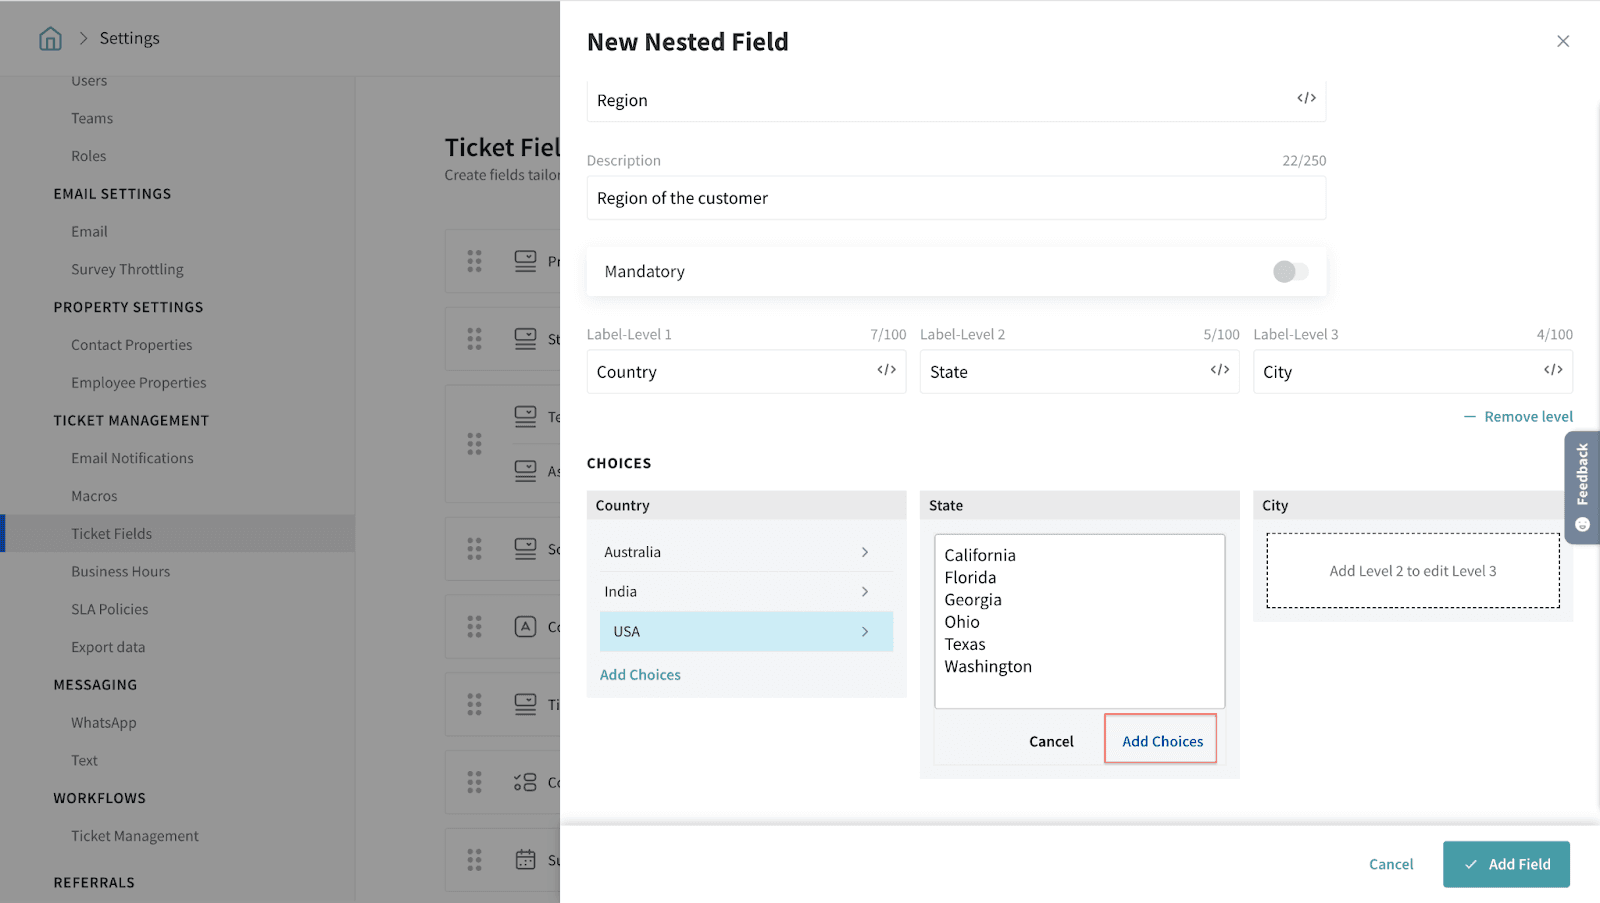
Now, select a choice on Level 2 to add its corresponding choices to Level 3.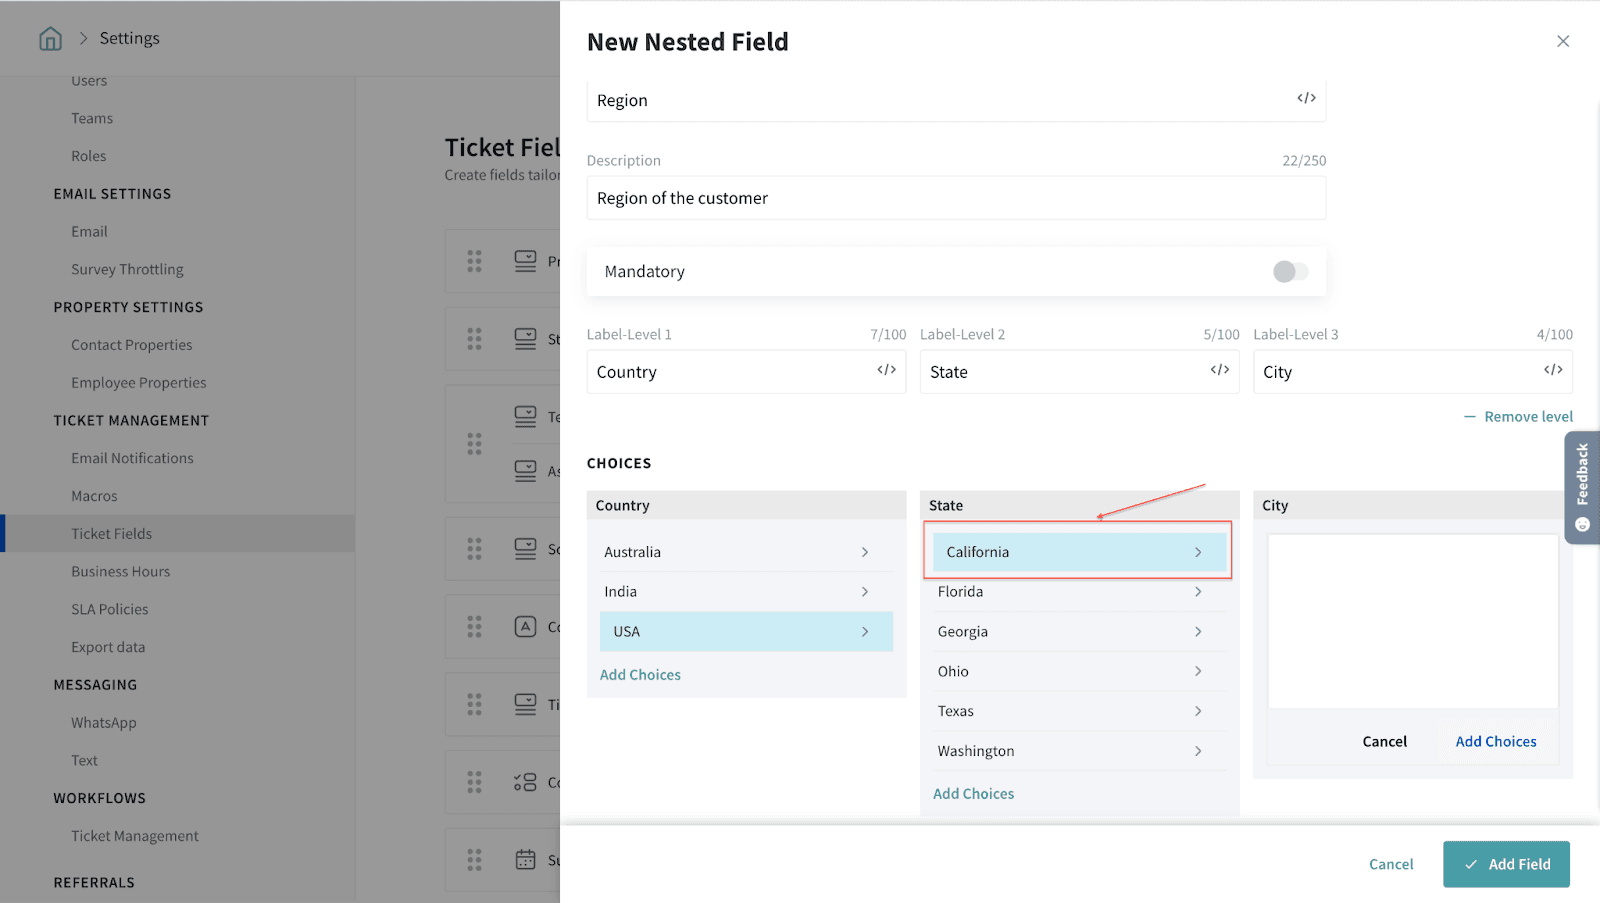
Add the choices one on each line. Once you complete adding choices to Level 3. click Add Choices.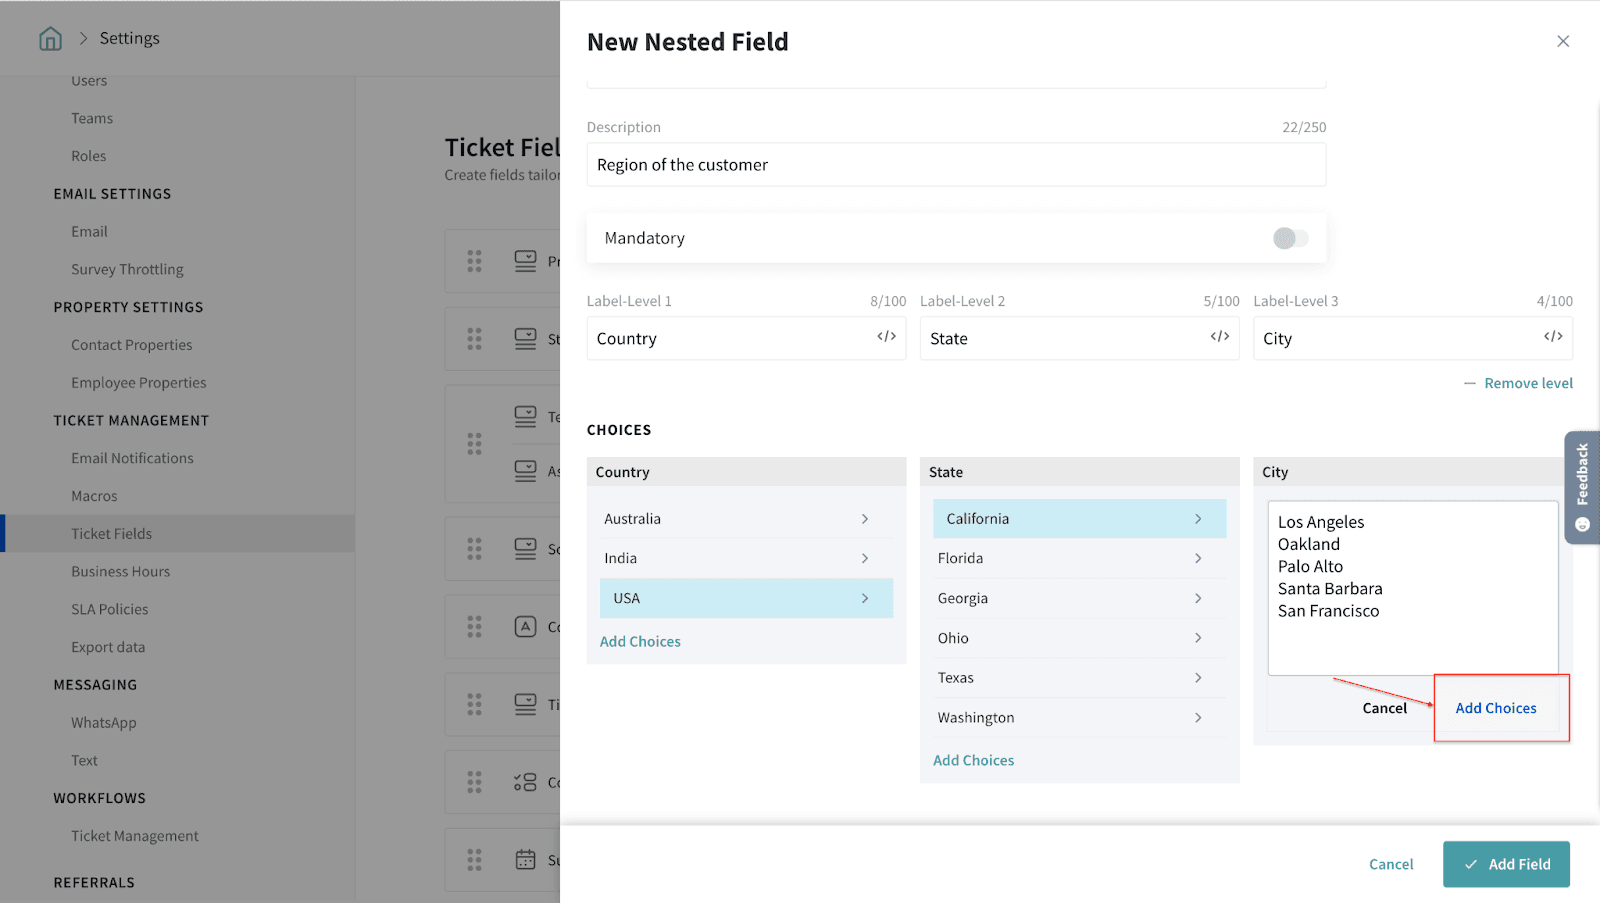
You can hover over the choices and choose to edit or delete them by clicking the corresponding icons and confirming the same.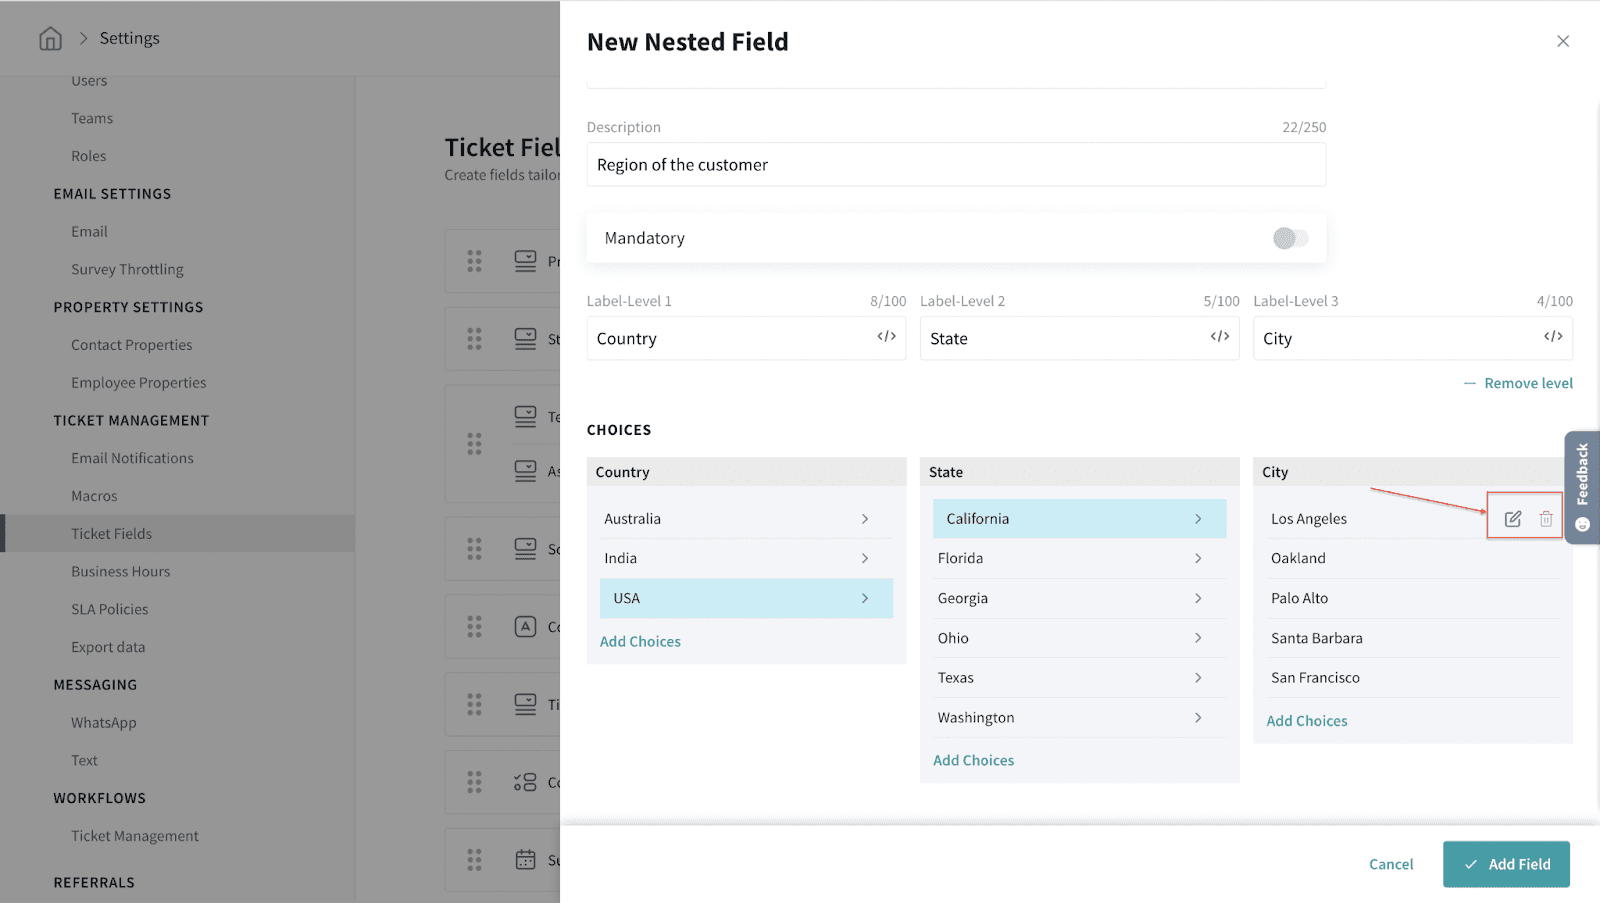
You can choose to delete the third level by clicking Remove level.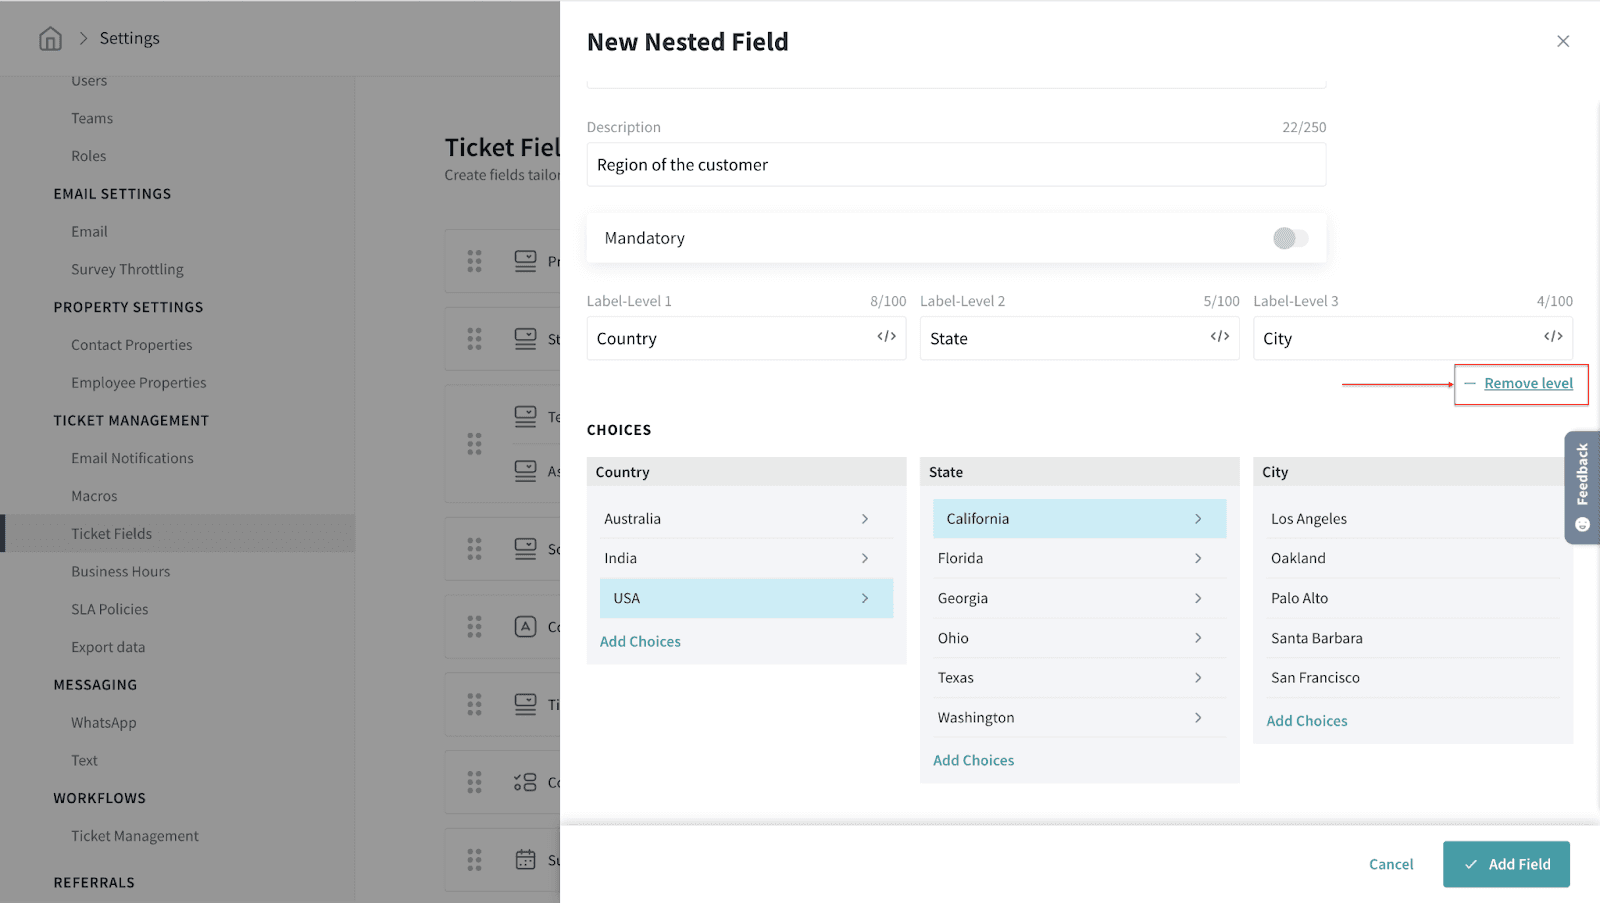
Sample screen while creating a ticket
5. Click Add Field button to confirm adding the new field.
If needed, you can choose to drag and drop the fields to rearrange them.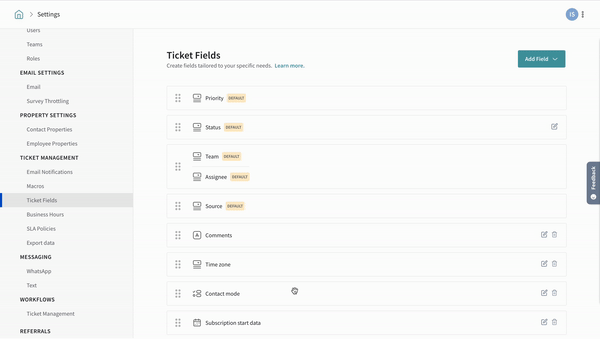
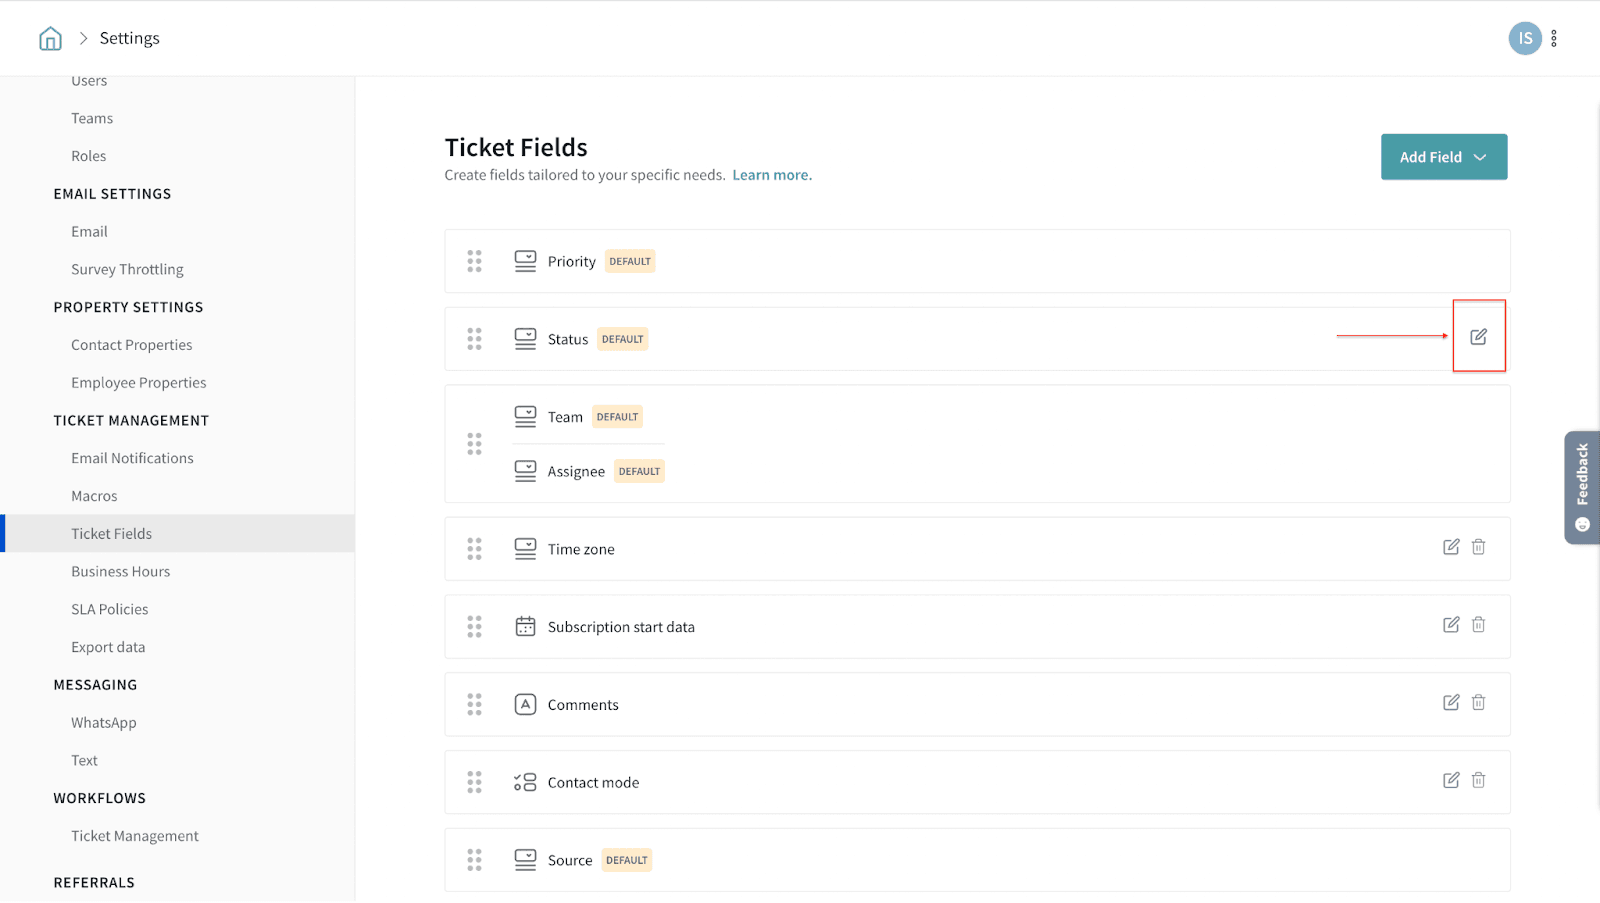
You can edit or delete a custom field by clicking the corresponding icons and confirming the same.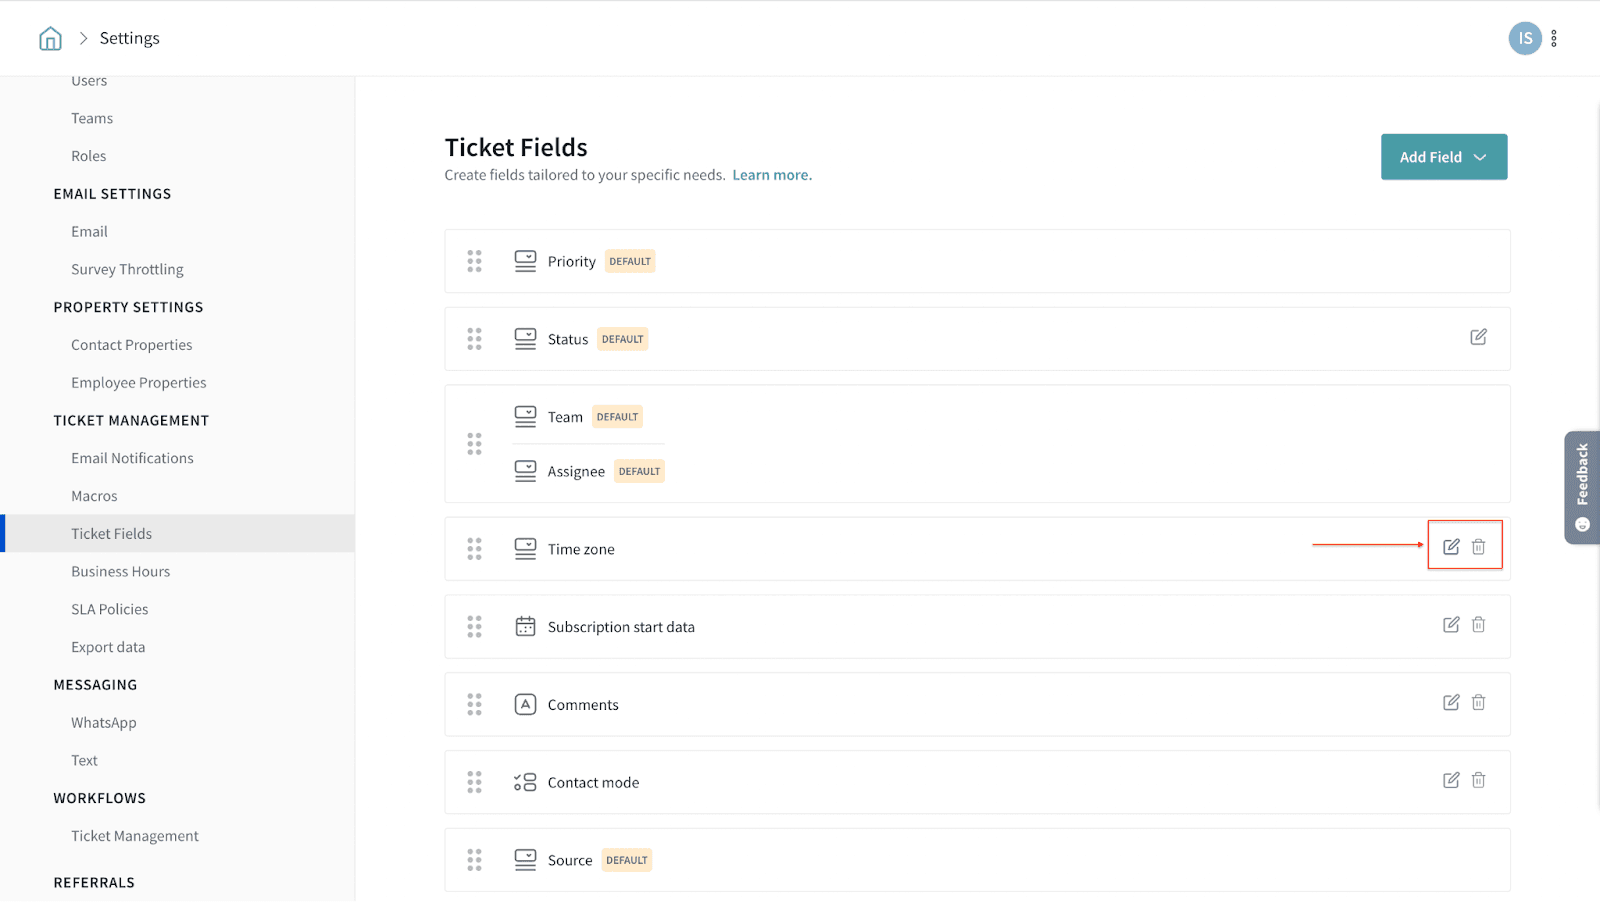
Tips
Well, that’s all the flexibility that custom ticket fields bring in to cater to your specific needs. Please reach out to us if you have any questions. We are just a chat away!
Powered By SparrowDesk