Search
Notion is a collaborative workspace platform and productivity software, loved by millions globally. It is used for note-taking, knowledge documentation, data storage, project management and task tracking. SurveySparrow’s integration with Notion stores survey responses inside Notion, saving users the effort of manually transferring data or having to switch between platforms. Teams can access CX data right where they work, making collaboration easier and action faster. This kind of efficacy makes it a perfect solution for use-cases including, but not limited to:
In this article, we’ll cover the whole process of setting up the integration and syncing responses to Notion, from start to finish.
1. Inside your SurveySparrow account homepage, click on the settings icon.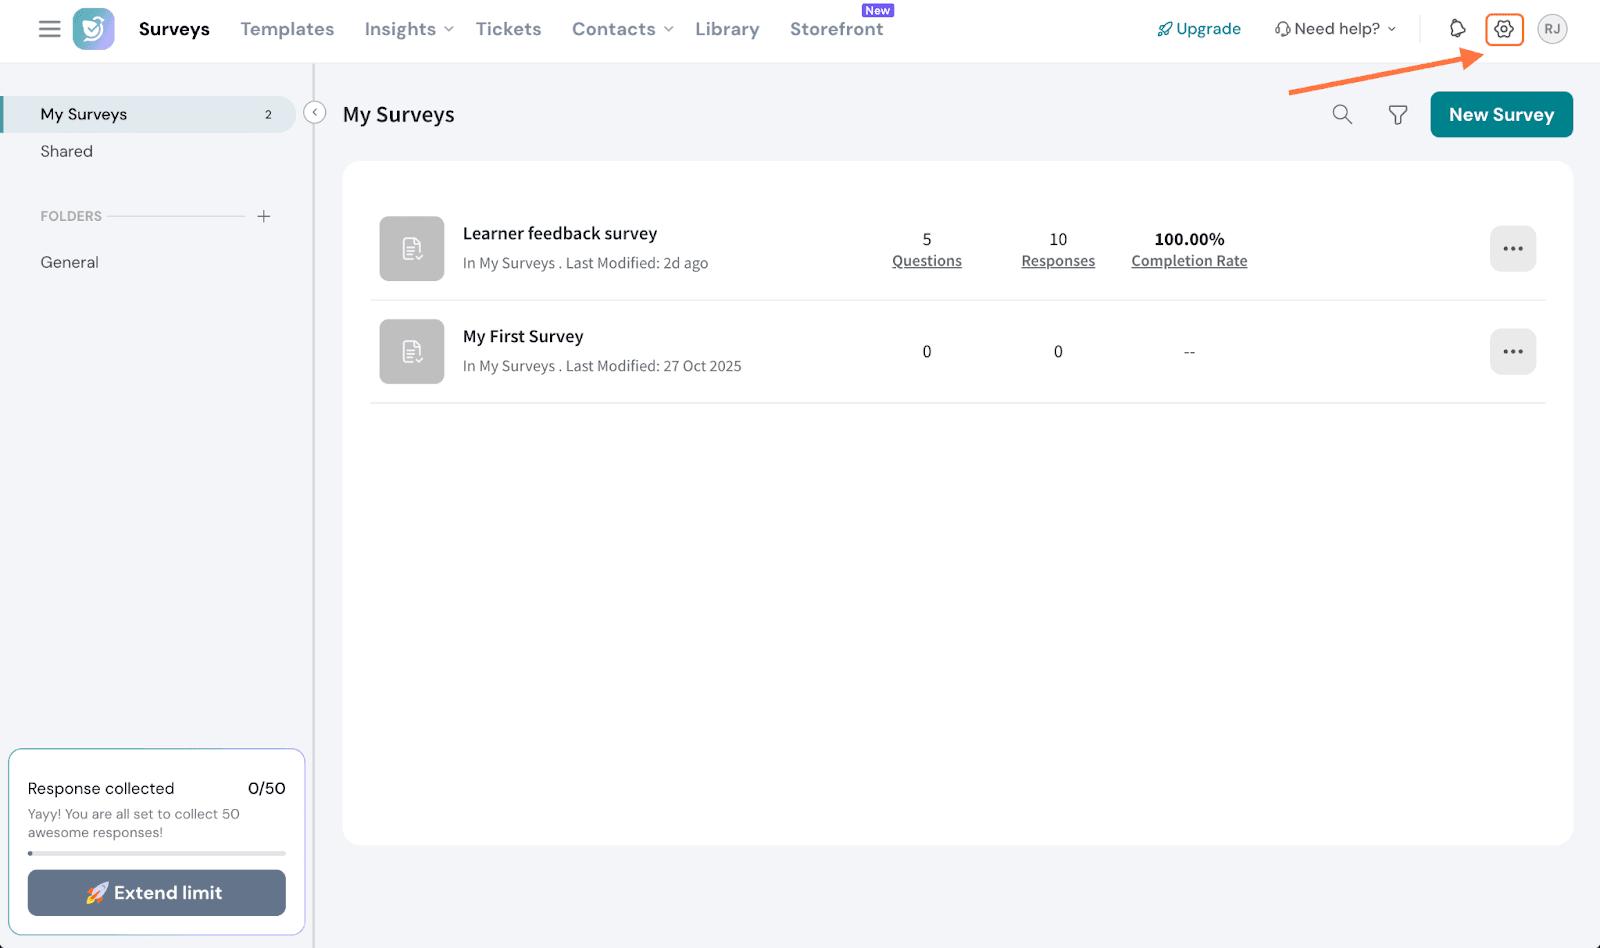
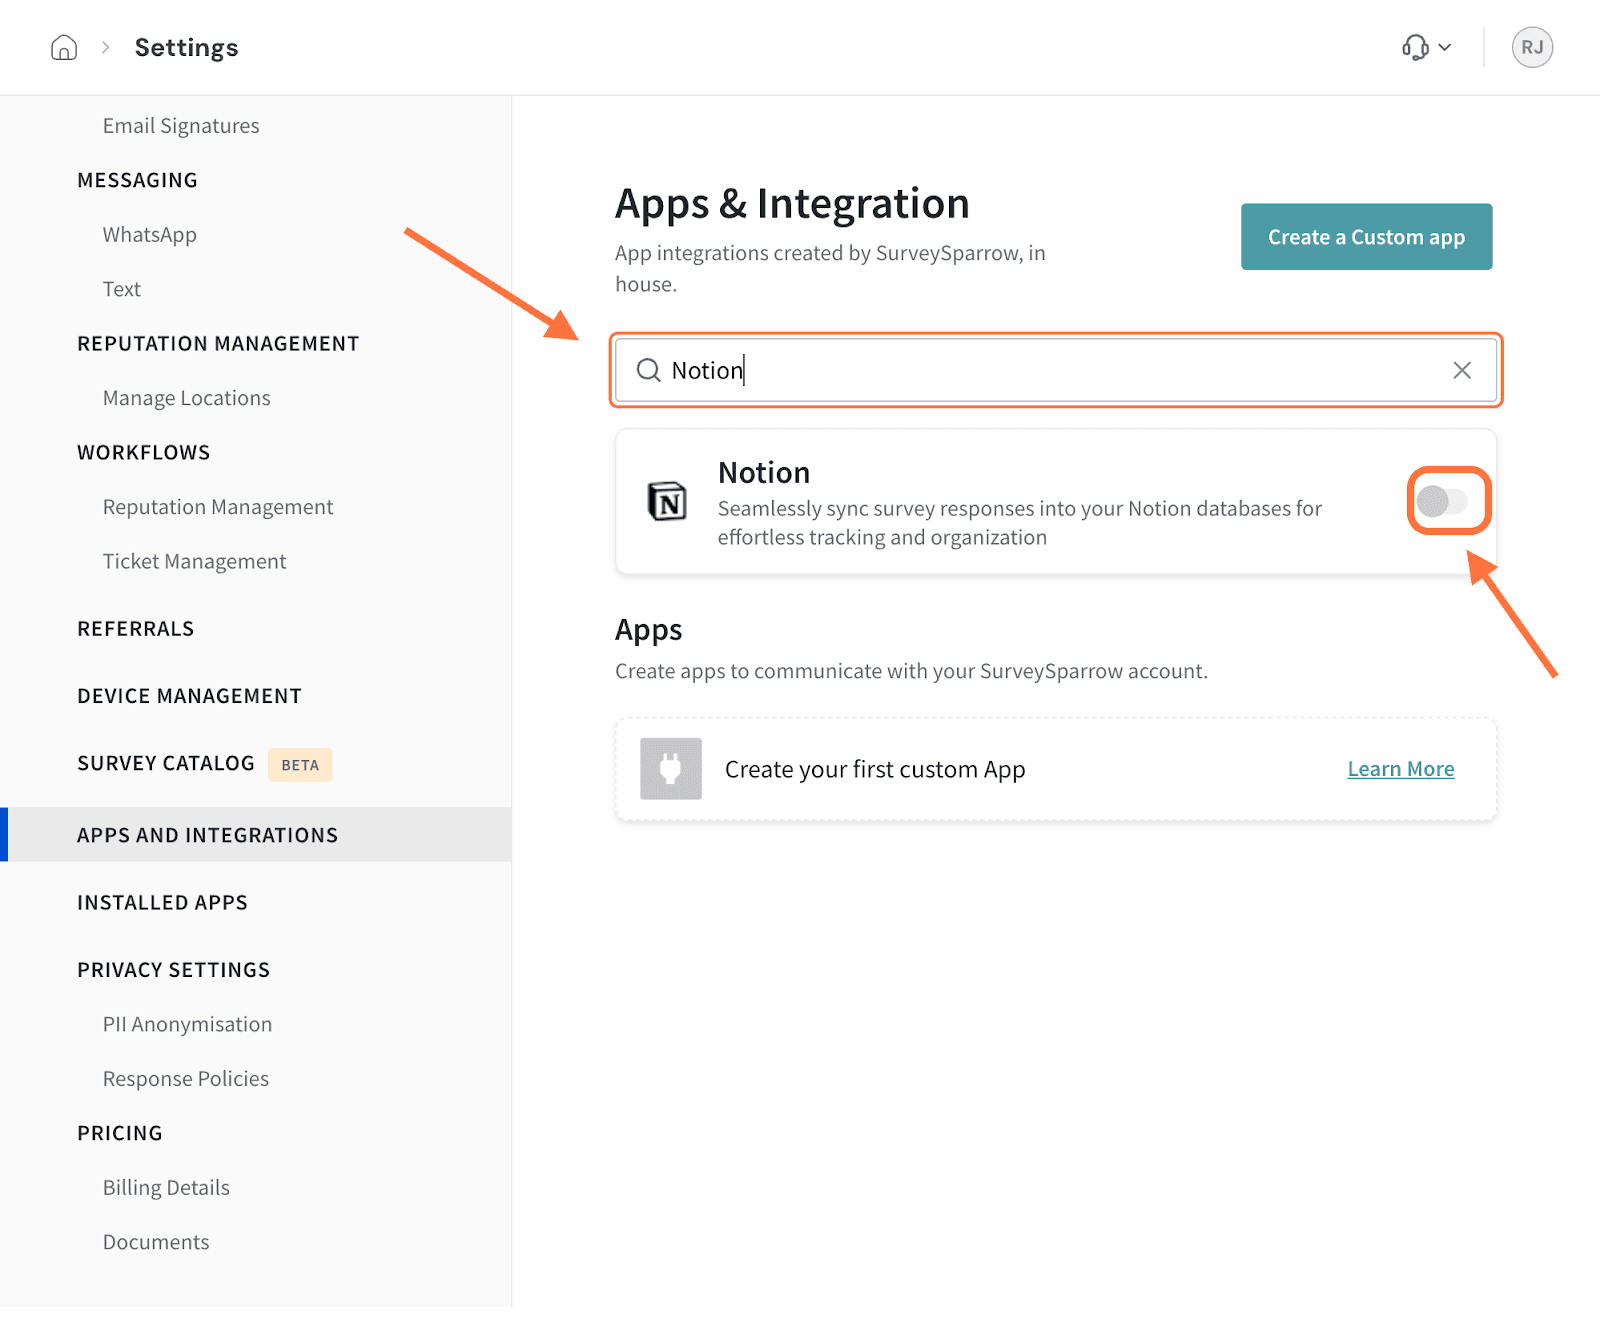
2. Scroll down the left panel till you see Apps & Integrations, then click on it.
5. Next, you must select the pages to connect to Notion. You can either use the search bar if you know the page. Or you can open up your teamspaces or your private section to inspect the pages within.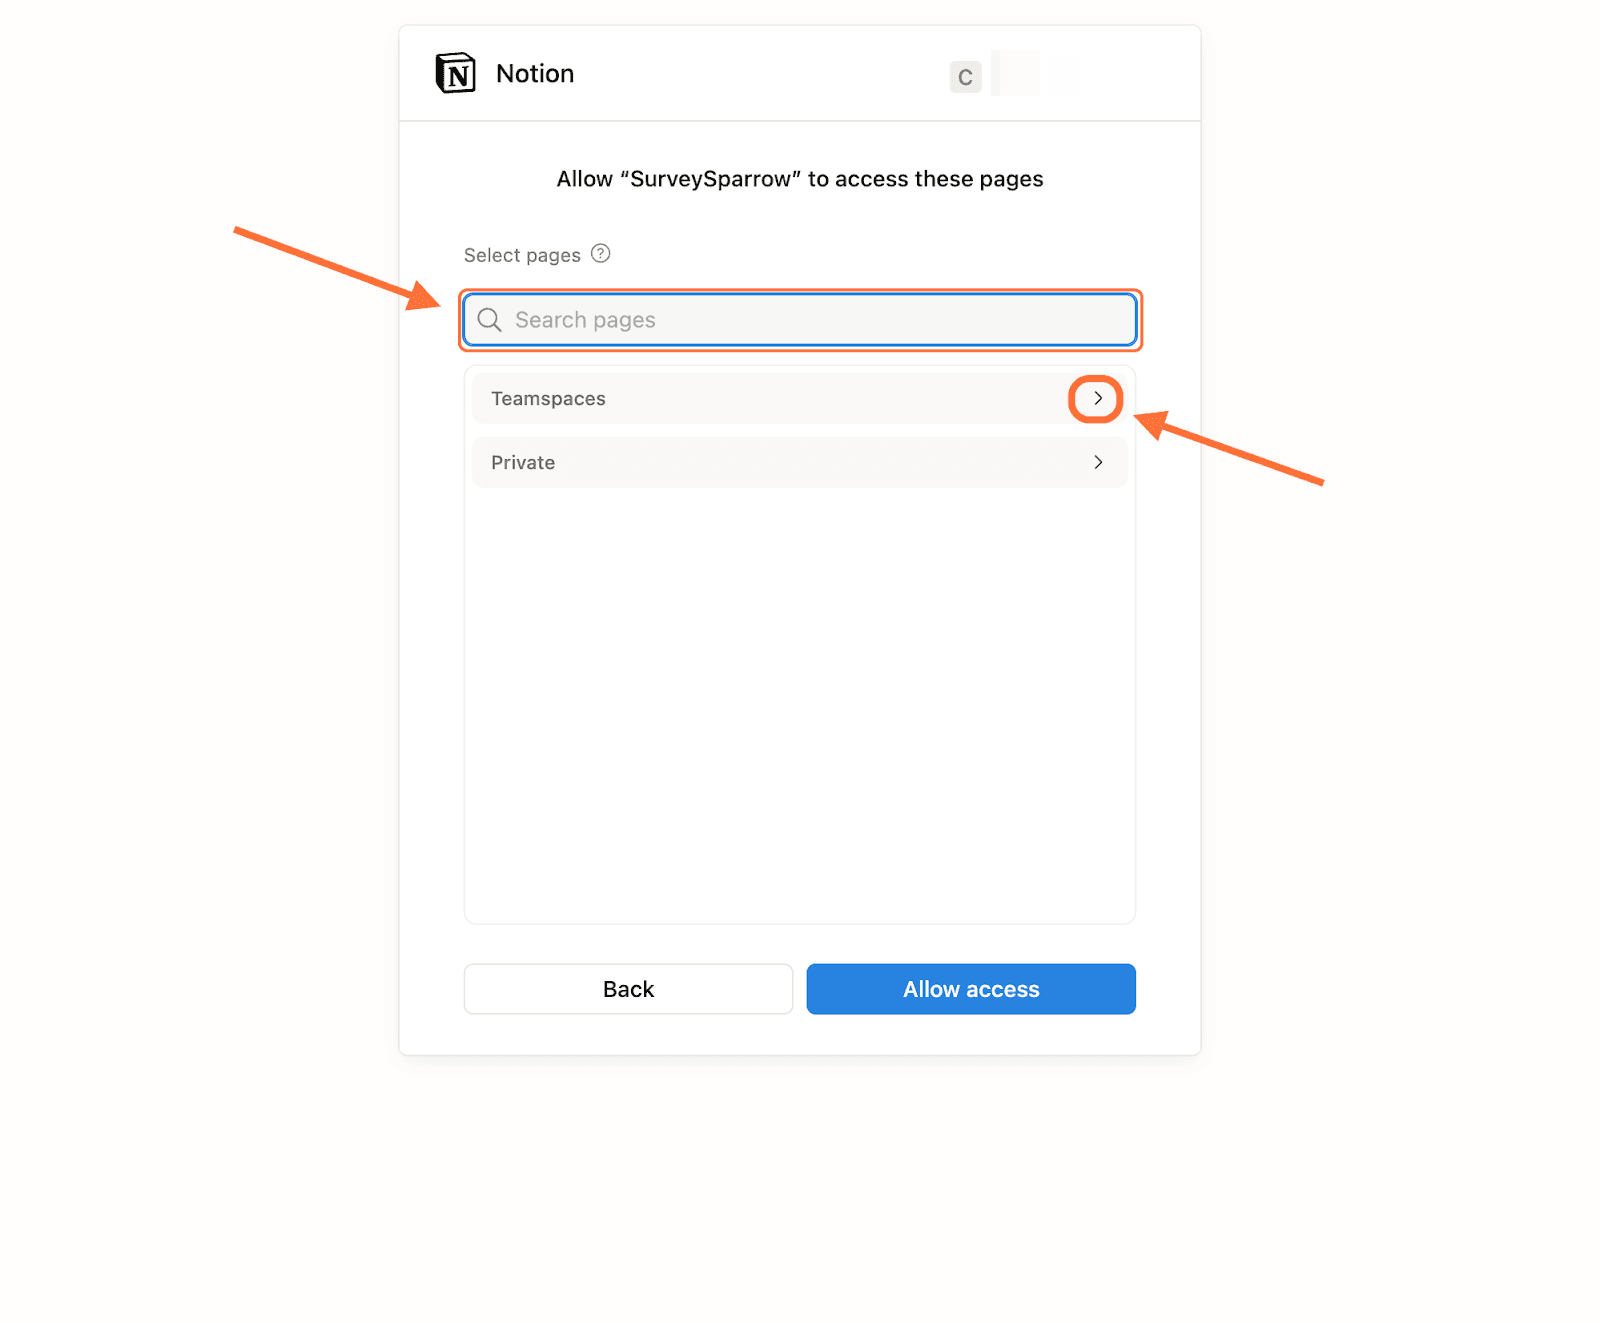
Note: The integration only allows access to pages inside Notion. Survey responses will be stored in databases within those pages.
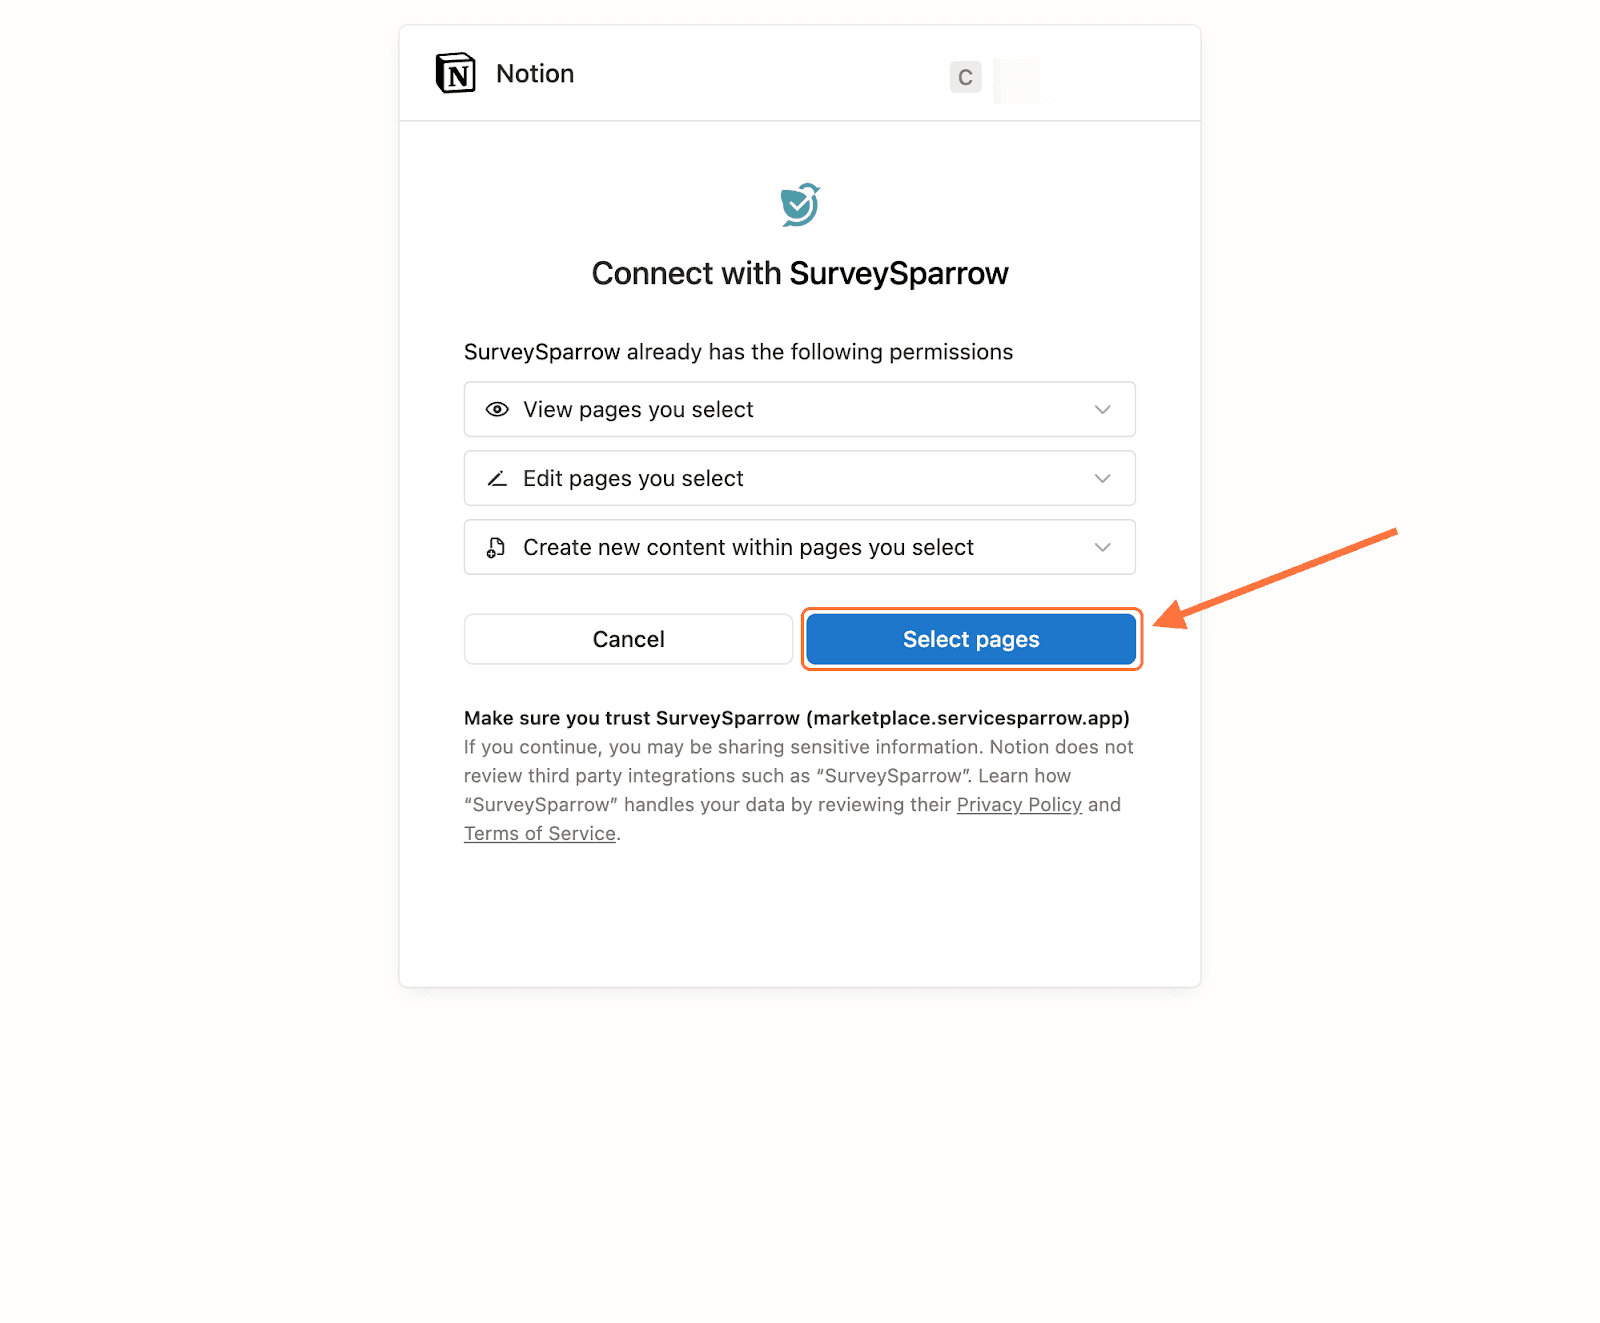
6. Once you’ve selected the necessary pages, click Allow access.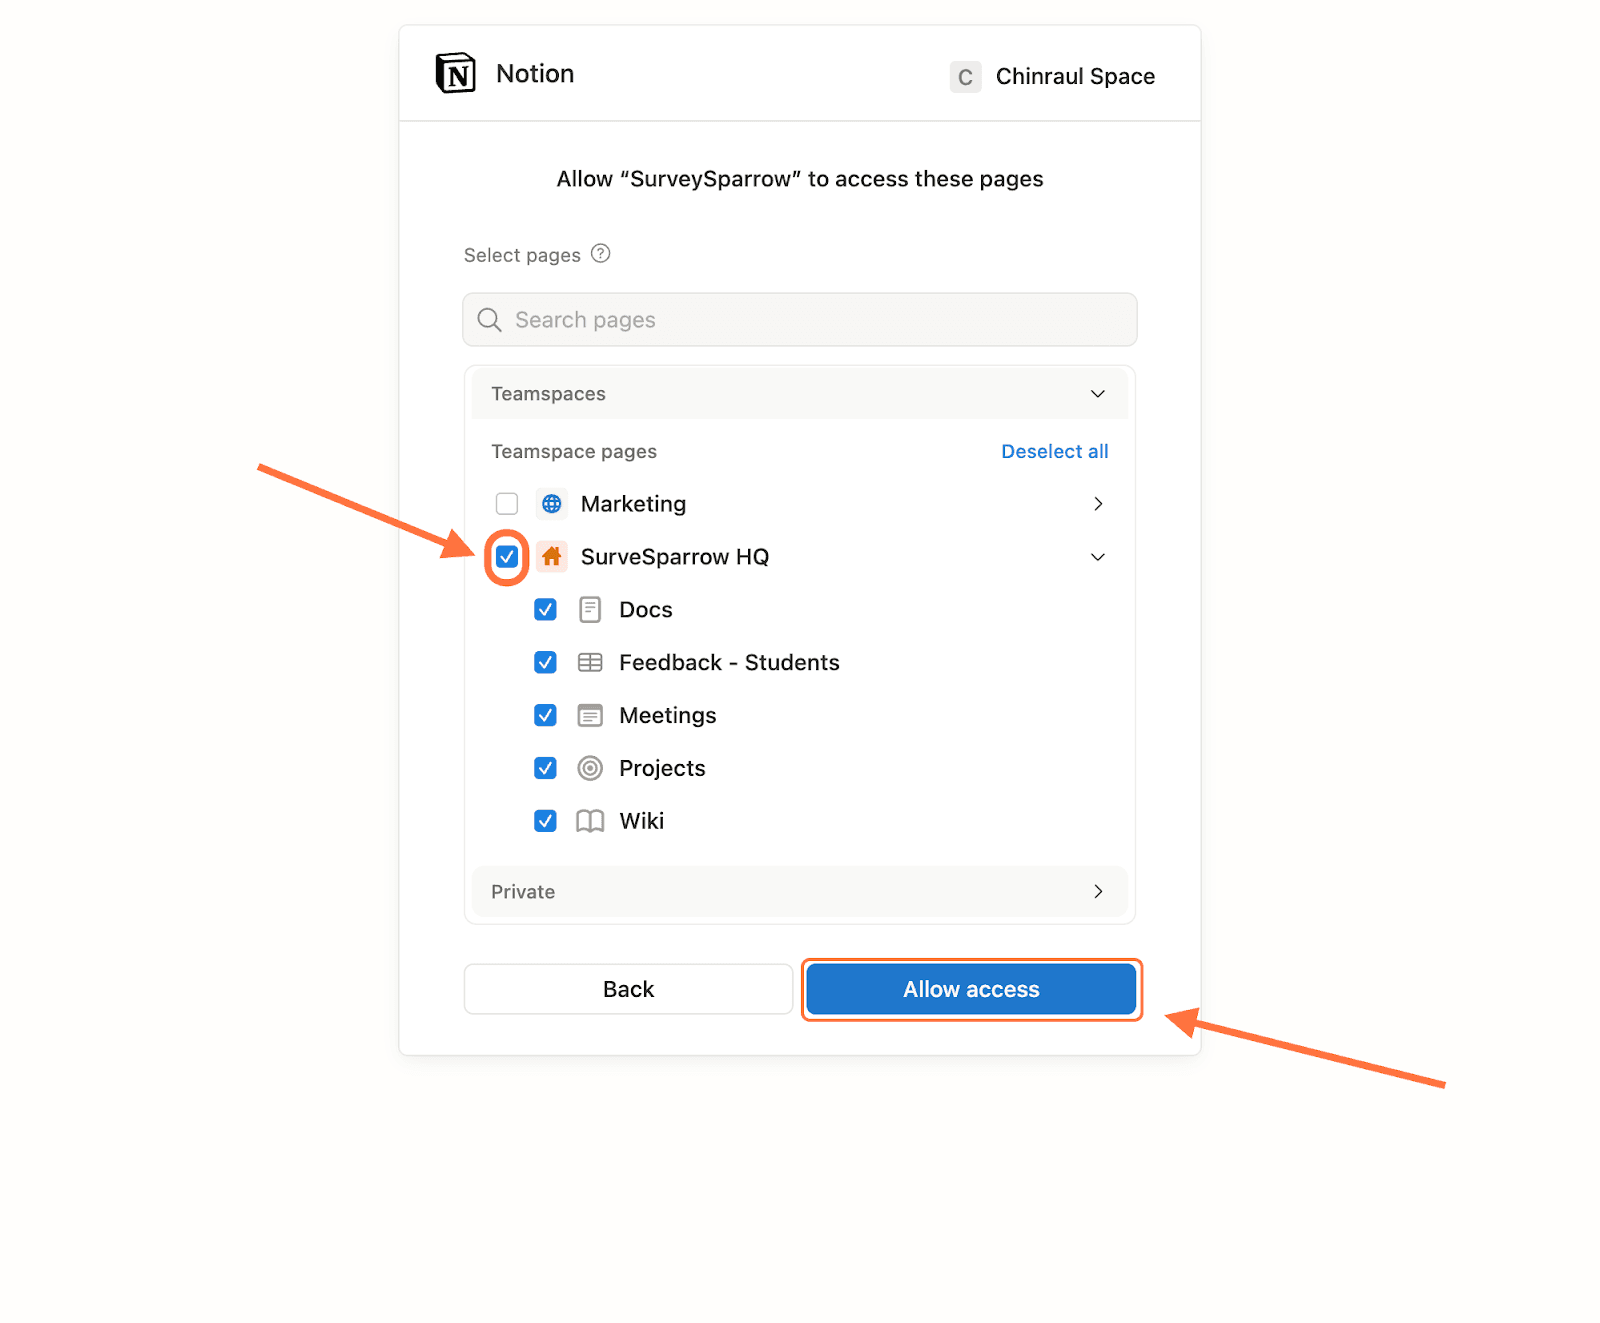
7. Now open the survey whose responses you want to import to Notion, then navigate to the Integrate section.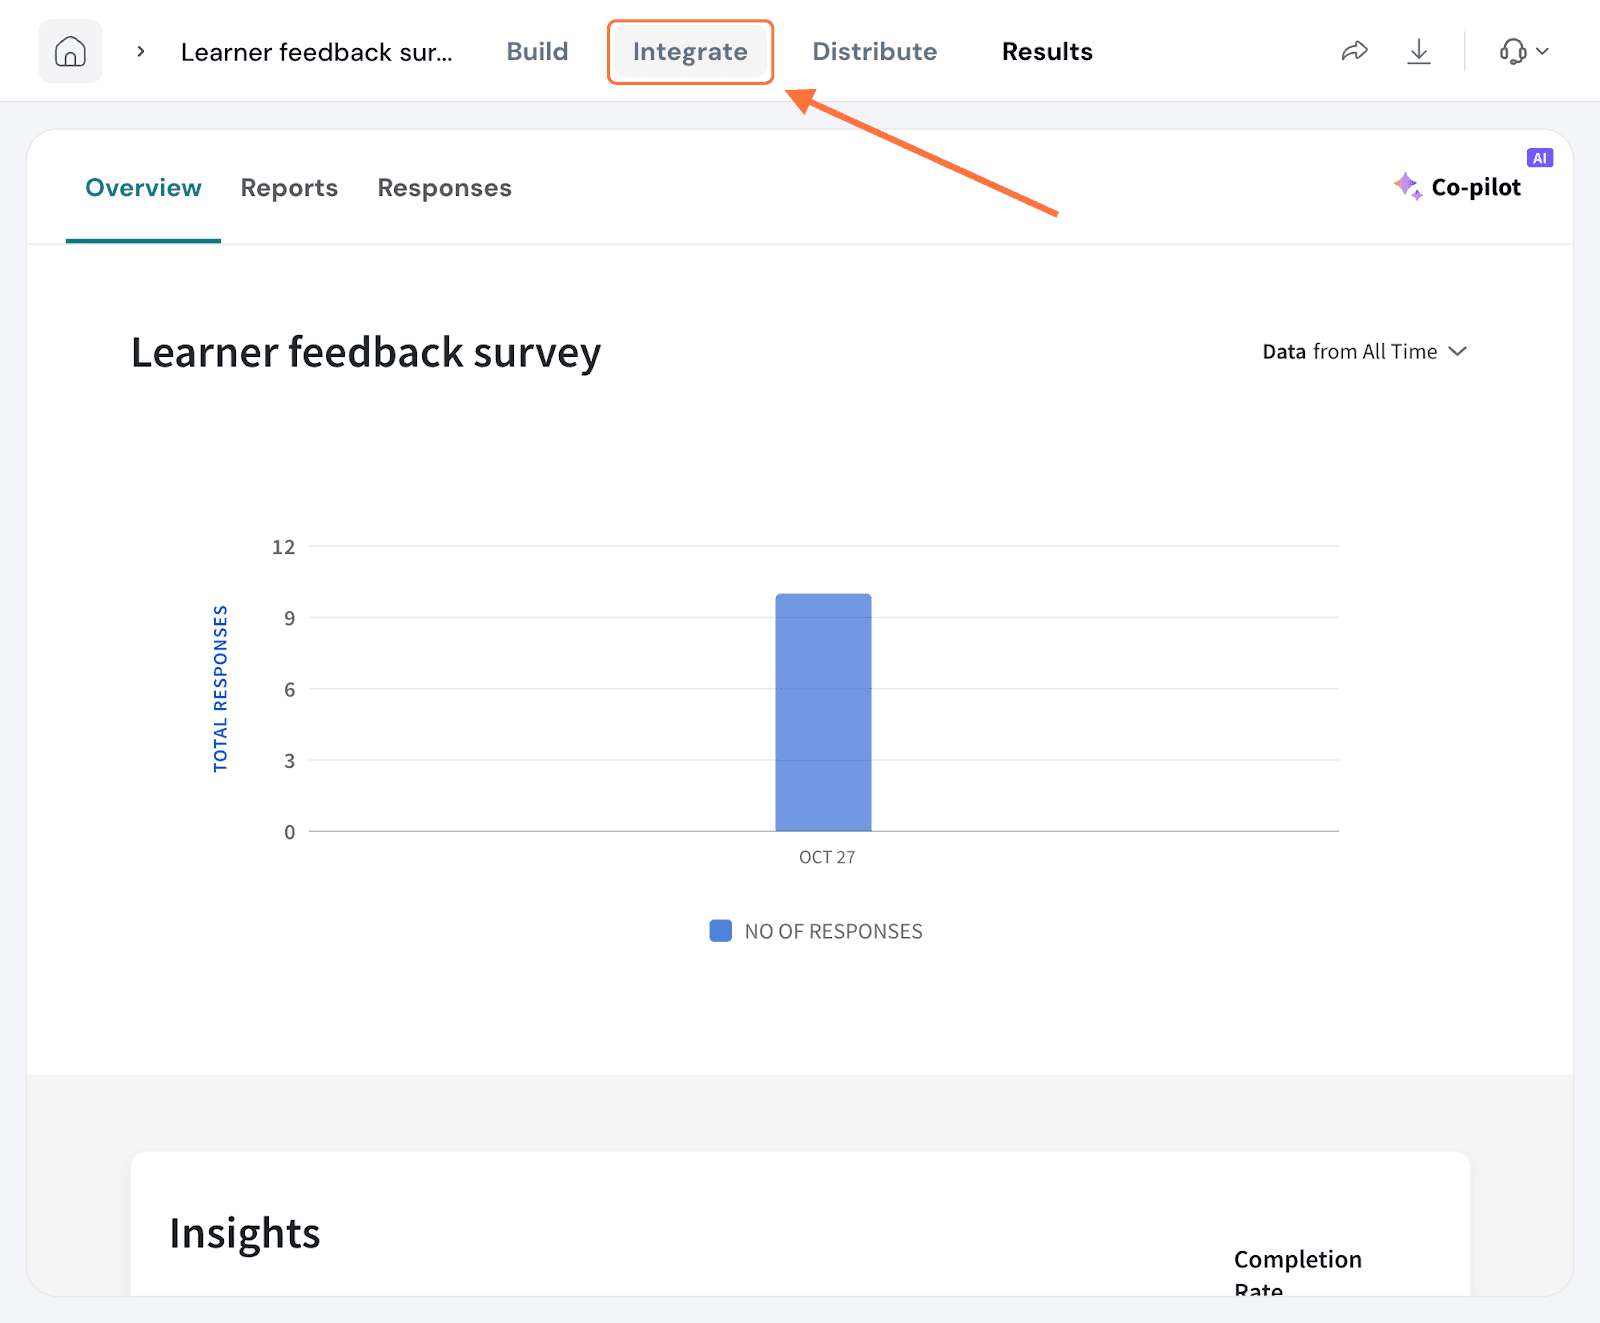
8. Search for the Notion integration and click on the toggle.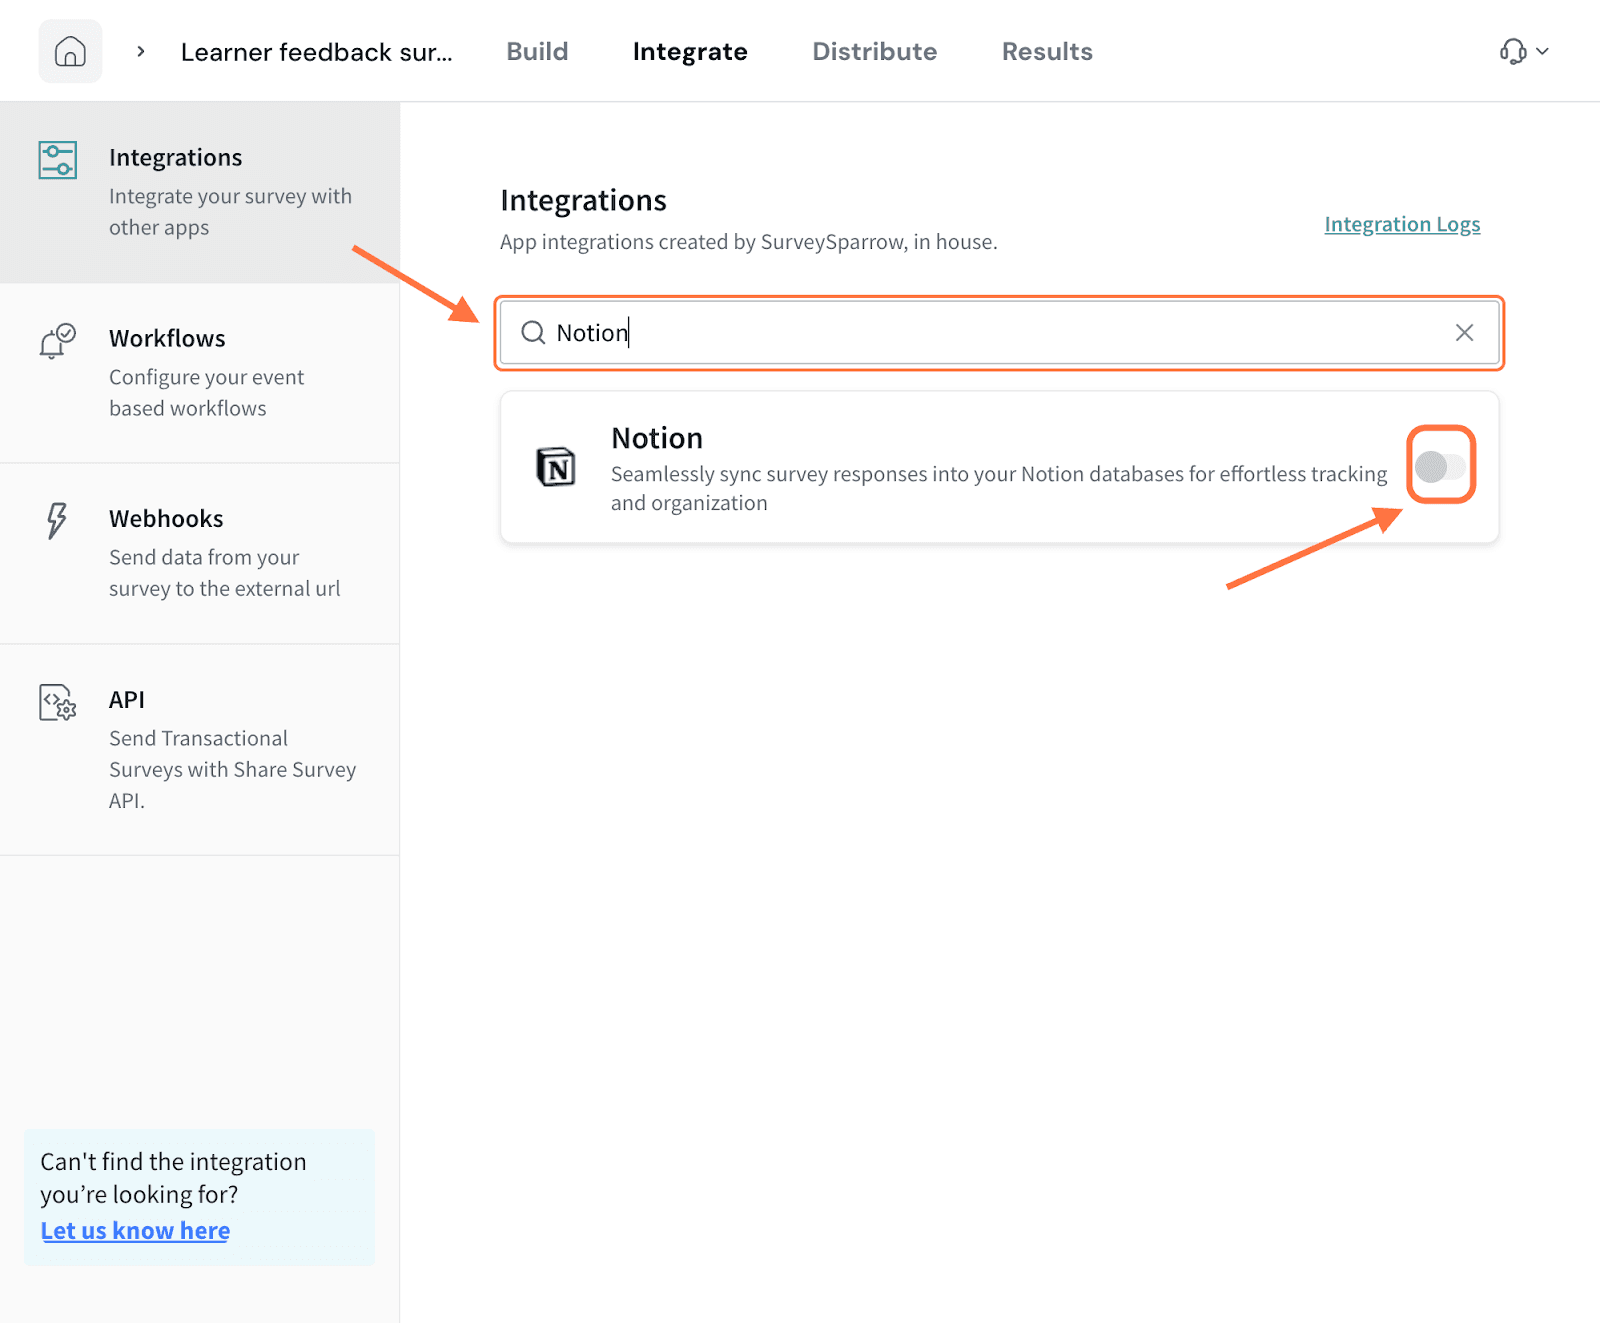
9. Now the mapping configuration screen opens up. Click on the drop-down under Action. As mentioned above, survey responses are stored inside databases. Users can either choose existing databases from within the pages that they provided access to, or create a new database to store responses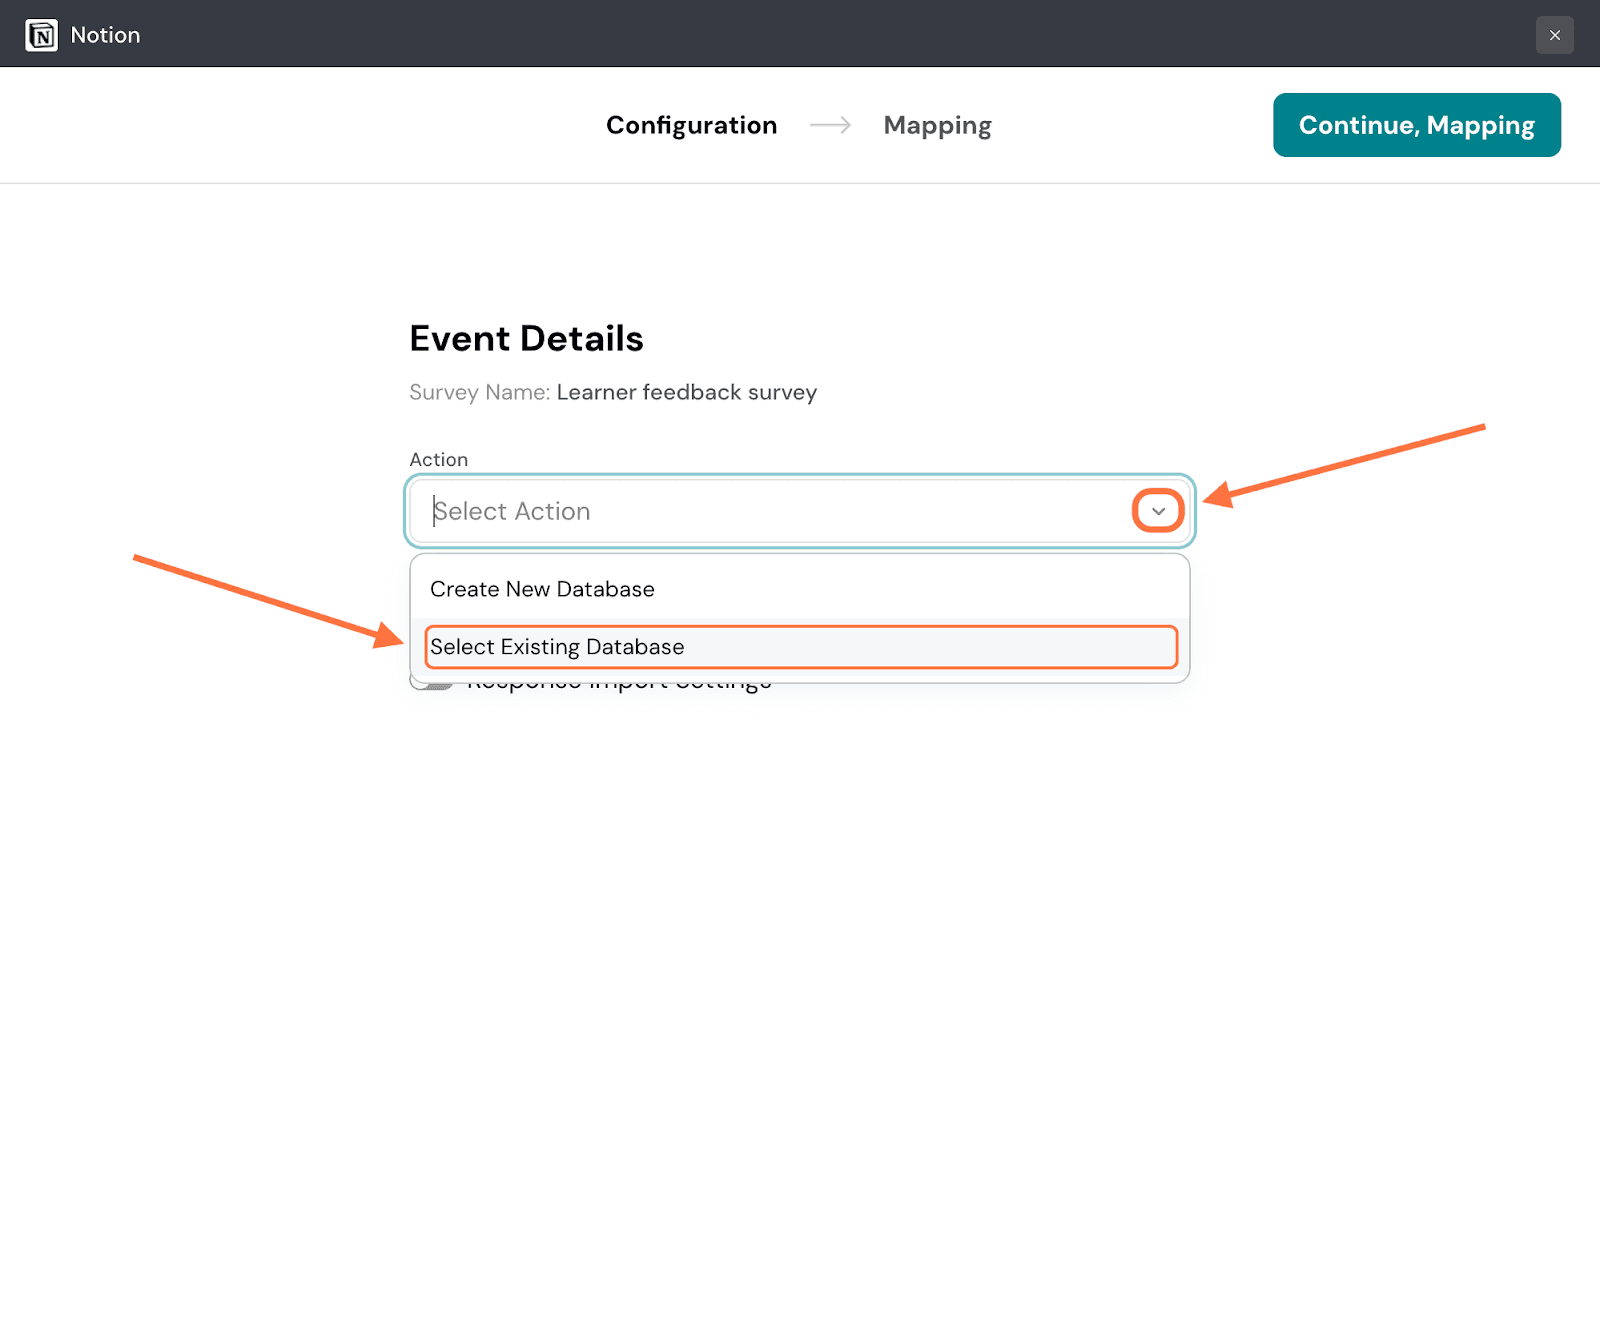
10. Next, you must select an existing database. Click on the drop-down under Select Database and choose from the options.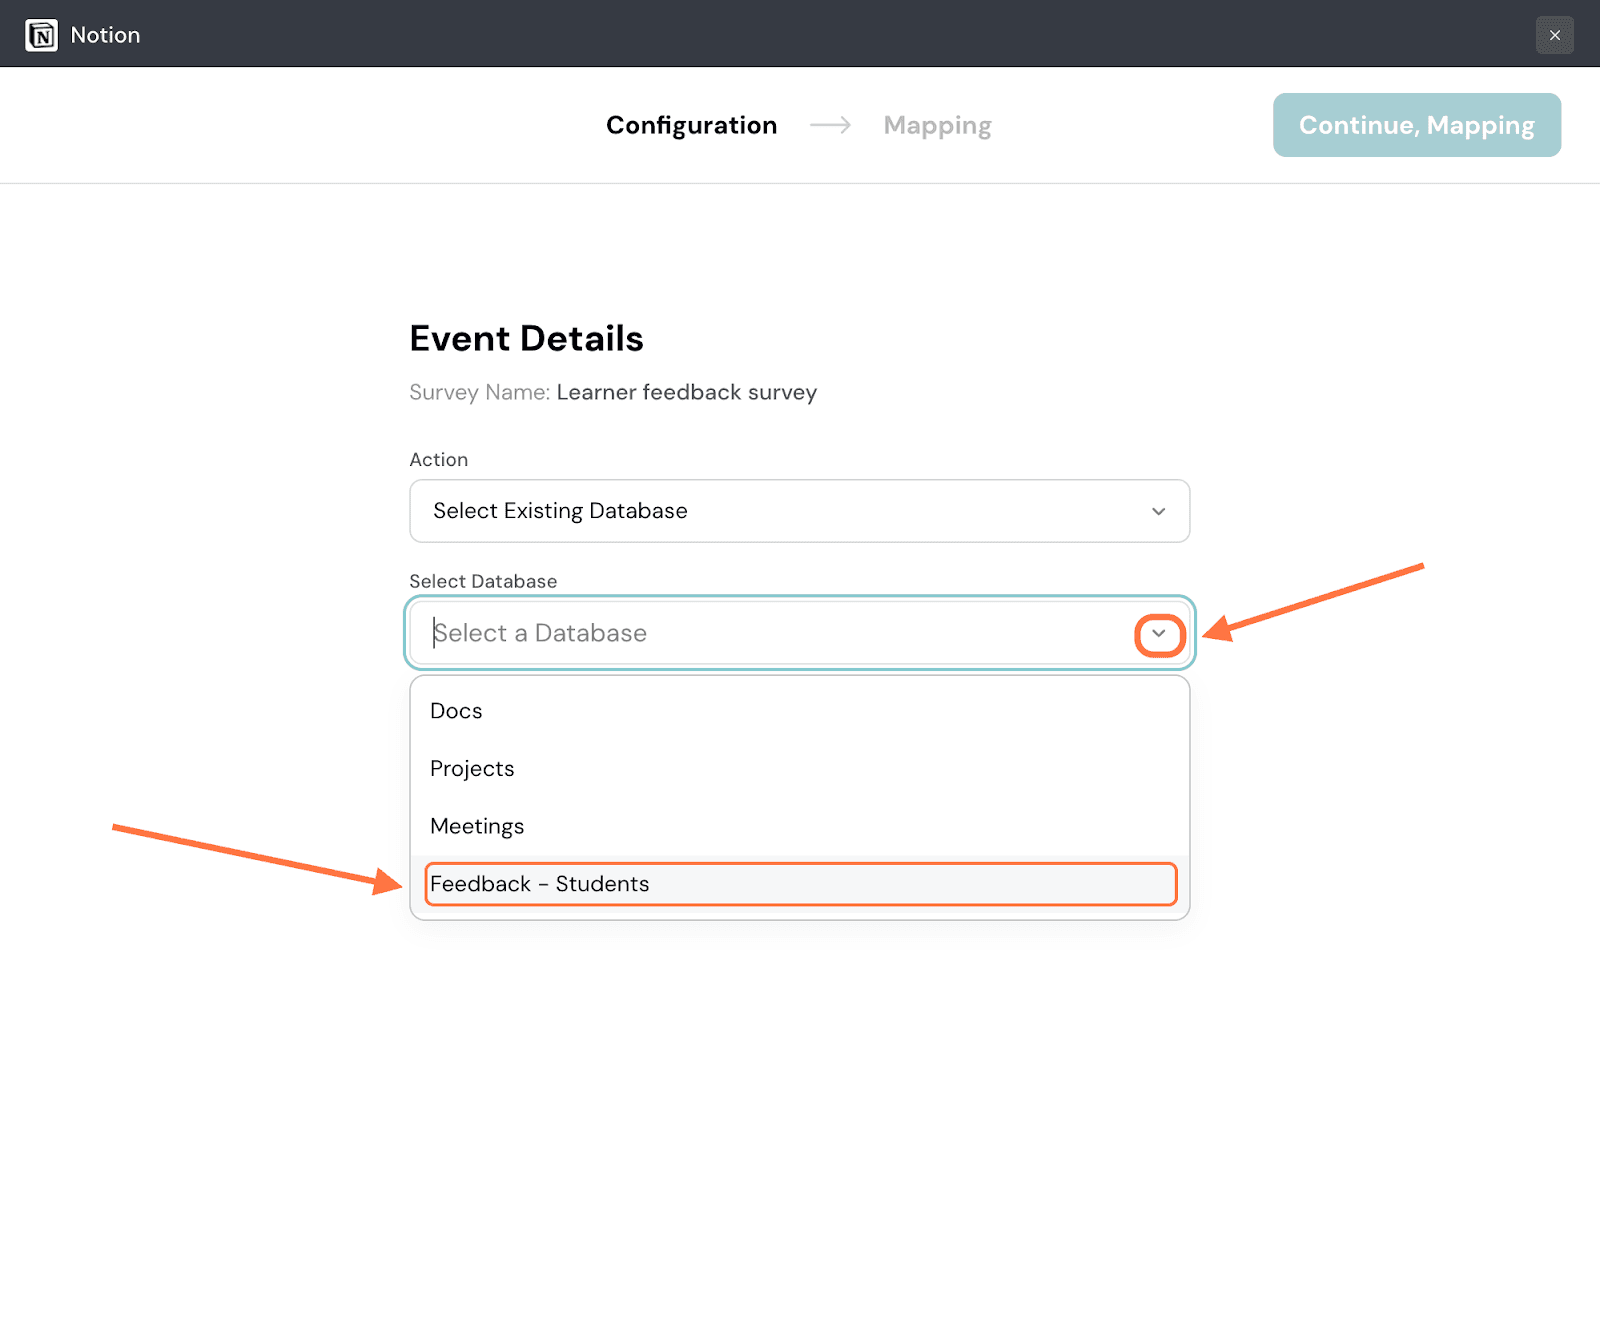
11. If you decide to create a new database, Notion will ask you to select a page to place the database in. Click on the drop-down under Choose Existing Page and select one.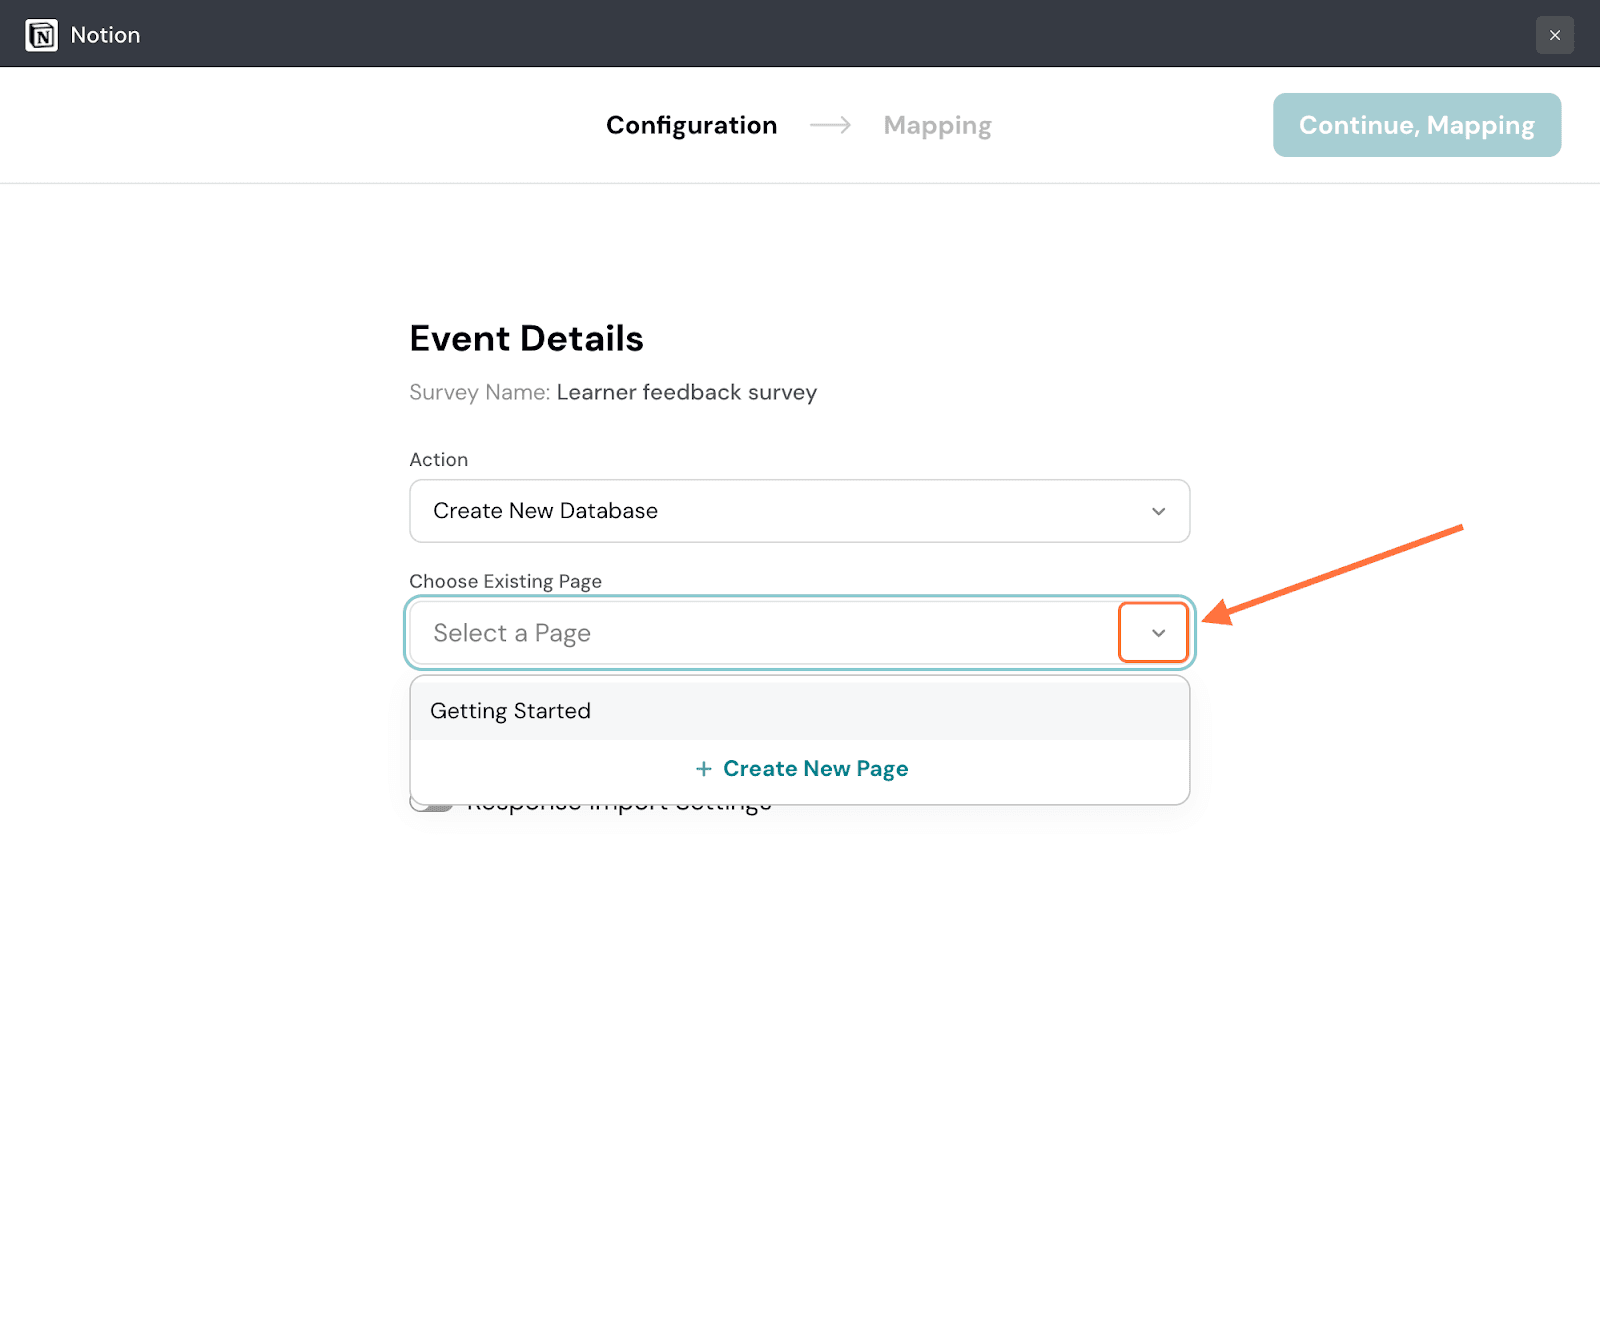
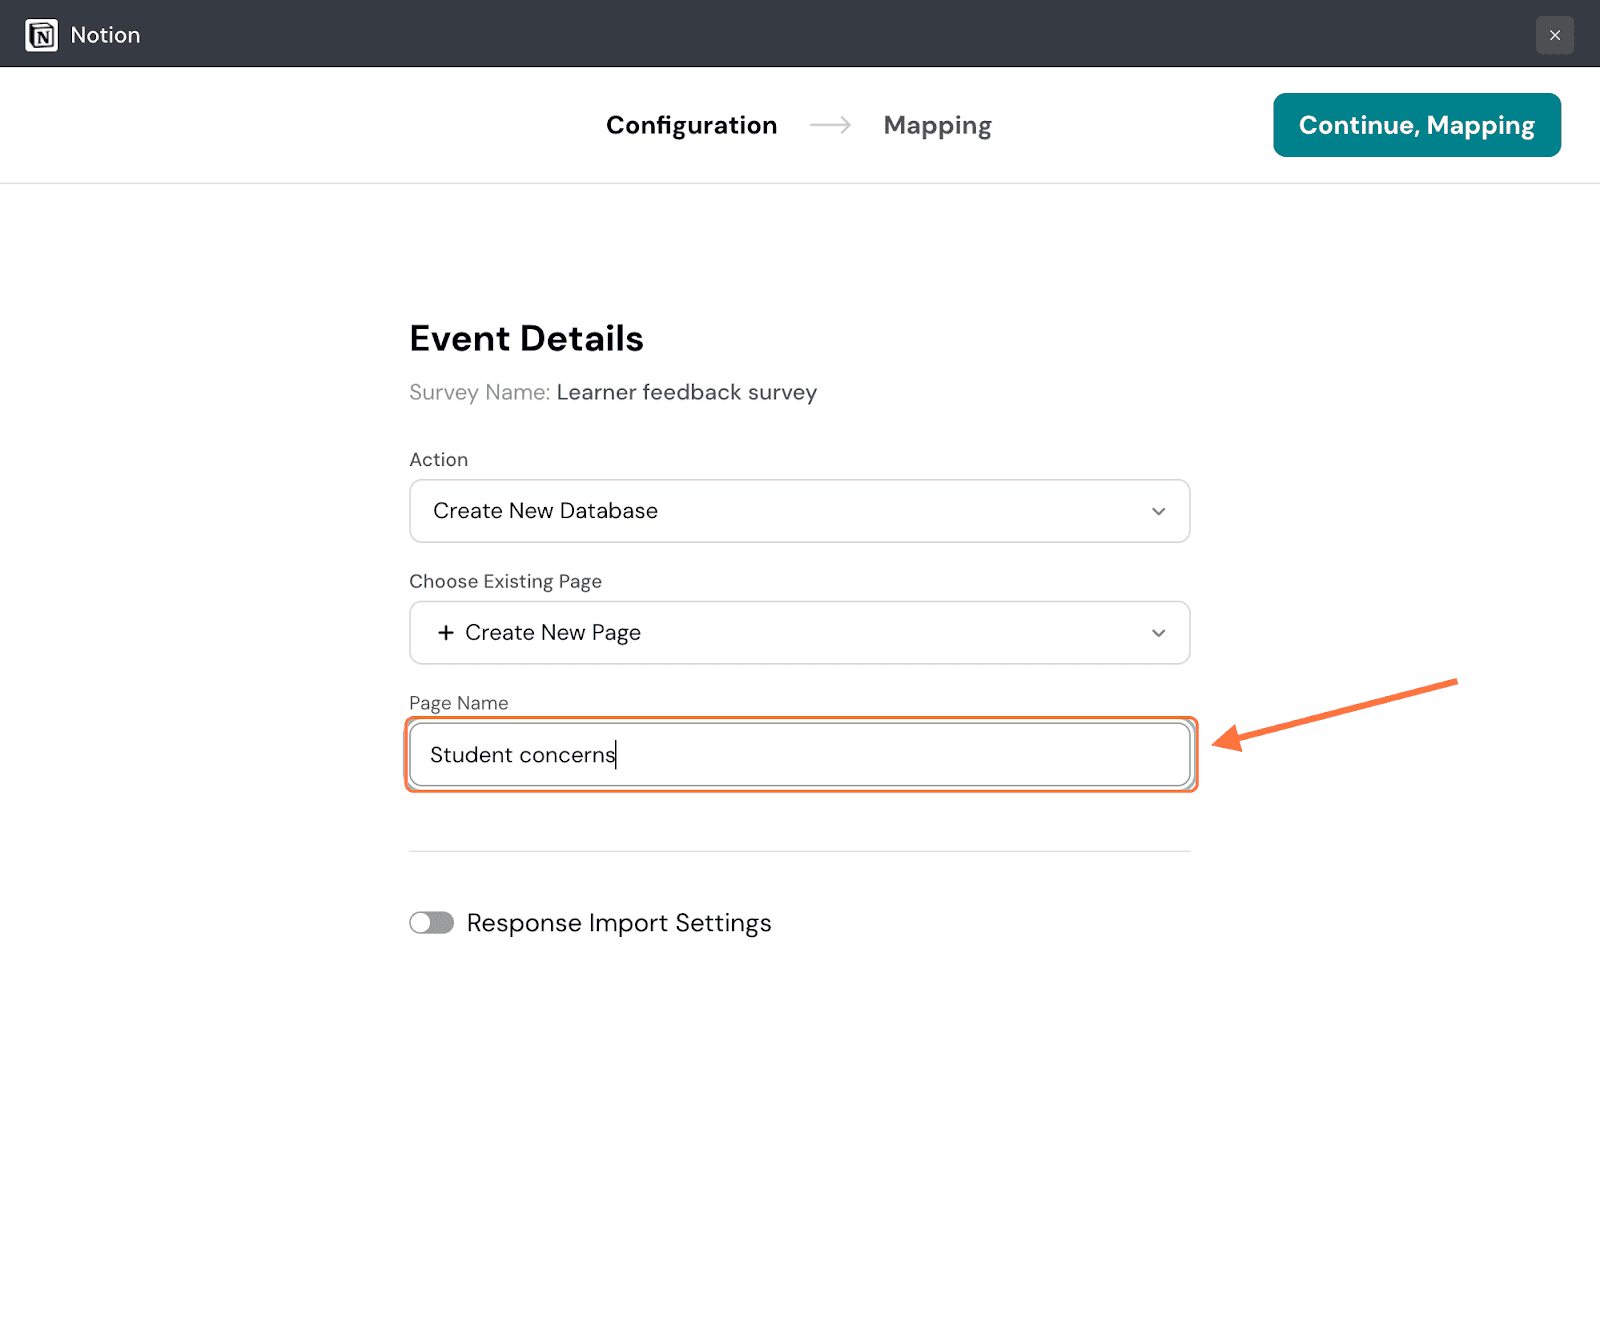
Note: If you want to create a new page, click on Create New Page, then type in a page name.
12. You can also choose to configure the time period from which responses are imported, by clicking on the toggle next to Response Import Settings. A drop-down appears, click on it to choose between the two settings. The default option is to import all responses received to date.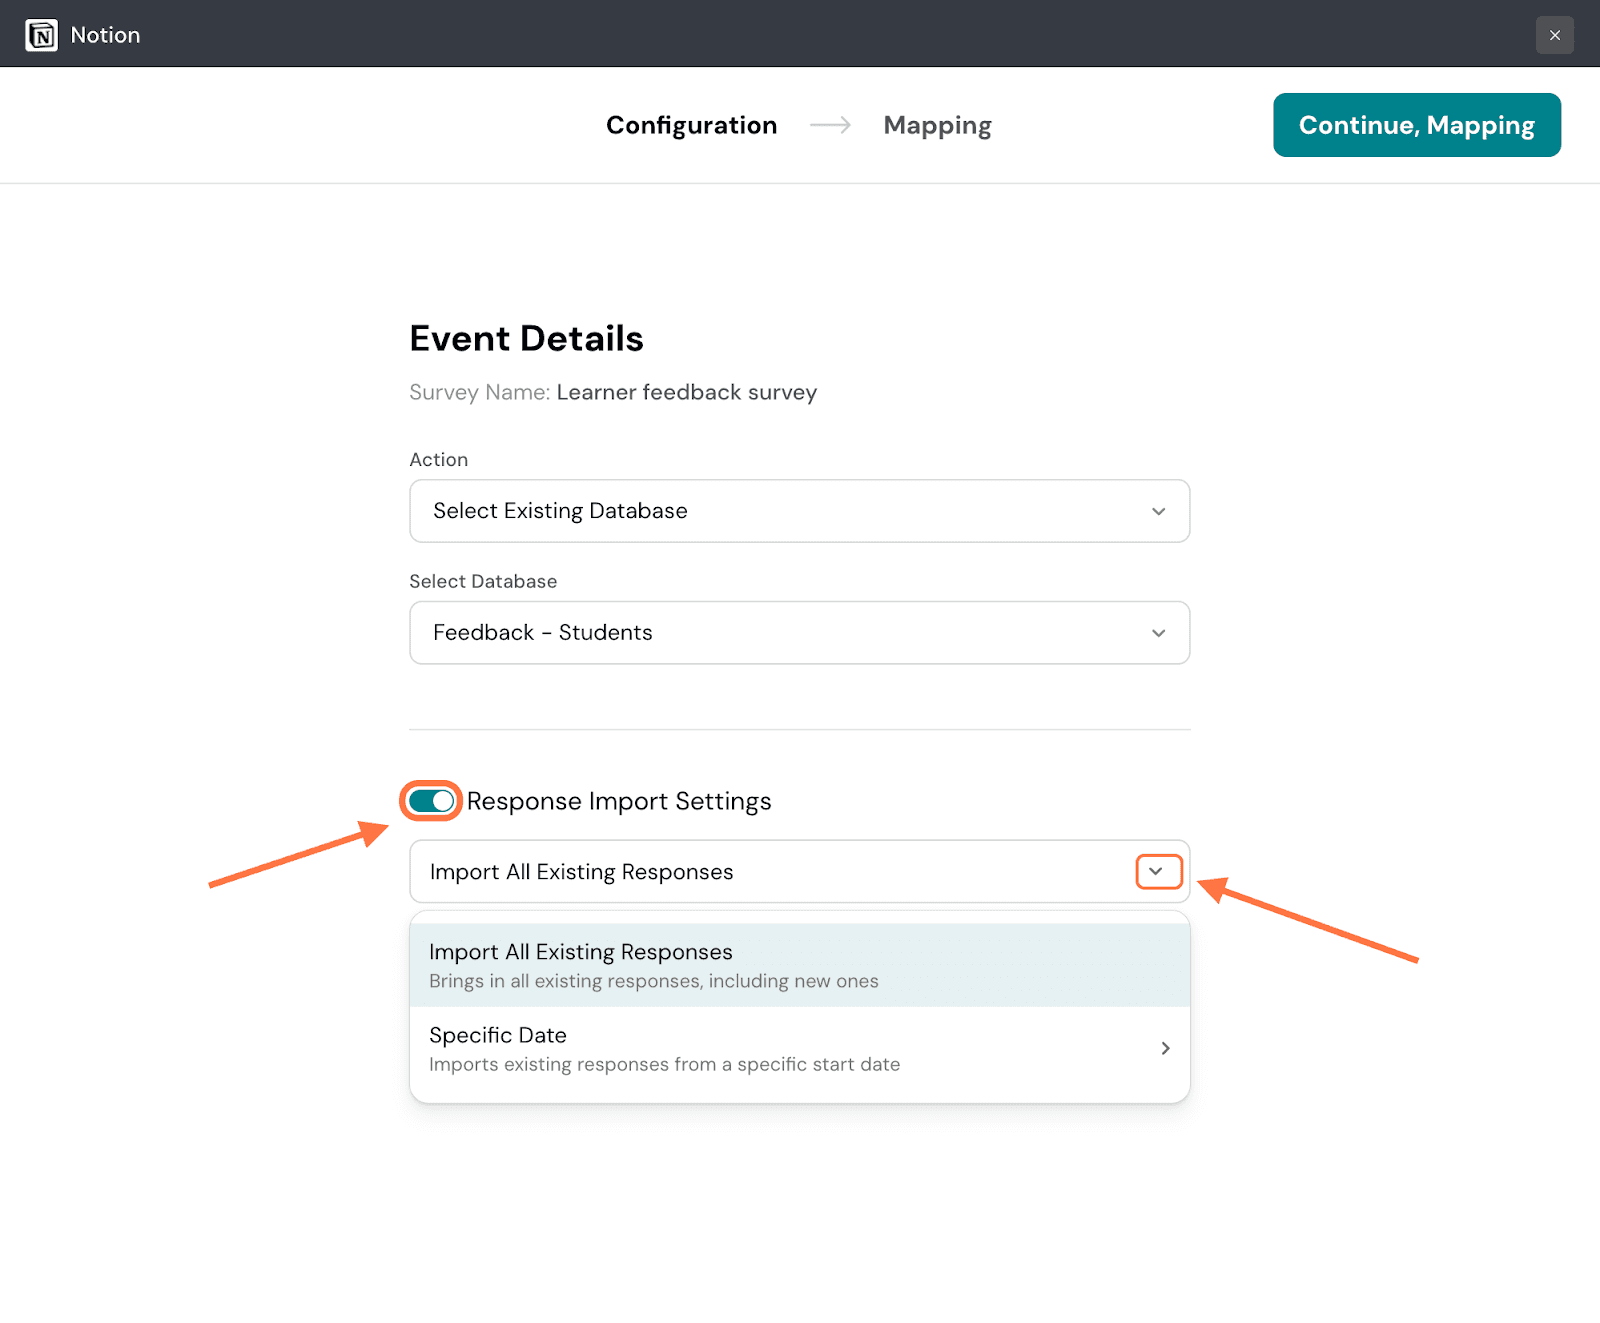
Note: If this toggle is not enabled, responses received prior to the integration set-up will not be stored in Notion.
13. But if you only want to import responses starting from a particular date, hover over the Specific Date option. A calendar will appear on the right. Choose your date, then click Apply.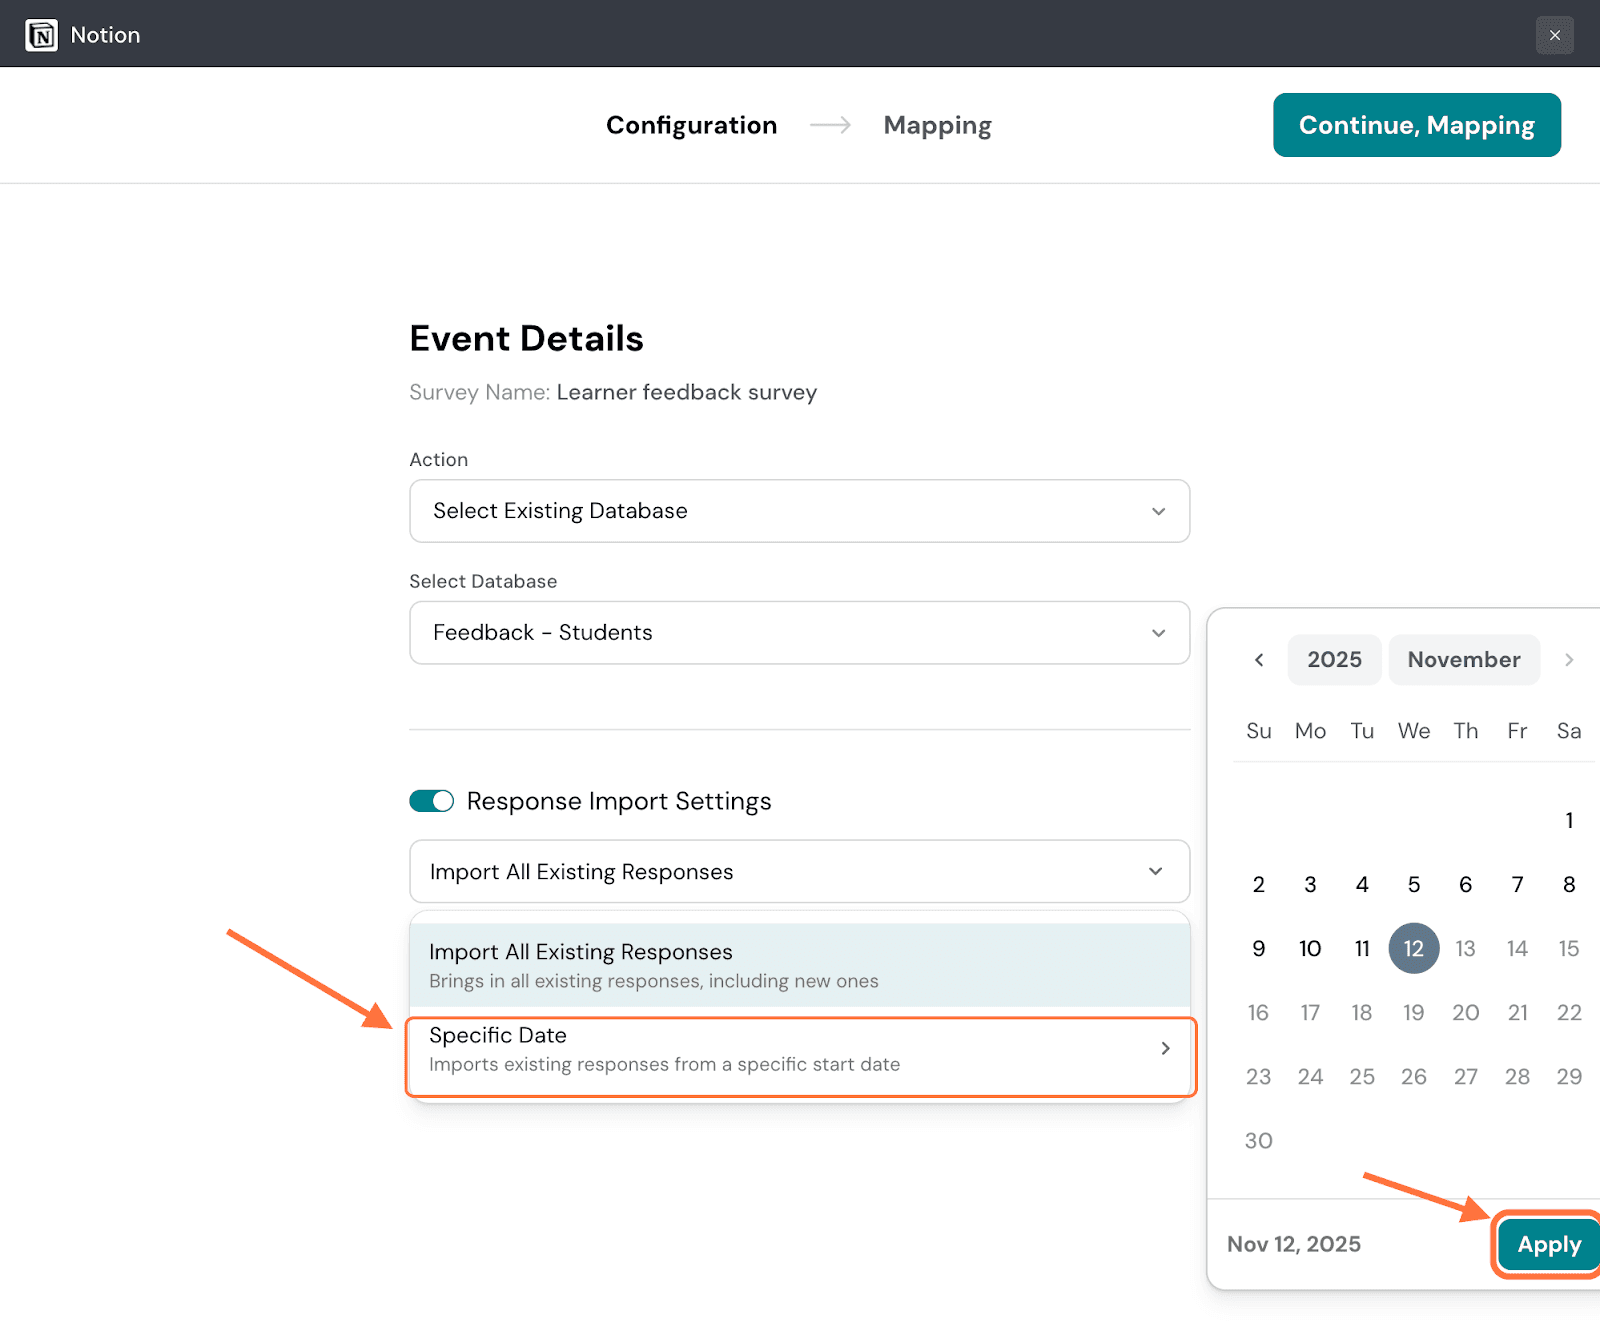
Note: The integration can only import a maximum of 10,000 responses from SurveySparrow to Notion.
14. Once you have configured all your import conditions, click on Continue, Mapping.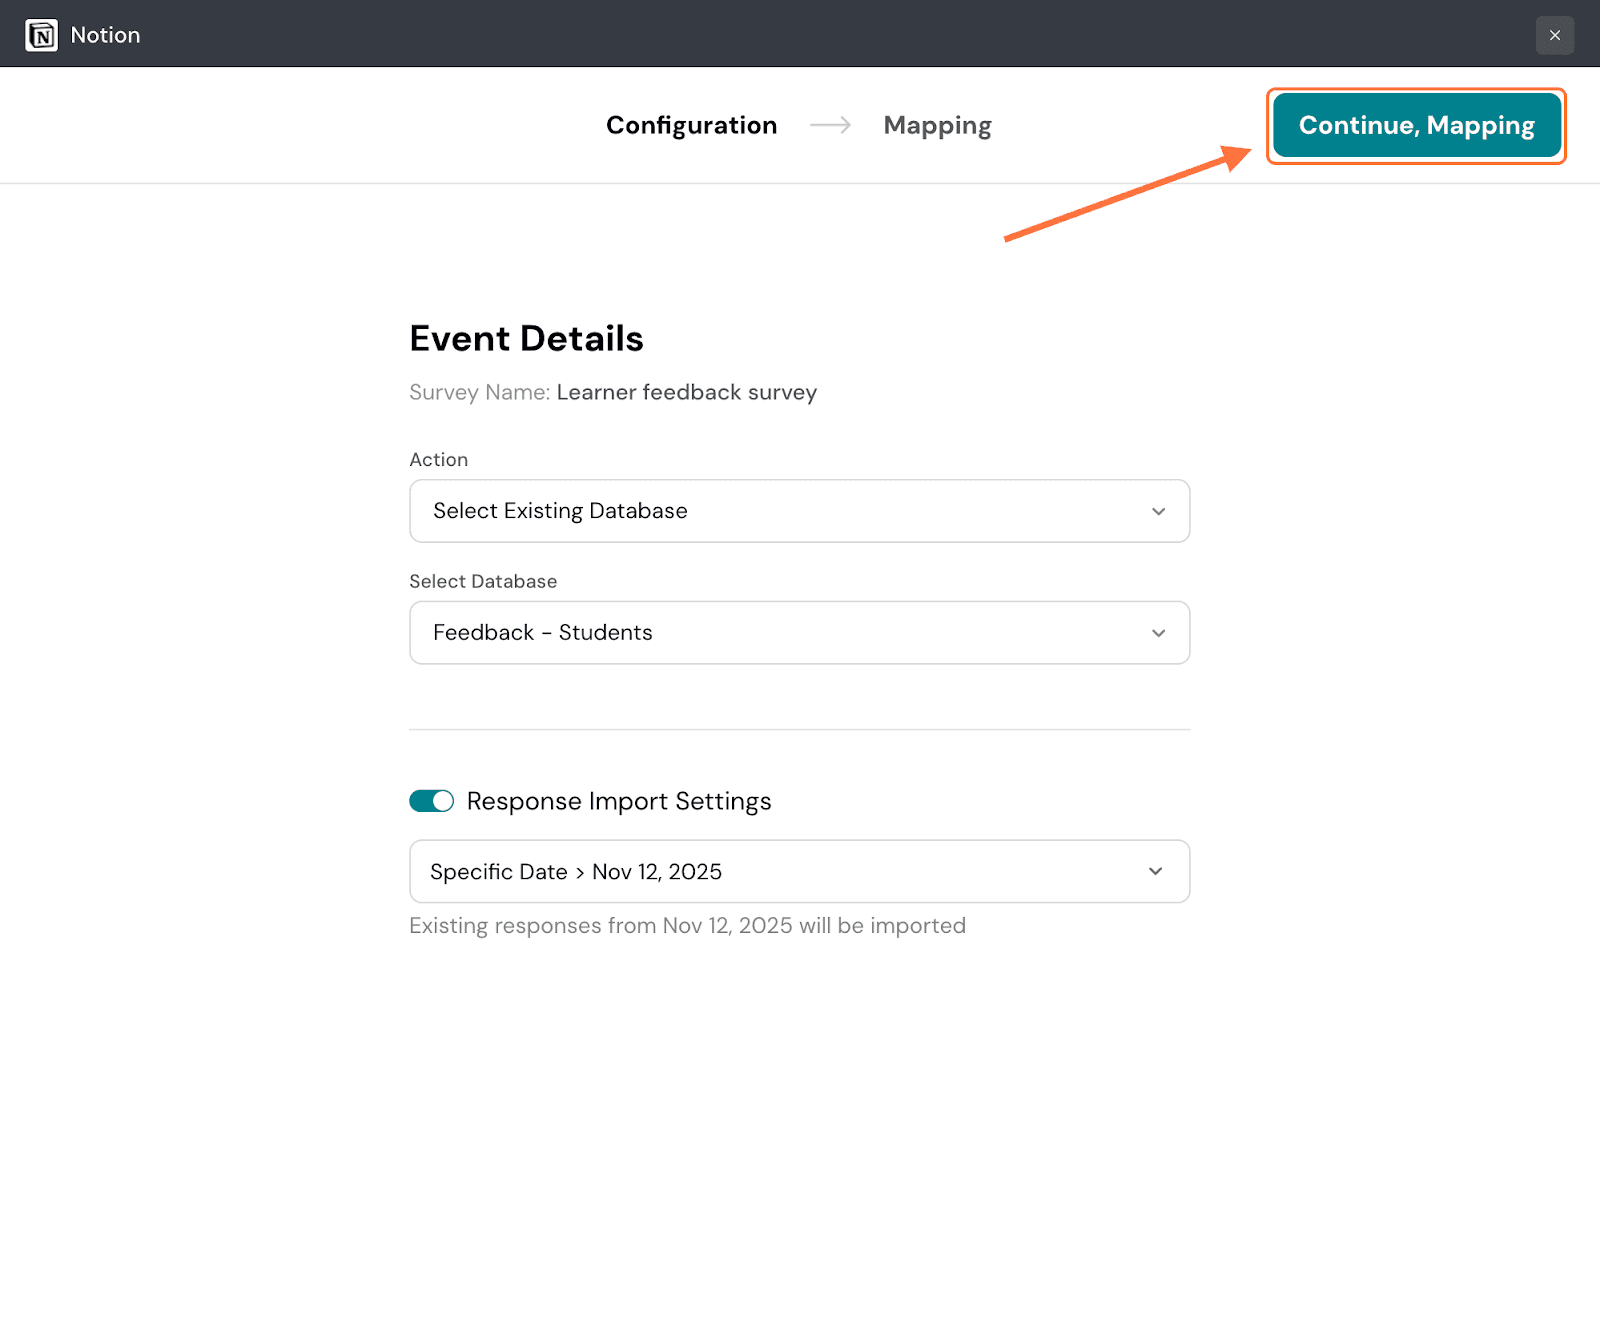
15. Inside the Mapping section, you must decide what data from the survey should be stored in the database and exactly where. Start by choosing the data type (which is set to a question by default). Click on the drop-down menu under Type and choose from the options.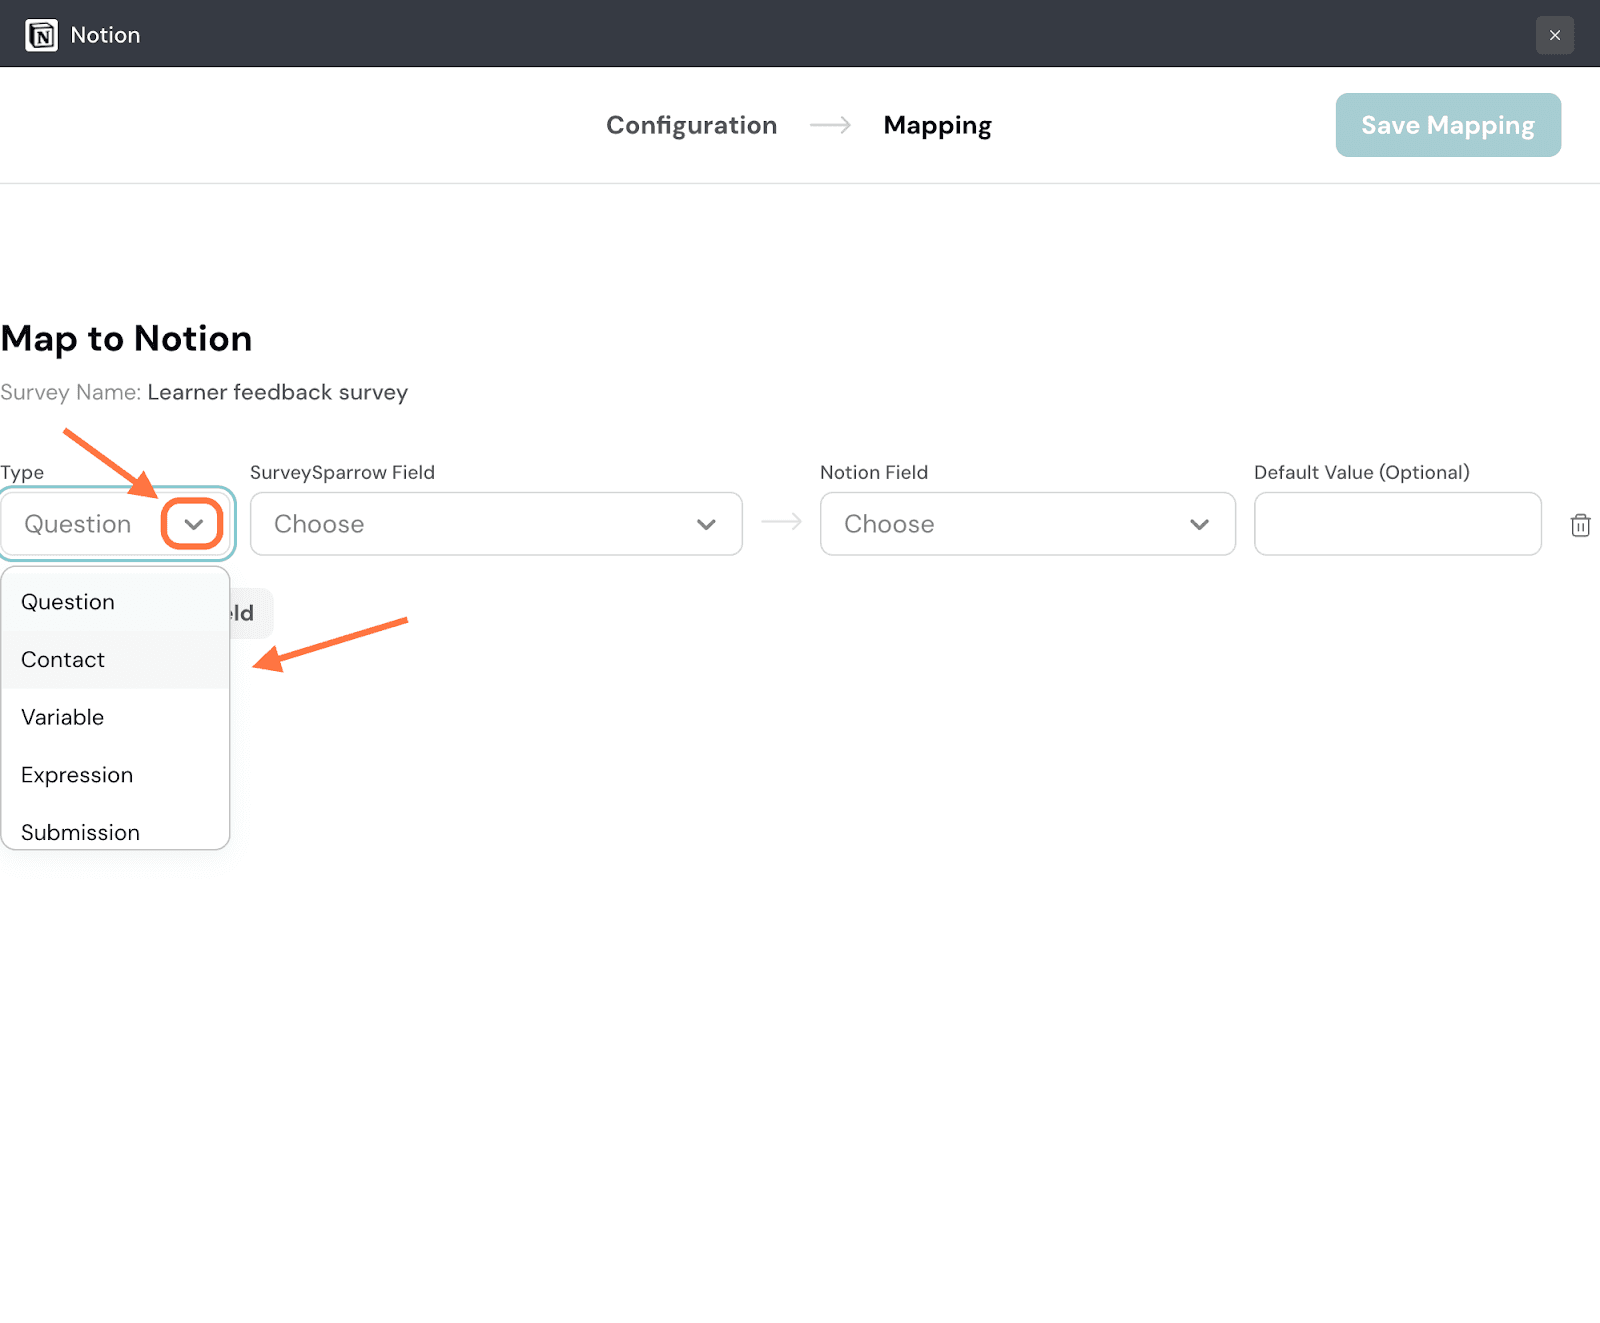
16. Next, you must choose an instance of that data type. For example, if you want to import a question type, you must select a specific question. In this case, we have chosen the contact type, so we must choose a contact property. Click on the drop-down under SurveySparrow Field and select from the options.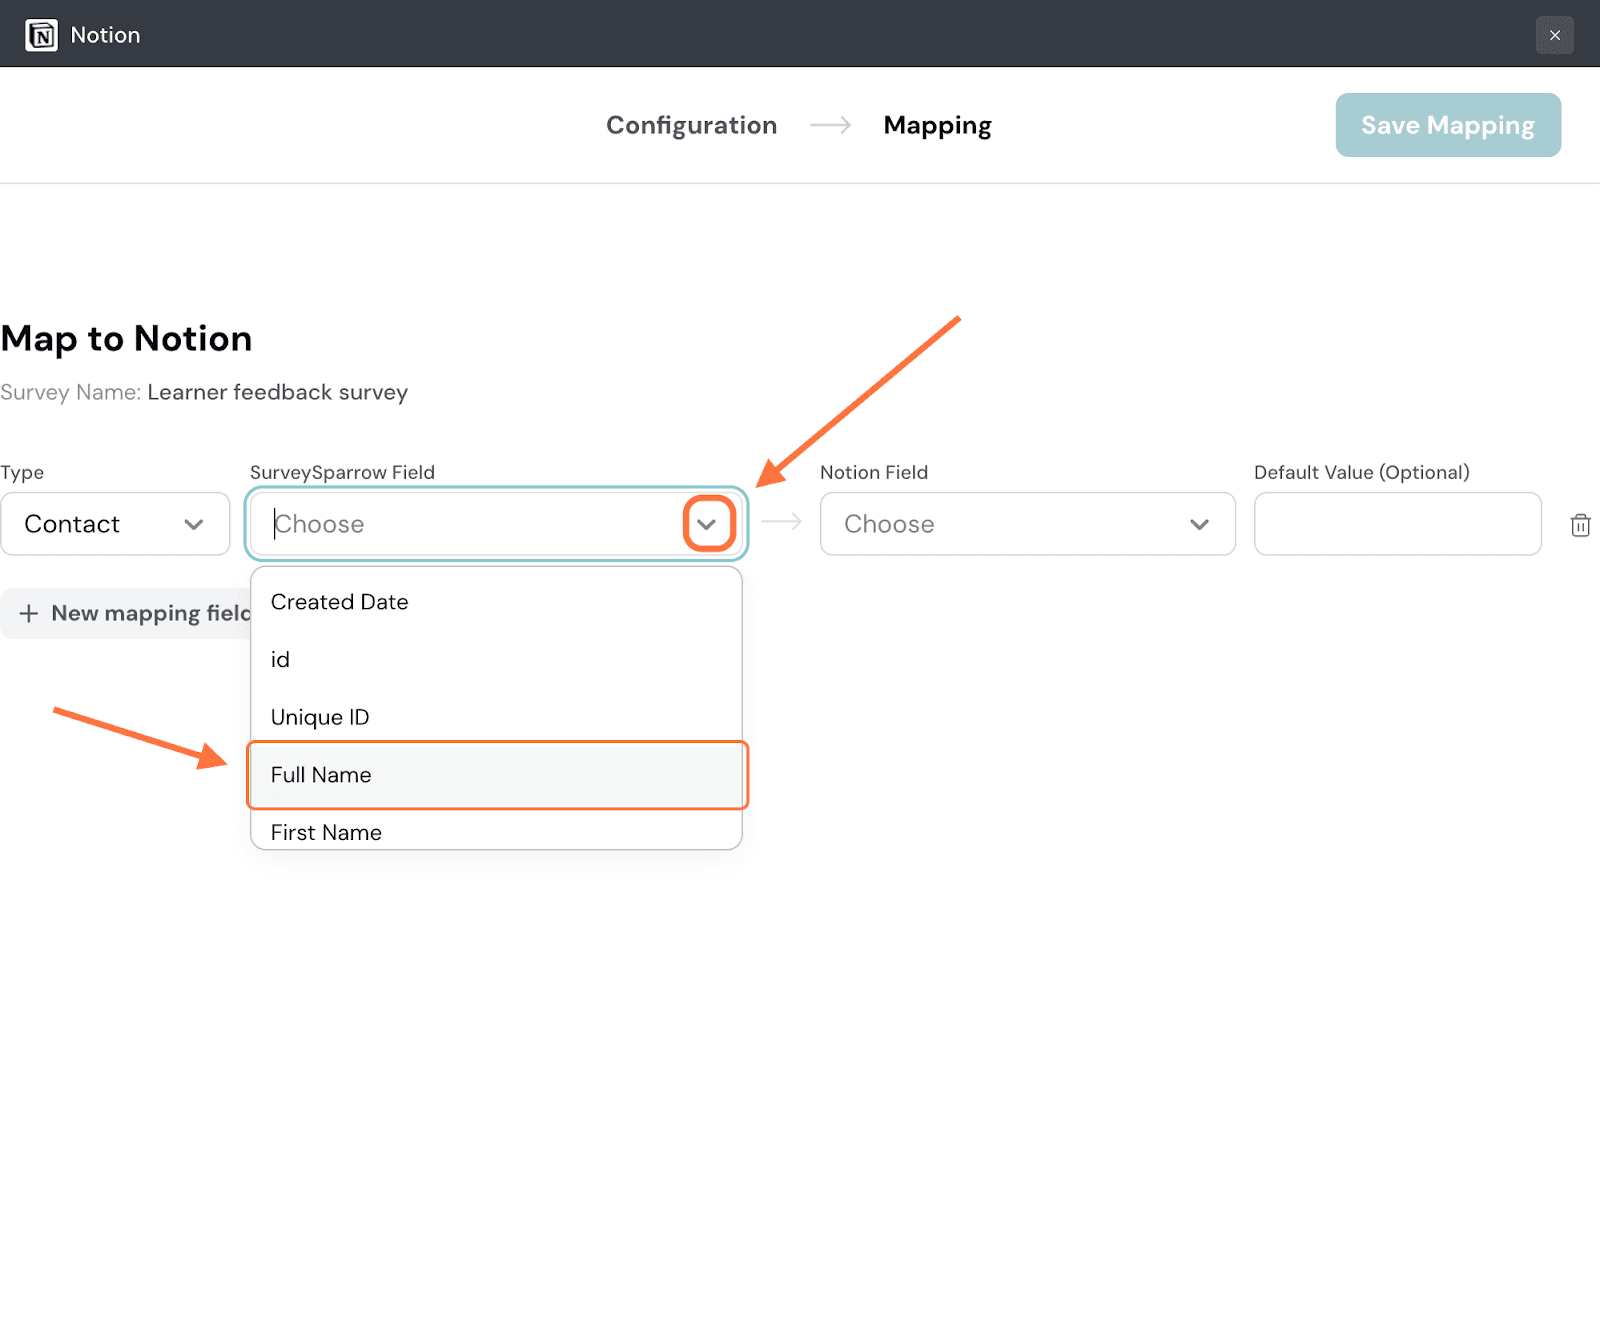
17. Finally, you must choose the database field in Notion to store the data type. Click on the drop-down under Notion Field and choose from the options.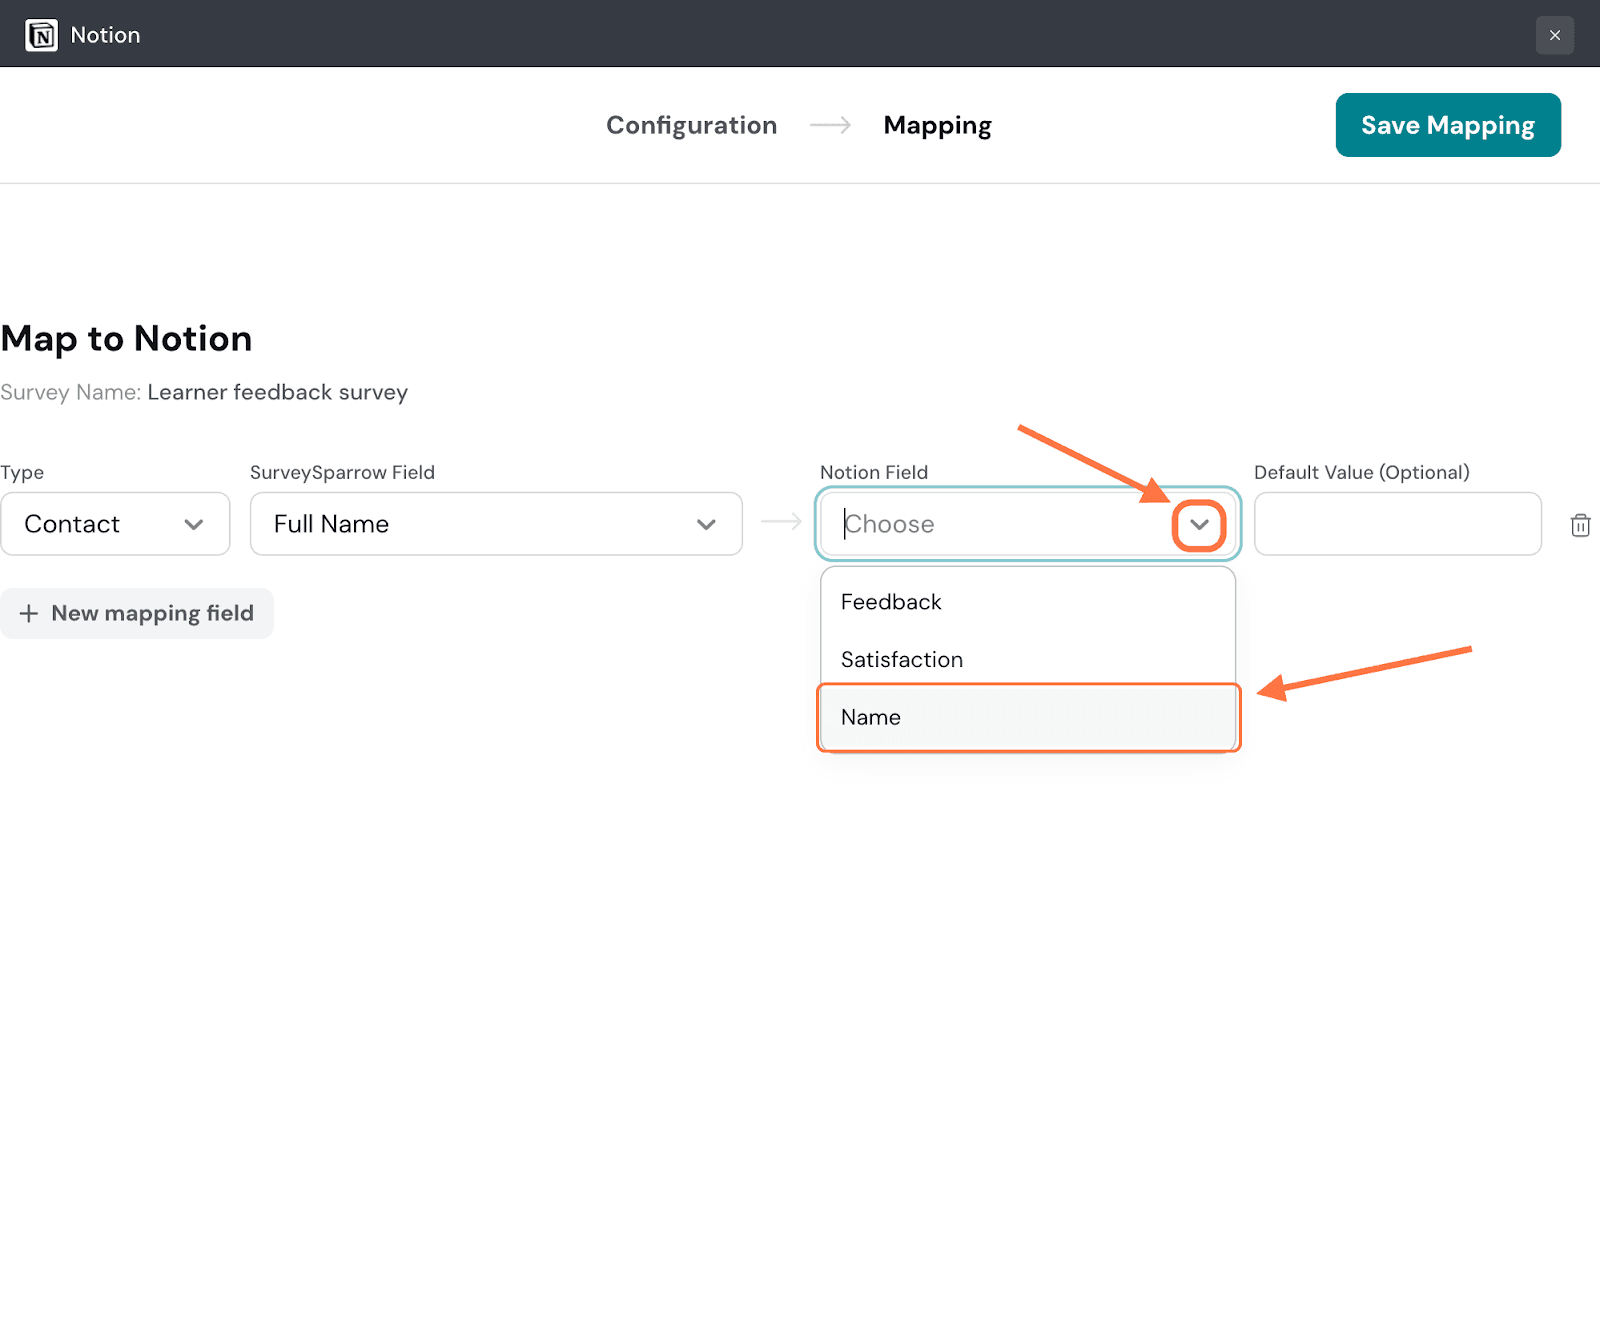
18. In case a response has no data for that particular data type (eg: an optional question that goes unanswered), you can create a default value to populate the Notion field instead, by entering it in the Default Value field. To import more than one data property from SurveySparrow, click on New Mapping field.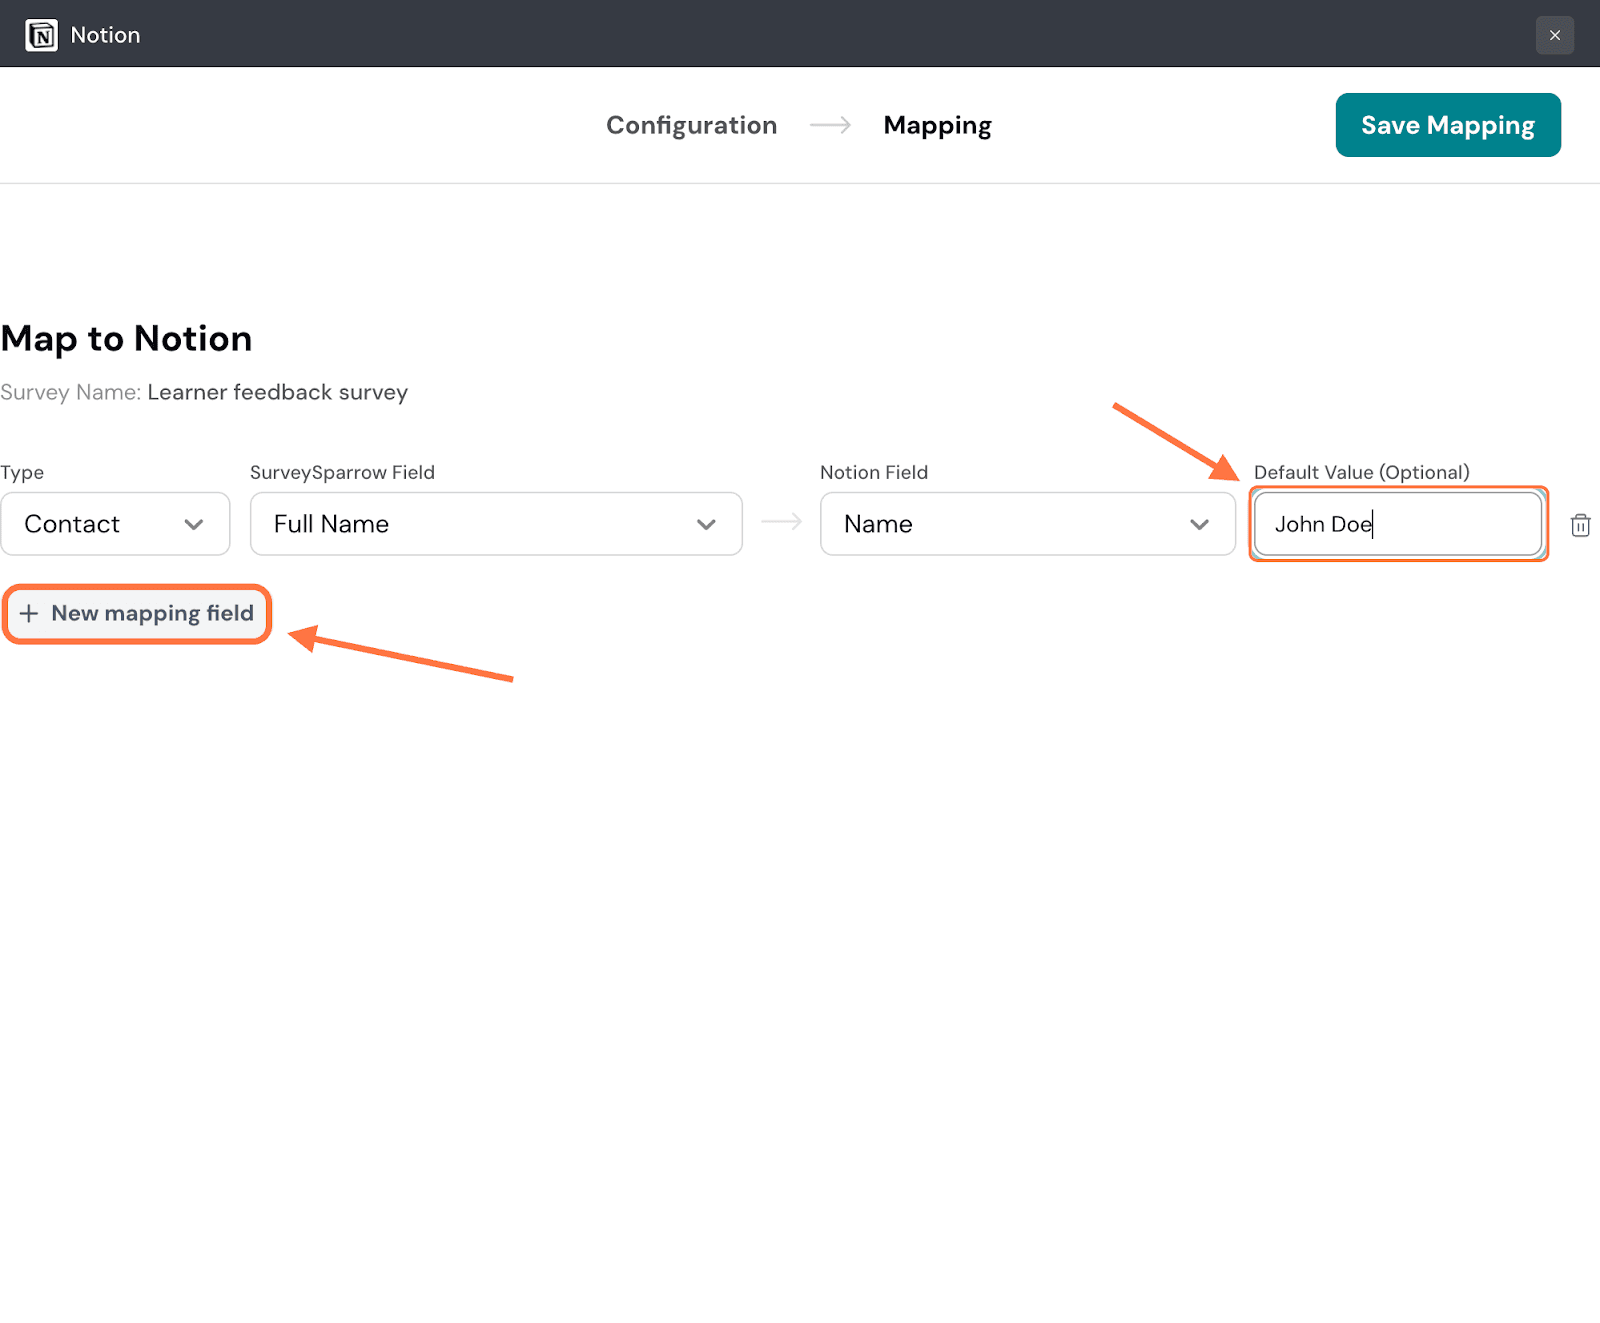
19. Once you have completed adding all the fields, click on Save Mapping.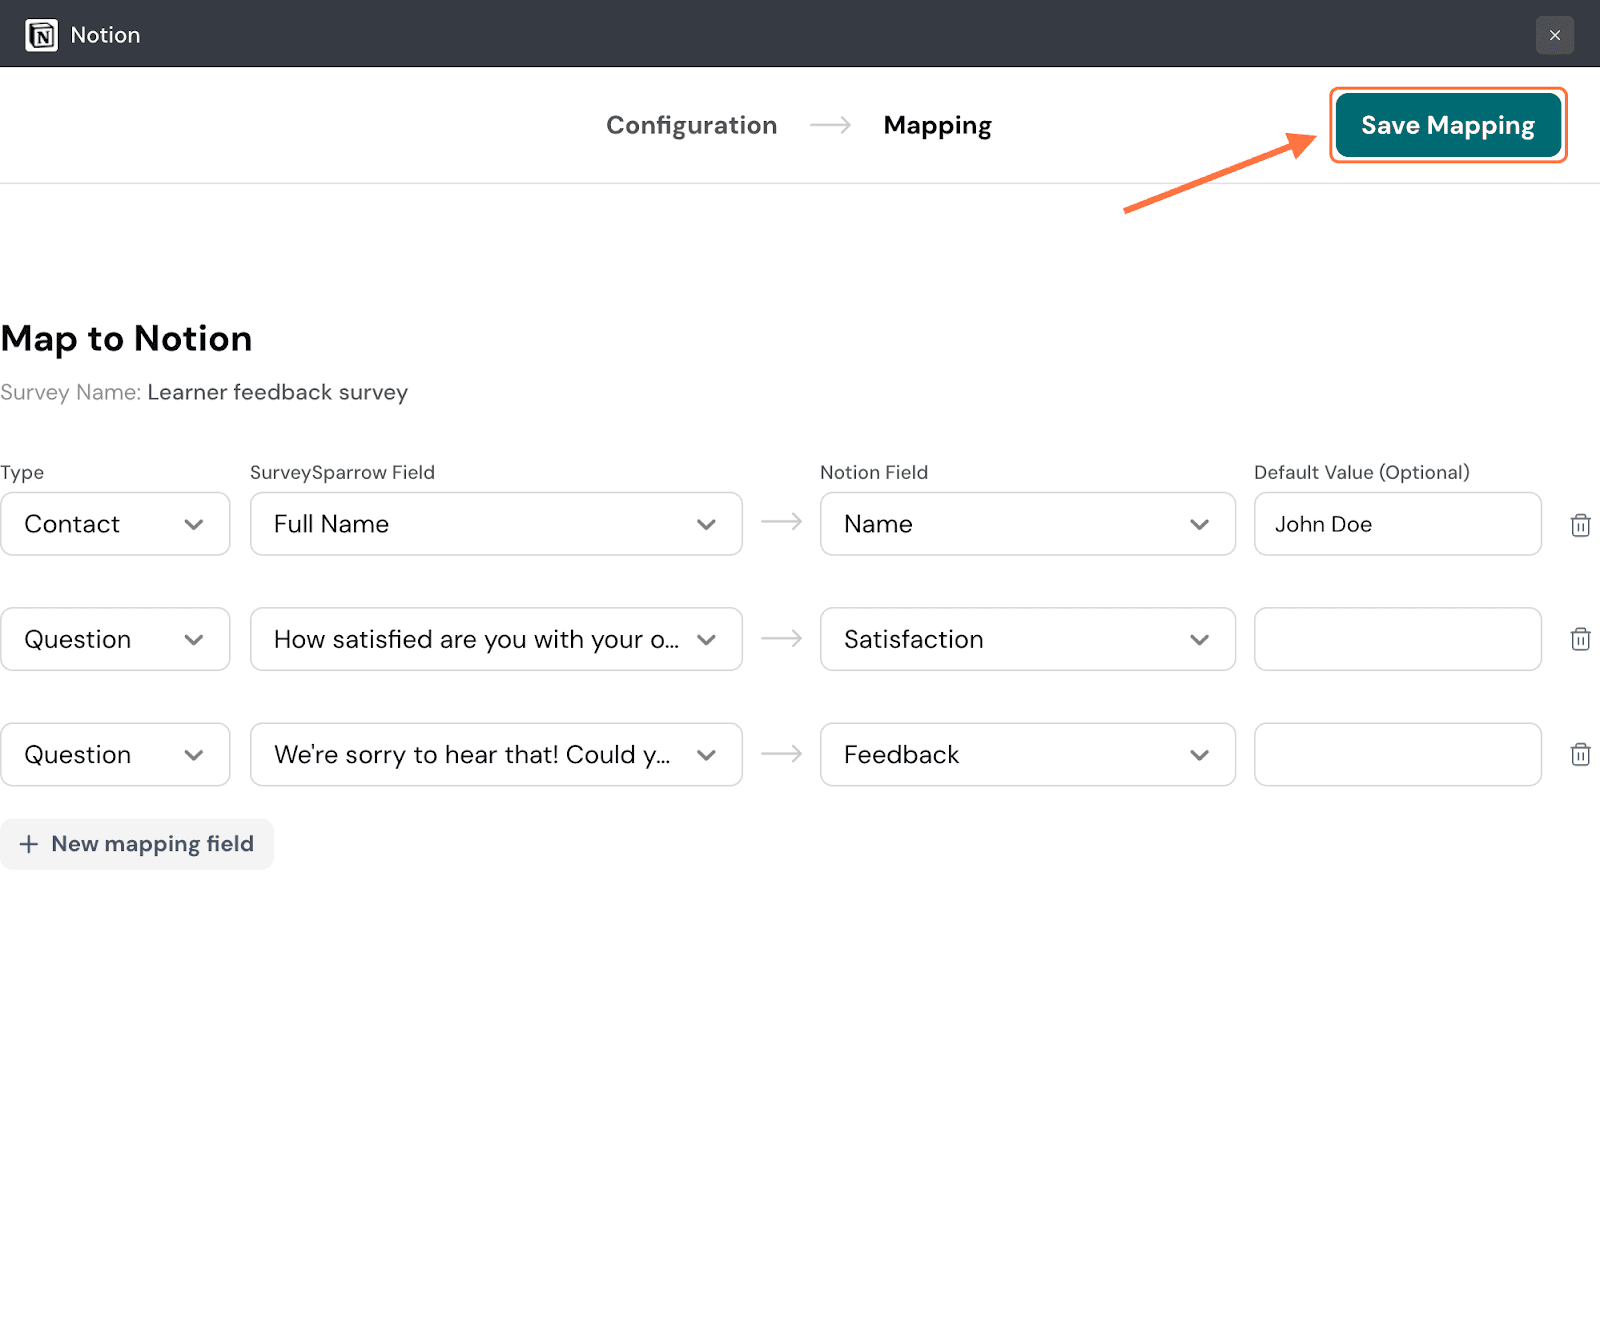
20. A final pop-up appears. Type in a name for the mapping and click Save Mapping.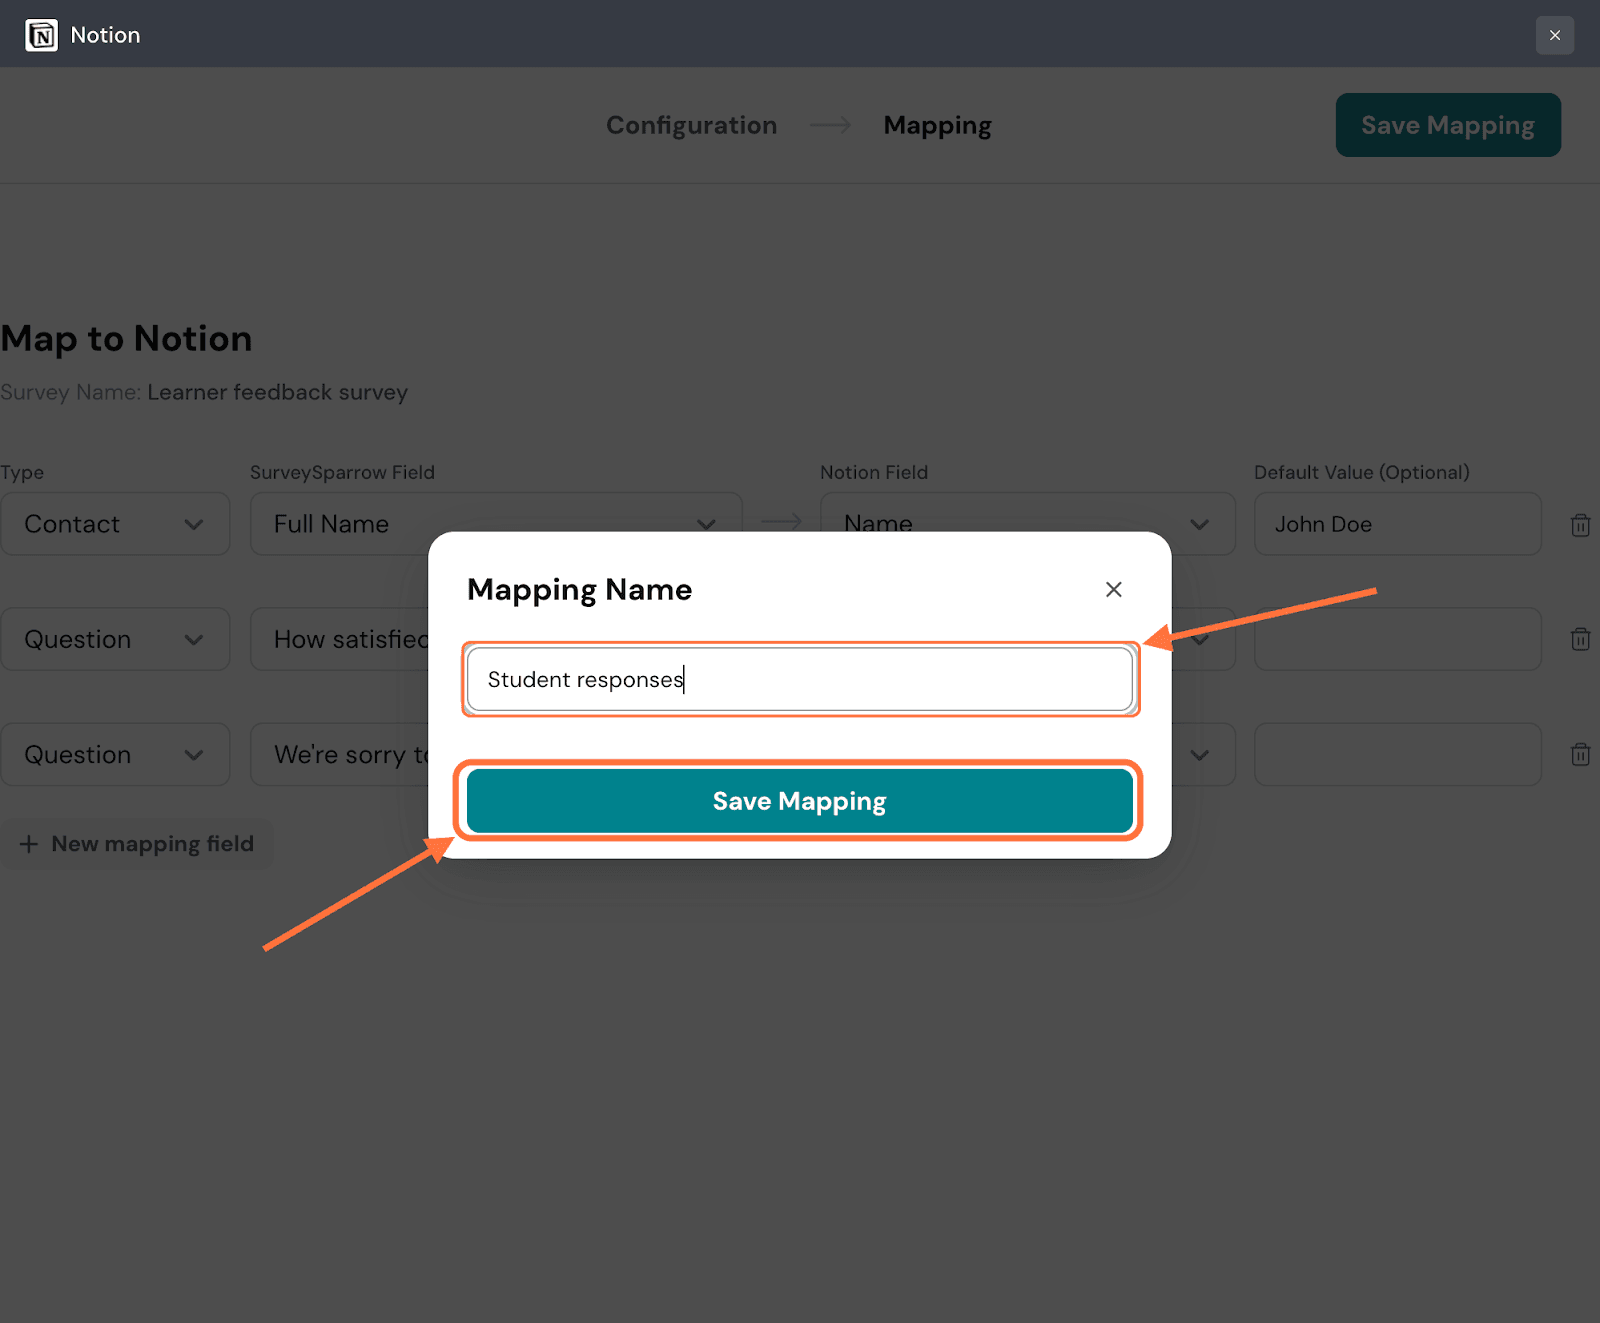
Note: The mapping creation flow described above is when you choose to import to an existing database. If you decide to create a new database (and a new page), a different screen appears with two mapping options. The default option is to send all the data. You will see the total number of items per data type.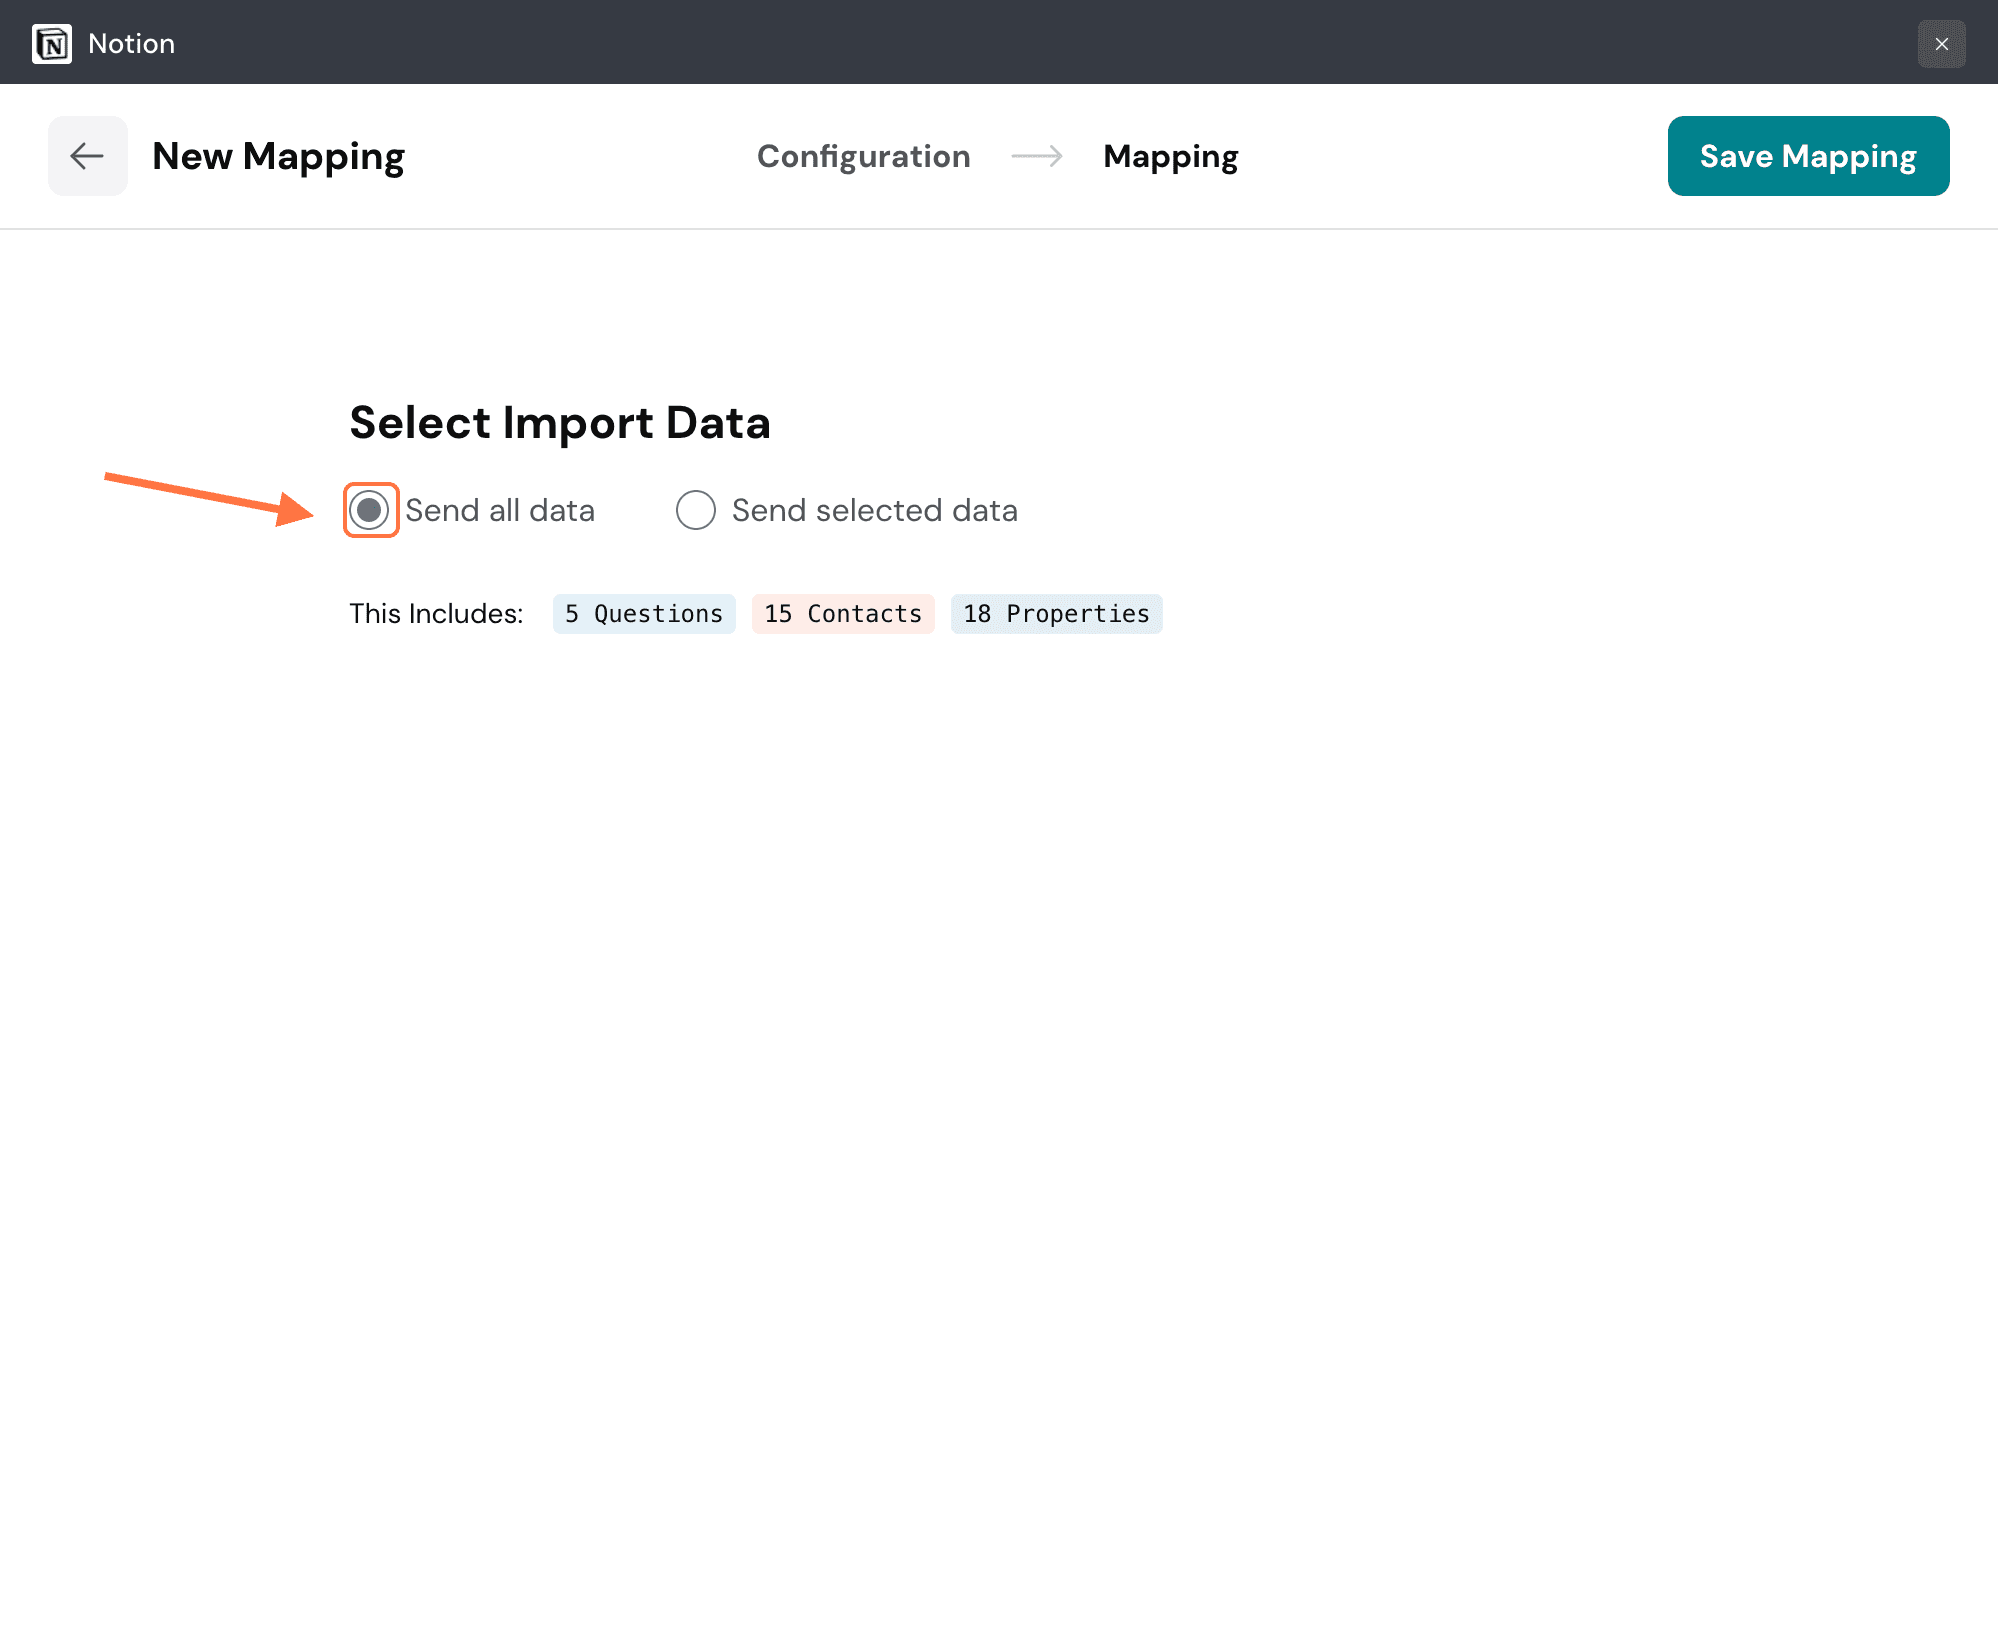
If you click on Send selected data, you can choose which item (per data type) you want to send. You can use the search box or open each tab and select items. The steps to save a mapping are the same as above.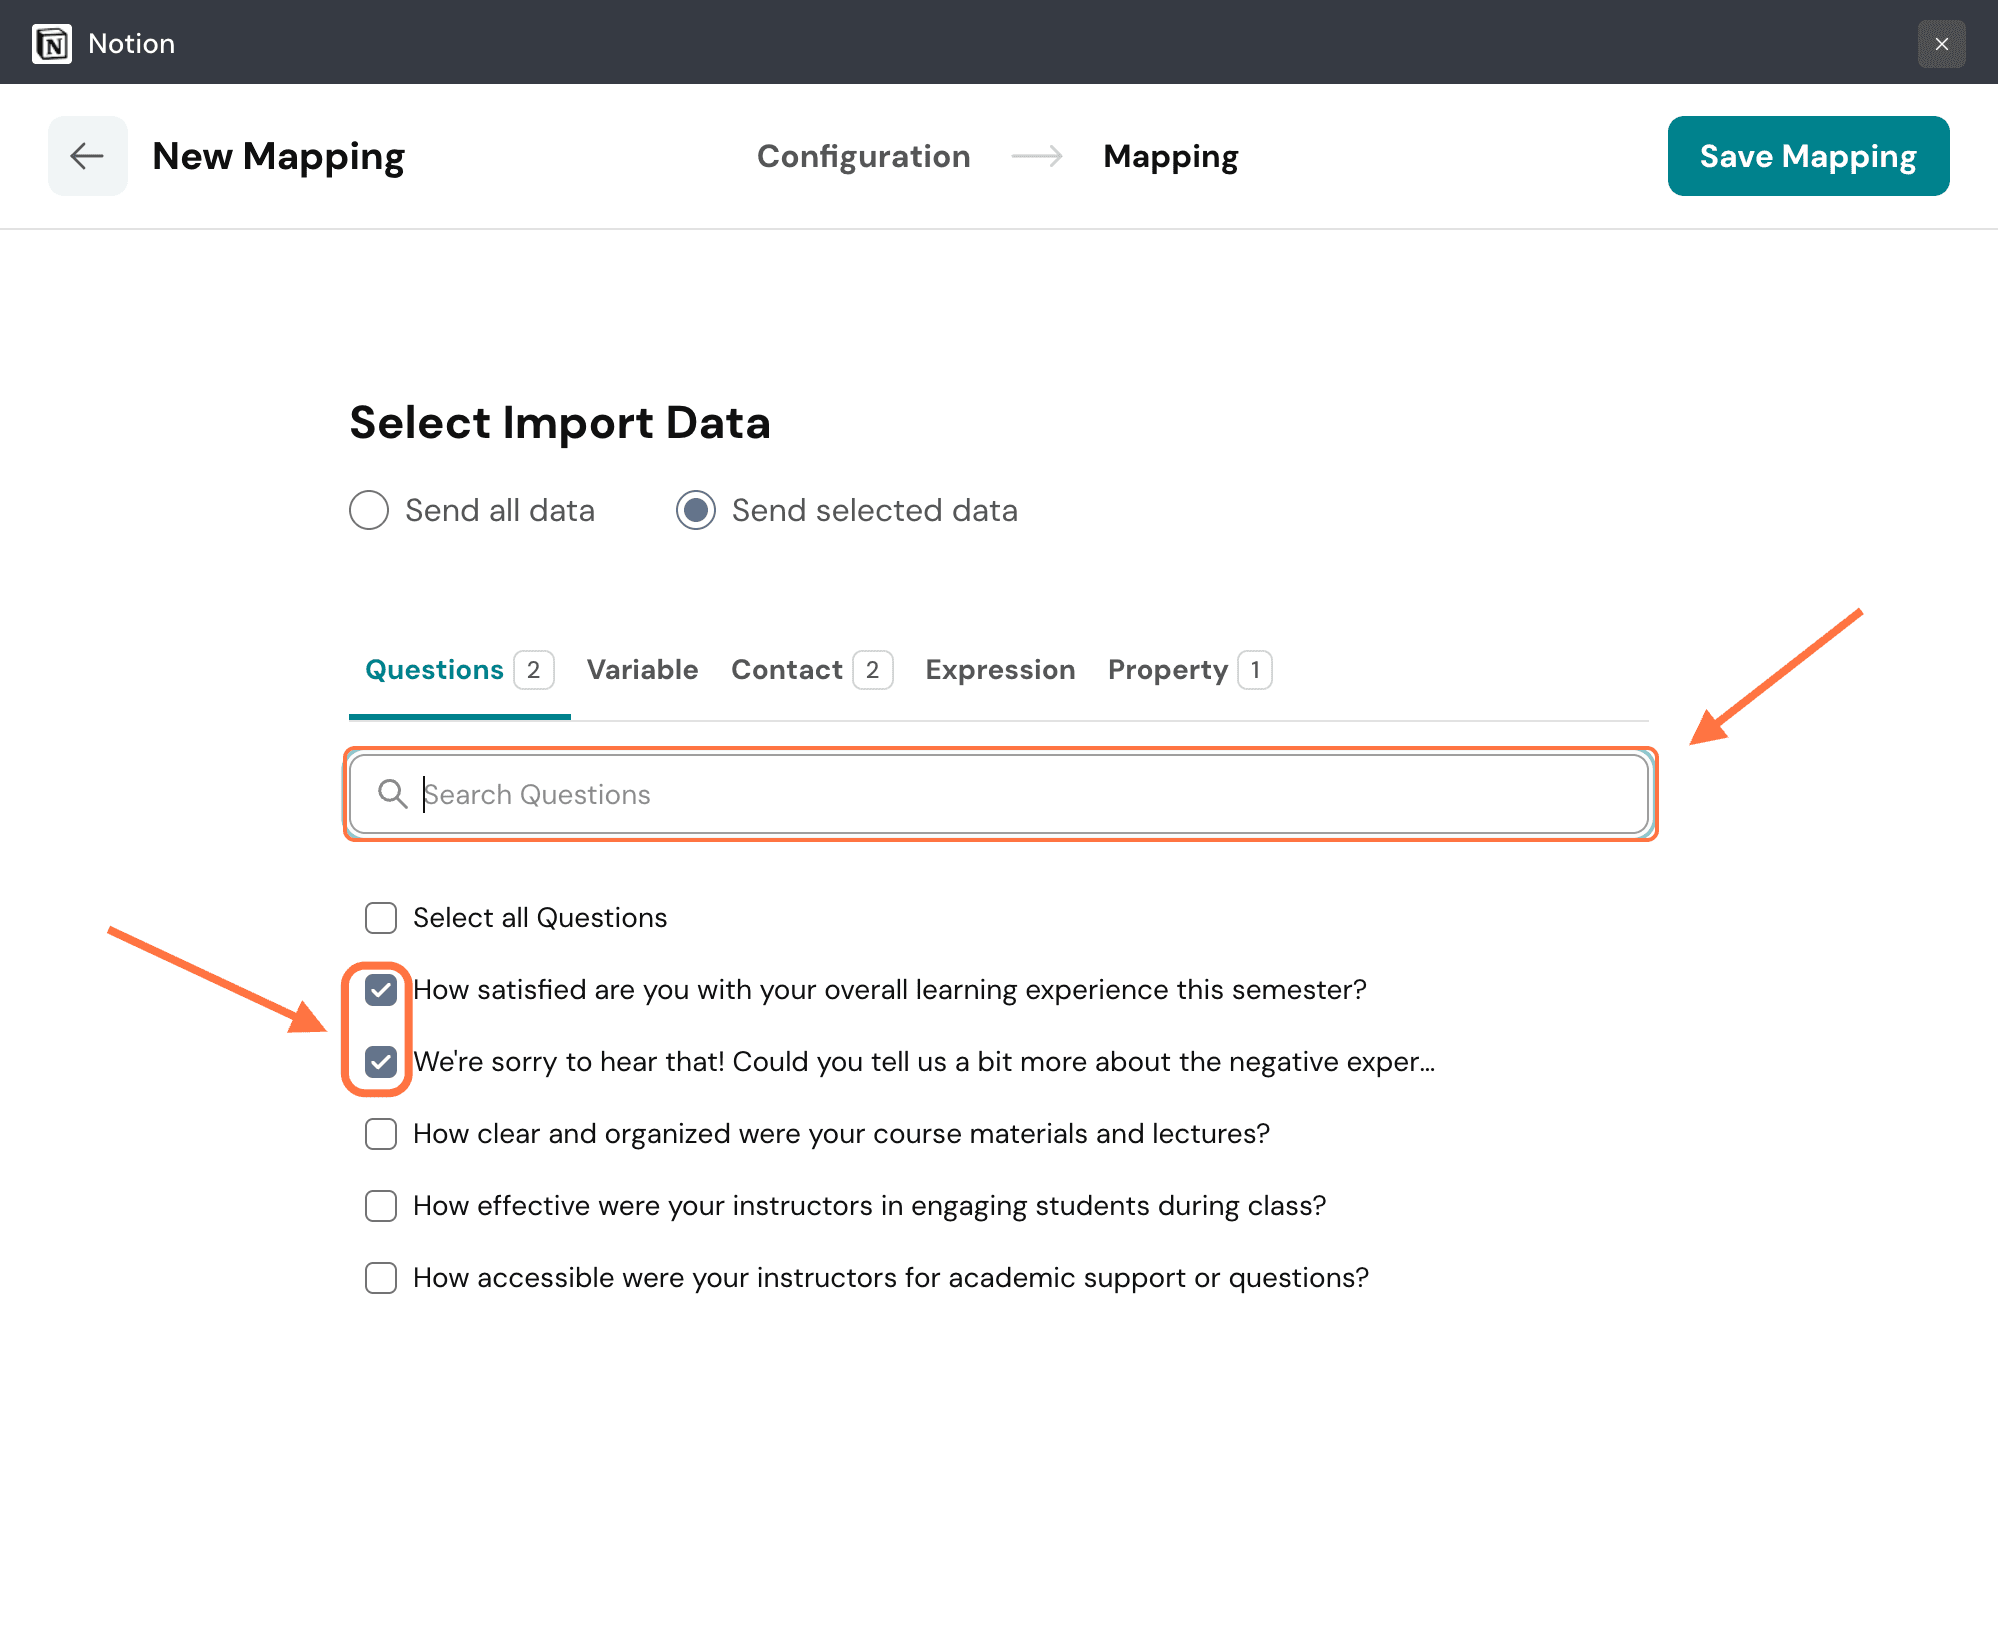
21. After saving the mapping, you will be taken to the mapping homepage, where you can see existing mappings. To get an overview of the mapping, click on the > icon on the left. The mapping card expands with all the details. If you wish to edit it, click on Edit Student Responses.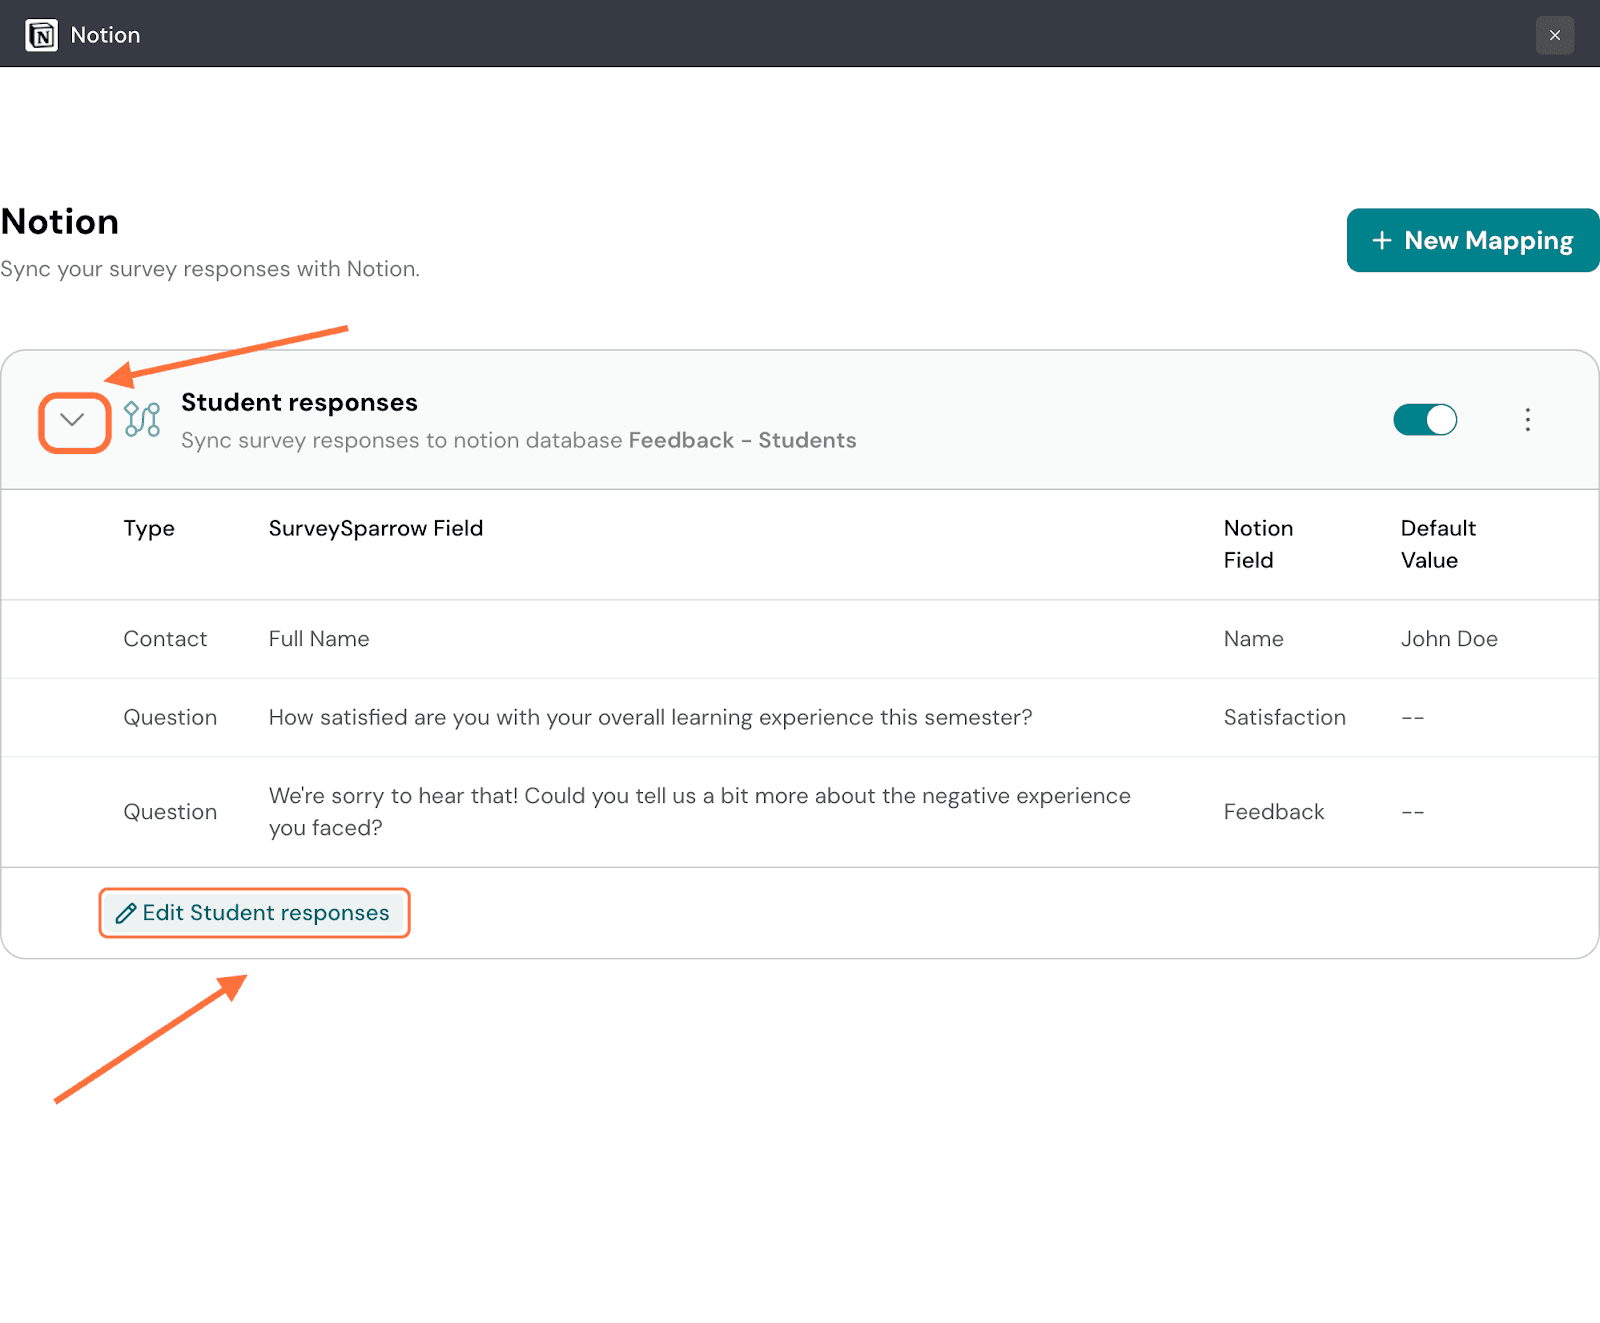
22. To delete the mapping, click on the three-dot icon on the right side of the mapping card, and click on Delete. You can also edit the mapping from this menu.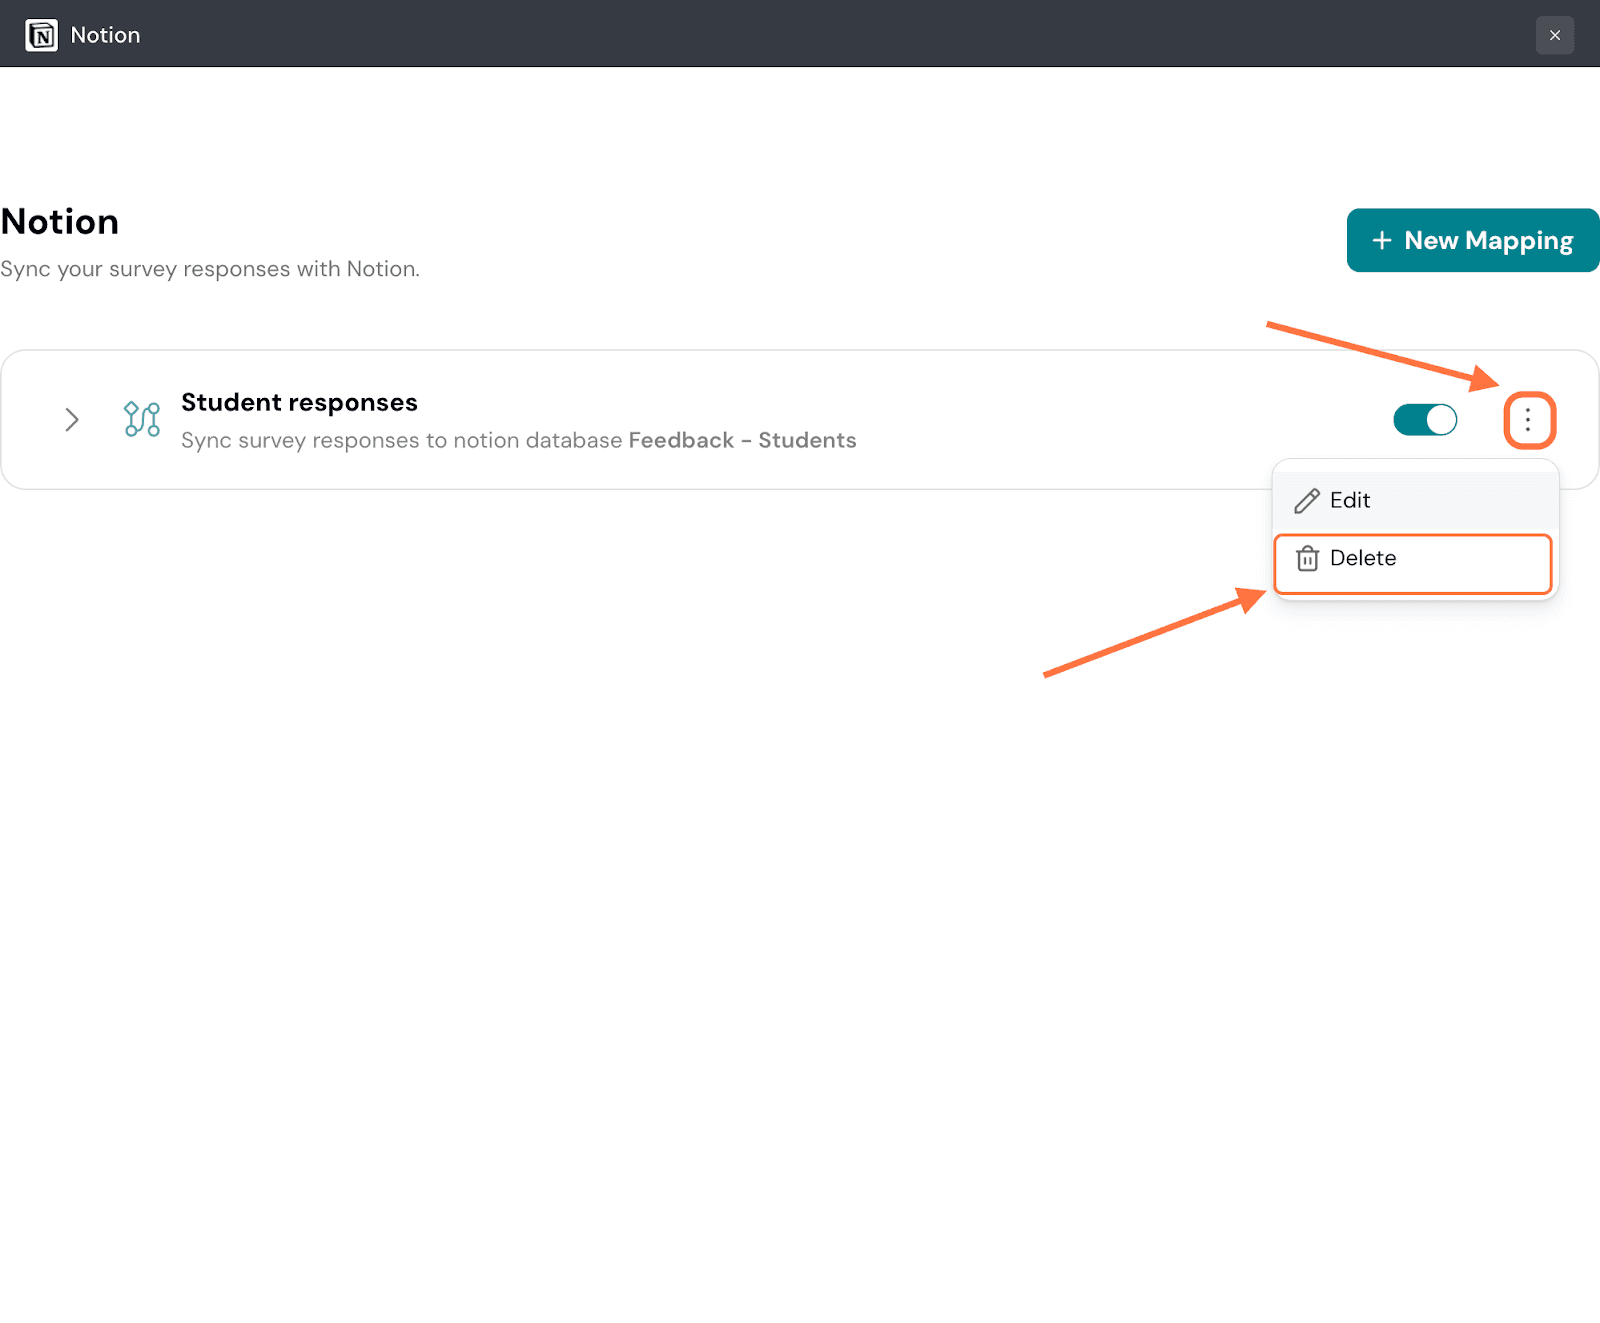
23. To pause the import at any time, click on the green toggle. To create another mapping, click on New Mapping.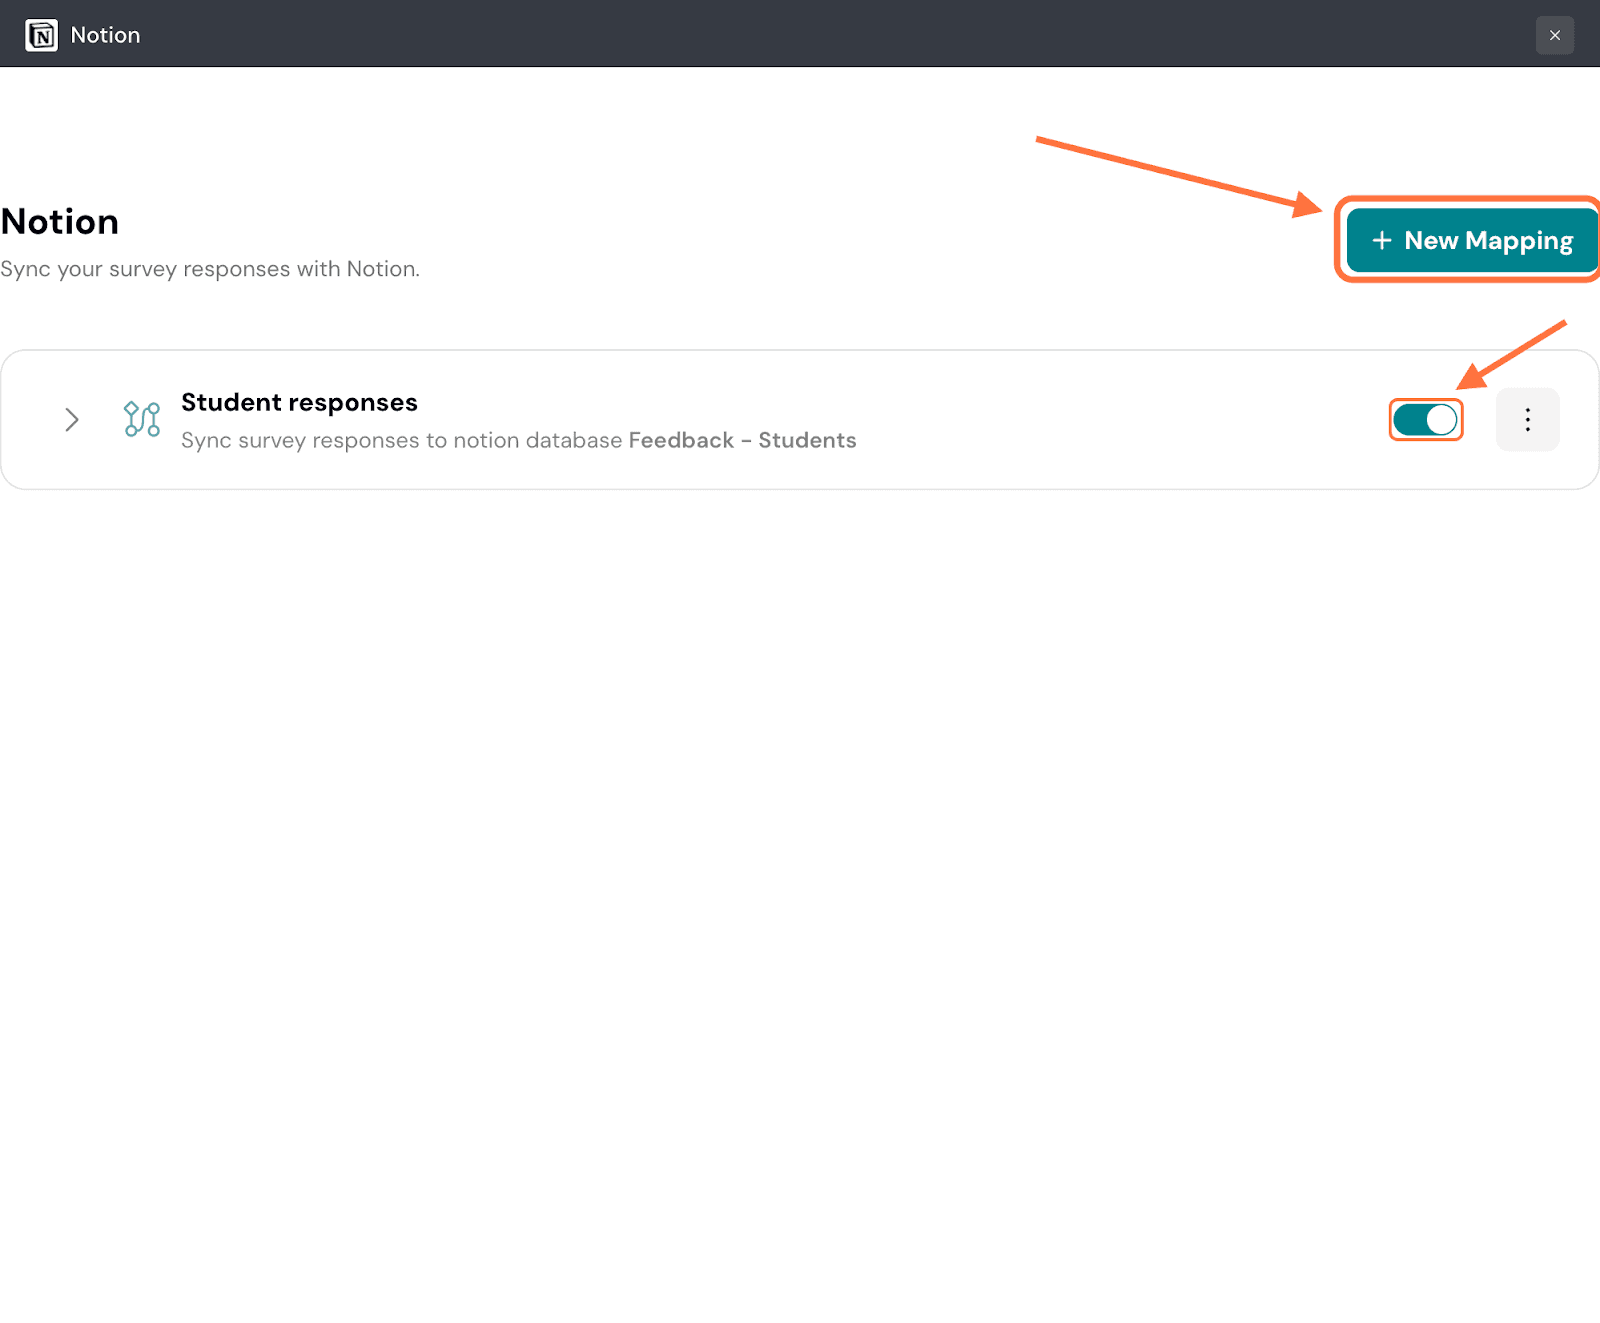
24. This is how your survey responses look like, in Notion.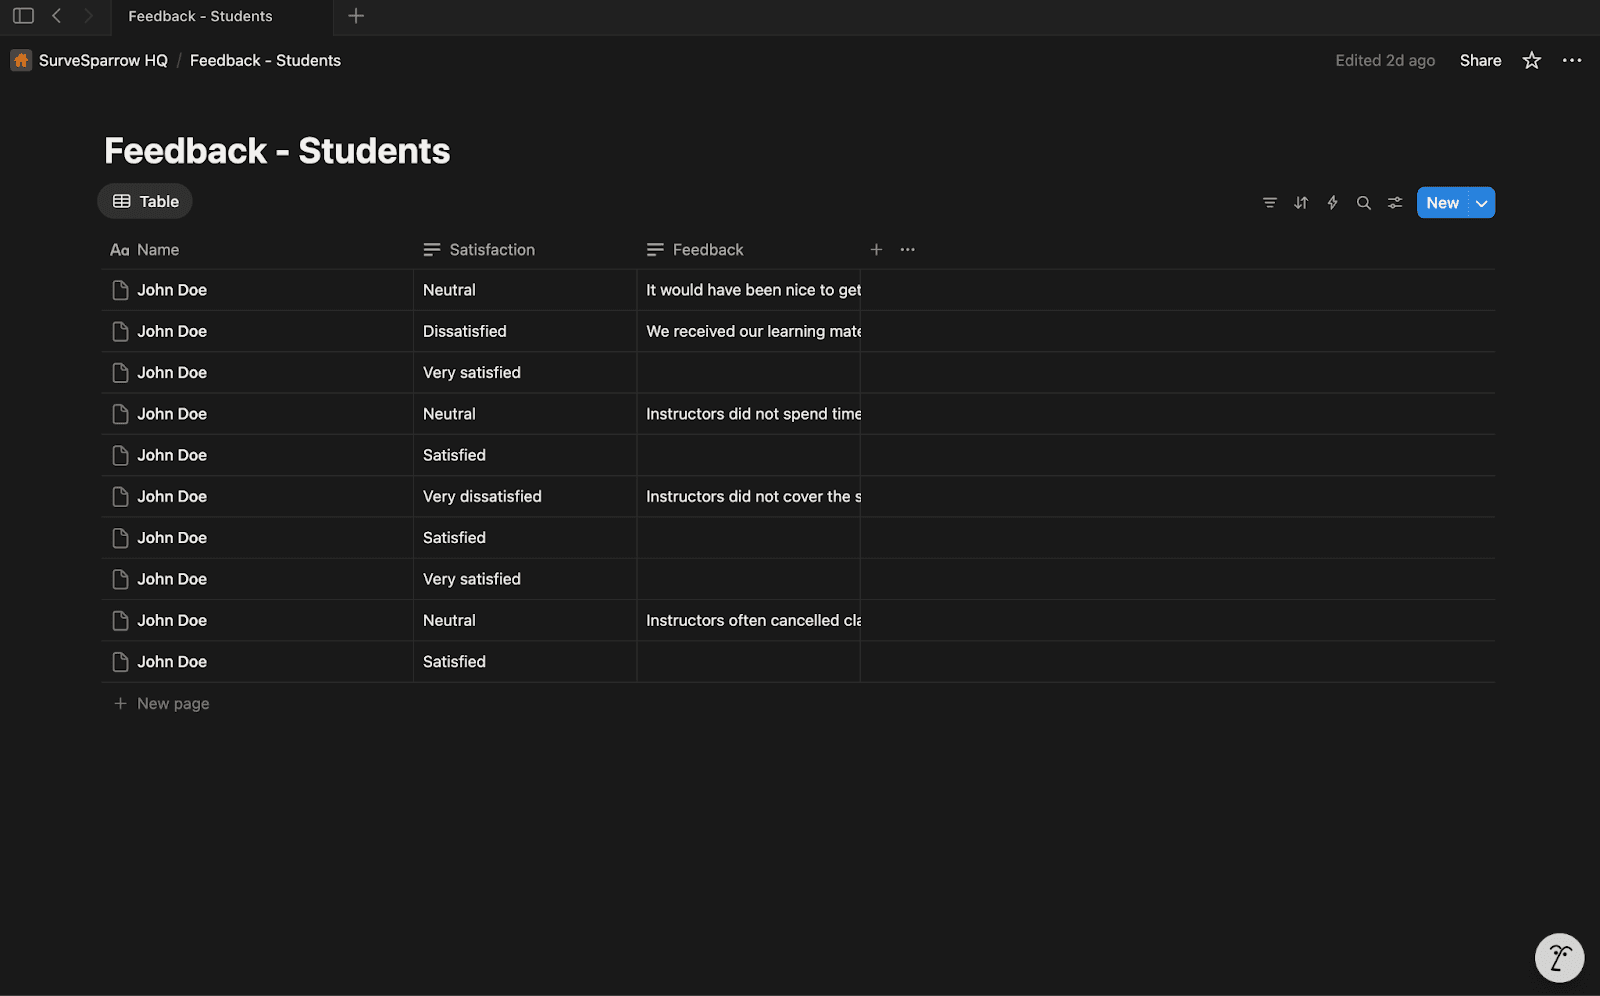
With that, you’re completely ready to make the most of SurveySparrow and Notion. Start connecting surveys to your Notion databases and let real-time syncing take care of the rest. Managing feedback in Notion is a whole lot easier, so get started today.
Feel free to reach out to our community, if you have any questions!
Powered By SparrowDesk