Search
Let’s see how to do it.
Configure PignOne Identity using the following steps,
1. Log in to the PingOne portal. By default, you will have Administrators as your Environment.
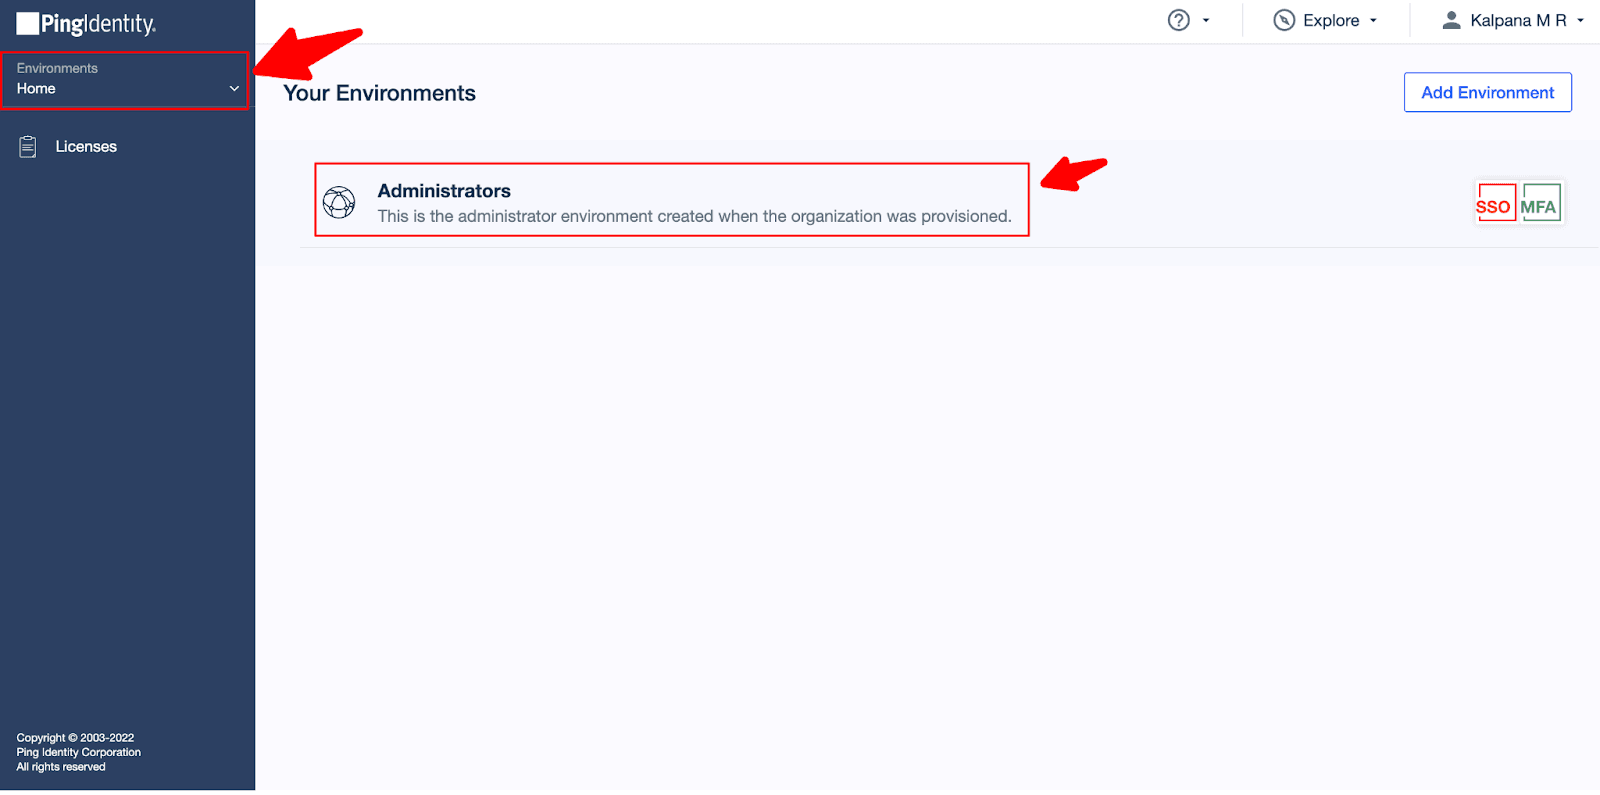
If you have an environment already set up, it will appear under Your Environments on the right side. You can select your environment from the list.
2. In the Environments Home Screen, Expand the Environments tab and select Connections.
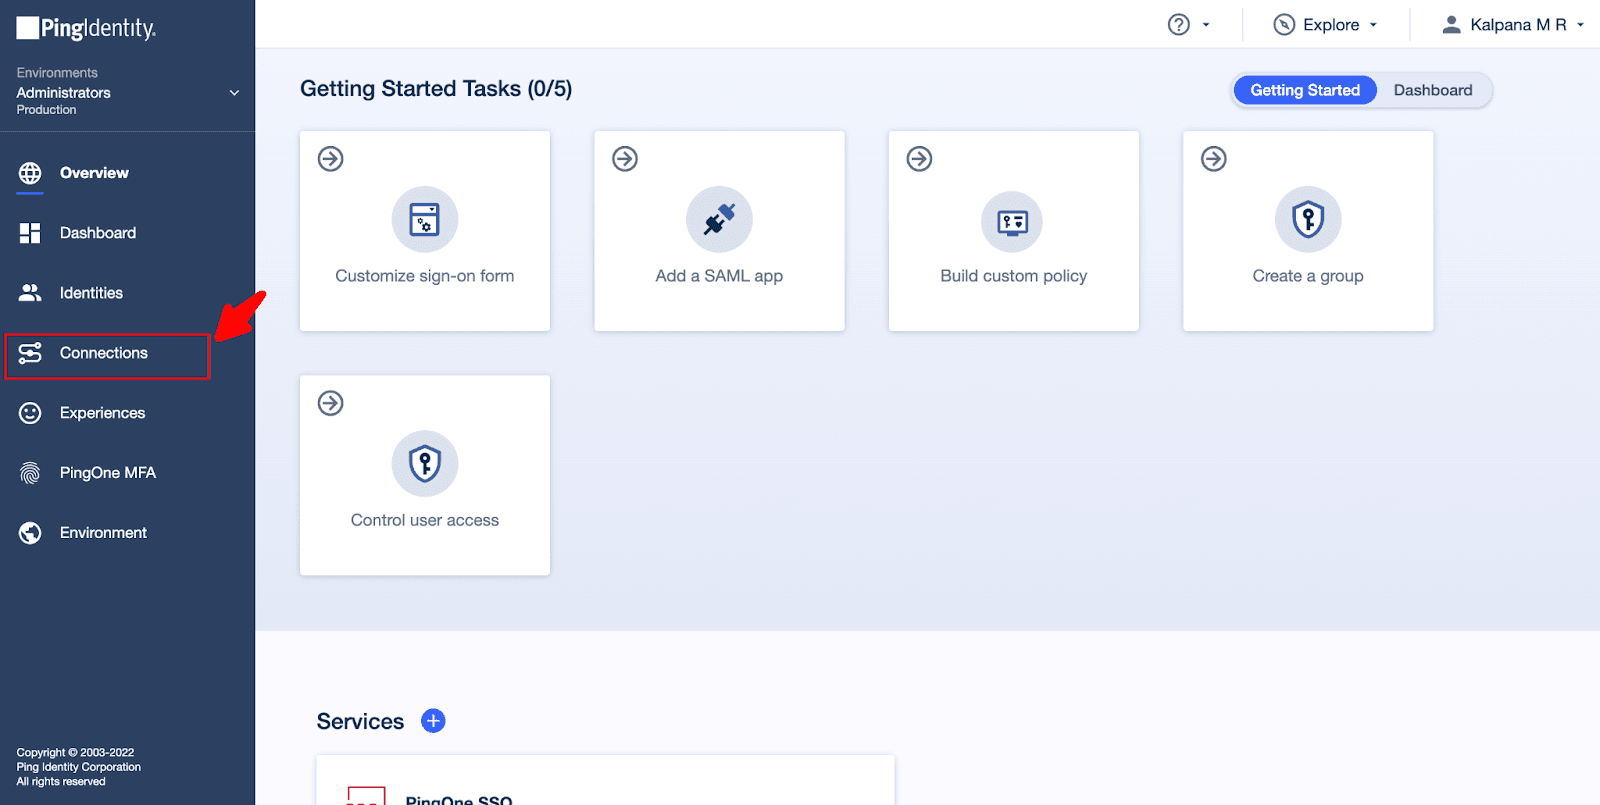
3. Select Applications. By default, PingOne’s three applications will be listed on the right Applications window.
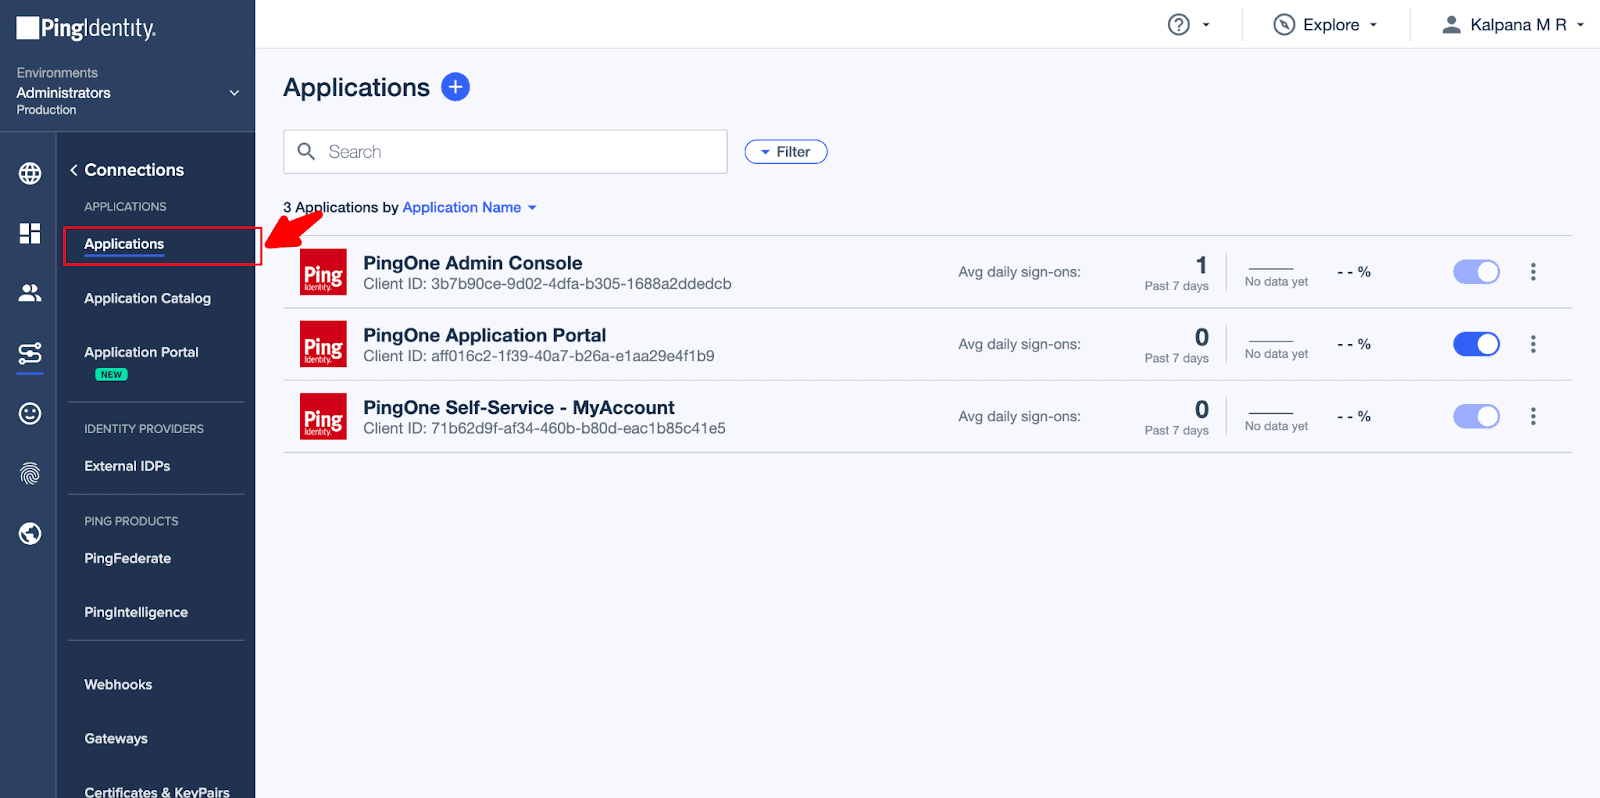
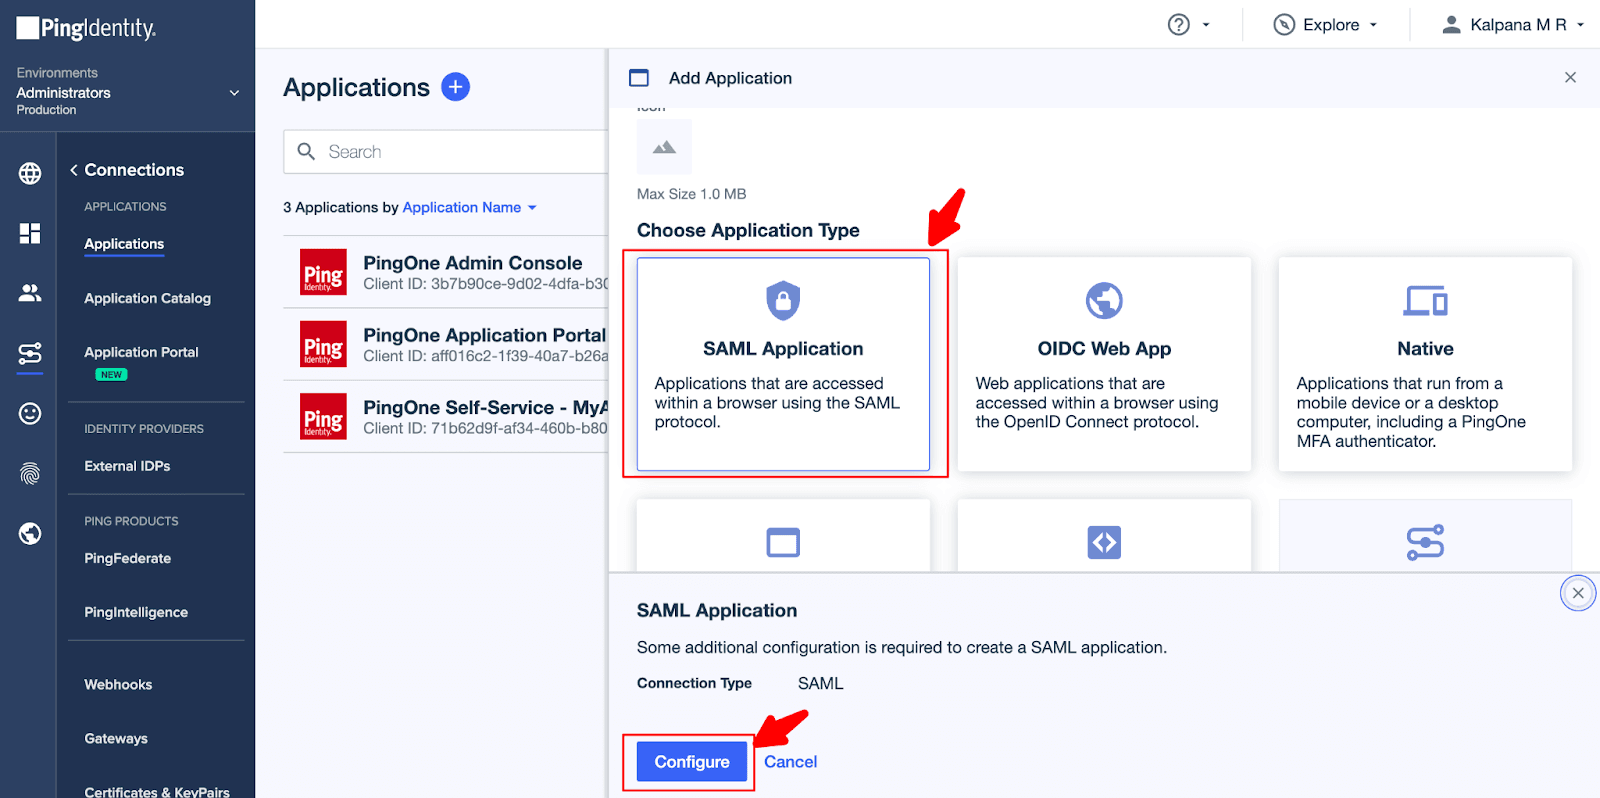
4. To add your application, click on the “+” symbol. The Add Application window will appear.
4.1 Add a name and description for your application. In our case, we have
Application Name - SS_SAMLSample
Description - SSO Login config
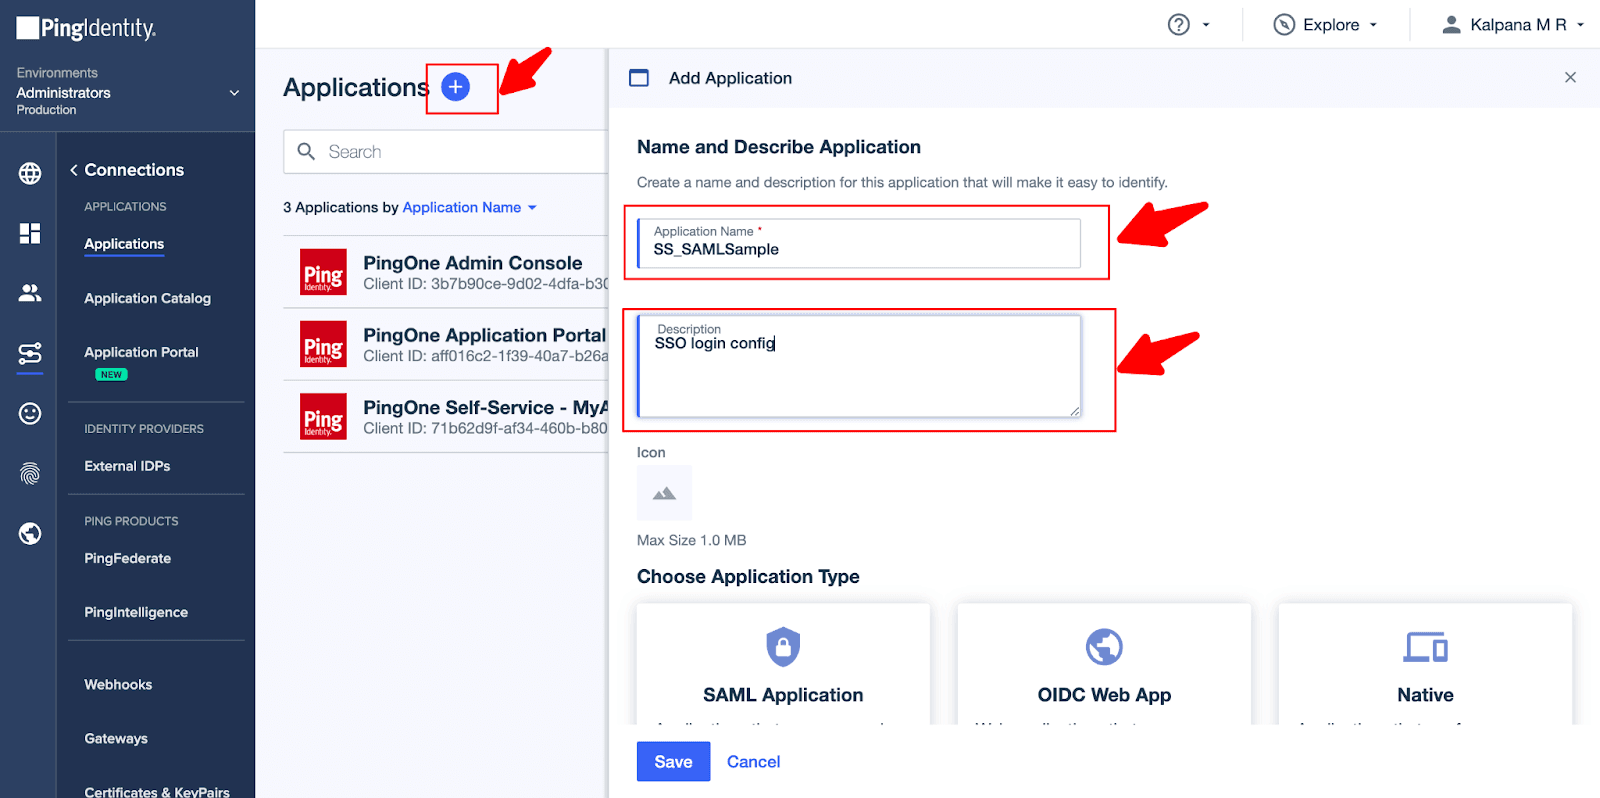
4.2 Scroll down and choose SAML Application as your Application Type. Click on Configure.
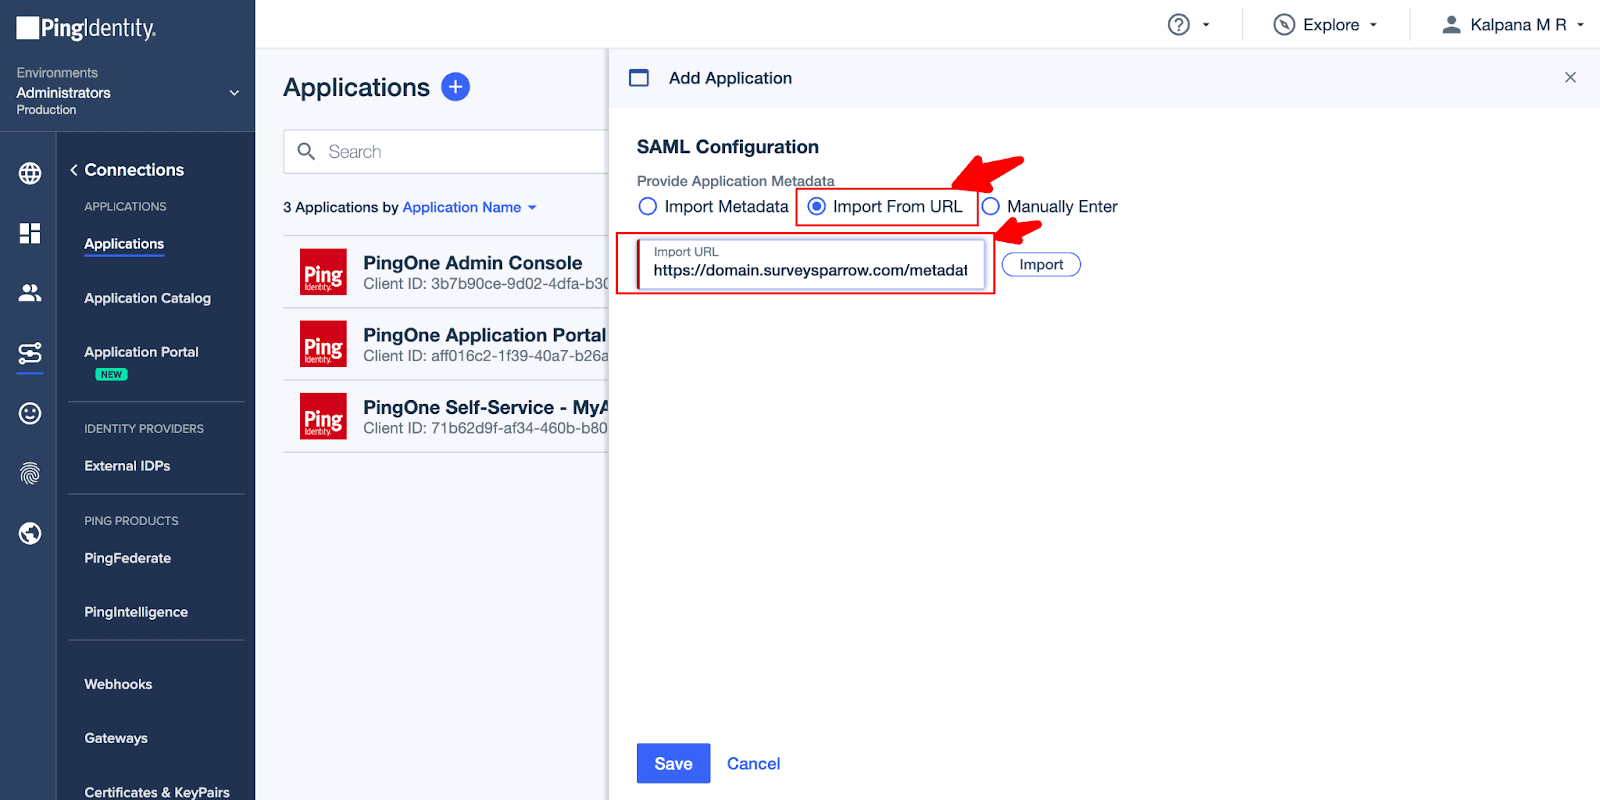
5. In the SAML Configuration window, choose the Import From URL option and paste the URL as https://domain.surveysparrow.com/metadata.xmland click on import.
Change the word domain in the Import URL to match with your SurveySparrow account. Say if your SurveySparrow account URL is https://customer.surveysparrow.com/, then your Import URL will be https://customer.surveysparrow.com/metatadata.xml.
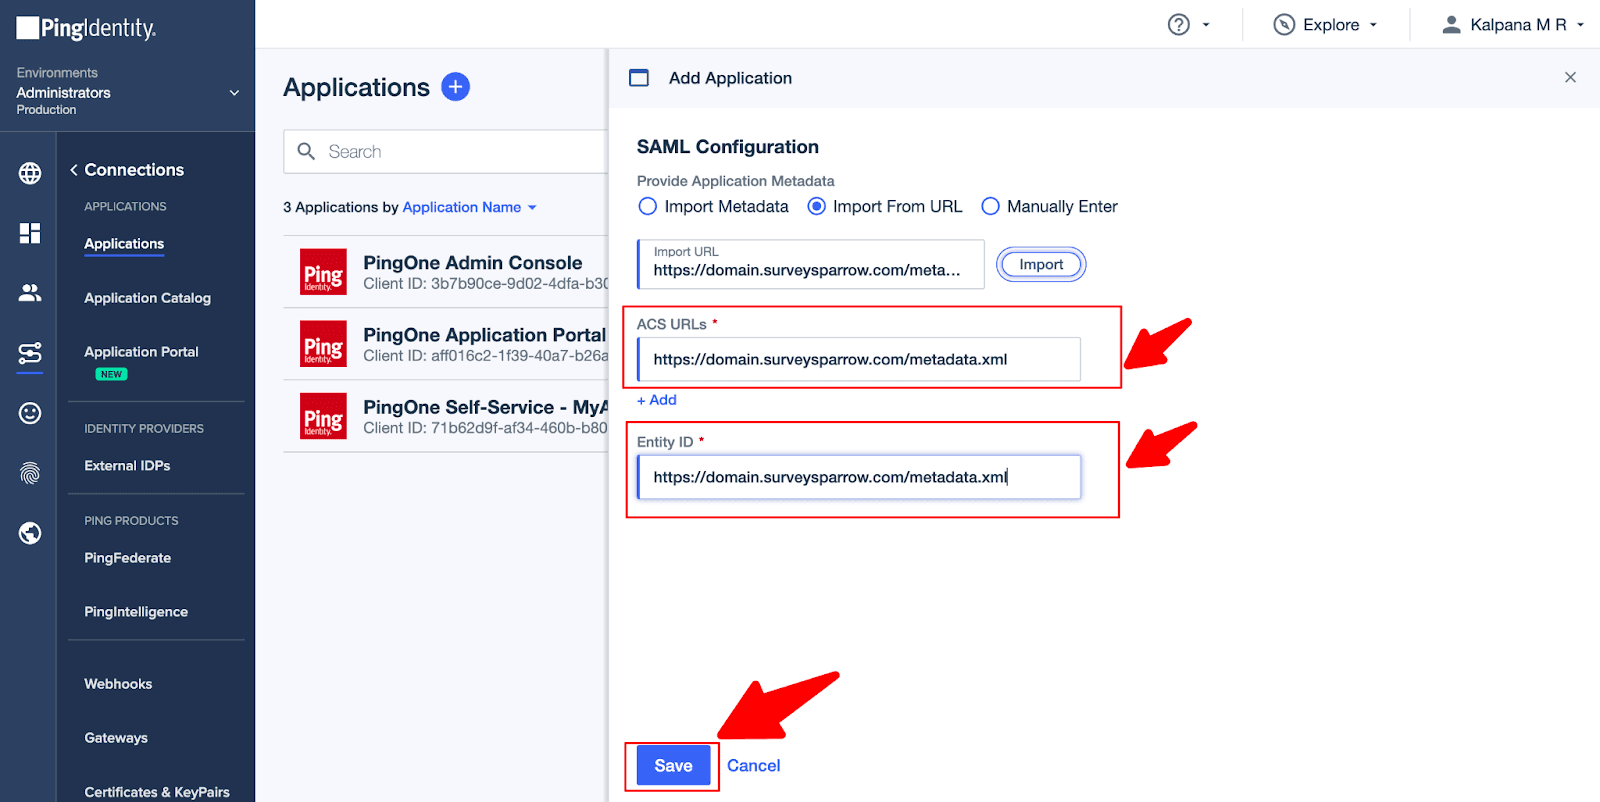
6. When you click on the Import button, two more fields will be automatically populated. Click on Save.
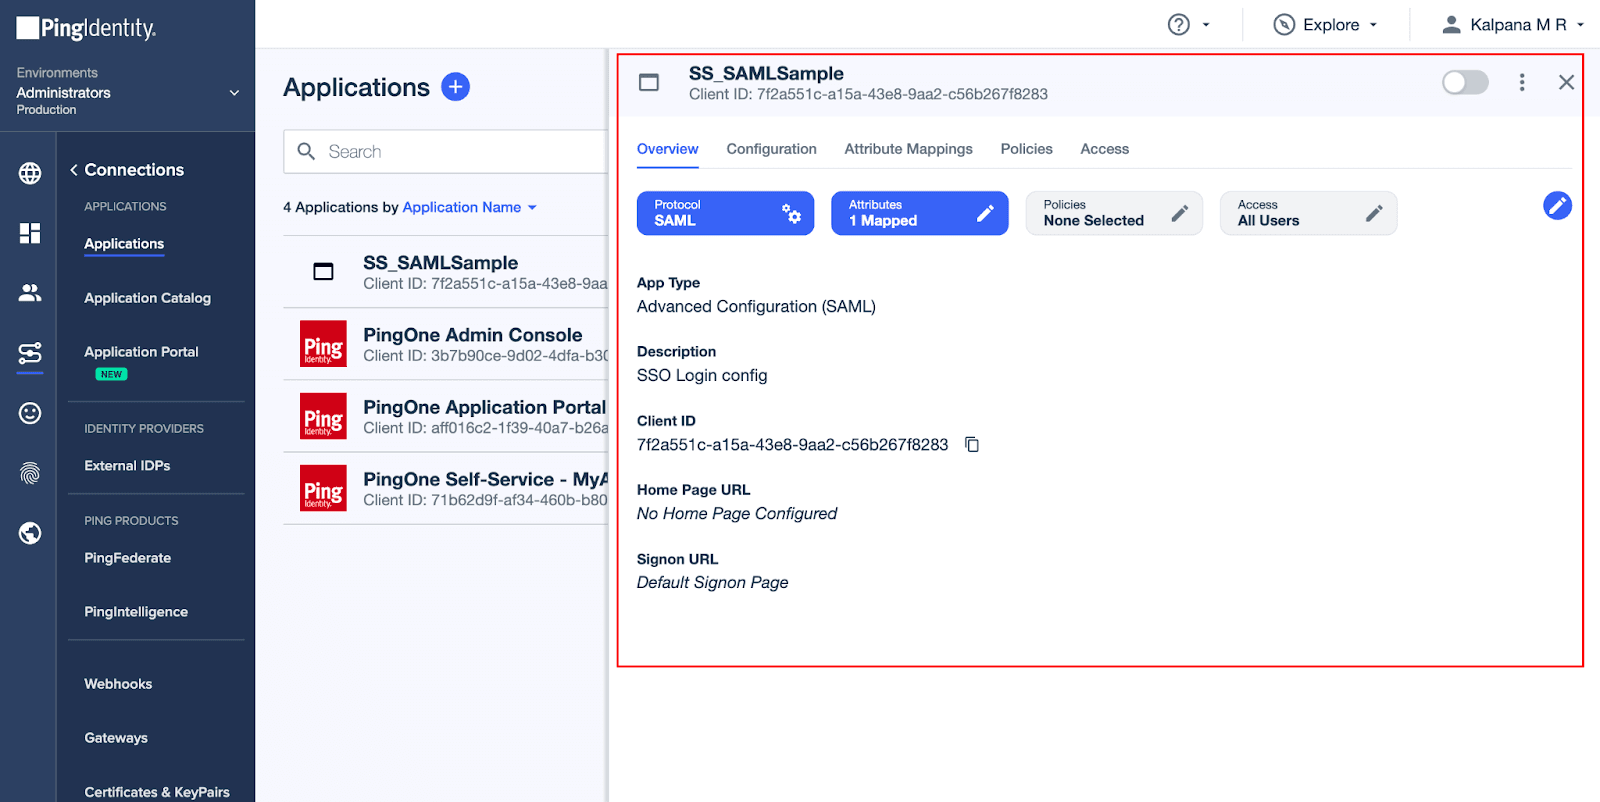
7. You will be taken to the following screen where you can configure your application details.
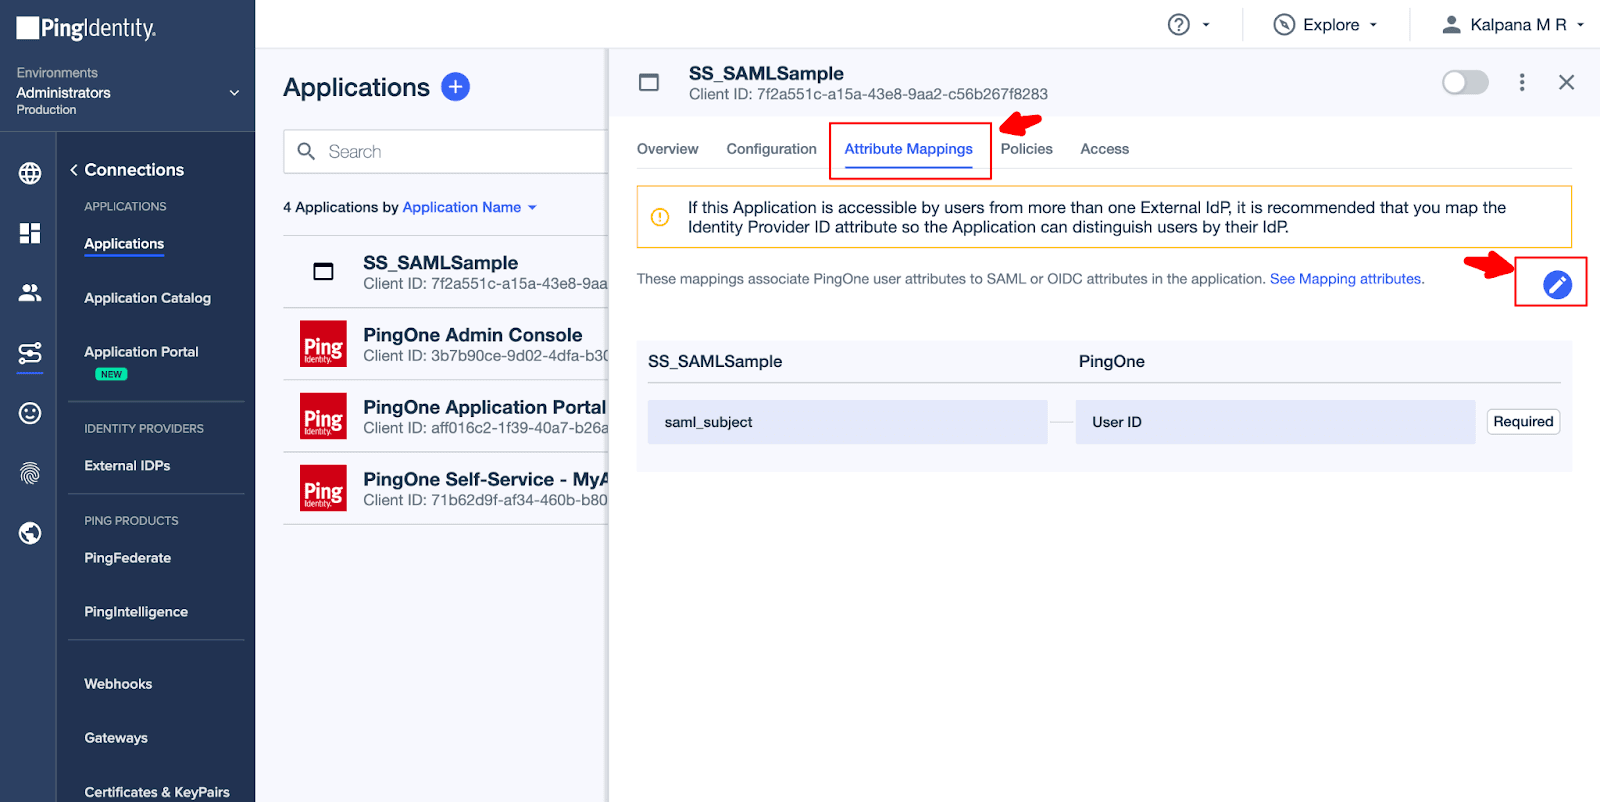
8. Click on the Attributes Mappings tab, and select the Edit icon.
9. In the Edit Attributes Mapping window, choose Email Address under the PingOne field and click on the Save button. 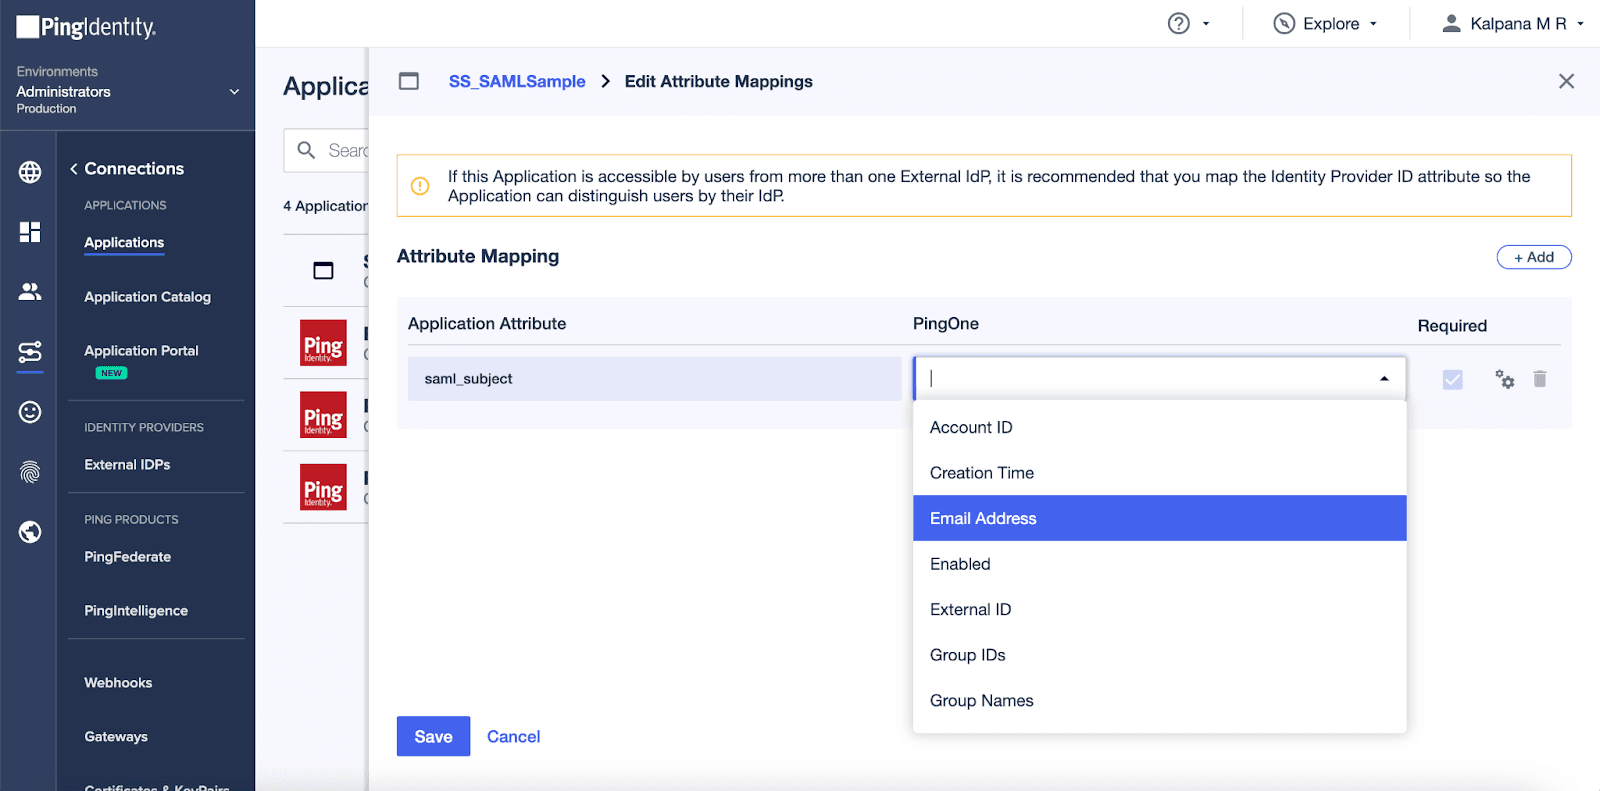
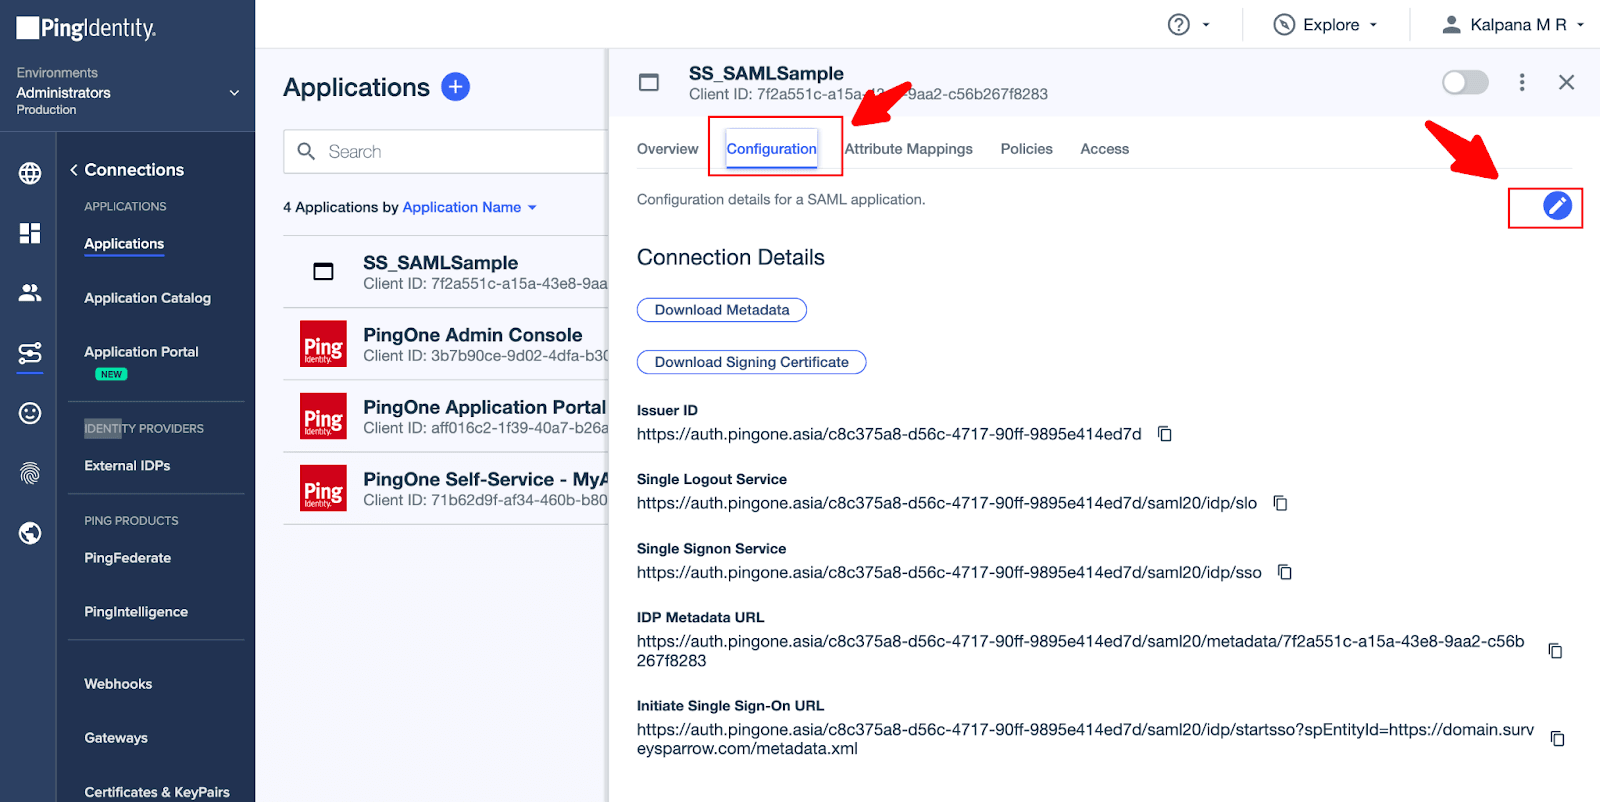
10. Click on the Configurations tab and select the Edit icon. Fill in the details in the Single Sign-On page with what is provided by the PingOne Provider.
Login URL - Single Sign-on Service X.509 Certificate:
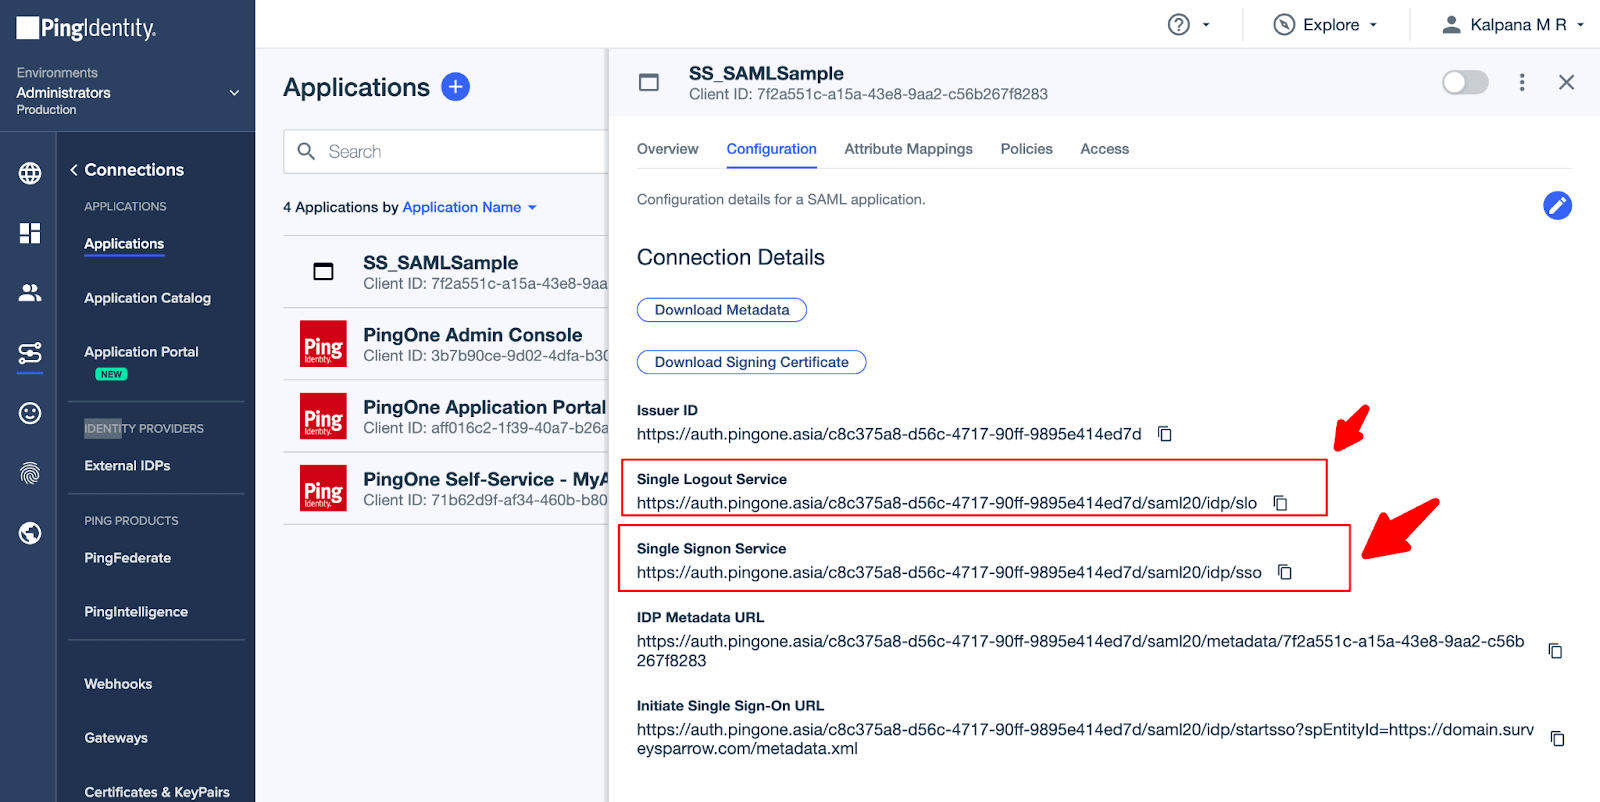
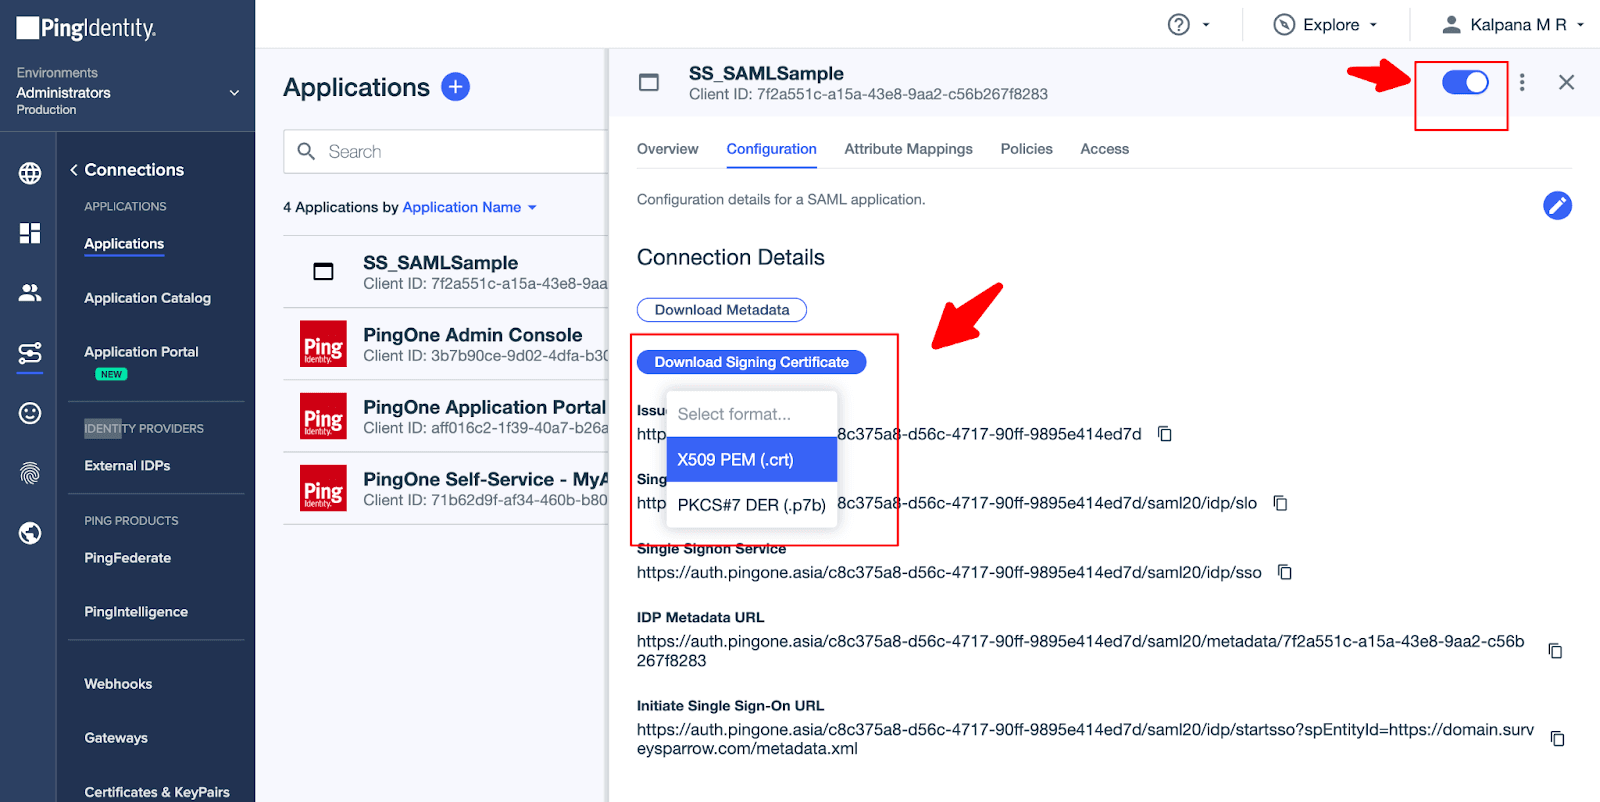
11. Now, you can see the Signon and Signout URLs here.
12. Click on the Toggle button on the top. This will allow users to access your application. Download the Signing Certificate in X509 PEM(.crt) format, as SurveySparrow supports this format.
Configure your SurveySparrow account using the following steps.
1. Login to your SurveySparrow Account, and click on the Settings Tab on top.
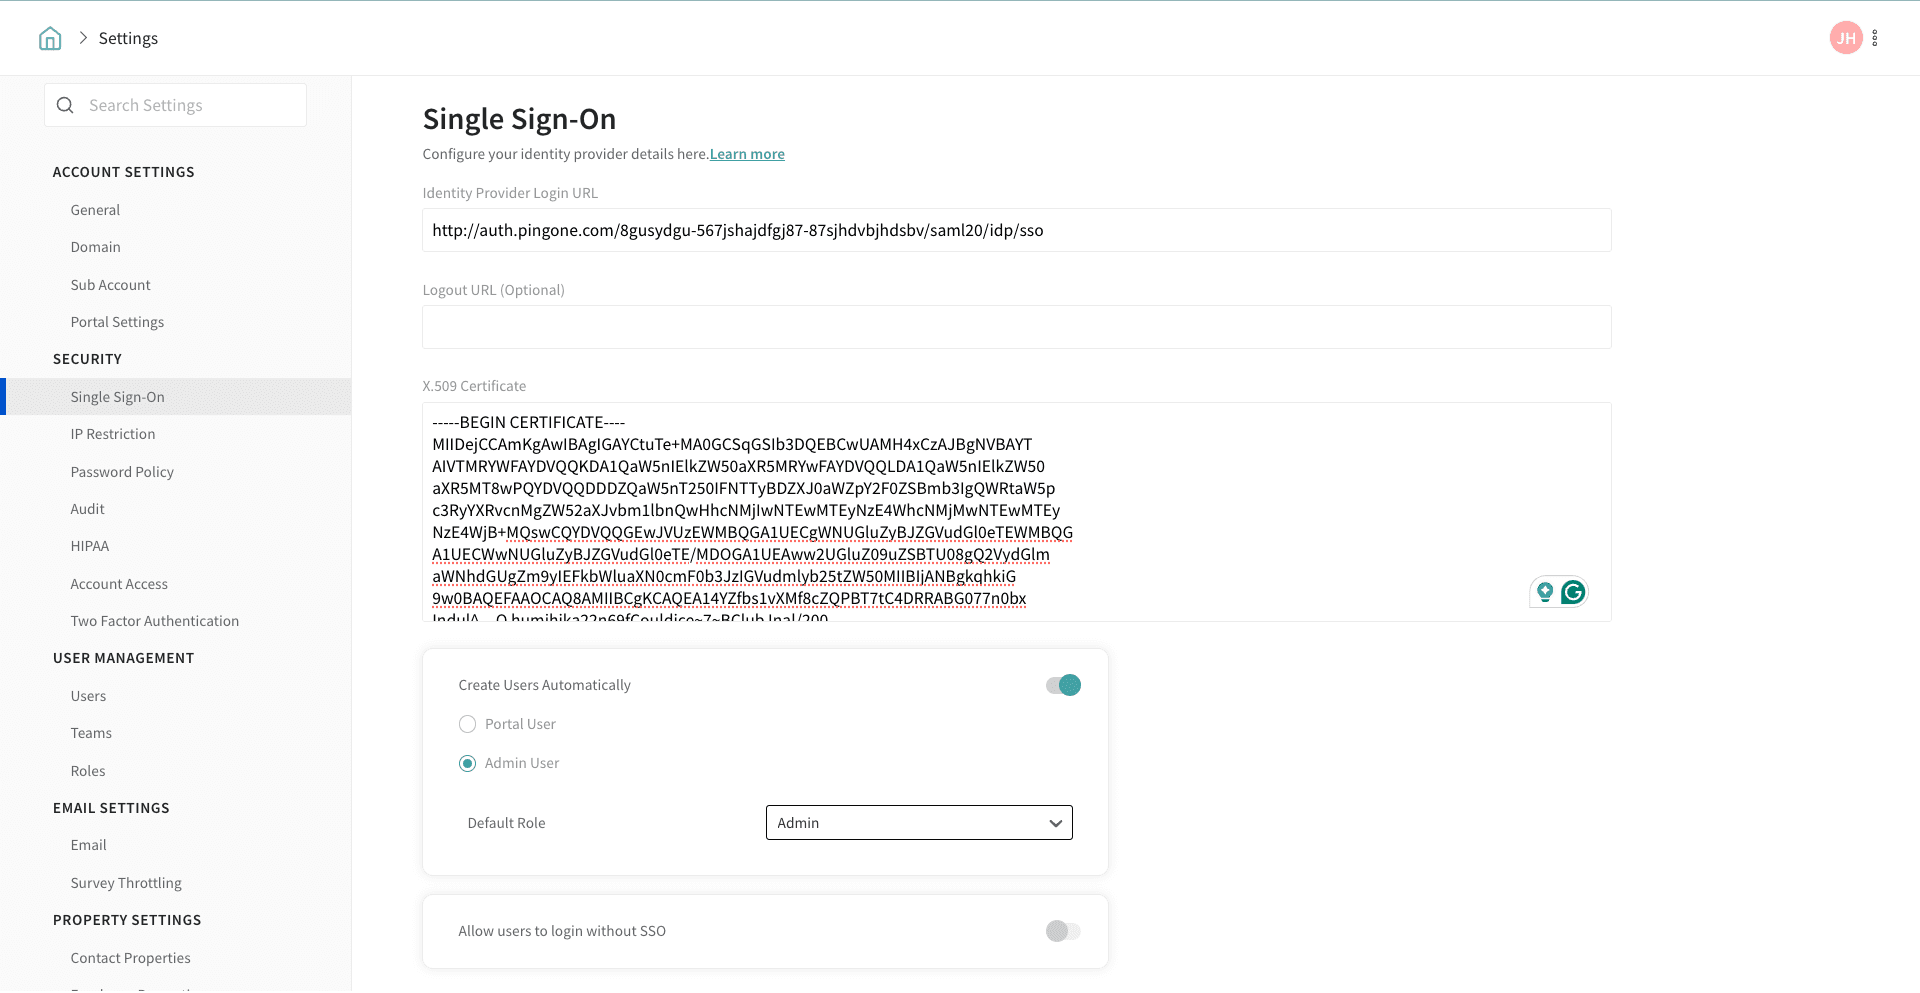
2. In Settings, navigate to the Security section from the left side tab and select Single Sign-On.
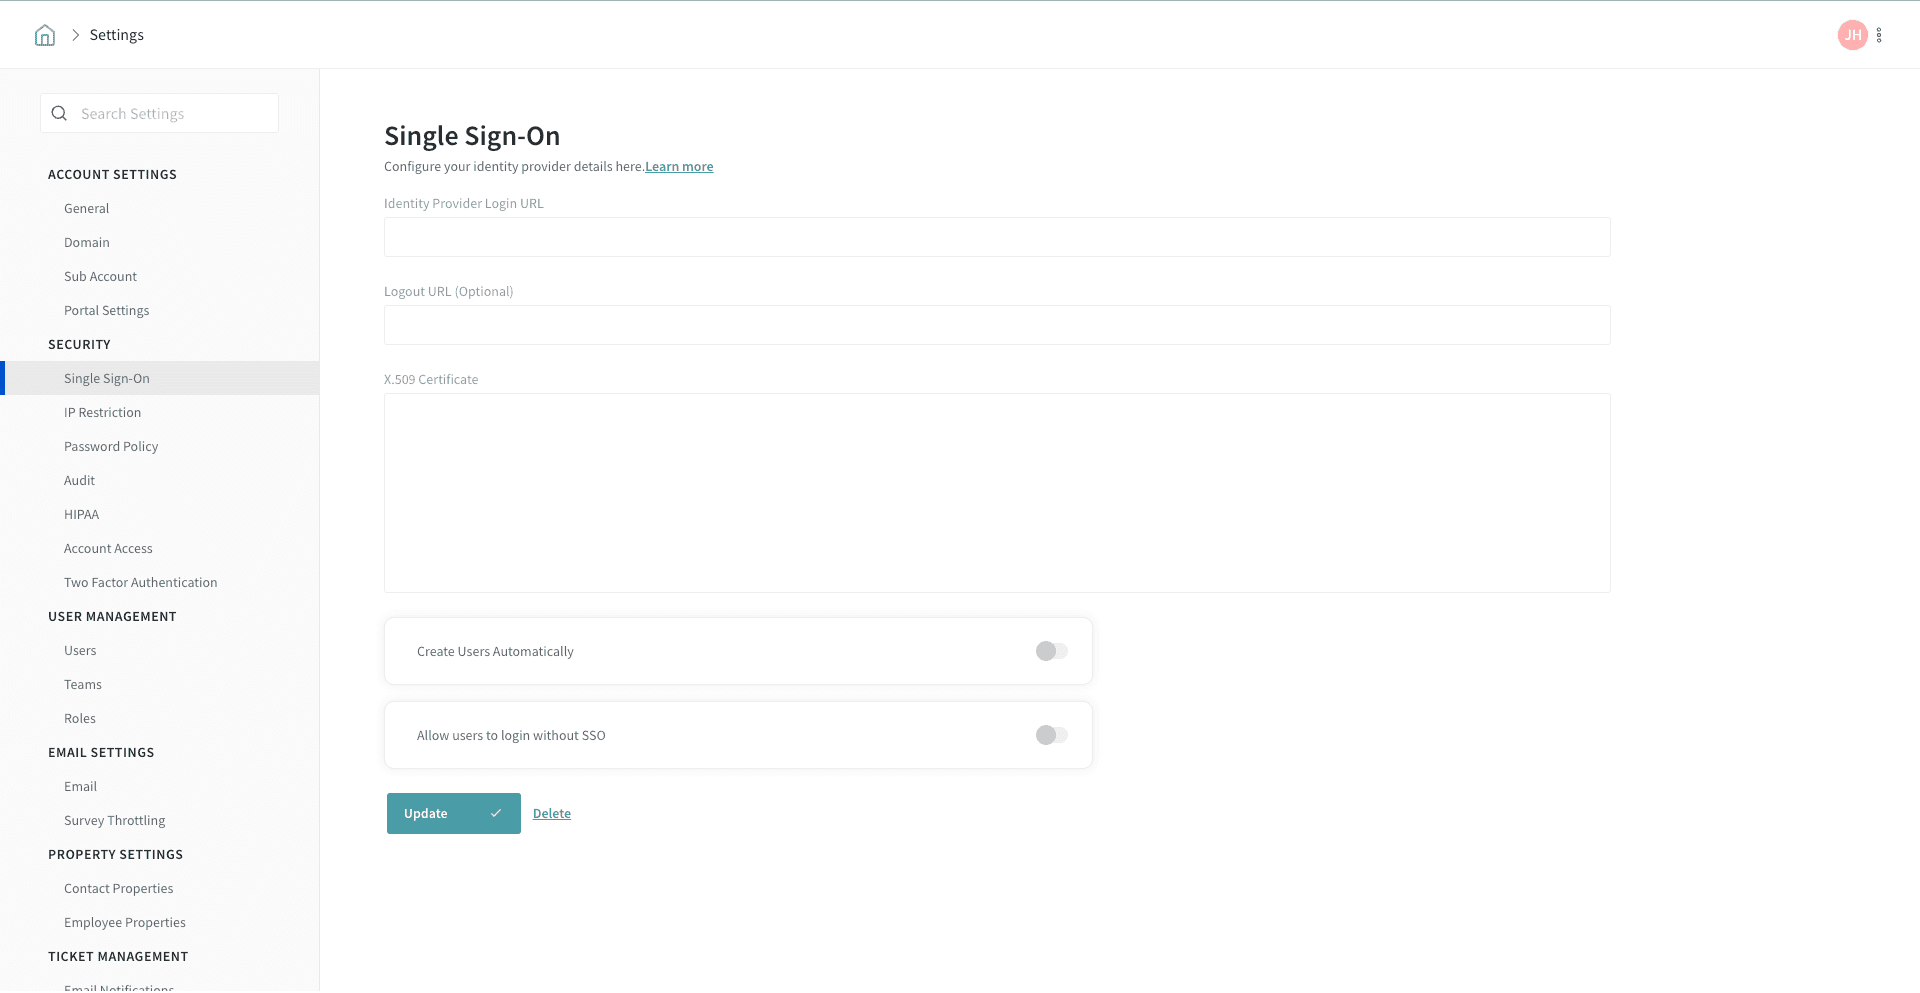
3. Now copy and paste details from your PingOne to your SurveySparrow account.
Now, you’ve configured Single Sign-On in SurveySparrow account using PingOne configured as your SAML. And all set to allow your users to sign in using the SSO method.
Please reach out to us if you have any questions. We are just a chat away!
Powered By SparrowDesk