Search
Very often, you might want to send additional information about the user who is answering your questionnaire through the SurveySparrow widget.
If you are getting feedback from the users of your application, you already know who is answering since they have already logged in. Asking for the name and email address again in the widget doesn't make much sense. Also, when you ask a question, addressing your users by their names offers more personalization. With the ability to send variables through SurveySparrow’s widget, it is possible to do so.
The following steps explain how to send variables through the widget:
The variables that must be tracked through the widget should be created in the survey. To add variables in the survey,
1. Open your survey.
2. Click on the Global Variables icon on the left sidebar in the Build section.
3. Click the “+Add a Custom Variable” button.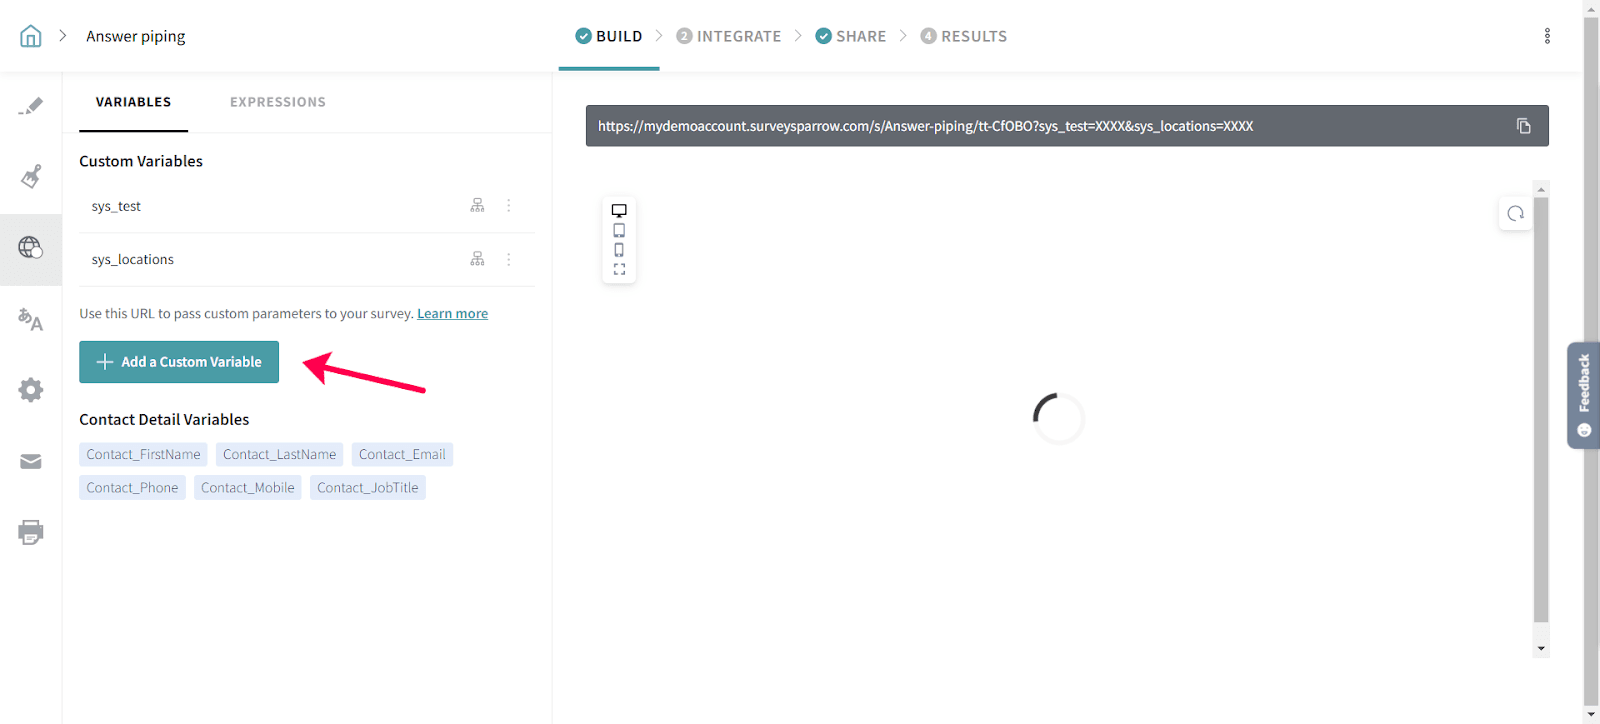
4. Add your variable names in the Label, and click Save Variable.
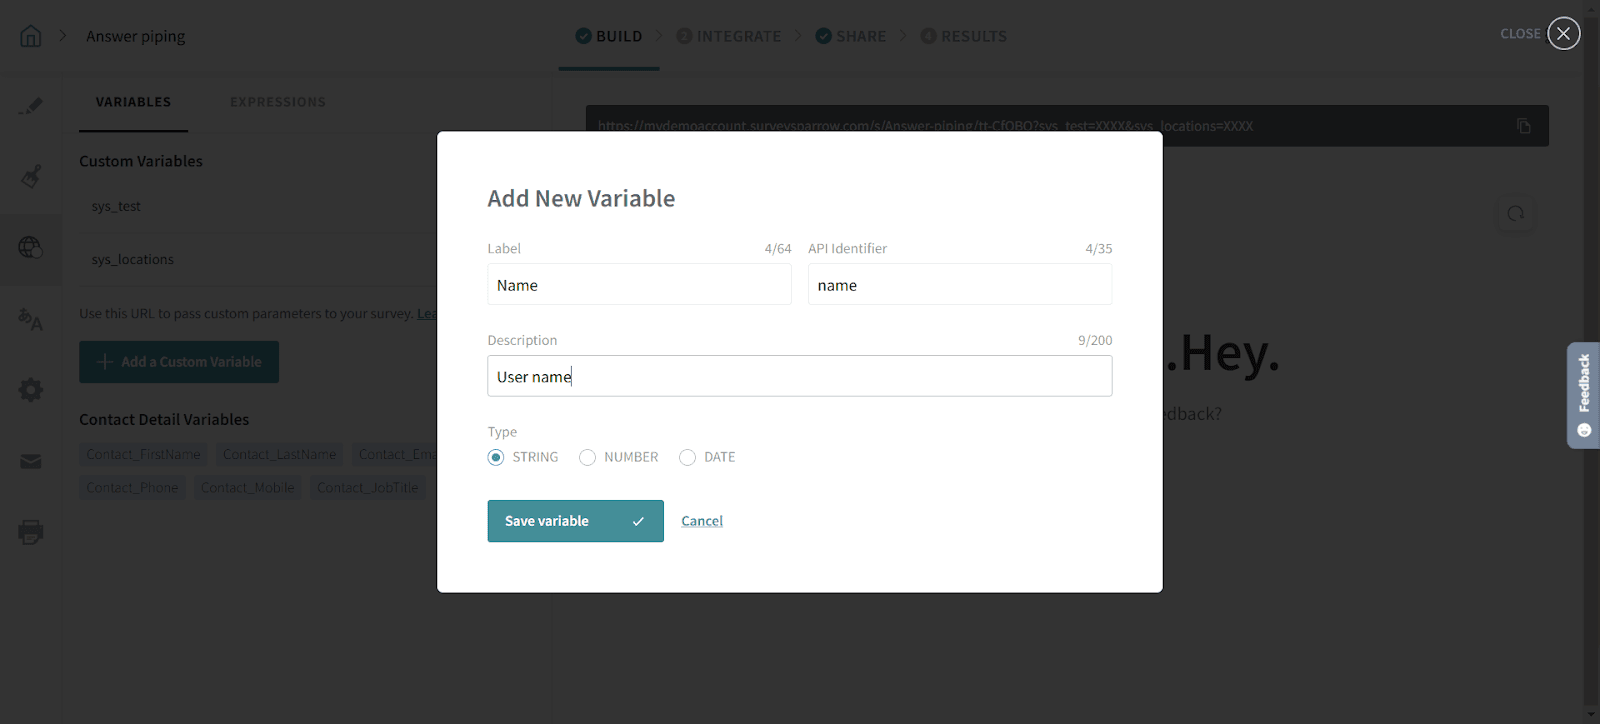
In this example, let’s say we have added the name and email address as the variables in the survey.
Once the user has logged in, you can trigger the widget and set the variables using the following code.
sparrowLaunch({
   name: "John Doe",
   mail: "[email protected]"
 })
Now, your survey can access the variables, name, and mail. You can add the above sparrowLaunch function at any place within your code if you intend to load the widget on demand.
In this case, you can copy and paste the Javascript code from the “Embed share” section to your webpage.
In this case, you can copy and paste the Javascript code from the “Embed share” section to your webpage. From the added Javascript code, you can cut and paste the sparrowLaunch function at the designated place on your webpage where the condition is set.
You can also use the variables in the questions to give a more personalized experience.
1. Under the Build tab, click on the dollar icon next to the question.
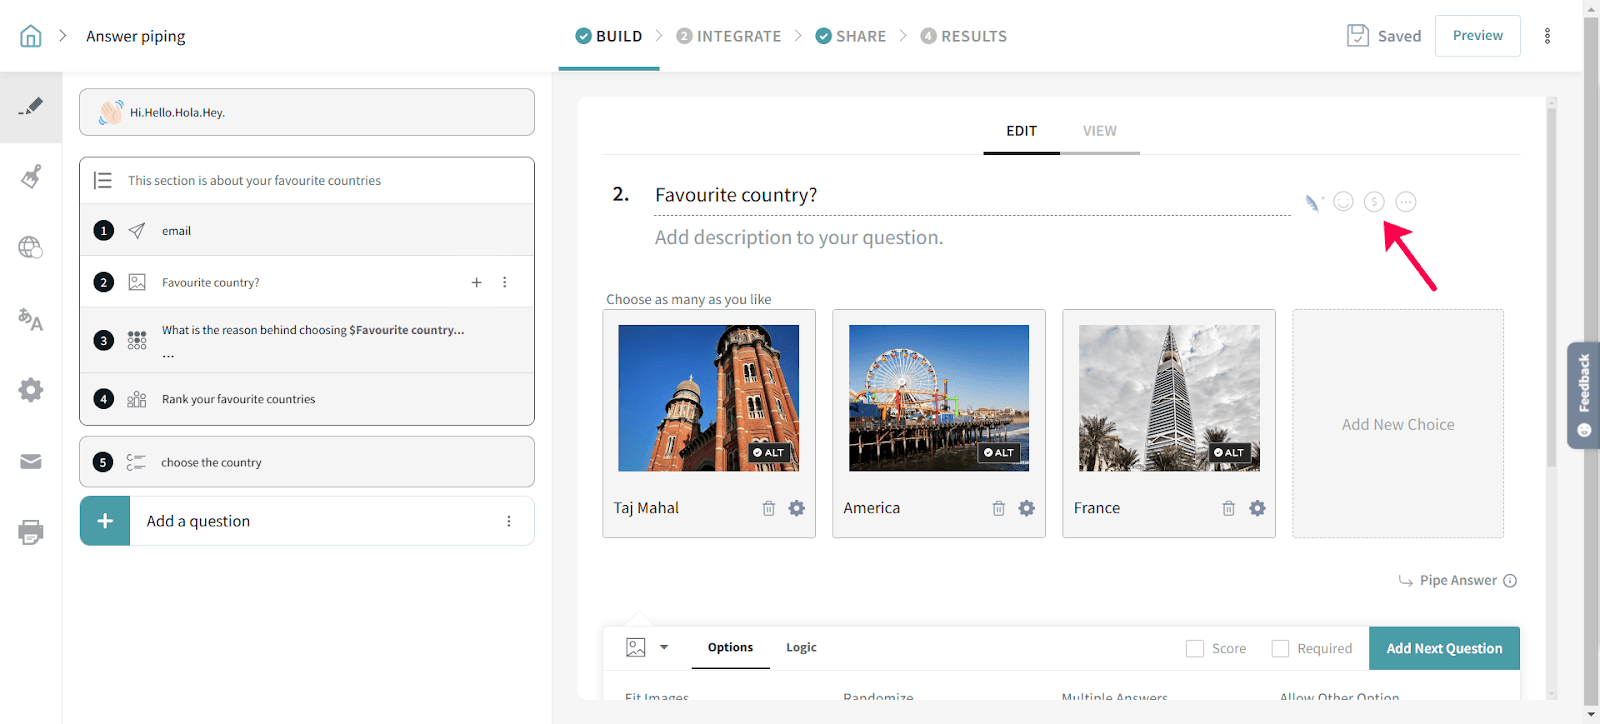
2. You can choose a suitable variable for the question.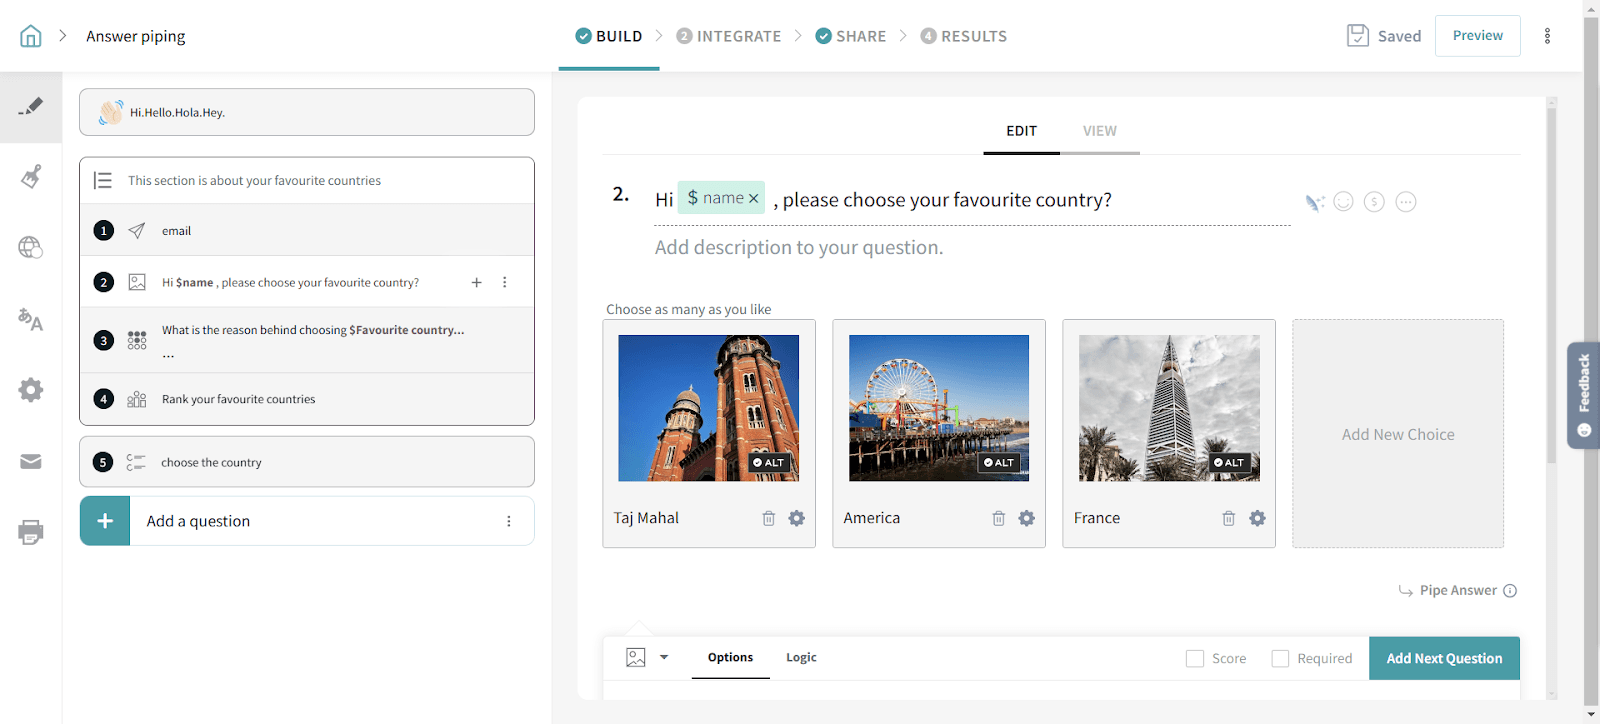
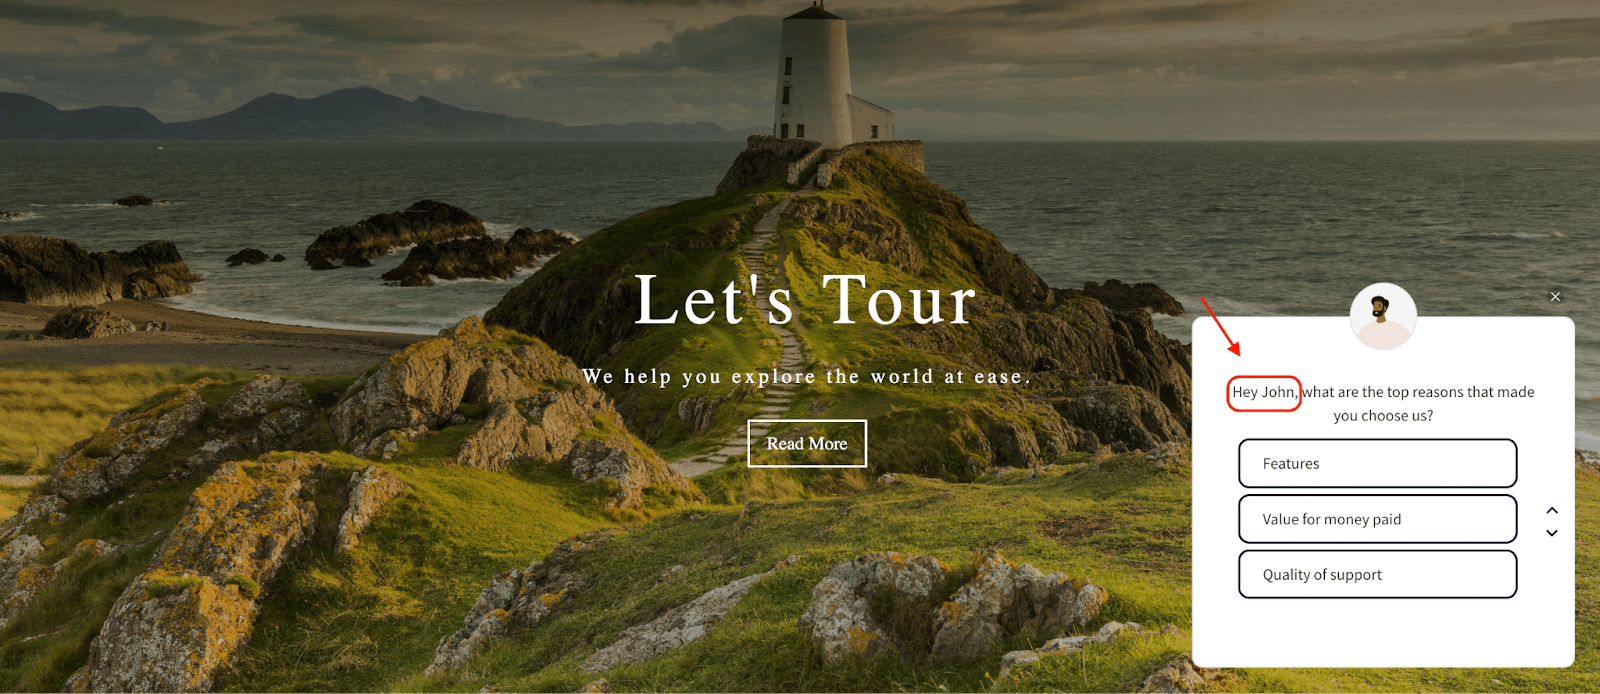
When a logged-in user answers the widget, they will see their name.
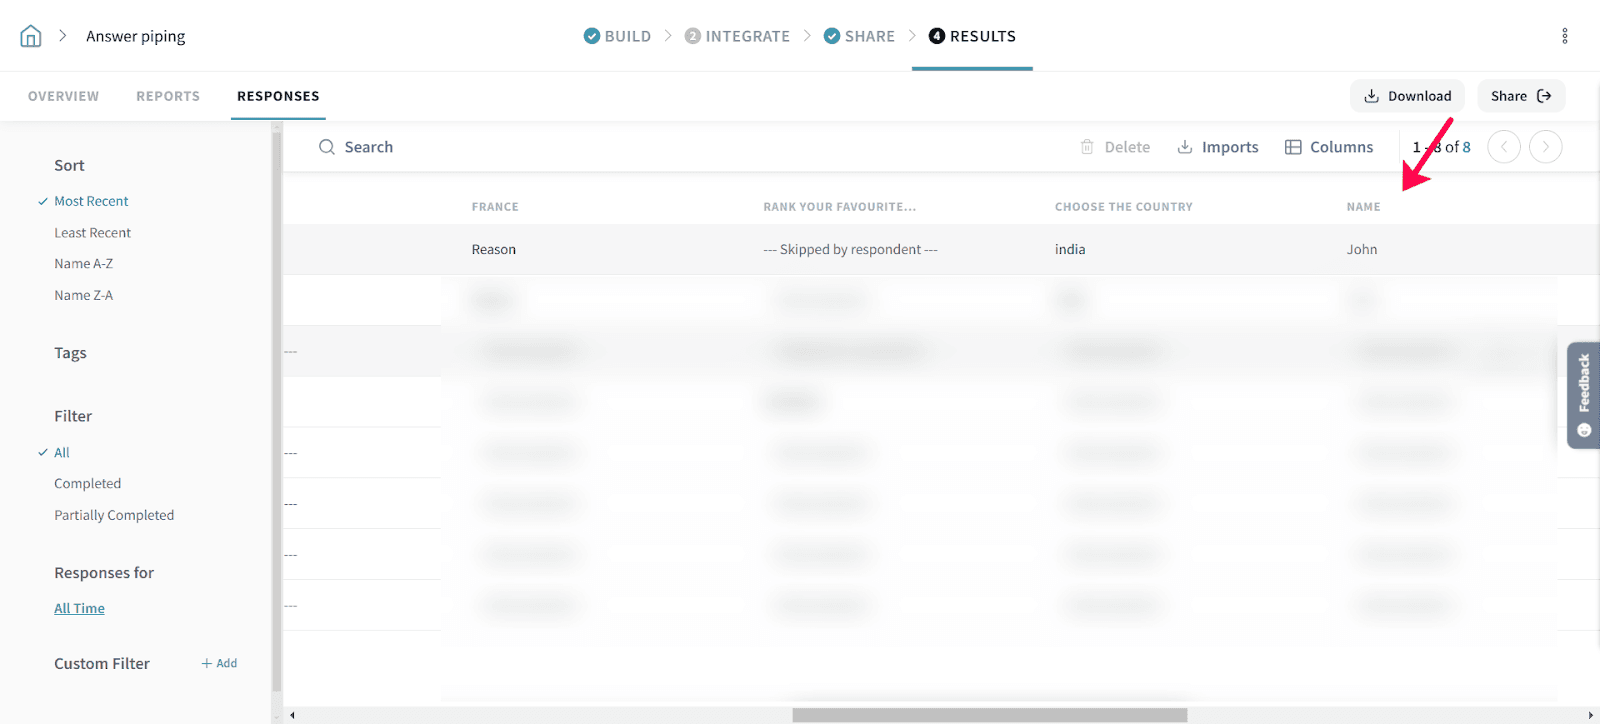
Once the user starts answering, a response entry will be created with the user's details added as custom variables.
If you want to remove the widget based on a specific user action, you can call the code below.
sparrowRemove()
To load a widget on demand, we had requested to set a configuration to stop the widget from loading when the page loads using the below script.
<script>
 window.sparrowConfig = {
   triggerOnLoad: false
 }
</script>
We have optimized the script for faster rendering and simplified the deployment process. We recommend you adopt the latest version for better performance.
Do not worry about the scripts you have already deployed. It will not be affected.
Please reach out to us if you have any questions. We are just a chat away!
Powered By SparrowDesk