Search
Google Sheets is used by millions across the globe for data management, analysis and collaboration. SurveySparrow’s Google Sheets integration automatically consolidates your survey data in the right place, all the time. Users have the flexibility to choose the type of data they want to export; in addition, they can connect their surveys to multiple Google accounts.
This makes it easier for you to run customized data analysis and create custom visualizations and reports. You also get additional options to export your data (PDF, CSV, TSV, ODS, etc). Some possible applications include:
In this article, we’ll go through the steps of setting up the integration:
Note: SurveySparrow also has an add-on for Google Sheets that allows you to import survey responses without leaving your spreadsheet. To learn more, click here.
1. After you’ve created your survey (or opened an existing one), click on the Integrate tab.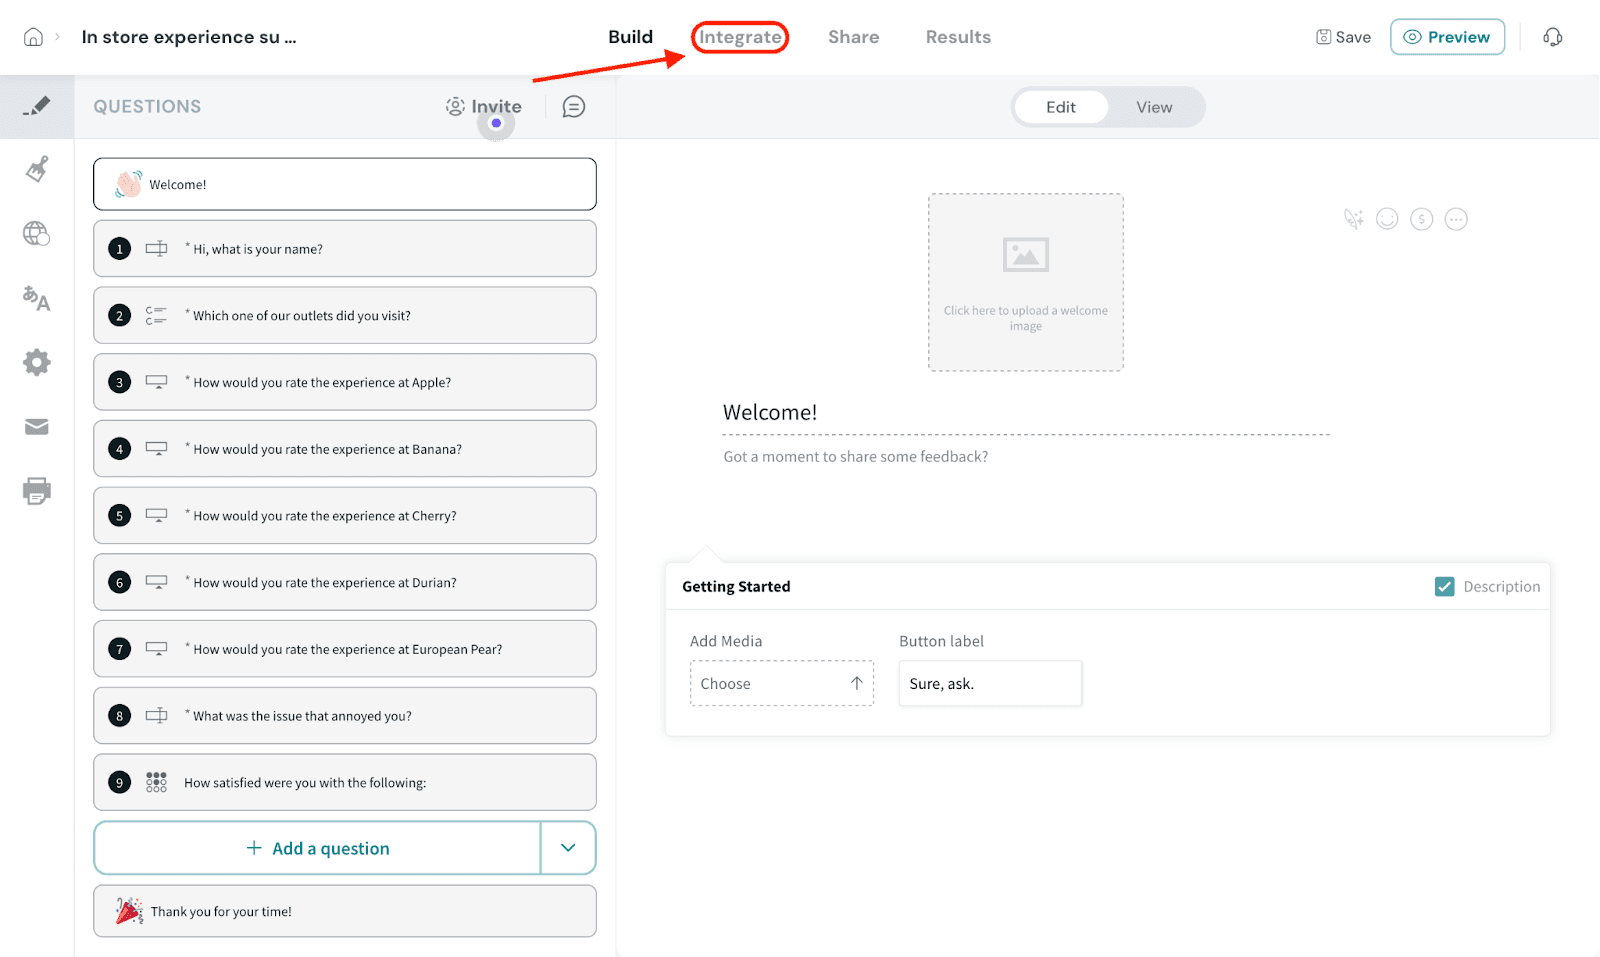
2. You will see a list of integrations to choose from. Use the search box (or scroll down) to find the Google Sheets integration. When it appears, click on the toggle.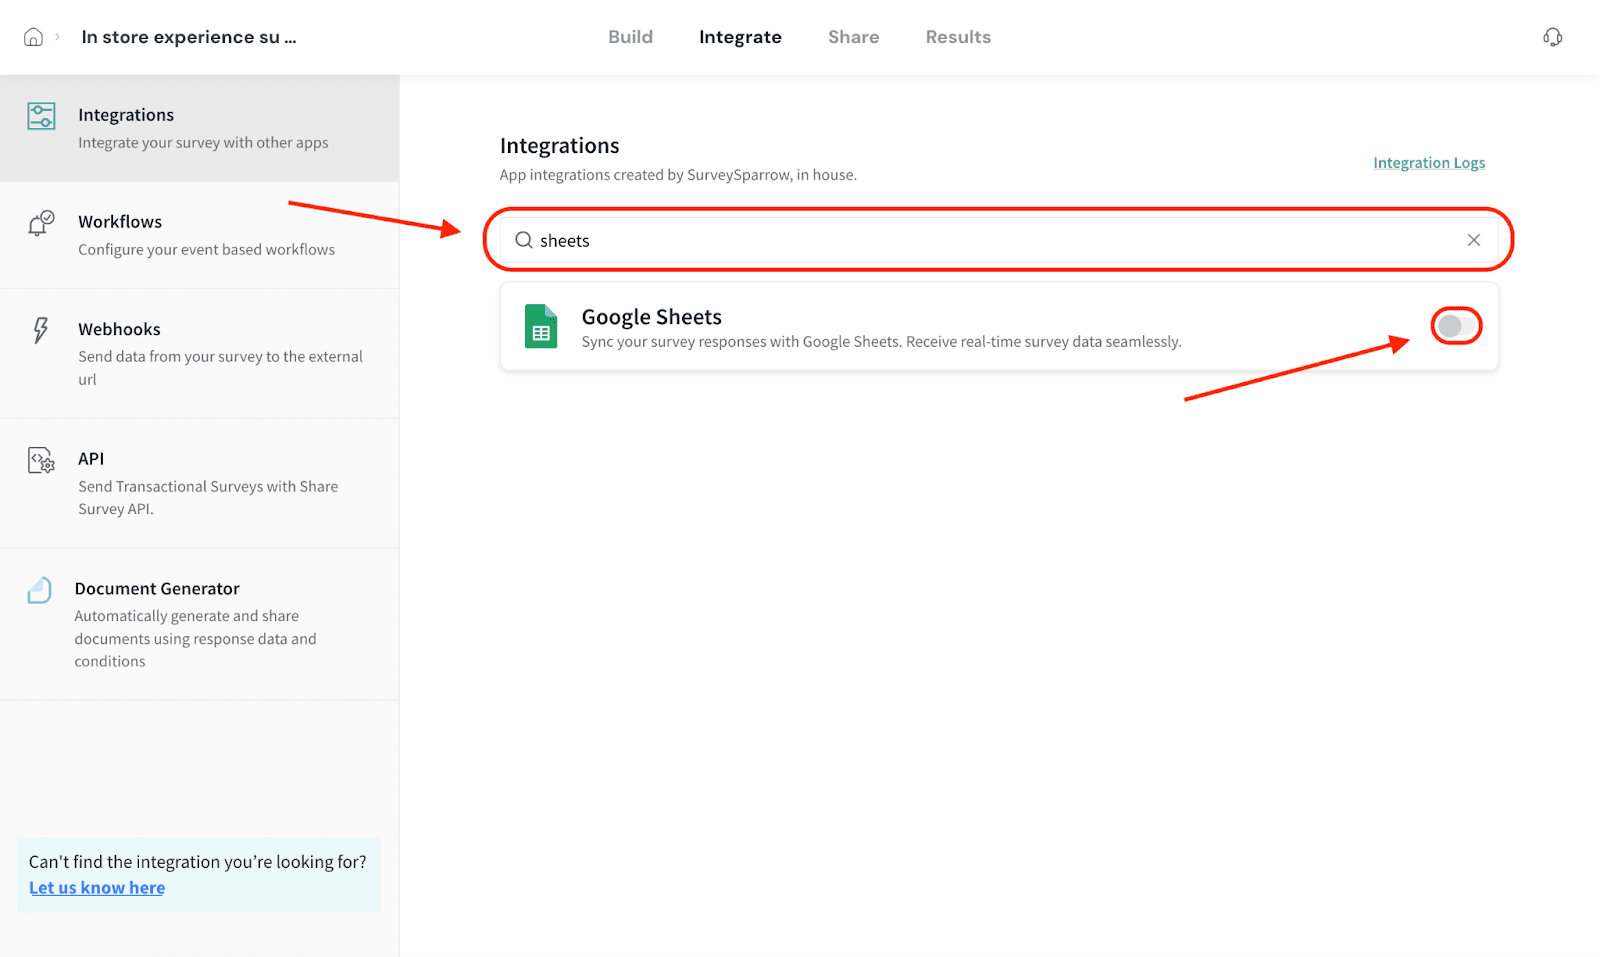
3. You will be redirected to a sign-in screen. Choose a Google account to connect to SurveySparrow.
4. Click Continue.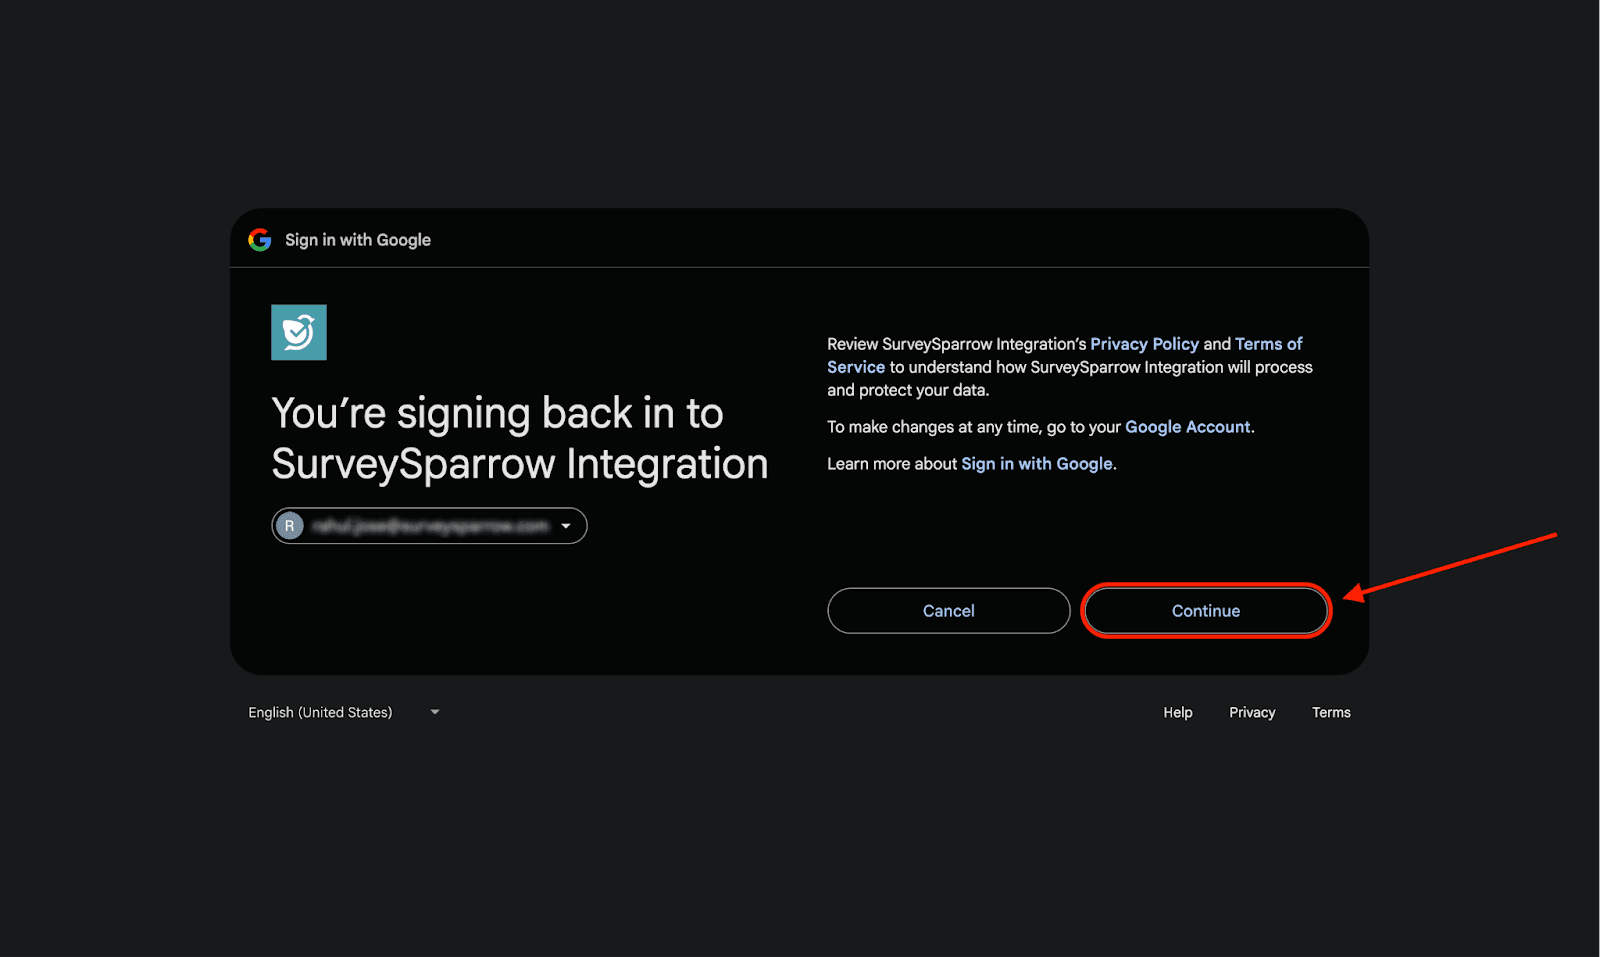
5. Then click Allow. After this, the integration is complete.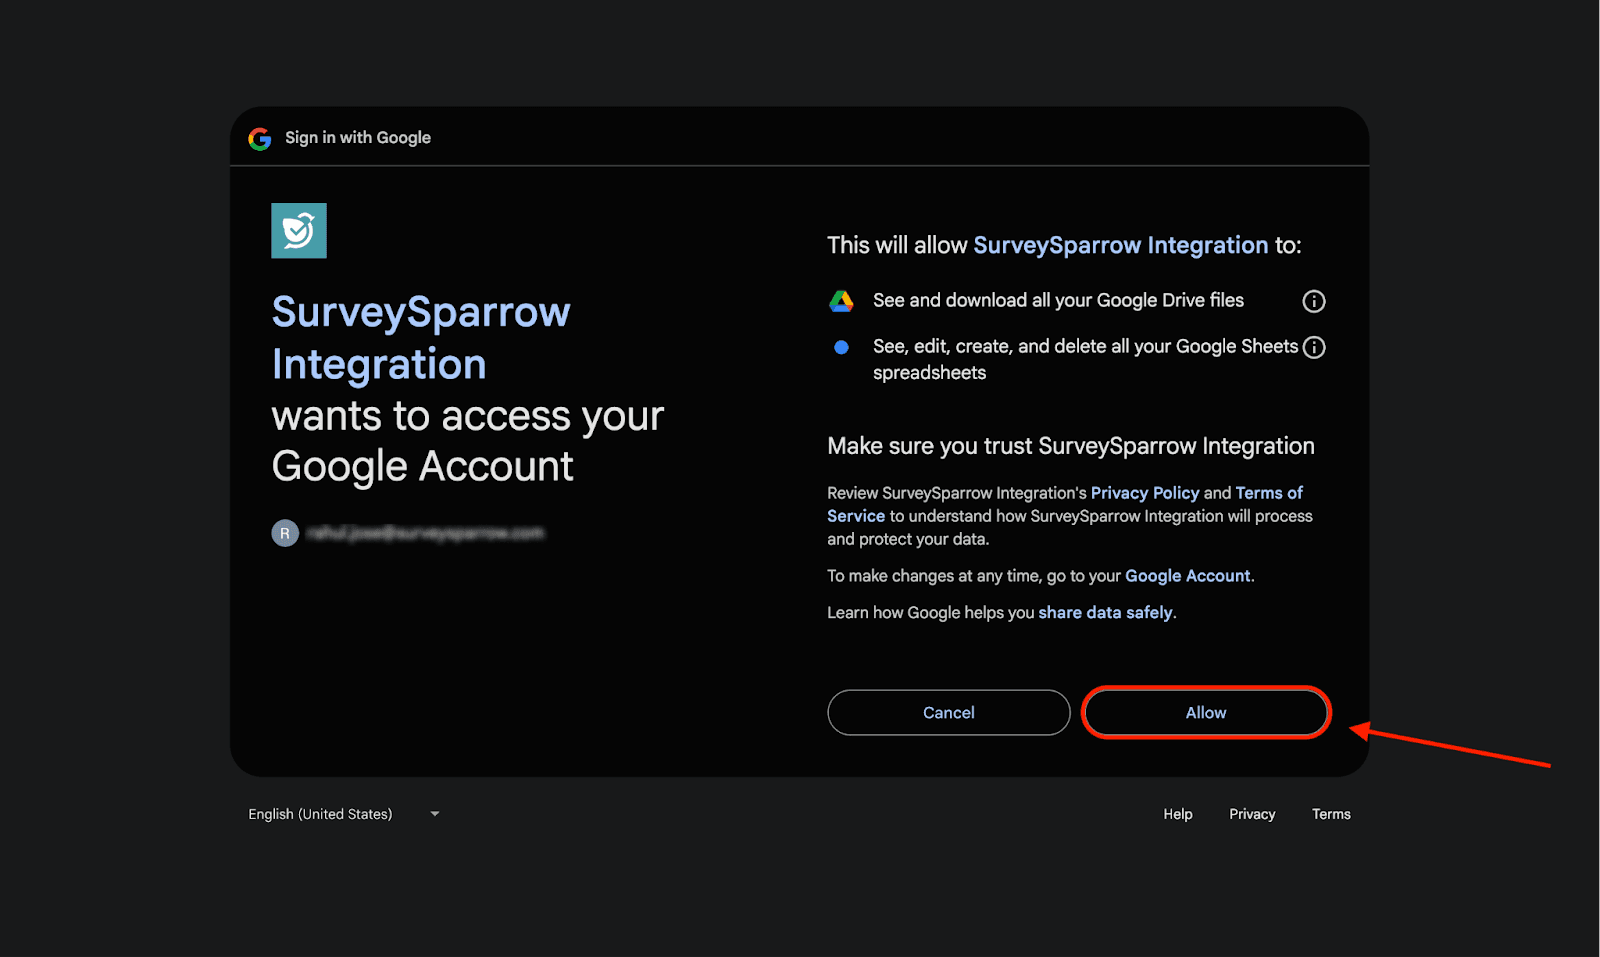
If your SurveySparrow account is used by multiple users, each of them will have their own surveys and would want to push the data from their respective surveys to their own Google Sheet. SurveySparrow makes it simple to connect multiple accounts to Google Sheets. Let’s explore how.
1. On the home screen, click on the Settings icon.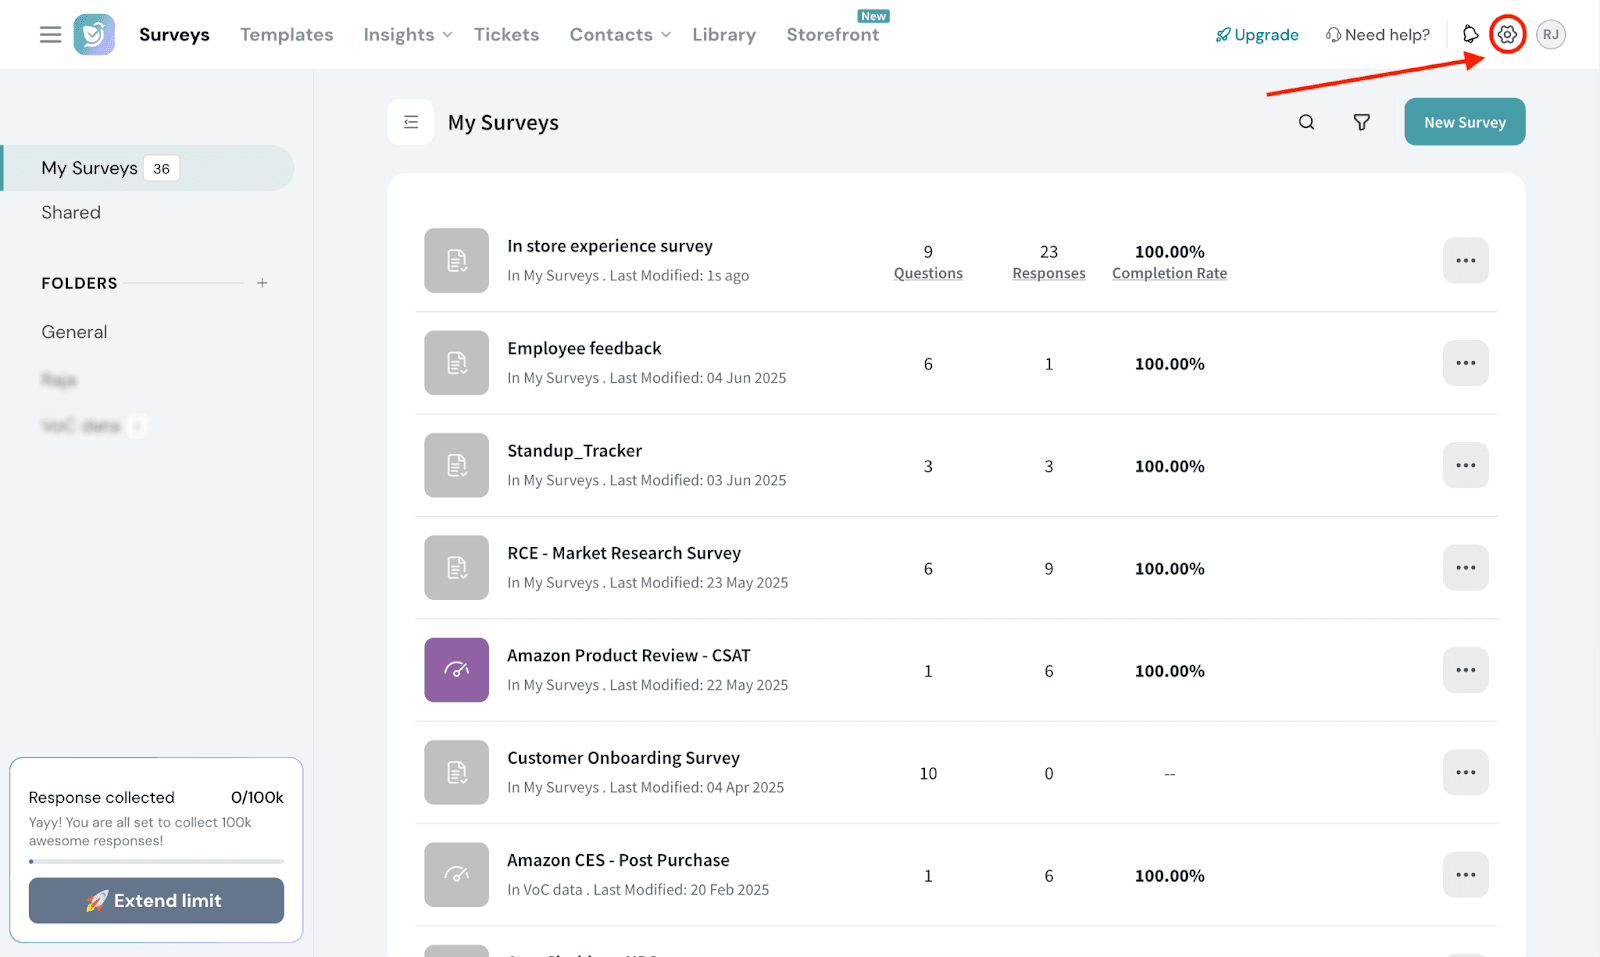
2. Navigate to the Apps and Integrations section.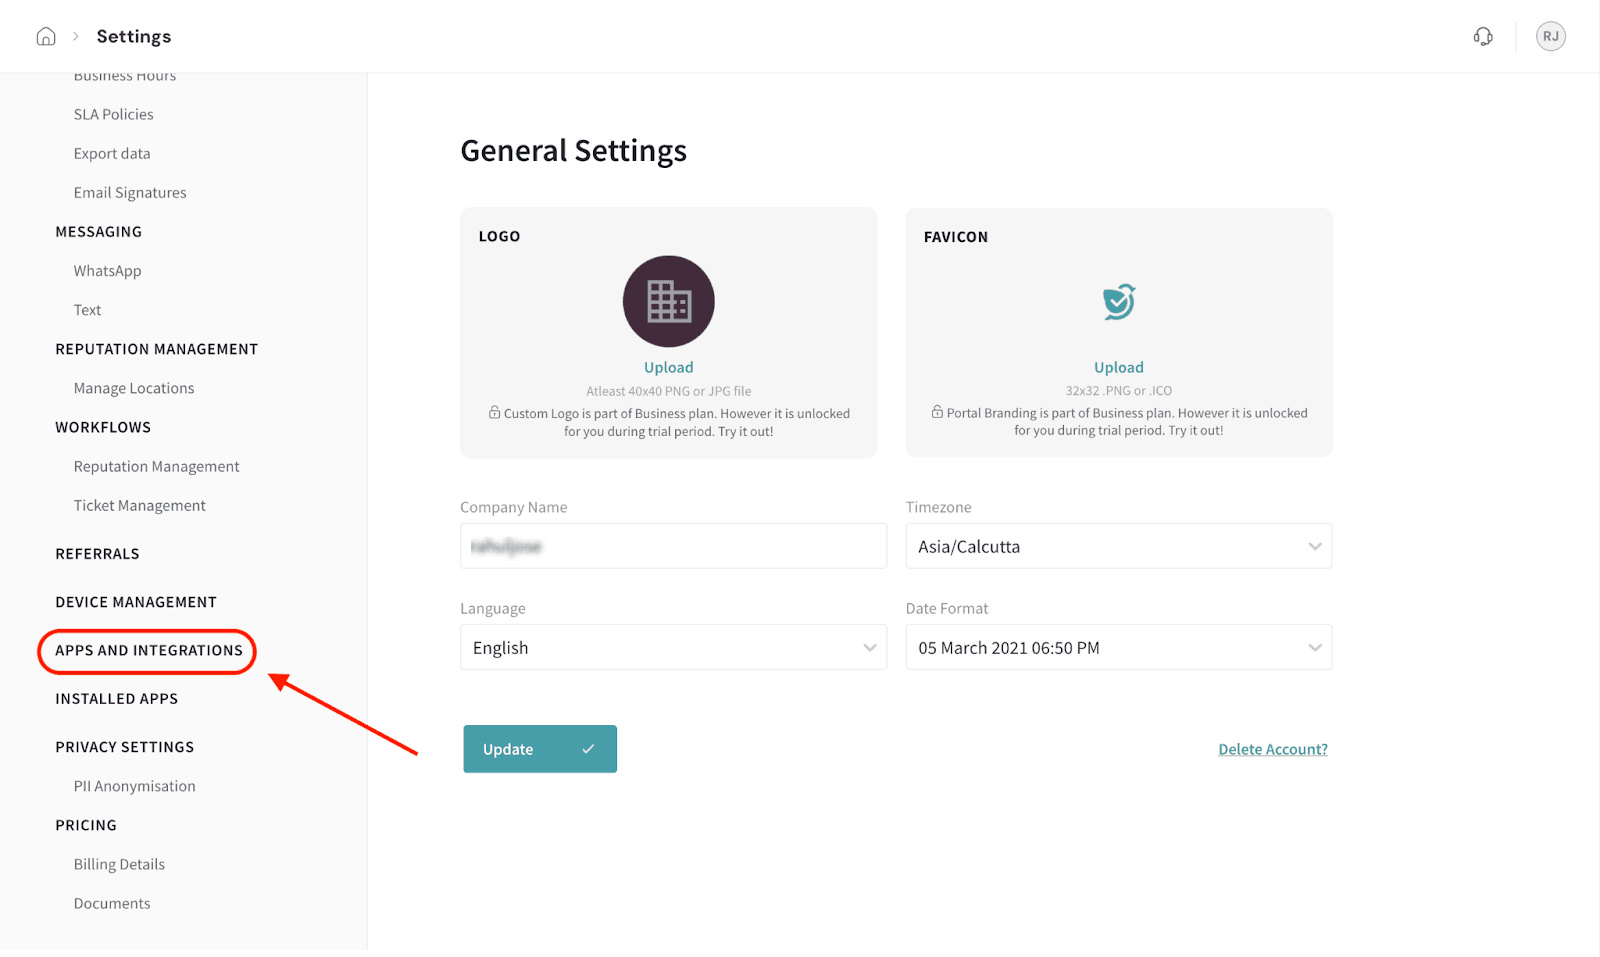
3. A list of integrations appears. Type in the search box or scroll down till you find the Google Sheets integration, and click on it.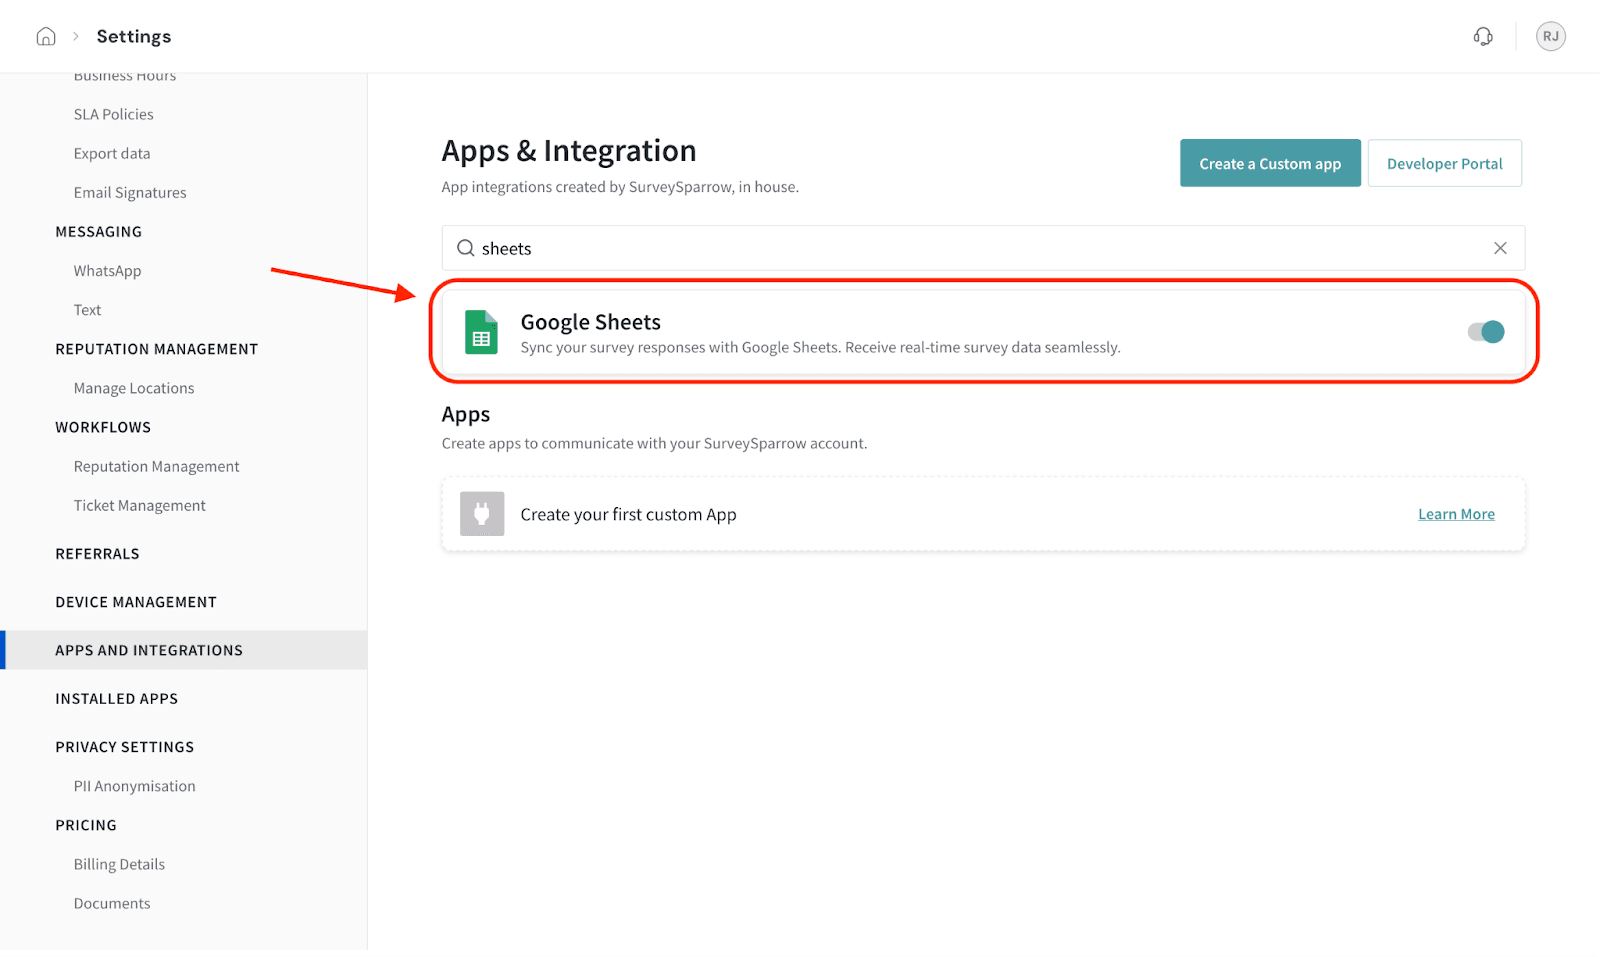
4. Under the Accounts section, you’ll see the accounts connected to Google Sheets. To add a new account, click Add Account.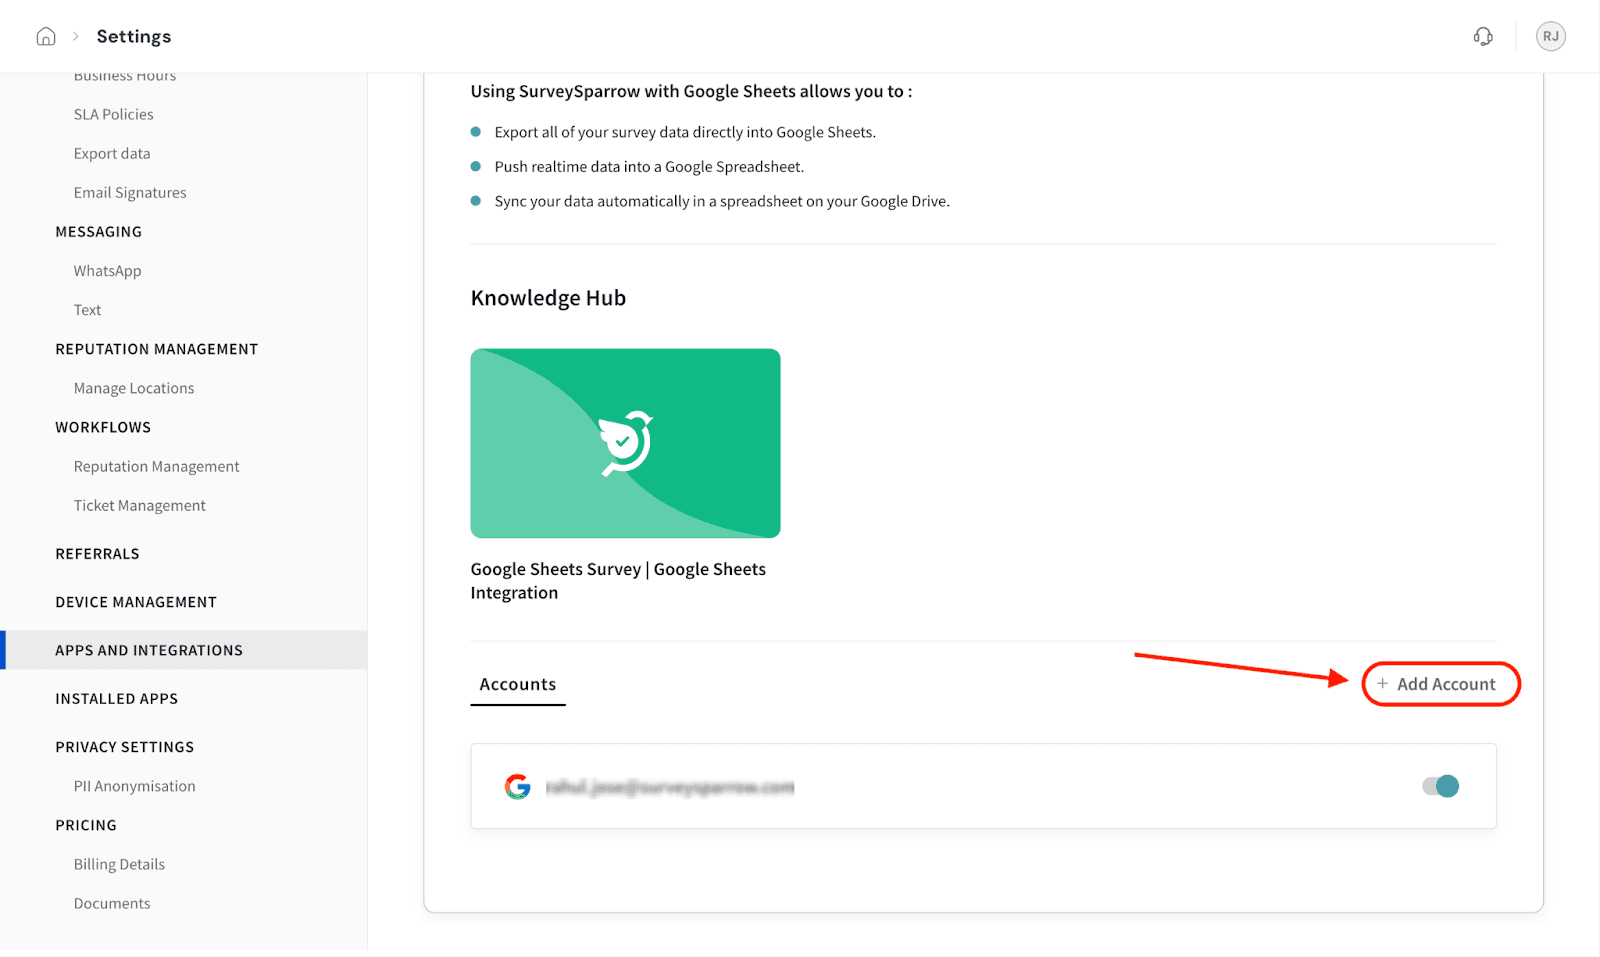
5. Choose the account that you want to connect to Google Sheets and complete the sign-in process as described earlier.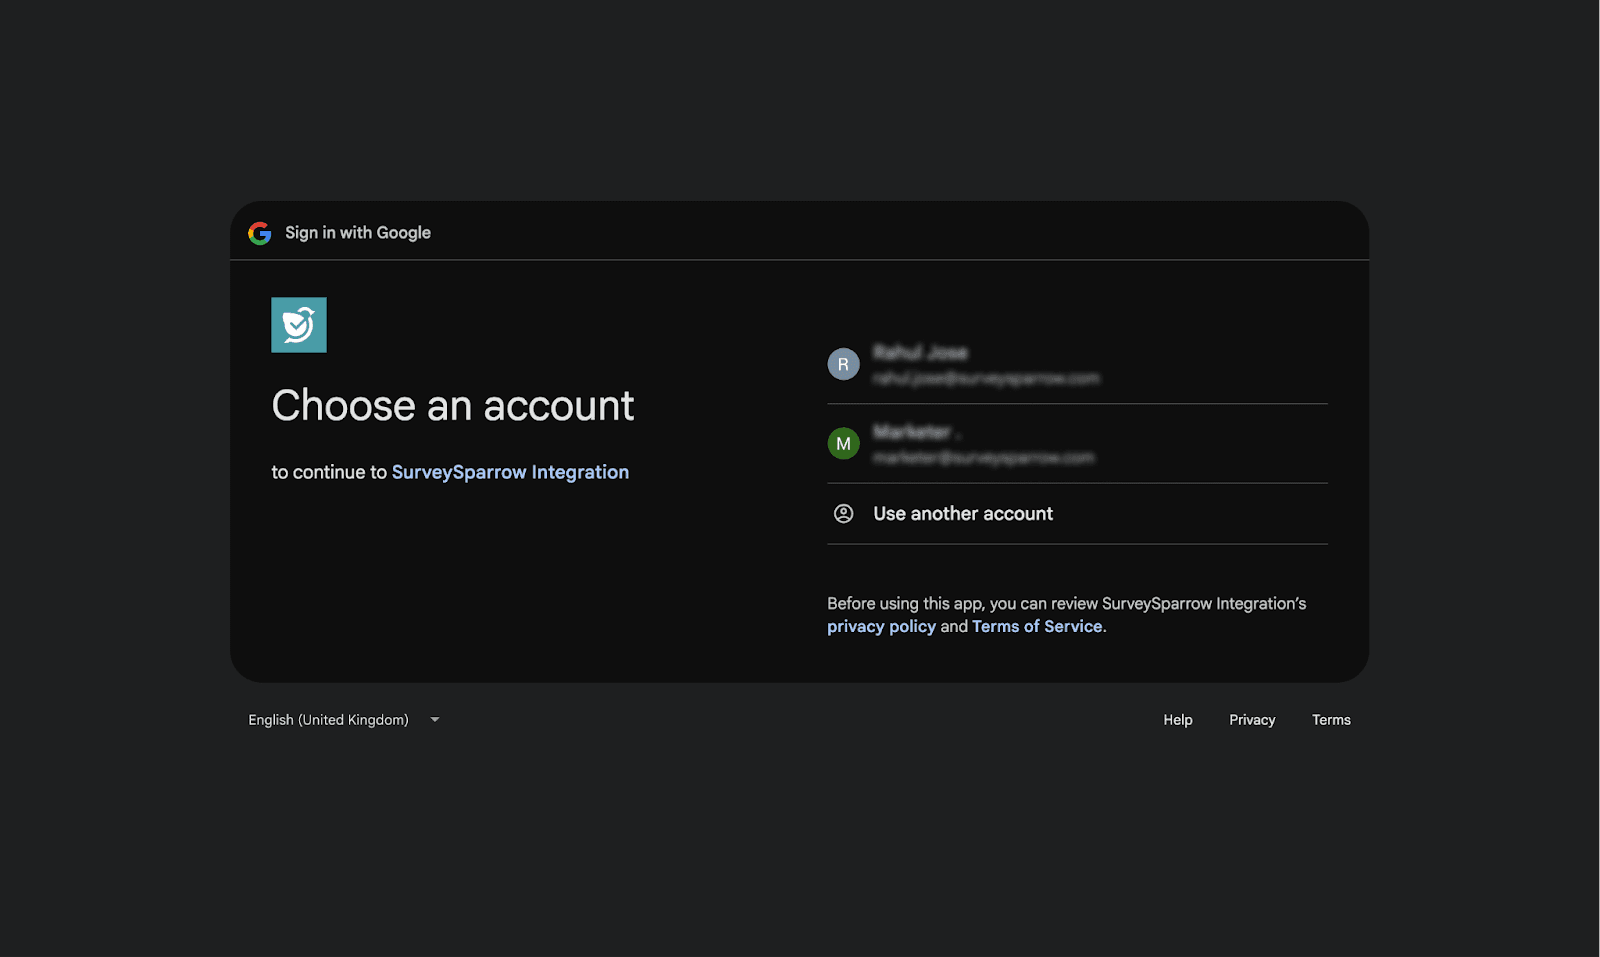
Note: You must be logged in to the account that you want to connect.
6. Now, when you’re mapping responses to Google Sheets, you can choose among different accounts.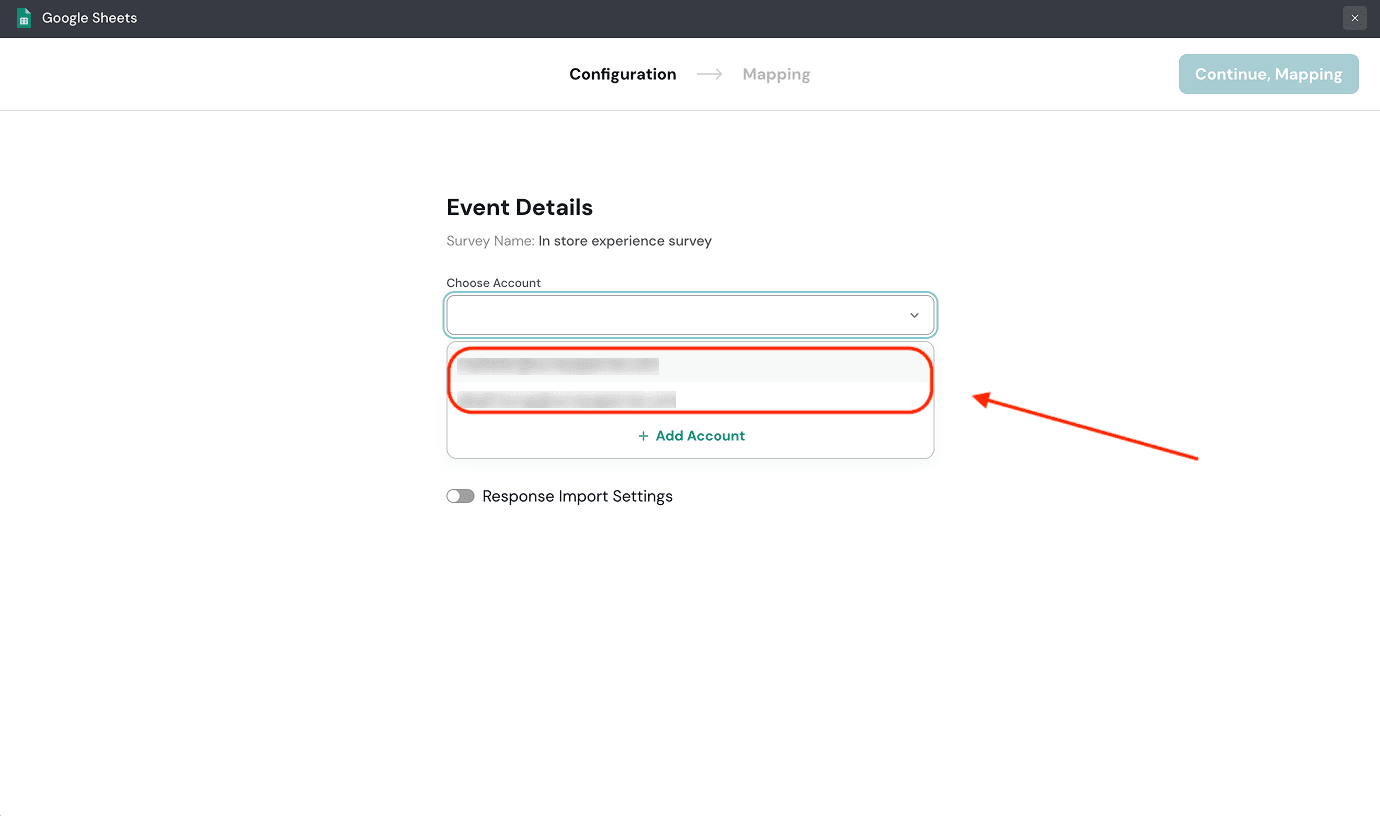
7. You can also add additional accounts within a specific survey’s Google Sheets integration. From the Choose Account drop-down, select Add Account and repeat the same steps outlined above.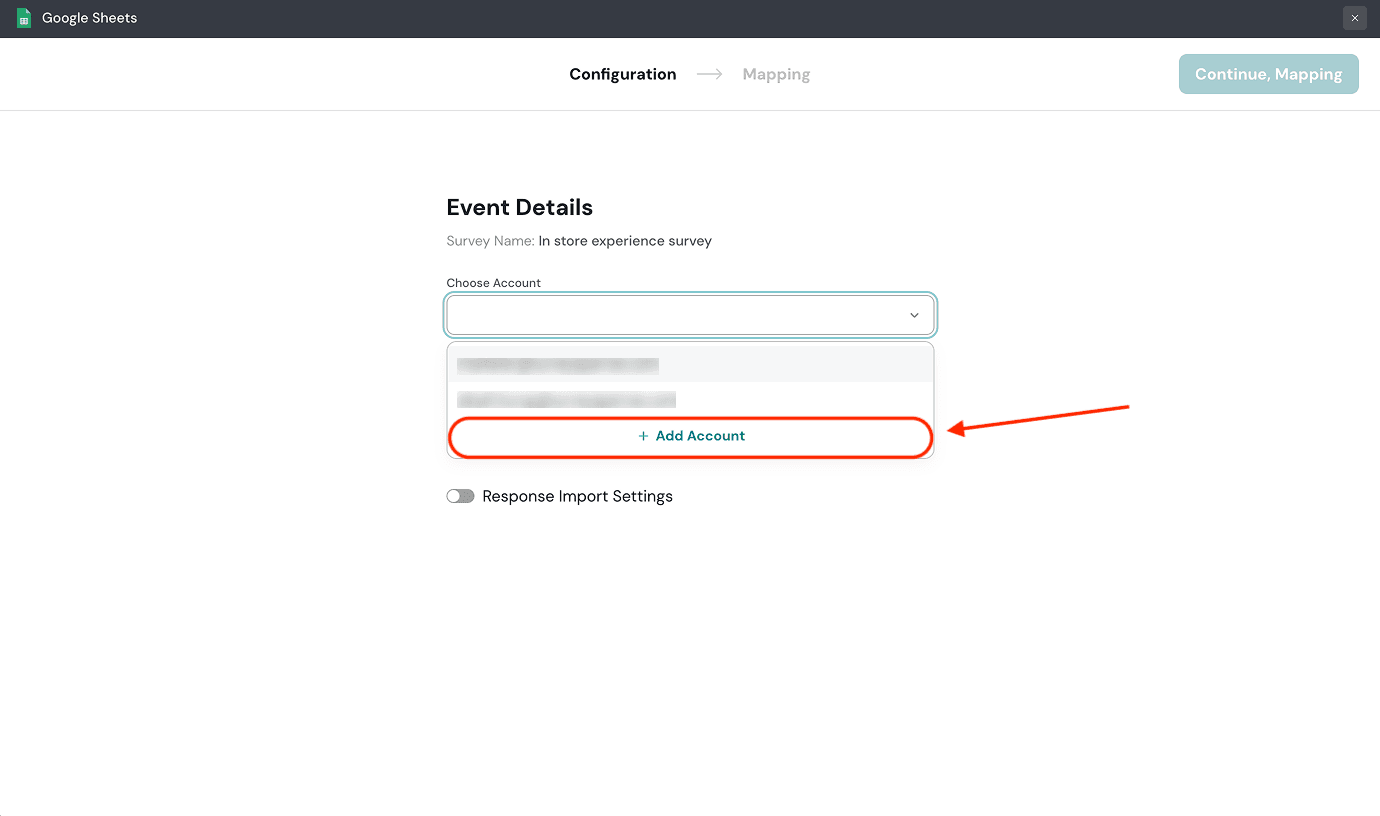
8. After adding the account, head over to the Apps and Integrations page within Settings. You can see the new account on the Google Sheets Integration page. You can temporarily disable connect for an account by turning off its toggle.
Note: If you switch off the toggle, response mapping will be temporarily paused.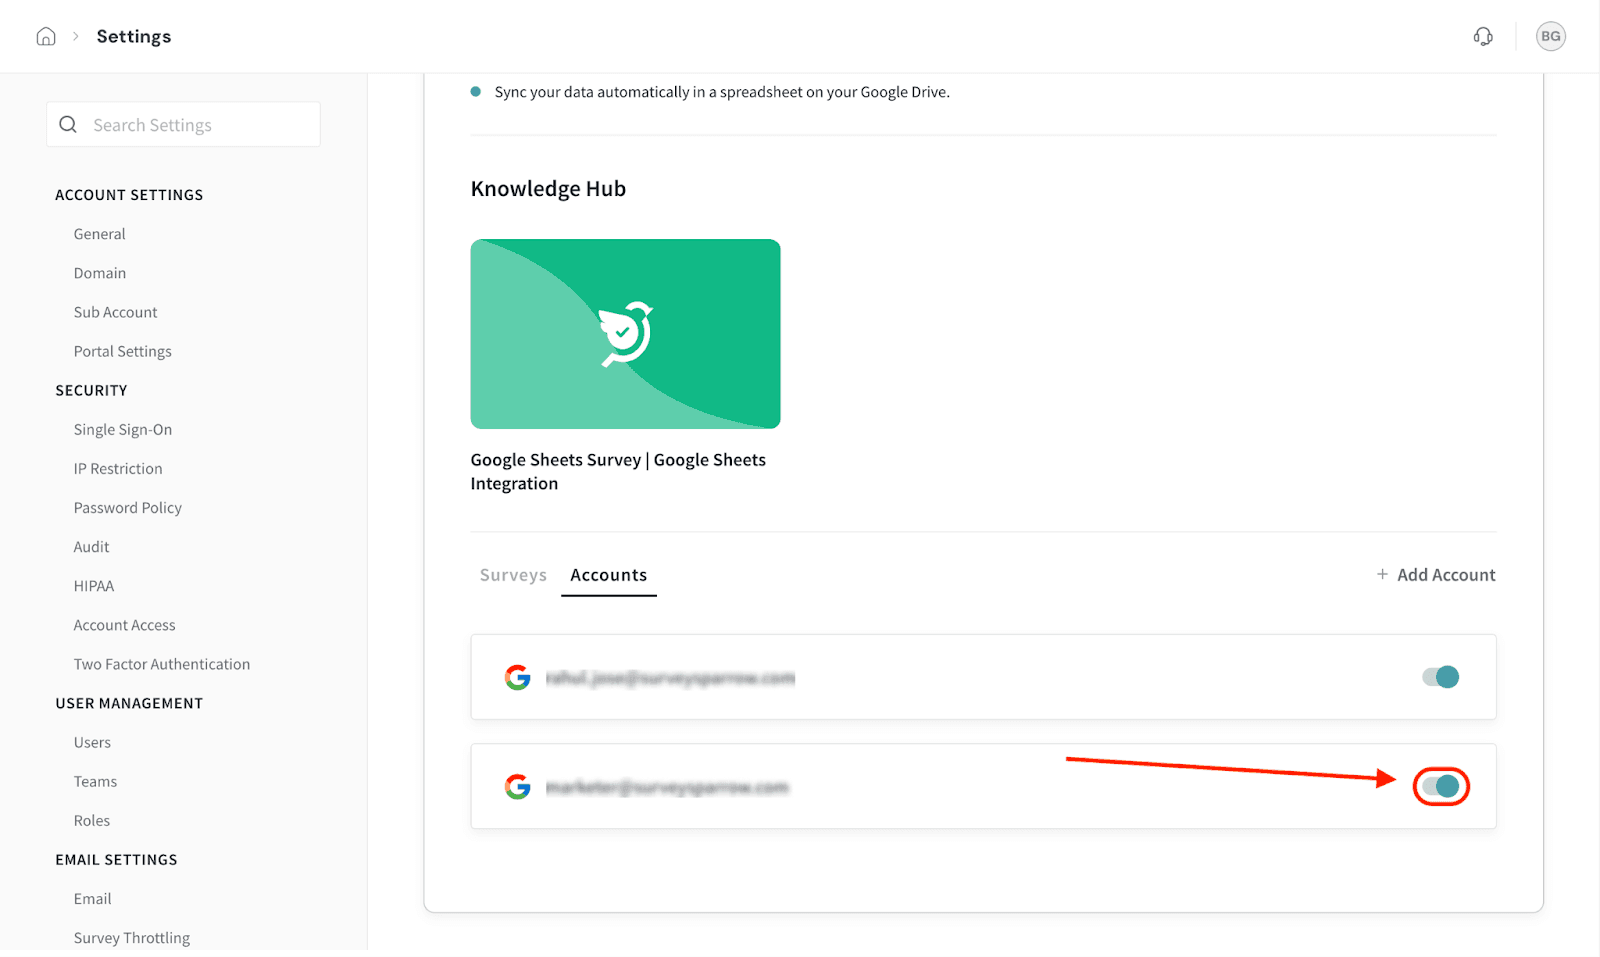
9. If you would like to delete the account completely, hover over it. Click the delete icon.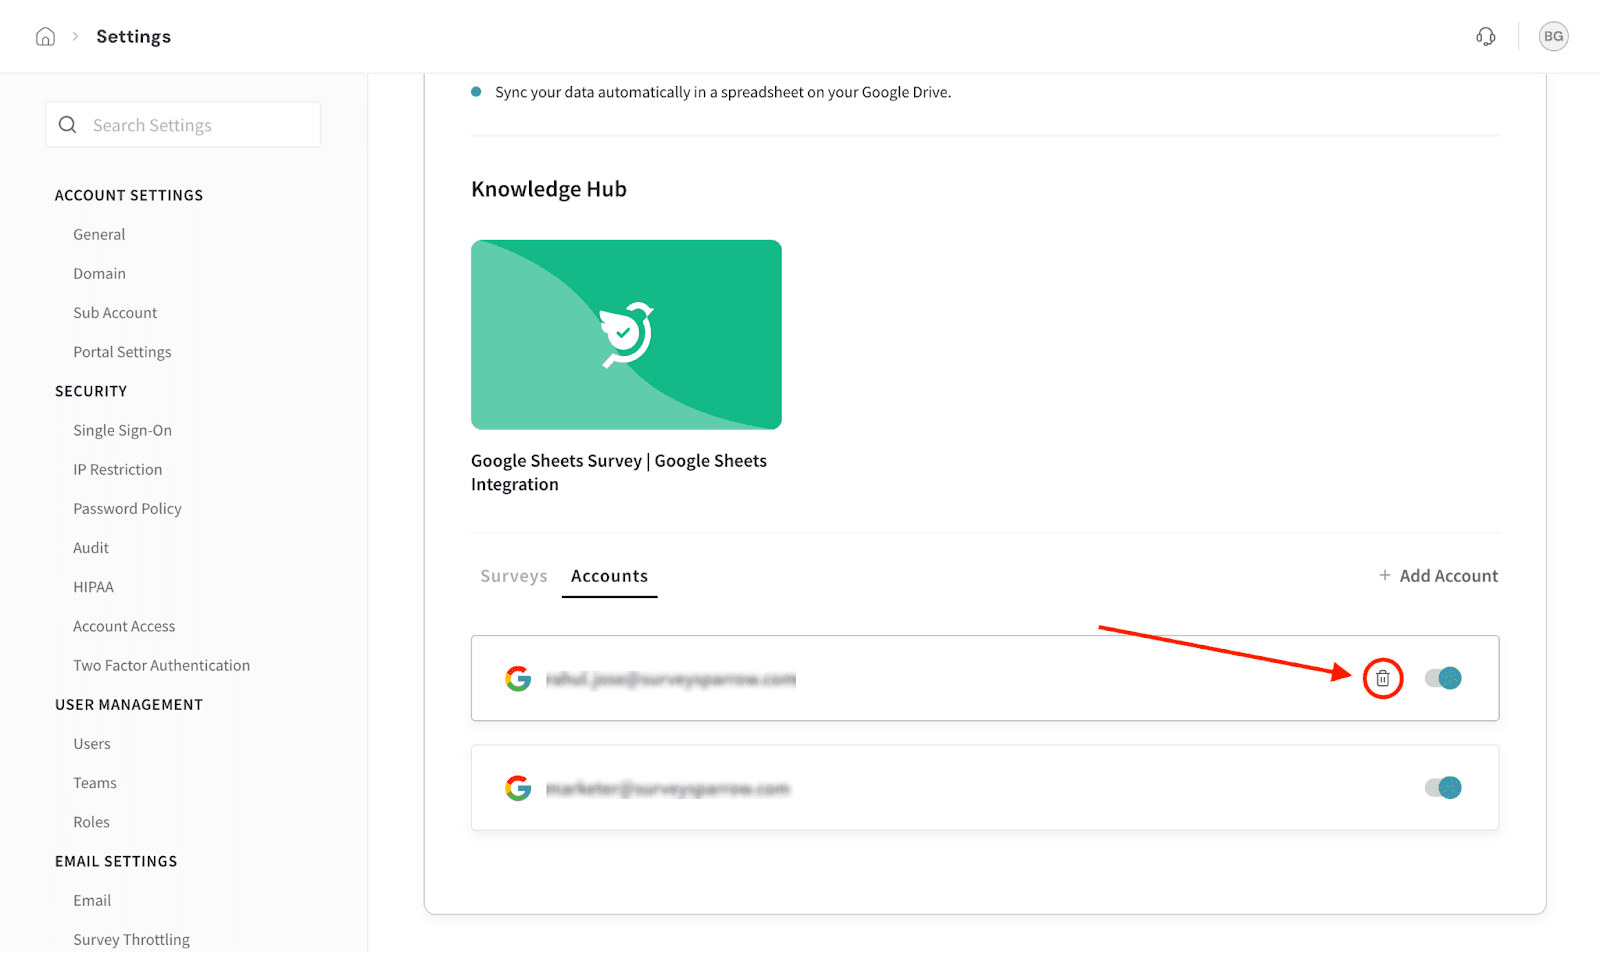
10. A confirmation message appears. Click on Confirm to proceed.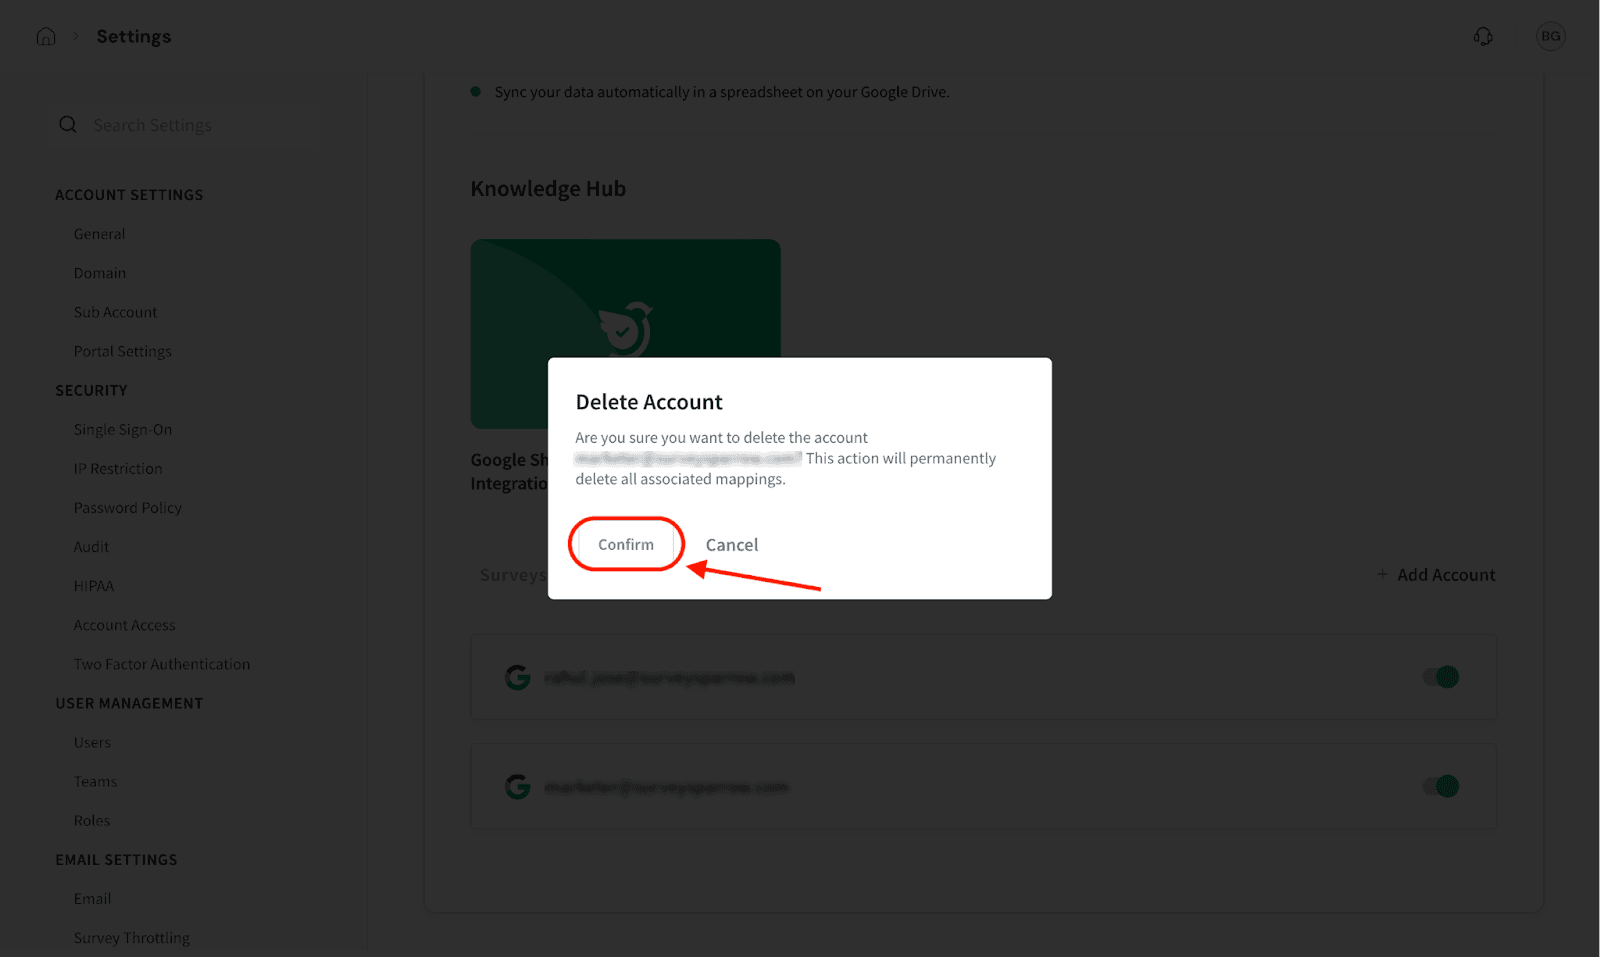
Note:
1. After the integration is complete, you need a destination spreadsheet to collect your survey data. There are three ways to set it up: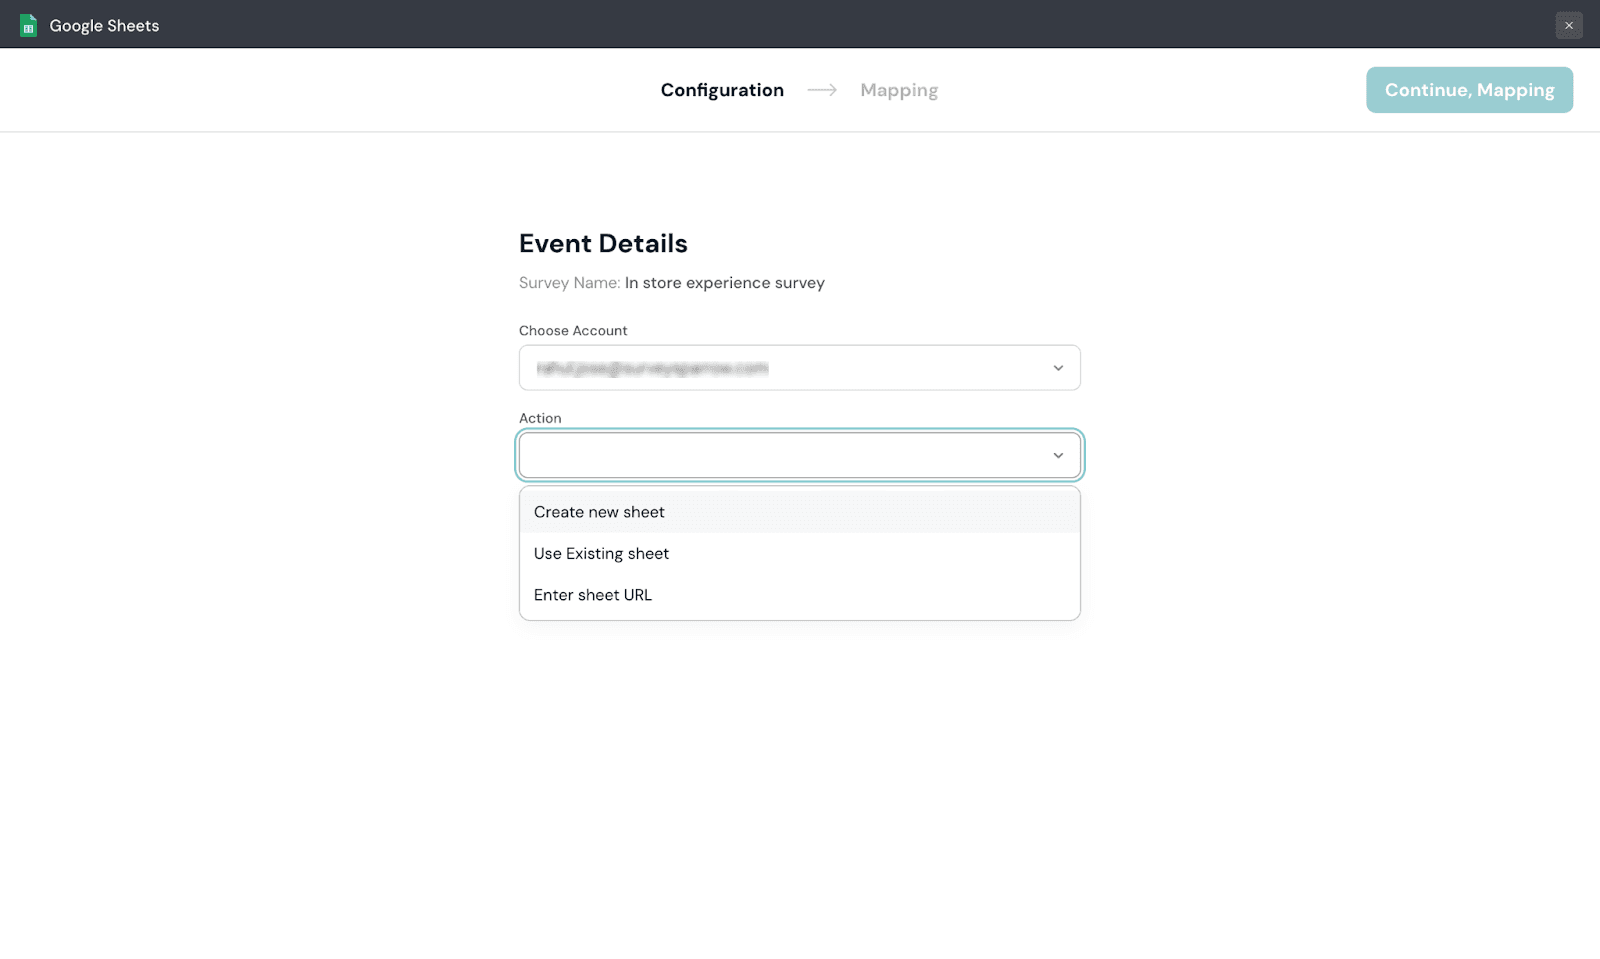
Here’s what you need to know about each option.
Create a new sheet: With this option, your responses are saved in a new spreadsheet under your account. All you need to do is provide a name.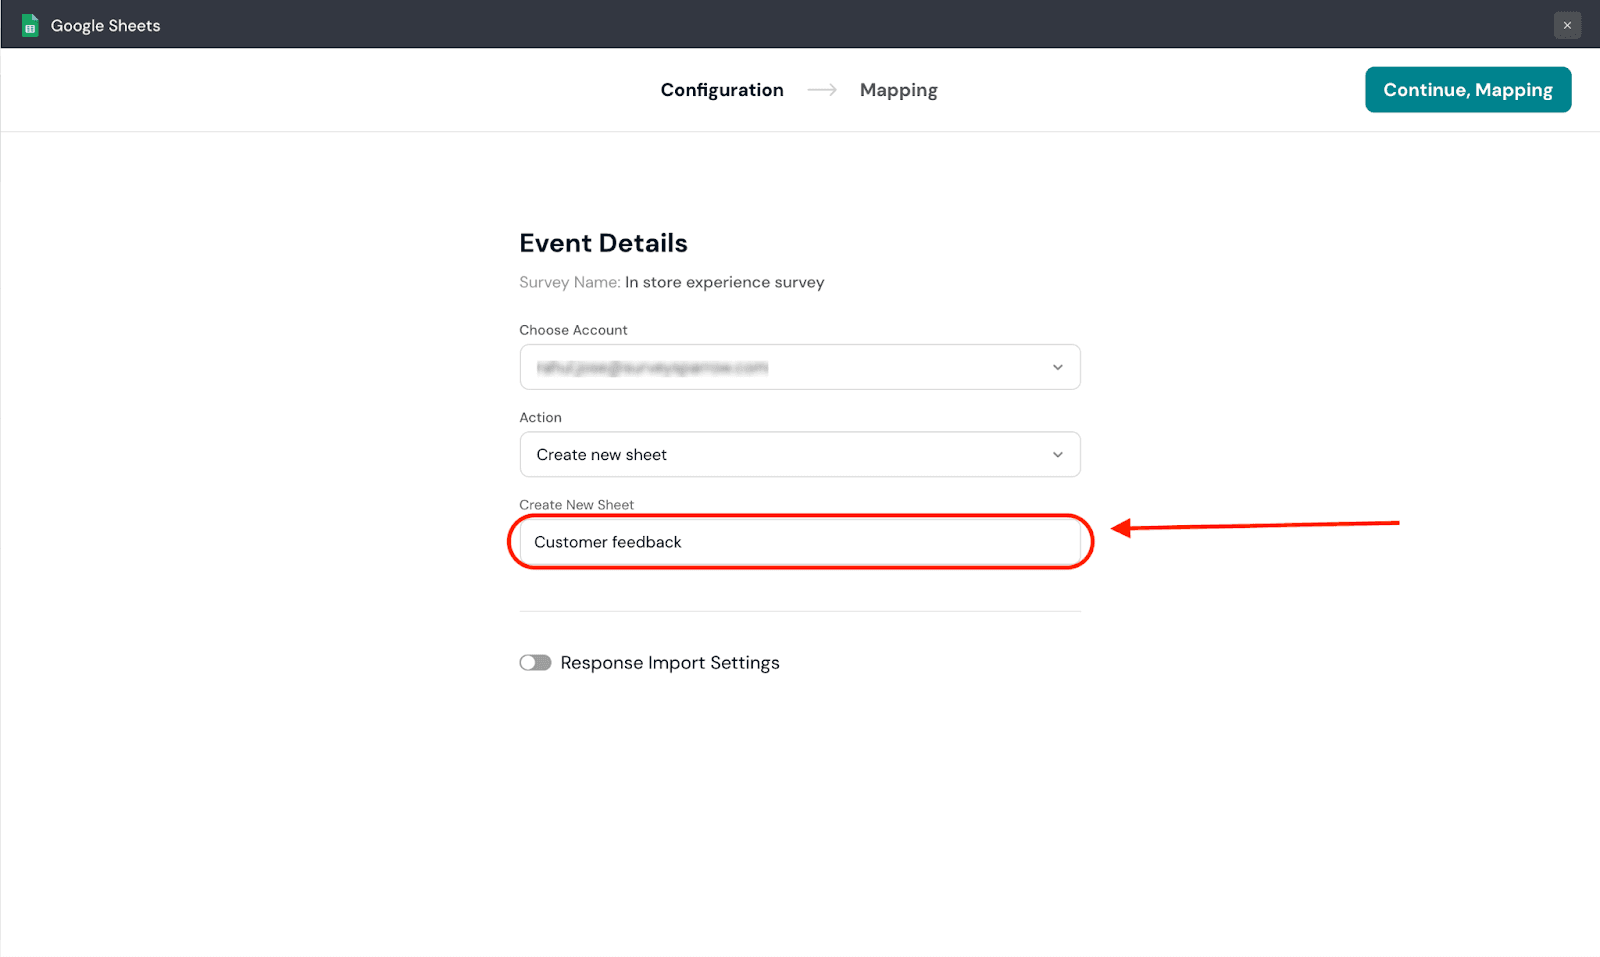
Use existing sheet: With this option, you can choose from all the existing spreadsheets you’ve created. However, the responses will be stored in a new worksheet inside the spreadsheet.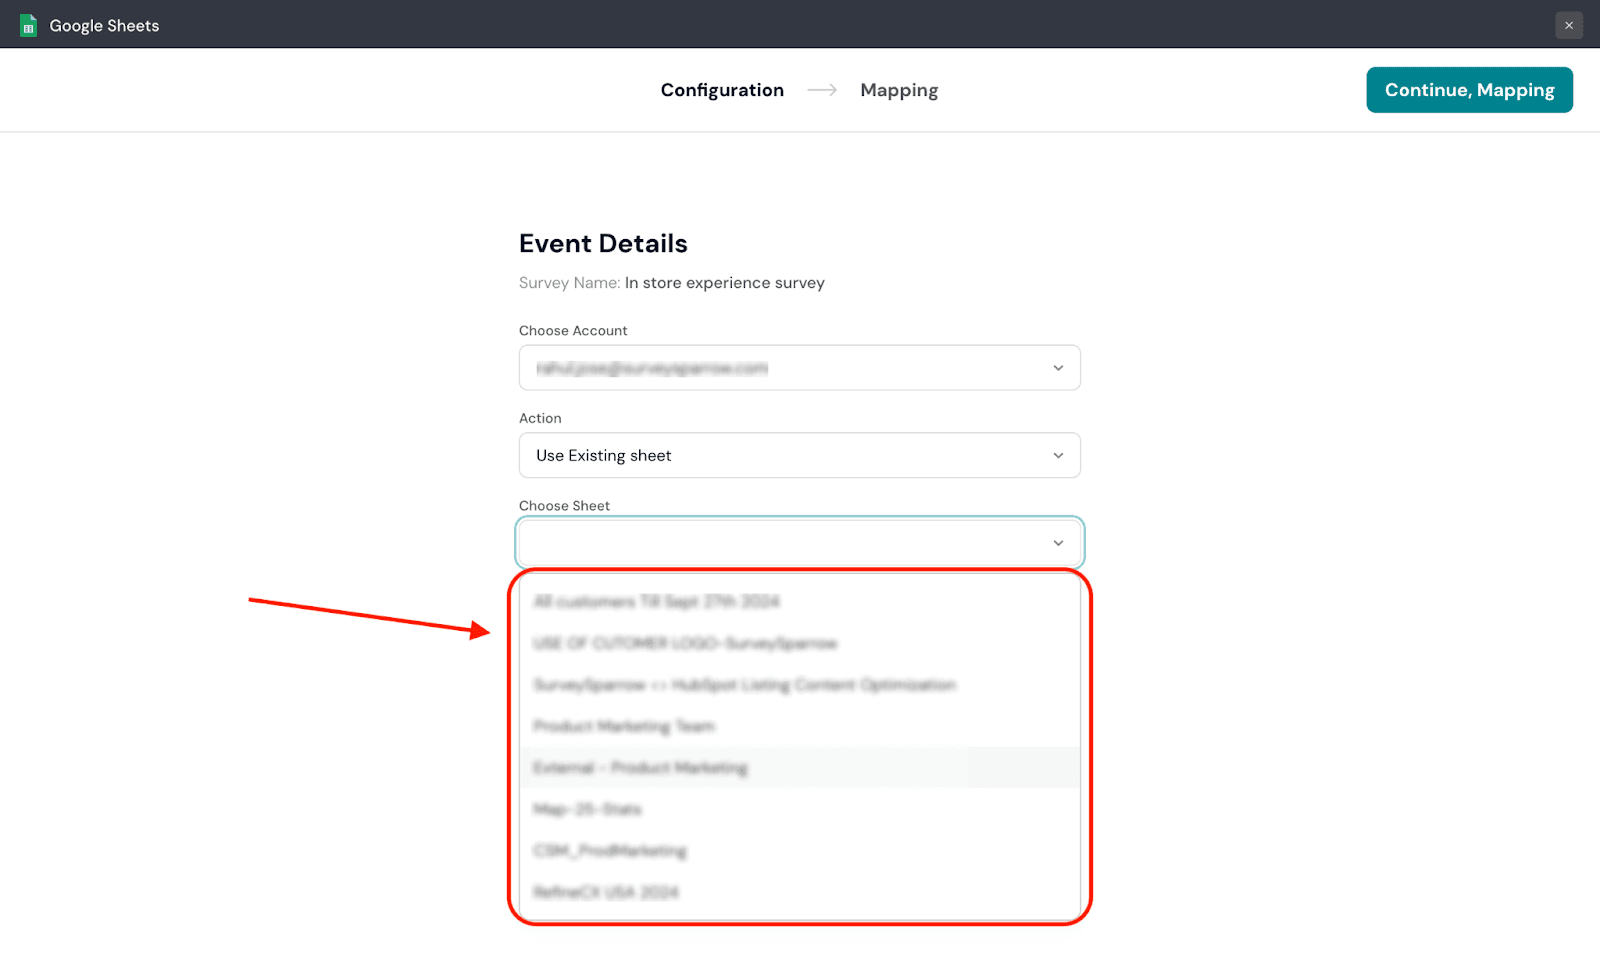
Enter sheet URL: This option allows you to connect any spreadsheet saved in your Google Drive that you have edit access to.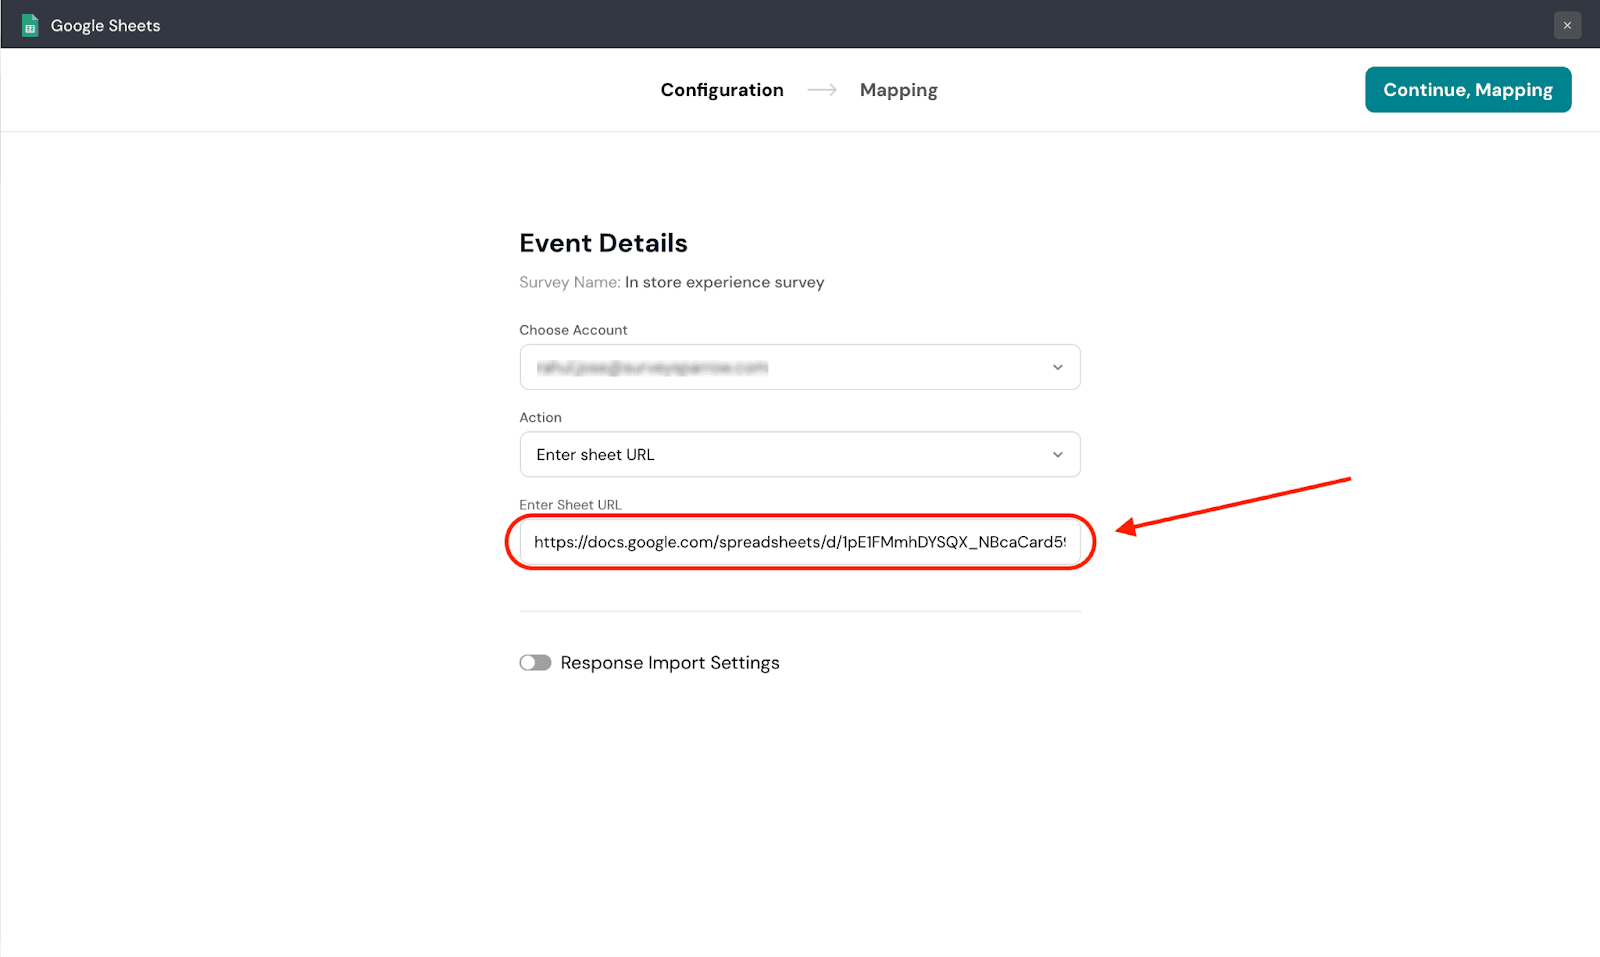
2. By default, only new responses (that arrive after the integration is set up) are sent to the spreadsheet. But if you wish to change it, click on the toggle for Response Import Settings.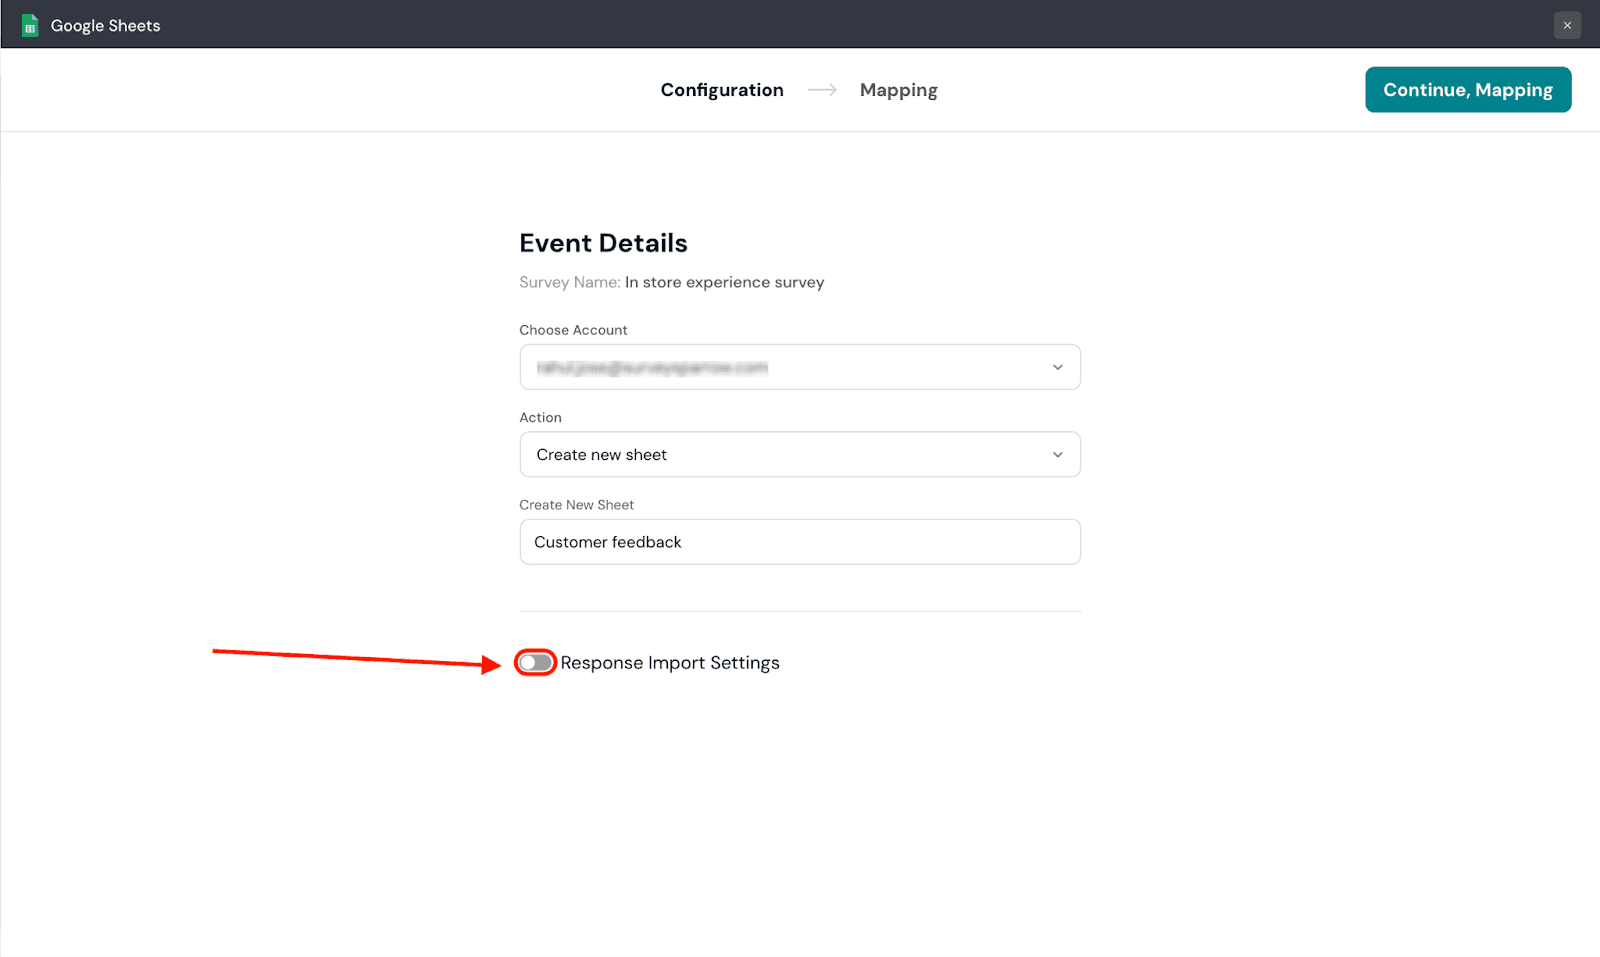
3. A drop-down button opens up. Click on it.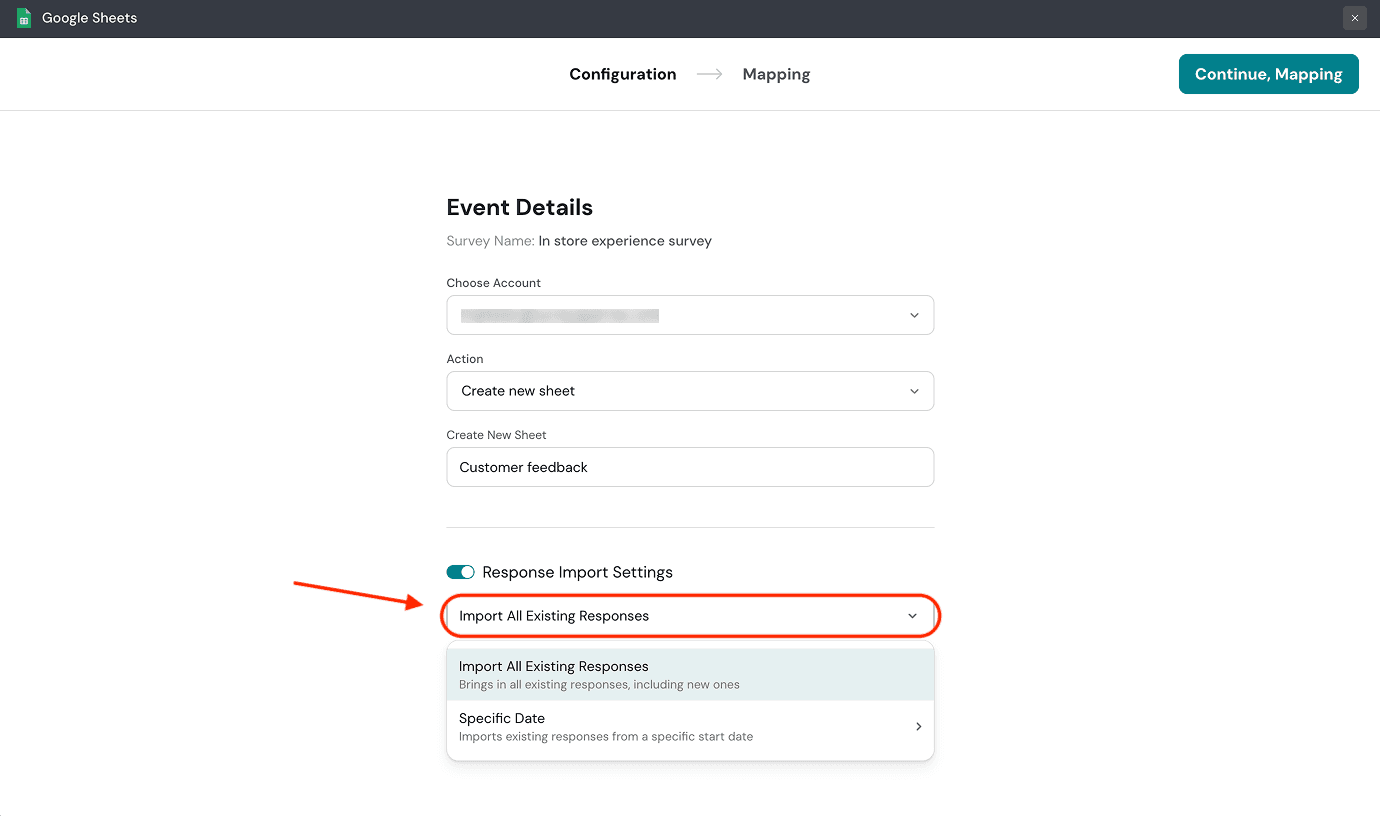
There are two options to choose from. The first option (Import All Existing Responses) is default and allows you to import old and new responses.
The second option (Specific Date) allows you to only import responses starting from a particular date (which can be today as well). After selecting the date, click Apply.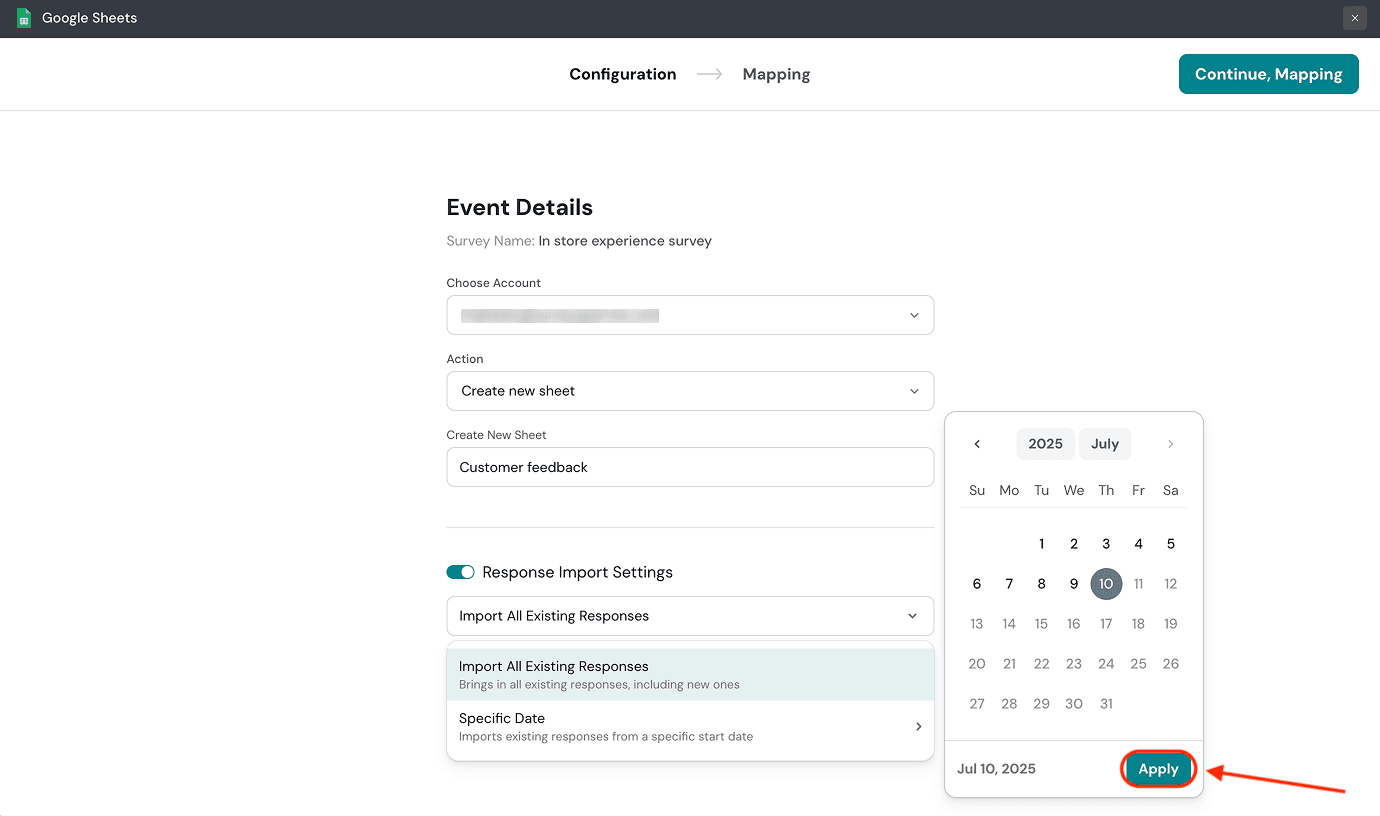
4. After you’re ready, click Continue Mapping.
5. In the mapping section, you can see and choose exactly what gets sent to the spreadsheet. The default setting is to send all the data (responses, contacts, variables, expressions, properties). But if you would like to change it, click on the button for Send selected data.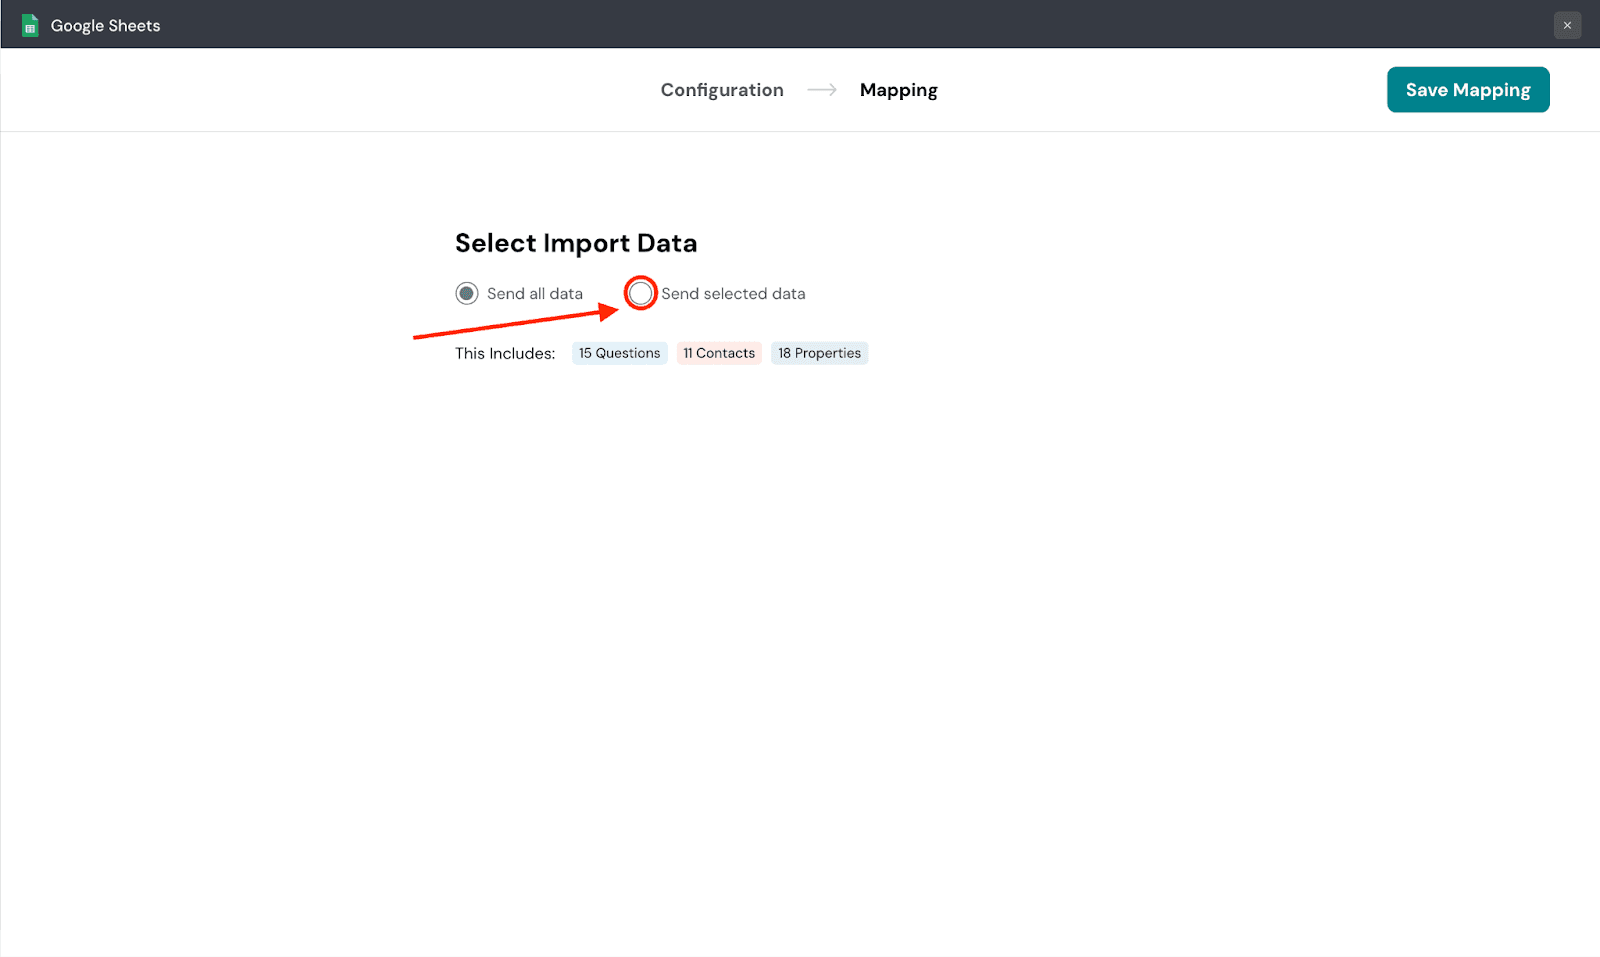
6. Here for each data type, you can select the exact items you want to send. Once you are ready, click Save Mapping.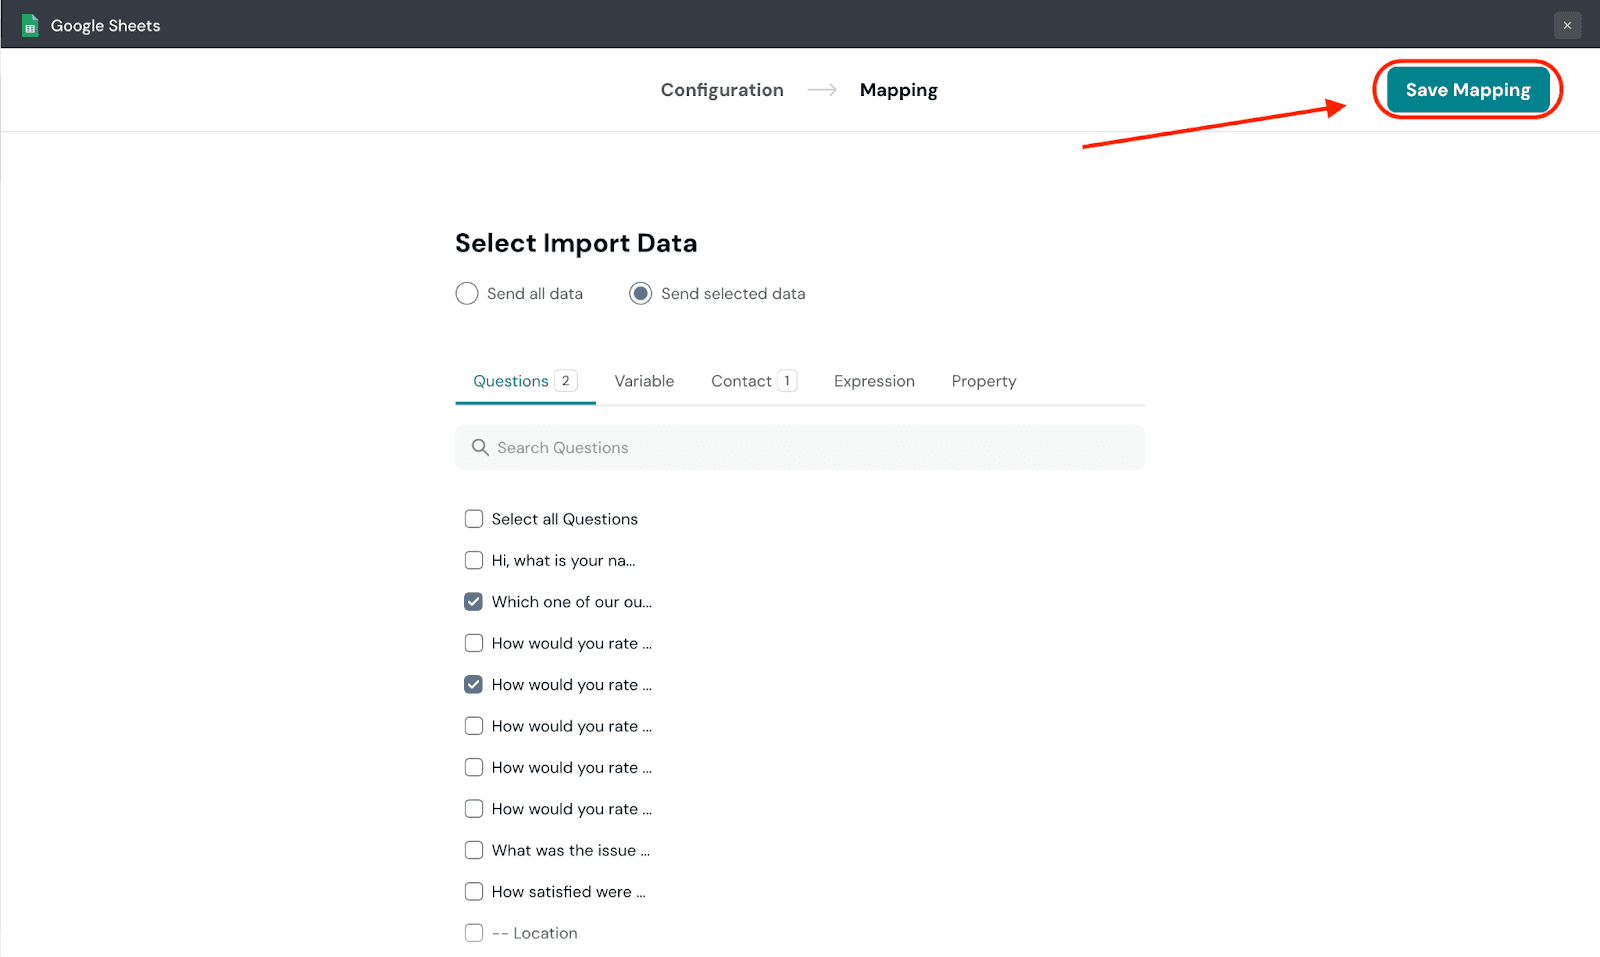
7. Now the mapping is ready. If you wish to review it, click on the left arrow.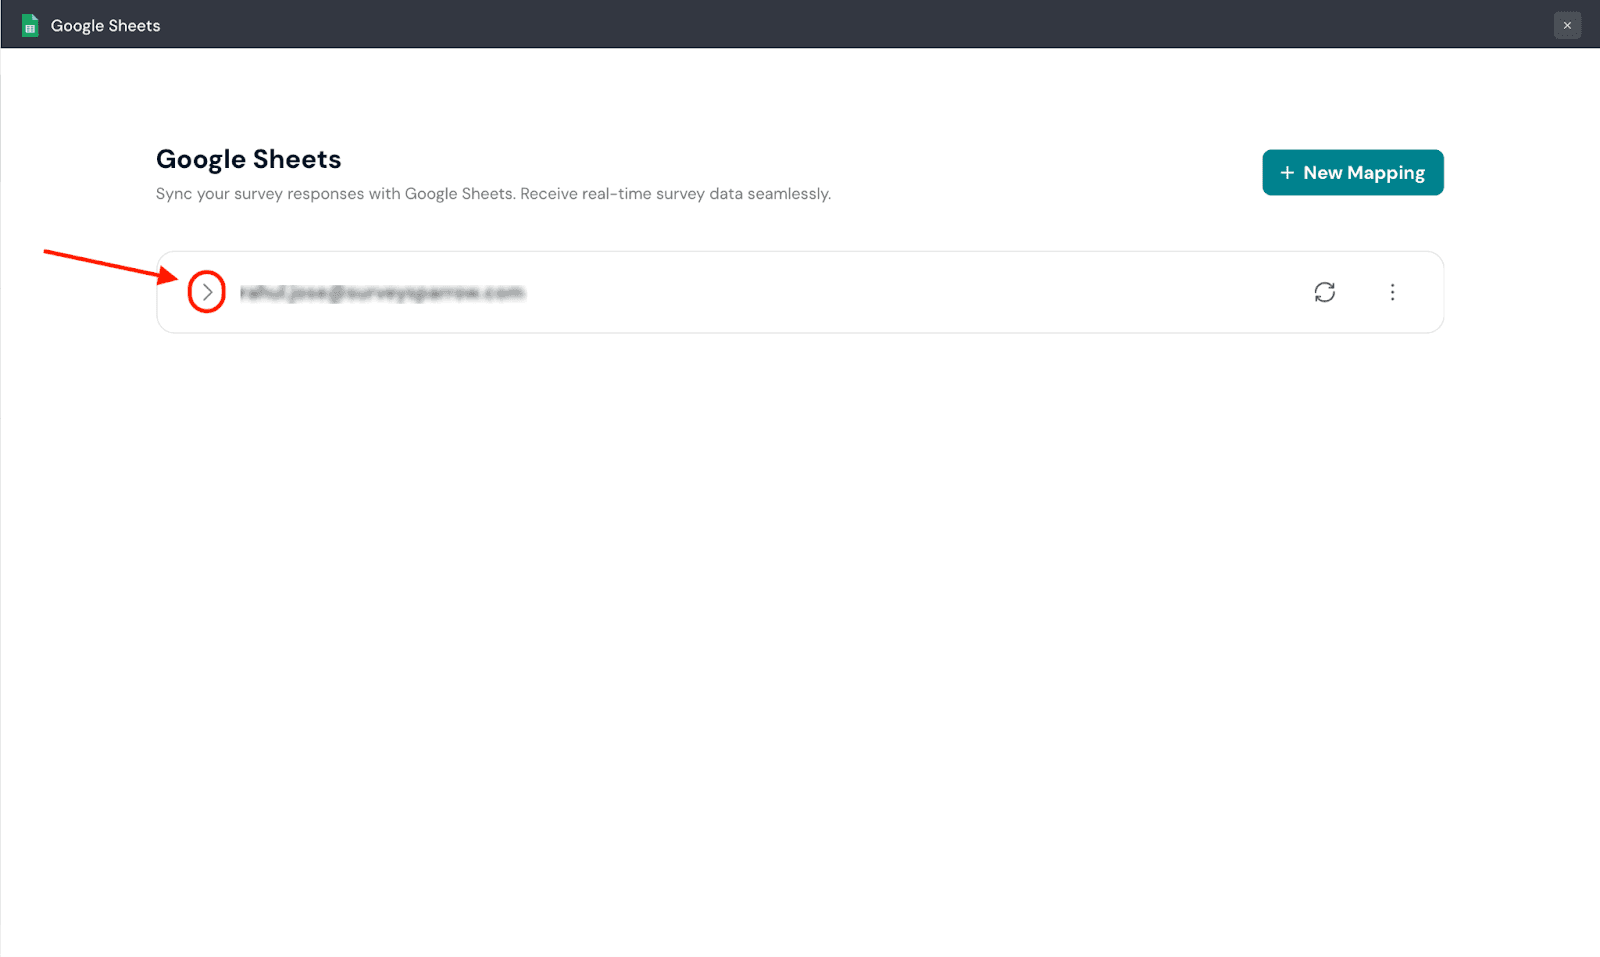
8. If you wish to edit the mapping, click Edit Mapping.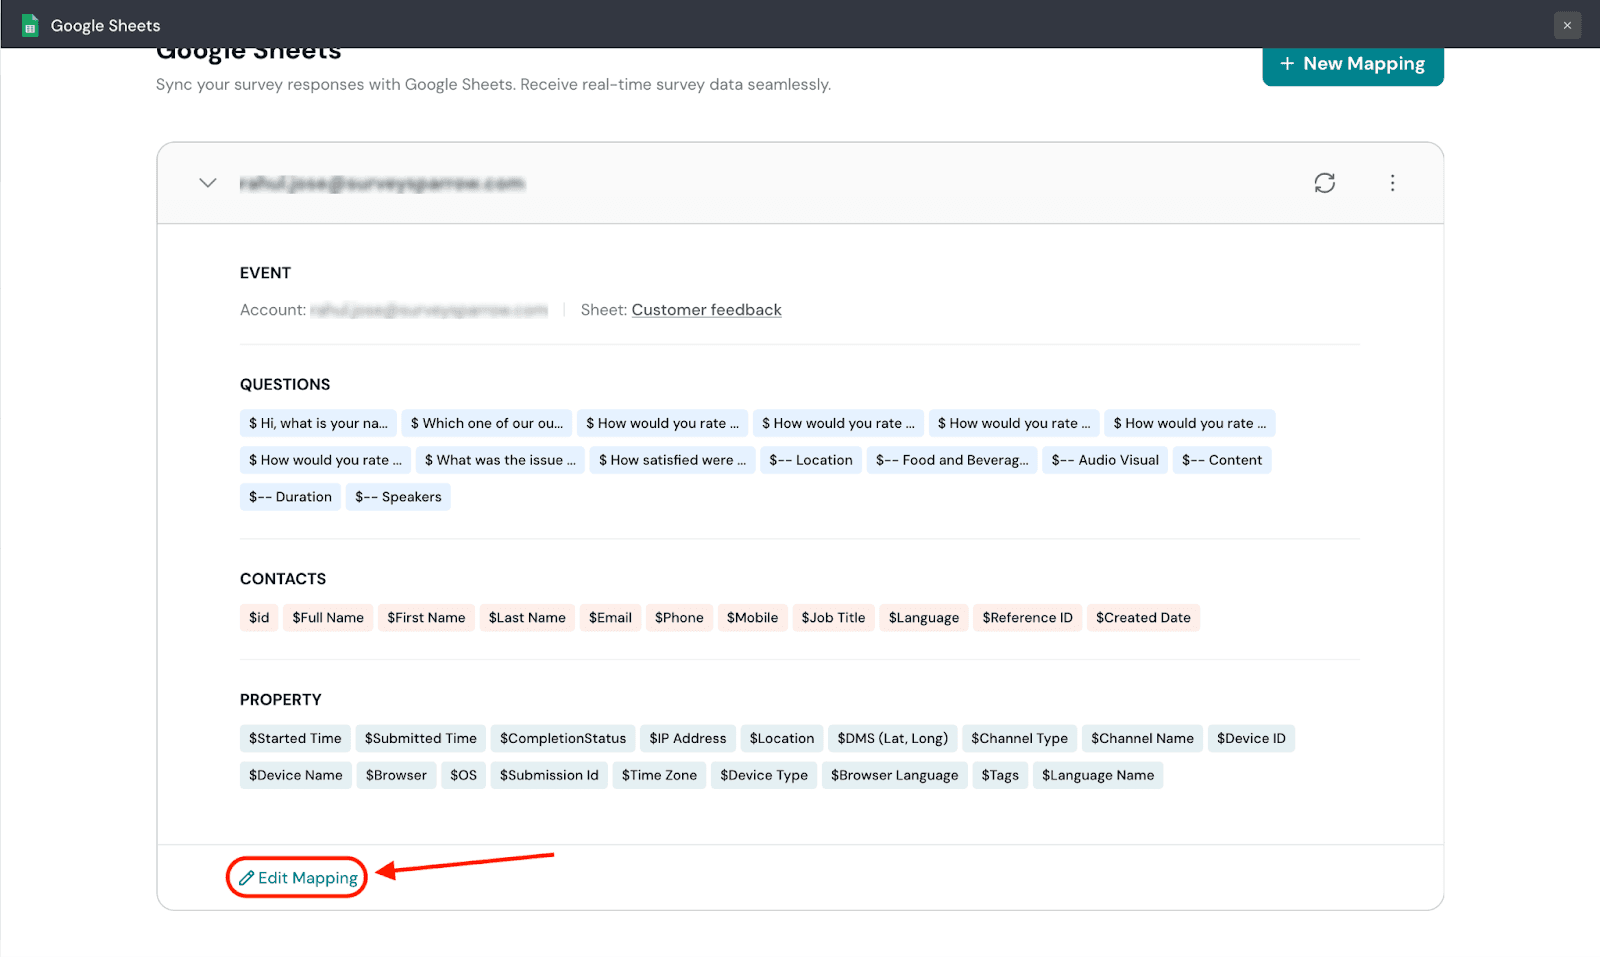
9. New responses are synced to Google Sheets at specific intervals. If you would like to sync responses immediately, you can click the sync icon.
10. To delete the mapping, click on the horizontal 3-dot icon, then select Delete.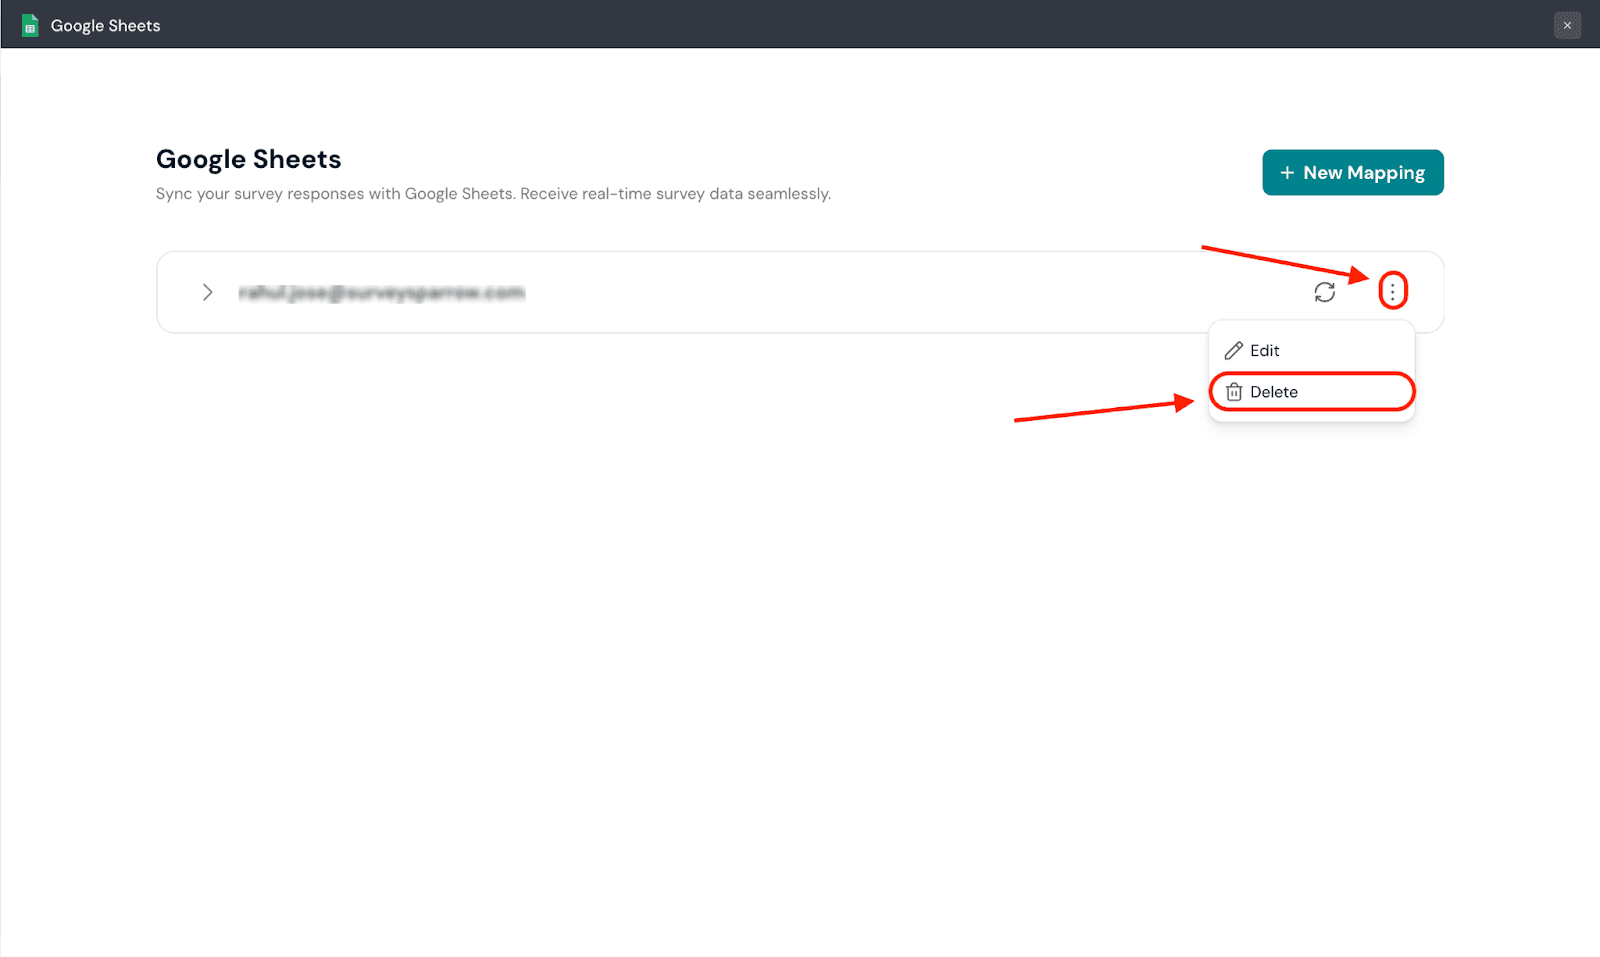
11. To add another mapping, click New Mapping.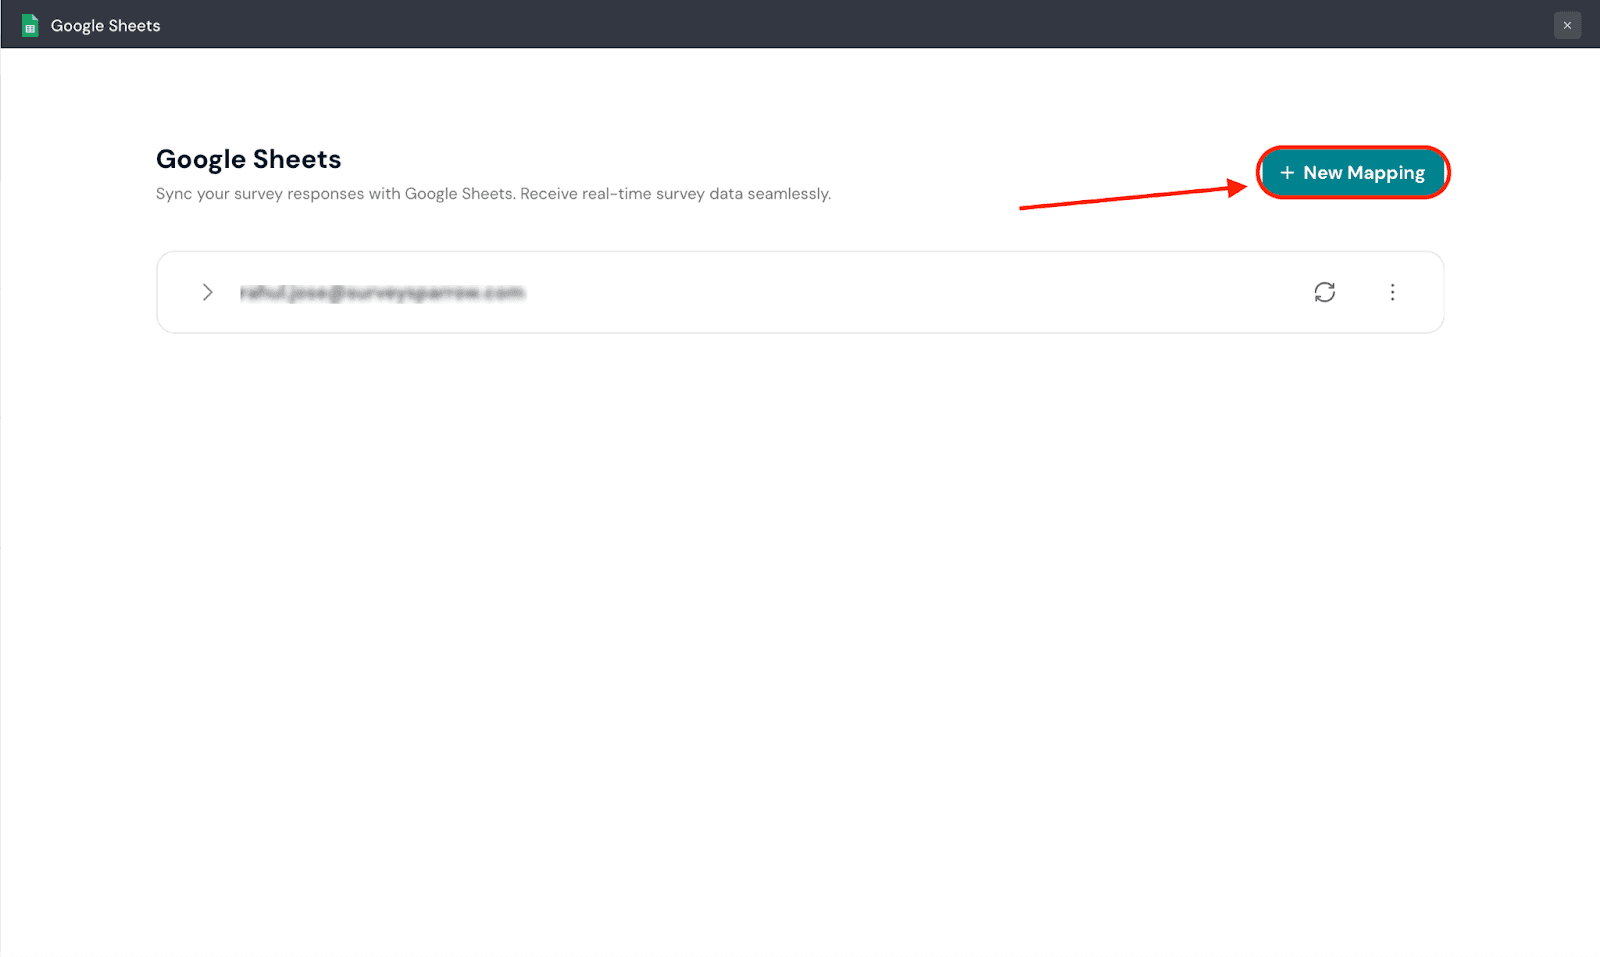
Note: You cannot create another mapping with the same Google account. Each mapping requires a unique Google account.
Now you are all set to roll out the survey and track responses in real-time! This is how your spreadsheet looks like, and any new response data gets automatically saved here.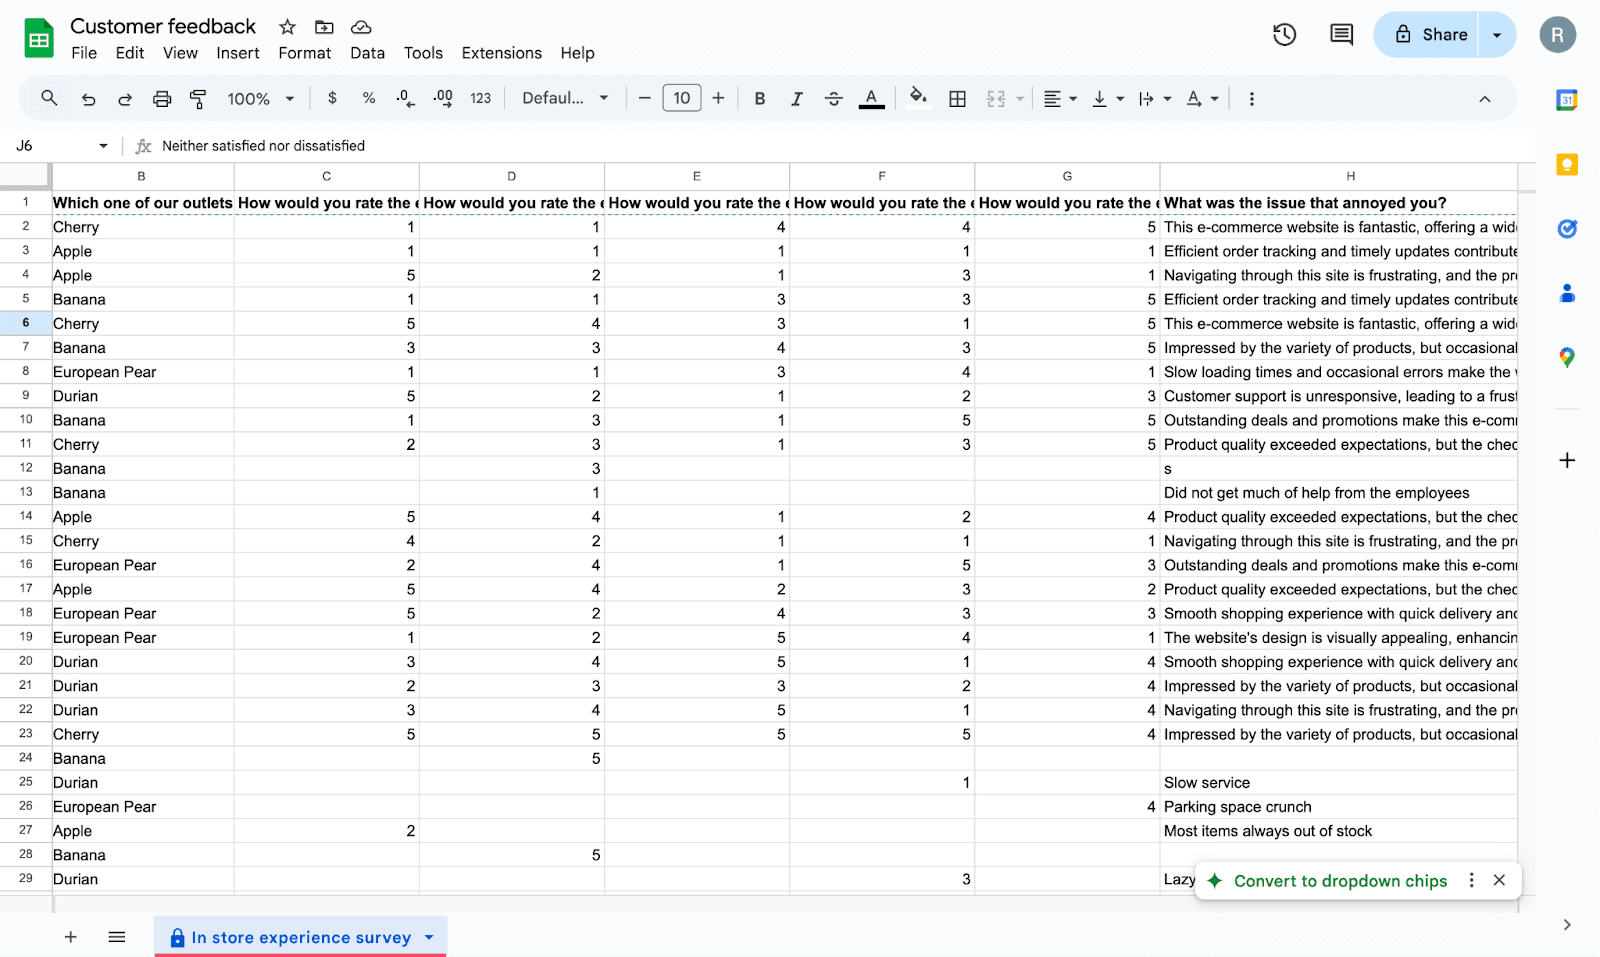
Google Sheets has a limit of 10 million cells per sheet/workbook. Therefore, when the number of responses imported exceeds 10 million, a new sheet with the same name is created to store excess responses.
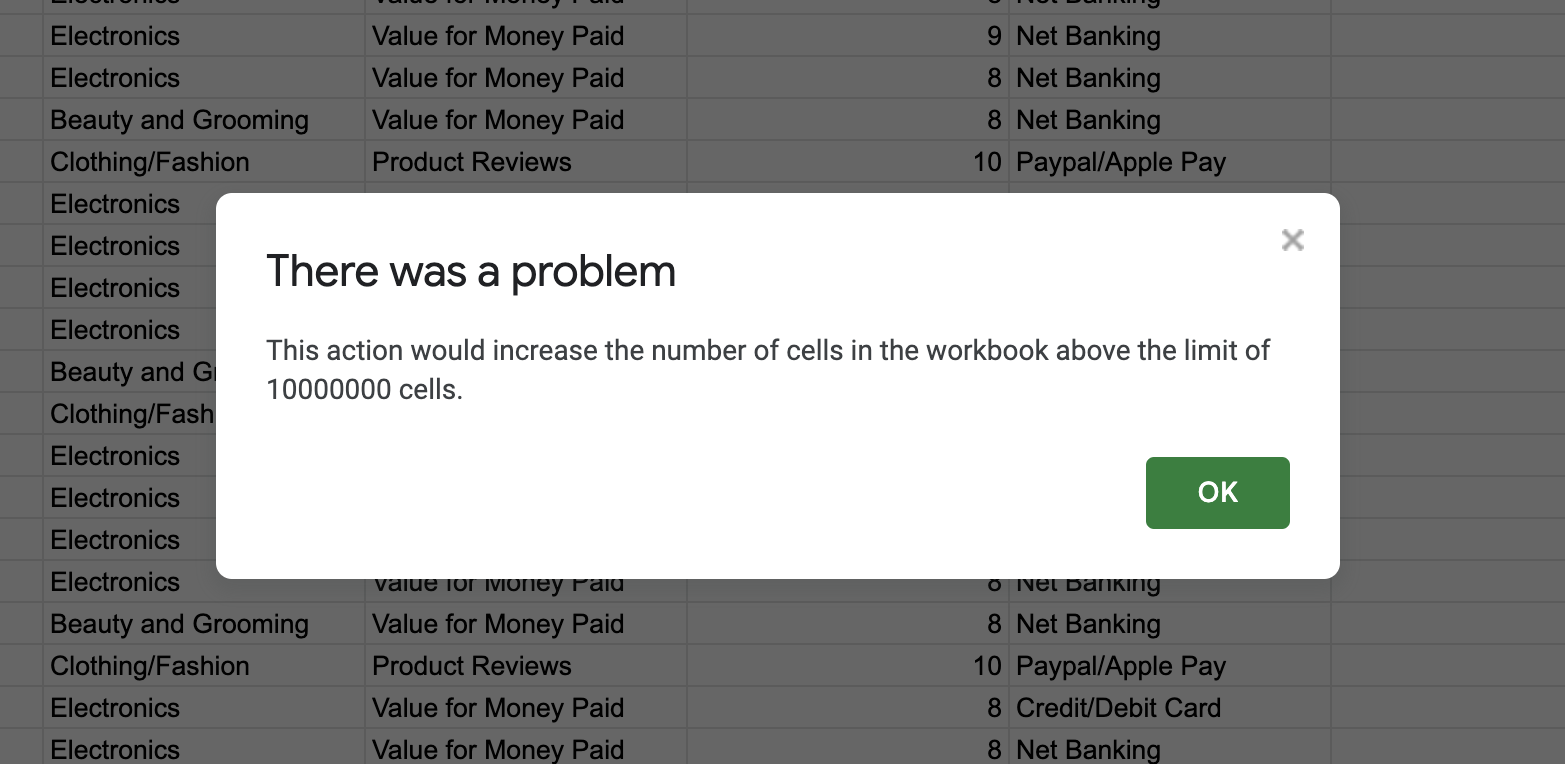
Every time the 10 million cell limit is exceeded, a new sheet with the same name is created in your drive, and previous sheets are renamed automatically.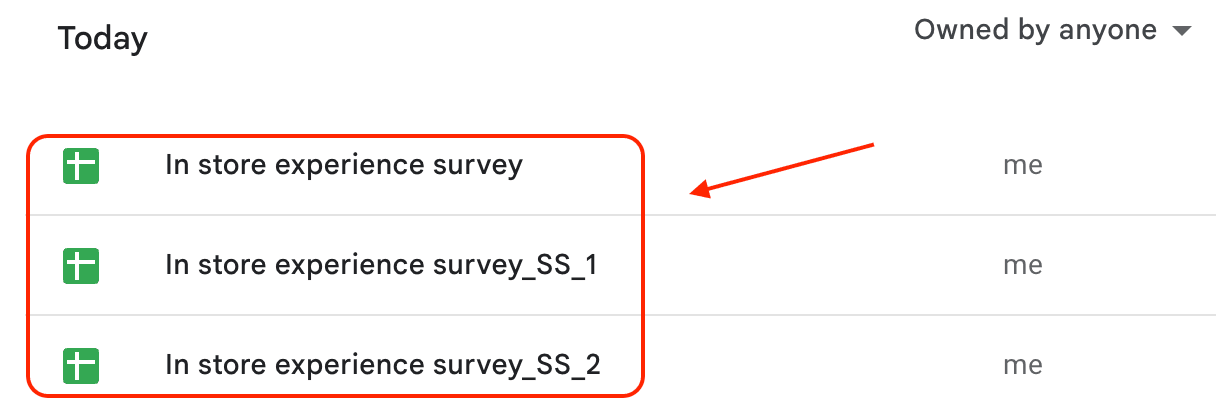
An email alert, along with the link to the sheet, will be sent to your registered email address whenever a new sheet is created.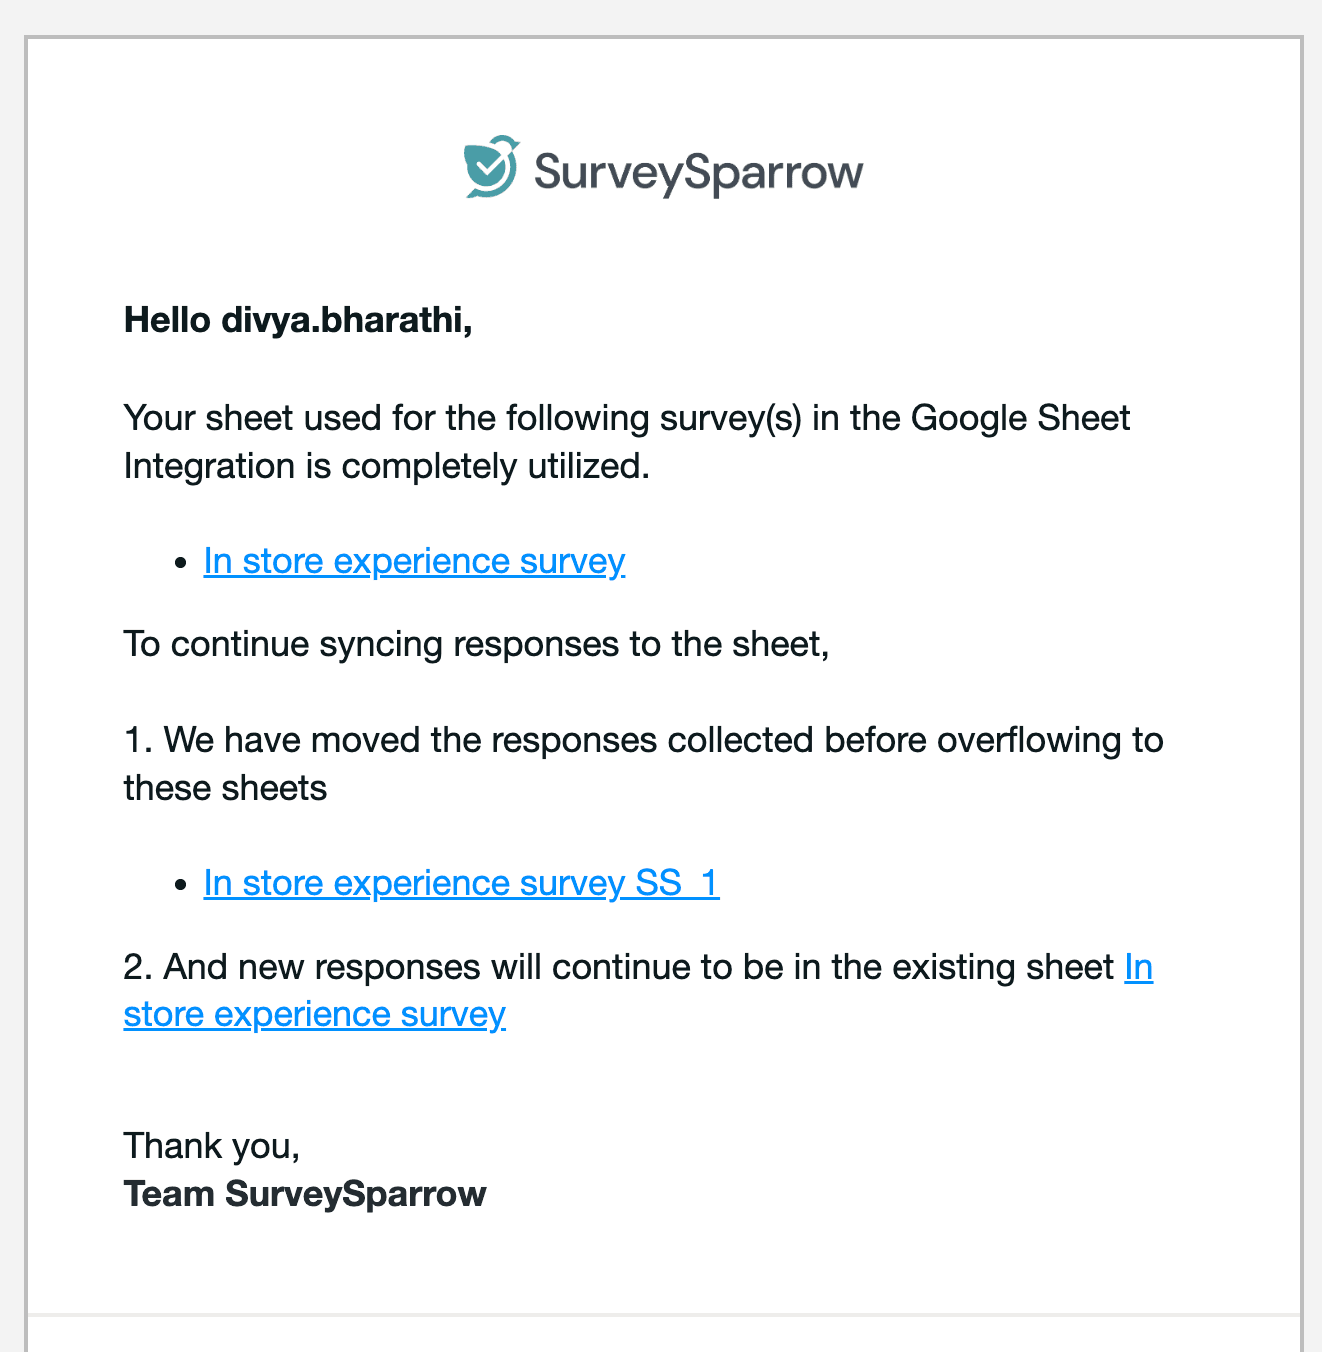
In case the sheet is not saved in your drive, an email alert asking for you to update a new sheet will be sent to the registered email address.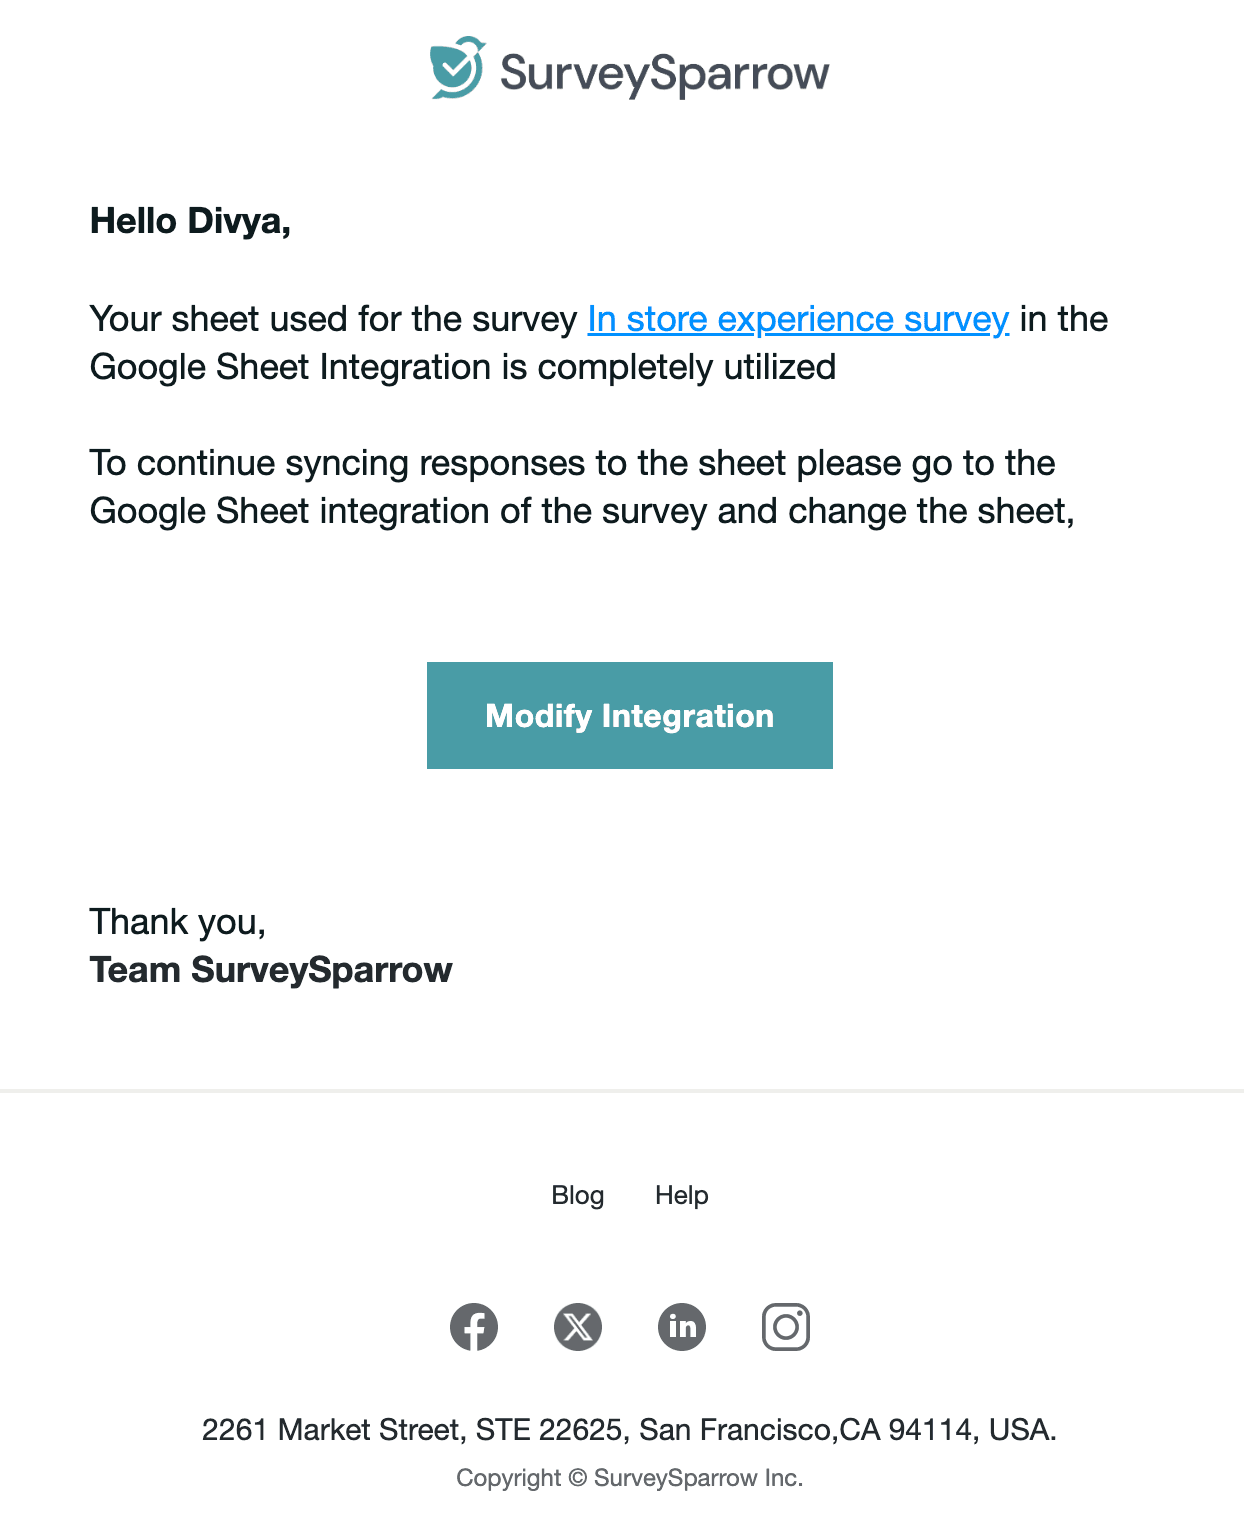
Upon adding a new sheet, you can simply turn on the sync option that is right next to the Google Sheet Integrations toggle will enable you to retrieve all the previous data to the new sheet.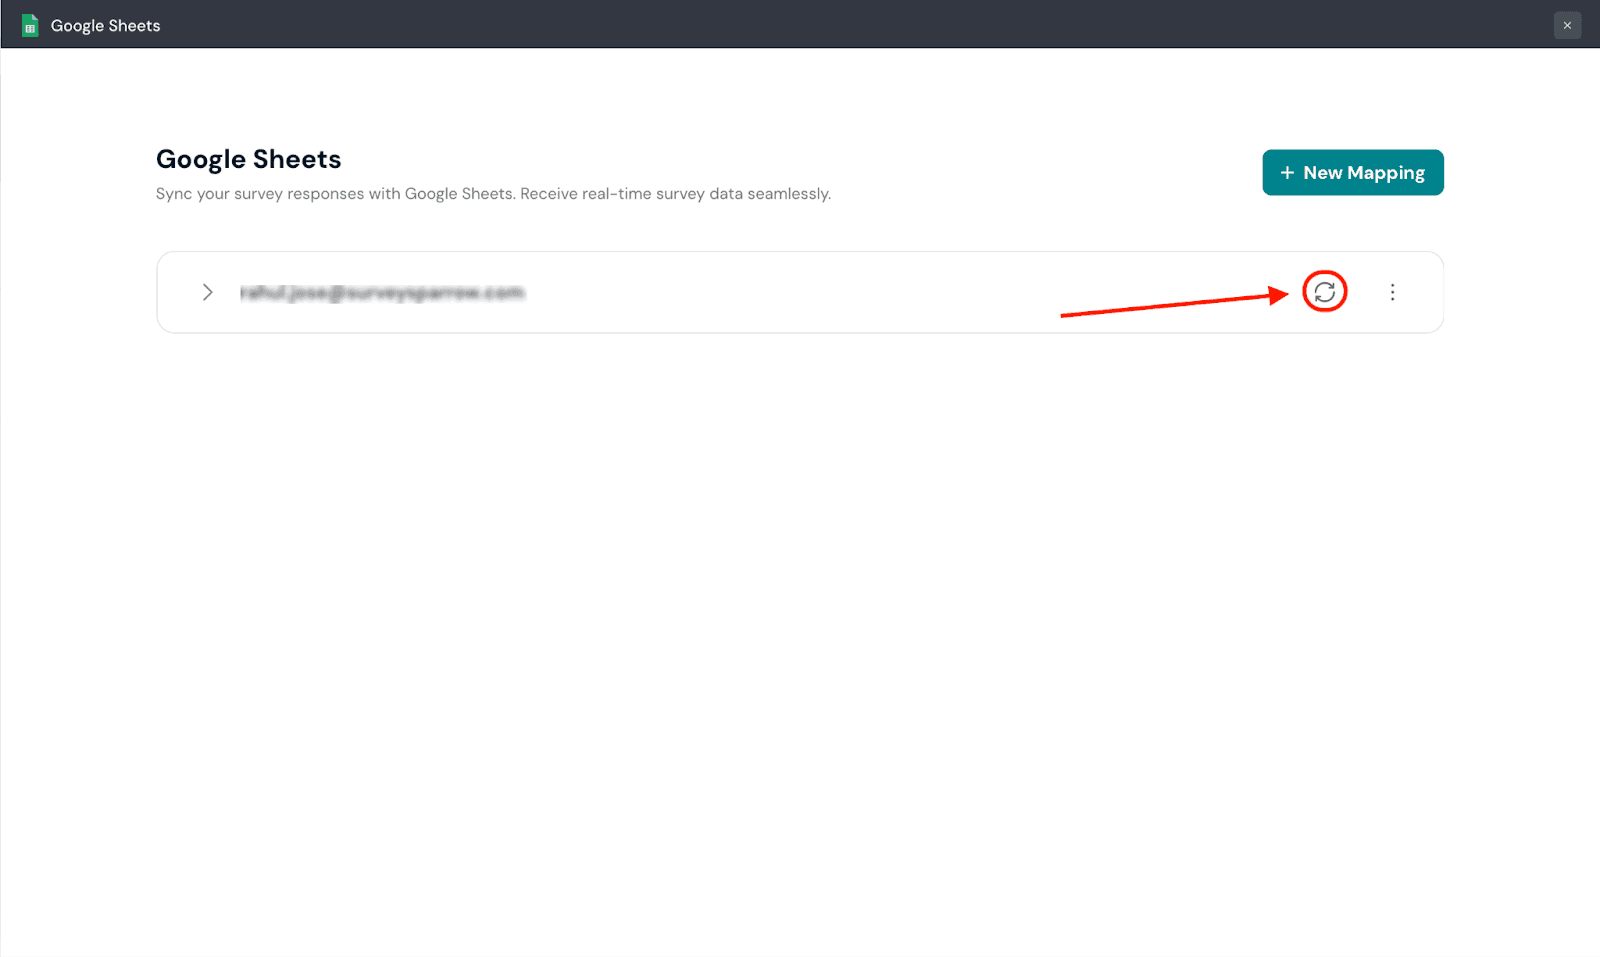
Now, you’re completely prepared to make the most of Google Sheets to manage your survey data. But if you’re looking to do something more, we have an add-on for Google Sheets. Visit this article to learn more.
Feel free to reach out to our community, if you have any questions.
Powered By SparrowDesk