Search
If you're running your business on Shopify, SurveySparrow's app makes it effortless to collect customer feedback at different stages of the post-purchase journey via survey triggers. It can be used in situations including but not limited to:
These insights will improve your product quality, drive impactful business decisions and ultimately build meaningful customer relationships.
Let’s see how the integration is set up.
1. Once you set up a store on Shopify, you can install the SurveySparrow app with the help of our support team.
2. Next, sign-up or log in to your SurveySparrow account.
3. Once you log in, create a new survey or open an existing one.
Now, let’s Create Triggers based on events occurring in your Shopify Store
4. Open the SurveySparrow app in Shopify.
5. To create a new trigger, click on the New Trigger + button.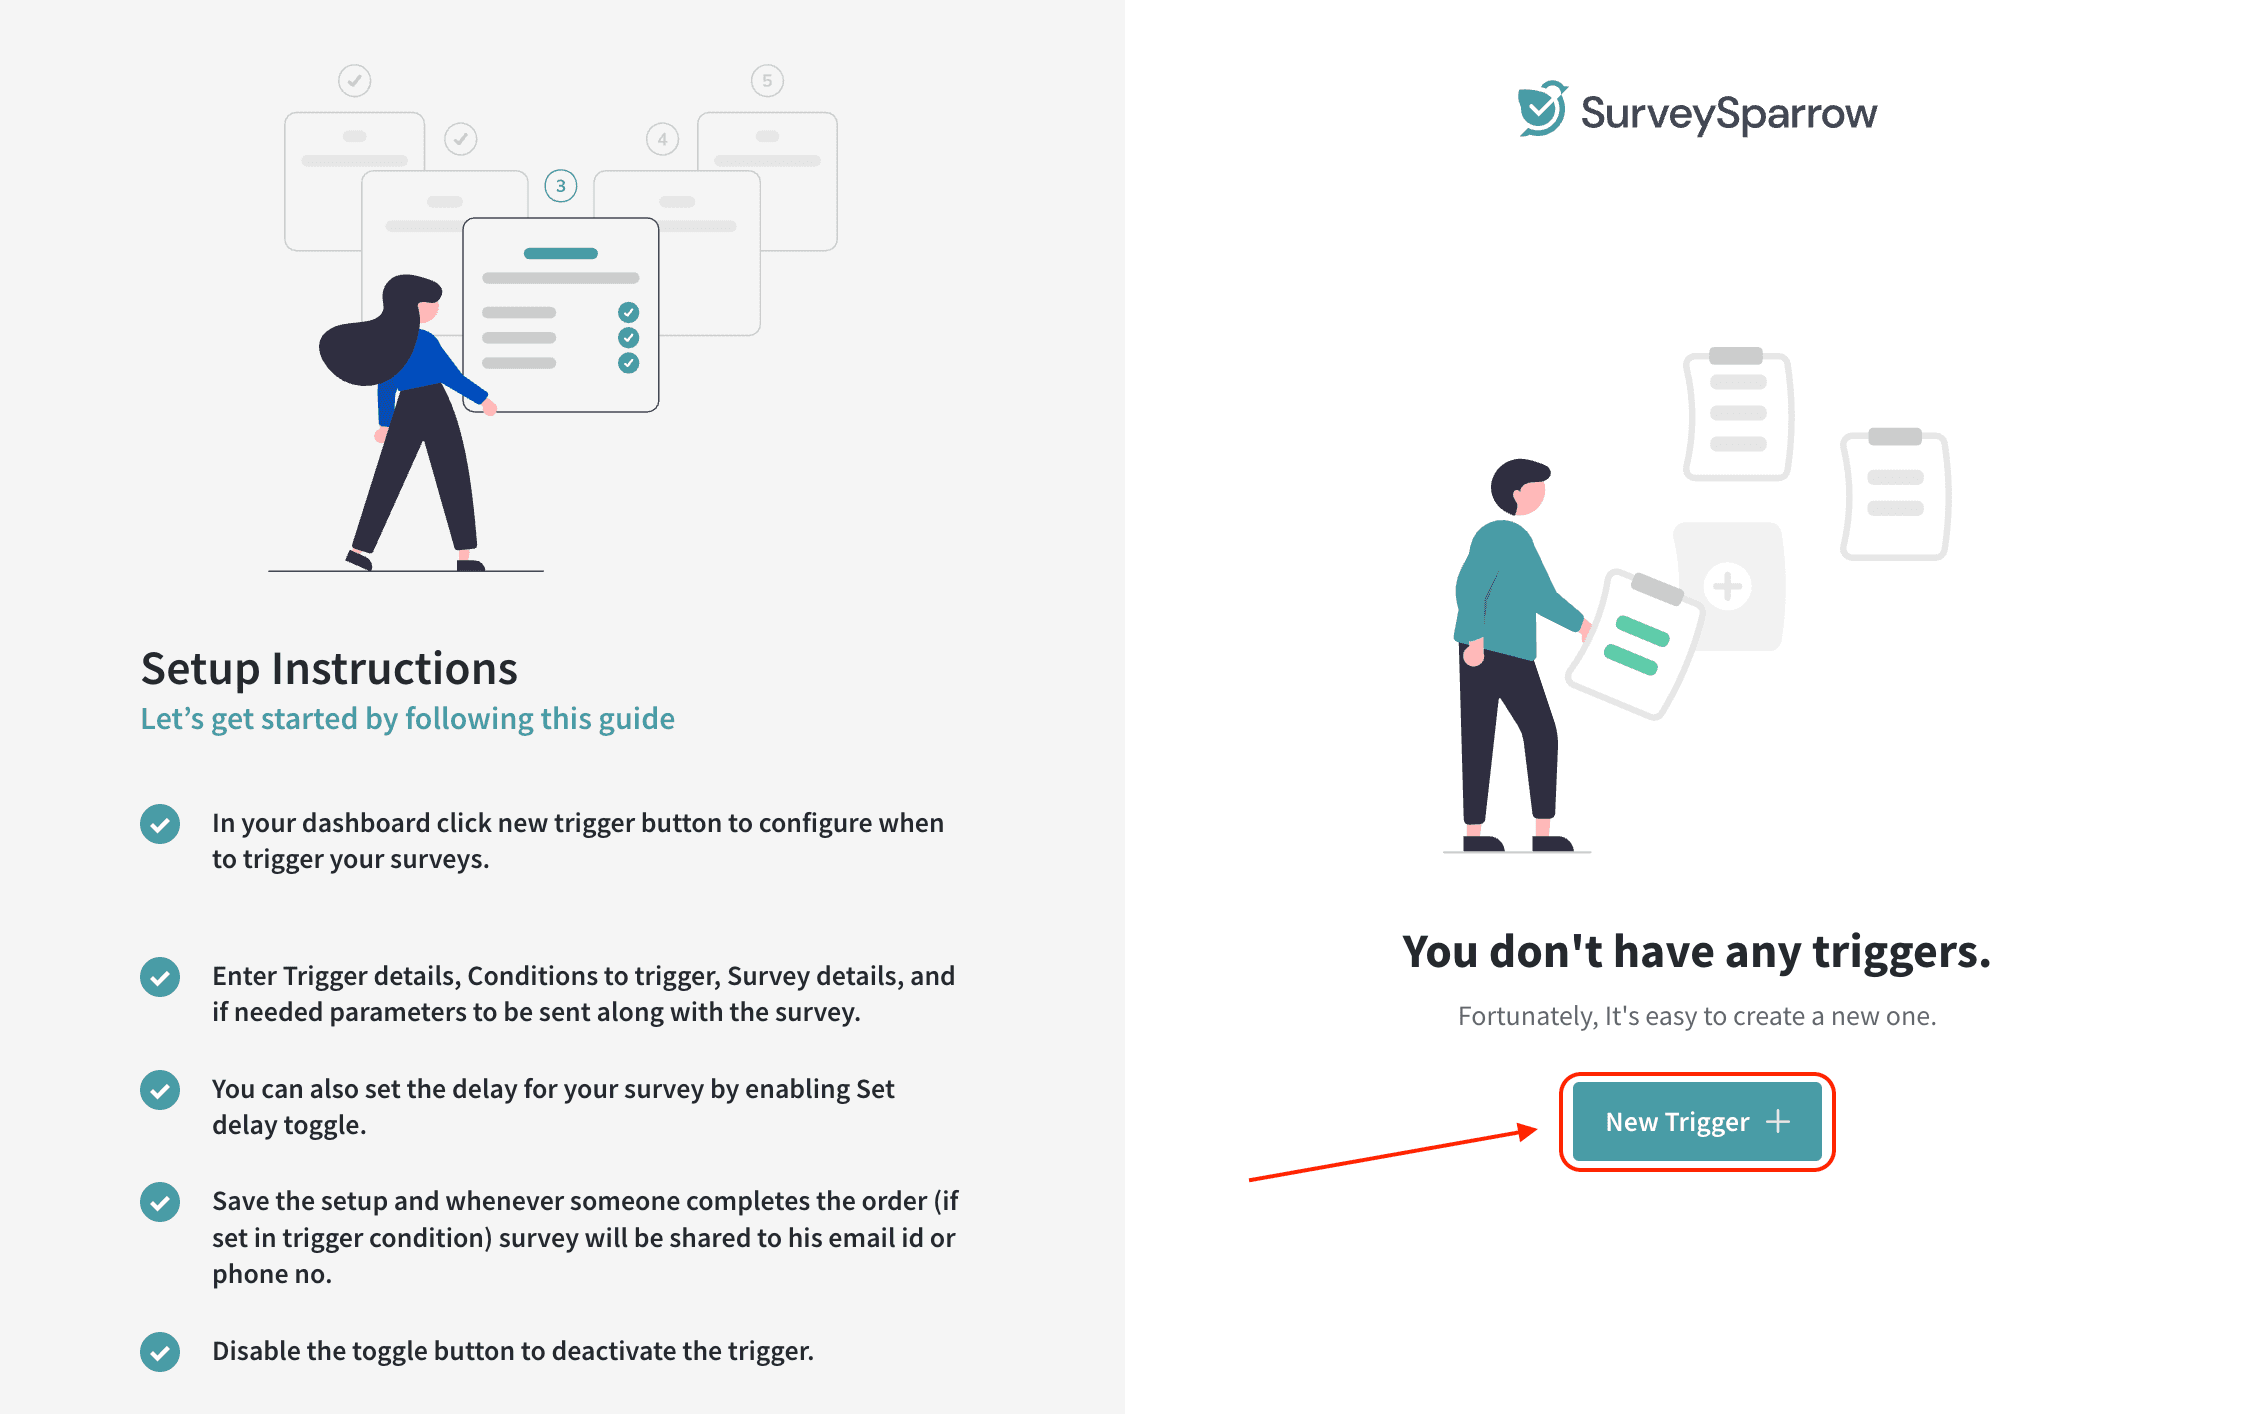
6. Enter the Trigger Name and Description for your future reference.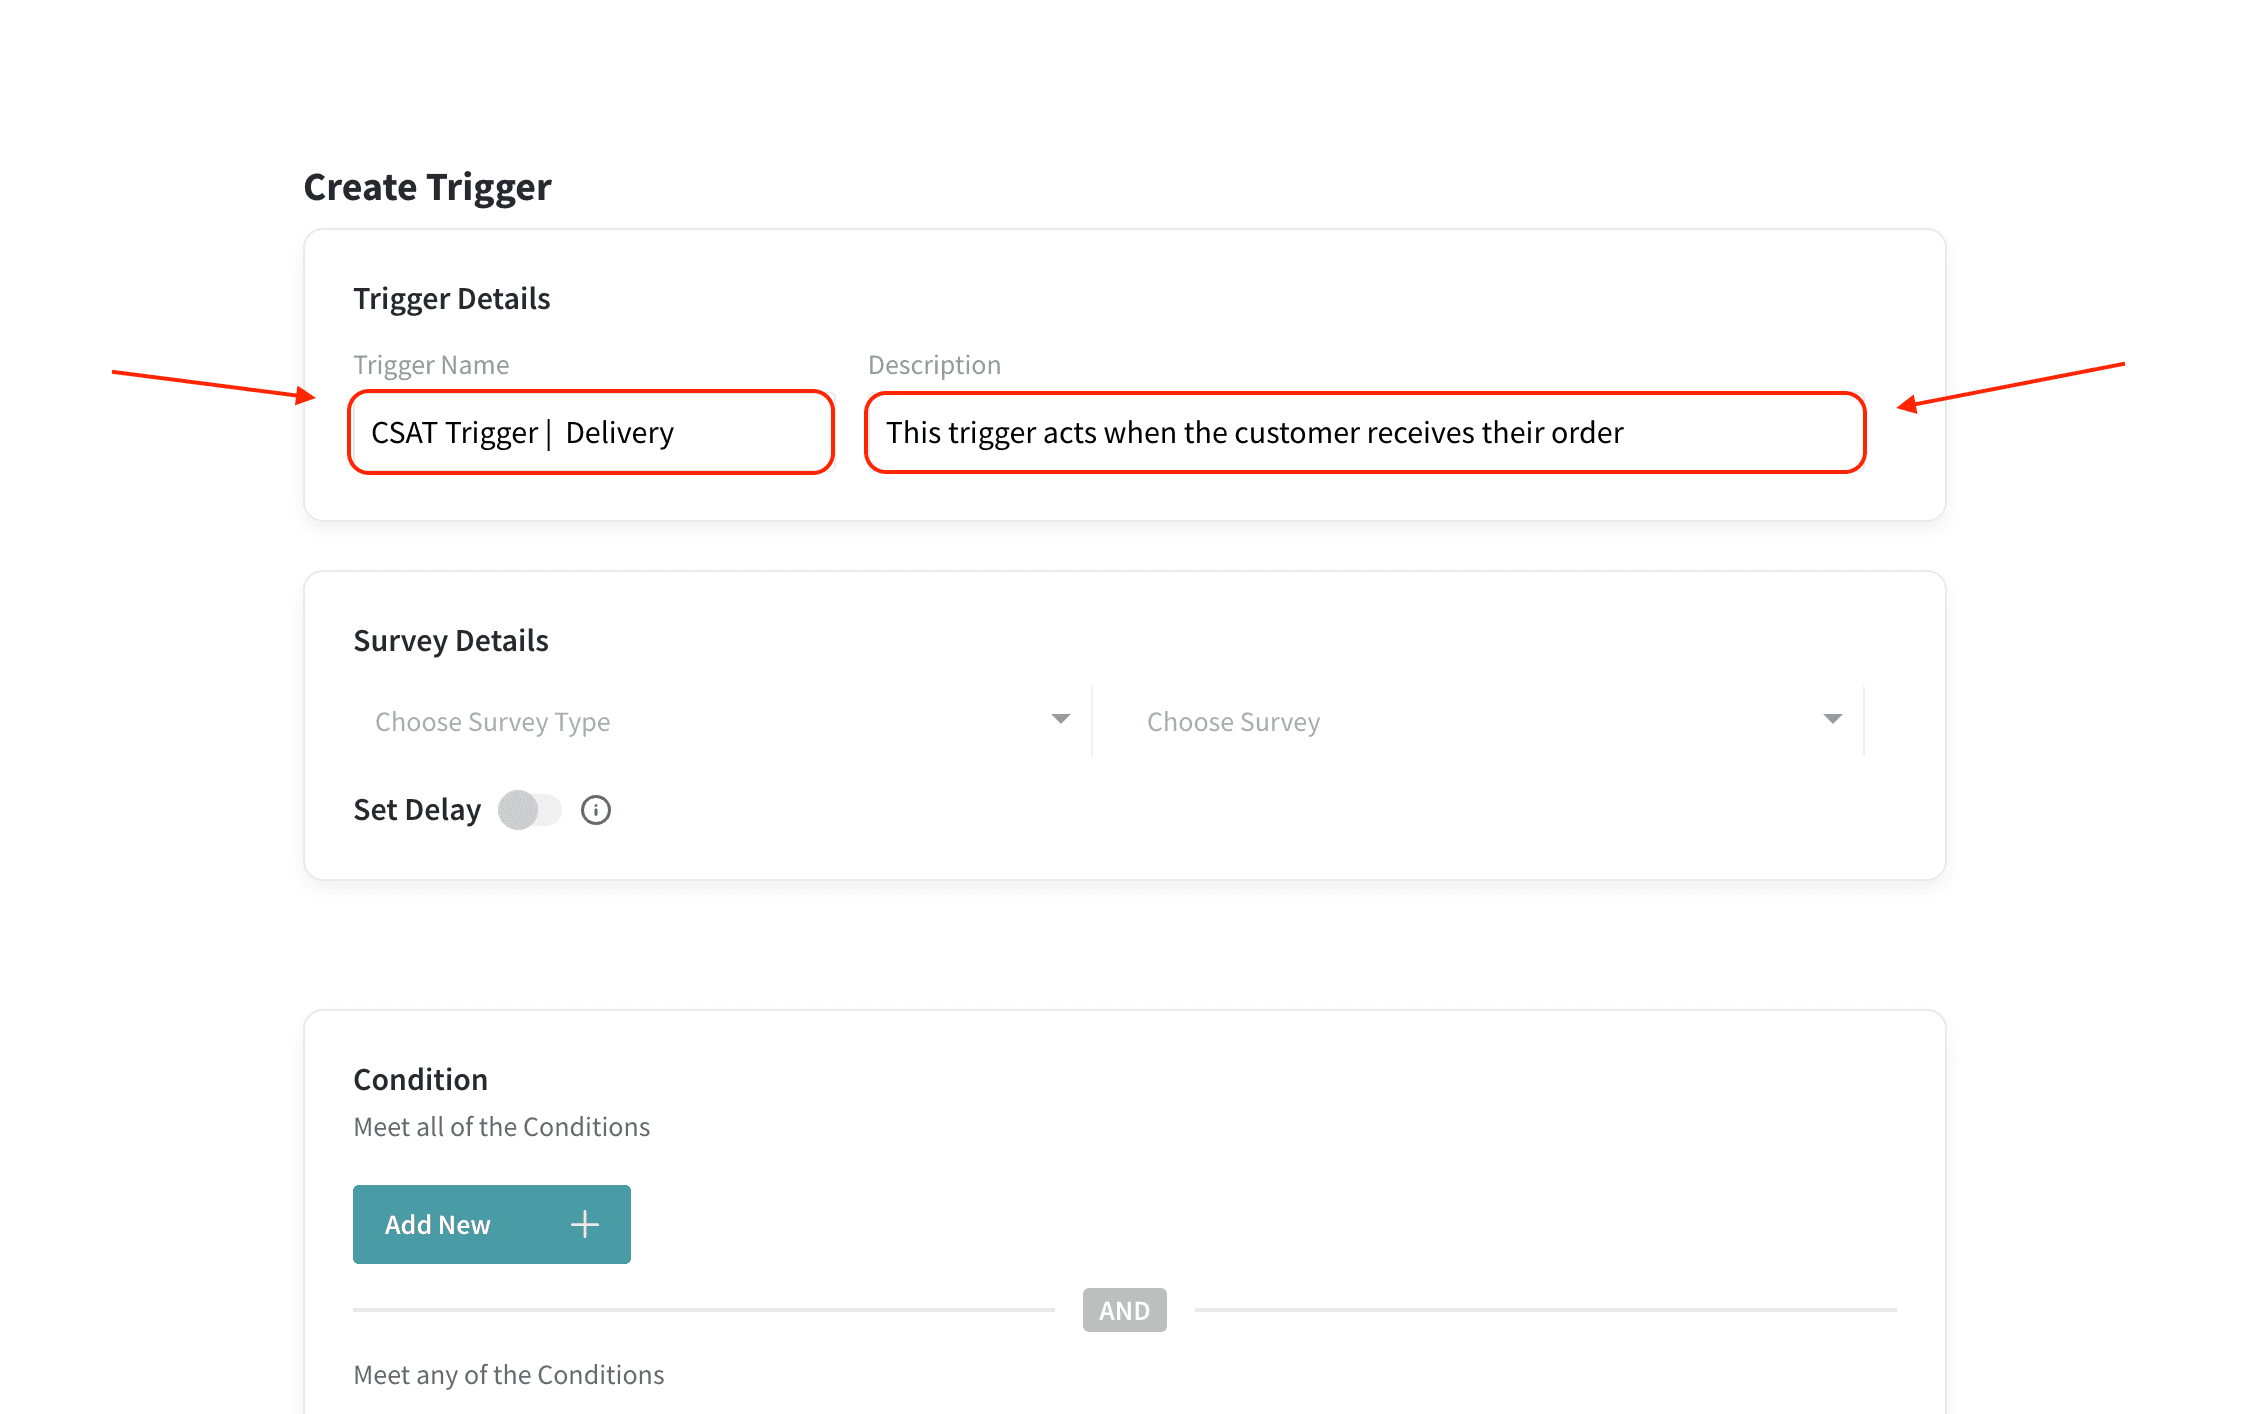
7. Next, you must choose a survey. Choose the survey type and the corresponding survey in your SurveySparrow account, by clicking on the respective drop-down menus.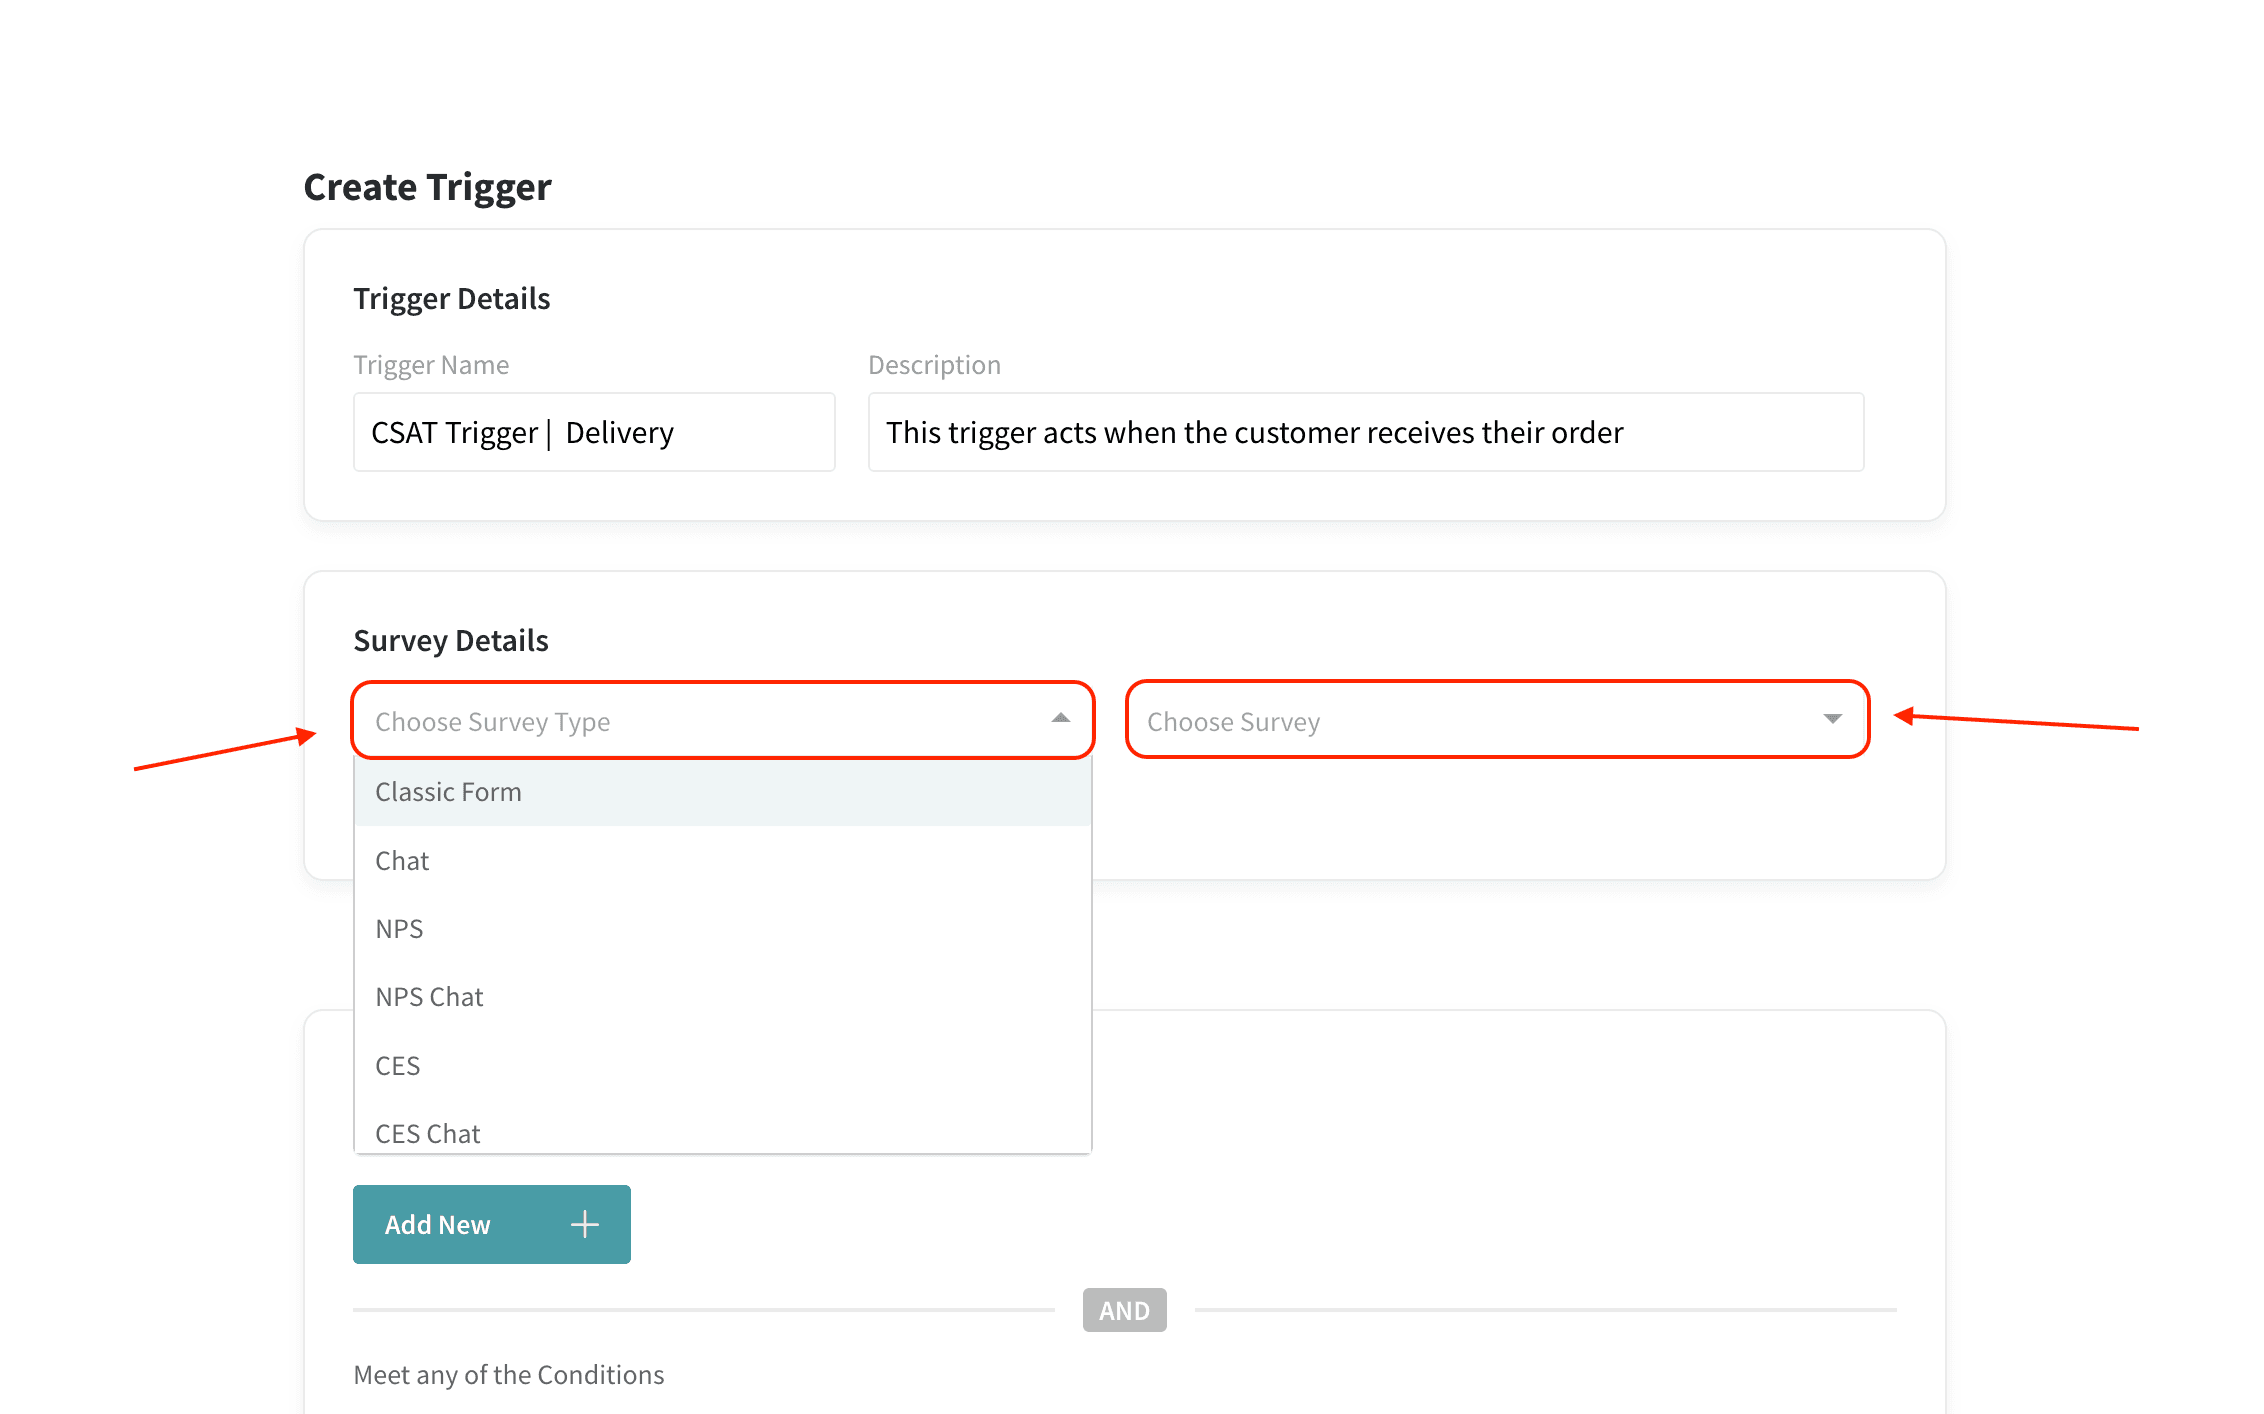
Note: If there are no surveys matching the survey type you select, you will receive an error message.
8. You also have the option to set a buffer period (in days) between the trigger event and the survey deployment if required. All you need to do is click on the toggle next to Set Delay, then type in the number of days.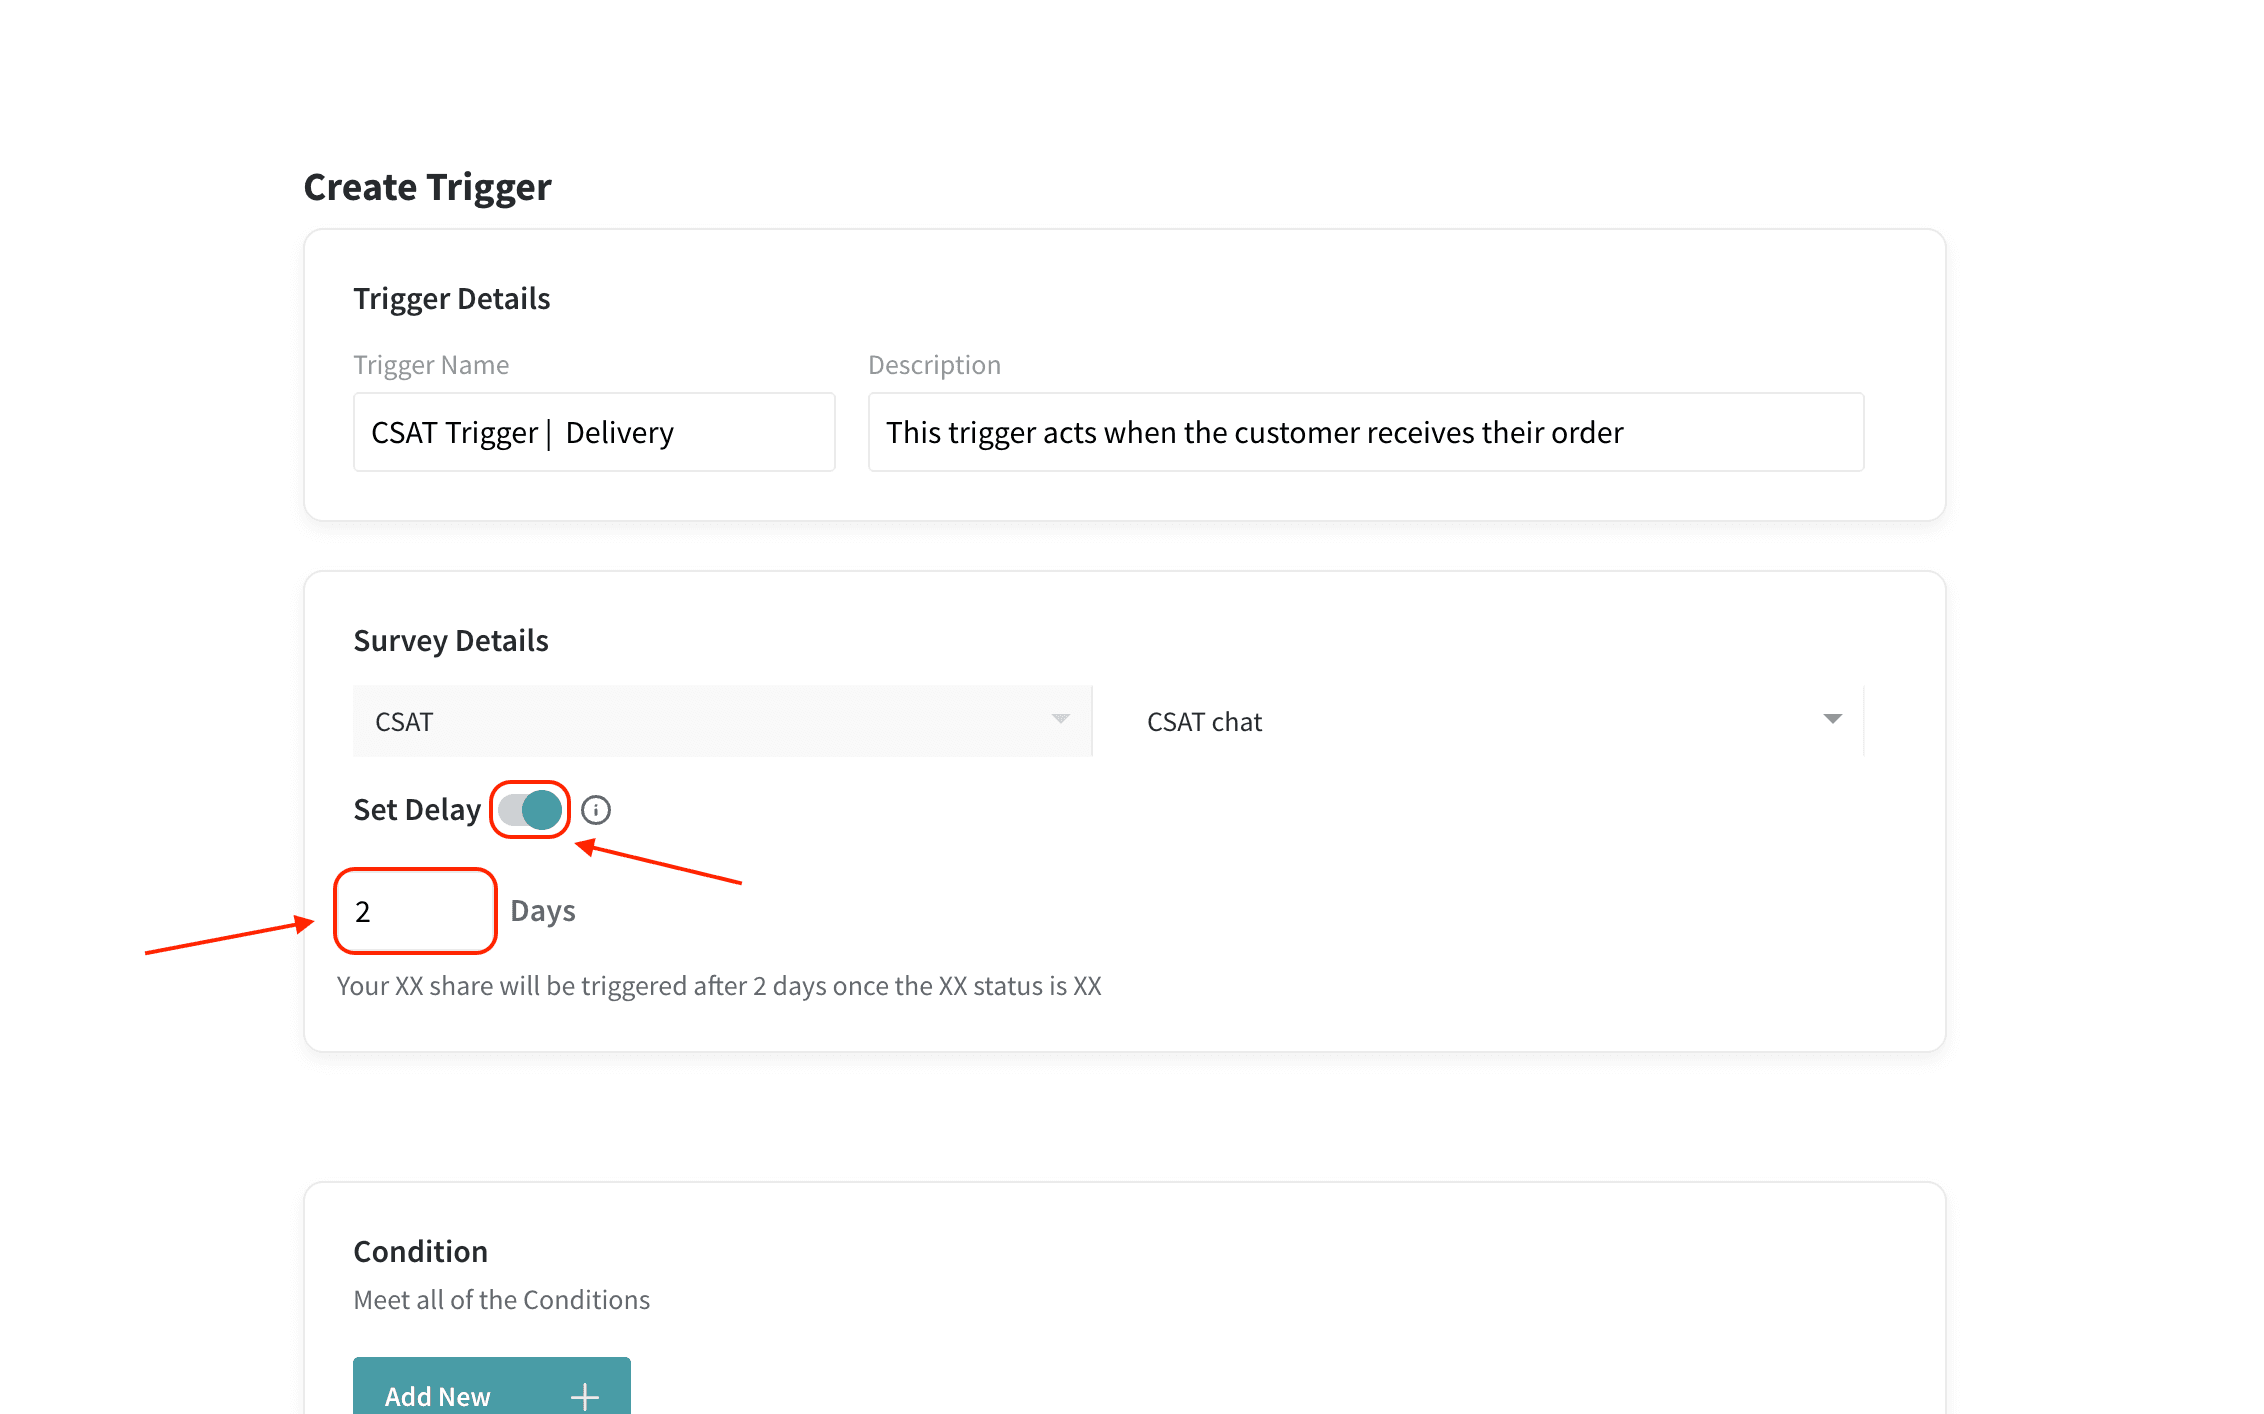
9. Now, you need to create the conditions for the trigger to act. You can create a maximum of 2 conditions. Click on Add New+.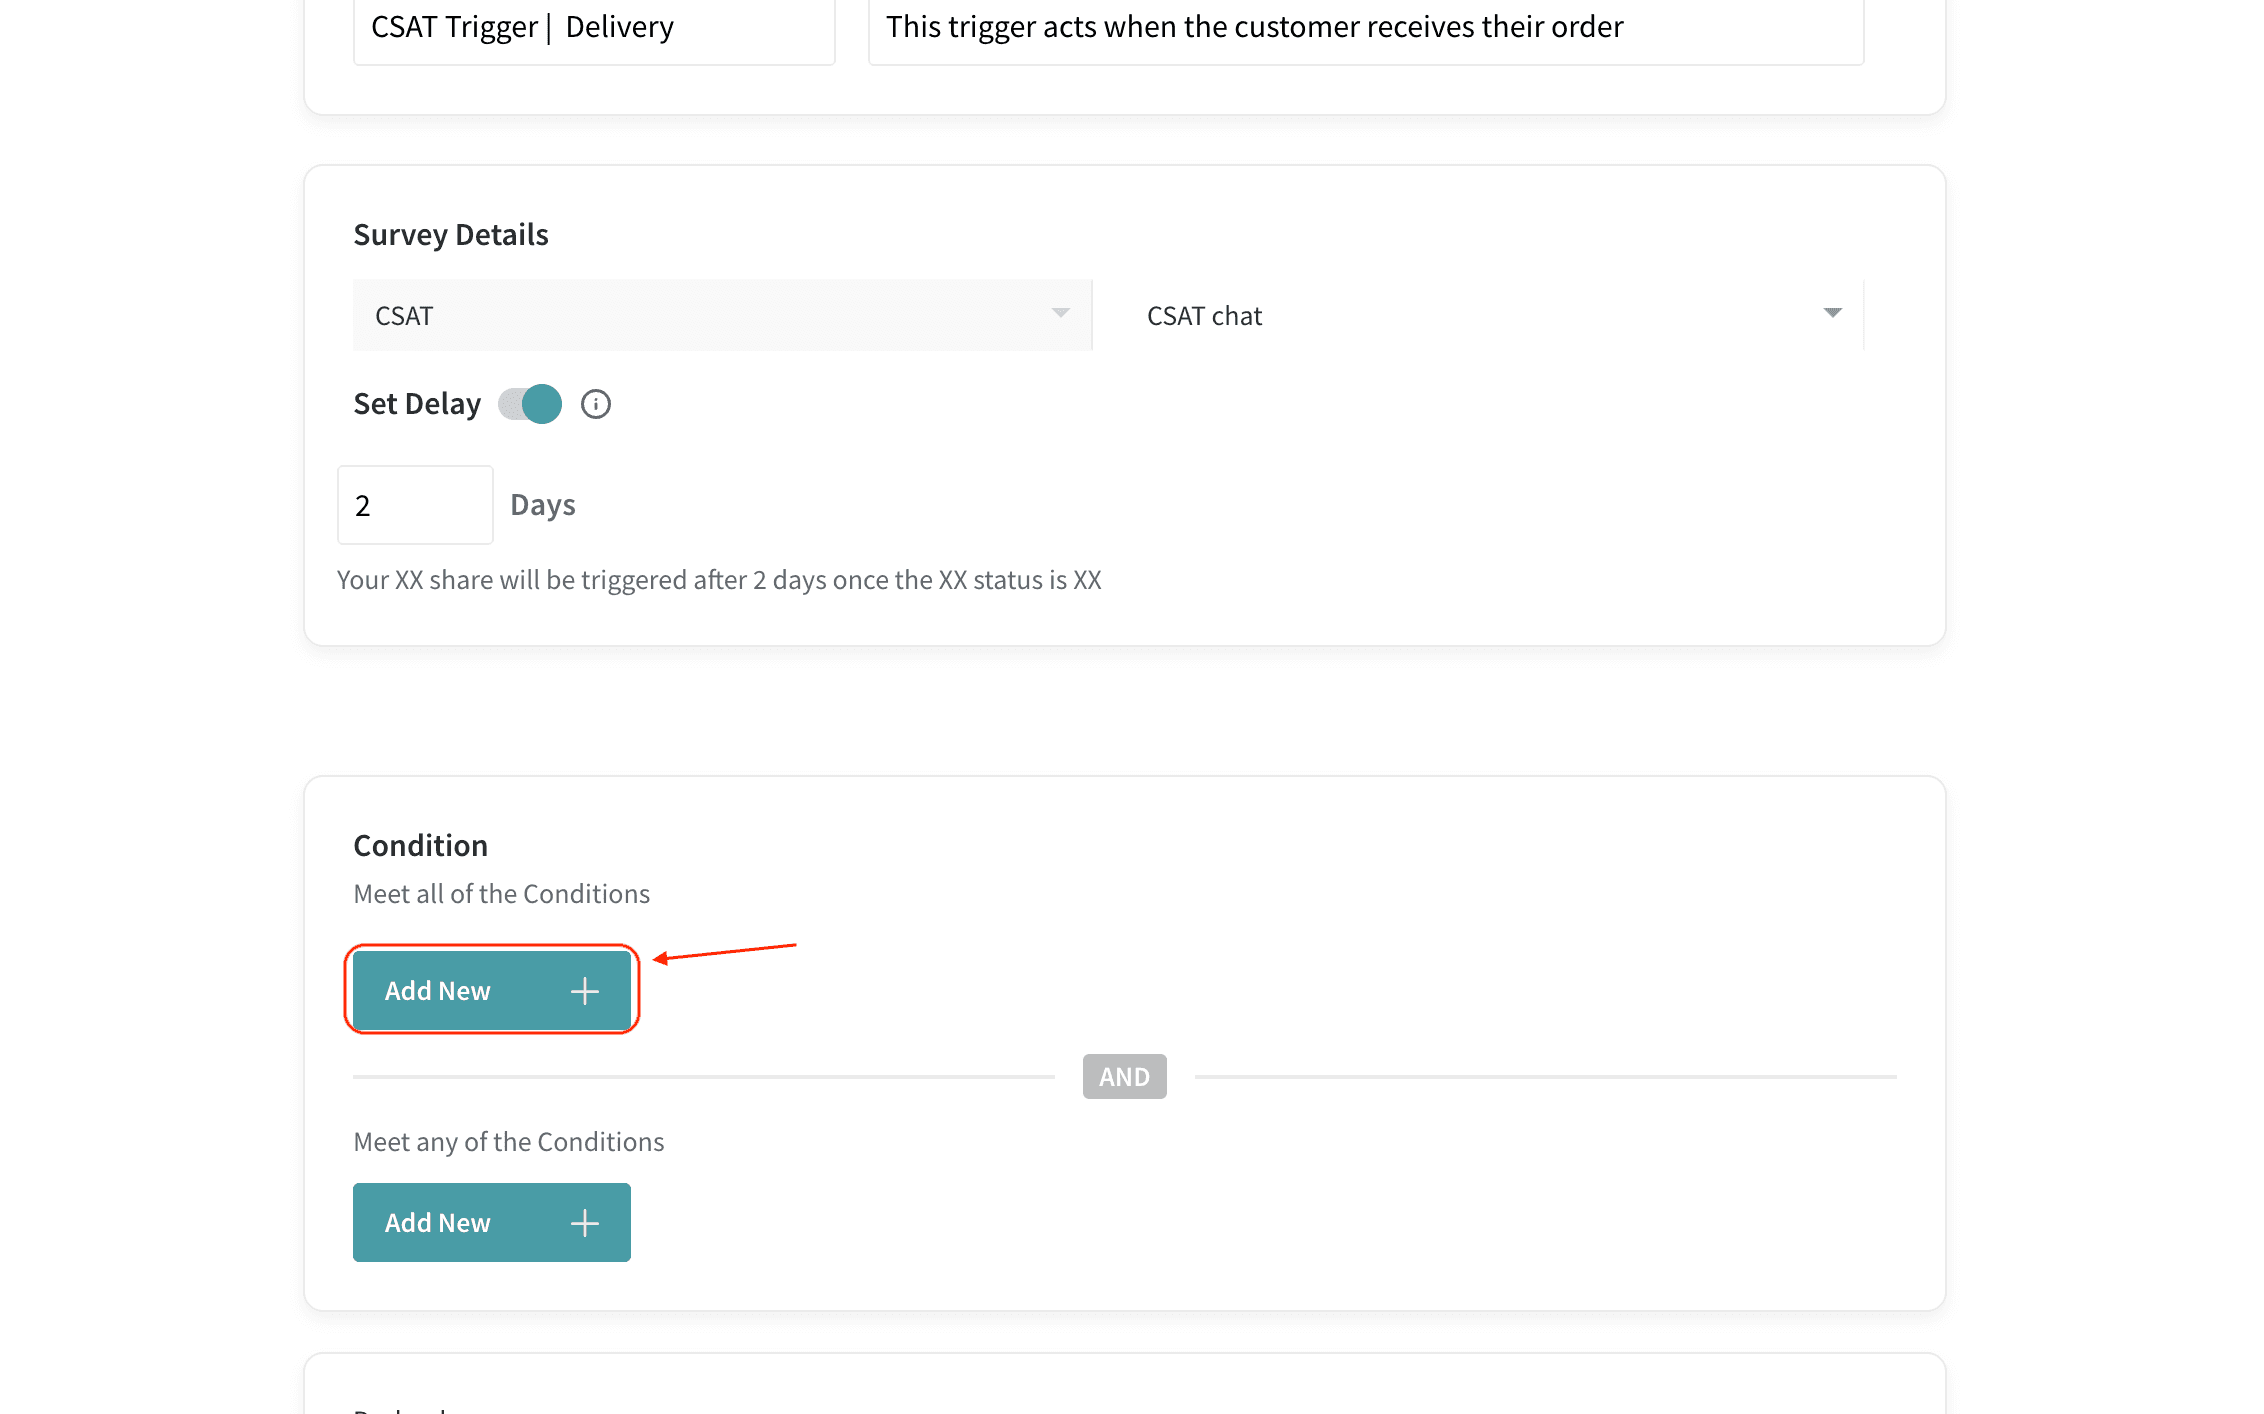
10. Start building a condition by selecting an object. There are 5 objects to choose from: Order, Product, Customer, Shipping Address and Payment. For this example, let's use the Order object.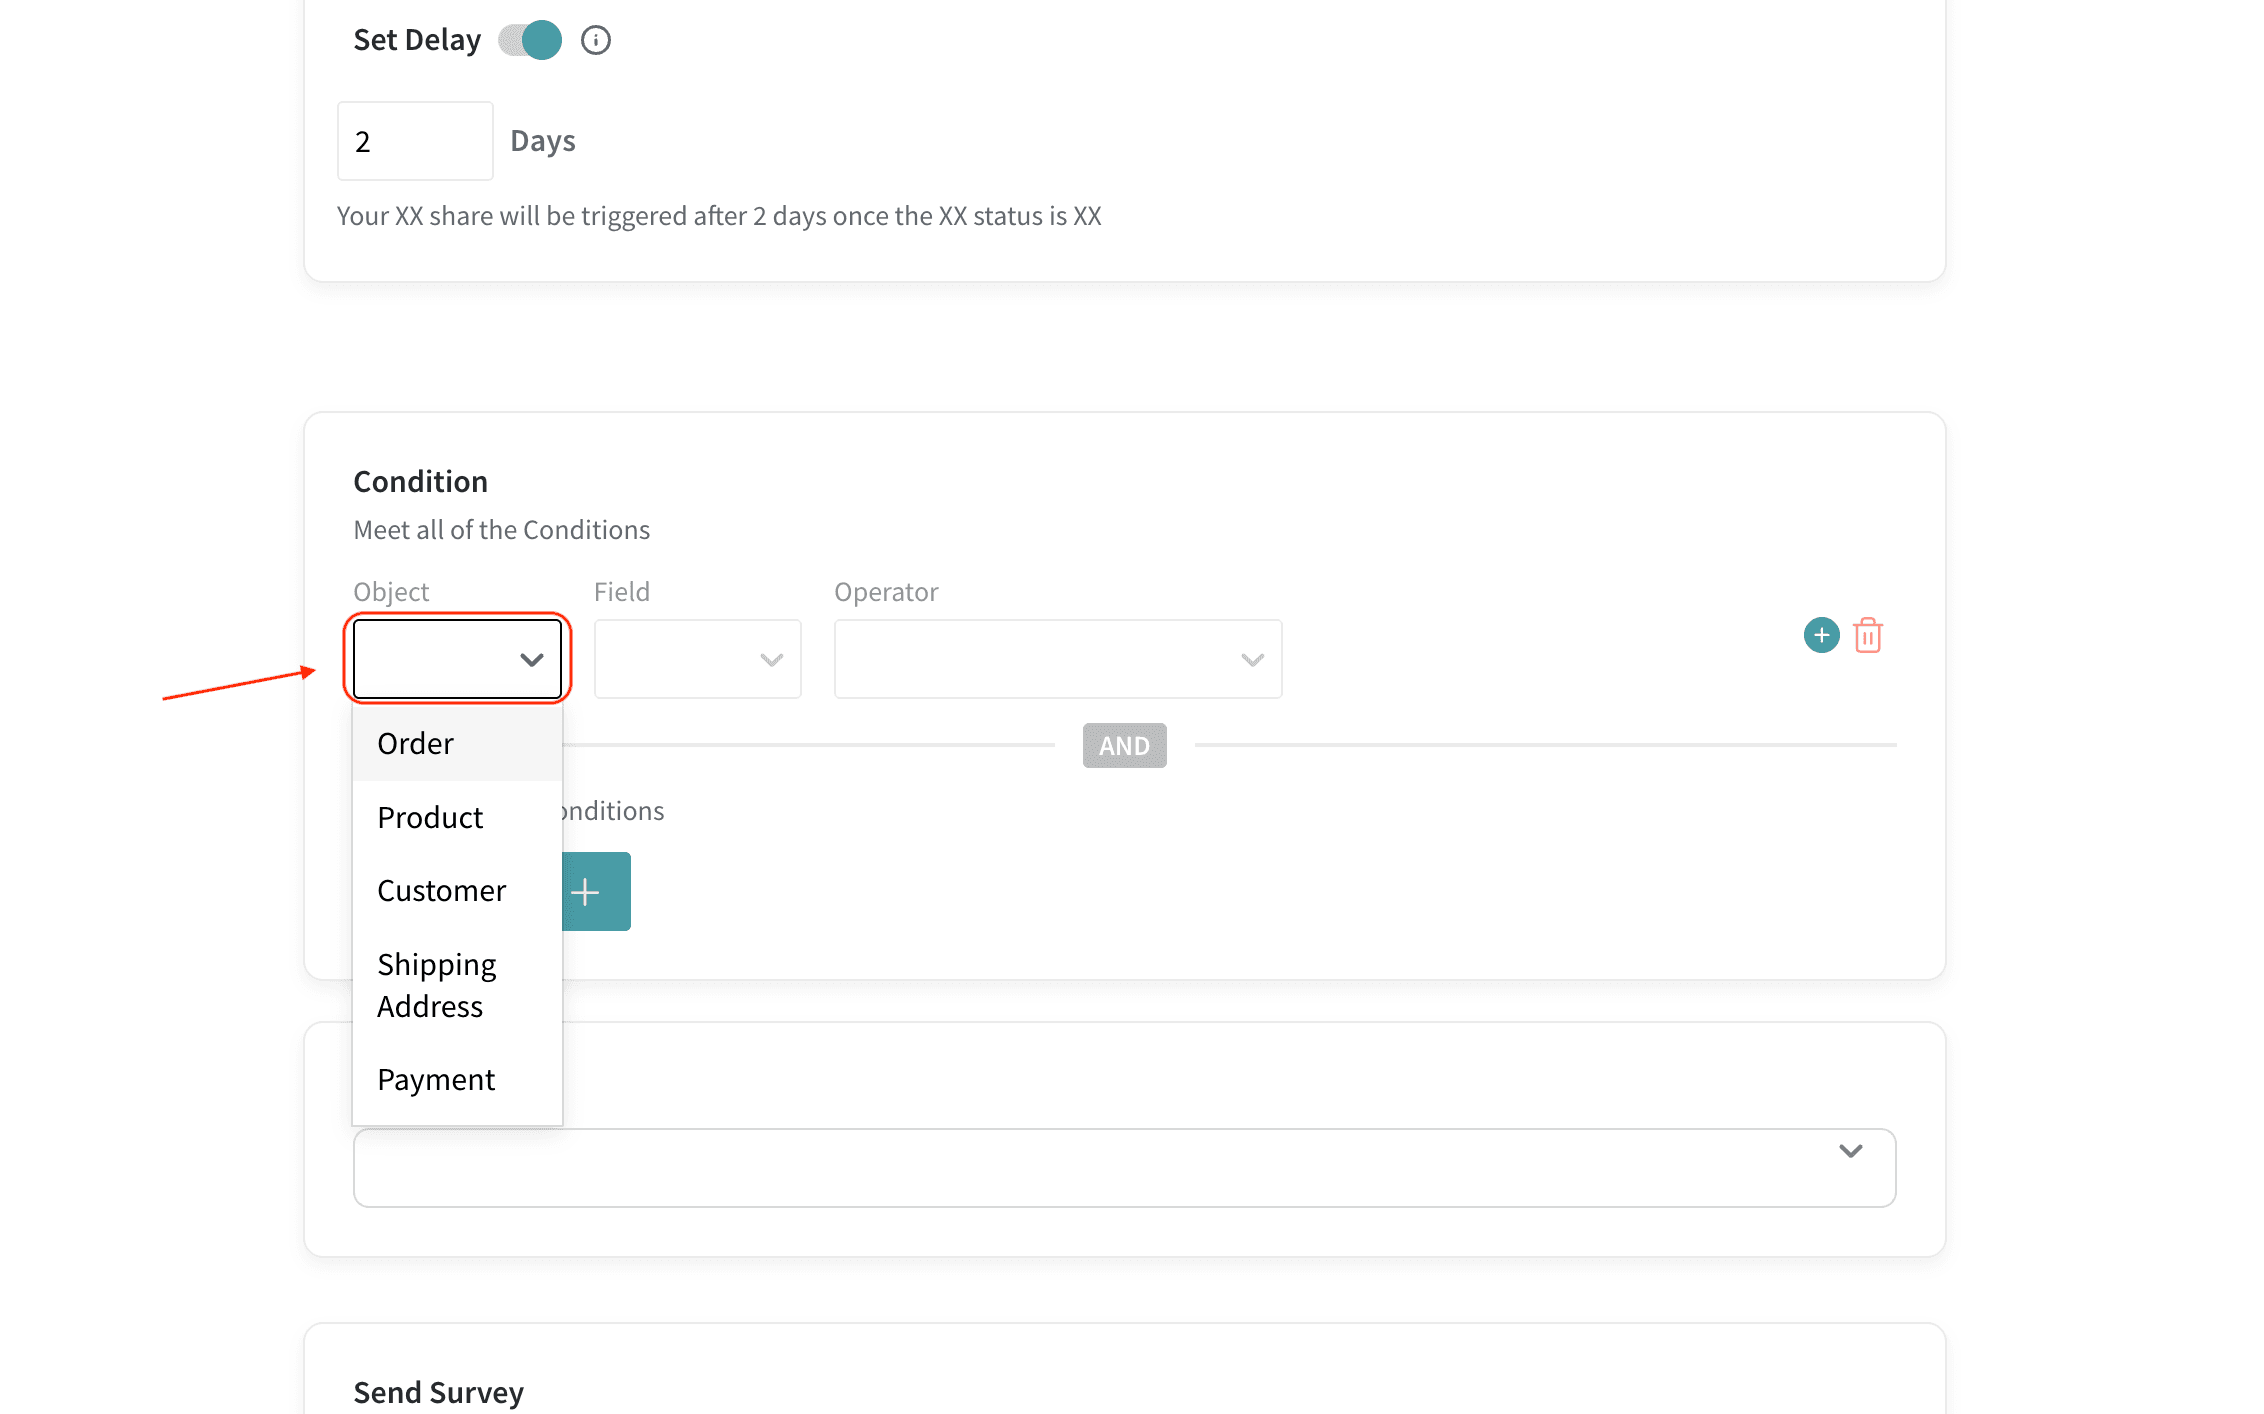
11. Next, you must select an attribute of the object from the Field drop-down. For the Order object, you have 8 fields: Status, Tag, Note, Source Name, Discount Codes, Total Discounts, Vendor, SKU.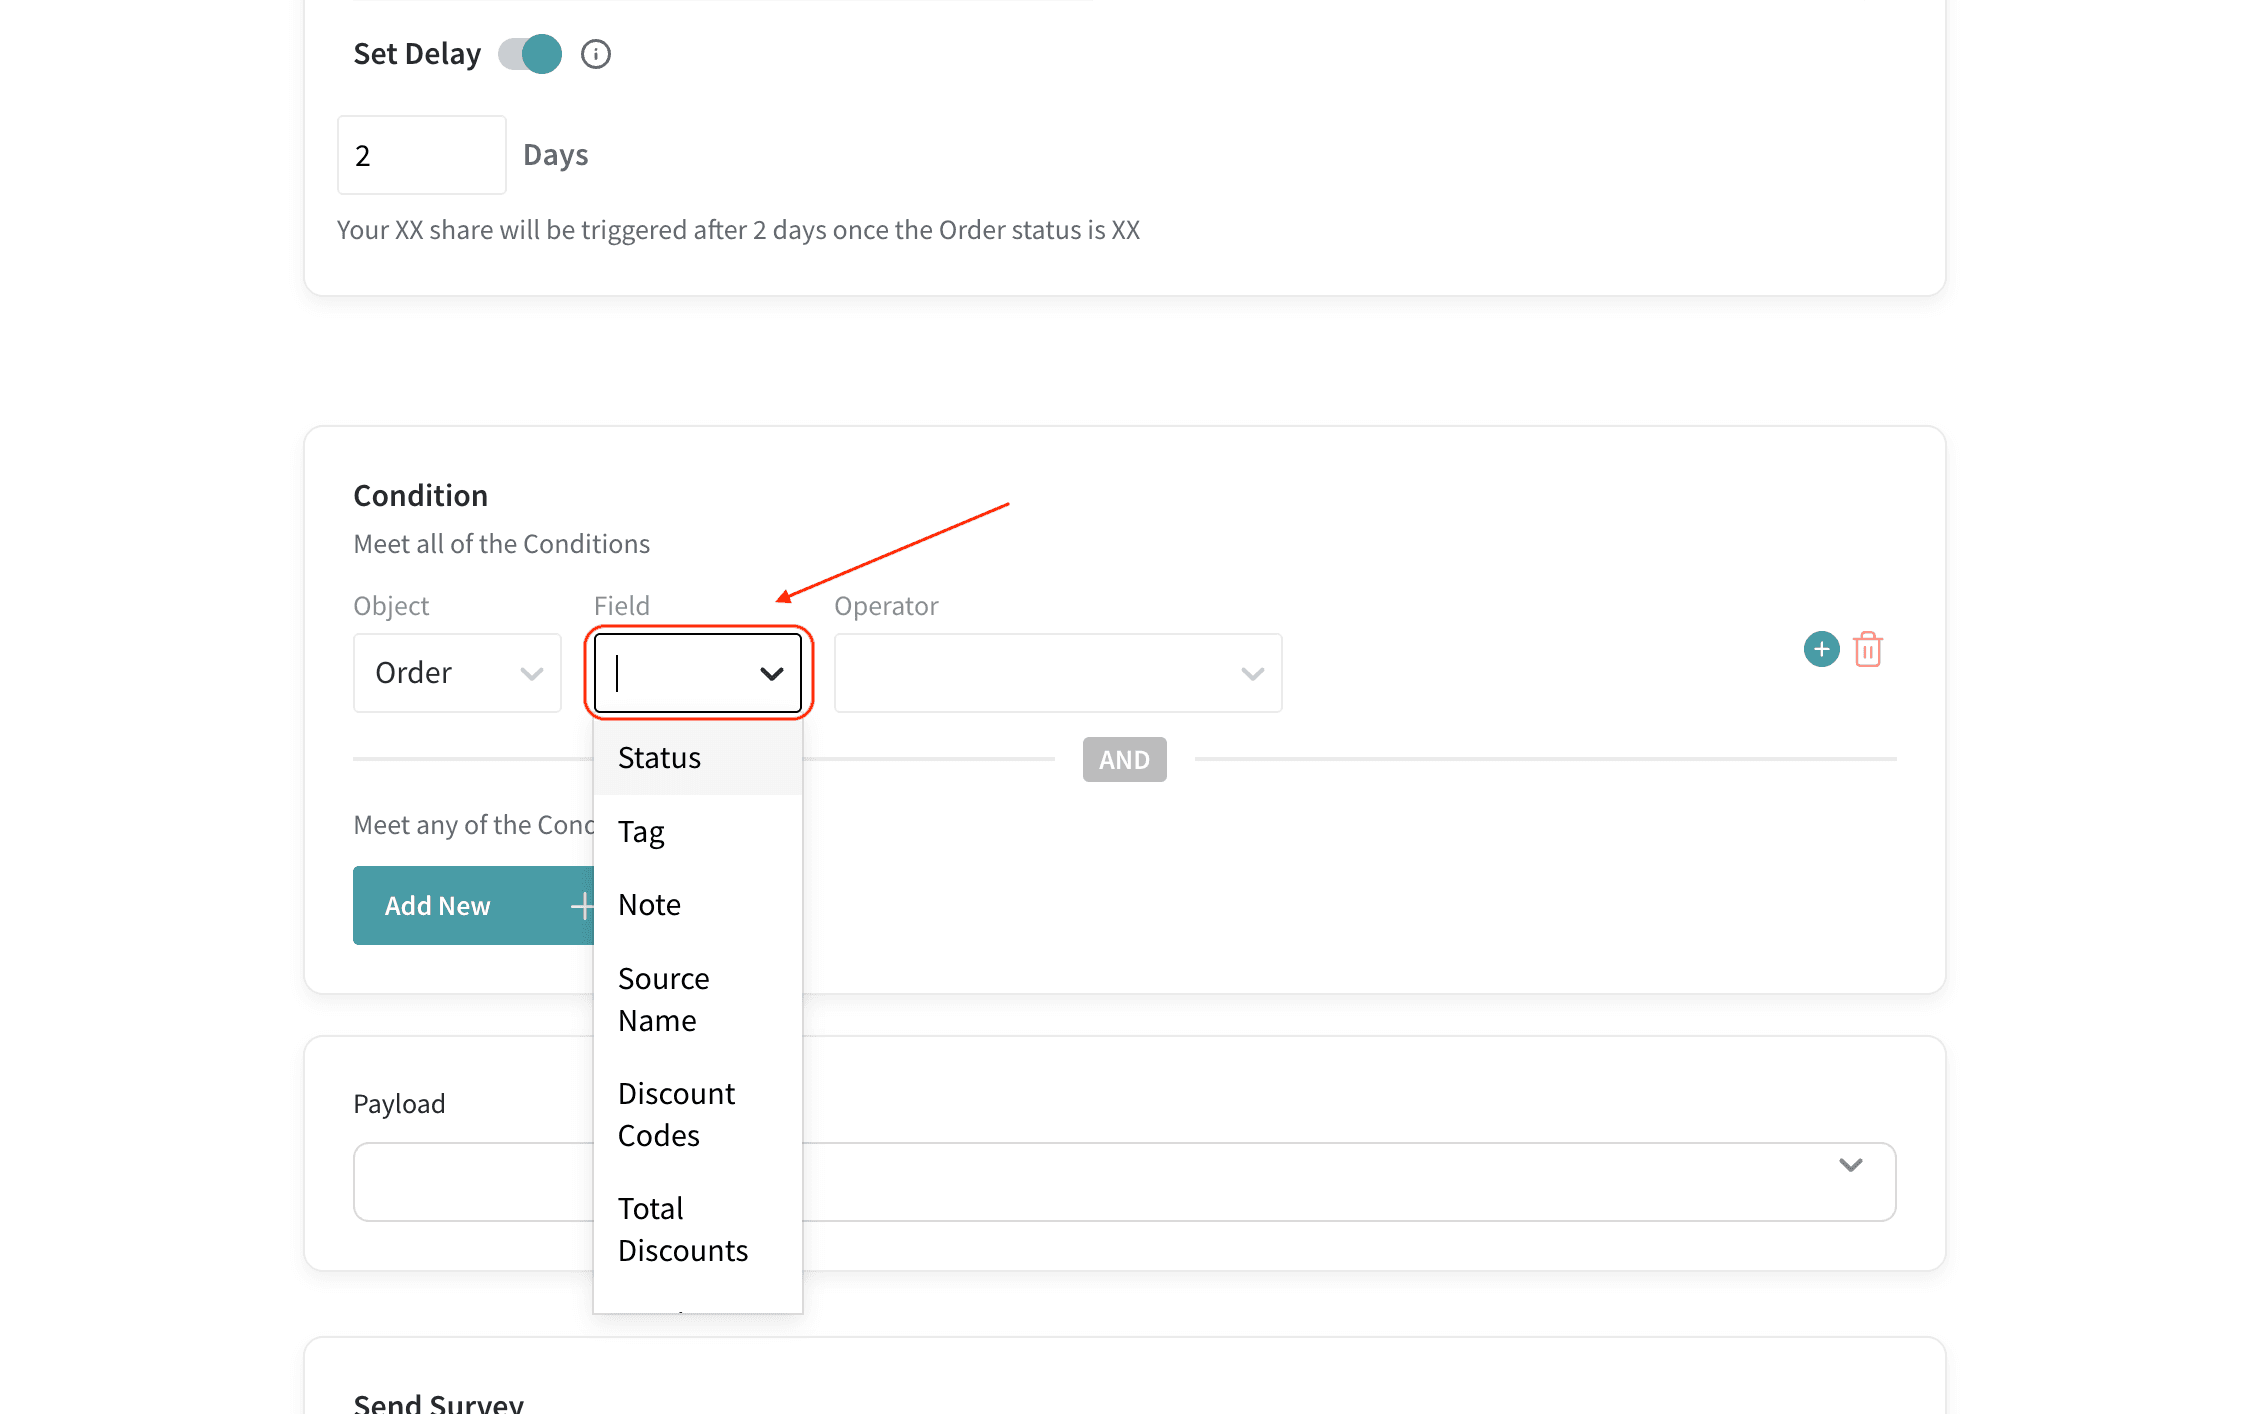
For this example, let choose Source Name. This filter allows you to sort out orders based on the source (online store or Shopify PoS).
Note: Other key objects to be aware of are Product and Customer.
For the Customer object, there are 2 fields (SMS marketing consent and Email marketing consent), which can be very helpful to ensure that you don't inadvertently spam customers who are not part of your marketing lists.
12. Next, you must choose the operator and the value for the field. These will vary as per the object and attribute selected.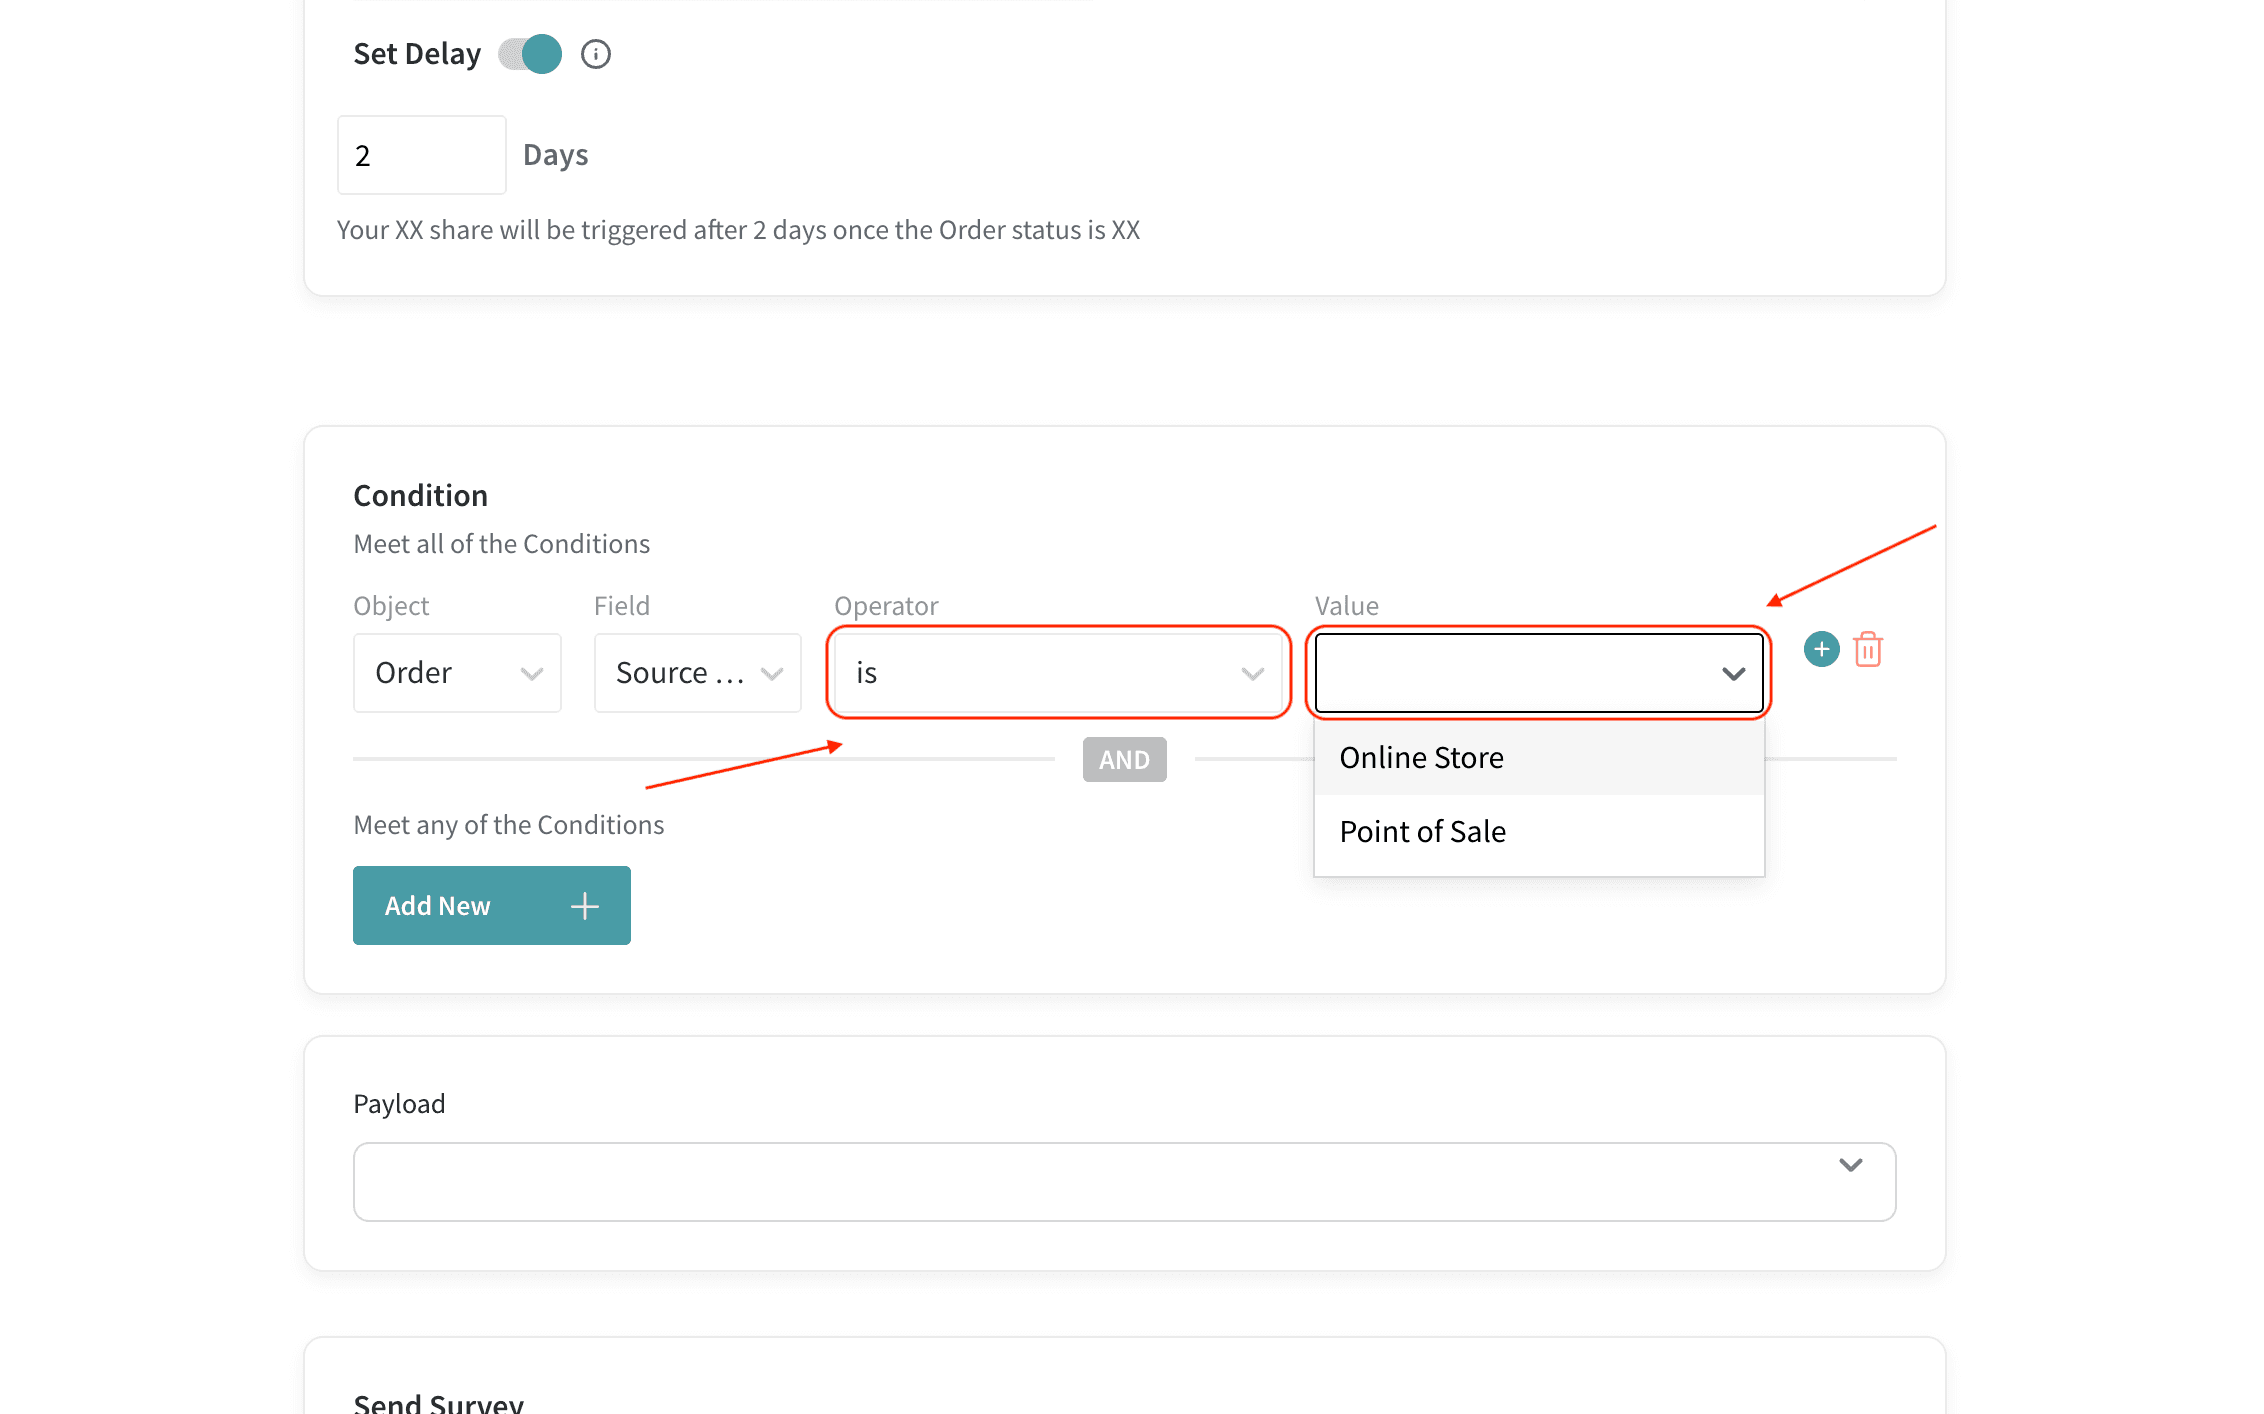
13. You can make your condition more specific by clicking on the green plus button to add more object parameters.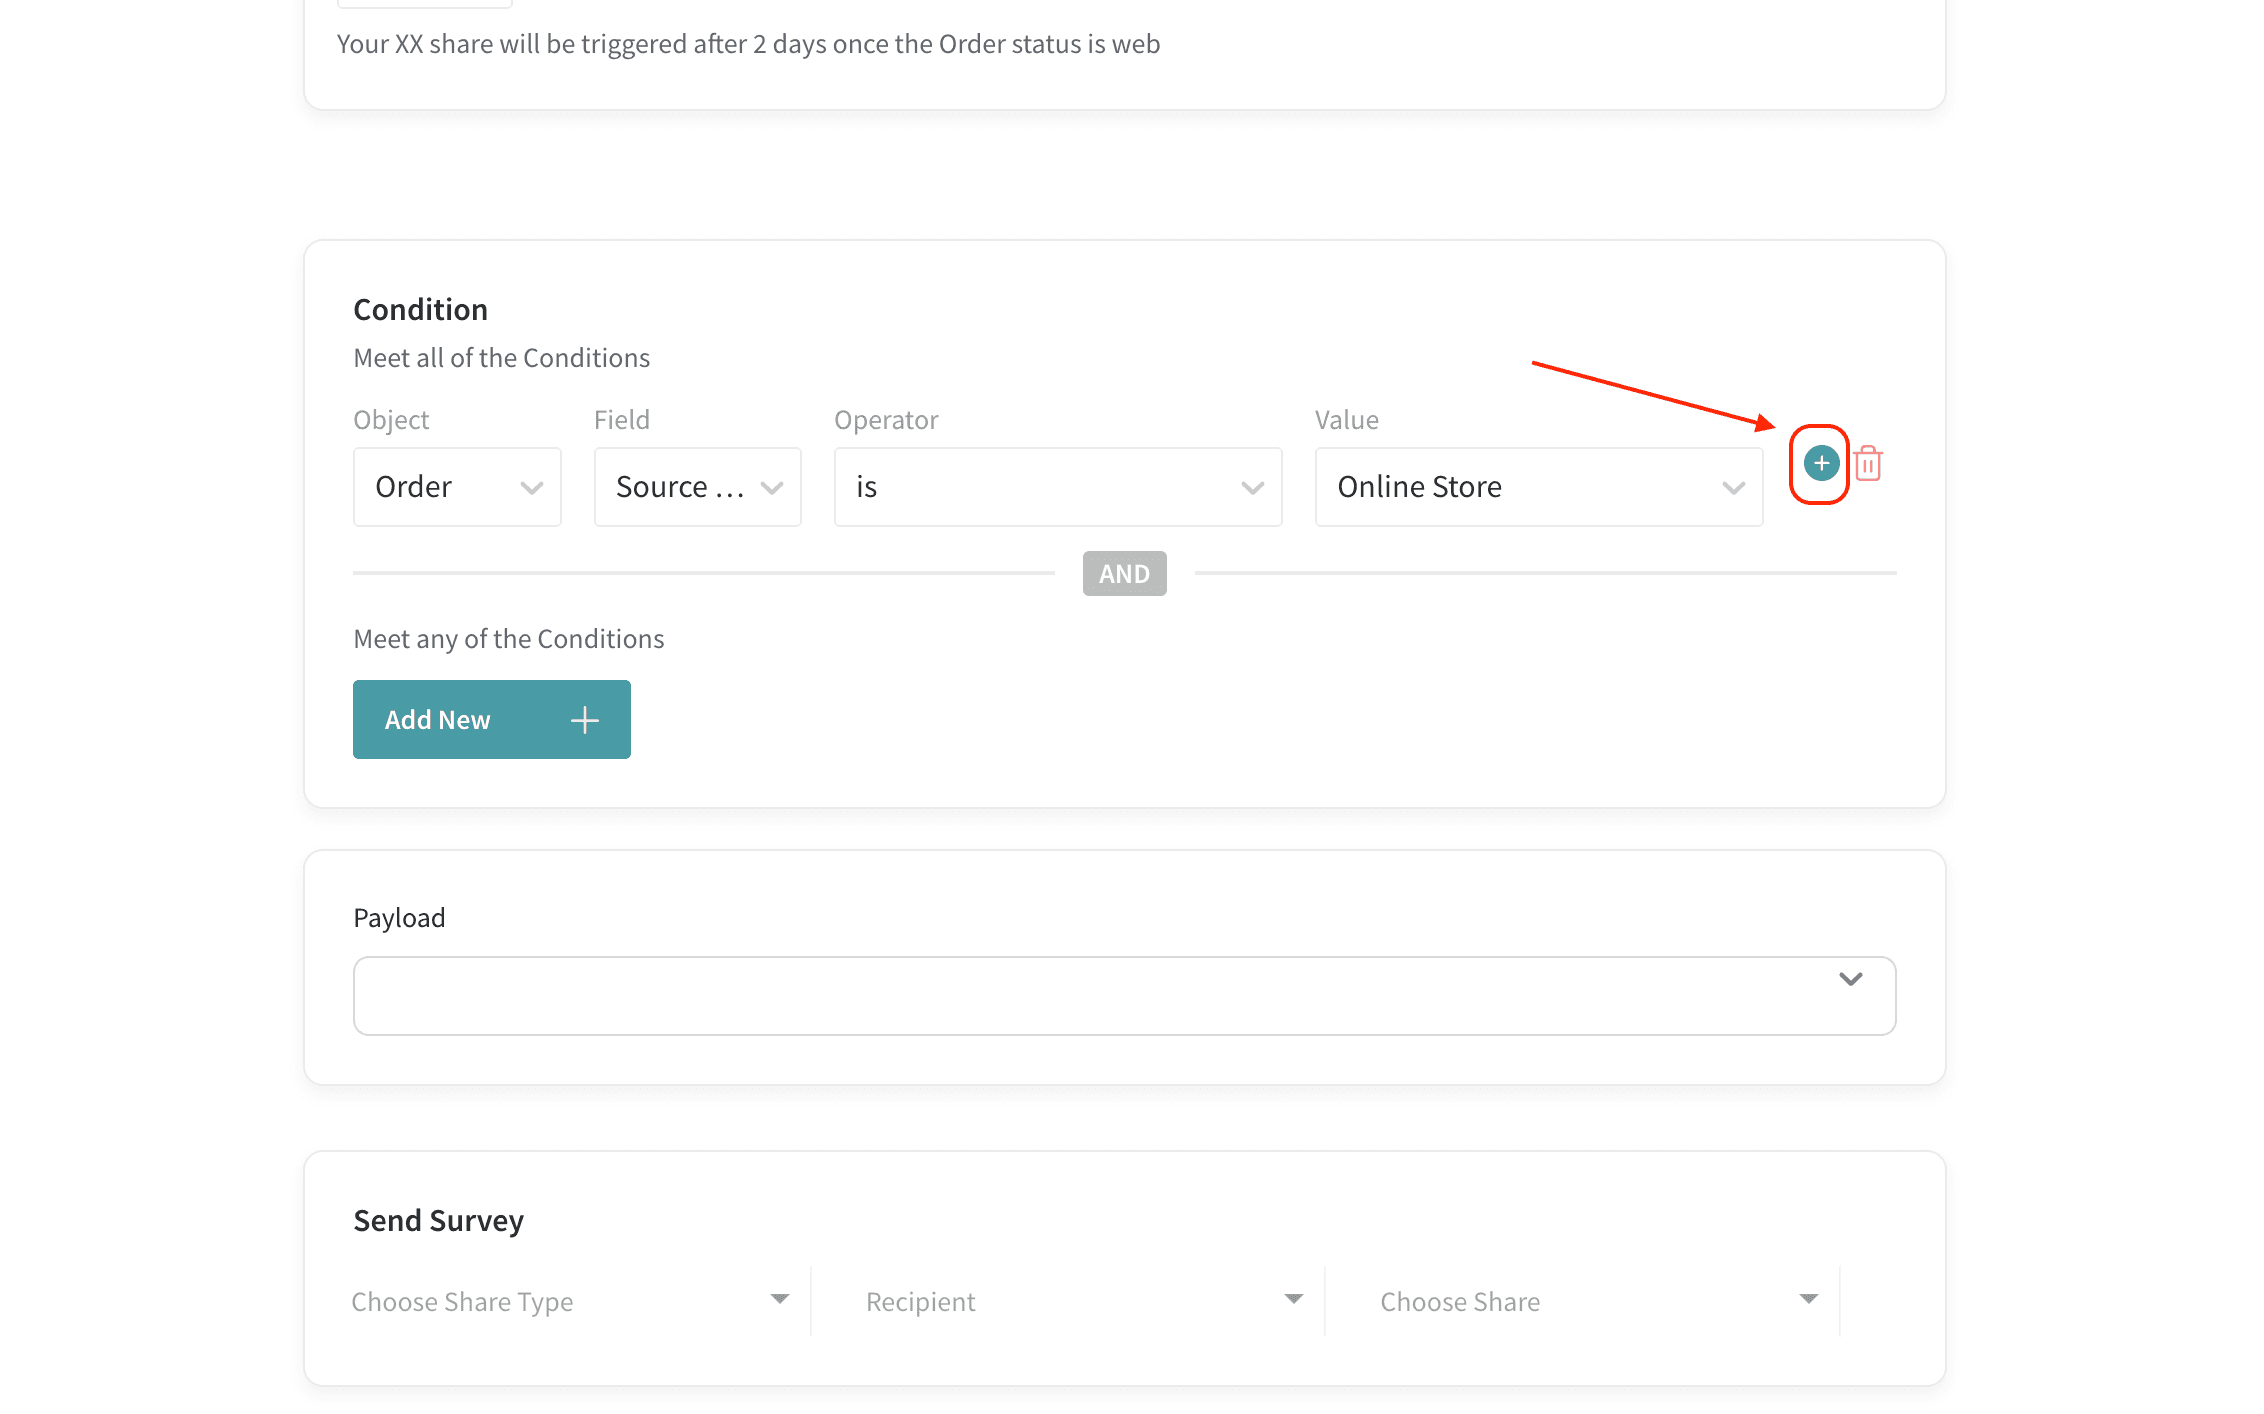
12. Additionally, if you want to pass variables, you can easily do that in the payload section.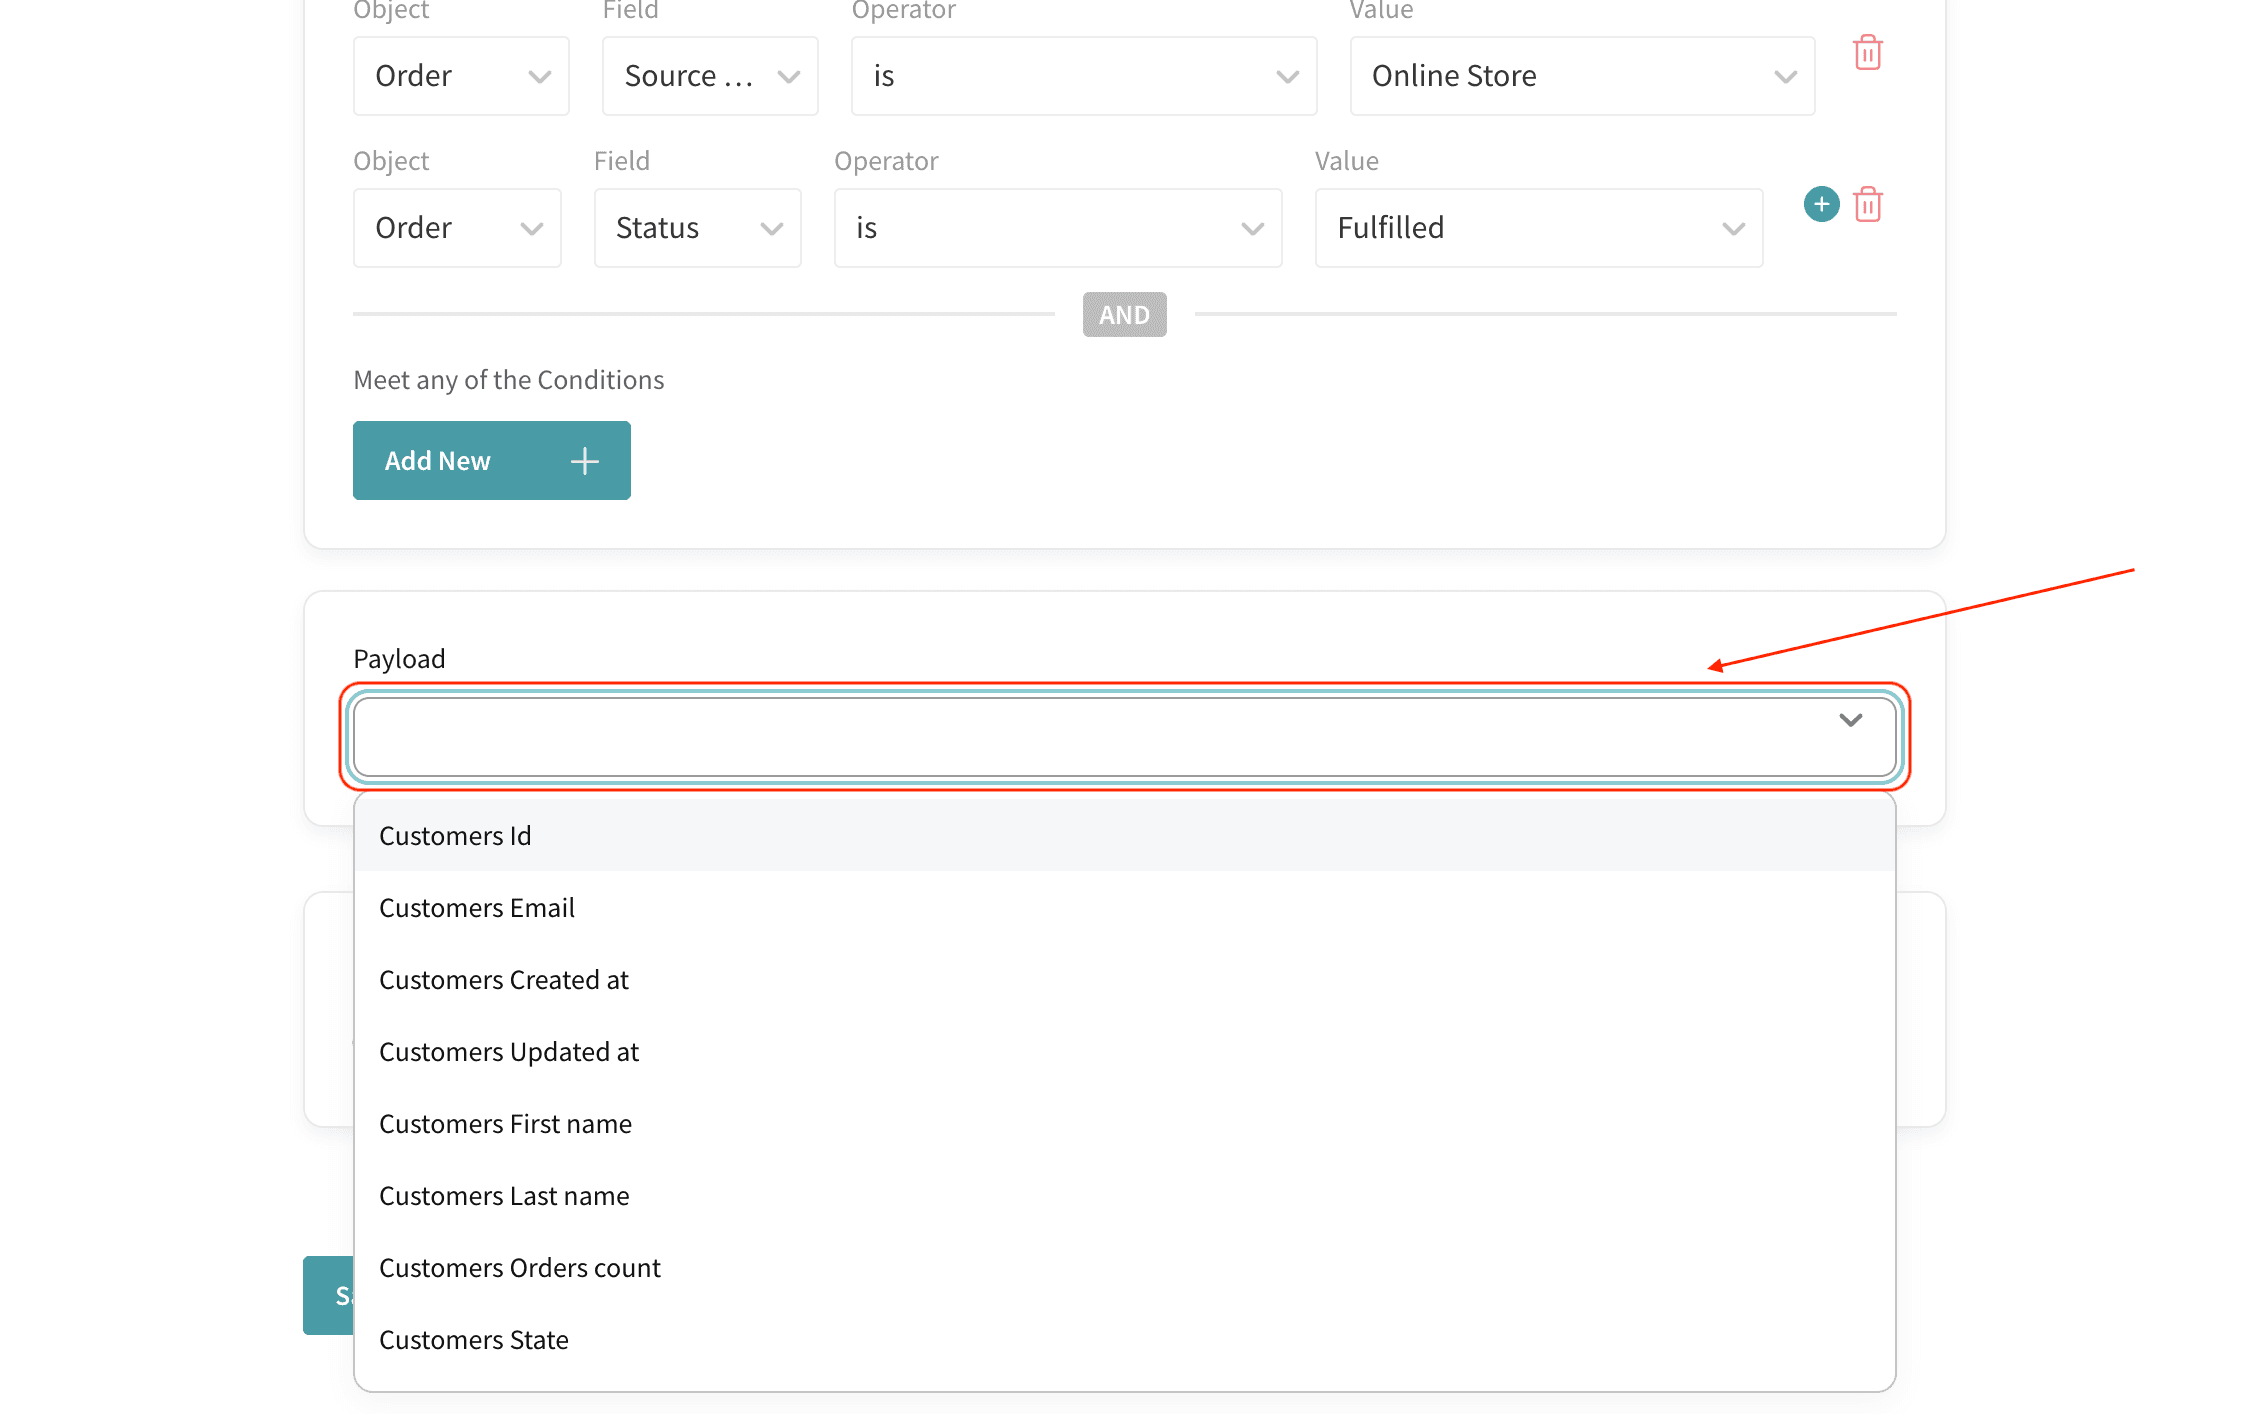
13. Then you need to choose the share channels via which the survey is deployed (email, SMS, WhatsApp). Click on the Choose Share Type drop-down menu.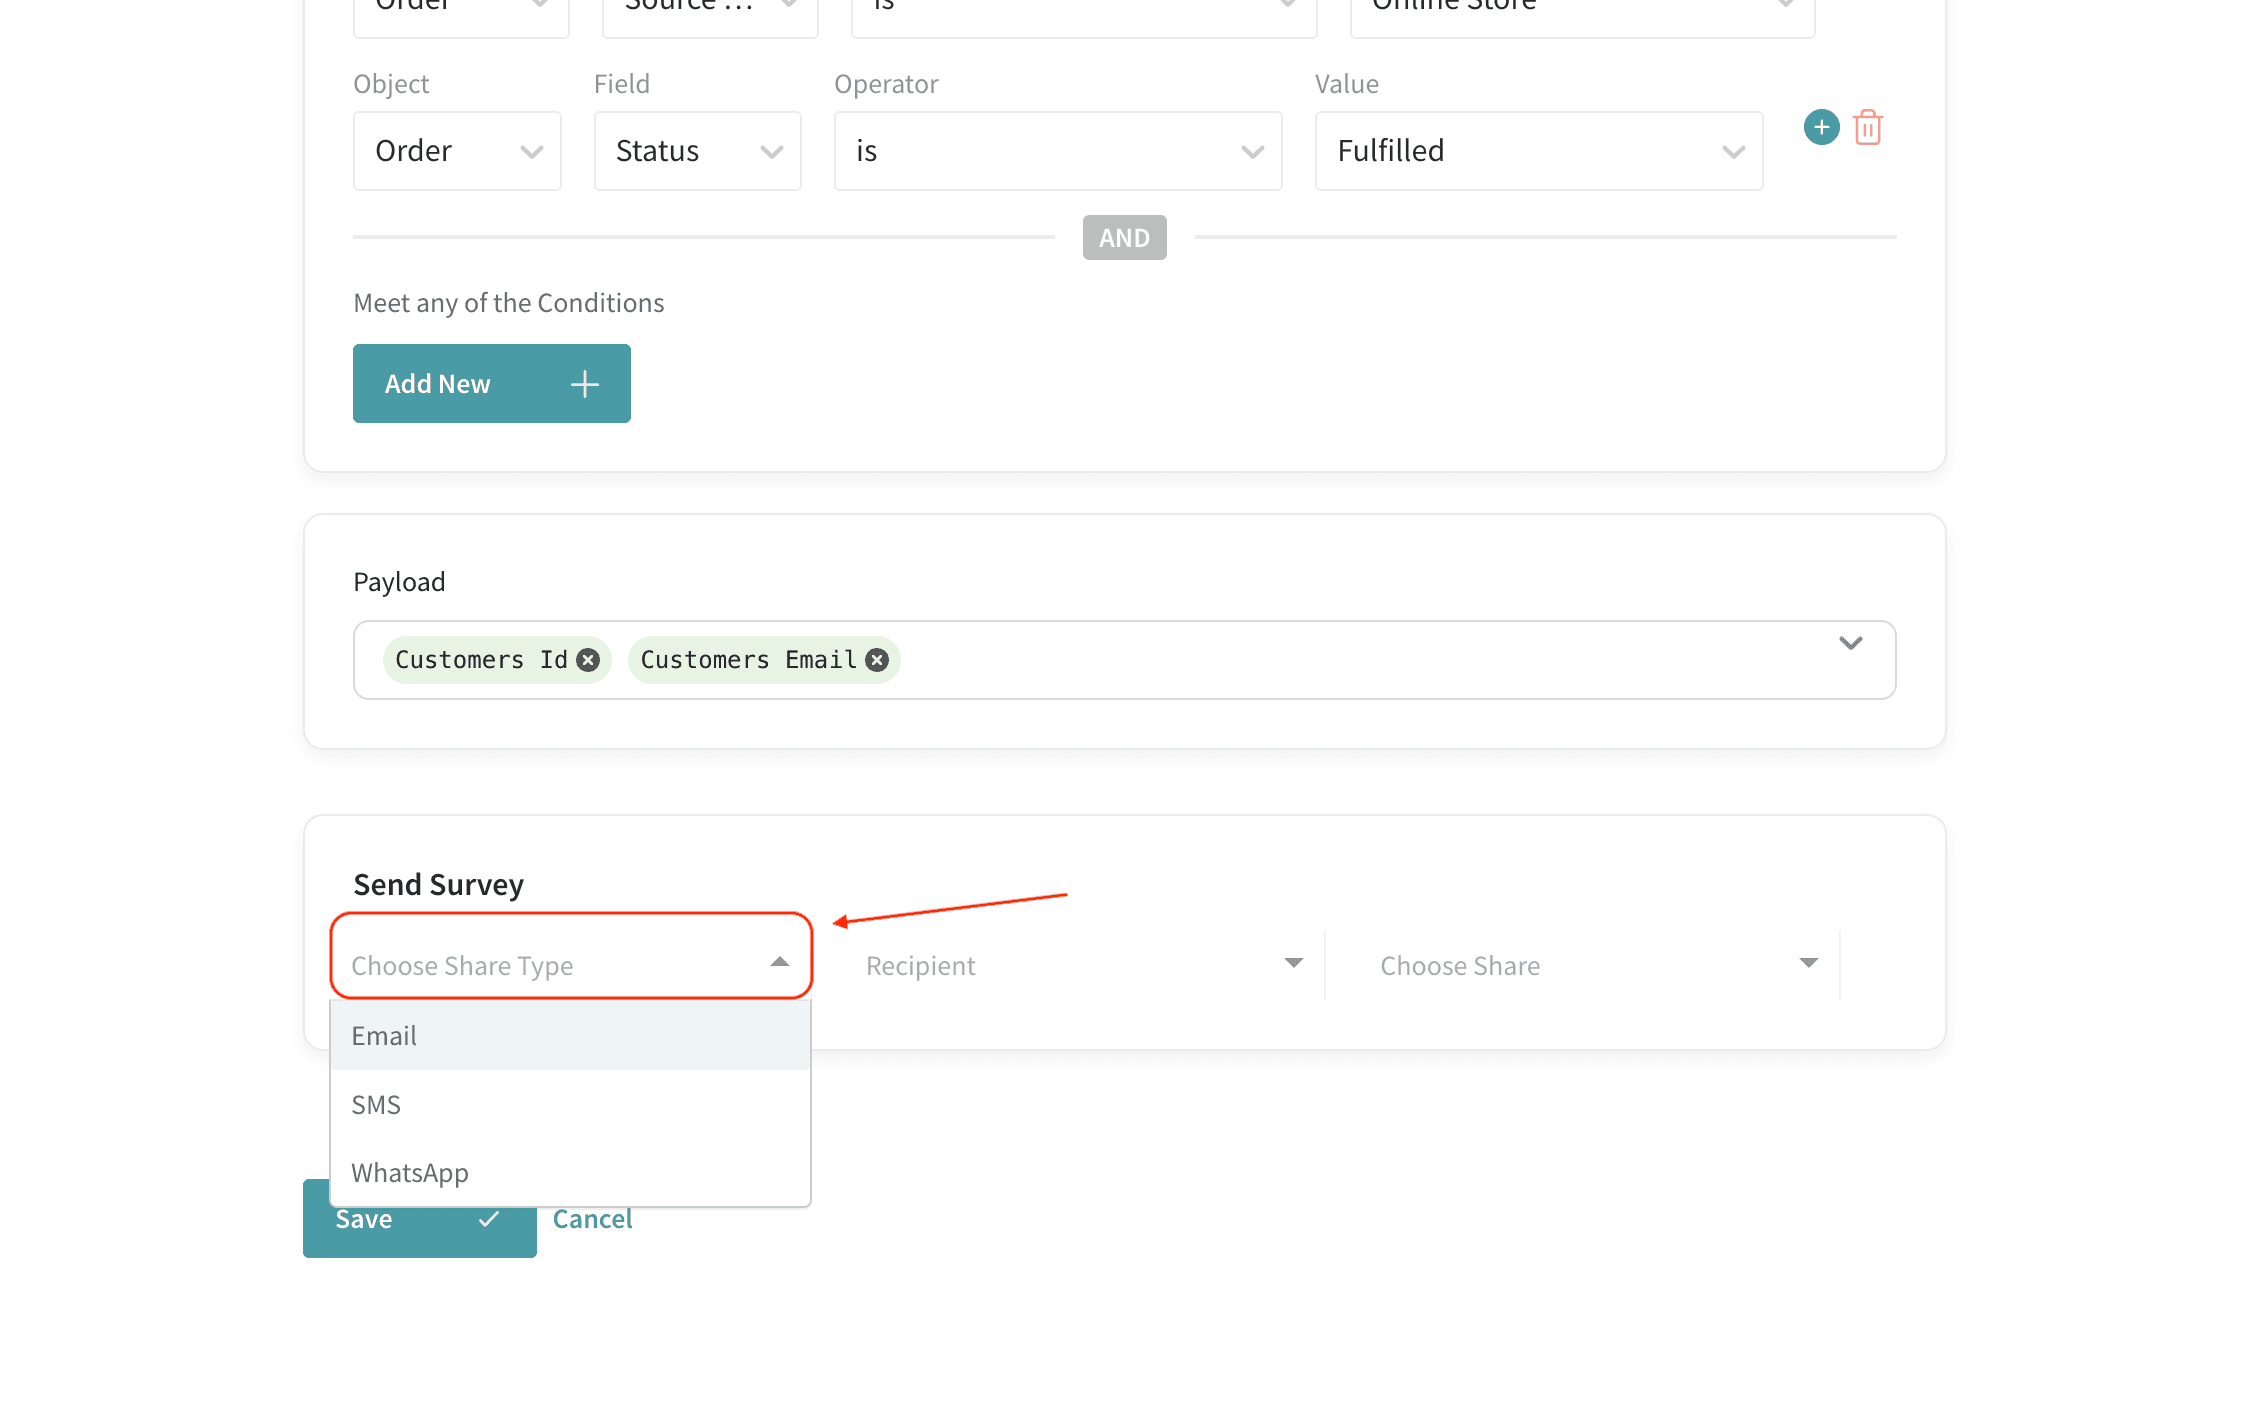
14. Then you must choose the recipient audience.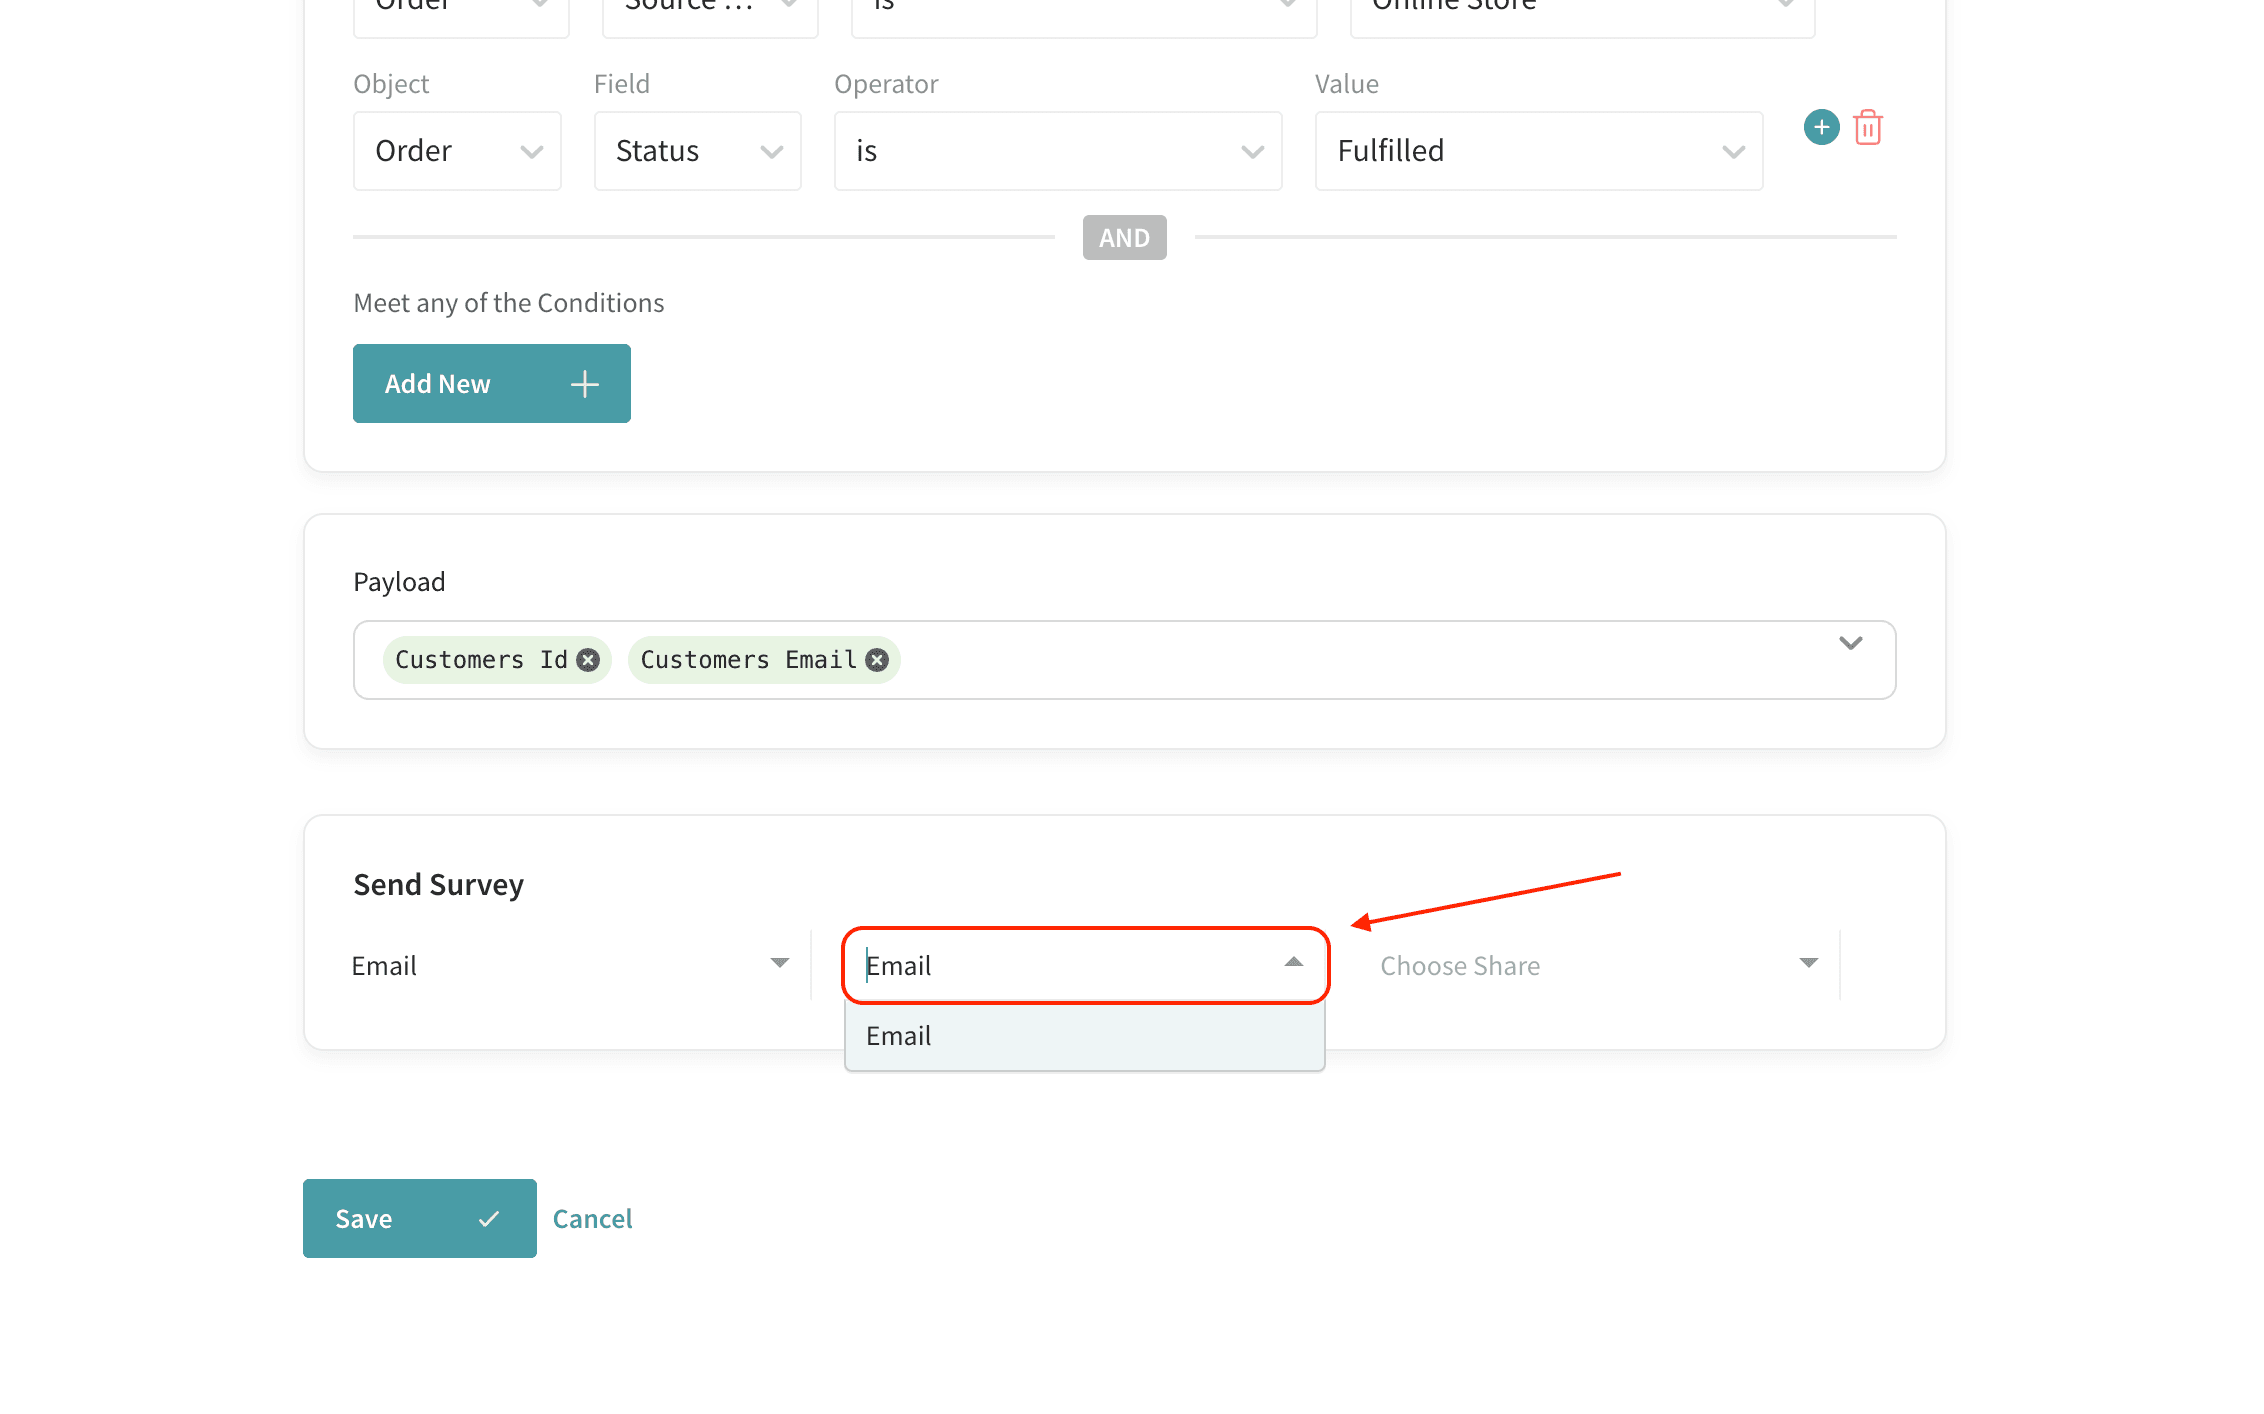
Note: For email, the audience is pre-set, whereas for WhatsApp and SMS, you can choose between the phone number attached to the customer's address by default, or another number.
15. Finally, you must choose an existing share in your SurveySparrow account for that particular share type.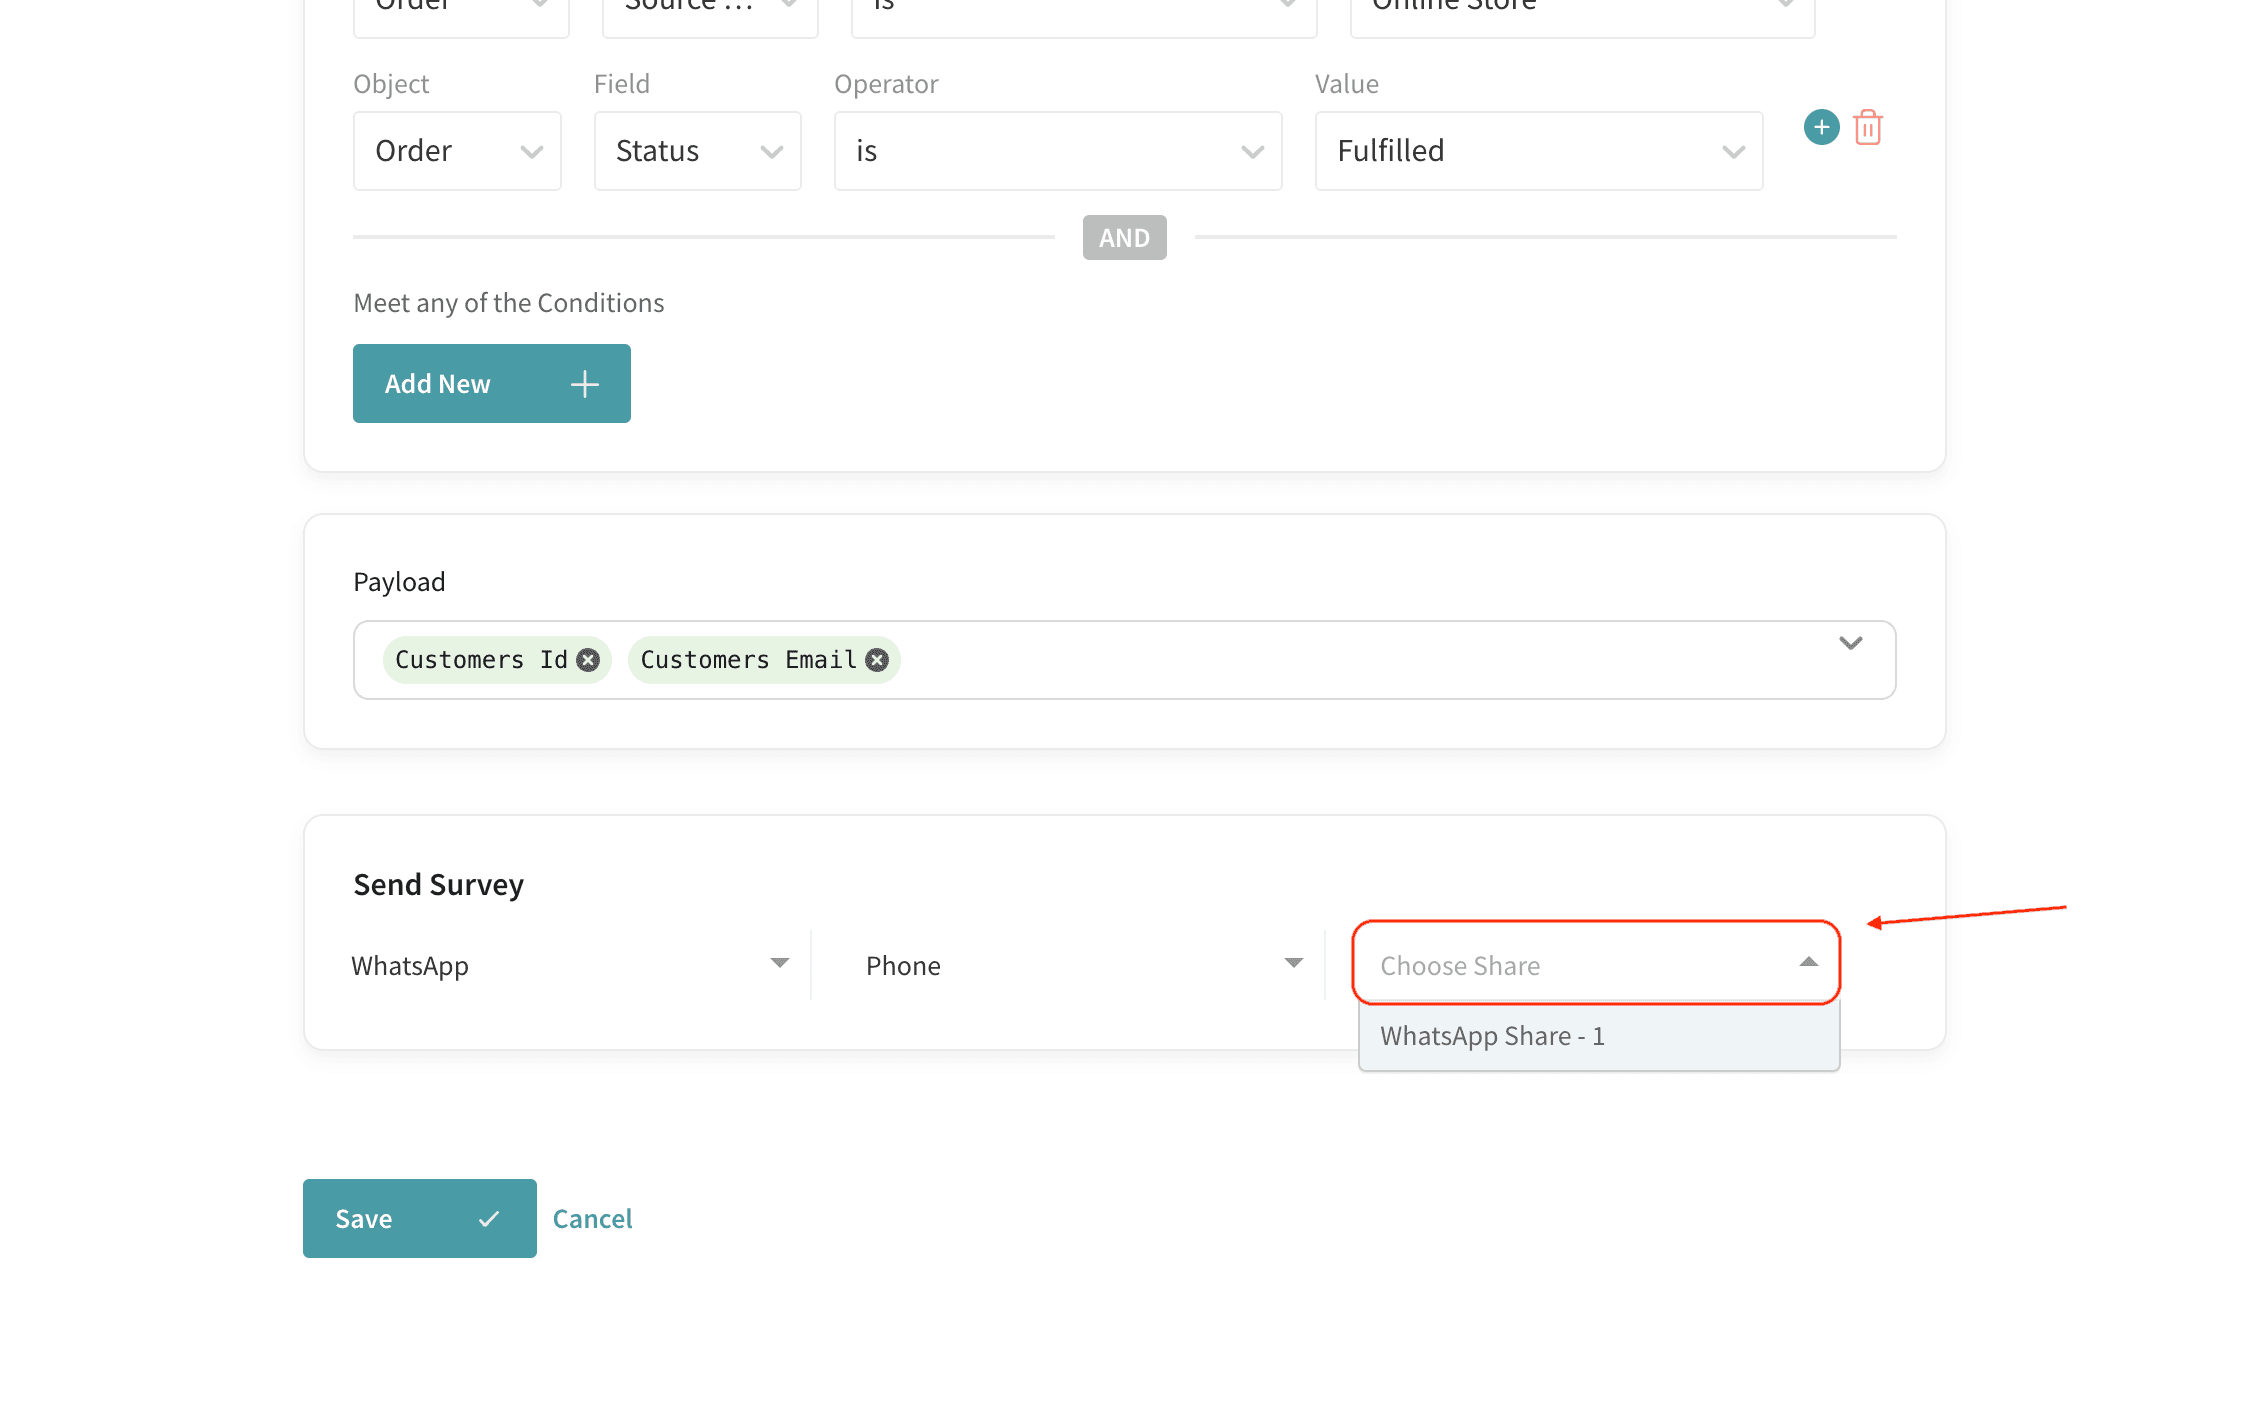
Note: If you do not have any existing share for the SMS and WhatsApp share types, you will see an error message. However, for email shares, you can just click + New Share and start with a fresh share.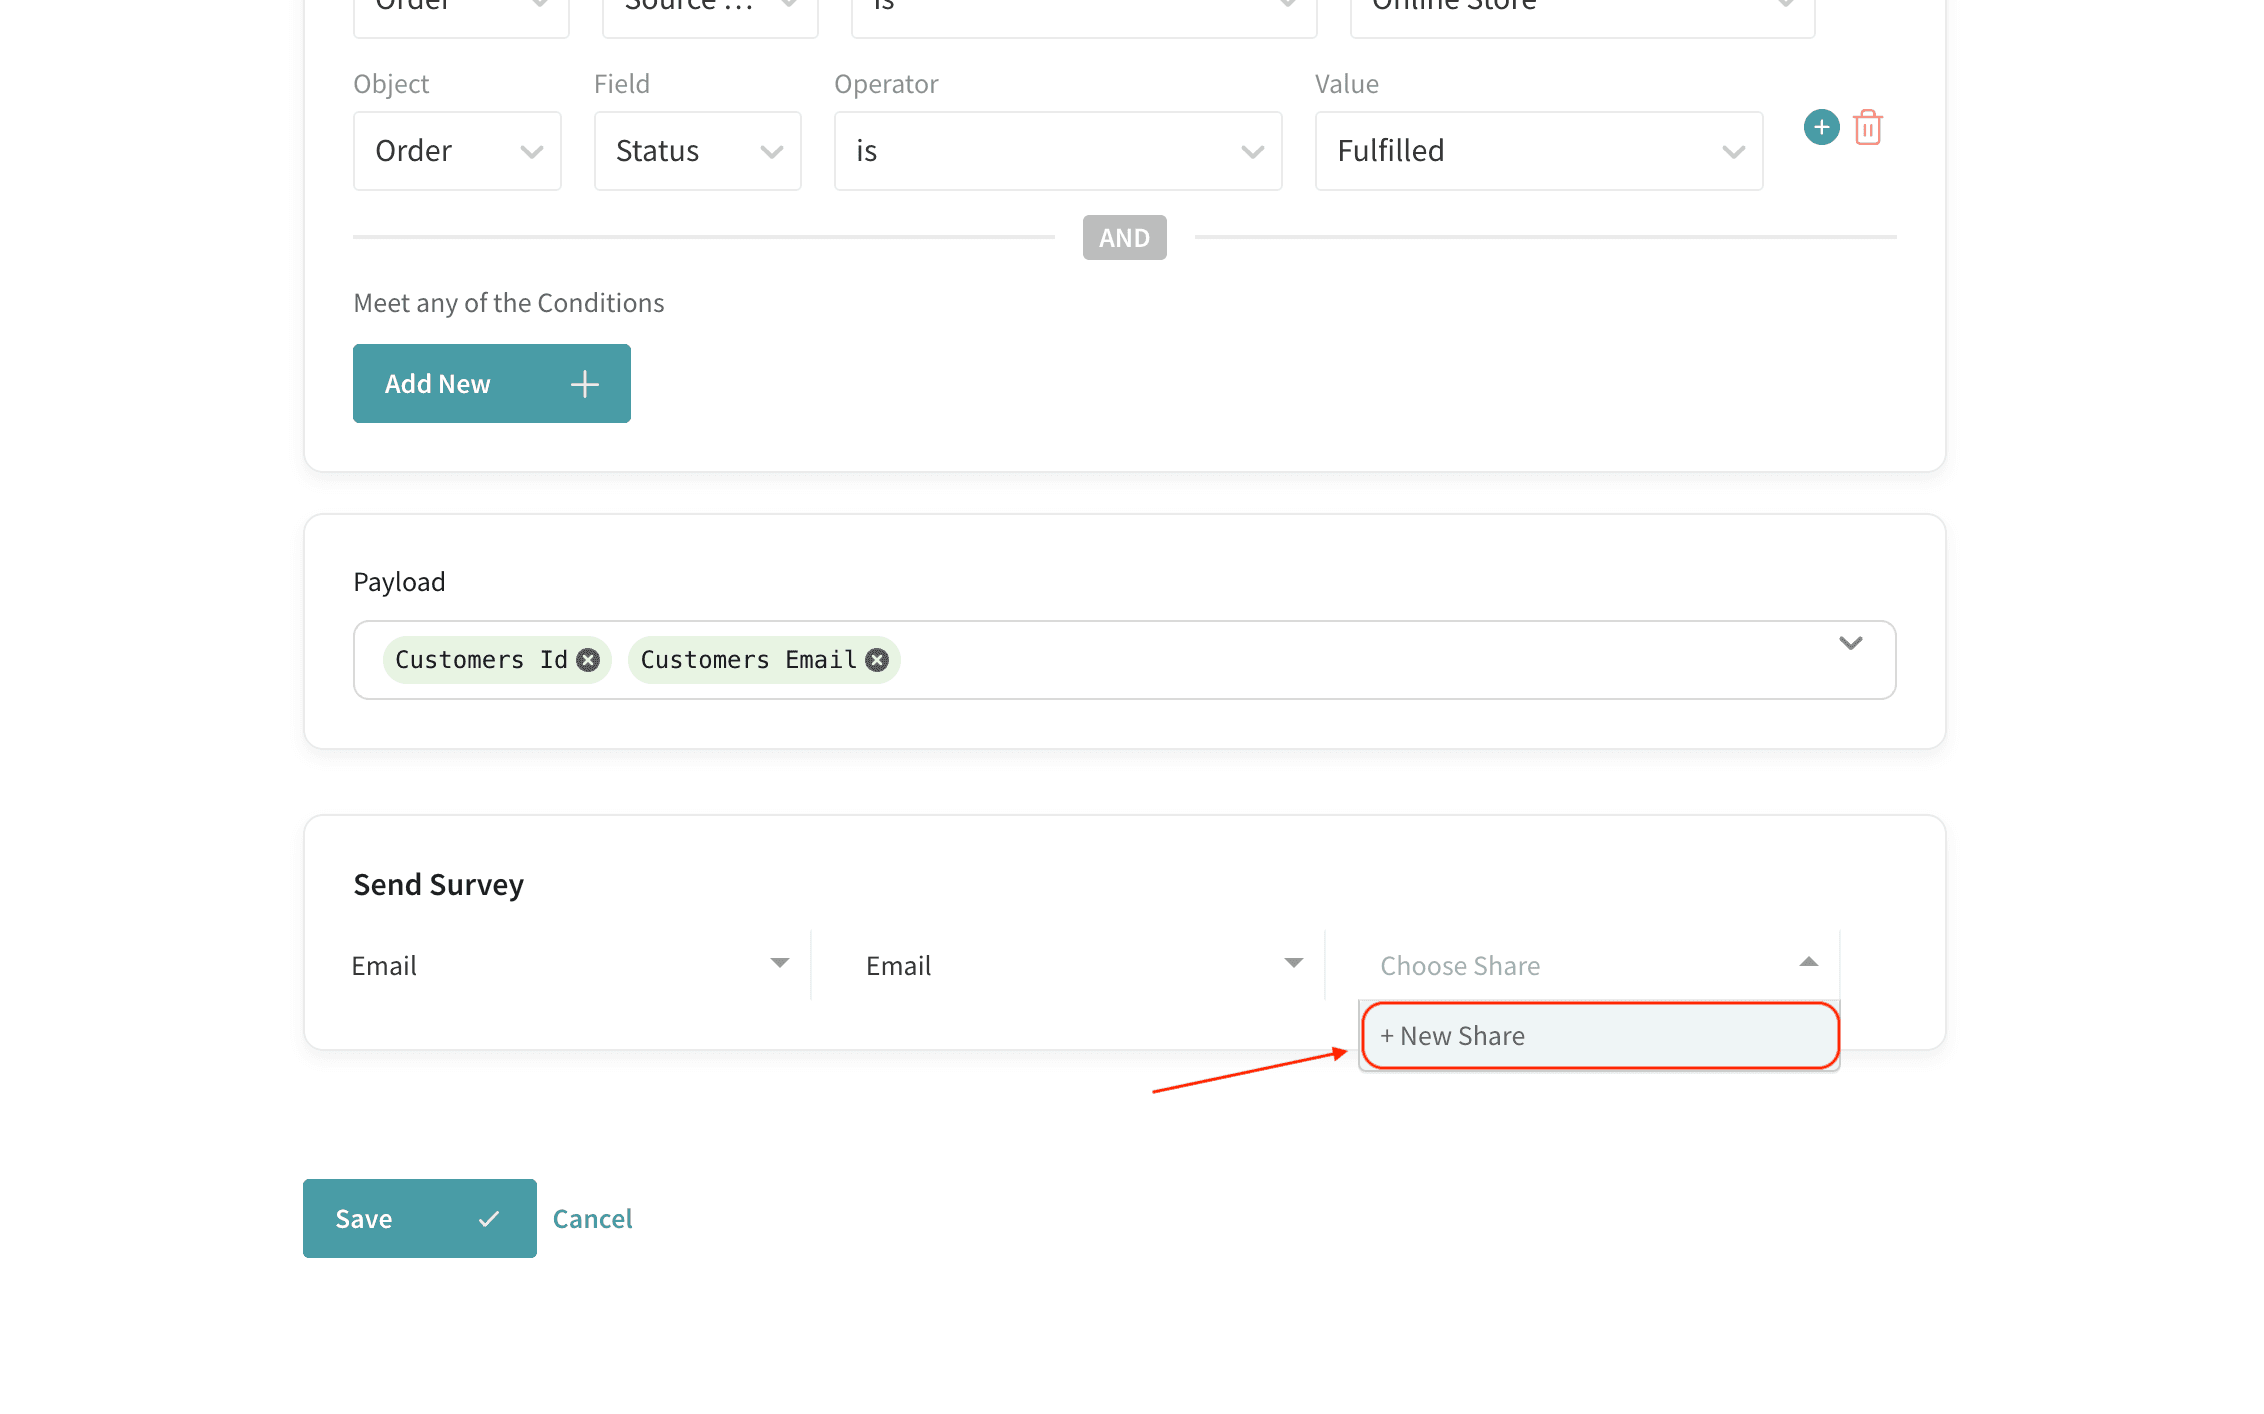
16. Click Save to finish setting the trigger.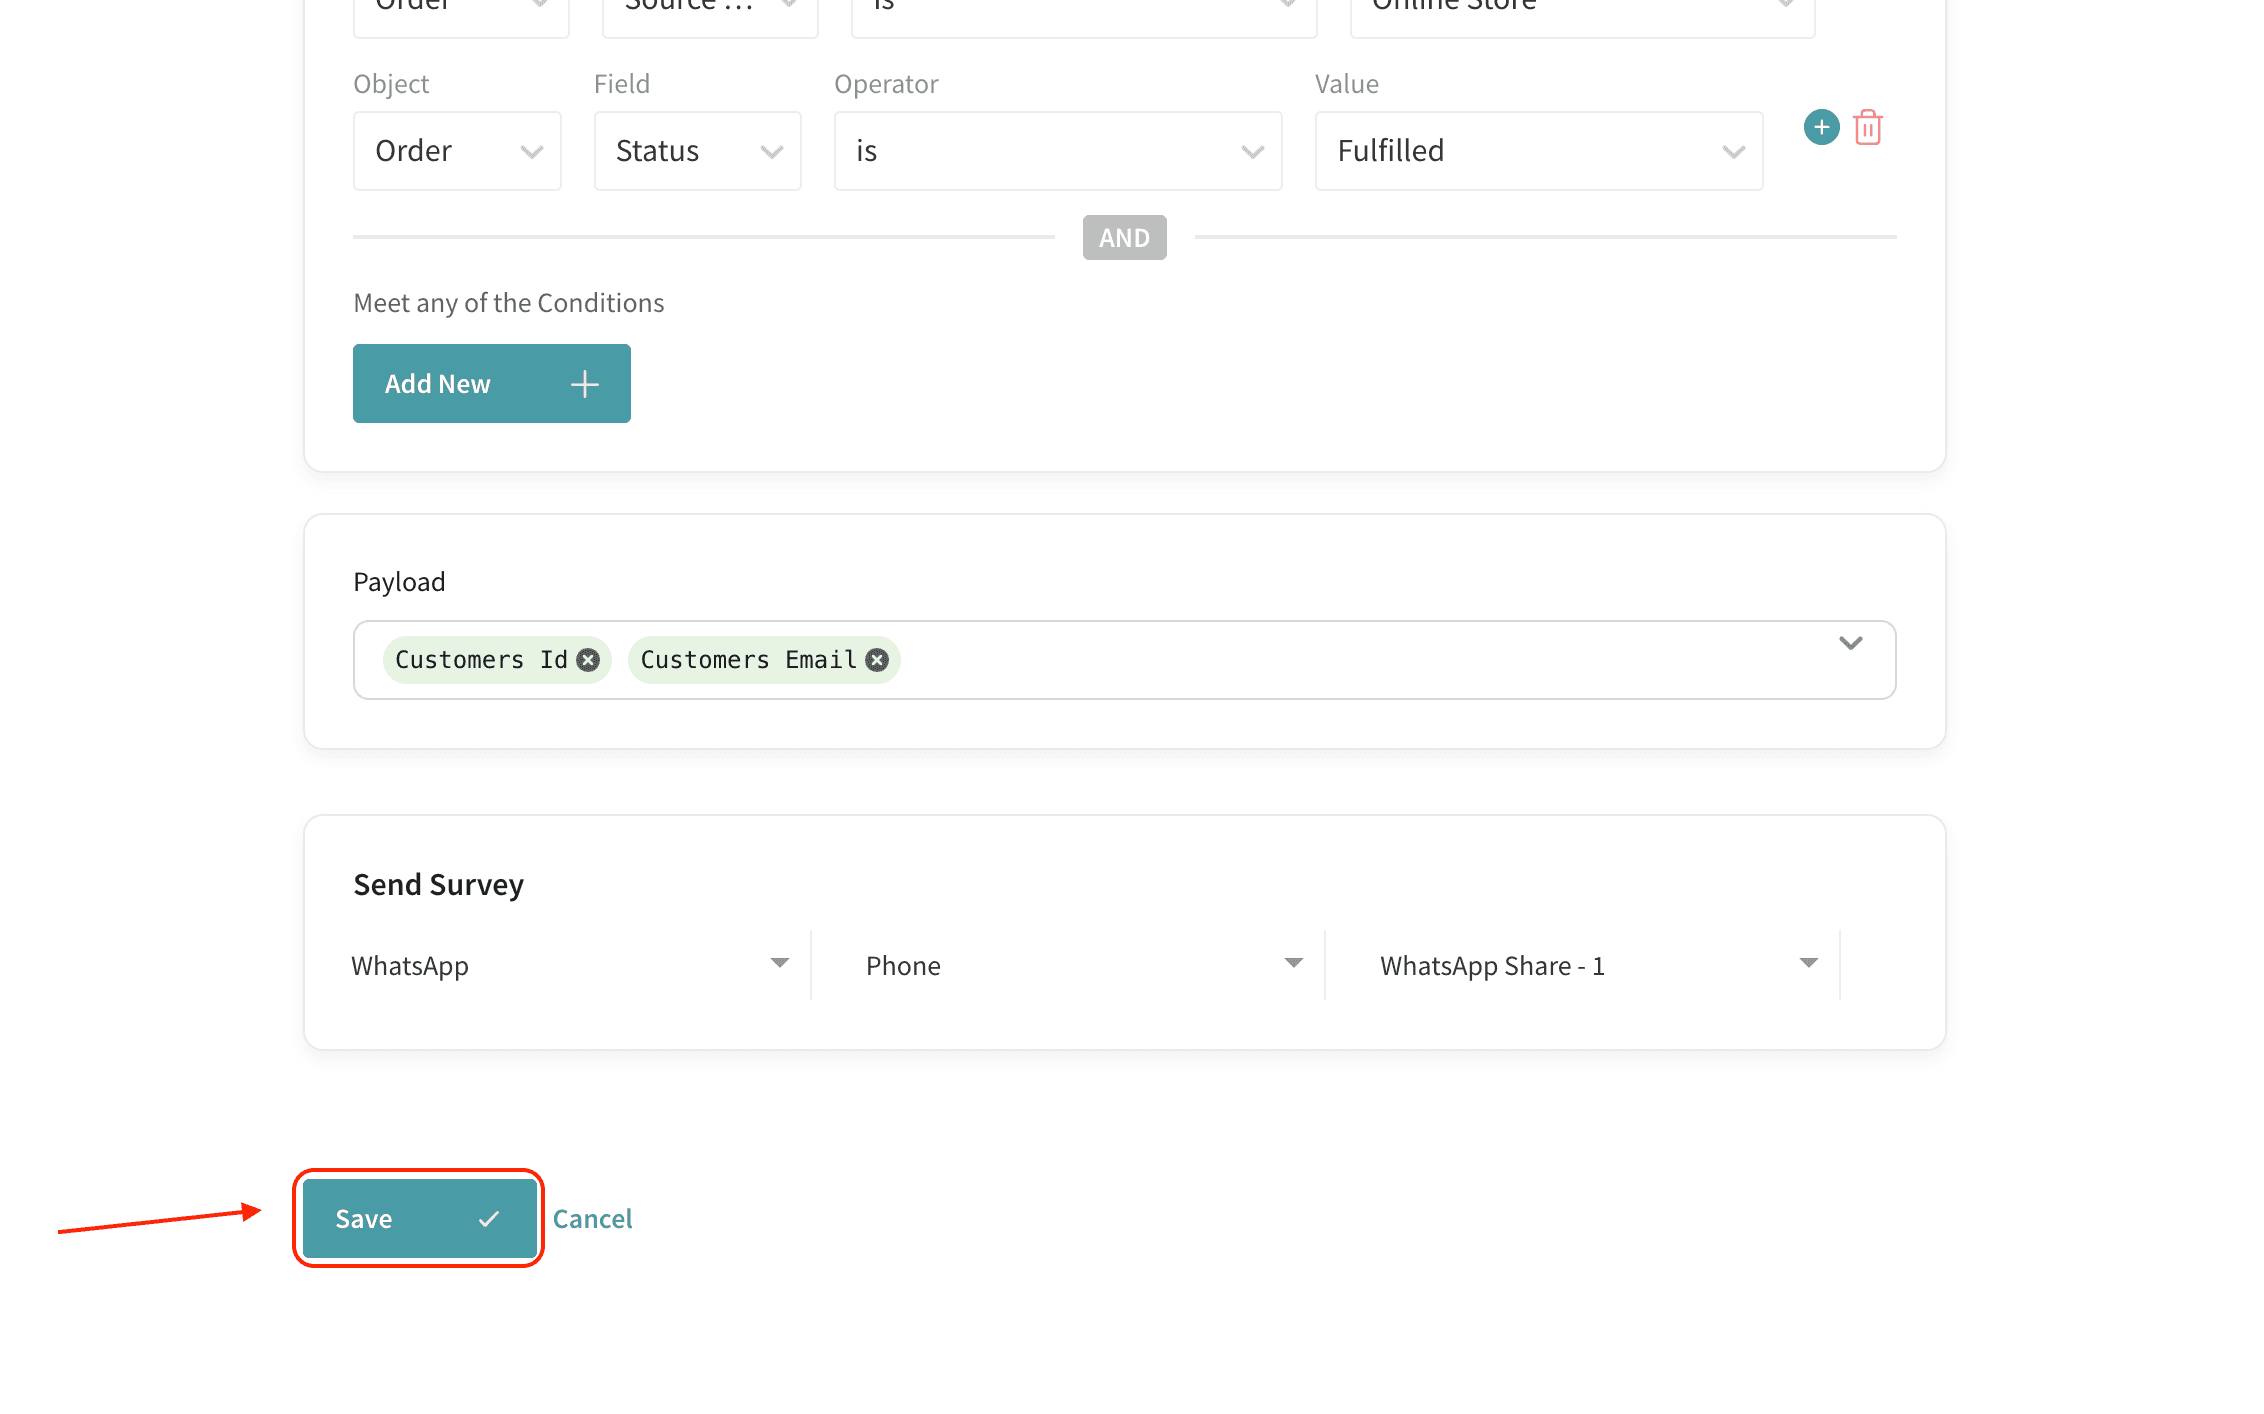
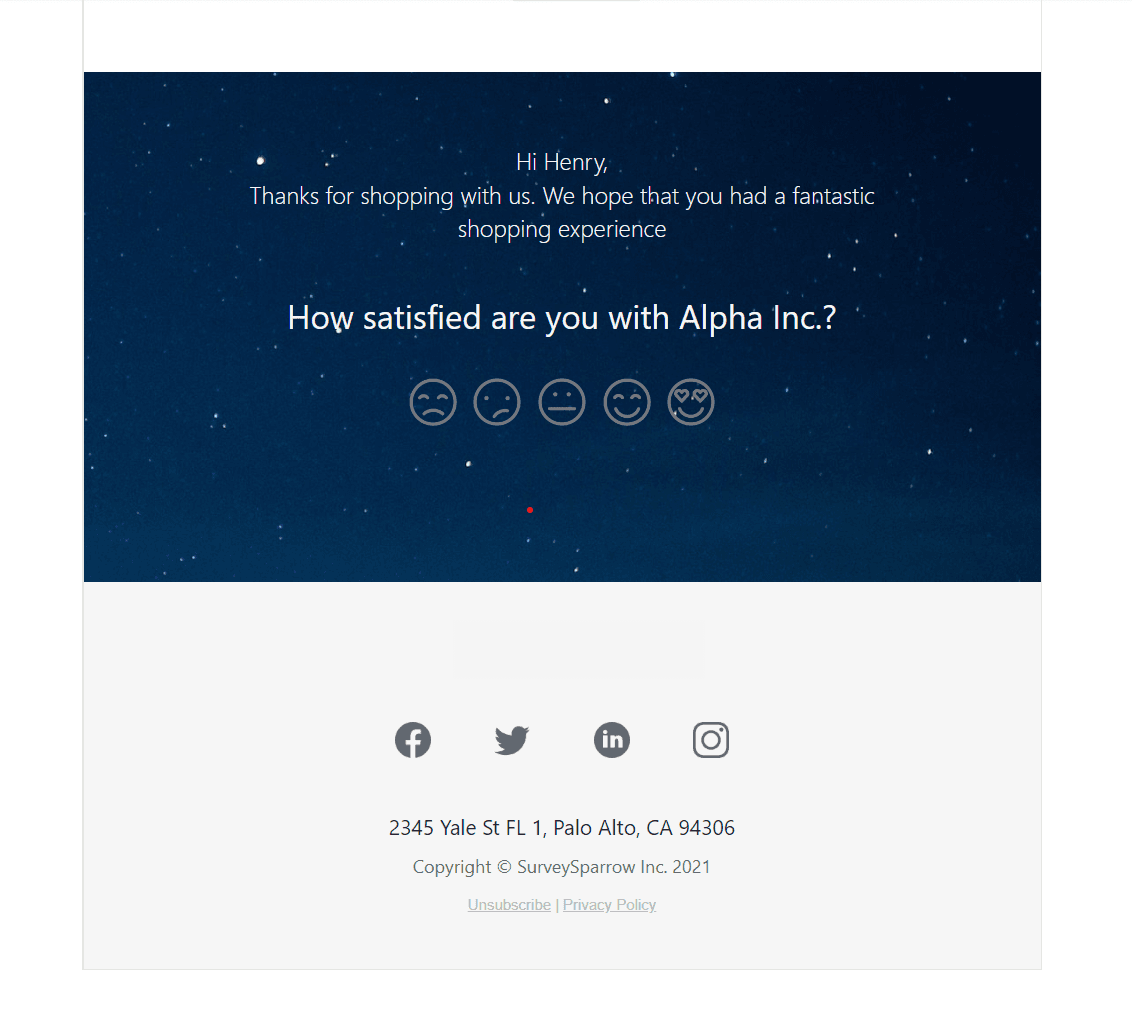
Once the condition is met, the customer will receive an email survey as configured in the trigger.
For example, if you had configured the trigger to send a CSAT survey after order fulfilment, the customer will receive an email survey, as shown below.
15. On your SurveySparrow app dashboard, all the created triggers will be listed. Under each trigger, you can see the survey type, survey name, and share type.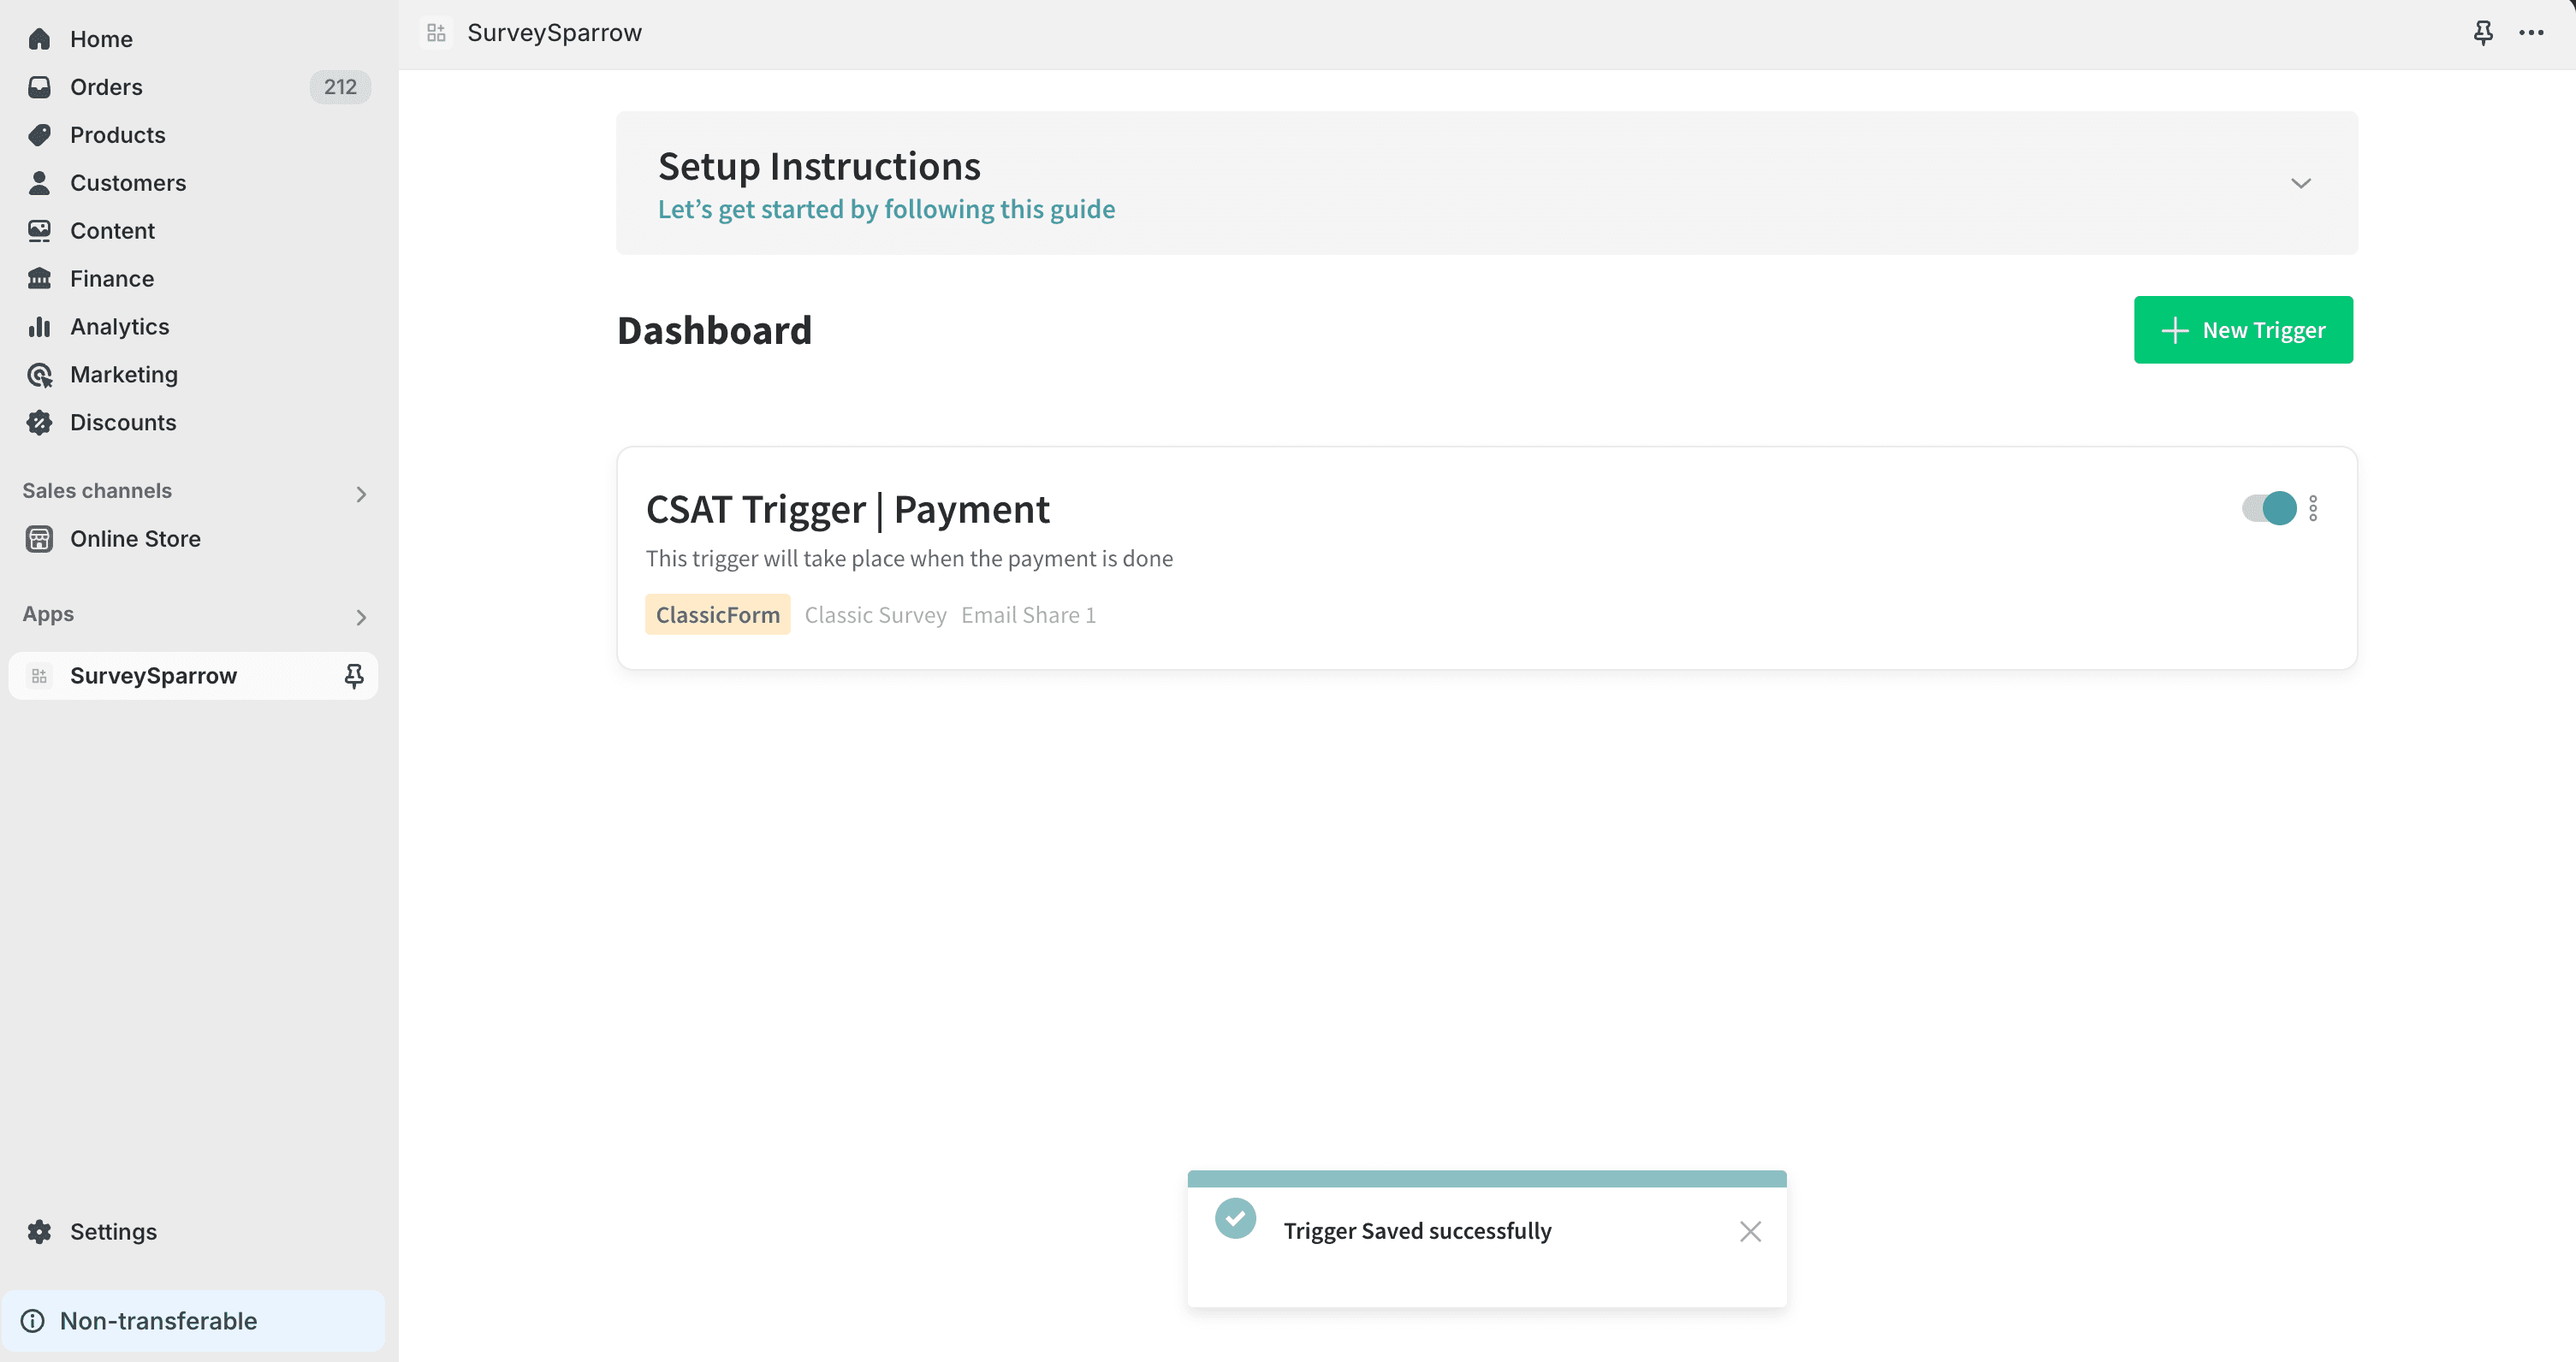
16. You can pause the live triggers simply by disabling the toggle.
17. In case you wish to edit/delete a trigger, you can do it effortlessly by clicking on the more option.
18. To uninstall the App navigate to Apps, then click SurveySparrow and click delete.
Note:
1. Why is the SurveSparrow app not visible in the Shopify app store?
SurveySparrow app is yet to get approval from Shopify’s app submission team. However, it is available as a private app for Shopify users. Please reach out to our support team with your store ID to set up the integration
2. Can I create surveys from the SurveySparrow app in Shopify?
Currently, you can create surveys only from your SurveySparrow account. We’ll promptly inform you when we add the functionality to the SurveySparrow app in Shopify.
Please reach out to us if you have any questions. We are just a chat away!
Powered By SparrowDesk