Search
HubSpot is a leading all-in-one CRM platform that unifies sales, marketing, and customer service tools to help businesses manage their customer relationships and grow more effectively. SurveySparrow’s native integration with HubSpot enables teams to sync survey responses directly into HubSpot records and trigger surveys based on CRM events without manual intervention.
This helps revenue and customer experience teams act on real-time feedback, close the loop with customers, and build more personalized workflows.
Some interesting use cases include:
In this article, we’ll walk you through setting up the integration and configuring its core capabilities, specifically:
1. Inside your SurveySparrow account, click on the Settings icon.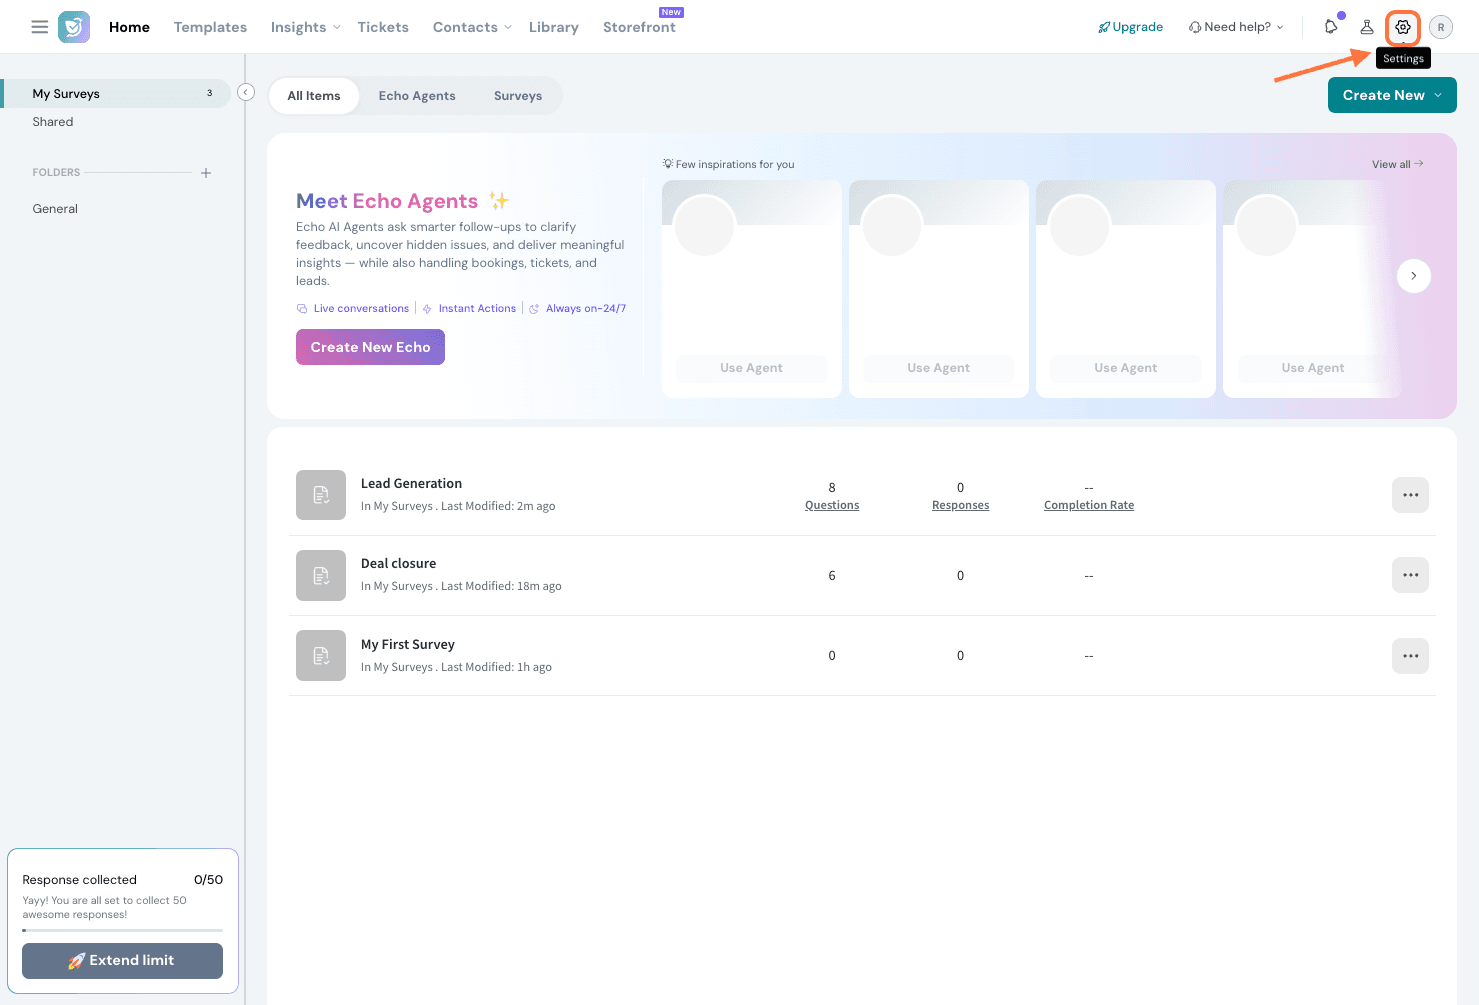
2. In the account settings section, scroll down till you see the Apps and Integrations option, then click on it.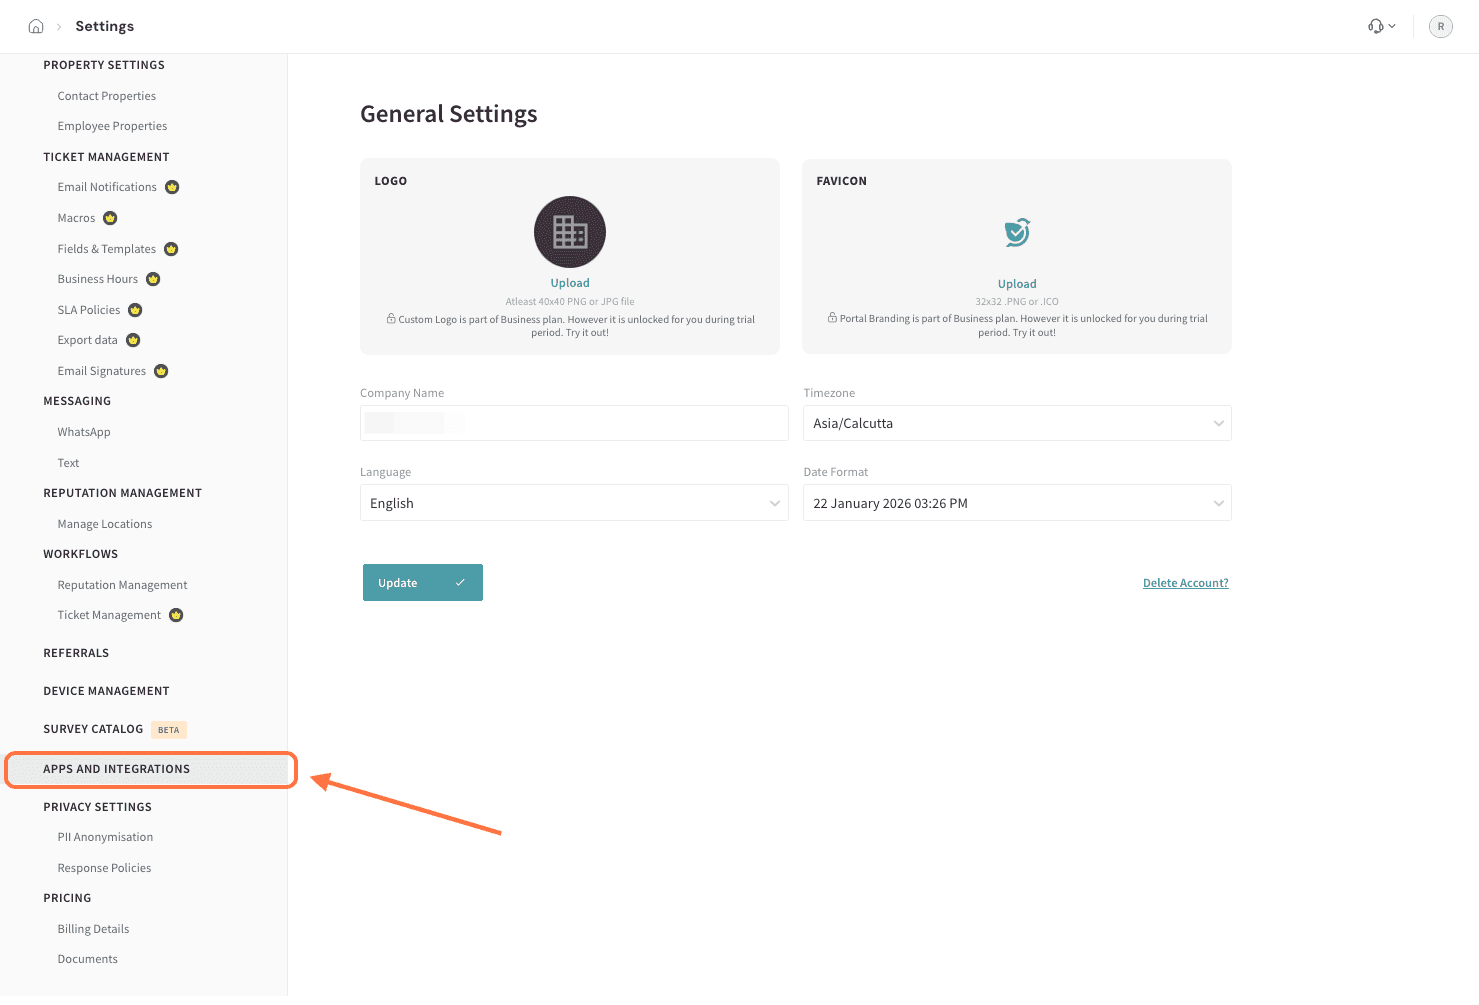
3. Search for HubSpot using the search box, then click on the toggle.
4. Once enabled, you’ll be redirected to the below page. Click Sign in to your HubSpot account.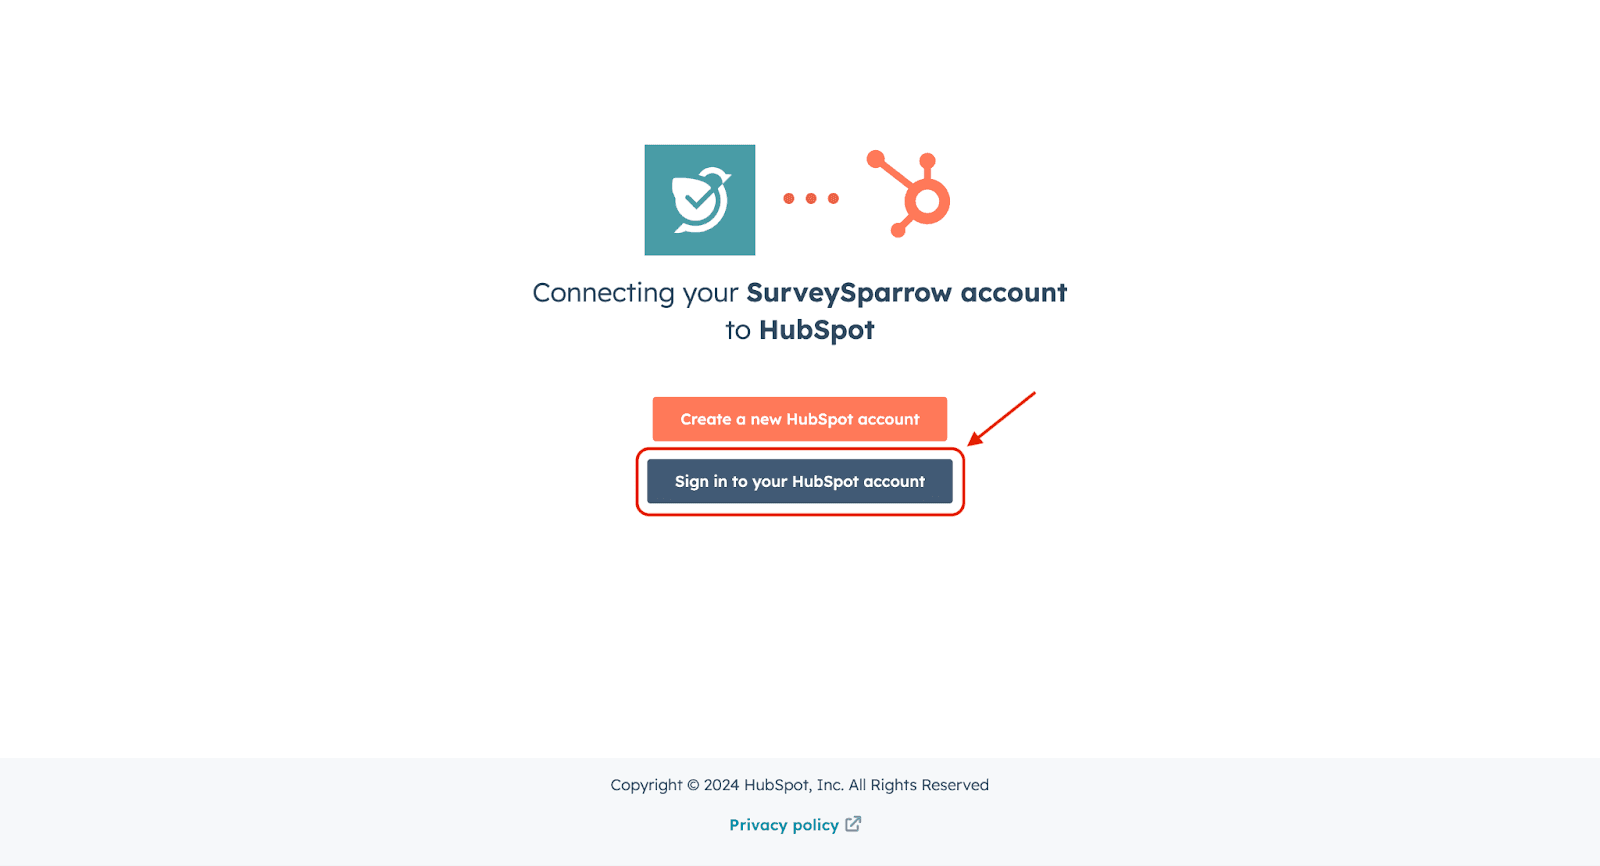
5. Proceed with your HubSpot credentials to complete the integration.
Note: The HubSpot integration has been revamped with a new UI and support for additional objects when creating triggers and mappings. Even if you have already connected your account to HubSpot already, you will need to reconnect in order to use these new objects. If you have already connected your integration to HubSpot previously, you might now see a banner prompting you to reconnect.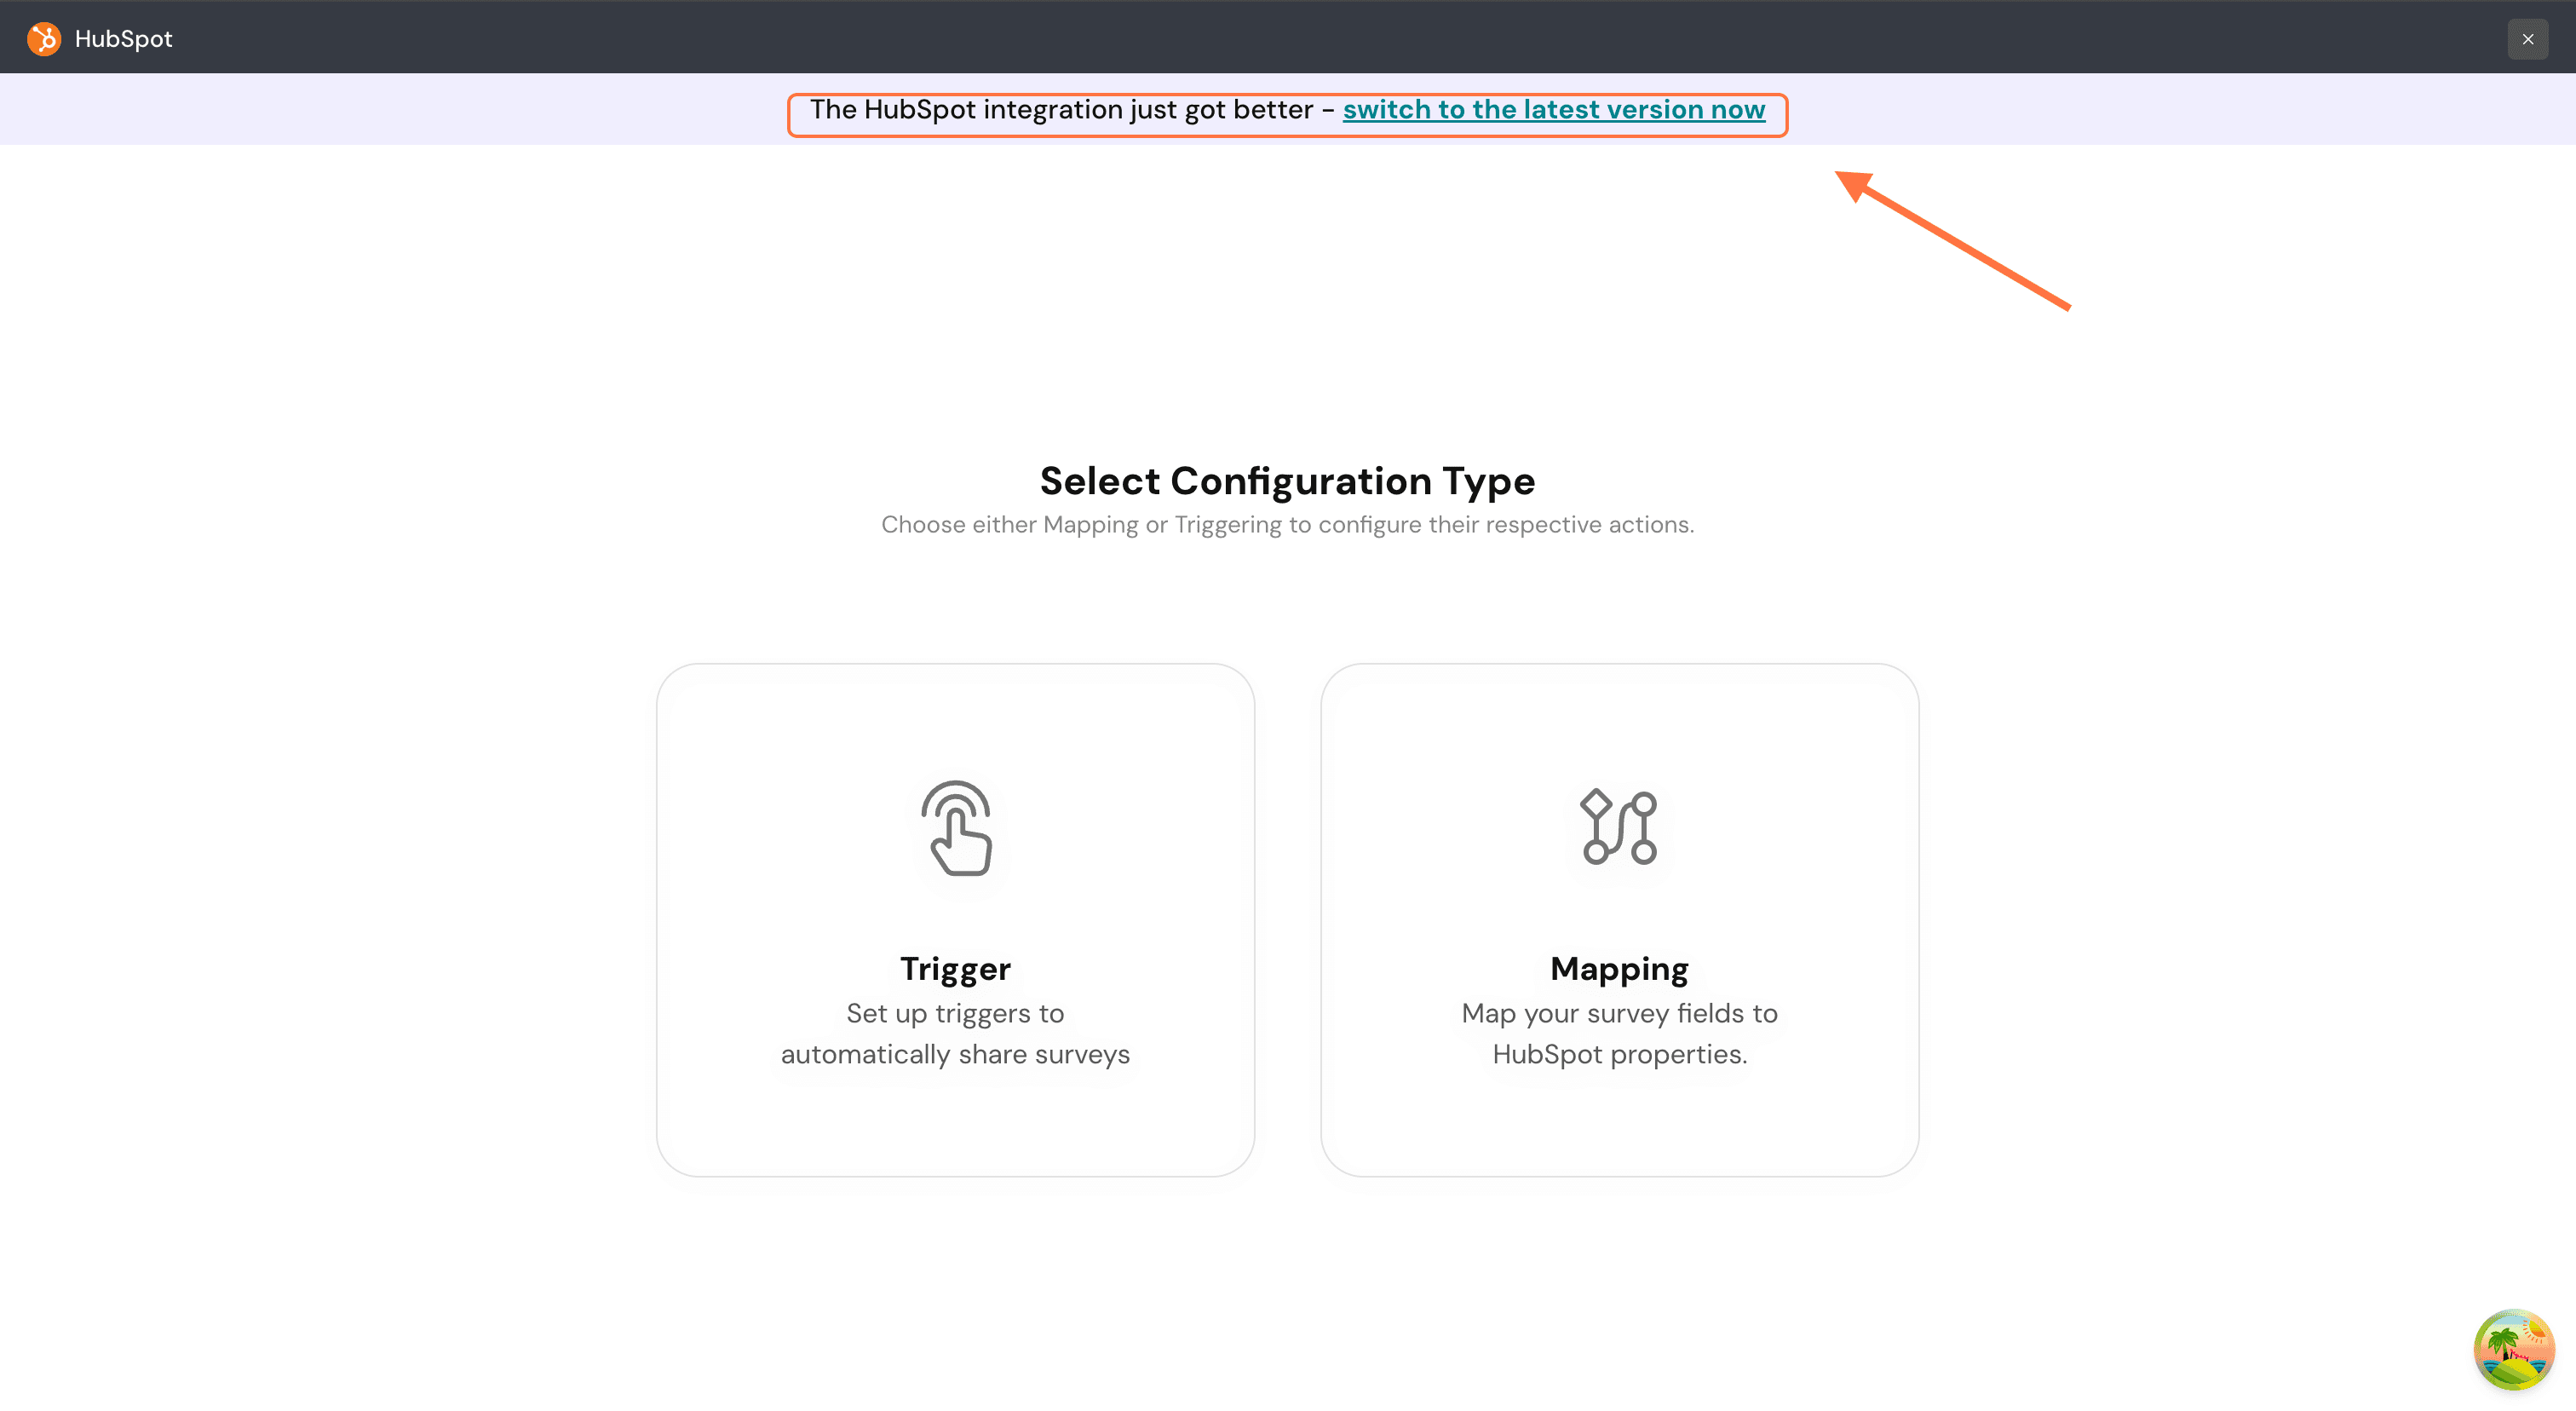
2. In the Integrations section, search for the HubSpot integration and click on the toggle next to it.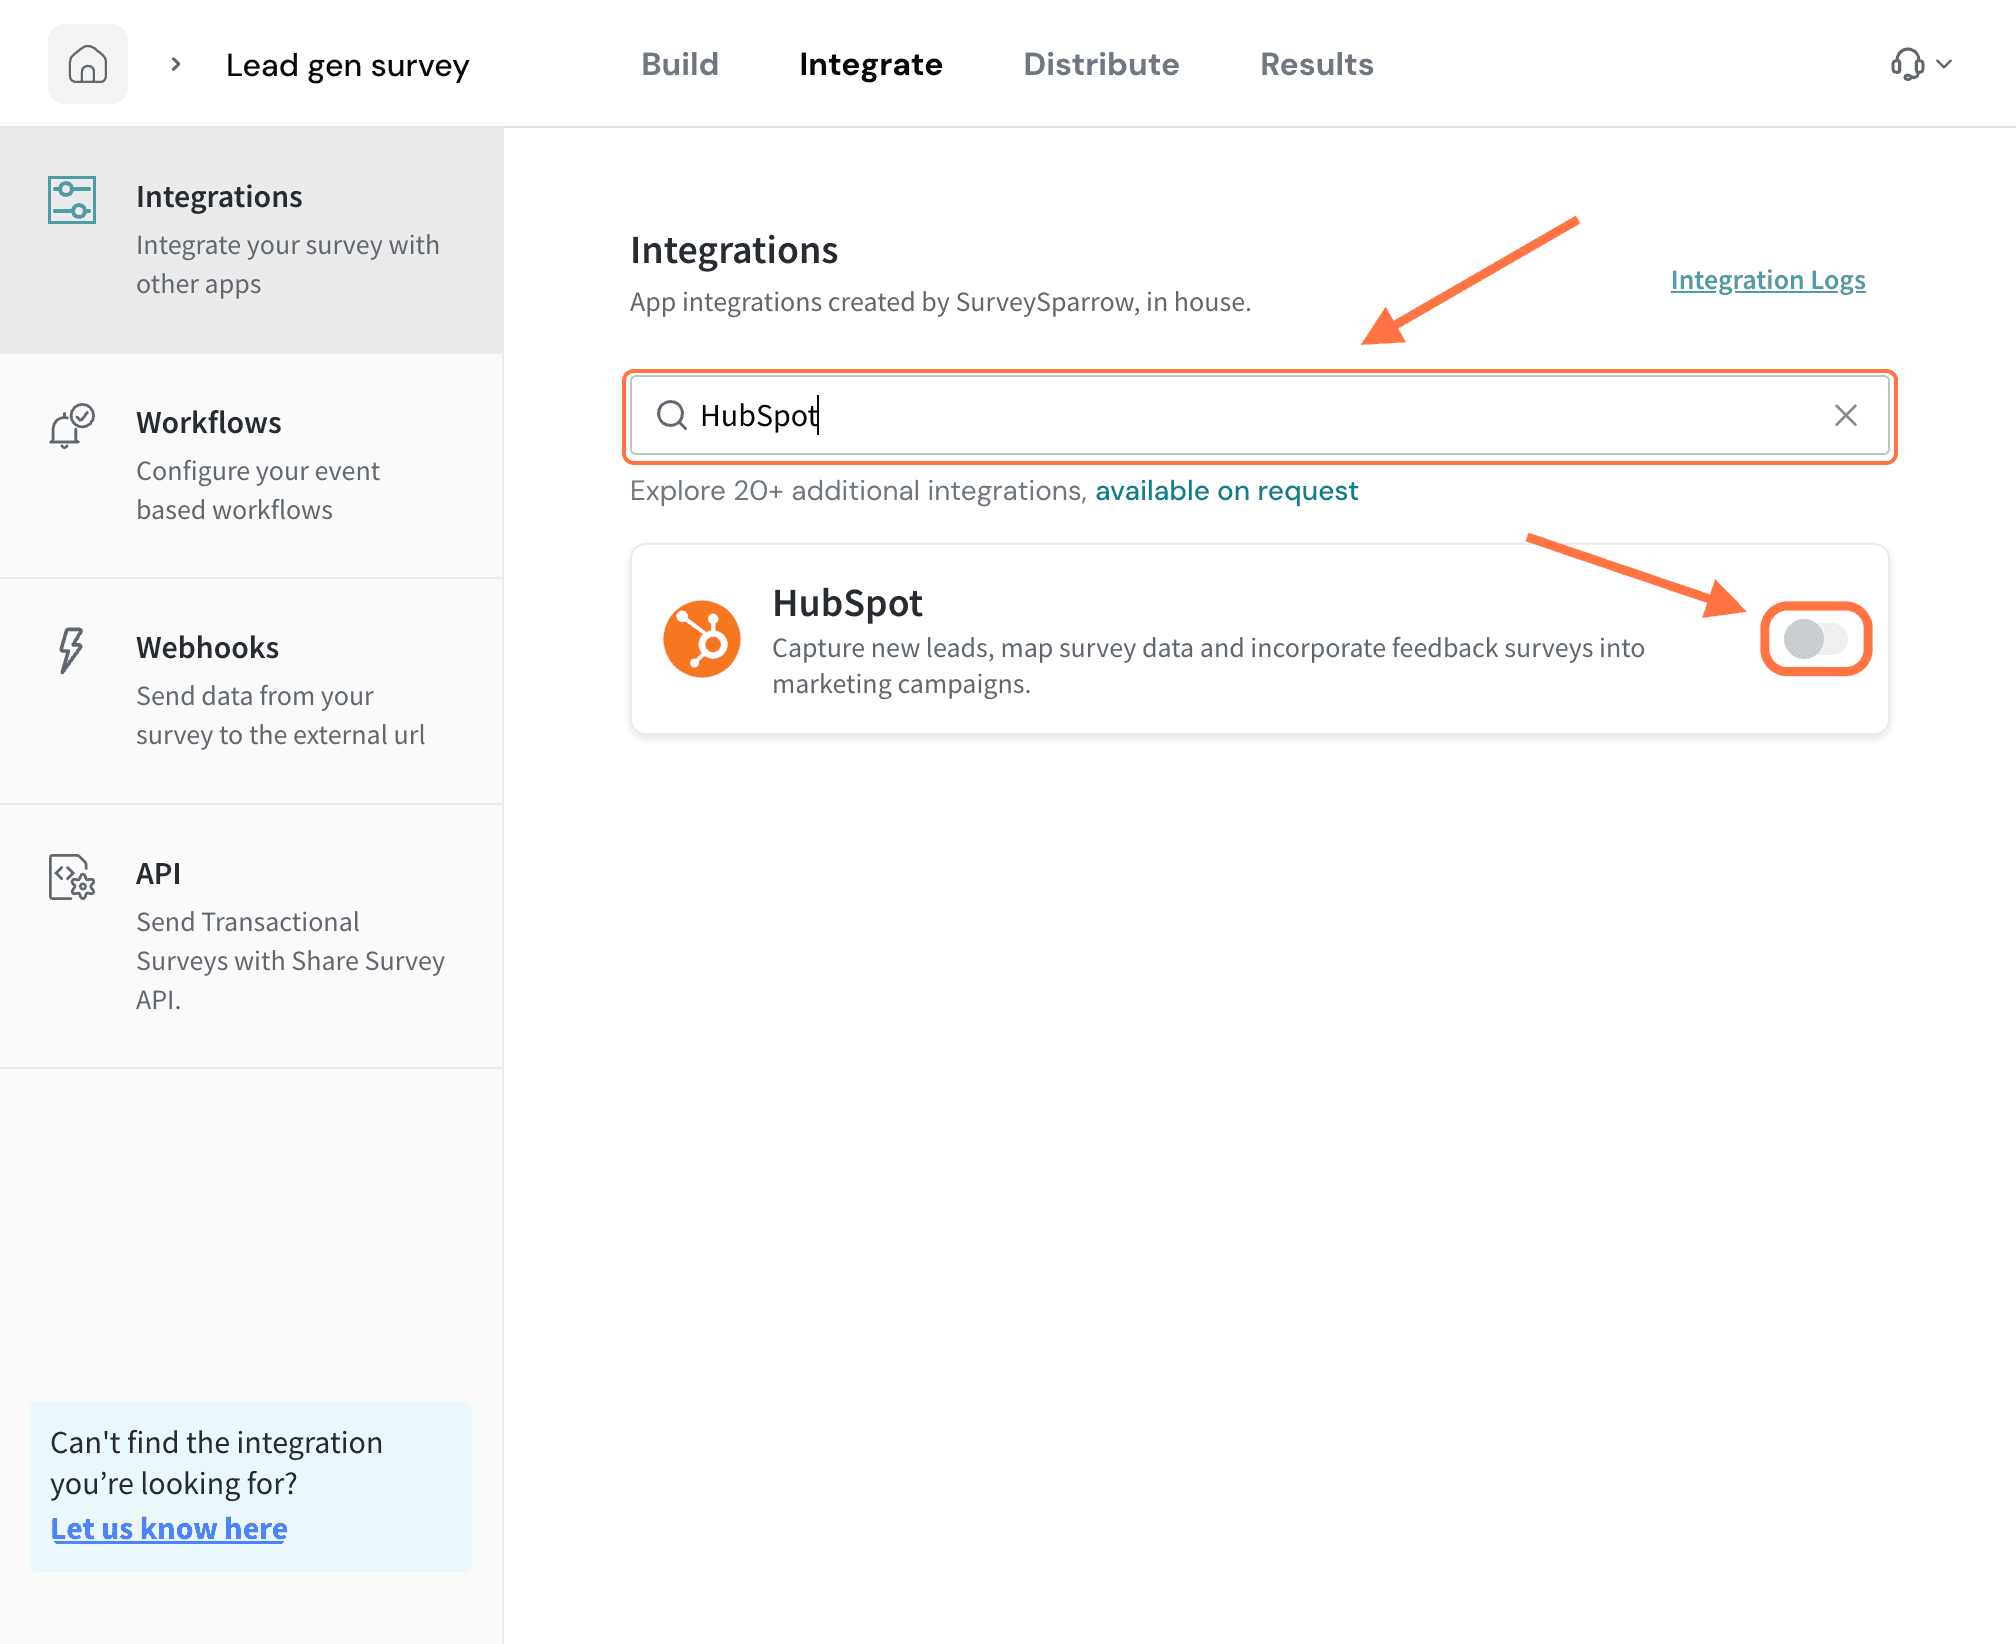
3. Open the HubSpot integration within the survey whose responses you want to map, then click Mapping.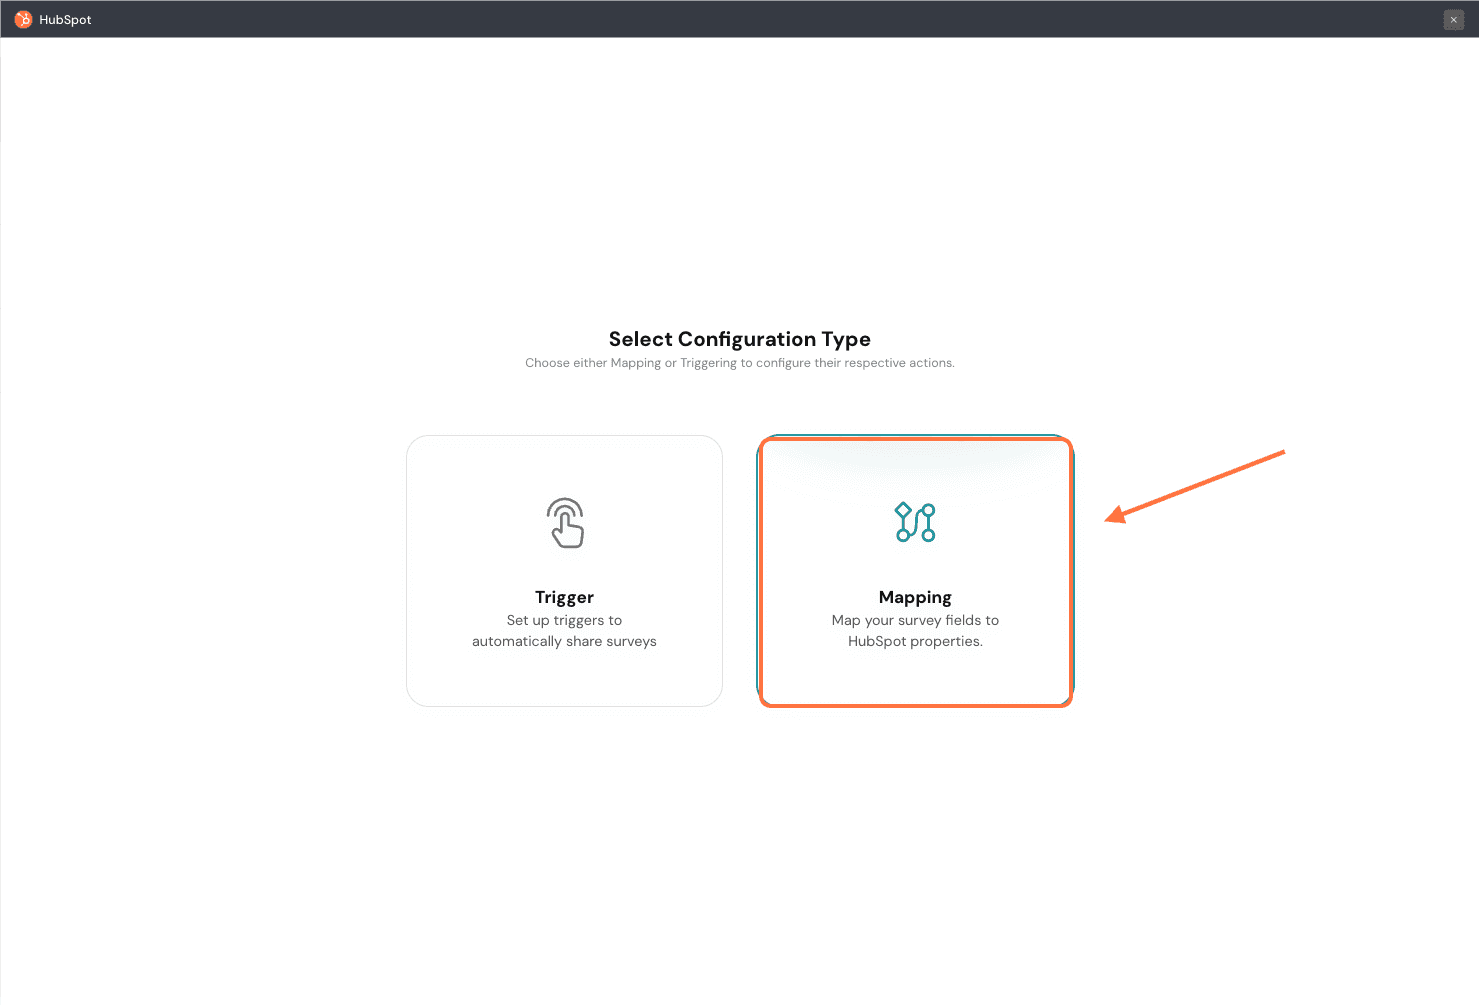
4. Then select the object category to which you would like to map responses, by clicking on the drop-down under Choose Object and choosing from the options.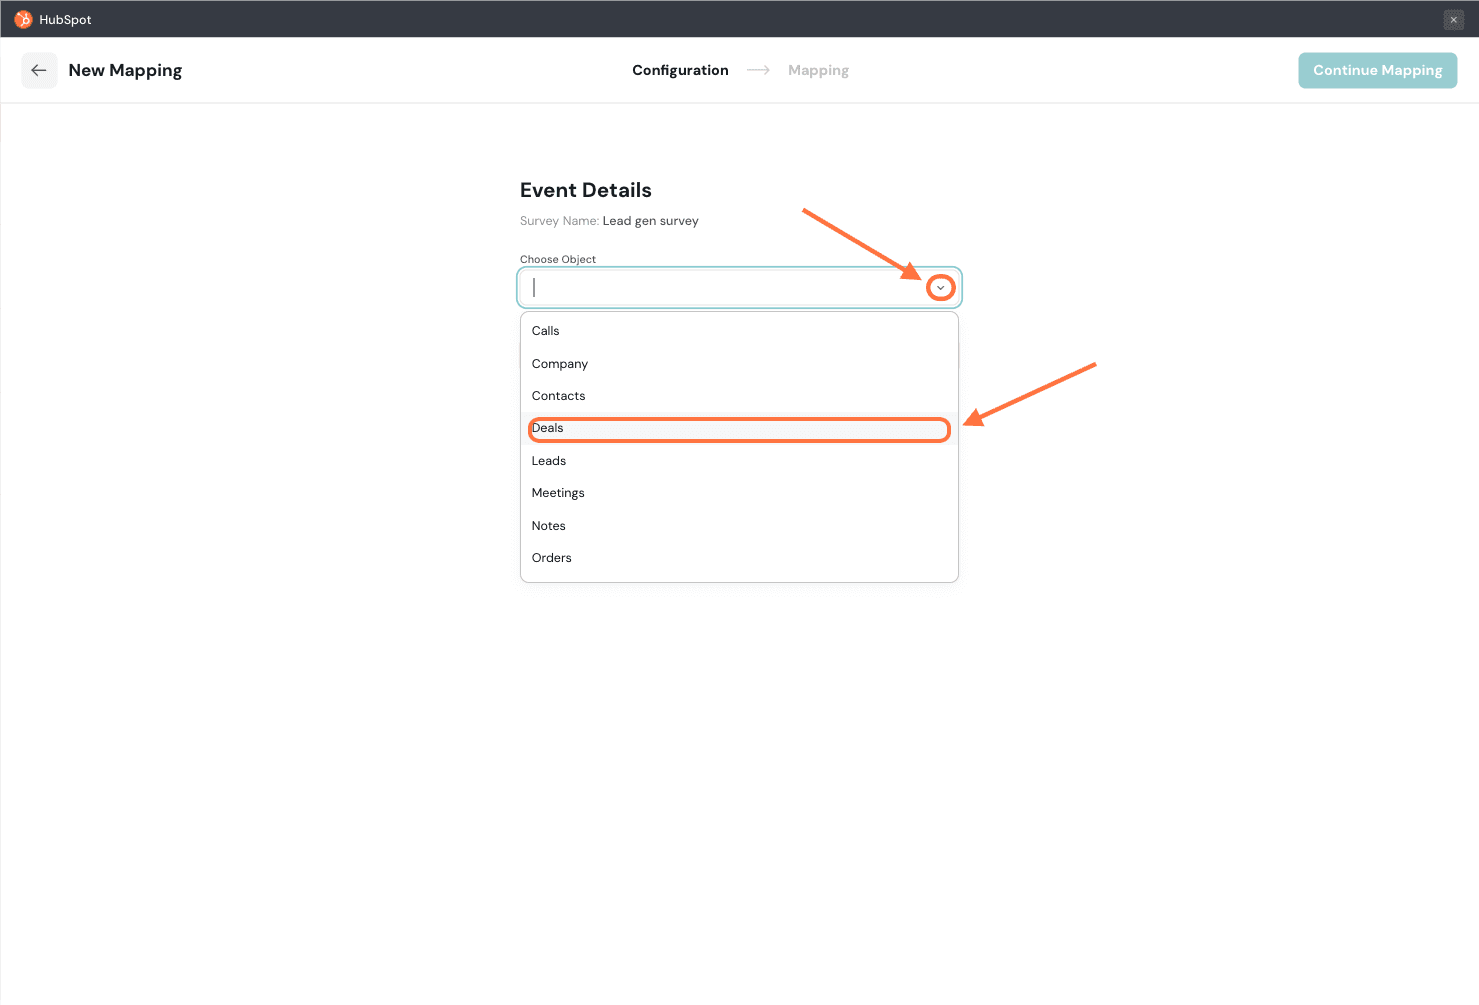
5. Next, you must choose the exact type of mapping action, by clicking on the drop-down menu under Choose Action. There are two types of actions available: creating (creating a new record of that object type), and updating (updating the fields of a specific record of that object type). Not every object will have the two options. For now we’ll click Create.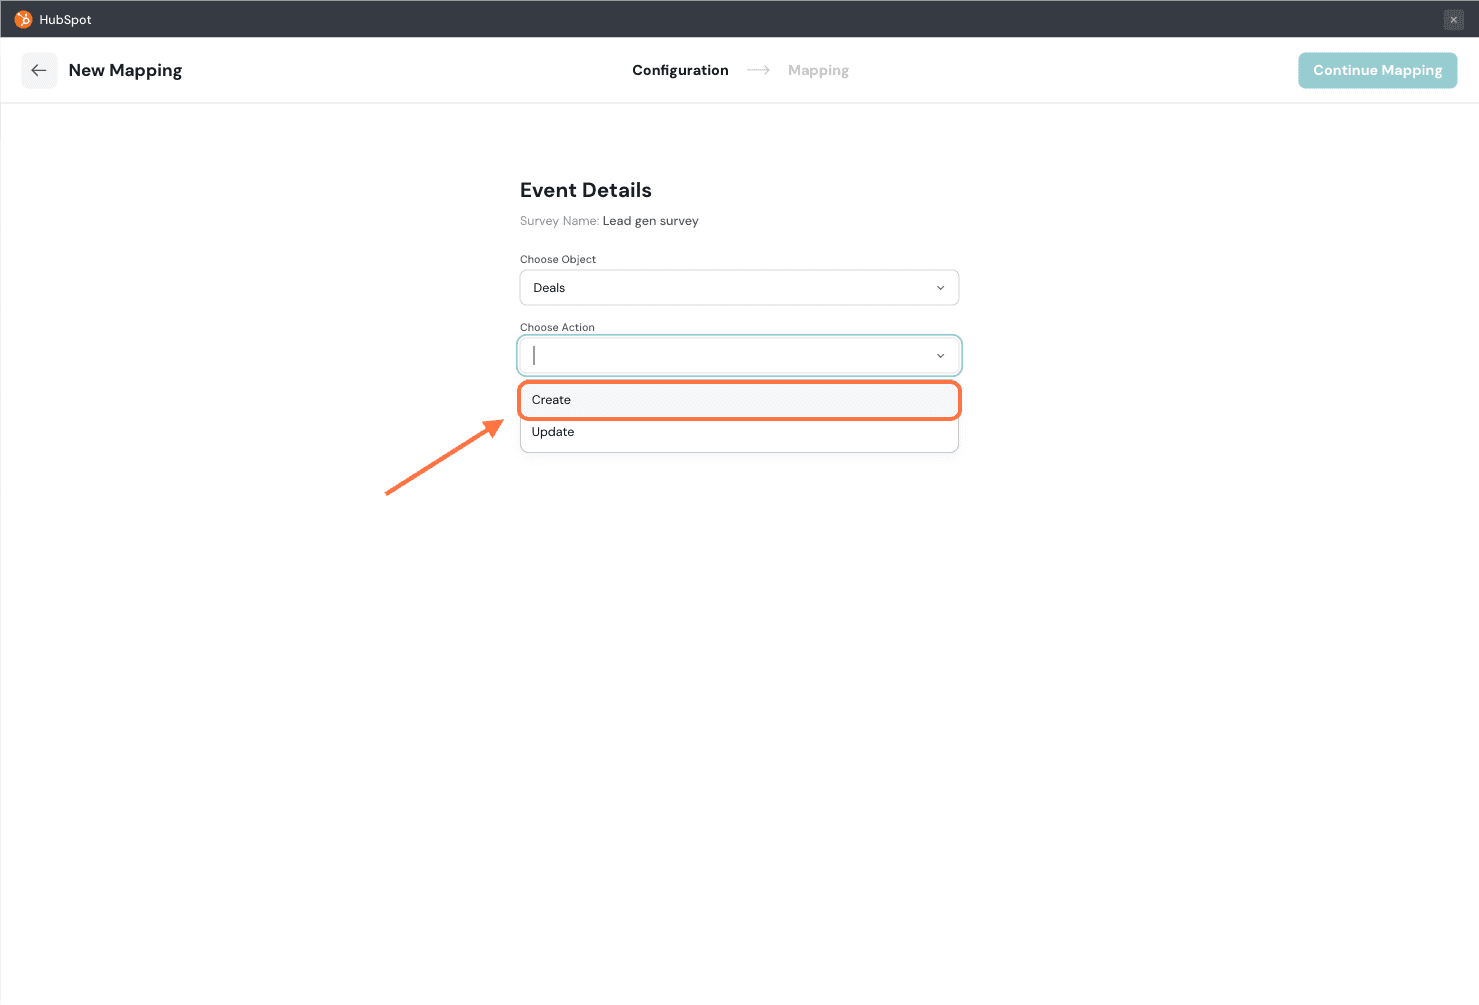
6. Next, click on Continue Mapping.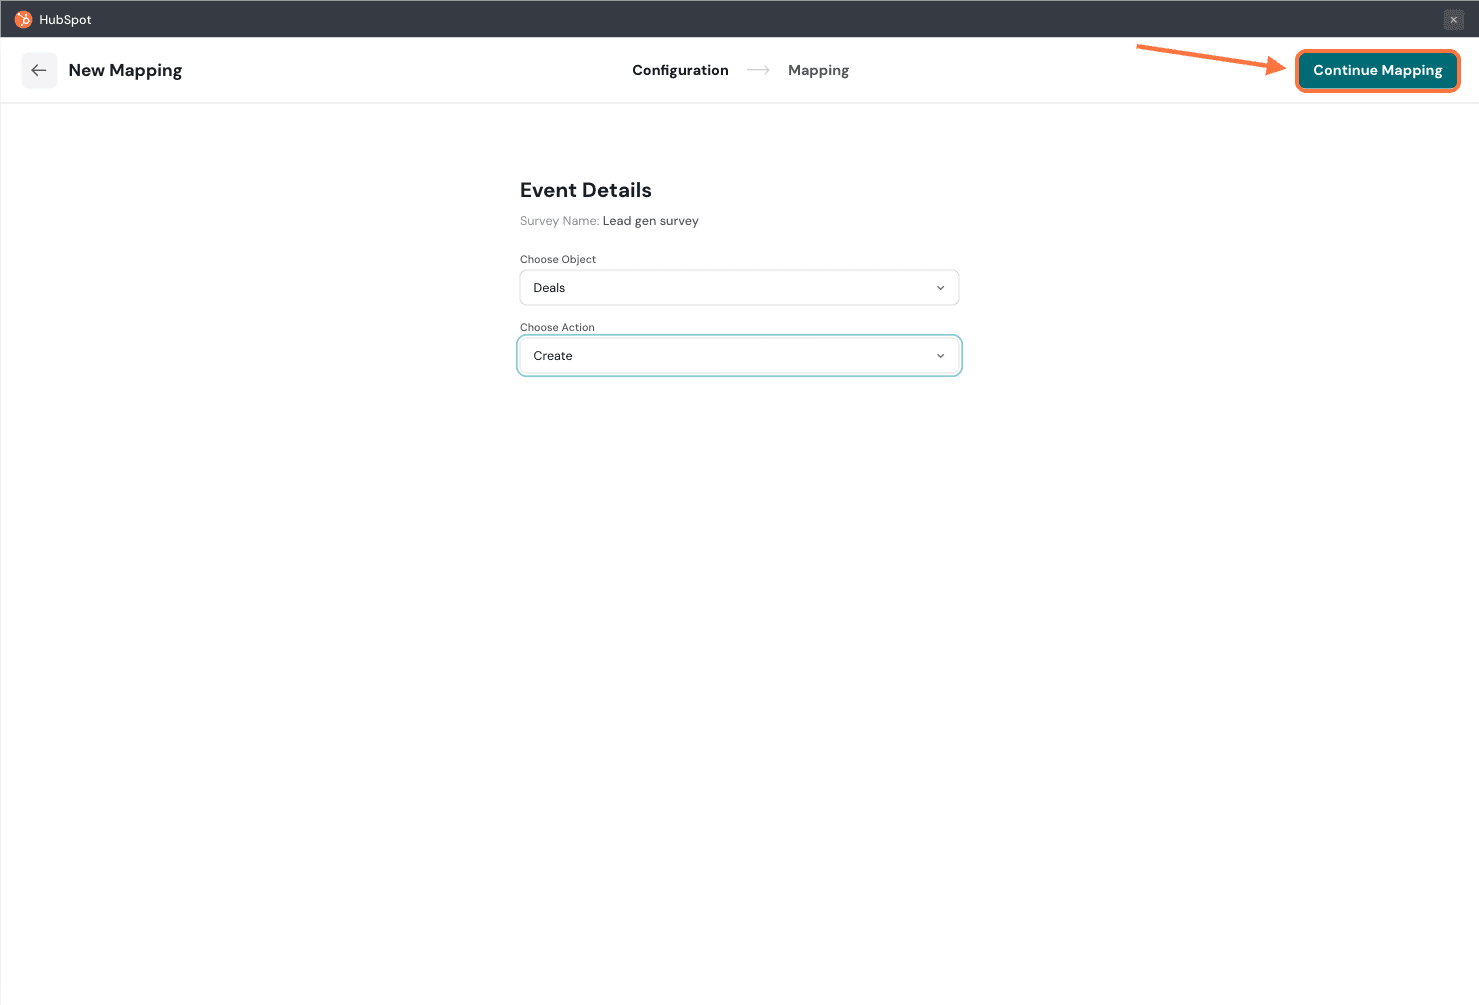
7. Now after choosing the object type and mapping action, you must define which exact data gets mapped in which fields of the record, aka create mapping fields. A mapping field has different components. The first component is the survey data type. By default, it’s a question, but you can change this by clicking on the drop-down menu under Type and choosing from the options.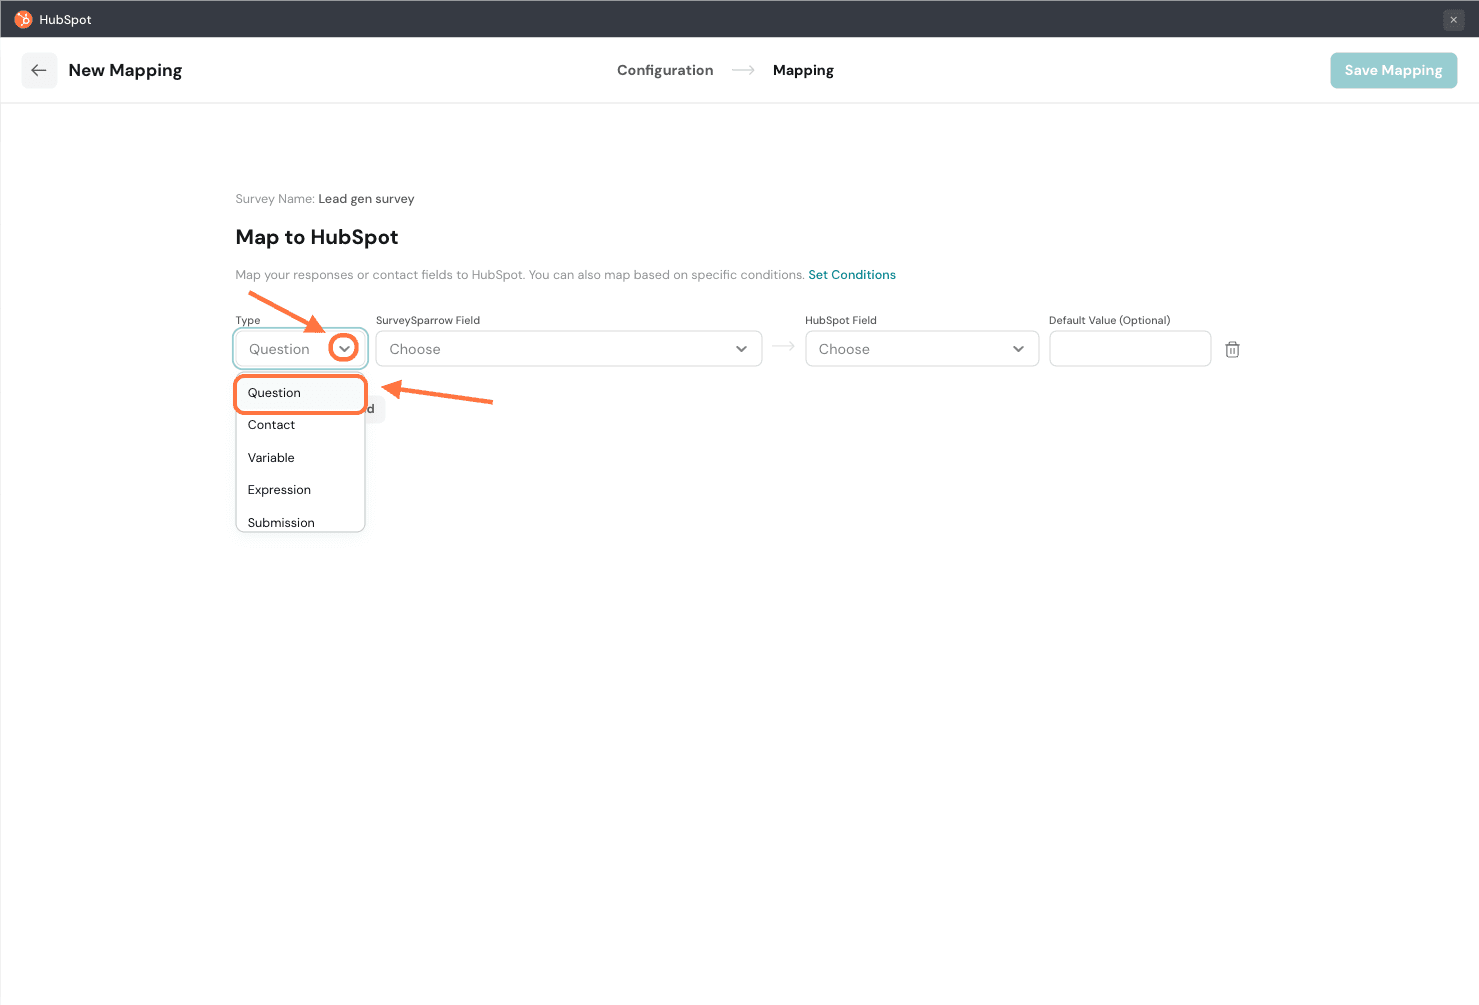
8. Next, for the chosen data type, you must choose a particular instance from the survey. In this instance, it would be a specific question. You can do this by clicking on the drop-down under SurveySparrow Field, and choosing from the options.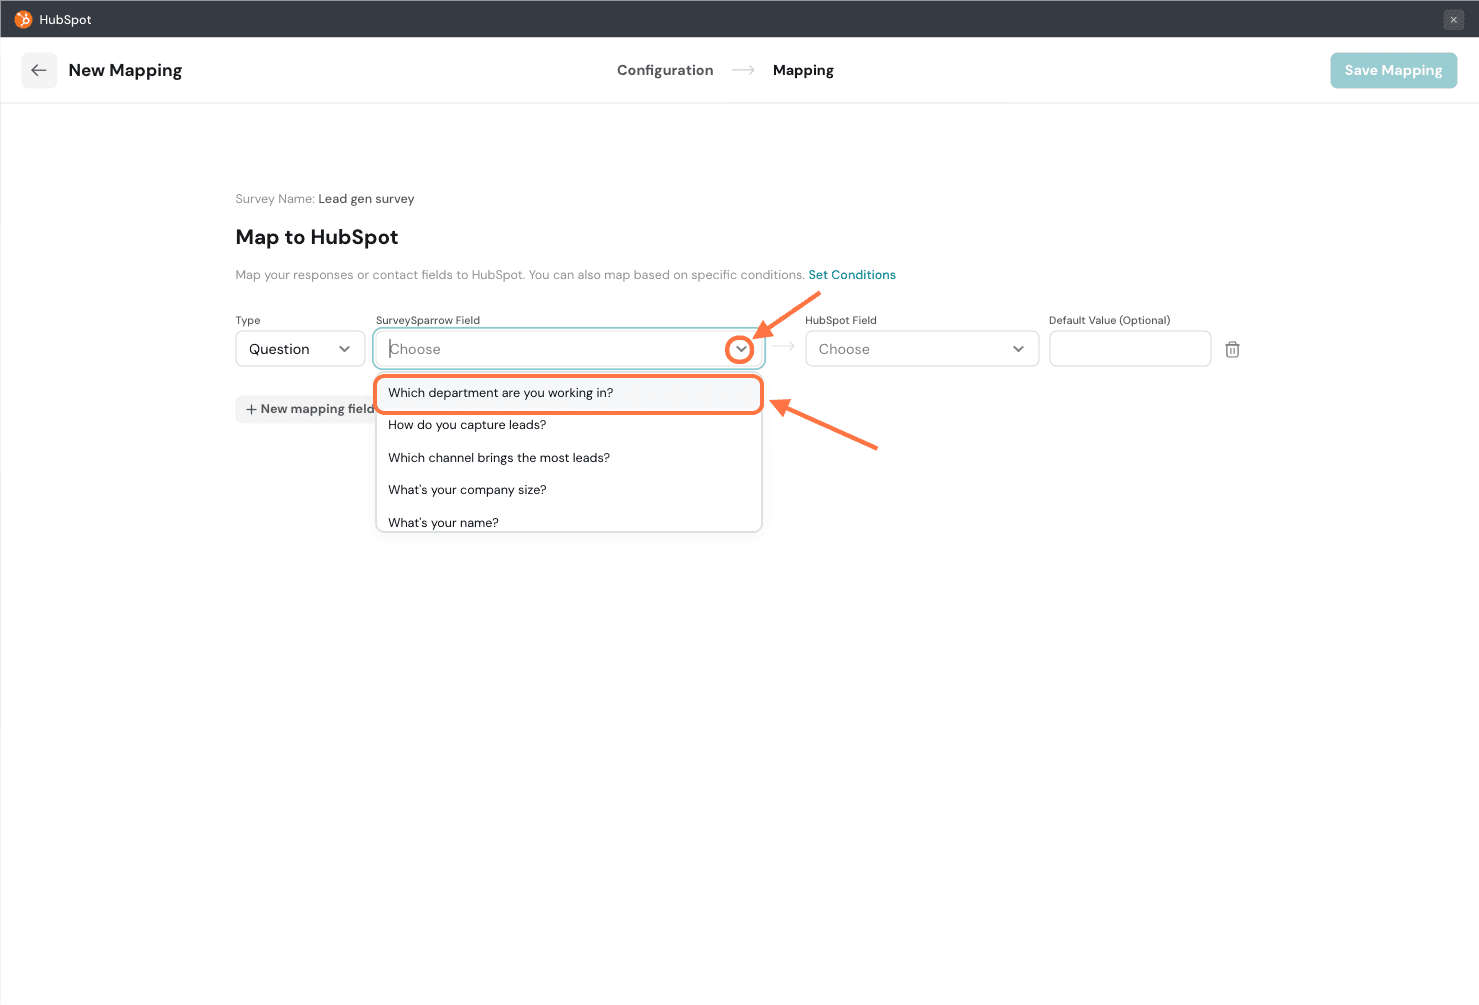
9. You also need to define which field of the newly created record is the destination for the data type, by clicking on the drop-down menu under HubSpot Field.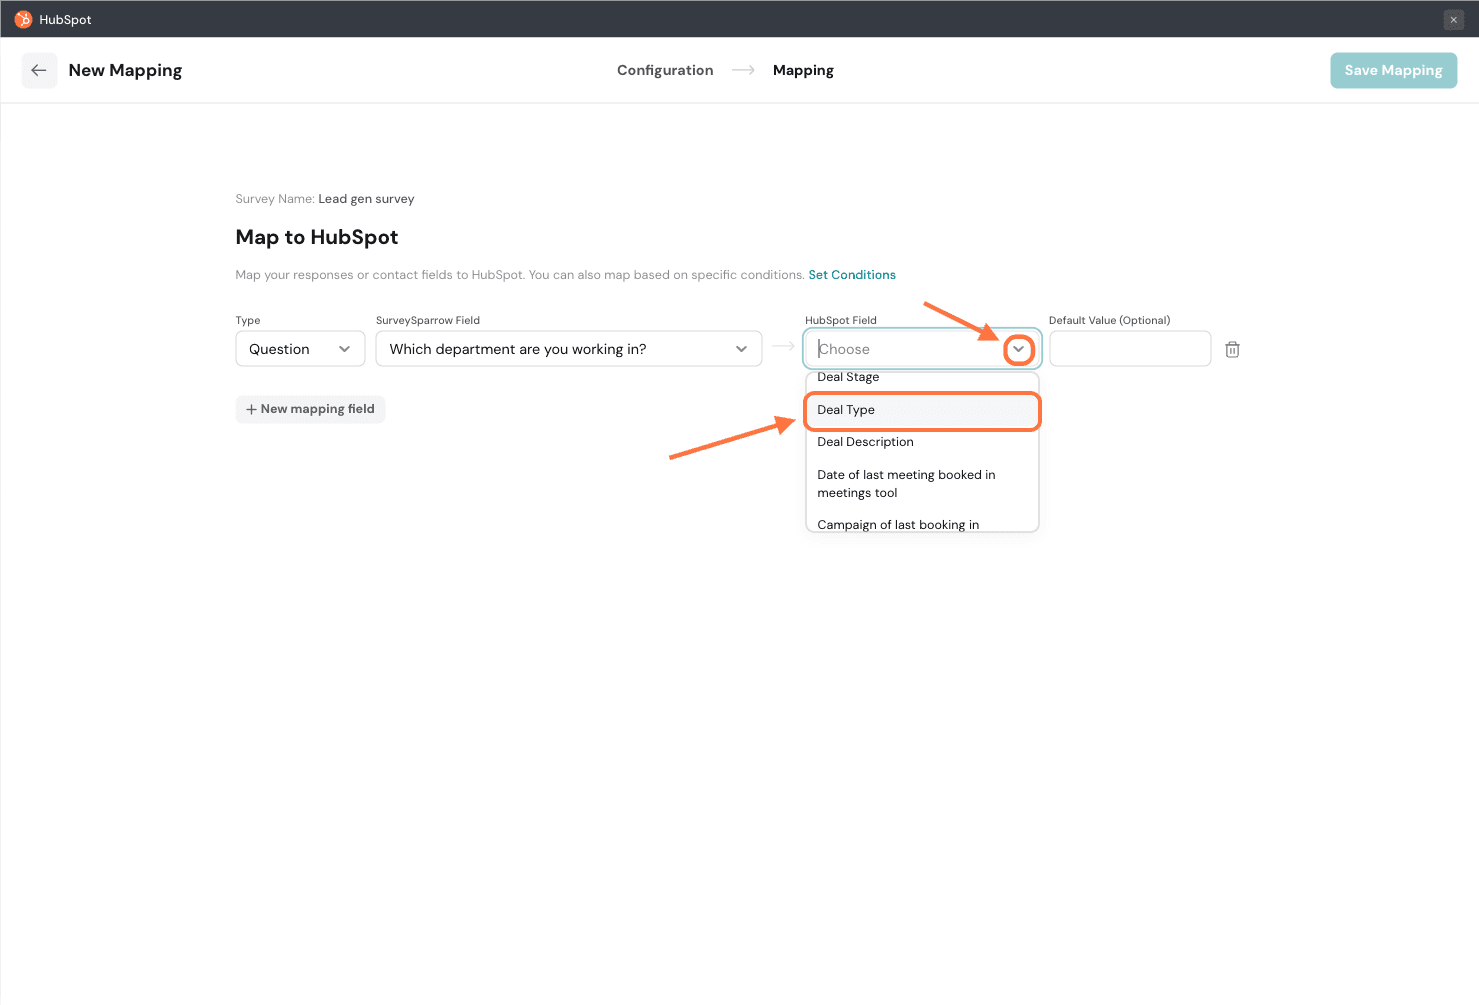
Note: For some types of objects, like Calls, the first mapping will have a preset HubSpot field, which cannot be changed. The field will vary as per the object (eg: Call Title would be the field for Calls). So you would also have to create additional mapping fields in order to proceed.
Note: During the Configuration section, if you chose Update as the action, the first mapping will also have a preset HubSpot field that can’t be changed. But in this case, it is always going to be Record ID. Once again, you must create additional mapping fields to proceed.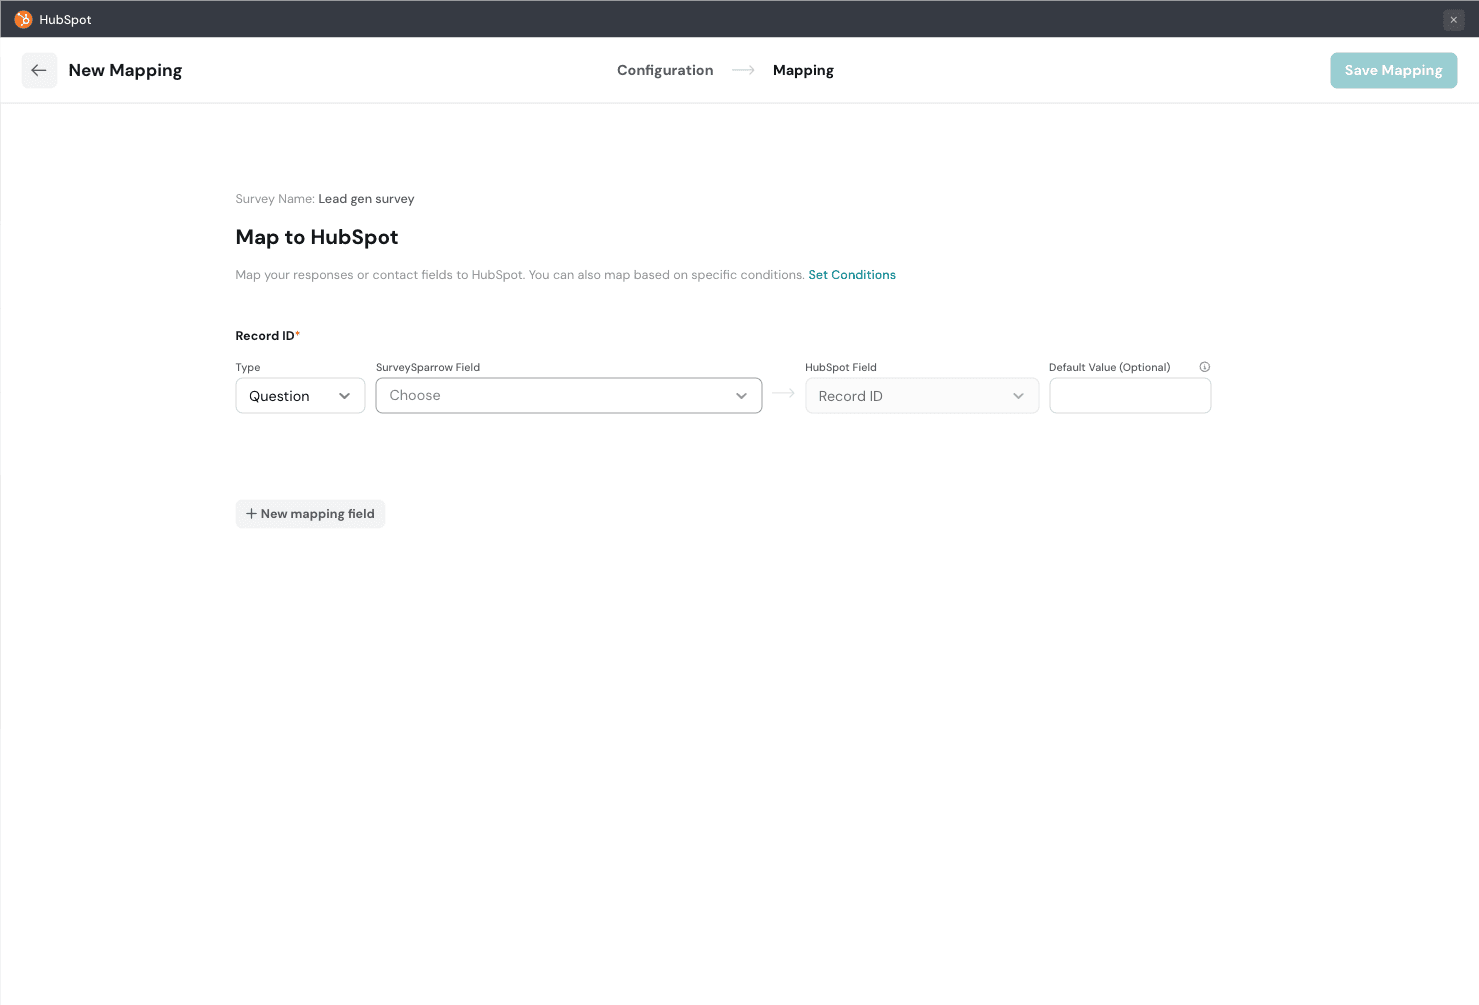
10. If the data type has a null value (eg: in this case, a question that goes unanswered), you can add a default value to be filled instead.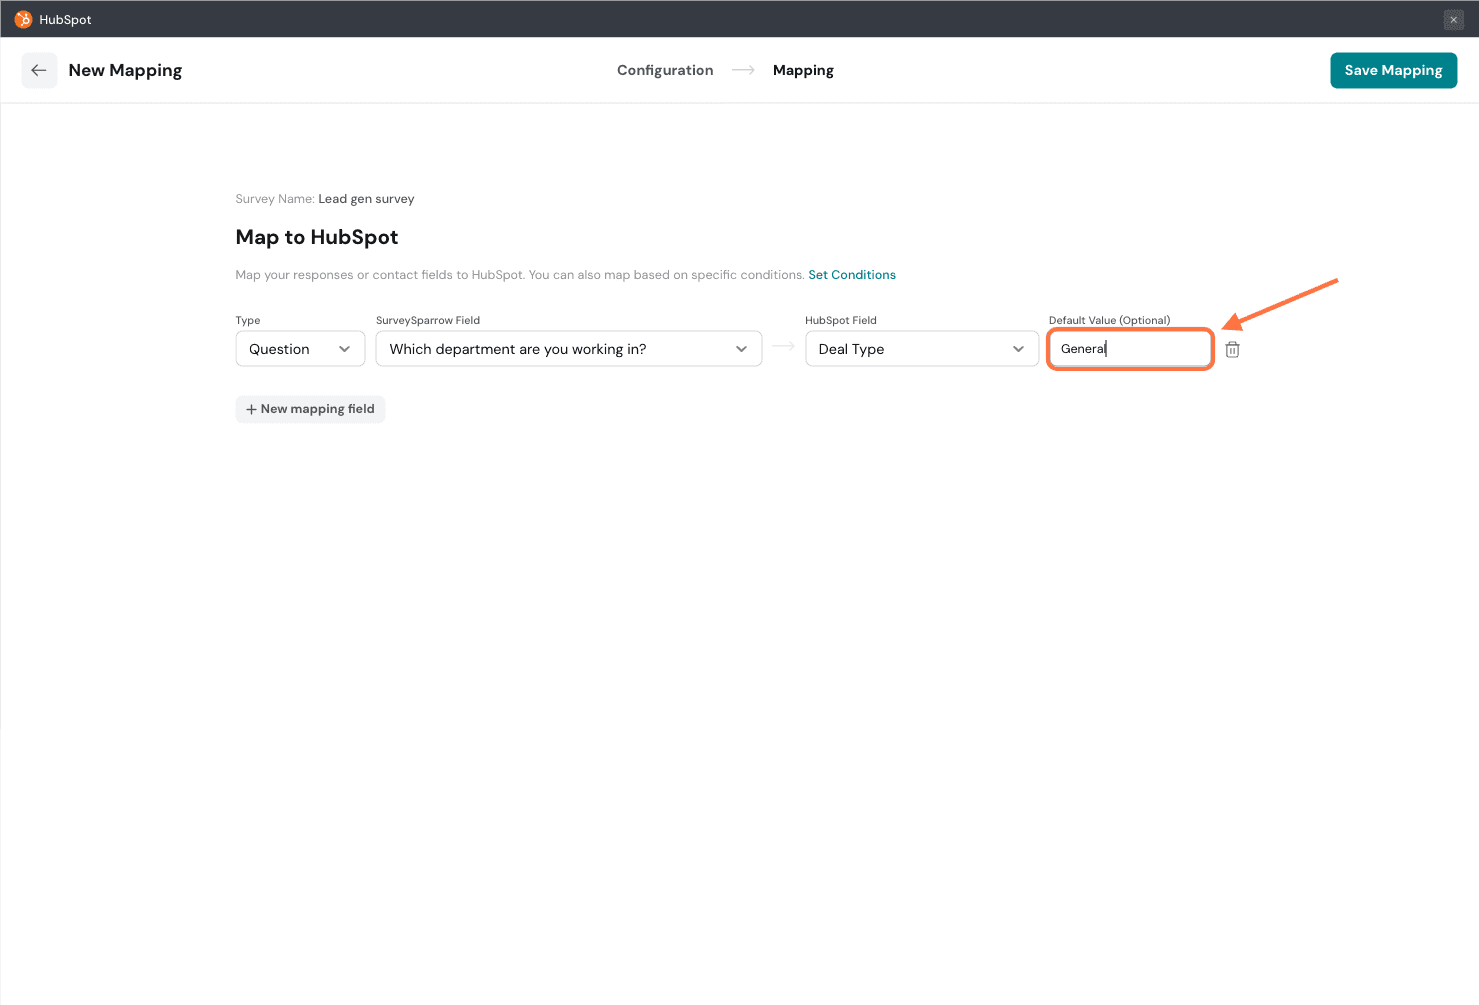
11. To create additional mappings, click on New mapping field.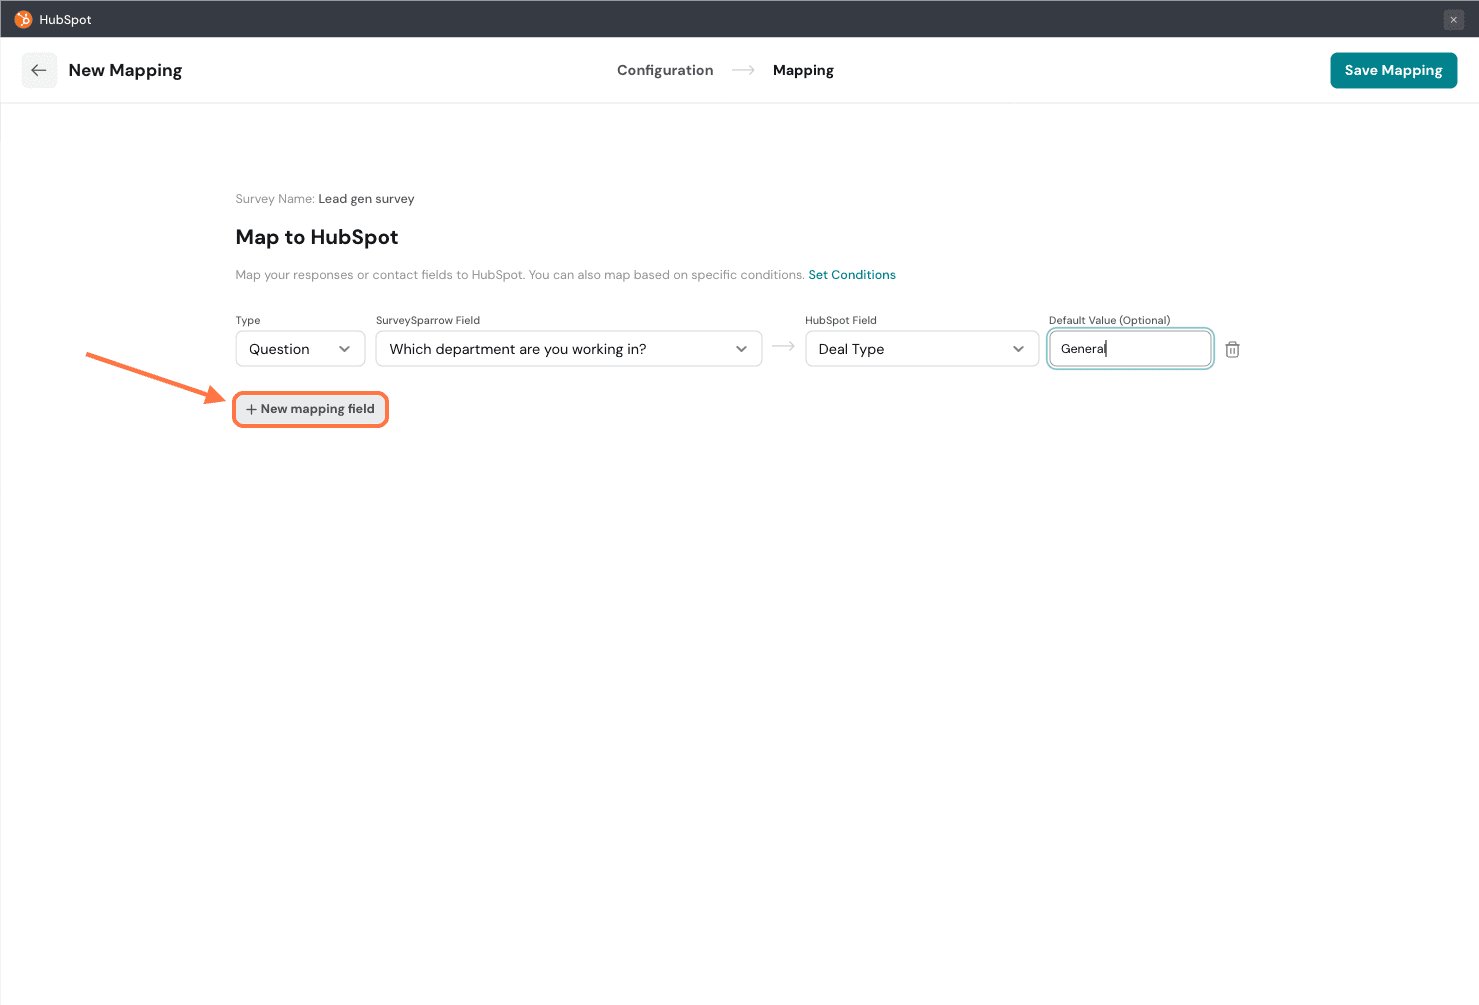
12. Once you’ve added the mapping fields, and are ready to save it, click on Save Mapping.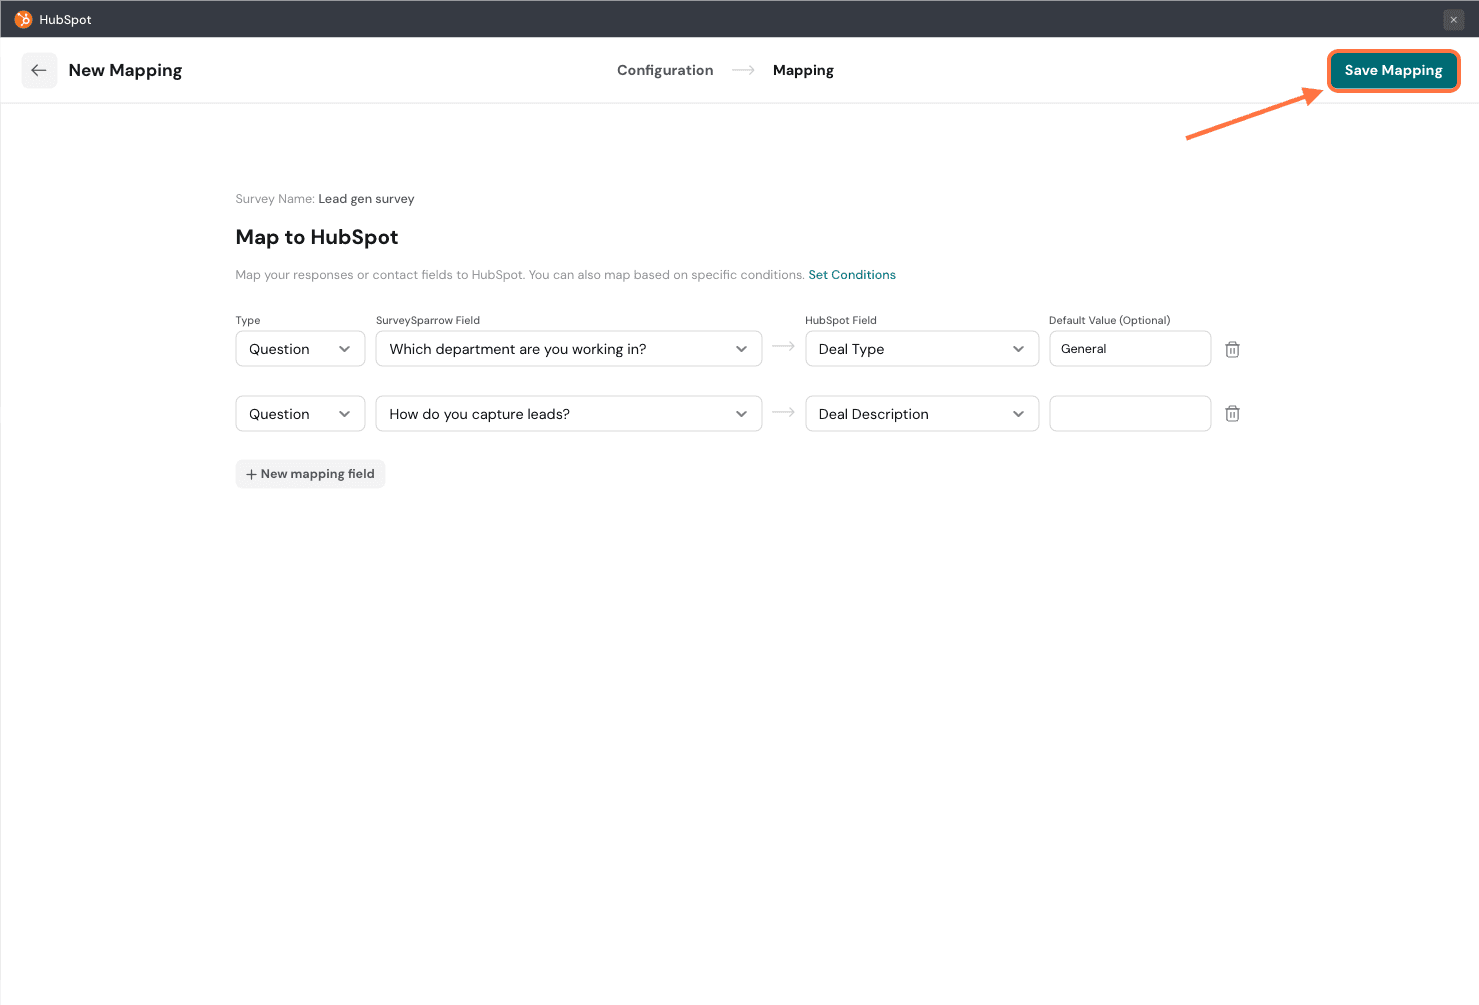
13. Enter a name for the mapping and click Save Mapping. Just as described before, you will be taken to a section where you can see both triggers and mappings. You can edit, delete, pause existing mappings and create new mappings.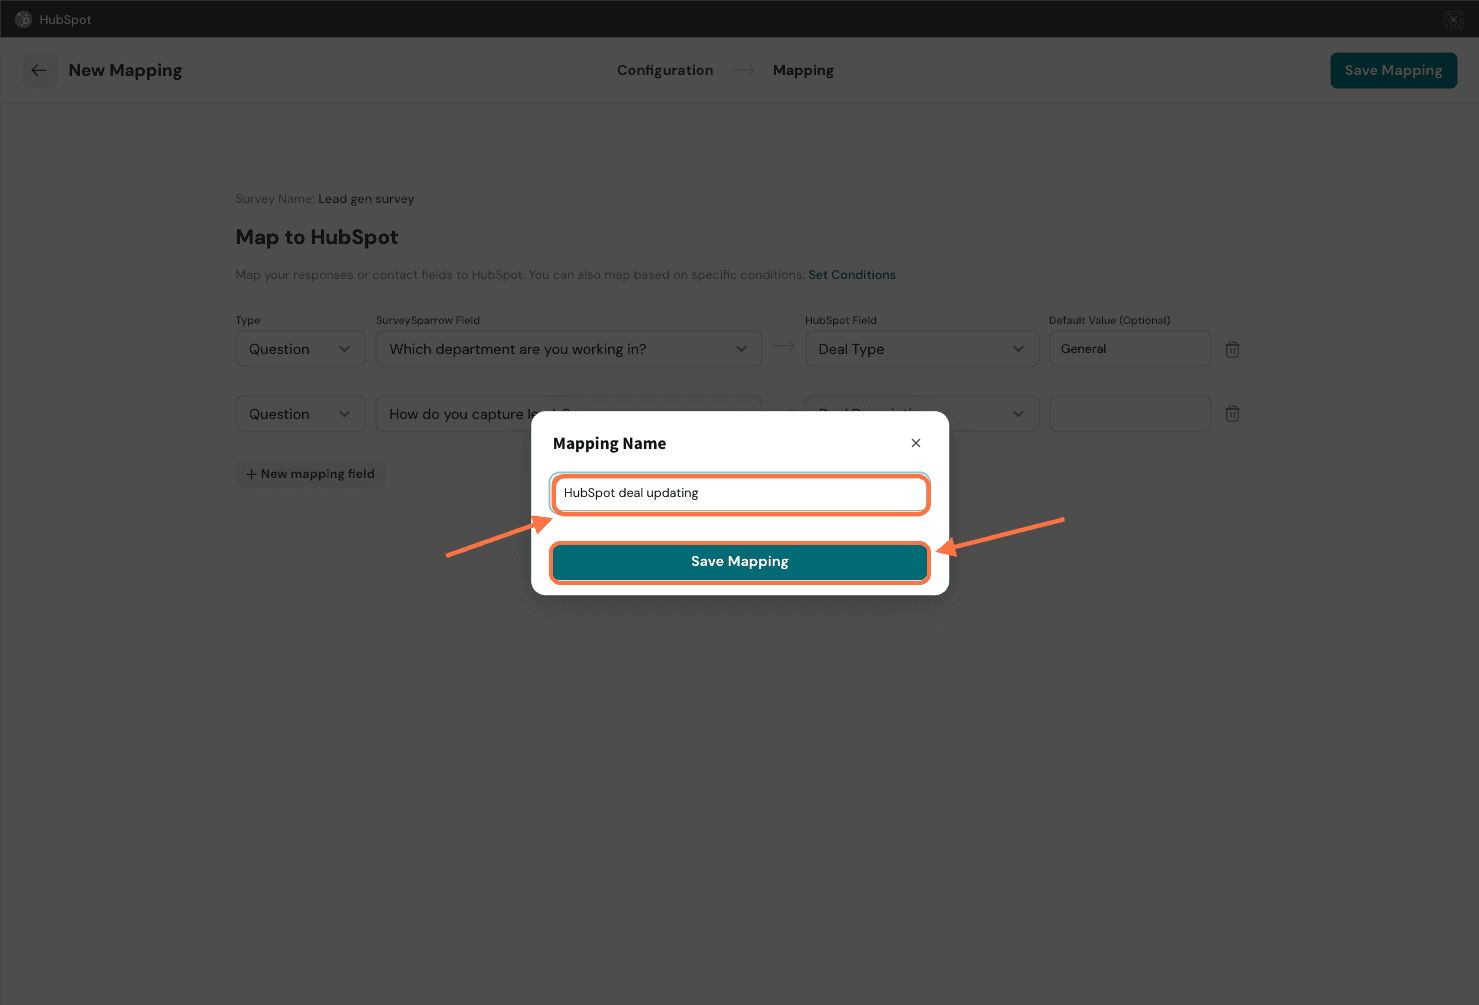
14. Just as described before, you will be taken to a section where you can see both triggers and mappings. You can edit, delete or pause existing mappings and create new mappings.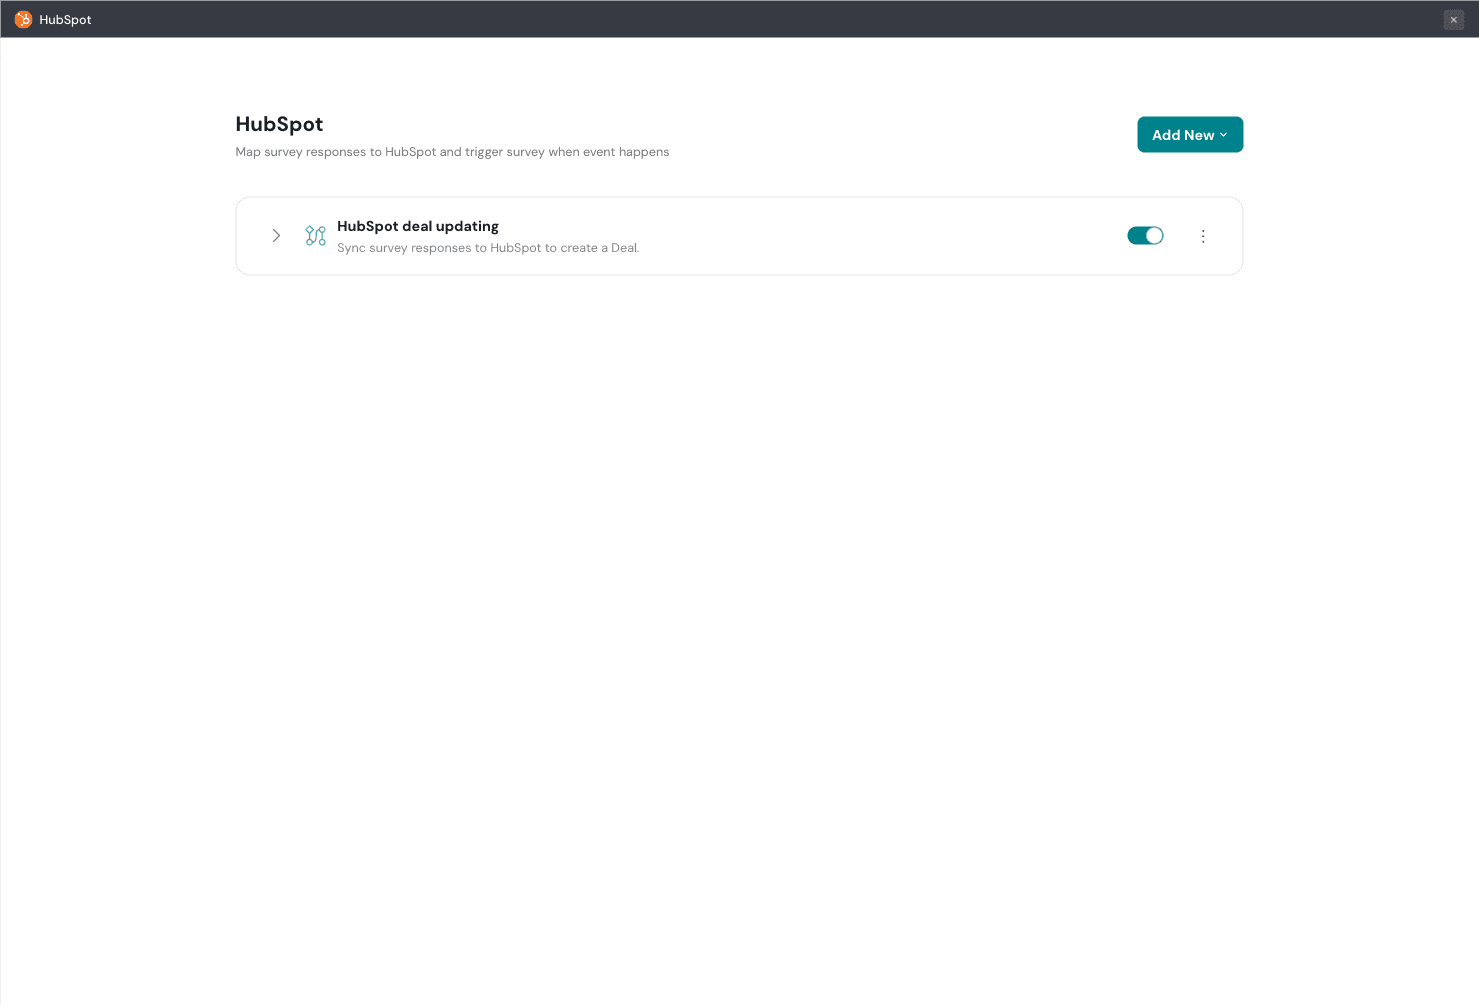
As and when the user completes the survey, the responses will get mapped to the corresponding HubSpot fields.
Note: Ensure you add surveysparrow.com to your Additional site domains on HubSpot
1. Open/create a survey, then click on the Integrate tab.
2. Search for HubSpot using the search box, then click on the toggle.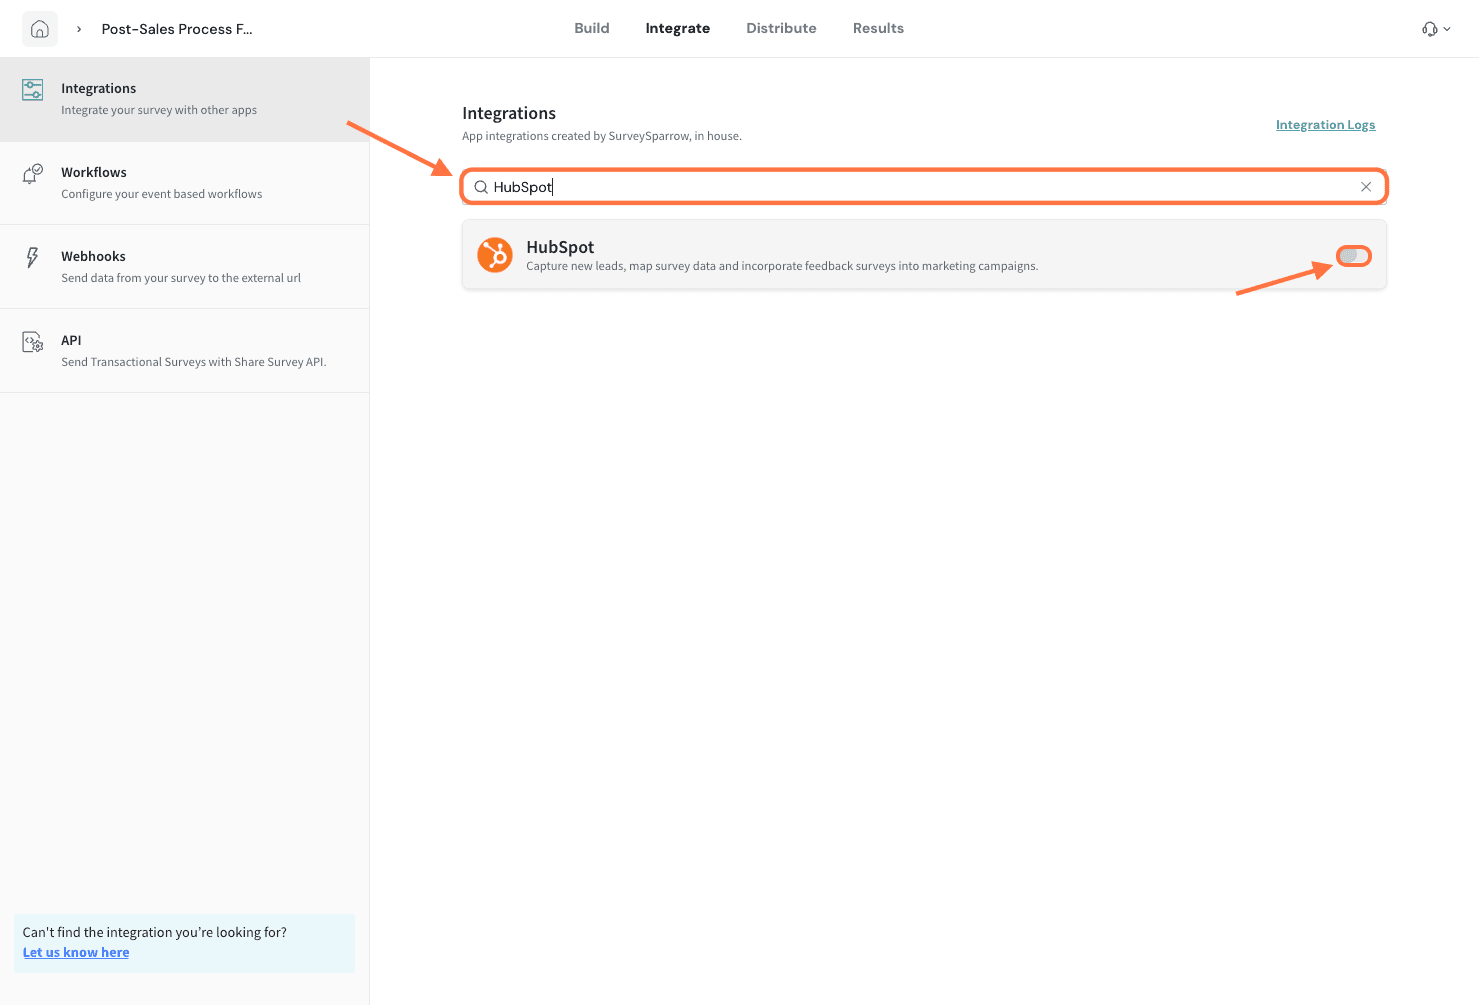
3. Inside the HubSpot integration window, click on Trigger.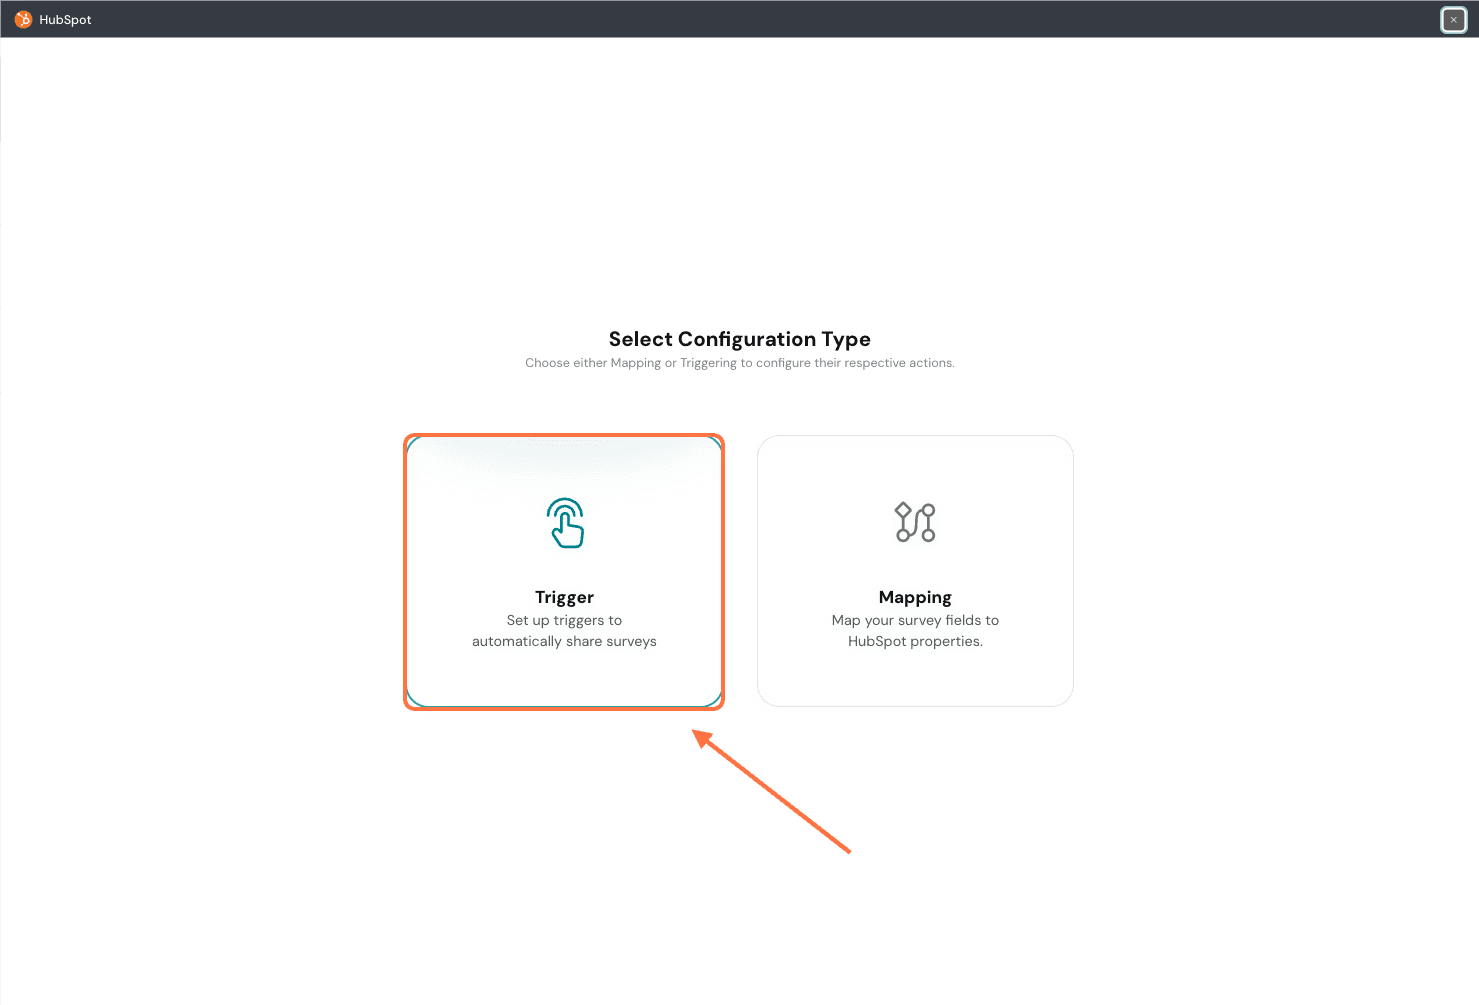
4. To create a trigger, you need to define the event that sets it off - which consists of an object in HubSpot (calls, contacts, etc) and an action that happens to the object (a new record is created or an existing record is updated). Click on the respective drop-down menus under Choose Object and Choose Action and select the object and actions.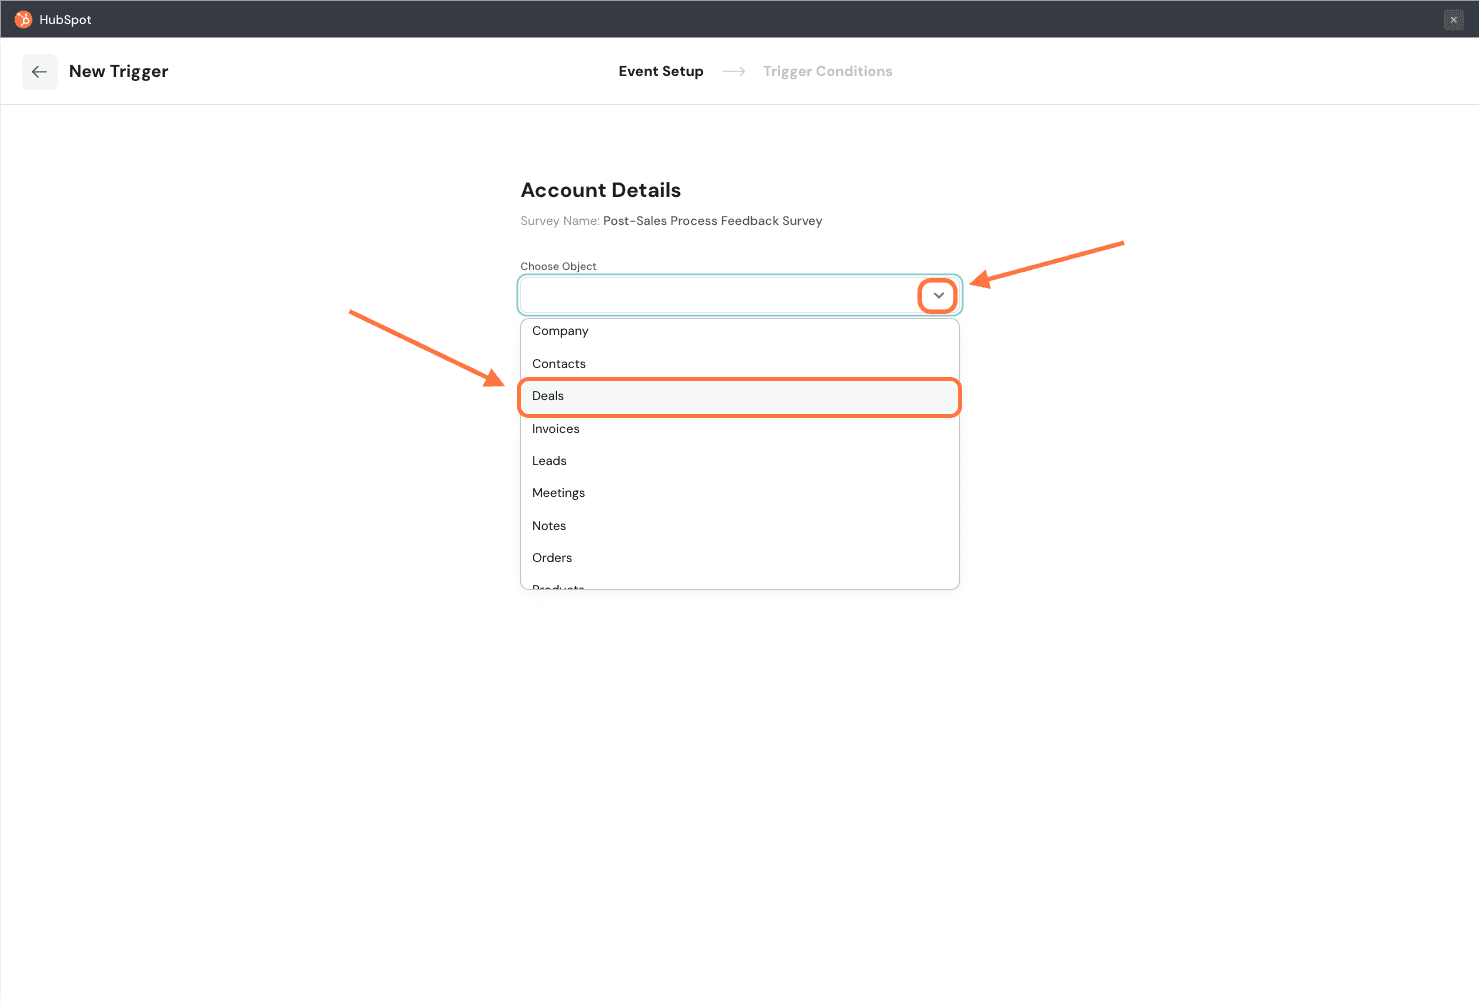
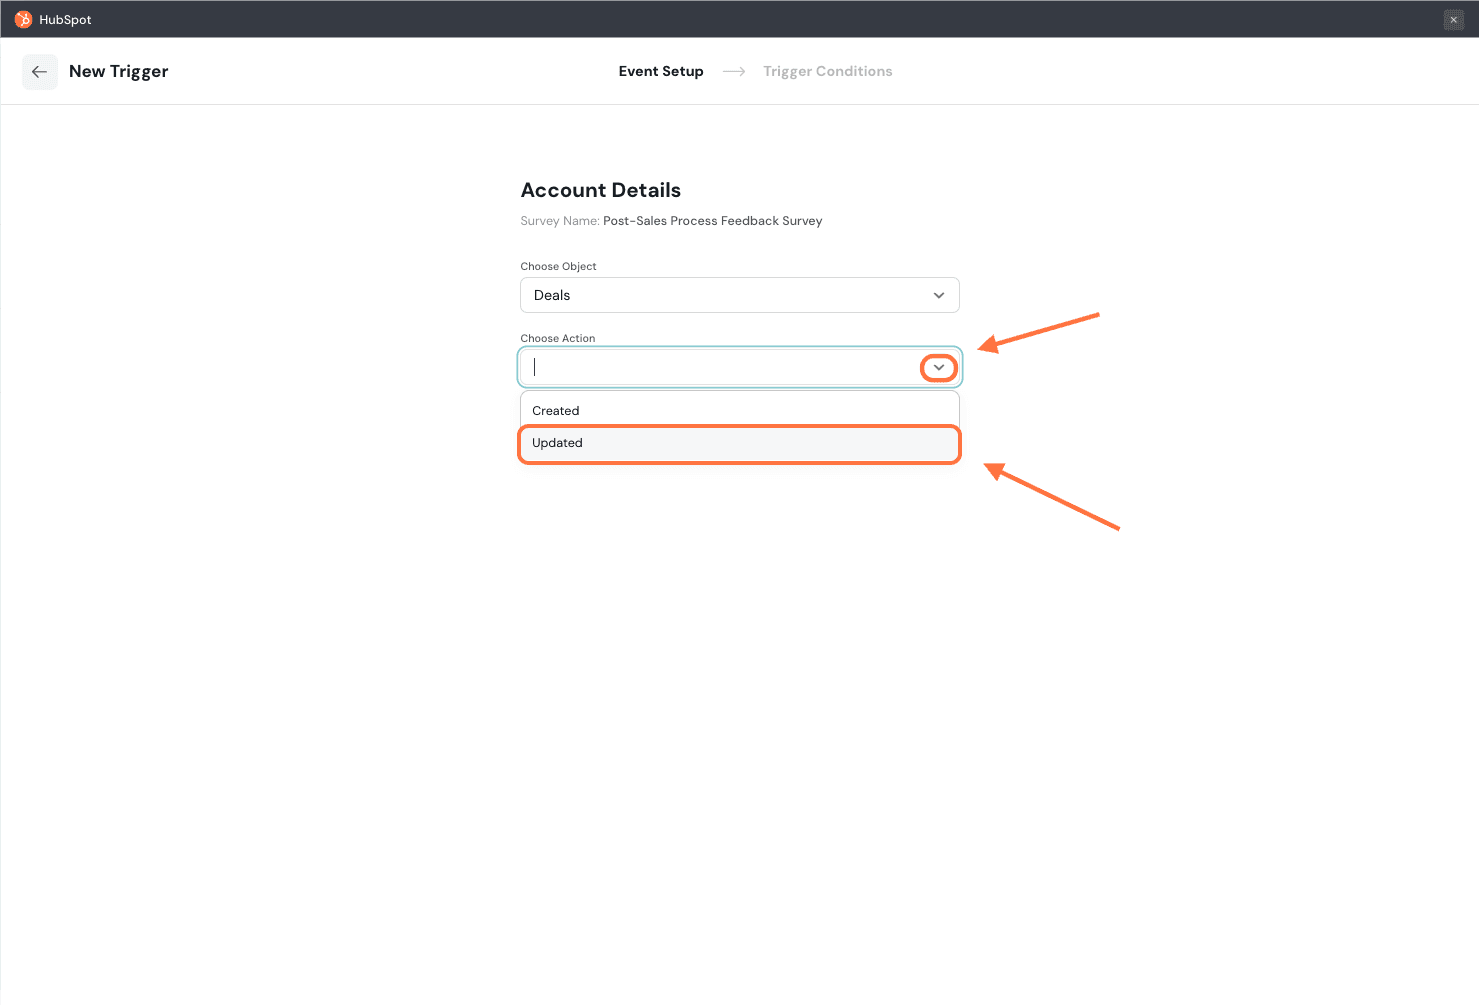
Note: Some objects will only have one action available.
5. Click on Continue.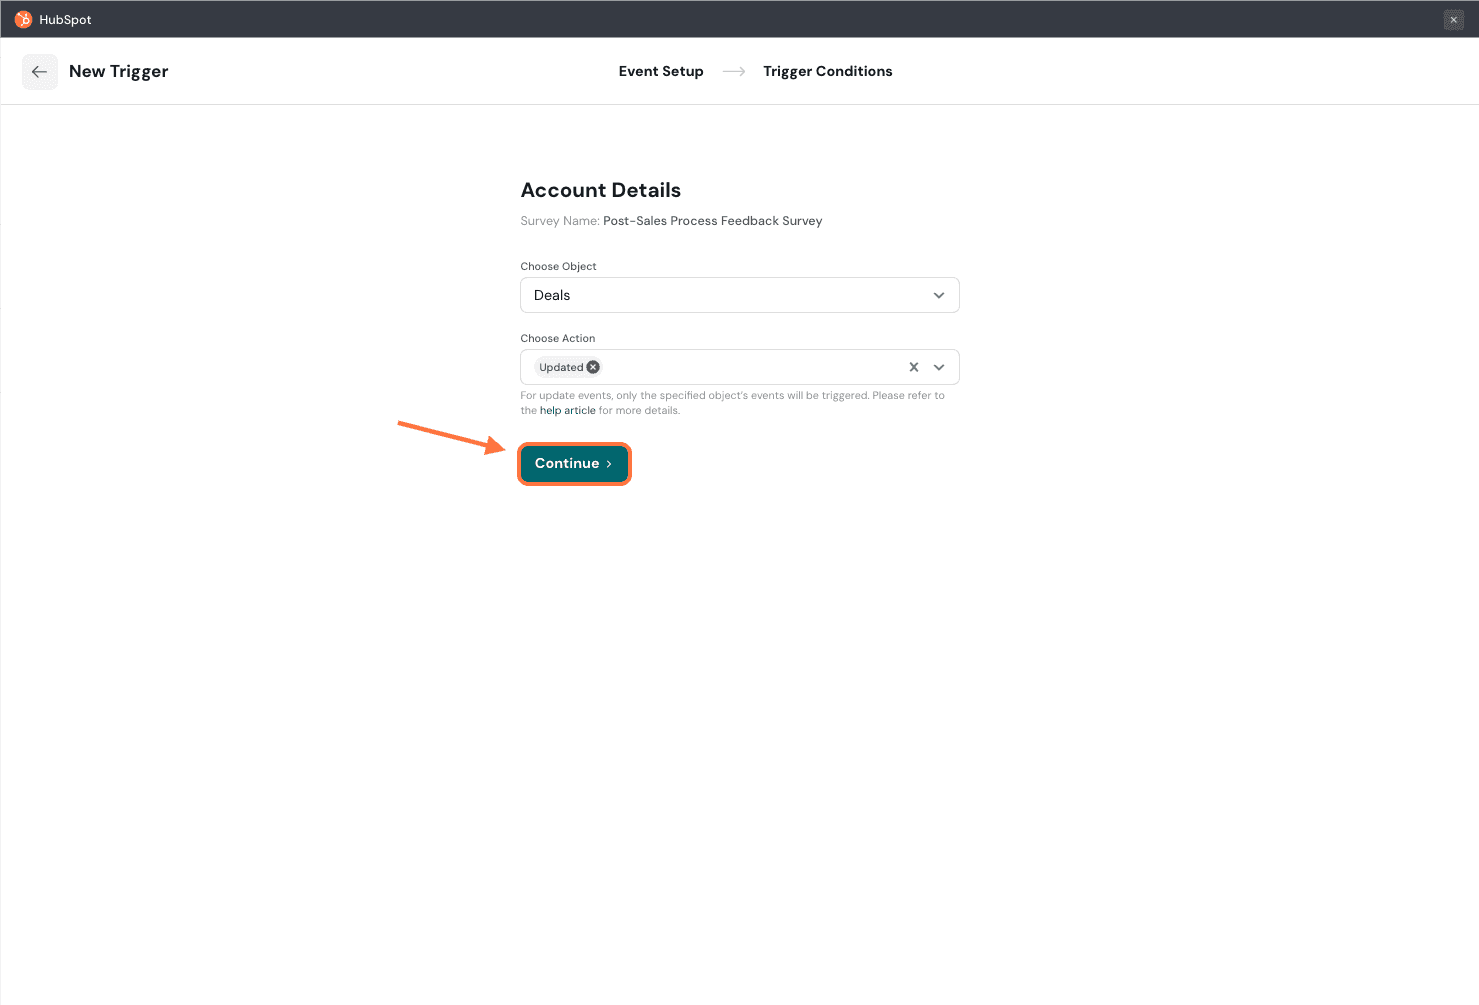
6. Next, we proceed to the Trigger Conditions section. Here we must decide the conditions that the selected object must satisfy in order to trigger the event. You can choose to have all the conditions obeyed at once or any one obeyed. To do this click on all and choose from the drop-down.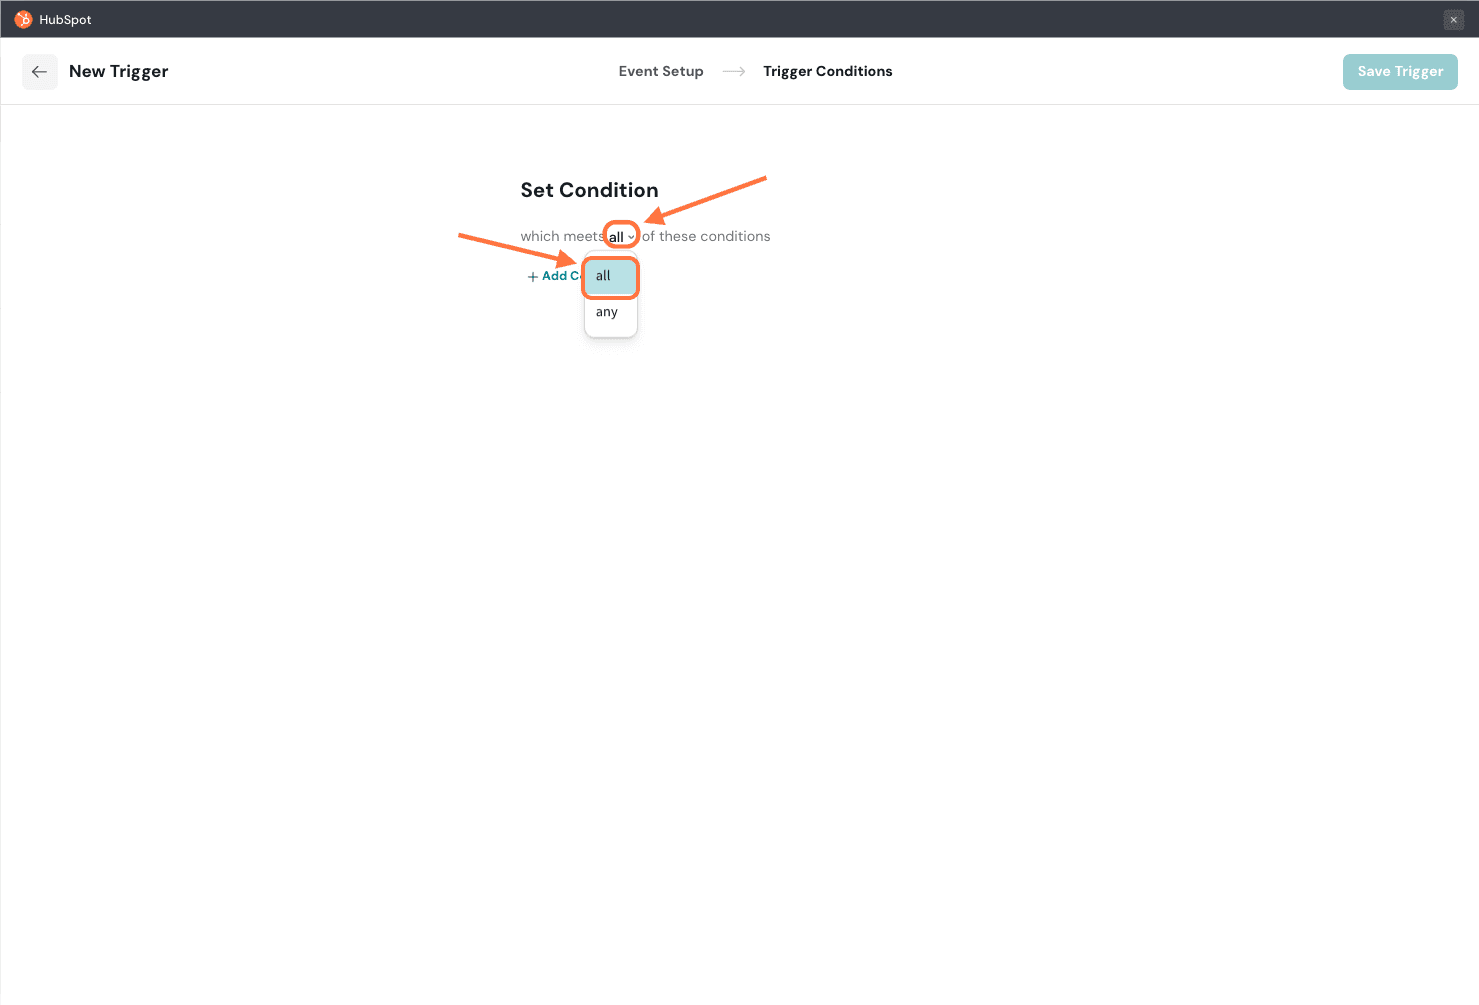
7. Next, you can start creating the conditions by clicking on Add Condition.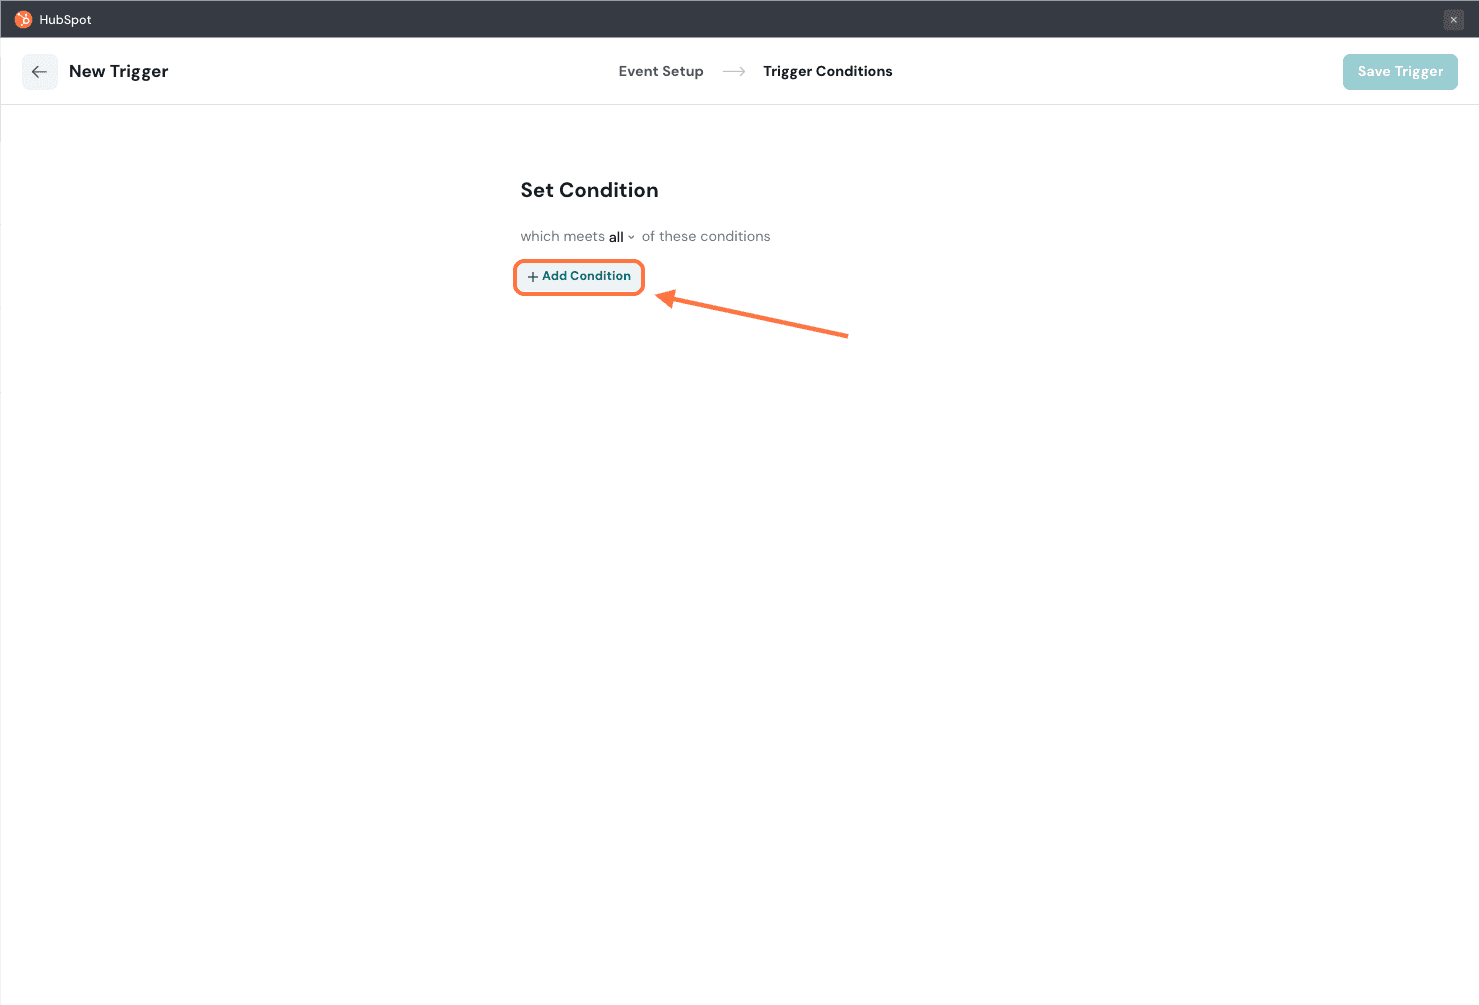
8. The first component of a condition is a property of an object (eg: for Deals, it would be Deal Stage, Deal Type). Select one from the drop-down menu under Choose Field or use the search box.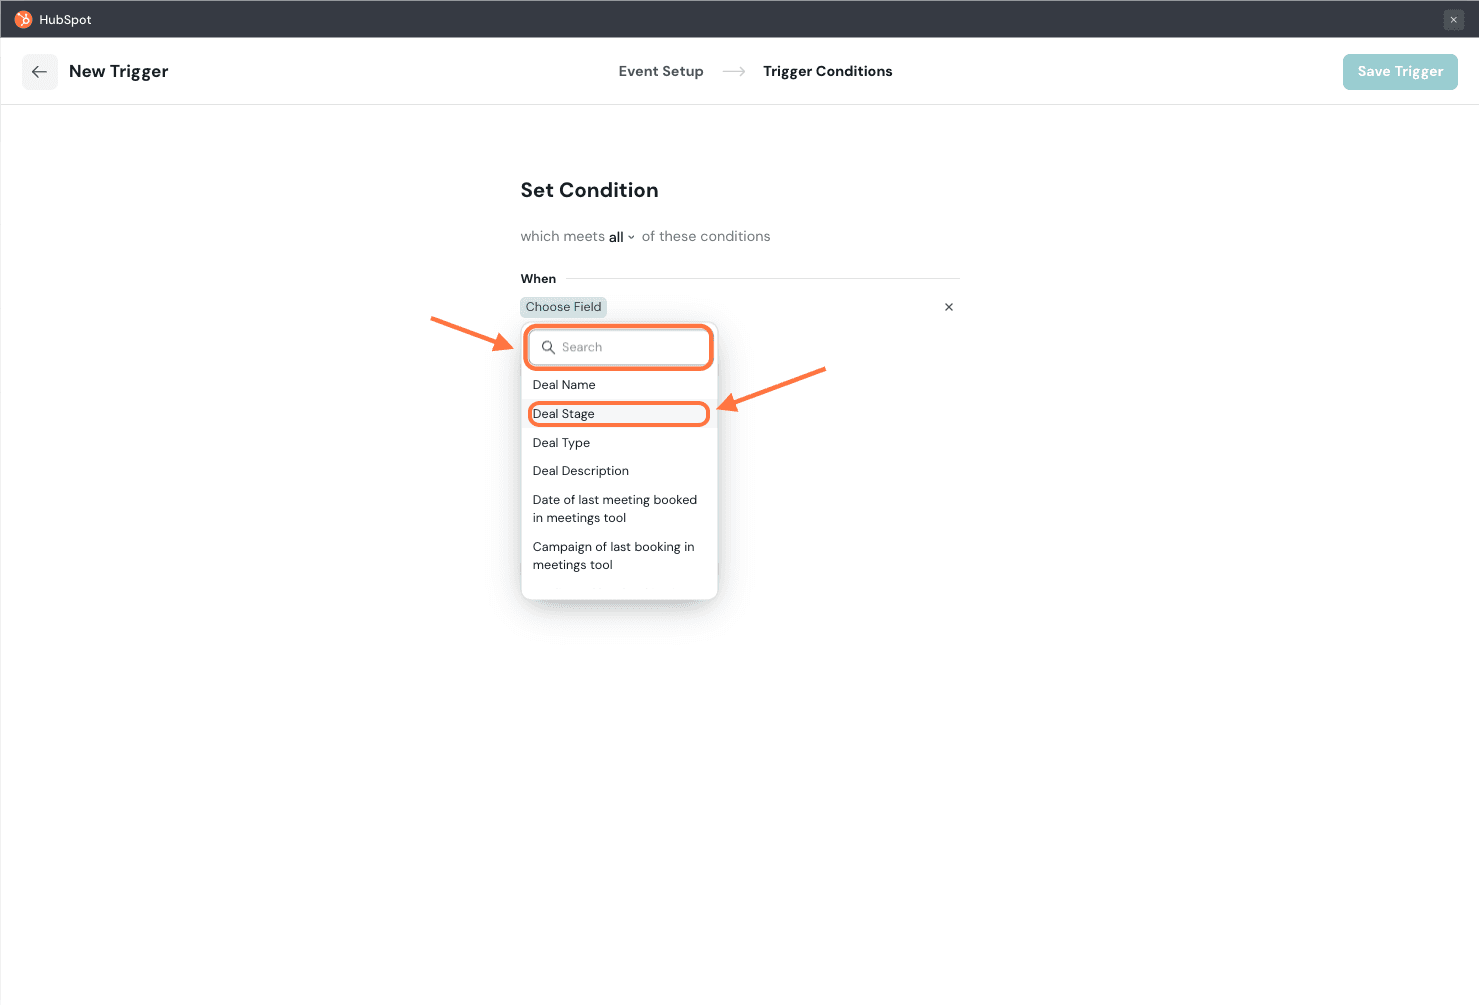
9. Next, you must choose a data operator for the property which will be used for comparison against the user-defined value . Choose an option from the drop-down menu under Choose Data Type.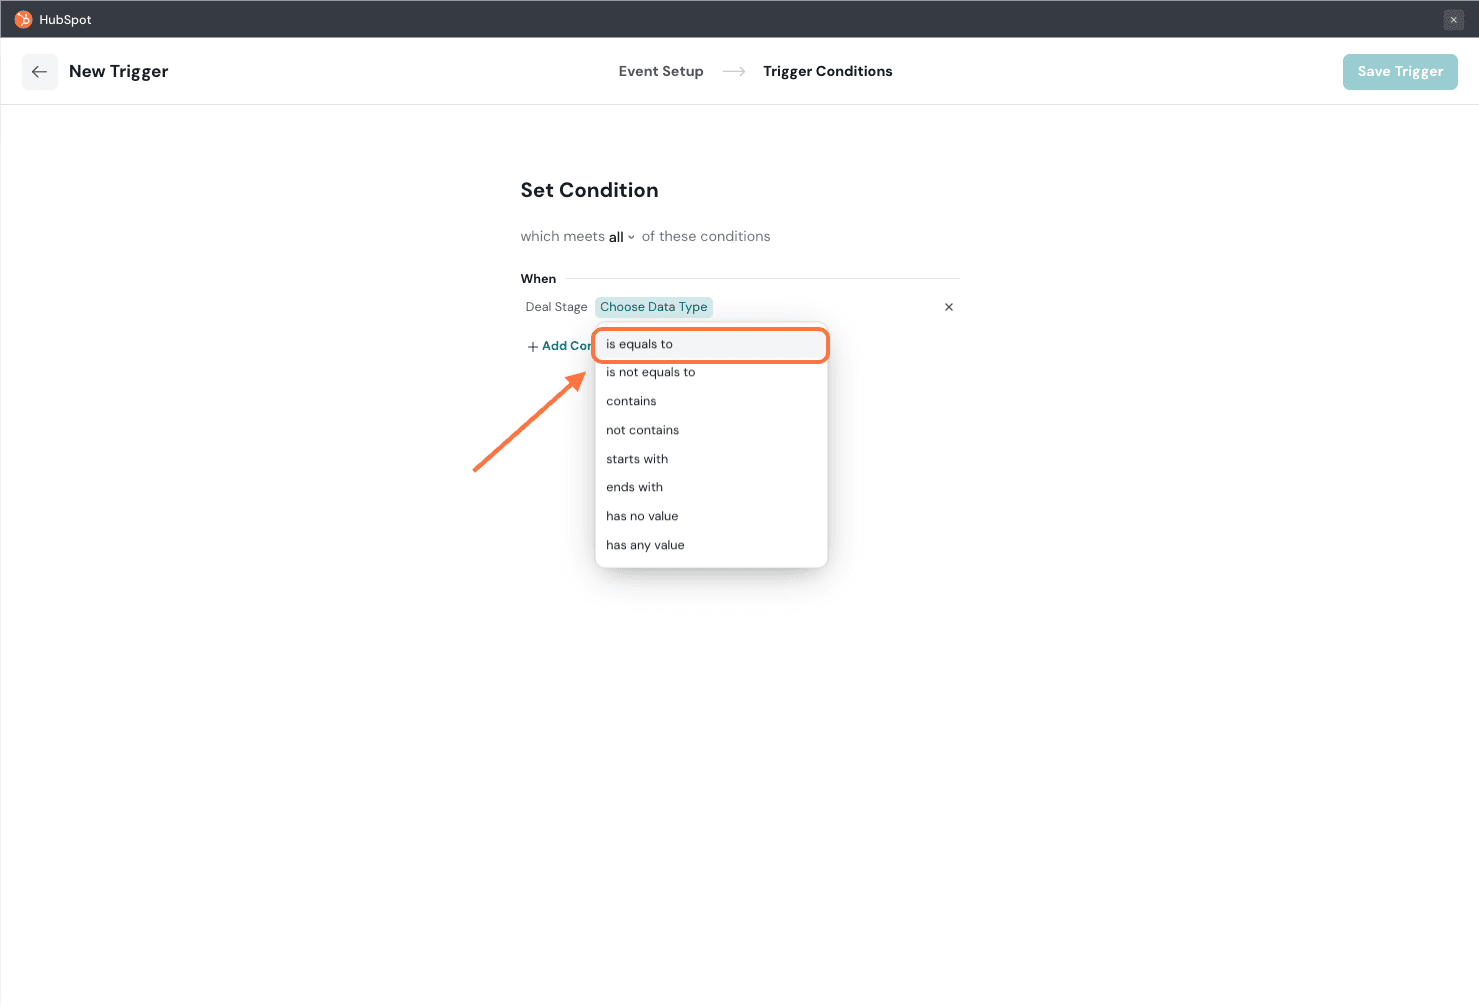
10. Next, you must define a value. Type it in and click Save.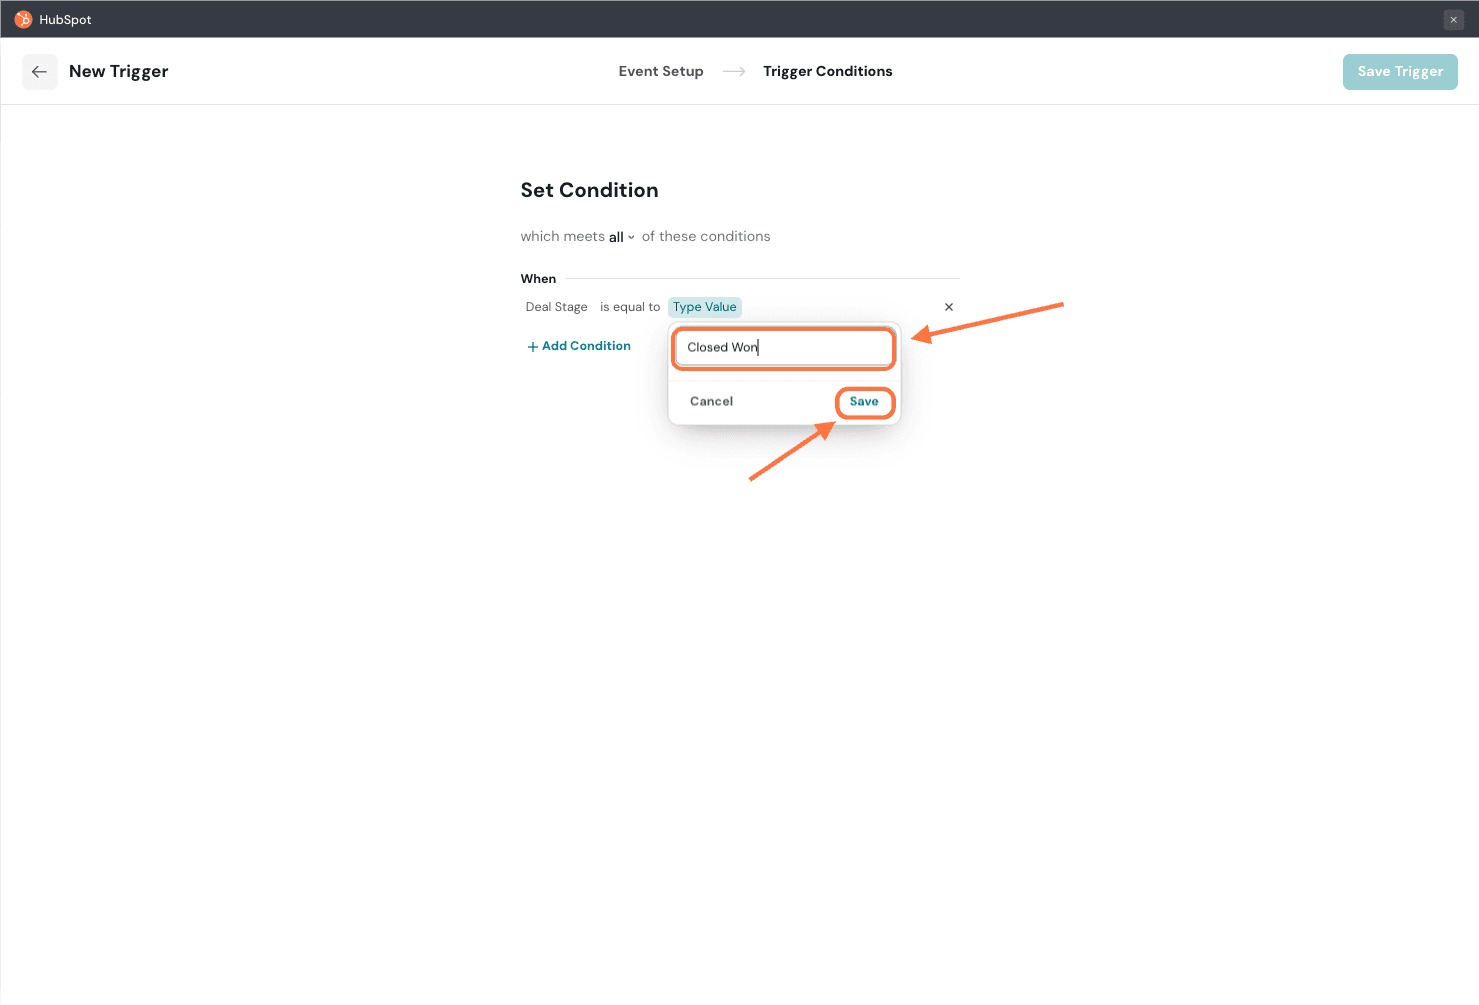
Note: In some properties, there might be pre-set values that you can choose, instead of having to type one. This will vary based on the type of property. For example, in date type properties, you must choose a date from a calendar.
11. To add more conditions, click on Add Condition.
12. Next, choose which variables from HubSpot to pass to the survey, by clicking on the drop-down menu under Choose Fields.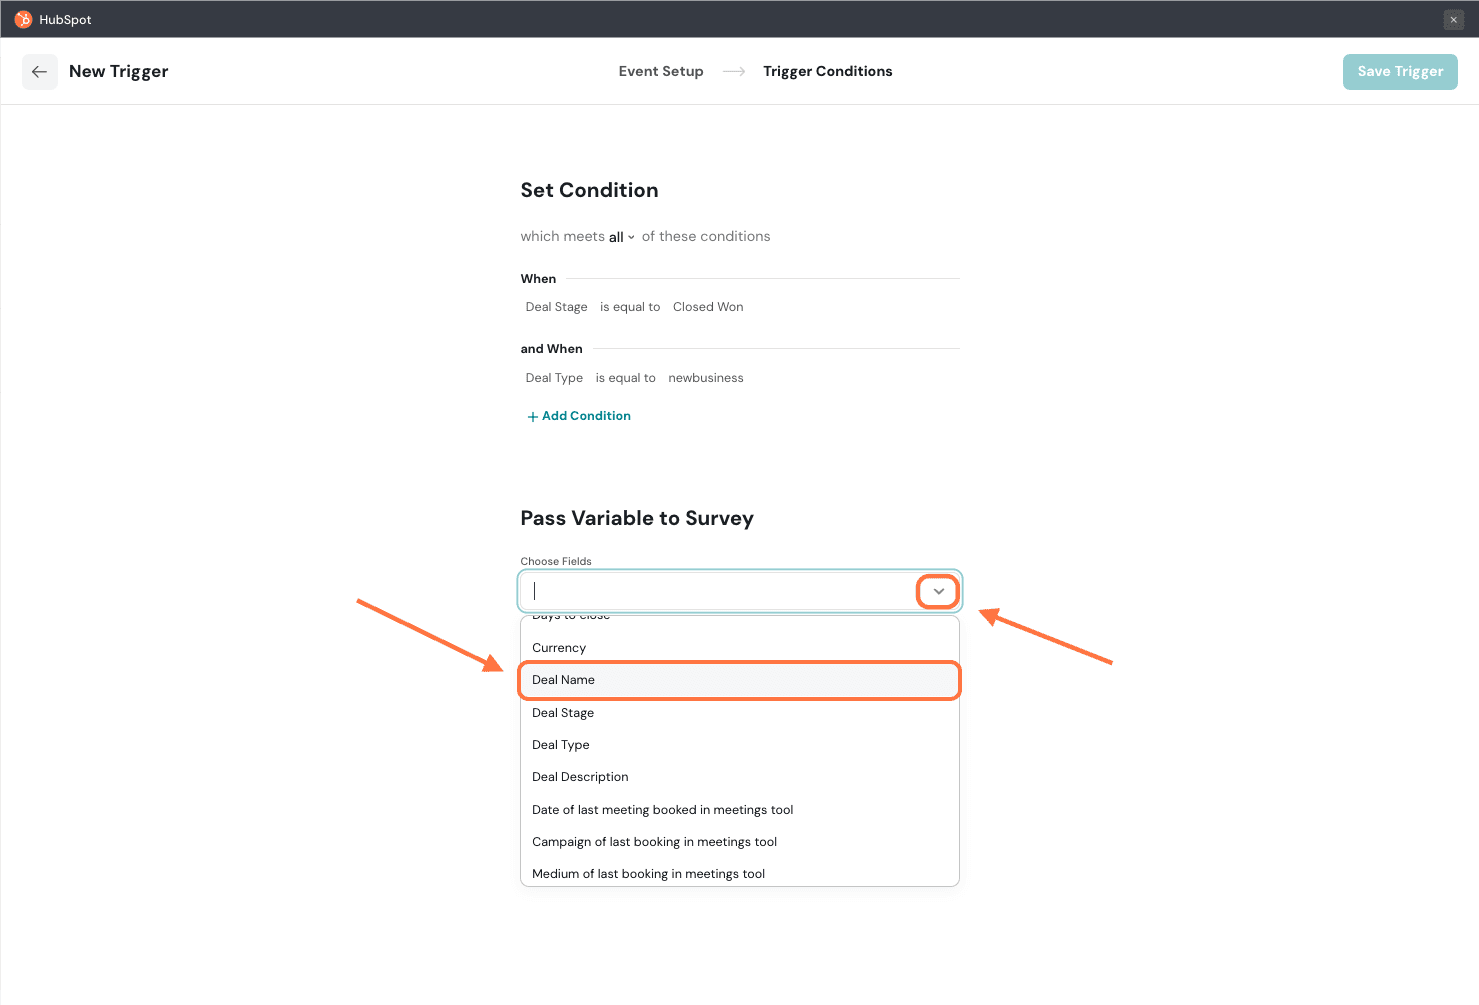
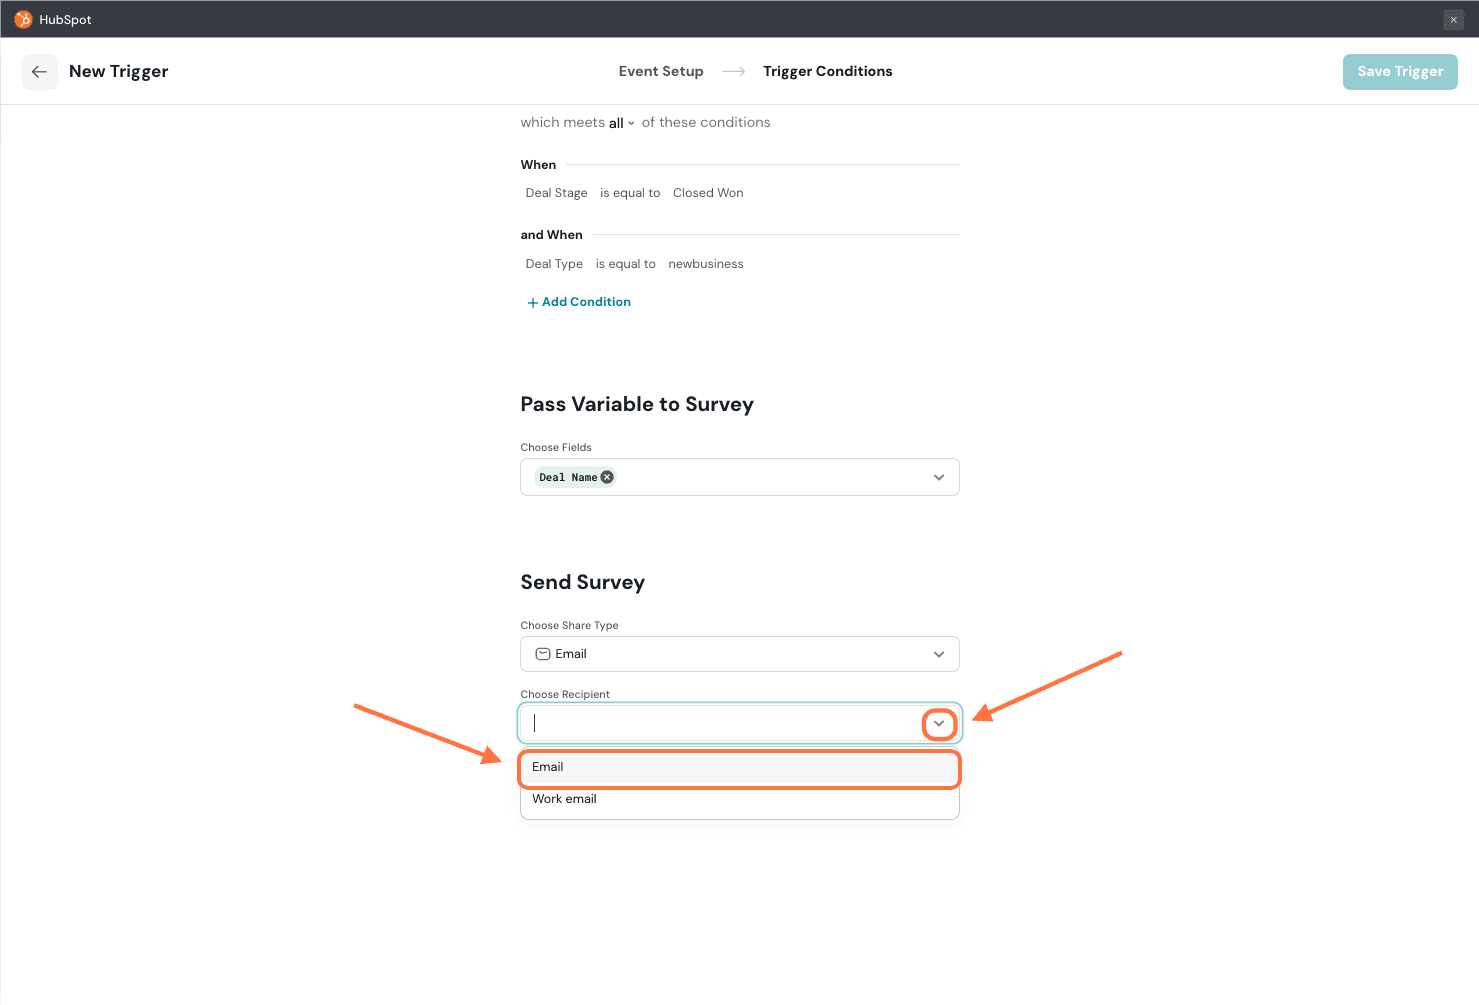
13. Next, select the share channel via which you want to distribute the survey. Start by clicking on the drop-down menu under Choose Share Type. Then click on the drop-down under Choose Recipient to select which exact contact property to use (from HubSpot), and then the drop-down under Choose Share Channel to choose an existing share of the selected type to use (from SurveySparrow).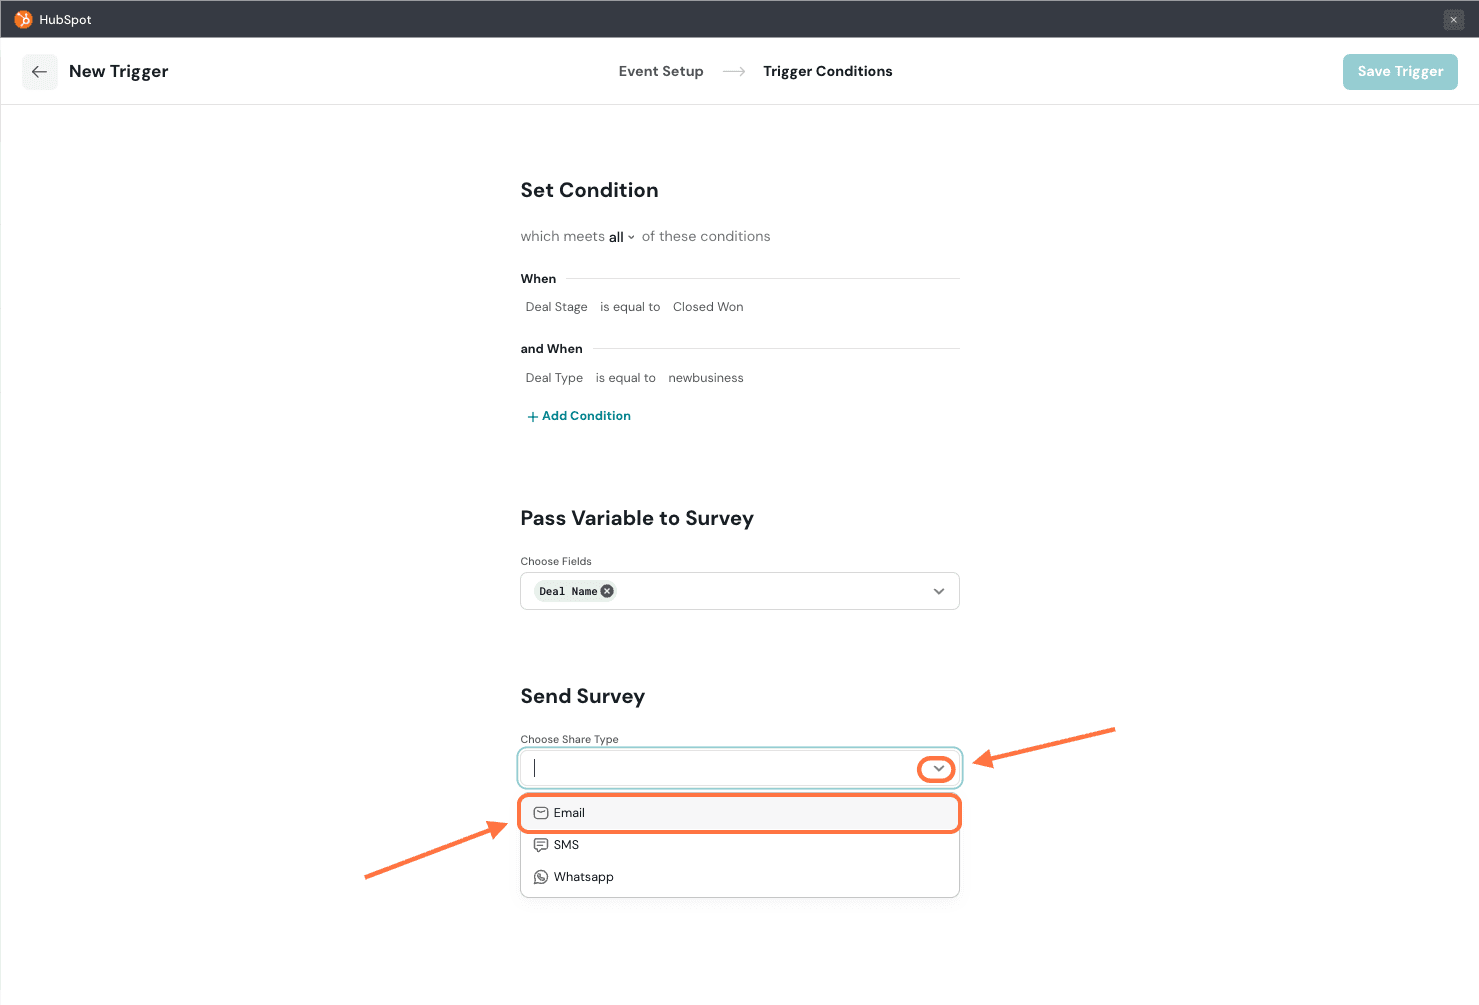
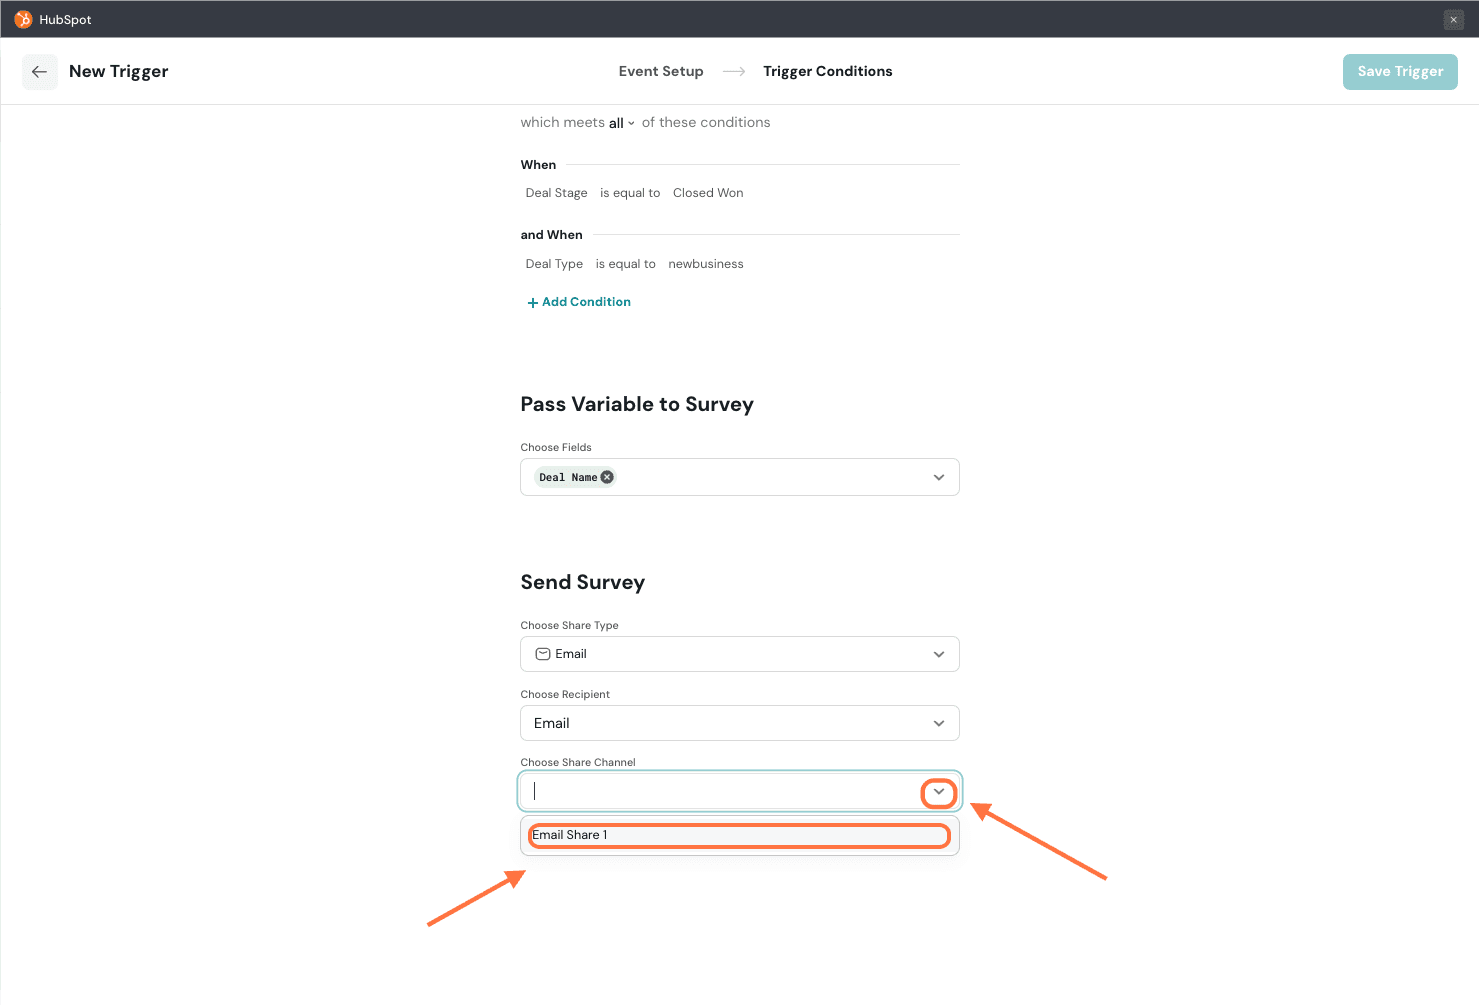
Note: If there aren’t any shares created for the selected share type, you have the option to create one right within the setup, by clicking on the New Share option.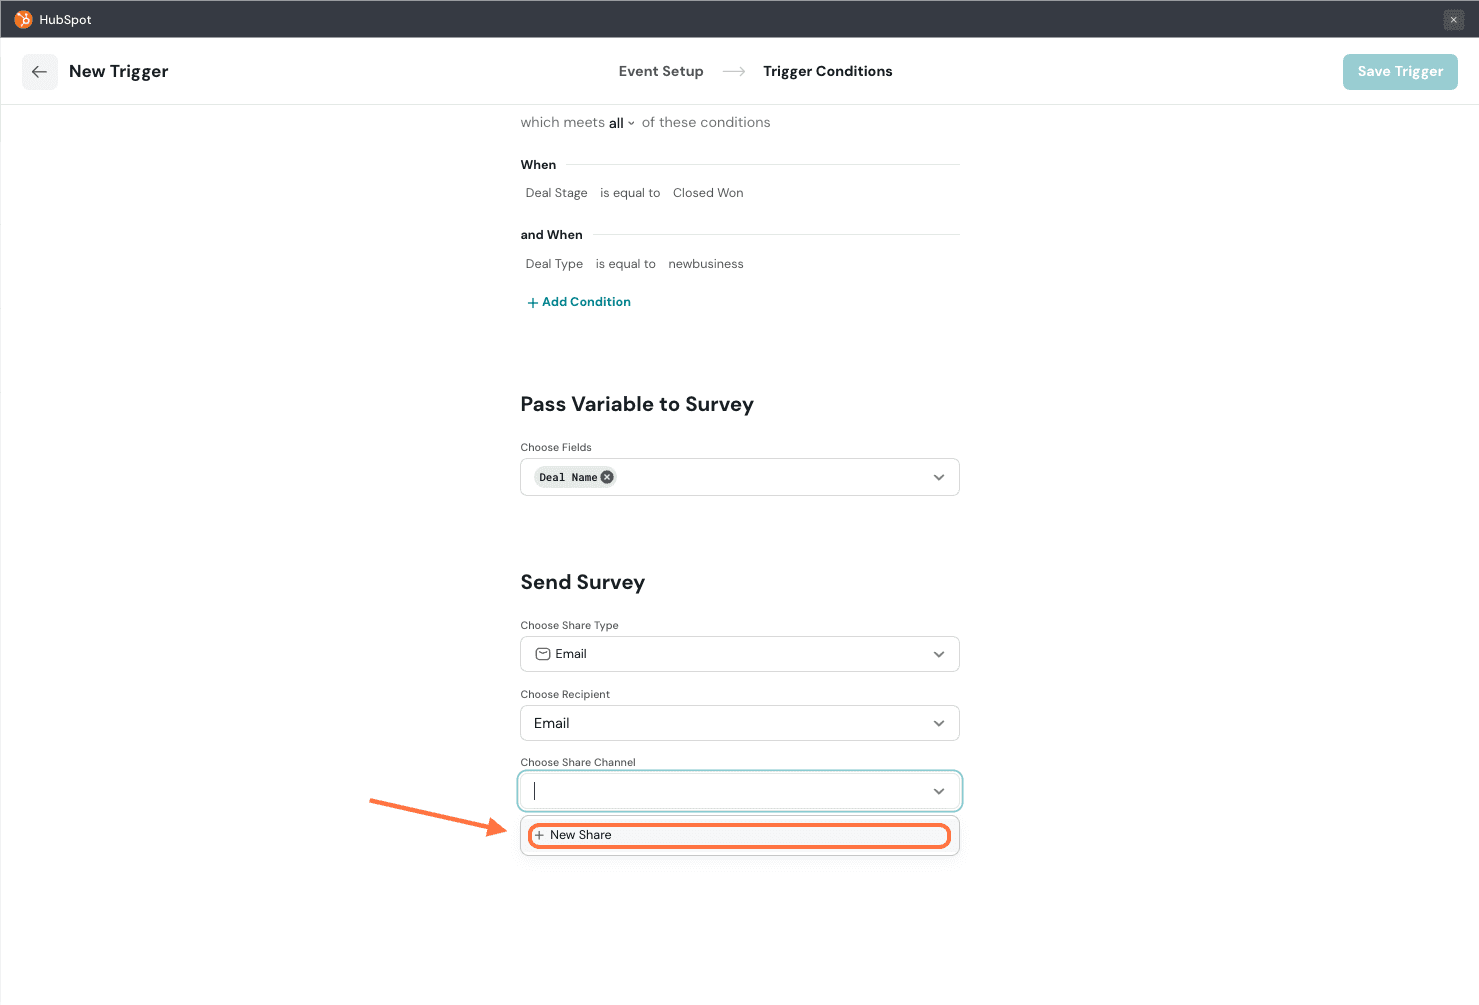
14. Once you’re satisfied with the trigger, click on Save Trigger.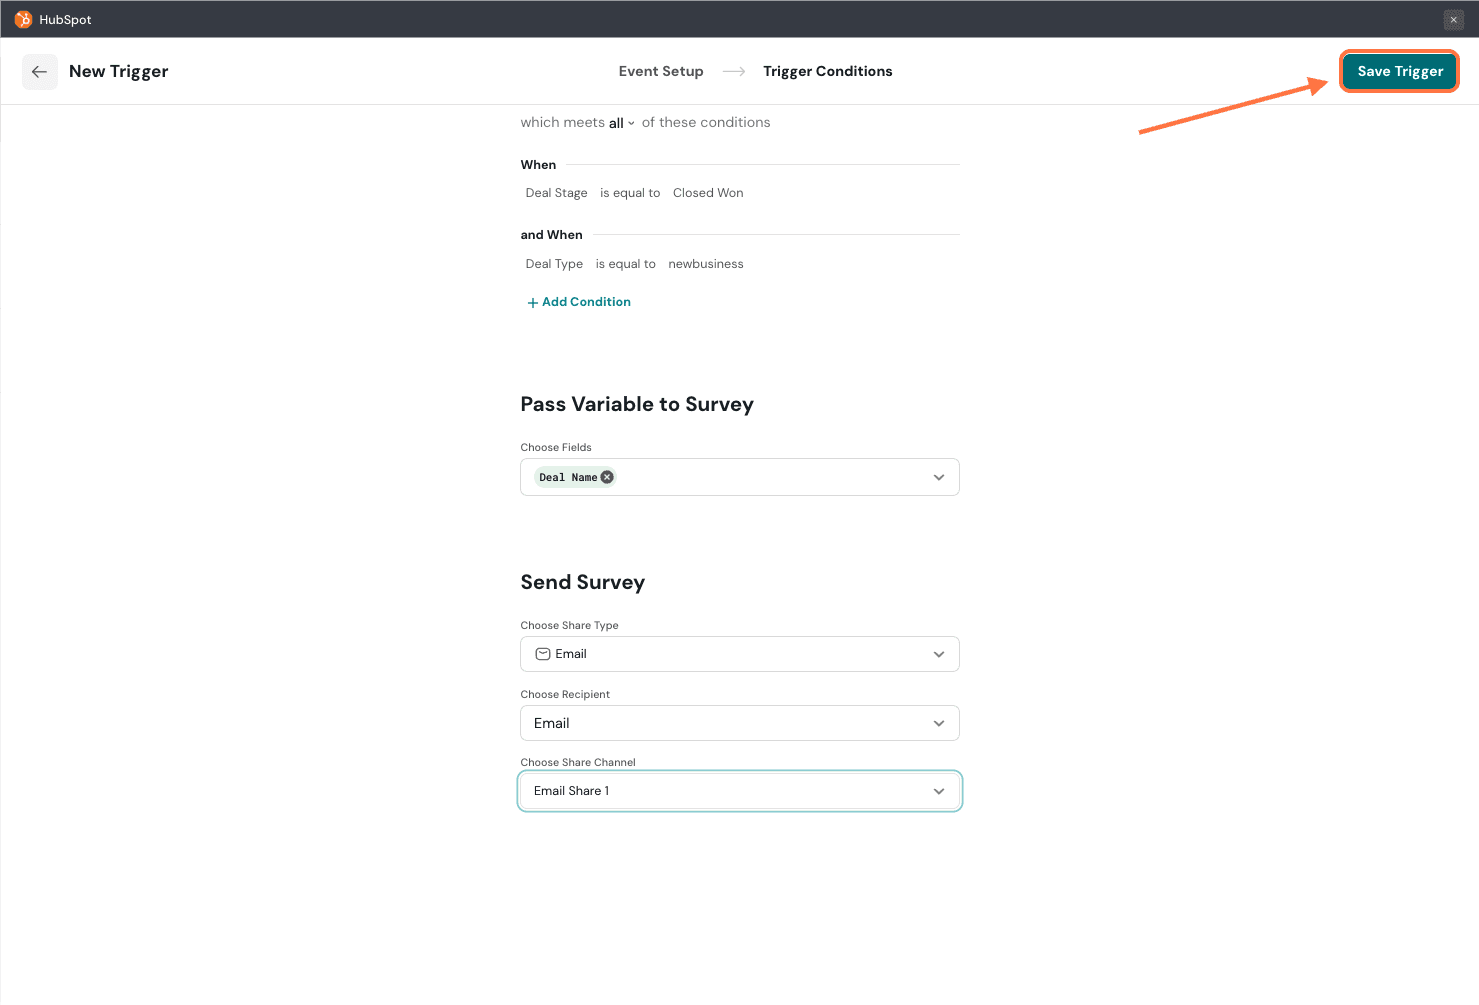
15. After the trigger is created, you will head to a section where you’ll get to view all the triggers and mappings you’ve created. You can pause the trigger, by clicking on the green toggle.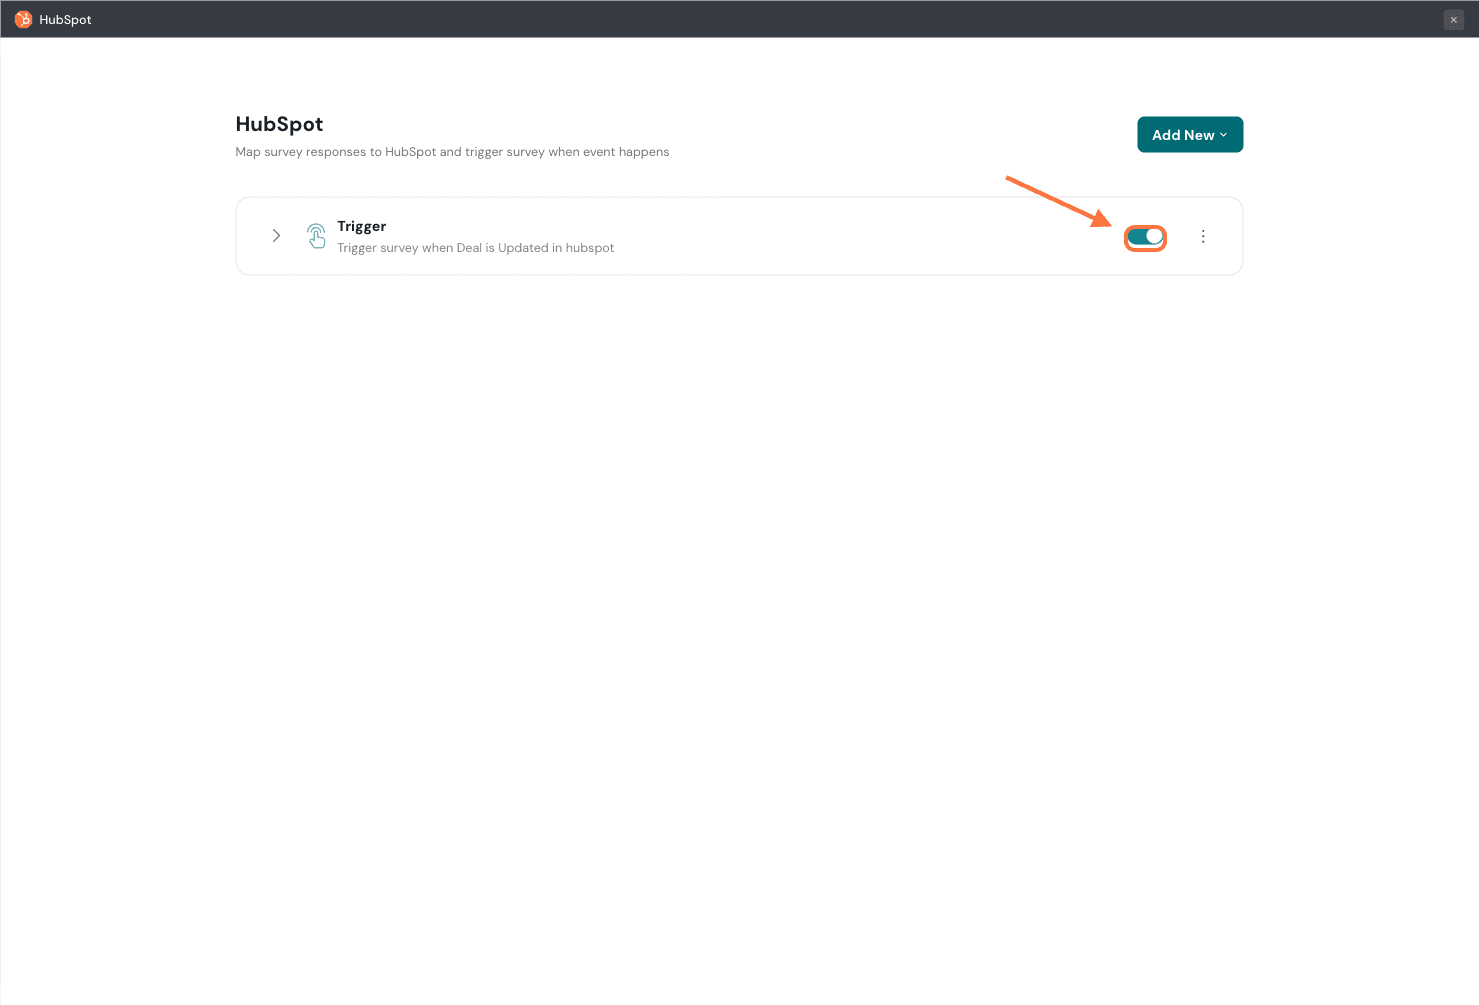
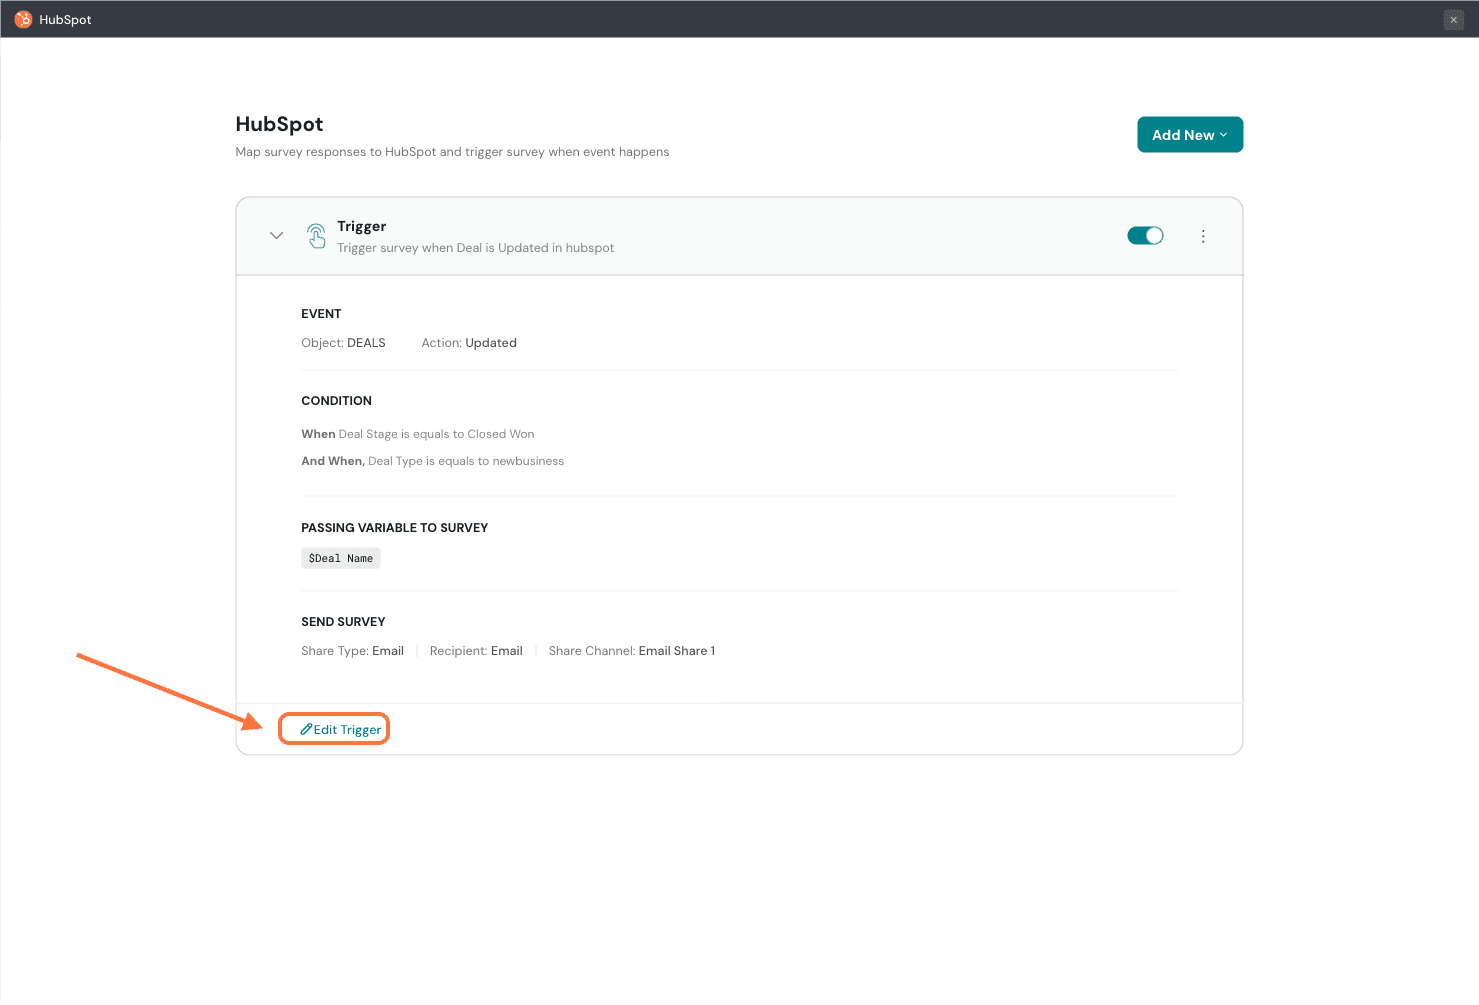
16. If you’d like to edit the trigger, click on the trigger’s card. It will expand. Then click on Edit Trigger.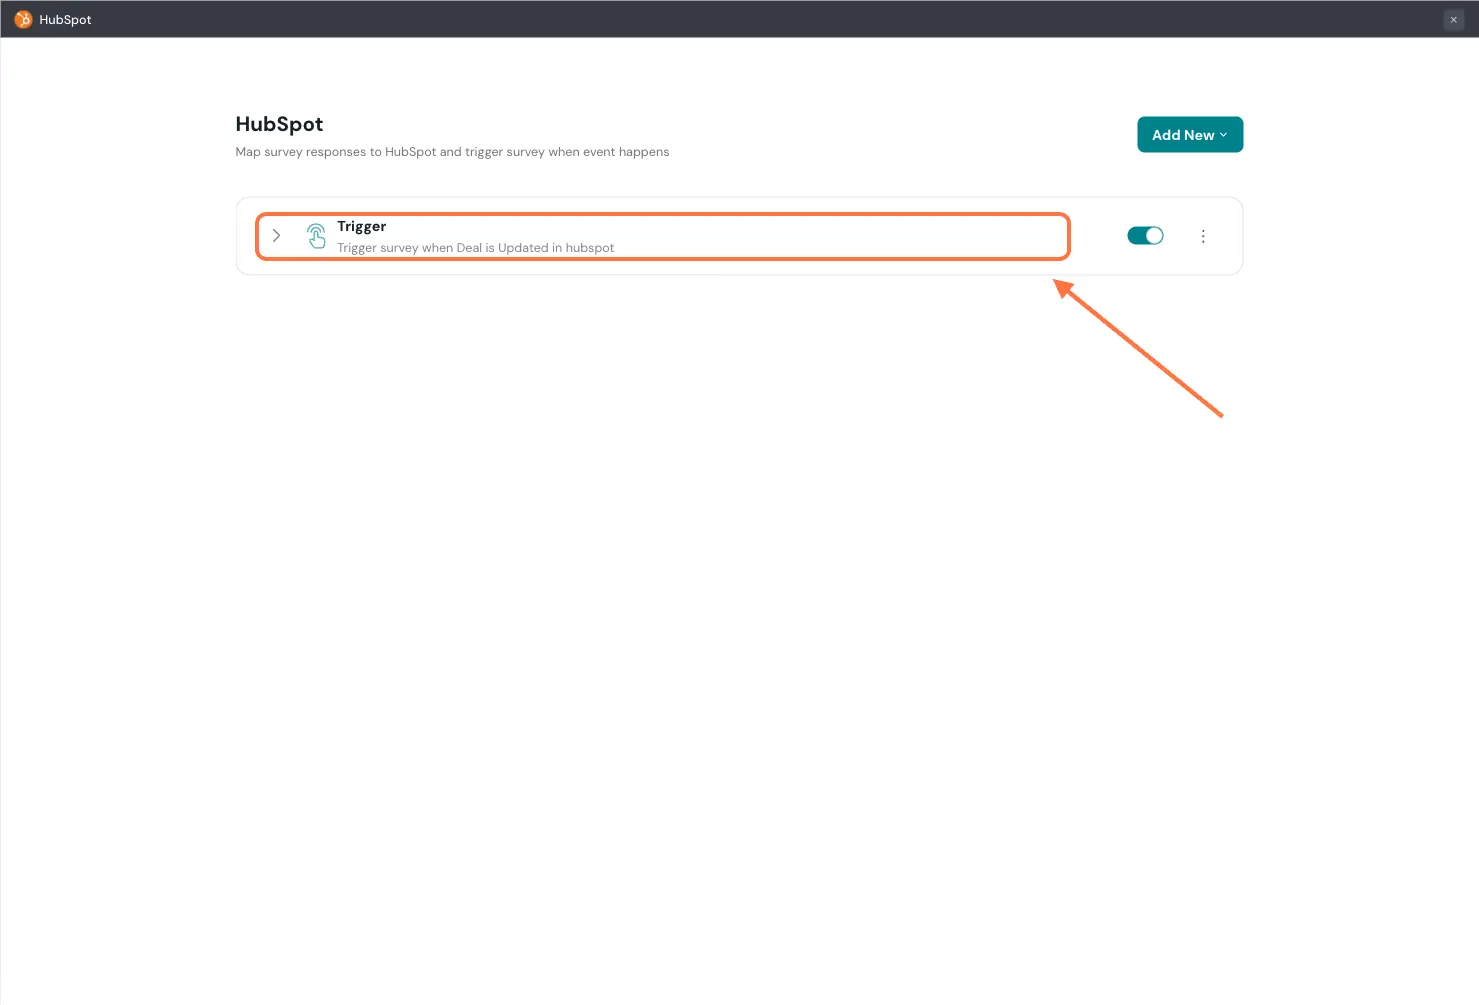
17. To delete the trigger, click on the vertical three-dot icon to the right of the trigger card. A menu appears, with the options to edit and delete triggers. Click on Delete.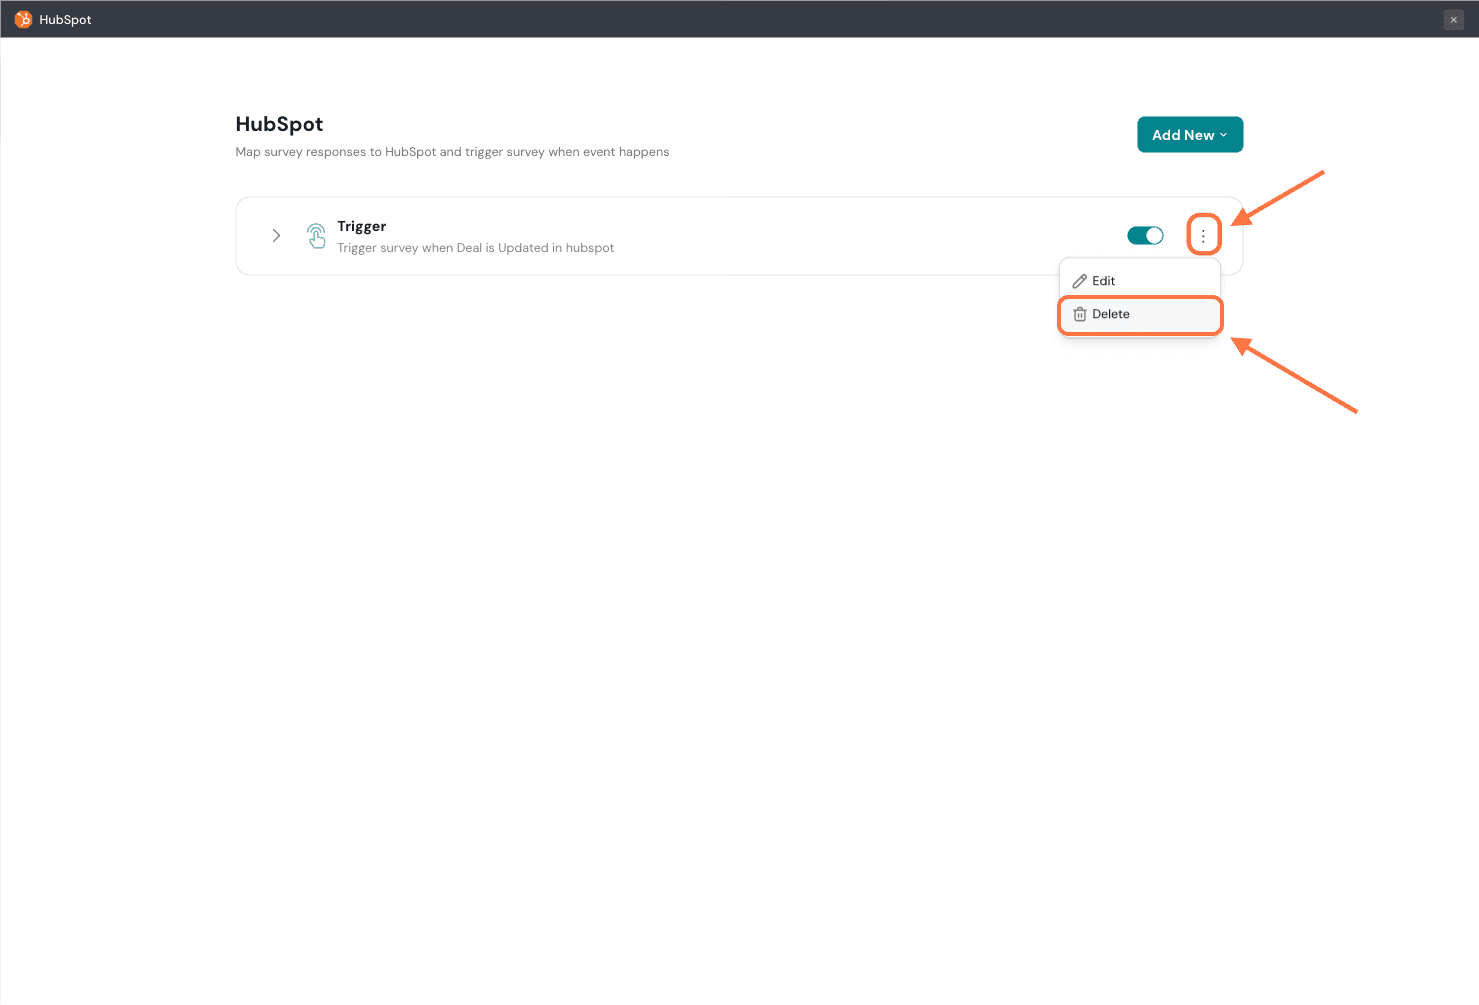
18. A confirmation pop-up appears. Click on Confirm.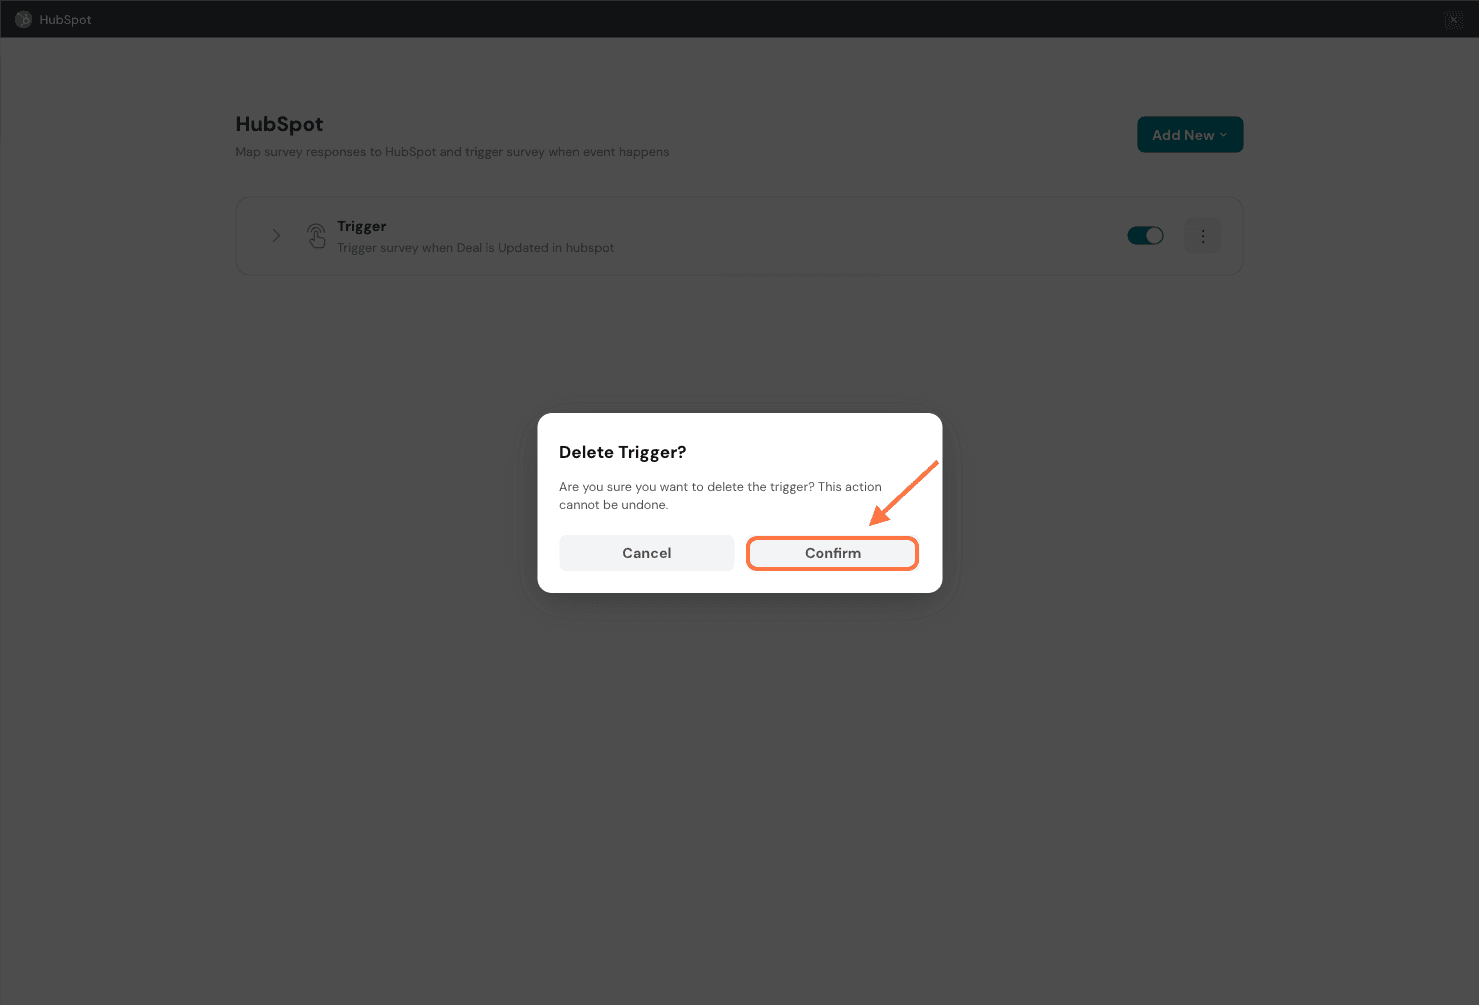
19. If you’d like to create another trigger for the same survey. Click on Add New, then select Trigger.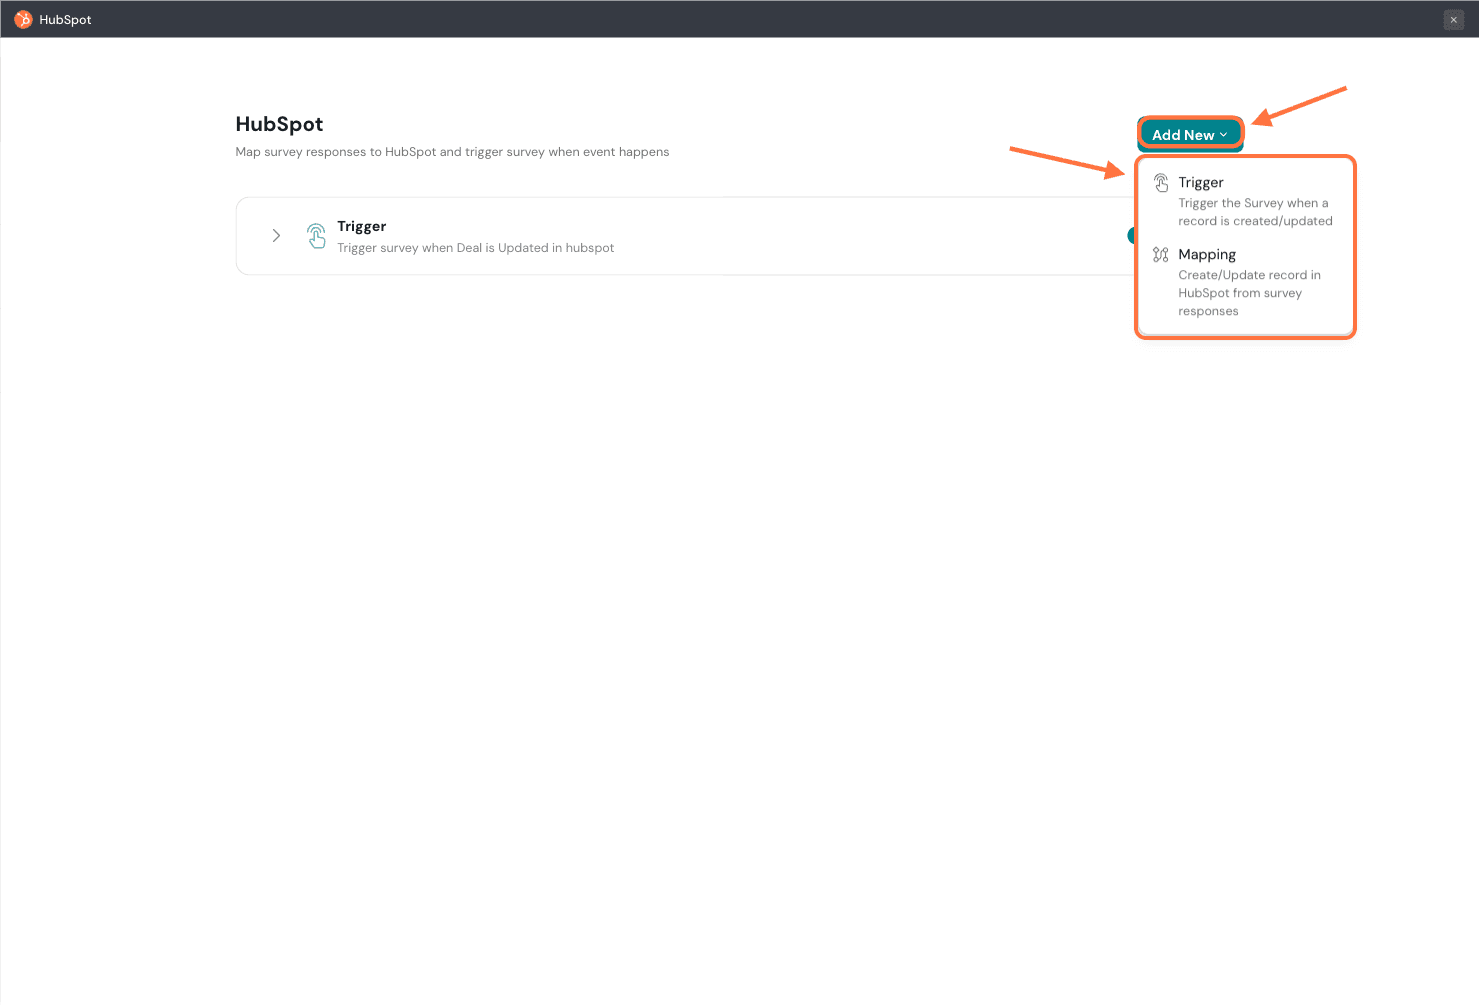
Note: SurveySparrow also has a workflow app that allows you to create triggers from within HubSpot. There are certain objects for which you might not be able to create triggers for via the native integration, but the app is far more versatile. To learn more, read this article.
1. In your SurveySparrow account homepage, hover over the Data section in the header, and click on Contacts.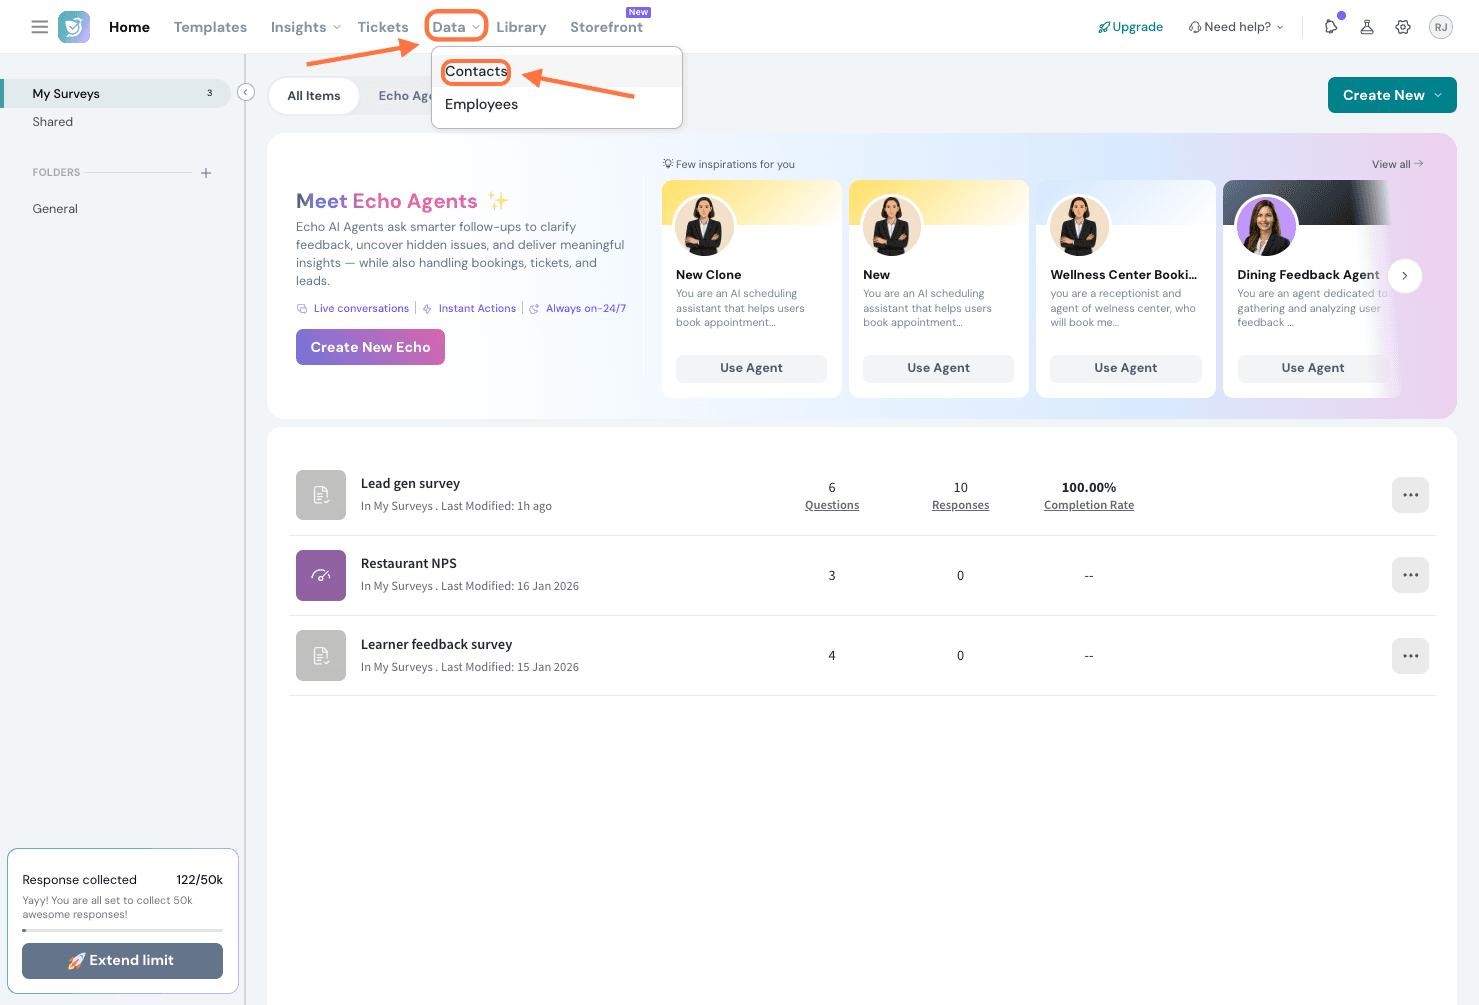
2. In the contacts page, click on Add Contacts.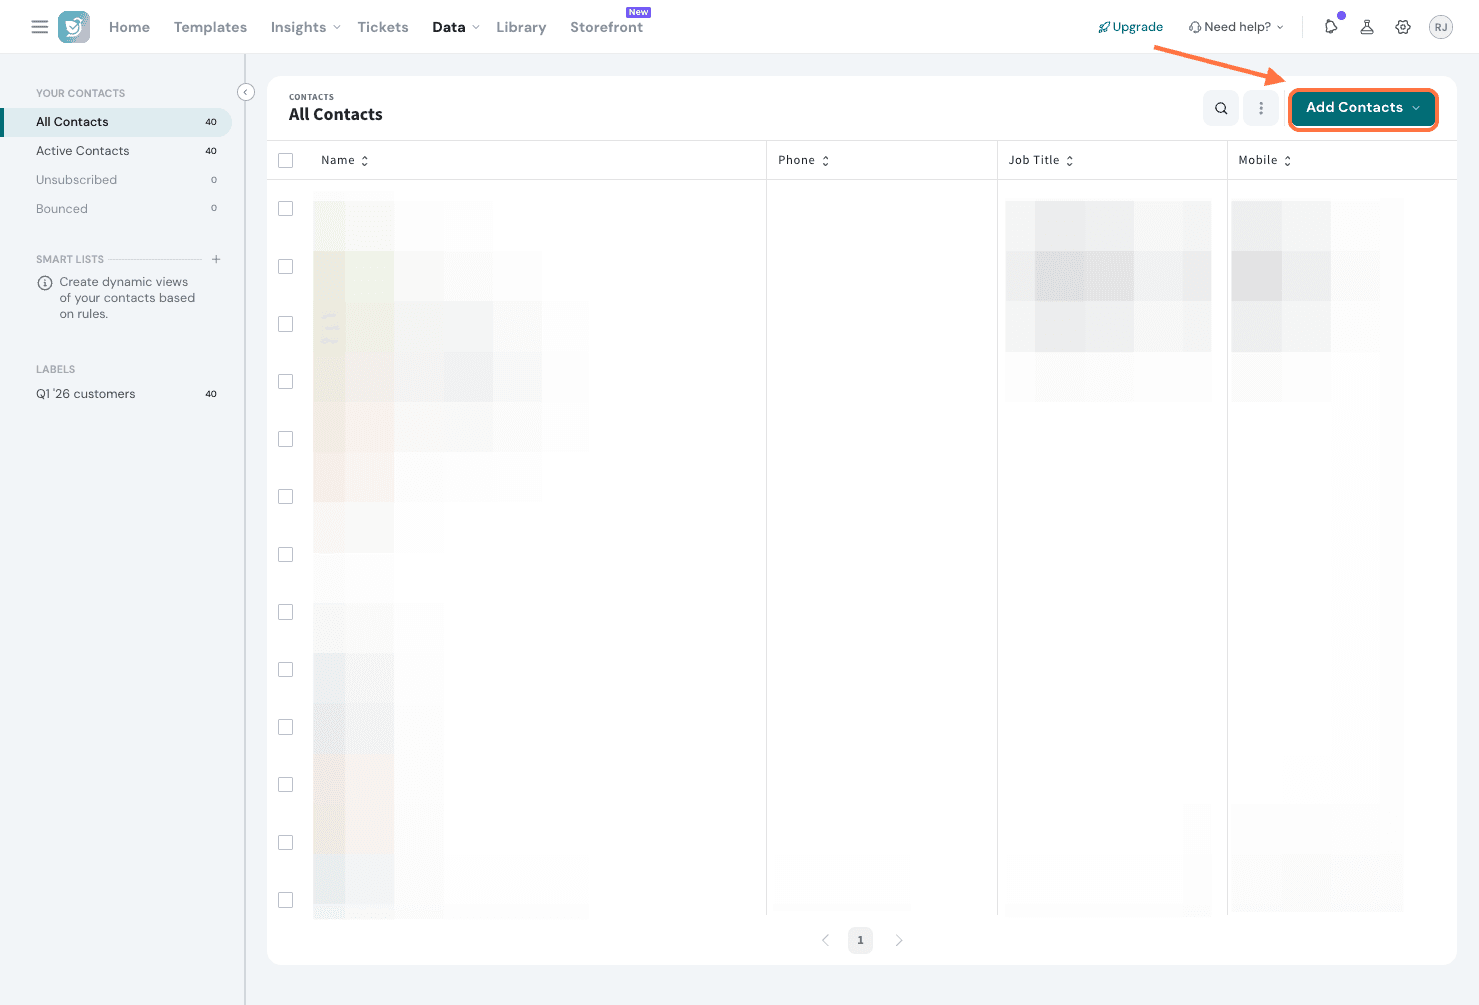
3. From the menu that pops up, click on More ways to import.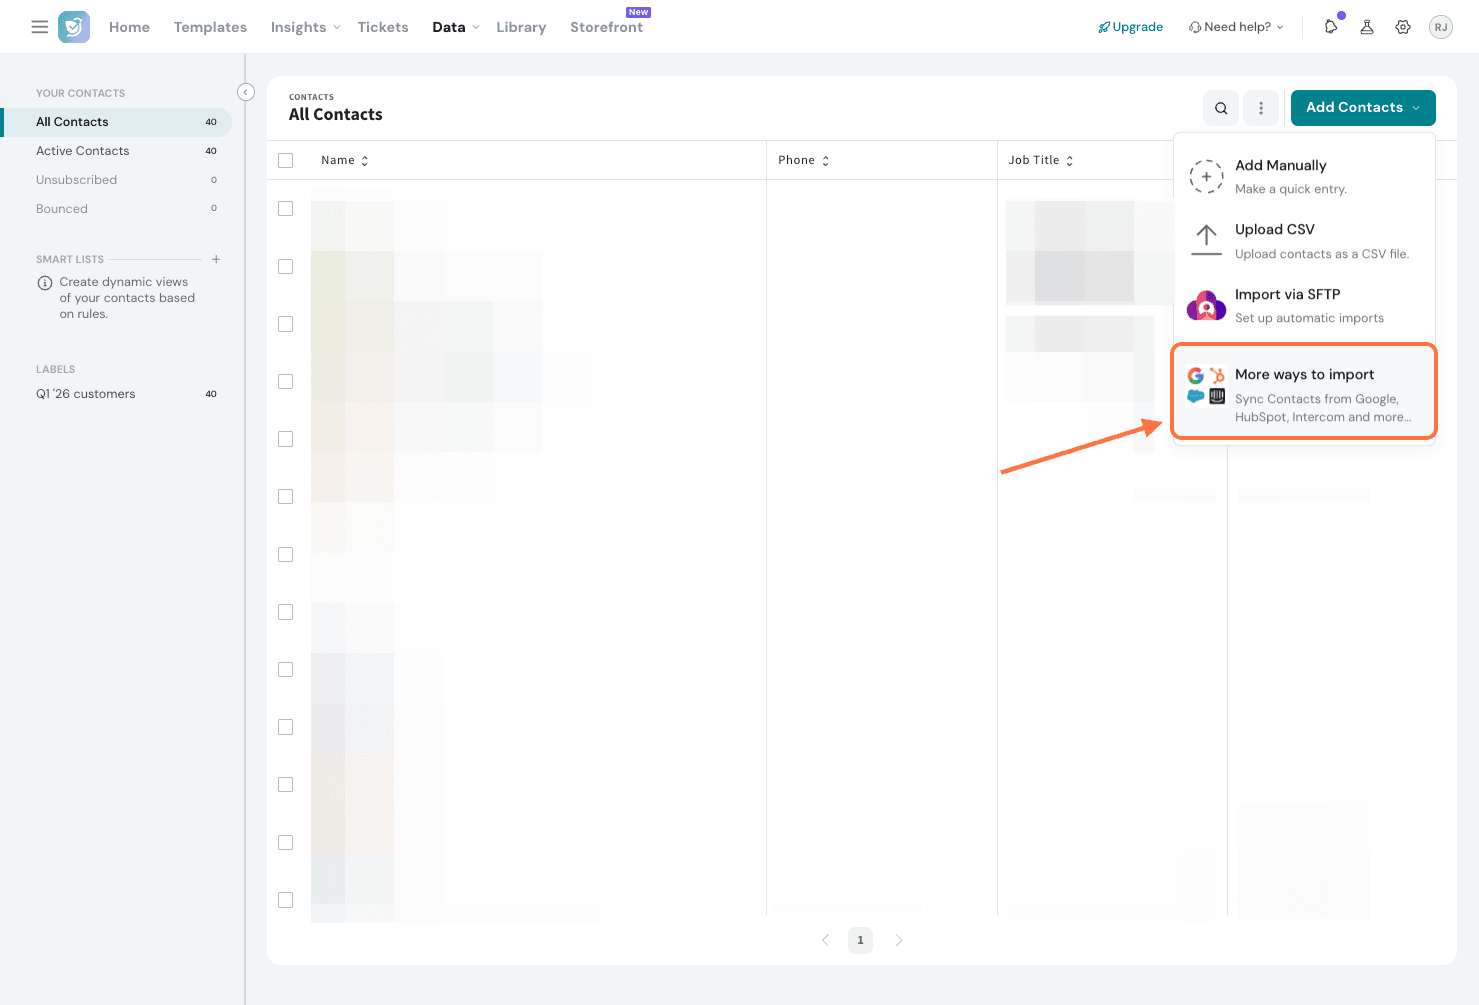
4. Click on HubSpot.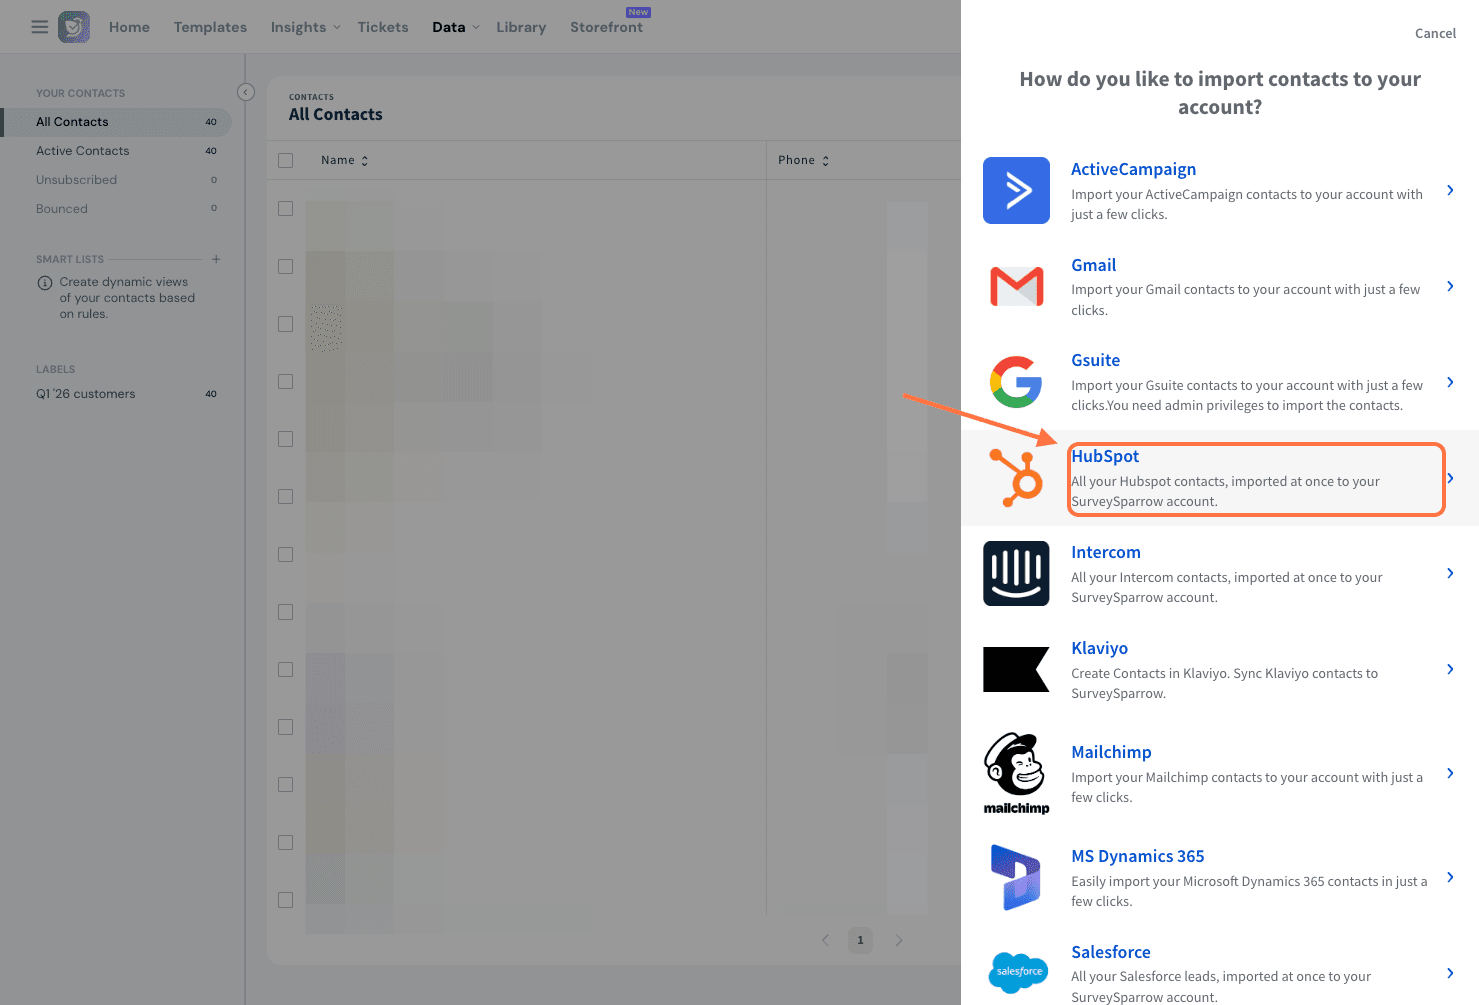
5. You can import all your contacts at once, or choose a specific list to import. Choose your preferred option and click Next.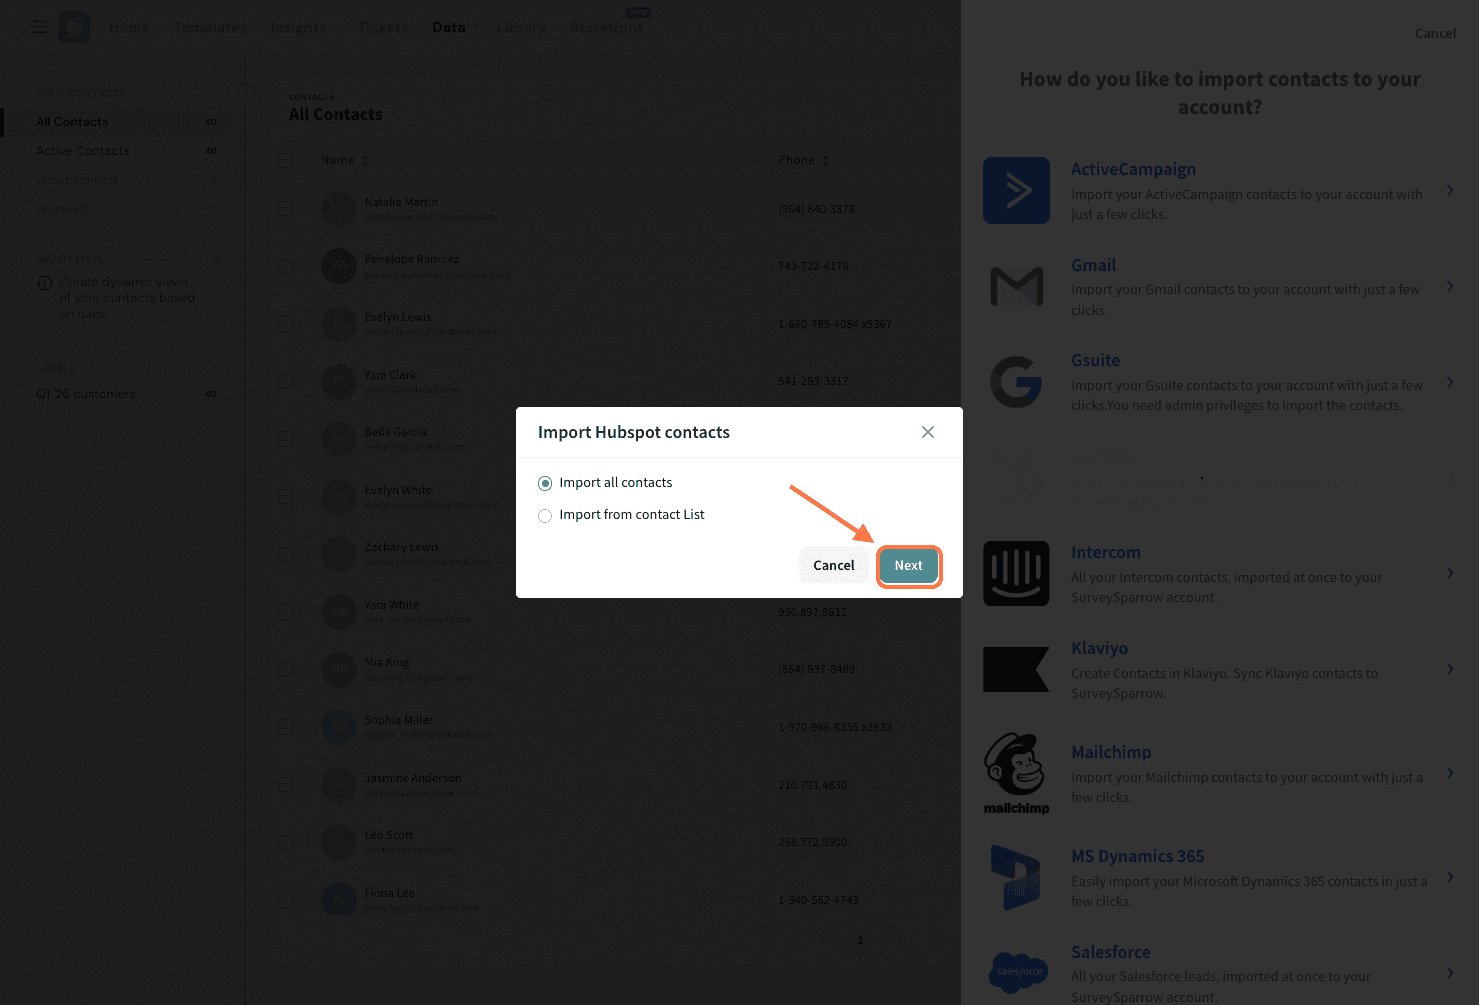
Note: If you click Import from contact list, you will see a drop-down menu. Click on it and choose from the lists in your HubSpot account, then click Next.
6. The mapping section opens up. Here, most of the HubSpot contact data is already mapped onto SurveySparrow fields, but you can manually adjust any mapping by clicking on its drop-down menu.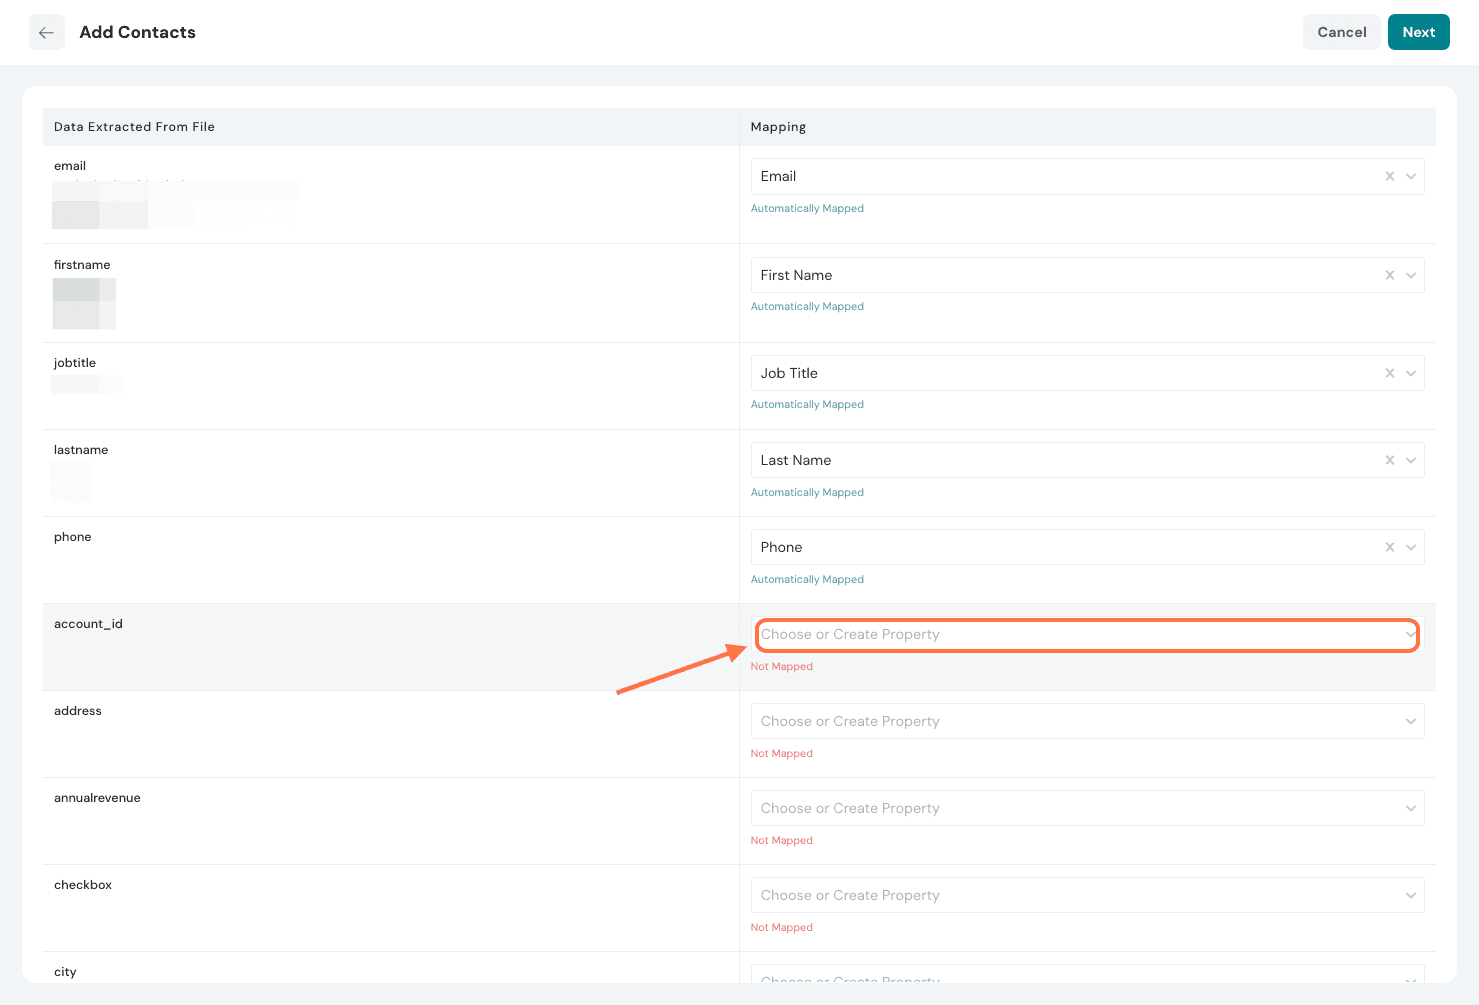
7. You can choose any of the default fields in SurveySparrow. In case you do not find a satisfactory field, you can create one by clicking on Create a Property.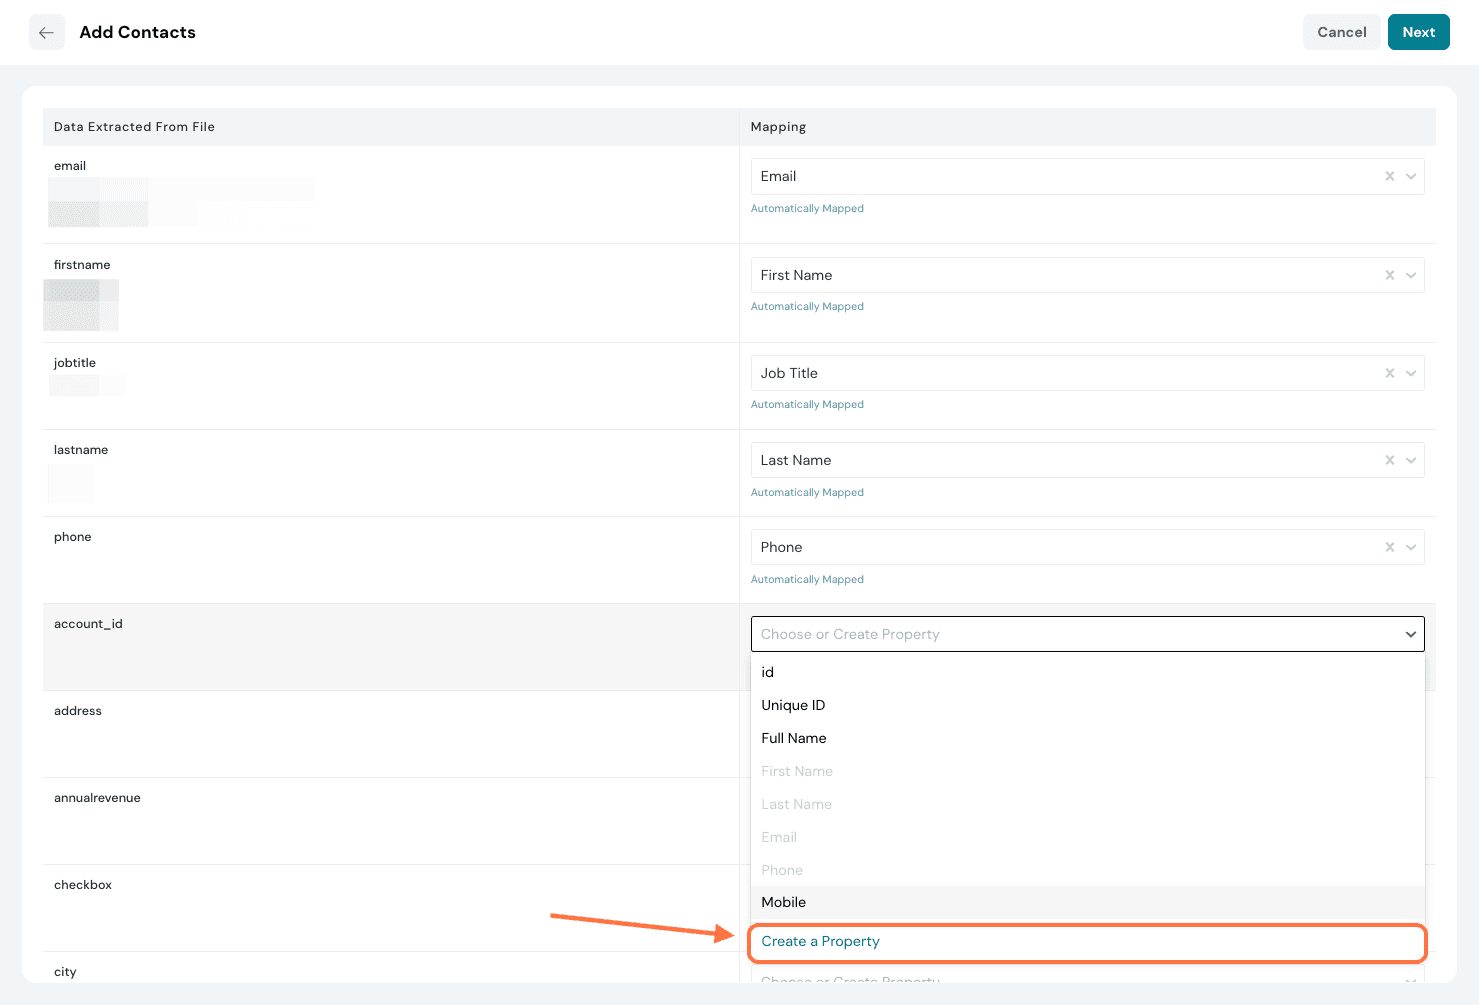
8. Here you can assign a label and name, choose the property type, add a description and choose the group. Once you are done, you can click Save & Close. Or you can choose to proceed to create another property by clicking on Save & Add Another.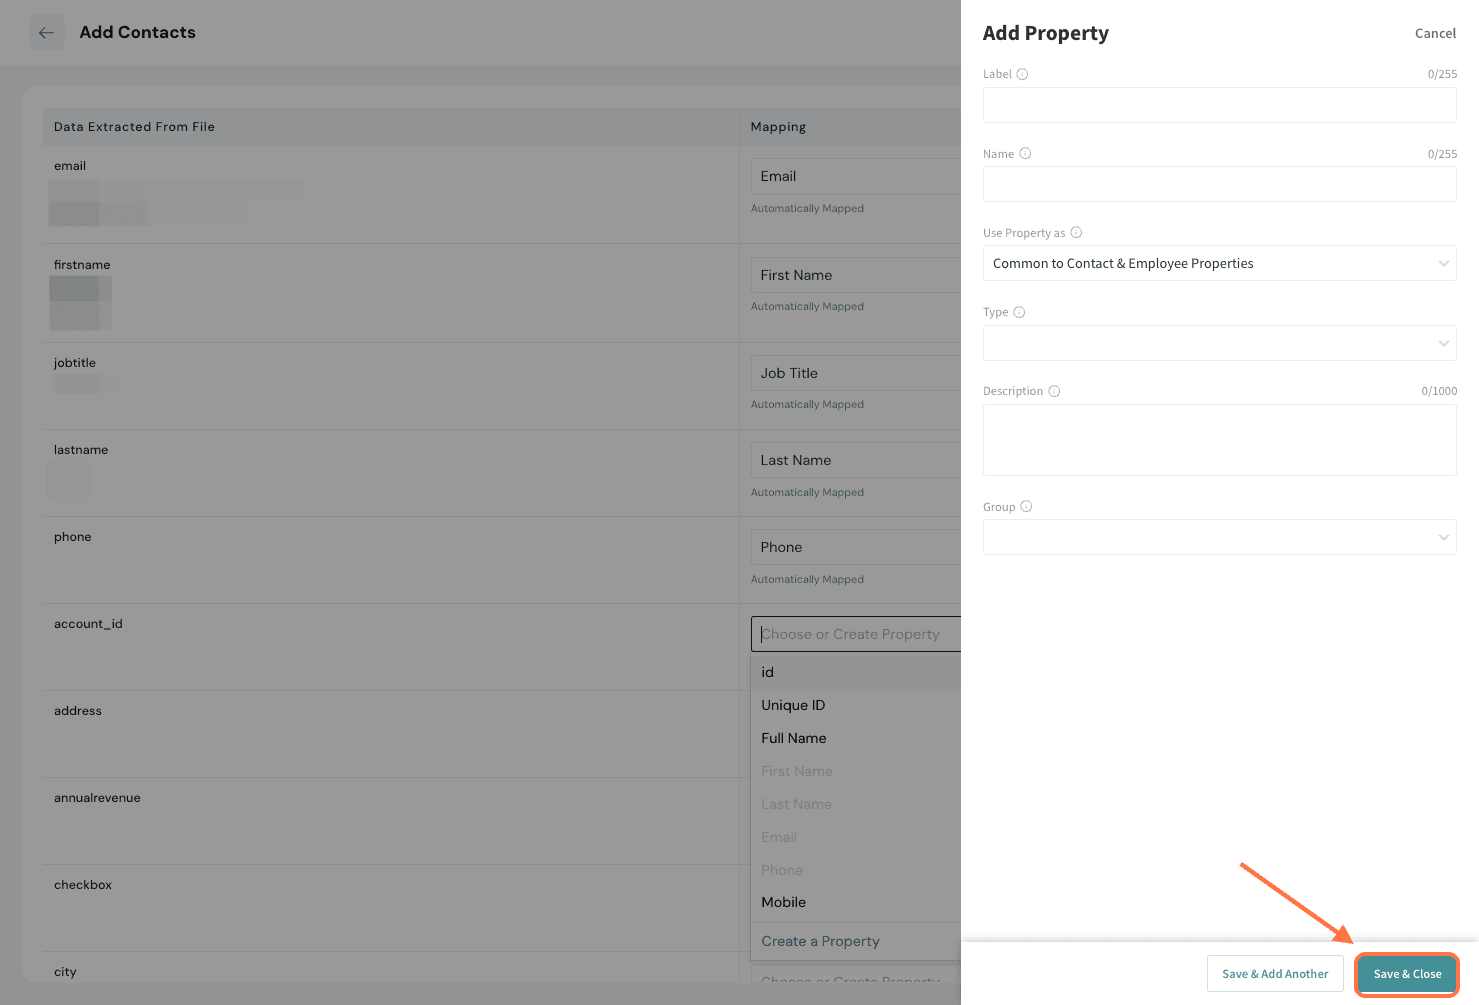
9. Once you are satisfied with the mapping, click Next.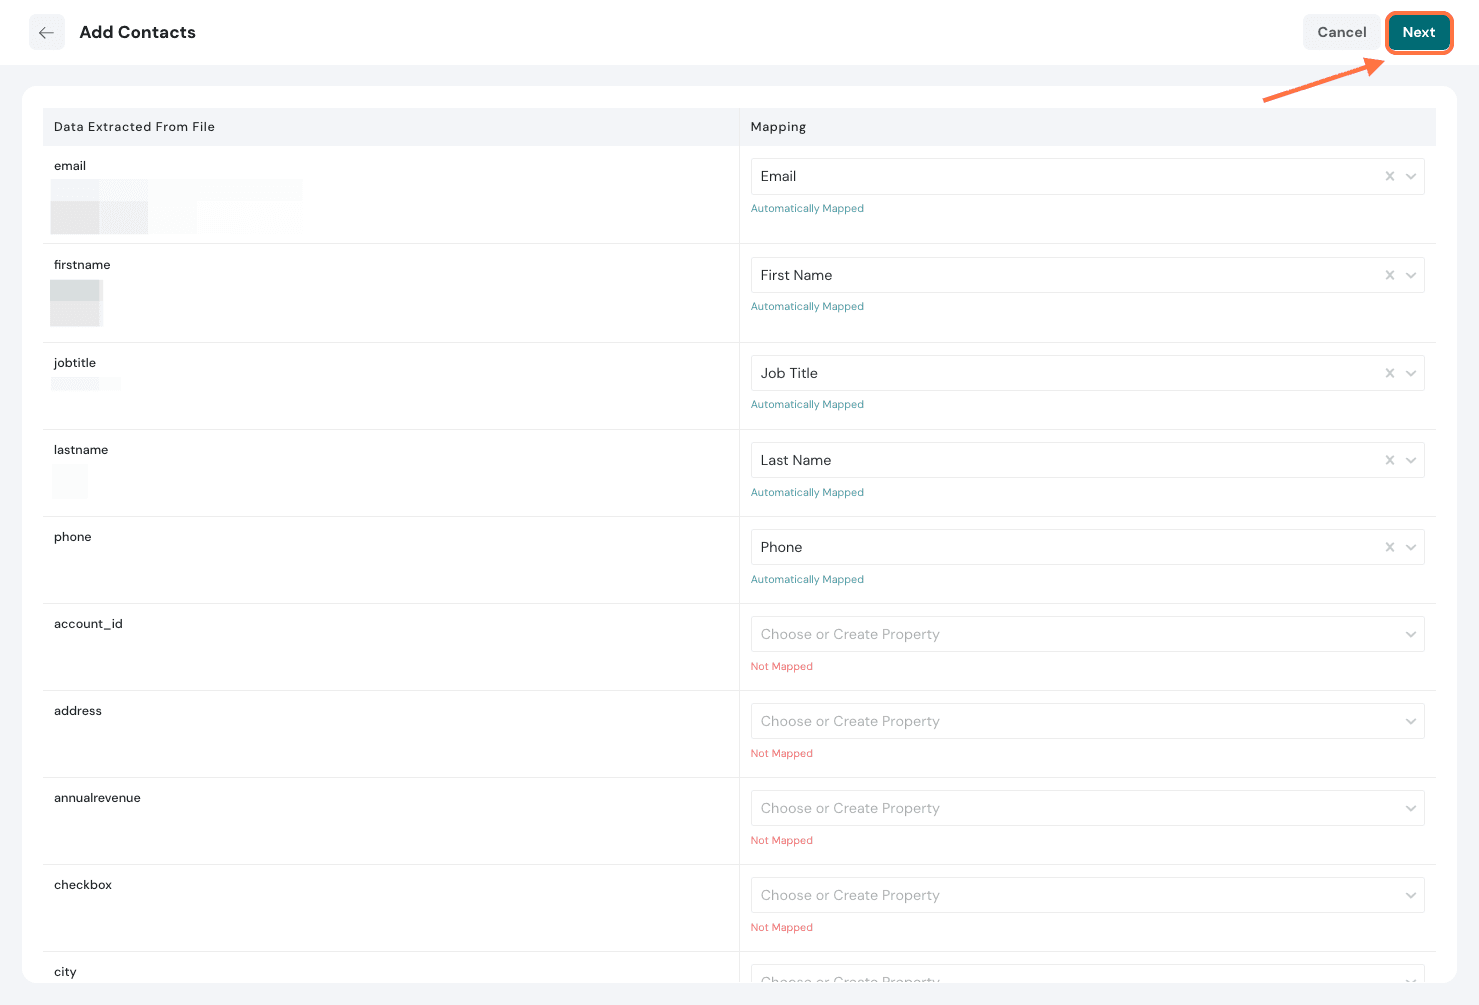
10. You must provide a name for the import. Once done, click Finish Import.
11. The imports section opens, revealing the recently finished import. If you wish to have it on a recurring basis, click on the toggle under Schedule.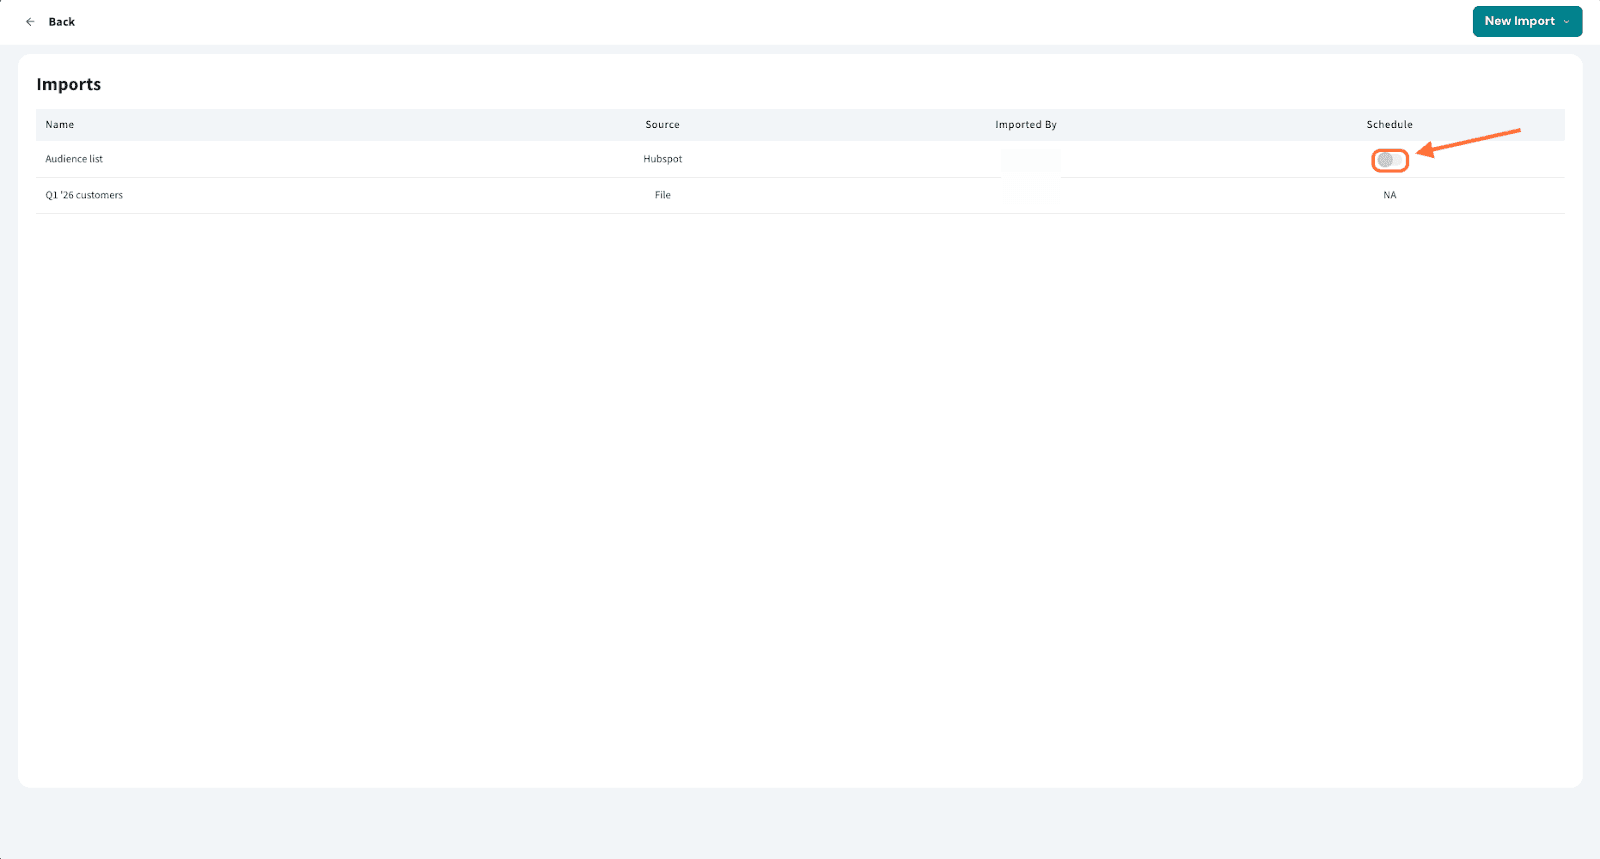
12. A scheduling pop-up opens. Click on the drop-down menu and choose the frequency (daily, weekly or monthly).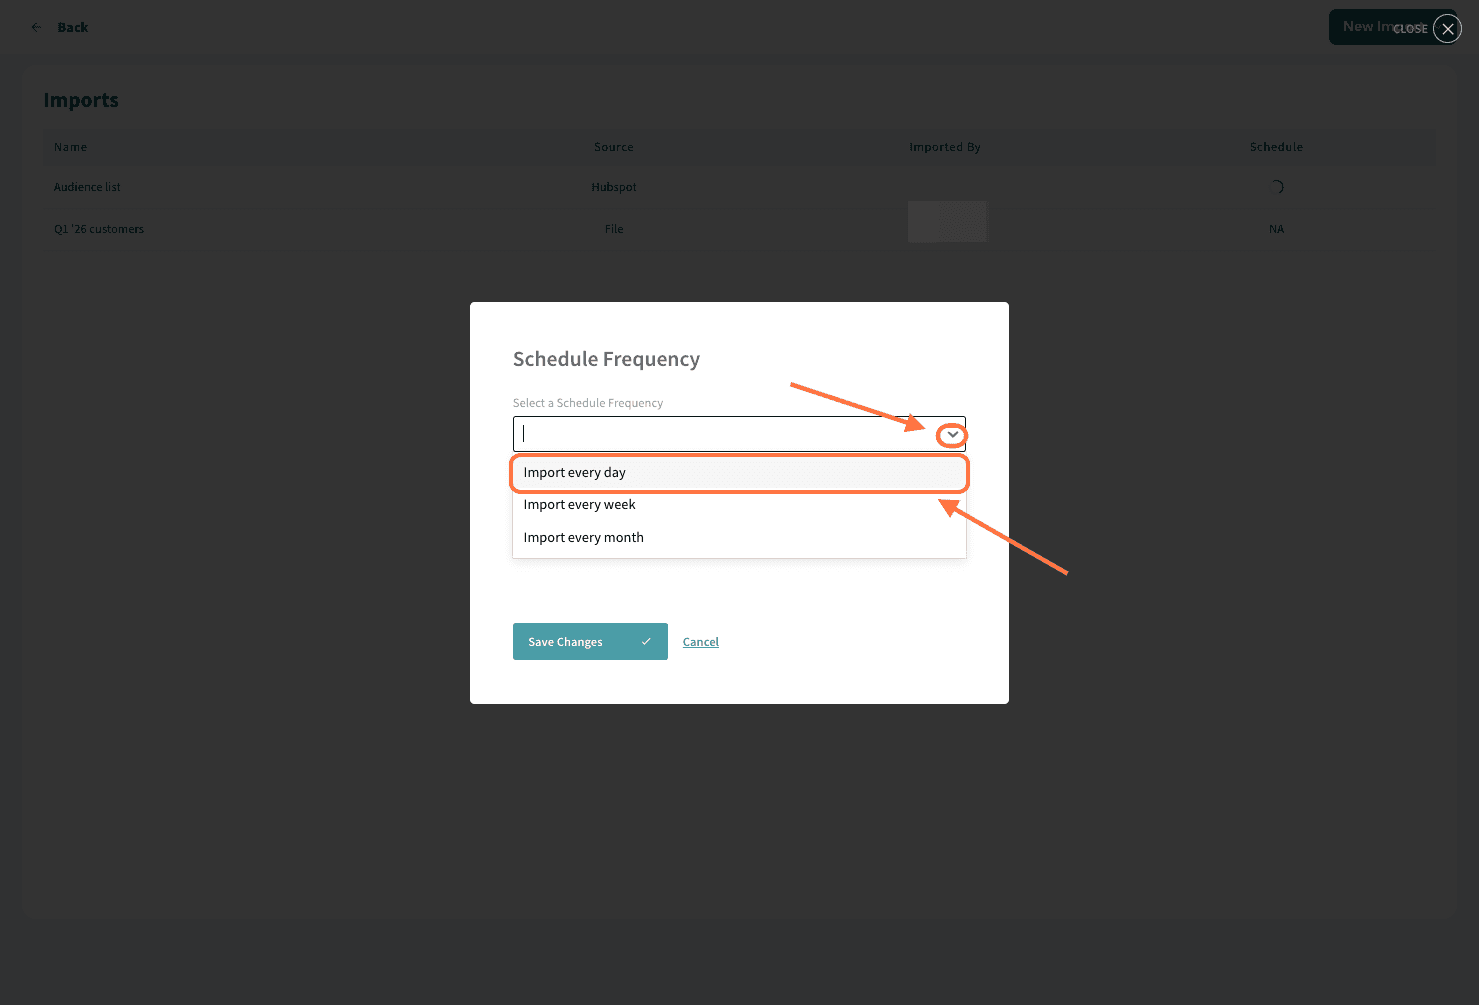
13. Once done, click Save Changes.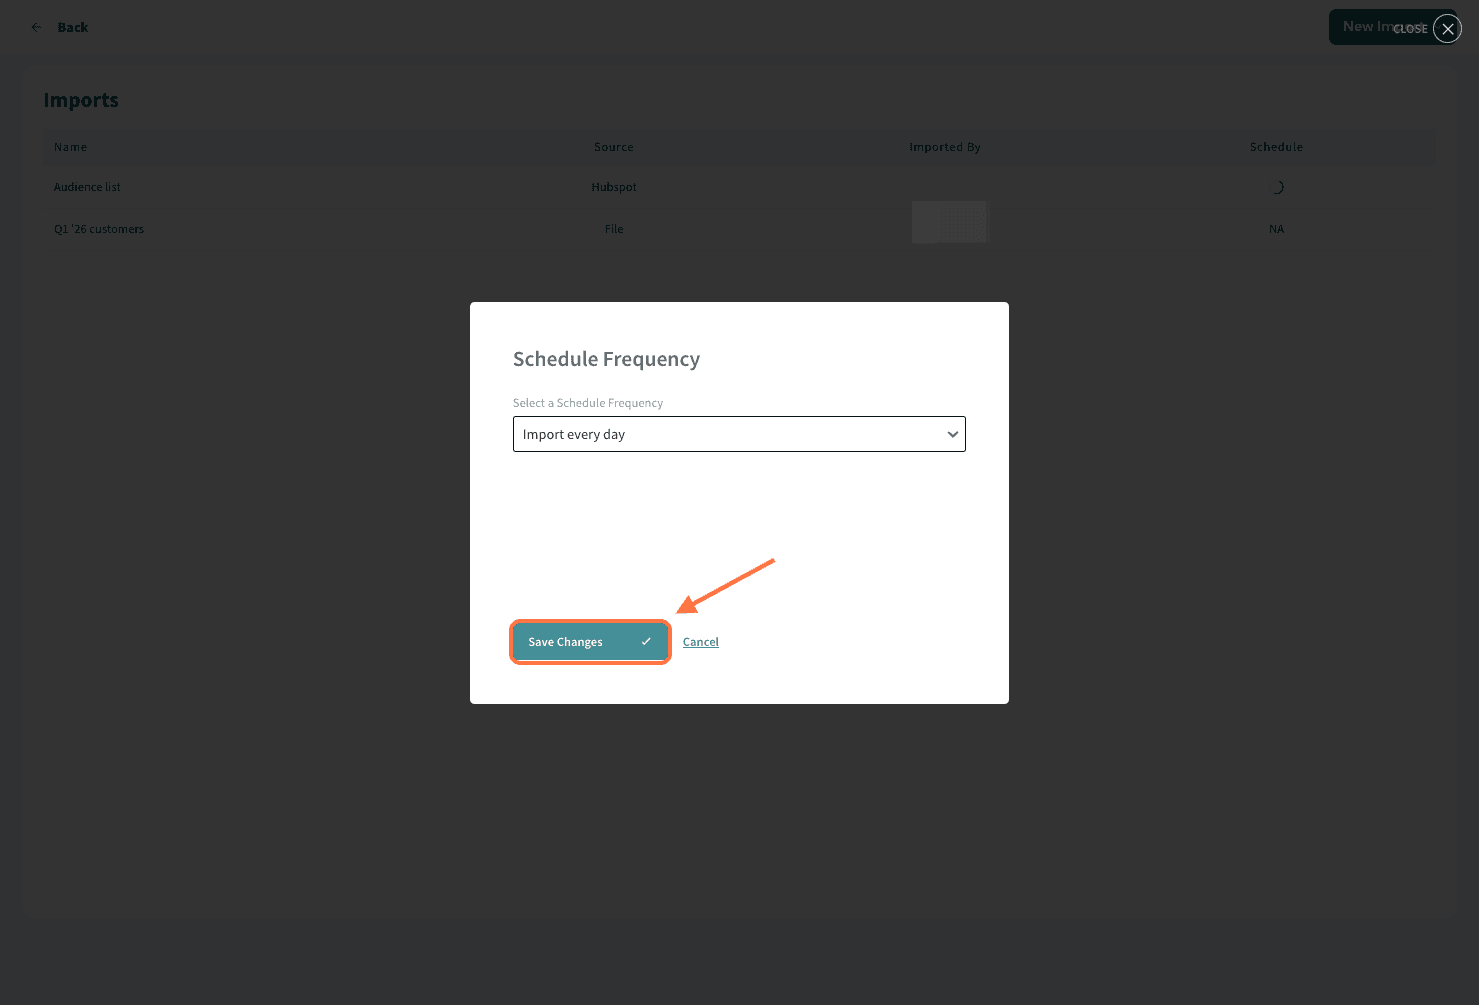
14. If you wish to import another list, click New Import.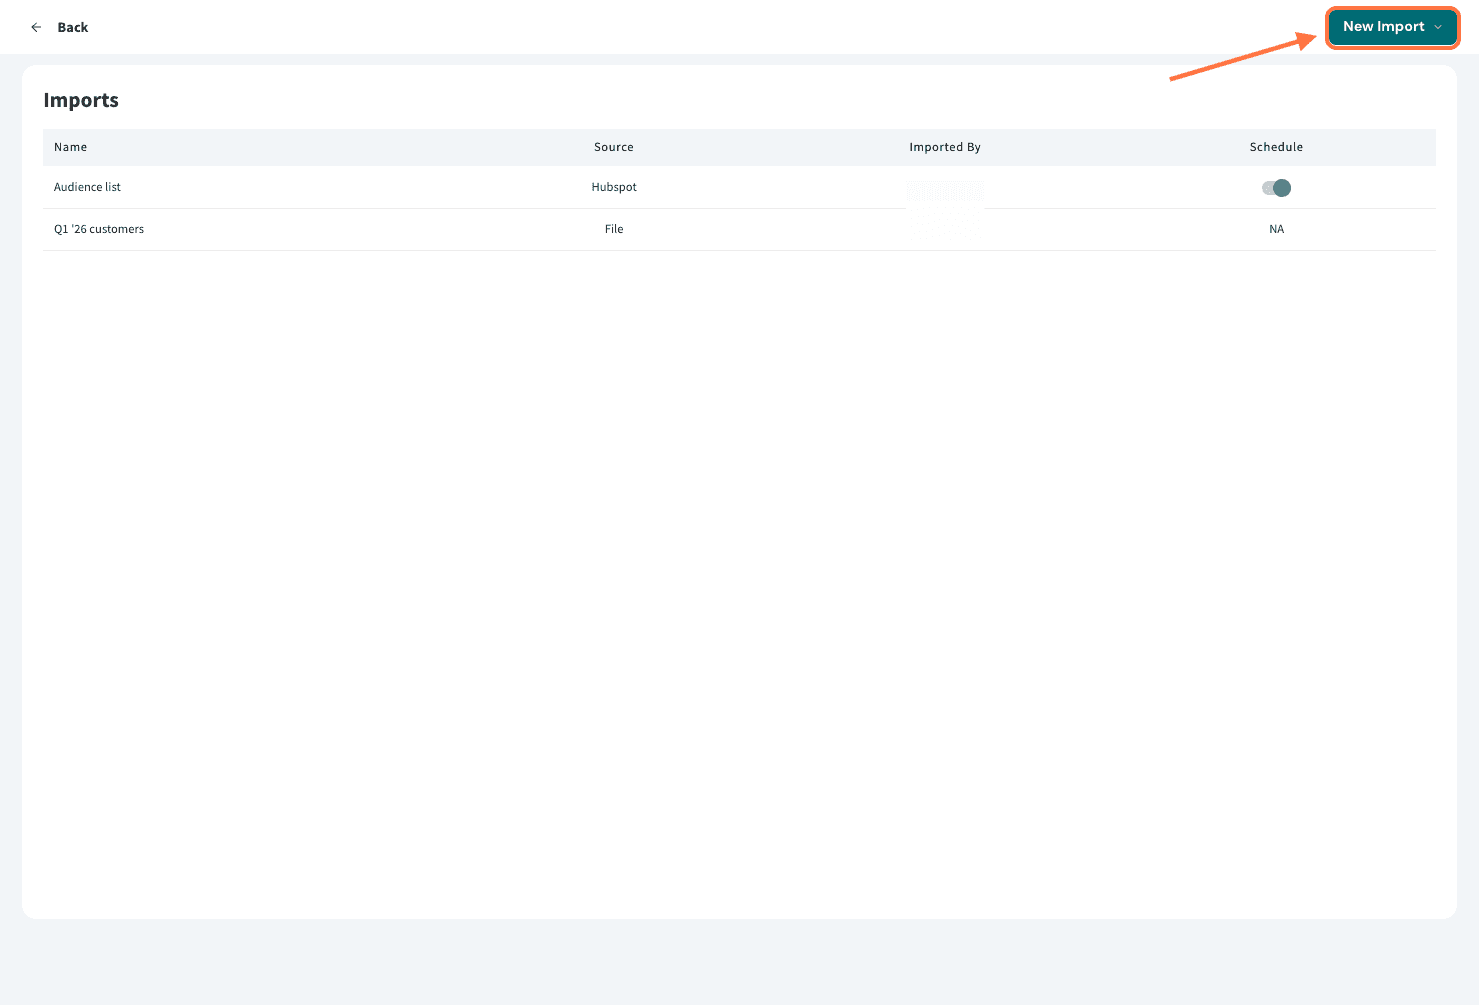
1. To disconnect the integration, go to your HubSpot account and click on the Marketplace icon.
2. Click on Connected Apps.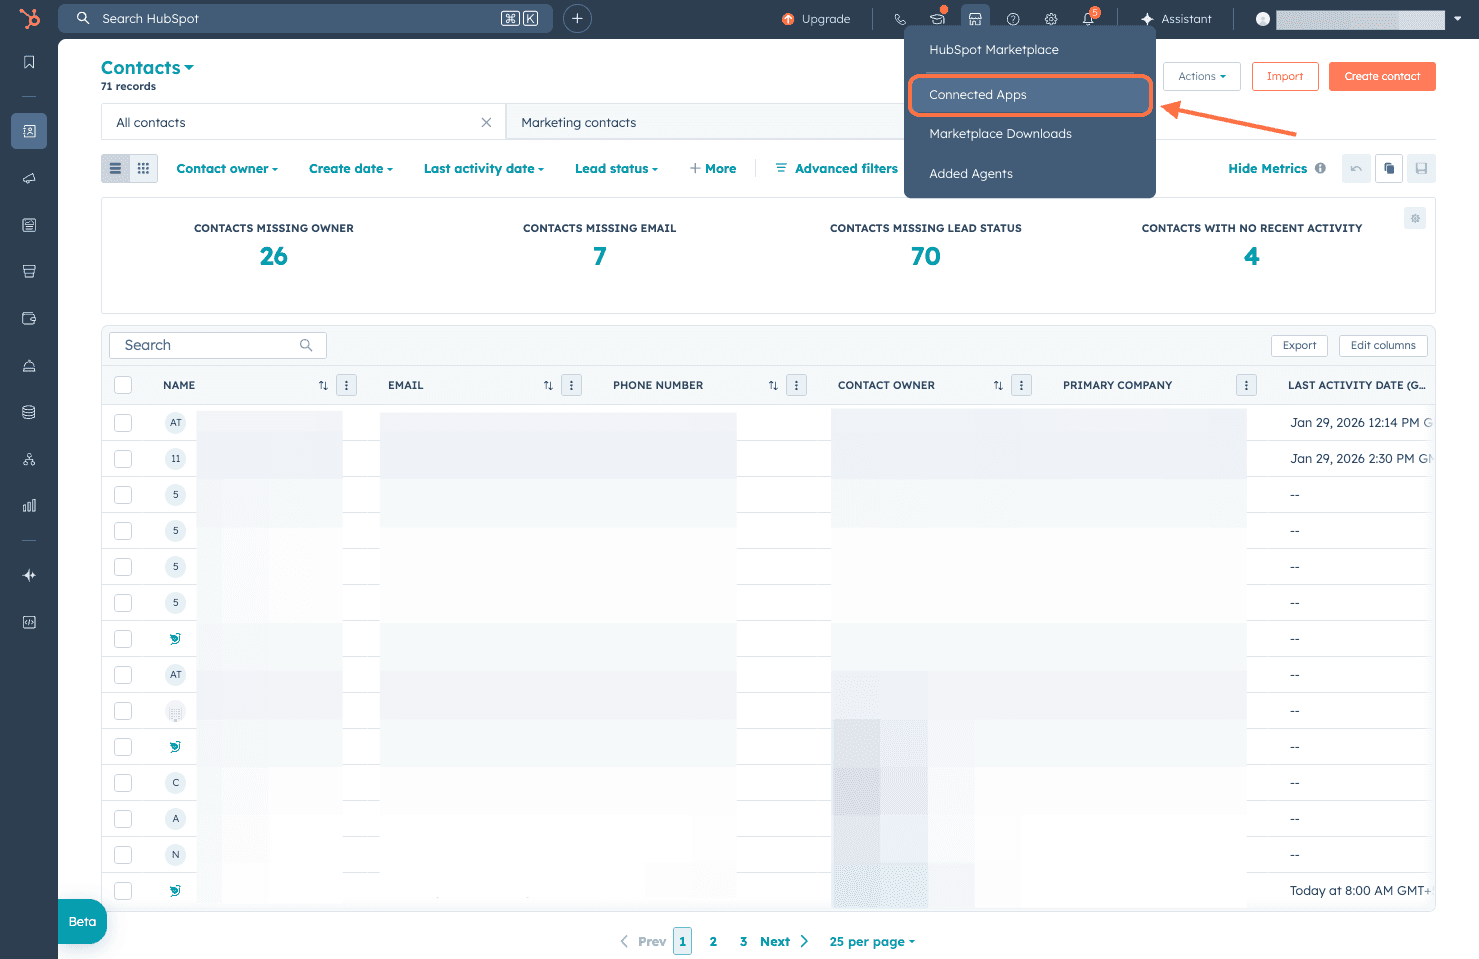
3. Search for SurveySparrow (search box or by scrolling down), then click on the Actions button.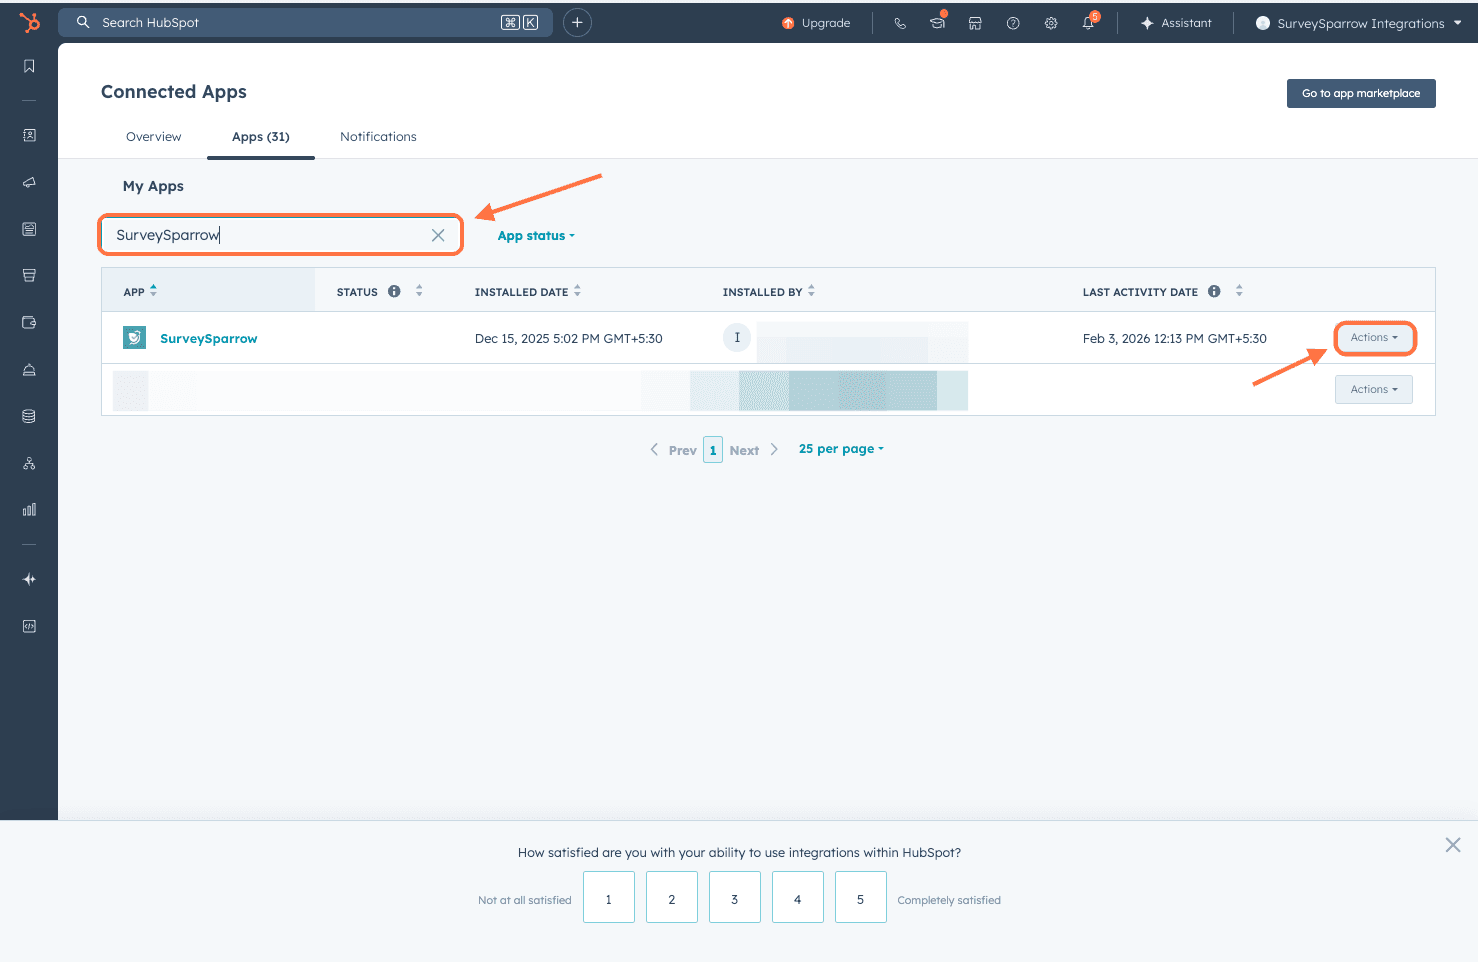
4. Click on Uninstall.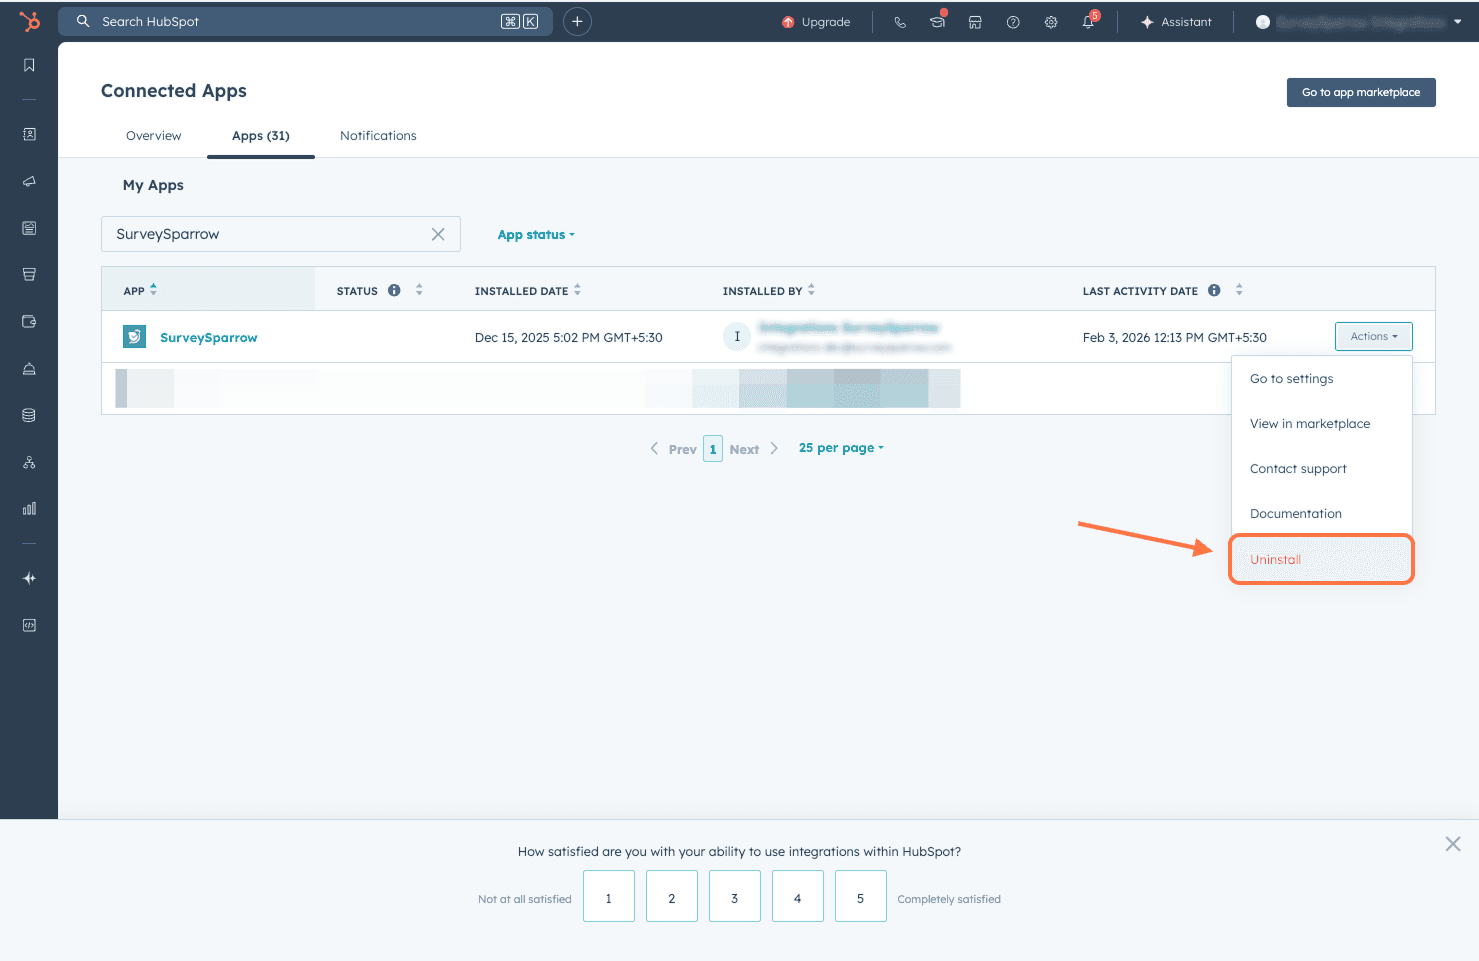
5. As a final confirmation step, type uninstall into the text box, and click Uninstall.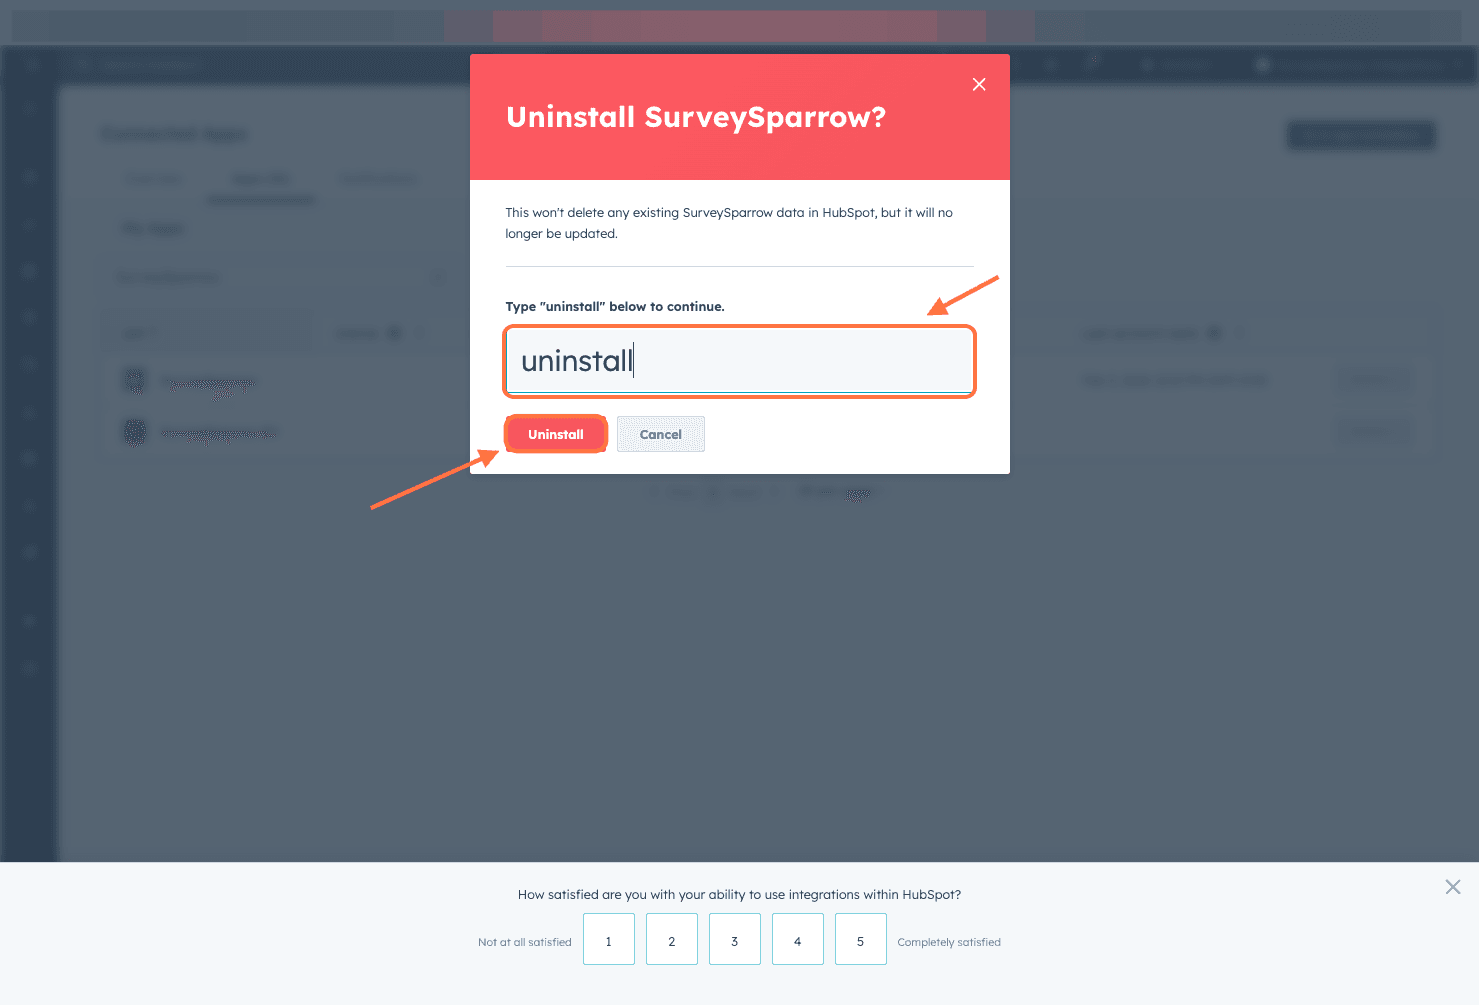
With the SurveySparrow–HubSpot integration, your customer feedback becomes an actionable part of your CRM: fueling smarter decisions across sales, marketing, and support. Whether you’re automating follow-ups, enriching lead data, or building closed-loop feedback systems, your insights are now embedded where your teams work every day.
Feel free to reach out to our community if you have any questions!
Powered By SparrowDesk