Search
Snowflake is a cloud-based data platform that enables organizations to store, analyze, and share large volumes of structured and semi-structured data with high performance, scalability, and security.
SurveySparrow’s integration with Snowflake allows you to automatically sync survey responses directly into your Snowflake environment or to a shared Snowflake database (hosted by SurveySparrow).
This integration eliminates manual exports and enables seamless data pipelines. IIt is built for data, CX, and analytics teams who want survey data ready for querying, reporting, and modeling without manual exports or pipelines
Some valuable use cases include:
In this article, we’ll walk you through setting up the integration and configuring response mappings, specifically:
However, this feature has not been enabled in your account. To get it, you must first request access via SparrowLabs, (where we roll out experimental features for early user feedback). Follow these steps:
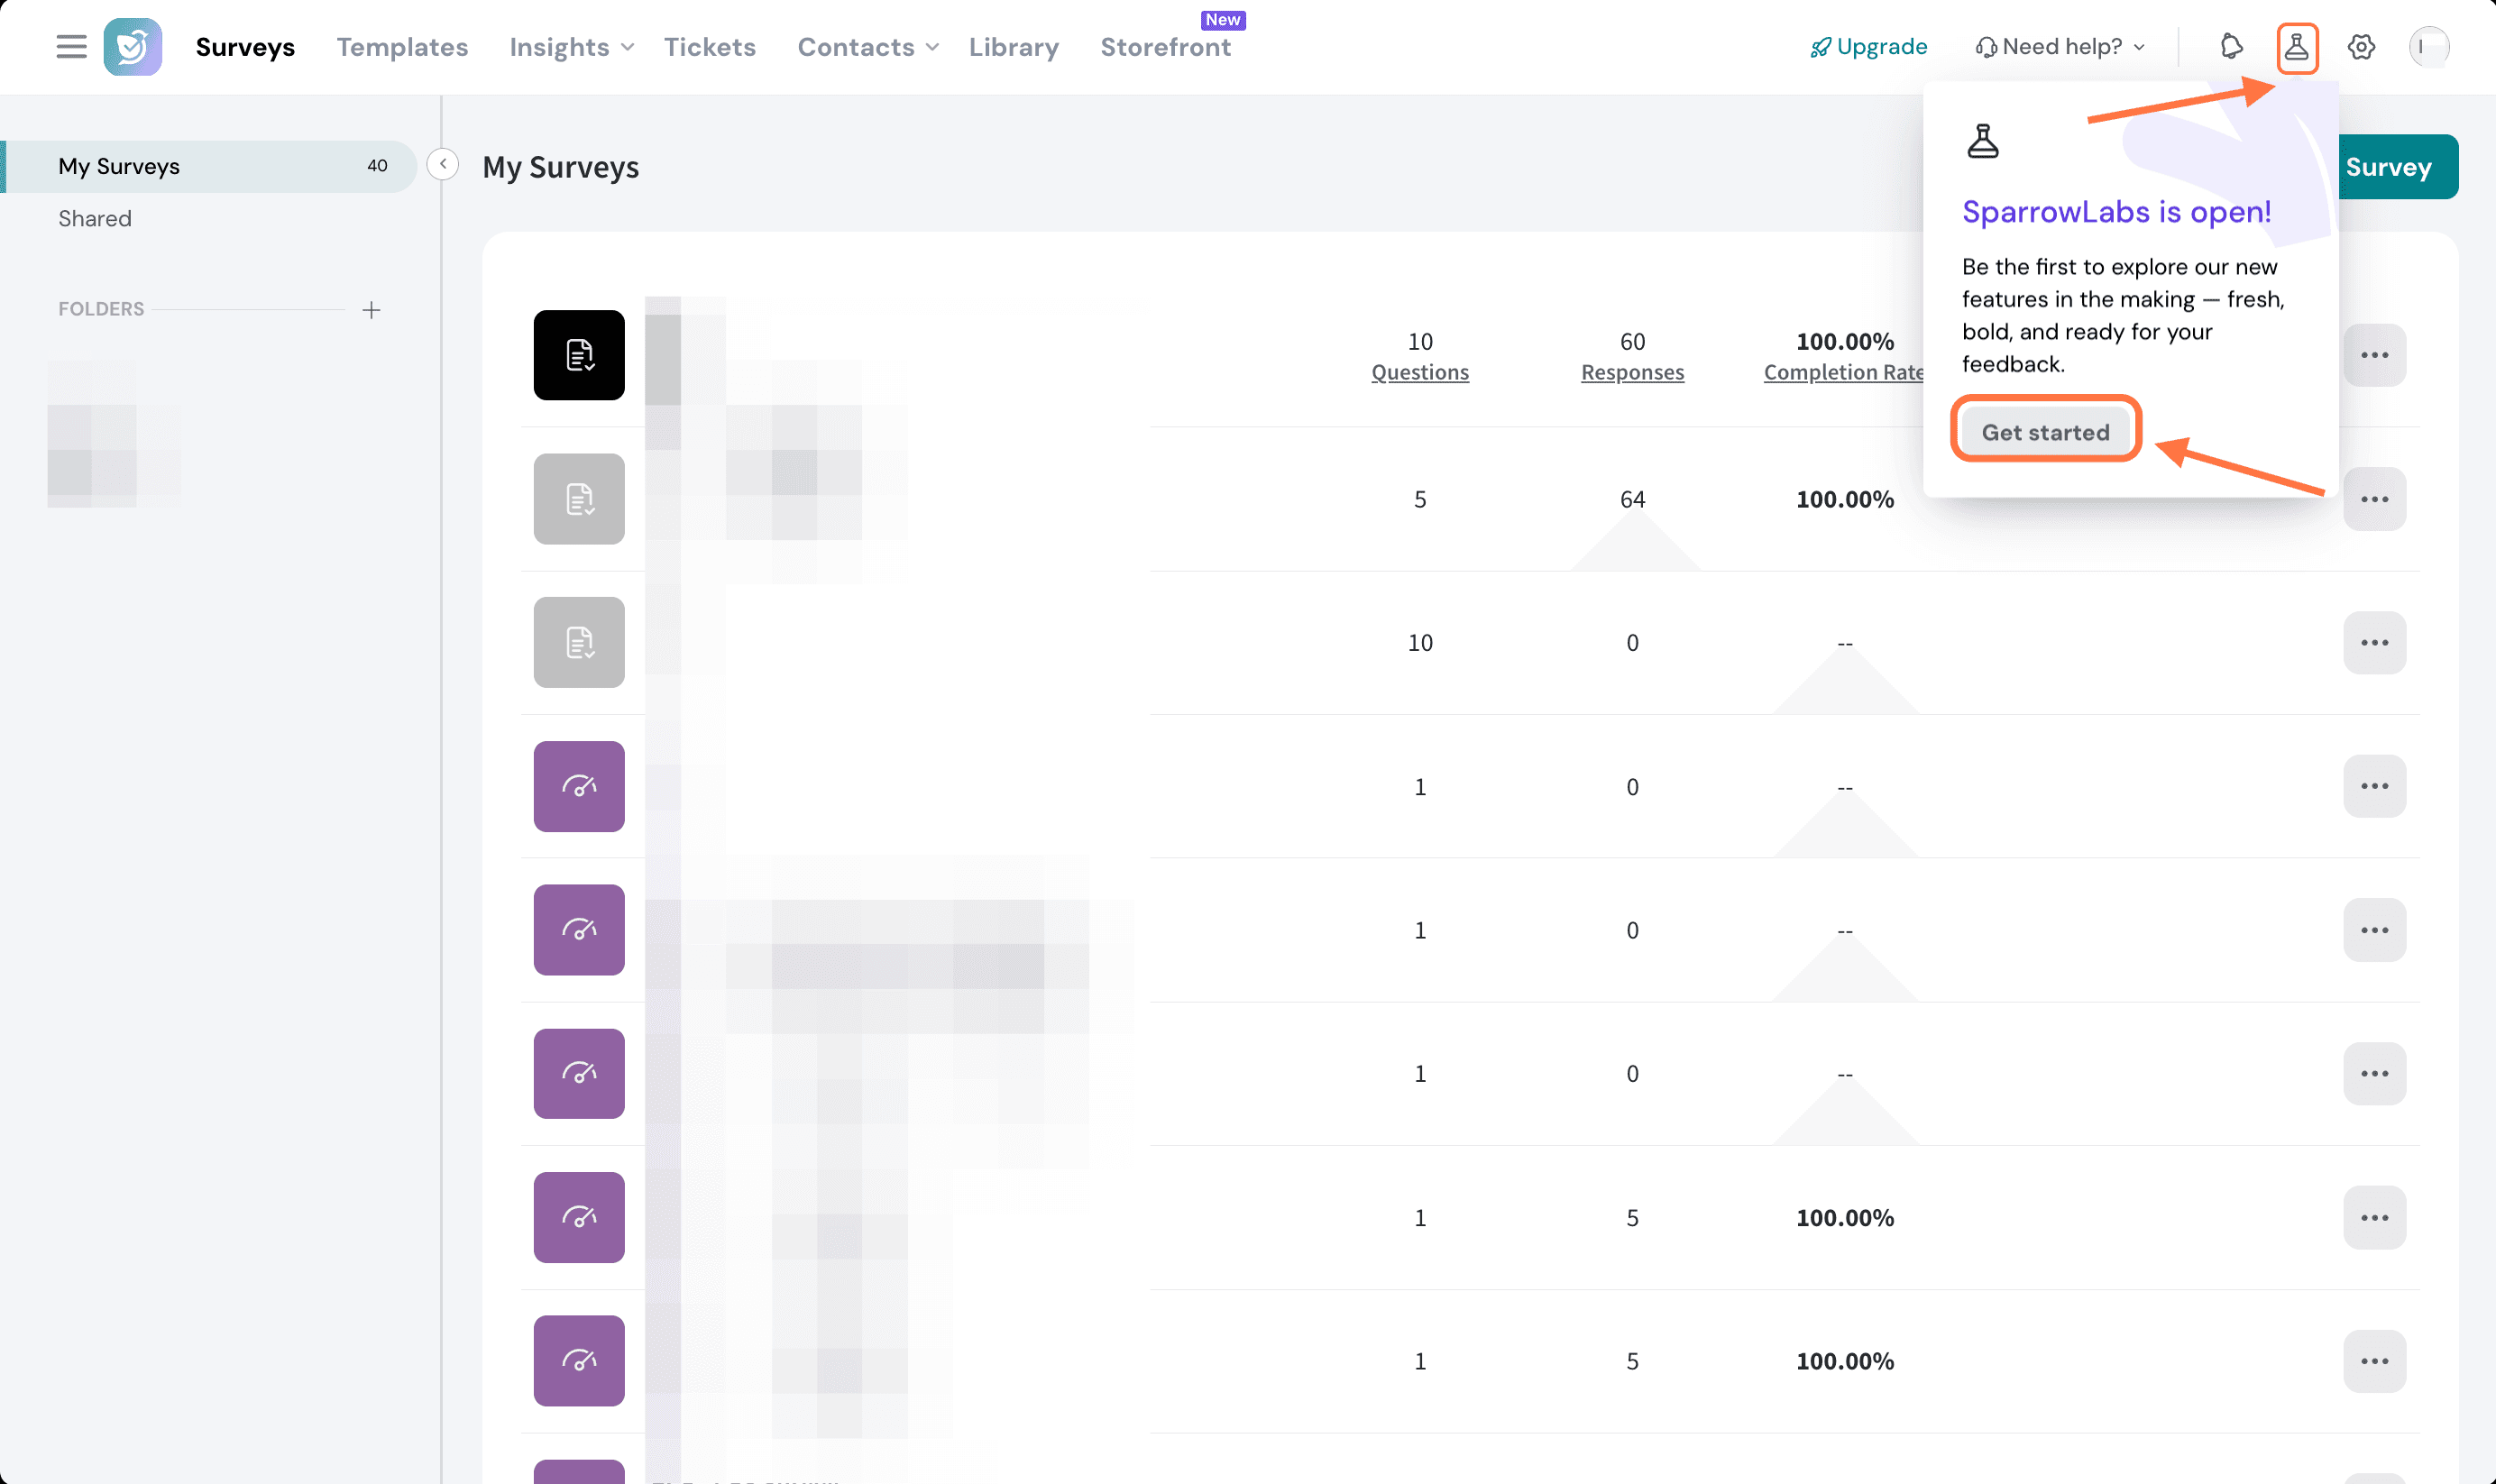
1. Inside your account, click on the SparrowLabs icon in the top right corner, then click Get Started.
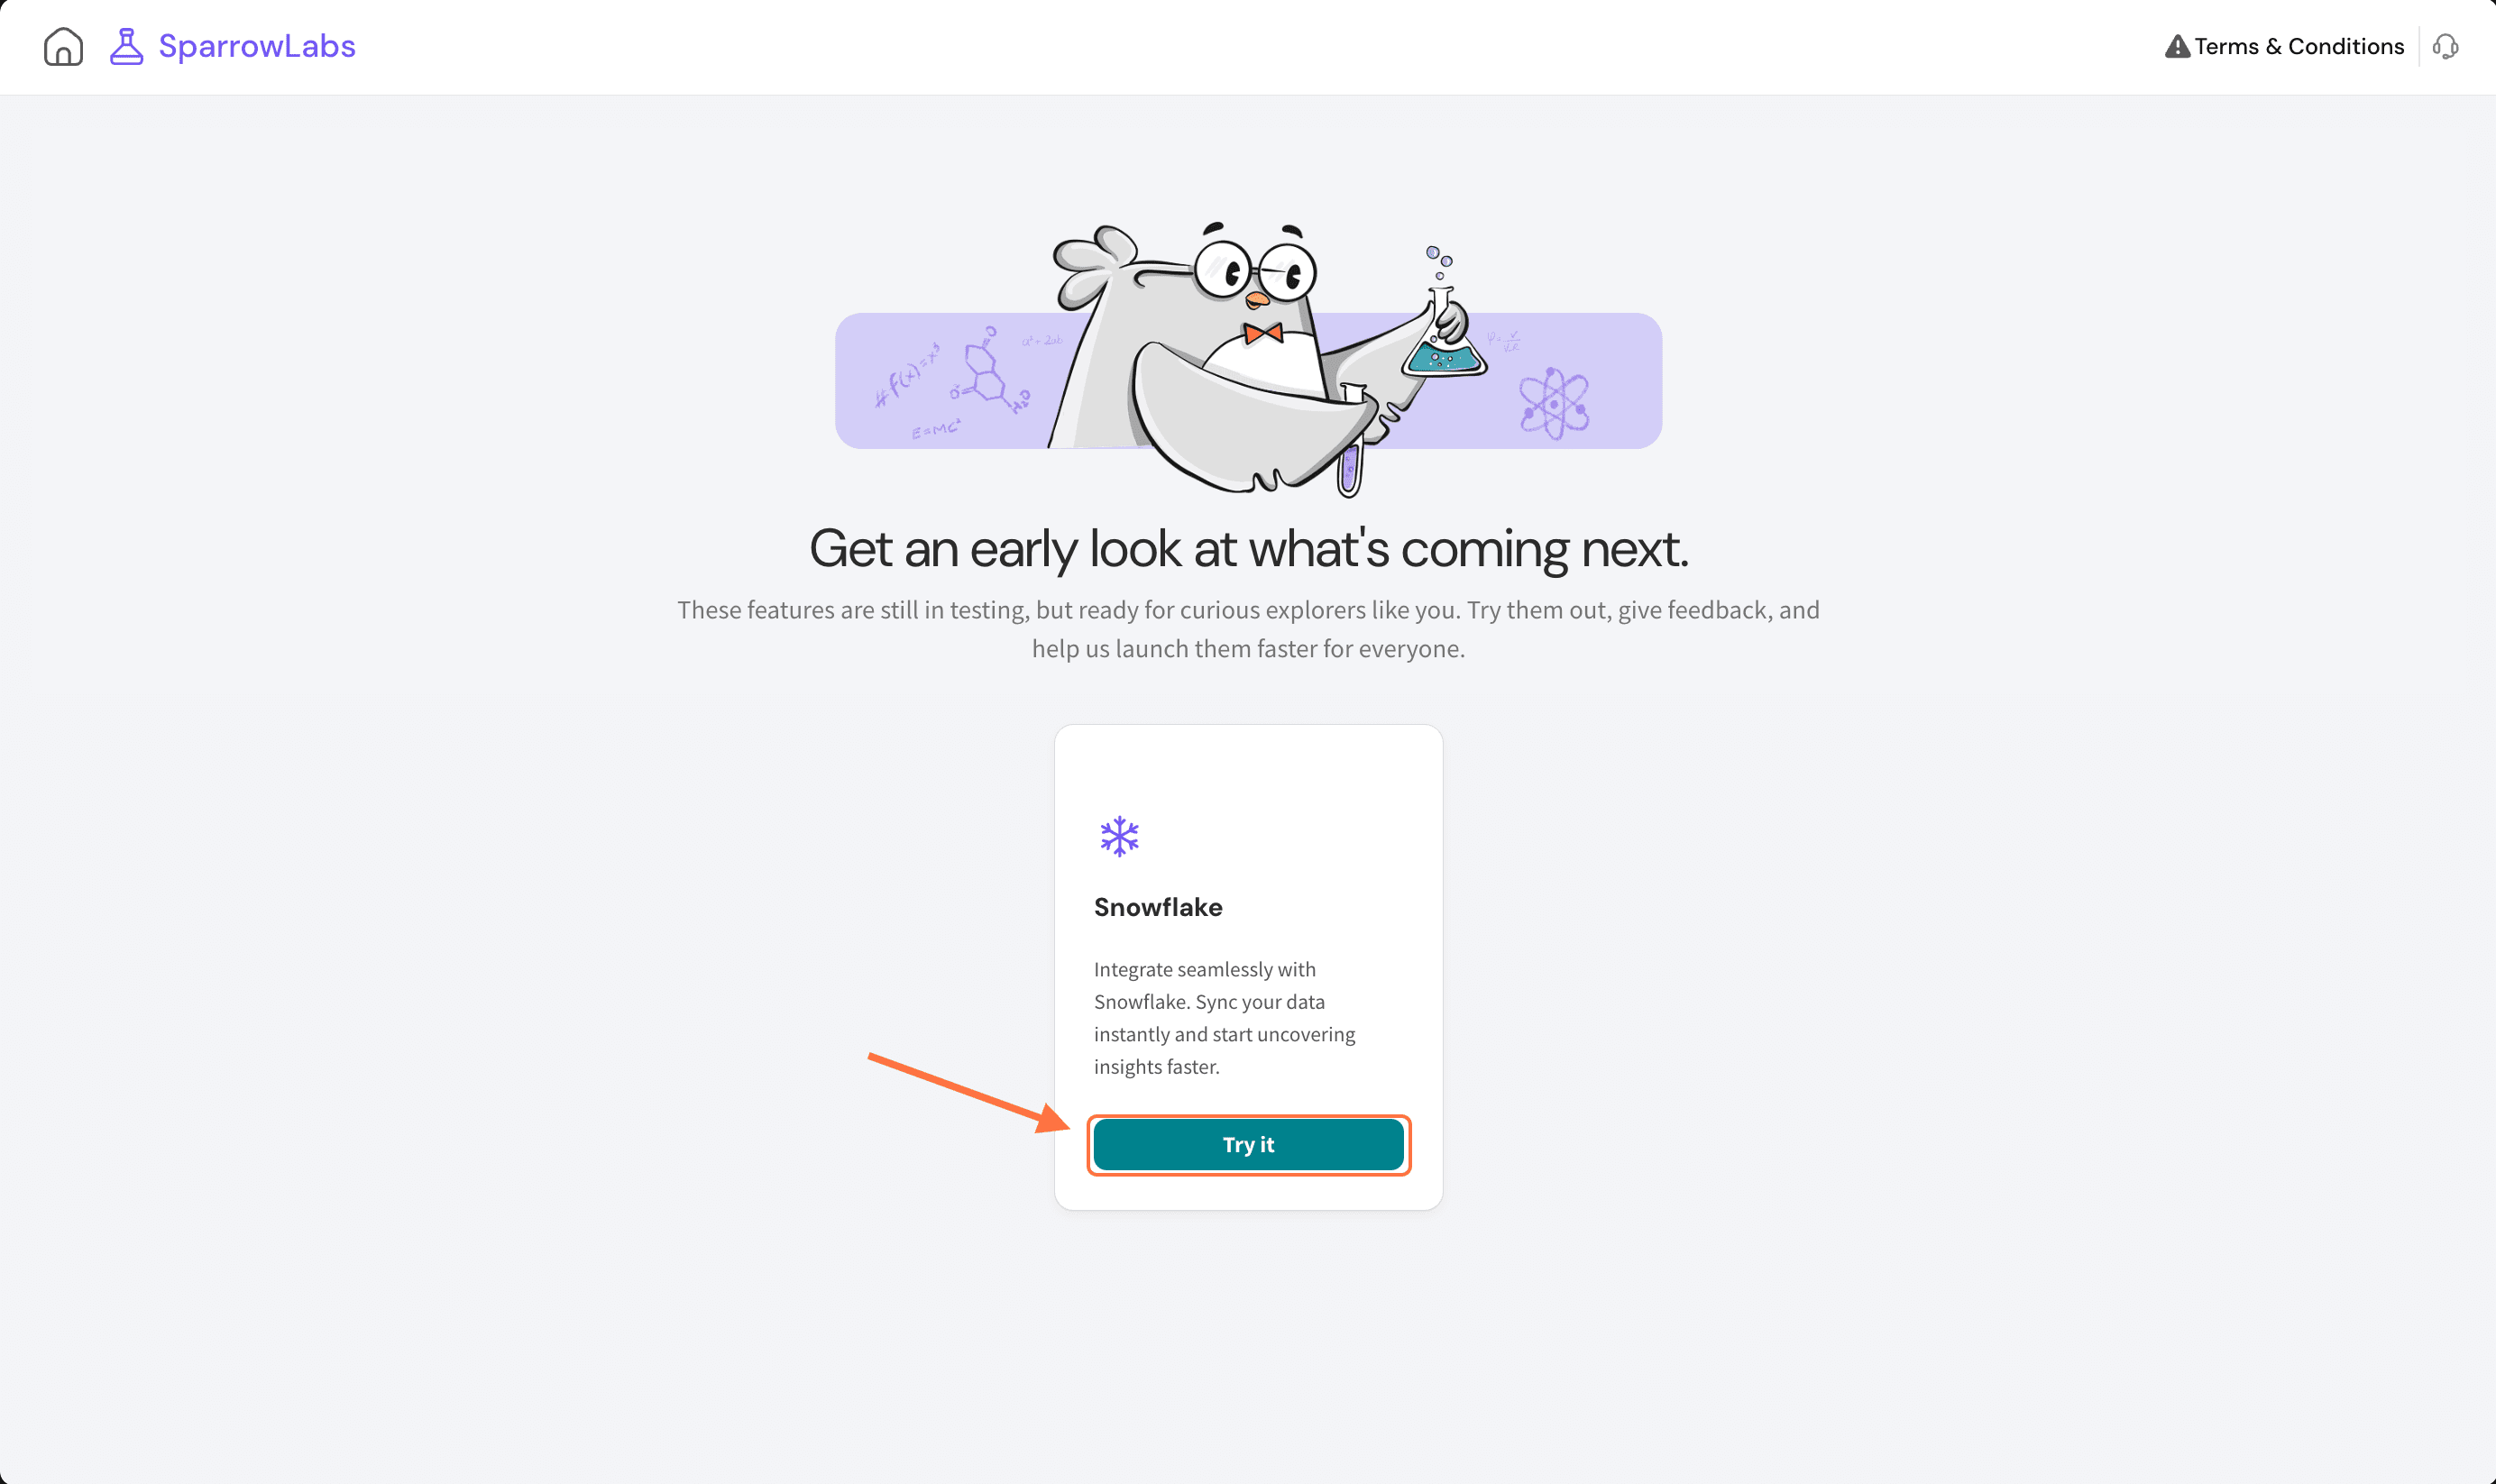
2. Inside the SparrowLabs section, you'll see a card for the Snowflake integration. Click on Try it.
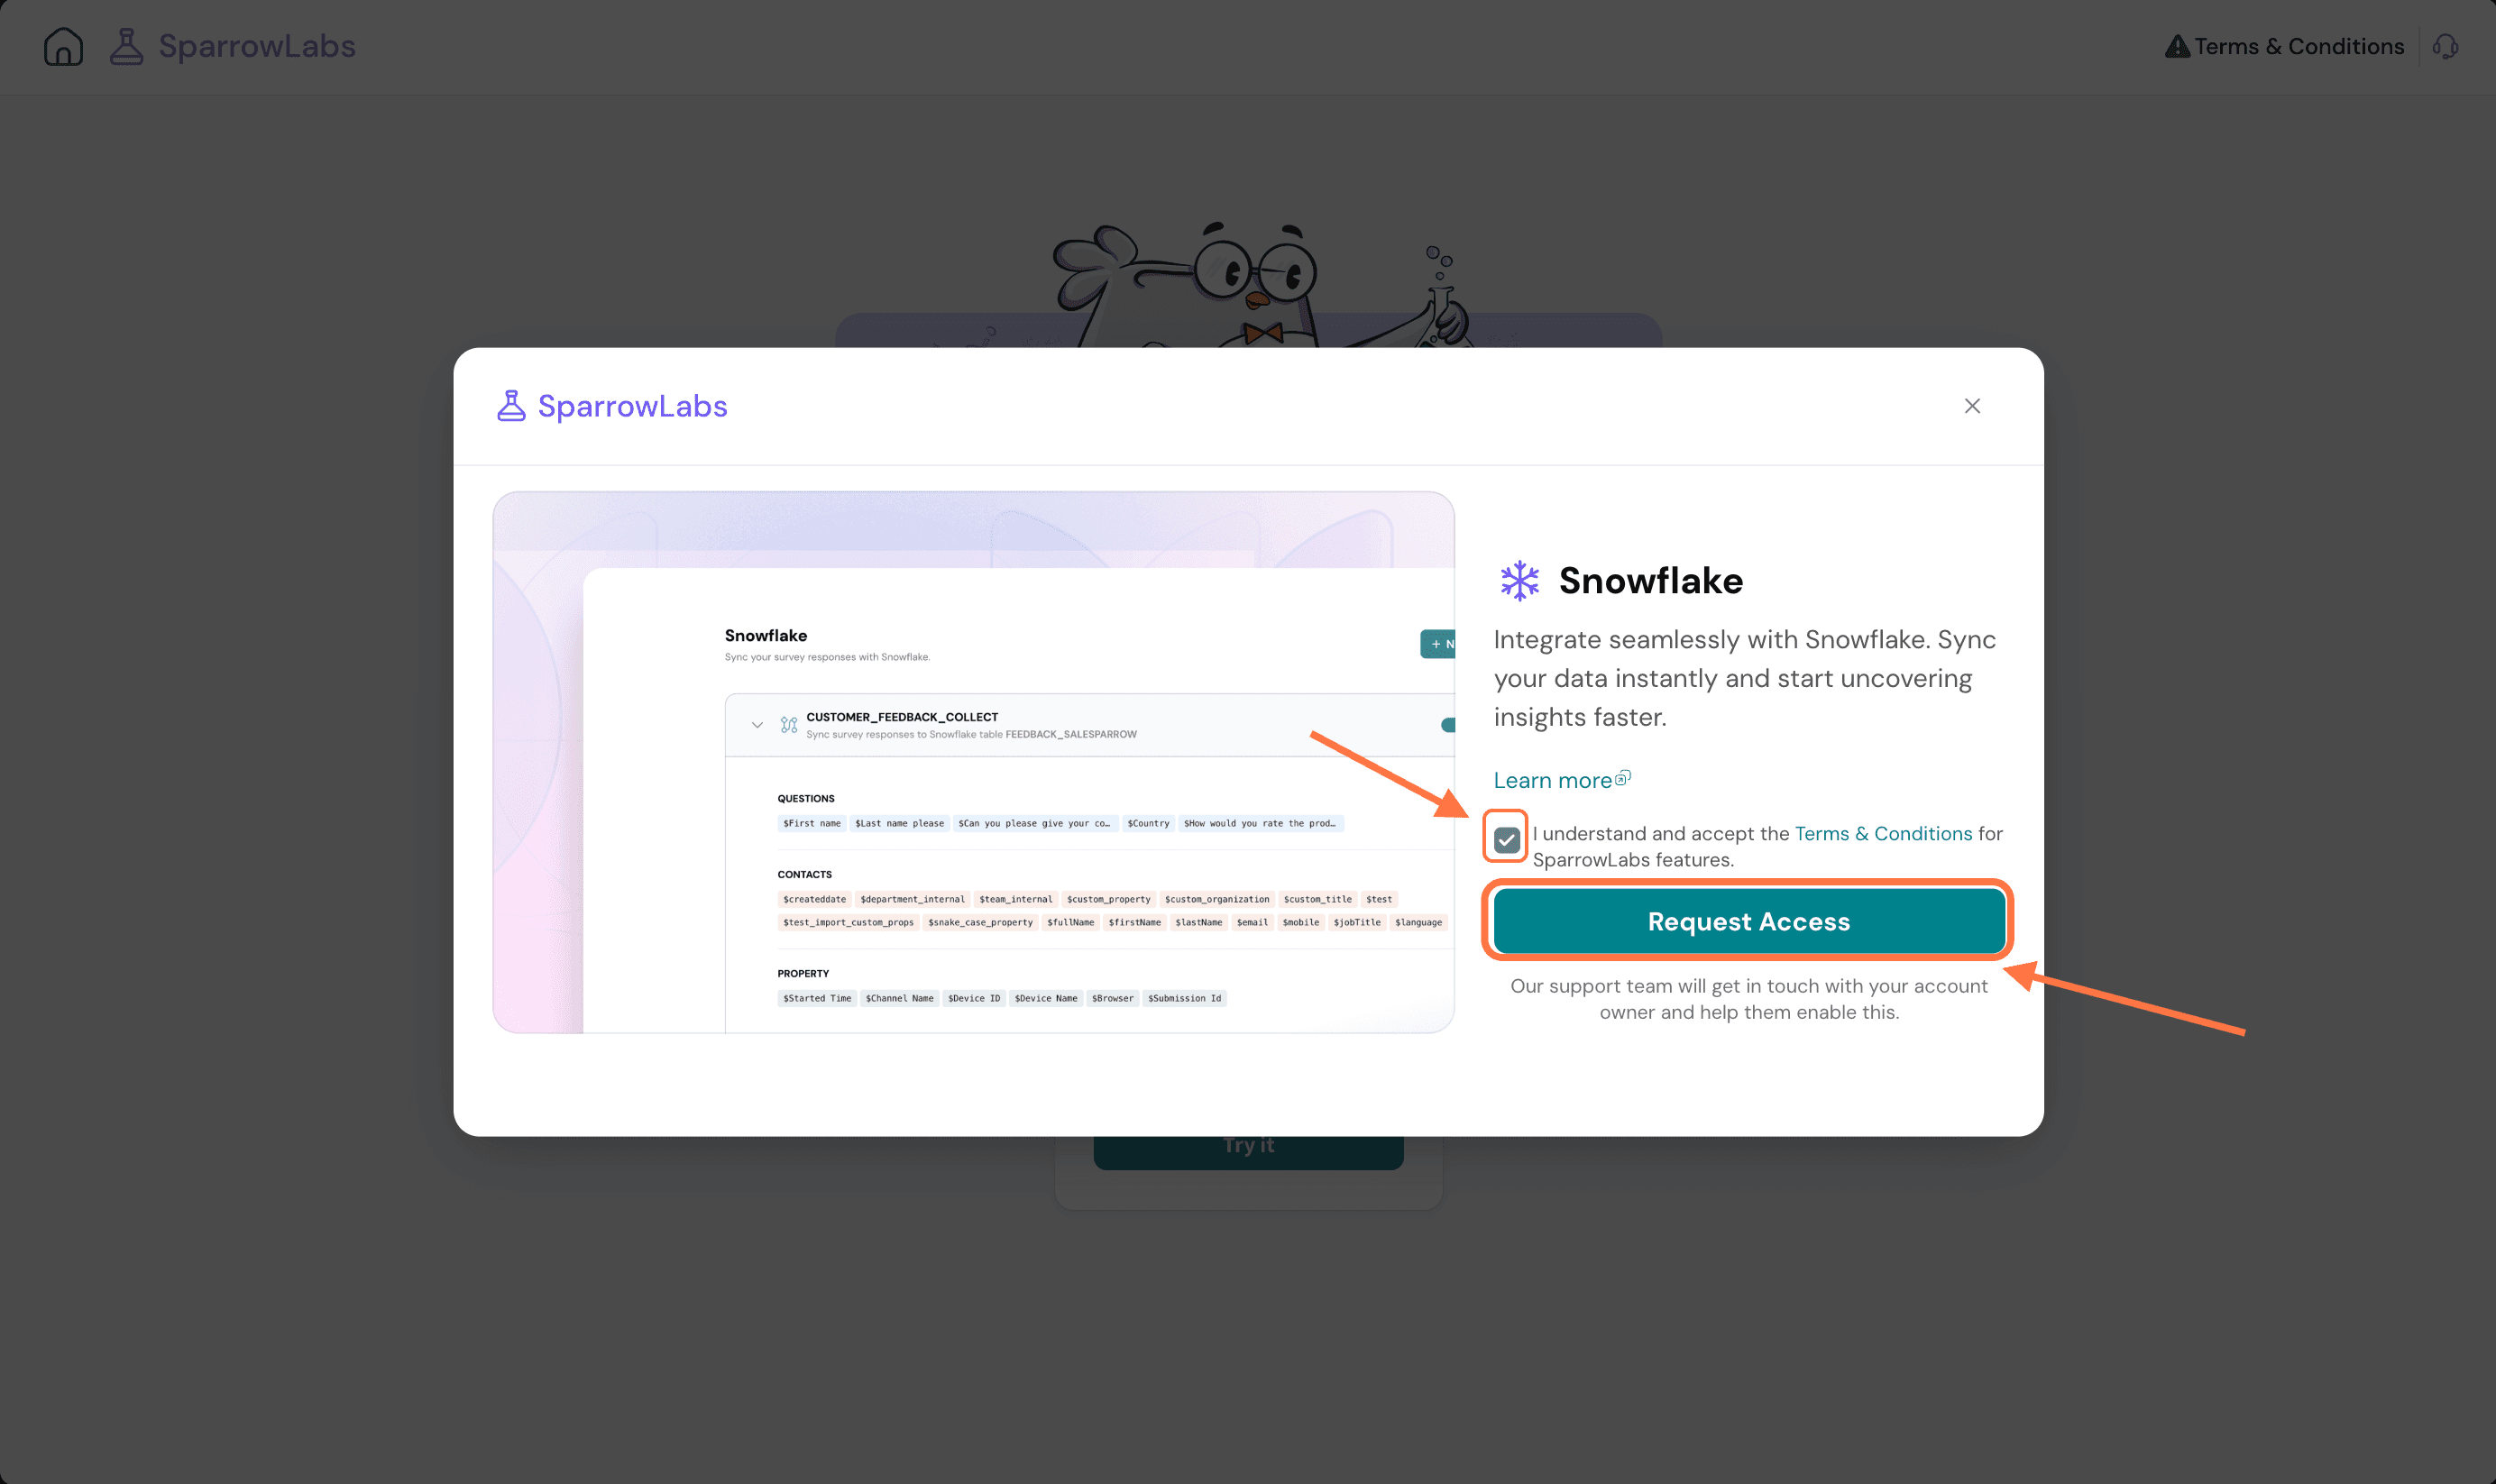
3. A pop-up appears. Click on the check-box for terms and conditions, then click on Request Access. Our support team will connect with you to enable it.
Once the feature has been enabled, follow the steps below to set it up.
1. Inside your SurveySparrow account, click on the settings icon.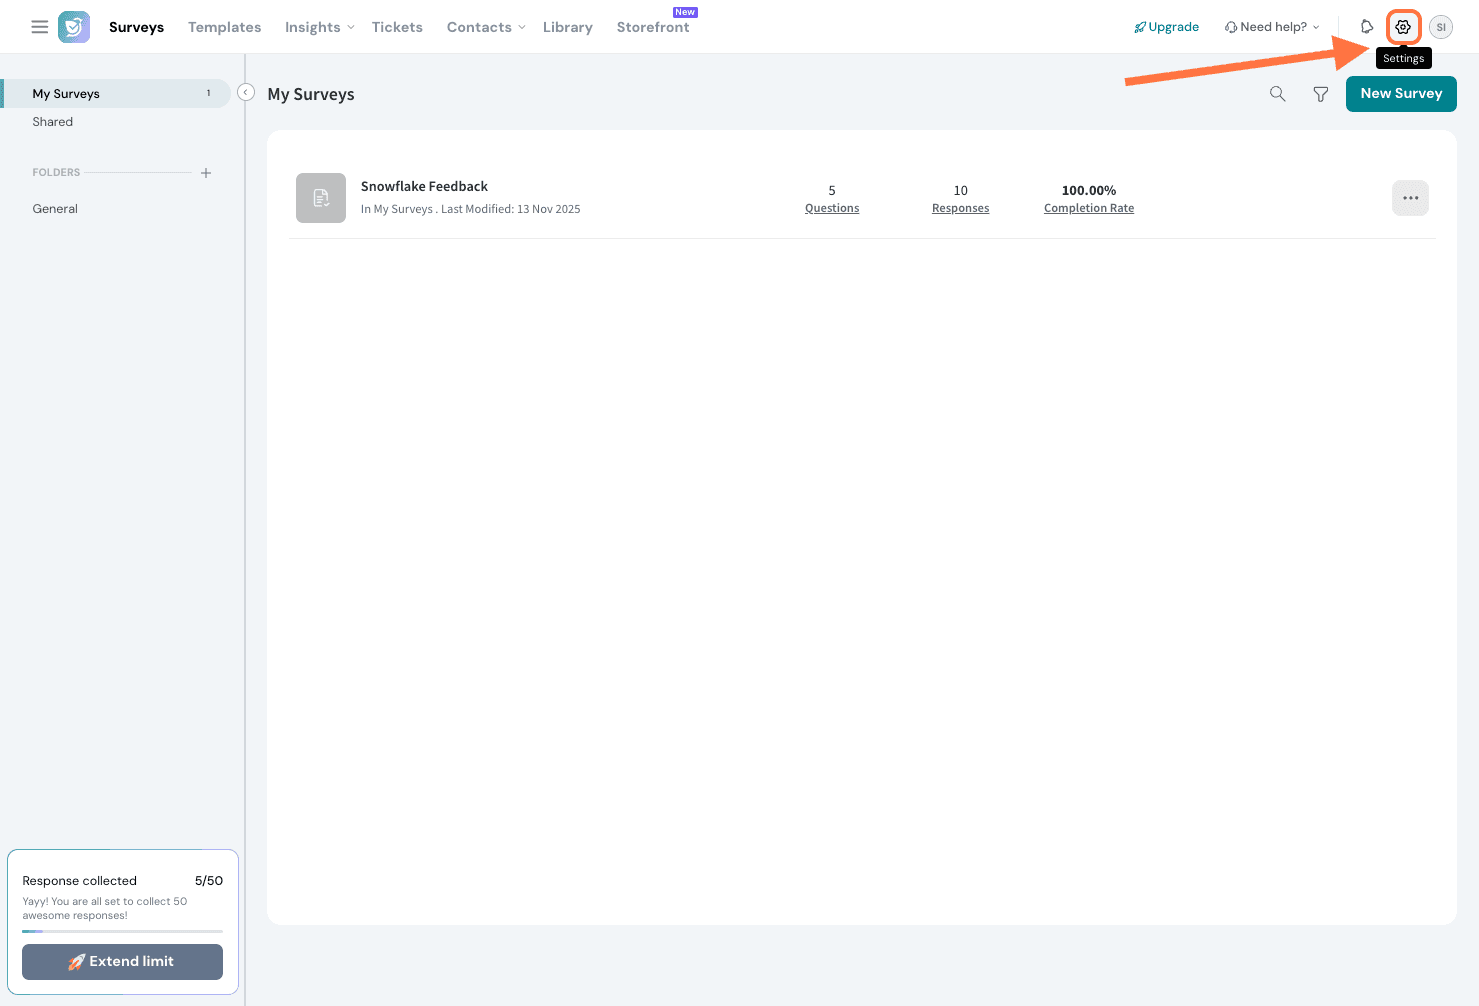
2. Inside the Settings page, scroll down the left-hand panel, until you see Apps and Integrations, then click on it.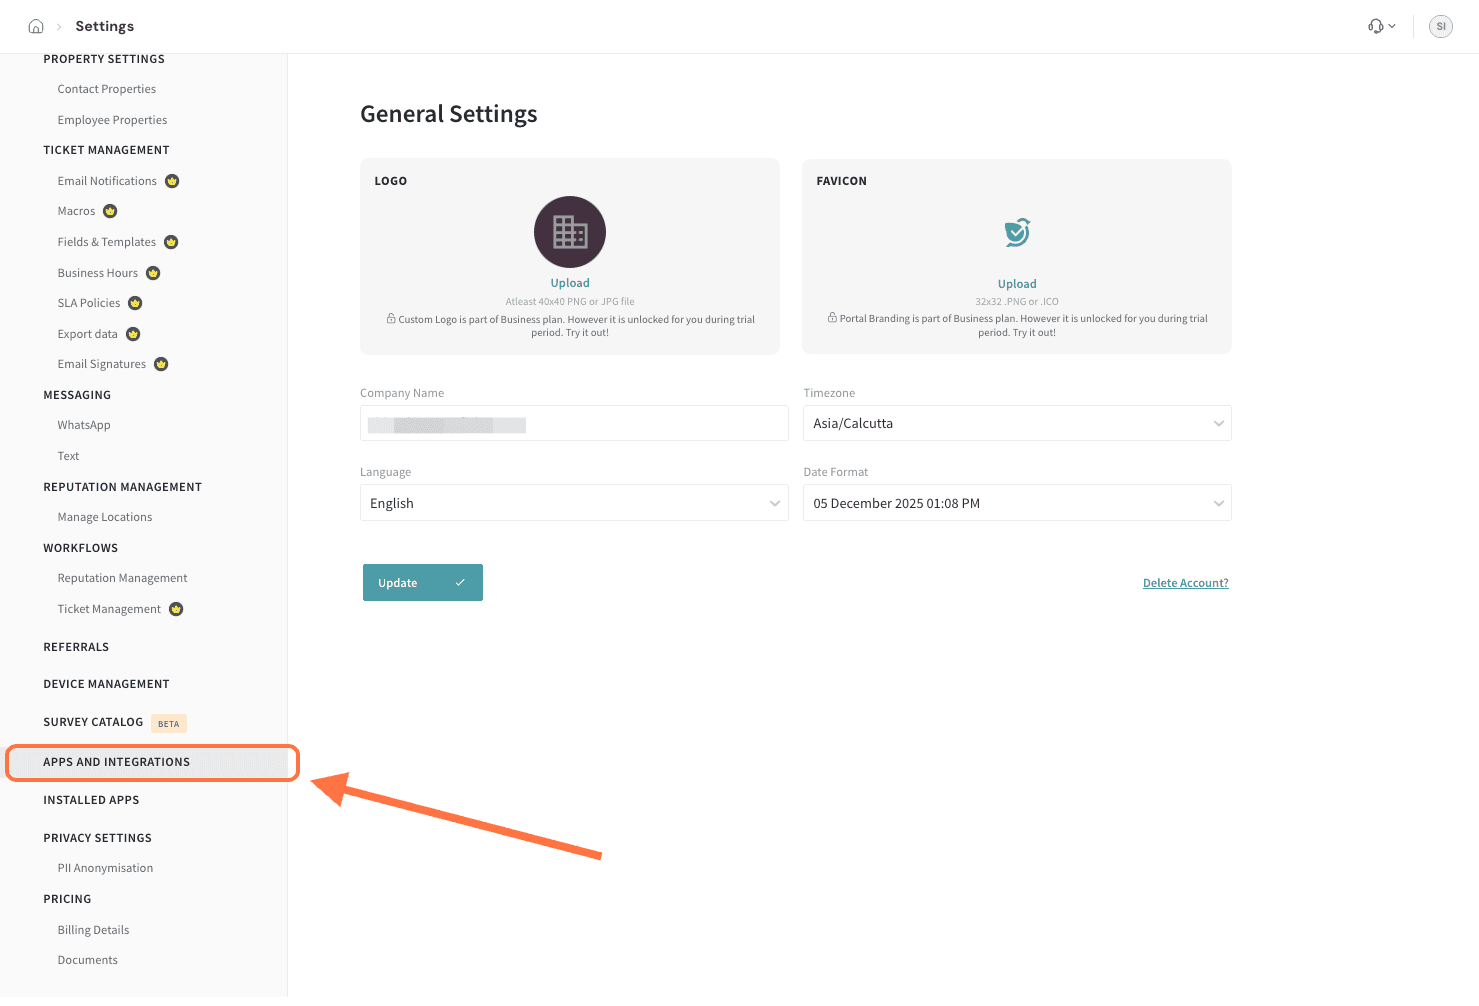
3. Search for Snowflake, then click on it.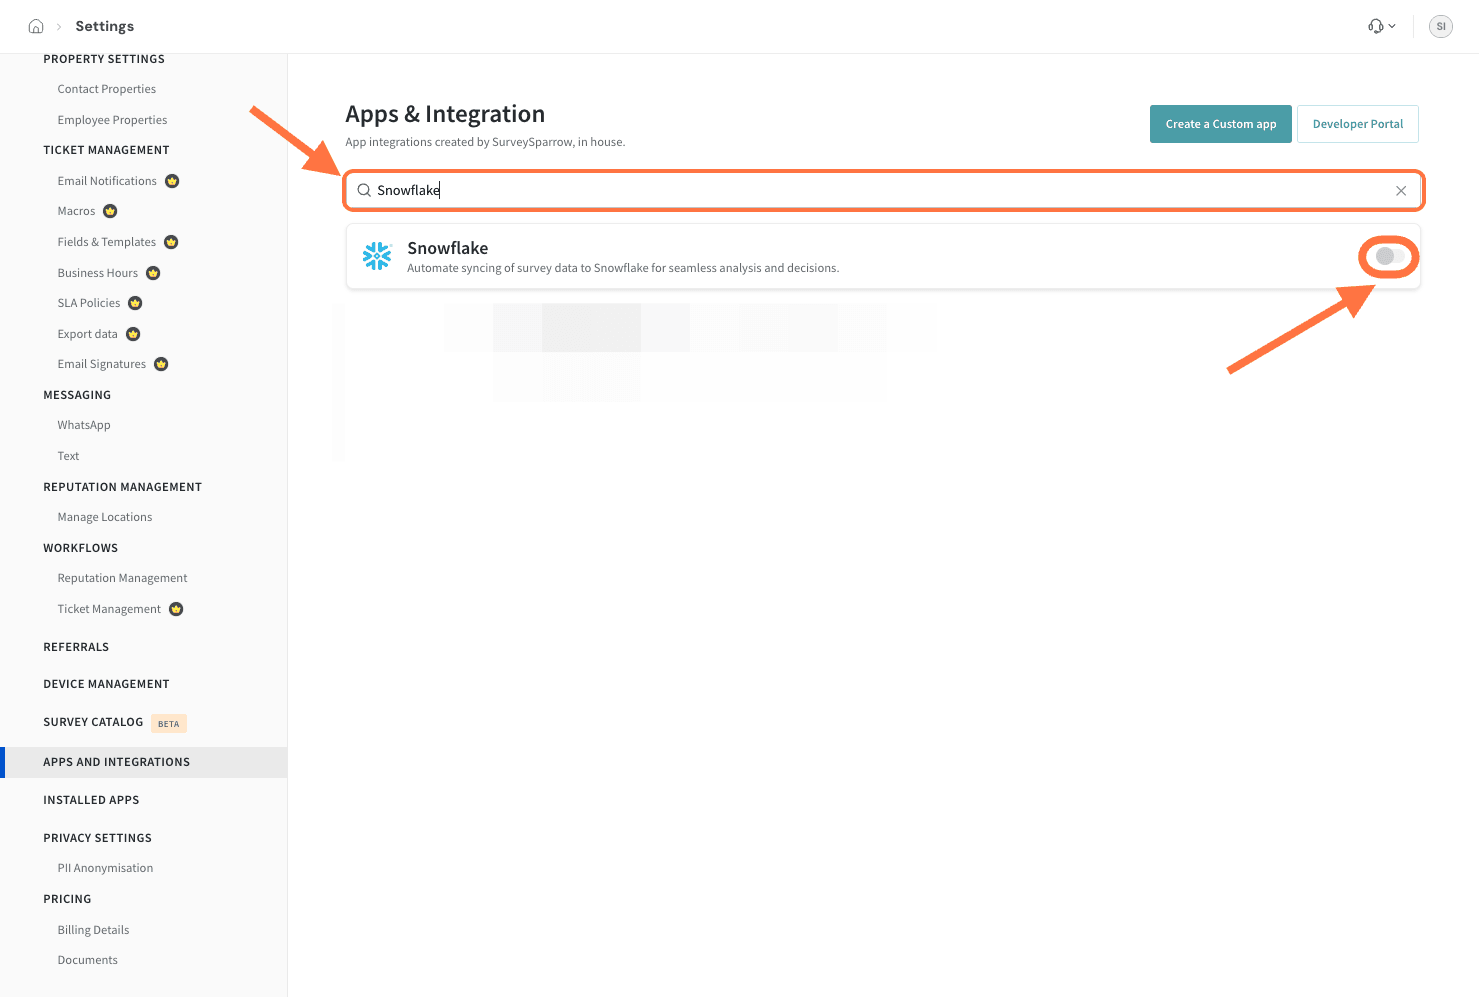
4. There are two modes to connect Snowflake to SurveySparrow:
Let’s start with Data Share.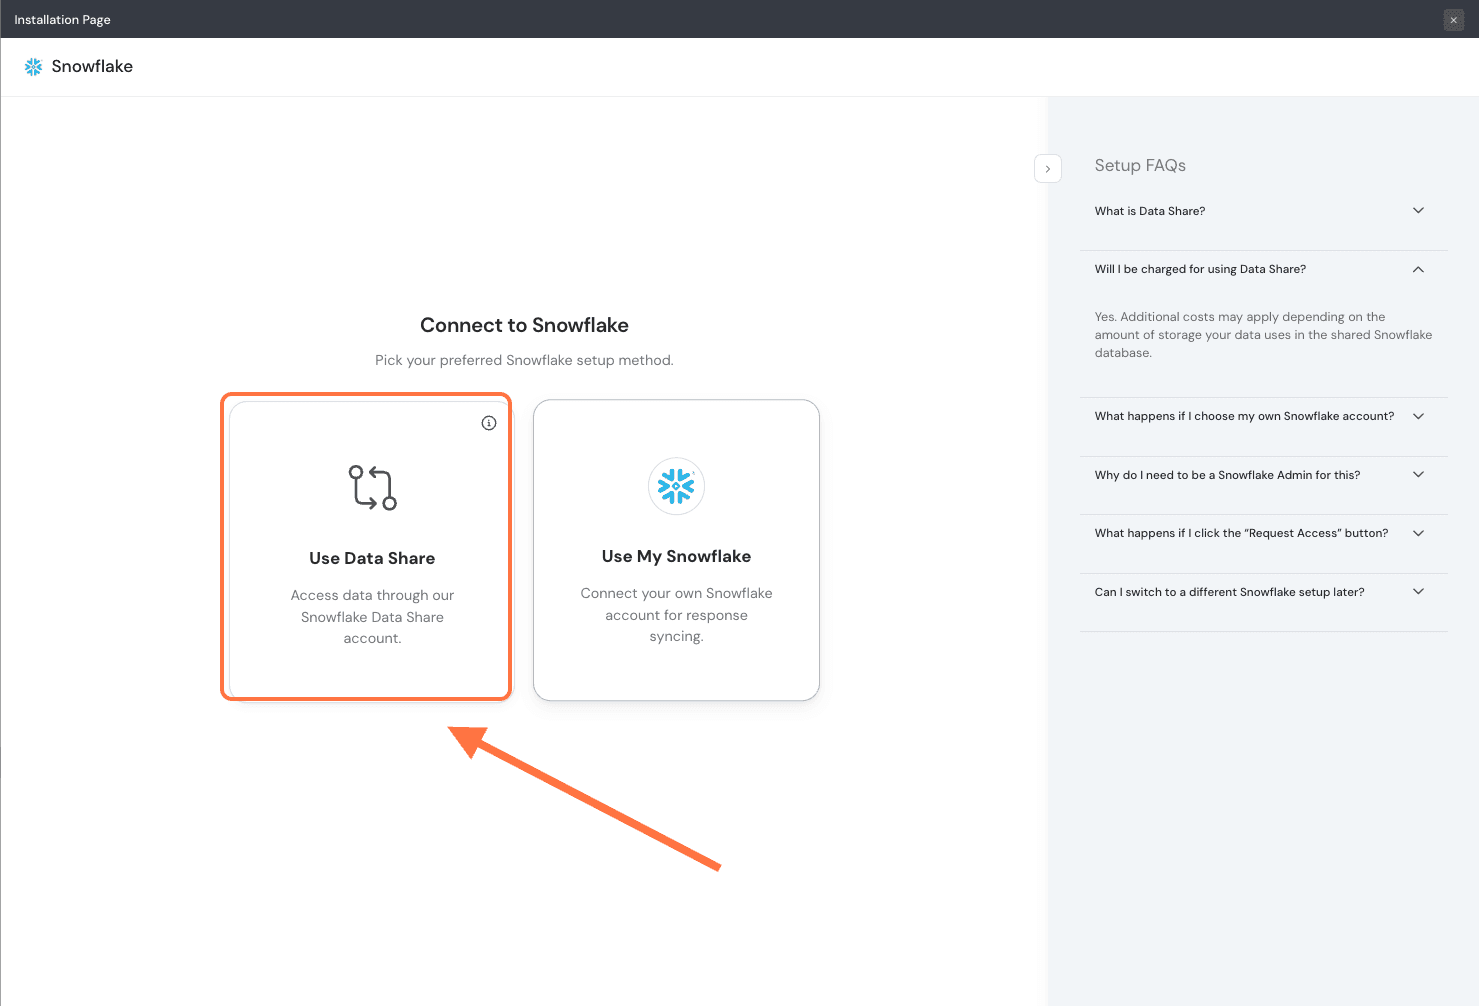
Note: When users choose one mode, it will apply to any survey mapping created for any survey henceforth. However, they can switch between these modes - meaning that existing mappings will stop and new ones will have to be created.
5. You will be asked to enter your account locator. You can either locate it within your Snowflake account details section or by running the script provided in the integration setup screen.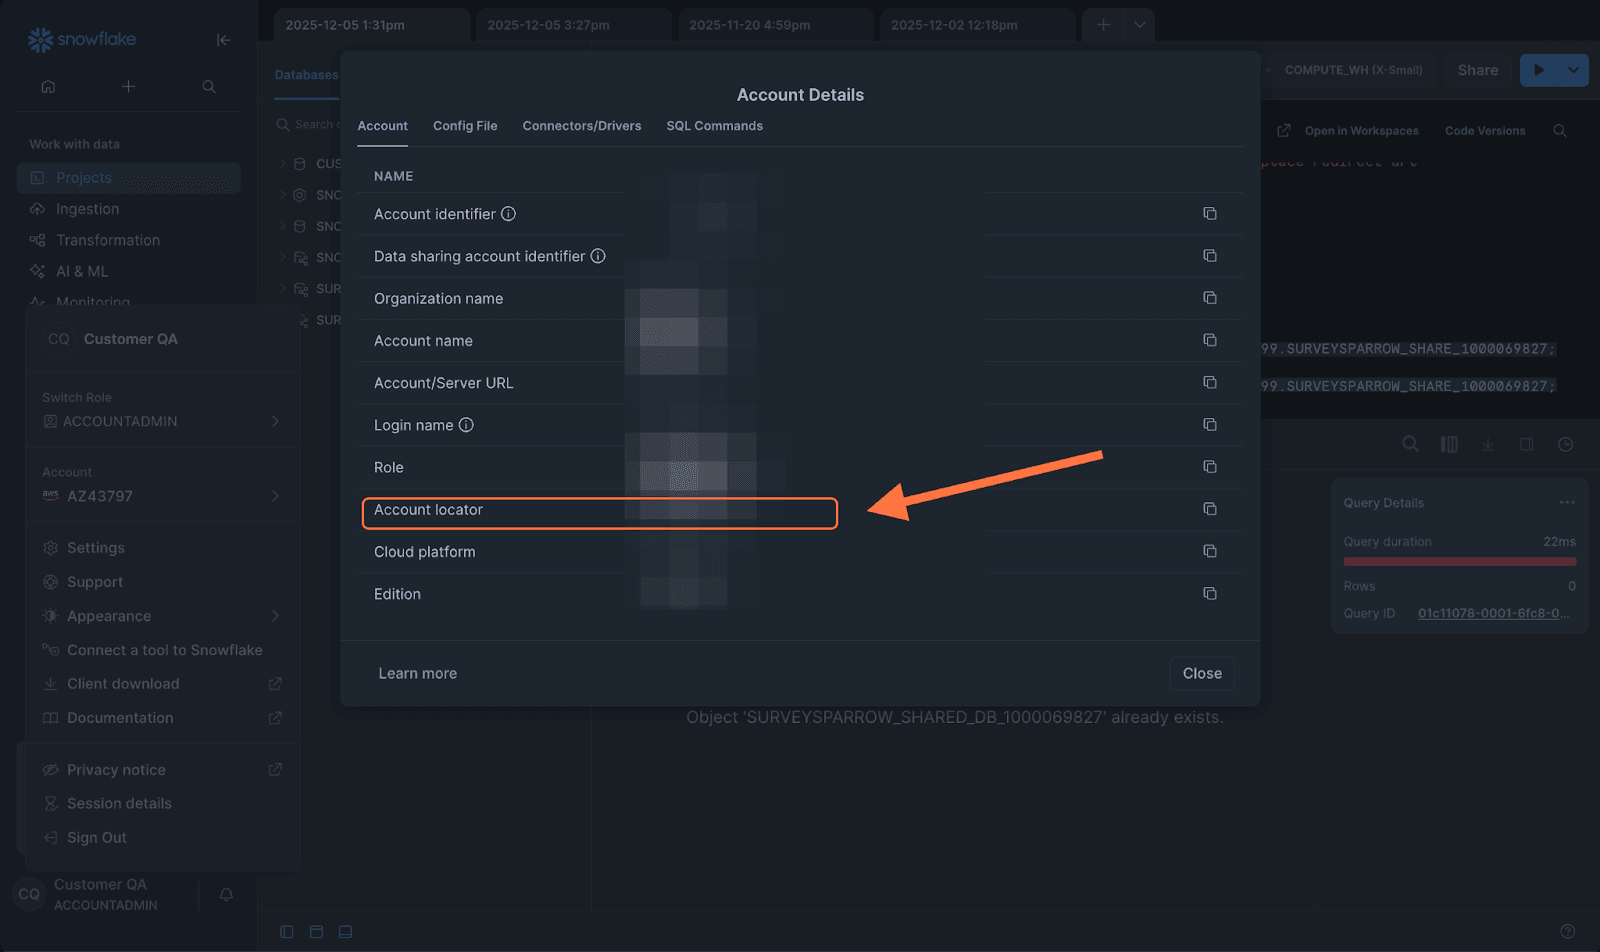
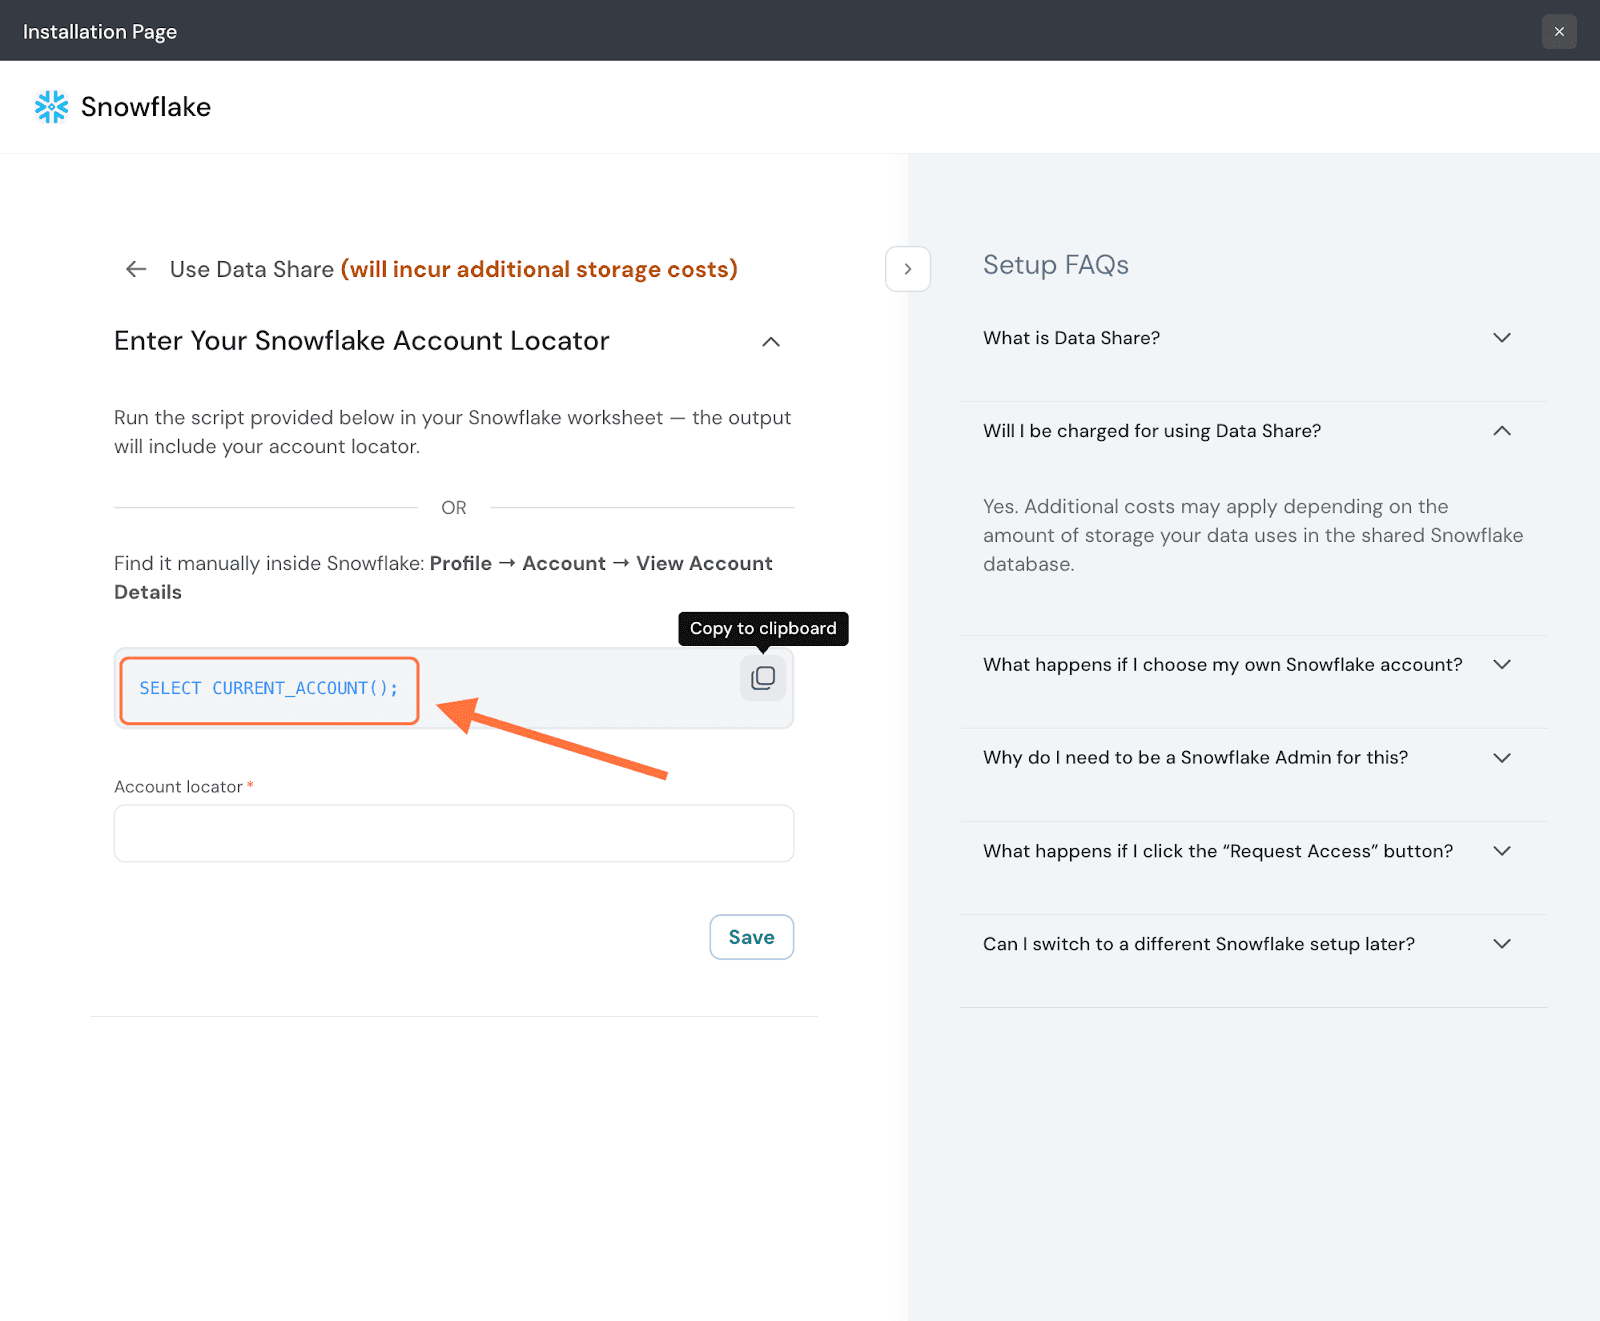
6. Once you’ve entered the locator, click Save.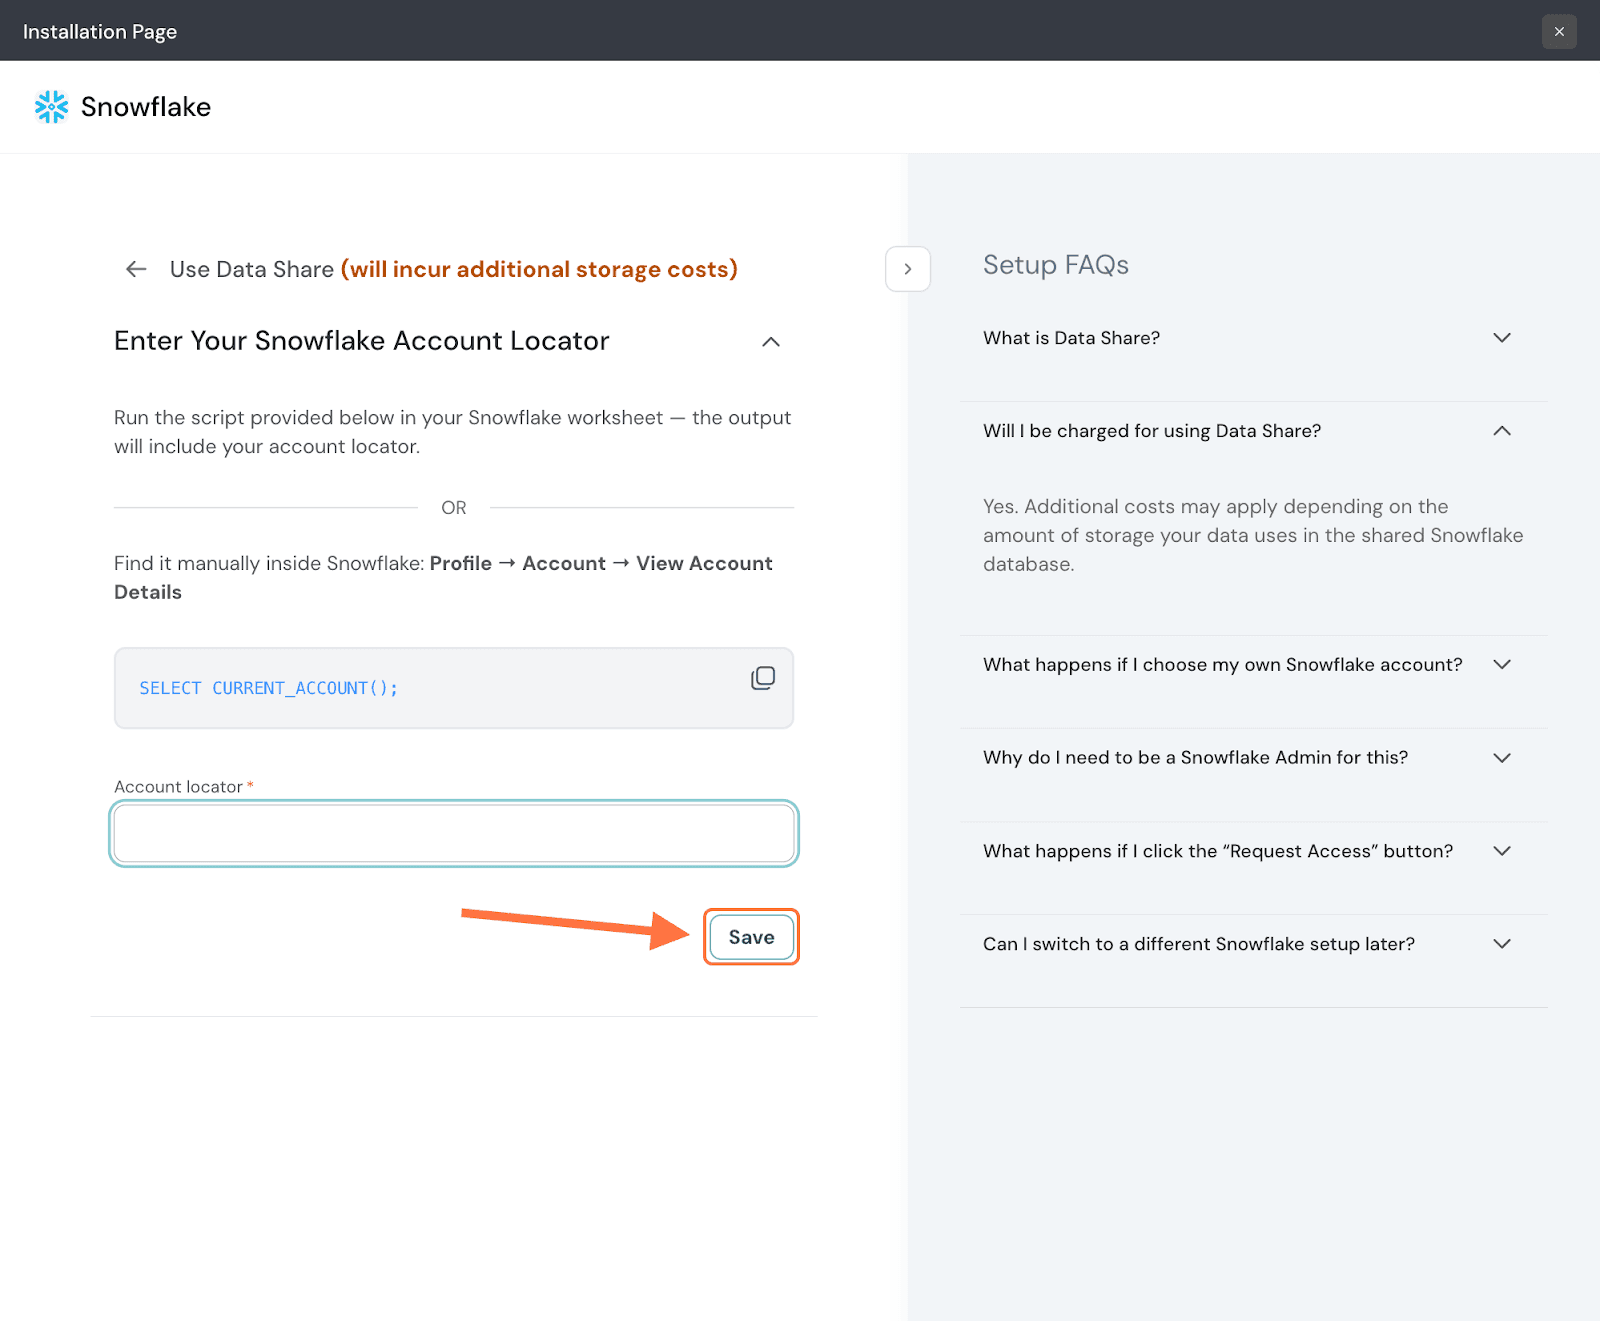
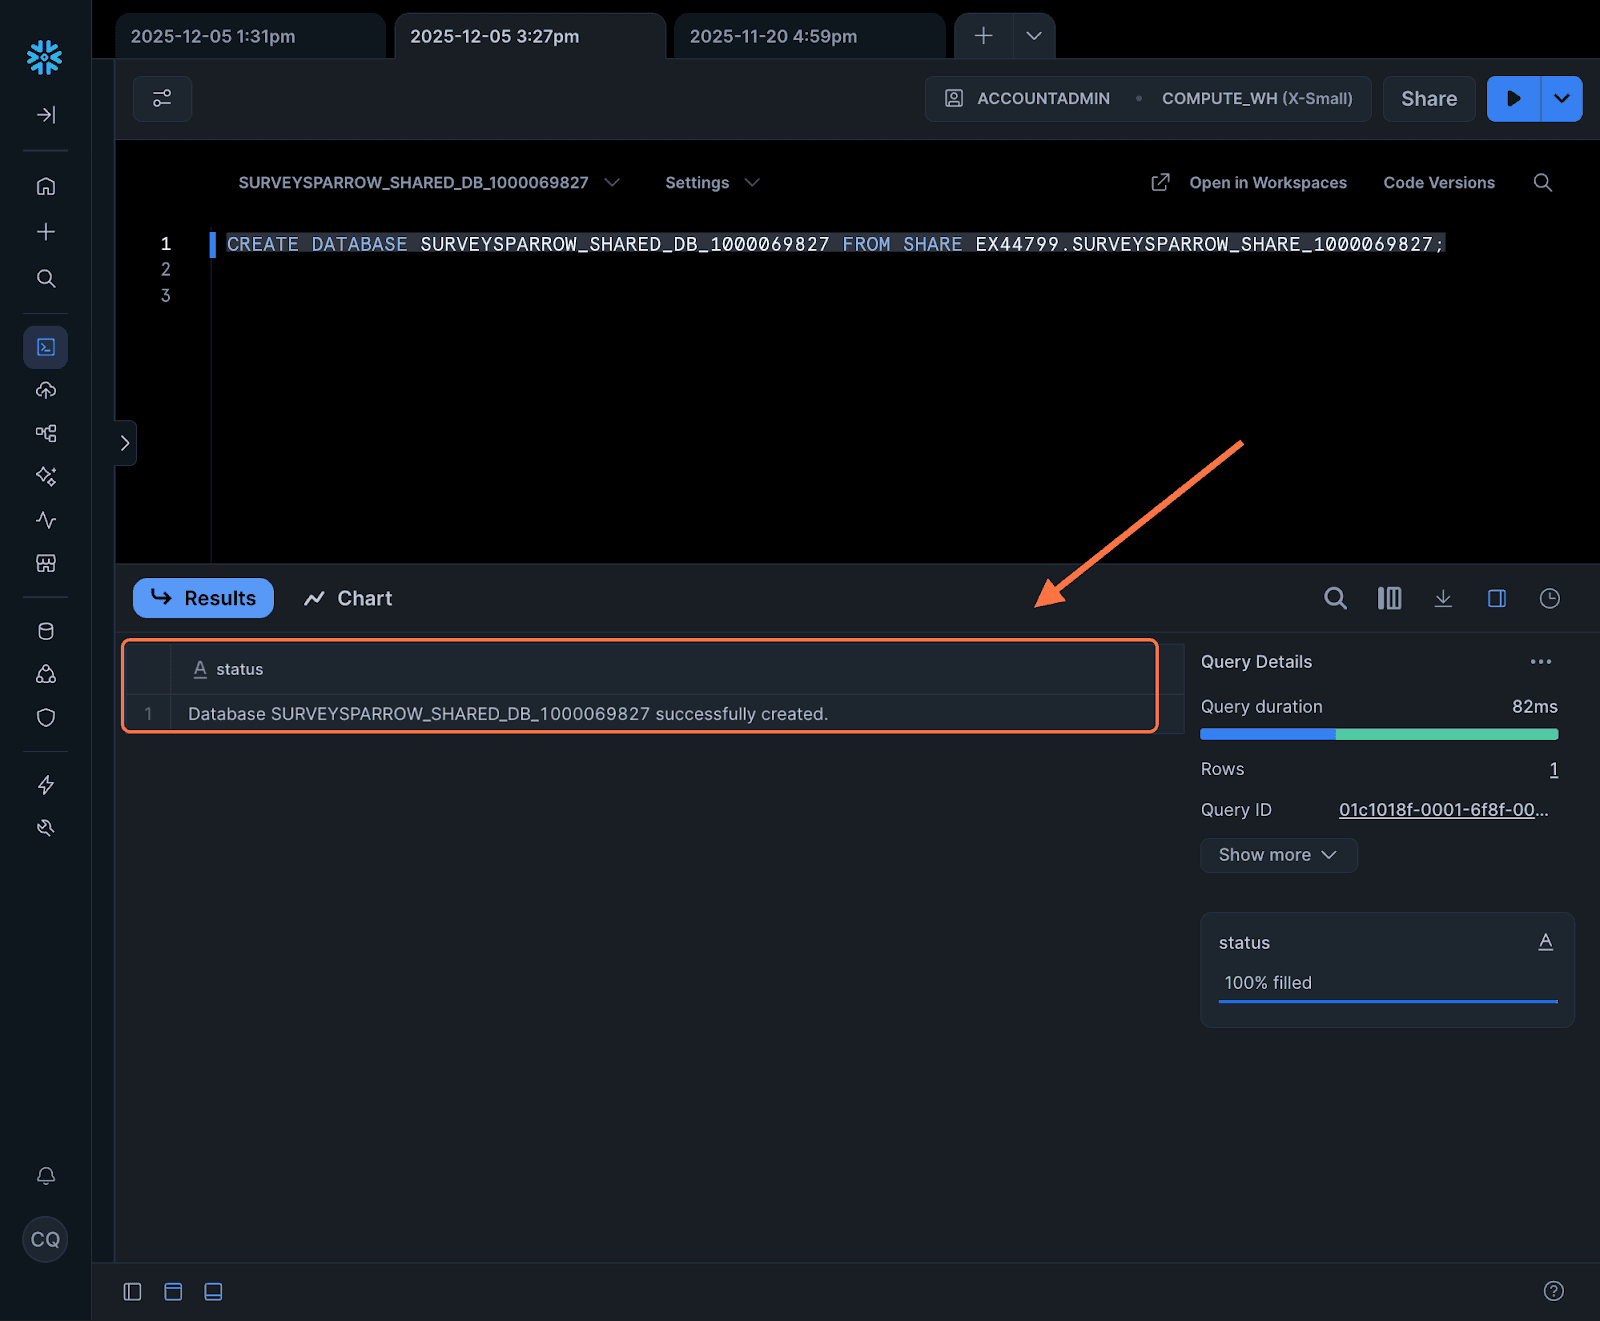
7. Next, you will need to create a shared database inside SurveySparrow’s Snowflake account. To do the same, you must run the script provided below within Snowflake. Copy it to your clipboard.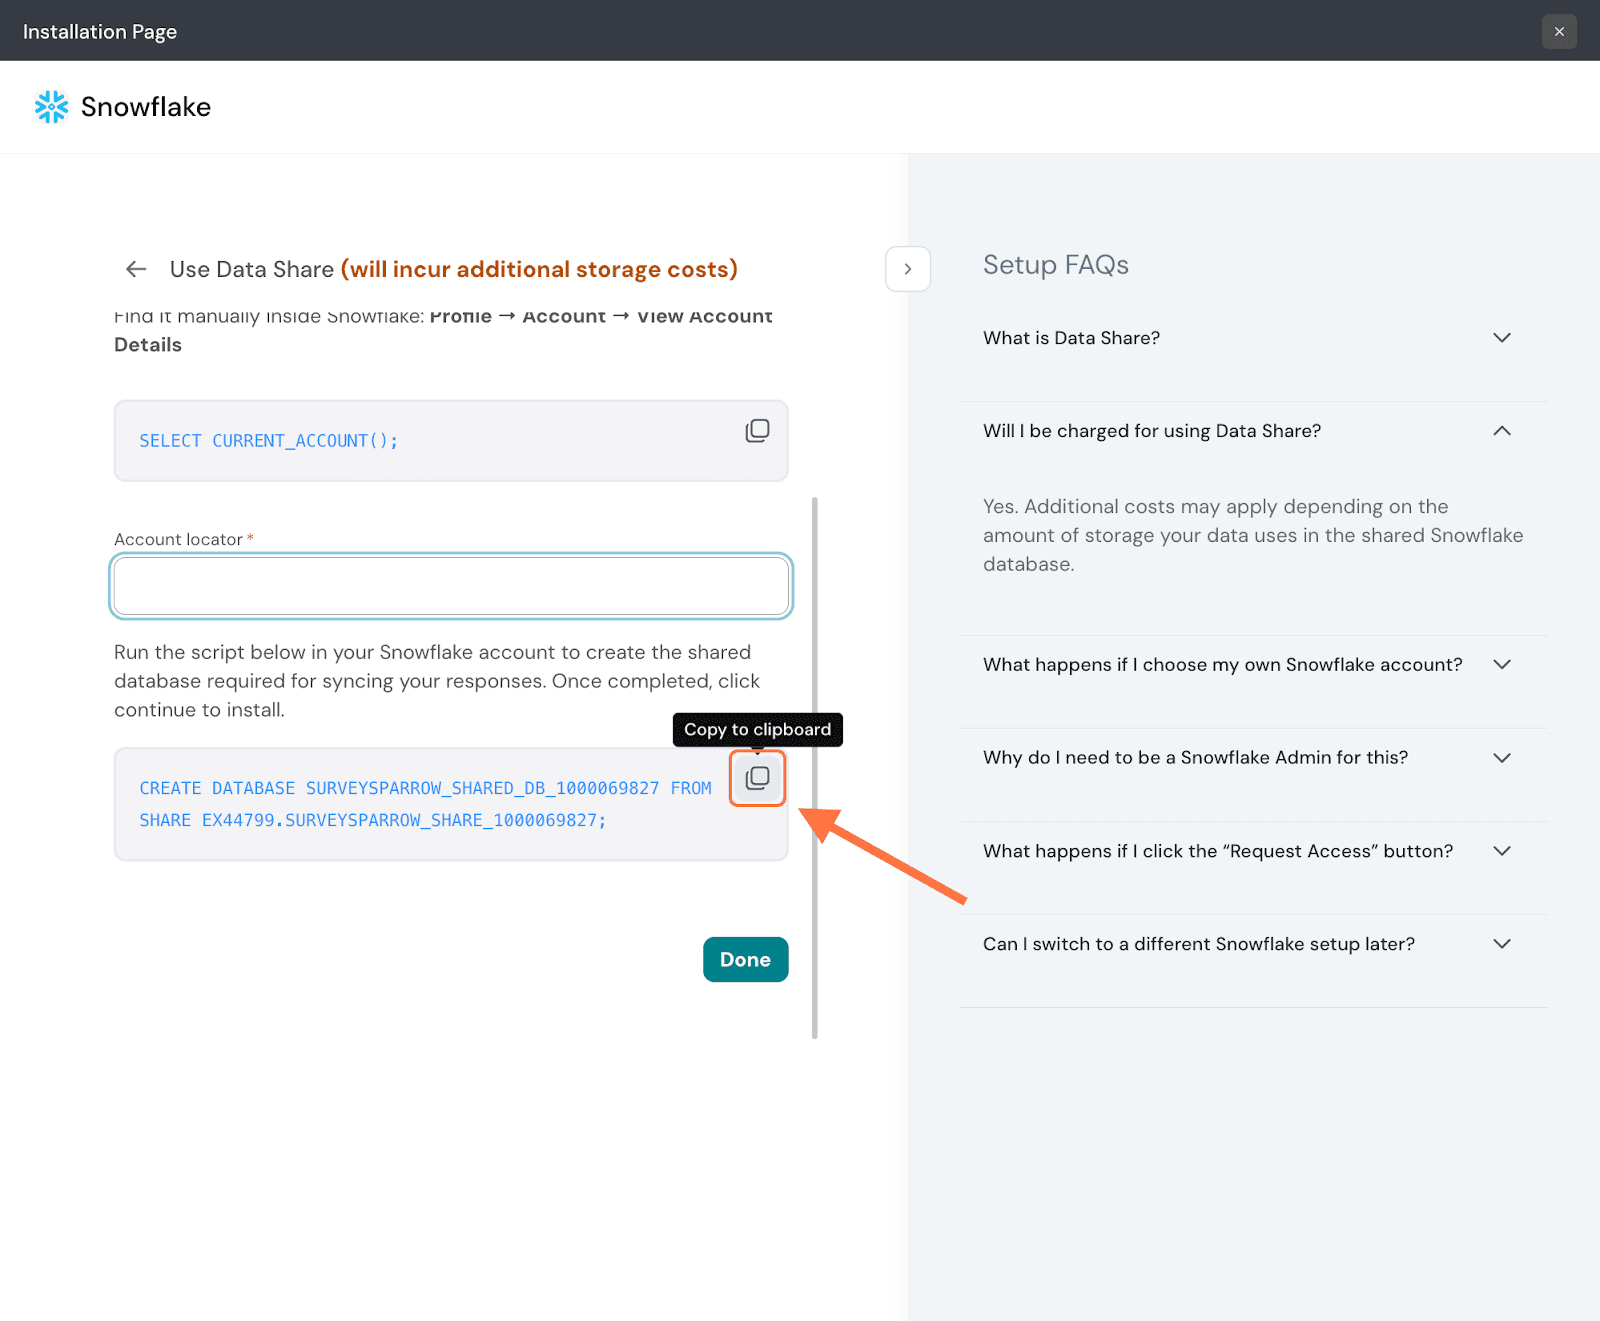
8. Paste it into a Snowflake worksheet and click on the Run icon. The script will return a success message (Database <name> successfully created).
9. Head back to SurveySparrow and click Done.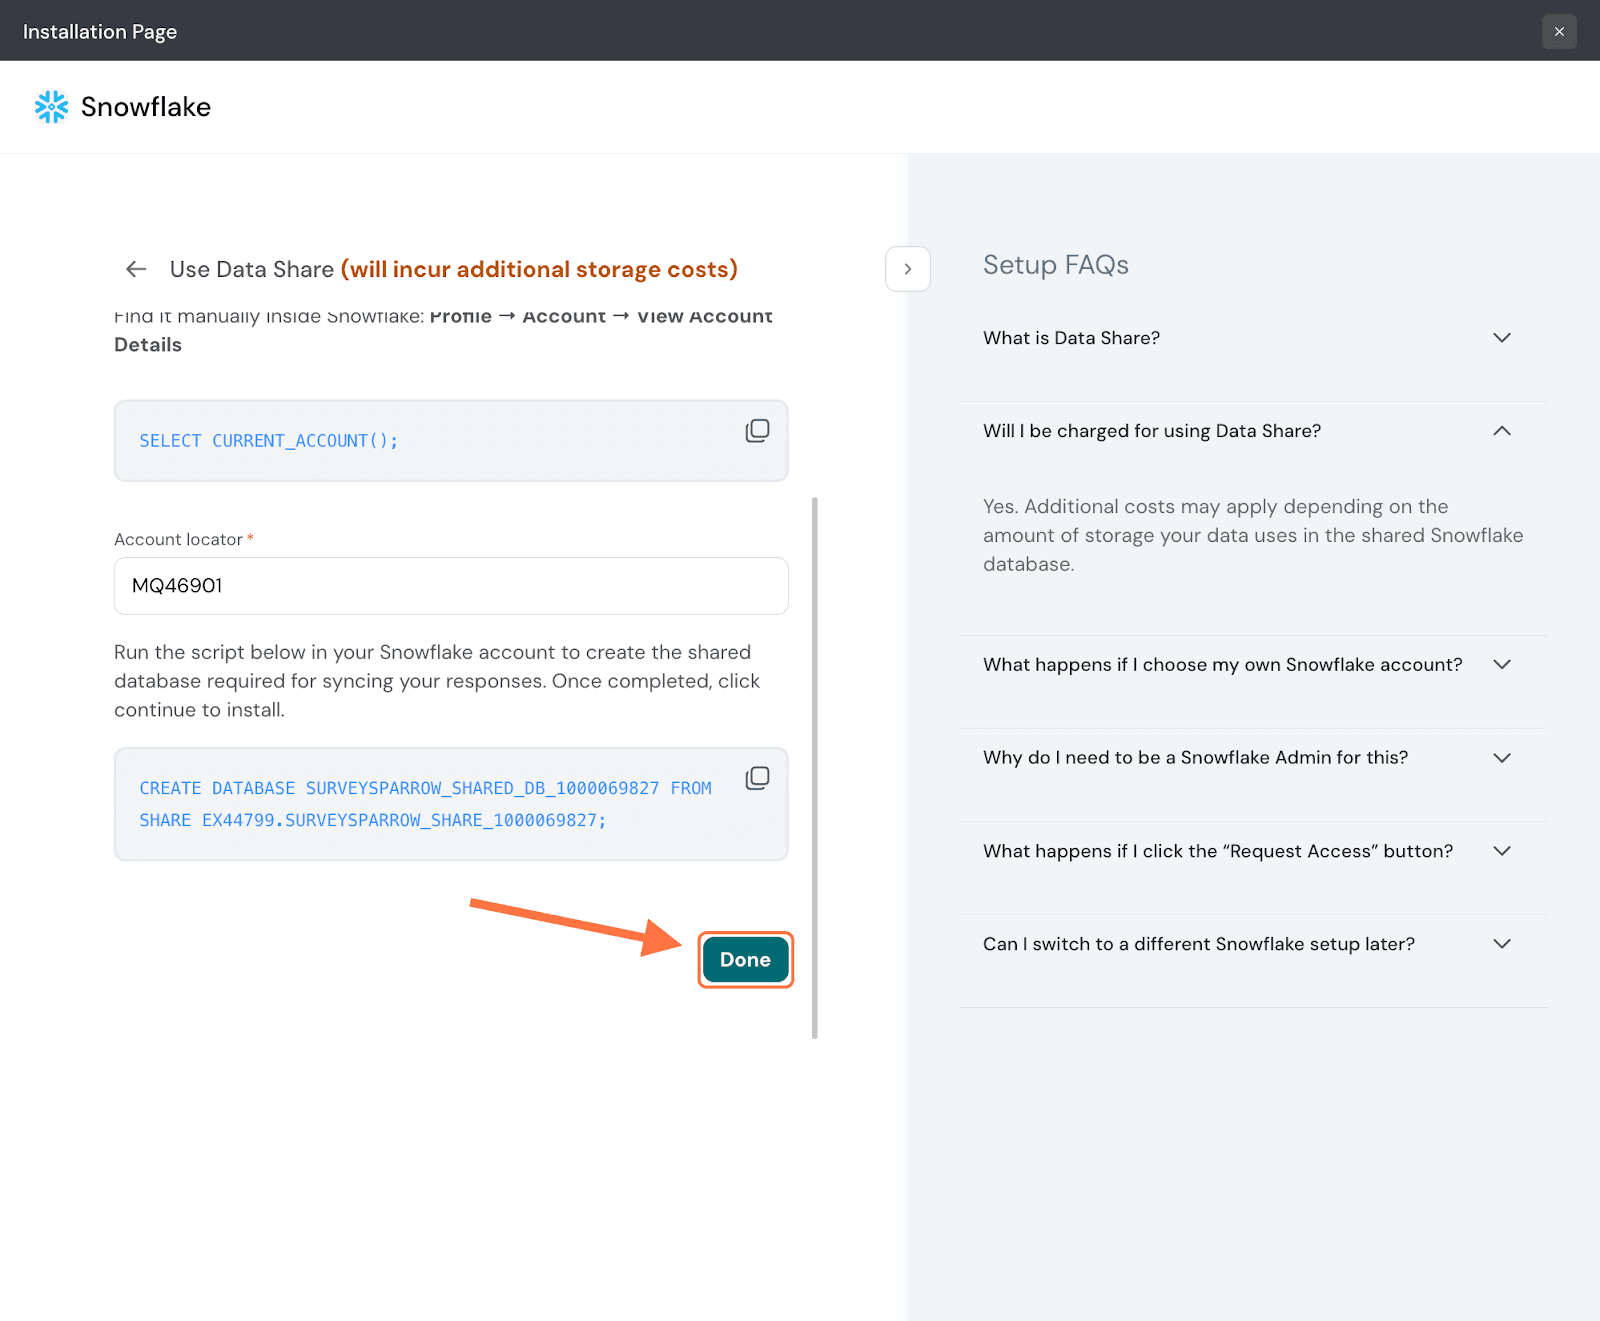
1. Inside SurveySparrow, open the survey whose responses you wish to sync to Snowflake, then click on the Integrate tab.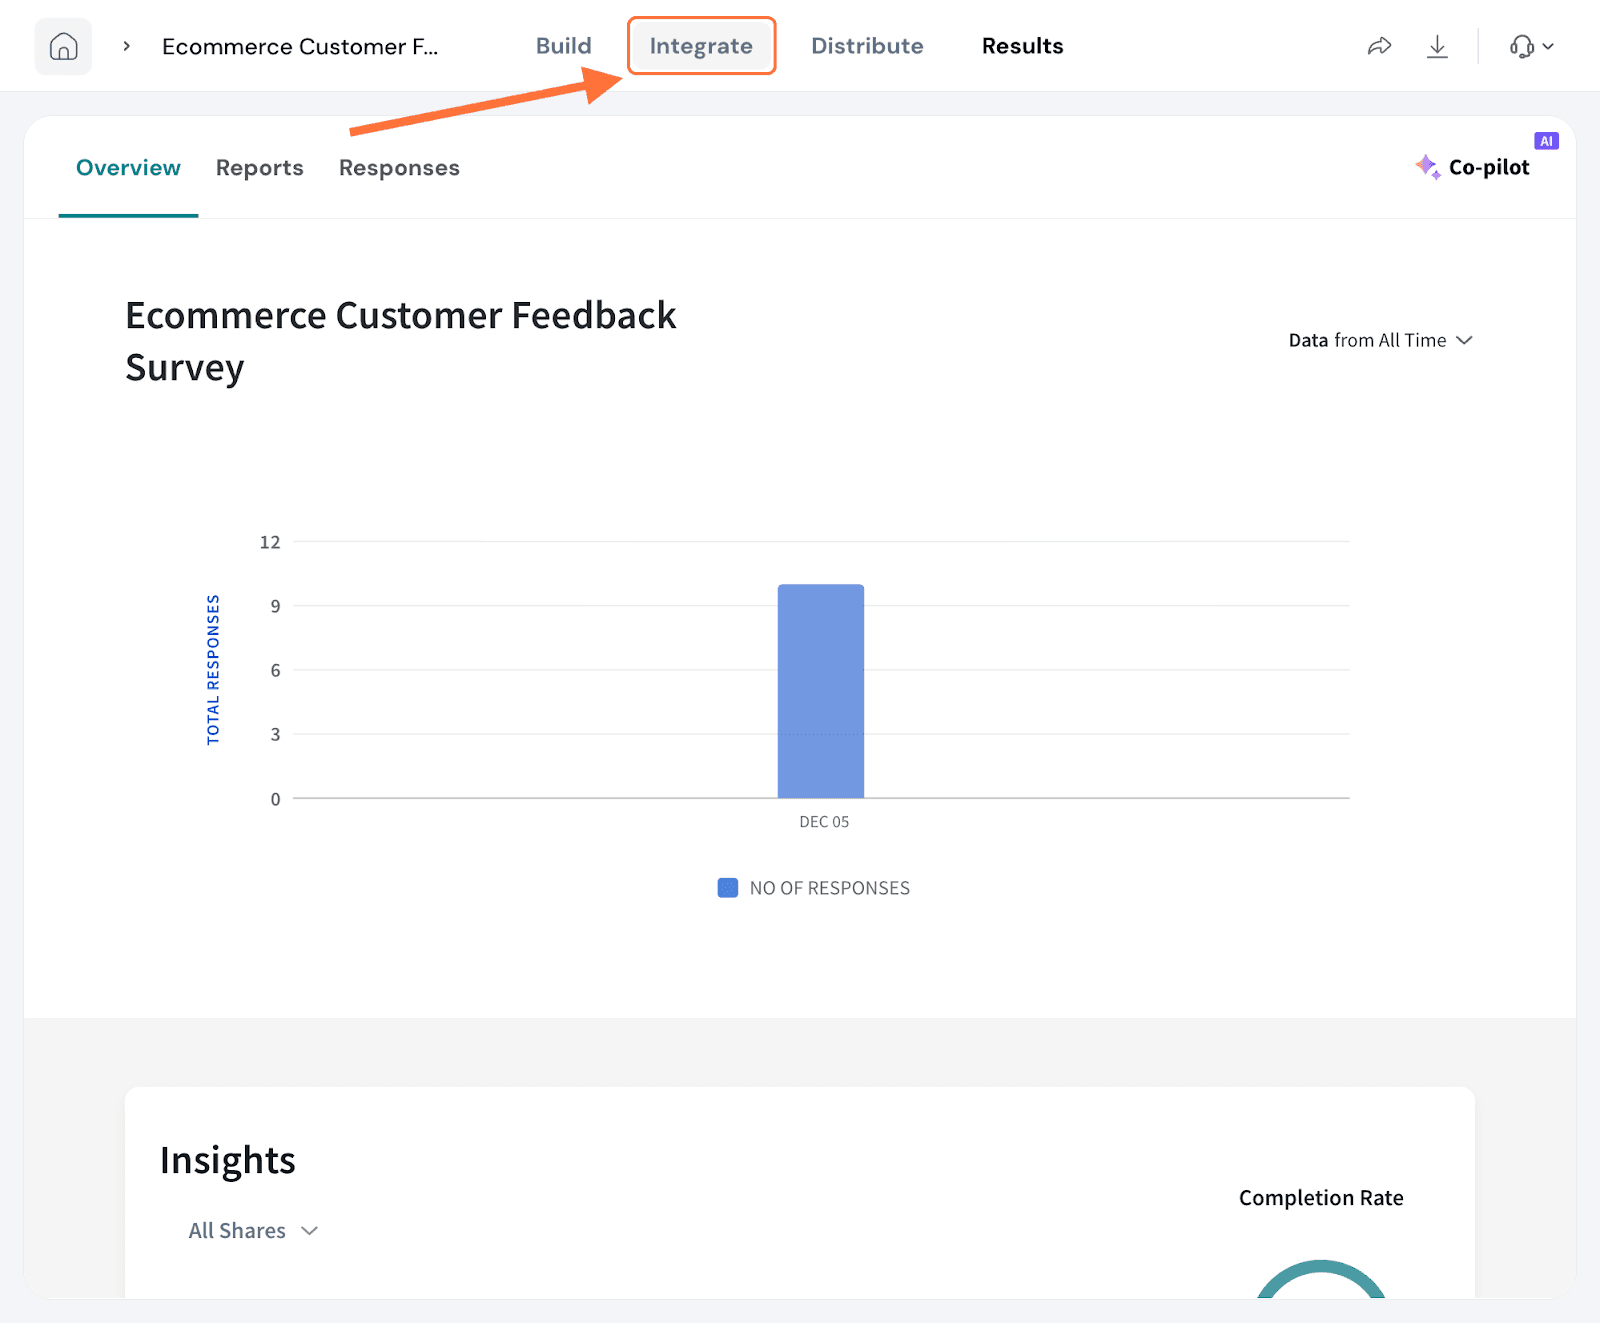
2. Search for Snowflake in the text box, then click on the toggle when it appears.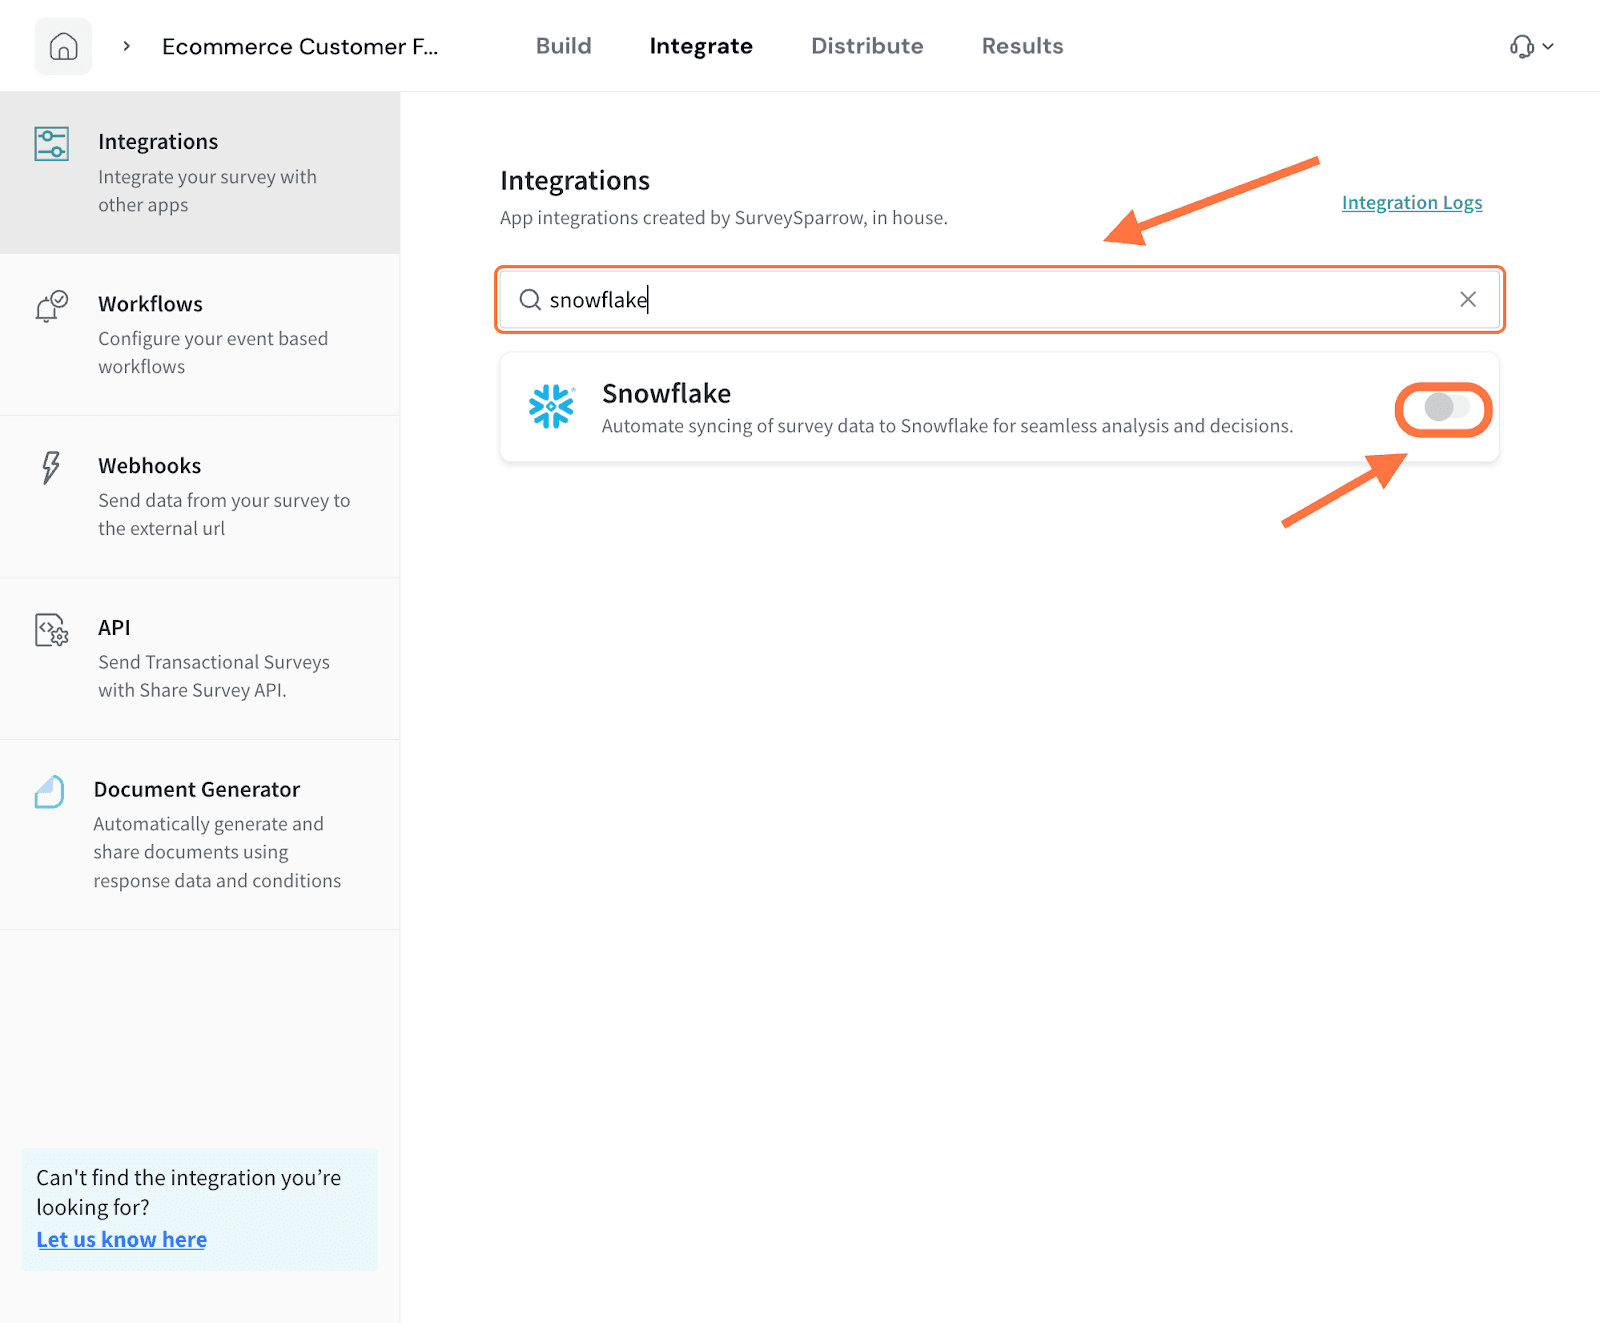
3. In the mapping configuration screen, you can choose to change the import start date, by clicking on the toggle next to Response Import Settings.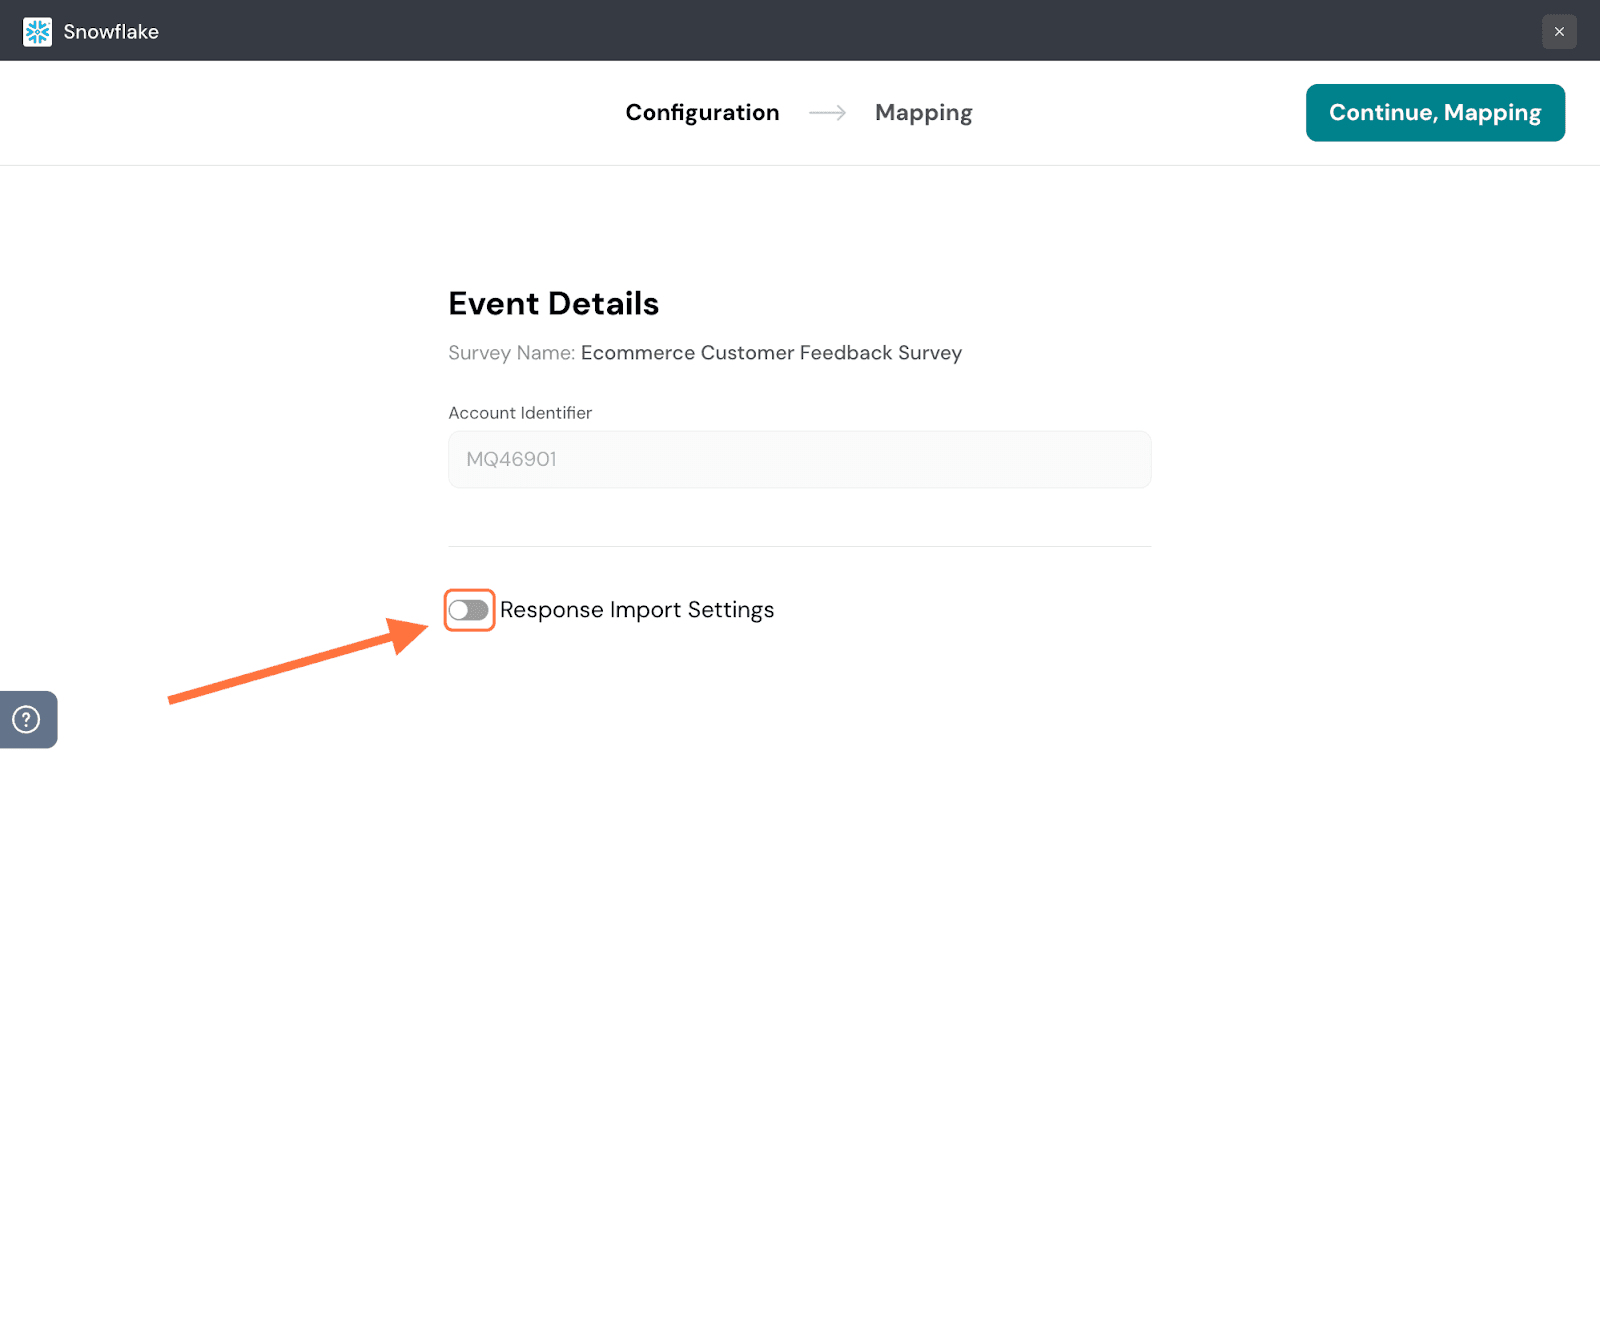
4. A drop-down menu appears with two options. The default option is to sync all existing responses and new ones. But if you wish to import responses from a specific start date, hover over Specific Date. A calendar appears to the side.
5. Select your chosen date, then click Apply.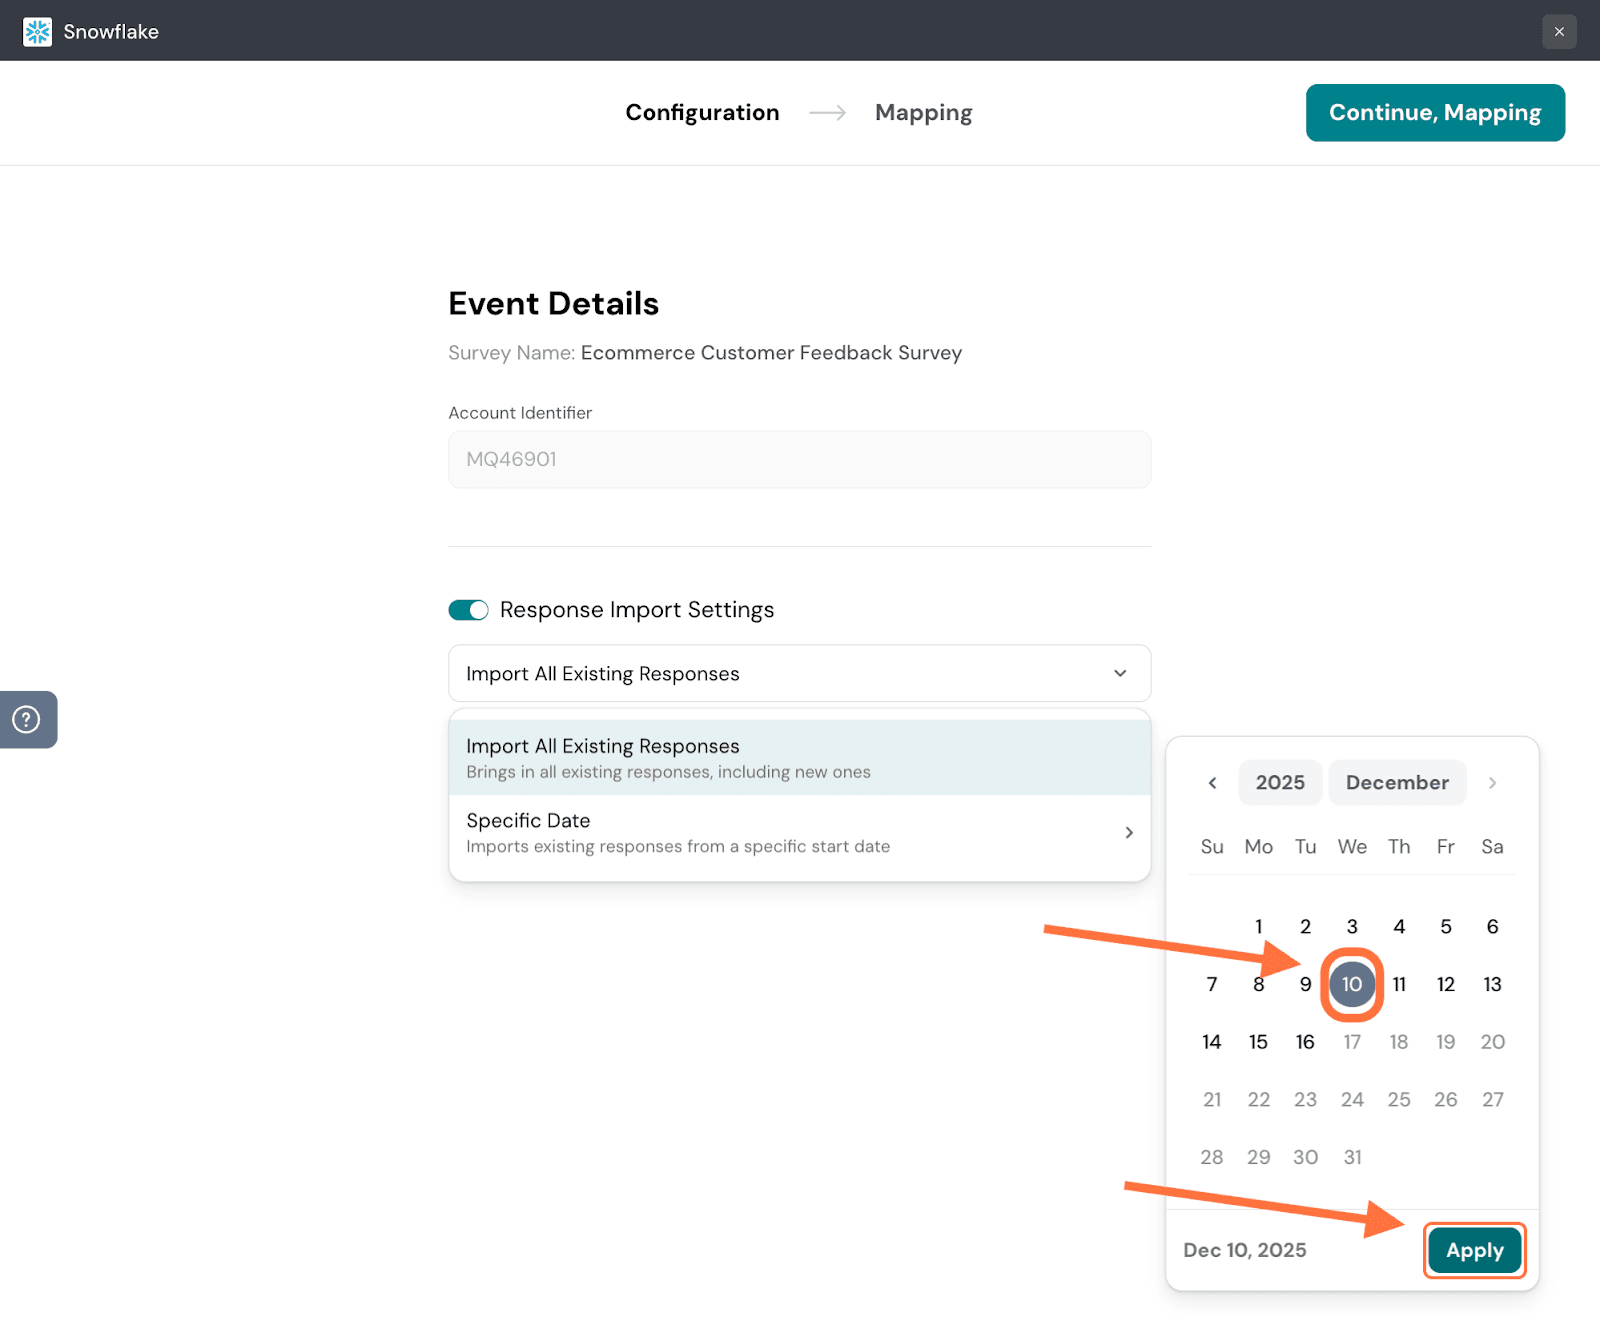
6. Then click on Continue, Mapping.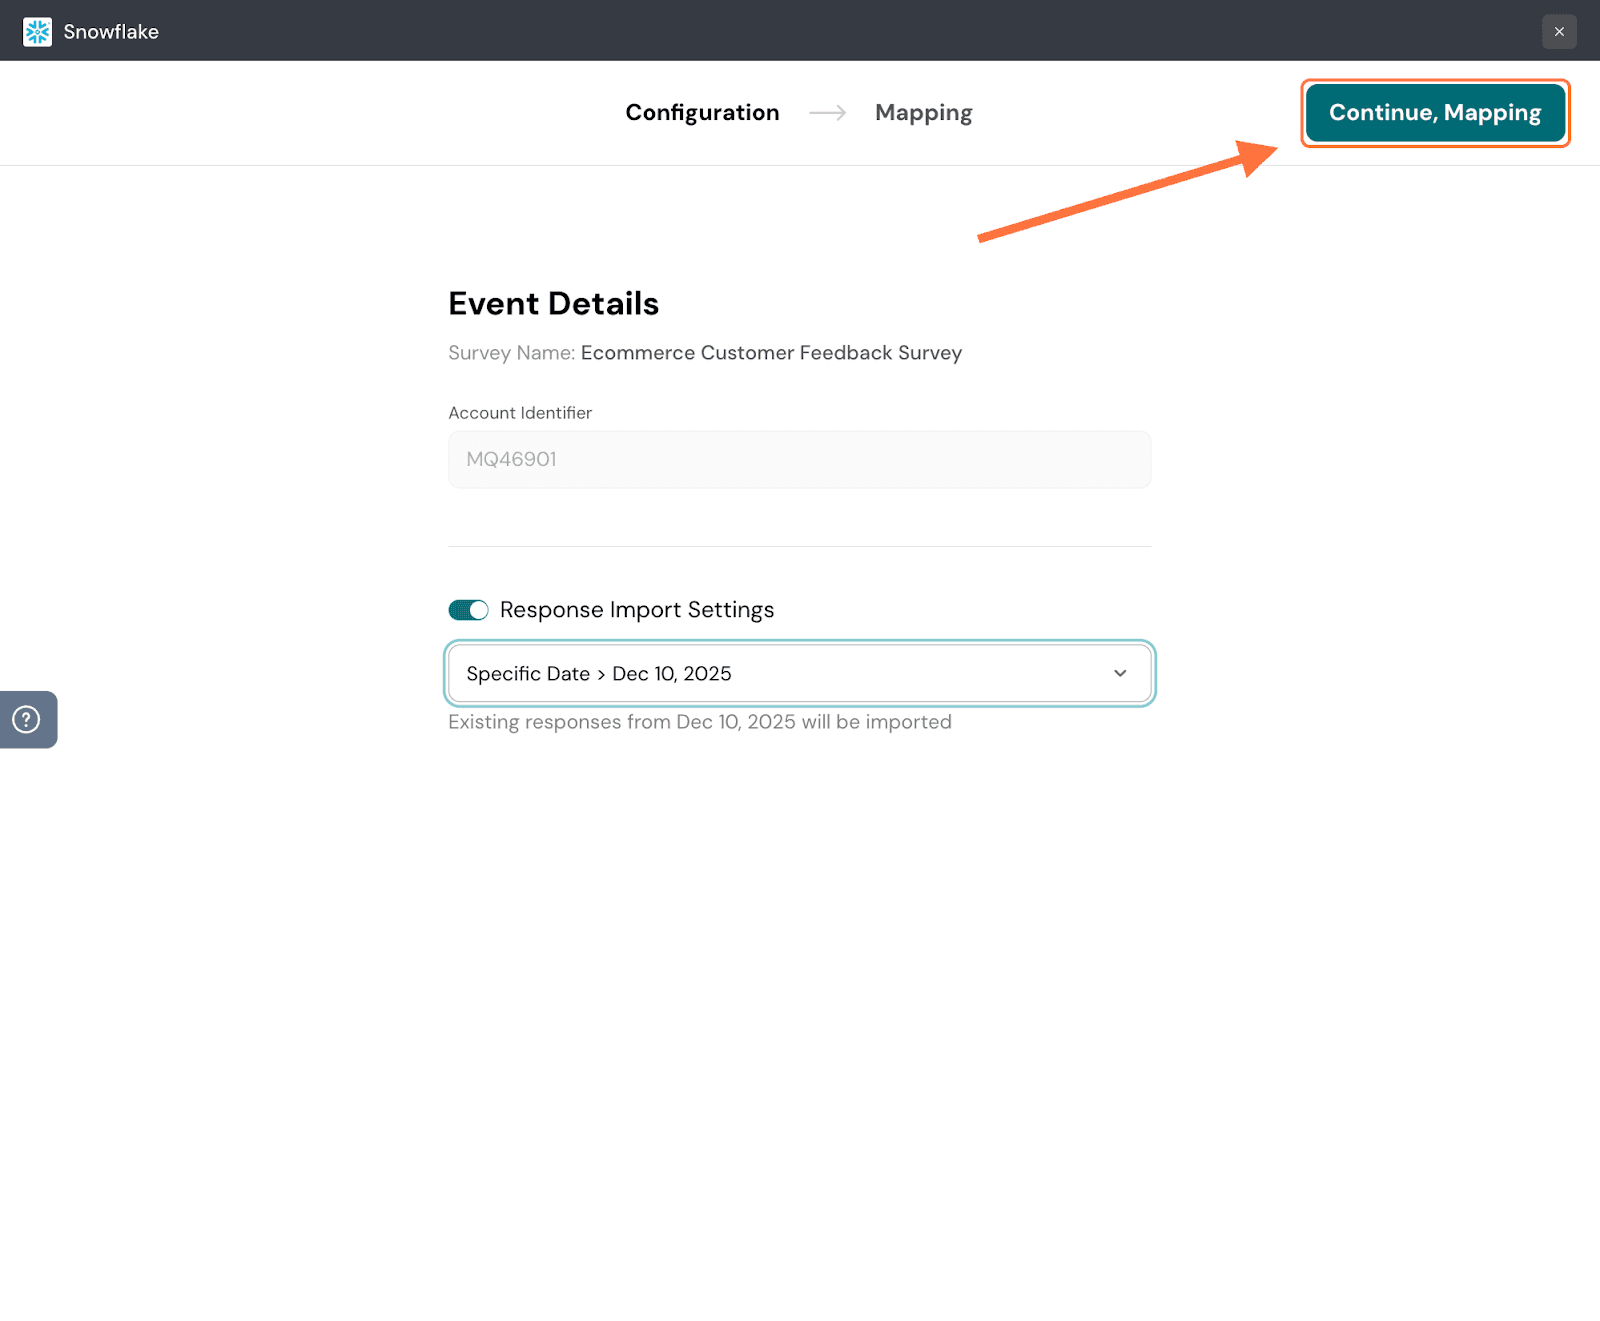
7. In the second section, you must choose what data to import. The default option is to import all existing data. You can see what types are being imported as well as the respective quantities. But if you only want to import specific data, click on the check-box for Send selected data.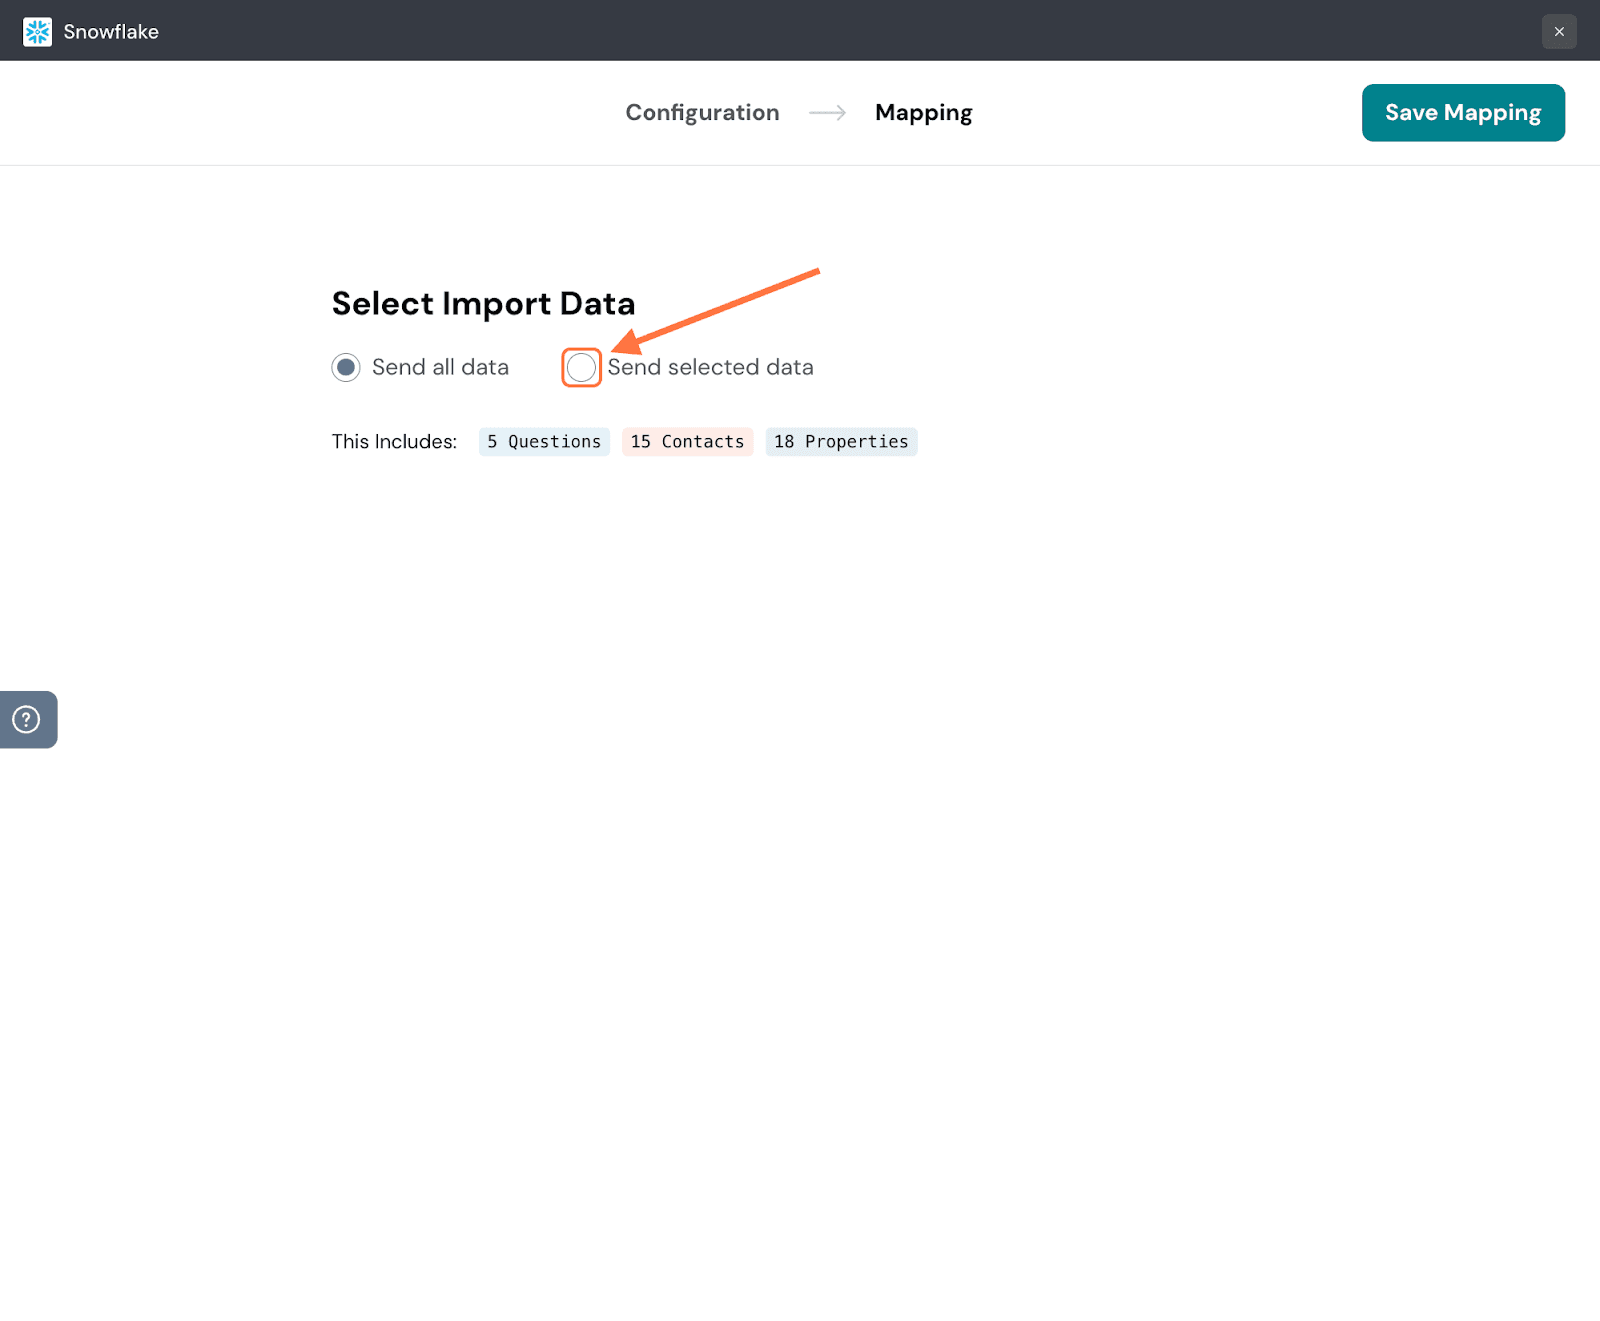
8. Here you will see each data type presented as a tab with its own checklist of individual items. The default tab is the Questions tab. Use the search box to find items, then select the check boxes. Accordingly the number of items selected will also appear in the tab.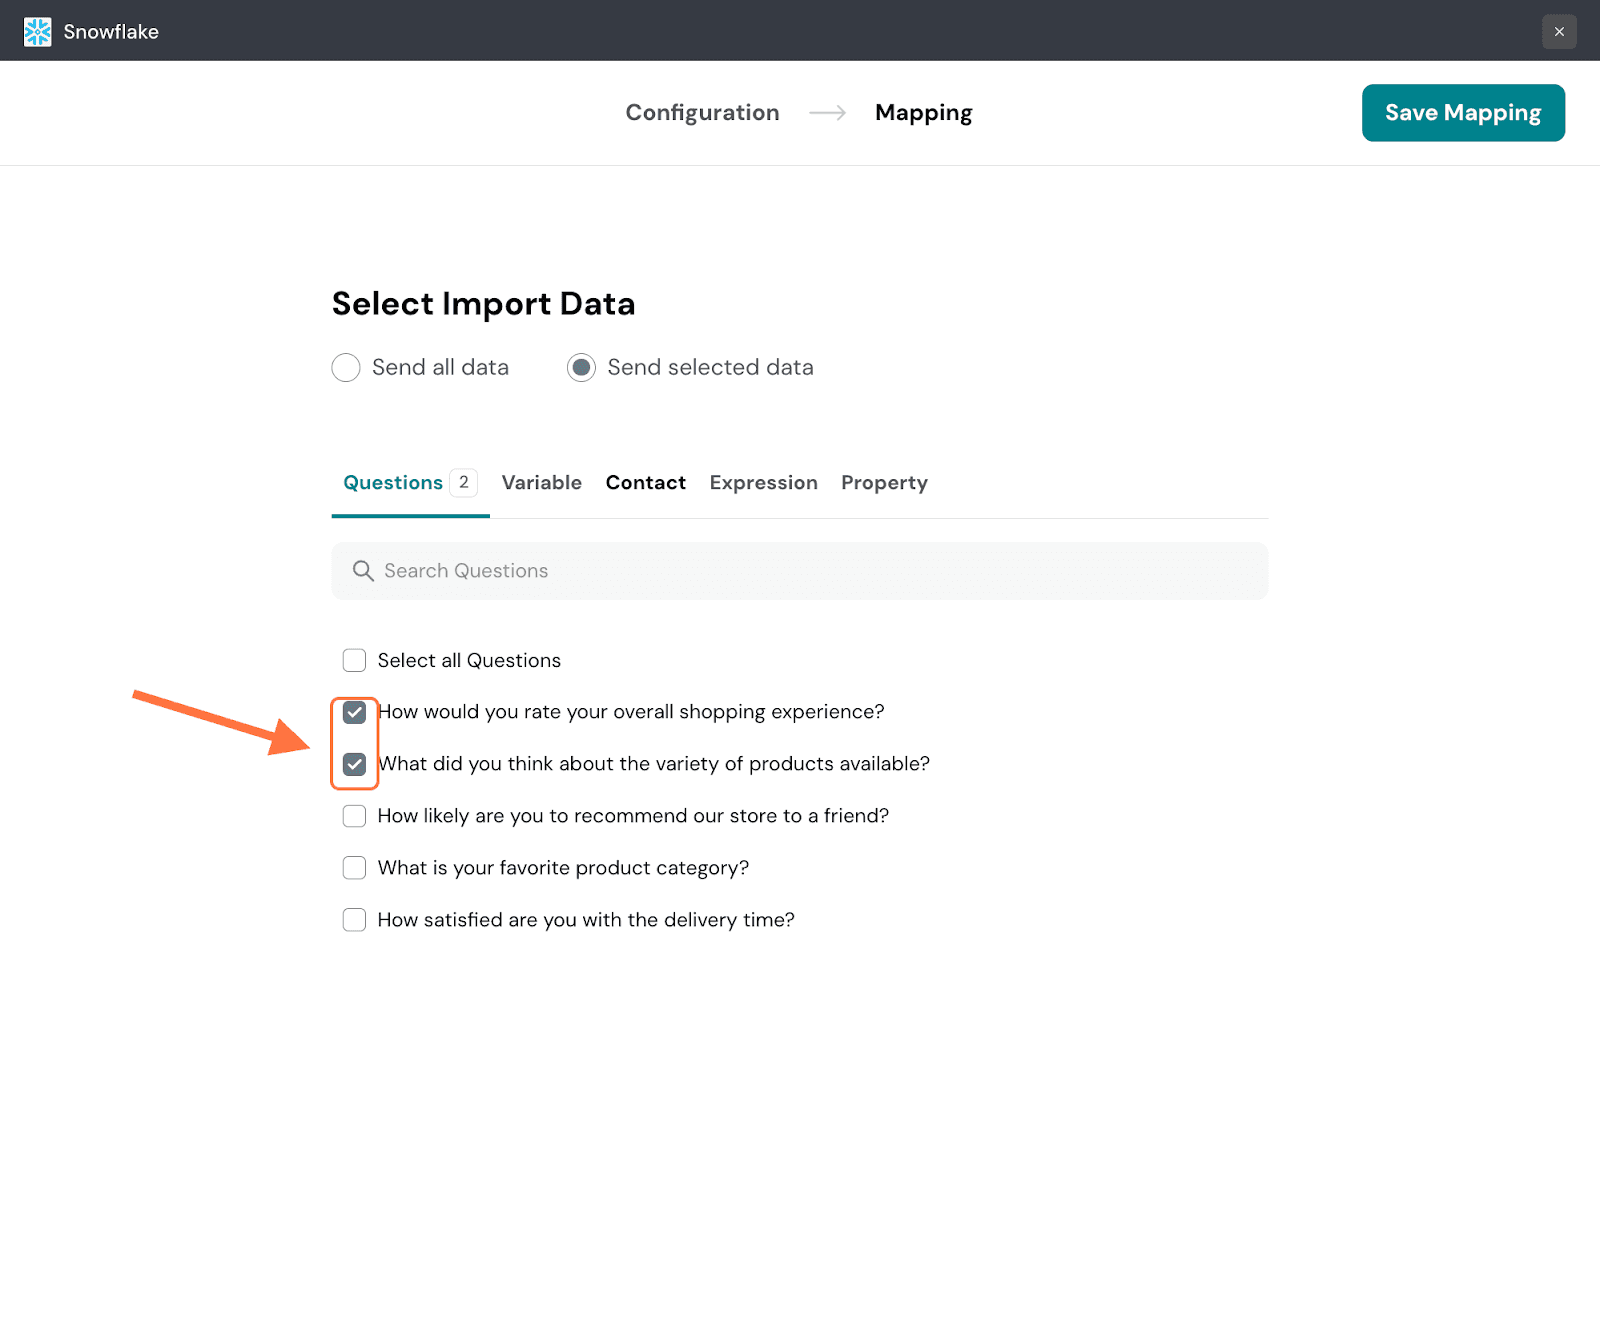
9. When you’re done selecting the items you want across each tab, click Save Mapping.
10. Type in a name for the mapping and click Save Mapping.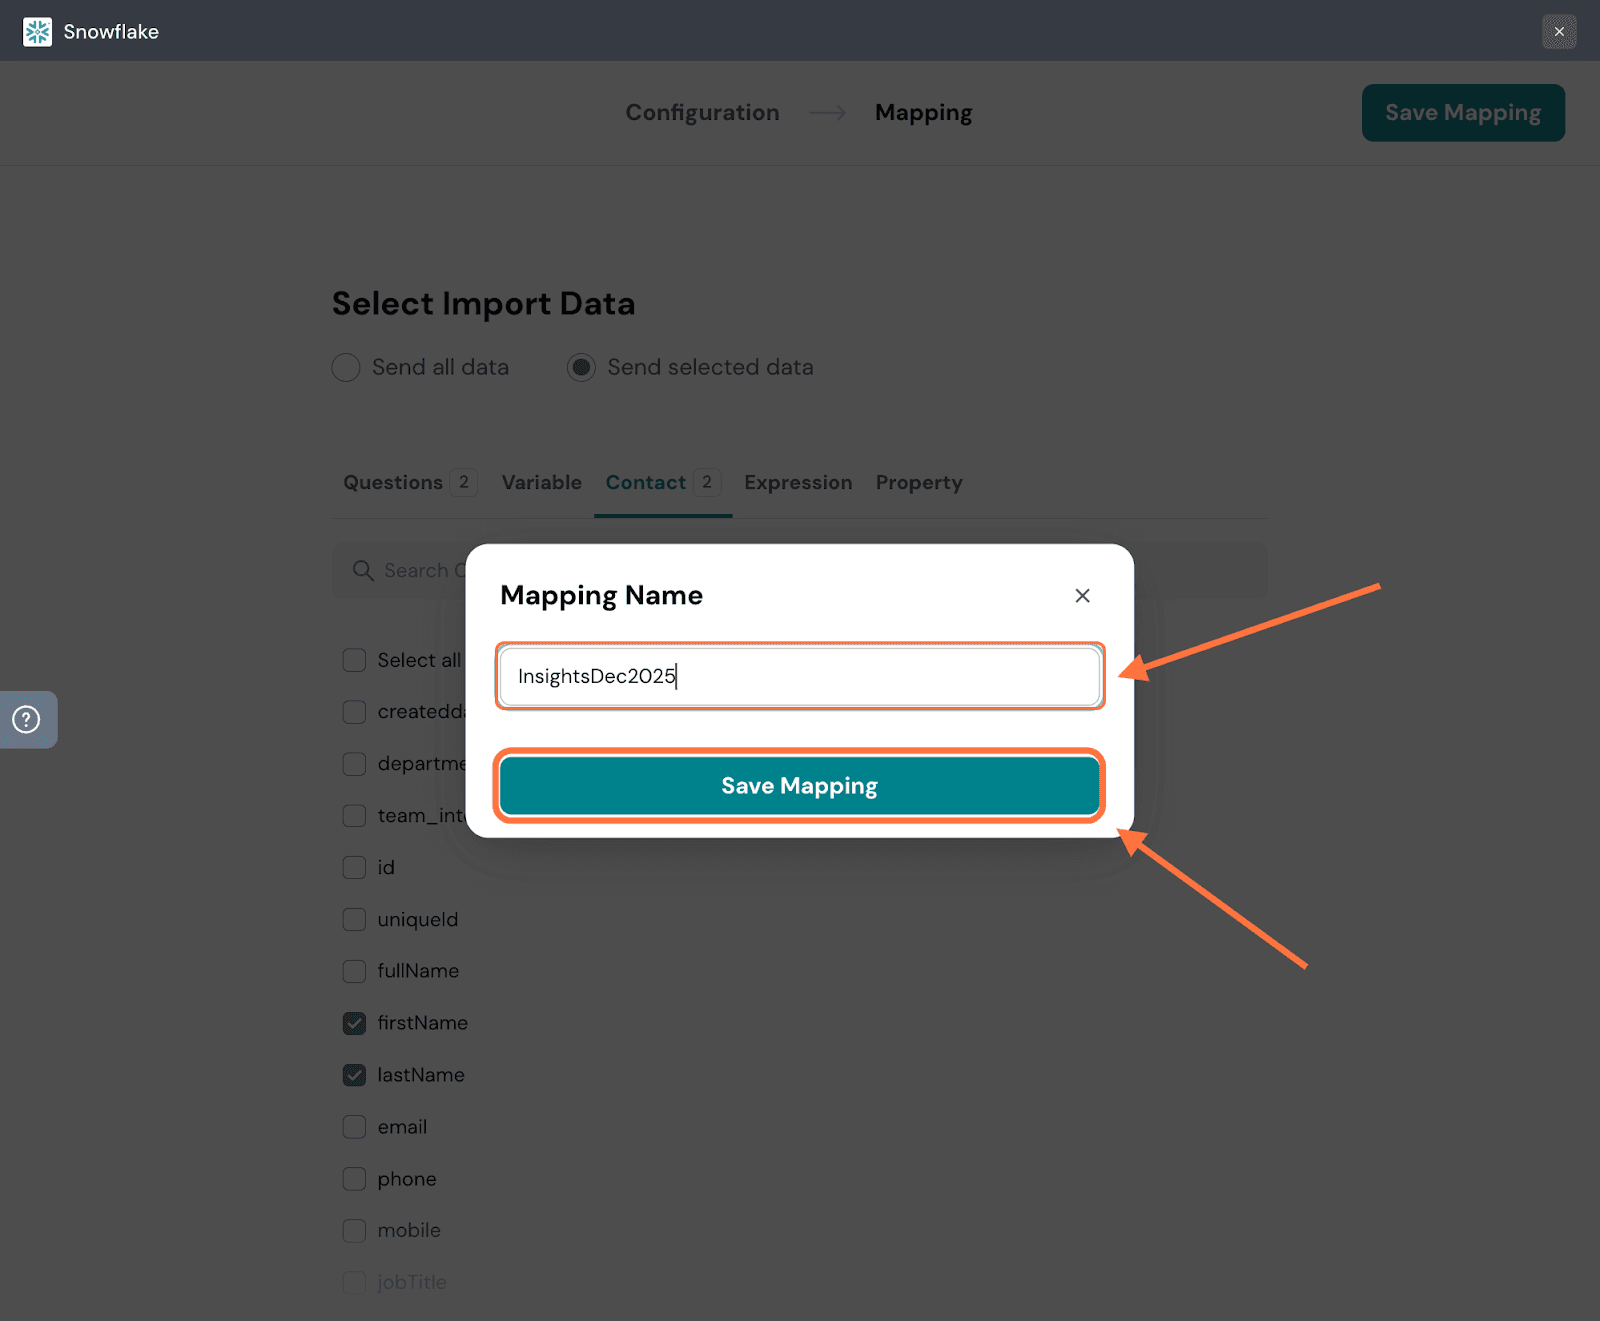
11. Now the mapping has been saved. To pause the mapping, click on the green toggle button.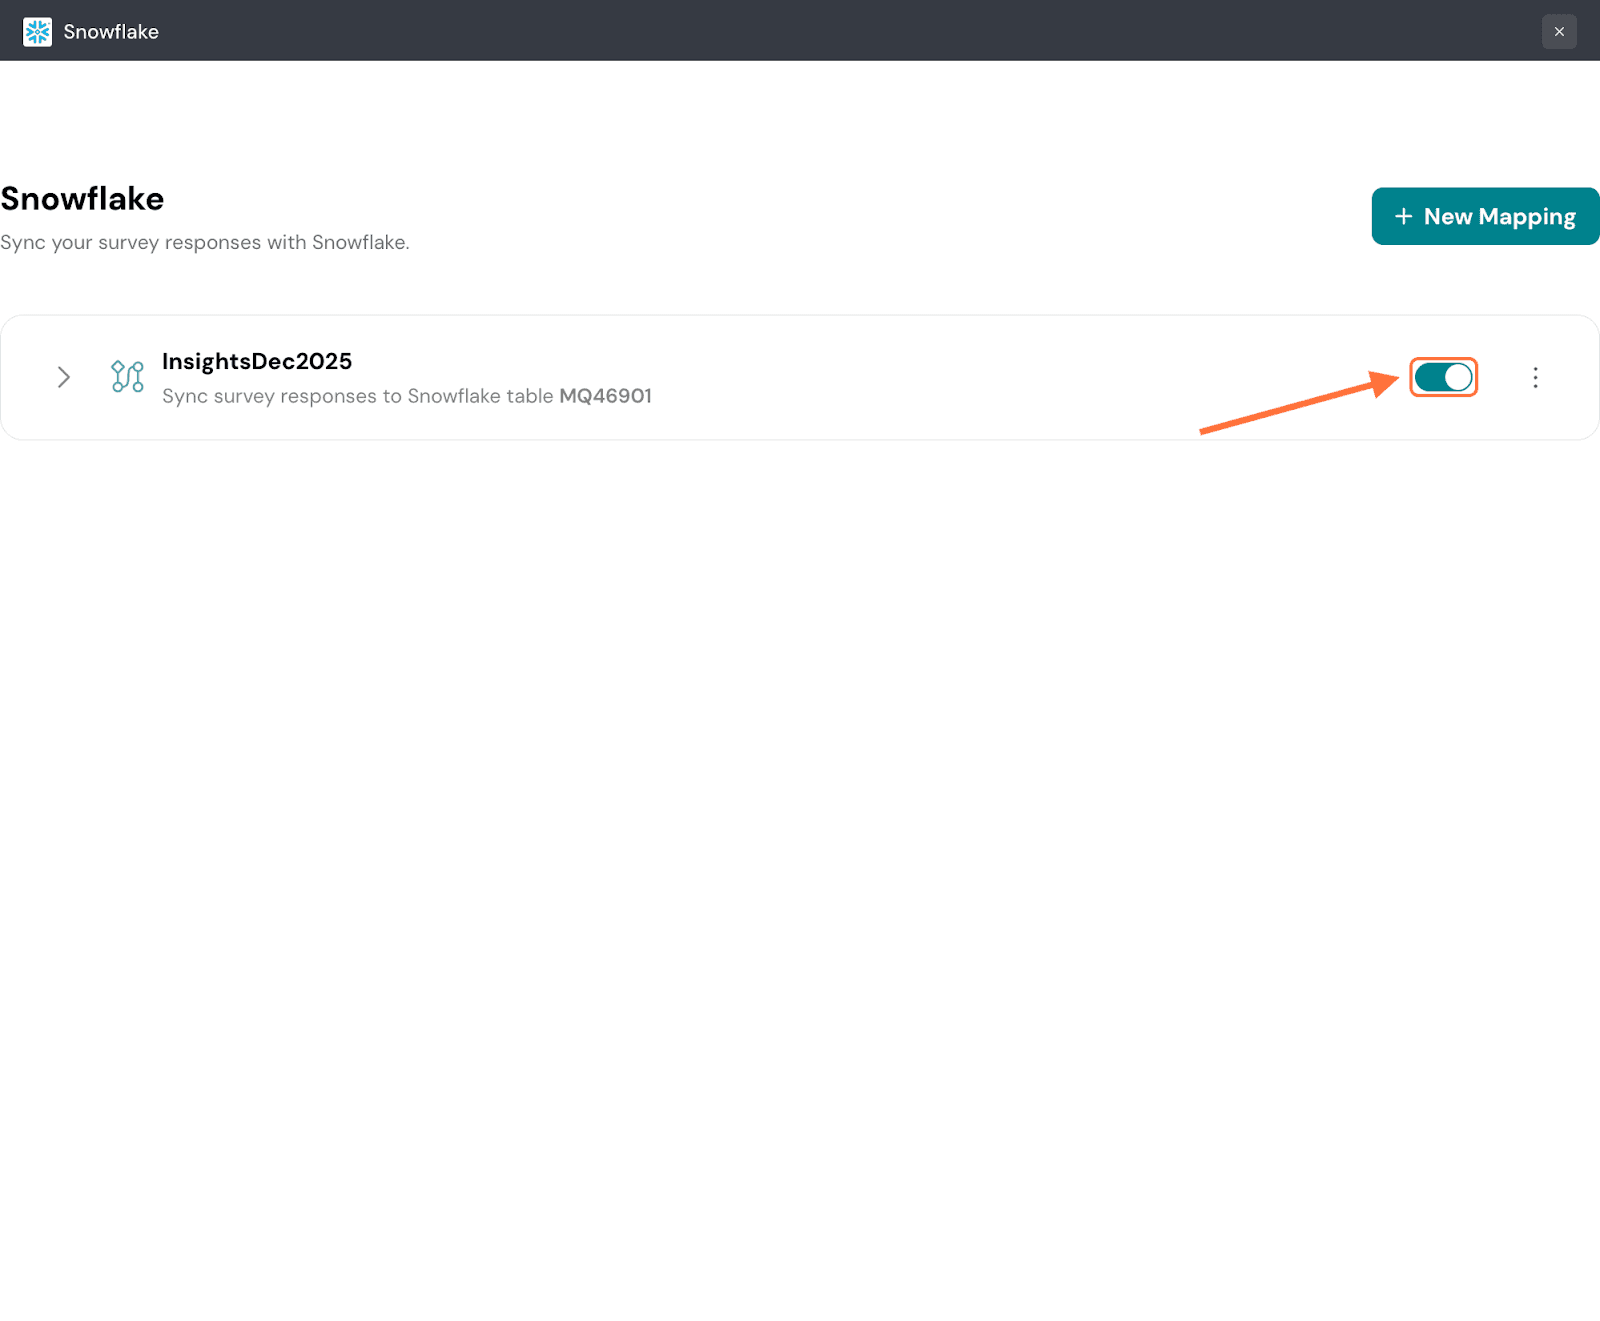
Note: Any responses that come in while the mapping has been paused will not be synced when it’s switched on.
12. To view the specific details of the mapping click on the arrow on the left. To edit the mapping, click on the edit message at the bottom of the expanded card.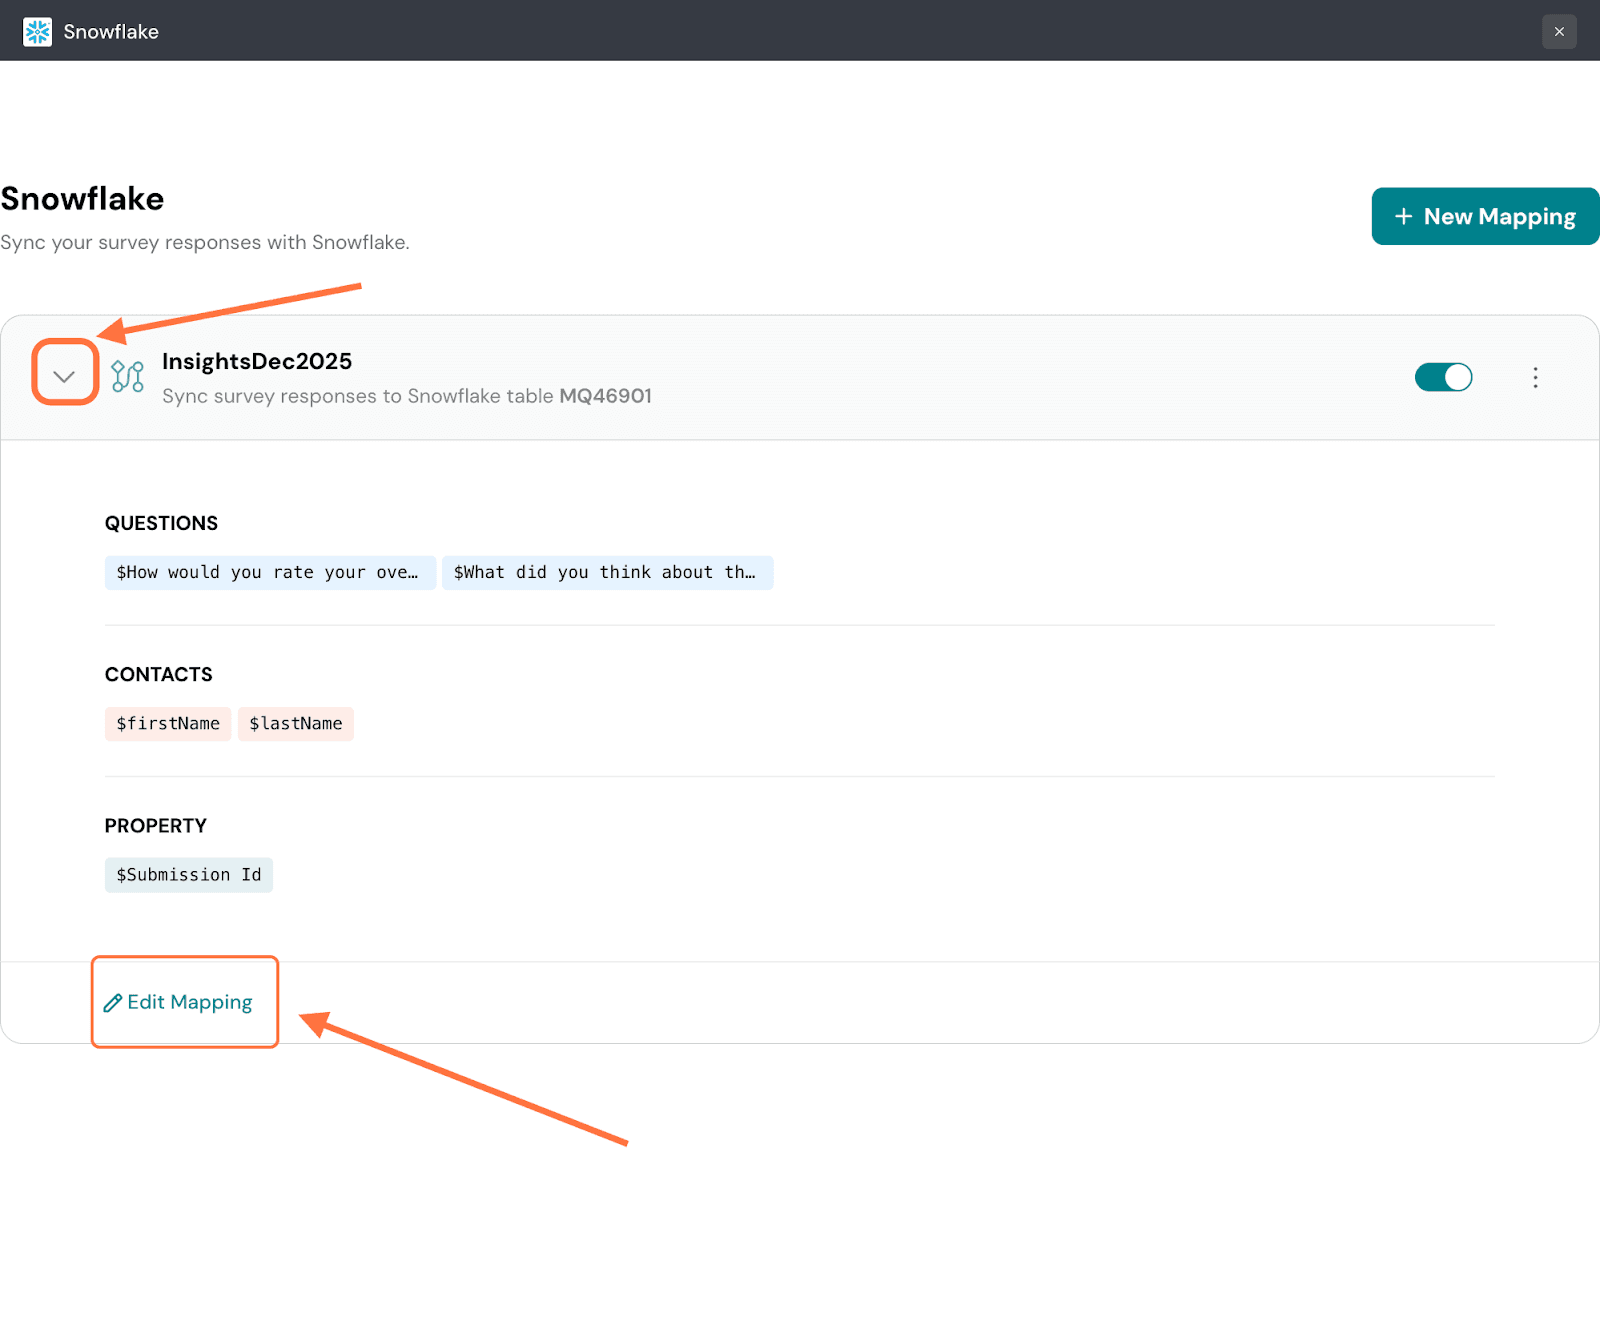
13. To create a new mapping, click on New Mapping.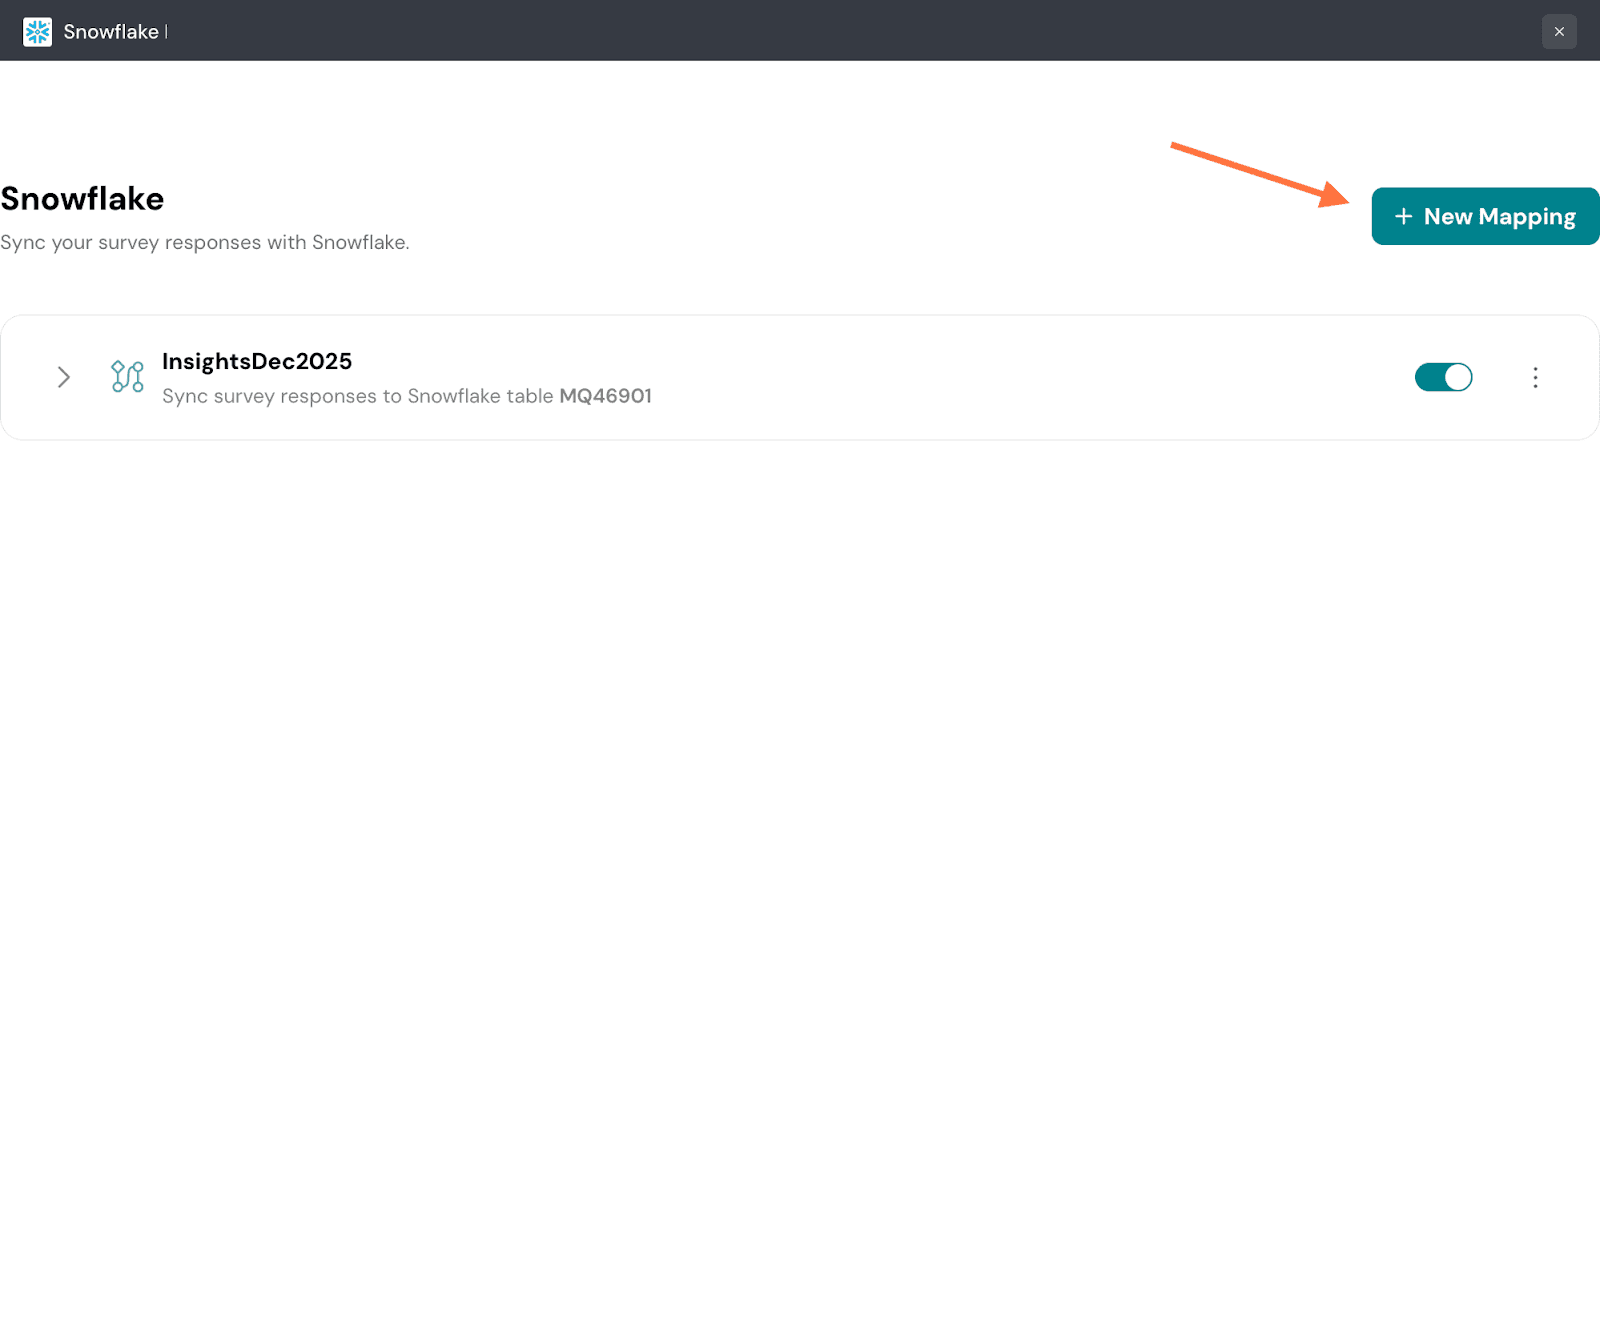
Note: To delete the mapping, click on the three-dot horizontal icon on the right, then select Delete from the menu.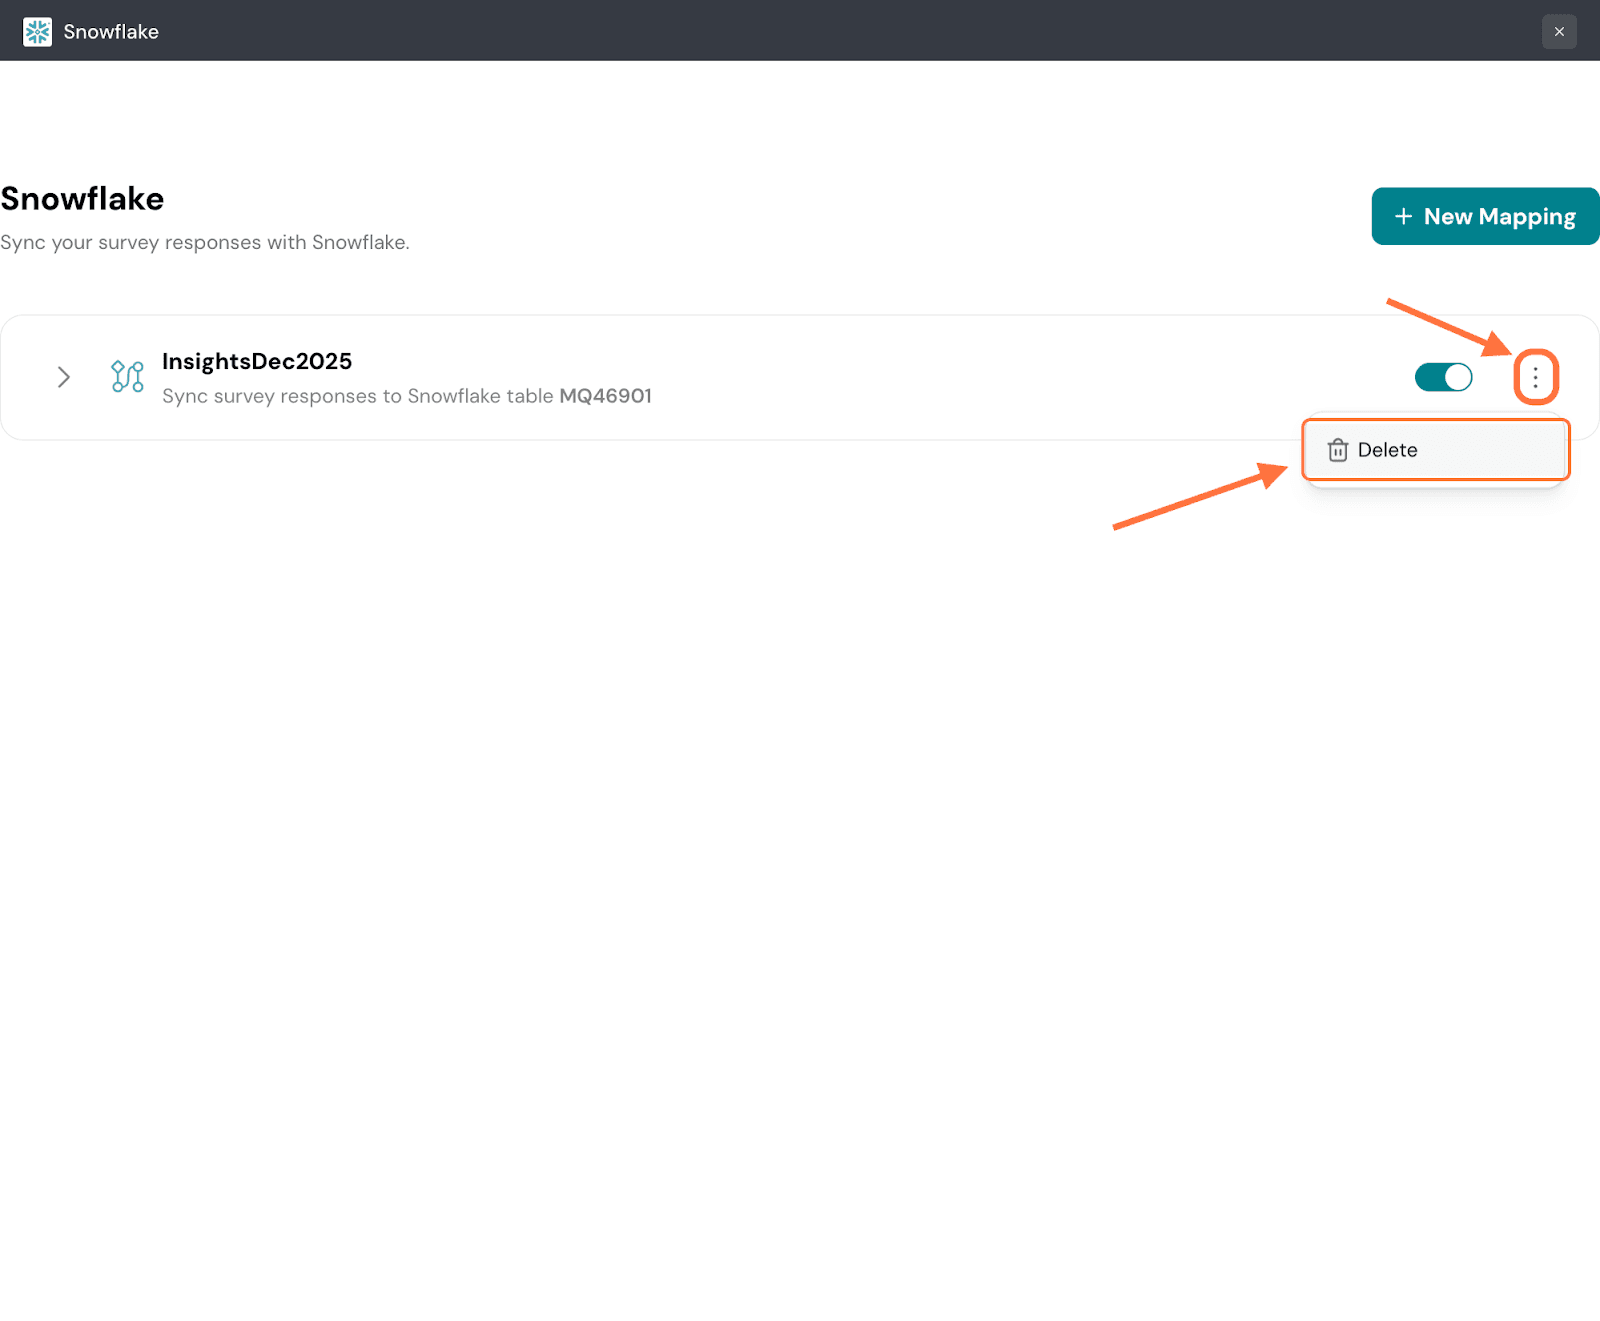
A confirmation pop-up will appear. To proceed, click on Confirm.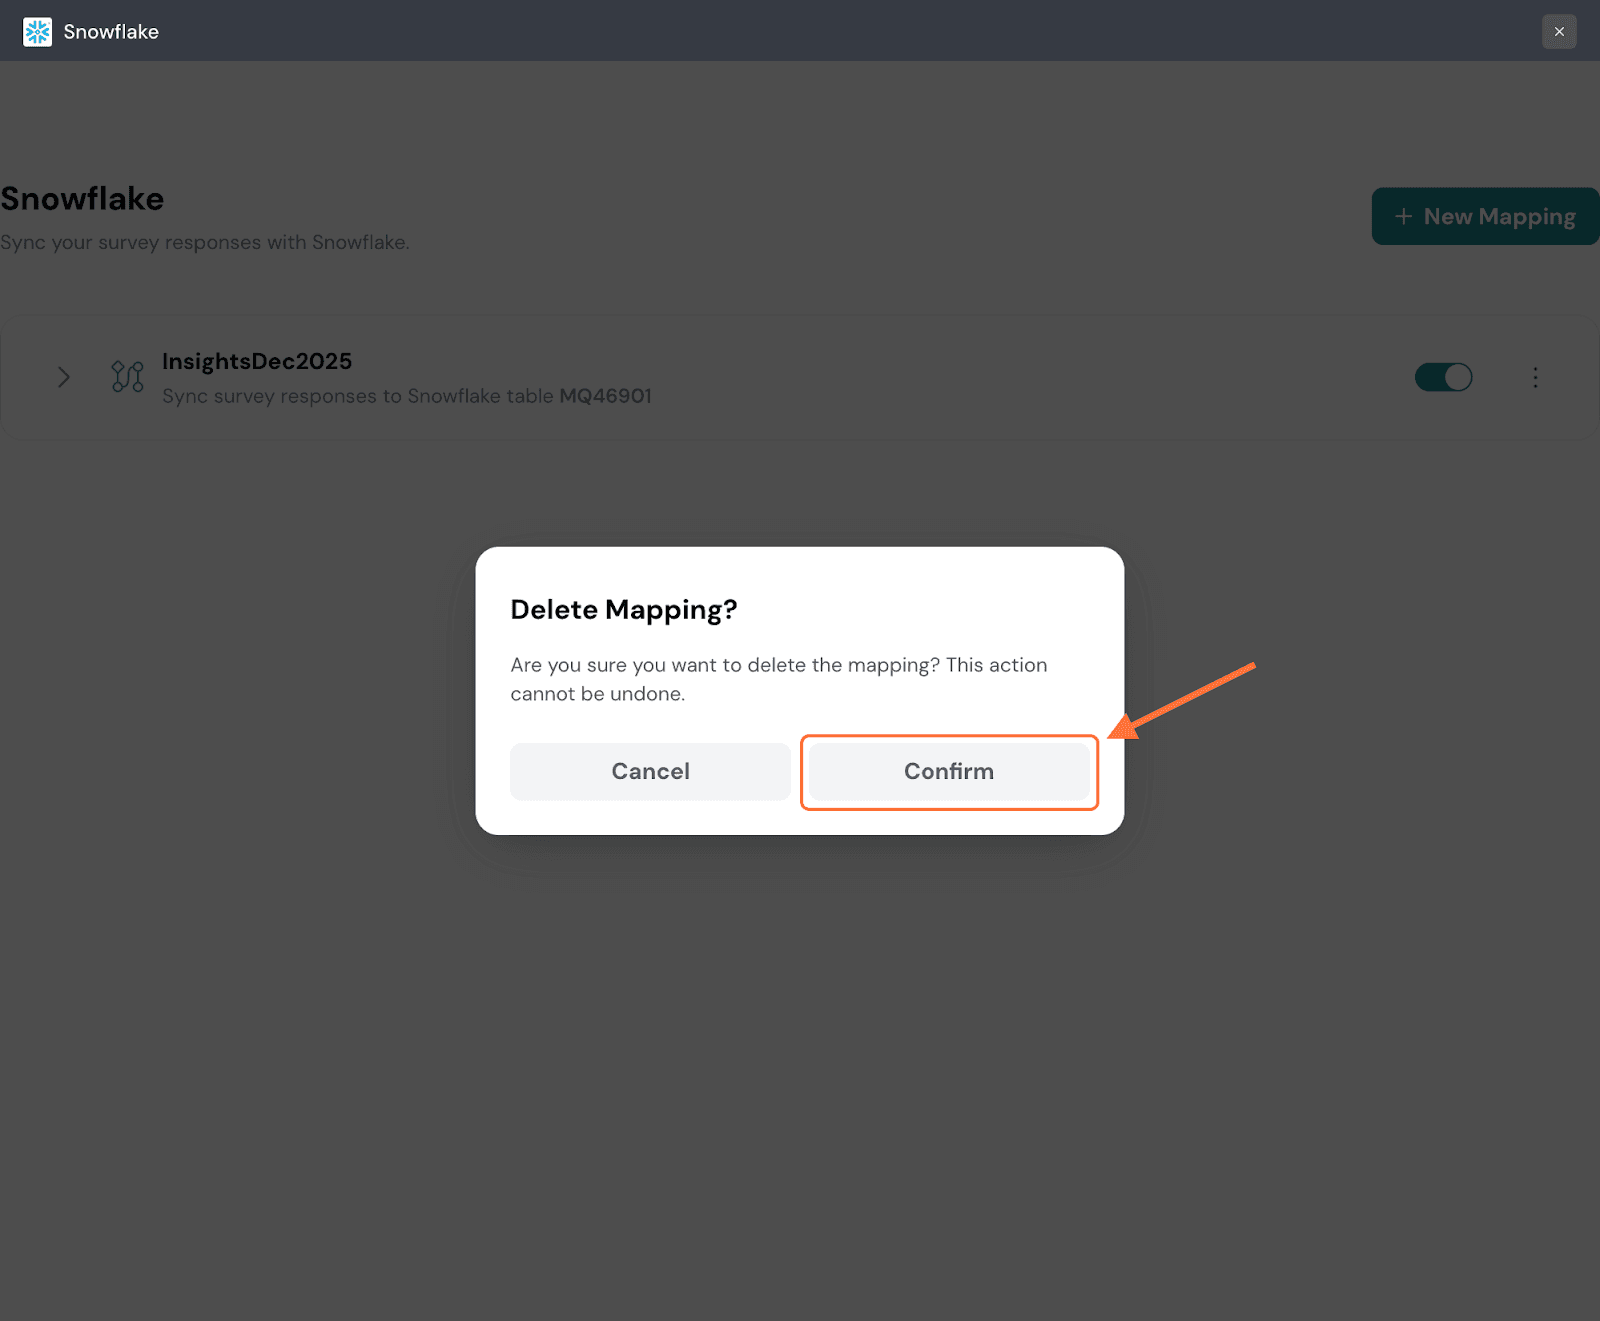
1. Now let’s learn how to integrate SurveySparrow with Snowflake via Direct connection. Follow the first 3 steps from the first section to find the Snowflake integration within your SurveySparrow account. After opening it, click on Use My Snowflake.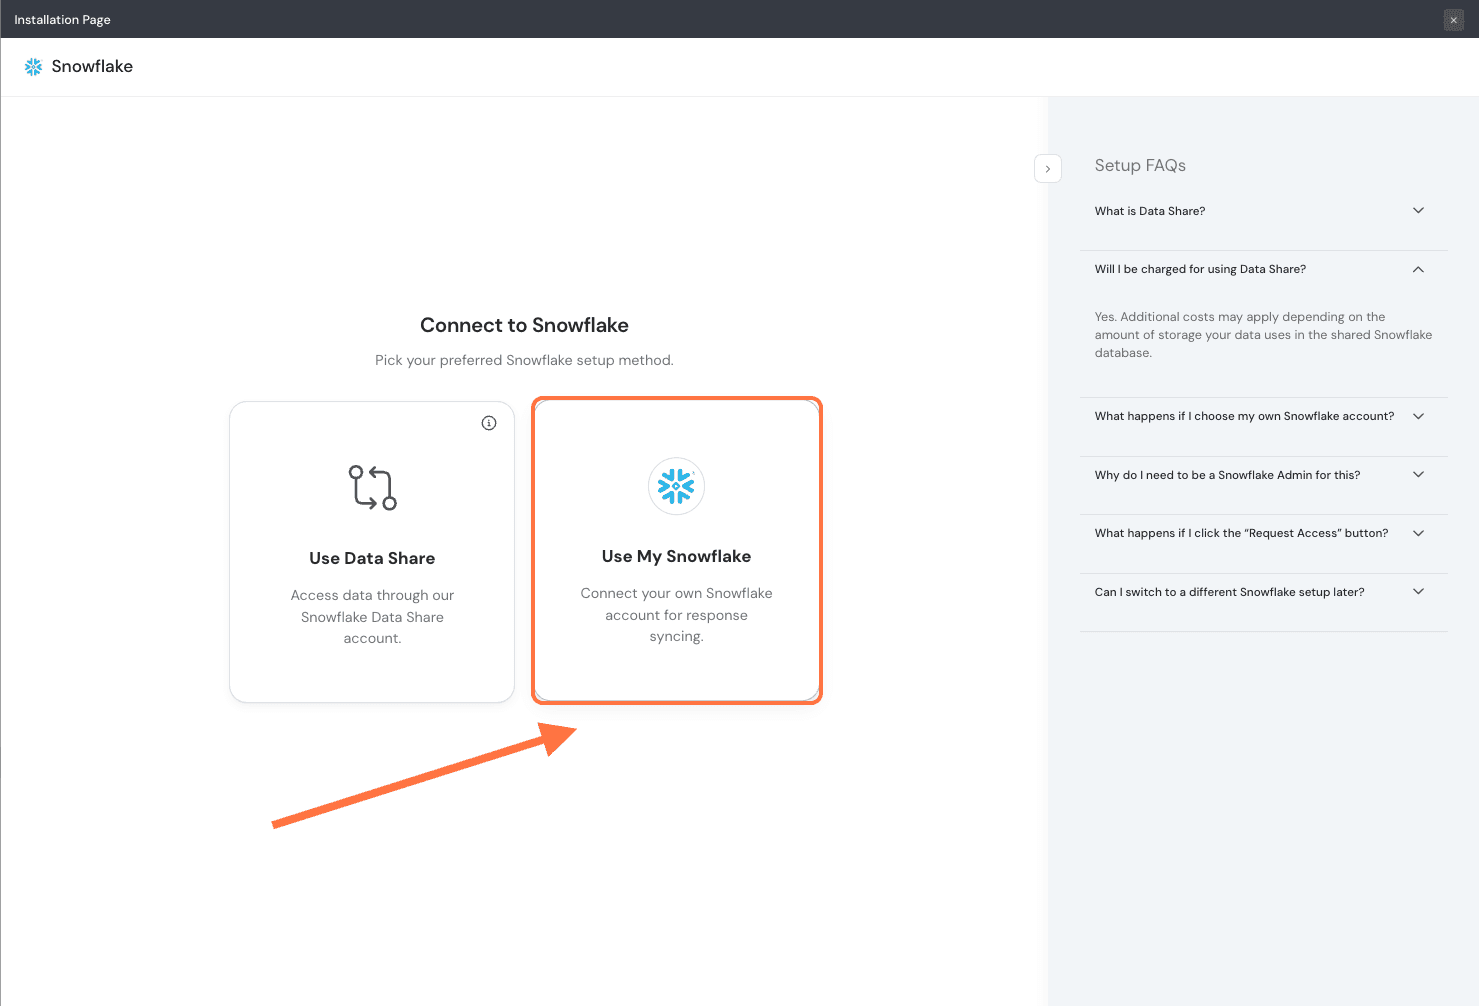
2. In order to authenticate the connection to Snowflake, you need certain parameters from your Snowflake. You can find them by running the script provided below inside Snowflake. First, copy it to your clipboard.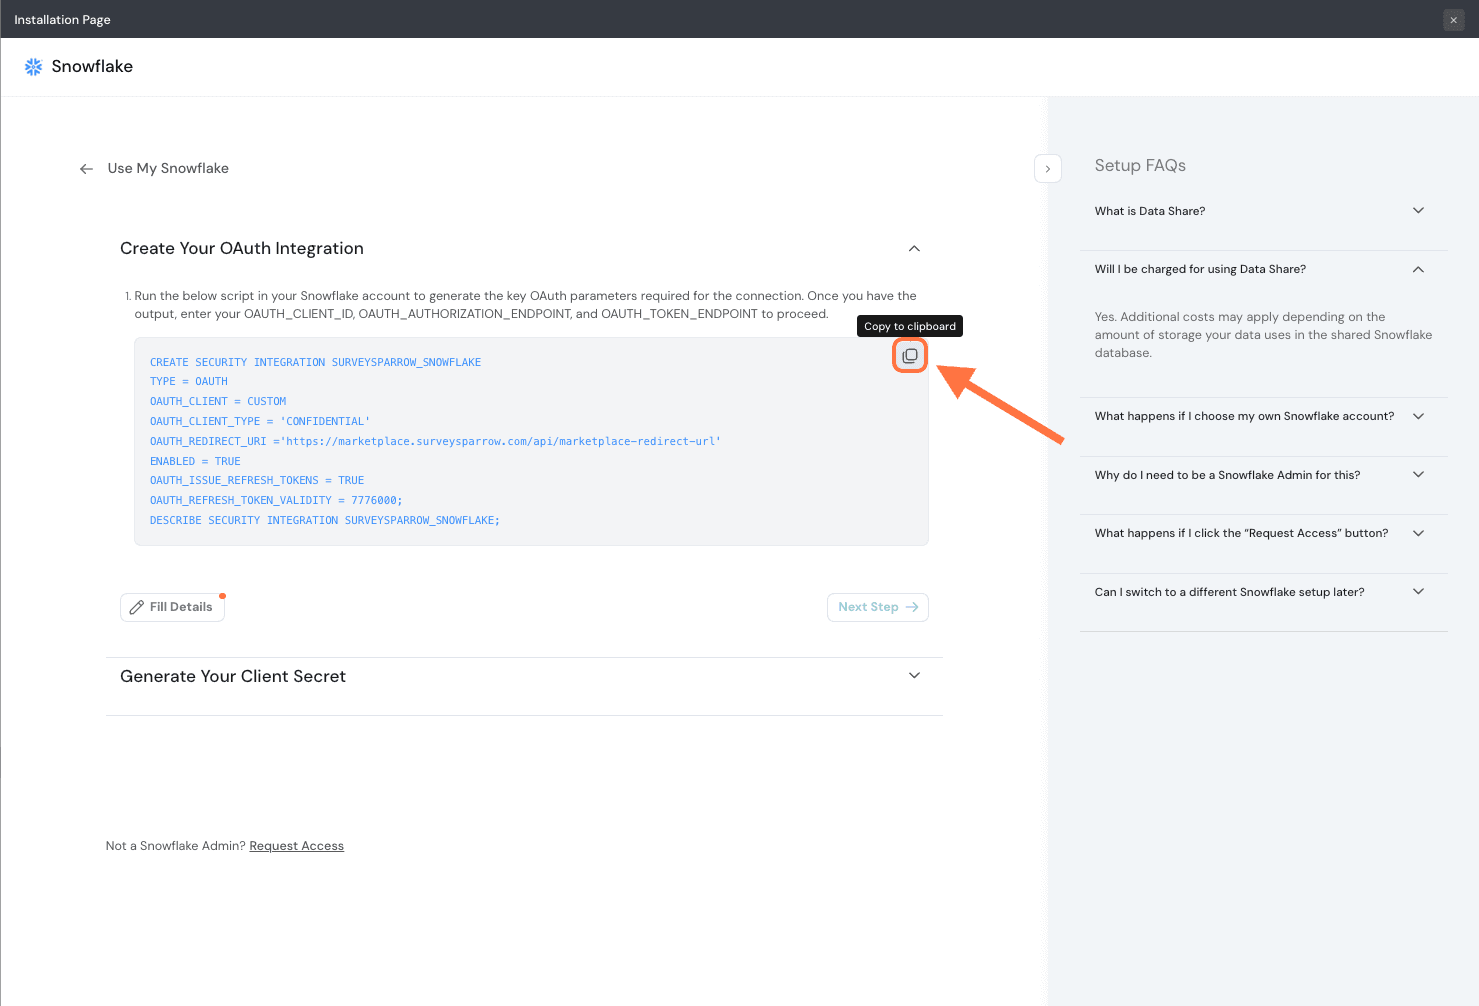
3. Then paste it inside a Snowflake worksheet and click the Run icon.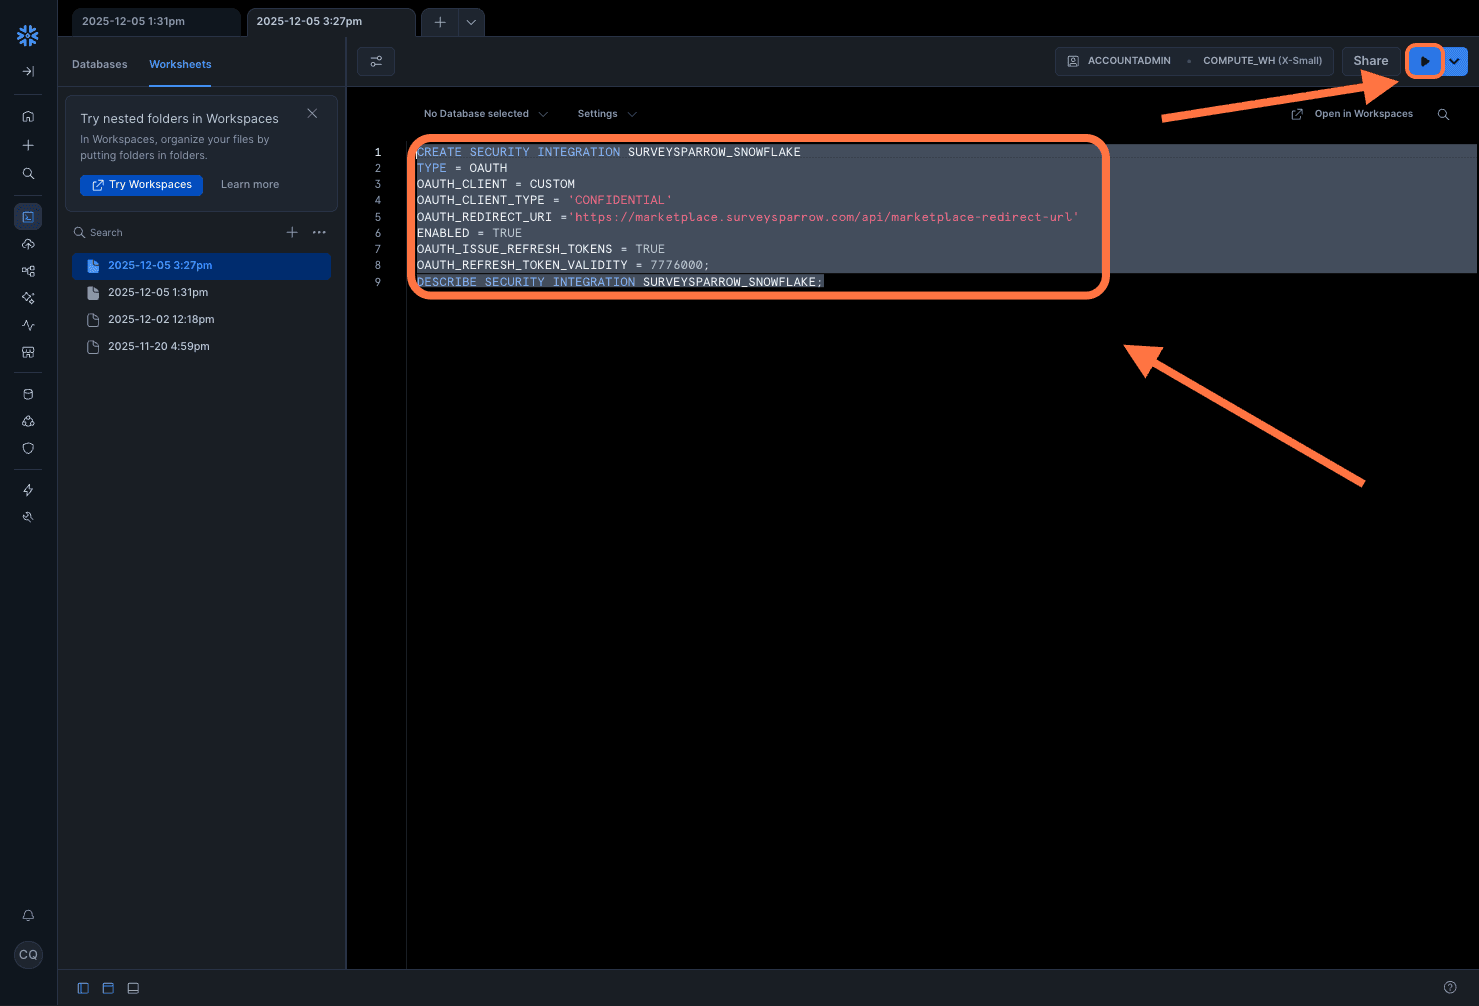
4. Snowflake will return some values. Note the values for the following: OAUTH_CLIENT_ID, OAUTH_AUTHORIZATION_ENDPOINT and OAUTH_TOKEN_ENDPOINT.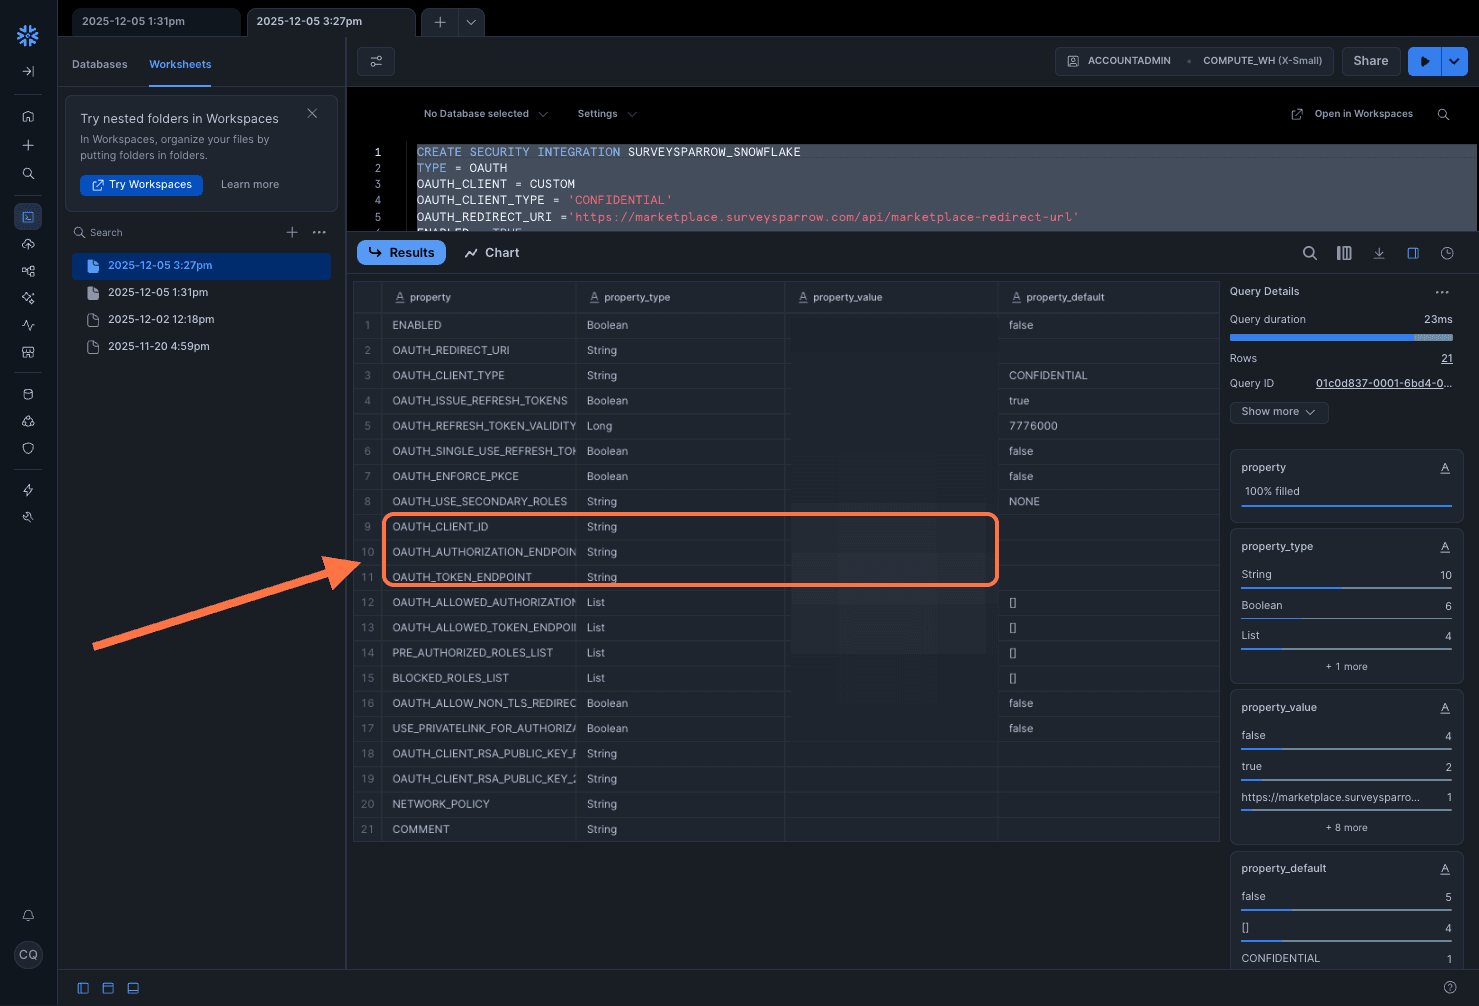
5. Head to SurveySparrow and click on Fill Details.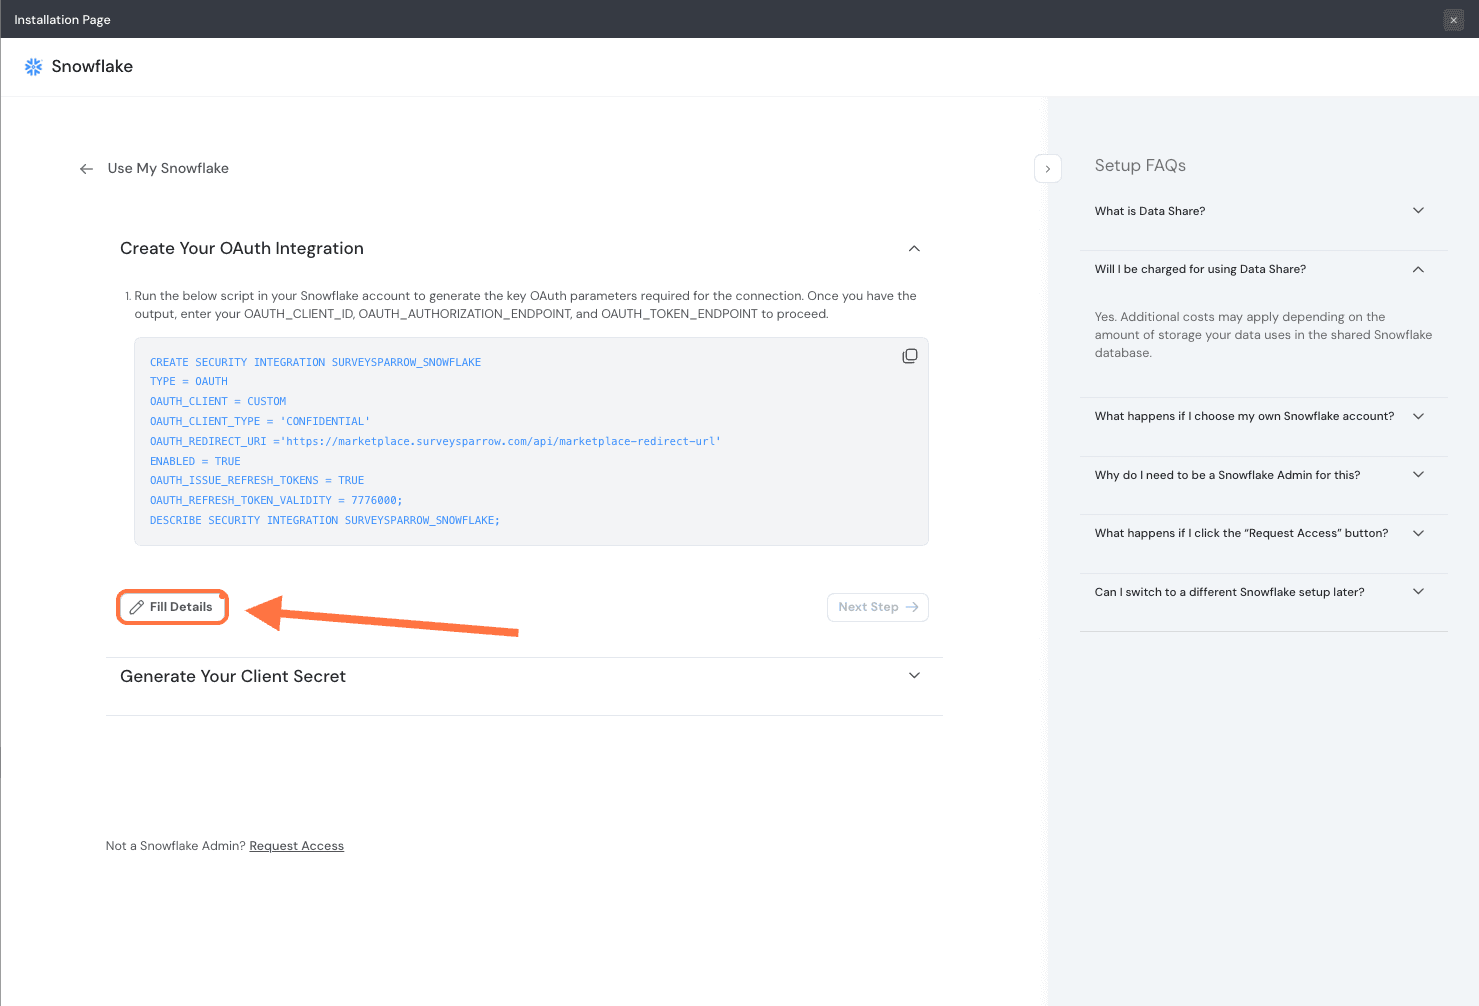
6. Then copy paste the values for the respective fields from Snowflake as mentioned above. Then click Save.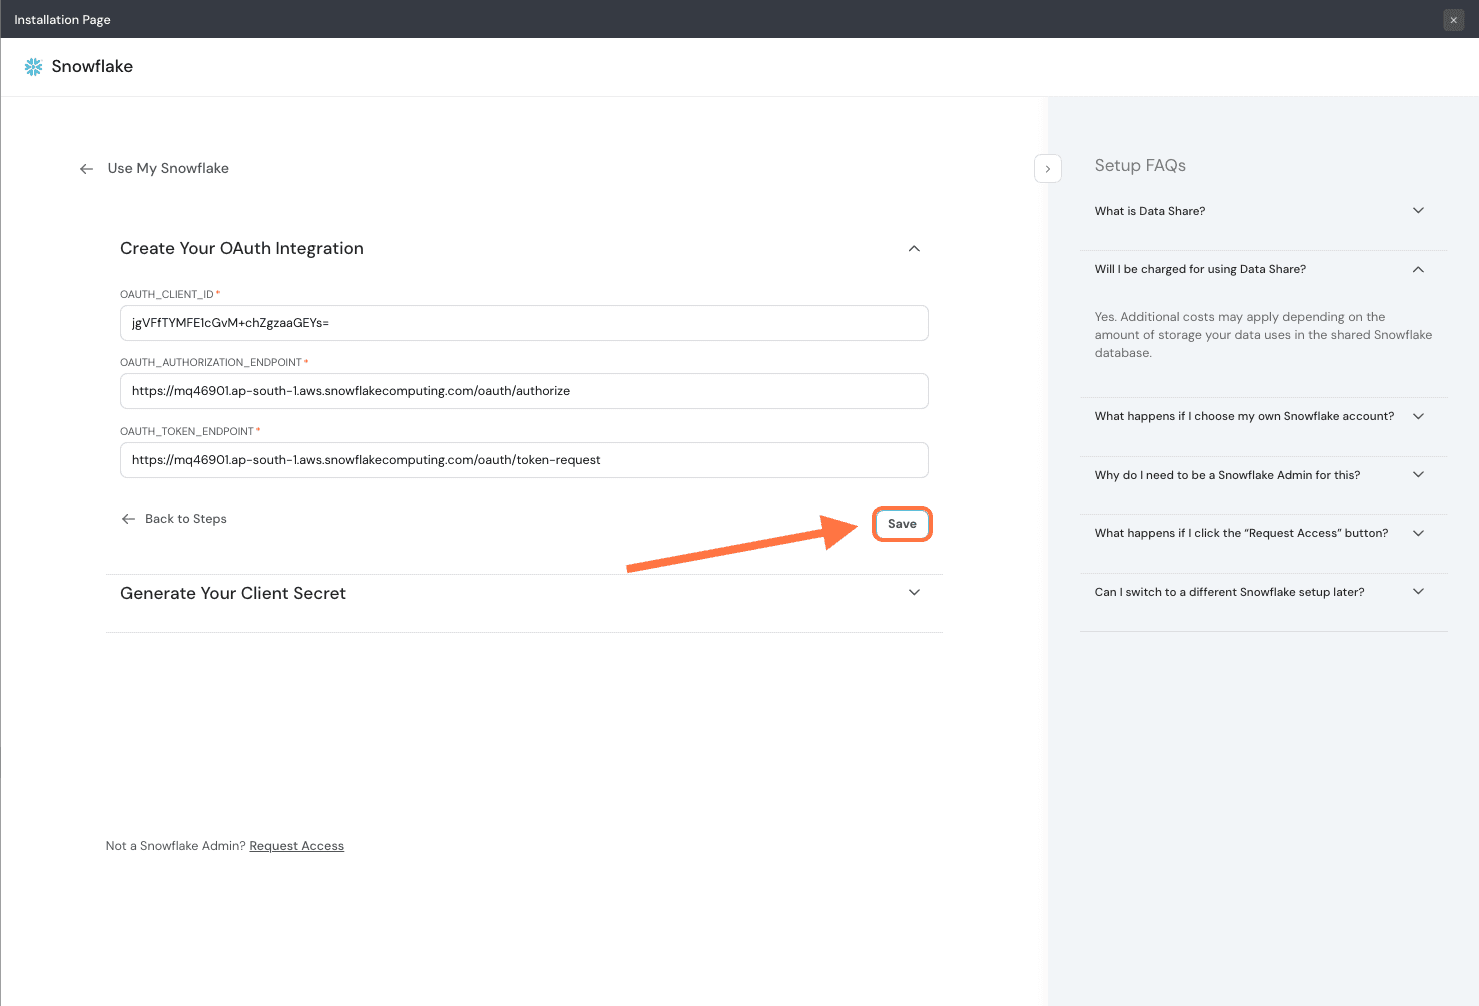
7. Click on Next Step.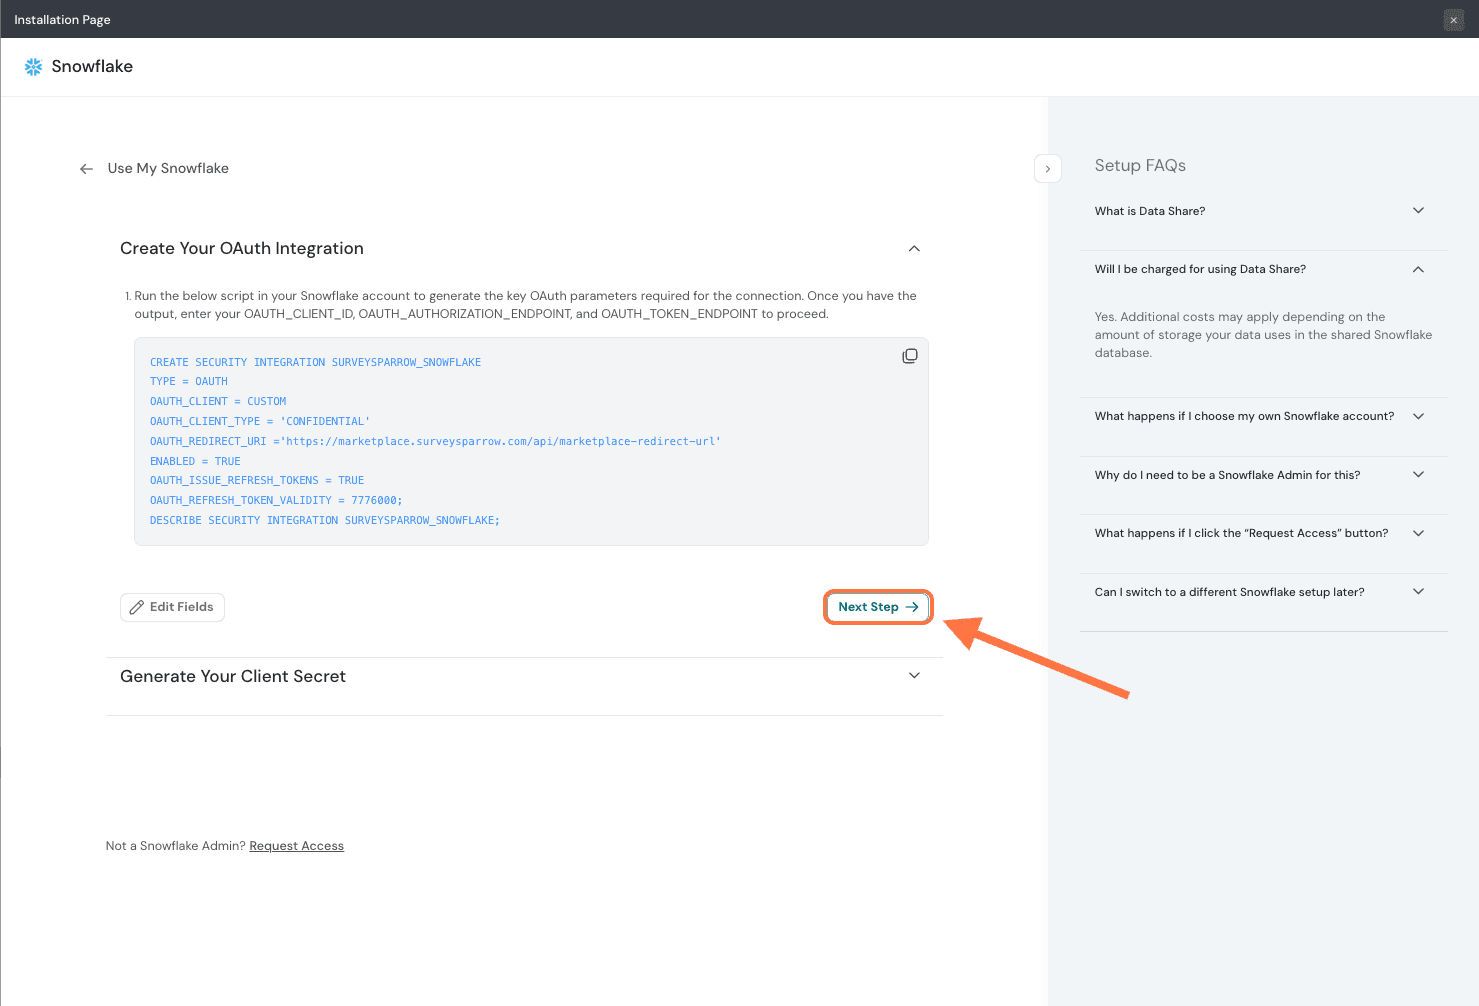
8. Now, you must find the client secret and account identifier. To do this, run the script below in Snowflake. Copy the script to your clipboard.
9. Then head to a Snowflake worksheet, paste the script and click on Run.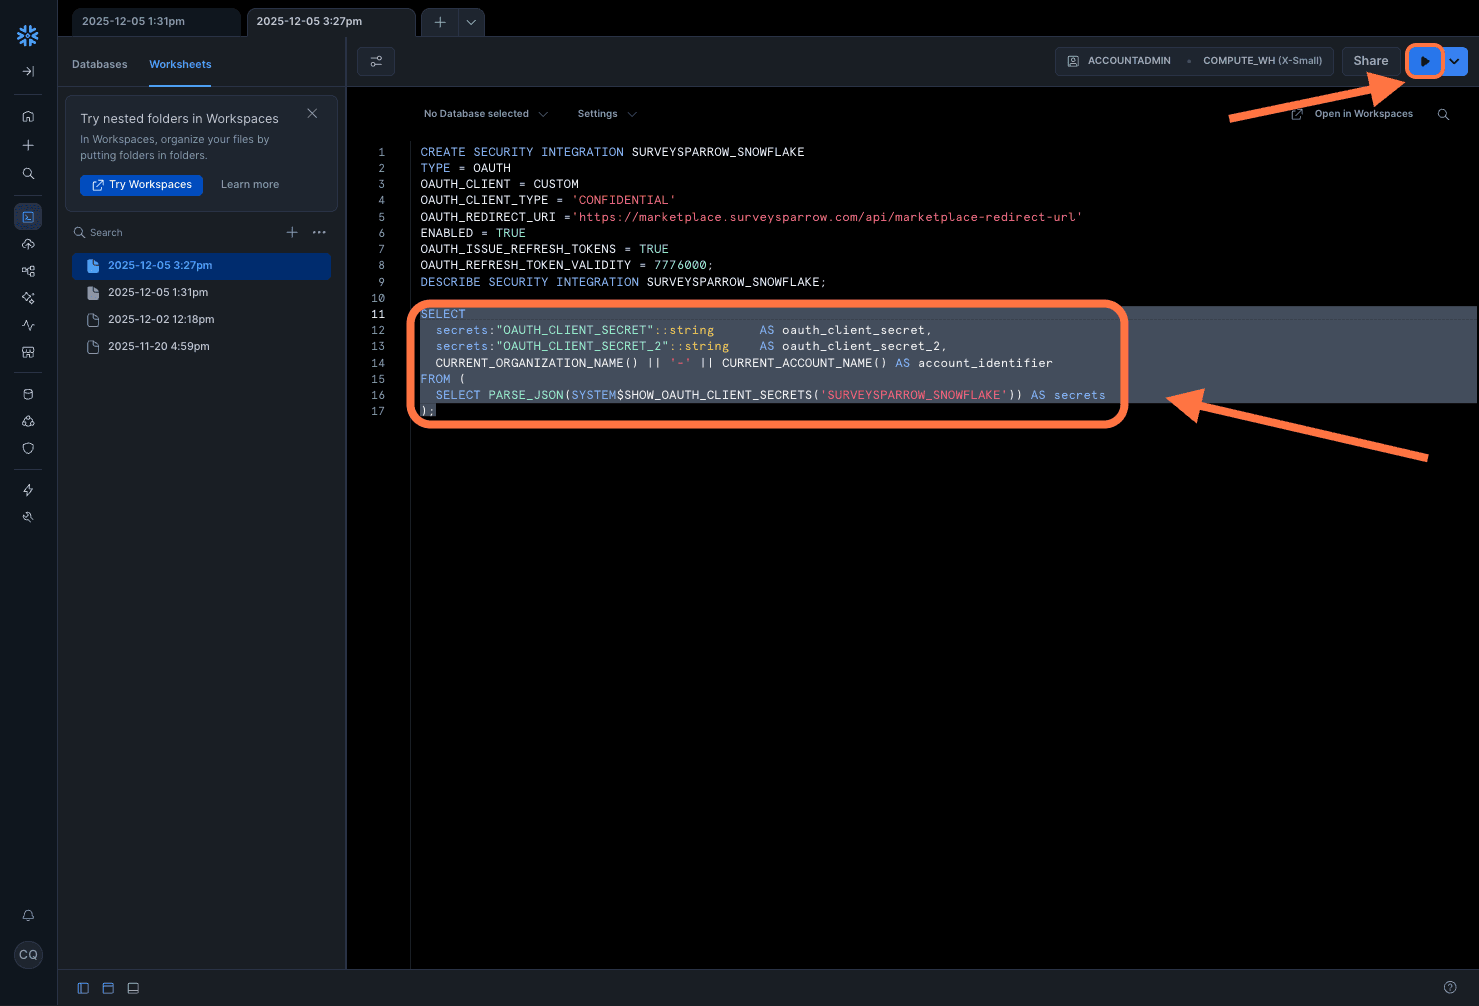
10. Note the values under OAUTH_CLIENT_SECRET and ACCOUNT_IDENTIFIER.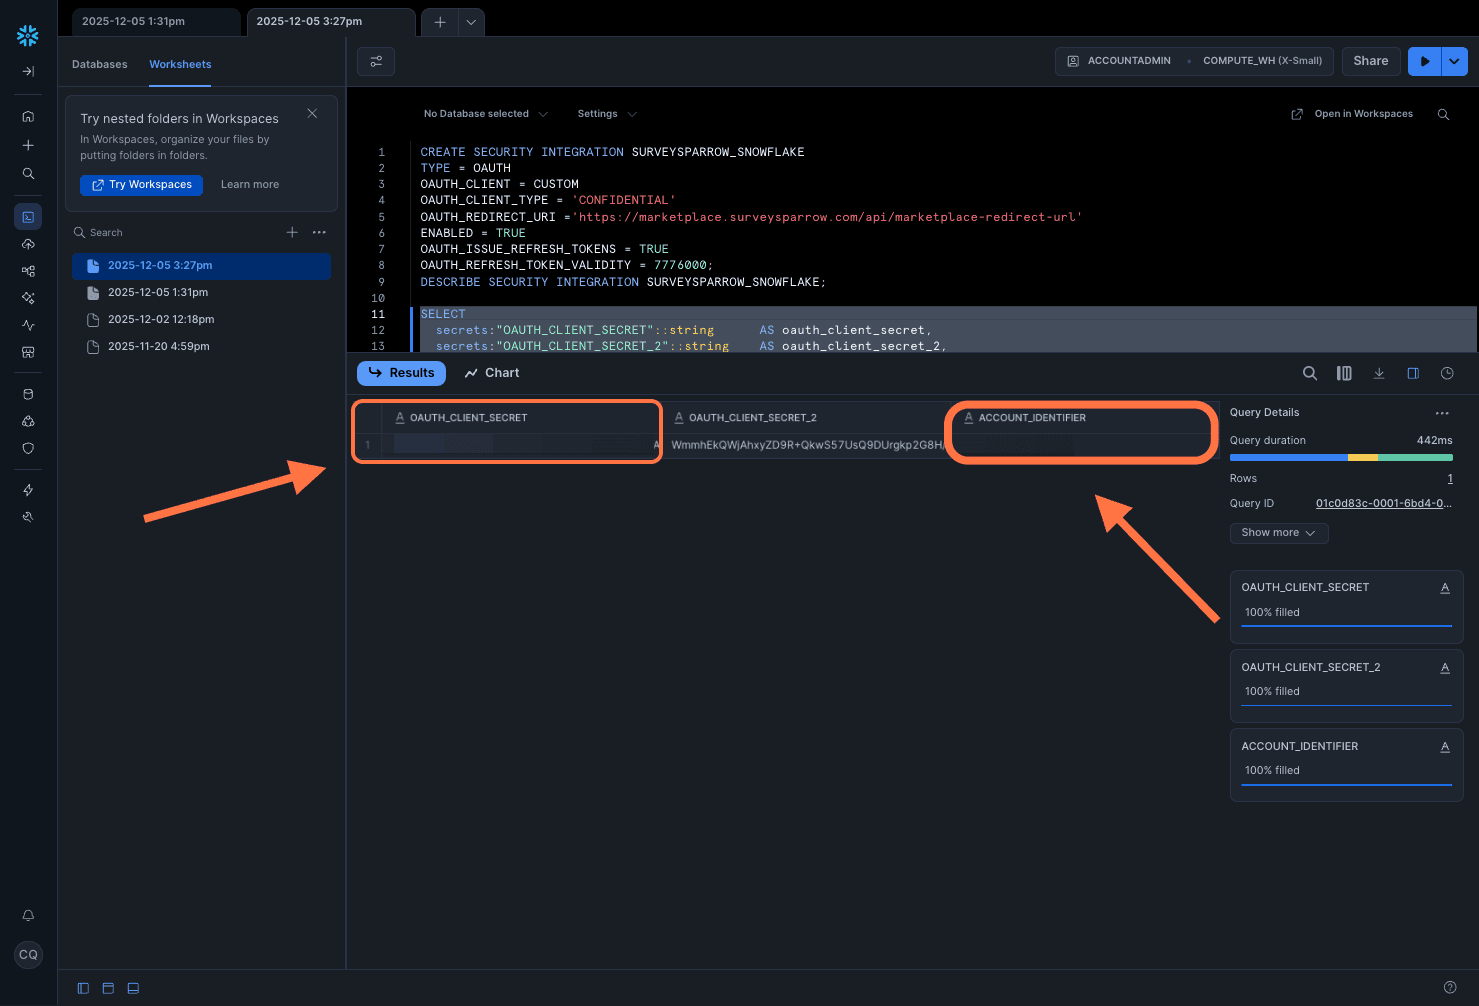
11. Go back to SurveySparrow and click on Fill Details.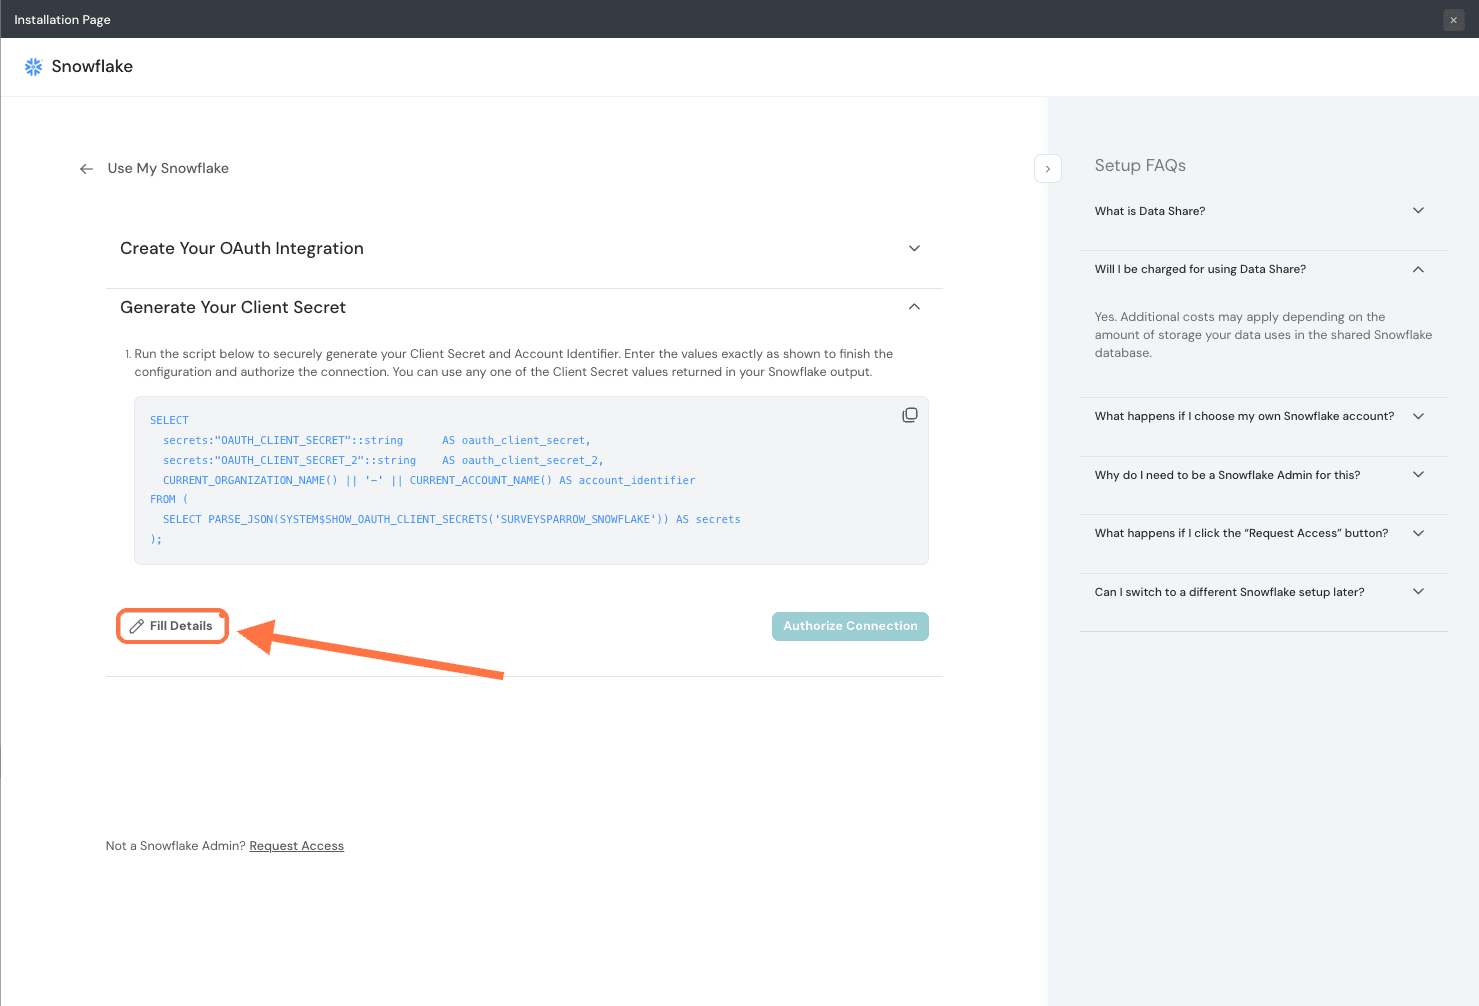
12. Paste the values in the corresponding fields and click Save.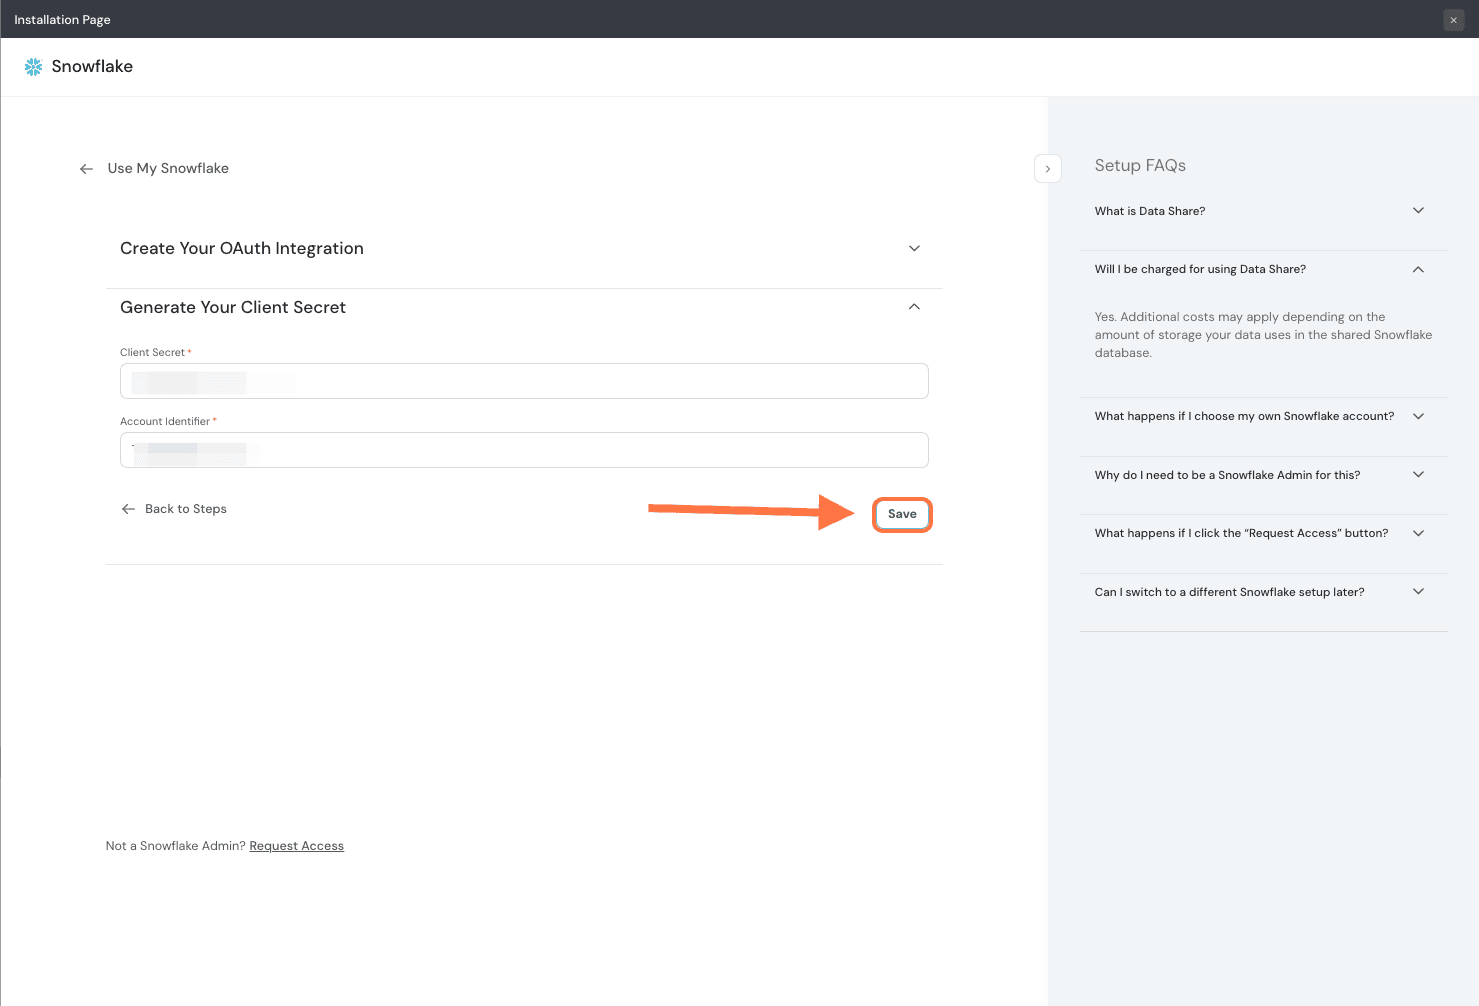
13. Then click on Authorize Connection.
14. You will be taken to a Snowflake login screen to authenticate the integration. Enter your credentials and click Sign in.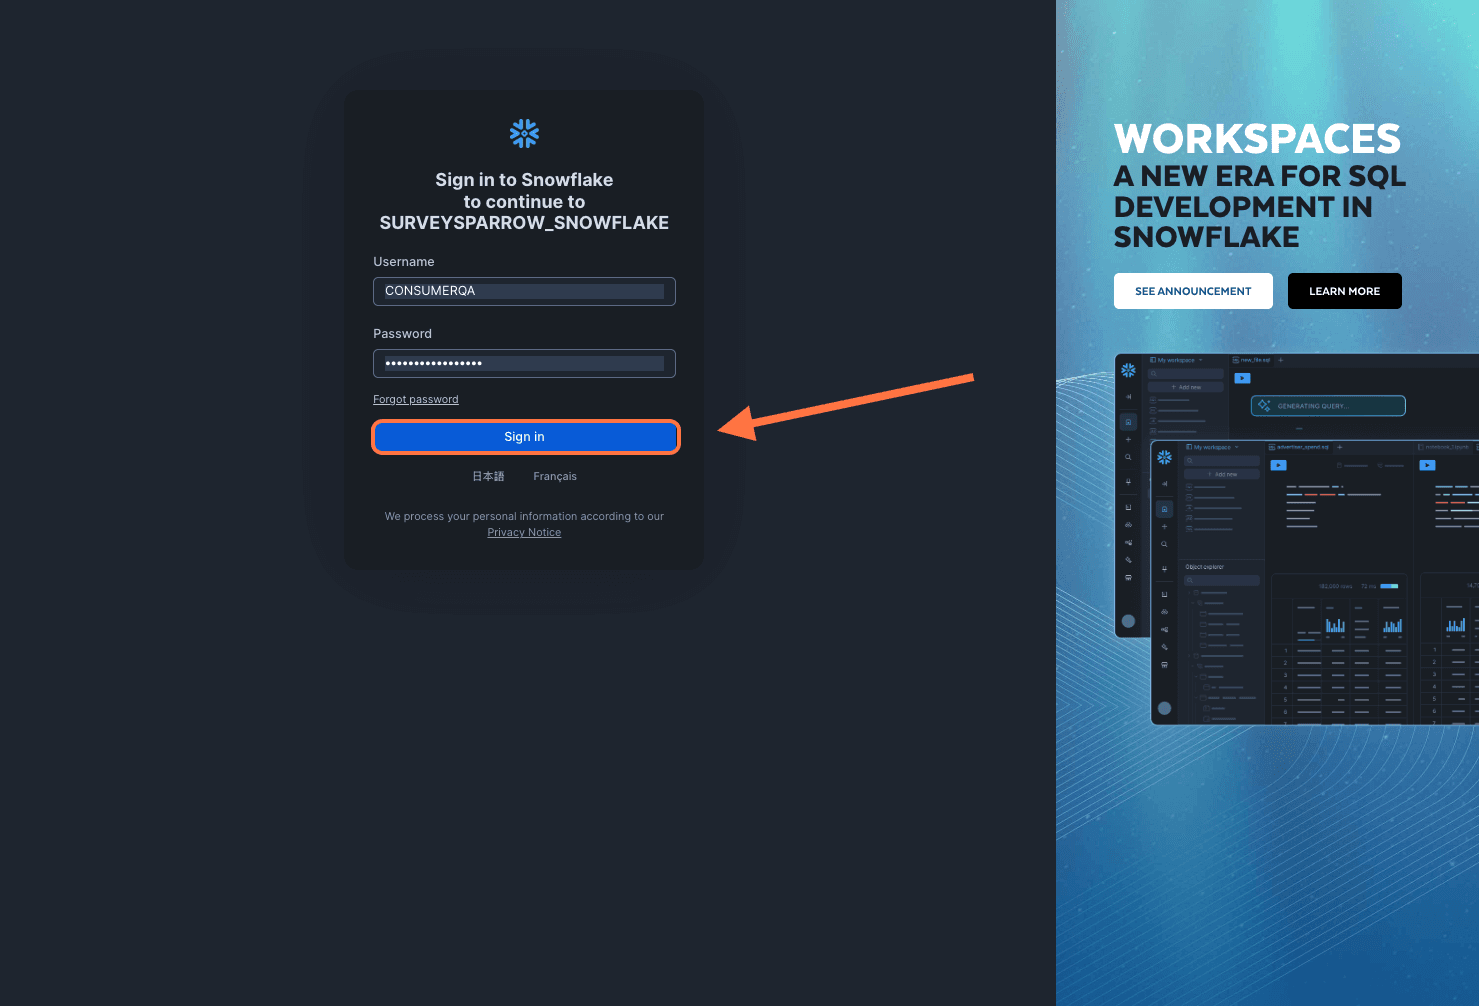
15. A confirmation message appears. Click Allow. You will be returned to SurveySparrow after the installation is complete.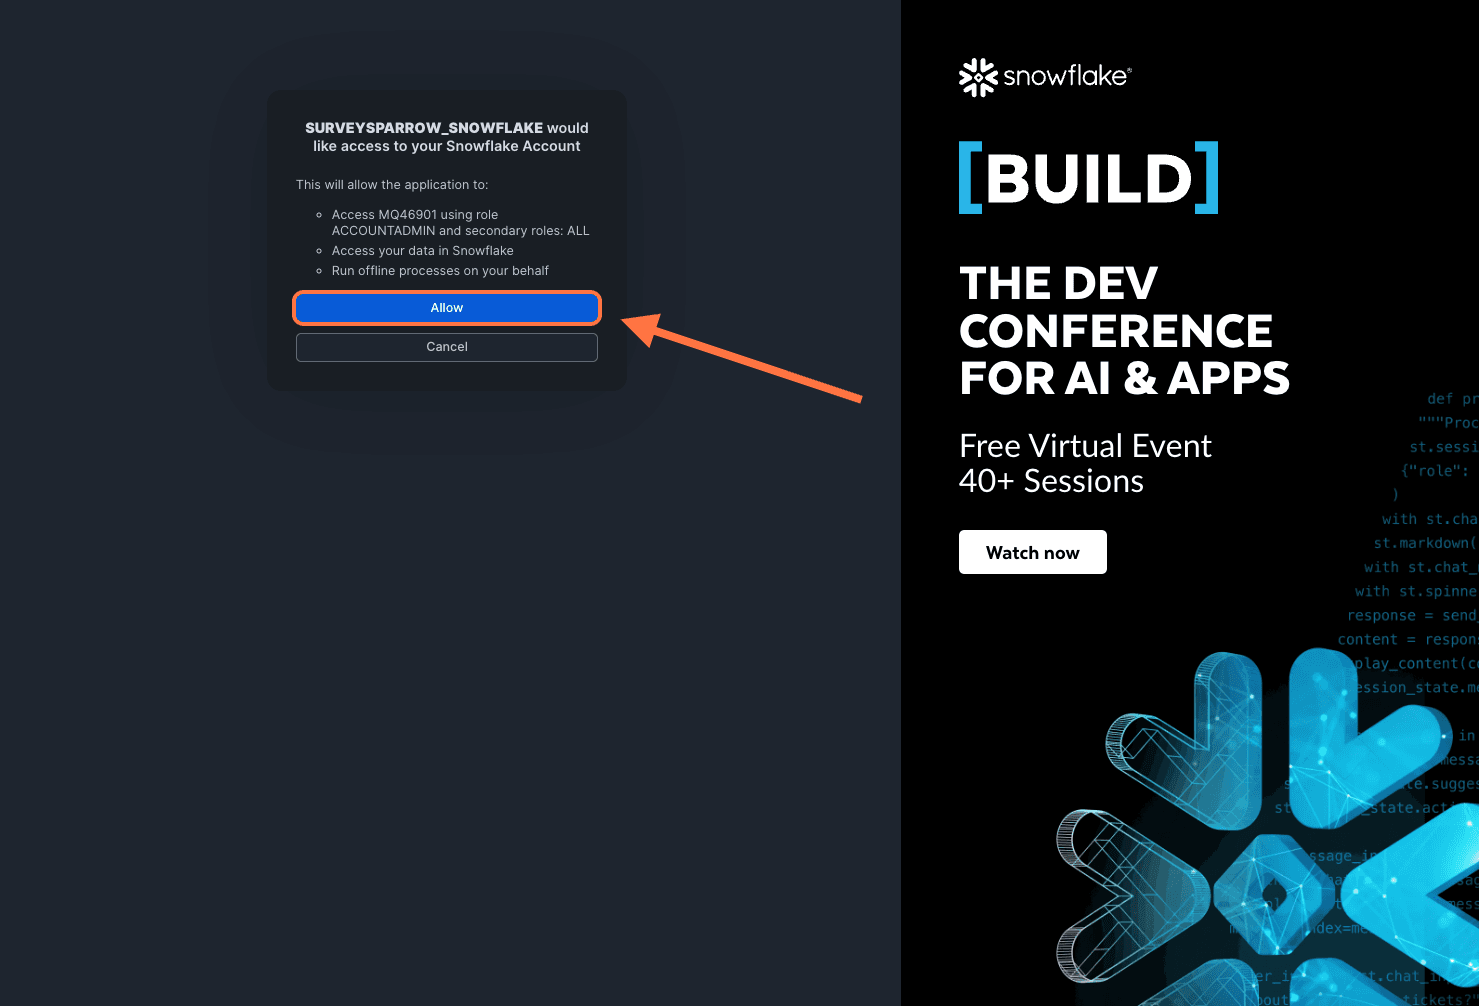
1. Inside SurveySparrow, open the survey whose responses you wish to sync to Snowflake, then click on the Integrate tab.
2. Search for Snowflake in the text box, then click on the toggle when it appears.
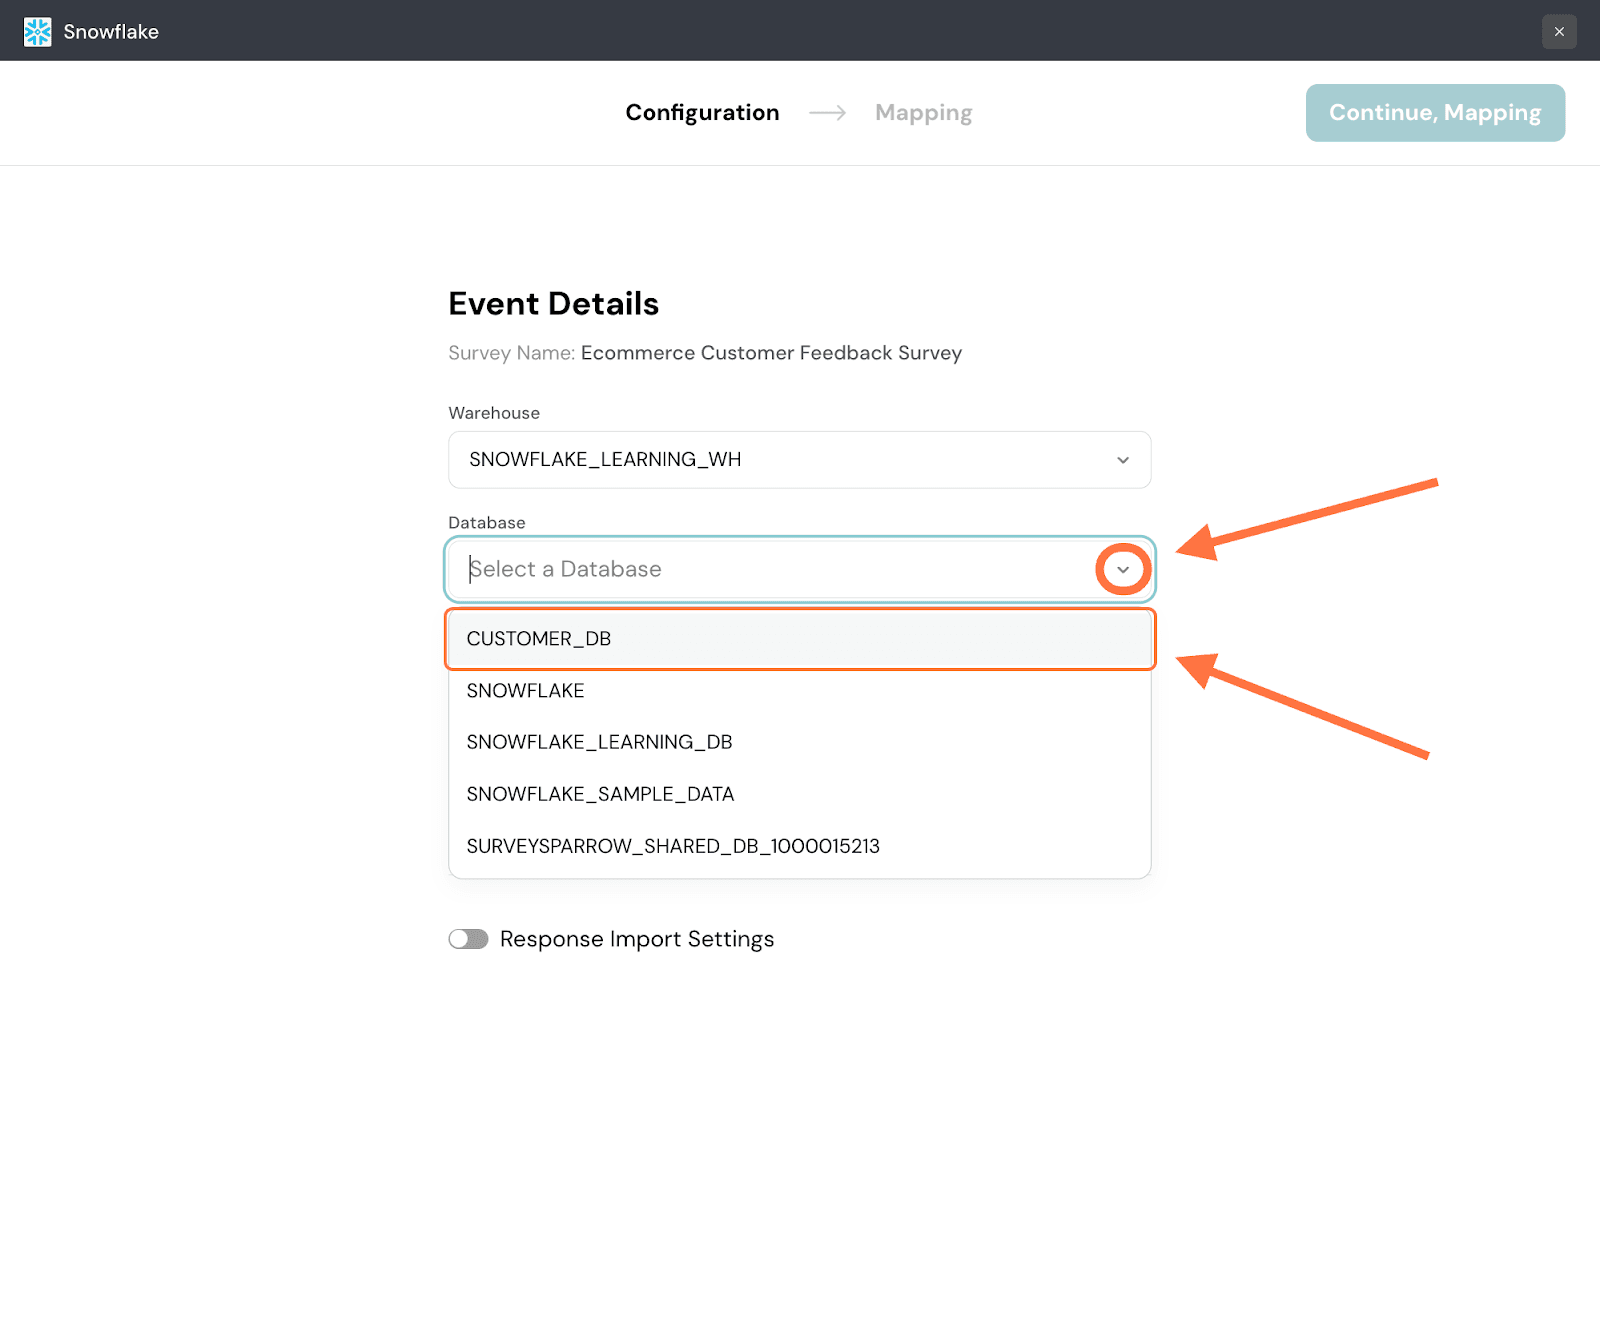
3. Within the mapping section, there are two parts. The first part is deciding the location of the mapping. Here you must choose the warehouse to run the mapping as well as the database and its schema within which the mapping will be stored. Click on the drop-down menu for each item one-by-one and choose from the options.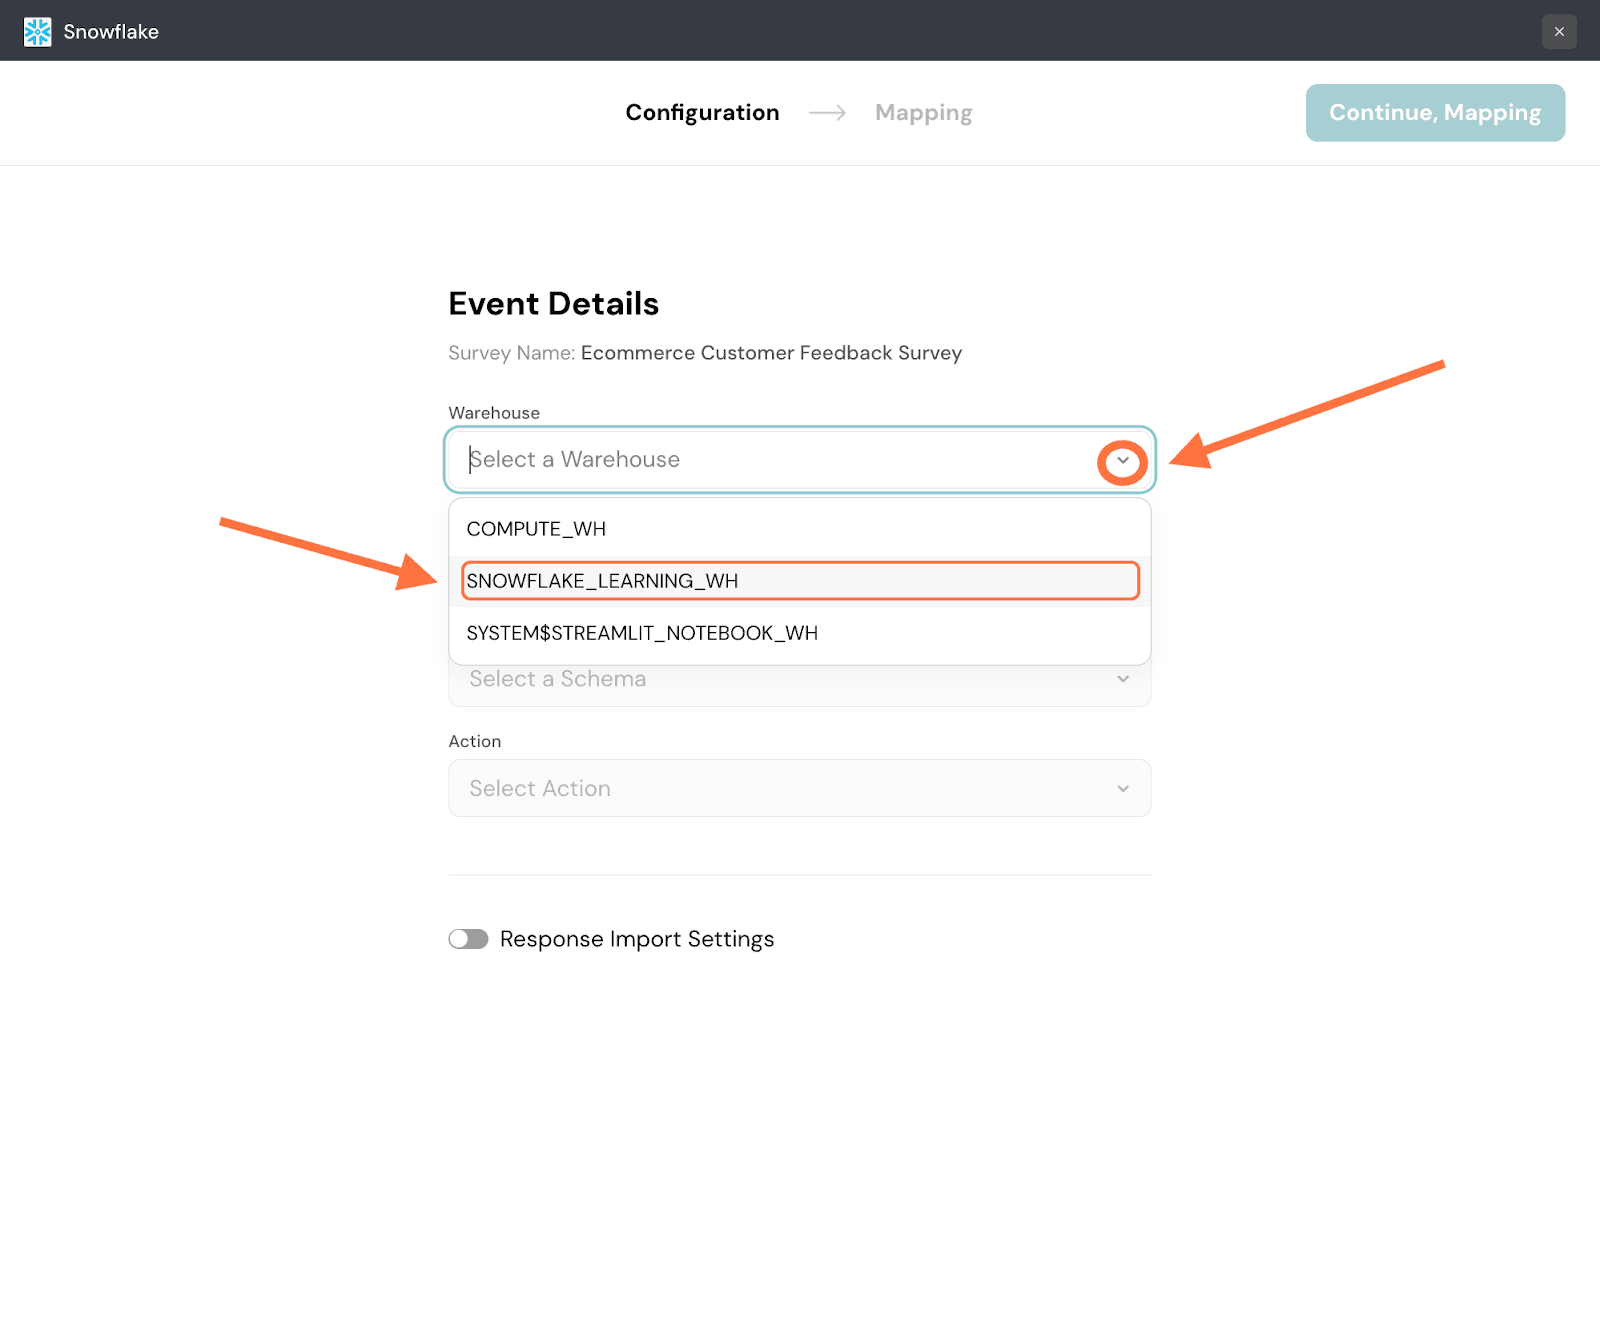

4. Next, you must choose which table the mapping must be stored in. You can either choose an existing table or create a new one within the chosen schema. Click on the drop-down and choose an action. For this instance, we’ll choose to create a new table.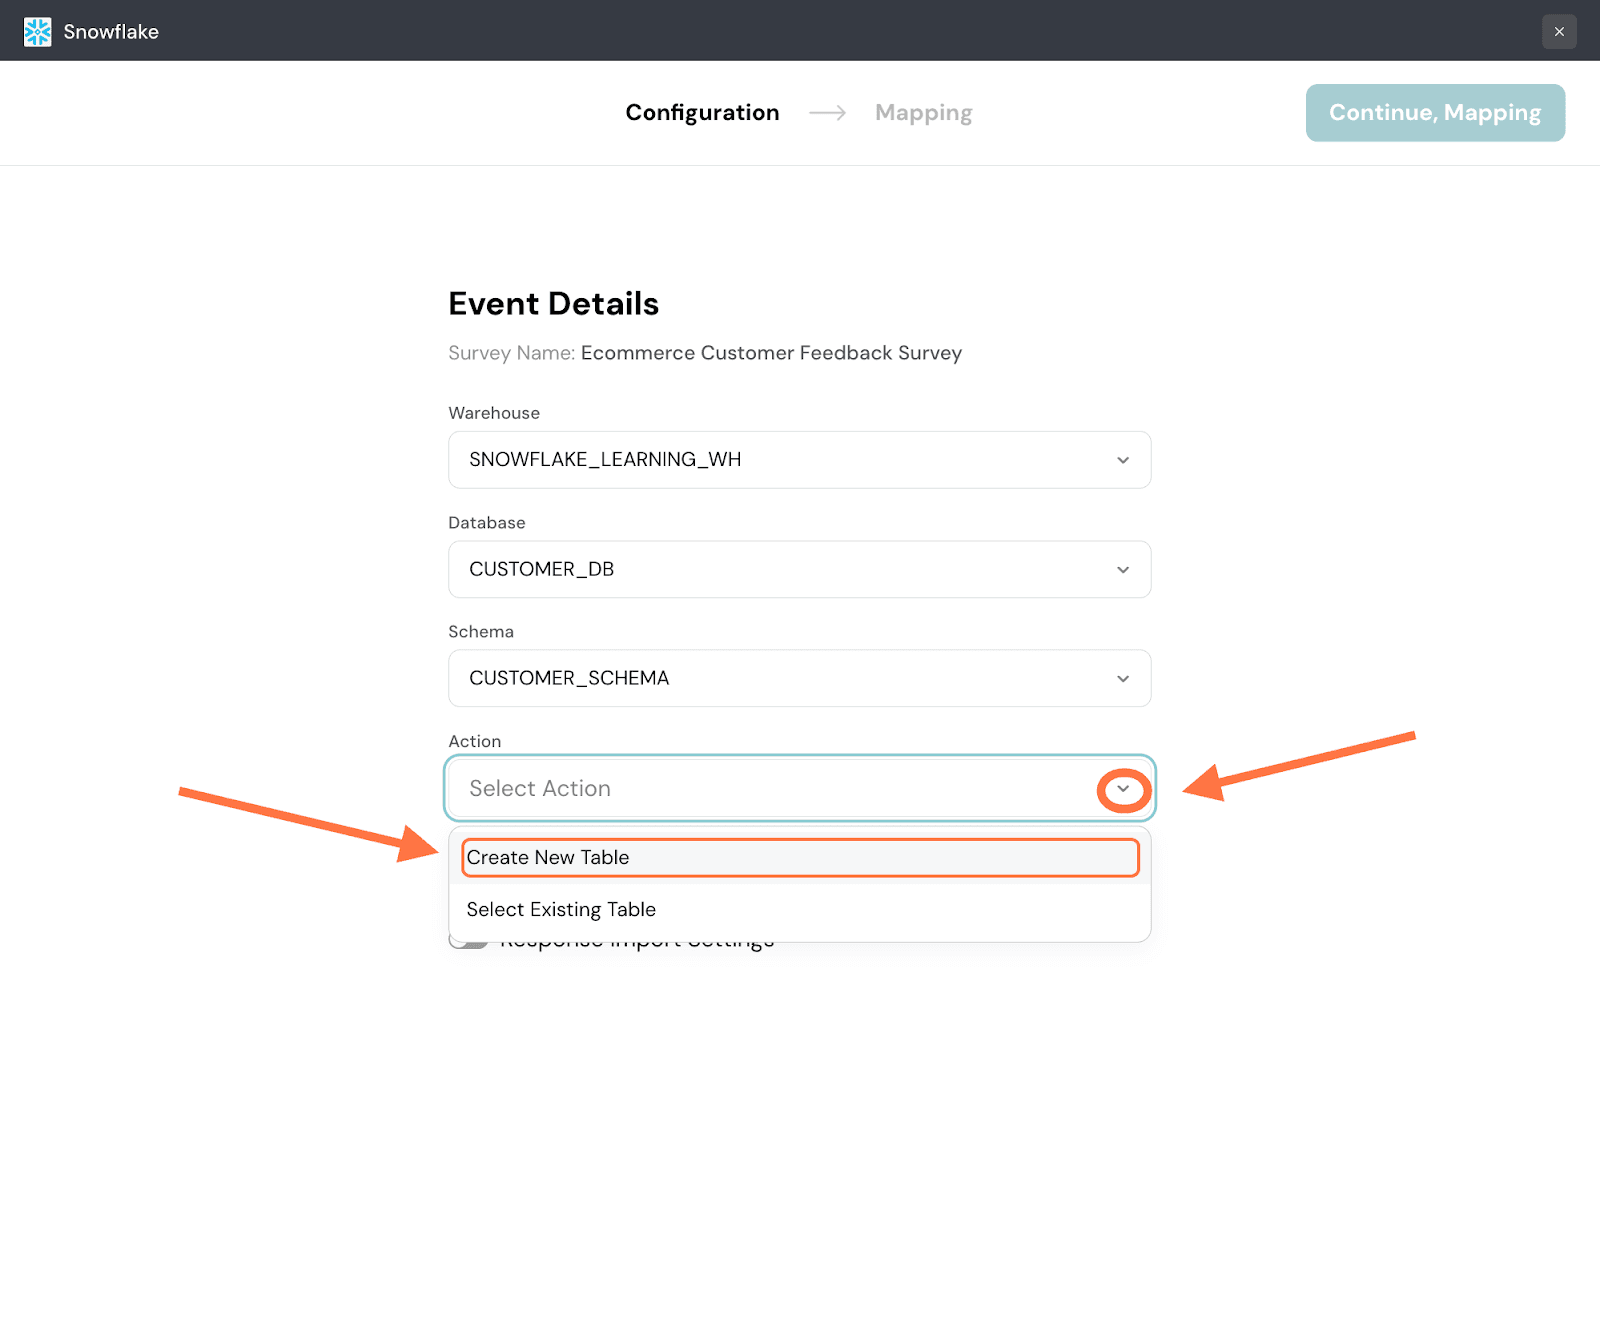
5. Provide a name for the table.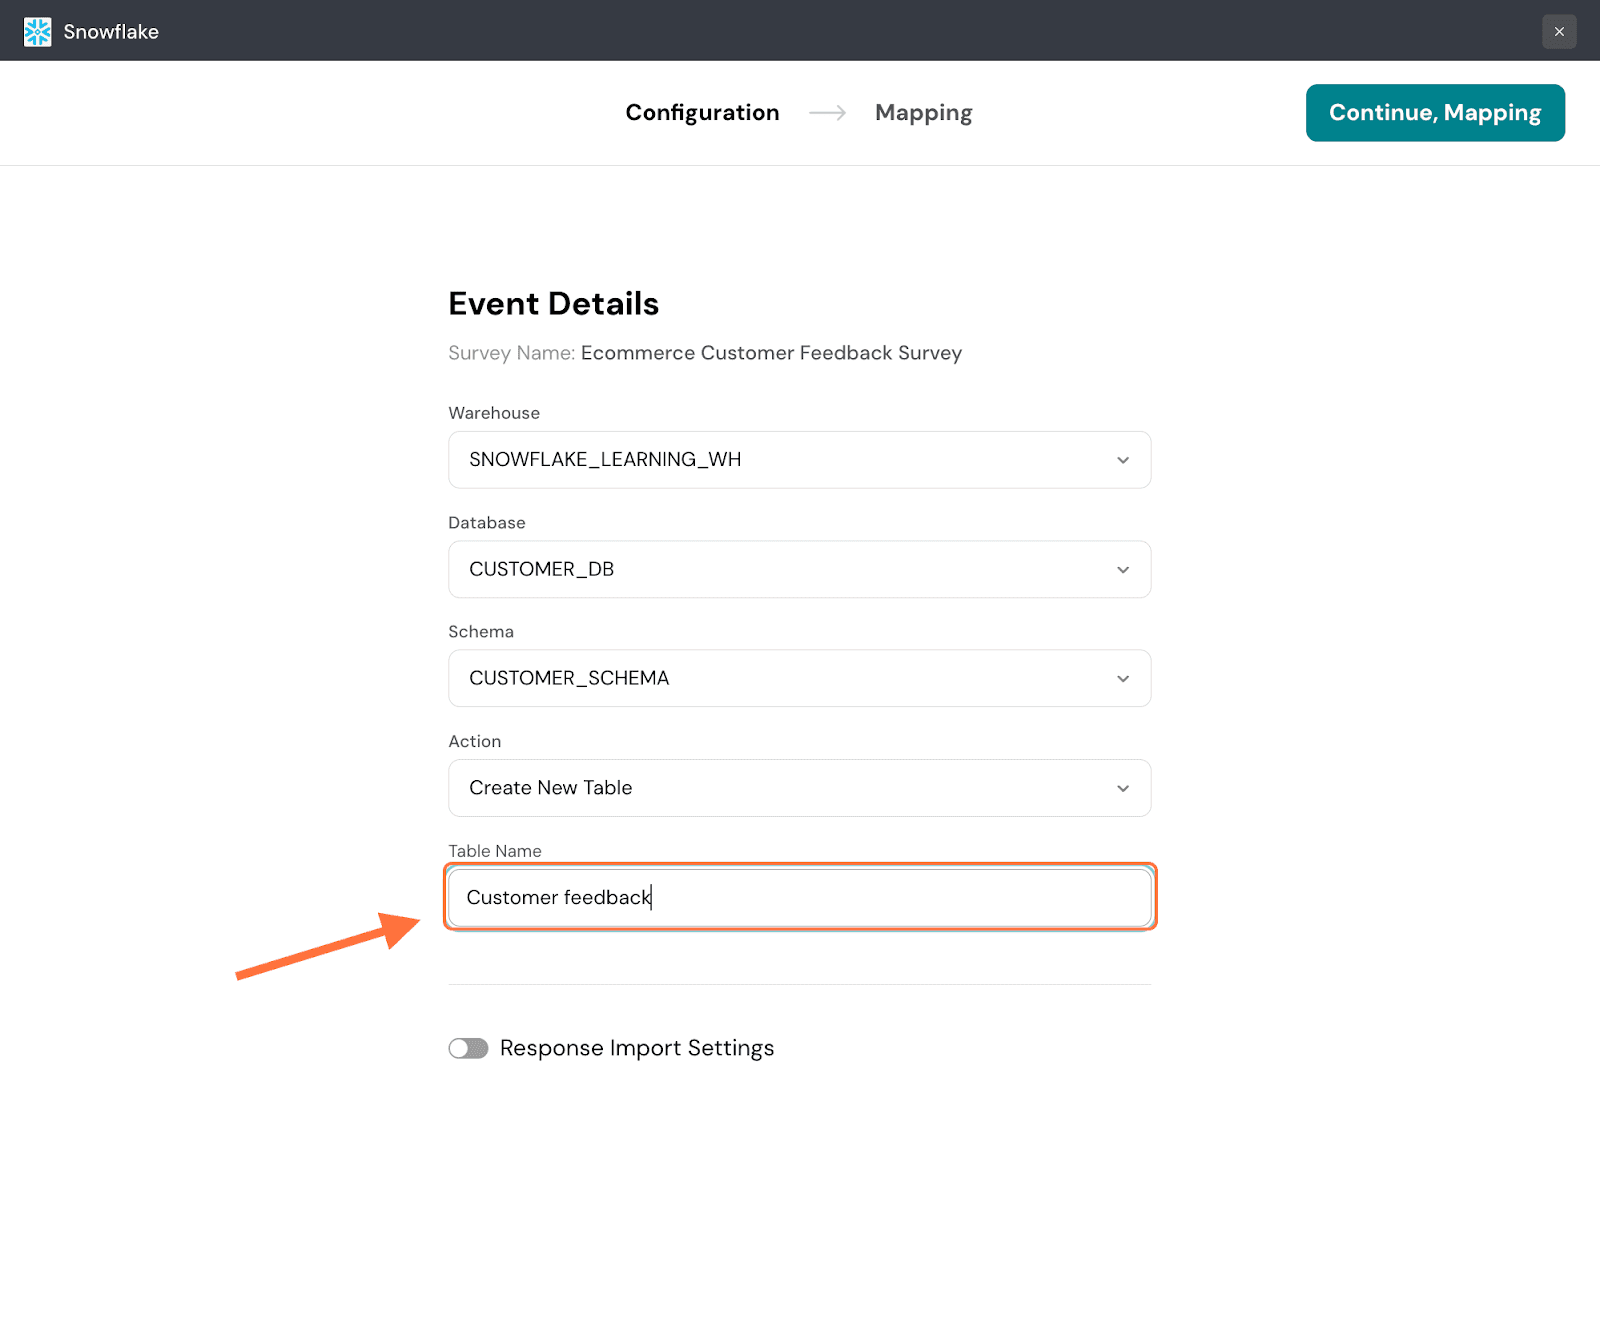
Note: If you chose to proceed with an existing table, you would have to choose from a drop-down menu of options, just like in the steps prior to the above one.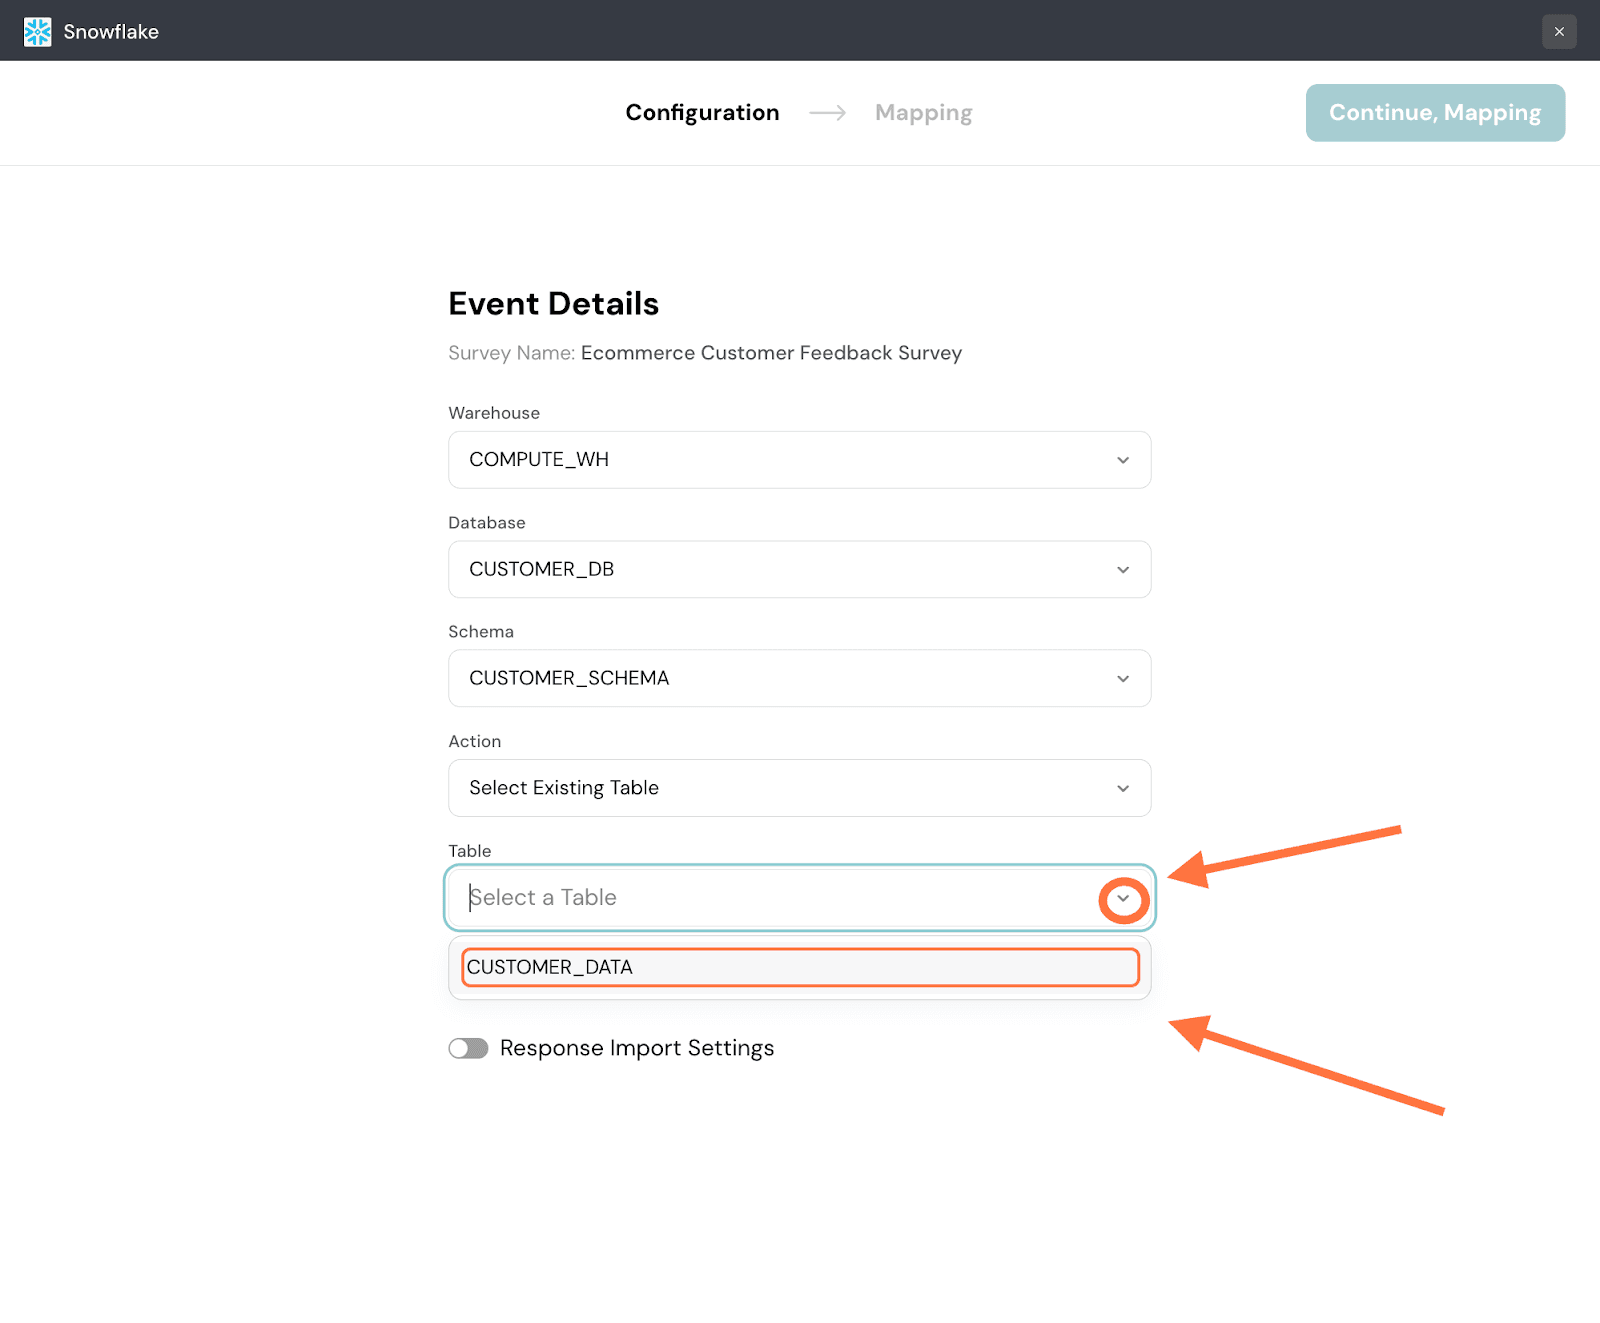
6. If required, you can also change the response import settings by clicking on the toggle. This decides the timeframe from which you want responses to be synced.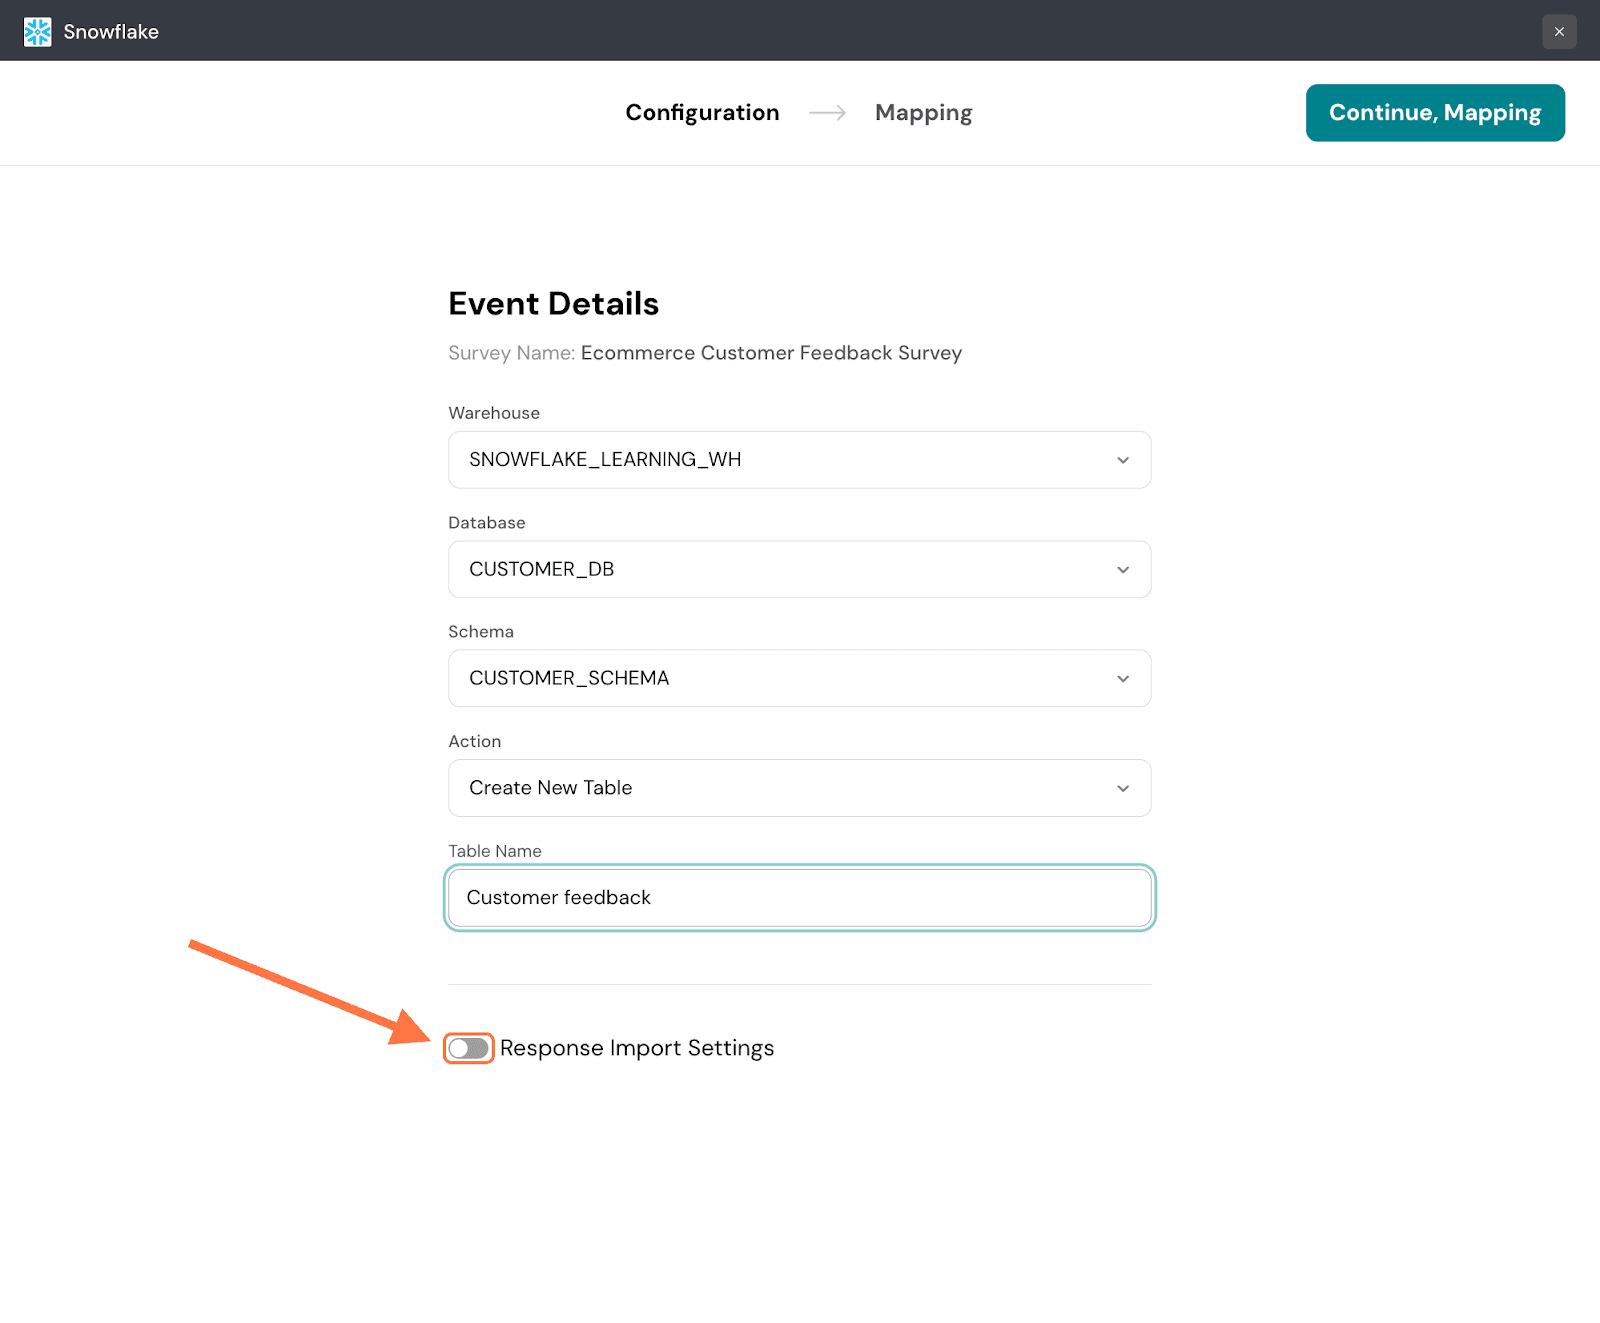
7. The default option is to sync all existing responses and new ones. But if you wish to import responses from a specific start date, hover over Specific Date. A calendar appears to the side.
8. Select your chosen date, then click Apply.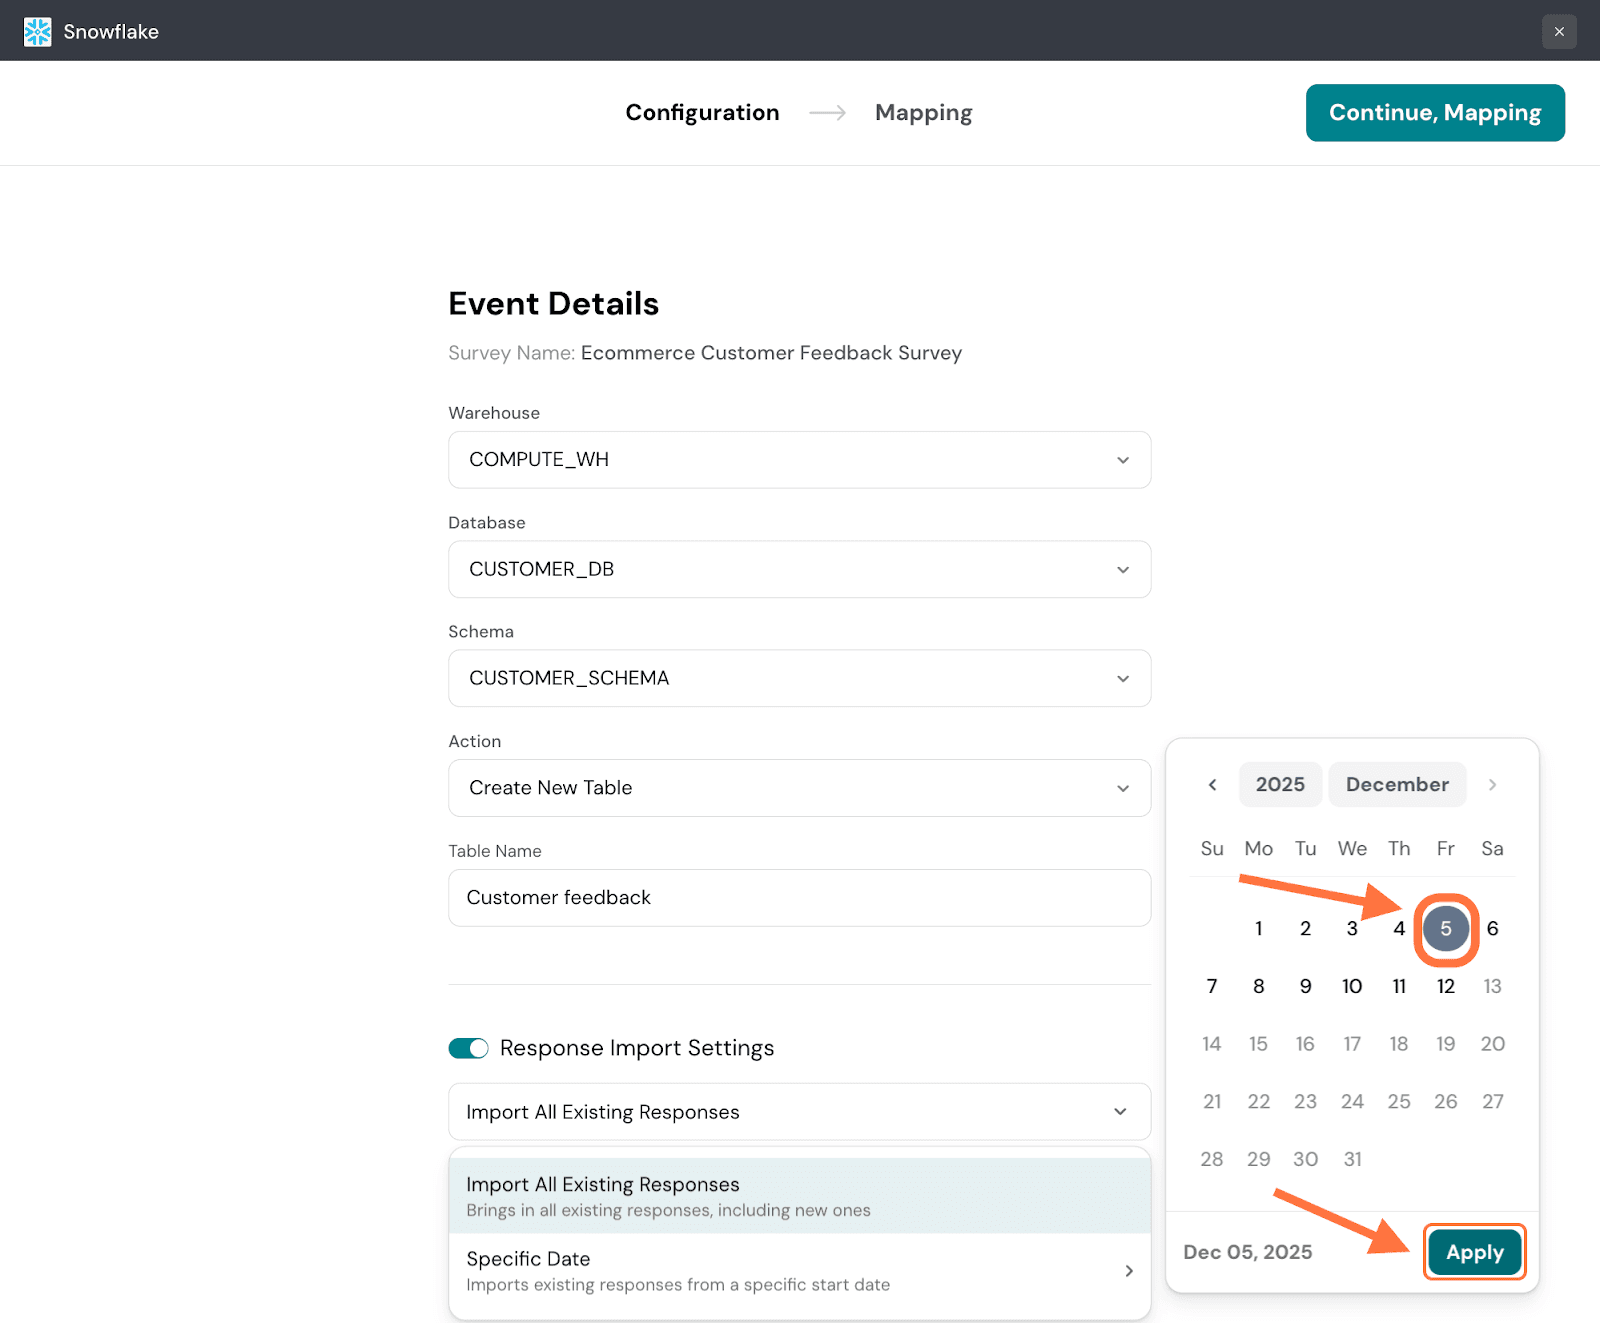
9. Next, click on Continue, Mapping.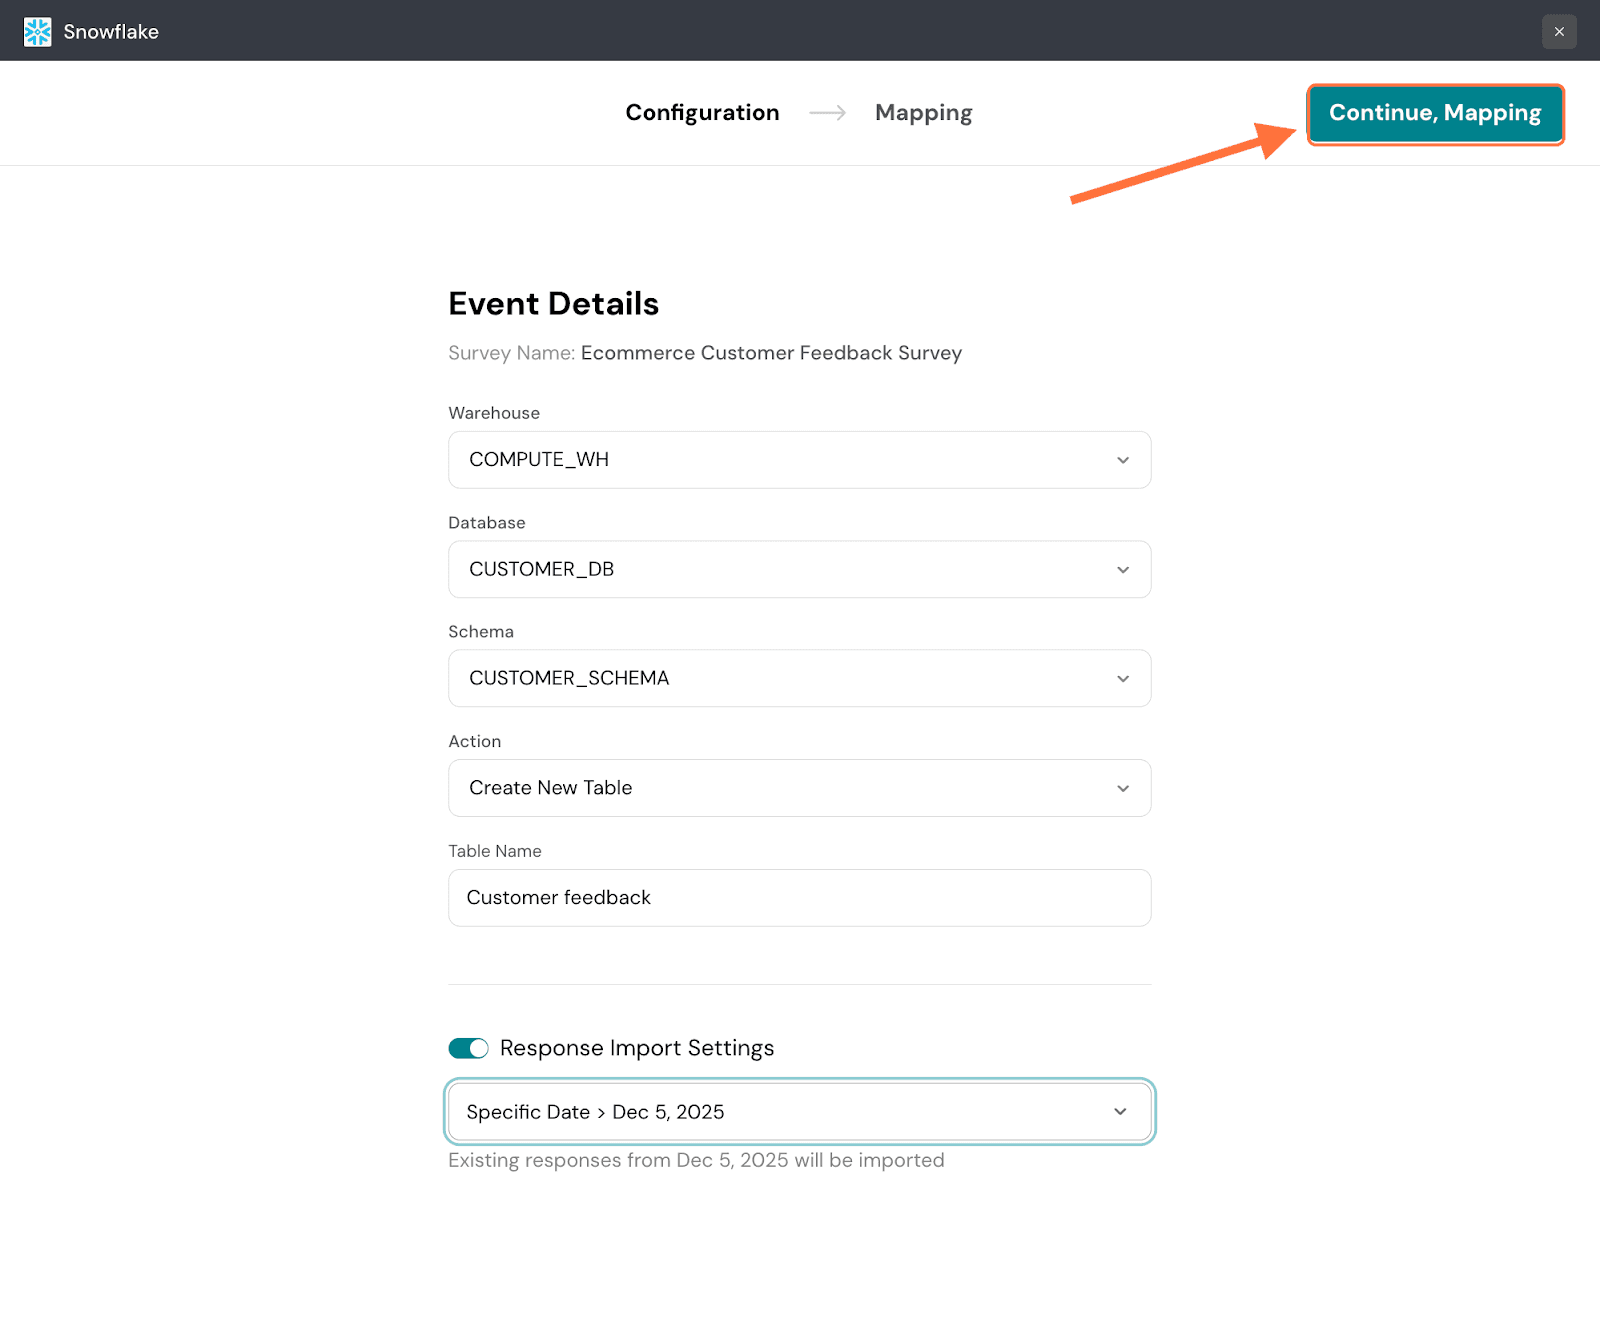
10. In the second section, you must choose what data to import. The default option is to import all existing data. You can see what types are being imported as well as the respective quantities. But if you only want to import specific data, click on the check-box for Send selected data.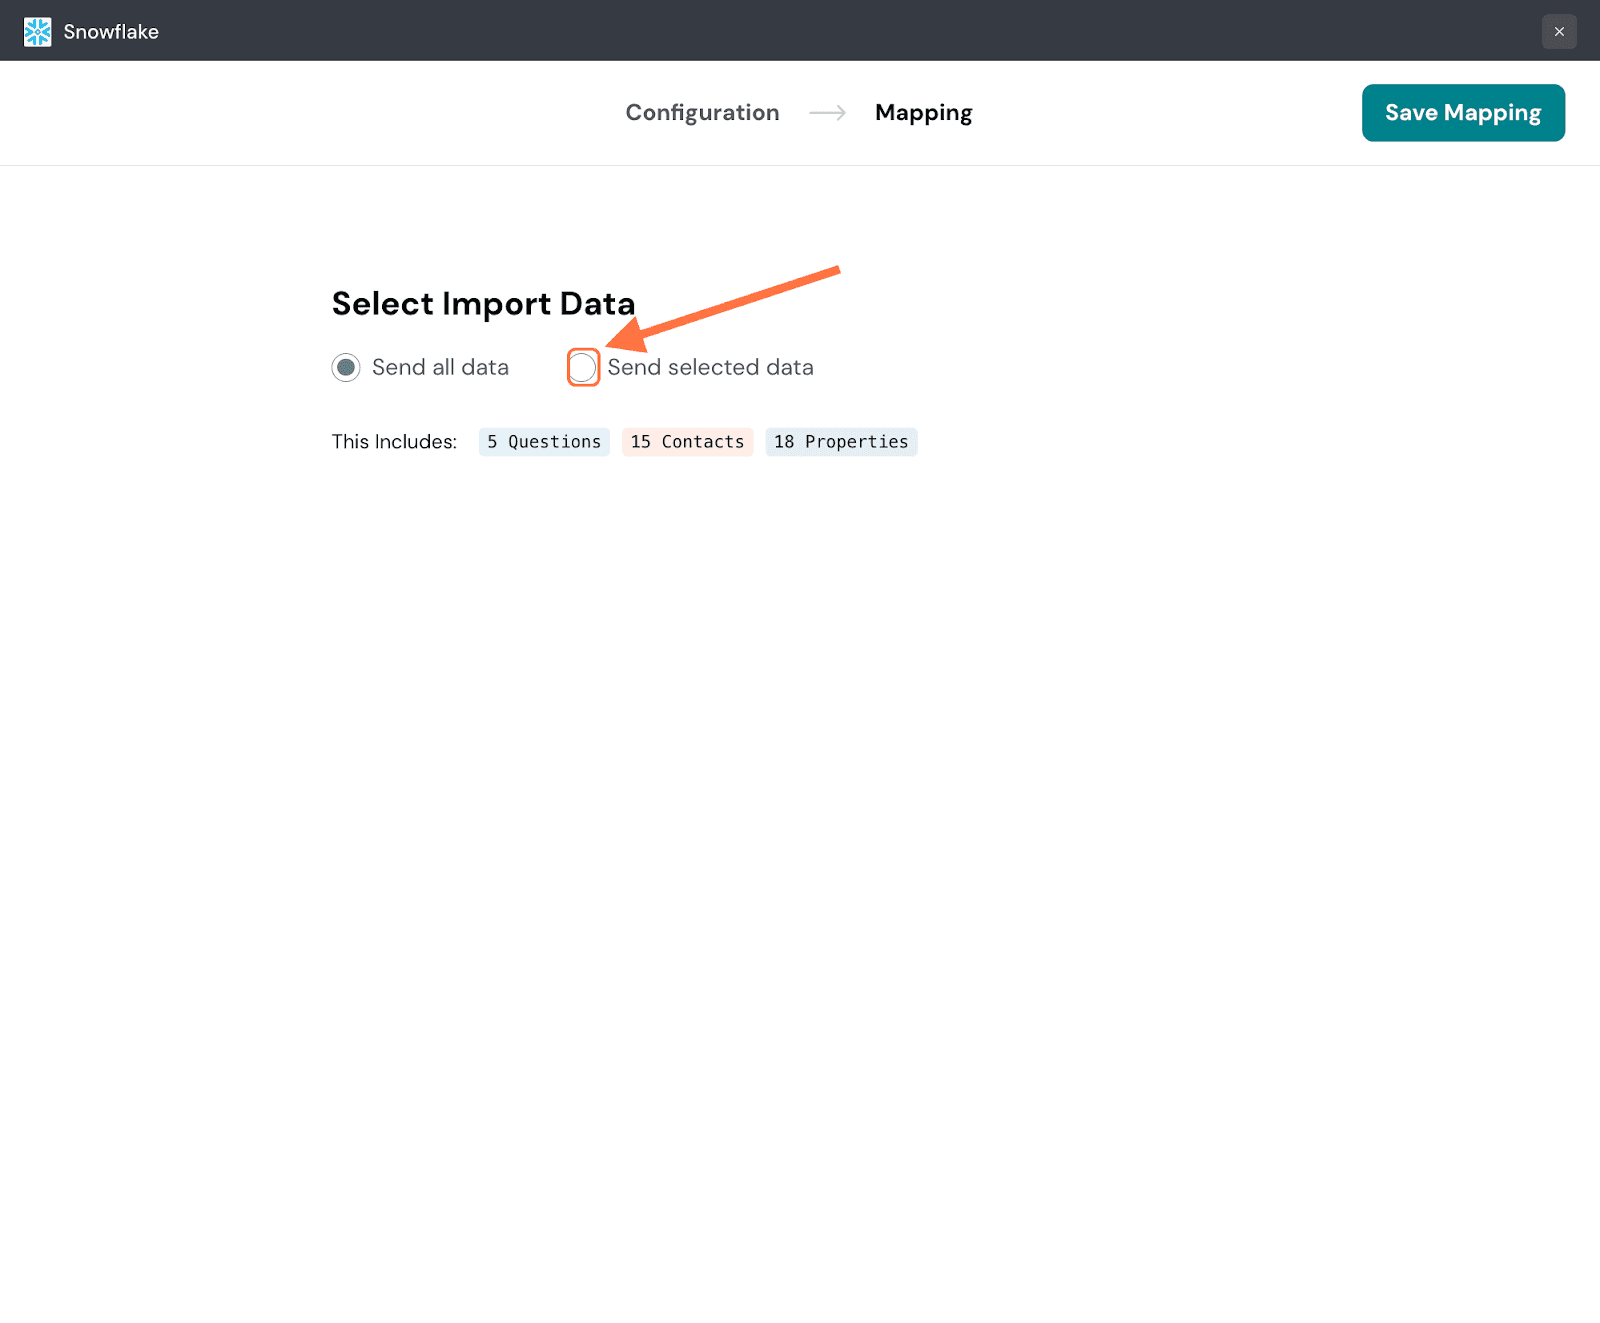
11. Here you will see each data type presented as a tab with its own checklist of individual items. The default tab is the Questions tab. Use the search box to find items, then select the check boxes. Accordingly the number of items selected will also appear in the tab.
12. When you’re done selecting the items you want across each tab, click Save Mapping.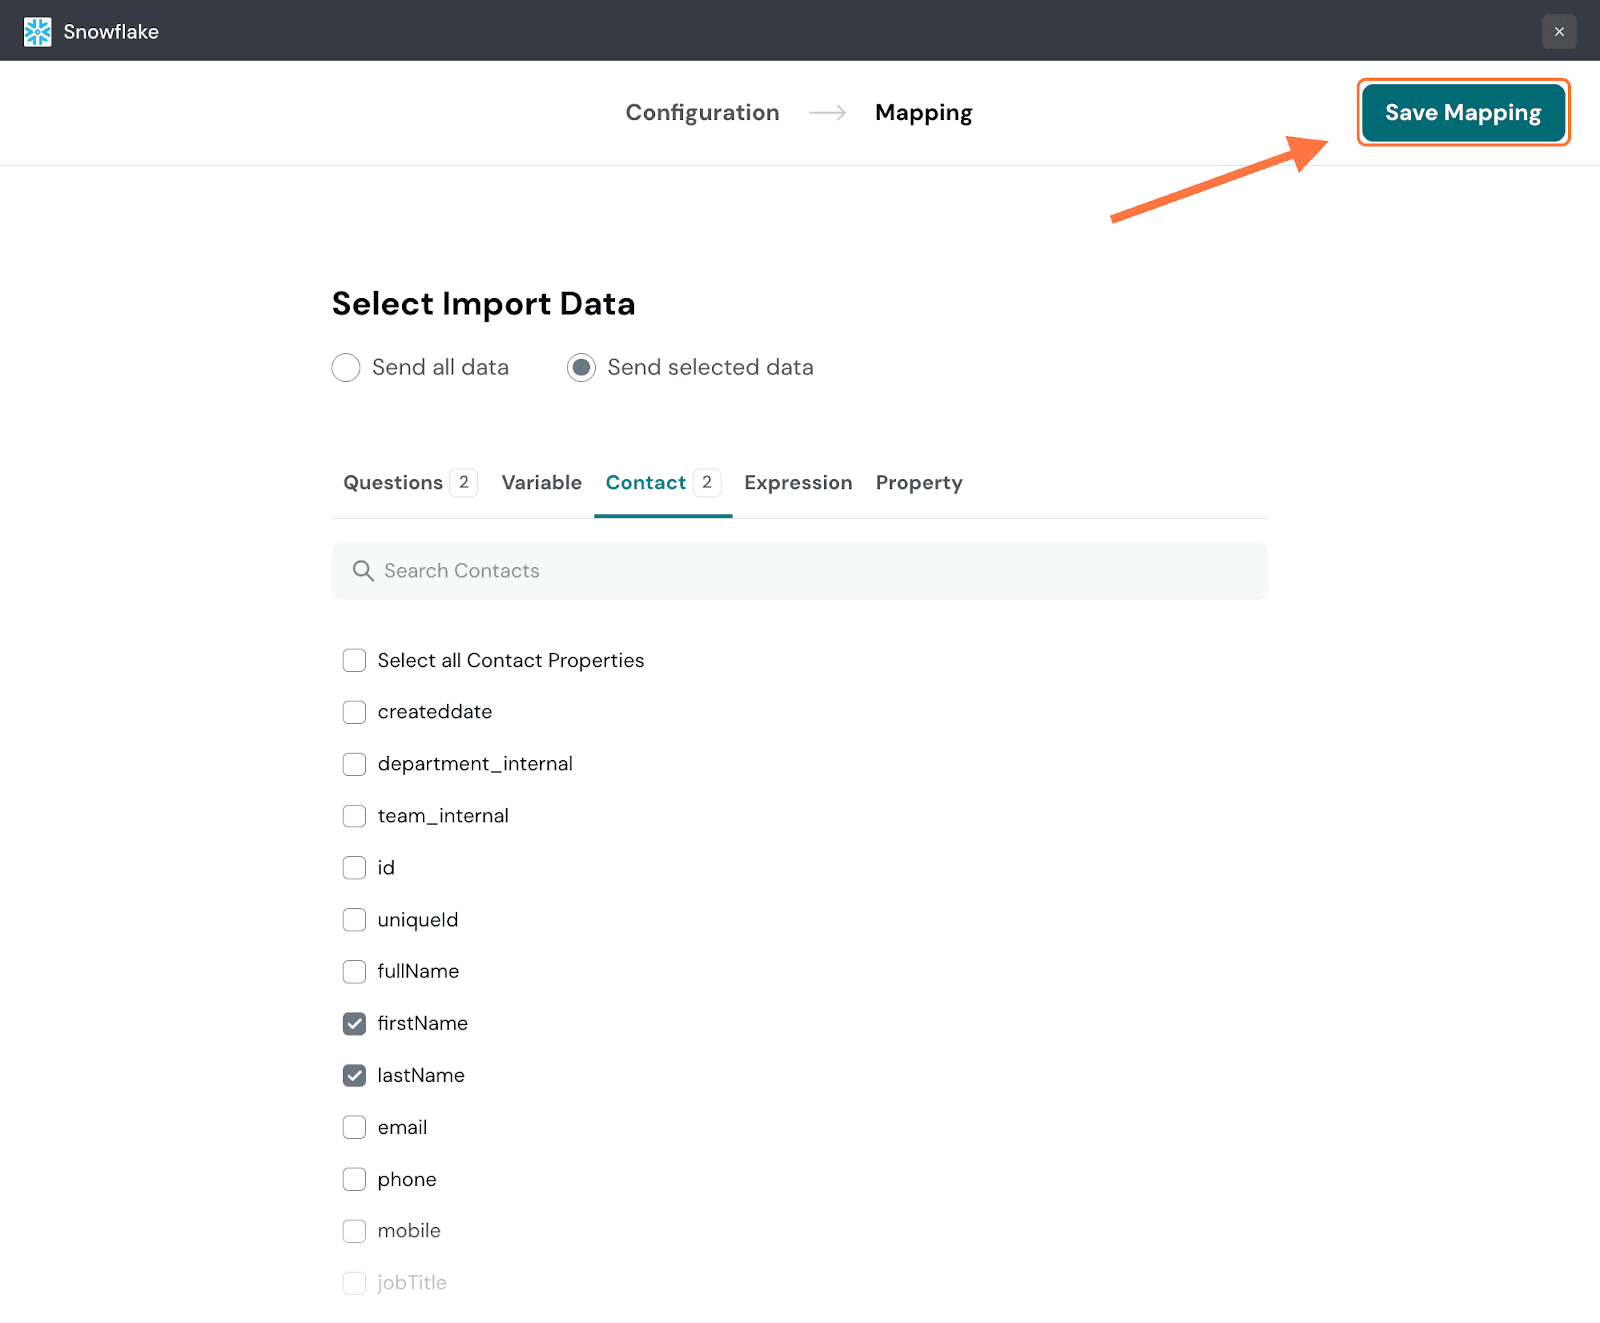
13. Type in a name for the mapping and click Save Mapping.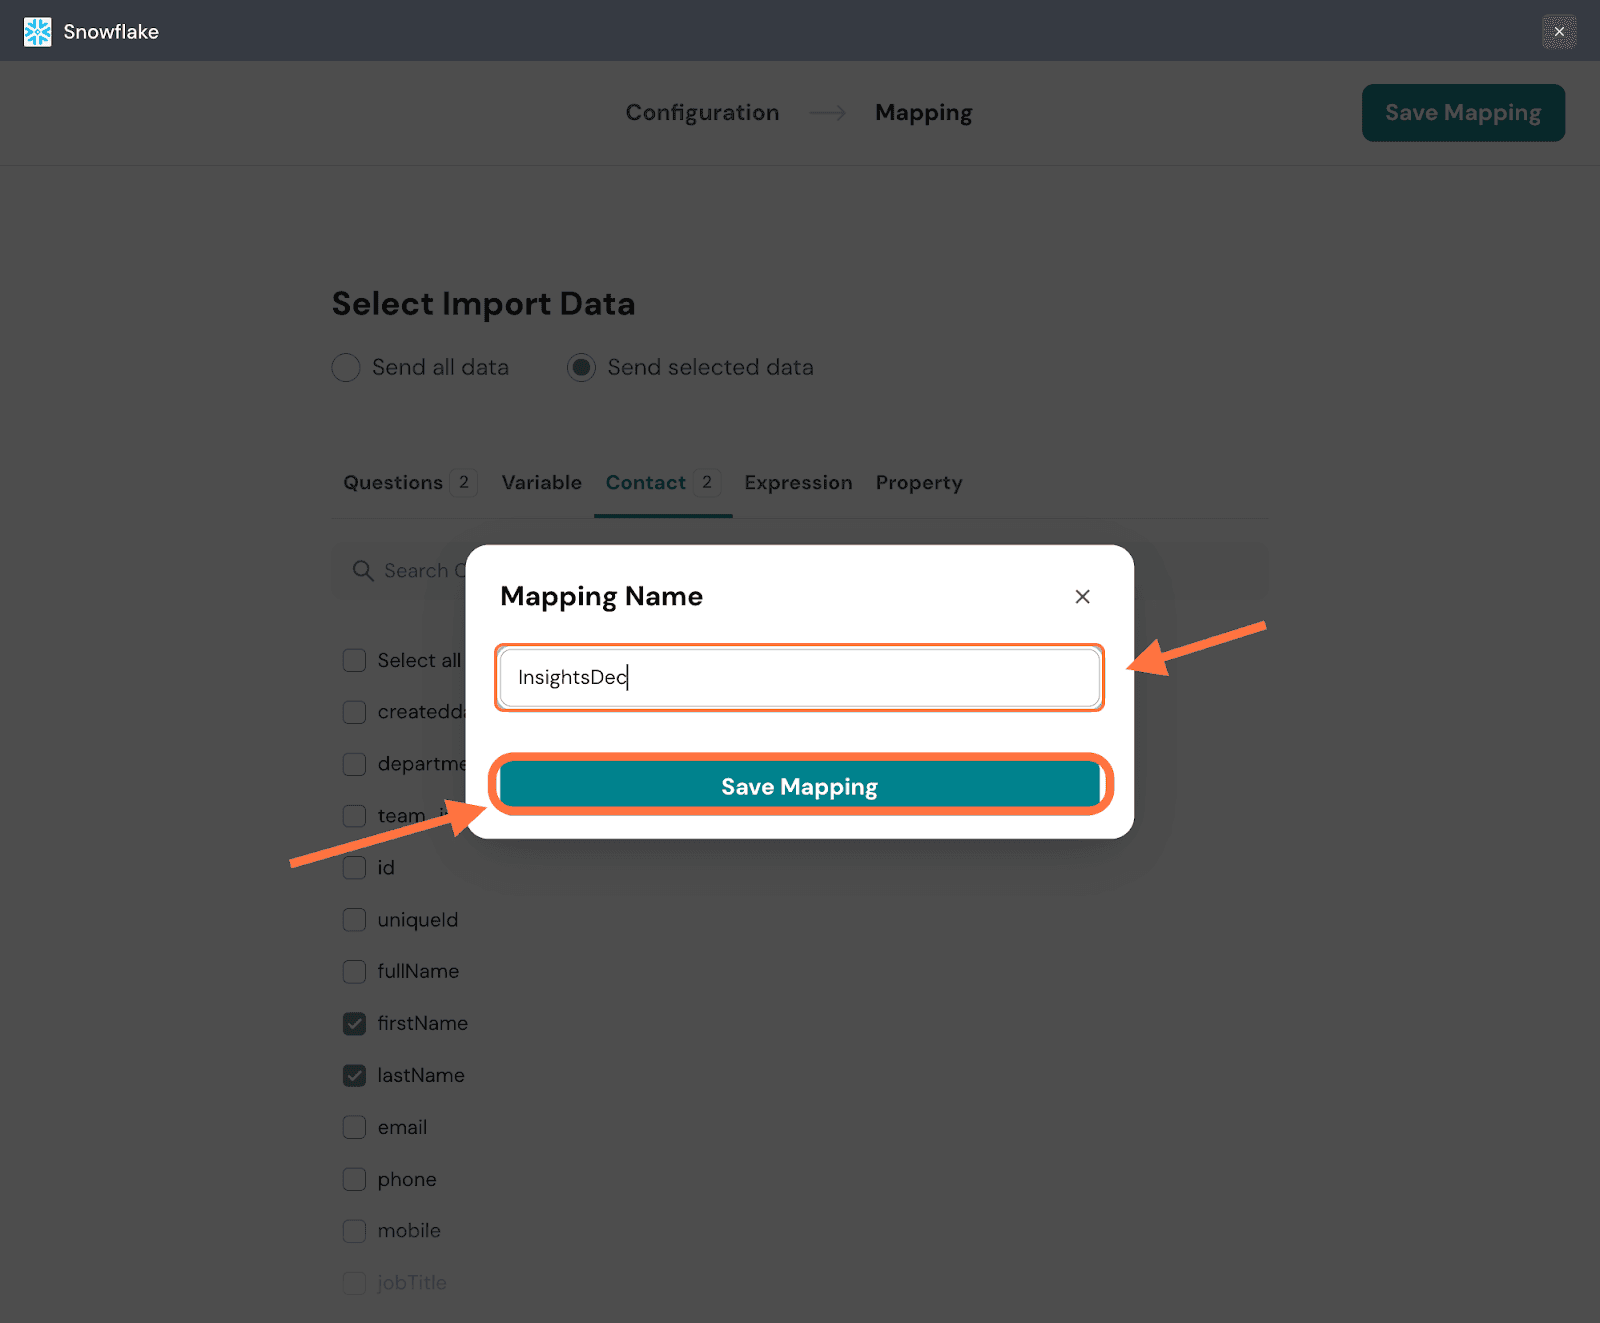
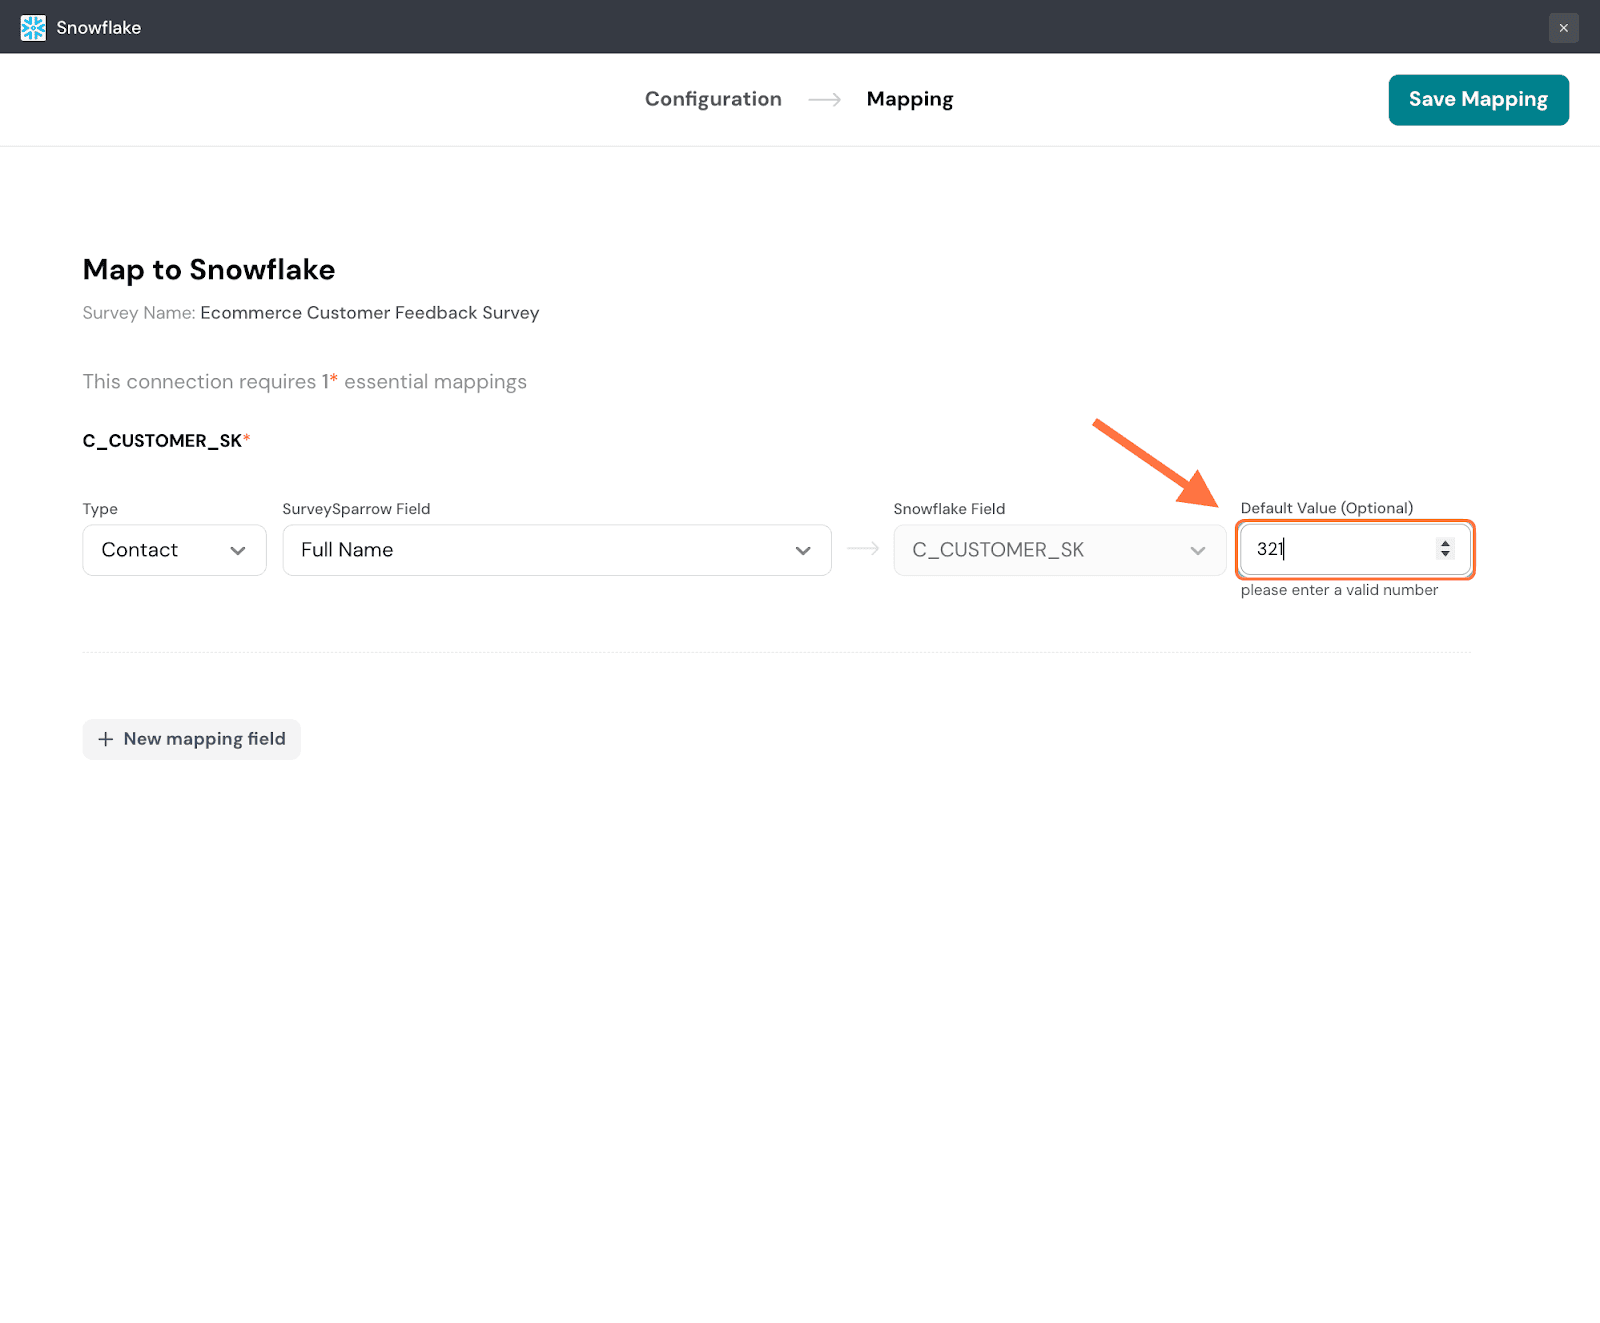
Note: If you chose to save the mapping in an existing table instead of a new table, the second section changes. In addition to choosing what data types to import, you must also choose the table fields where they must be synced to.
The first data item will be synced to a predefined field in Snowflake that cannot be changed. But you can change the data type and the specific item (or field in SurveySparrow), by clicking on the drop-down menus. If the data item for a specific response does not have any value, you can also choose to add a default value (must be numeric).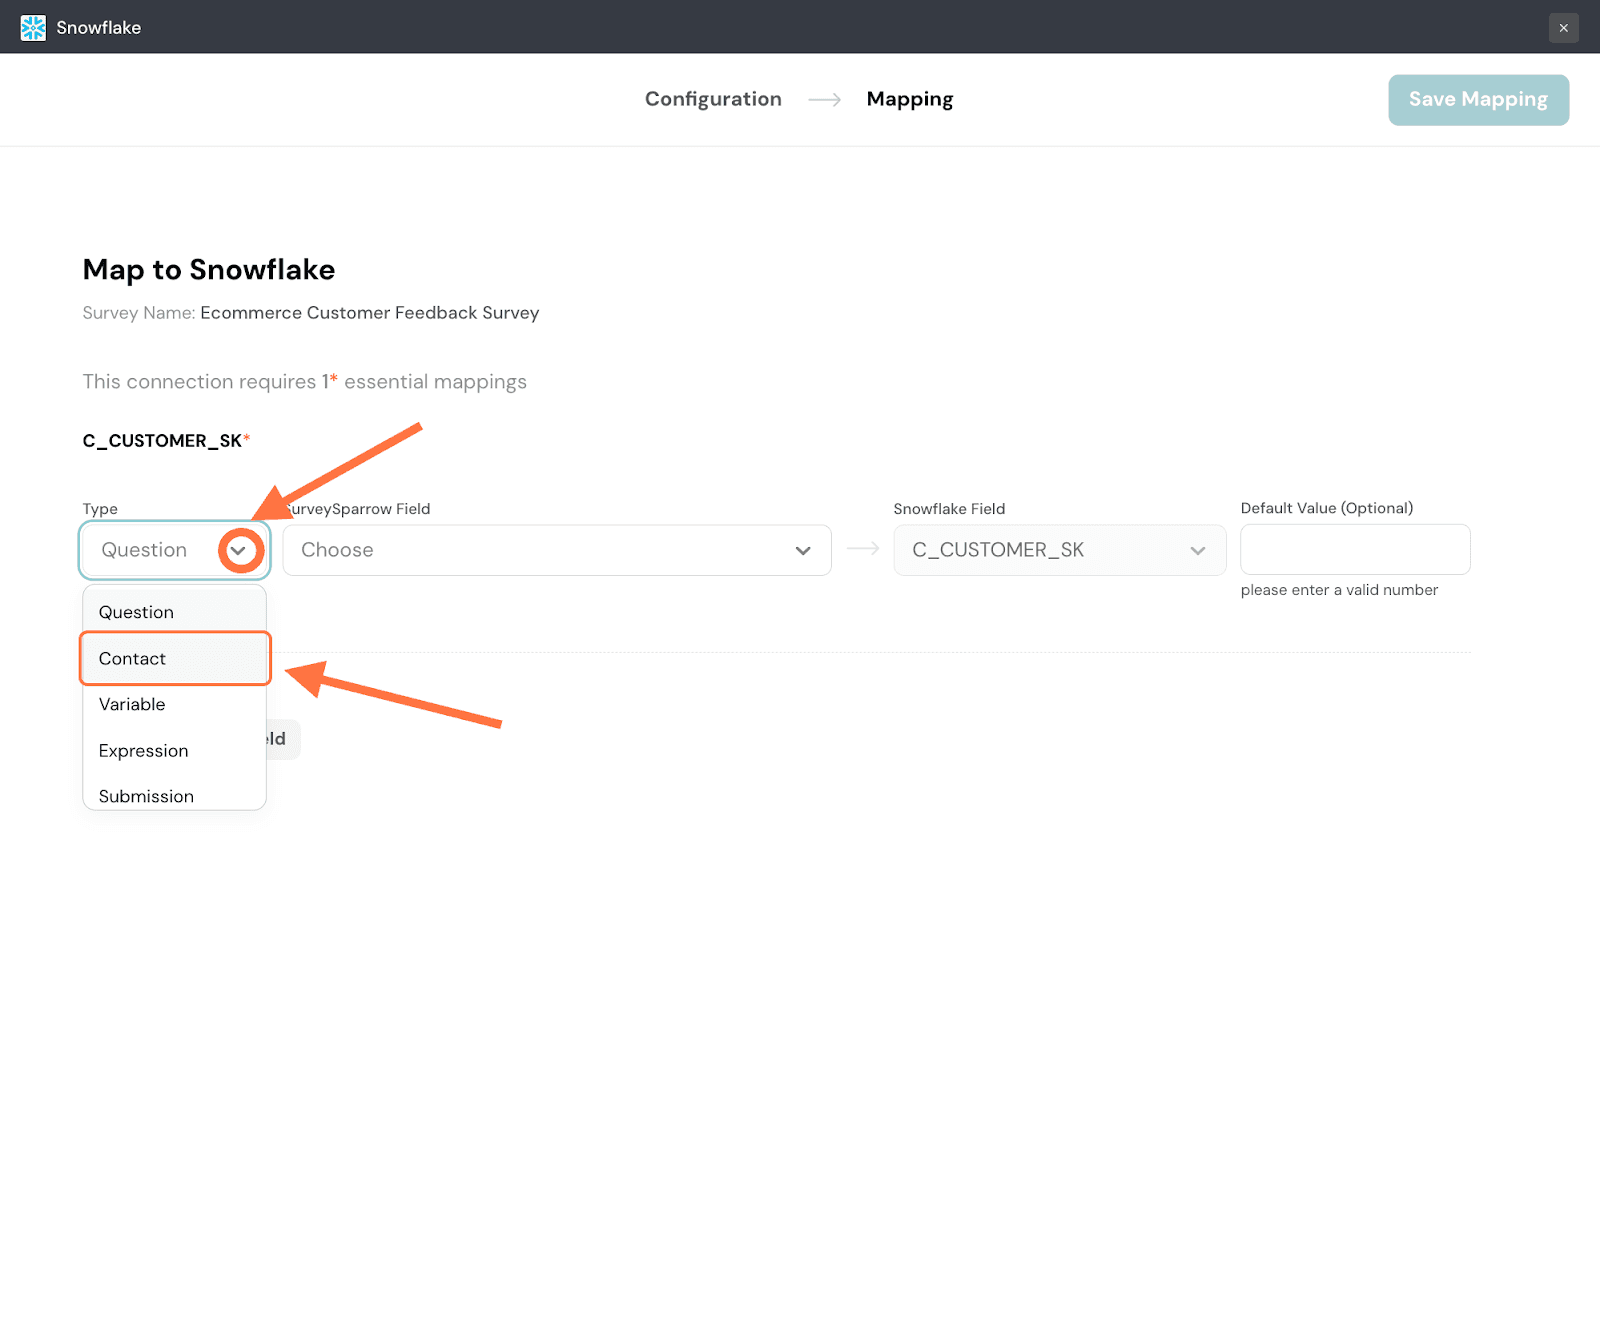
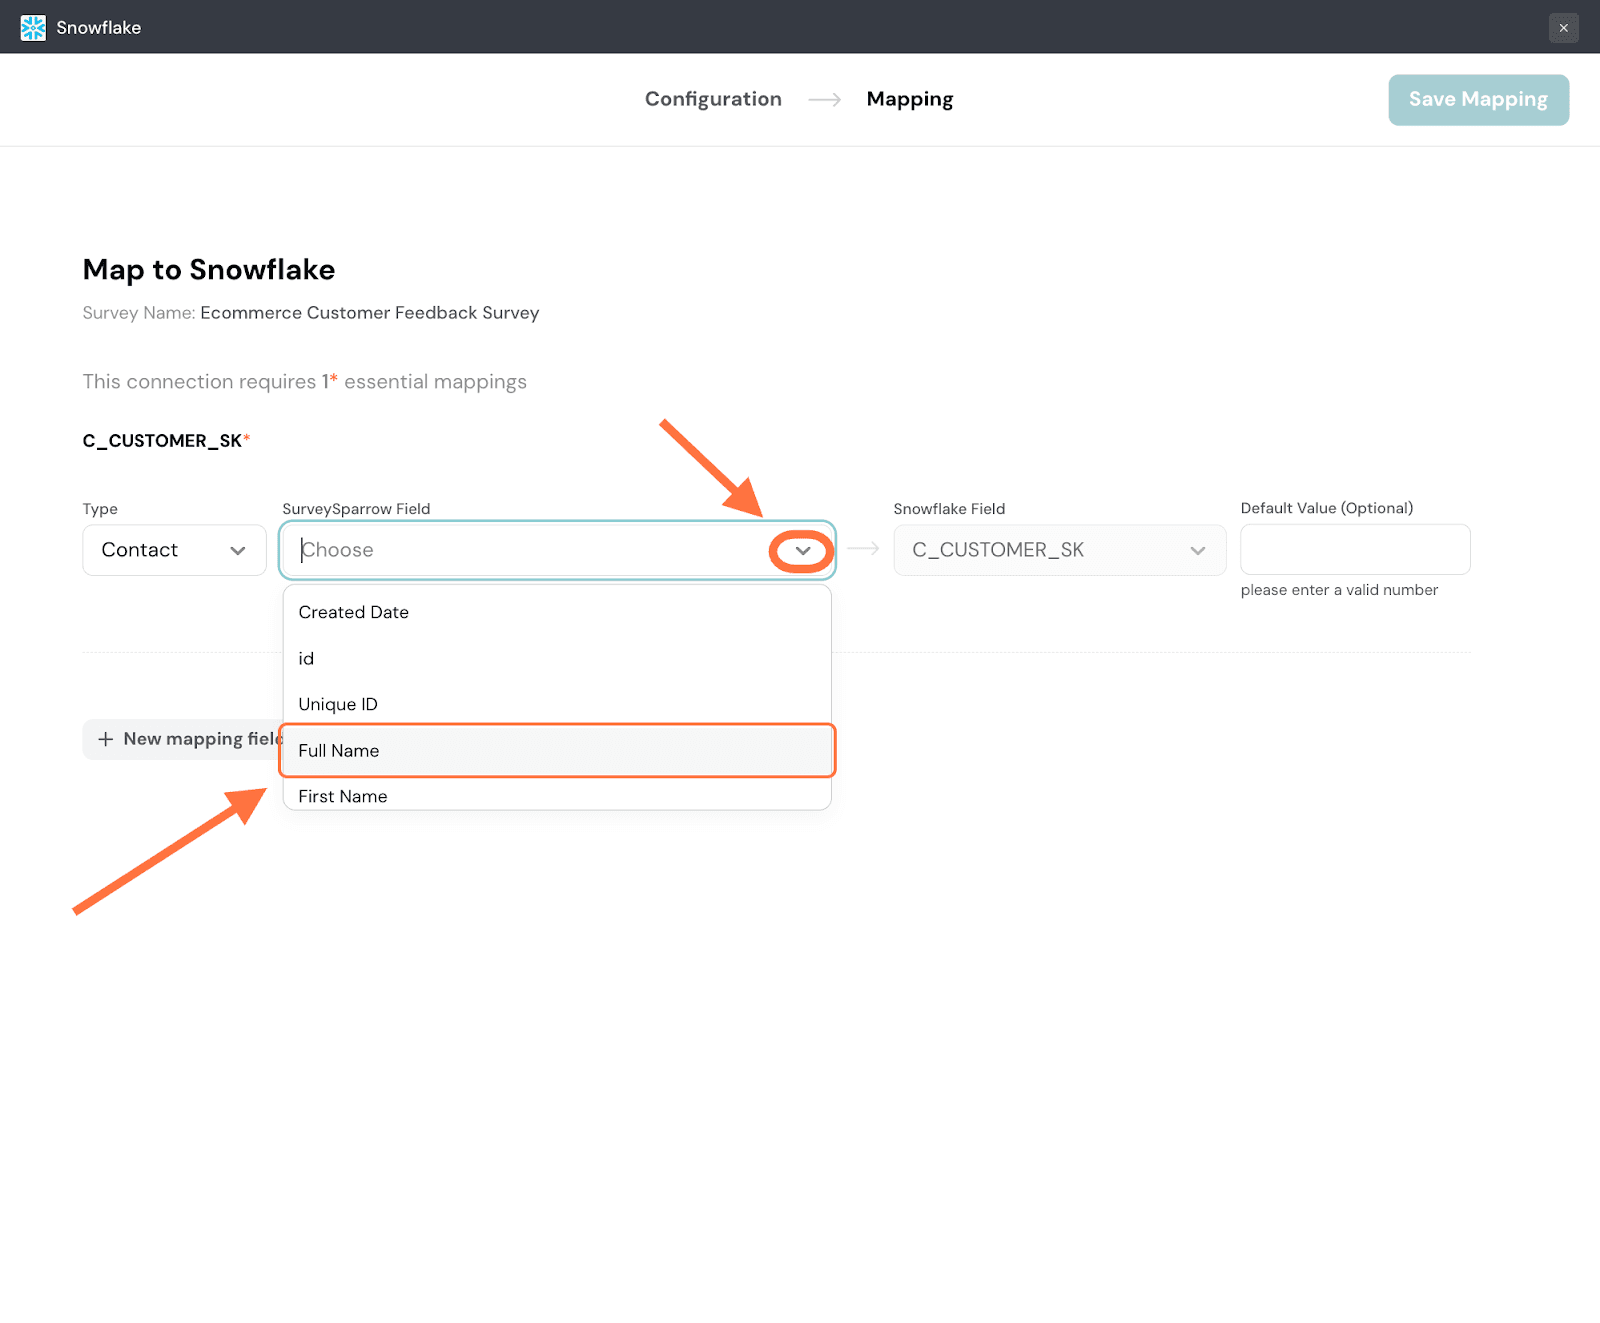
To import additional data items, click on New mapping field and repeat the same steps as above. Remember that for new mappings, you must also choose the Snowflake field.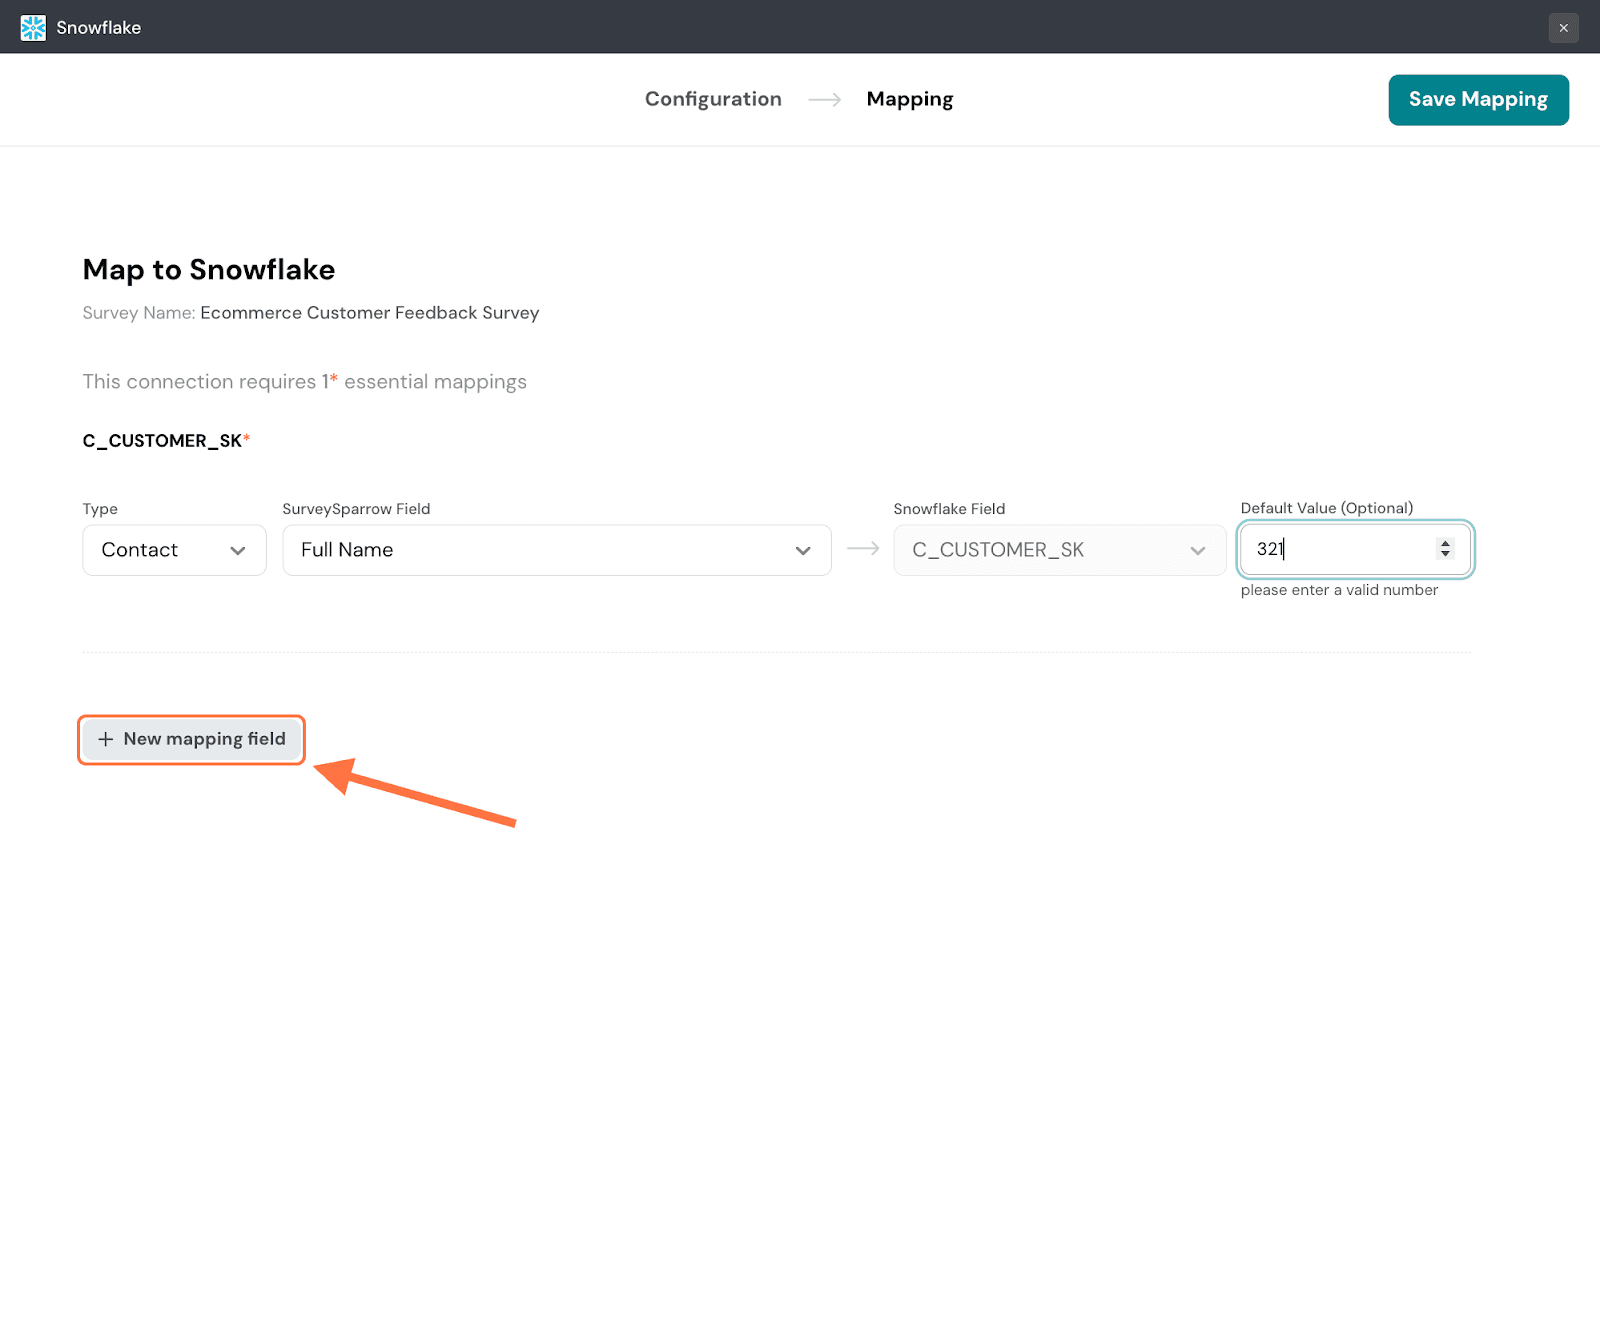
Once you’ve added all the necessary mapping fields, click Save Mapping.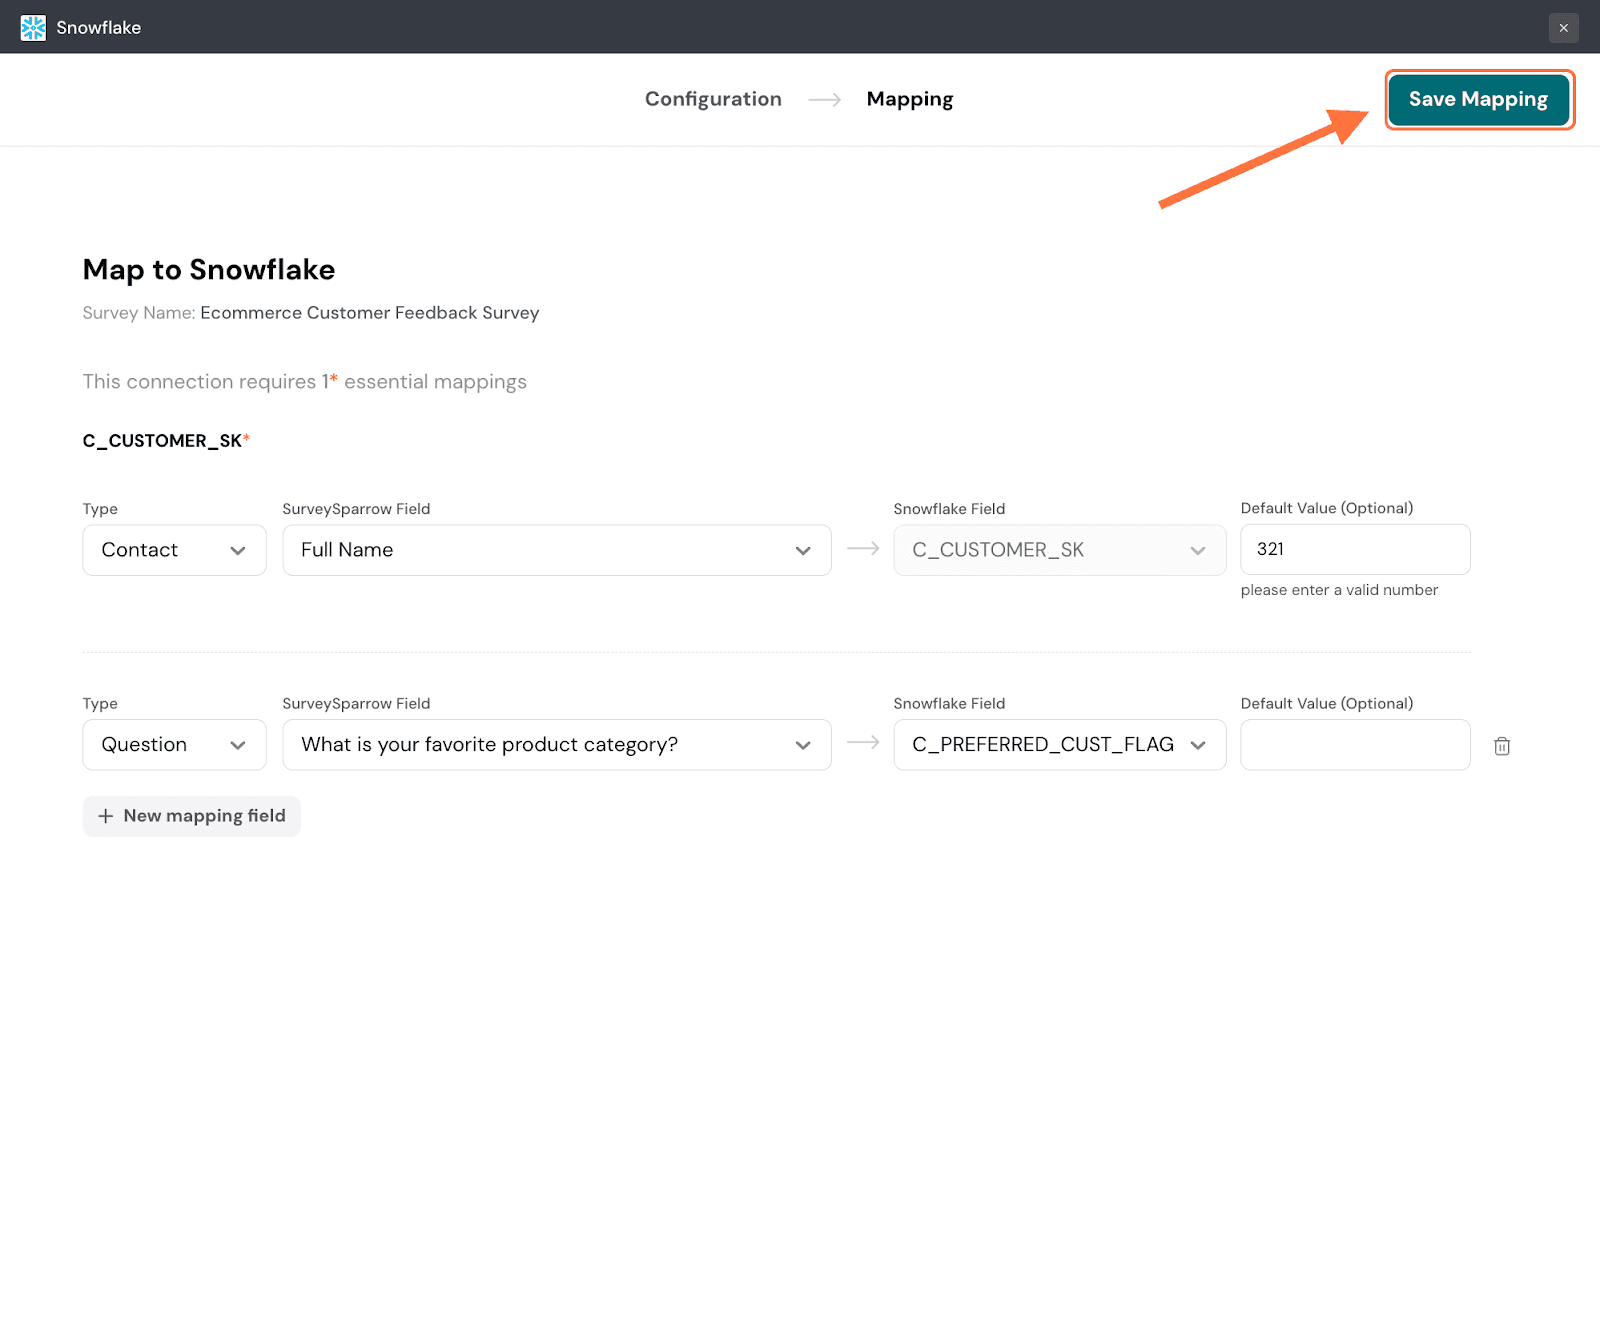
Enter a name for the mapping and click on Save Mapping.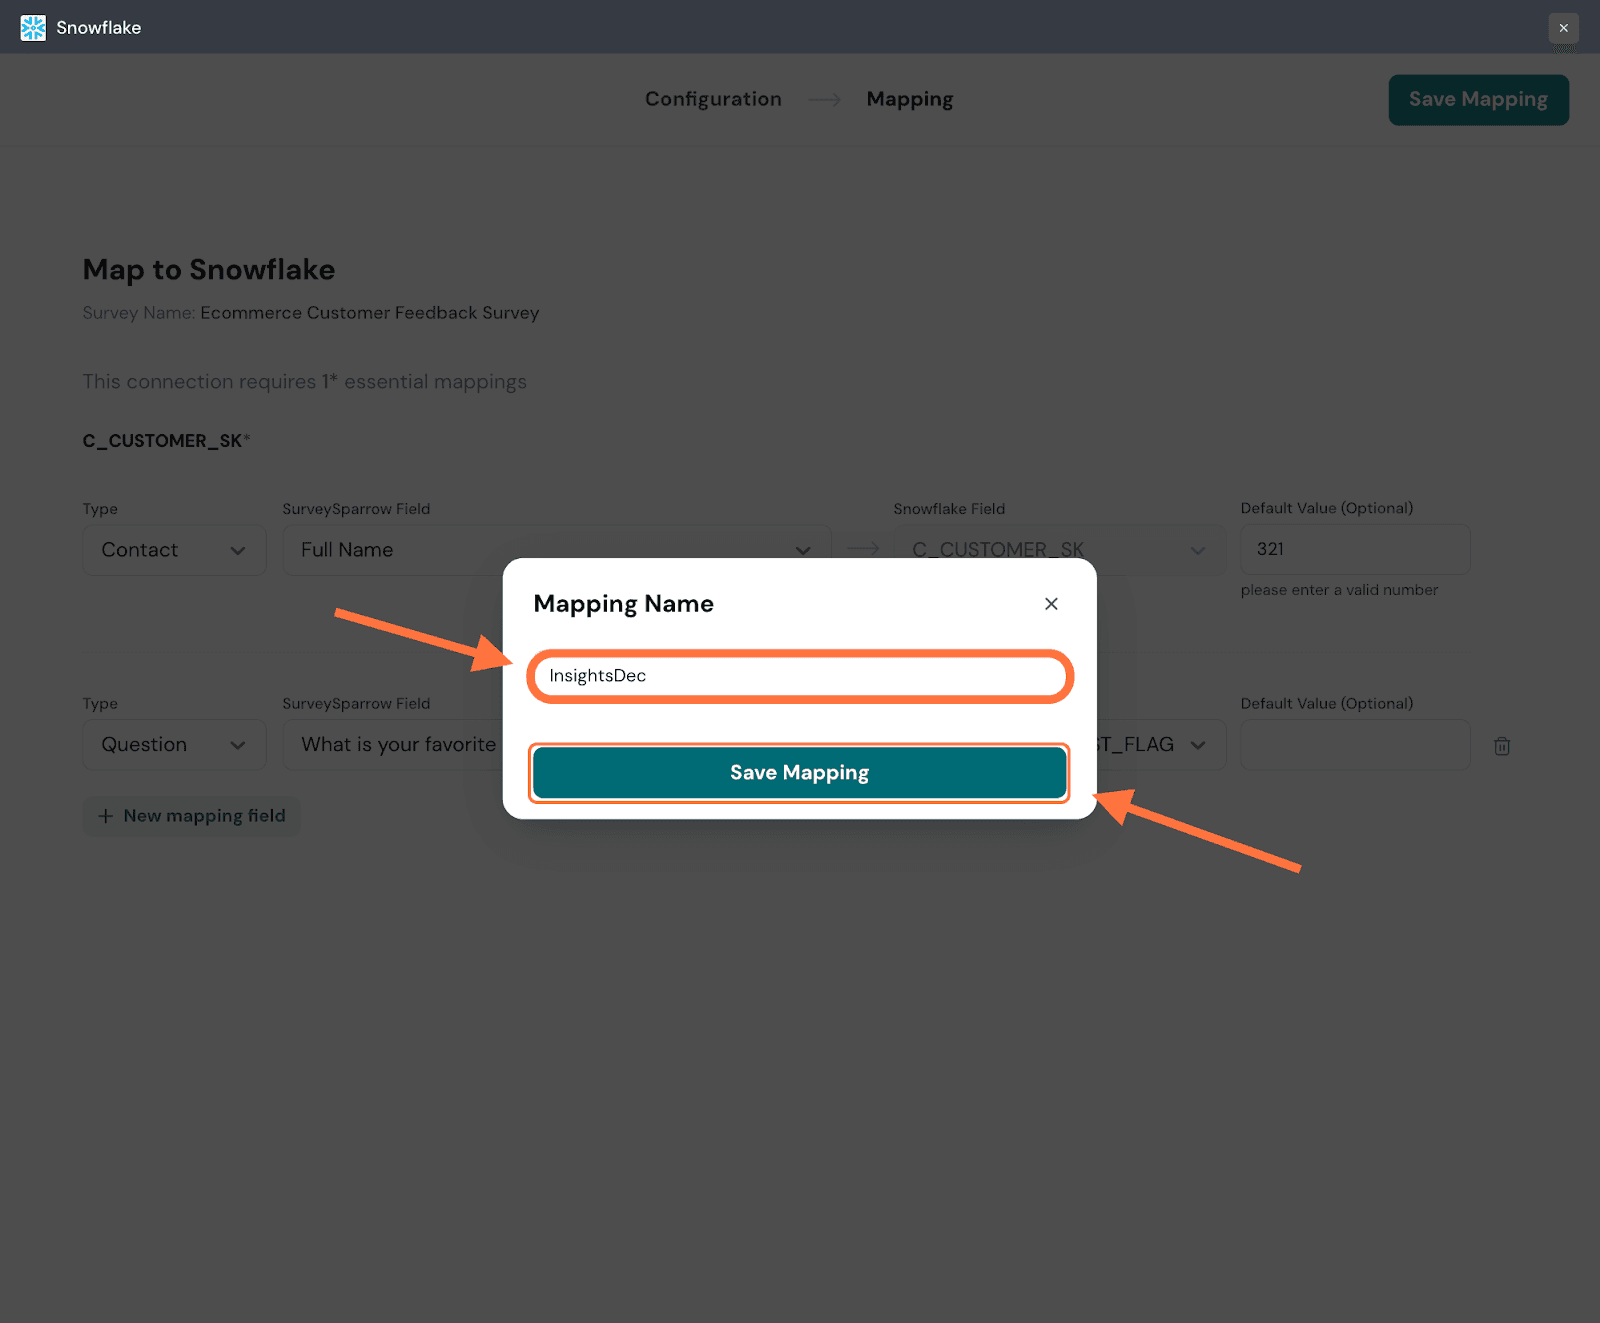
14. Now the mapping has been saved. To pause the mapping, click on the green toggle button.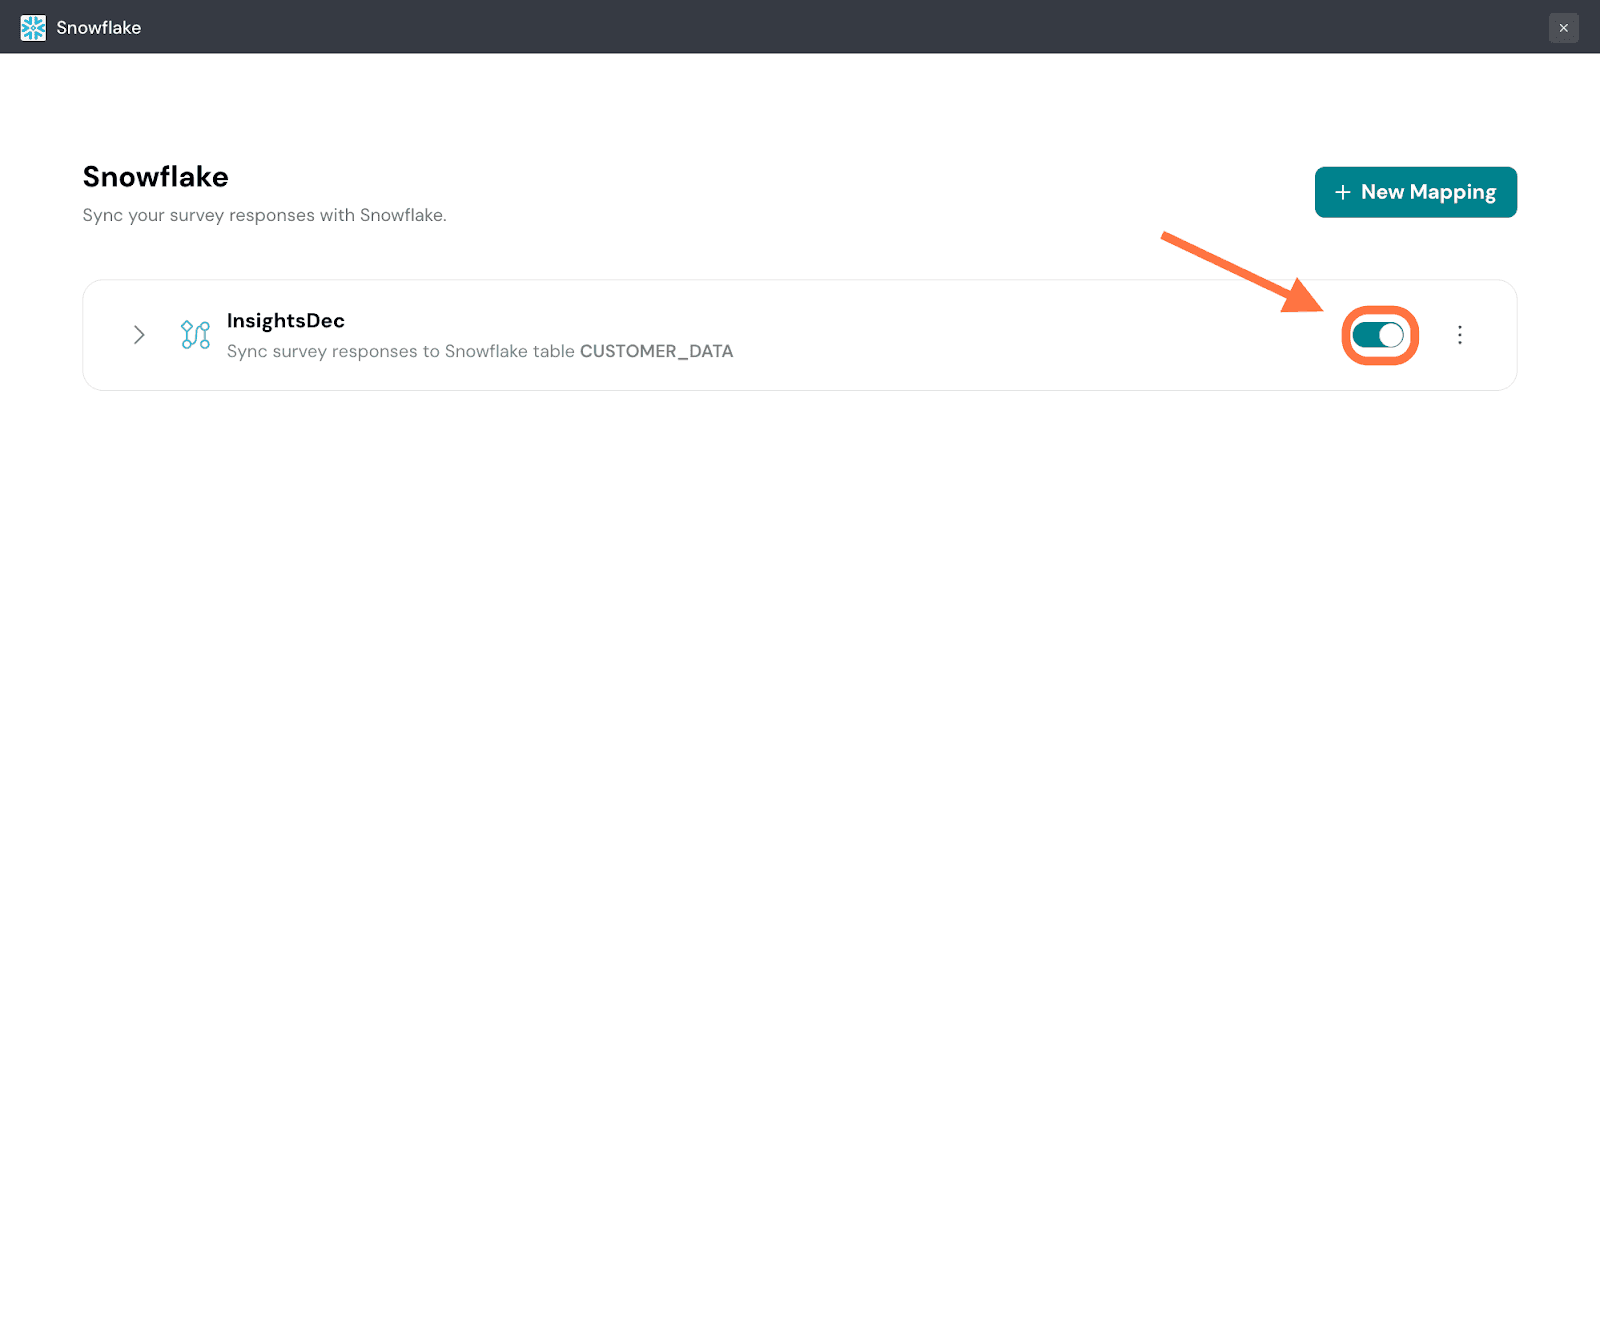
Note: Any responses that come in while the mapping has been paused will not be synced when it’s switched on.
15. To view the specific details of the mapping click on the arrow on the left. To edit the mapping, click on the edit message at the bottom of the expanded card.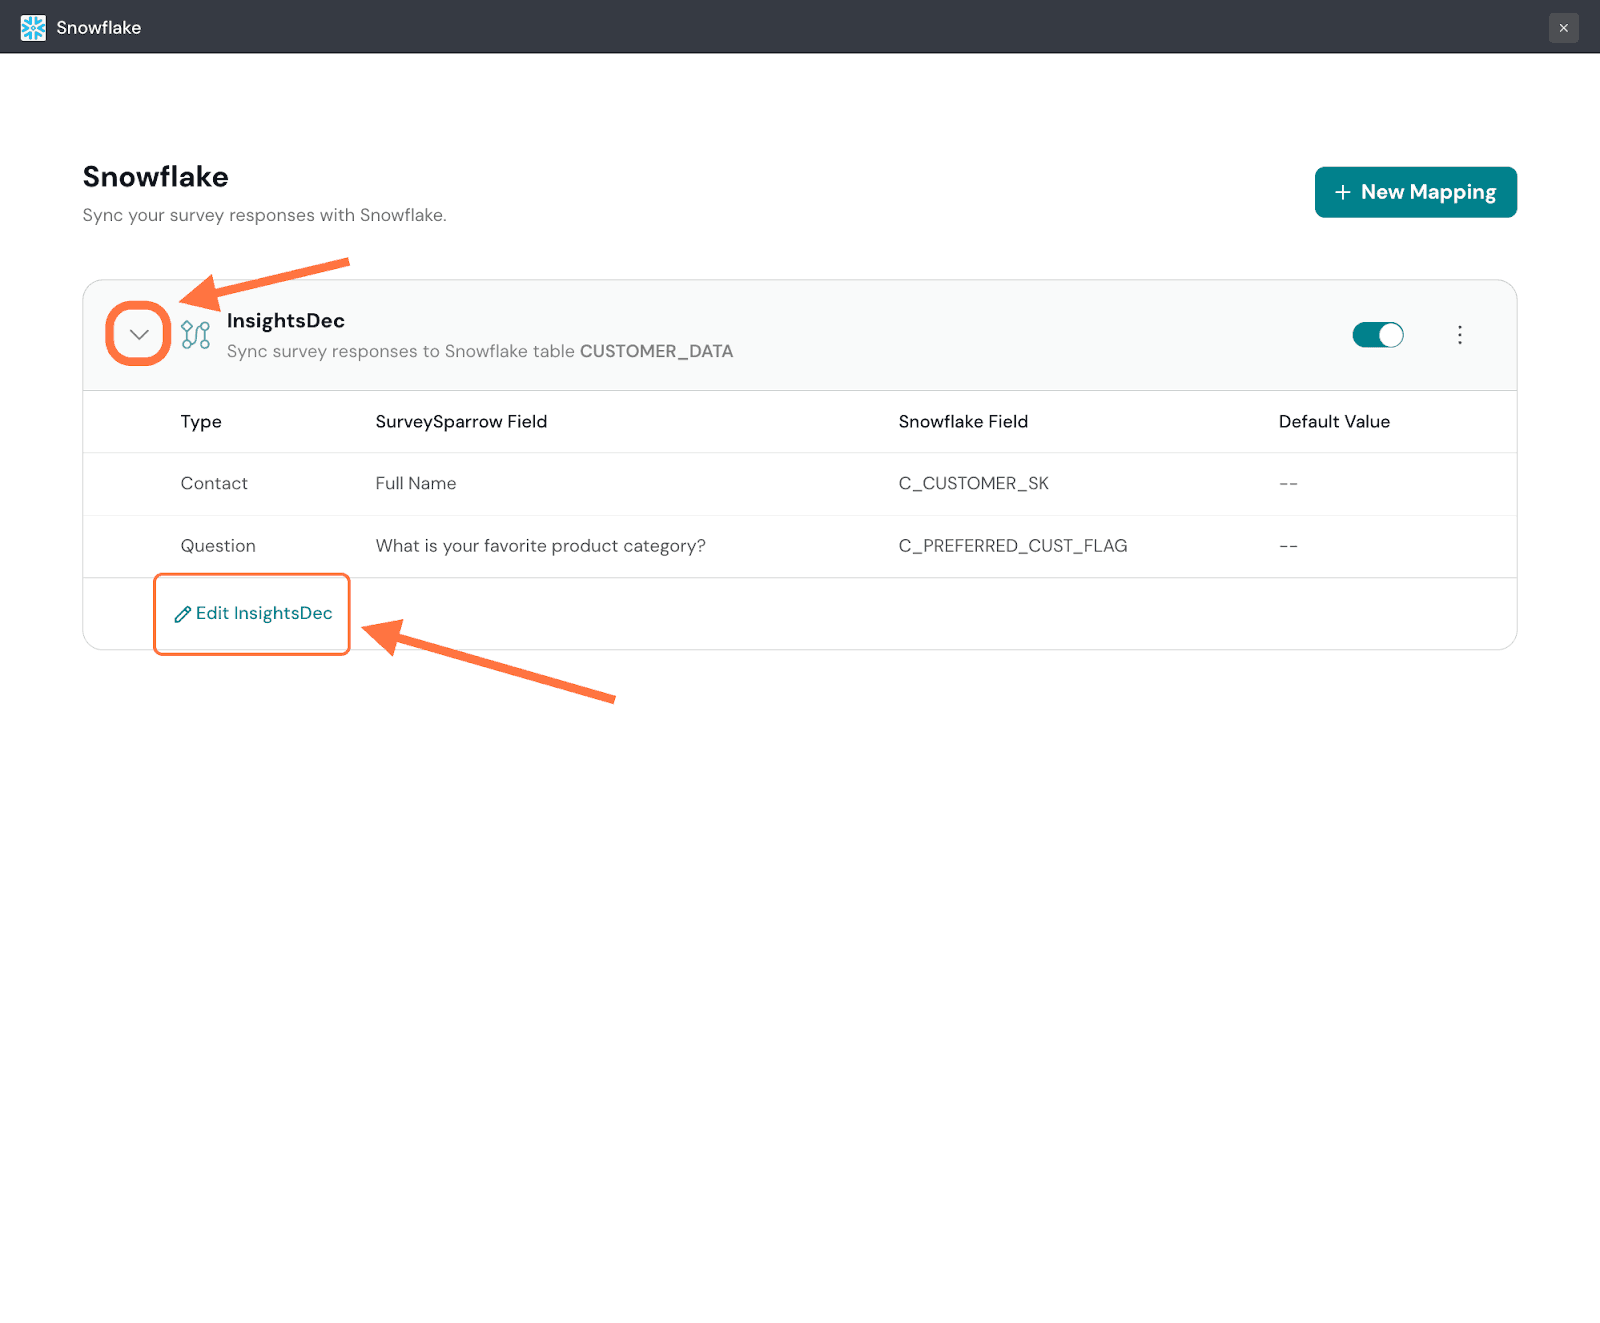
16. To create a new mapping, click on New Mapping.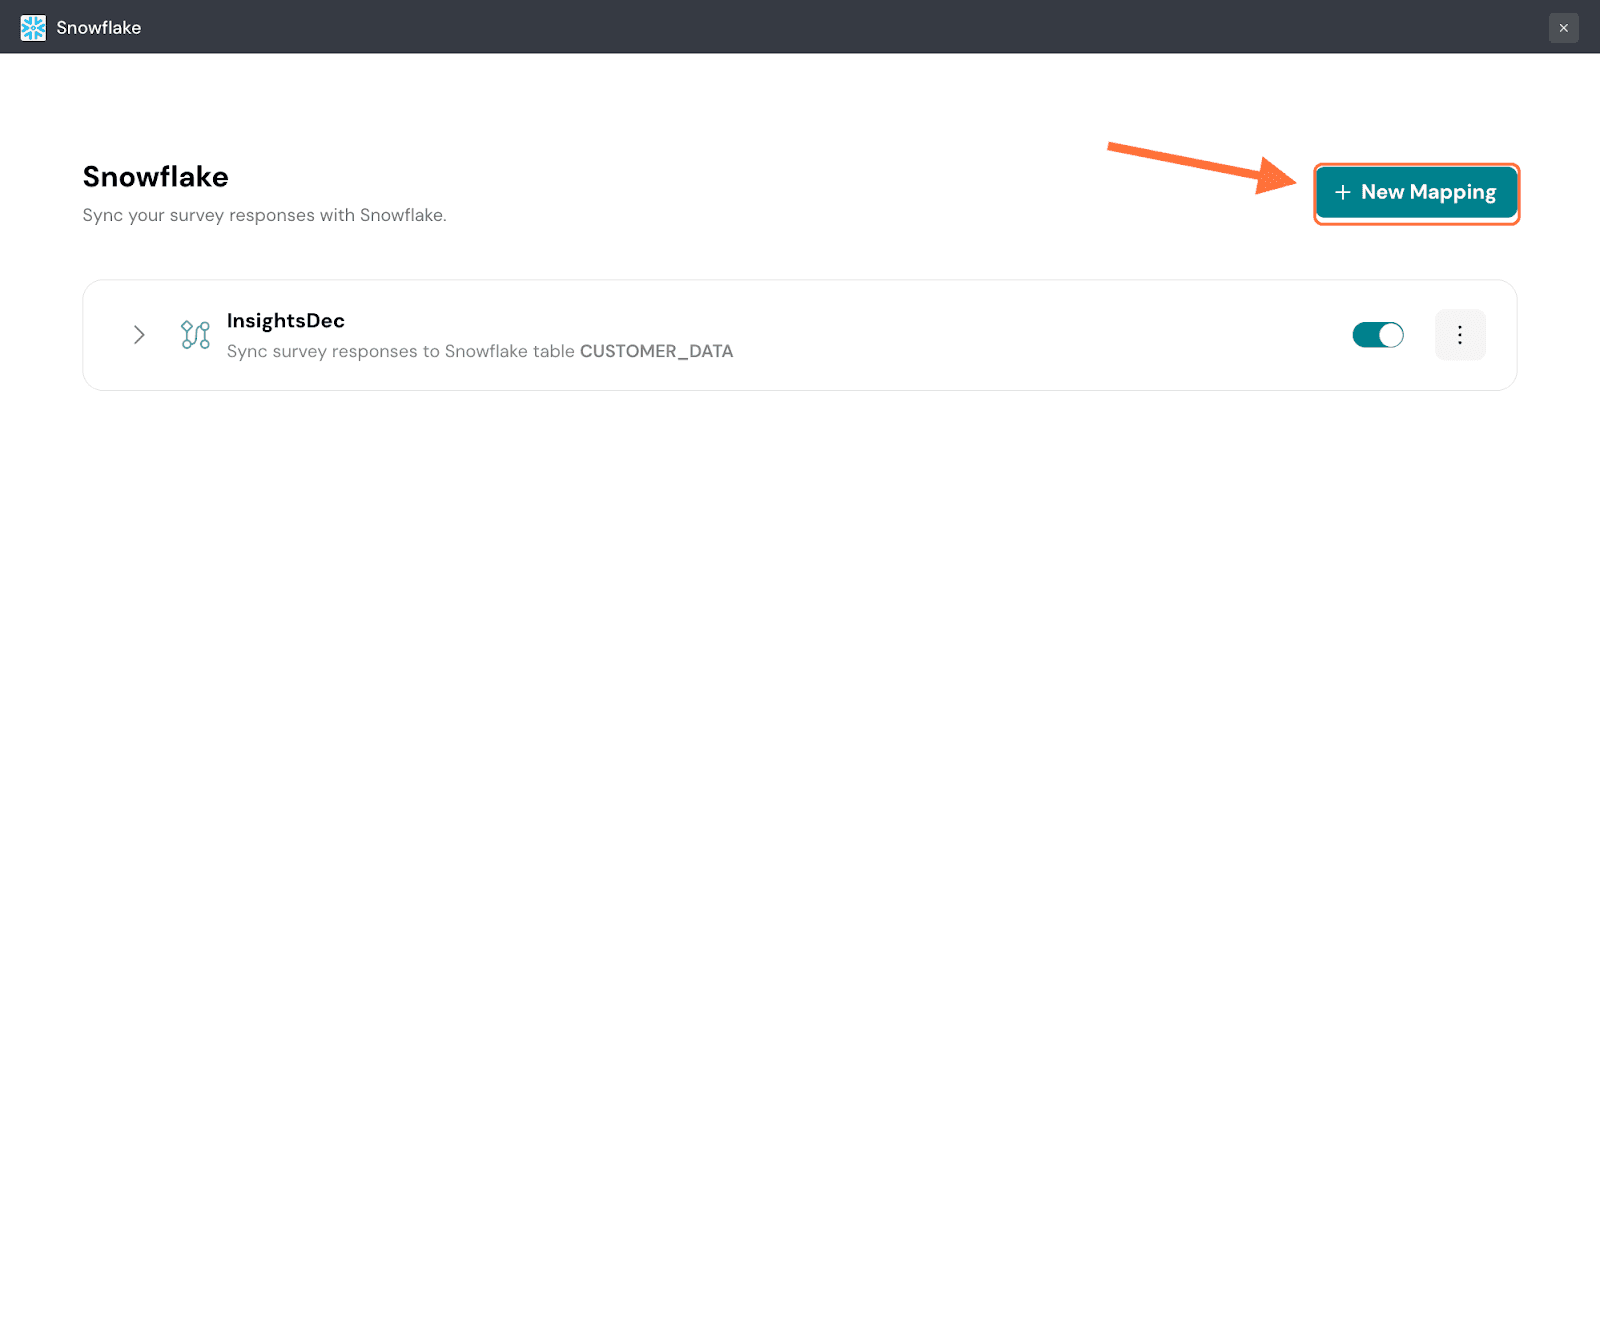
Note: To delete the mapping, click on the three-dot horizontal icon on the right, then select Delete from the menu.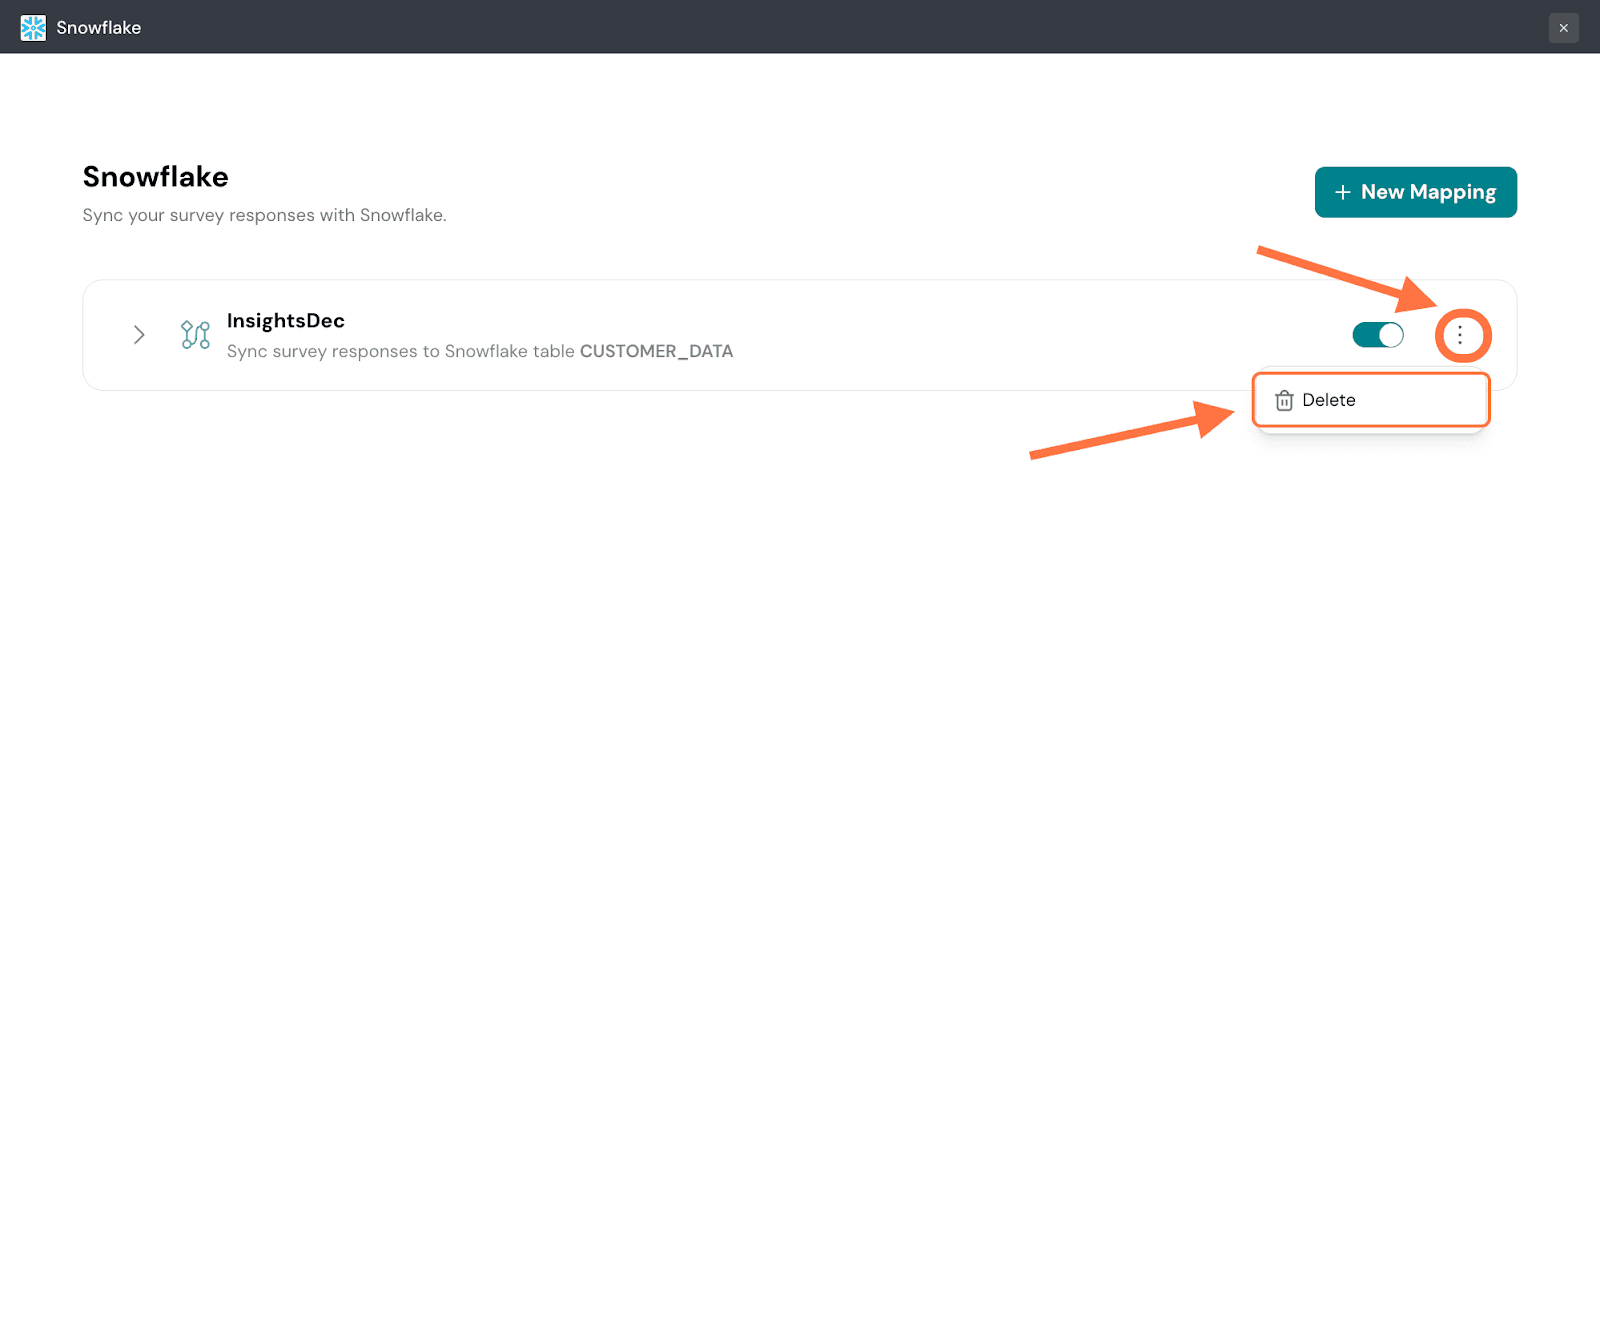
A confirmation pop-up will appear. To proceed, click on Confirm.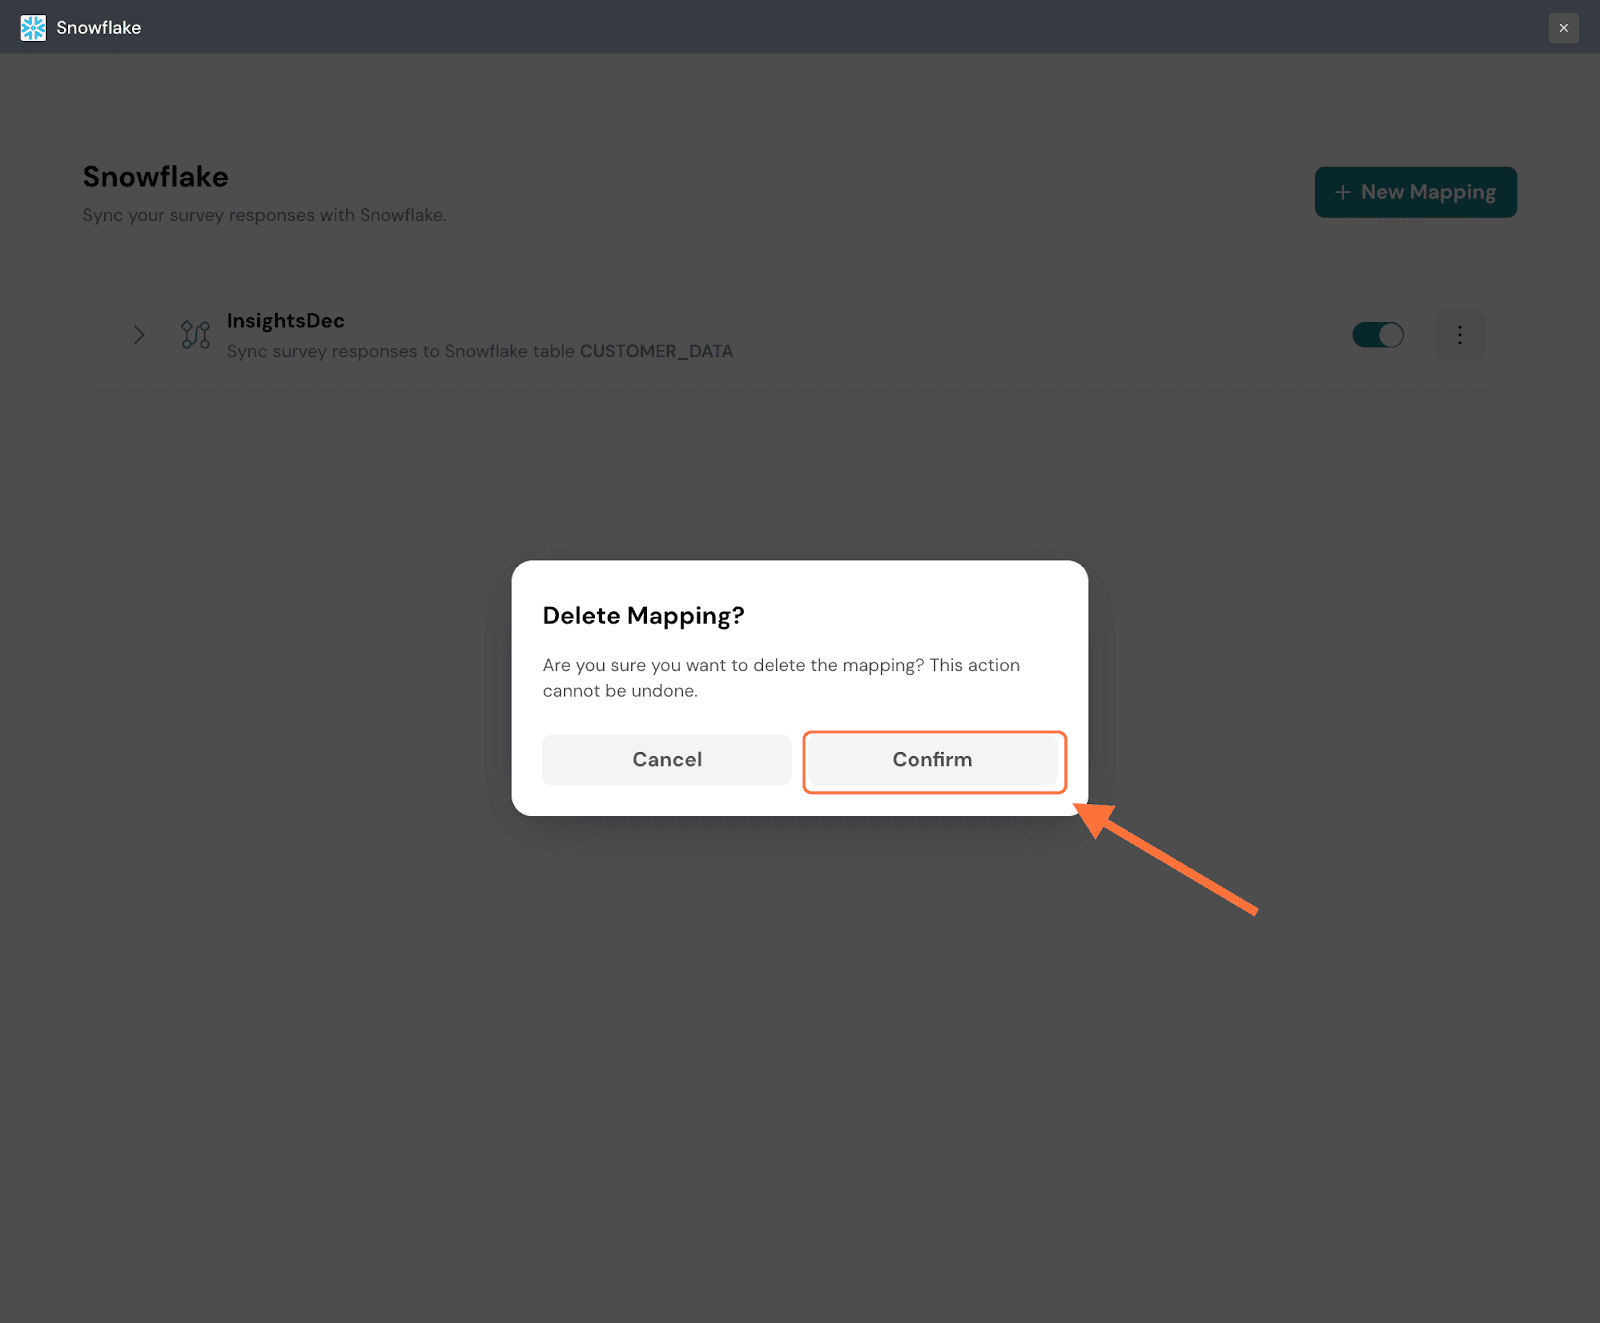
With that, you’re all set to unlock the full value of your survey data in Snowflake. Sync responses automatically, analyze them at scale, and combine experience data with the rest of your business data. Whether you choose Data Share for secure, read-only access or Direct Connection for full control, your customer insights are now ready to power your data ecosystem.
Feel free to reach out to our community, if you have any questions!
Powered By SparrowDesk