Search
SurveySparrow’s native HubSpot integration lets you trigger surveys based on HubSpot events when an object is created or updated. However, SurveySparrow also has a workflow app that allows you to create triggers from within HubSpot. There are certain objects for which you might not be able to create triggers for via the native integration, but the app is far more versatile.
Survey triggers help when you want to collect feedback at different customer interactions on time. Possible applications include:
In this article, we’ll lay out the process of setting up and using the app, specifically:
1. Inside your SurveySparrow account, click on the settings icon.
2. Scroll down the left-hand panel till you see the Apps and Integrations option, then click on it.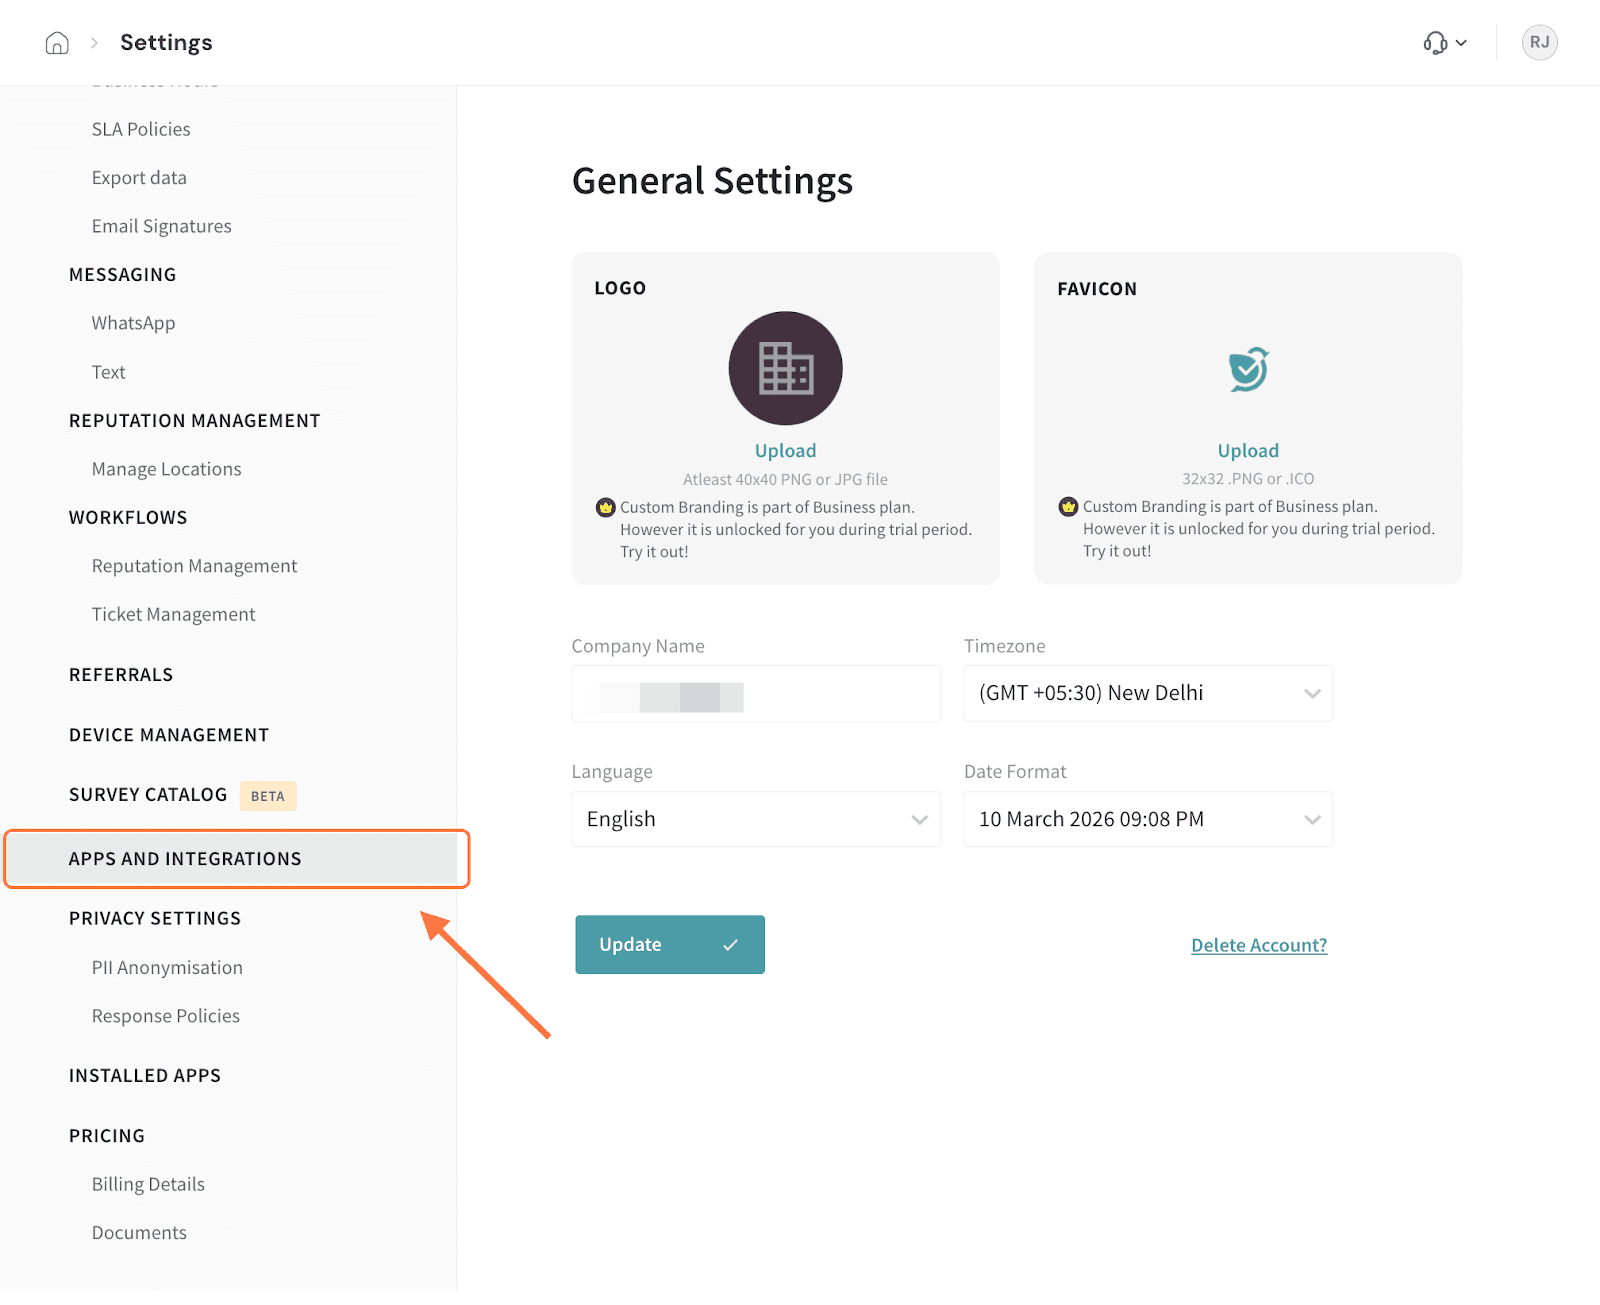
3. Search for the HubSpot integration, and when you see it, click on the toggle.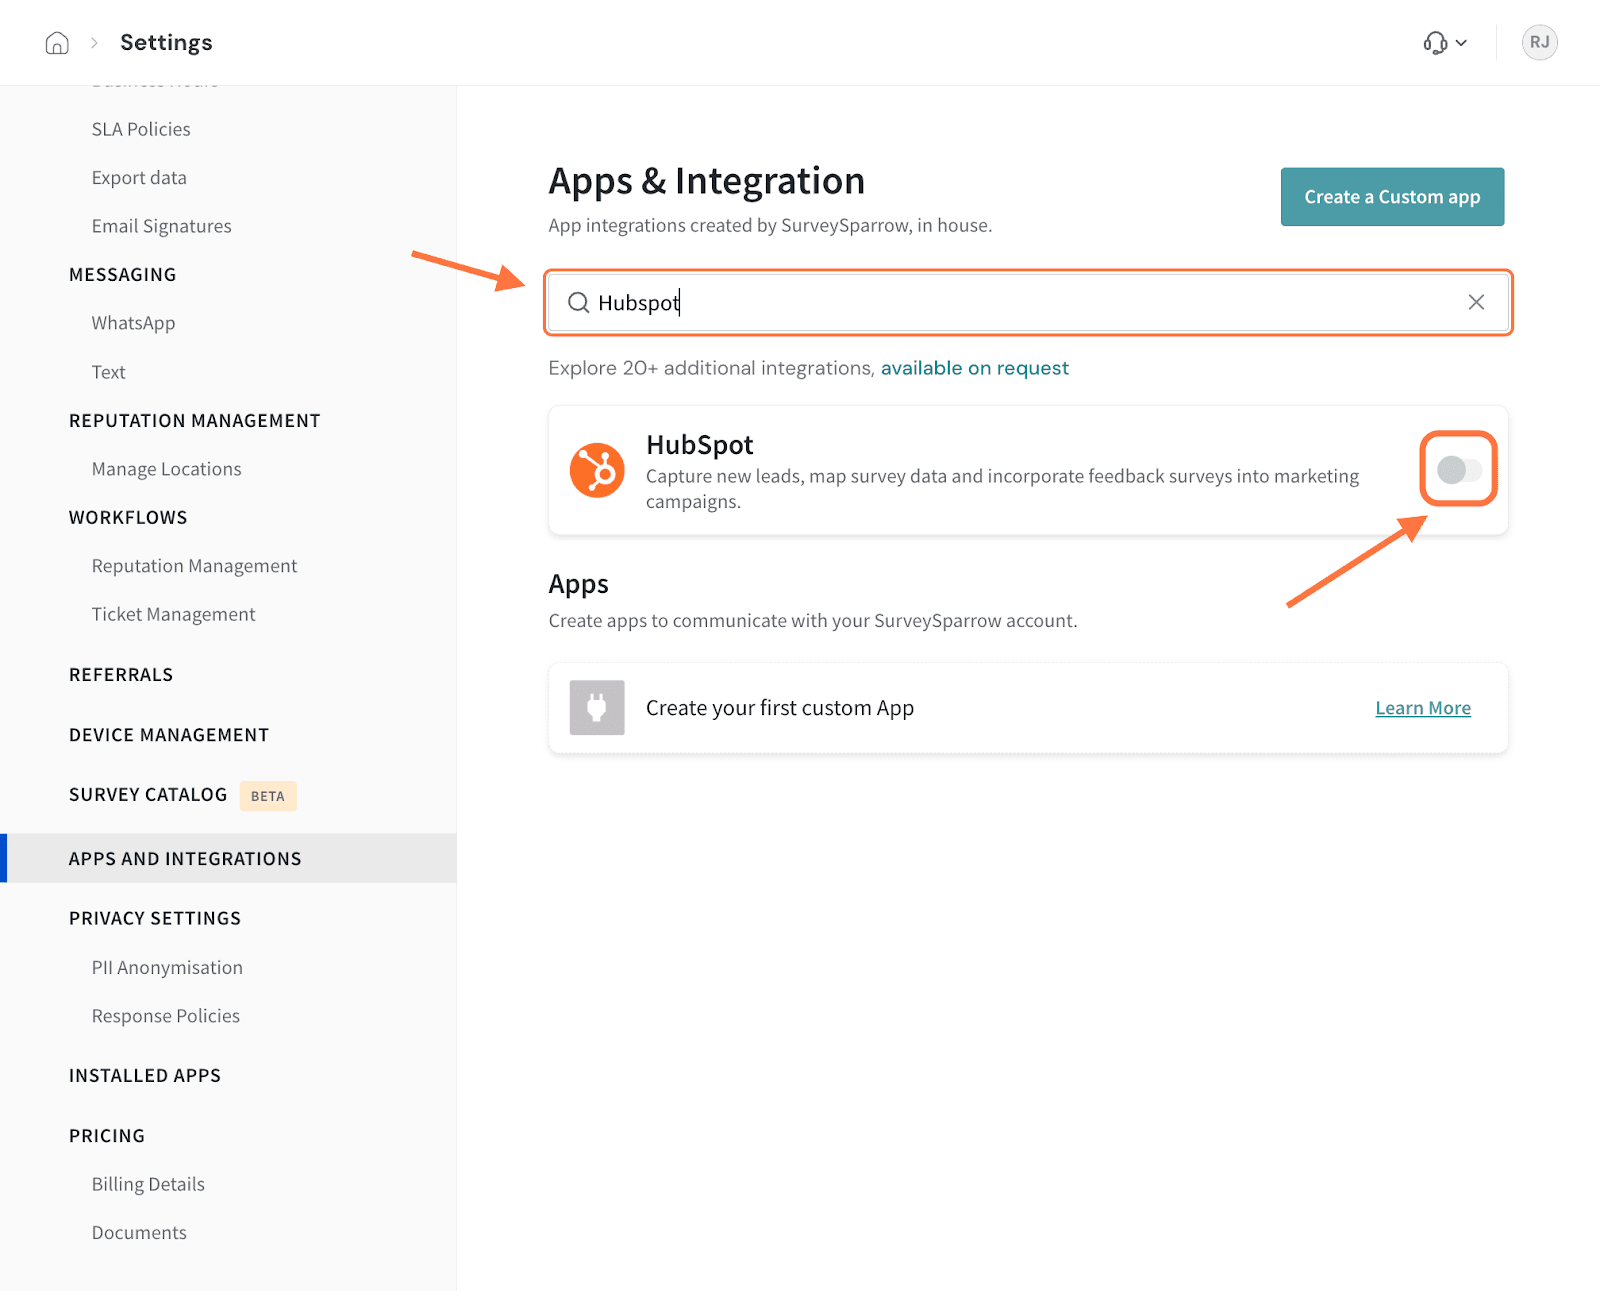
4. In the HubSpot OAuth screen, select the account you would like to connect to and click Choose Account.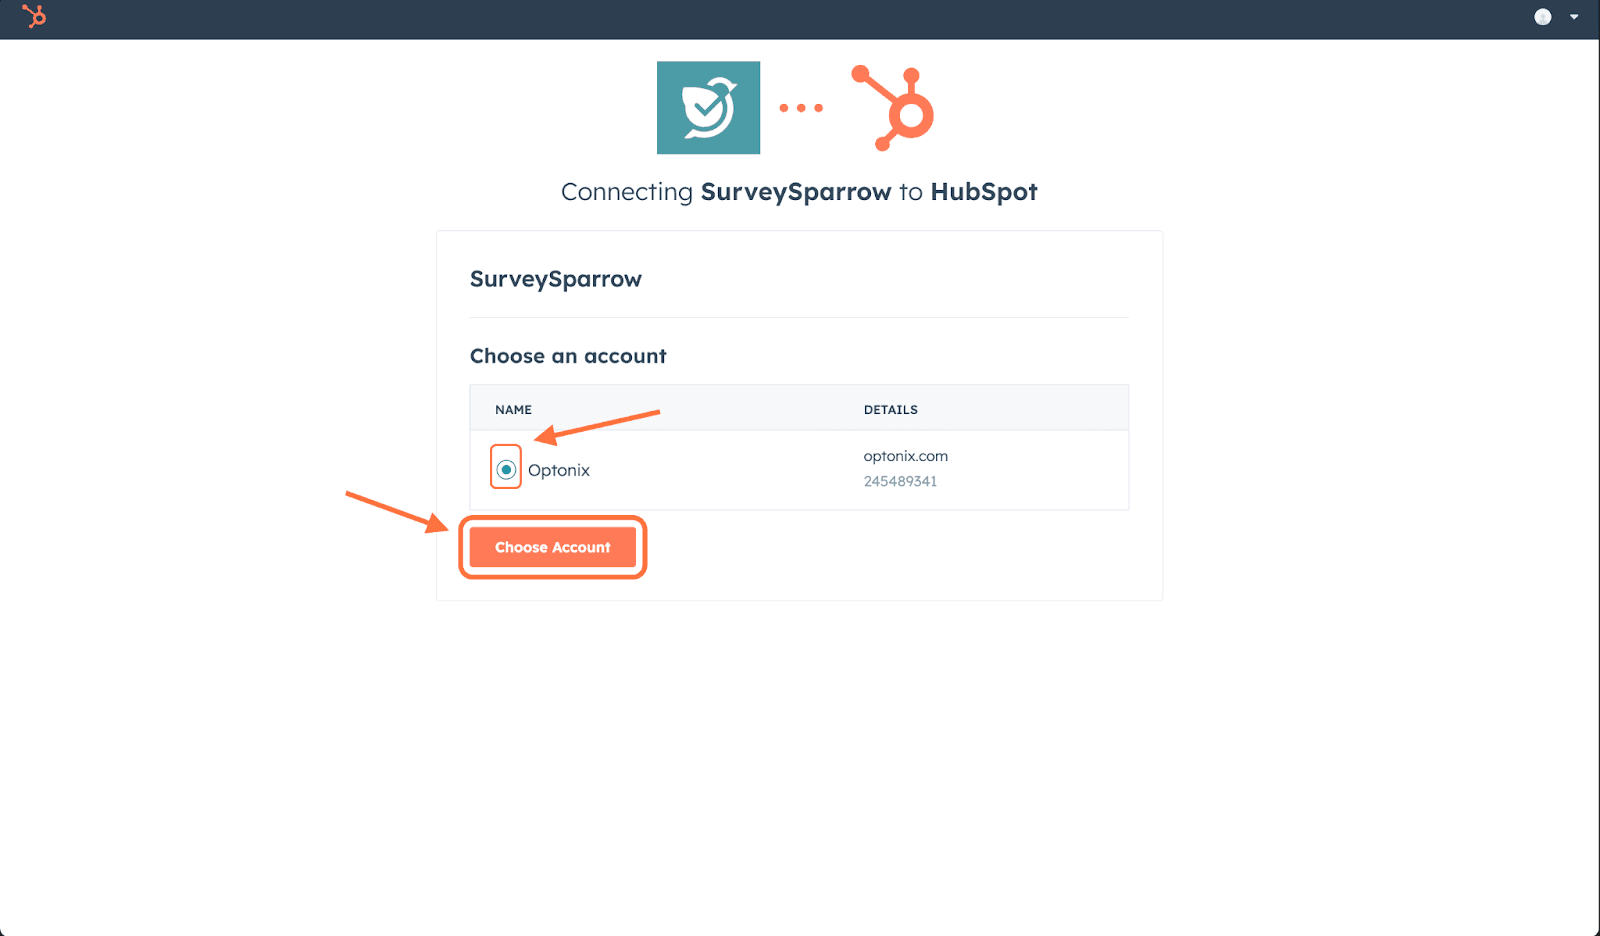
5. An installation confirmation message appears. Click on the check-box then click on Connect App.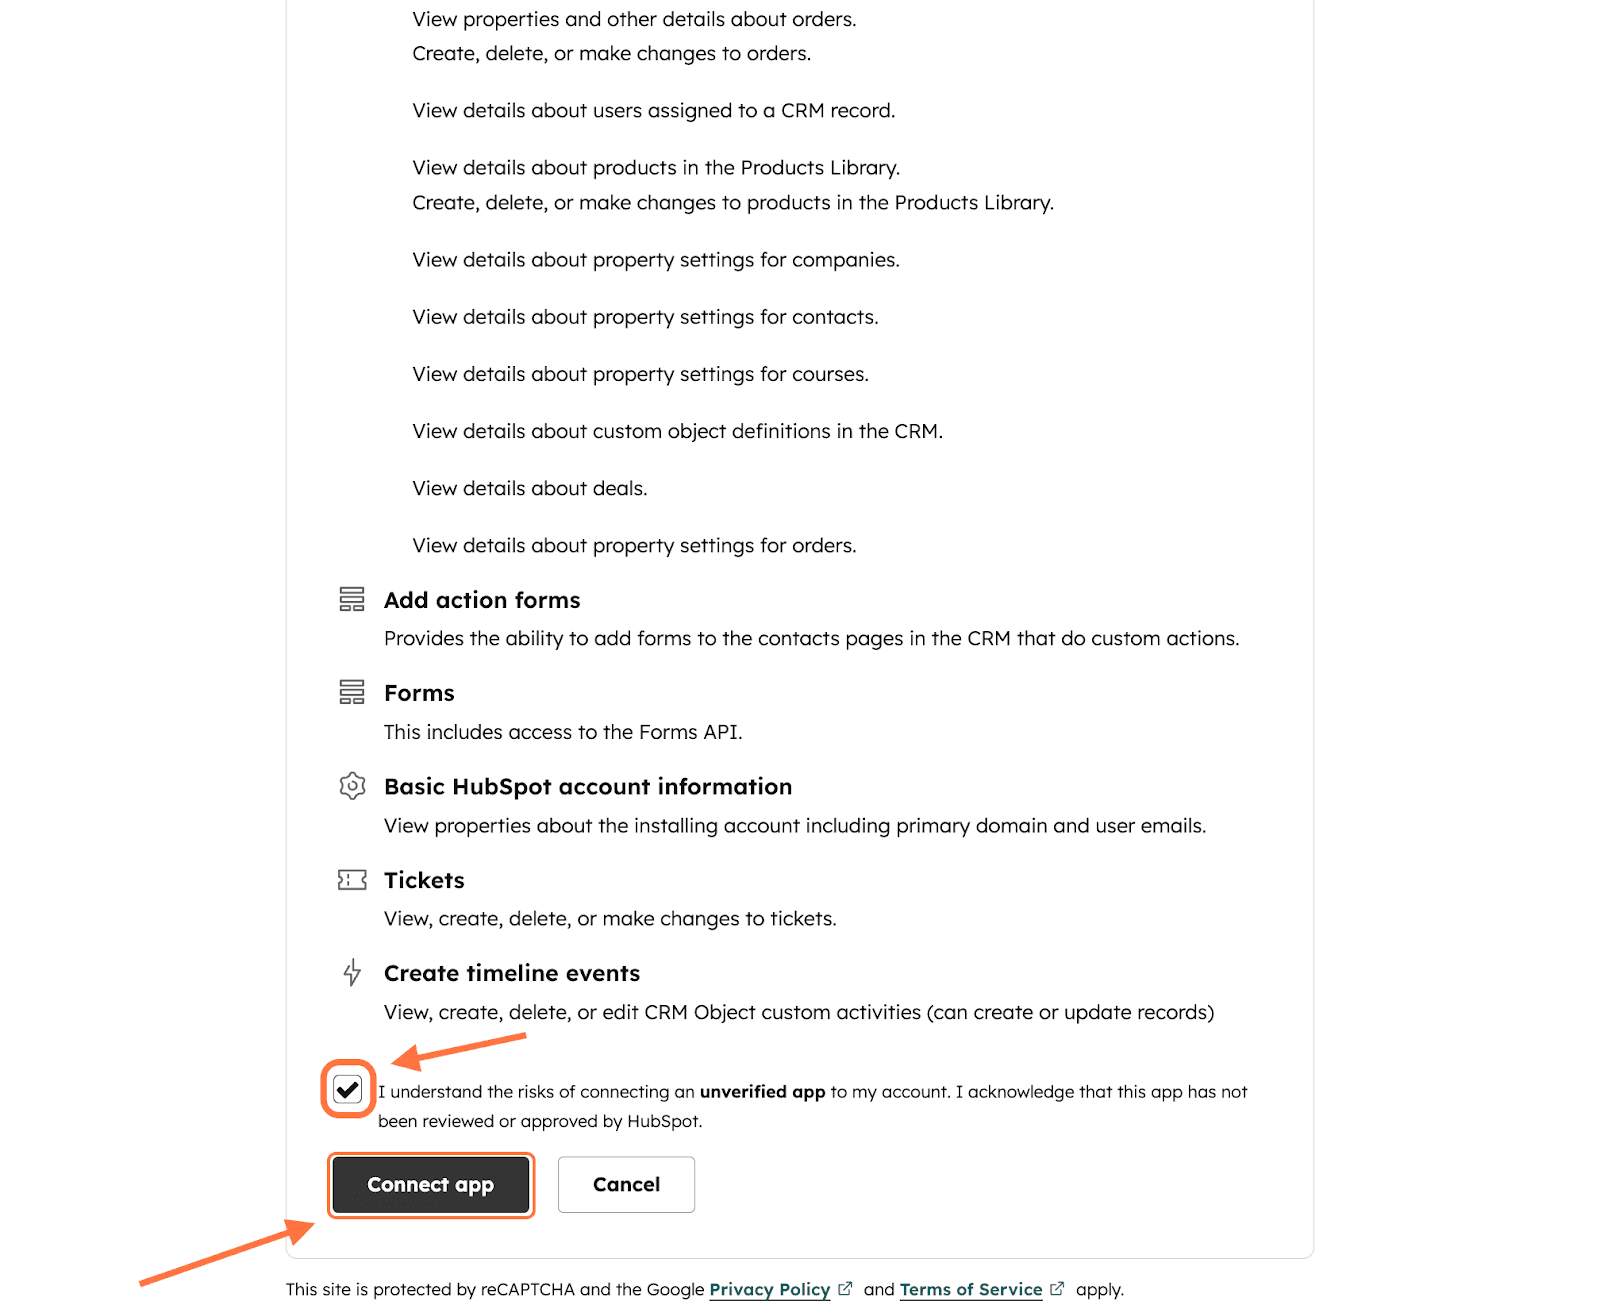
The app is now installed.
Note: You can also install the SurveySparrow app from HubSpot’s marketplace. Head to app.hubspot.com/marketplace and search for it.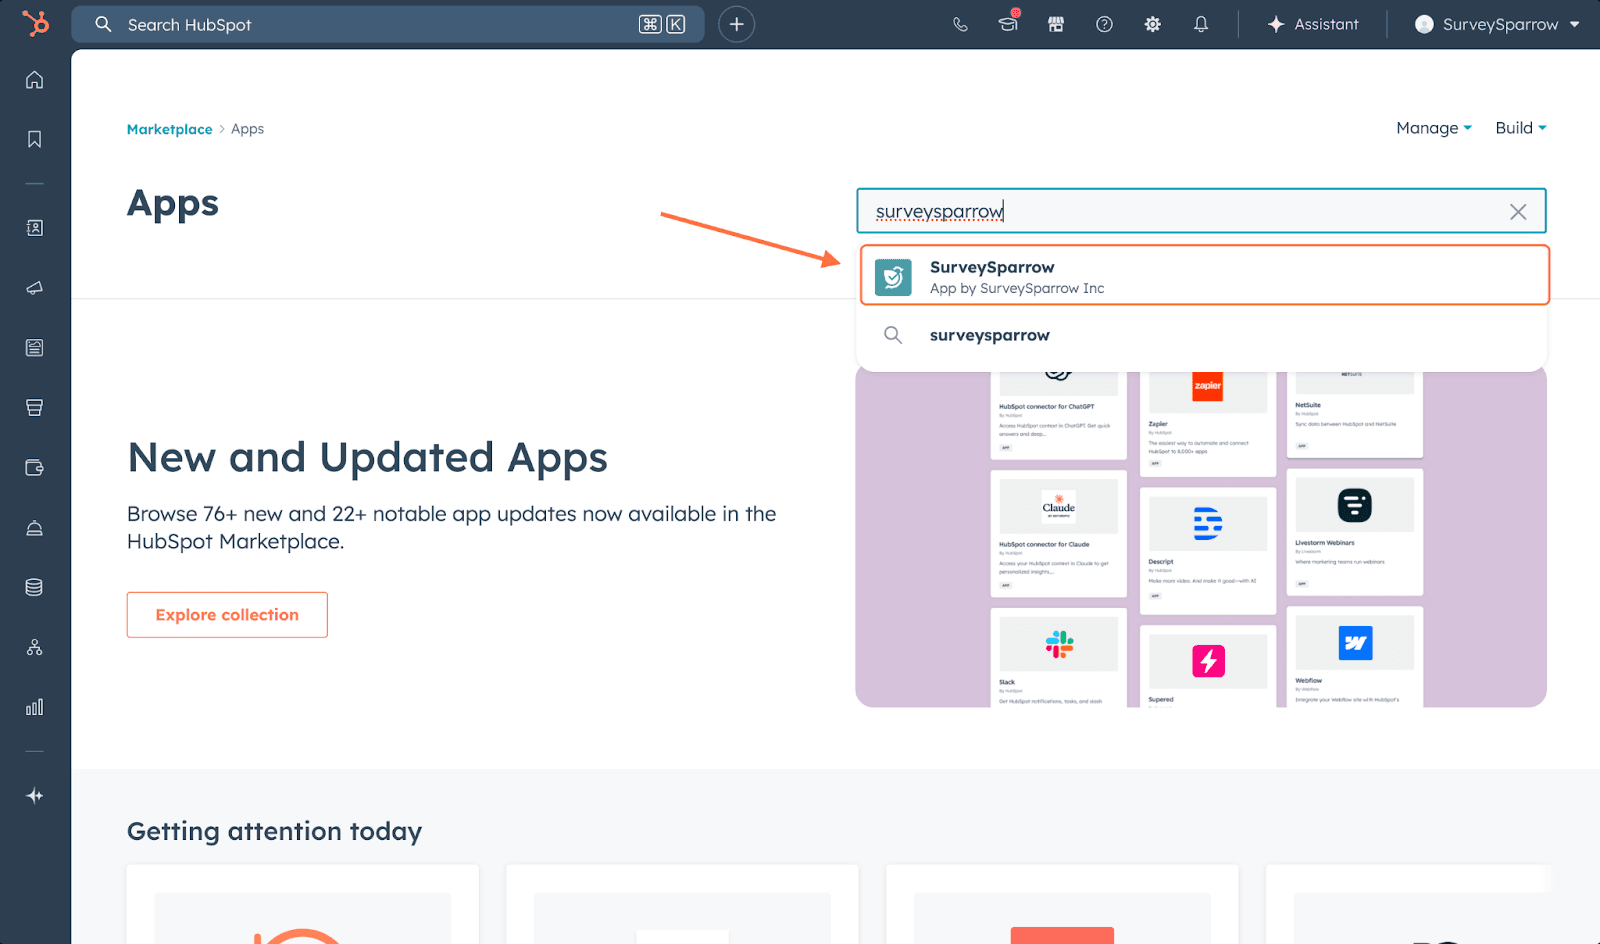
After opening it, click on the Install button.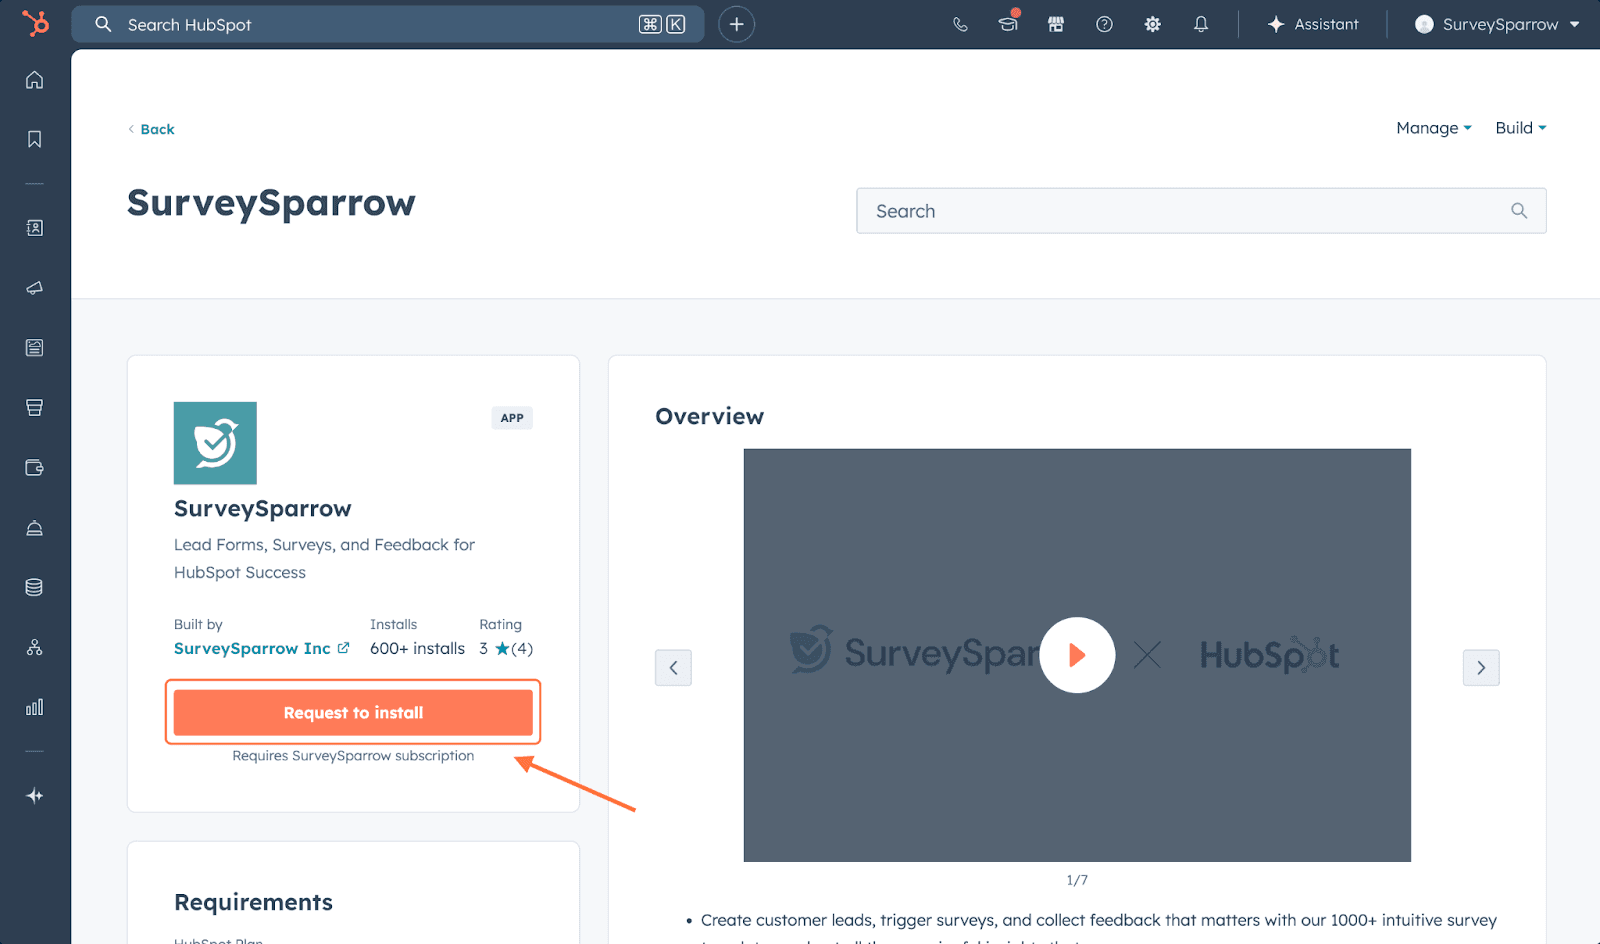
1. In your HubSpot account, click on More in the left-hand panel.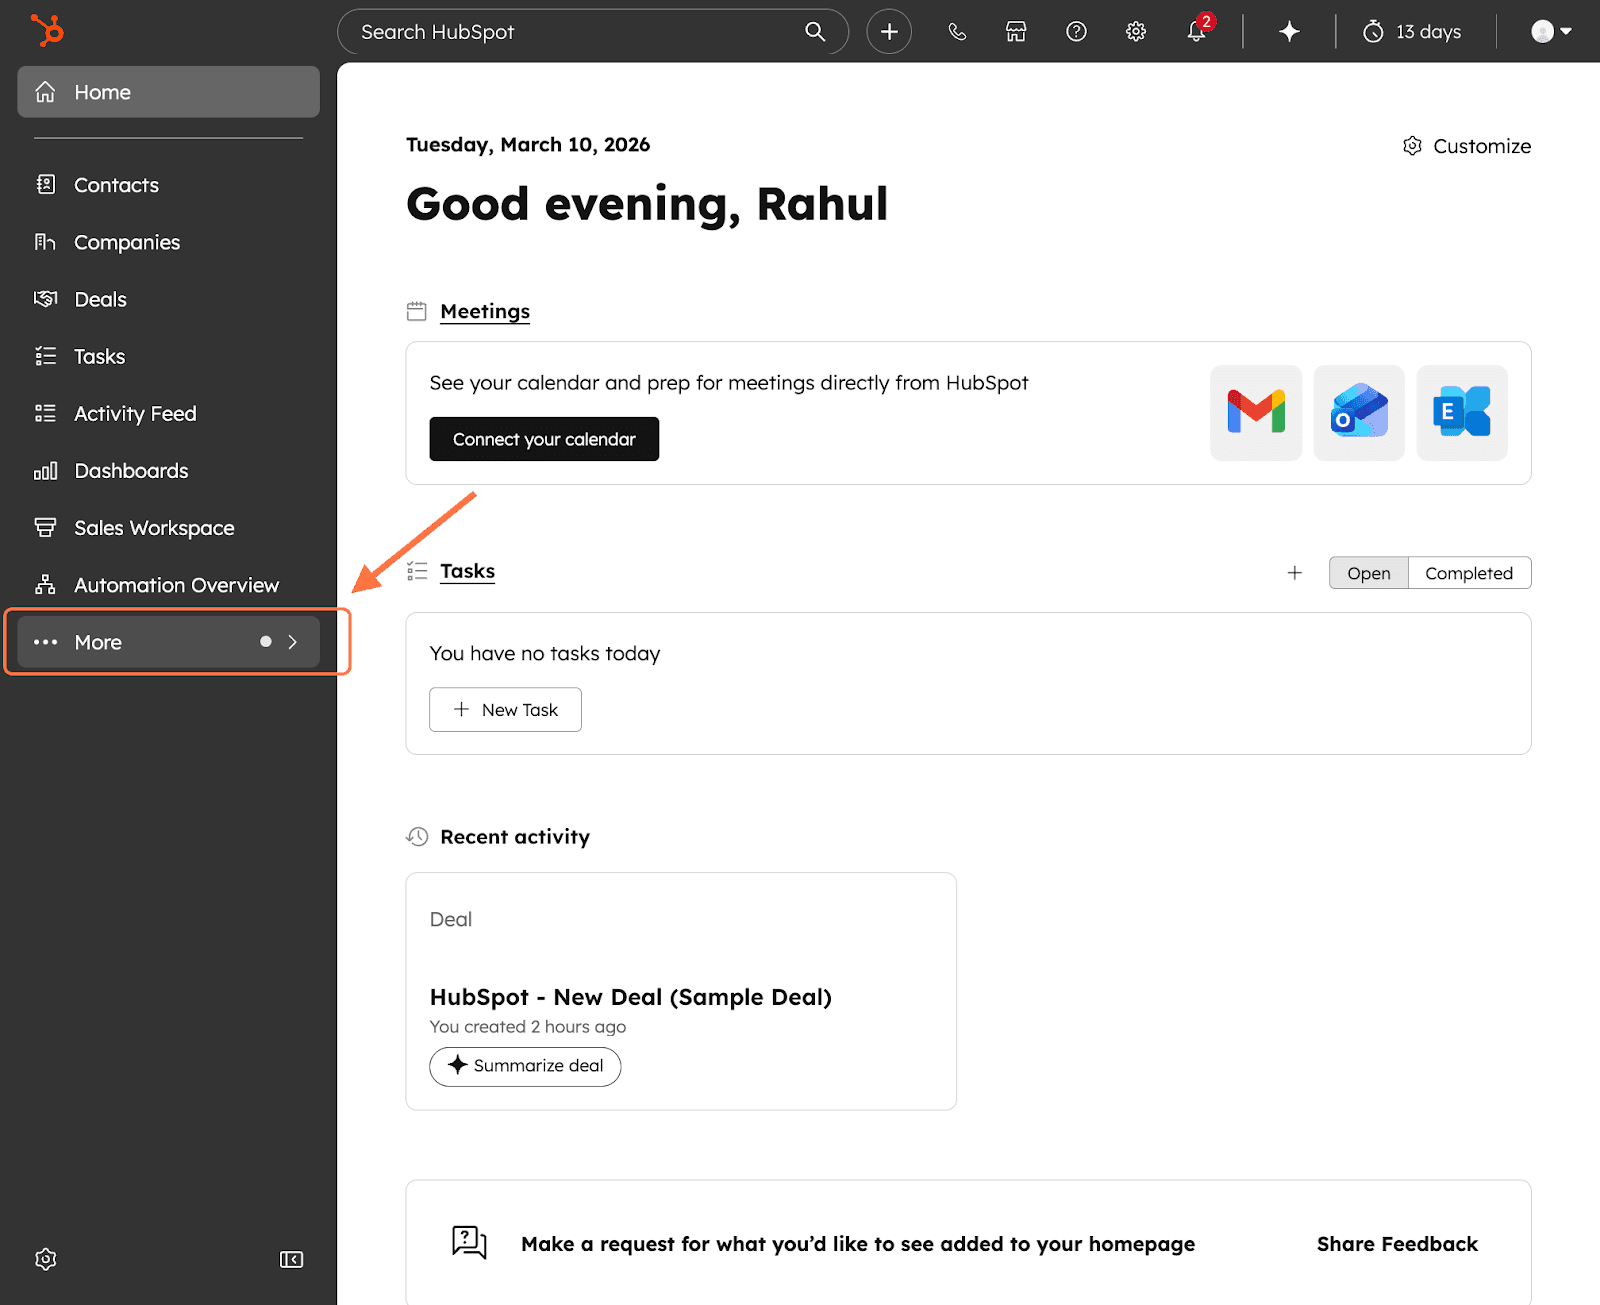
2. Hover over Automations, then click Workflows.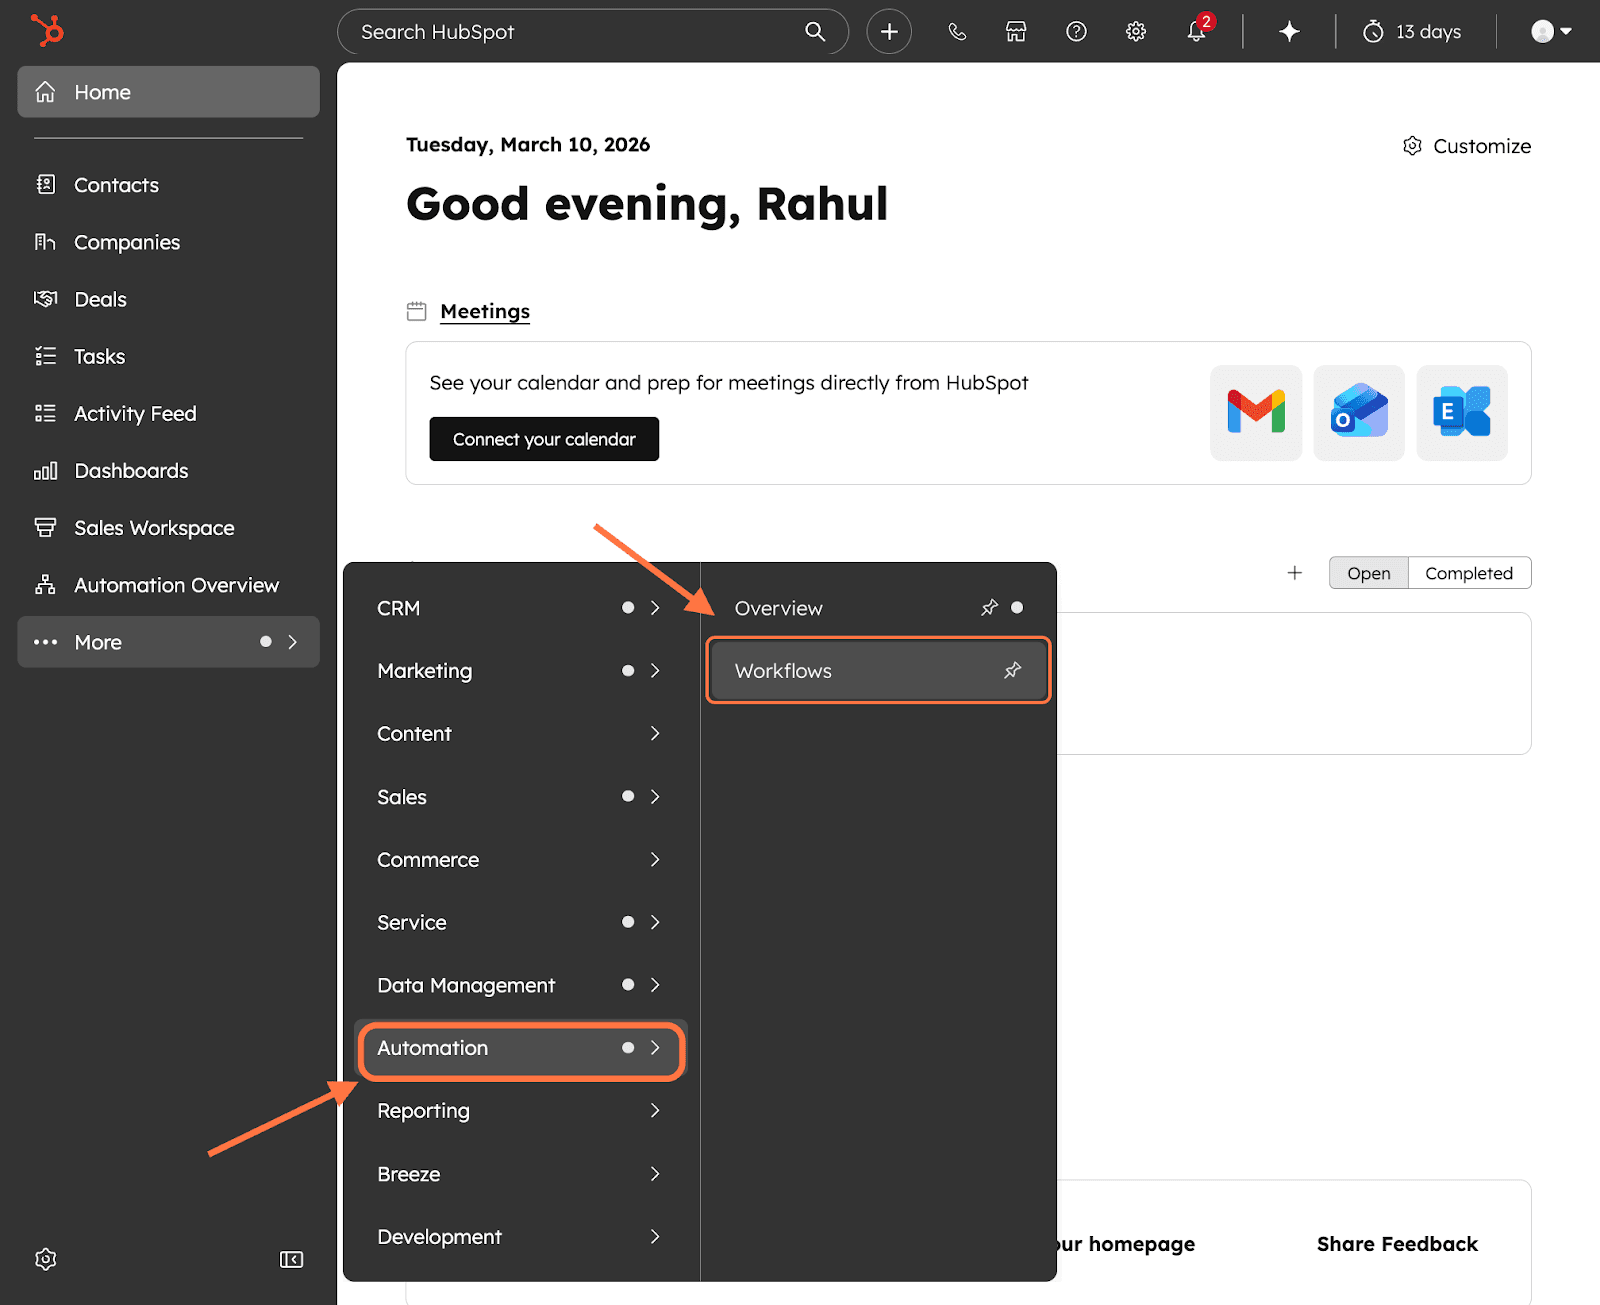
3. Click on Create Workflow.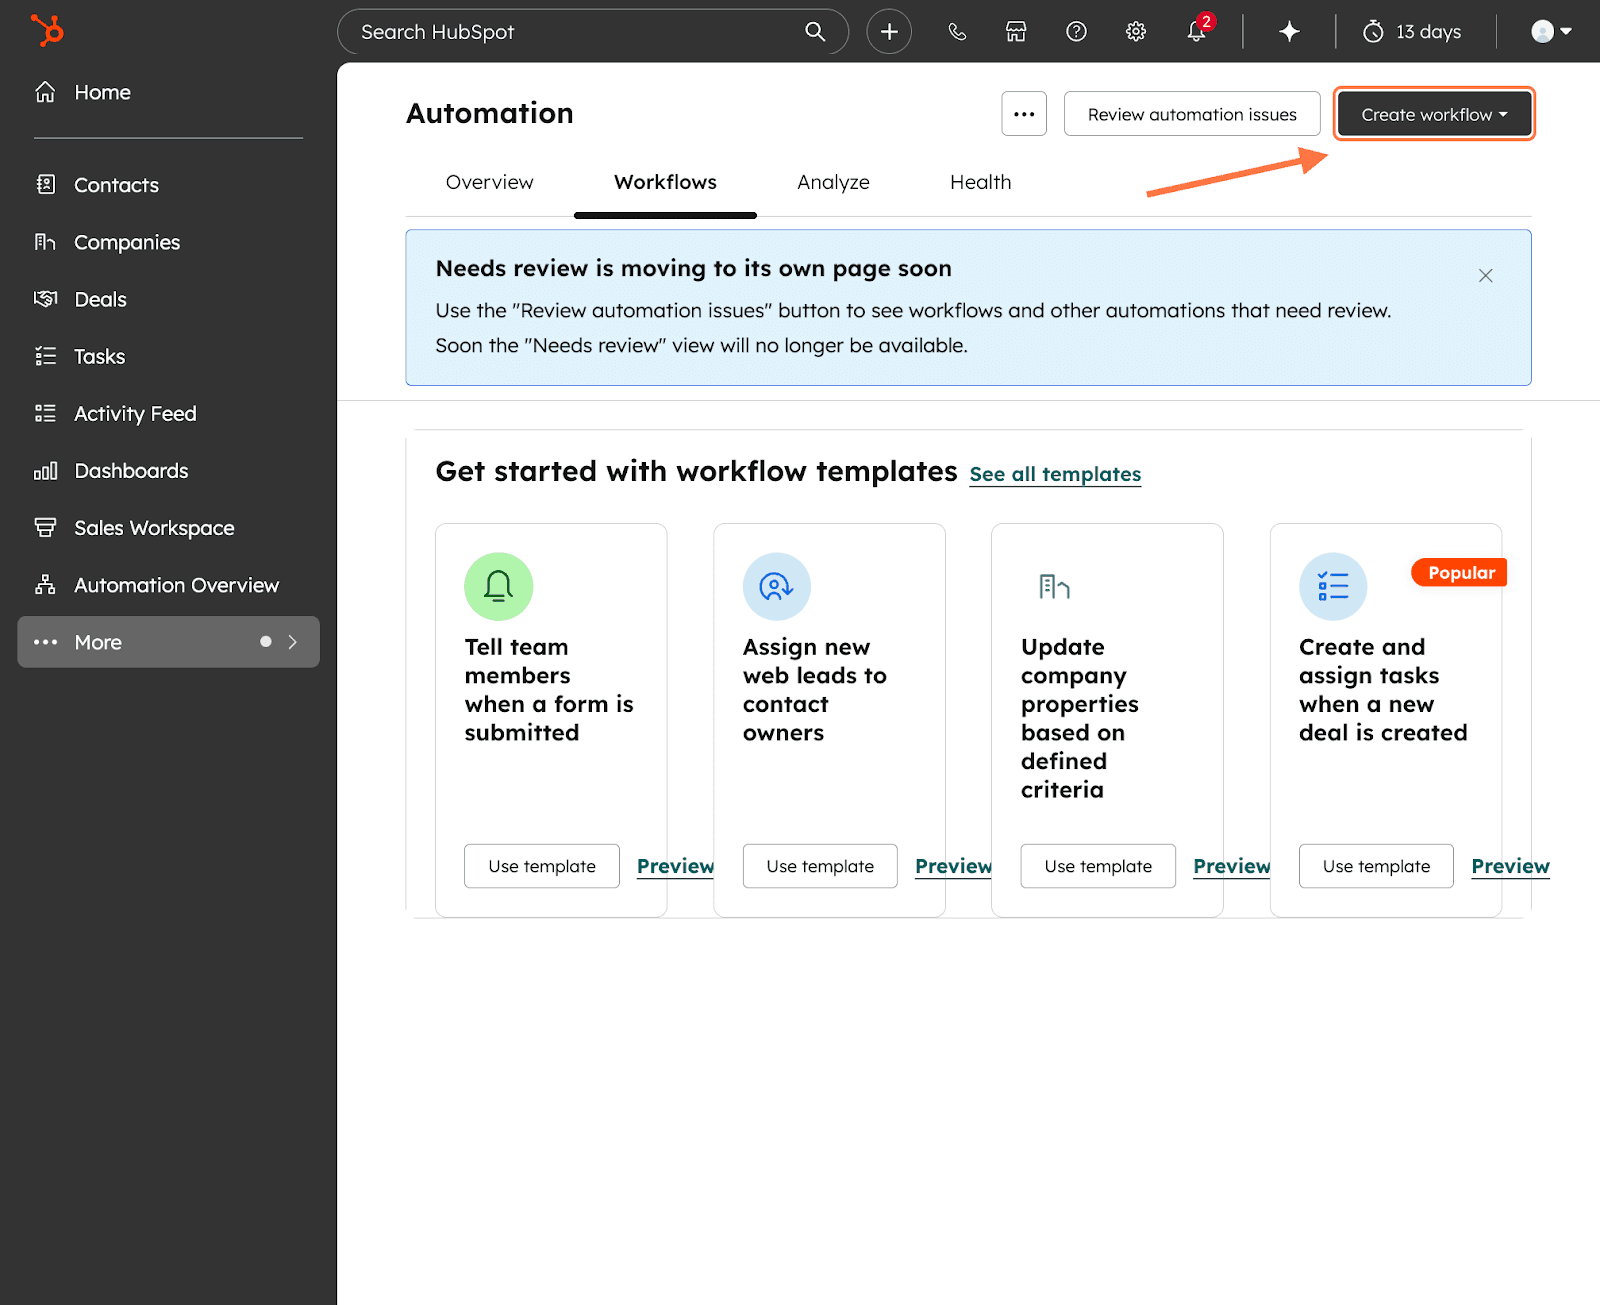
4. Click on From scratch.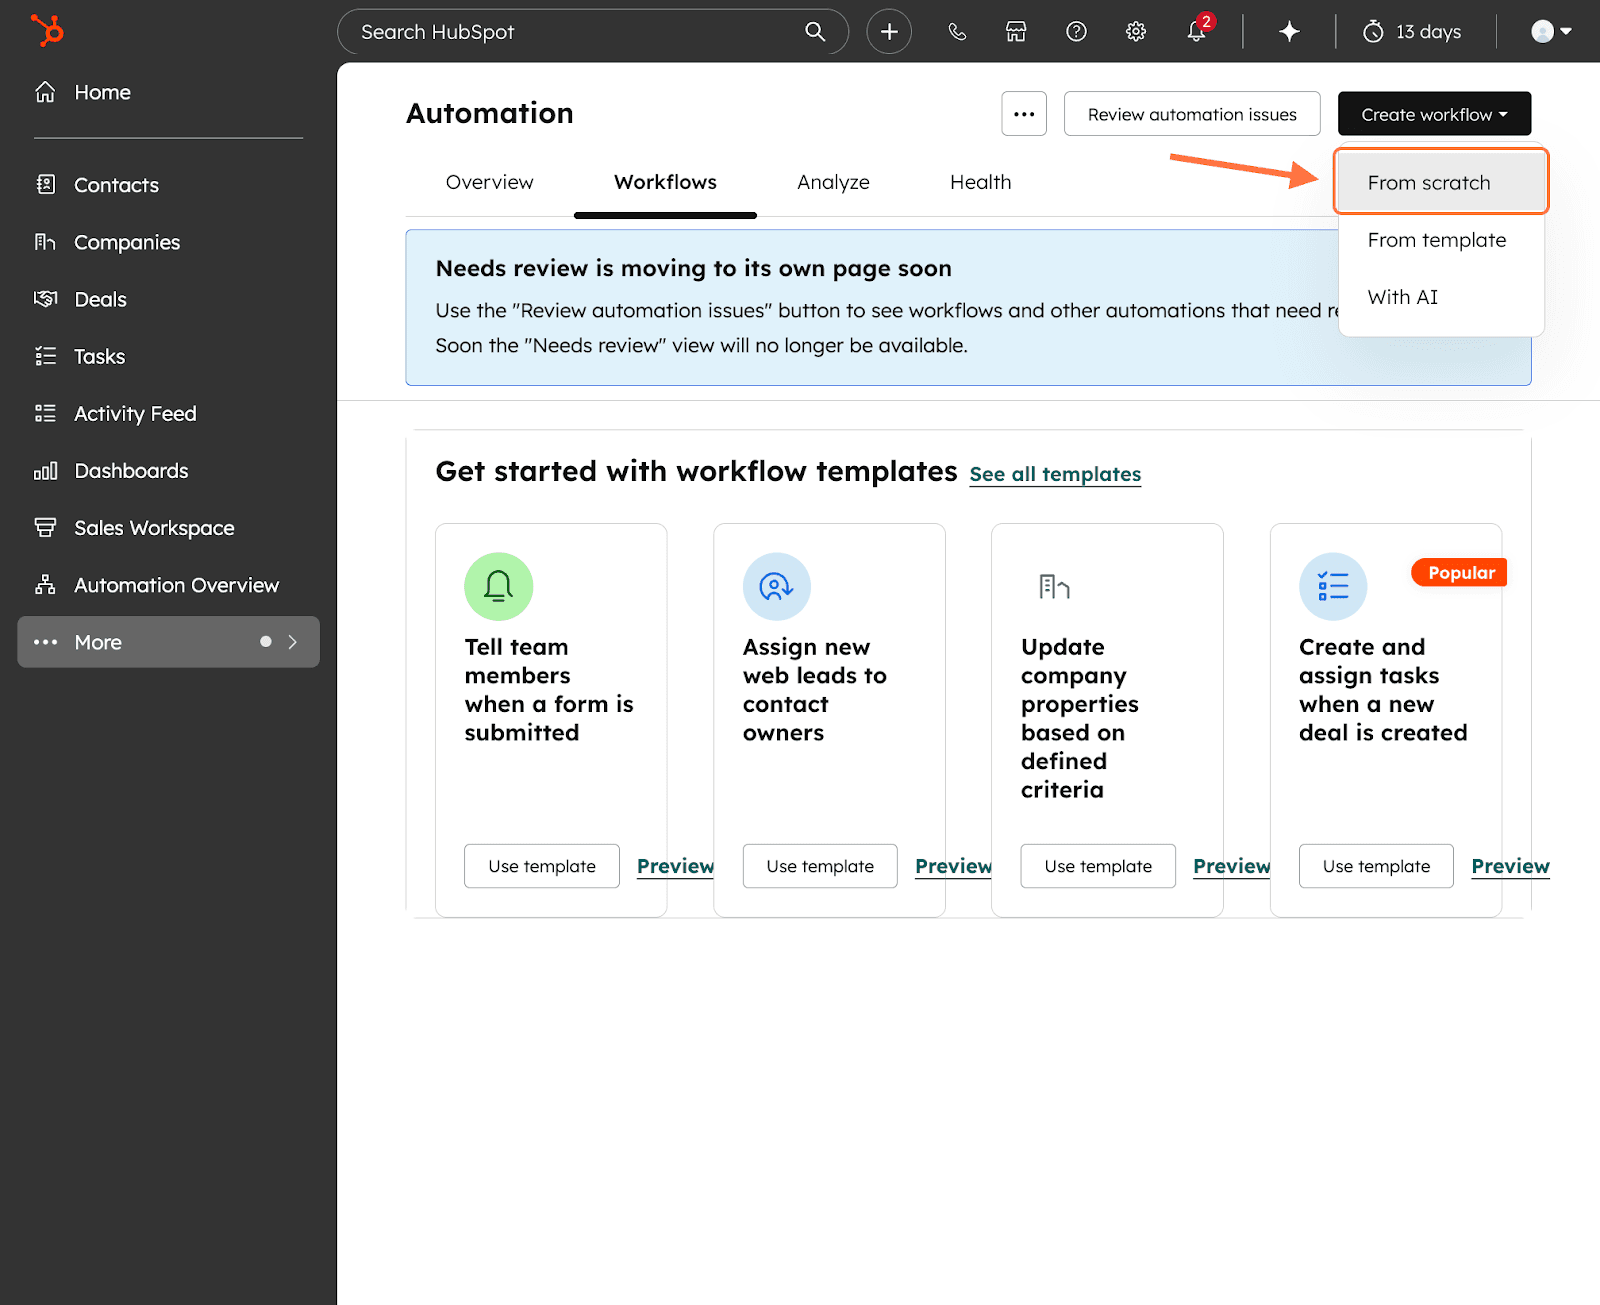
5. When creating an automated workflow, you need to define the trigger conditions. Click on the Met filter criteria button.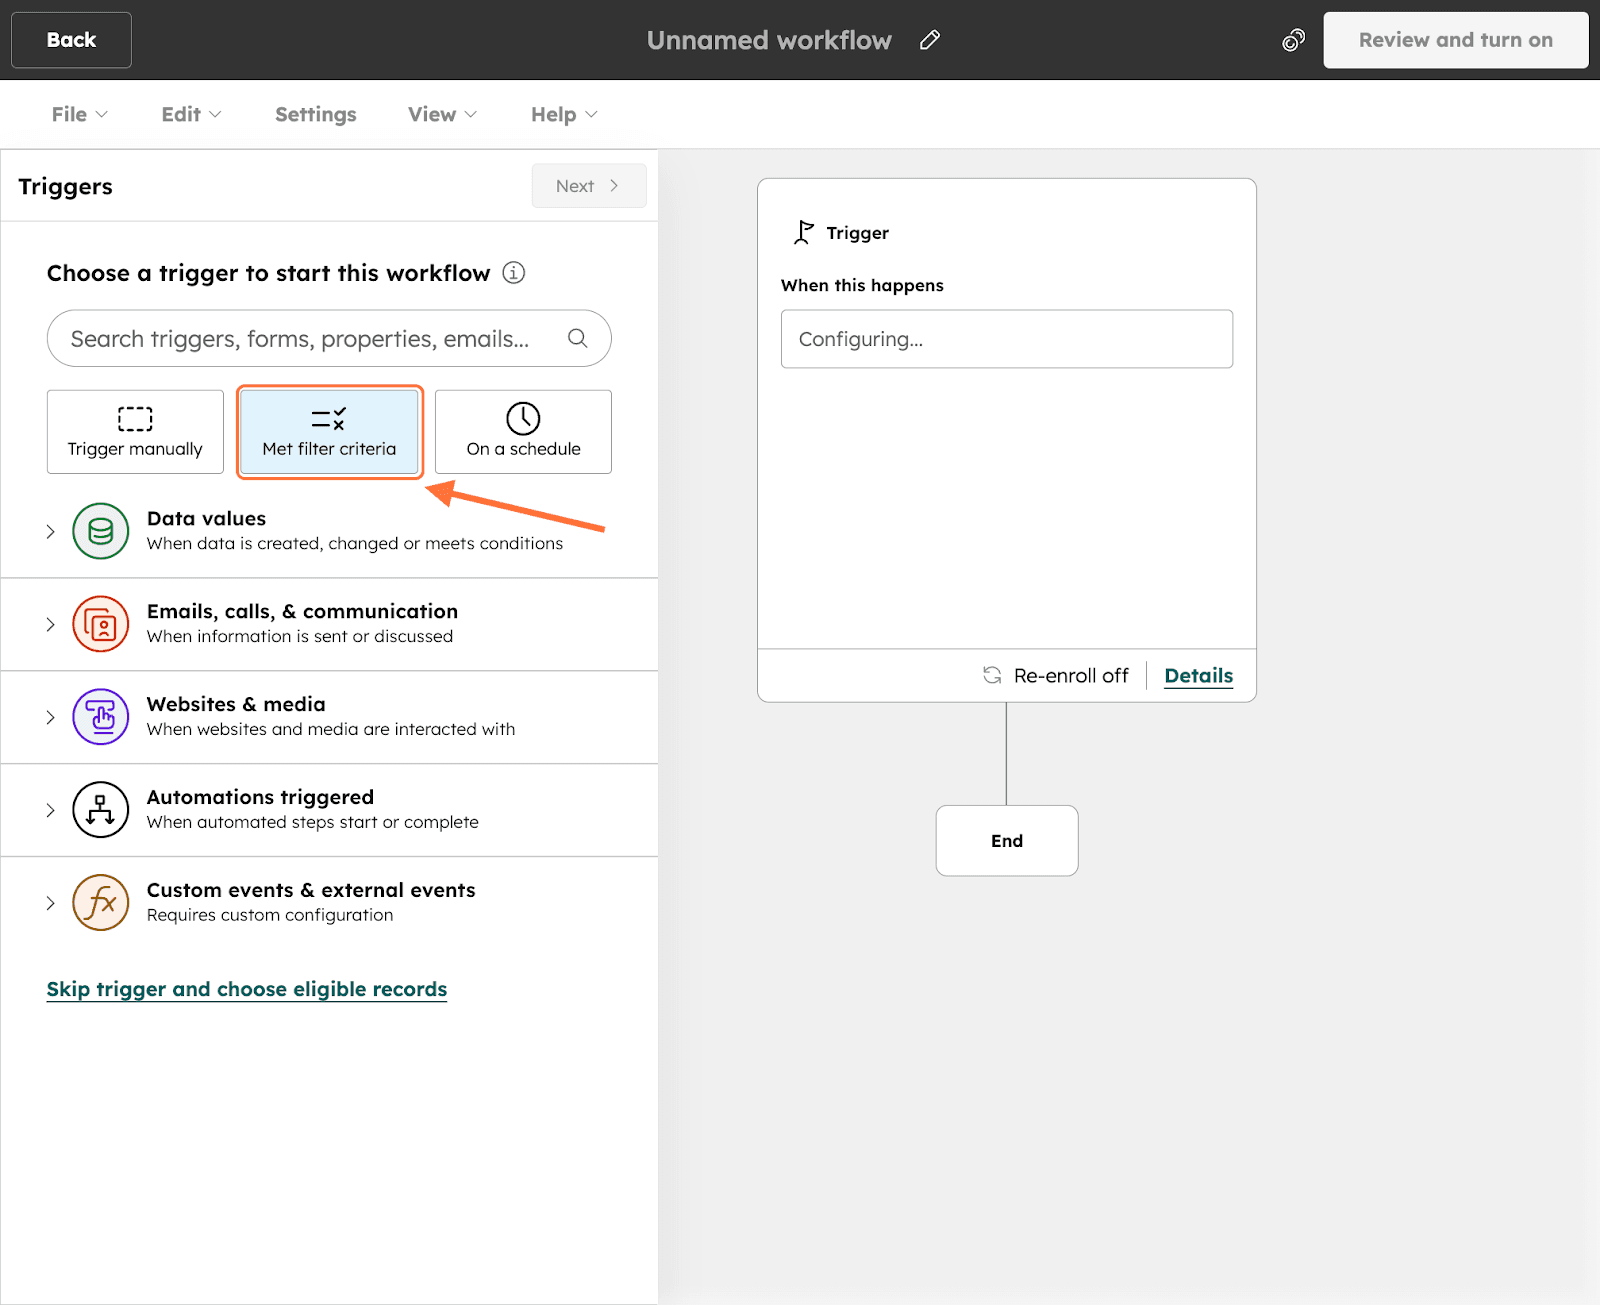
6. Select an object as the trigger. For this instance, we will select Deals.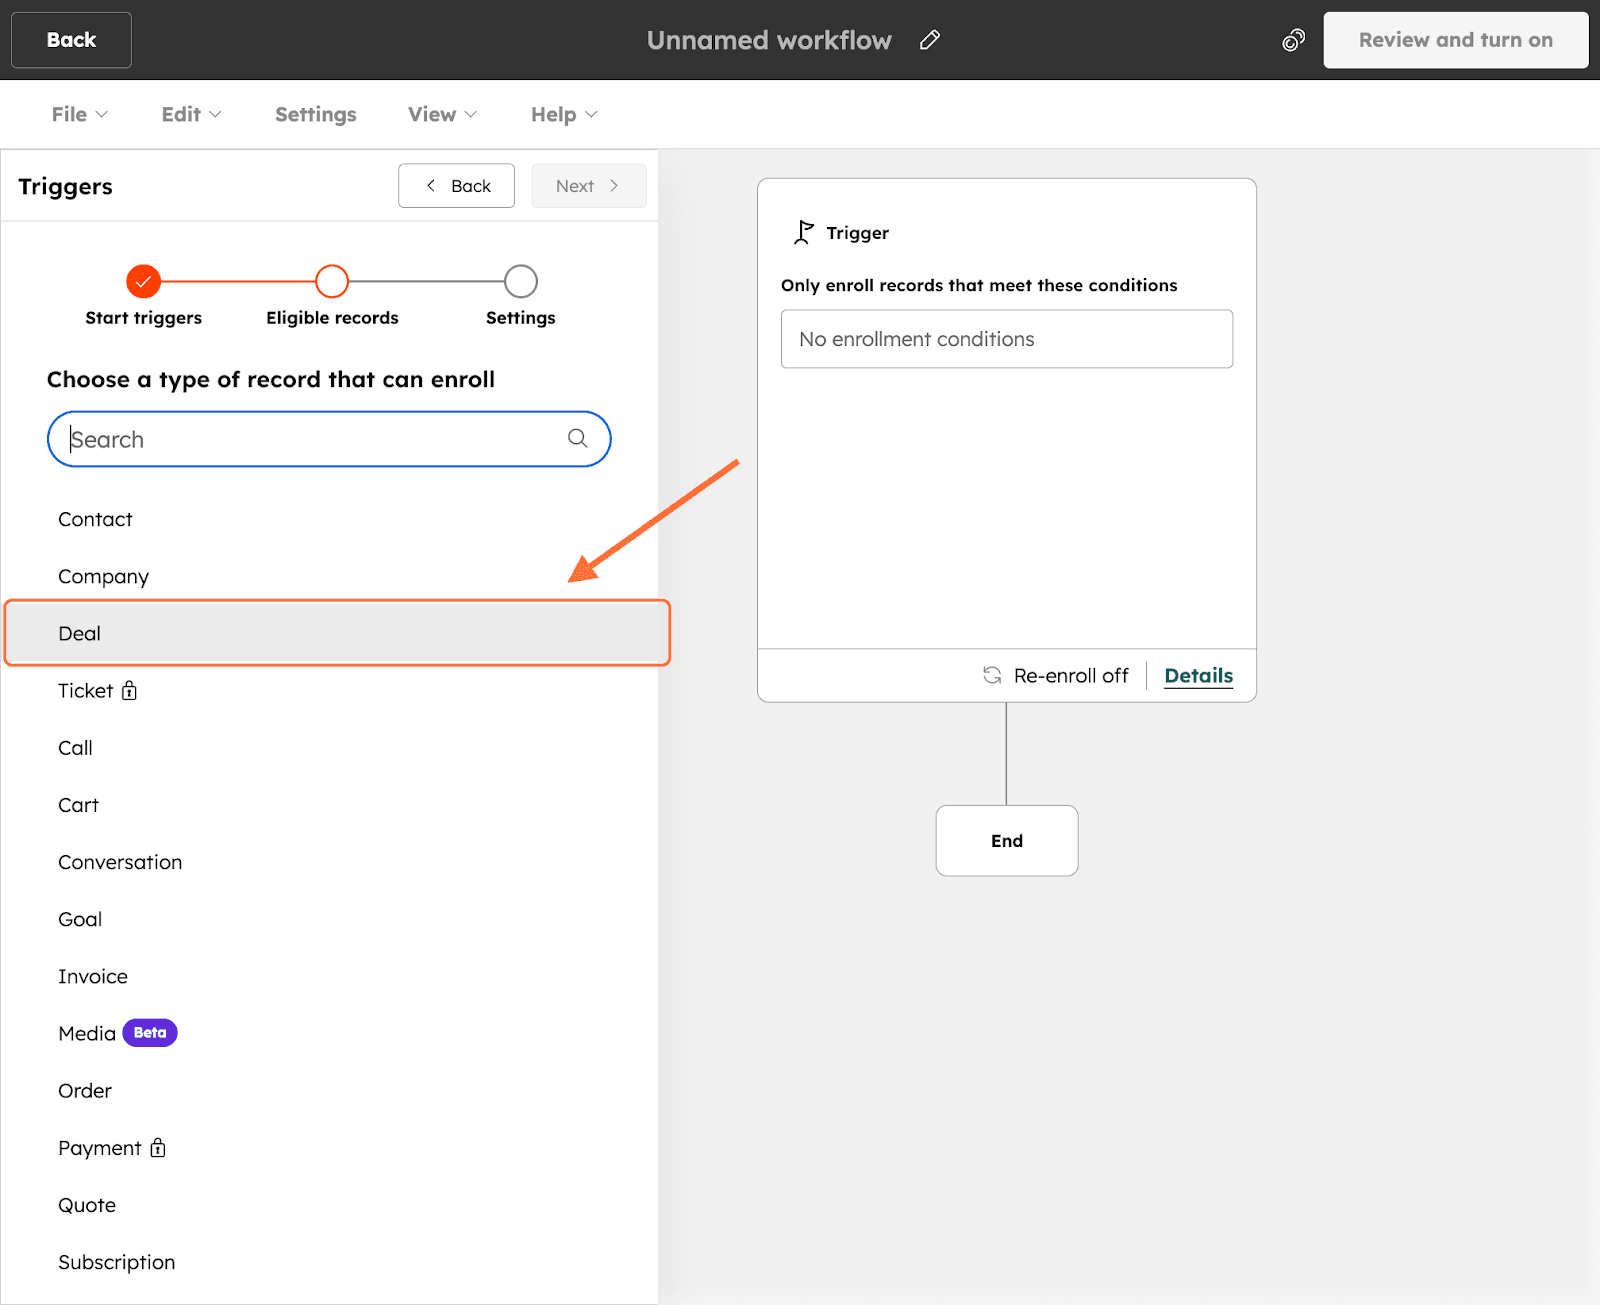
7. You must then apply filters on the record. You can use the object’s properties or any other properties from HubSpot in the menu. Here, we will select Deal properties as the filter category.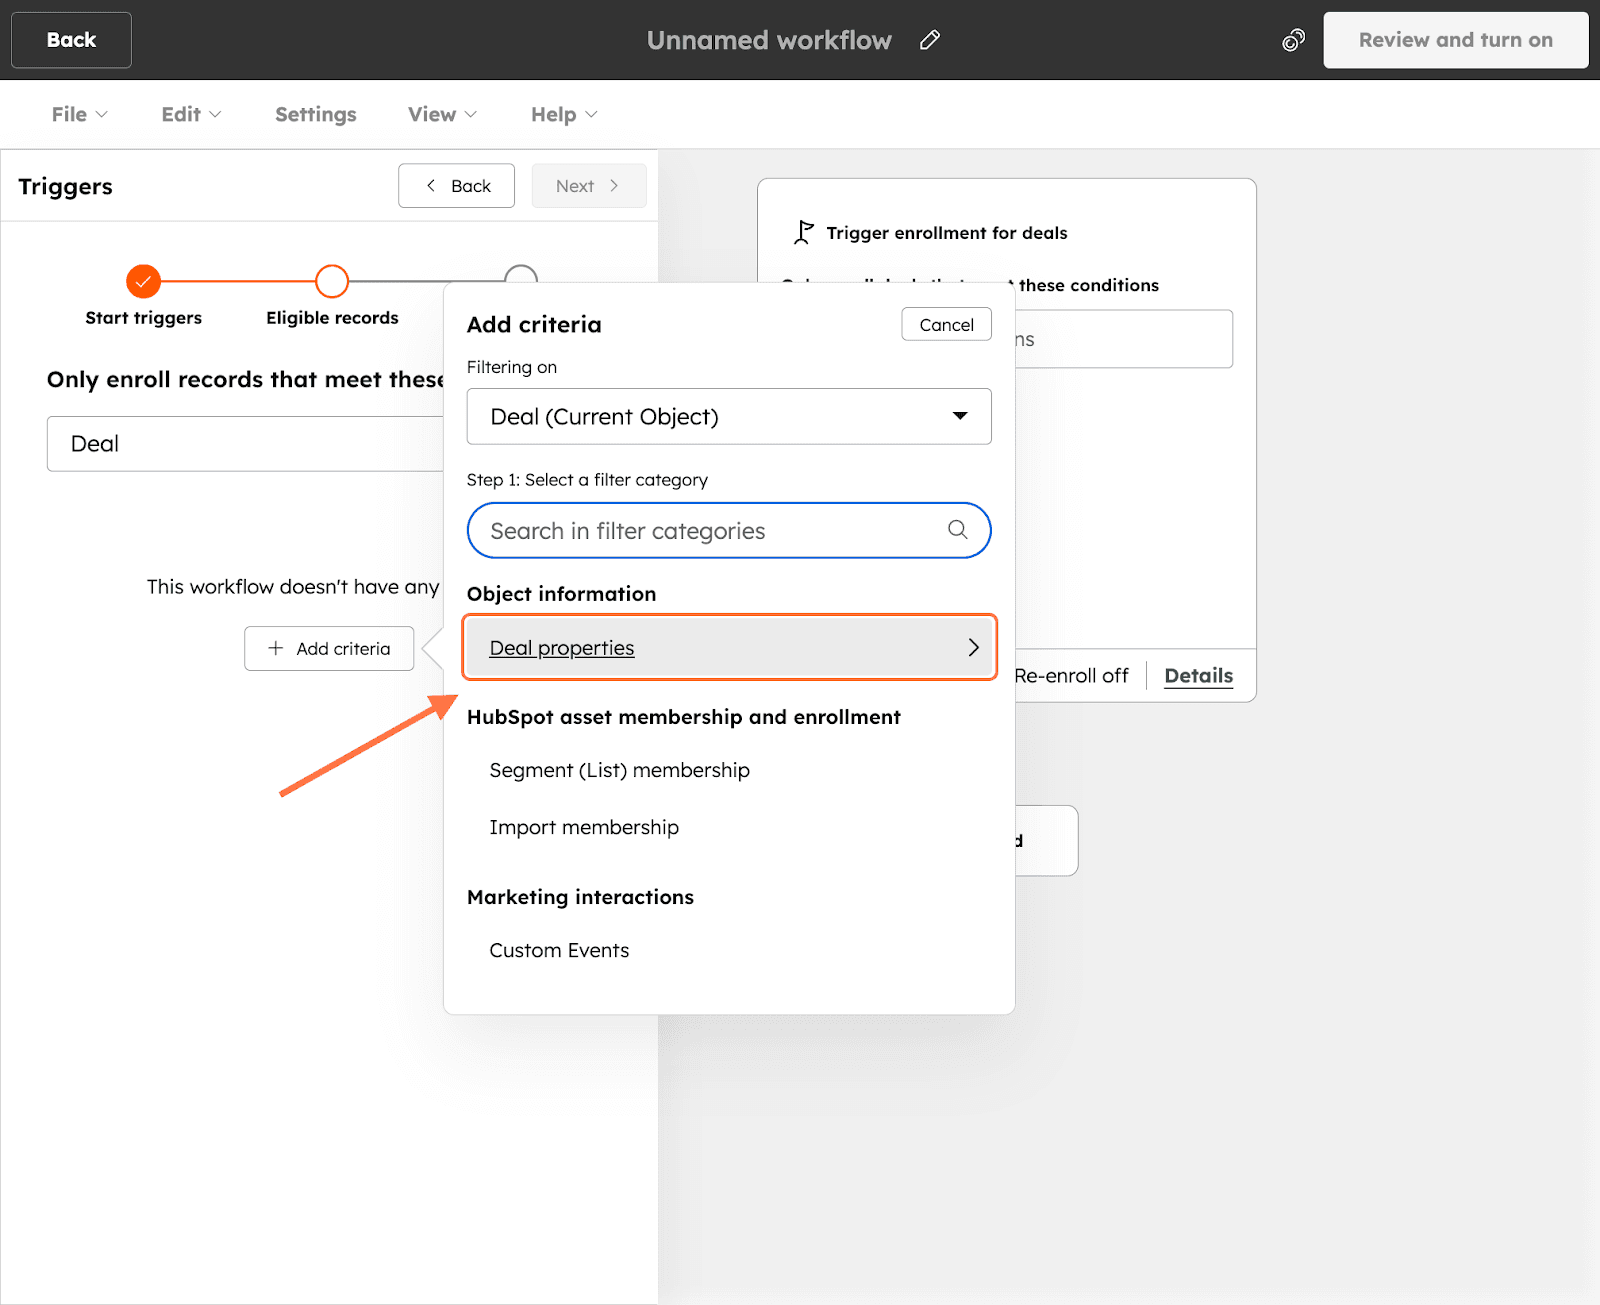
8. Now apply the specific filter. Select one or use the search box. In this case, we will select Deal stage as our category.
9. Now to define the filter logic, you must select the logic operator. The default operator is ‘is any of’, but you can click on the drop-down to change it.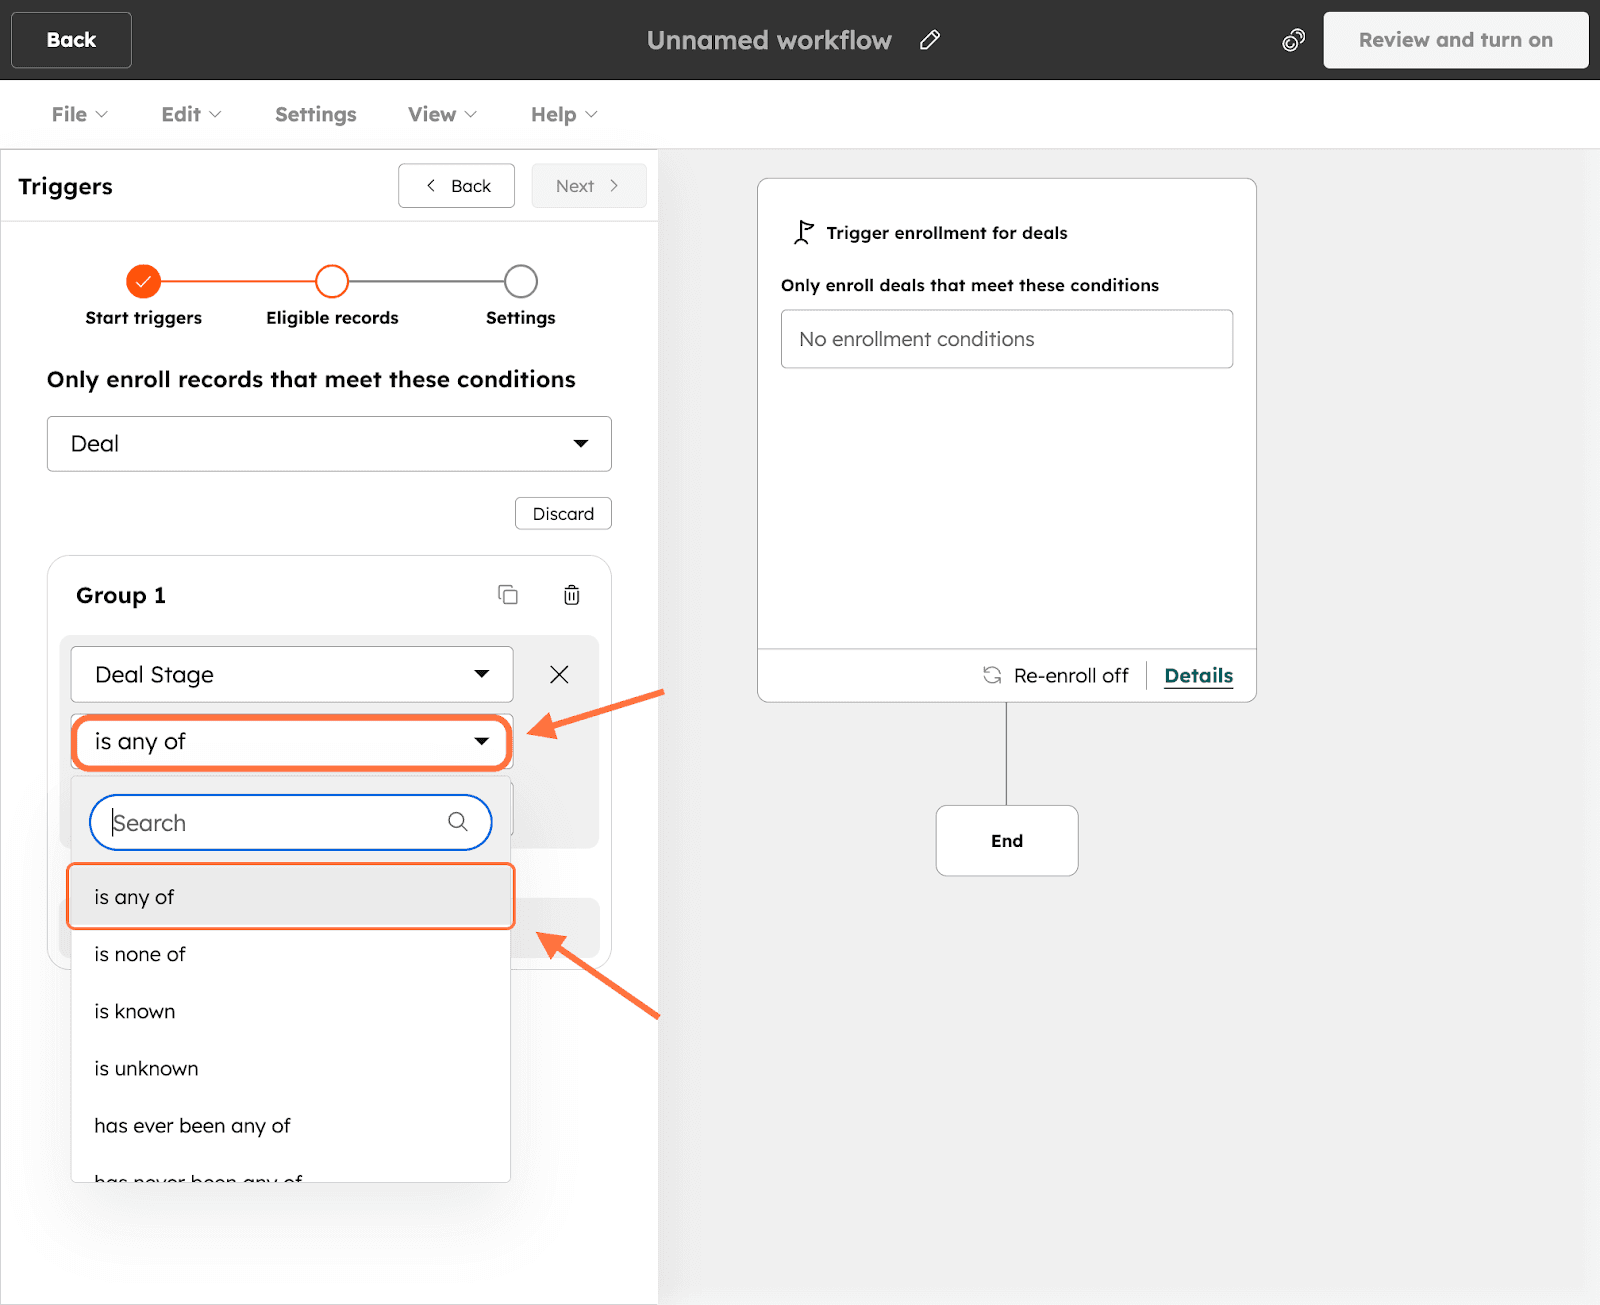
10. Following this, you have to define the value to validate/satisfy the trigger. Click on the Search drop-down and choose from the options. For this situation, we’re selecting Closed Won.

11. You can turn your filter to a filter group by clicking on Add criteria, then repeating the same steps. Note that a filter group runs on the AND filter logic, wherein all the filters in the group must be satisfied.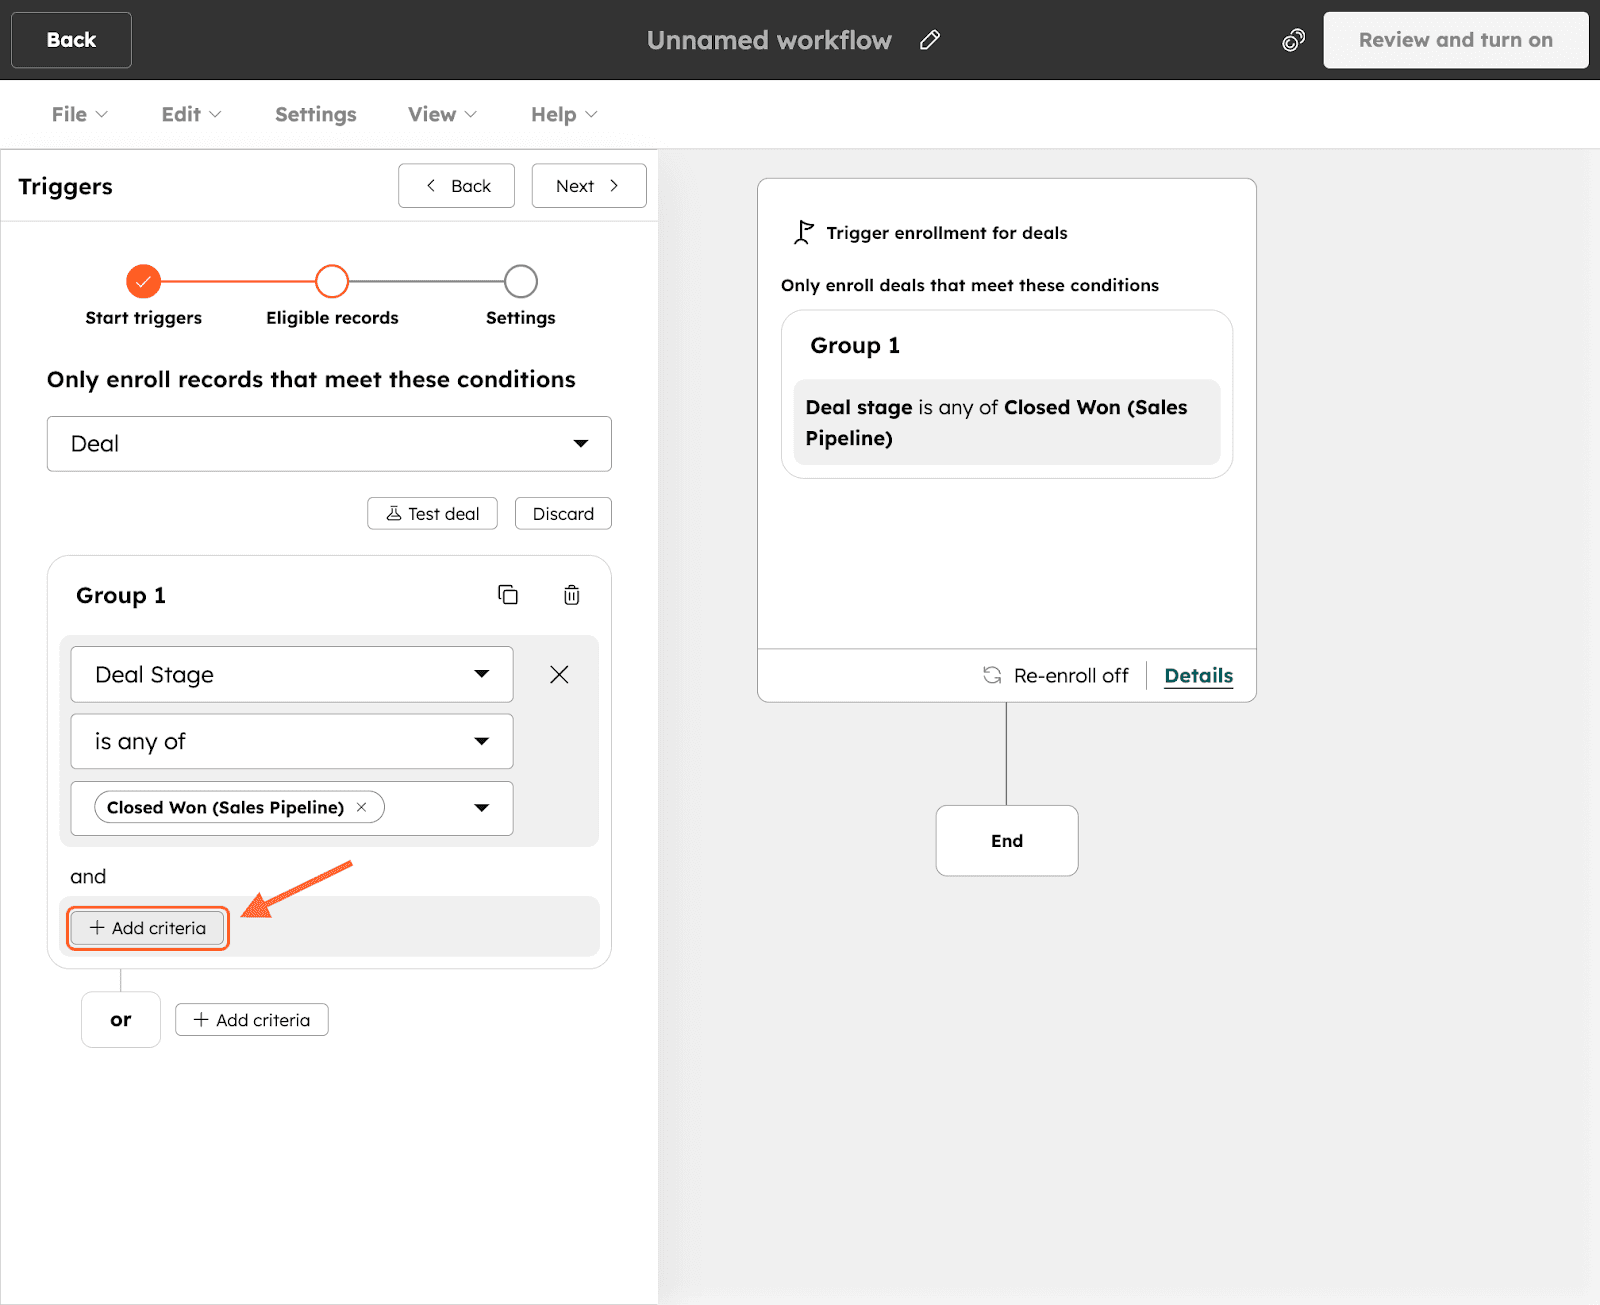
12. If you wish to have multiple filters/filter groups of which only/atleast one has to be satisfied, click on Add criteria outside the filter box, next to or. Follow the same steps from above to create the next filter.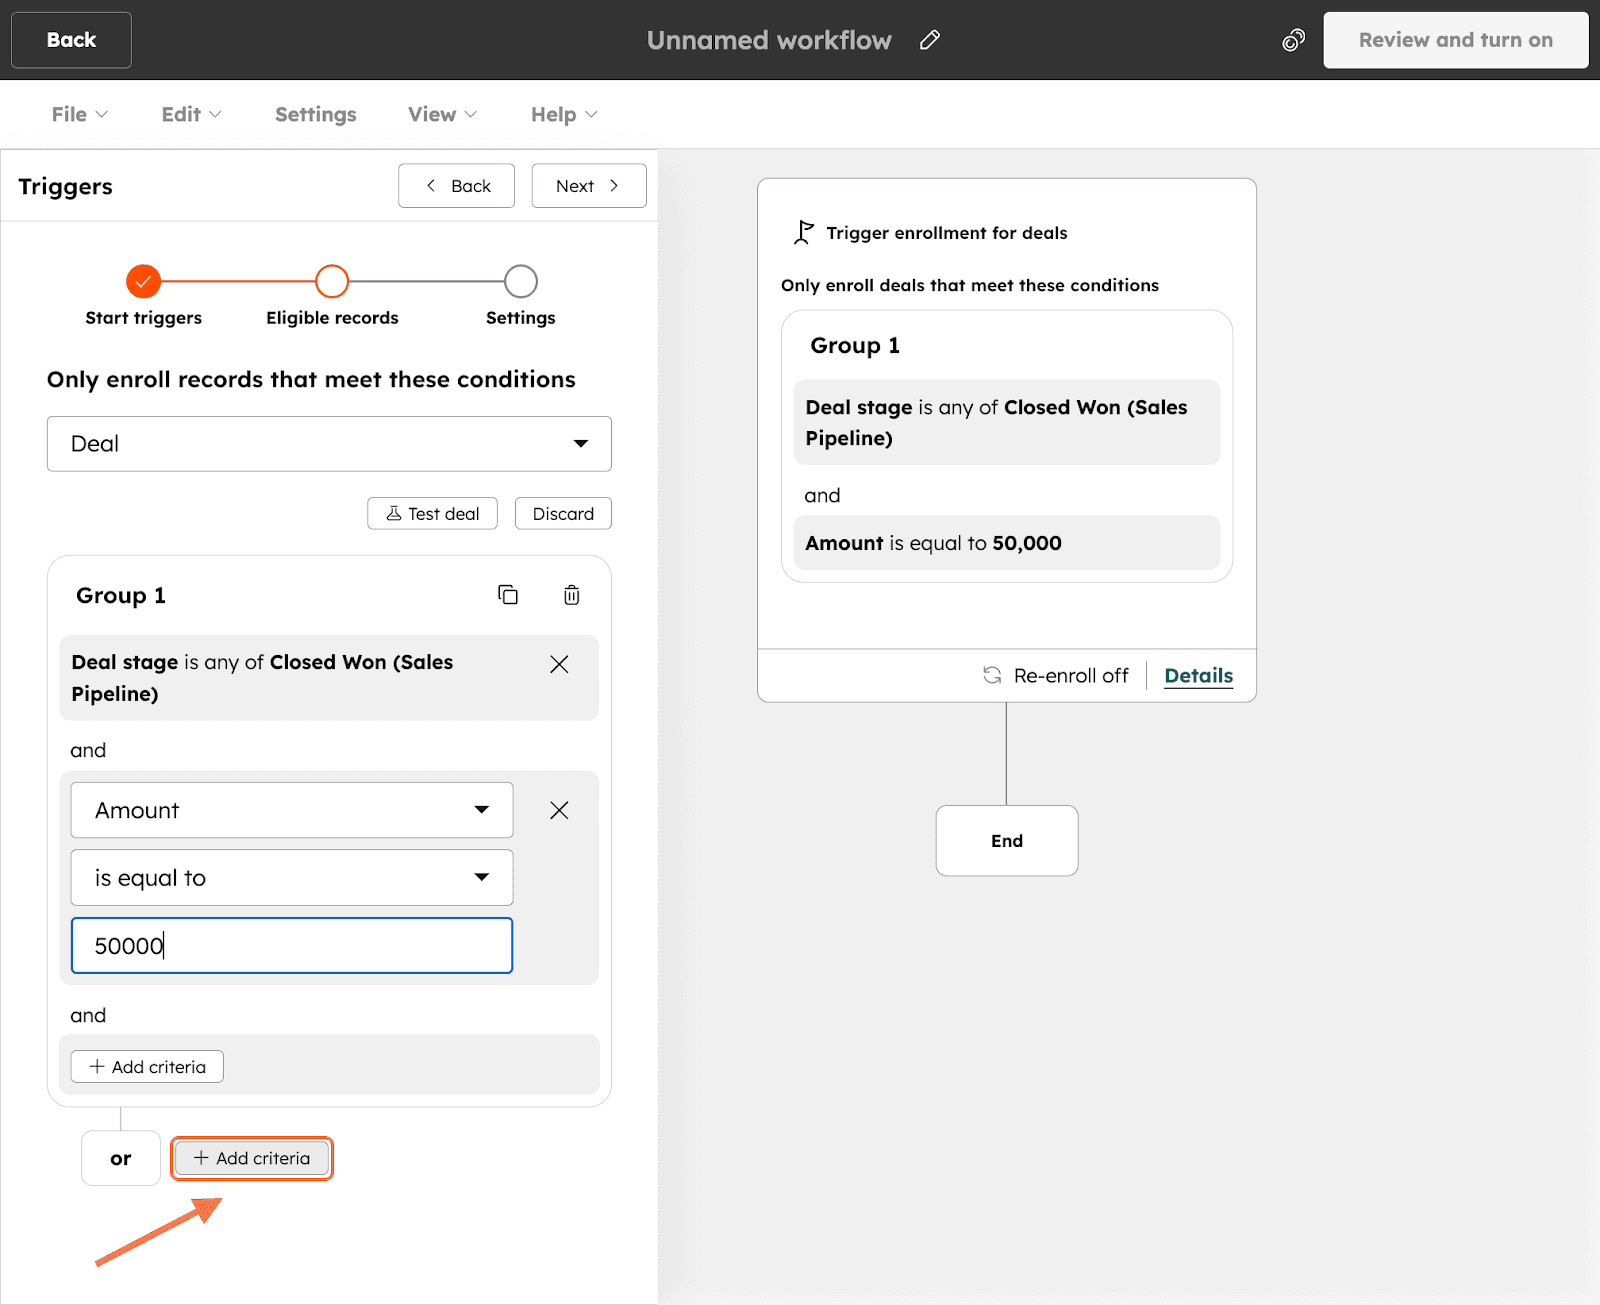
13. After you’ve built out your filters, click on Next.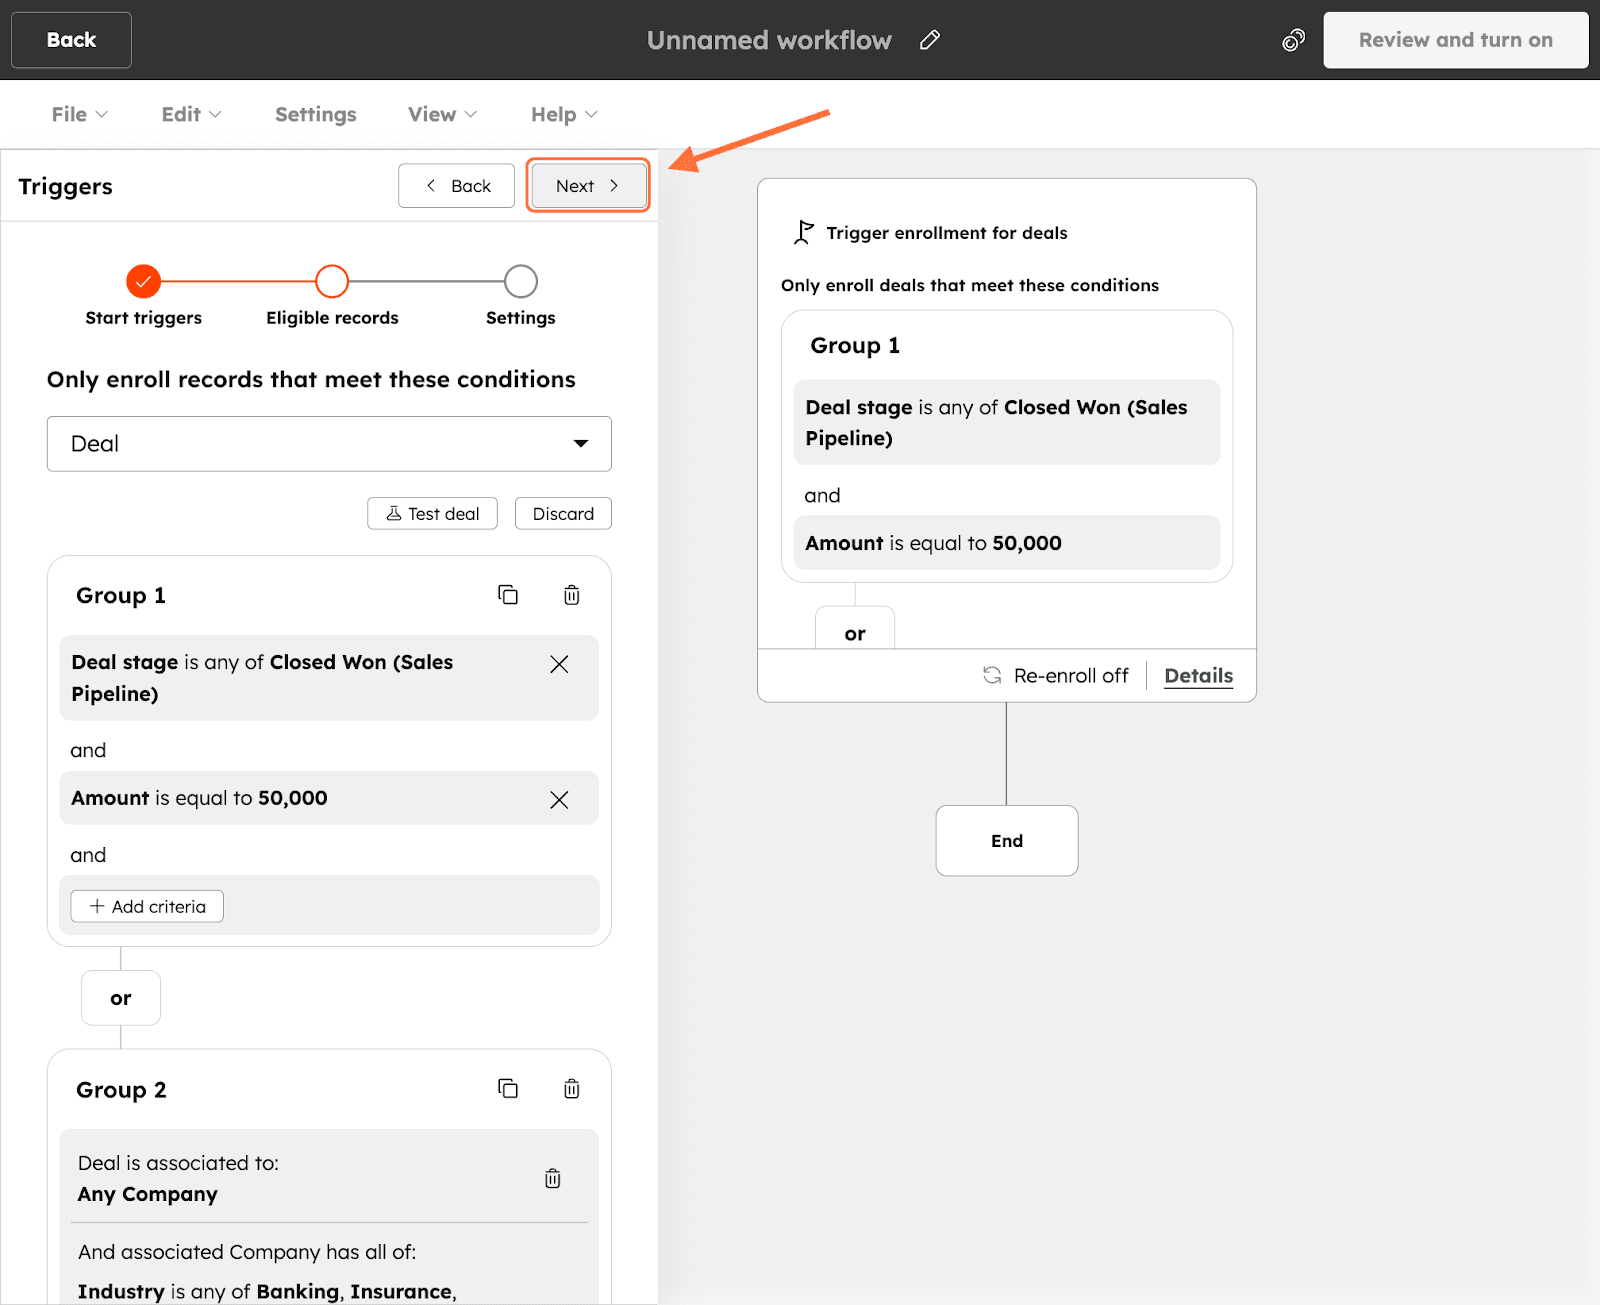
14. In the Eligible records section, click on Save and continue.
15. In the settings section, you will need to define the action. Scroll down till you see the Integrated apps section, then click on the SurveySparrow app.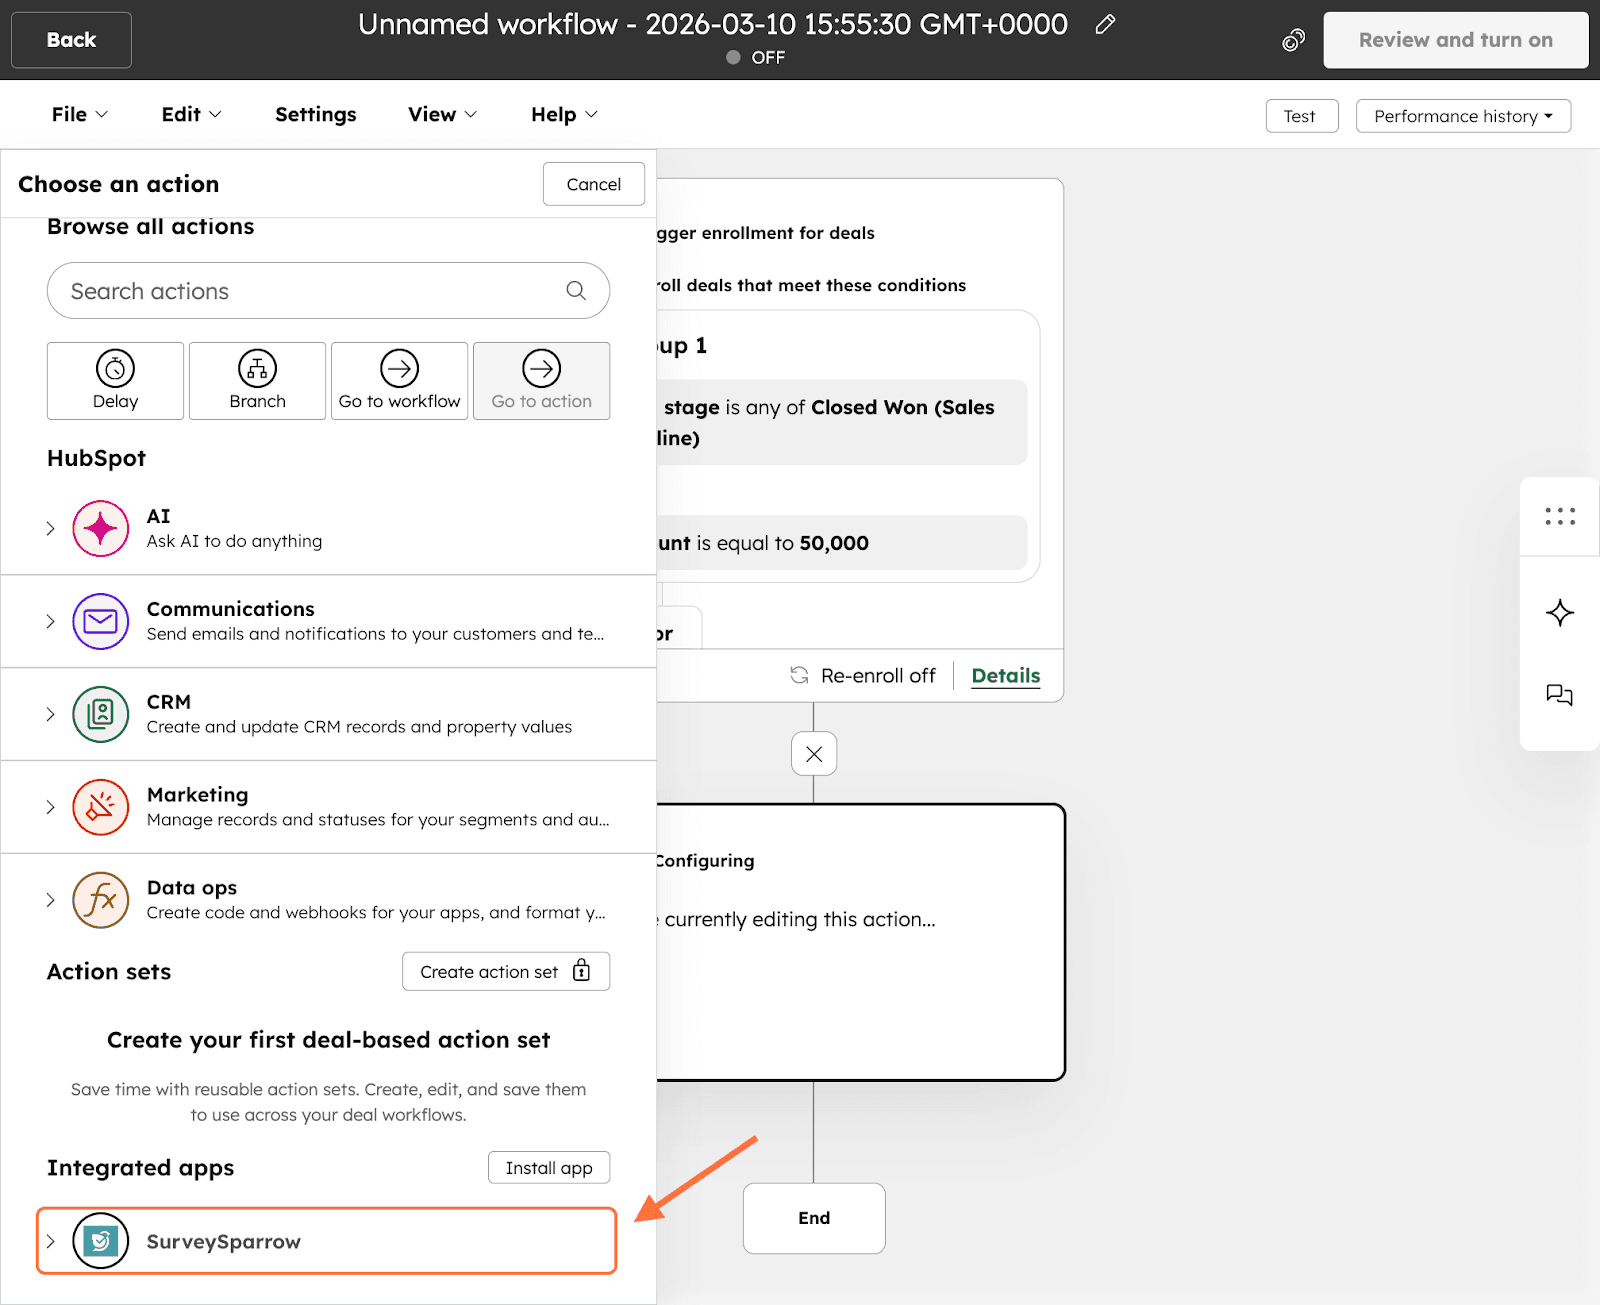
16. The app has one action: Share Survey. Click on it.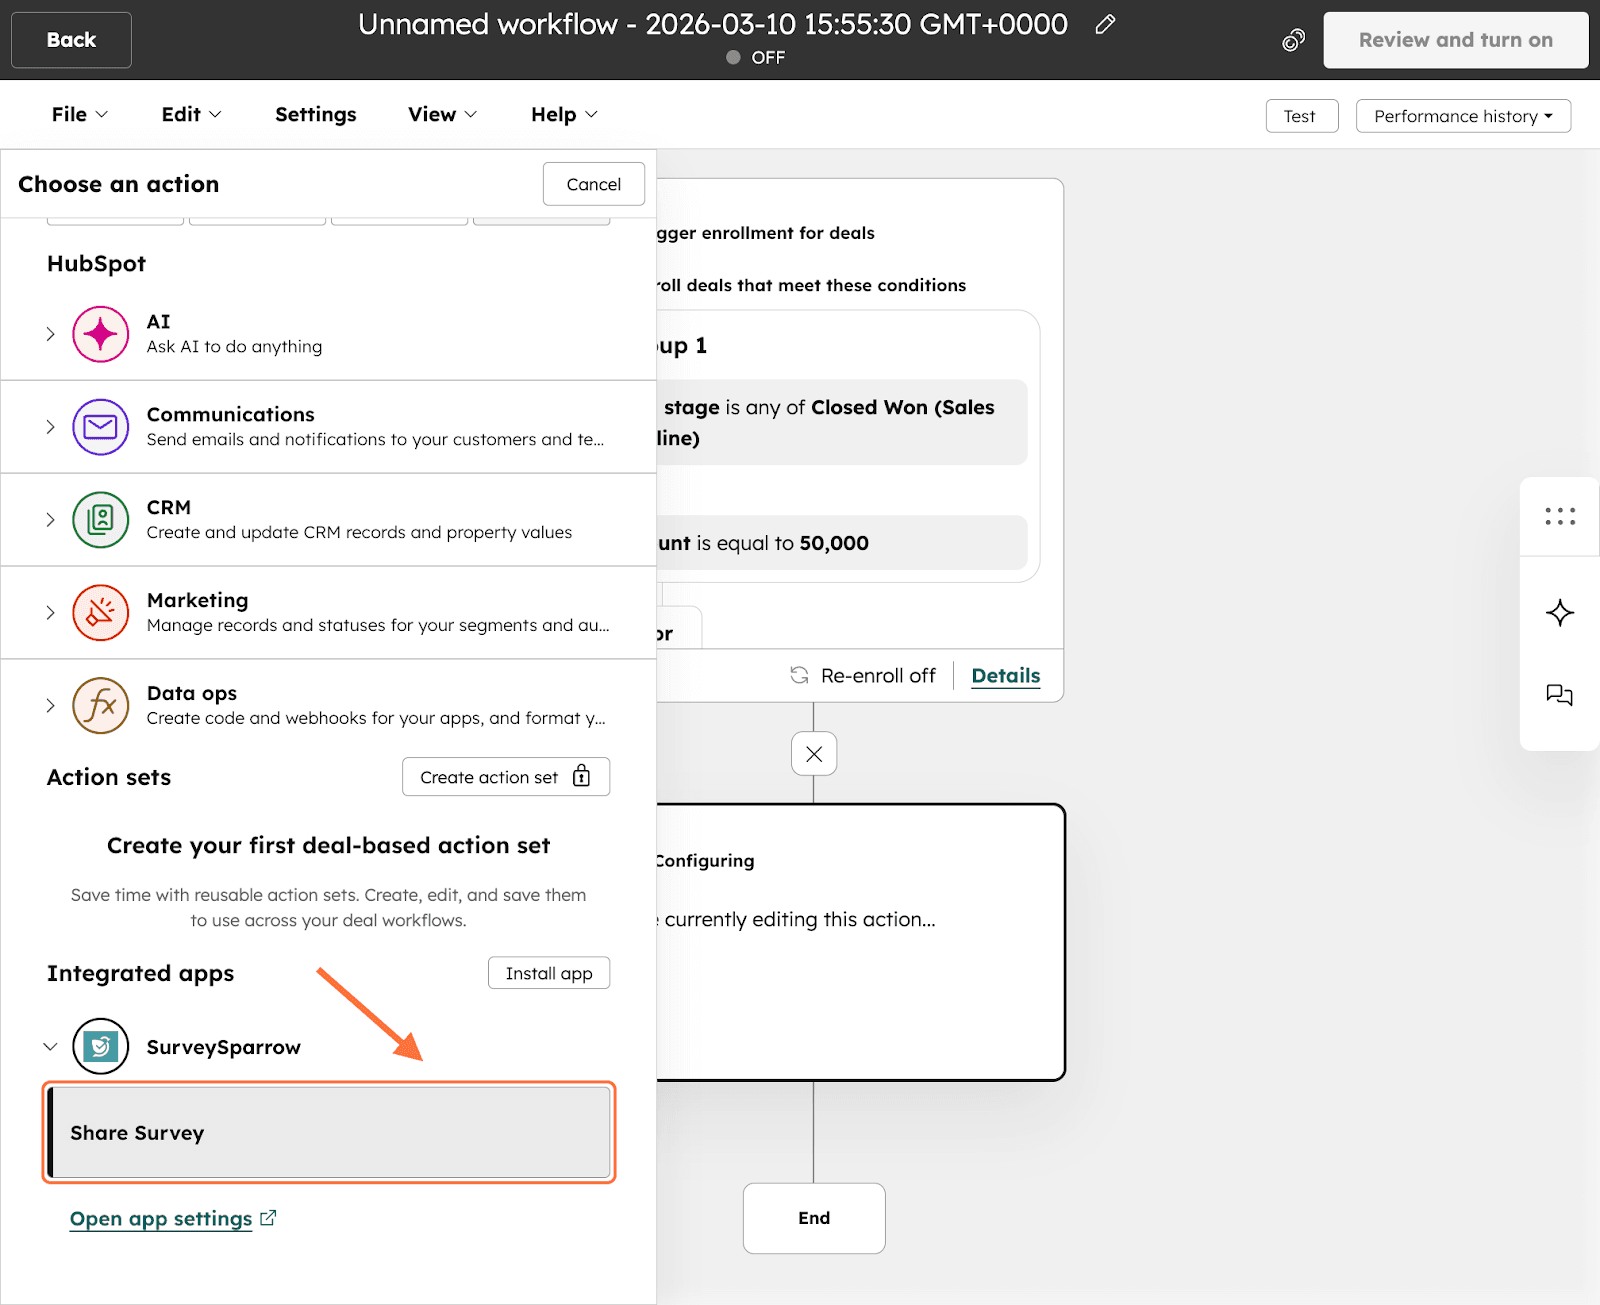
17. The app is open. Start by choosing a survey from your account. Click on the drop-down under Select a survey and choose from the options.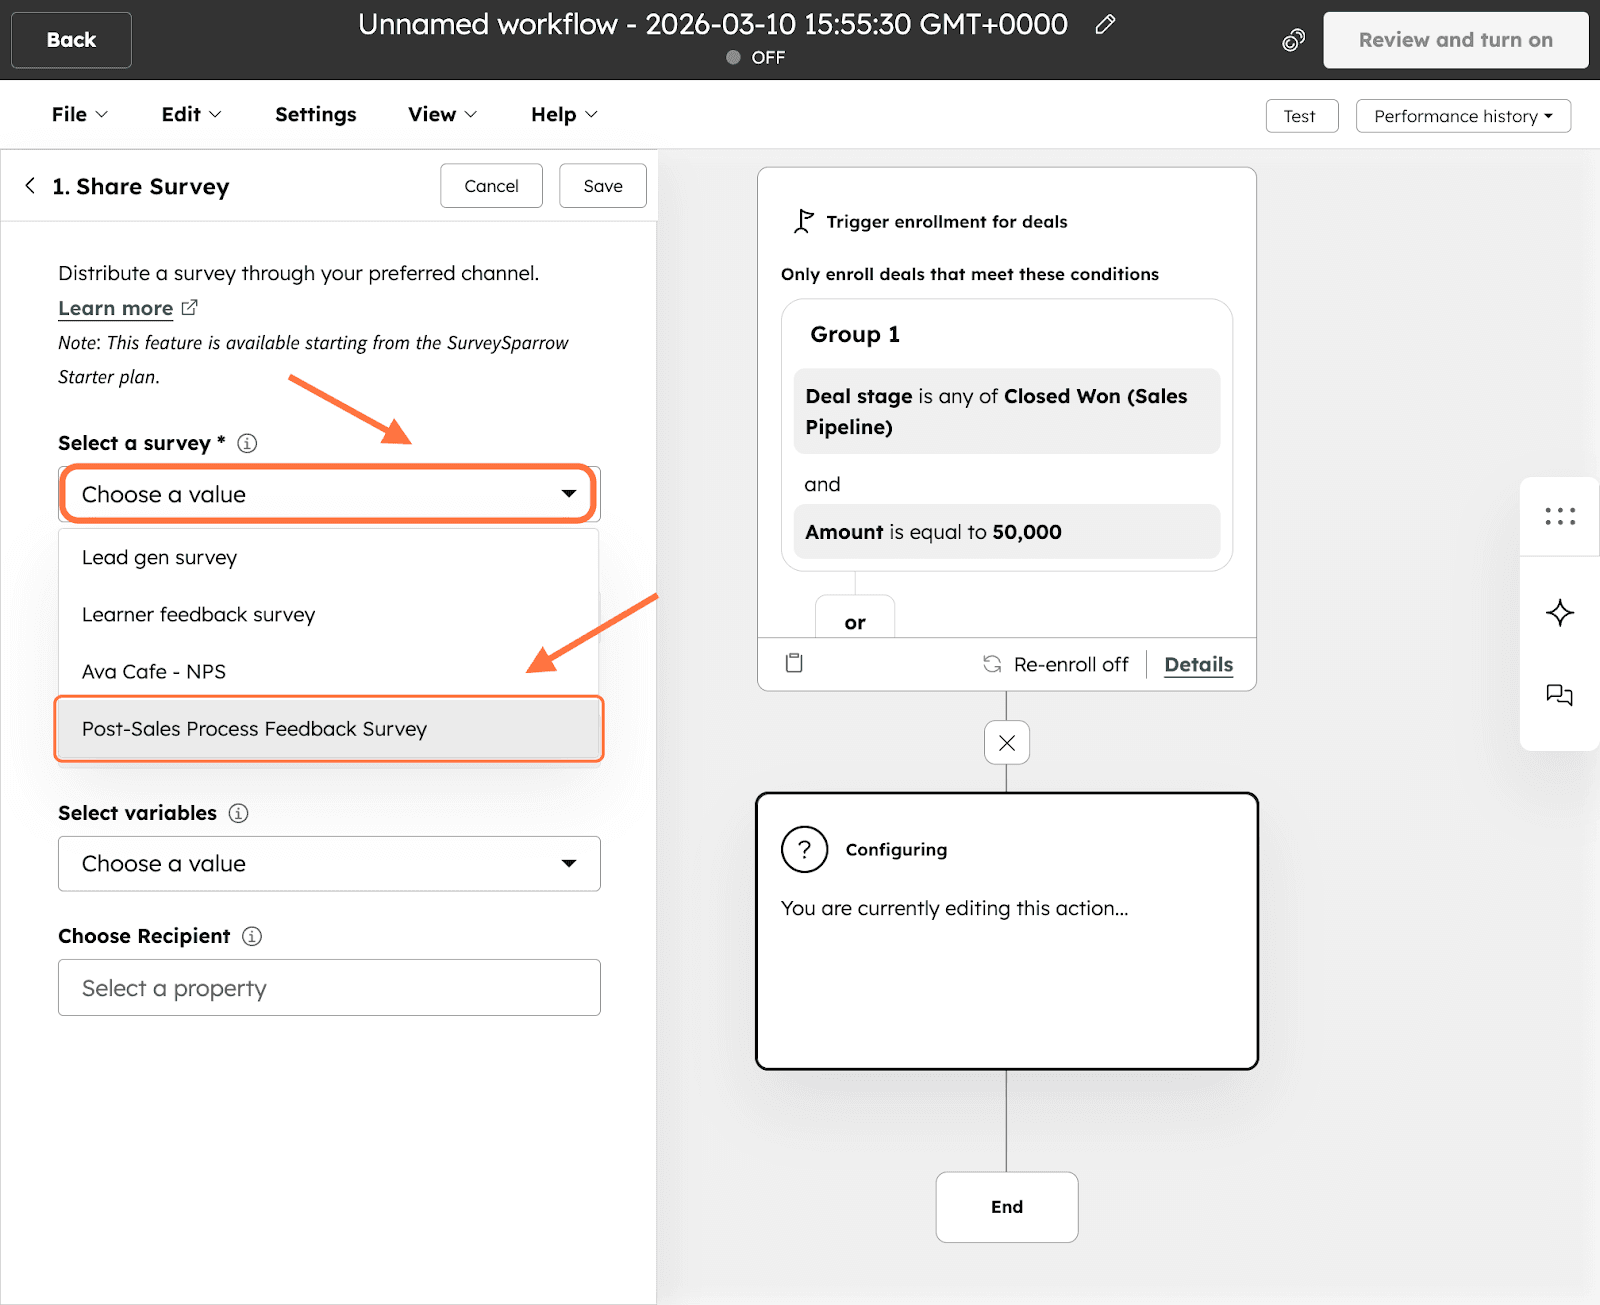
18. Then select the share channel via which you want to send the survey: Email, SMS or WhatsApp. Click on the drop-down under Select a share type and choose from the options.
19. Within the selected share channel type, you need to select an existing share channel. Click on the drop-down menu under Select a Share Channel and choose from the options.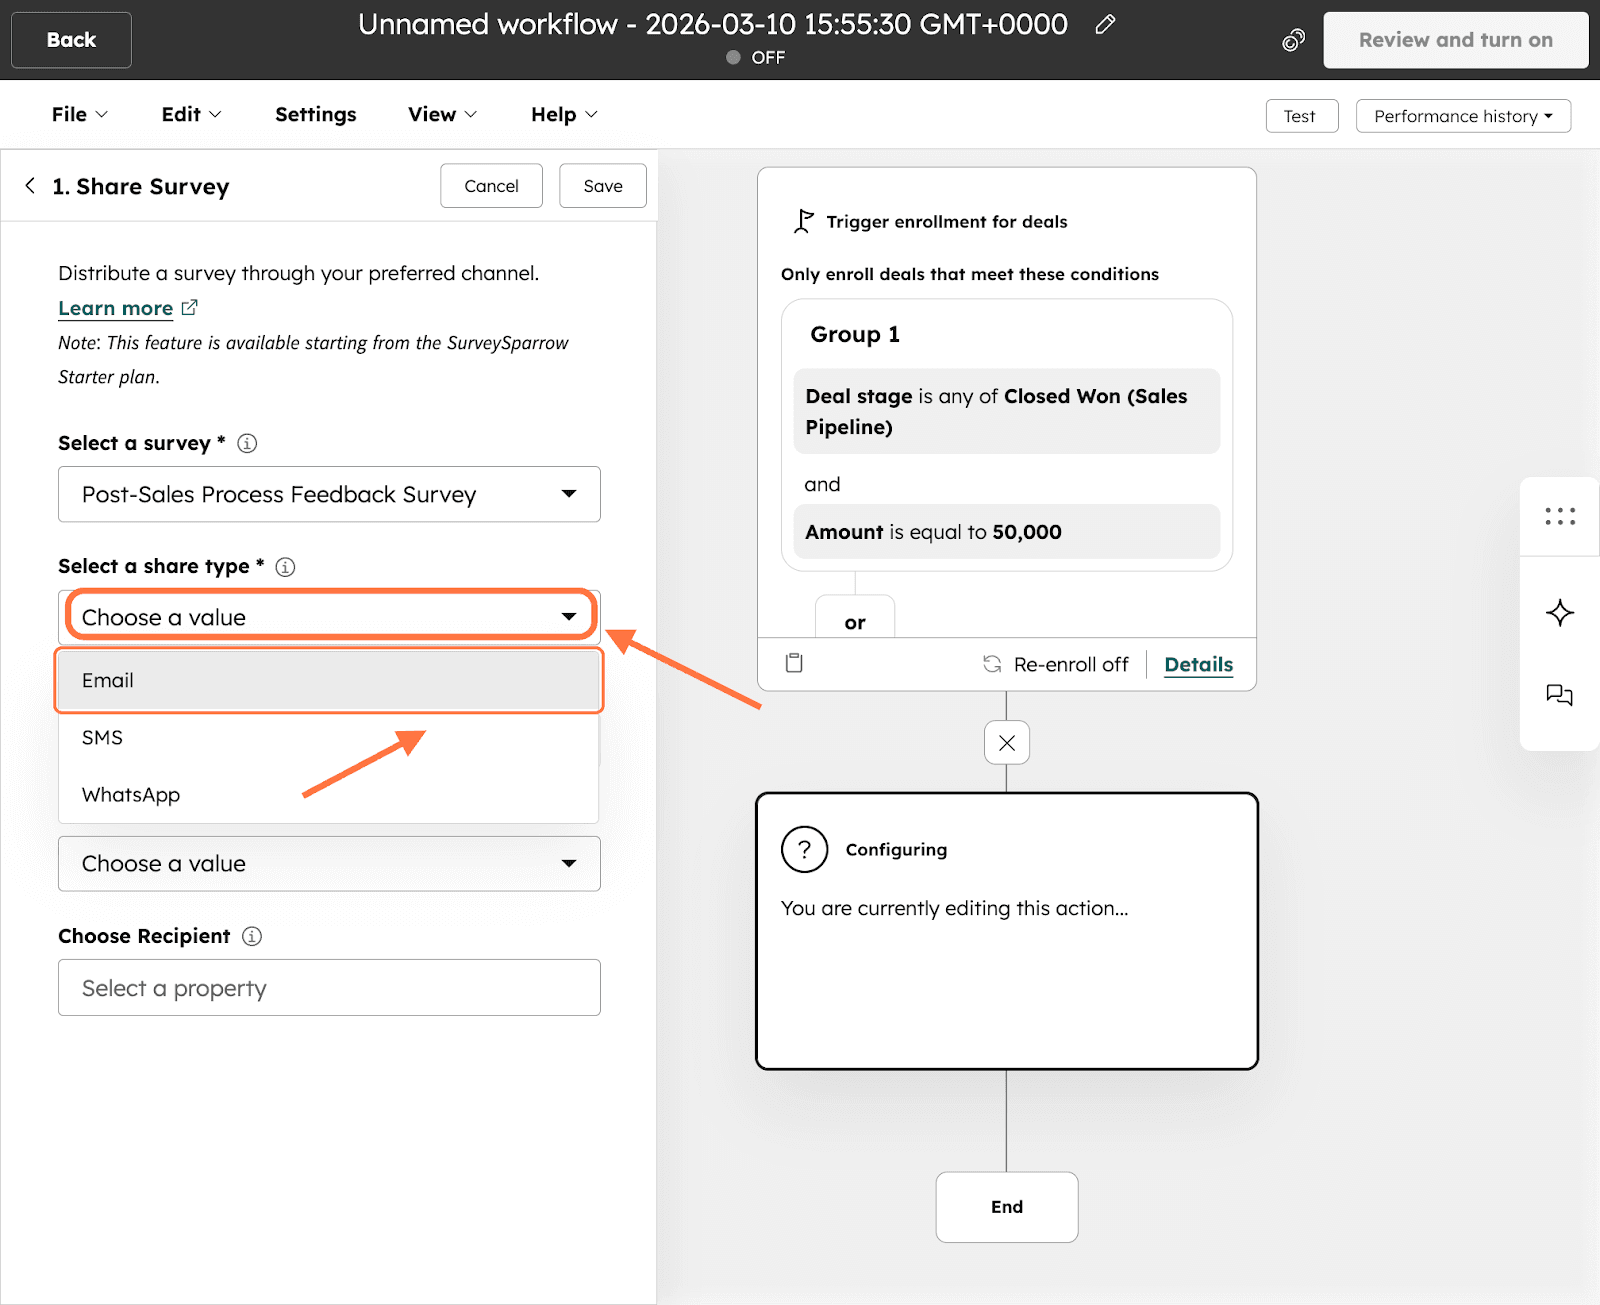
Note: If you do not have a share channel already created for that specific channel type, this field will be inaccessible.
20. You can pass variables from HubSpot via the survey to add additional information/context to the survey responses. Click on the drop-down under Select variables and choose from the options.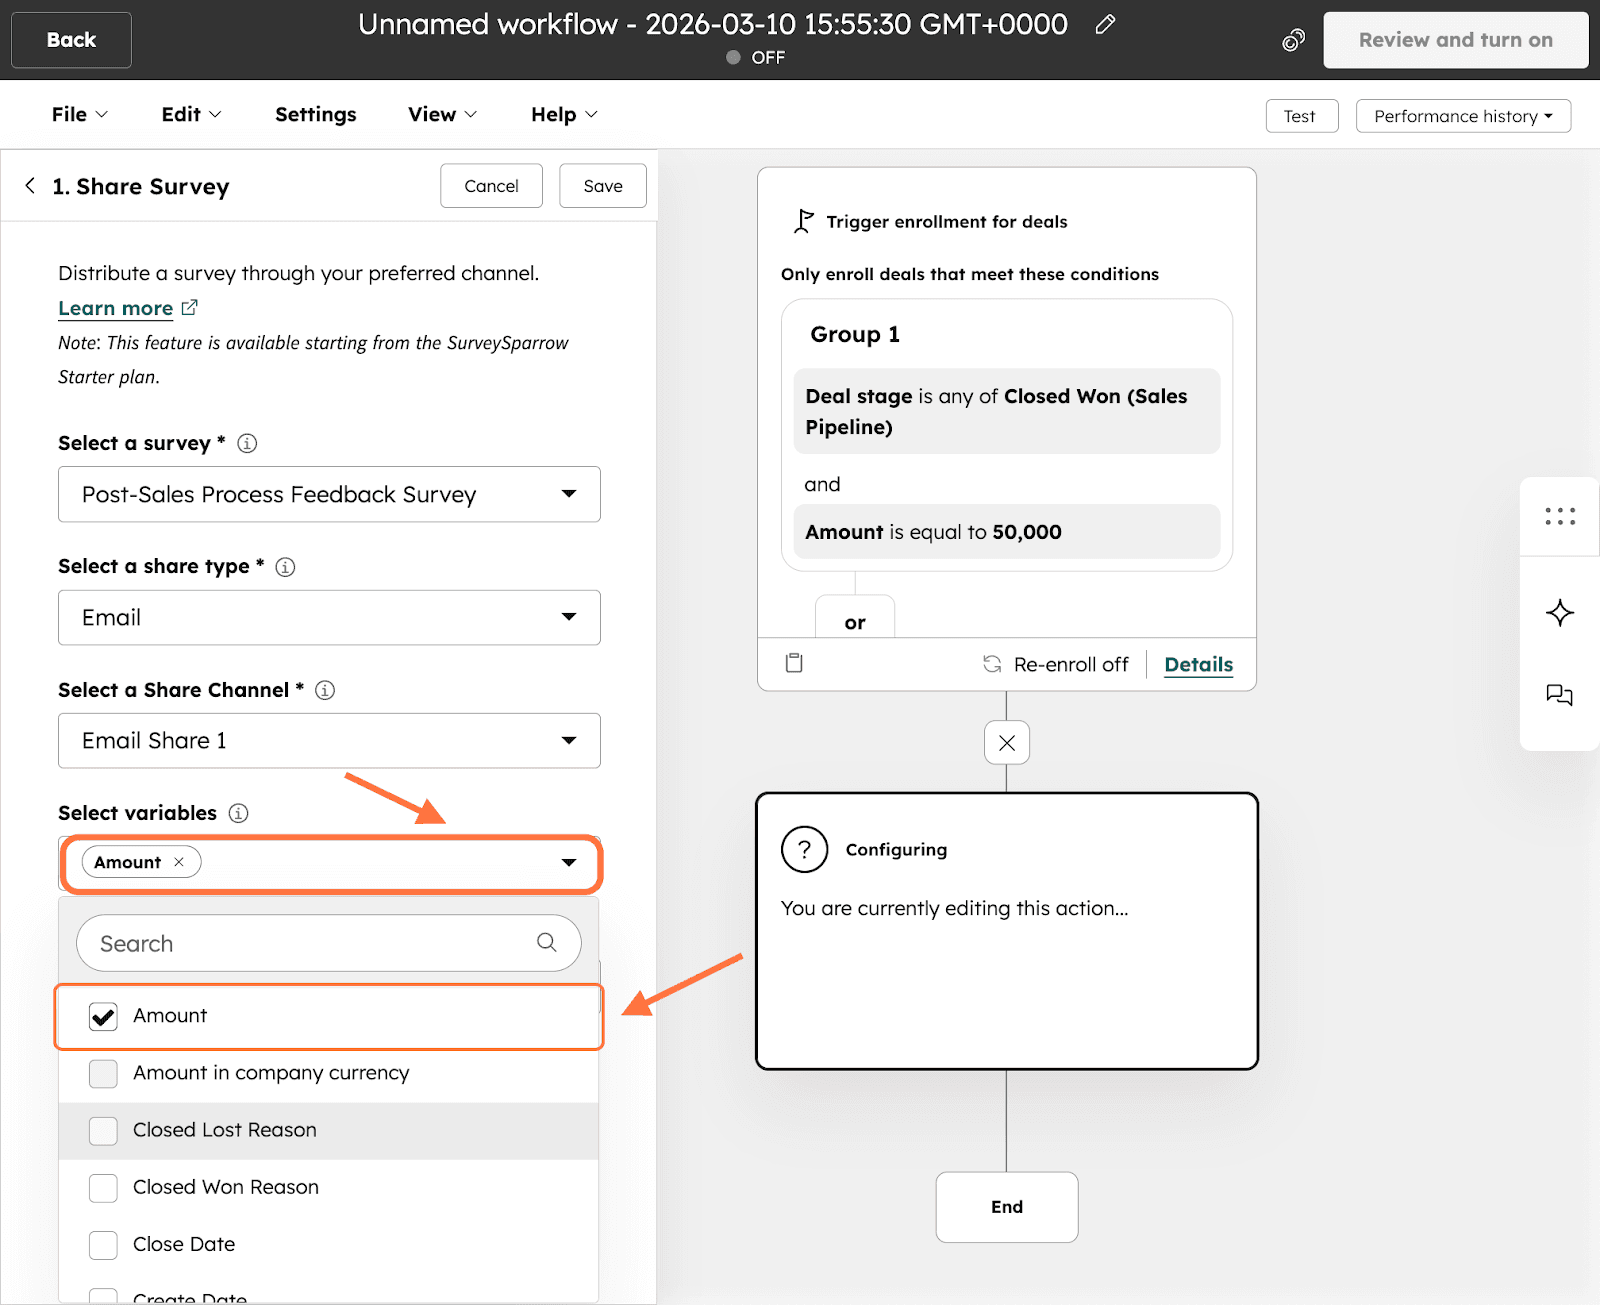
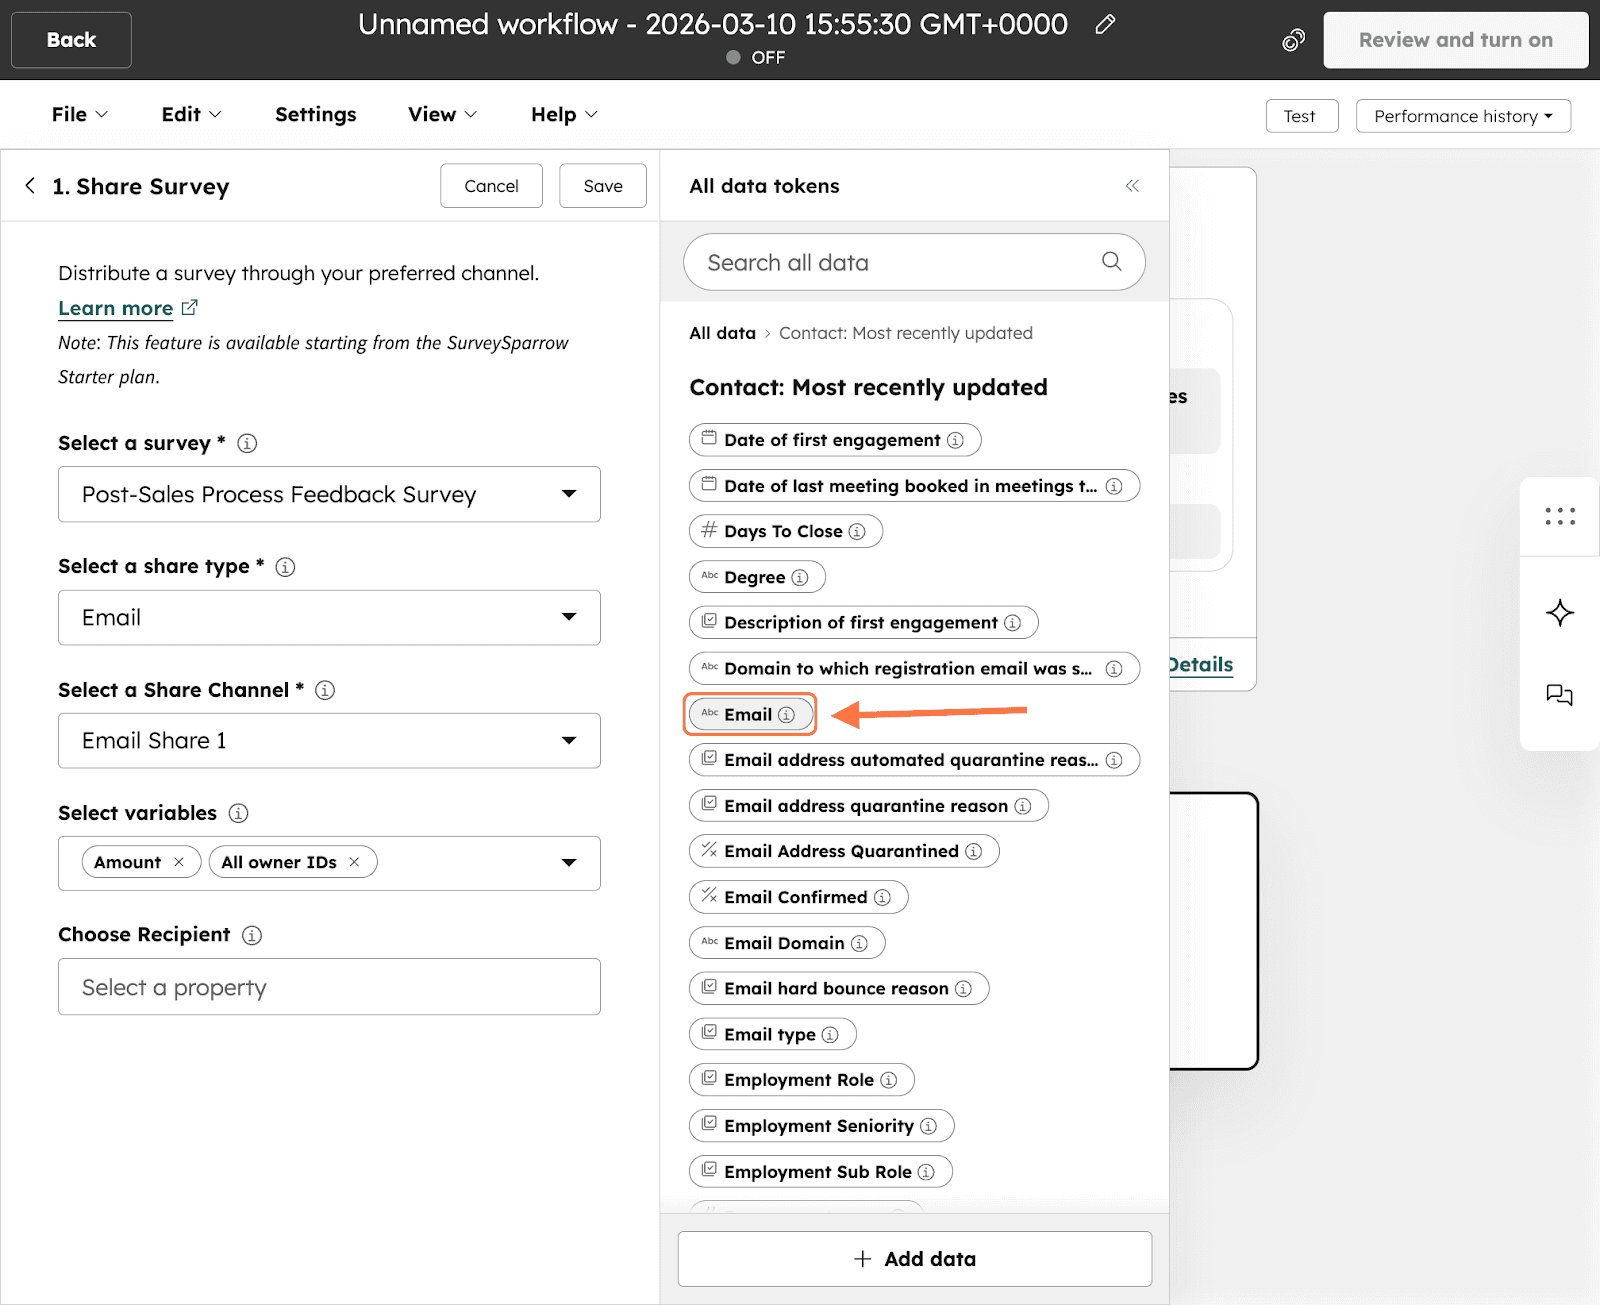
21. Select a recipient contact property (Email or phone number) to send the survey to, by clicking on the field under Choose Recipient.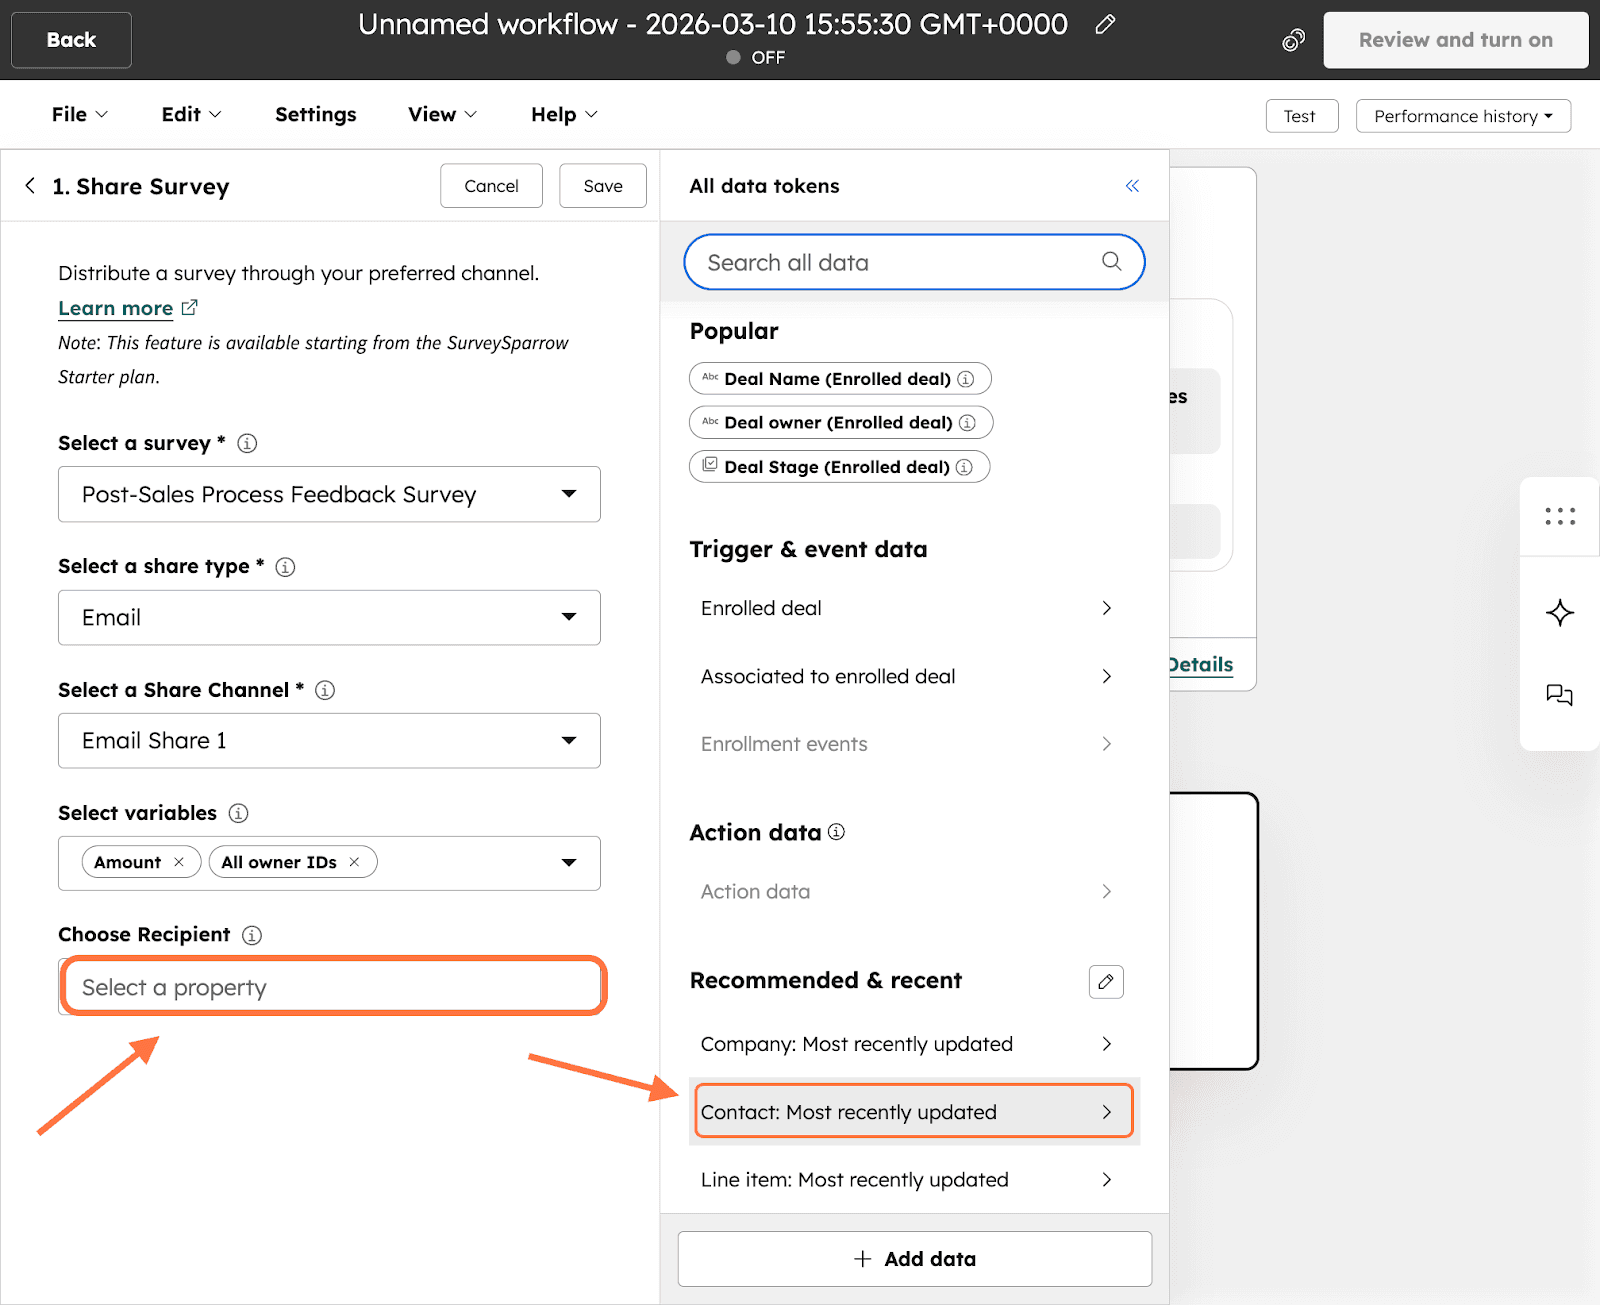
22. To finalize the survey deployment, click on Save.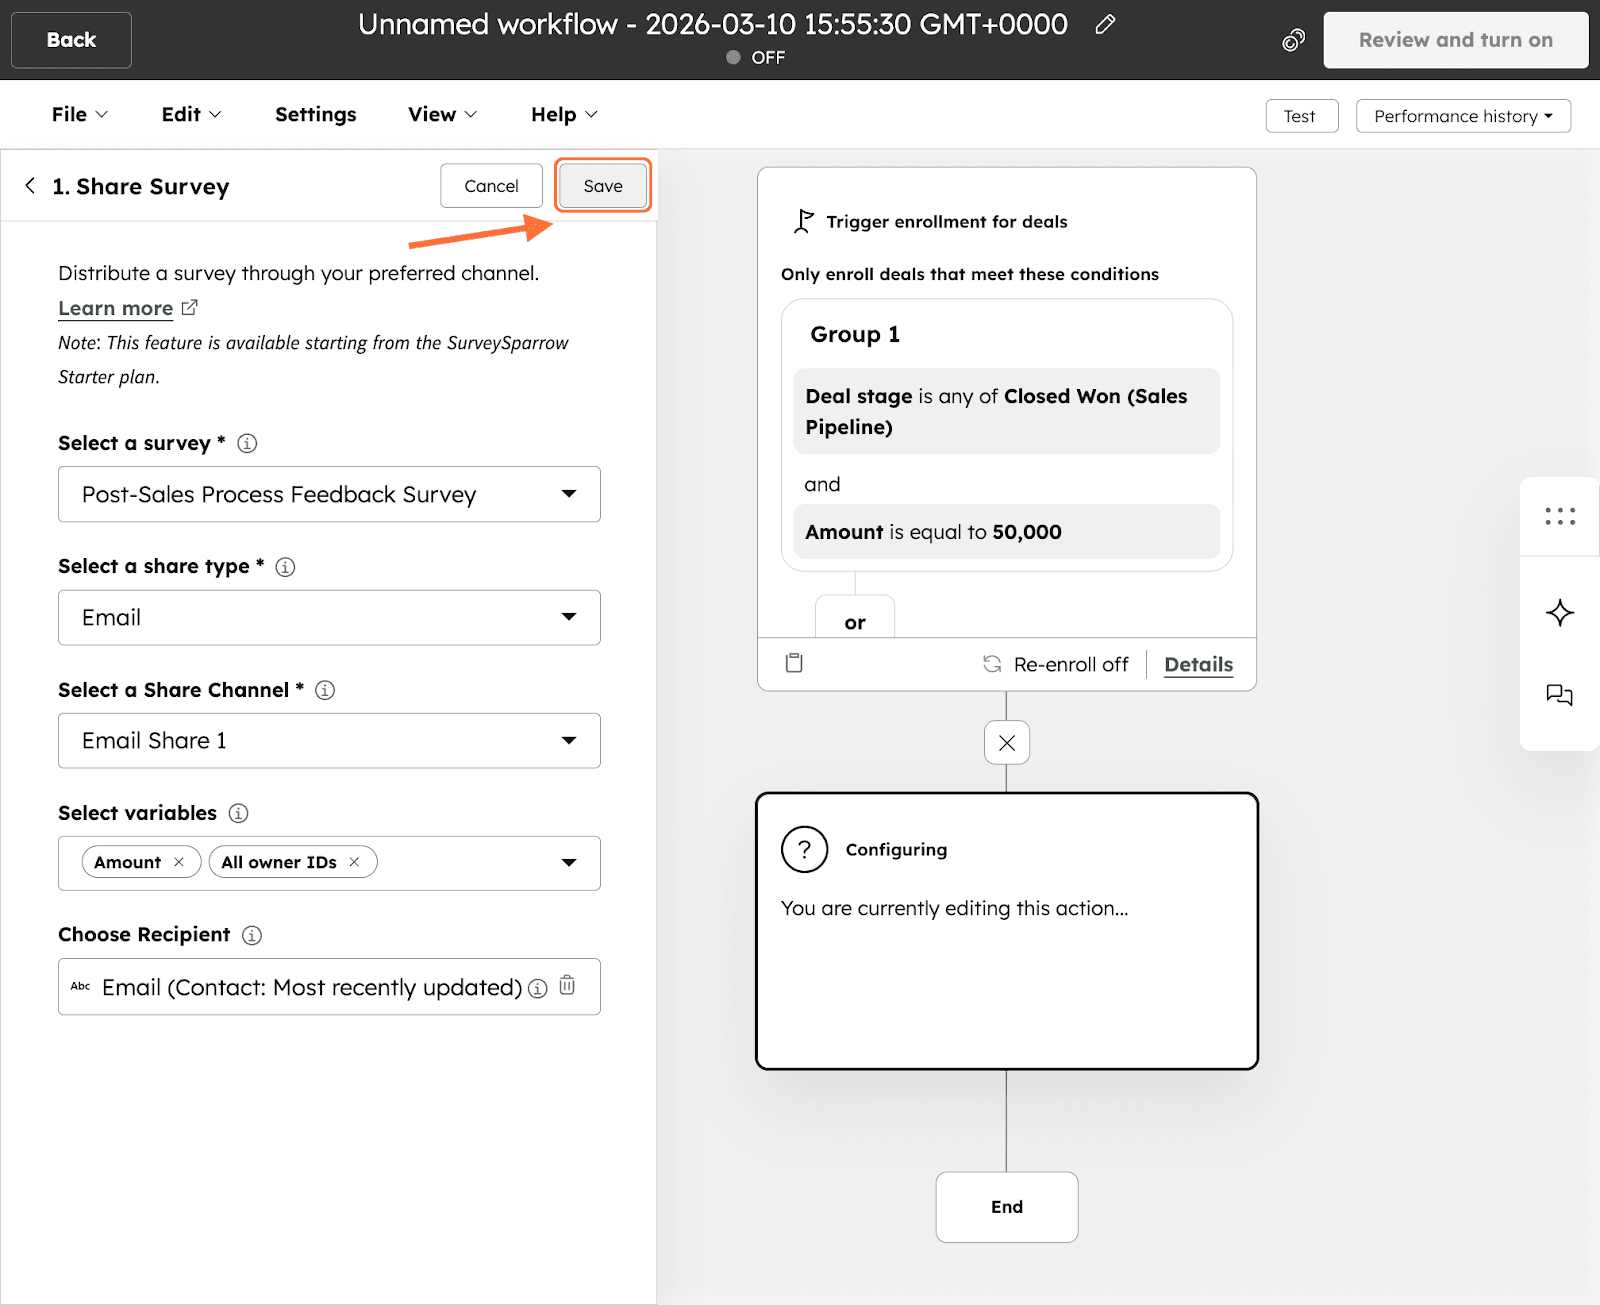
23. Now the action is ready. Note that each action node can only be used to send one survey via one share channel (type and specific channel). If you wish to send survey(s) across multiple channels, you will need to create different nodes. You can add additional nodes by clicking on the plus icon above/below each node. You can also duplicate an existing node by clicking on the icon at the bottom of its card.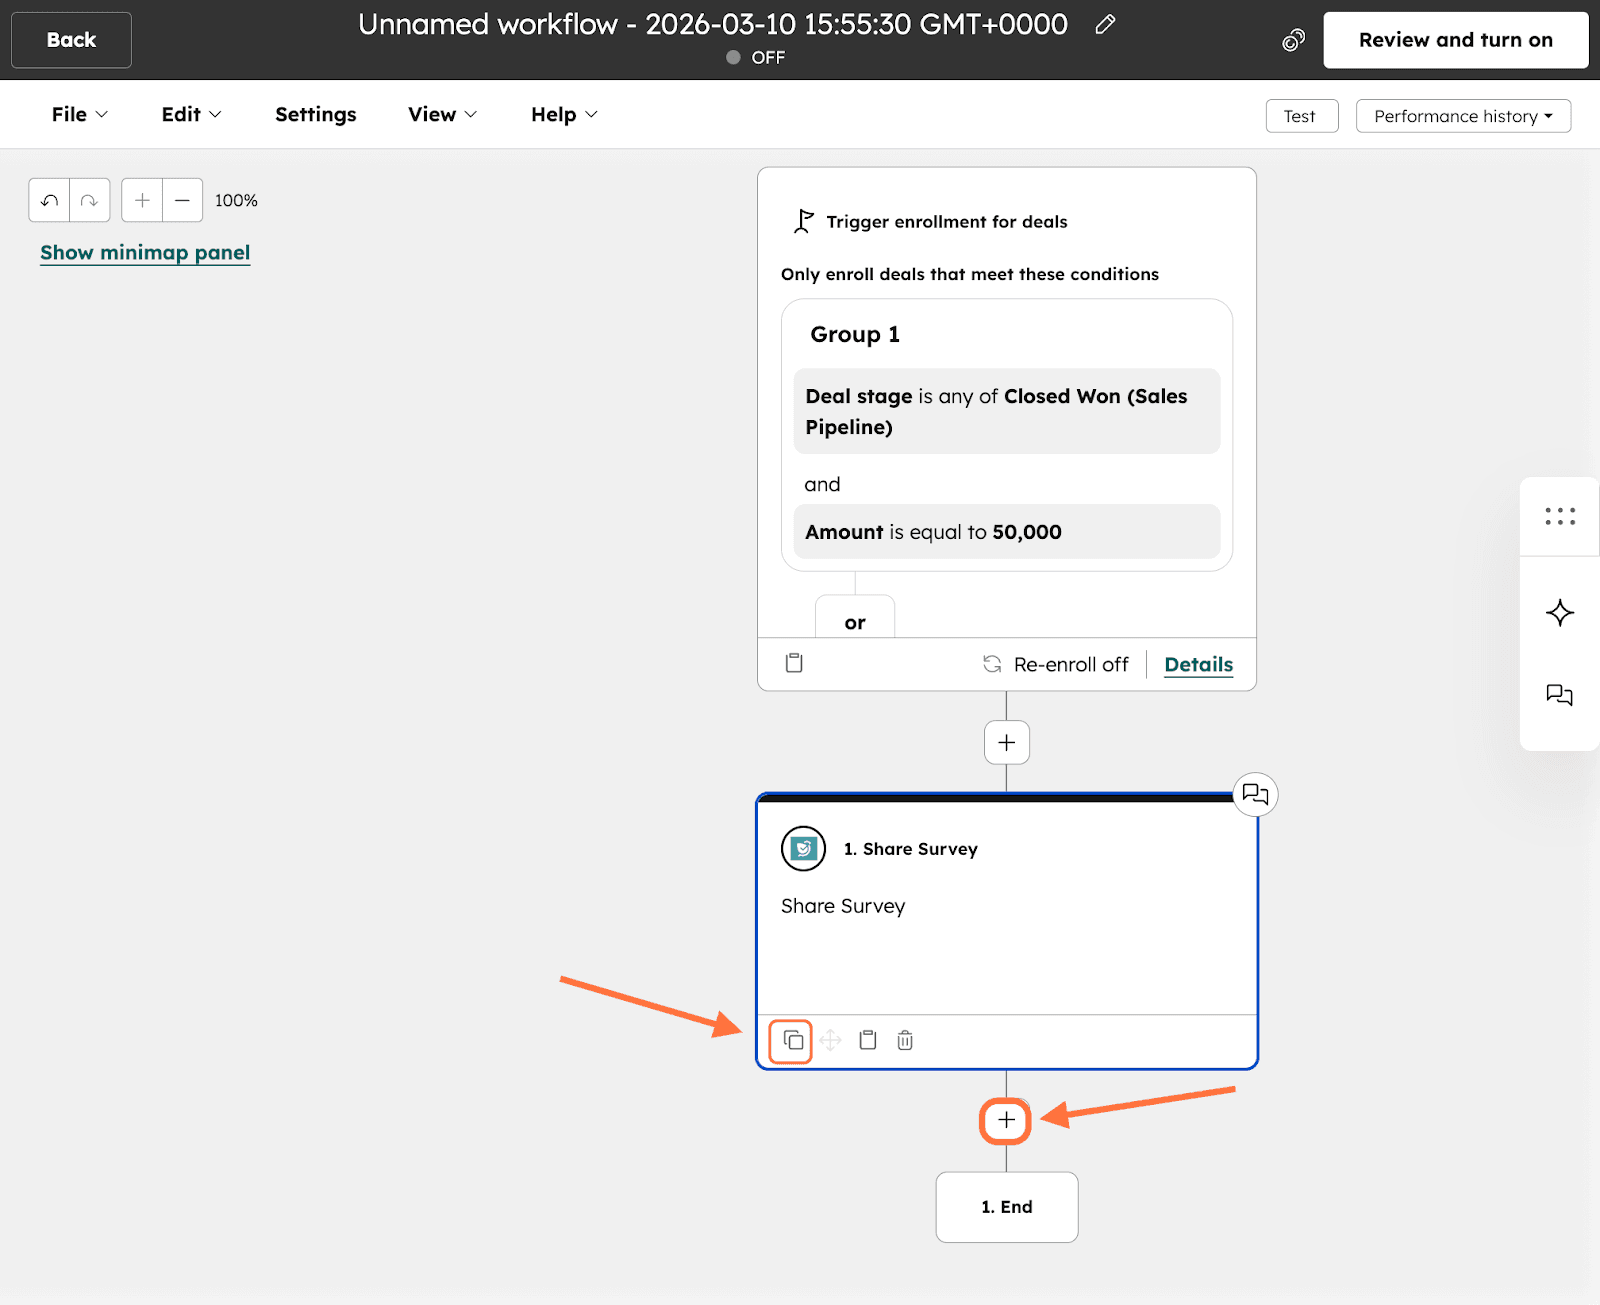
24. To switch on the workflow, click on Review and turn on.
25. The first part of reviewing the workflow is the enrollment settings, aka choosing between kickstarting triggers for all eligible records or new ones. Choose an option and click Next.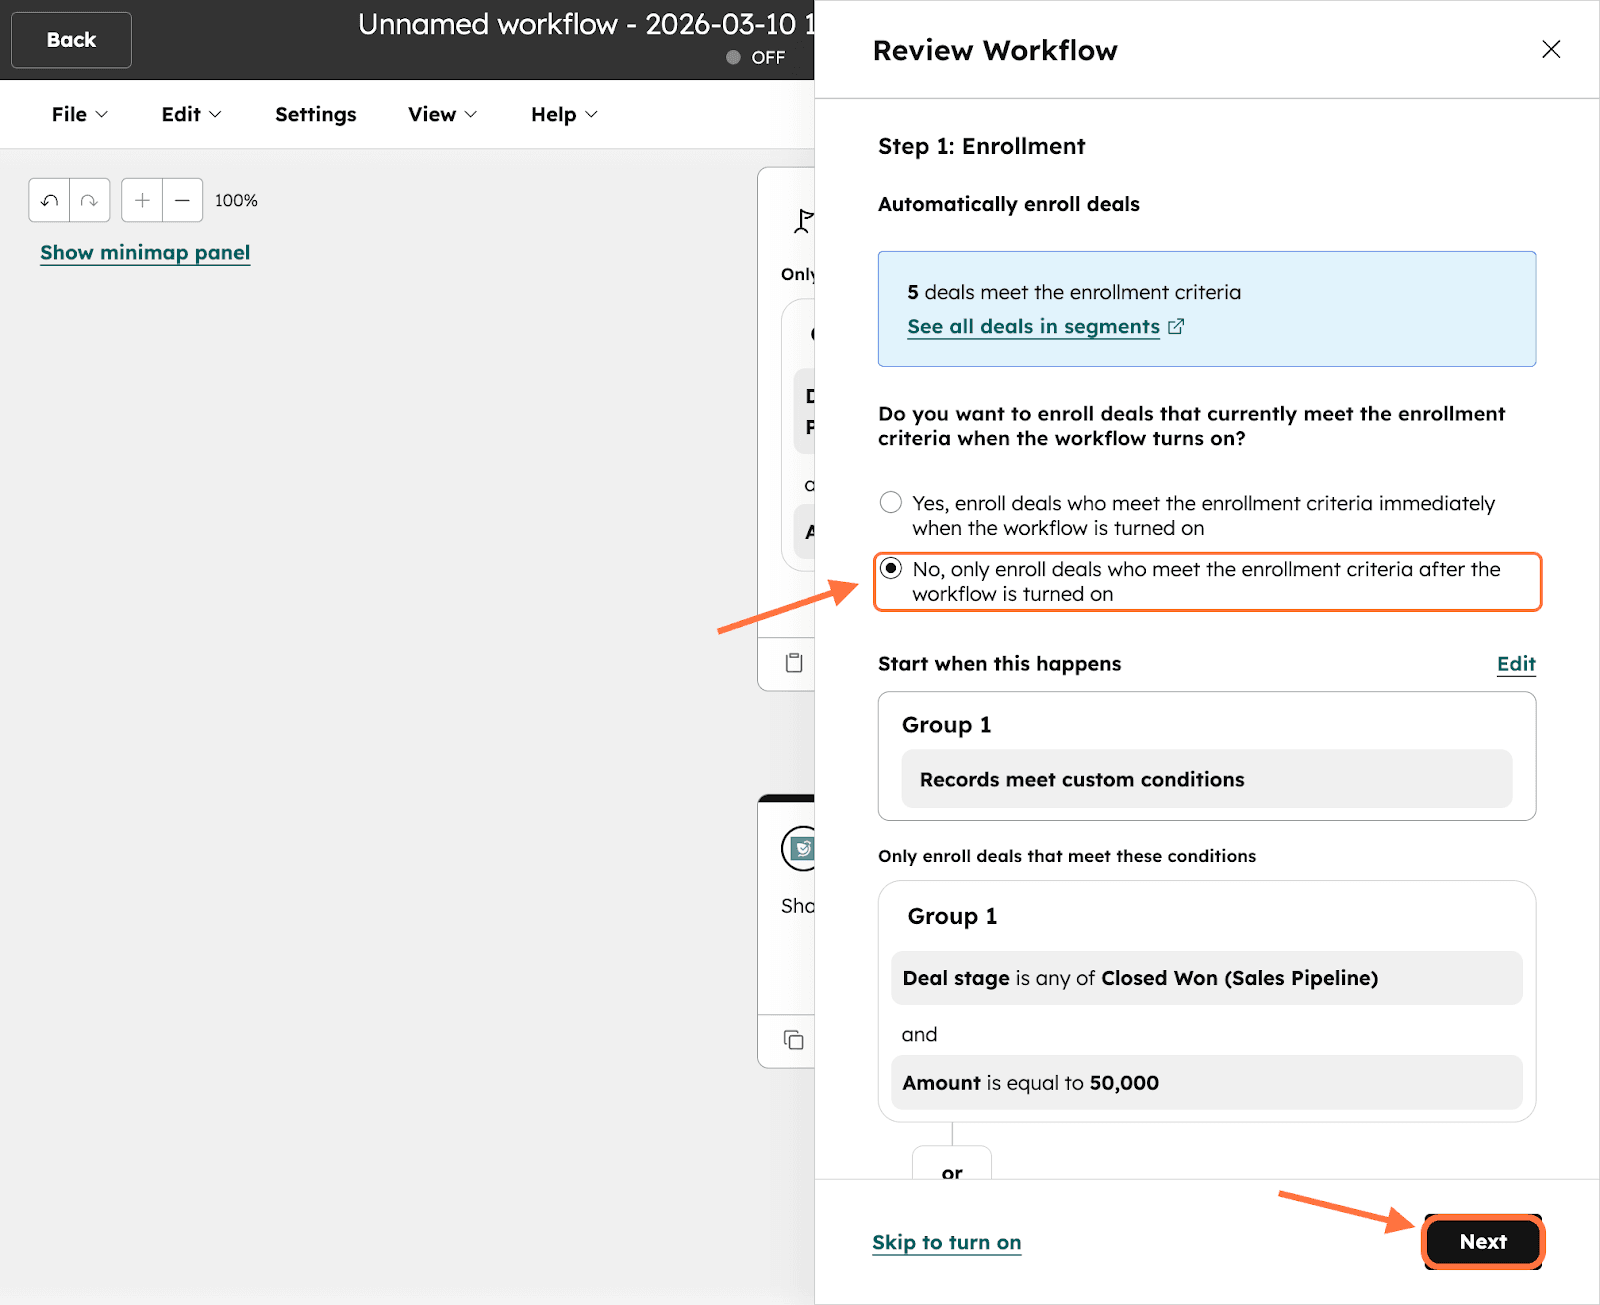
26. The next setting involves the scheduling and notifications for a workflow. Once you’ve completed the configurations, click Next.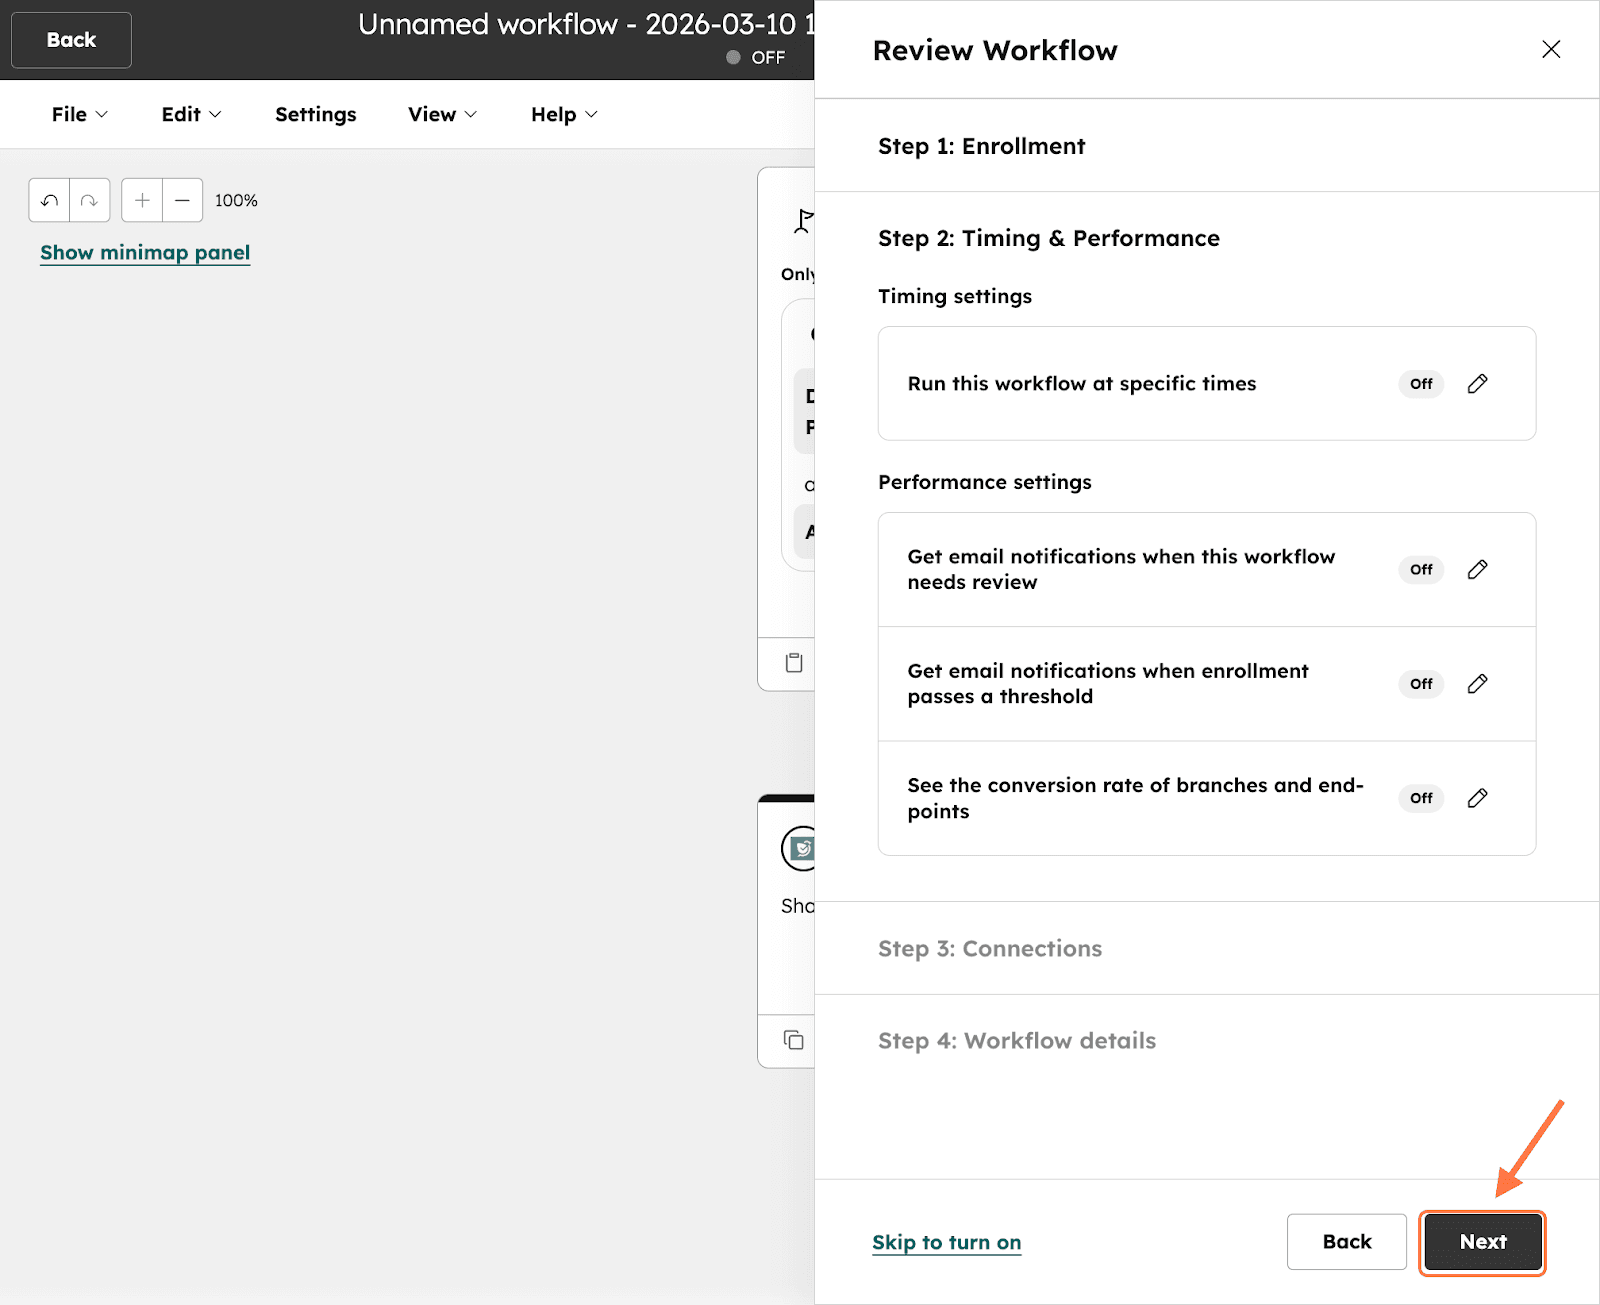
27. In the Connections setting, you can review the different data properties and other HubSpot elements that are involved in the workflow. Click on Next to proceed.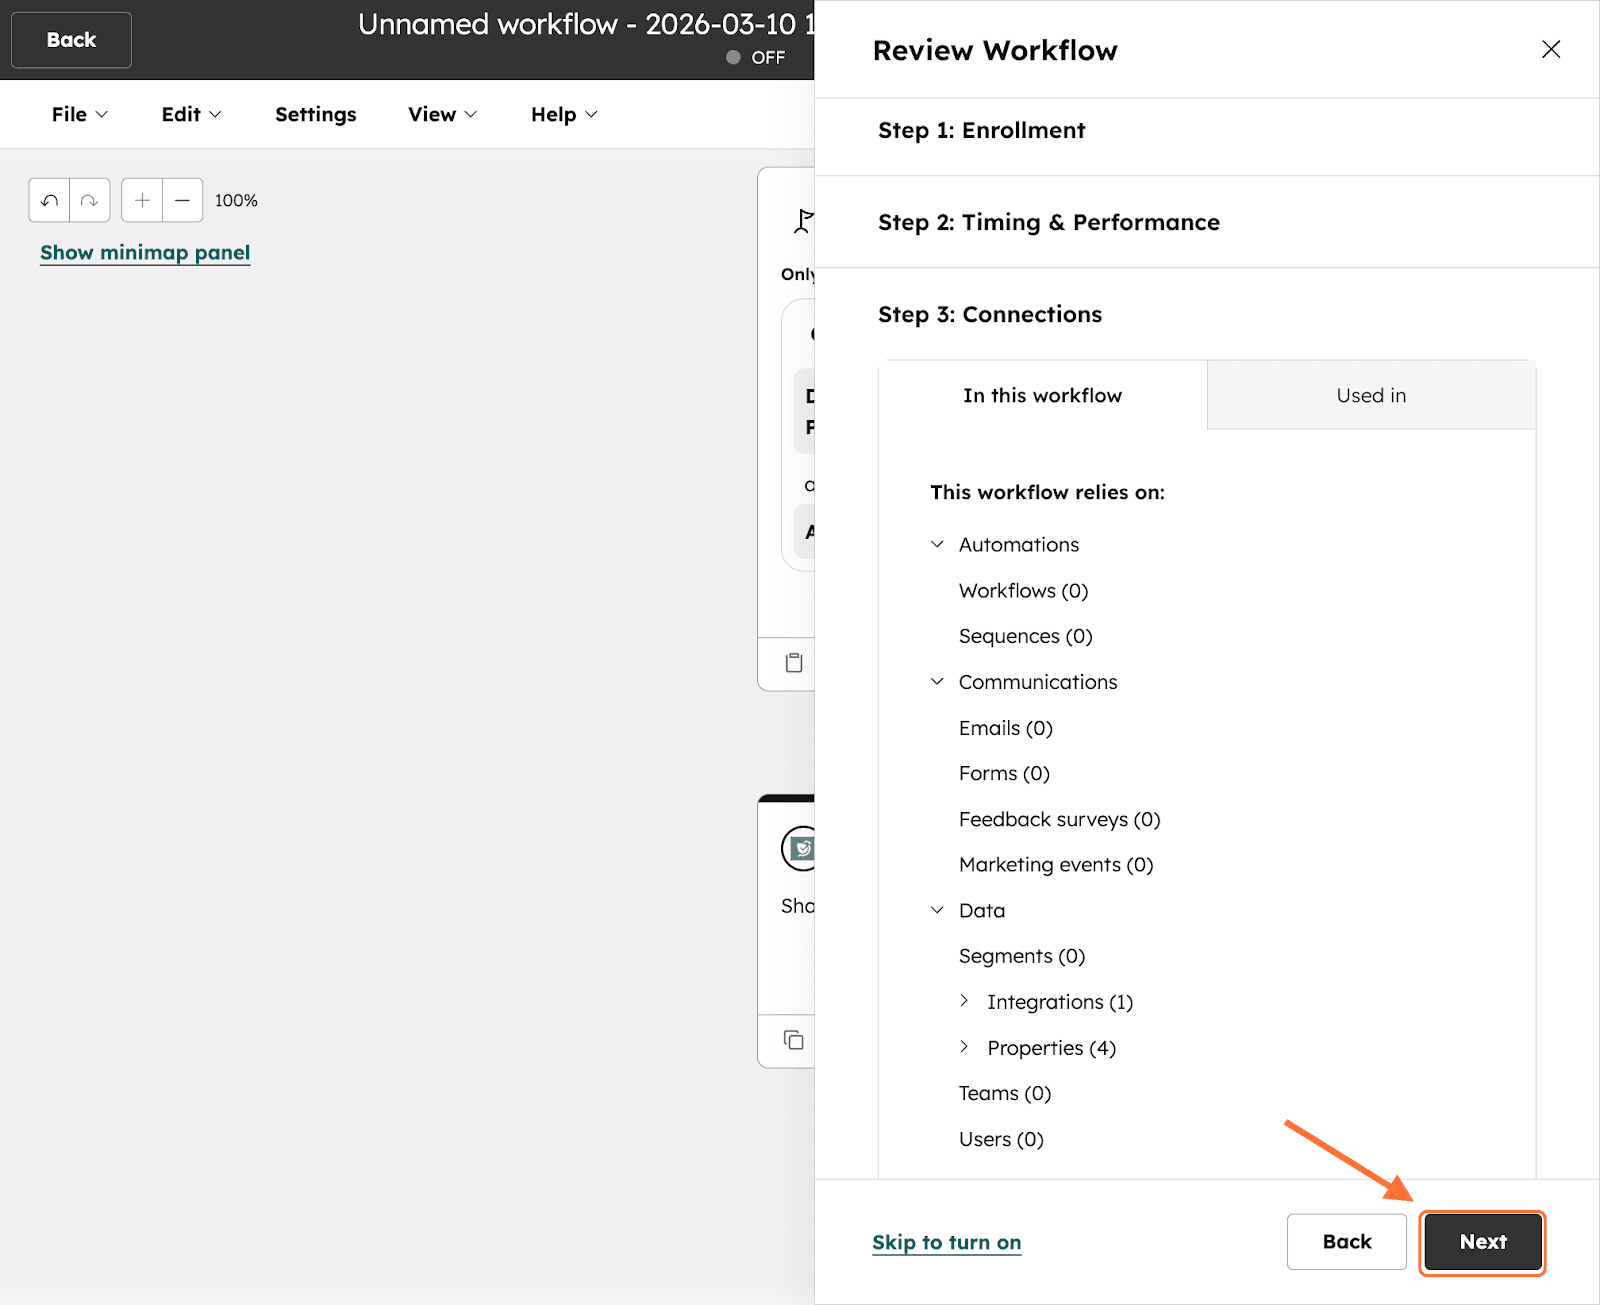
28. In the final section, a workflow name and description are auto-generated. You can edit if needed, and then click Turn on workflow to activate the trigger.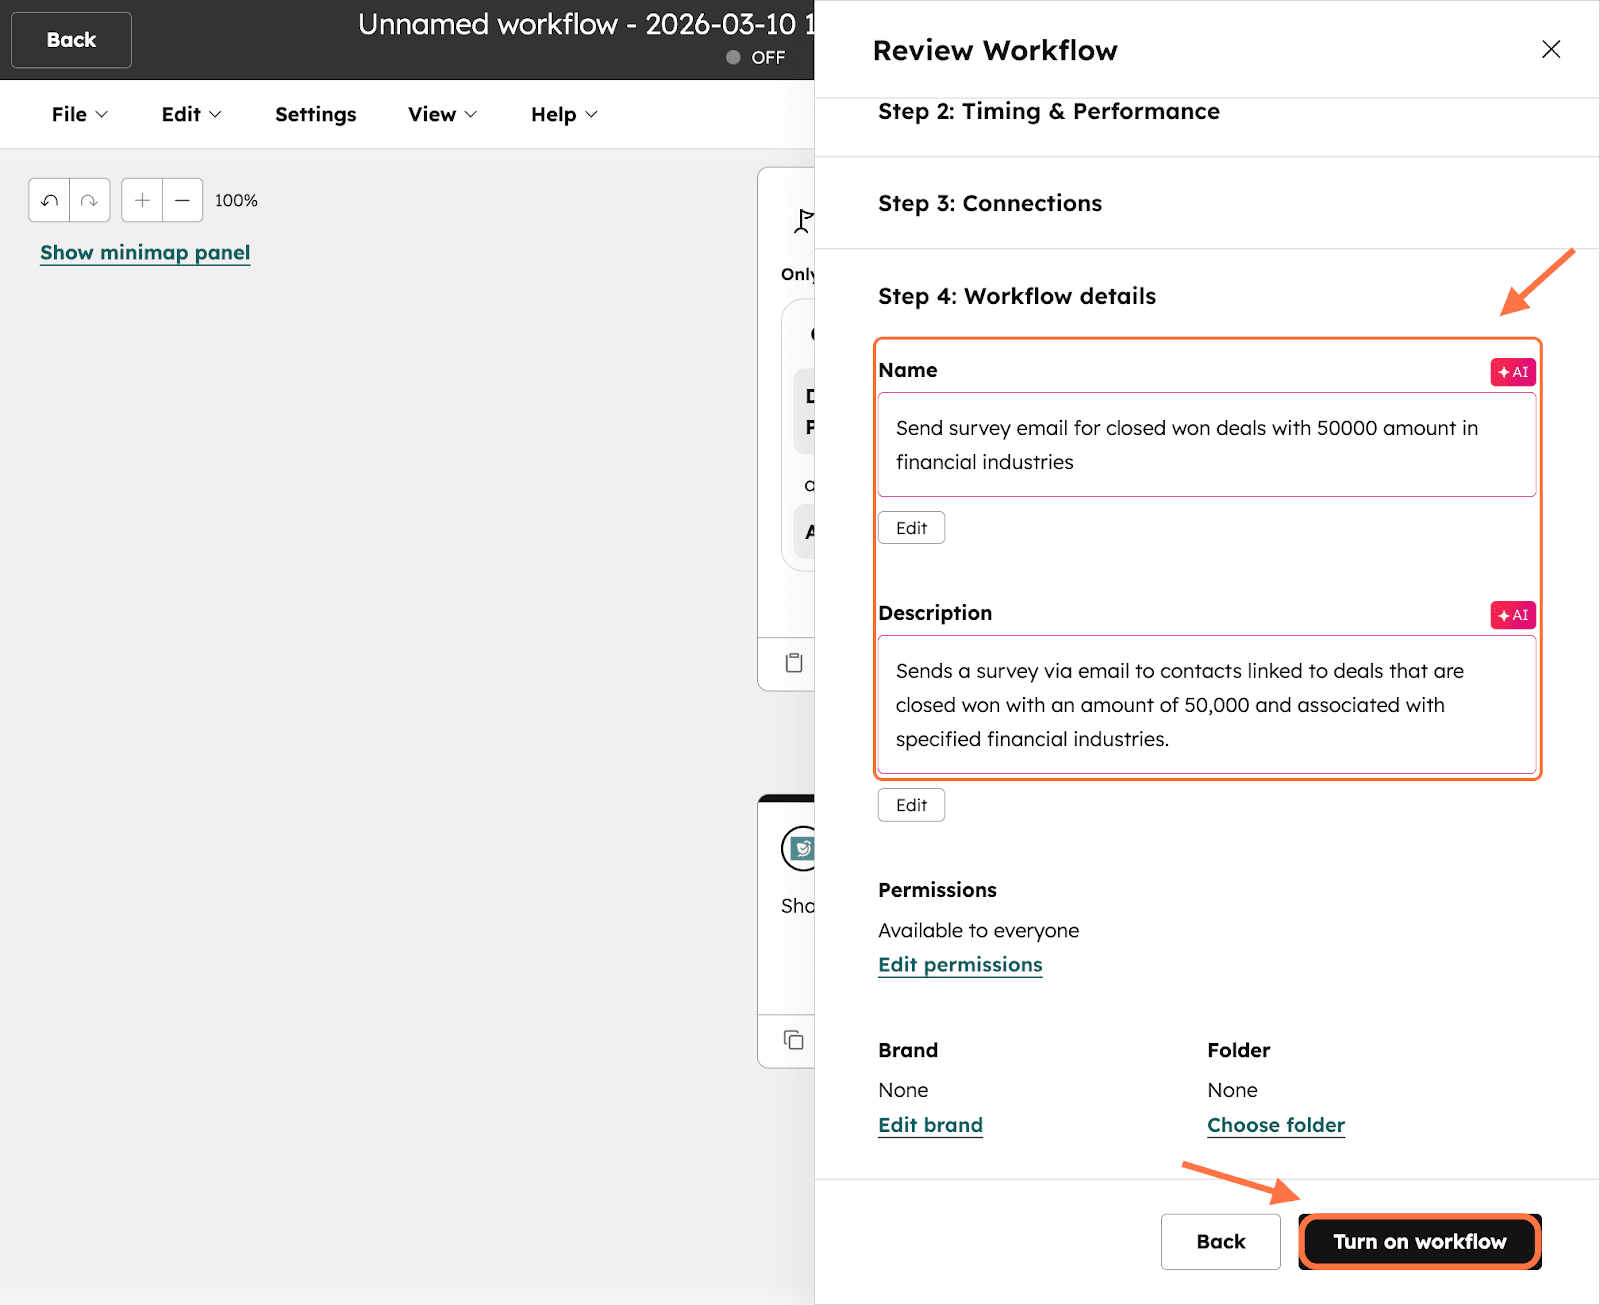
29. The trigger workflow is live. If you want to review the workflow history, head to the workflows section. Hover over the workflow you’ve created. Click on More, then click on View details to open the workflow history section.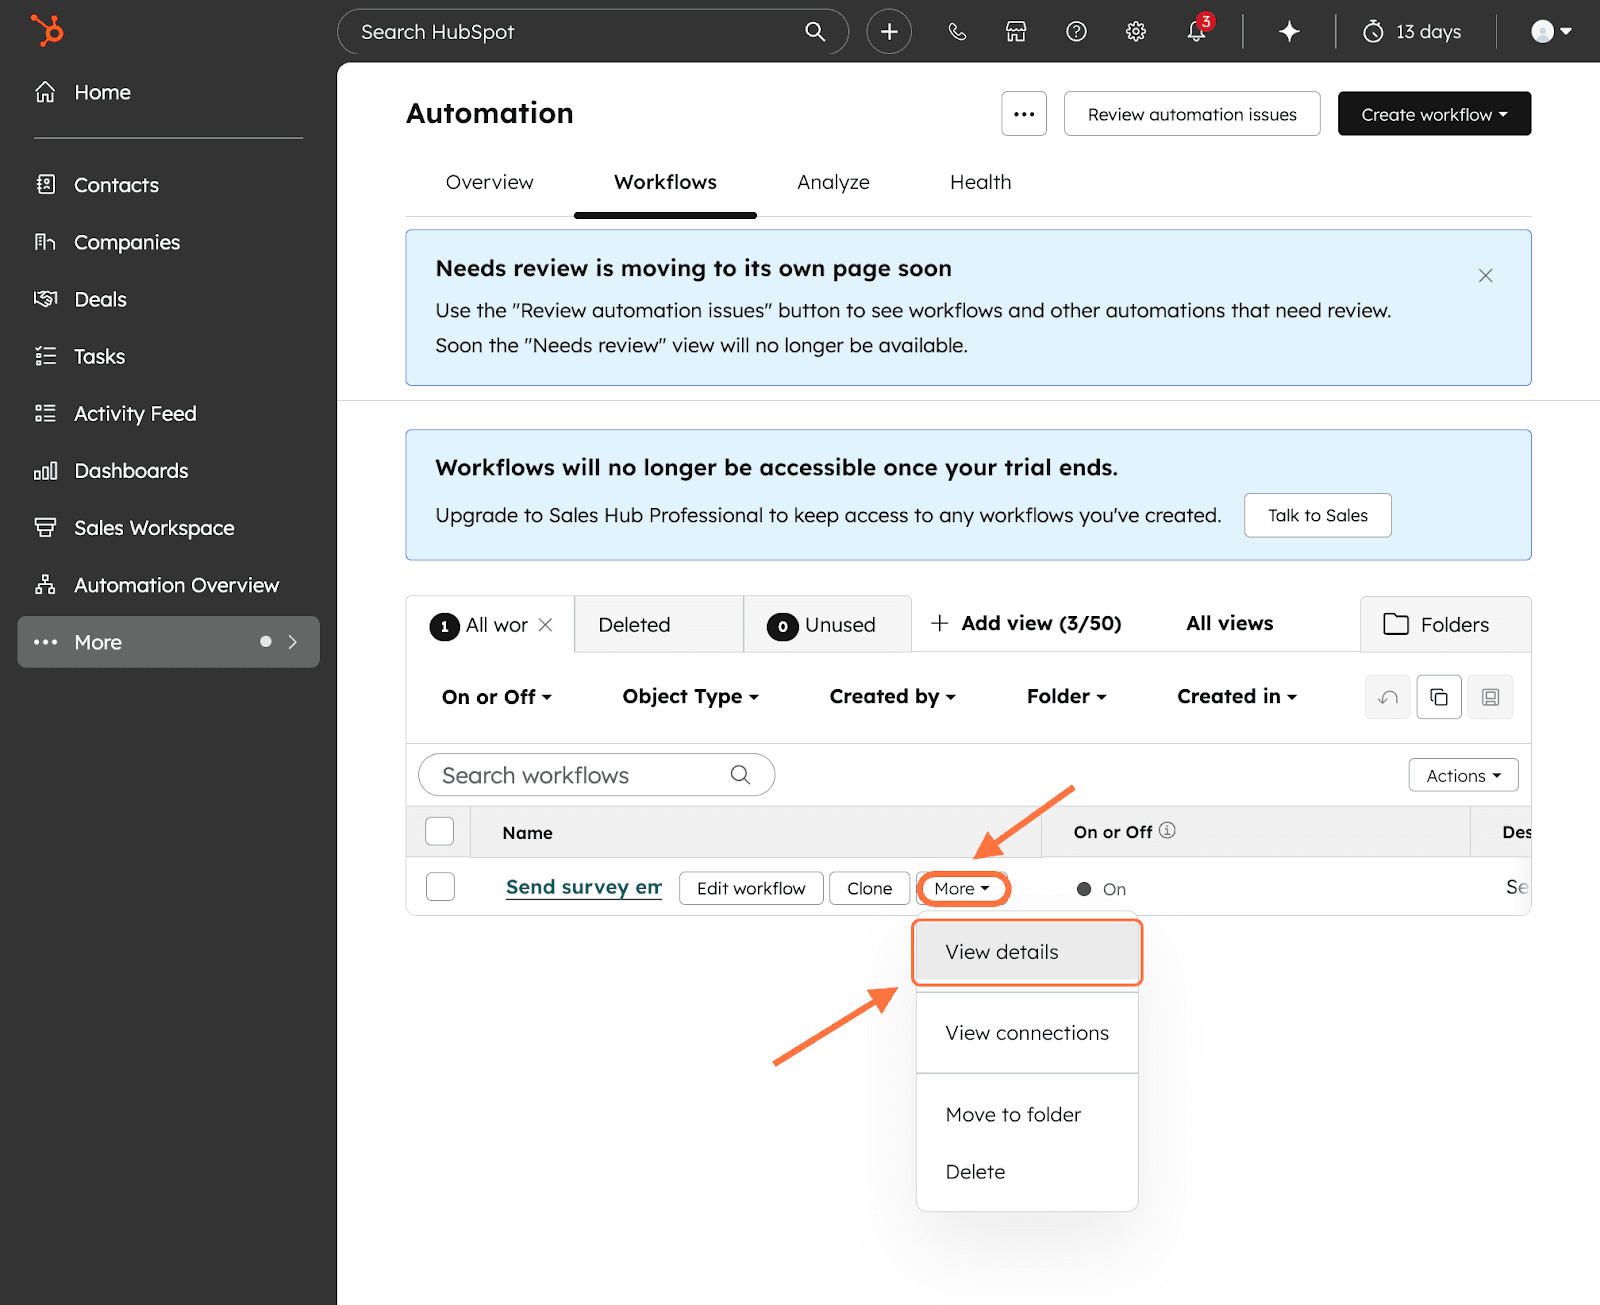
HubSpot’s workflow app gives you more flexibility with relative ease, as we’ve shown here. If the native integration doesn’t cut it, it’s the best option. Try it out today and build triggers closely matching your actual business flows. Collect feedback at the right time, every time and channel it into your marketing campaigns, sales playbooks and customer experience systems.
Feel free to reach out to our community if you have any queries.
Powered By SparrowDesk