Search
SugarCRM is a leading provider of CRM solutions for sales, marketing and customer support teams. SurveySparrow’s native integration now allows these teams to automate data entry and contact management using surveys that are connected to SurveySparrow. In this article, we’ll explore the process of:
1. Inside your SurveySparrow account, open the Account Settings by clicking on the gear icon.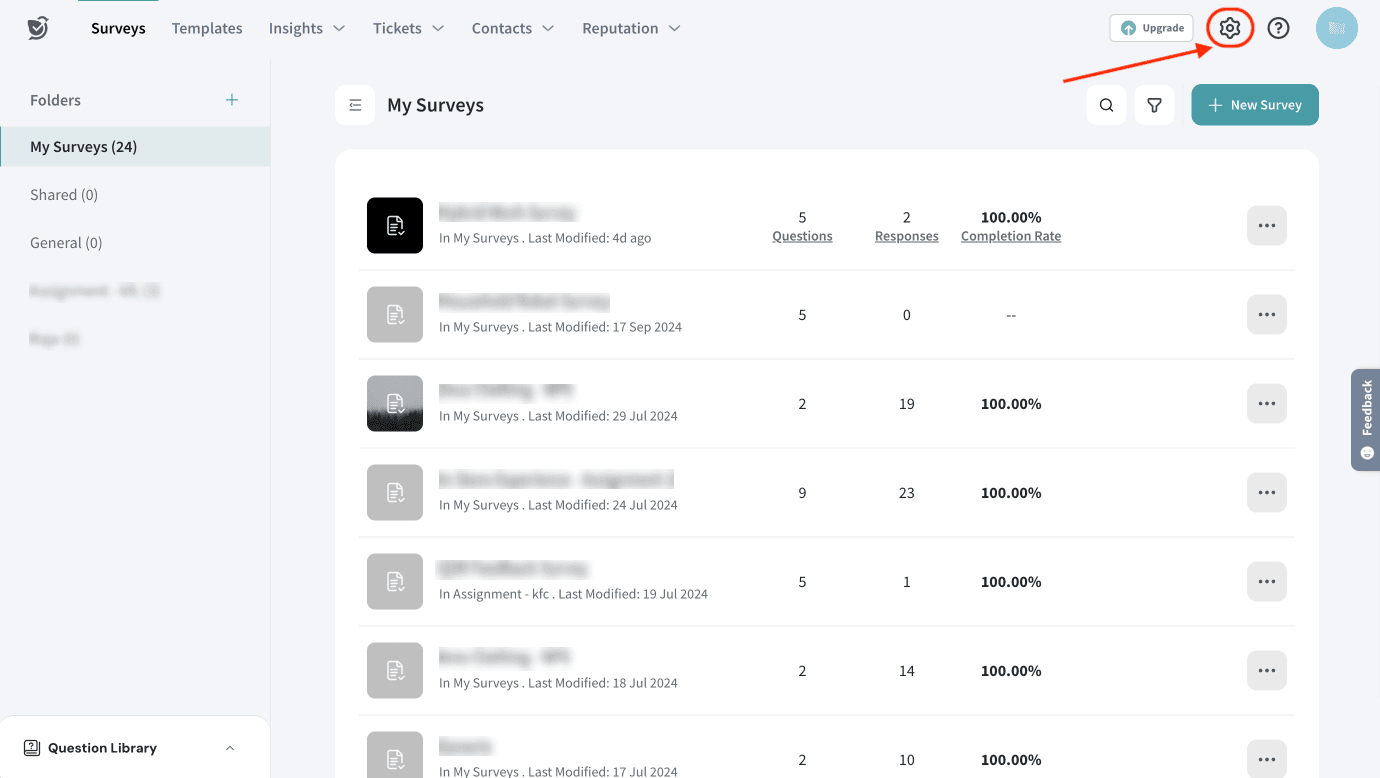
2. Scroll down the left panel, until you see Apps and Integrations, then click on it.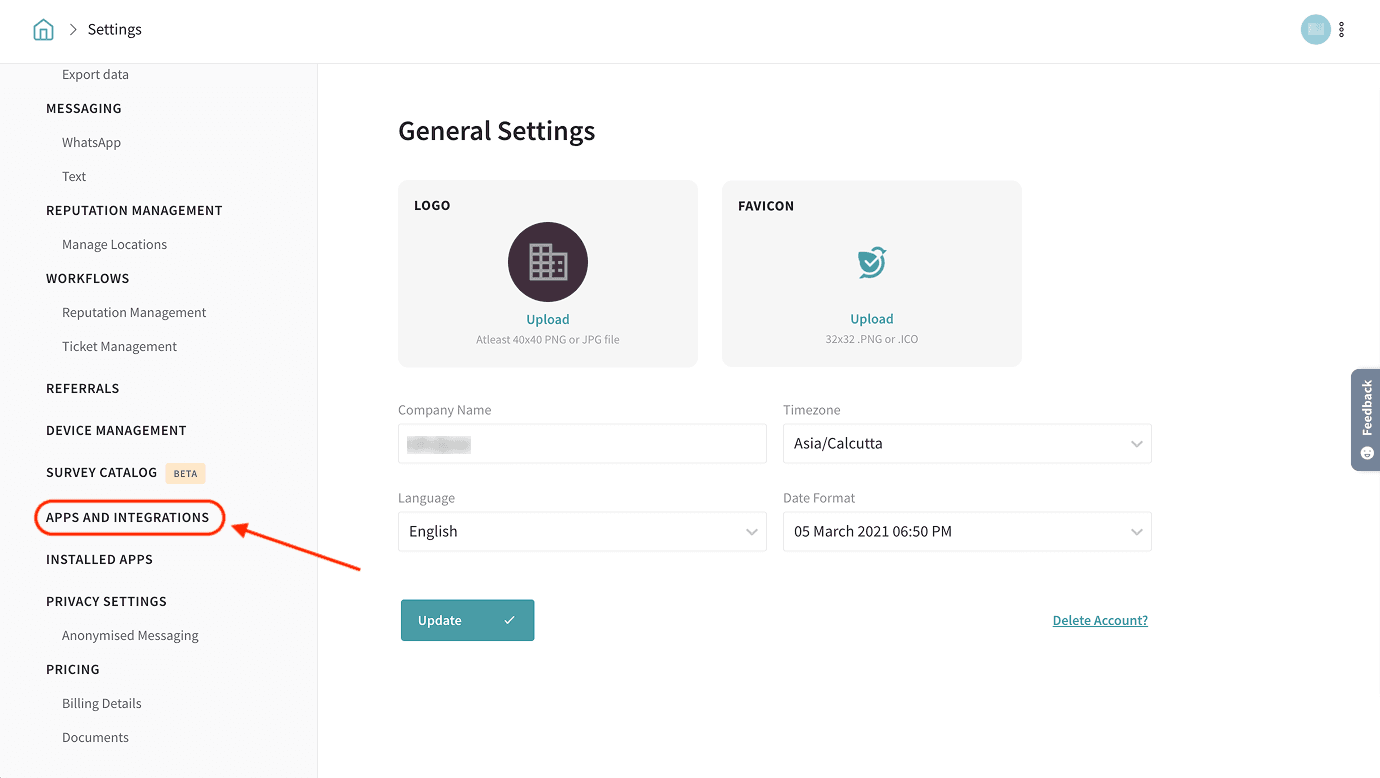
3. Search for the SugarCRM integration, then click the toggle.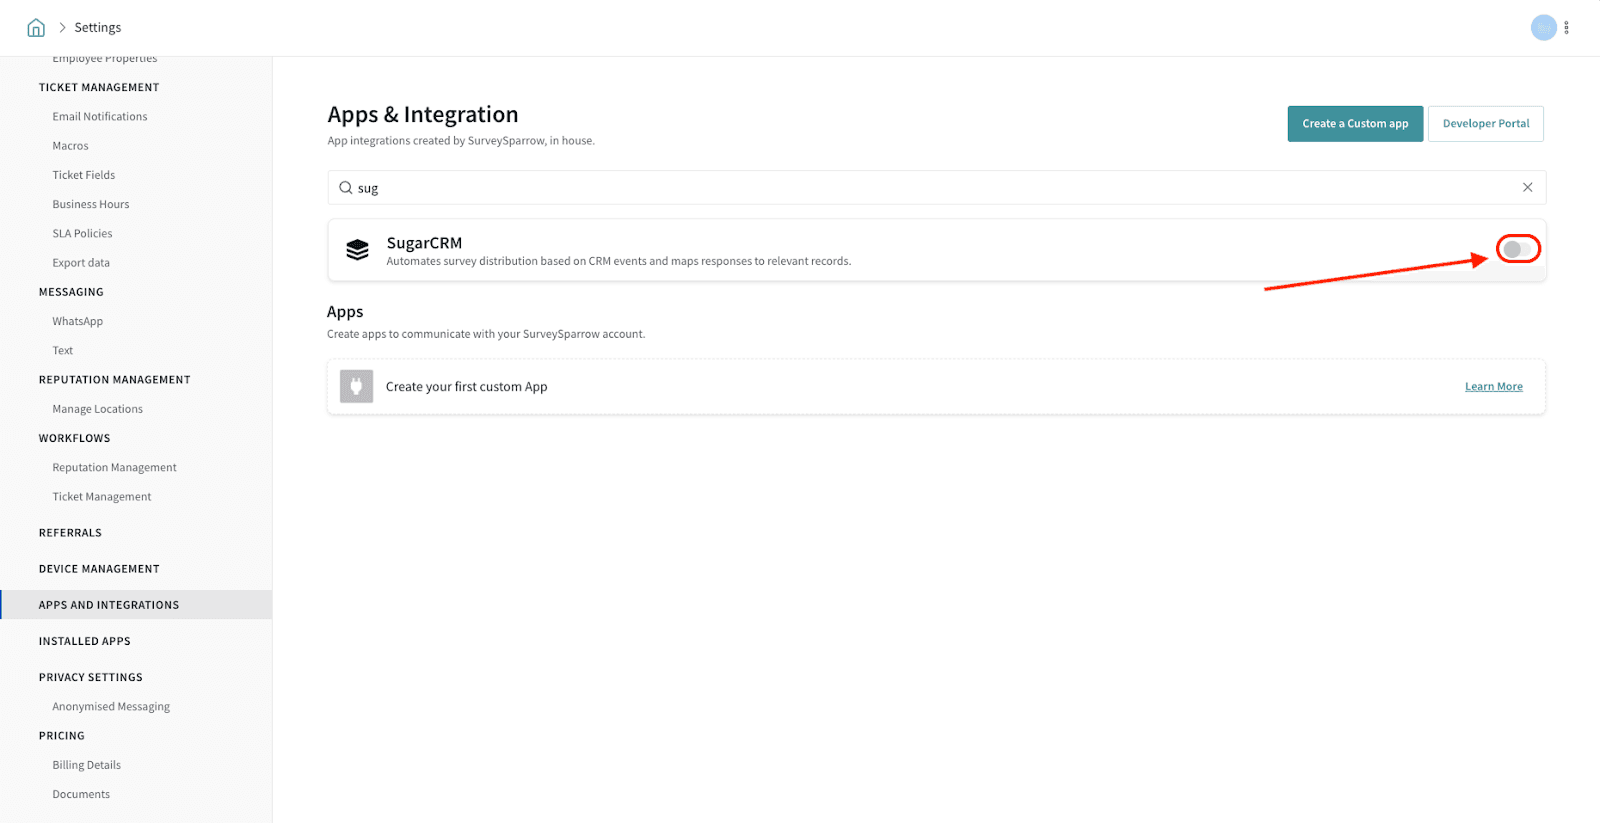
4. The installation page opens. Type in your SugarCRM credentials.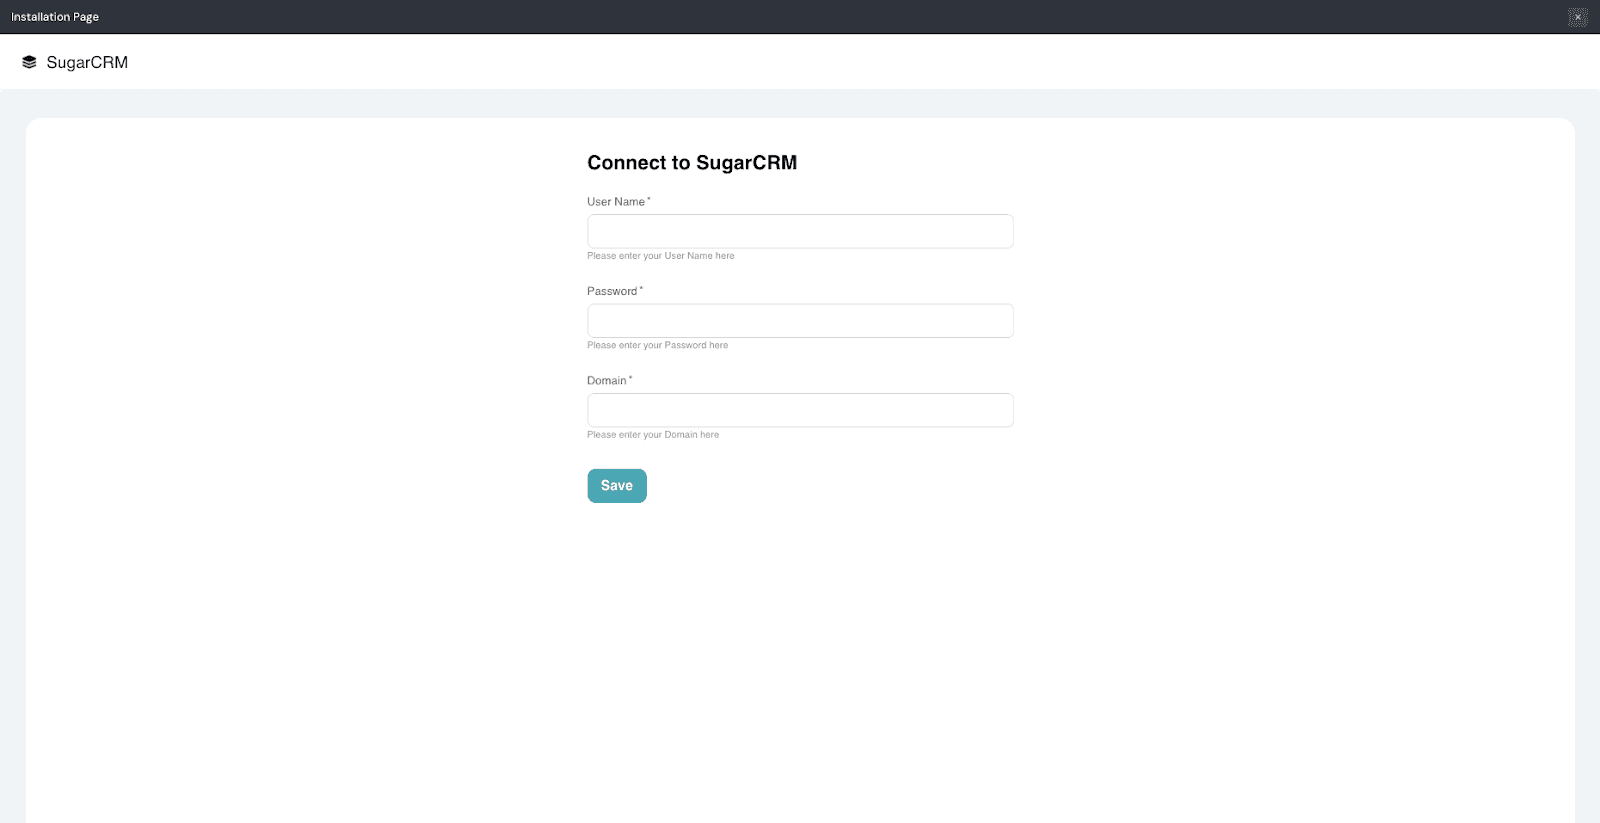
5. Next, click Save.
6. Now, open a survey that you want to connect to SugarCRM. Then head to the Integrate section.
7. Search for the SugarCRM integration, and click on the toggle when you see it.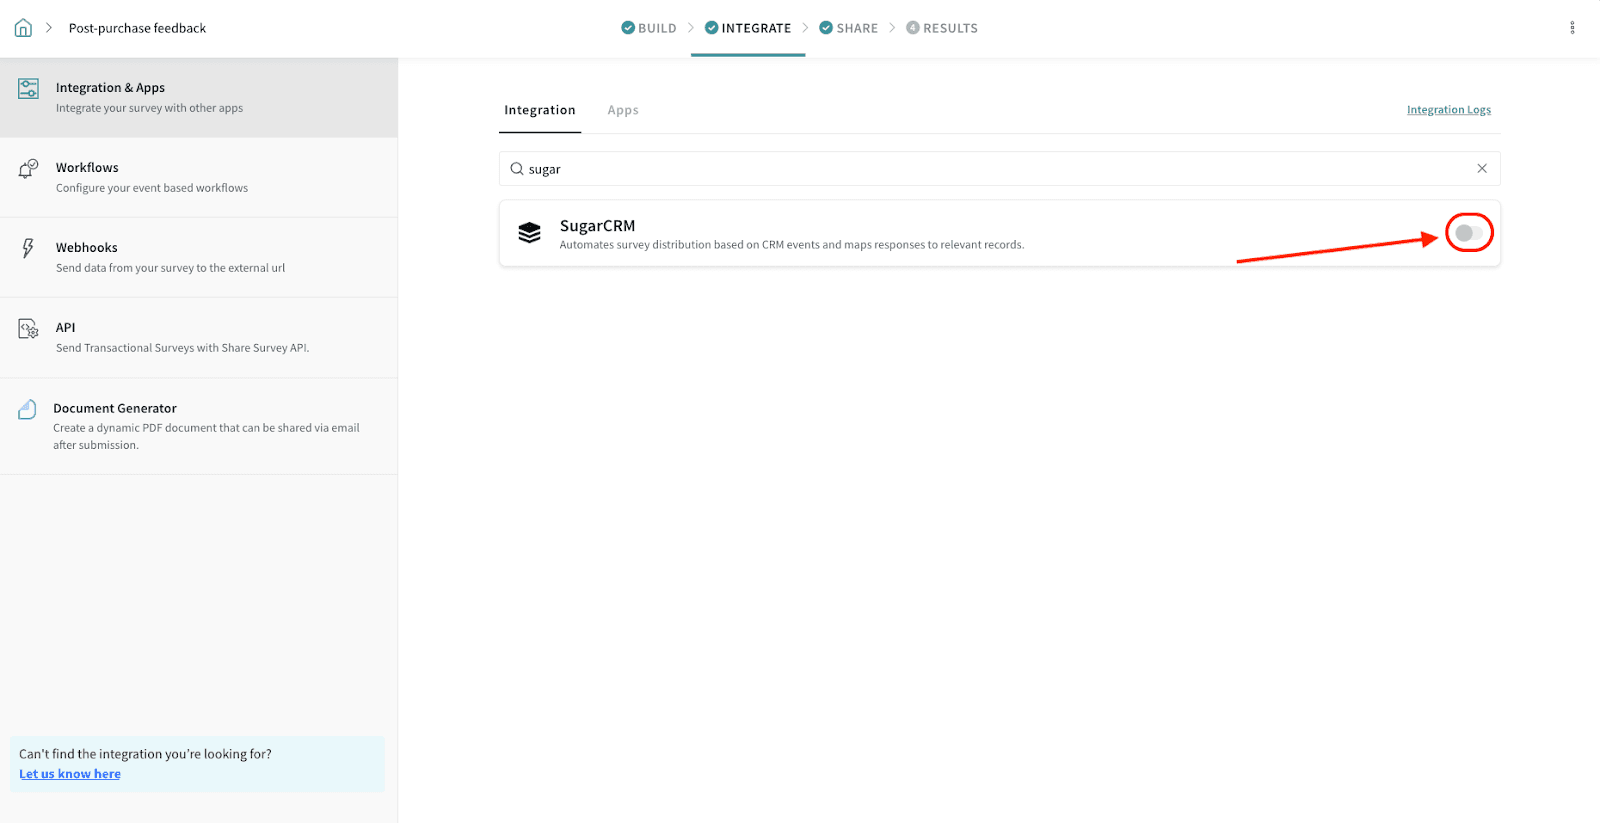
8. The integration screen opens up.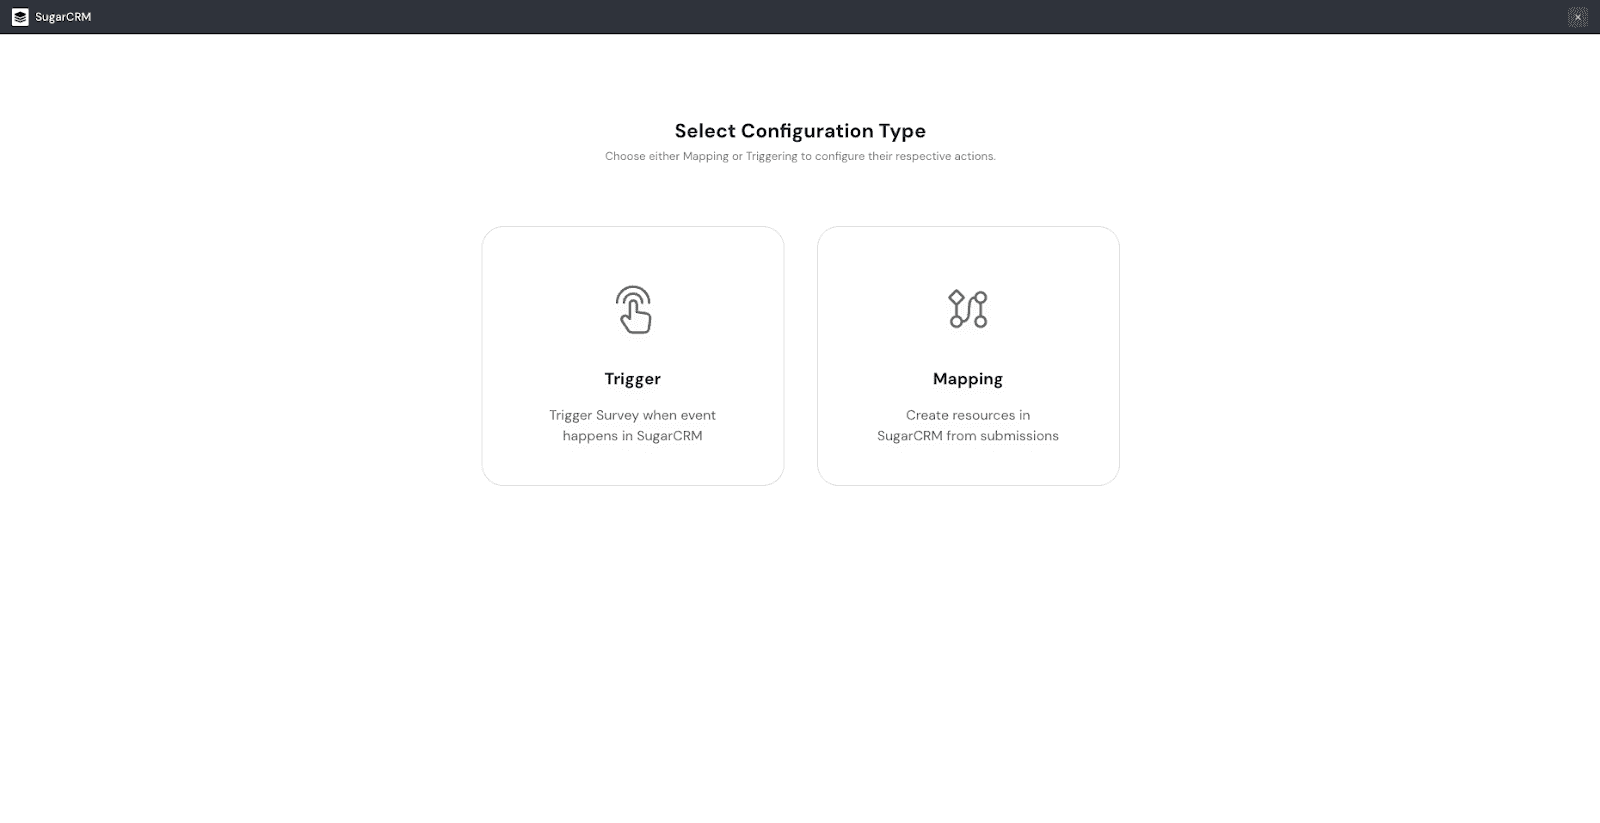
You can choose between setting up triggers or mapping responses. Let’s explore each feature one by one.
1. Start the setup by clicking Trigger.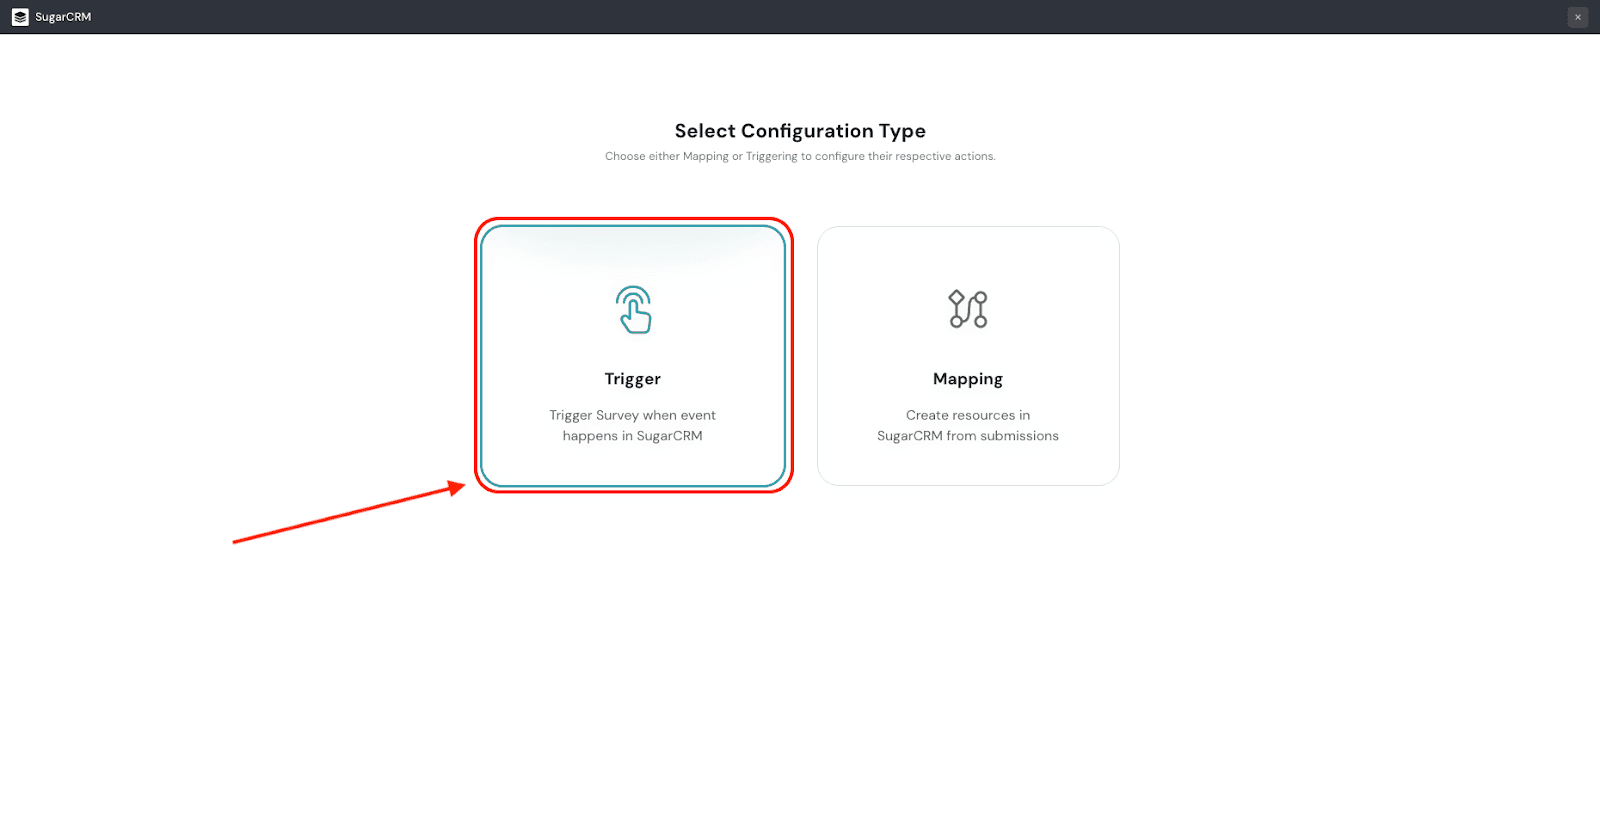
2. You will have to set up the event for the trigger.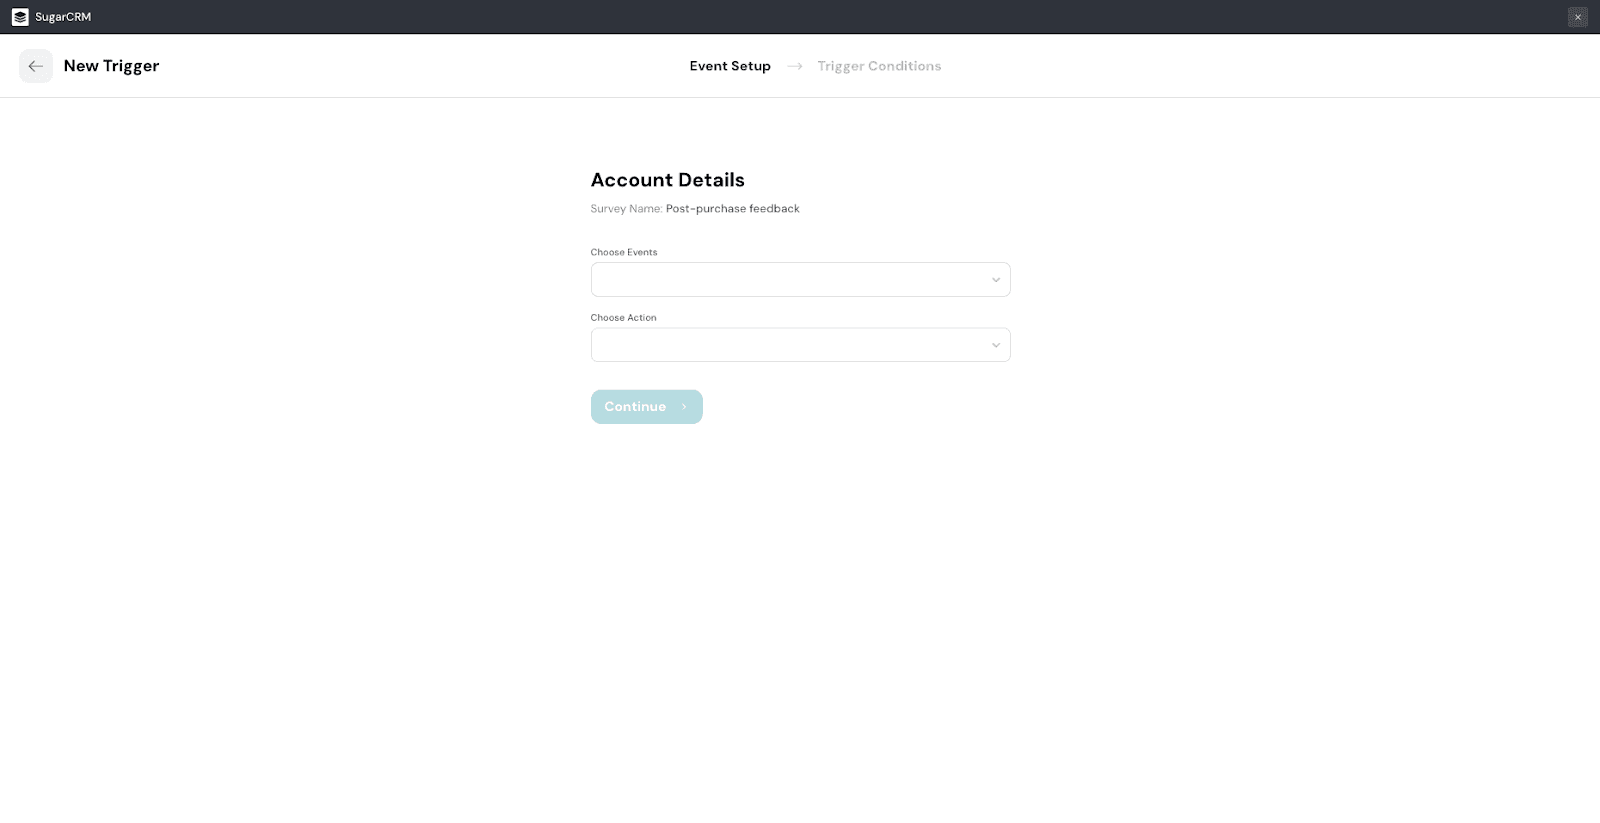
3. In SugarCRM, an event has two components: a module and an action. To select the module, click on the drop-down menu under Choose Events.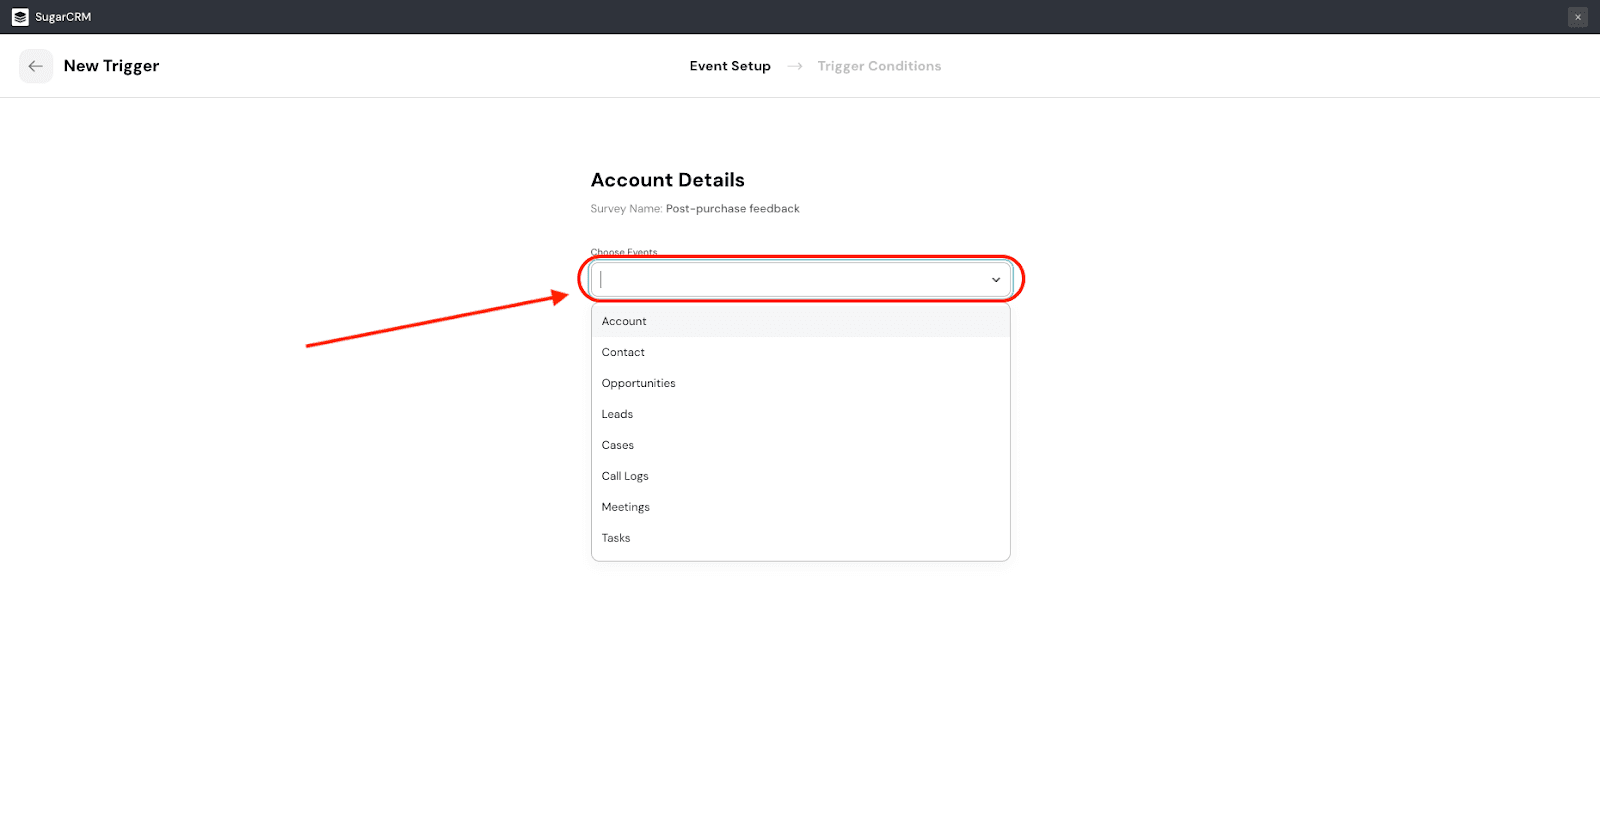
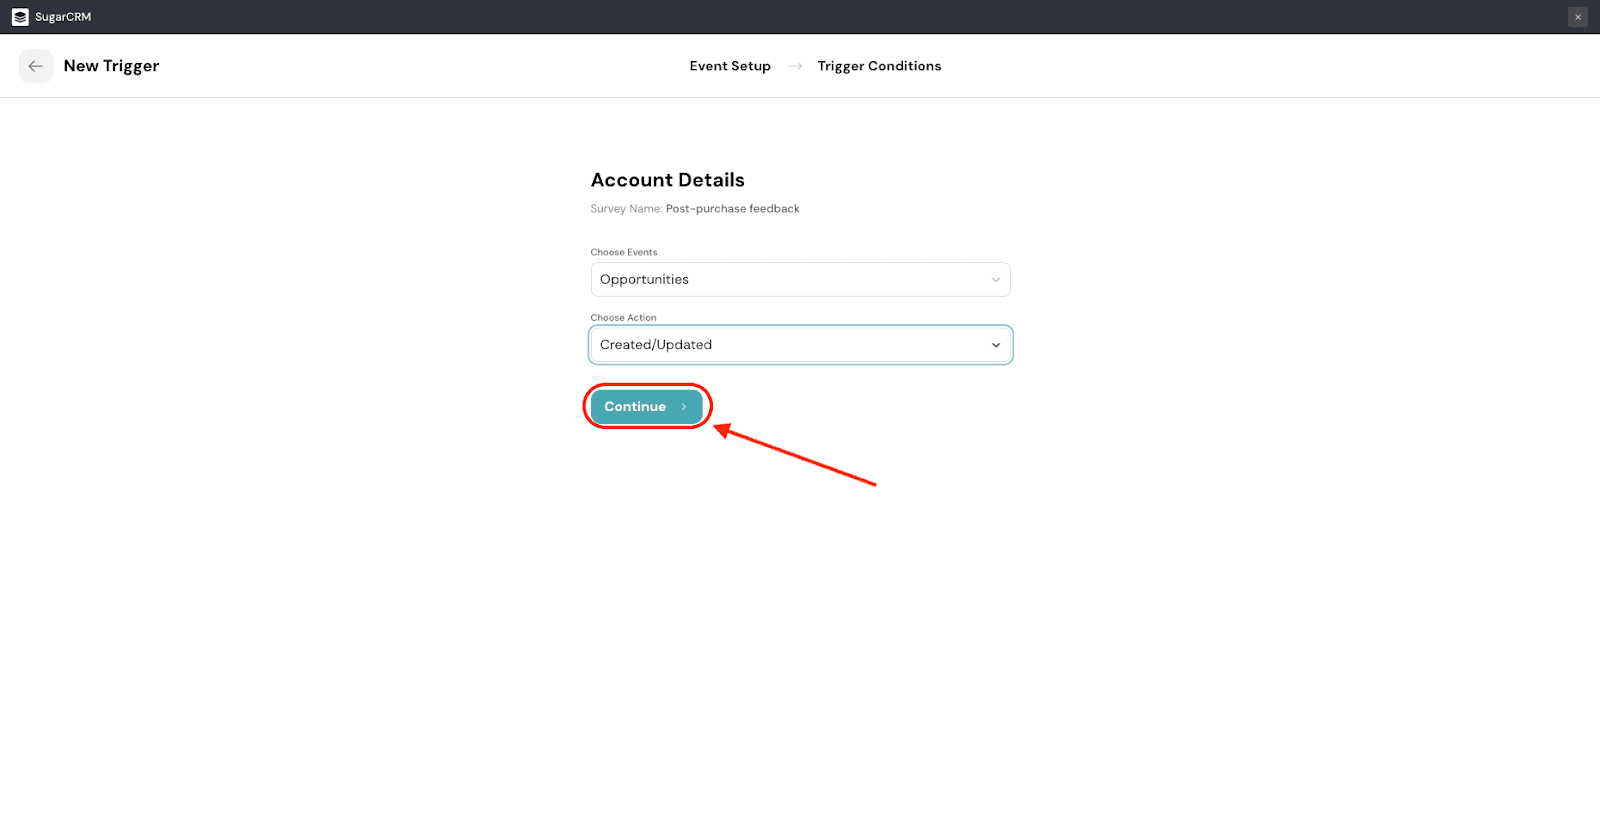
4. Then, you will have to choose an Action. Click on the drop-down menu under Choose Action and choose the action - which is created/updated.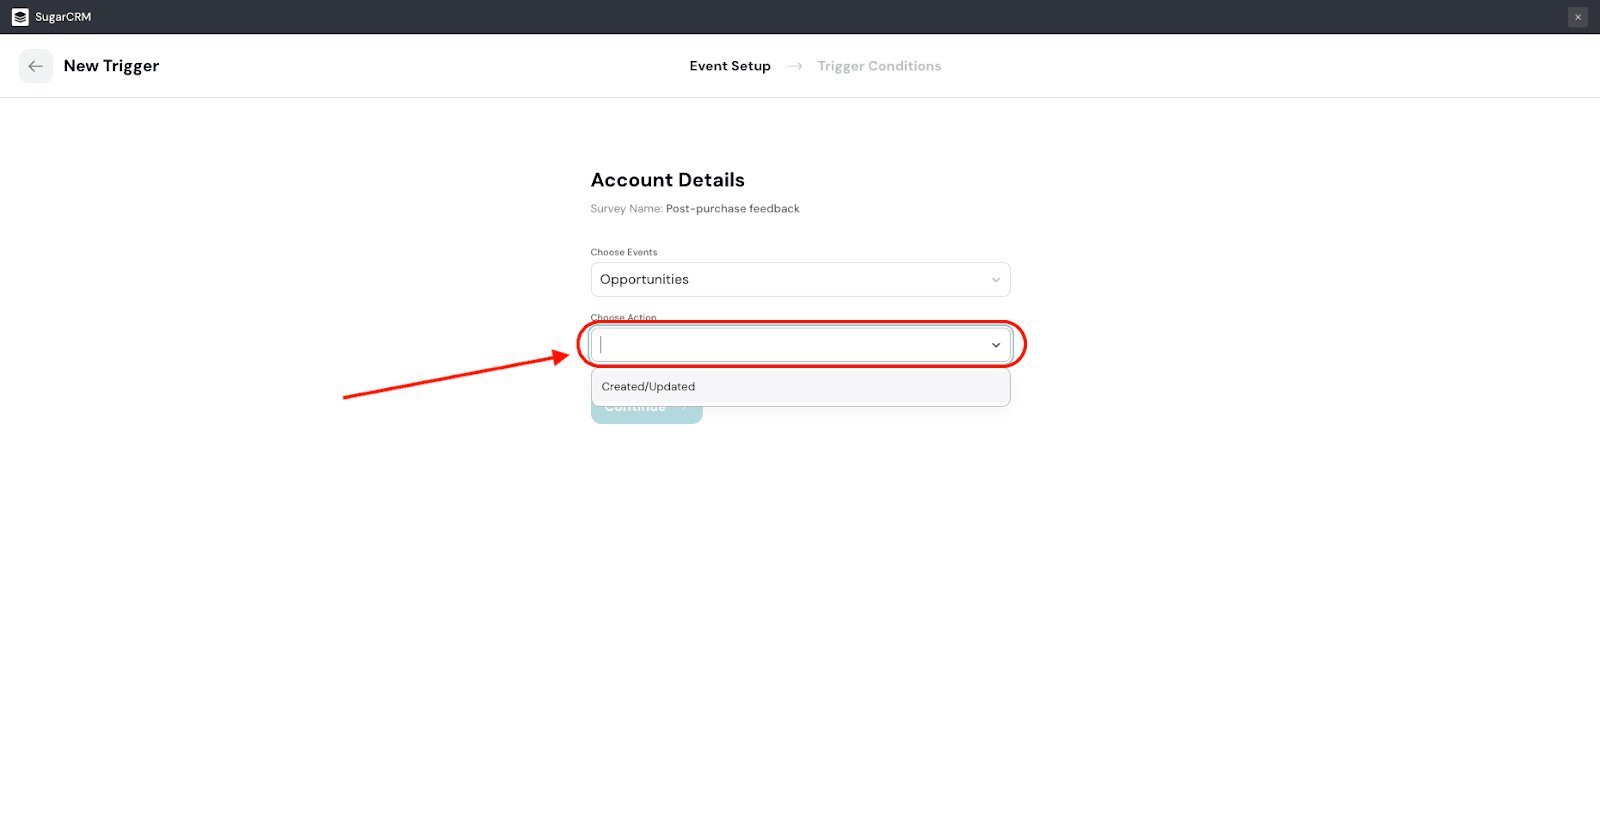
6. You will enter the trigger conditions screen, where you will have to specify the exact nature of the trigger within the module. You can add multiple trigger conditions here.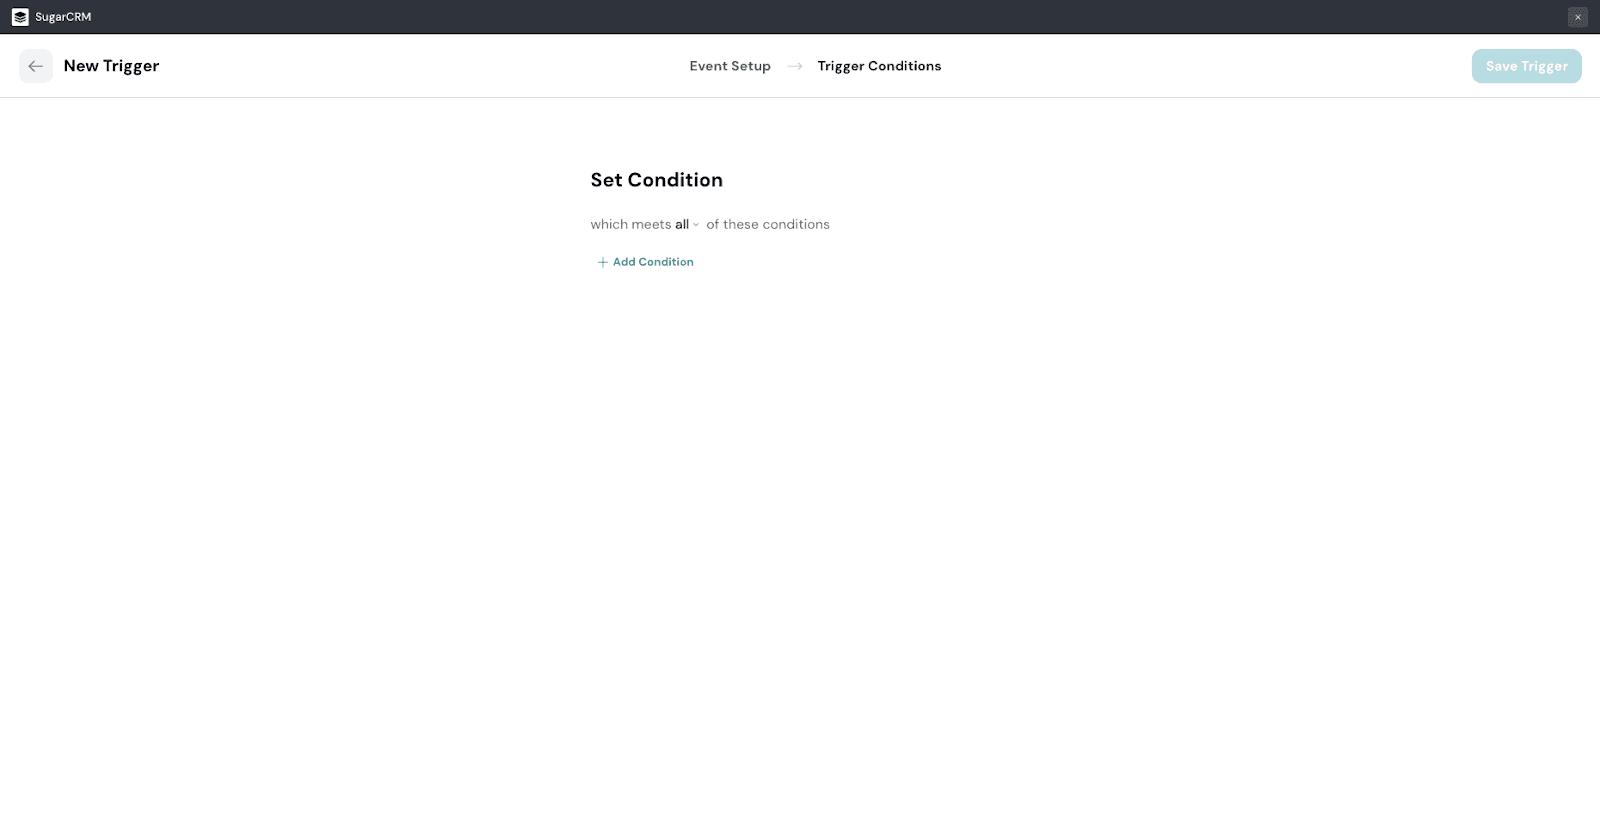
7. By default, the trigger is set to act only when all of the conditions are met. This makes the trigger very specific. But if you want to keep the trigger broad, click on the drop-down and select any.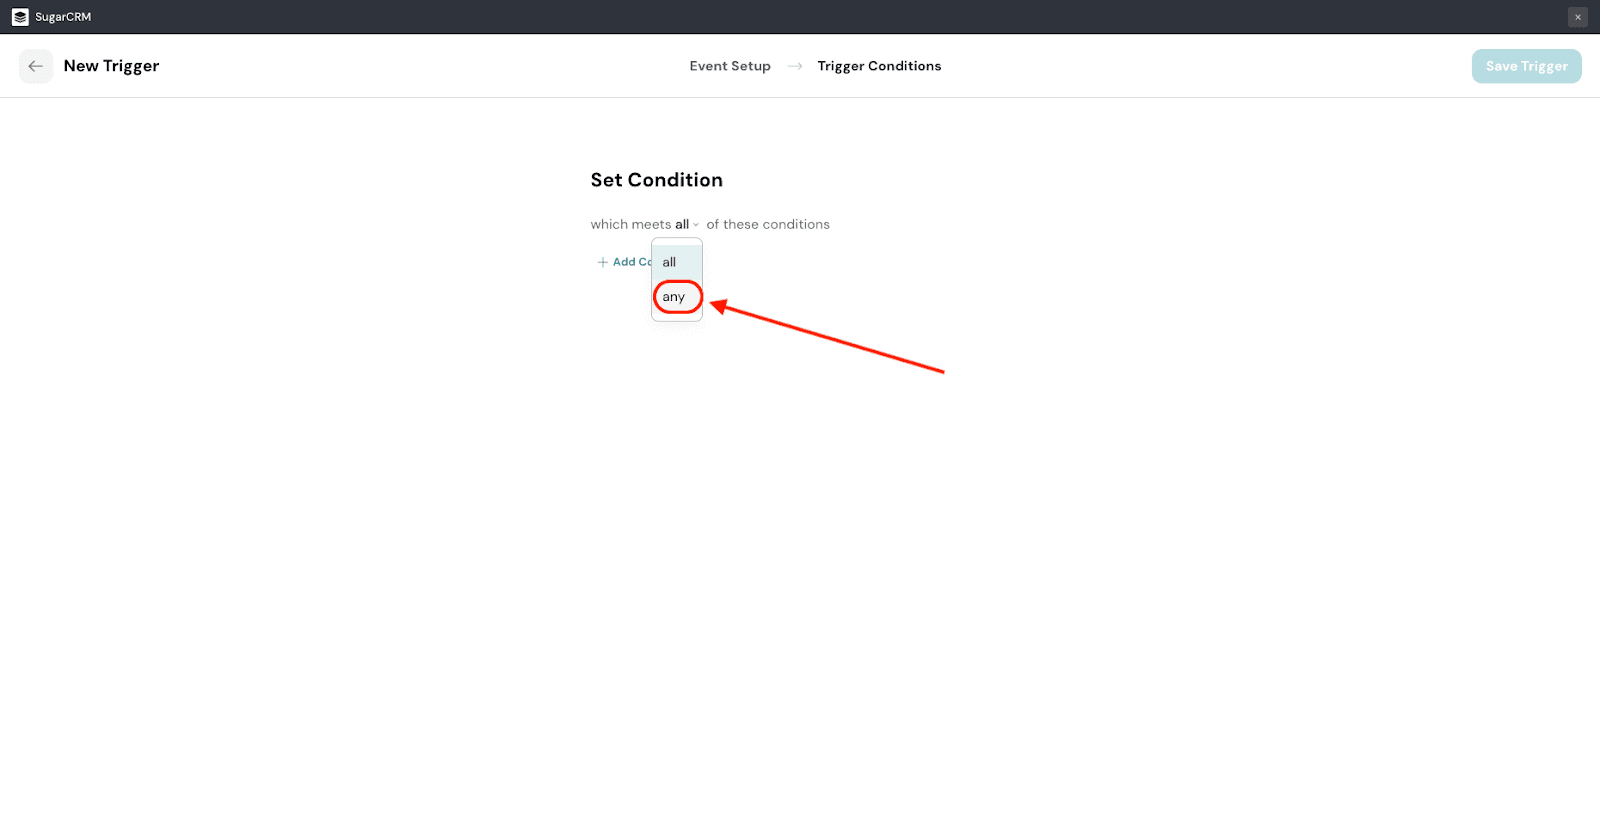
8. To begin creating triggers, click Add Condition.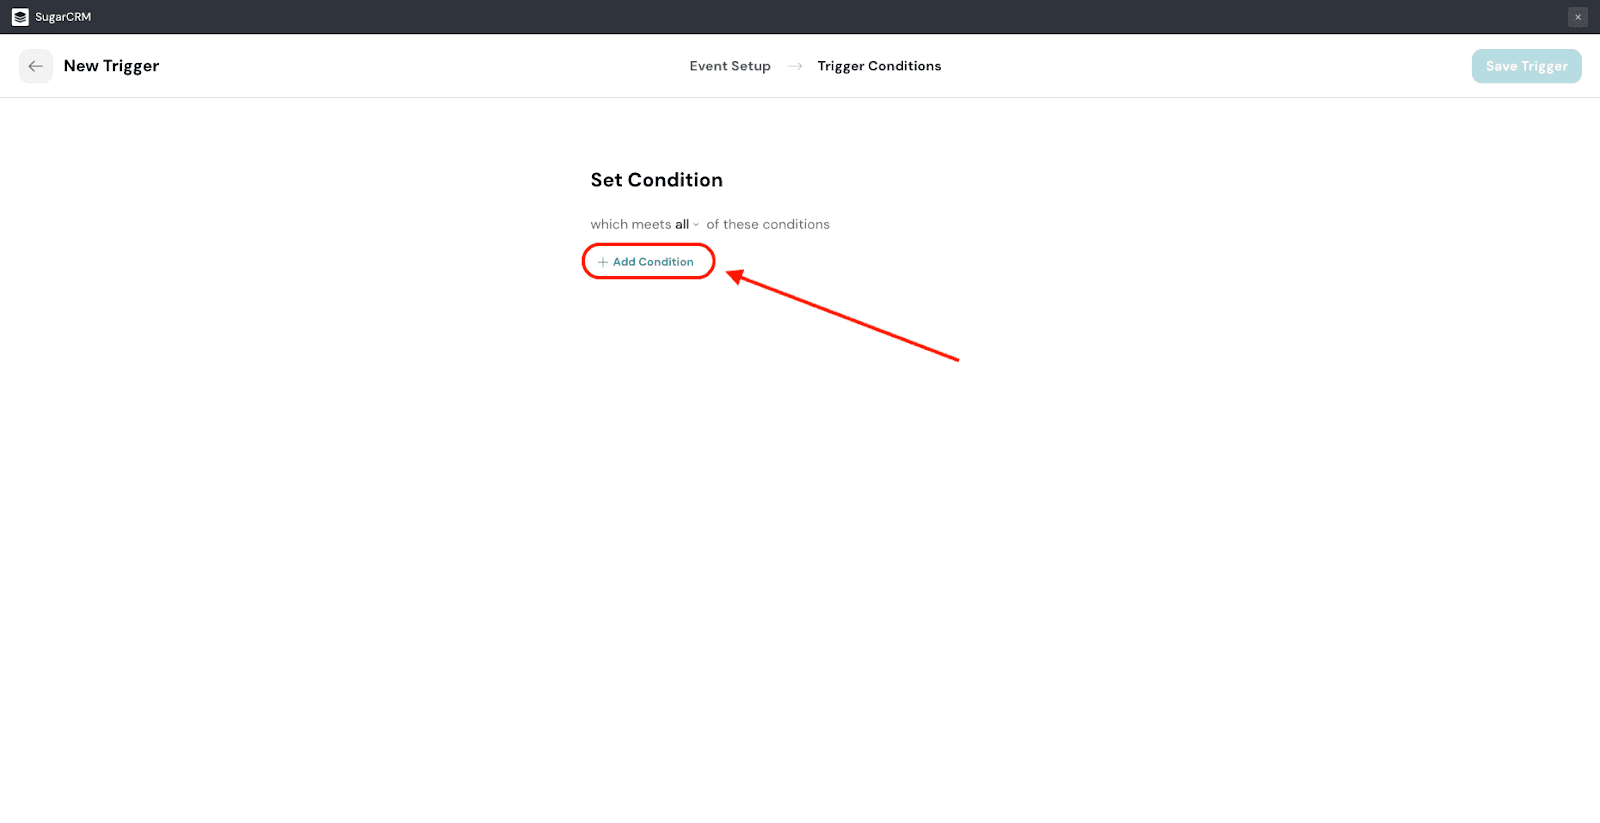
9. First, choose the exact field within the module.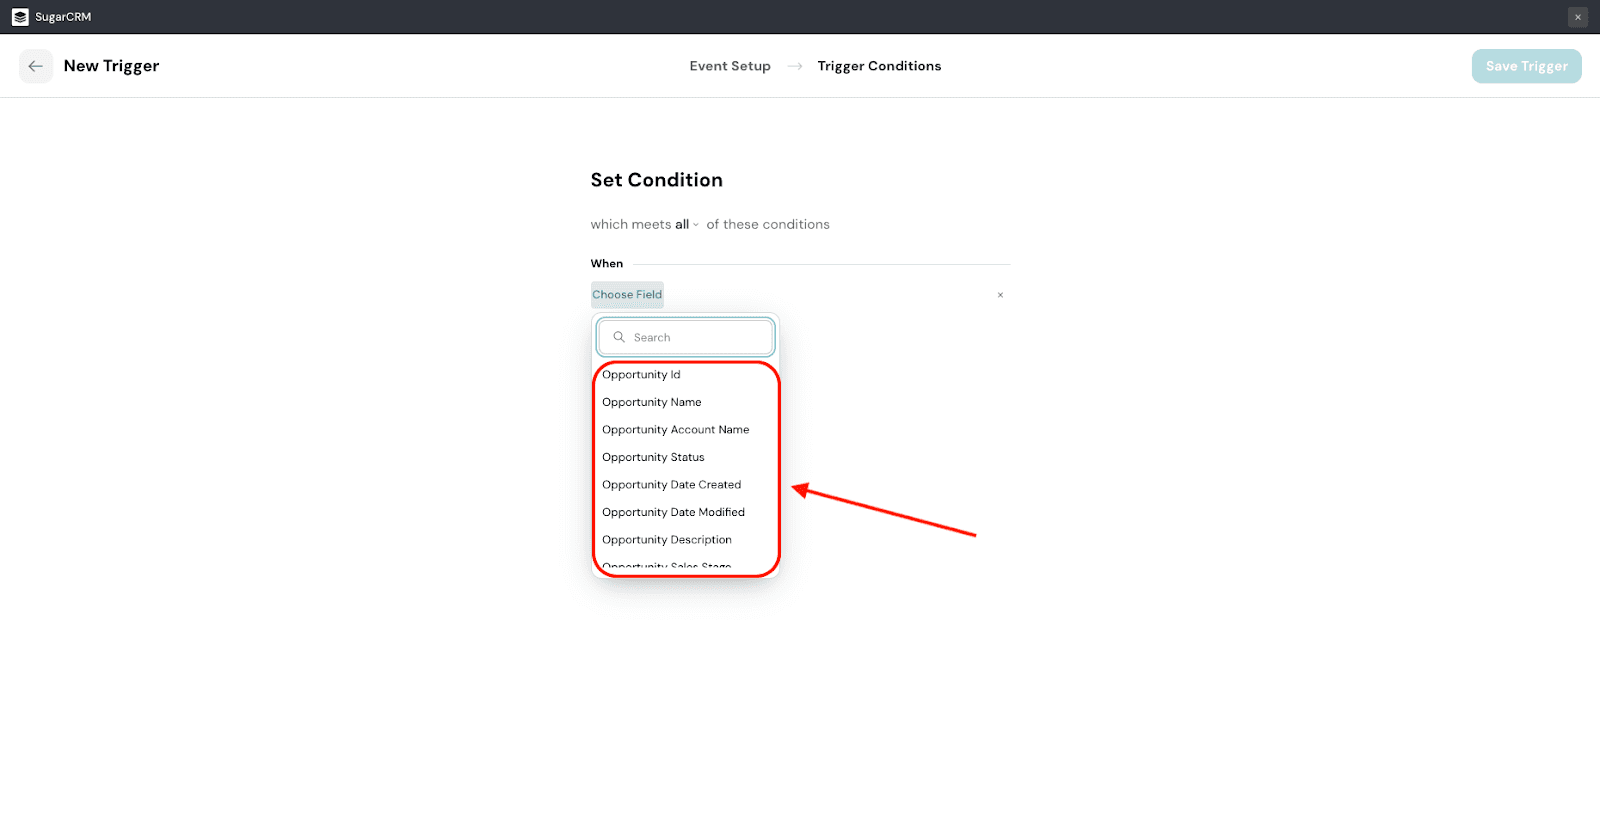
10. Next, choose the data type to filter the required field data.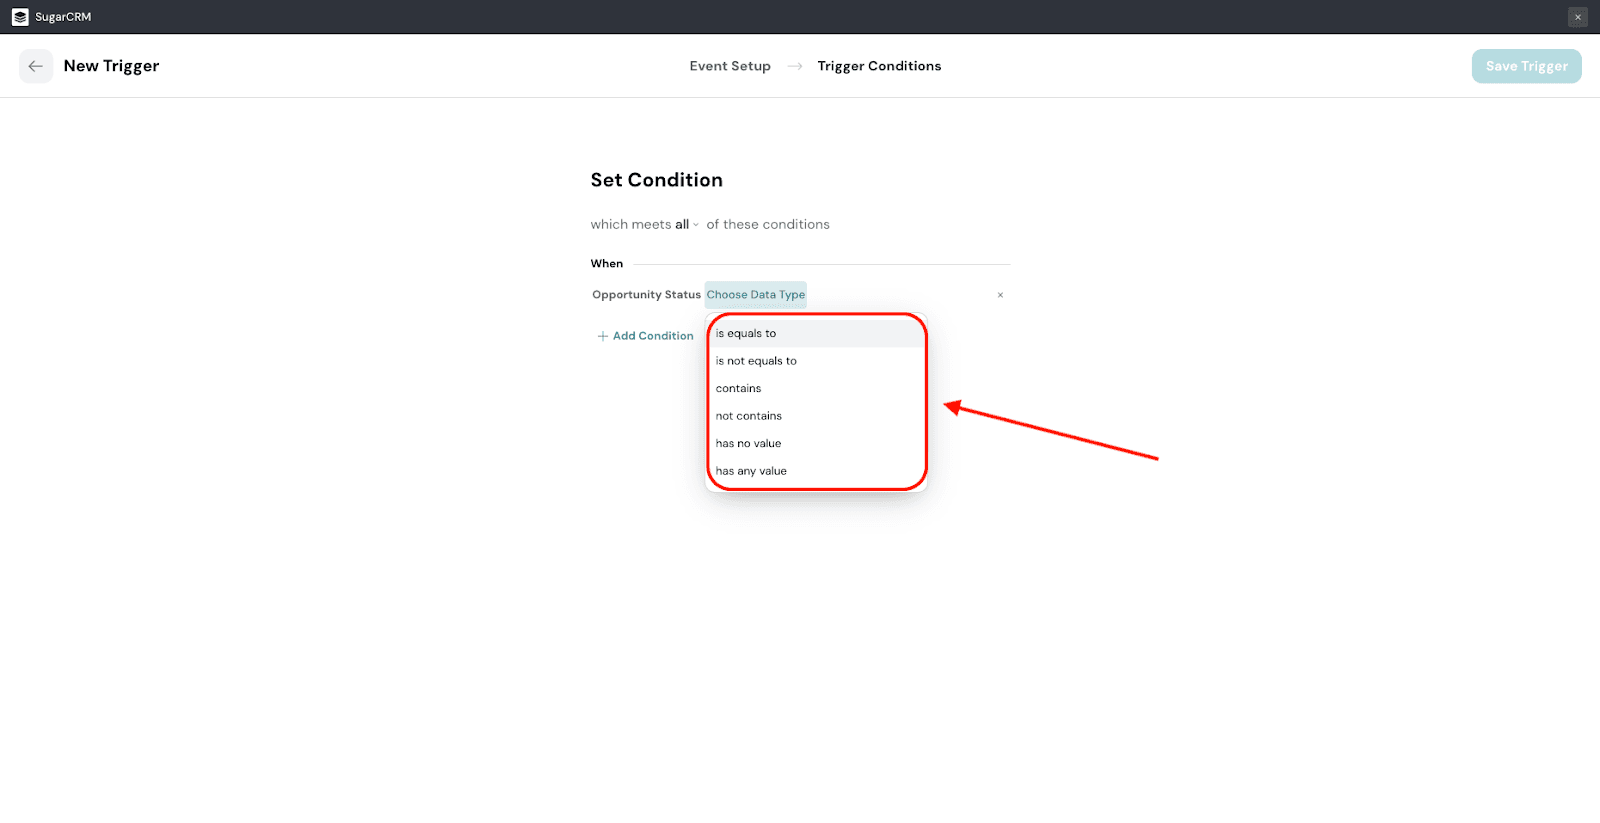
11. Then type in the value, and click Save.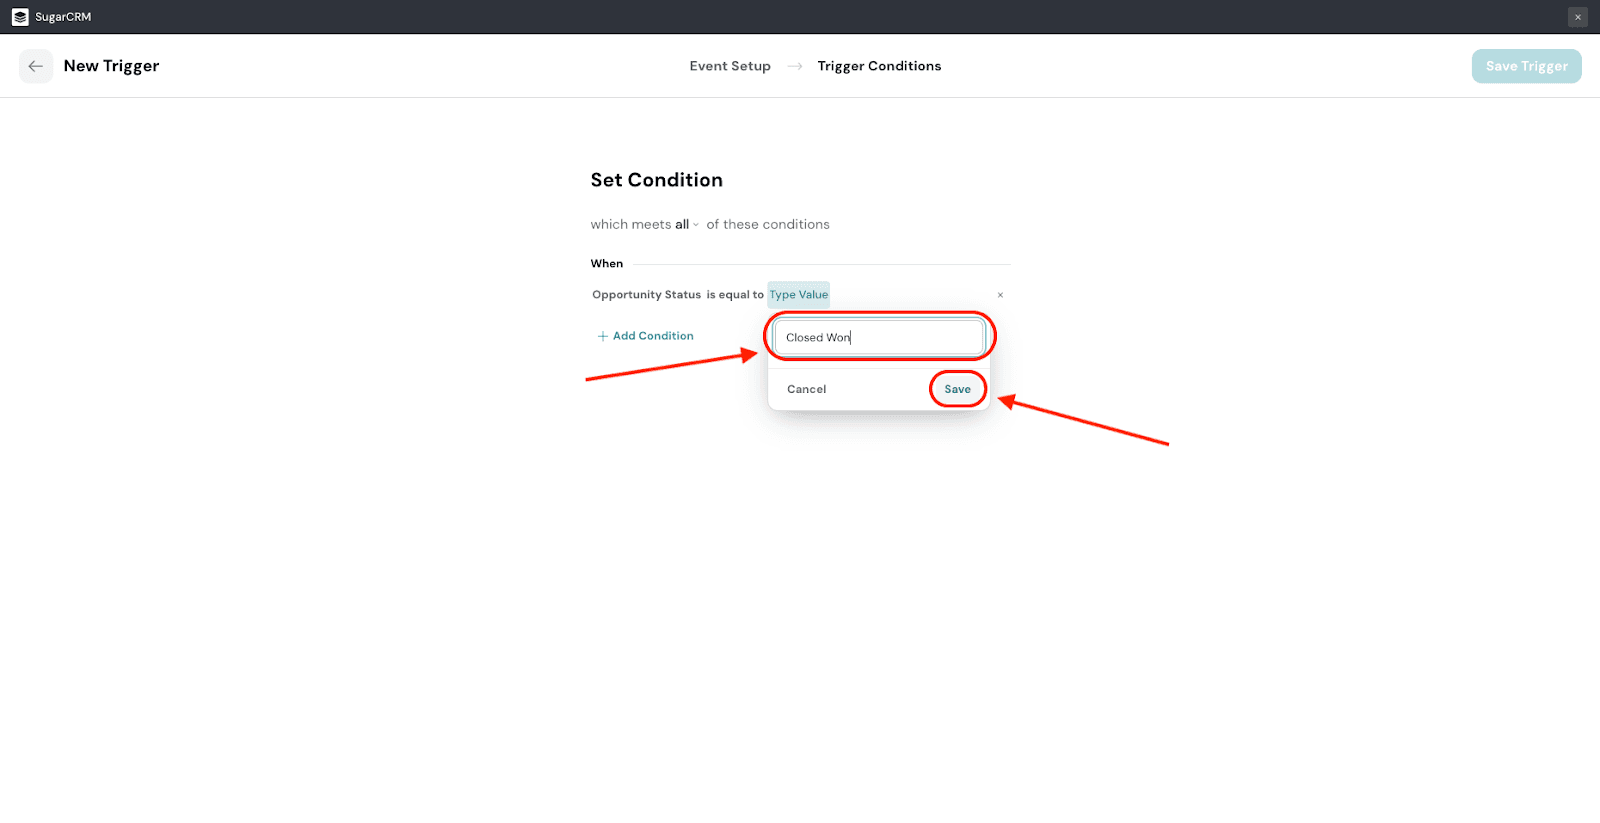
12. After creating your trigger conditions, you will have to pass variables to the survey. This allows for personalization, and ensures your survey responses are enriched with contextual data. Click on the drop-down menu under Choose Fields to choose.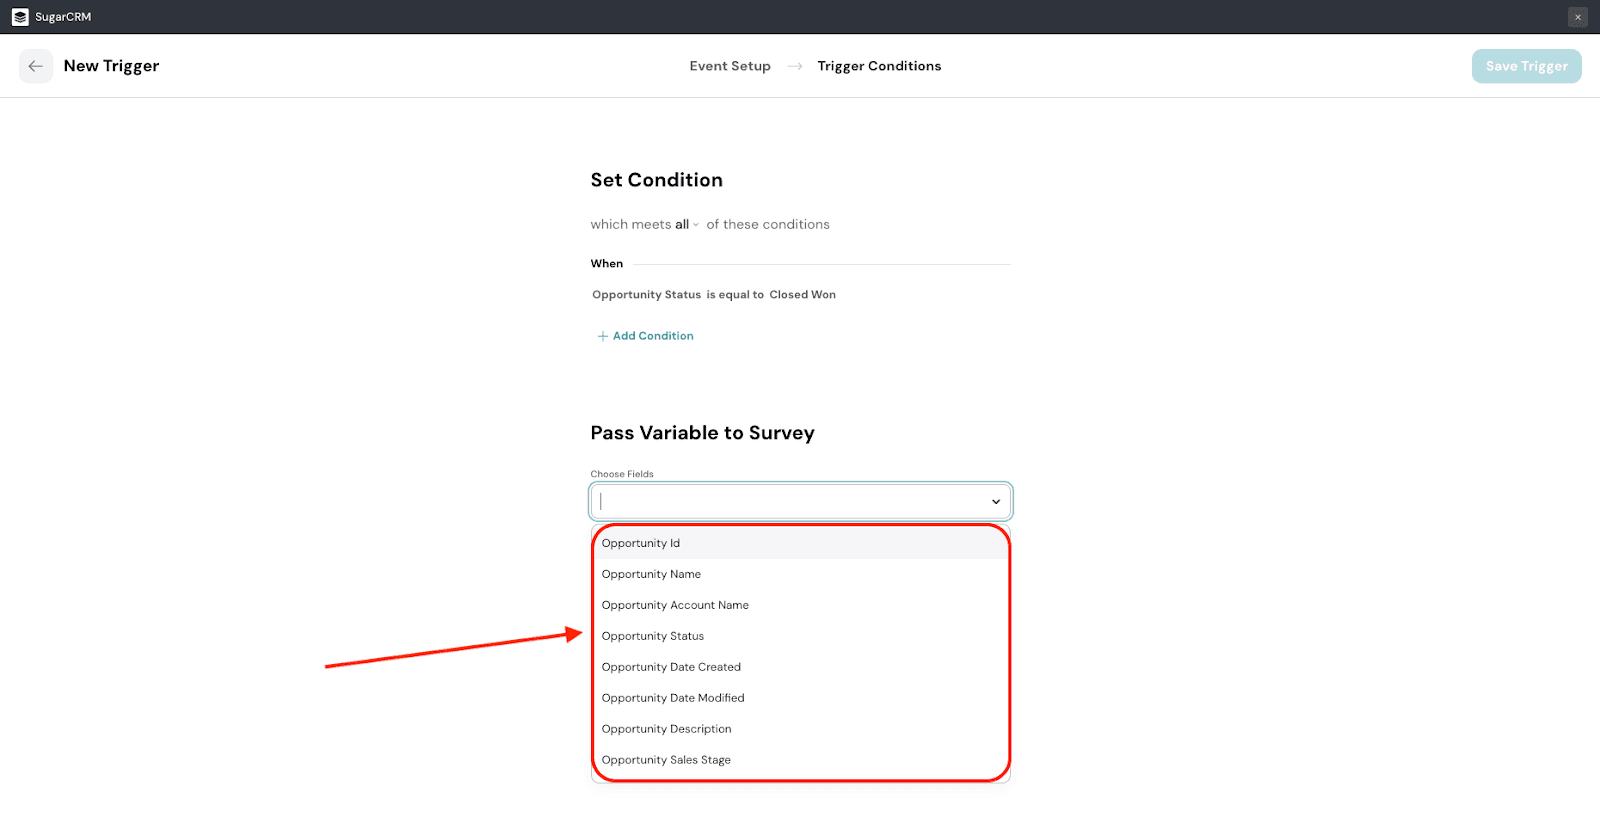
13. Finally, you will have to configure the survey’s deployment. The first item is the share type. You can choose between email, SMS, or WhatsApp. Click on the drop-down menu under Share Type to choose.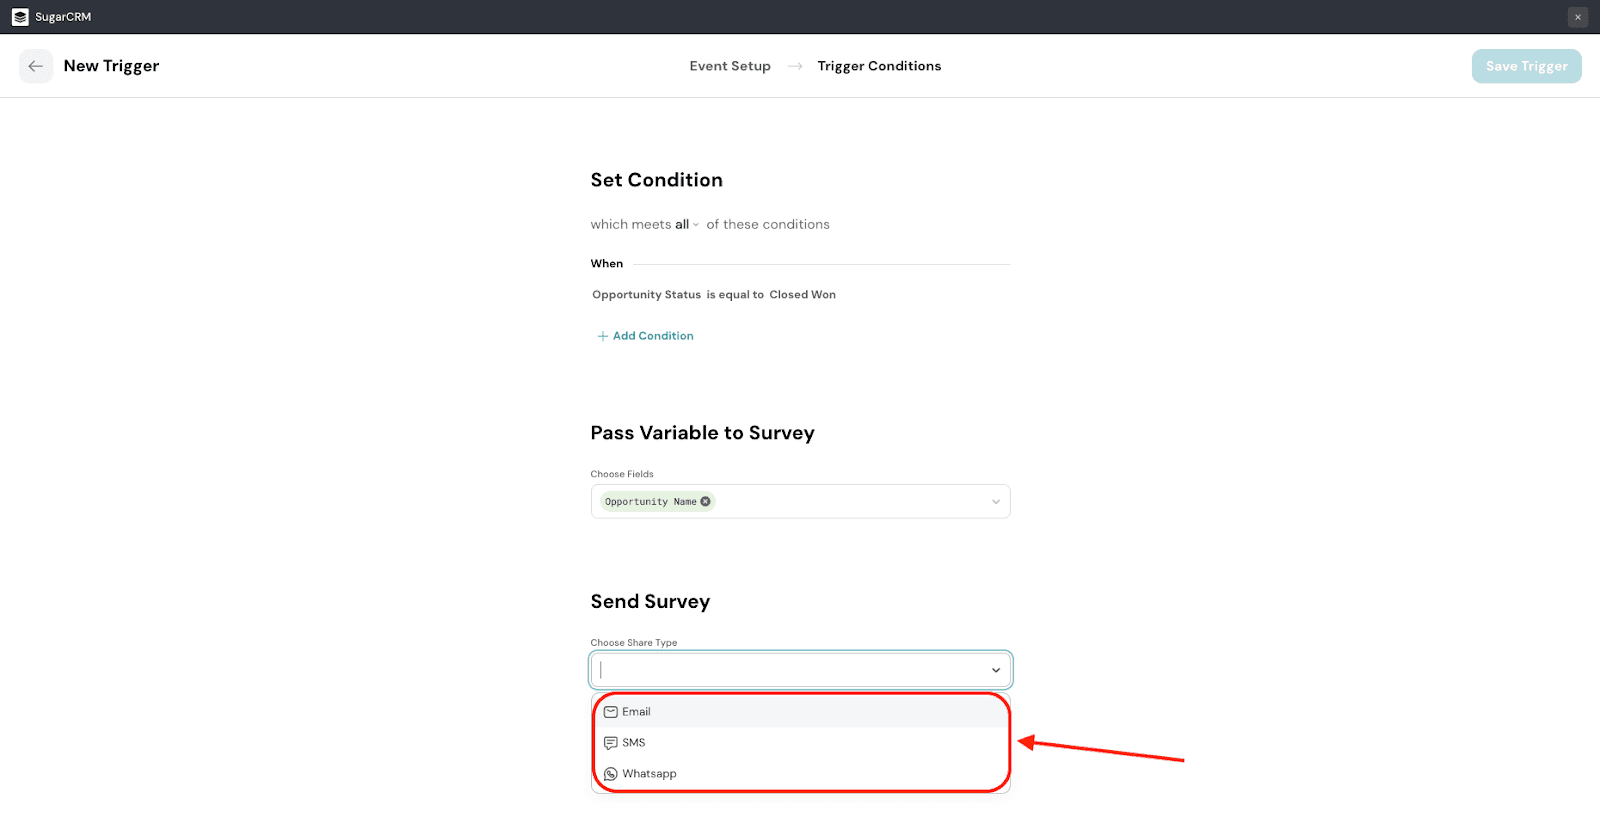
14. The second item is the recipient selection. You can choose between the account’s contacts or the user contact (which is linked to your SugarCRM account). Click on the drop-down menu under Choose Recipient to choose.
Note: For SMS and WhatsApp share types, you will also be able to select the alternate account number.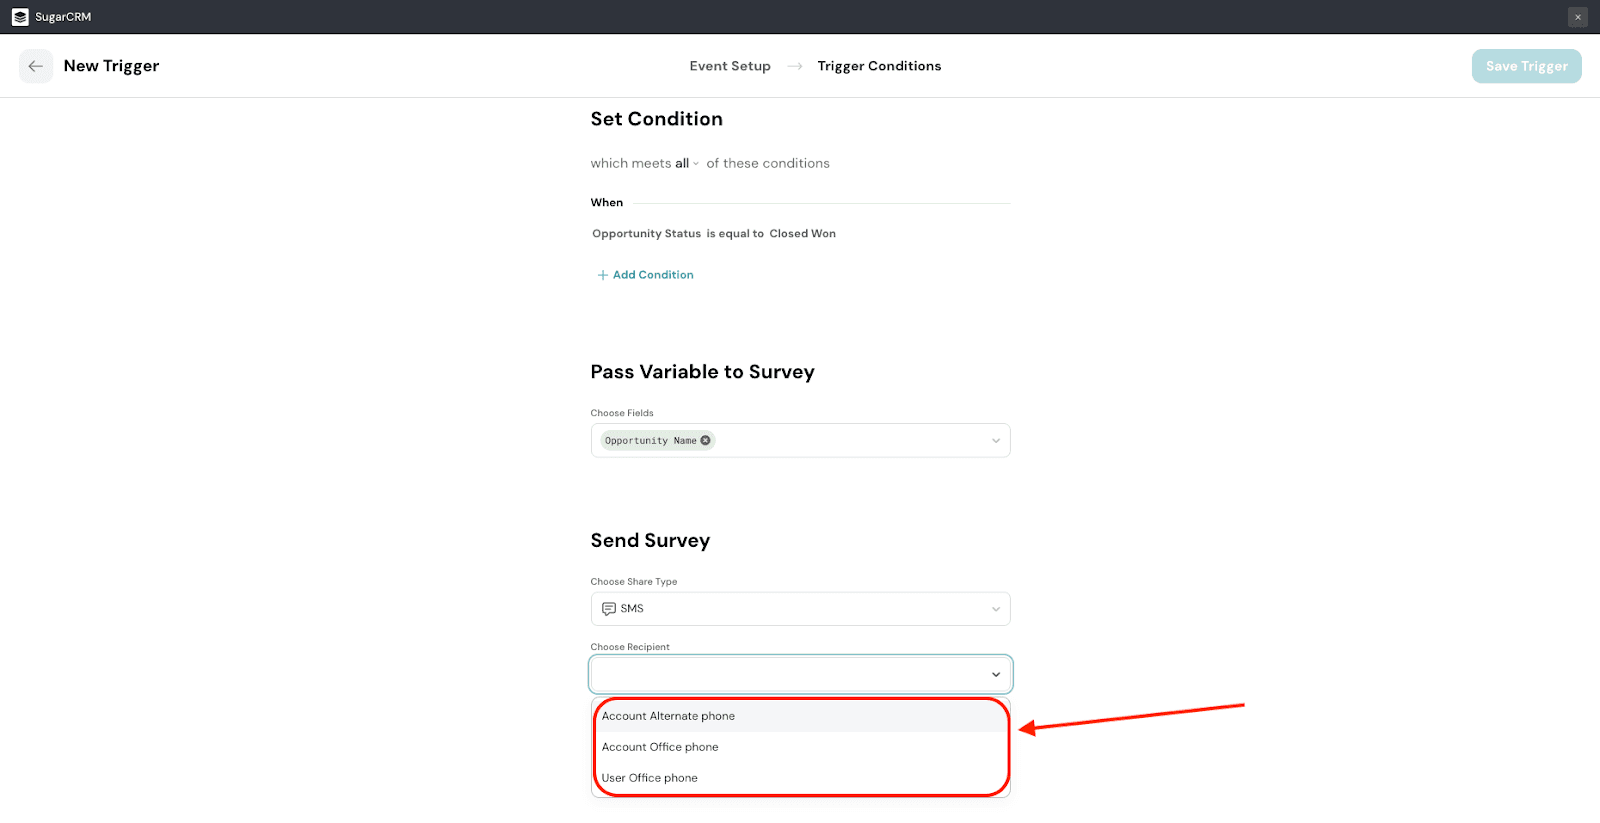
15. The third item is the specific Share Channel, where you can choose the exact share under the Share Type. Click on the drop-down menu under Choose Share Channel.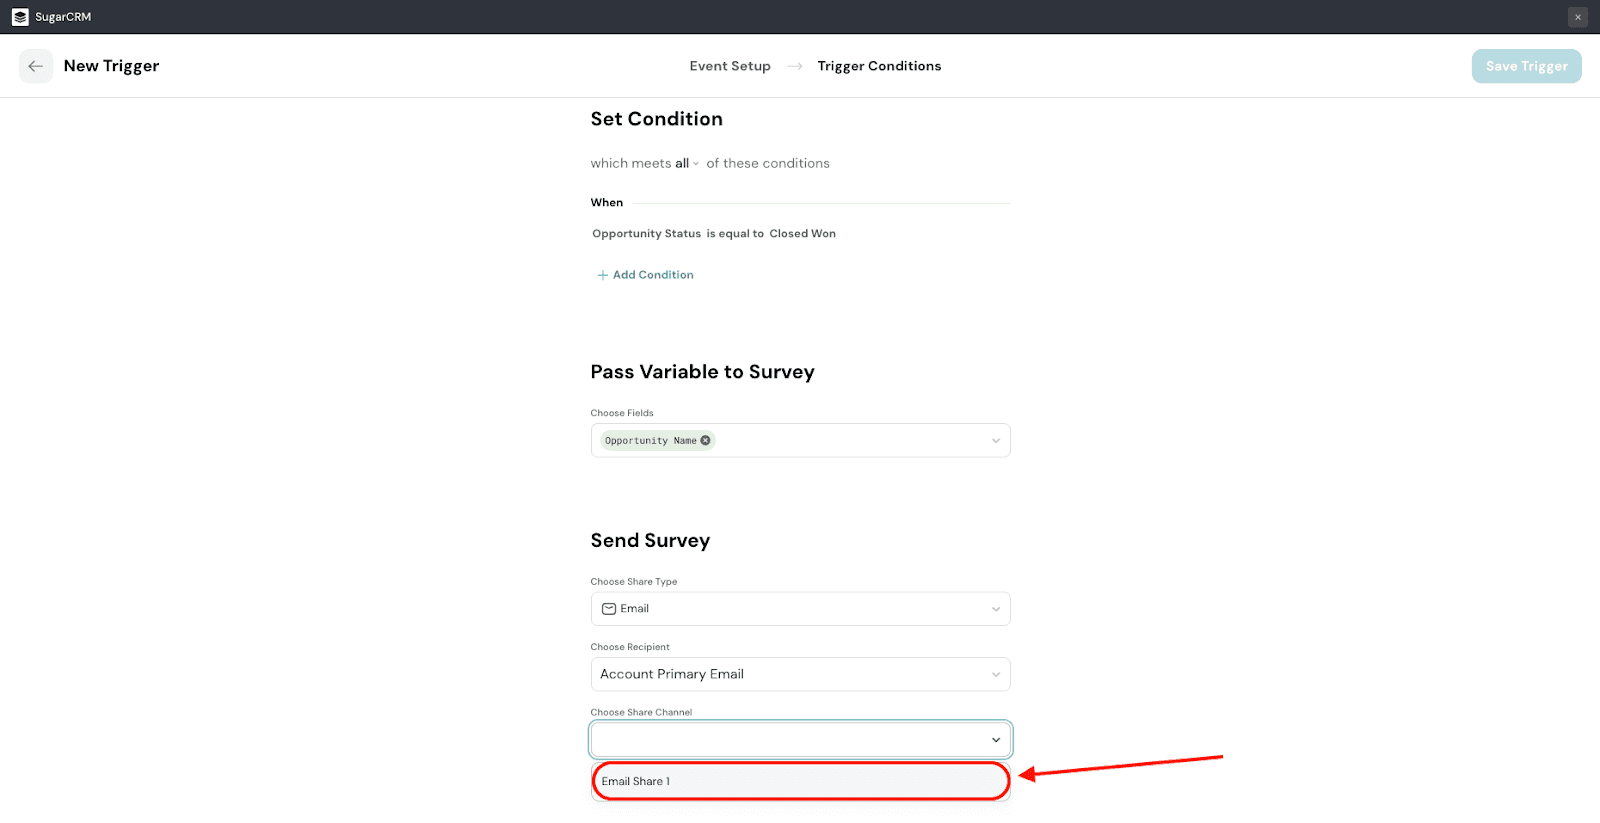
16. The trigger is ready. Click Save Trigger.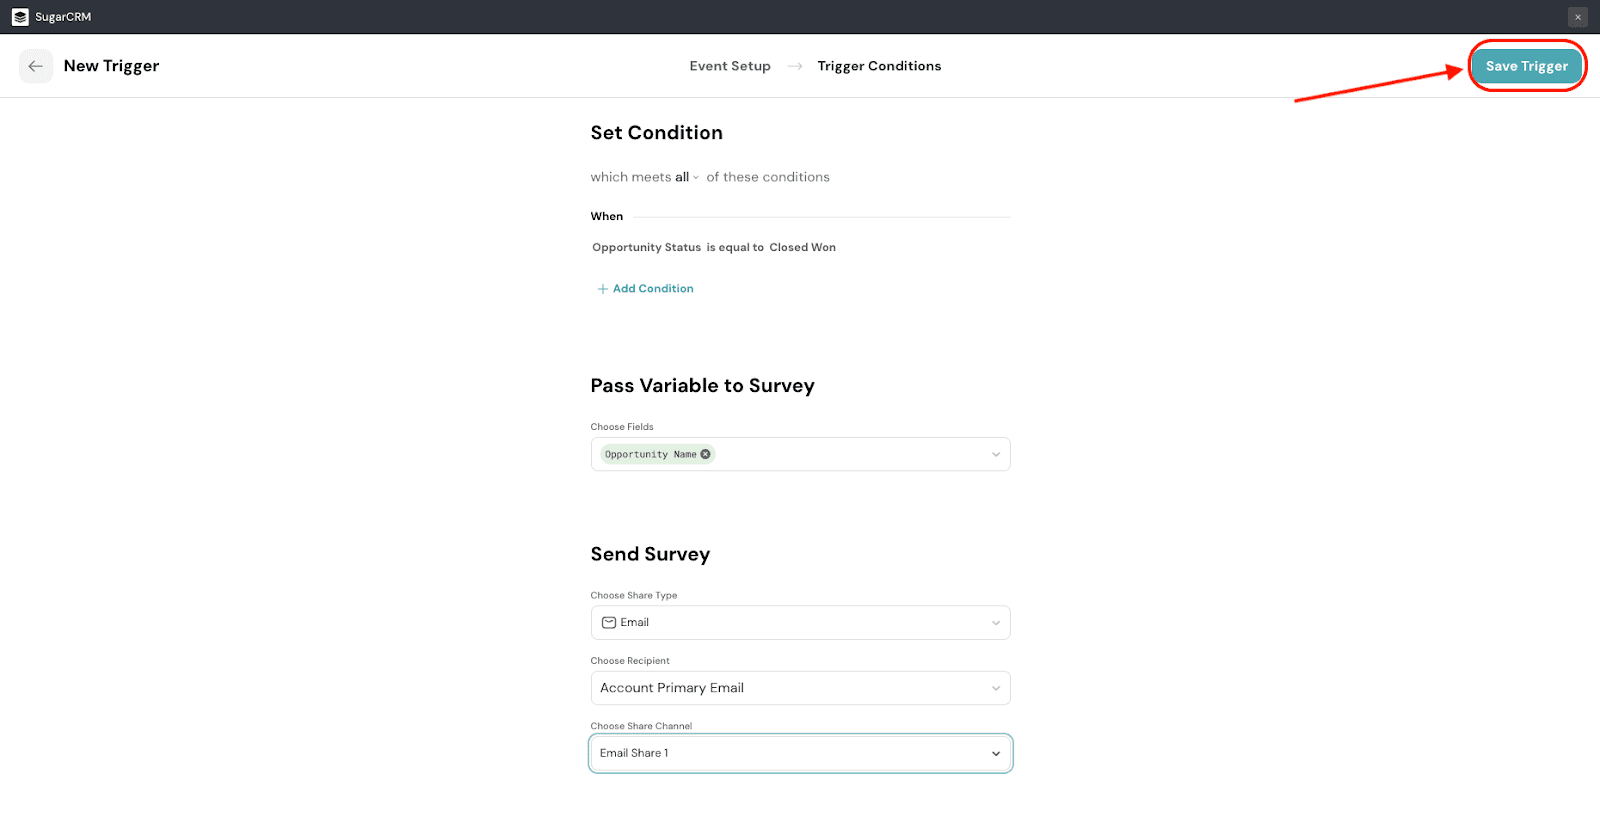
17. After you create your first trigger, you will be automatically returned to the Integration section of the survey. To view it, open the SugarCRM integration again. You will then be able to see it.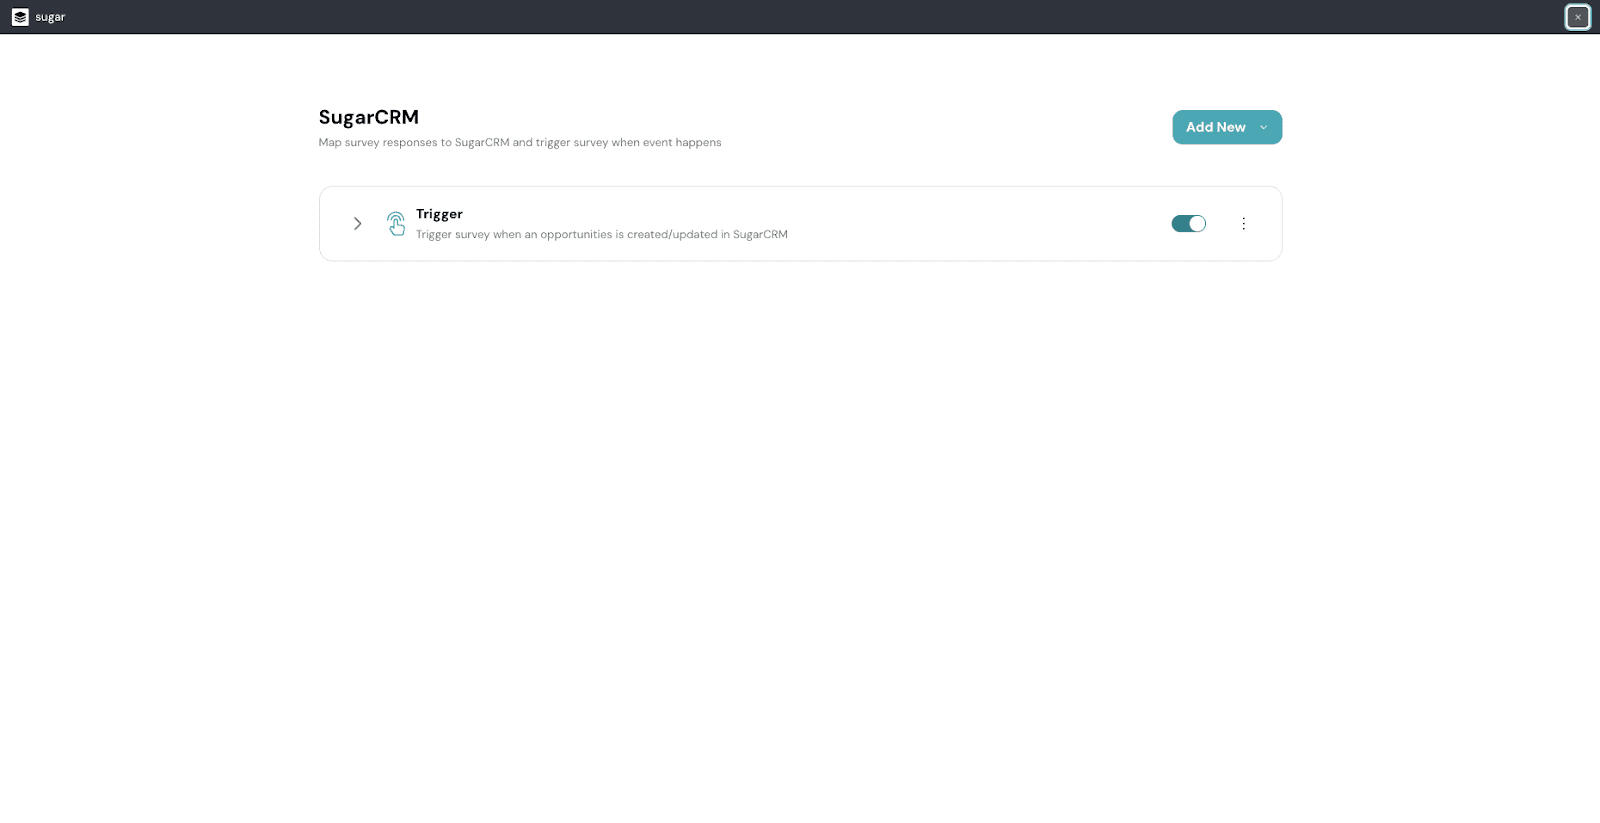
Note: If you exit the integration in the middle of the setup, the mapping is saved as a draft. You can view when you open the integration again.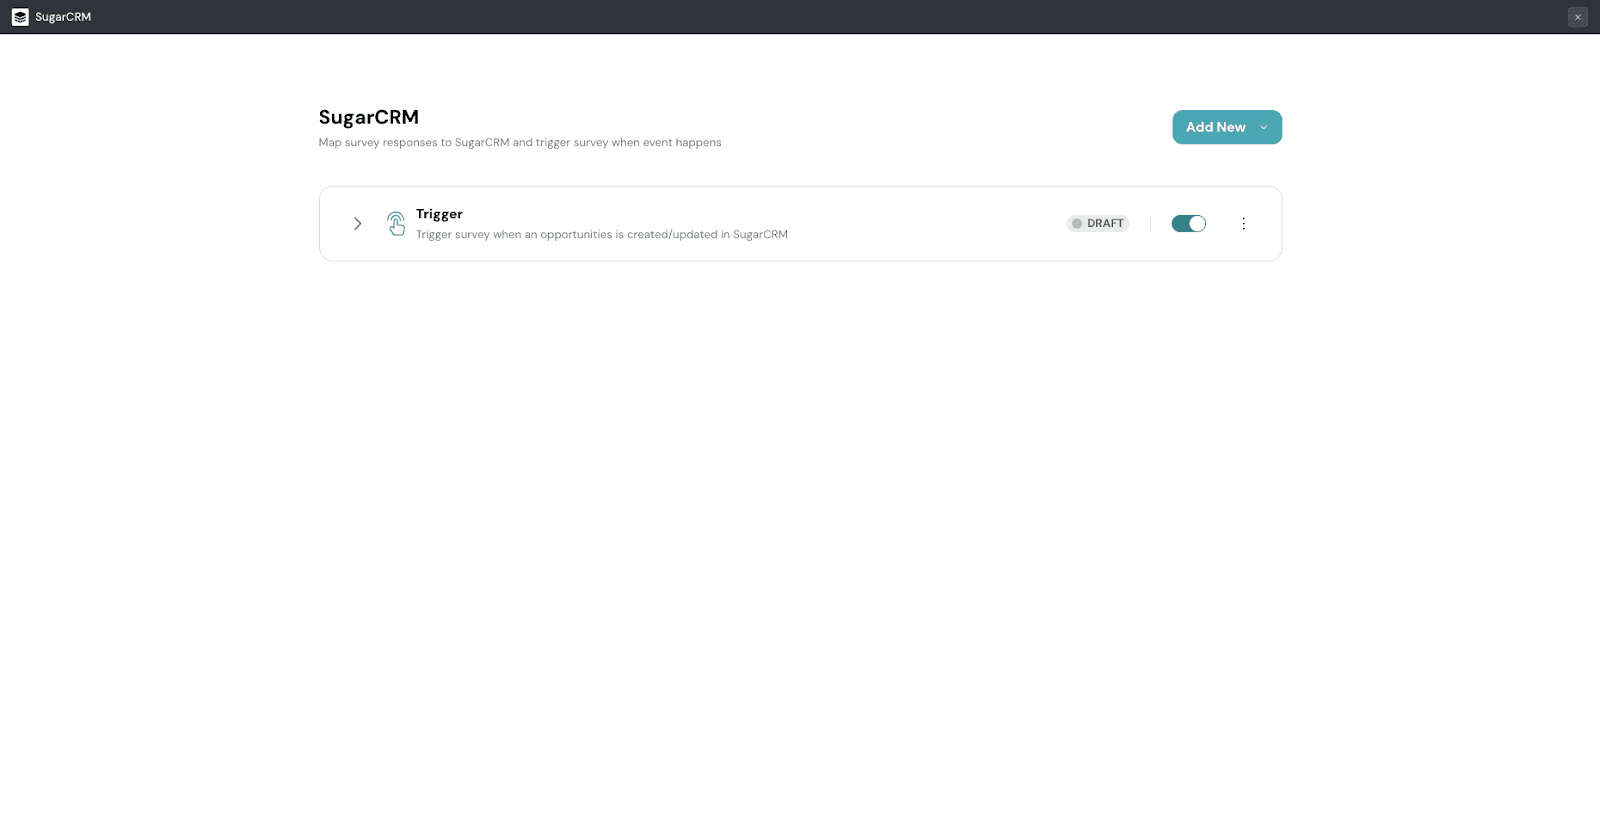
From here, you can add new triggers. You can also edit or delete existing triggers.
1. Start by clicking on Mapping.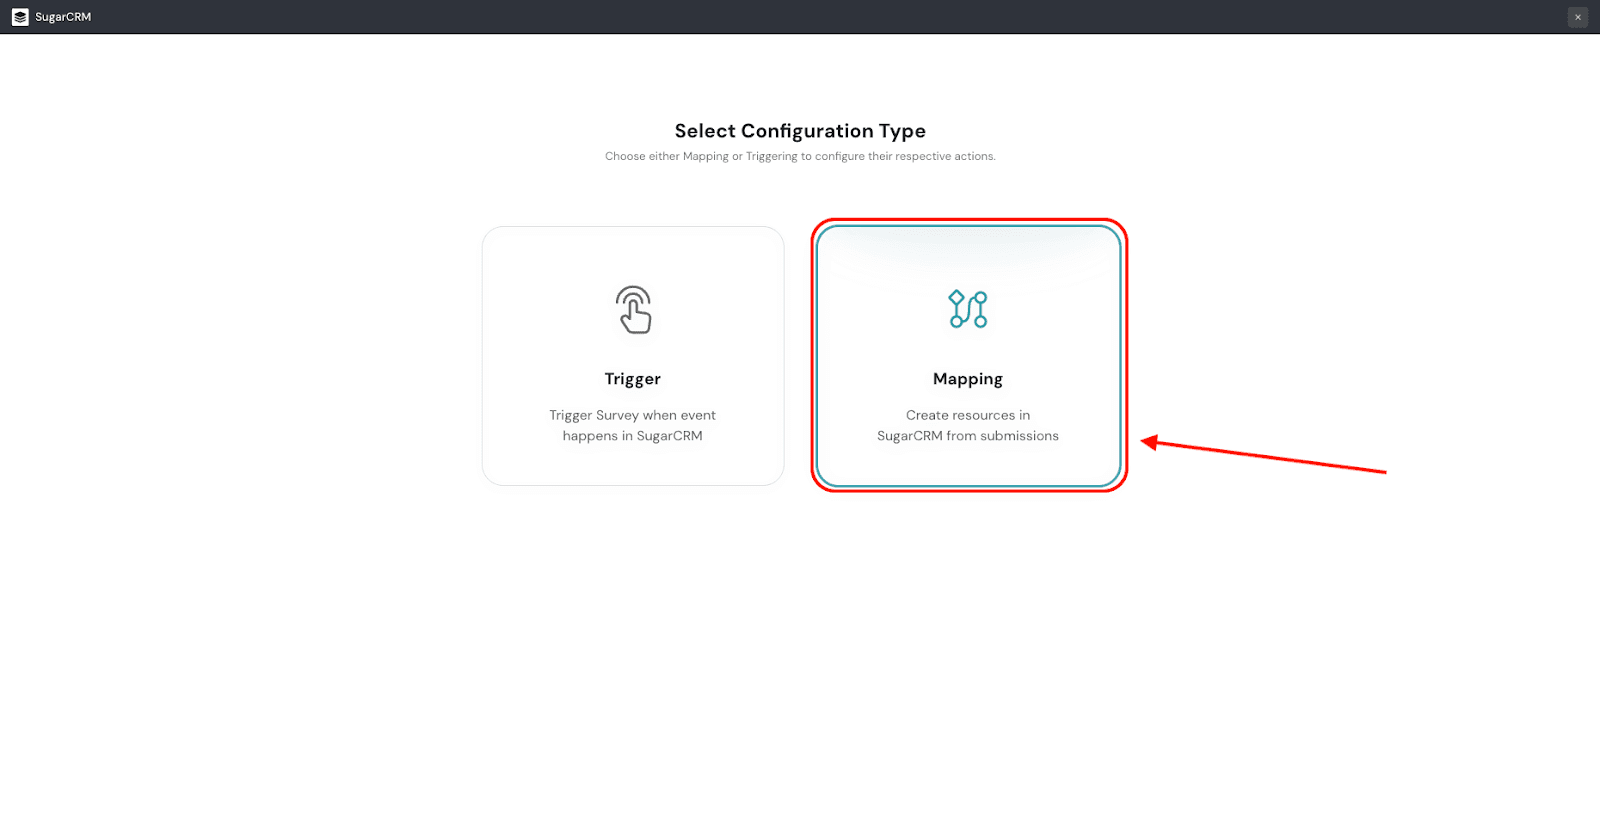
2. You will enter the mapping setup screen, where the first part involves creating an event.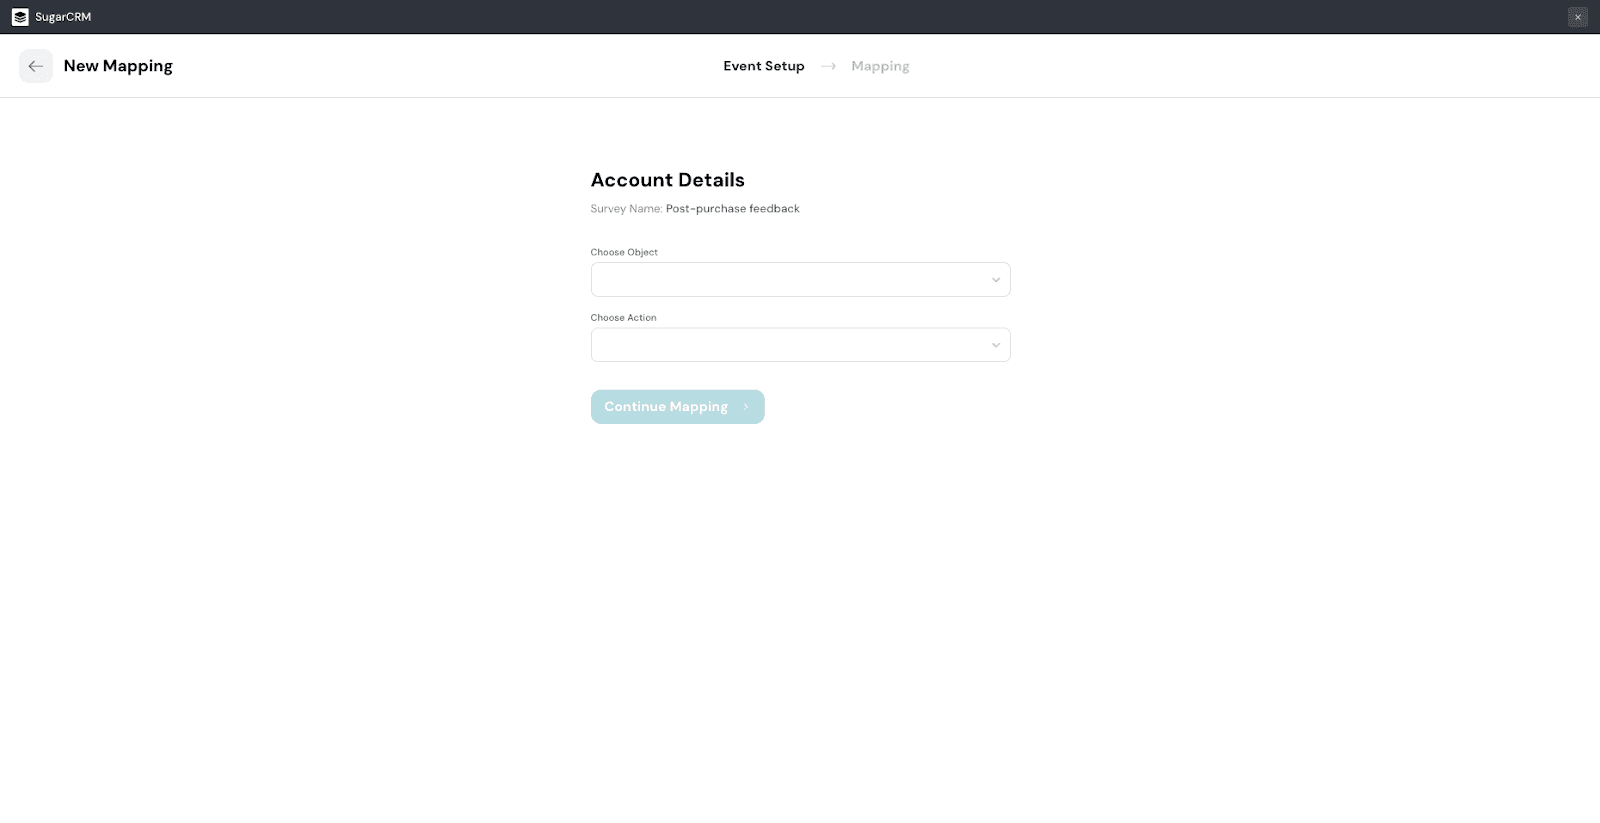
3. First, click on the drop-down under Choose Object to choose the module where the mapping will be located.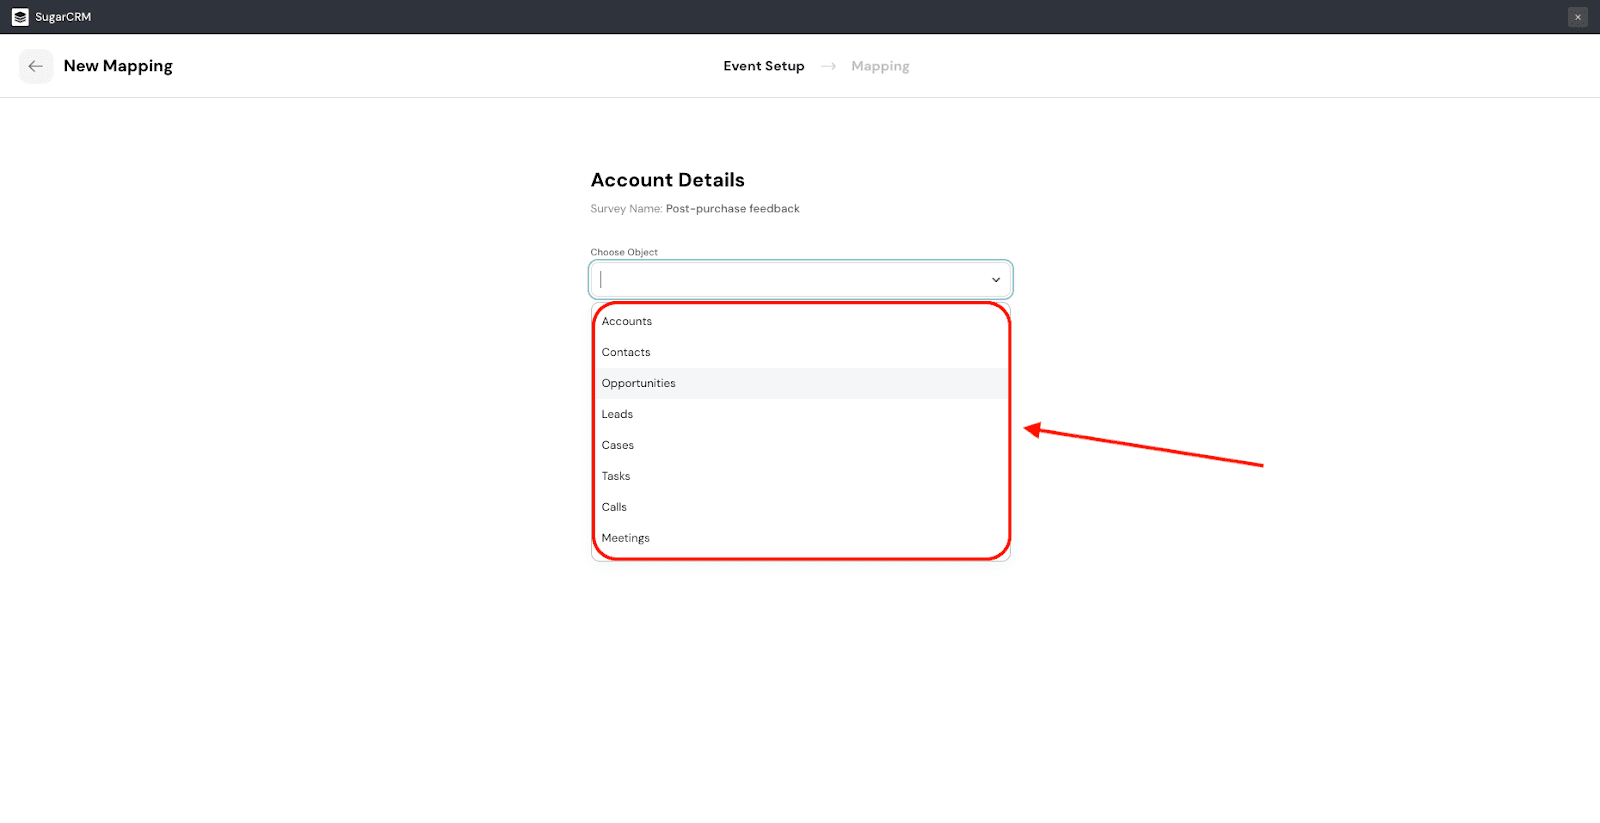
4. Then click on the drop-down menu under Choose Action to define what sets off the mapping. You can choose between creating or updating.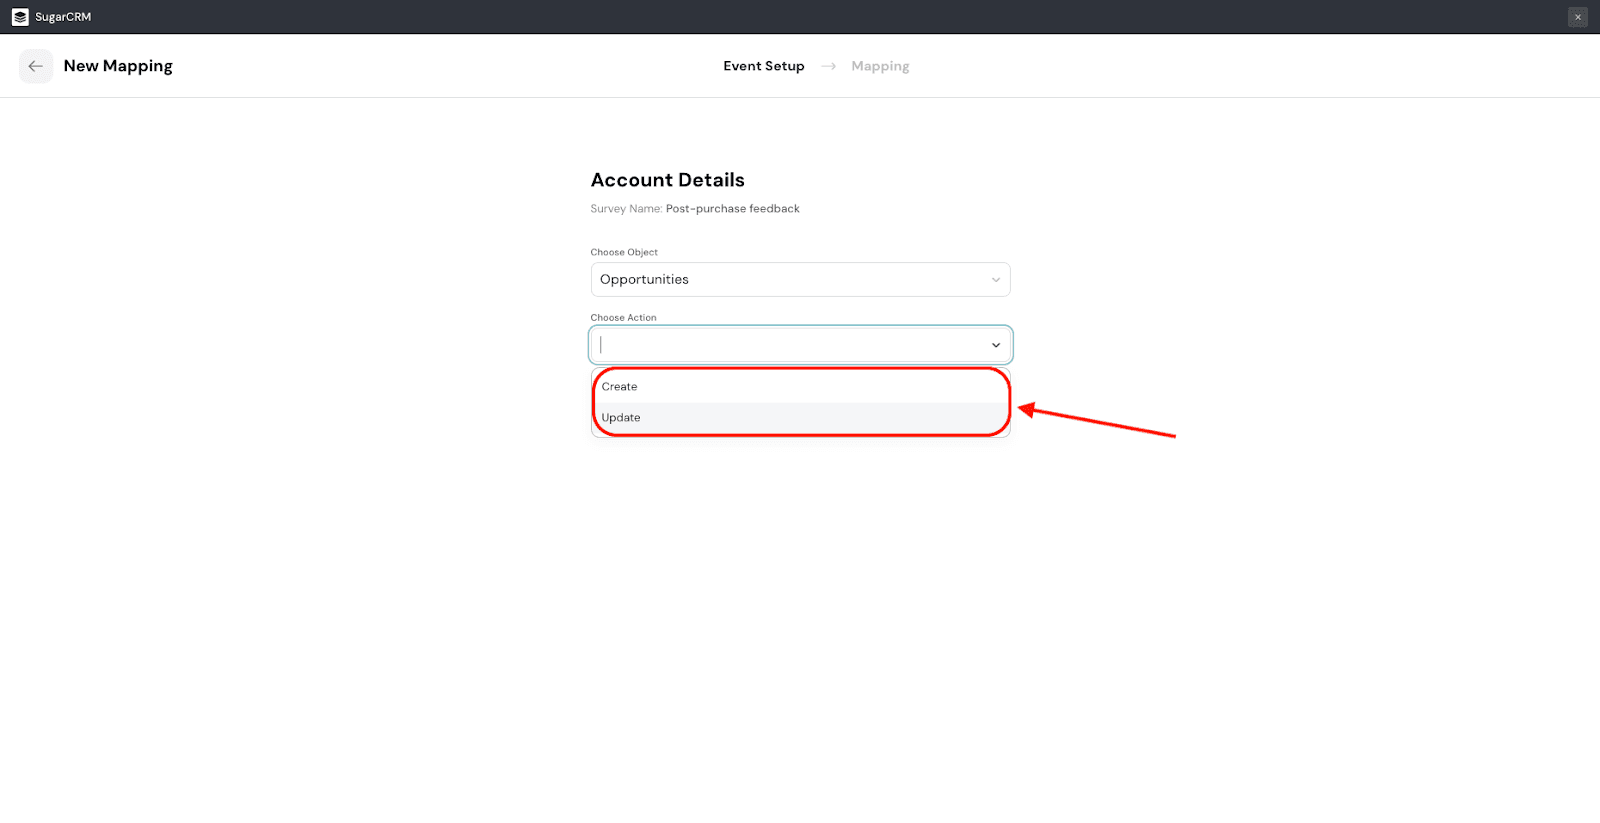
5. Next, click Continue Mapping.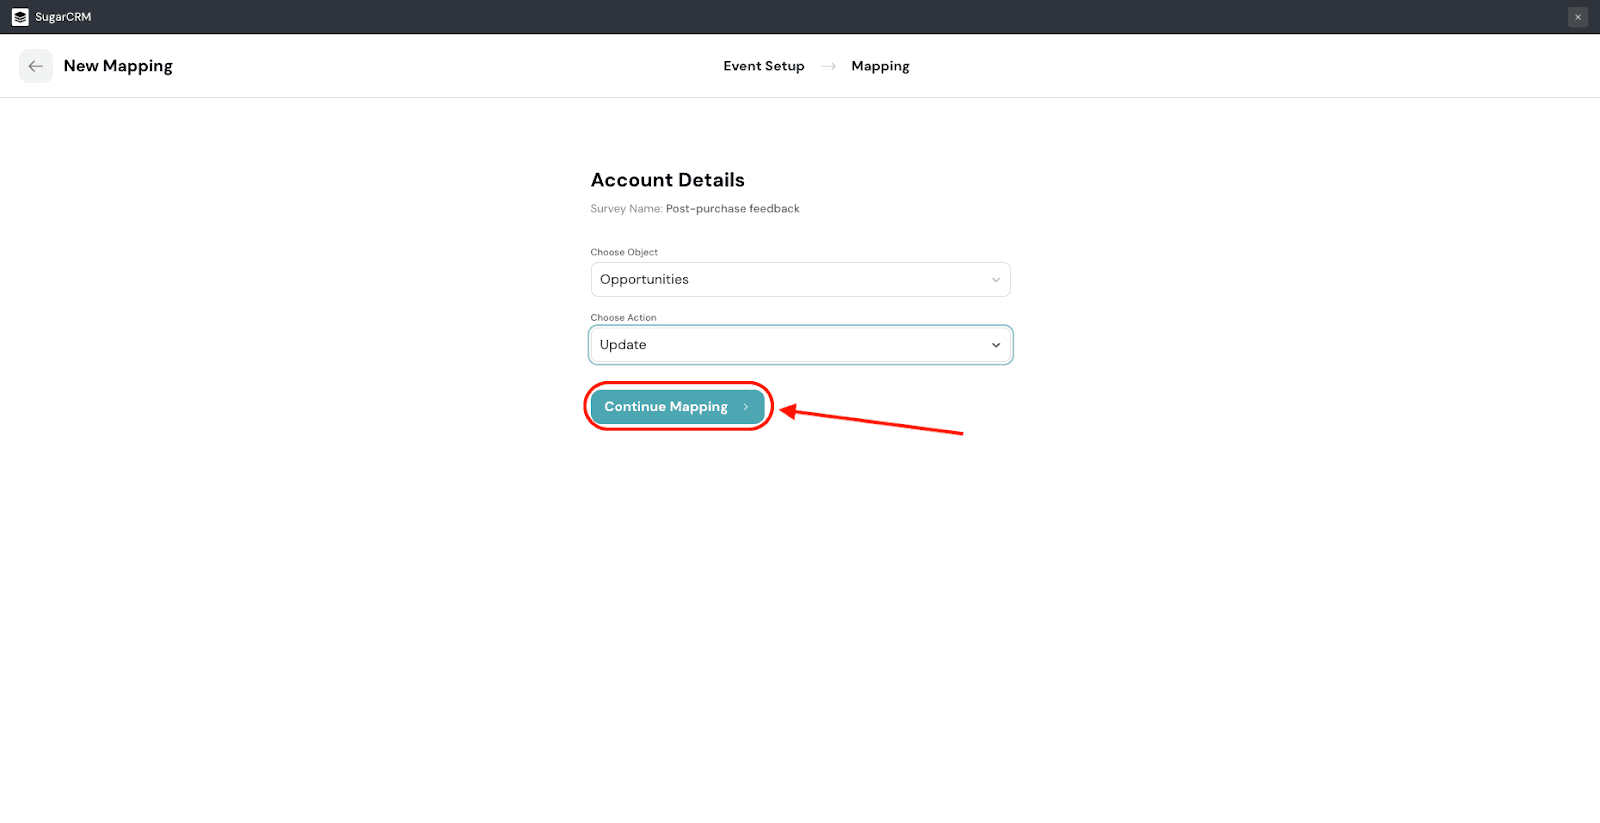
6. After this, you will have to configure the mapping fields, i.e. which aspect of survey data gets mapped to which fields in SugarCRM. The first mapping field is mandatory. The mapping will also mandatorily happen in the Id field in SugarCRM.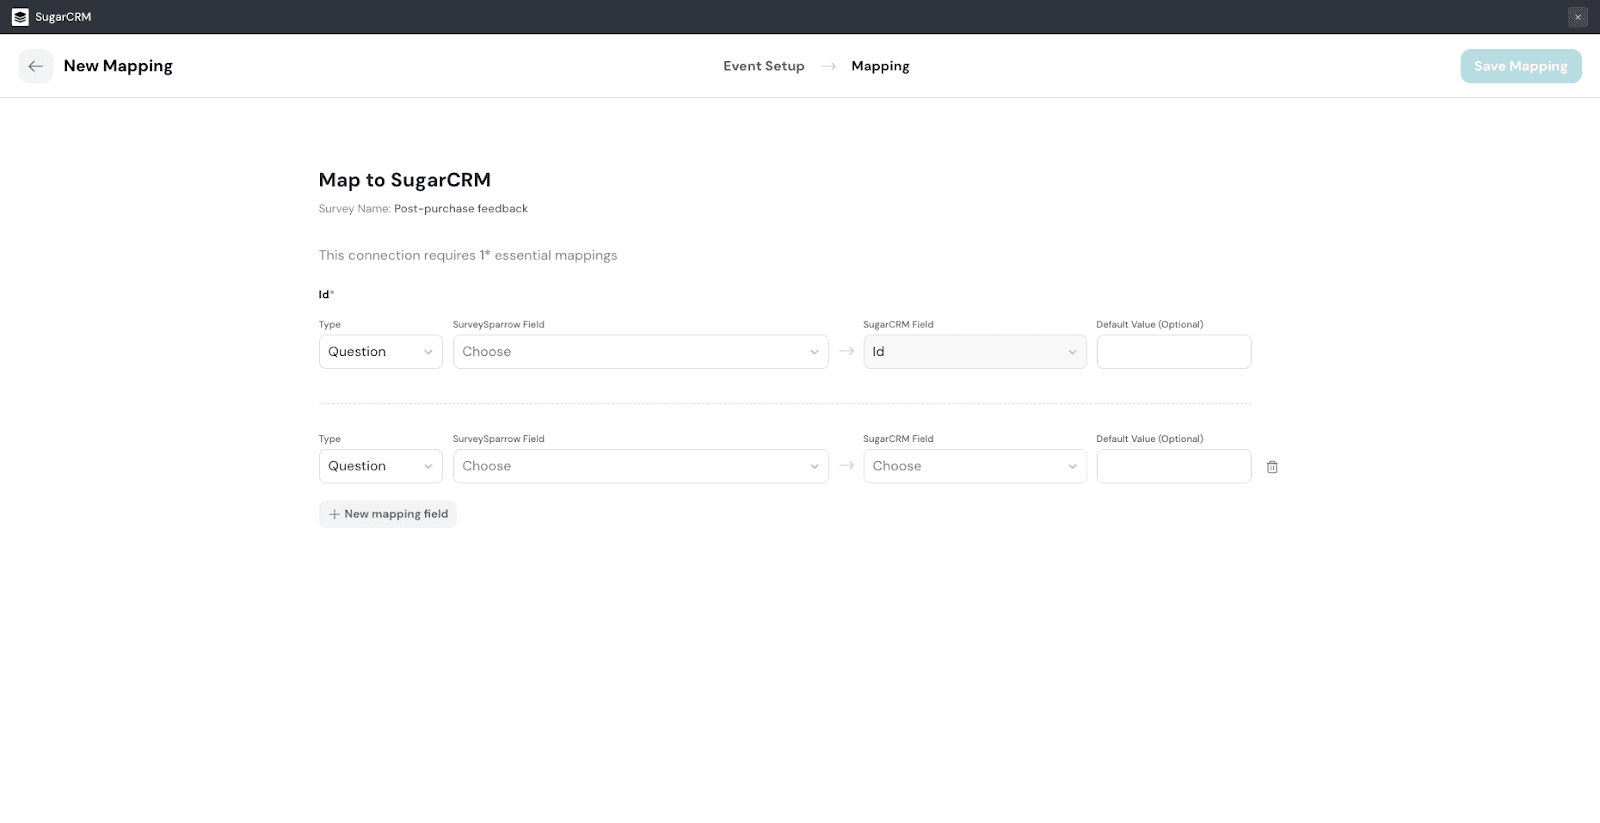
7. You can choose the type of data you want to map, by clicking on the drop-down field under Type.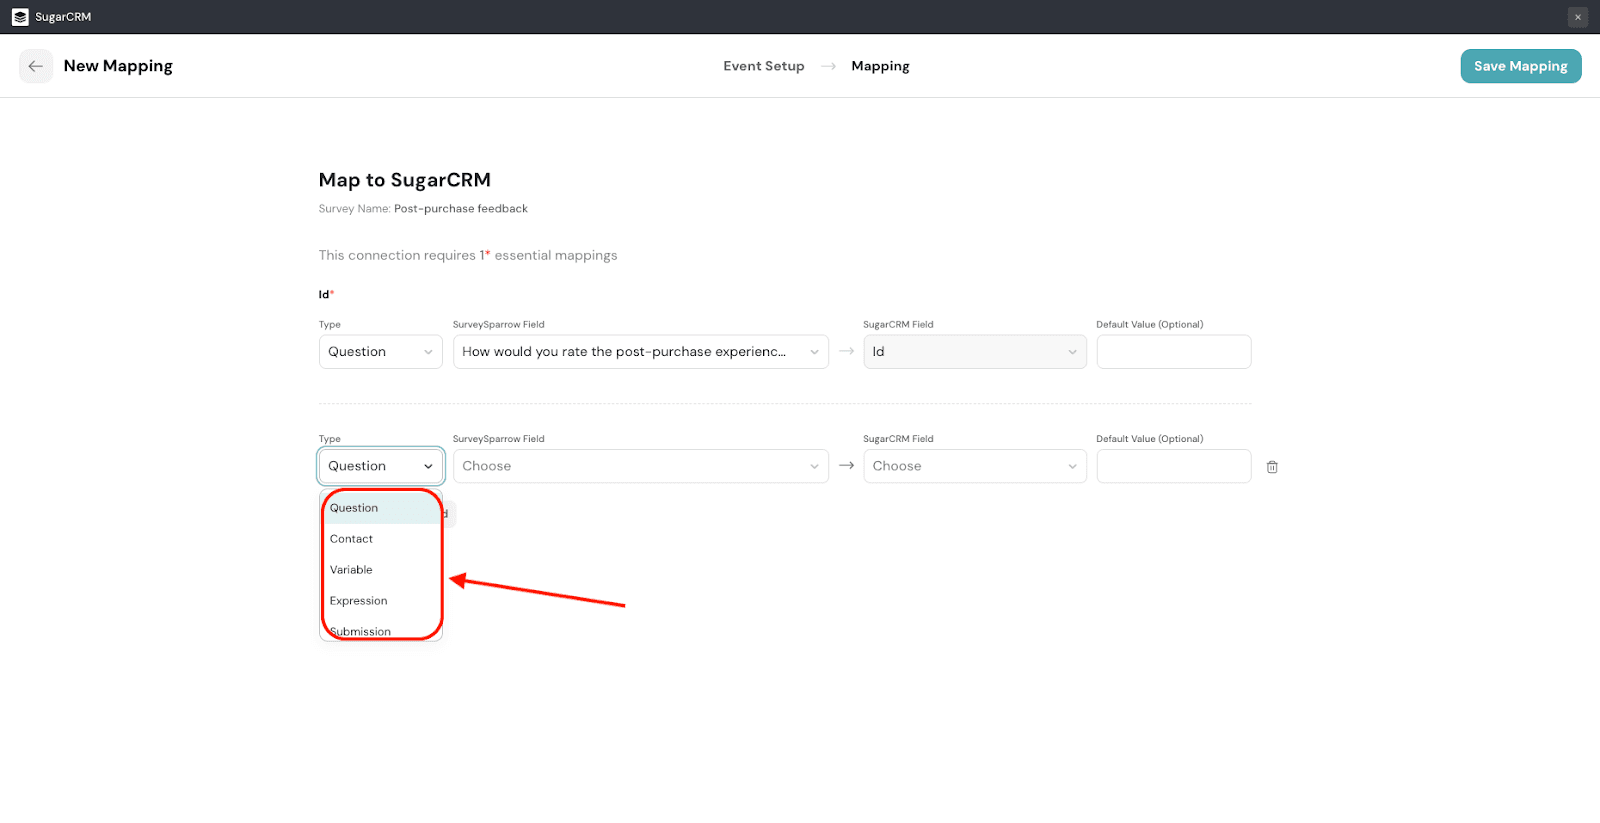
8. Then click on the drop-down menu under SurveySparrow Field to select the available options for that data type.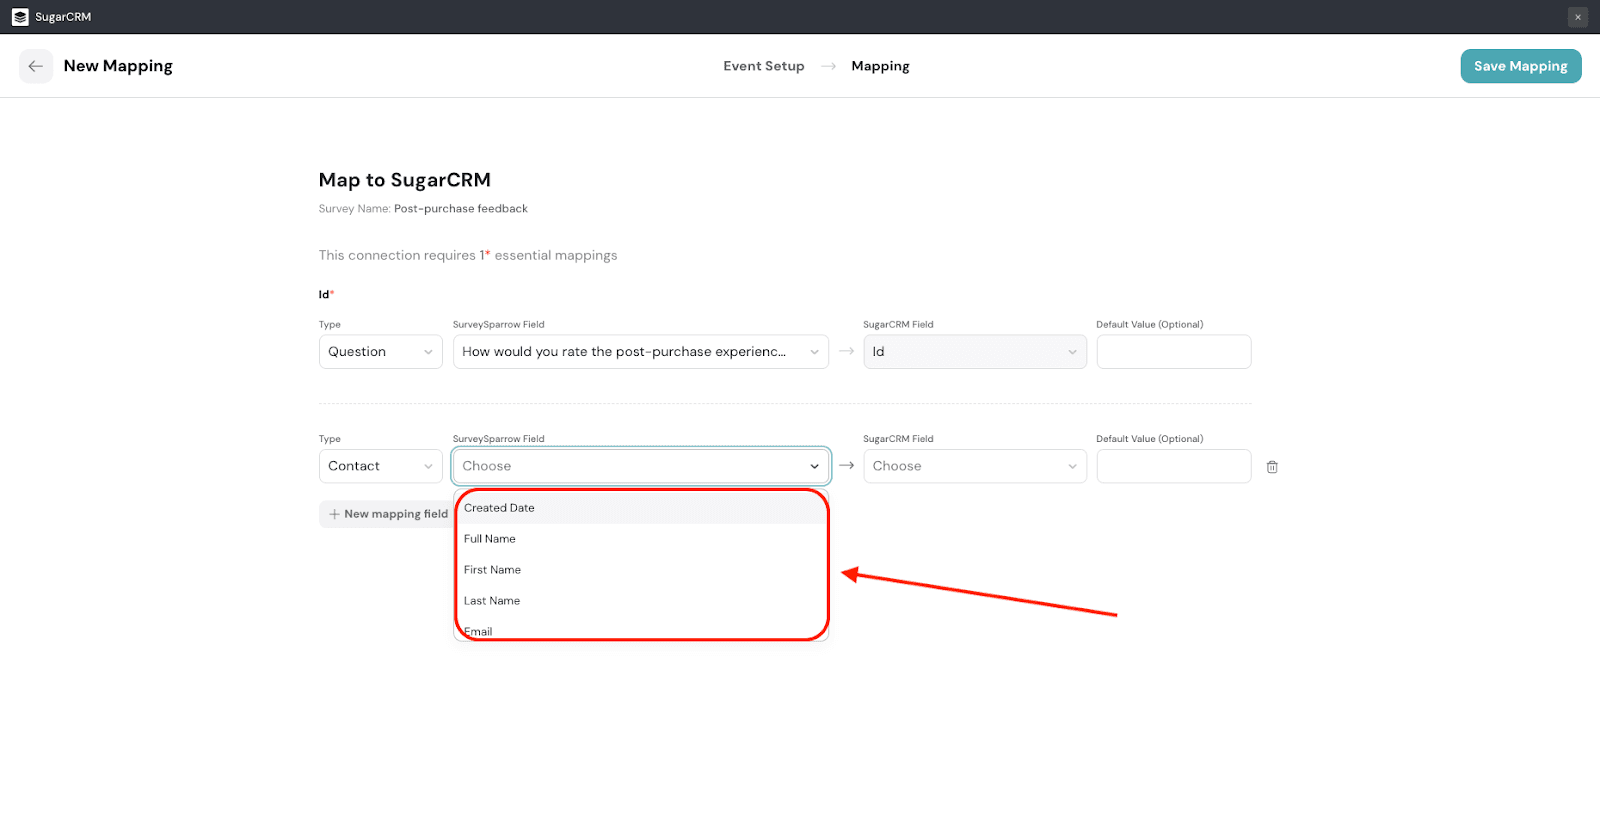
9. Choose the SugarCRM field where you want to map the data type.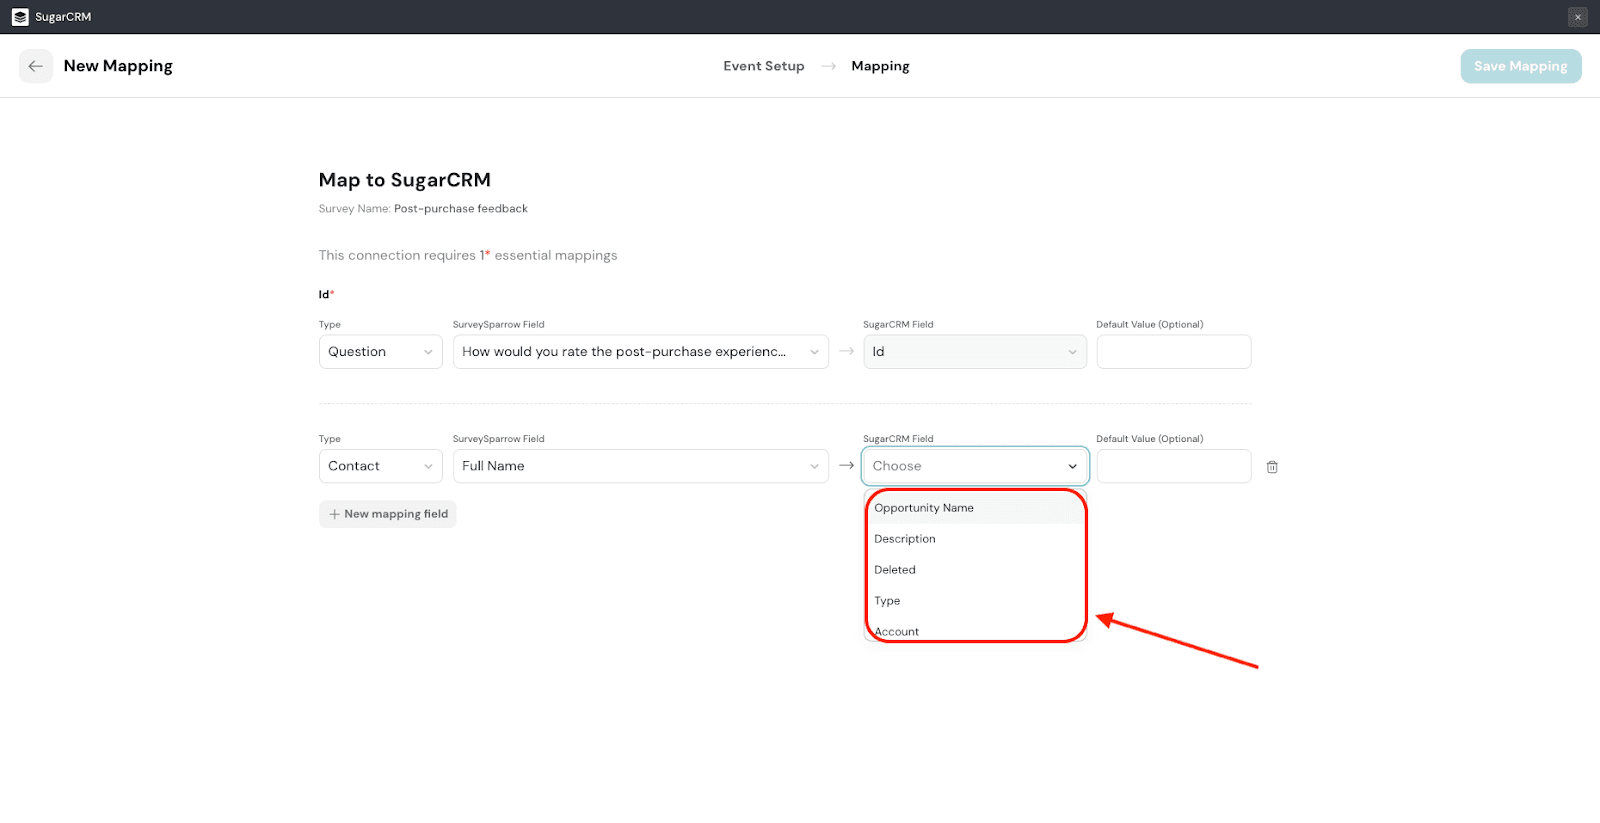
10. If you want to set a default value for the mapping, you can fill in the field. If there isn’t any data from the SurveySparrow field for that particular response, the default value gets mapped instead.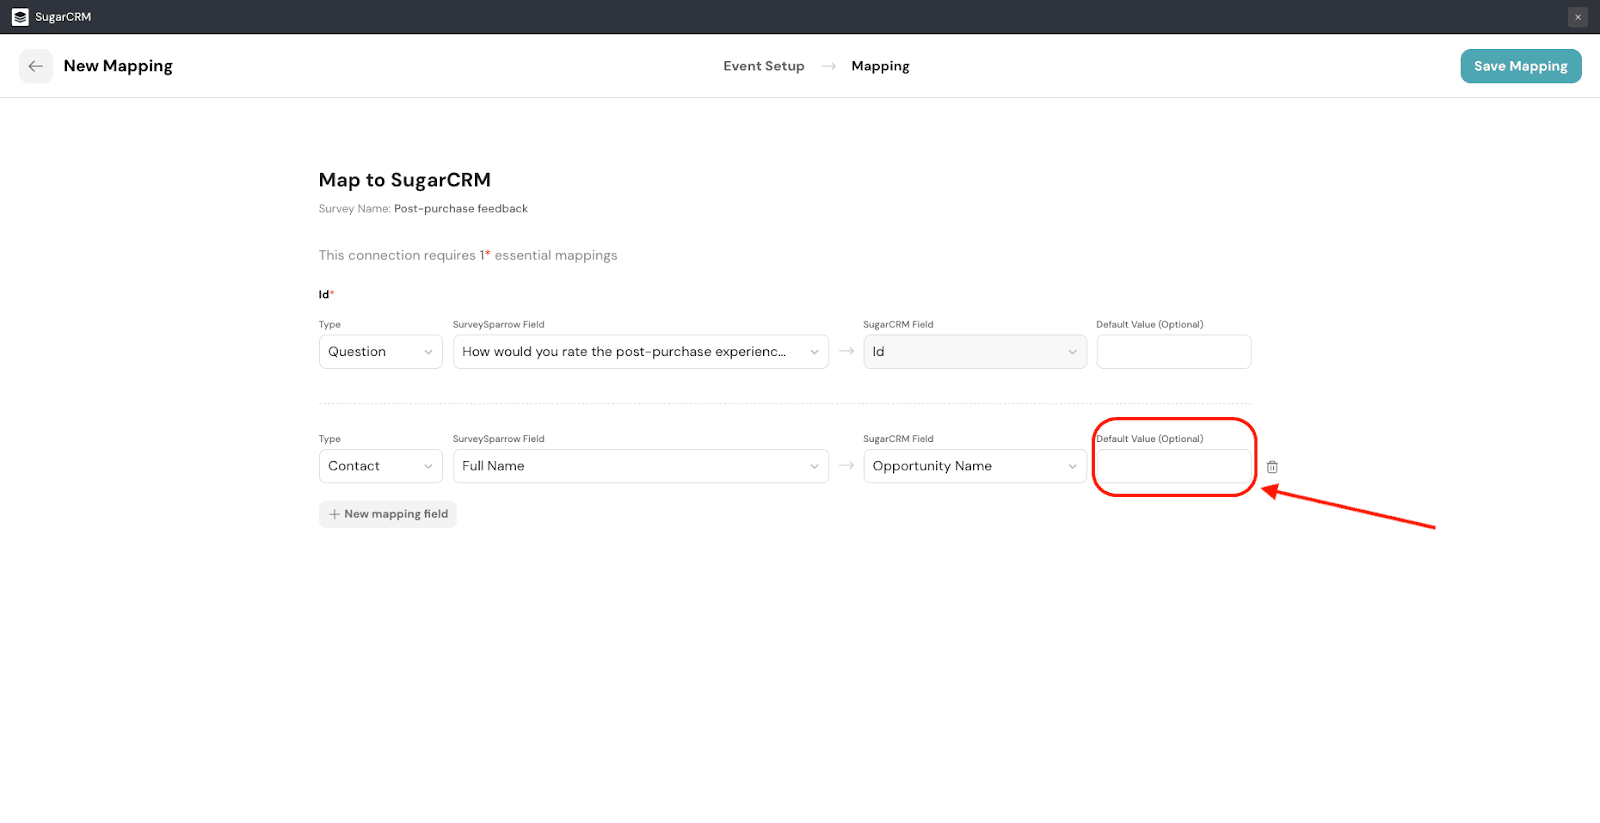
11. To add more fields, click New mapping field.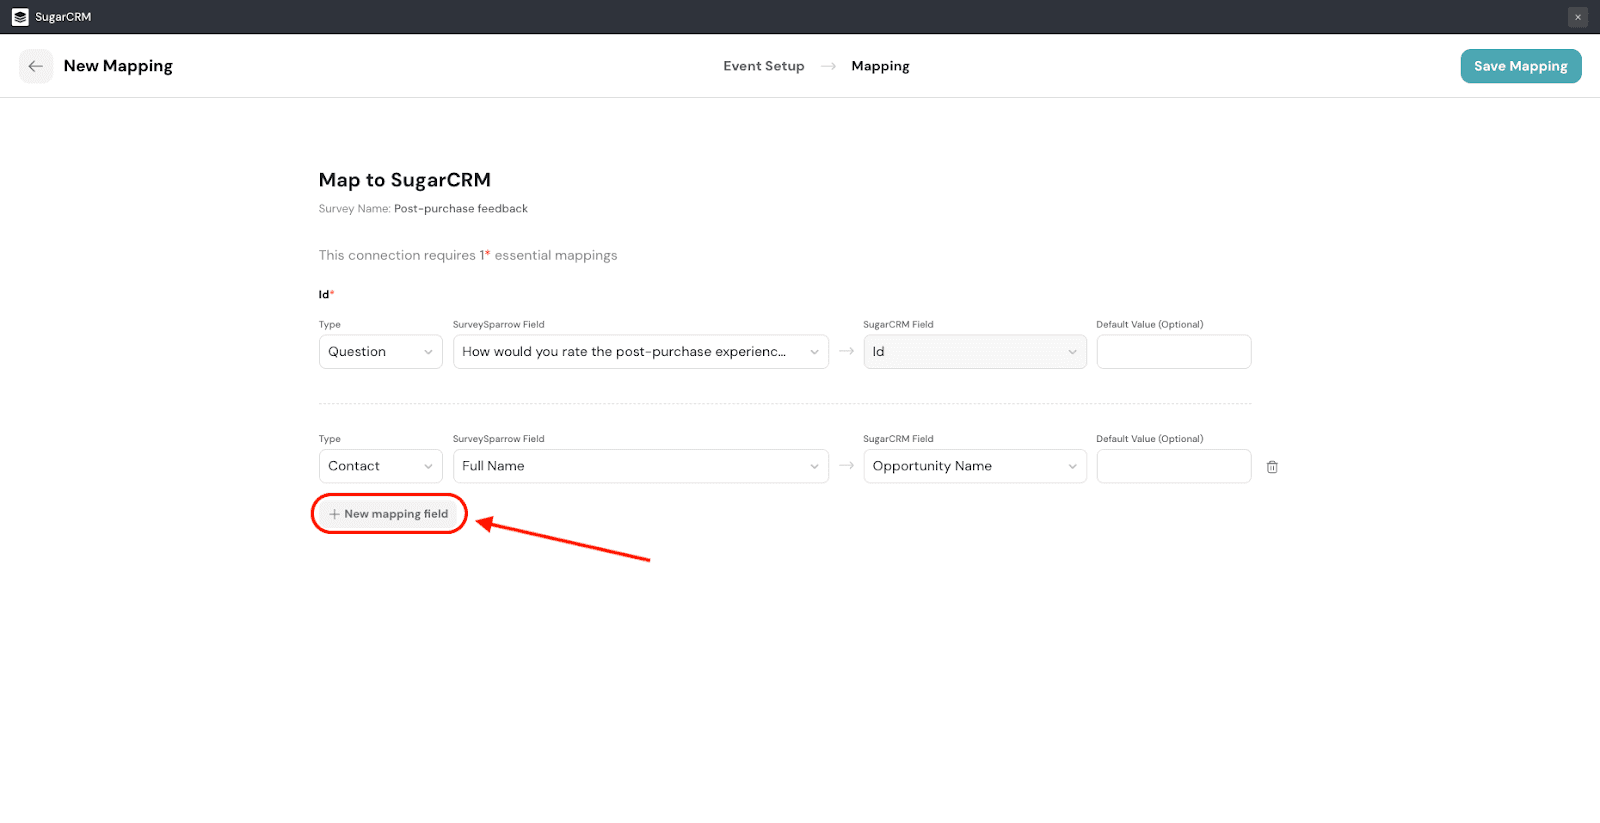
12. When you are ready, click Save Mapping.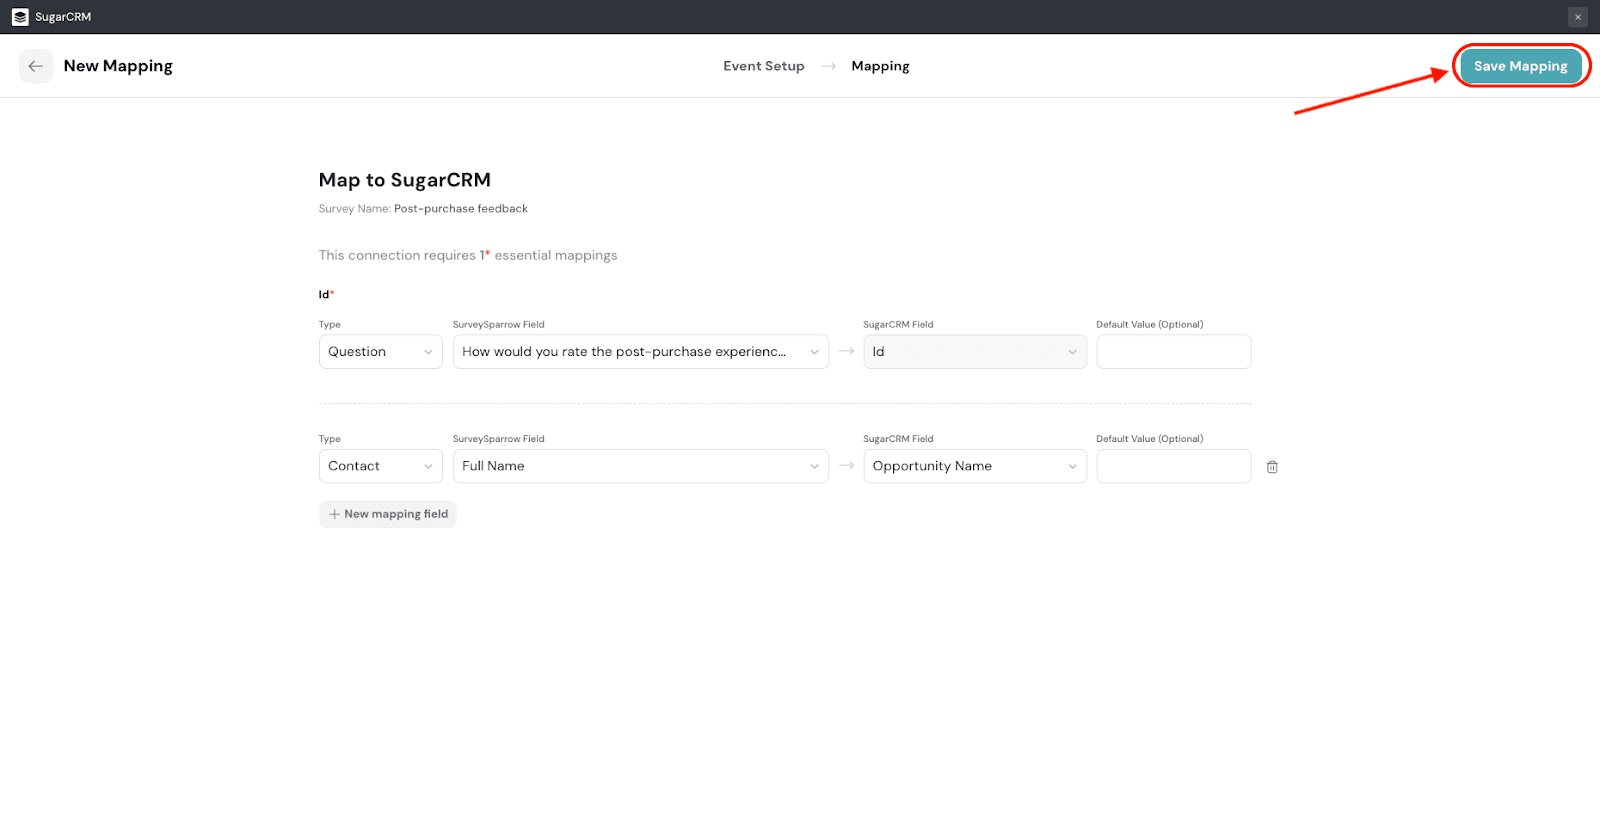
13. When you create your first trigger, you will be automatically returned to the Integration section of the survey. To view it, search for the SugarCRM integration and click on the toggle. You will be able to see it.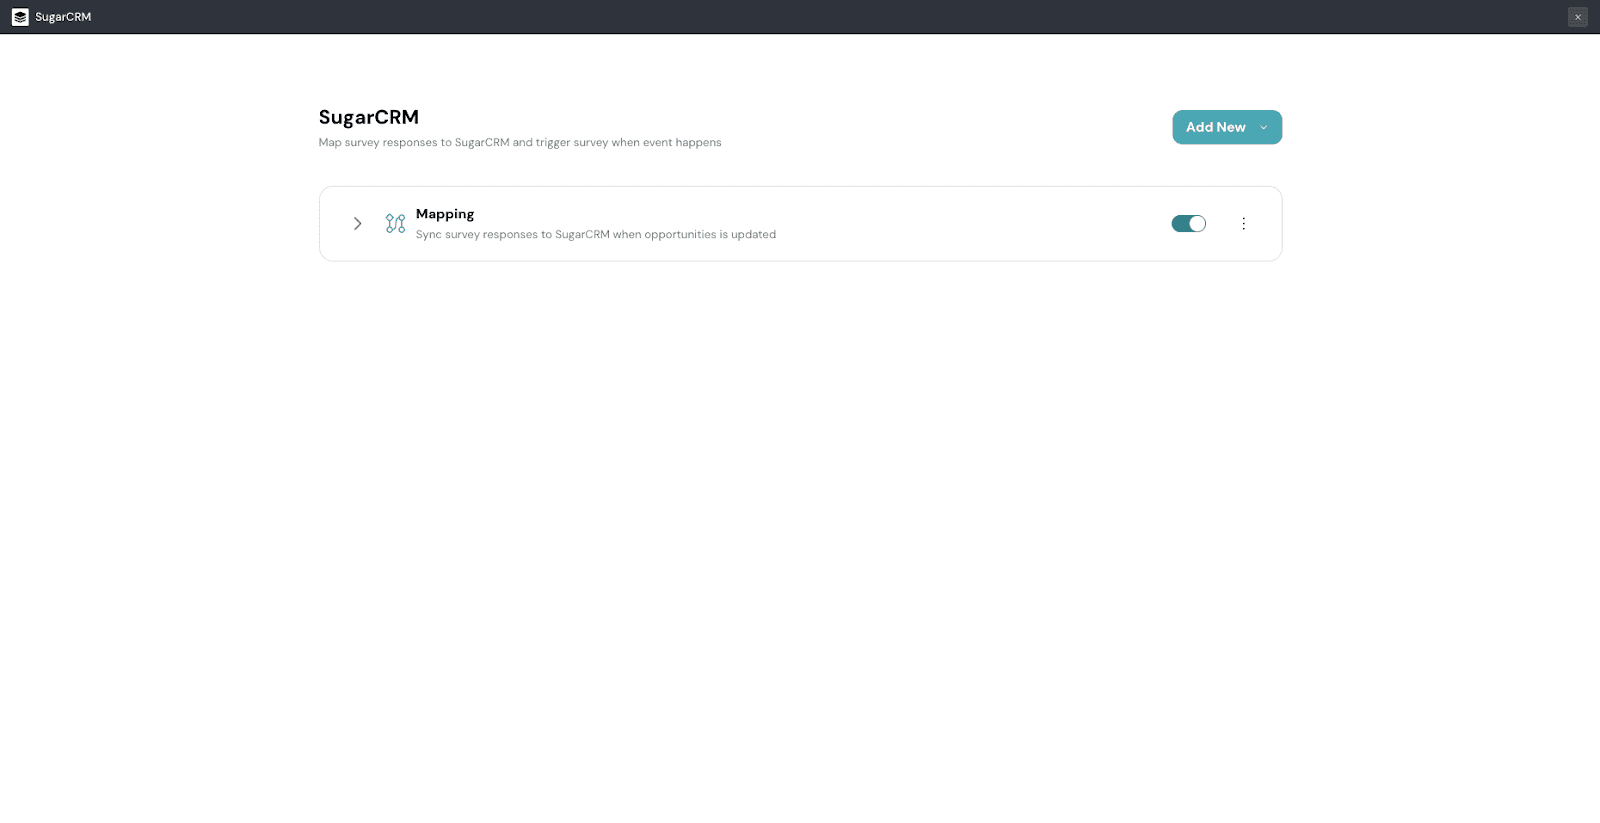
From here, you can add new mappings. You can also edit or delete the existing mappings.
Note: If you exit the integration in the middle of the setup, the mapping is saved as a draft. You can view it when you open the integration again.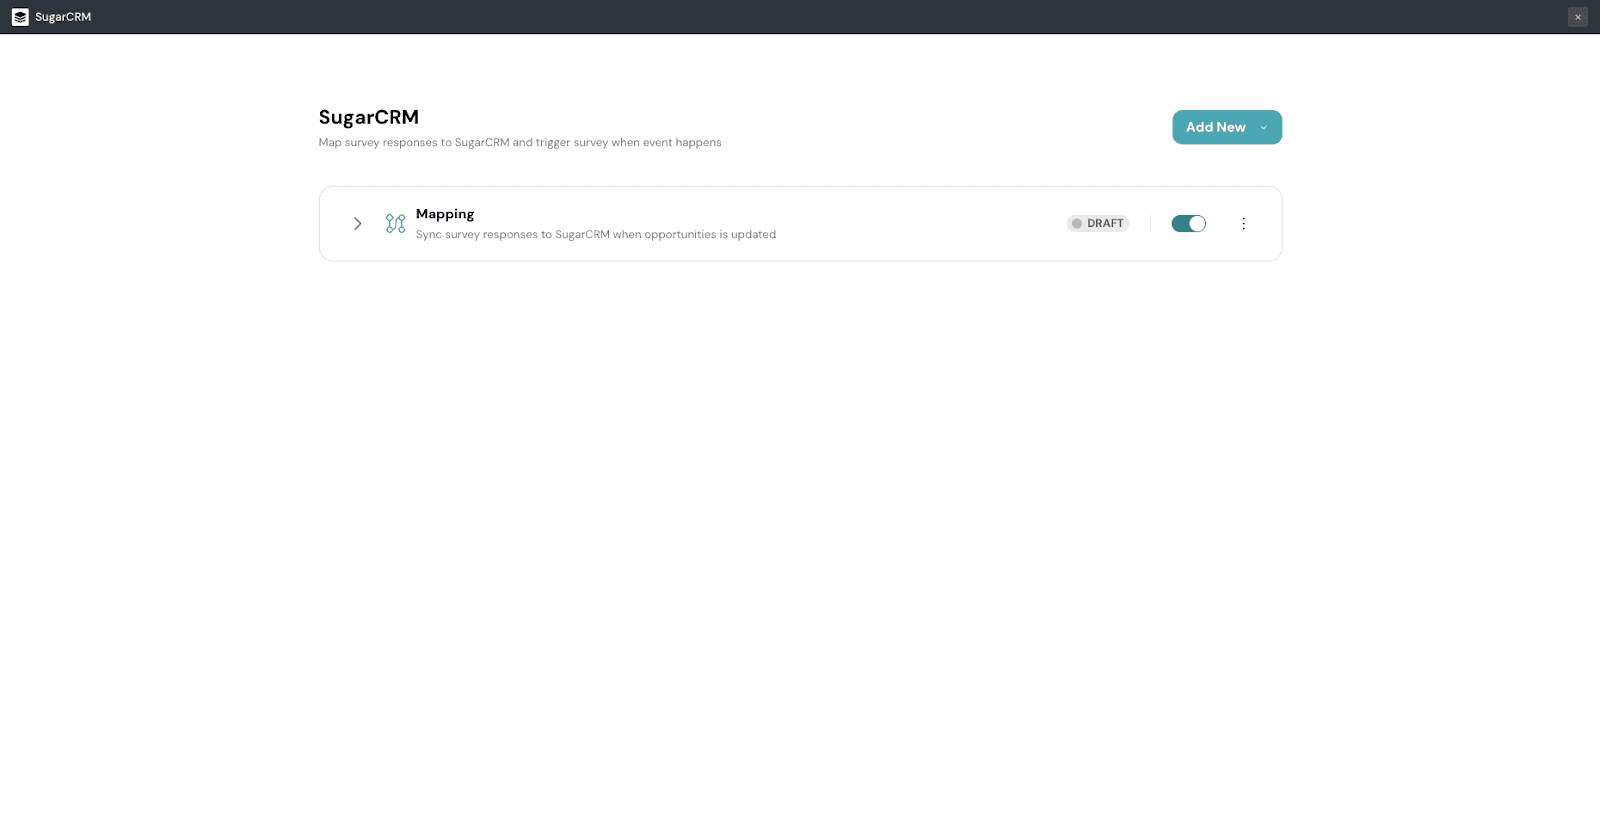
1. Inside your SurveySparrow account, click the Contacts menu, then select Contacts.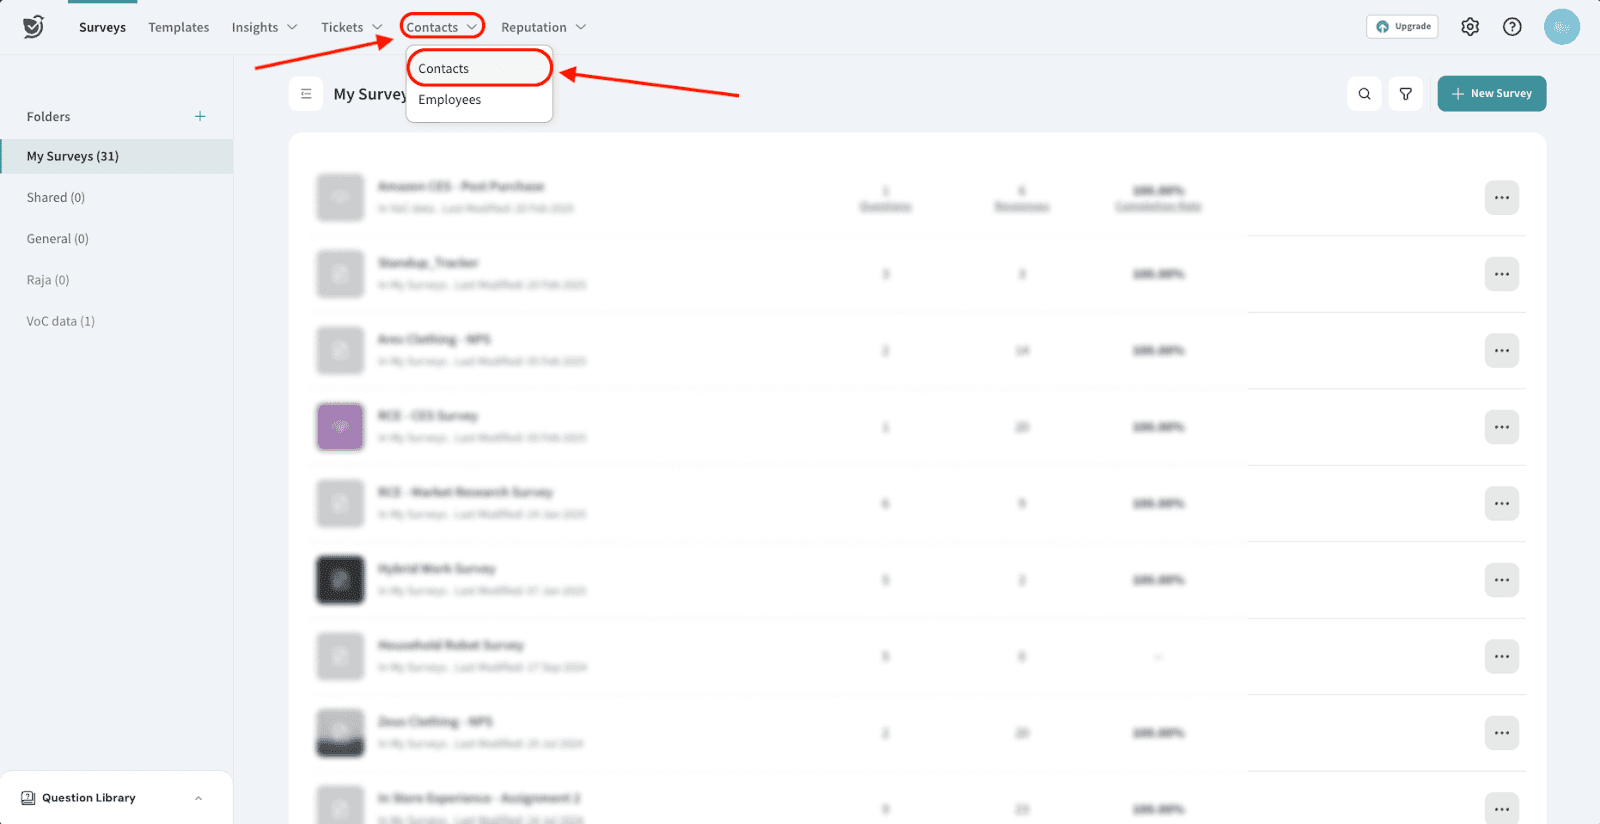
2. The All Contacts section opens up. Click Add Contacts.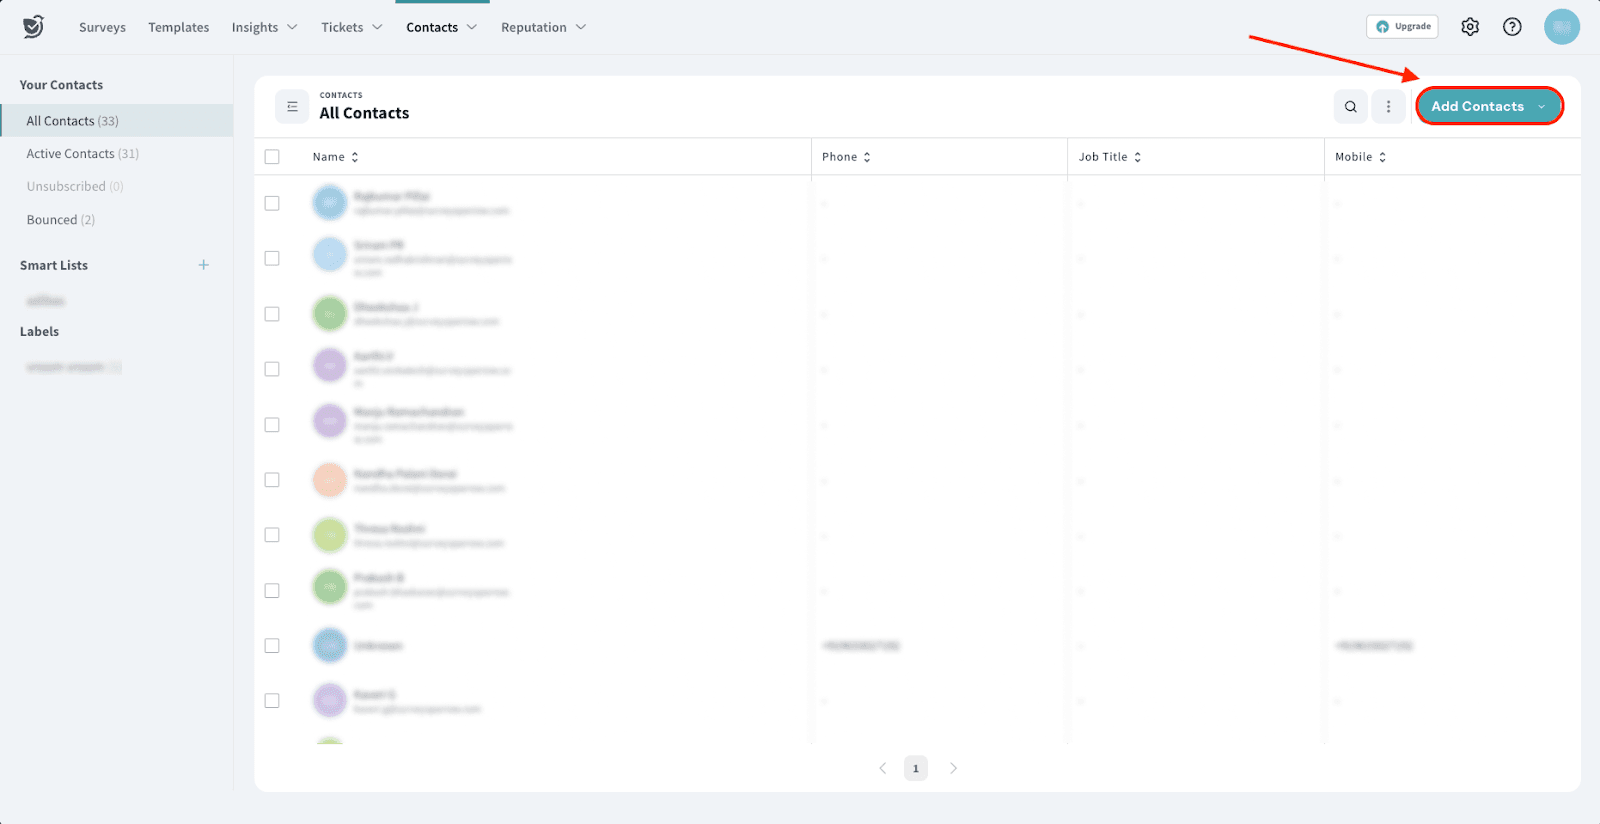
3. Click More ways to import.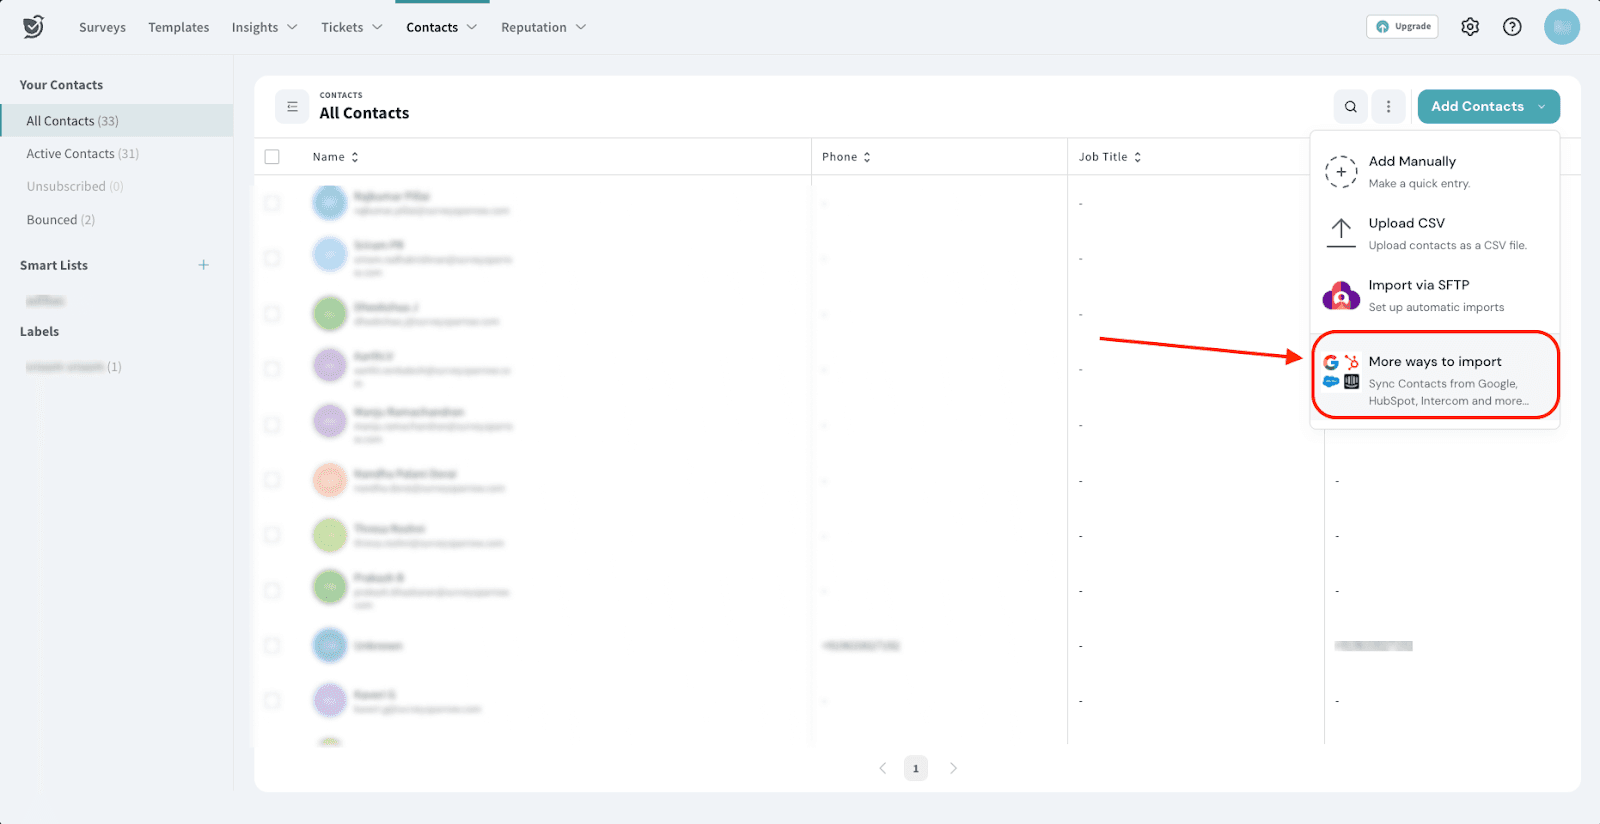
4. Scroll through the list of options, until you see SugarCRM. Click on it.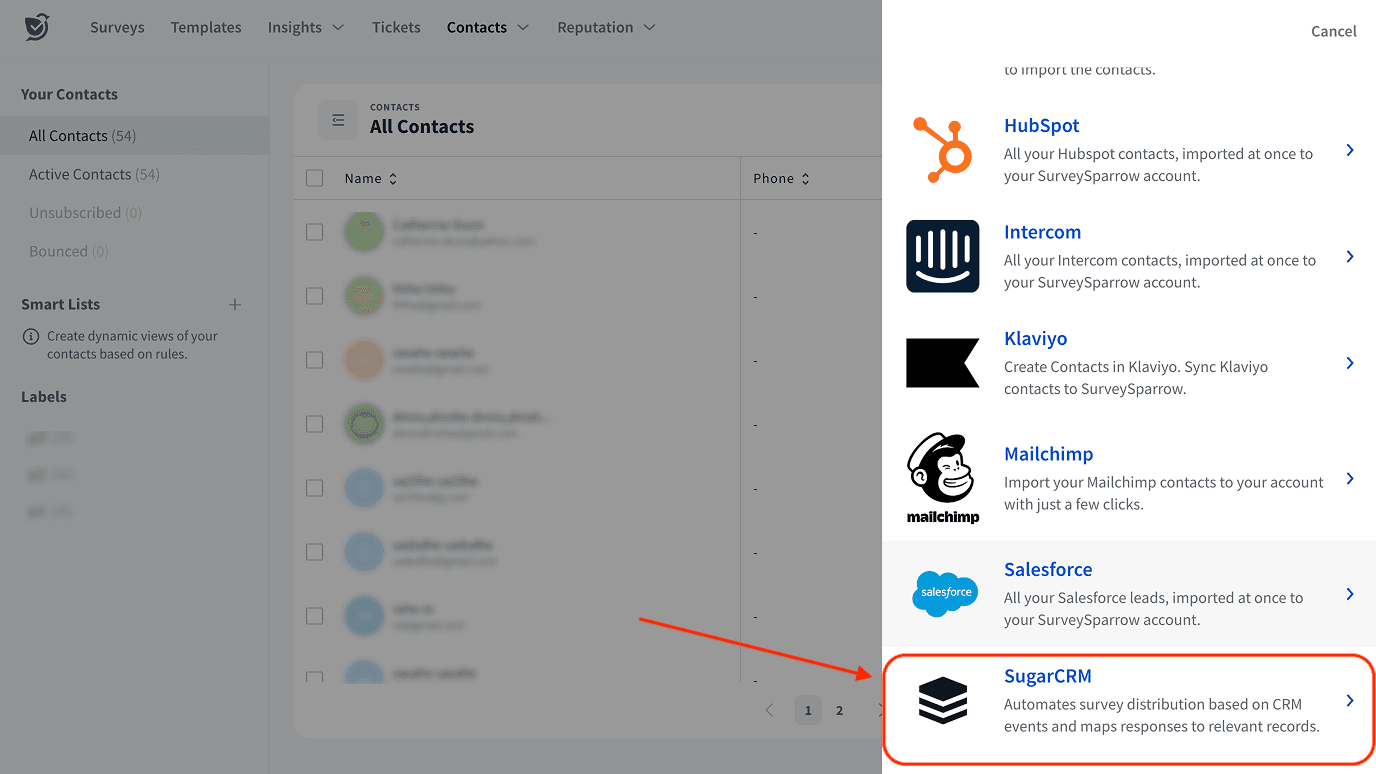
5. You can either import all of your SugarCRM contacts all at once, or only import from specific lists. The default setting is to import all the contacts. To import from a specific list, click Import from List.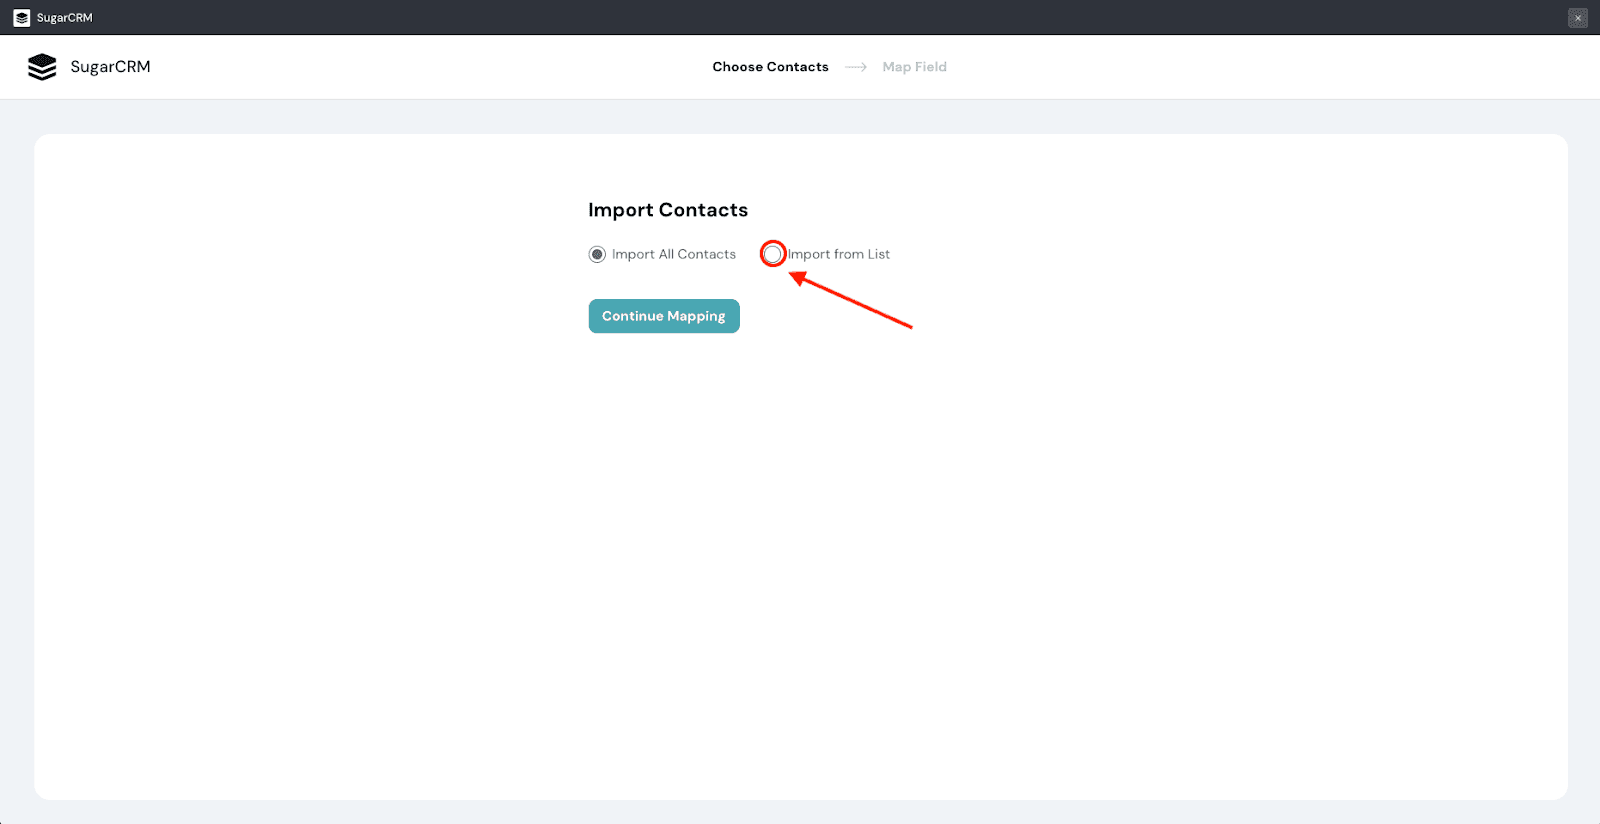
6. Then a drop-down menu appears. Click on it and choose the list to import.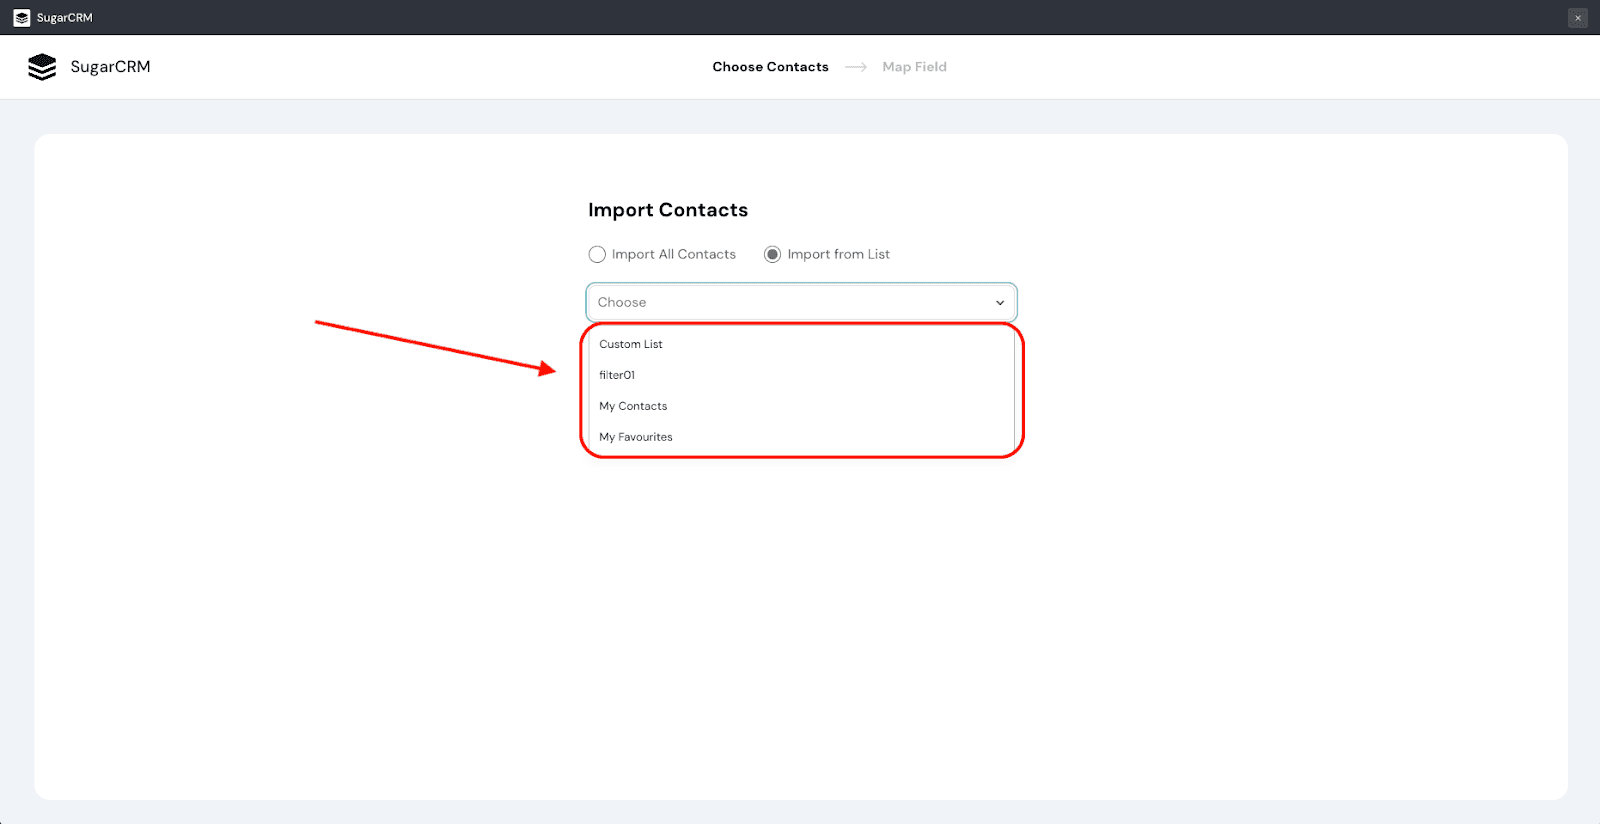
7. Next, click Continue Mapping.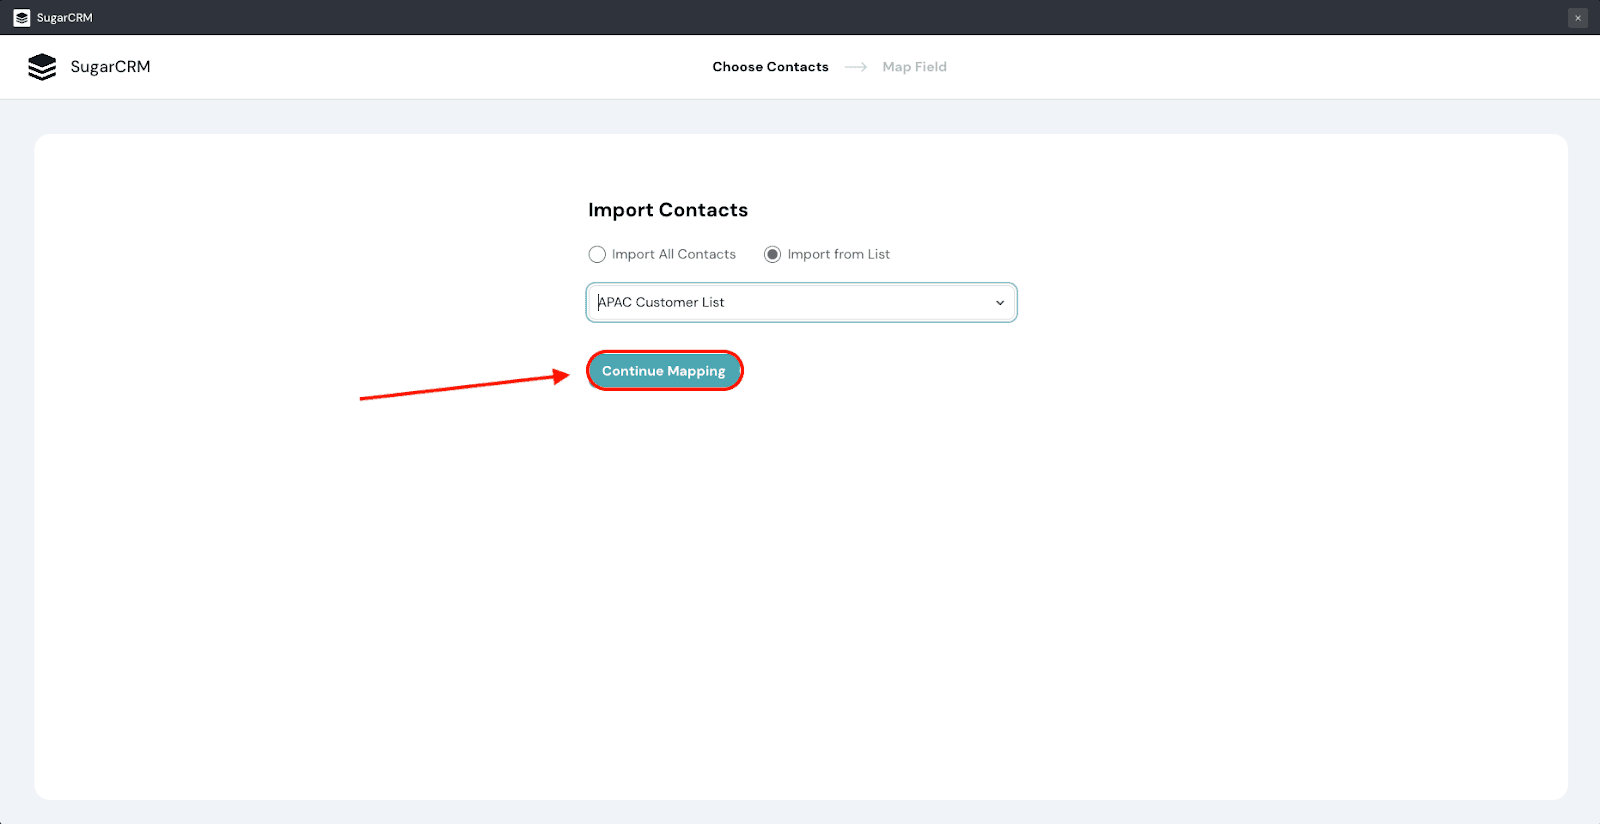
8. Now, you’ve entered the mapping section. The field mapping for essential values is automatically configured, but can be changed by the user. Once you are satisfied with the mapping, click Import.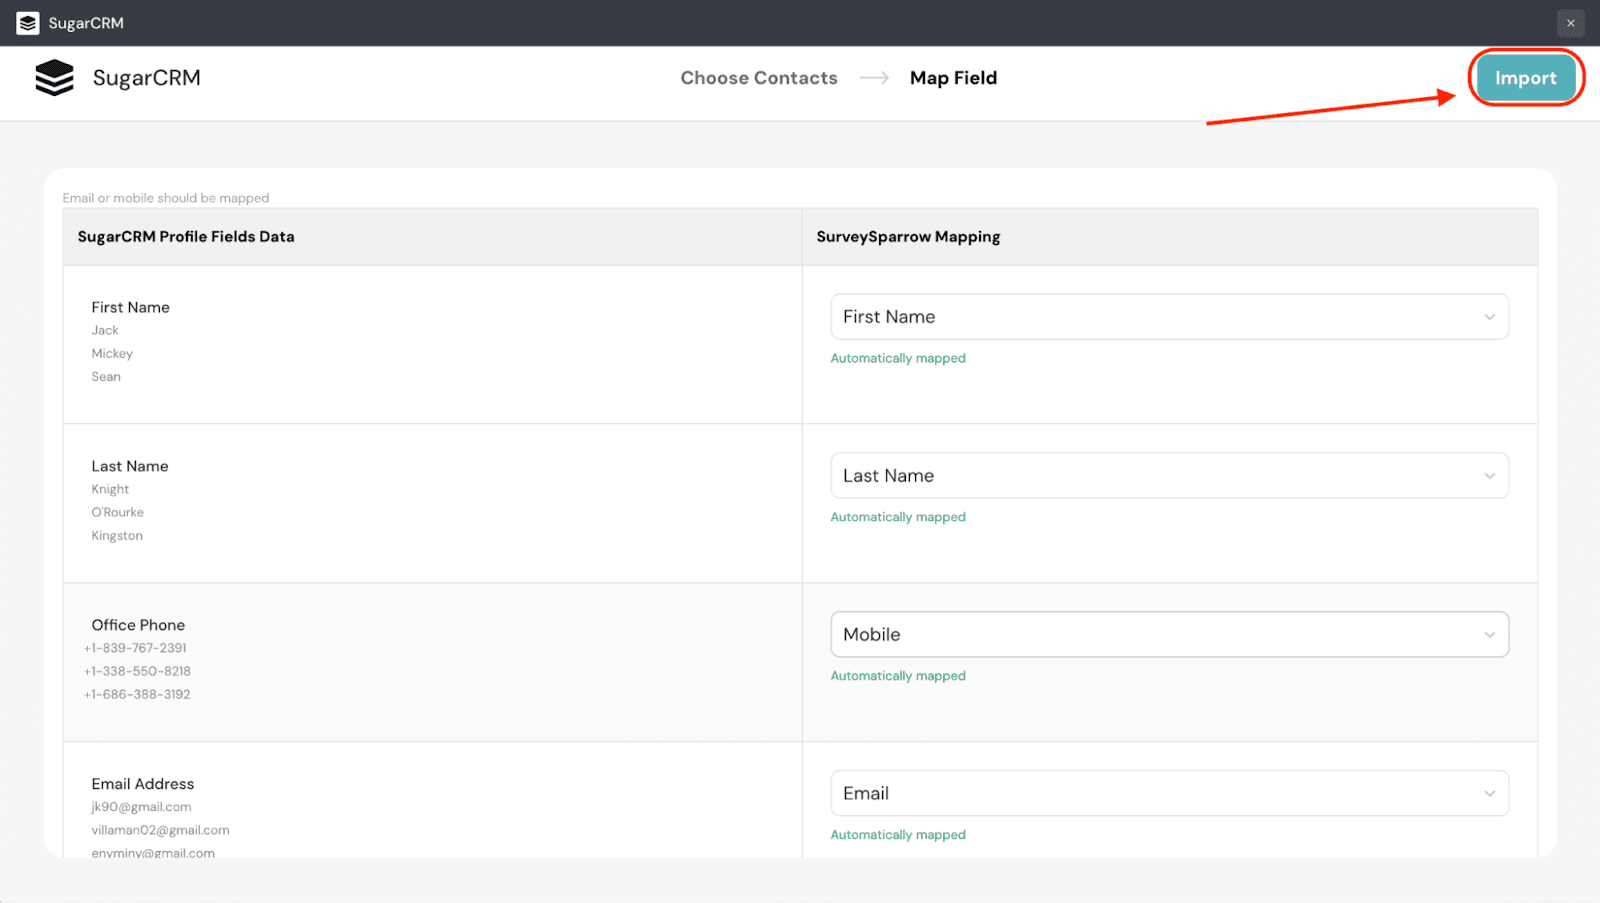
9. Create a name for the import, then click Finish Import.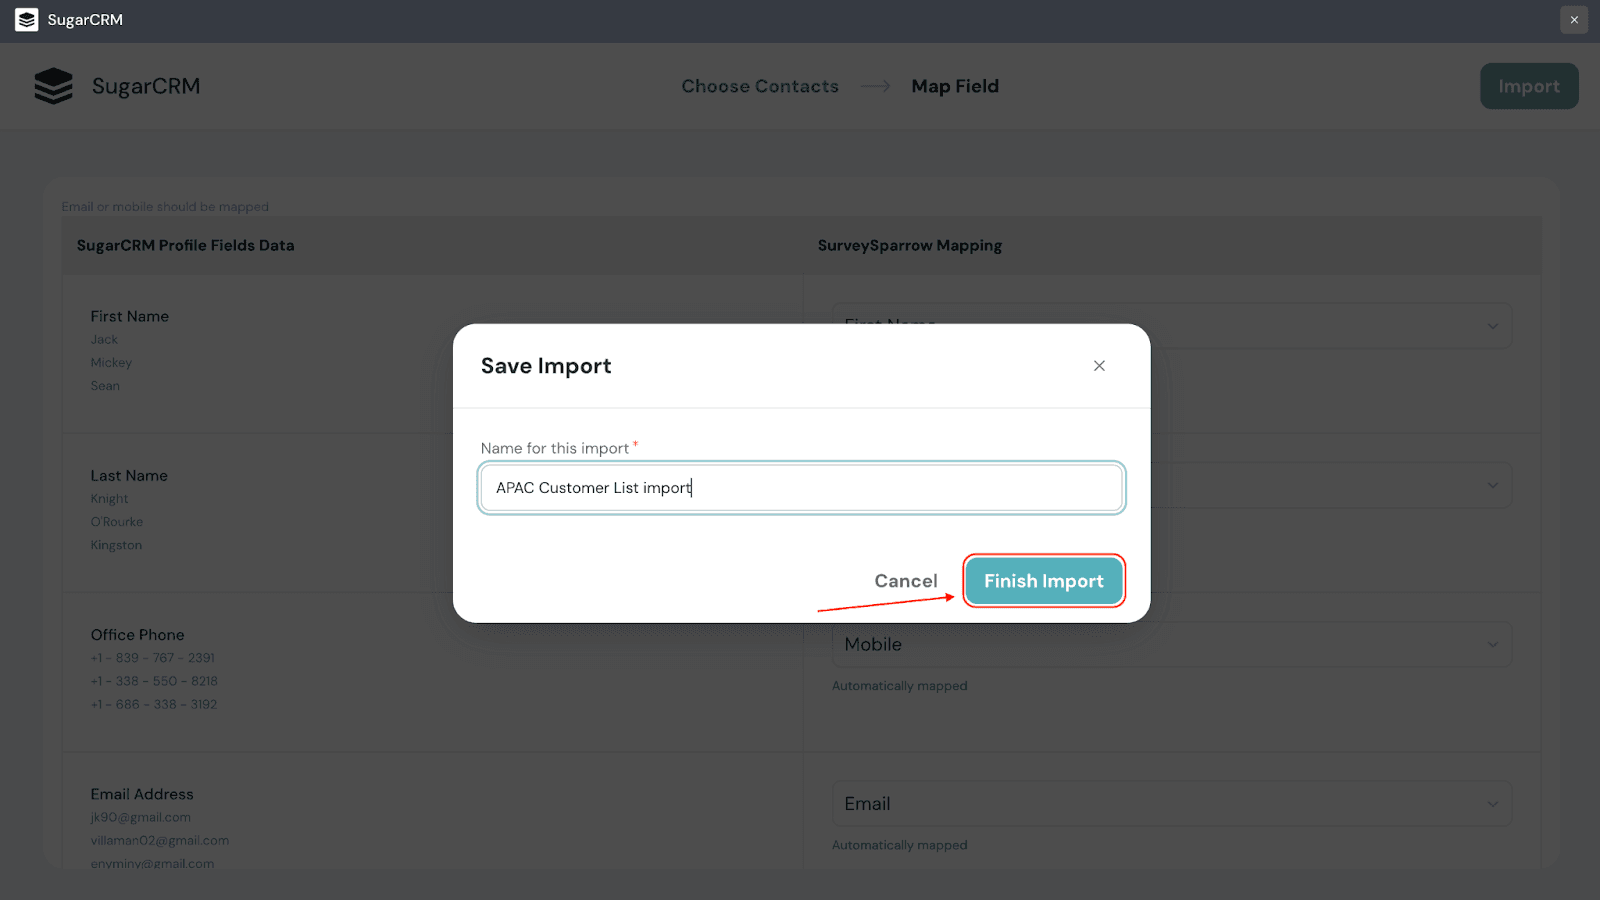
10. After saving the import, you are taken to SurveySparrow’s import section where you can see all of the completed imports from multiple sources. If the list you imported is one that is continually updated, you can set up a recurring import. To do this, click on the toggle under Schedule.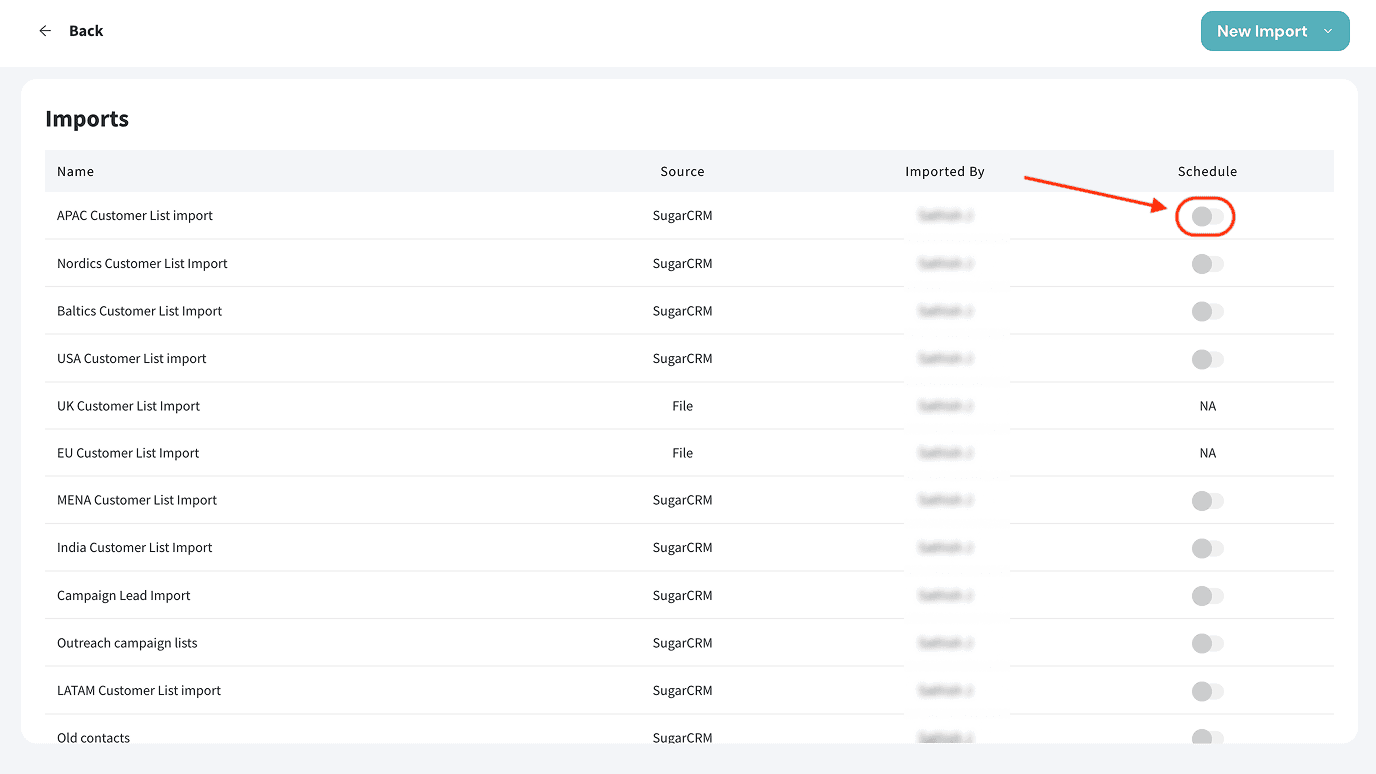
11. A scheduling pop-up appears. Click on the drop-down menu under Select a Schedule Frequency to choose the frequency of importing. You can choose between daily, weekly and monthly imports.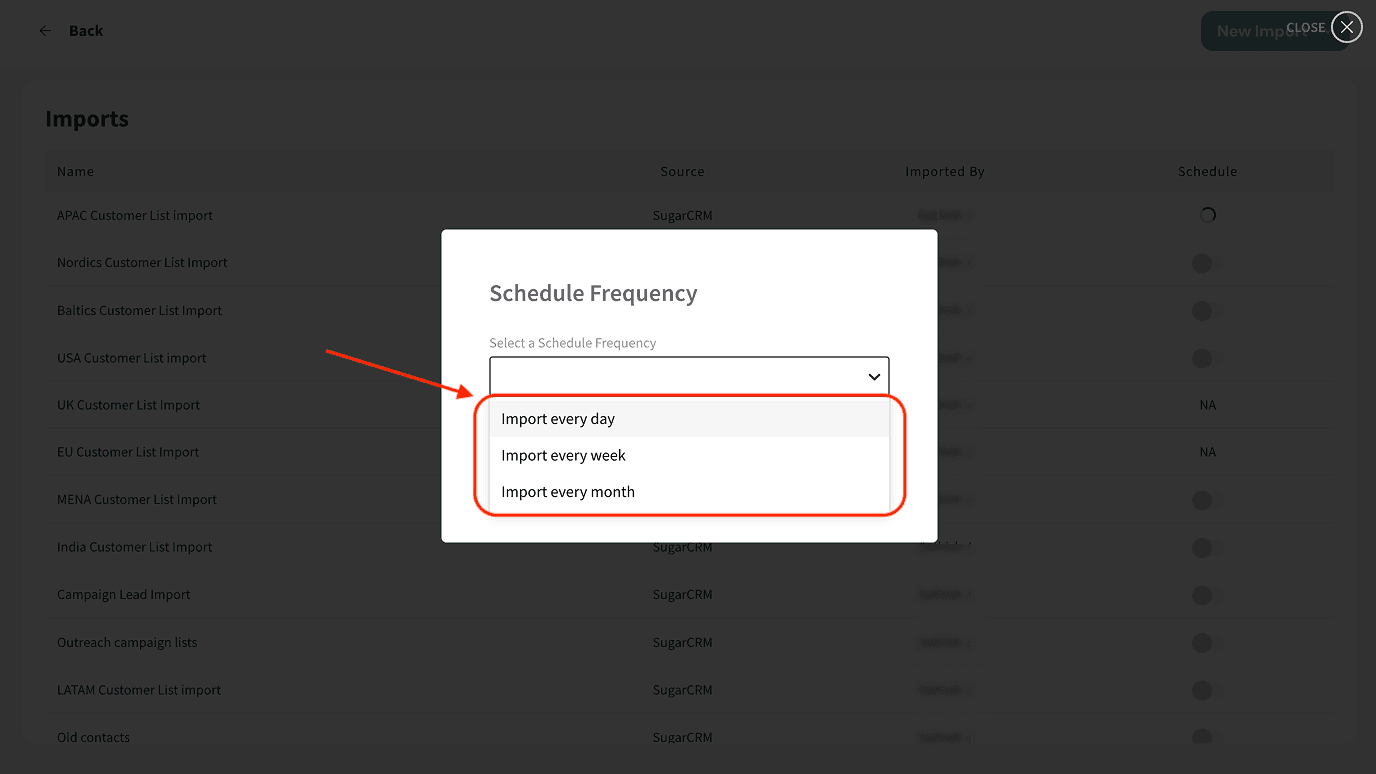
12. Finally, click Save Changes.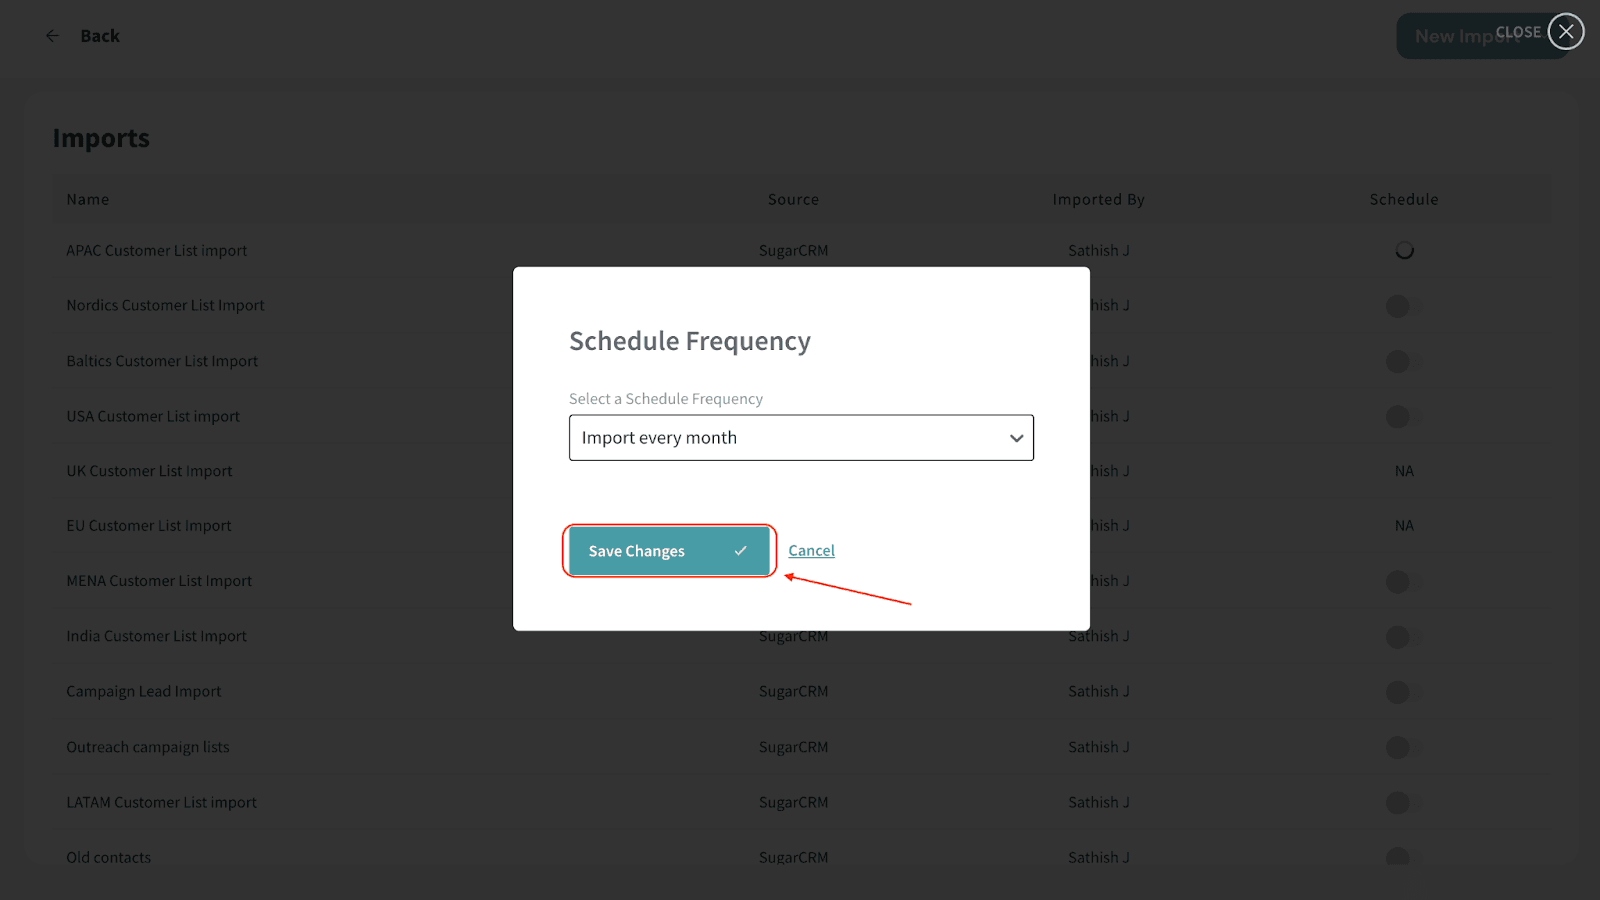
With the SurveySparrow integration, you can automate your CRM tasks and fully focus on delivering amazing customer experiences. Get started today and feel the difference!
Feel free to reach out to our community, if you have any questions.
Powered By SparrowDesk