Visual flow builder

Harris

Harris

January 29, 2026

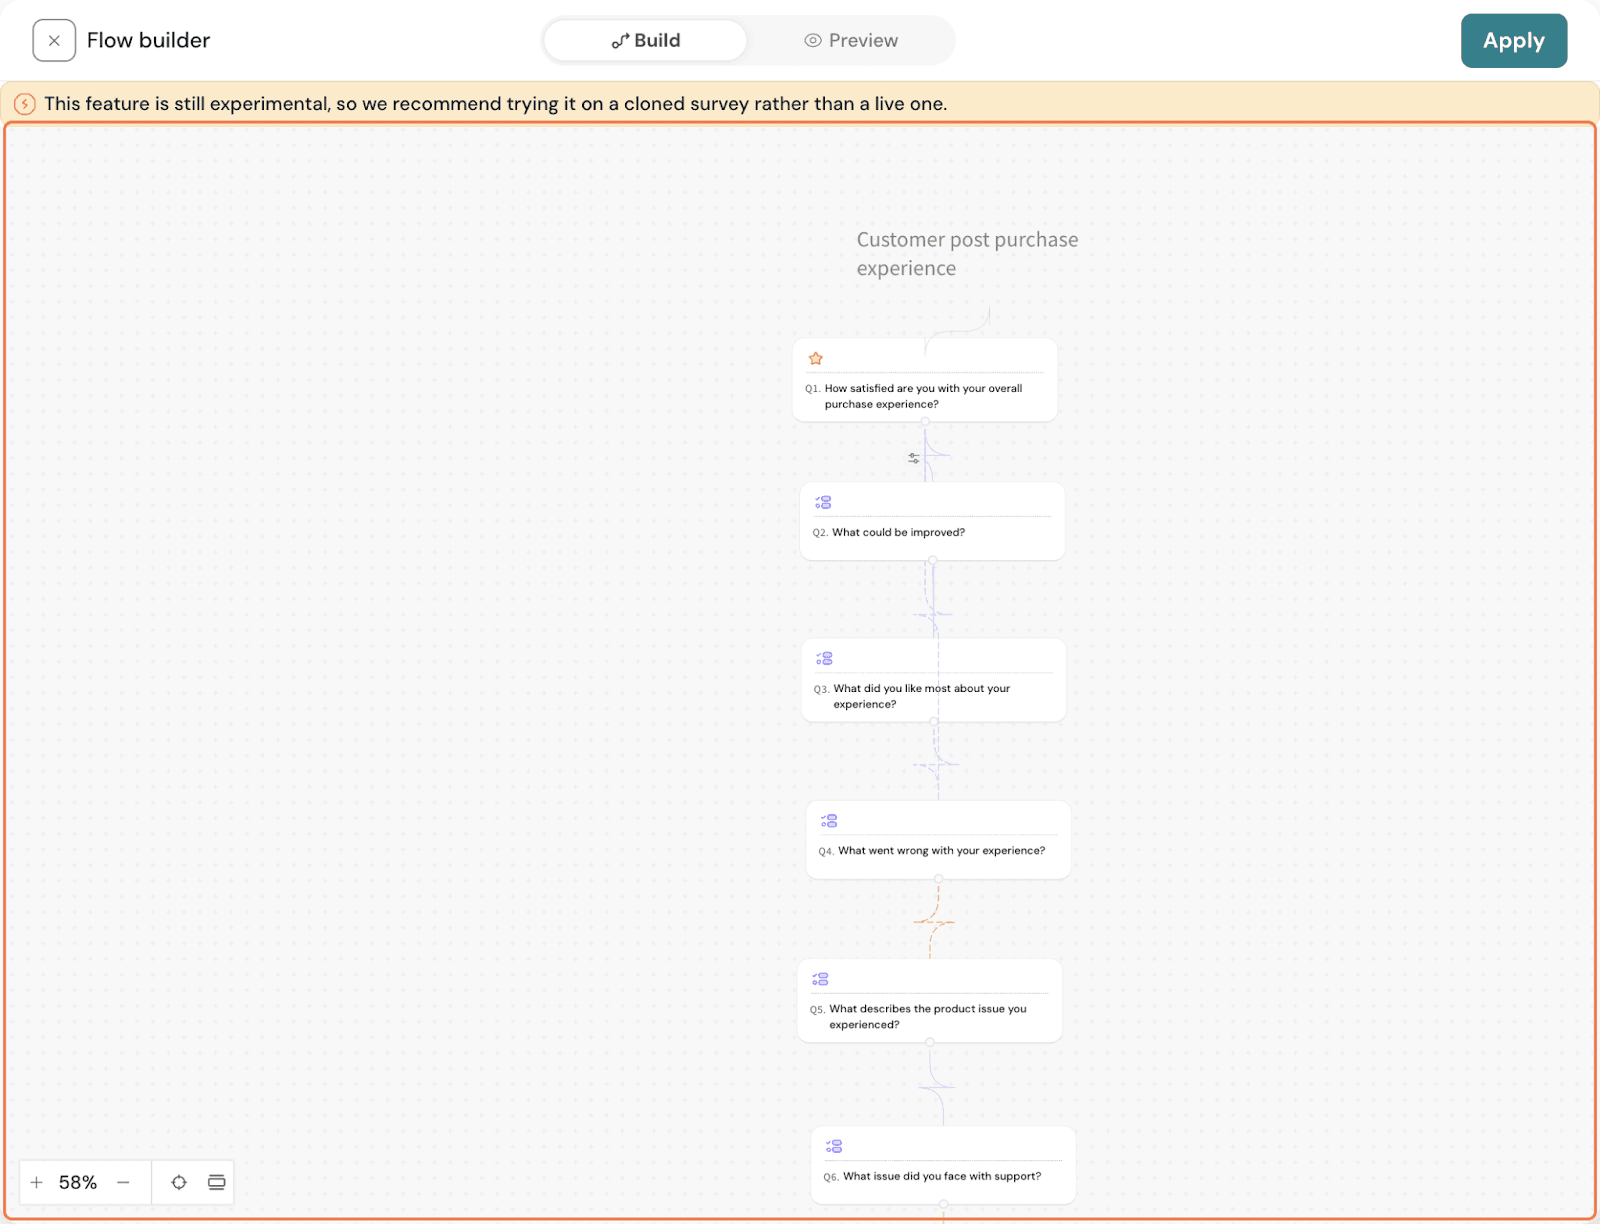
The Visual Logic Flow Builder makes complex survey logic easy to understand by presenting it as a clear, visual, end-to-end map. It enables teams to design and optimize logic flows from a single unified view, clearly showing how each question branches. By making the entire respondent journey visible and previewable, the builder helps eliminate blind spots, reduce logic errors, and ensure every participant receives a relevant and consistent survey experience. 

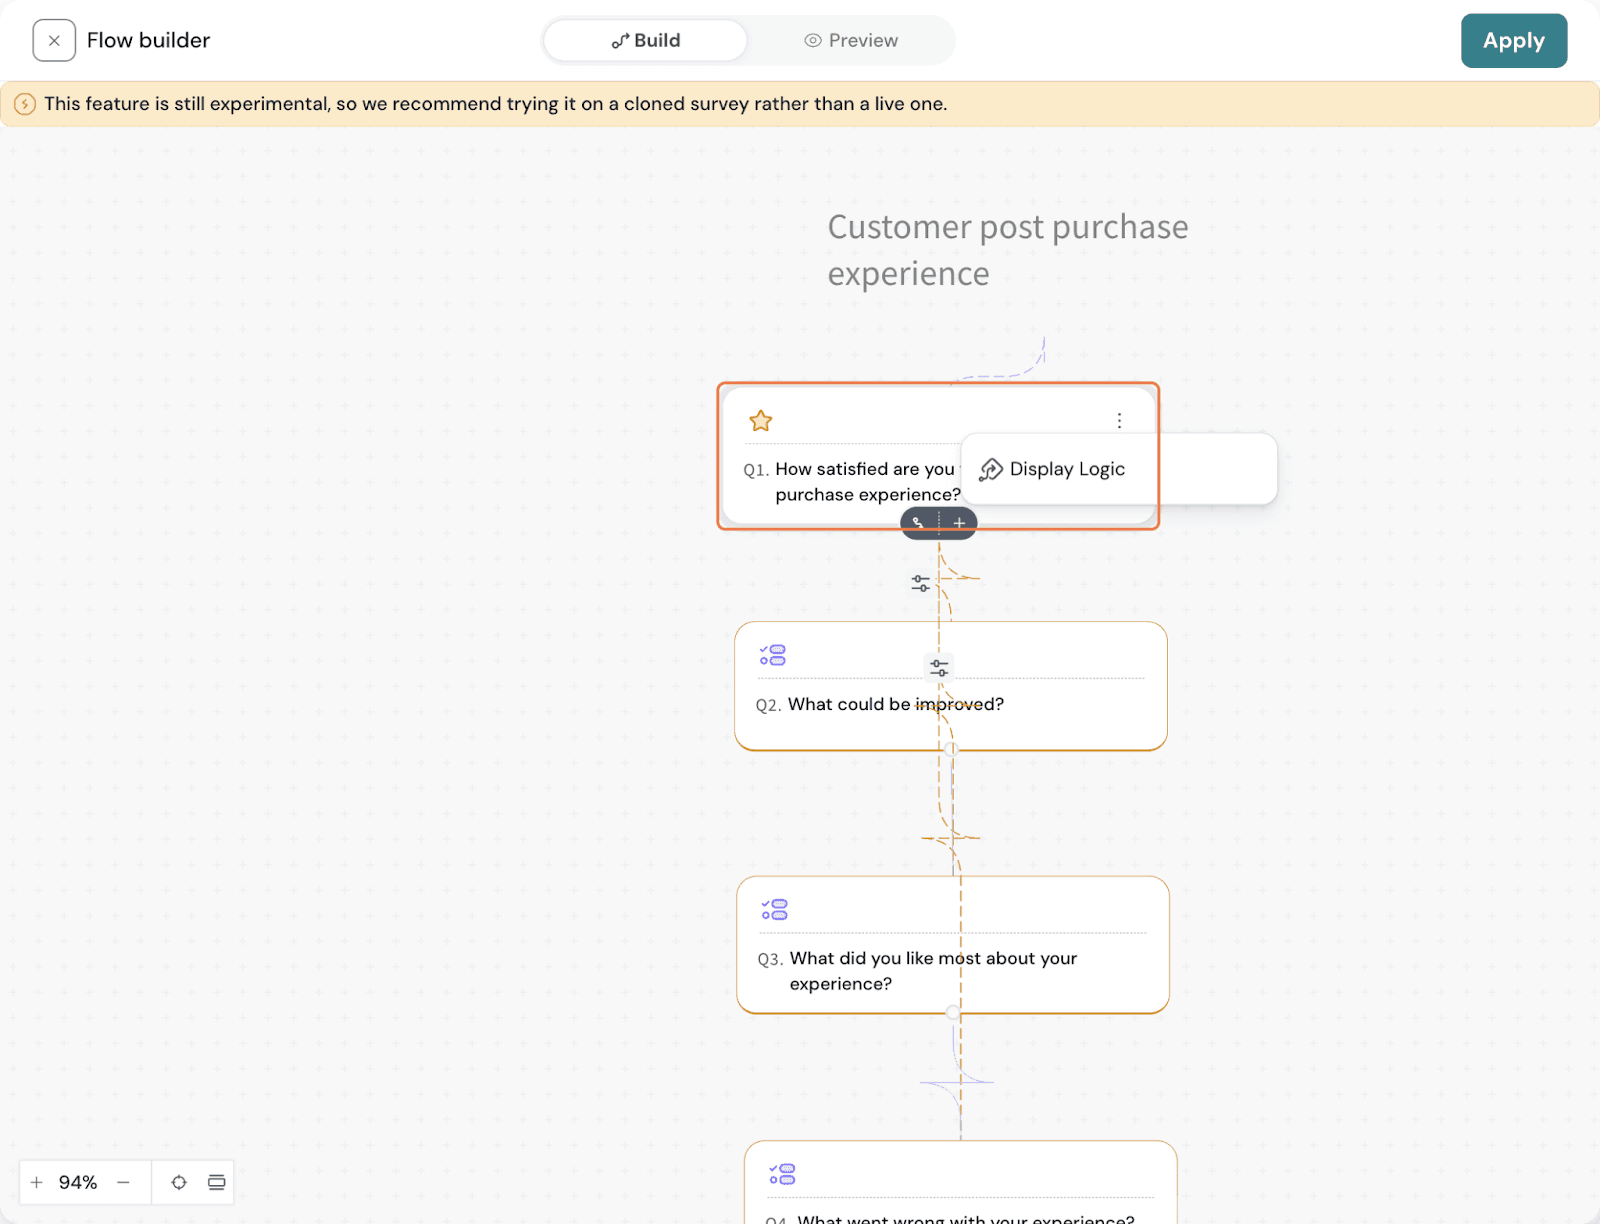
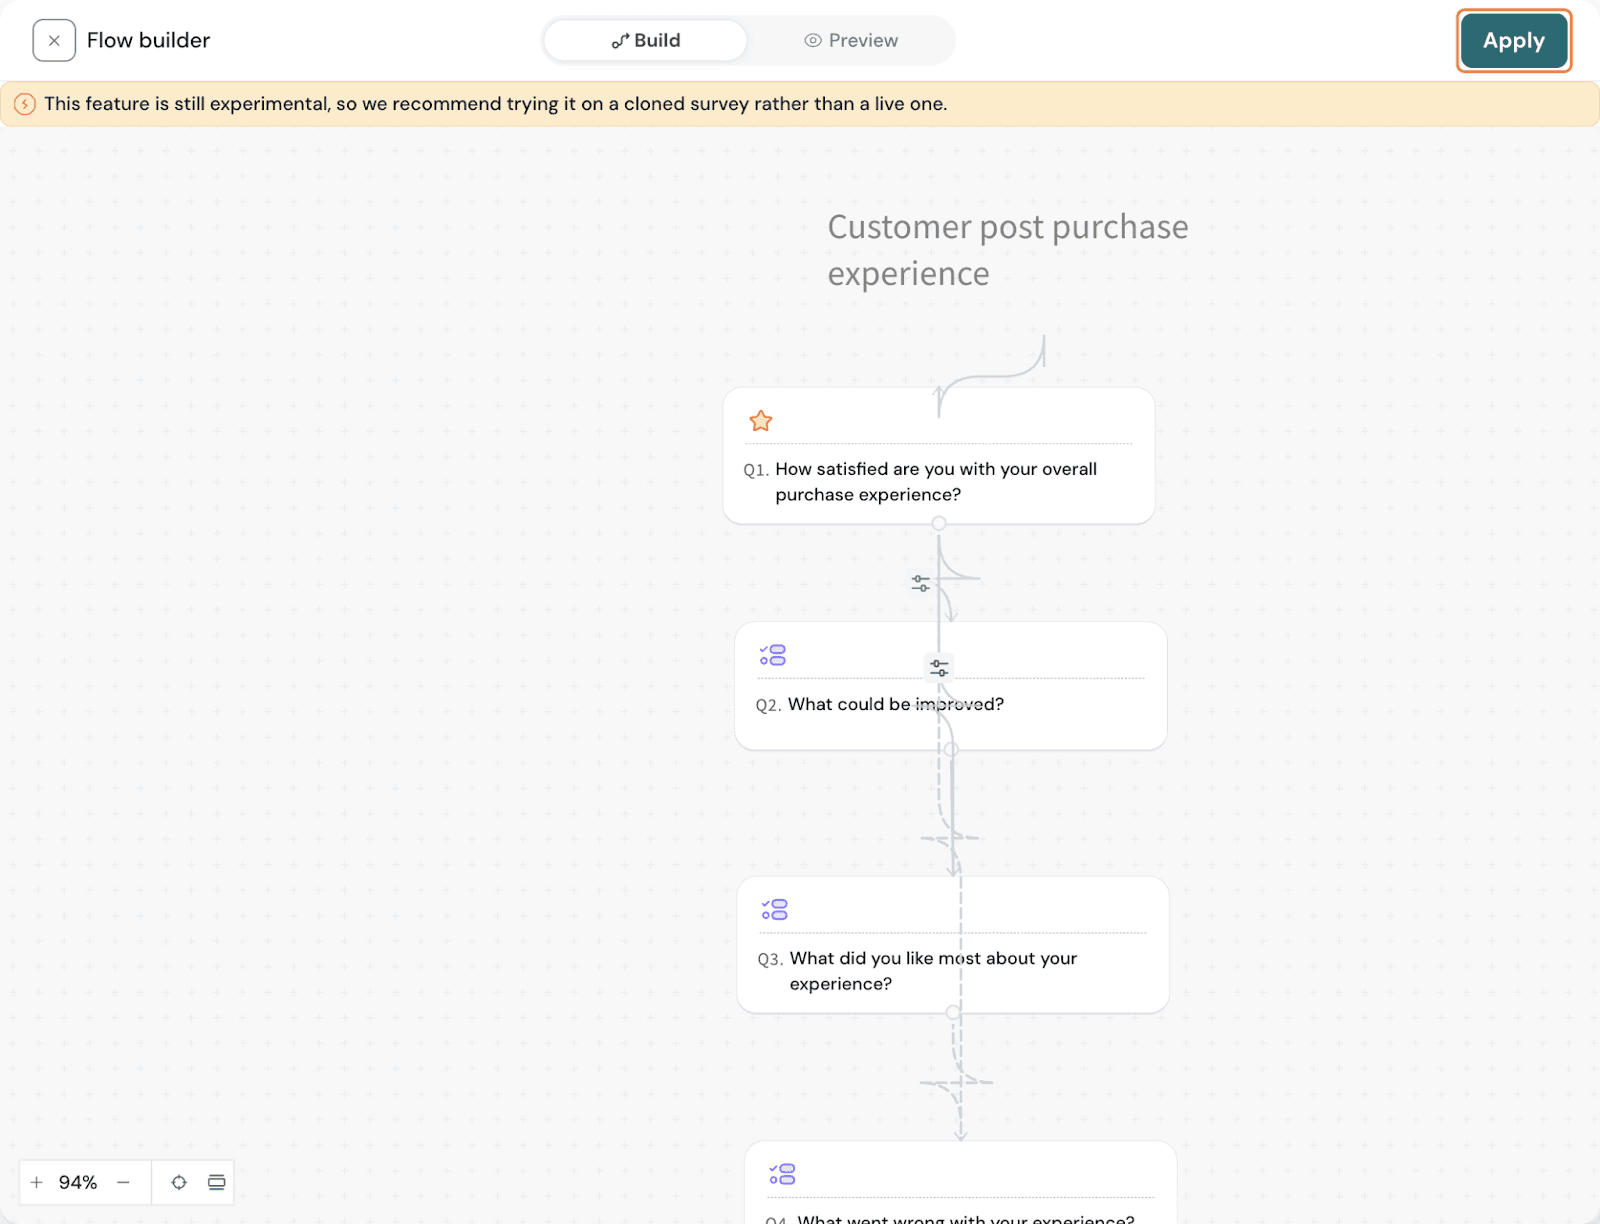
An eCommerce brand wants to understand how customers feel about their experience after completing a purchase.
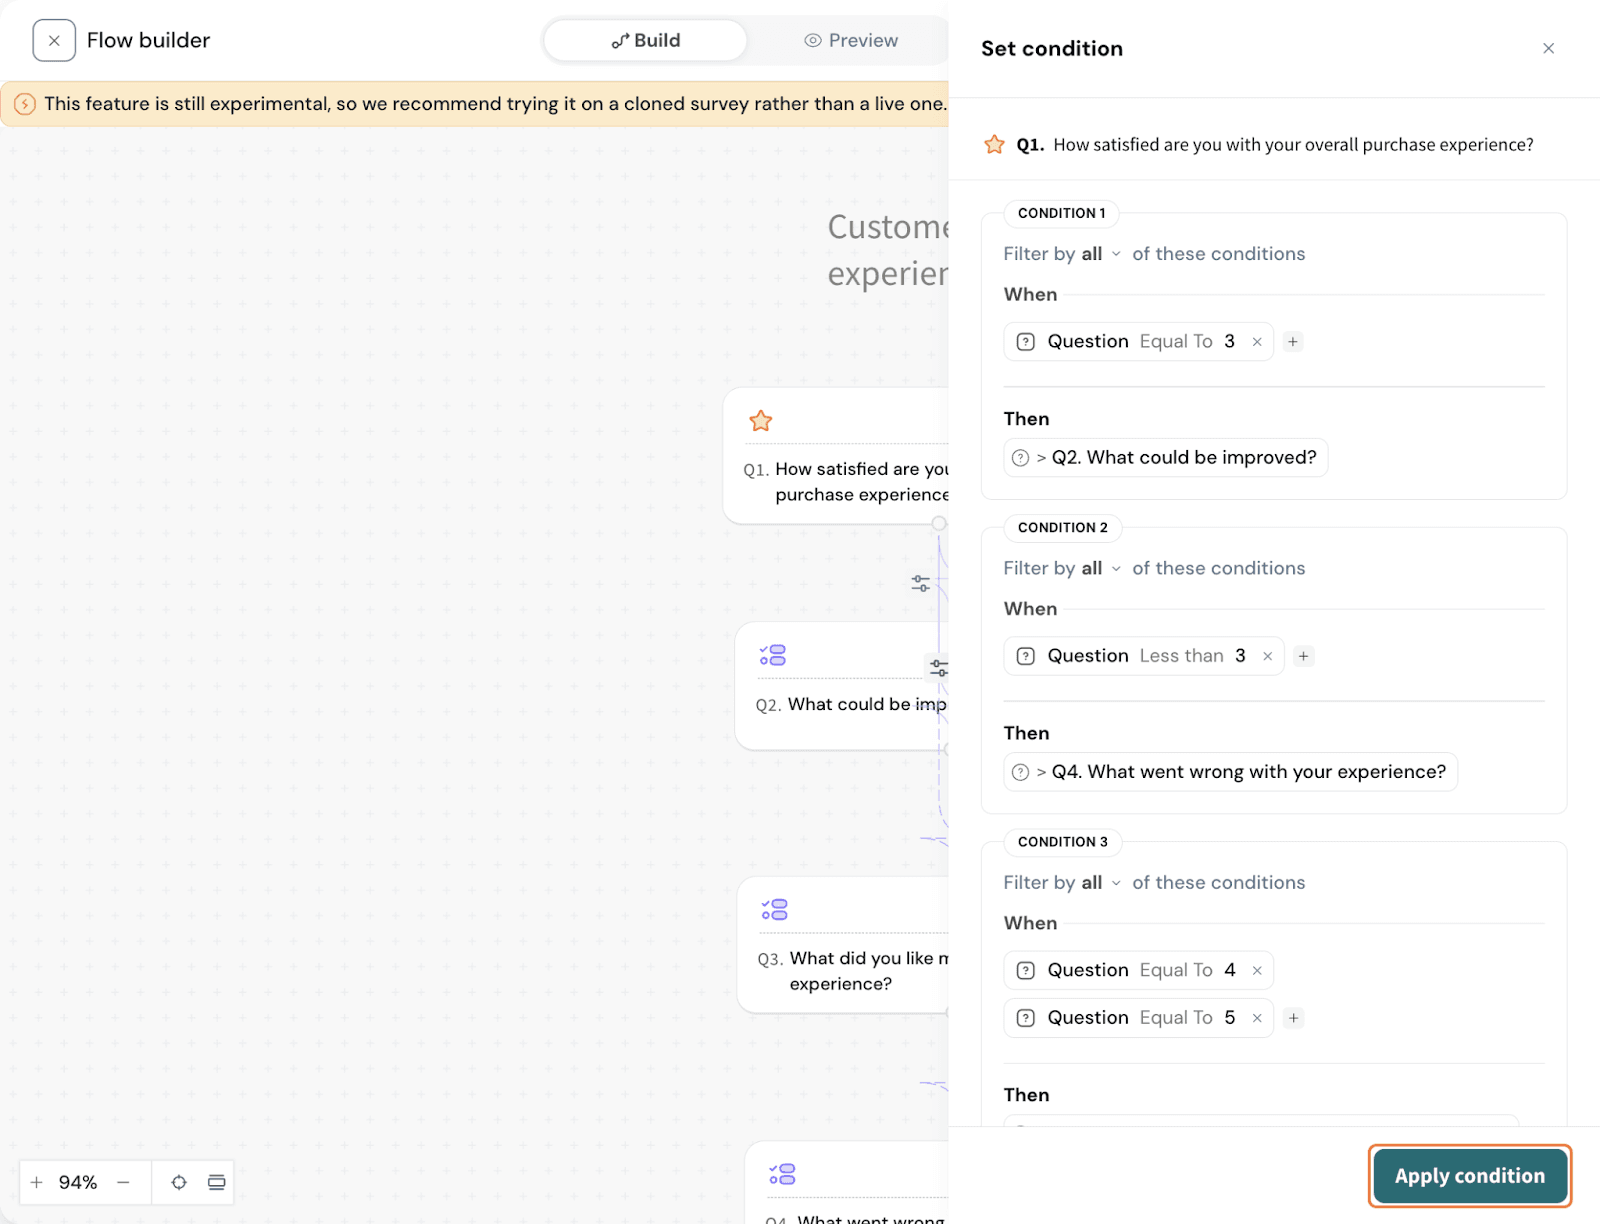
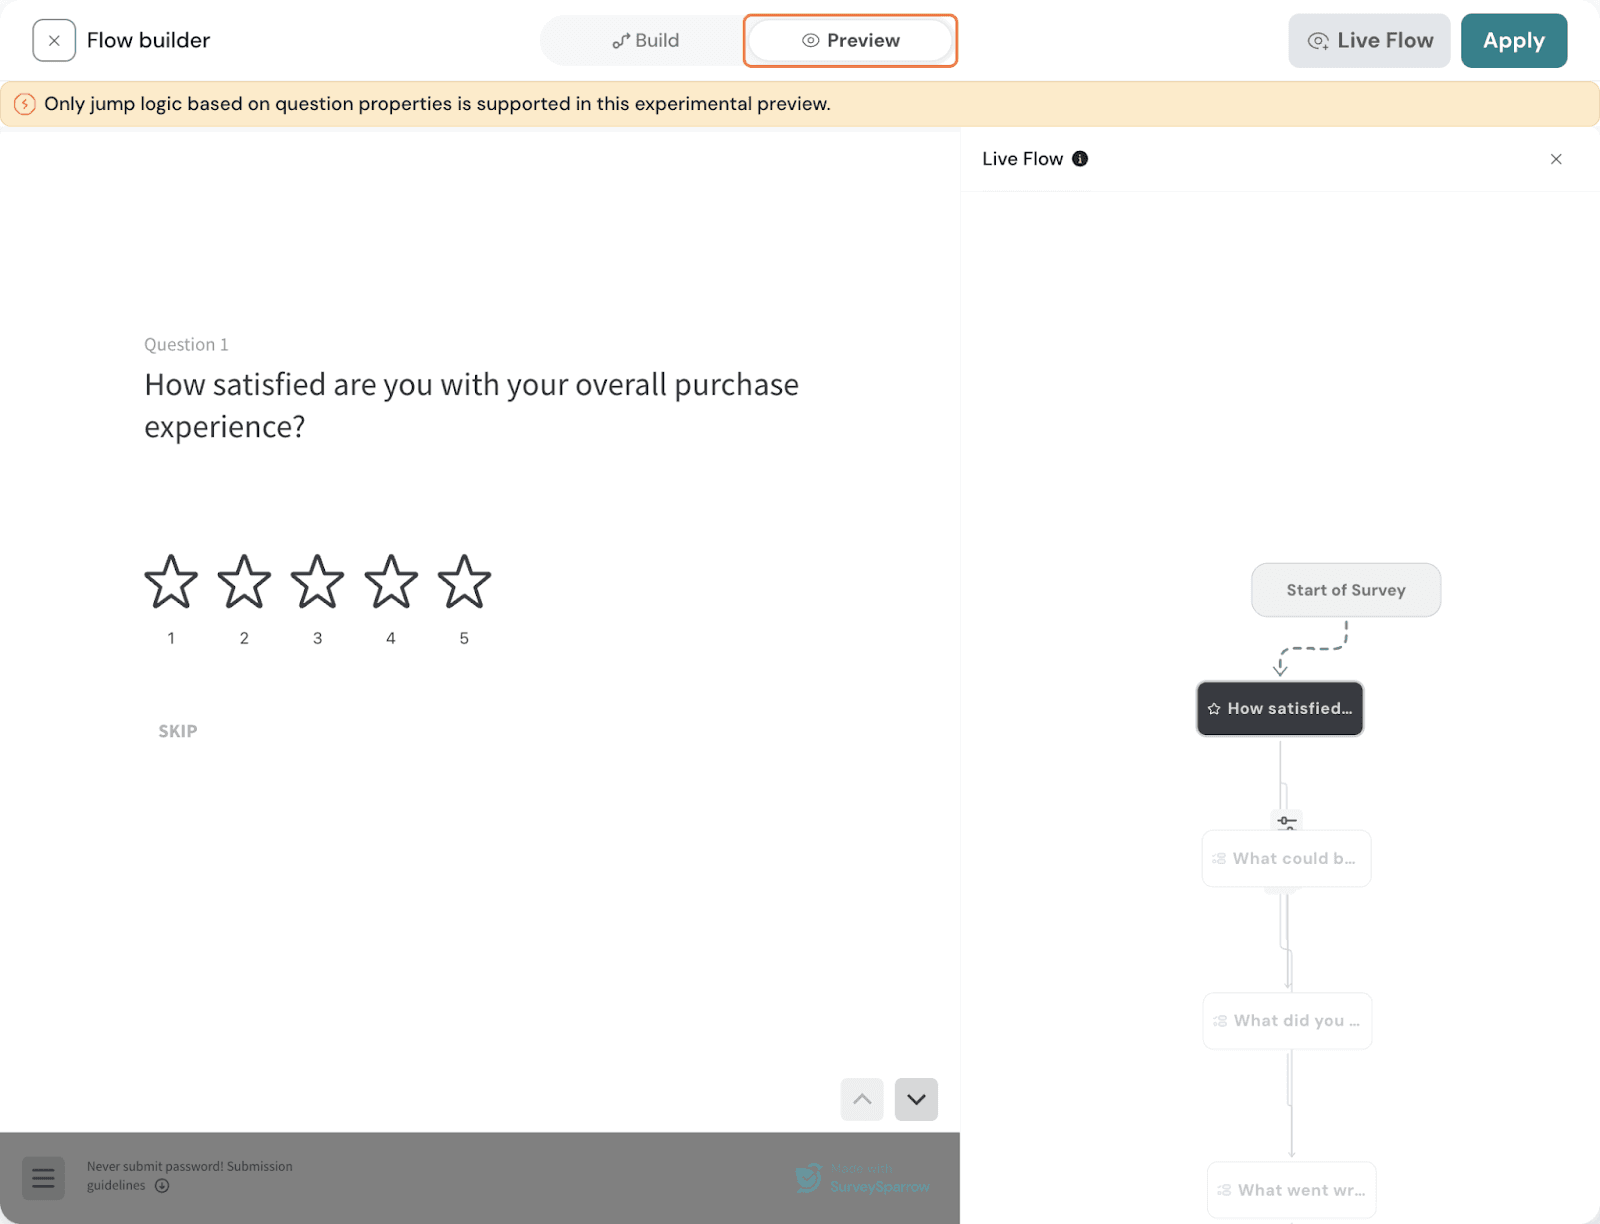
The survey begins with a simple satisfaction rating to gauge overall sentiment. Based on this response, the survey automatically routes customers to a relevant follow-up question, asking satisfied customers what worked well, and dissatisfied customers what needs improvement. This structured flow helps the brand separate positive signals from pain points and collect focused, actionable feedback without adding unnecessary questions.

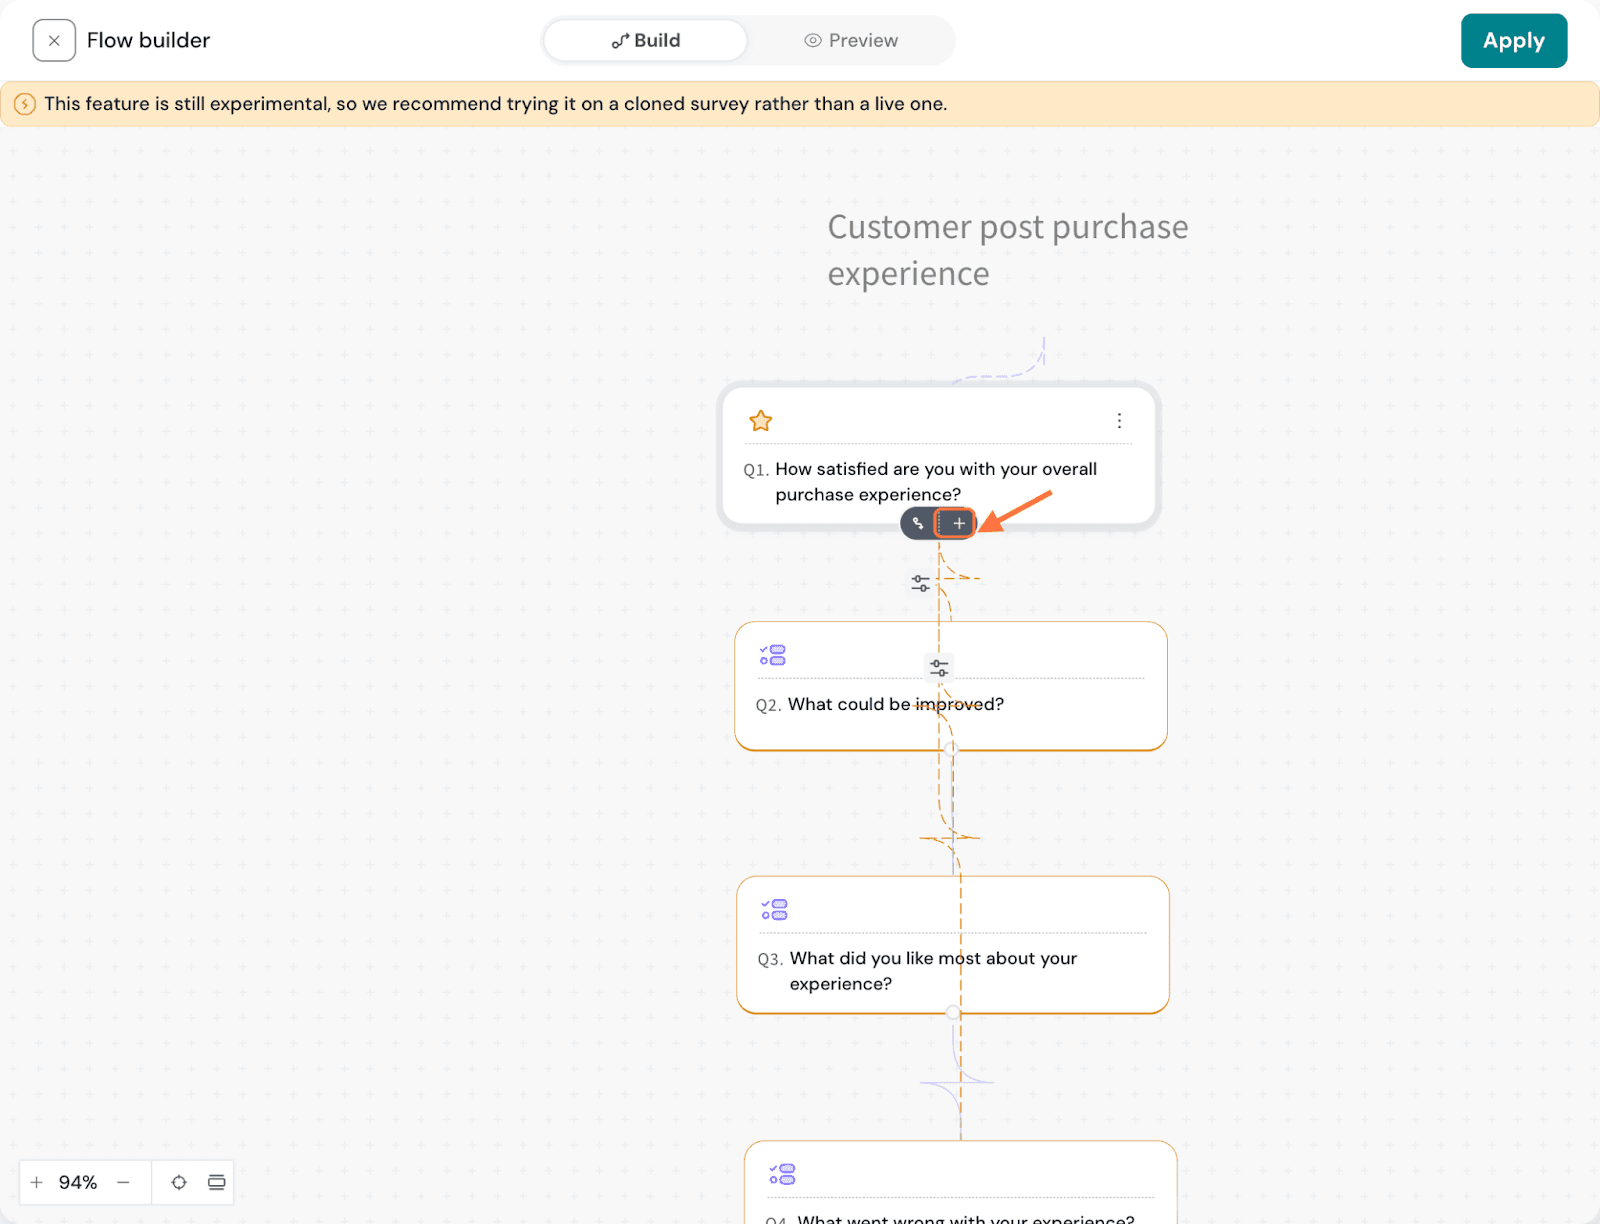
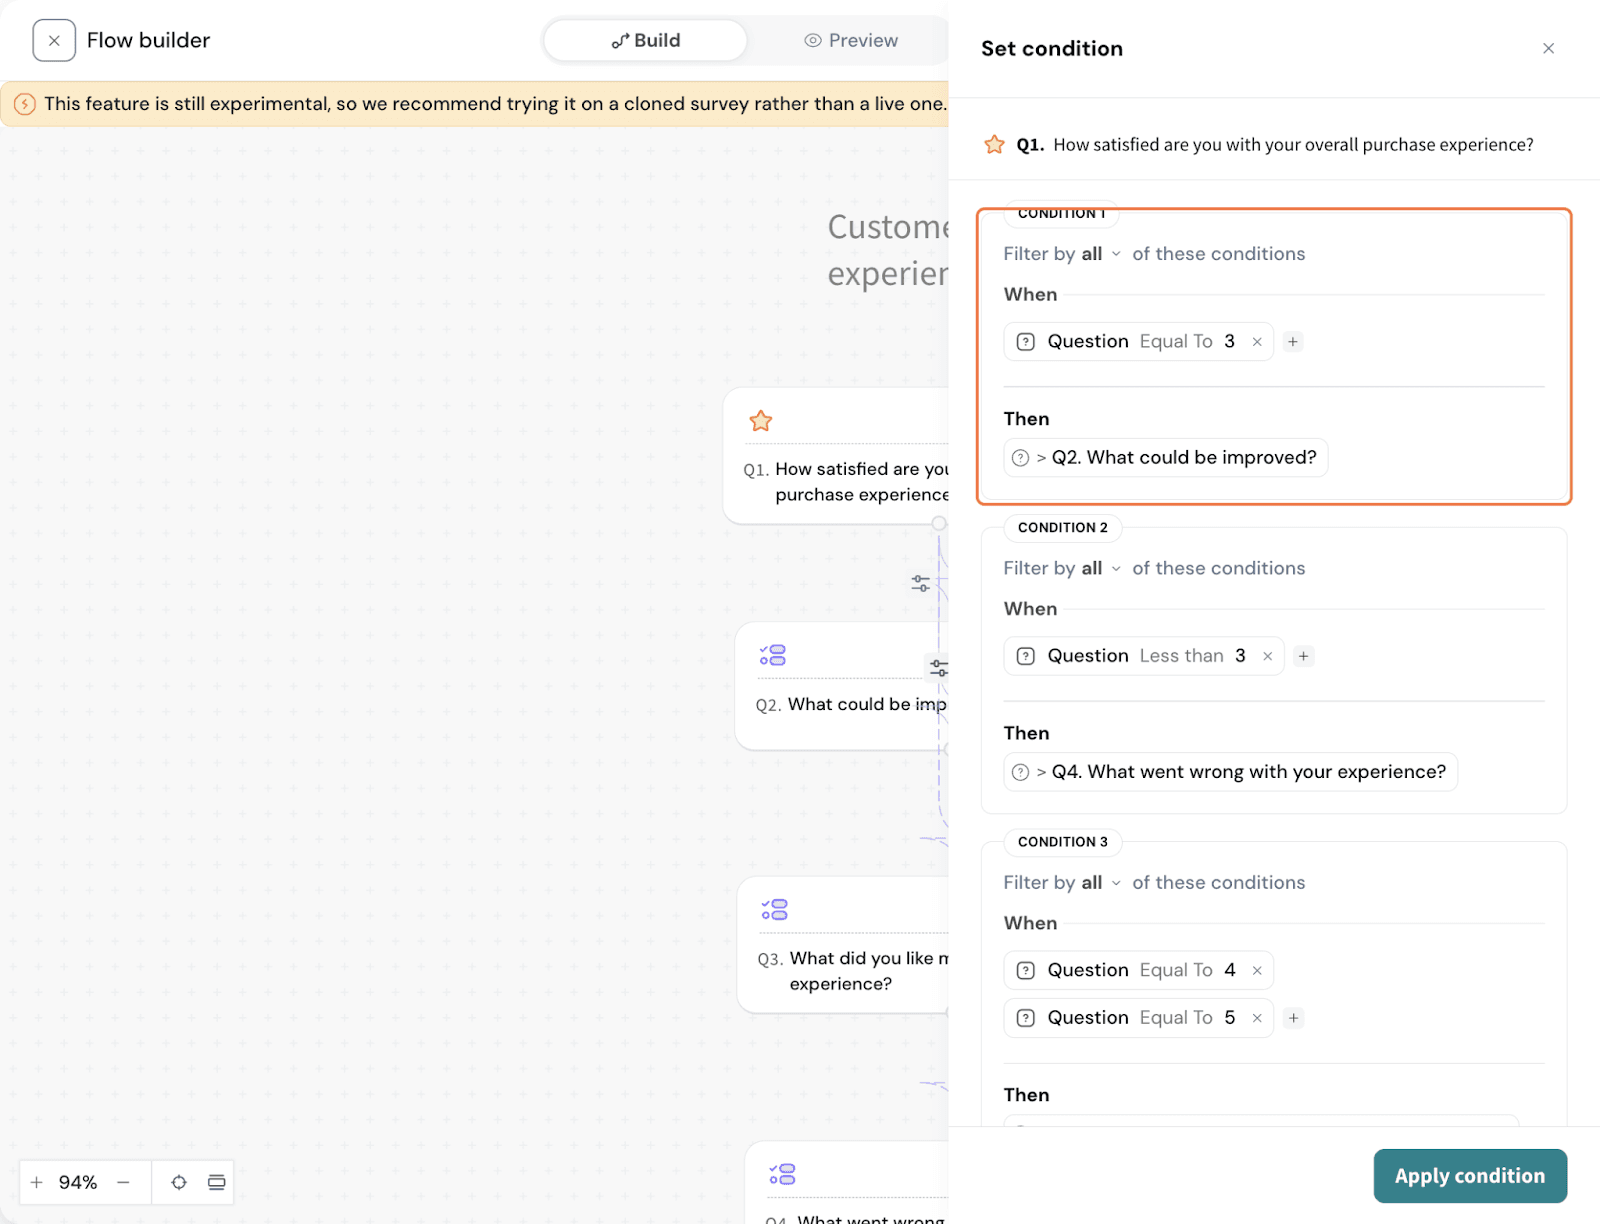
Let’s see how to build a logic flow using the Visual Logic Flow Builder.

  1. Navigate to the Build section
    Image
  2. Create your survey by adding all required questions.
    In this example, start with a rating question to capture the customer’s overall experience, followed by multiple-choice follow-up questions that will be shown based on the selected response.
    Image
  3. Click Flow Builder from the left-hand menu.
    ImageAll the questions in your survey will be displayed in the builder view.
    Image
  4. Click the three-dot menu on a question and select Display Logic, or use the + icon to add logic directly.
    Image

    Image
  5. Choose the condition type you want to base the logic on—Question, Contact, Variable, Survey Language, Channel, or Device Type.

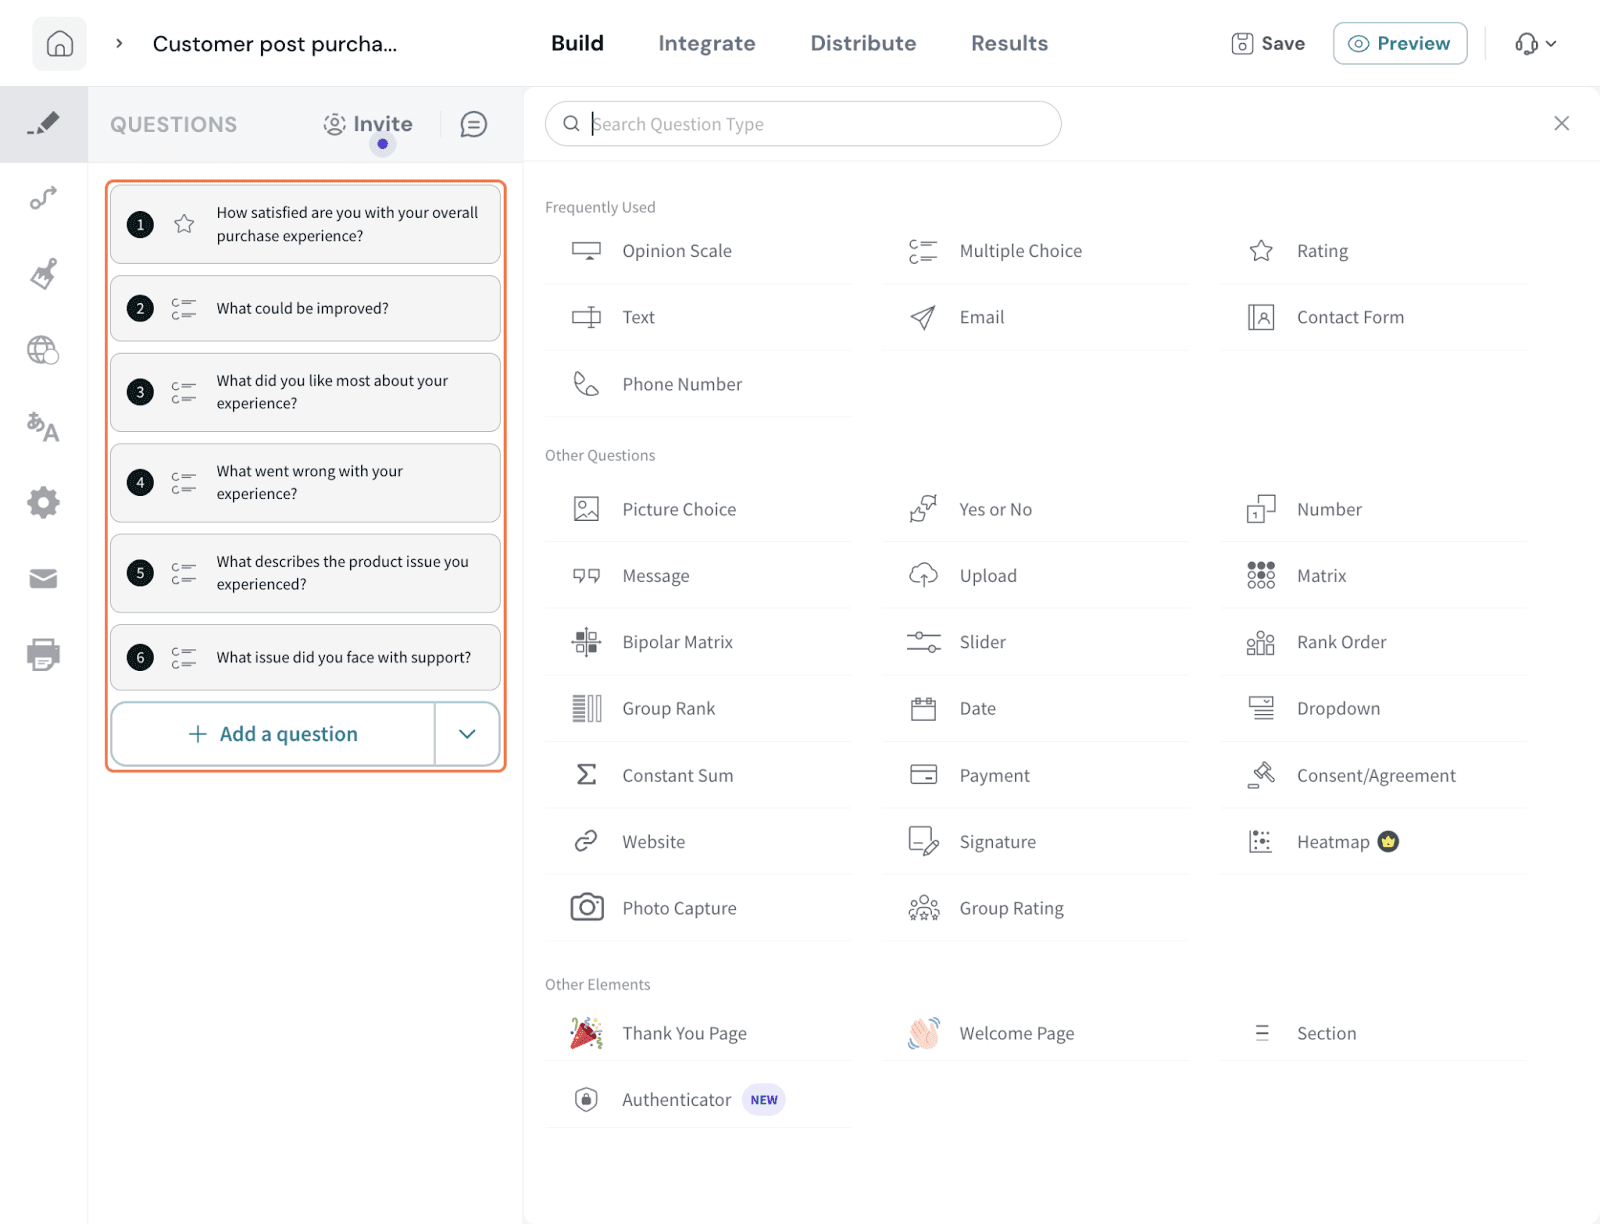
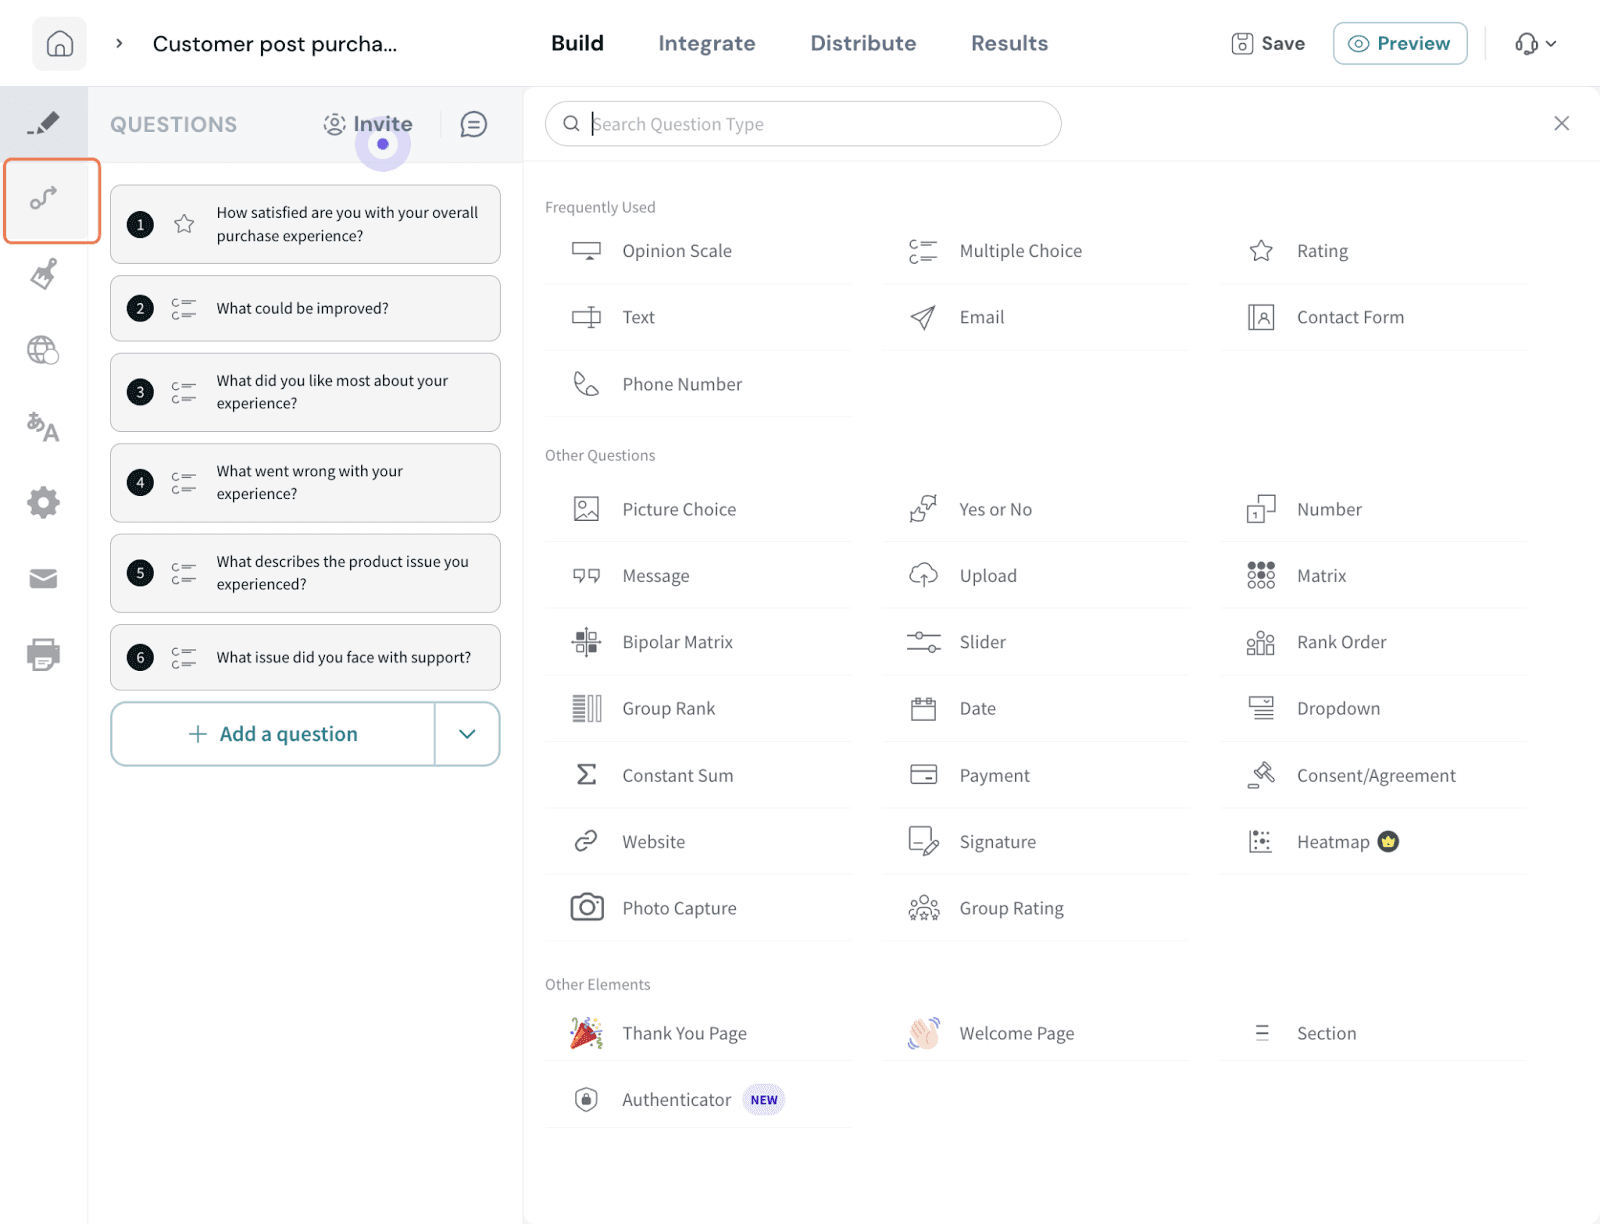
In this example, we are selecting Question.
Image

  1. Define the conditions based on the rating responses to control which follow-up questions are shown.

    Image
  2. Click Apply Condition to set the logic for the selected question.Image
  3. After configuring the logic, click Preview to see how the survey and logic flow will appear to respondents.
    Image
  4. Click Apply to save the logic flows you’ve created.
    Image
  5. Type Confirm and click Apply to finalize and save your changes.
    Image

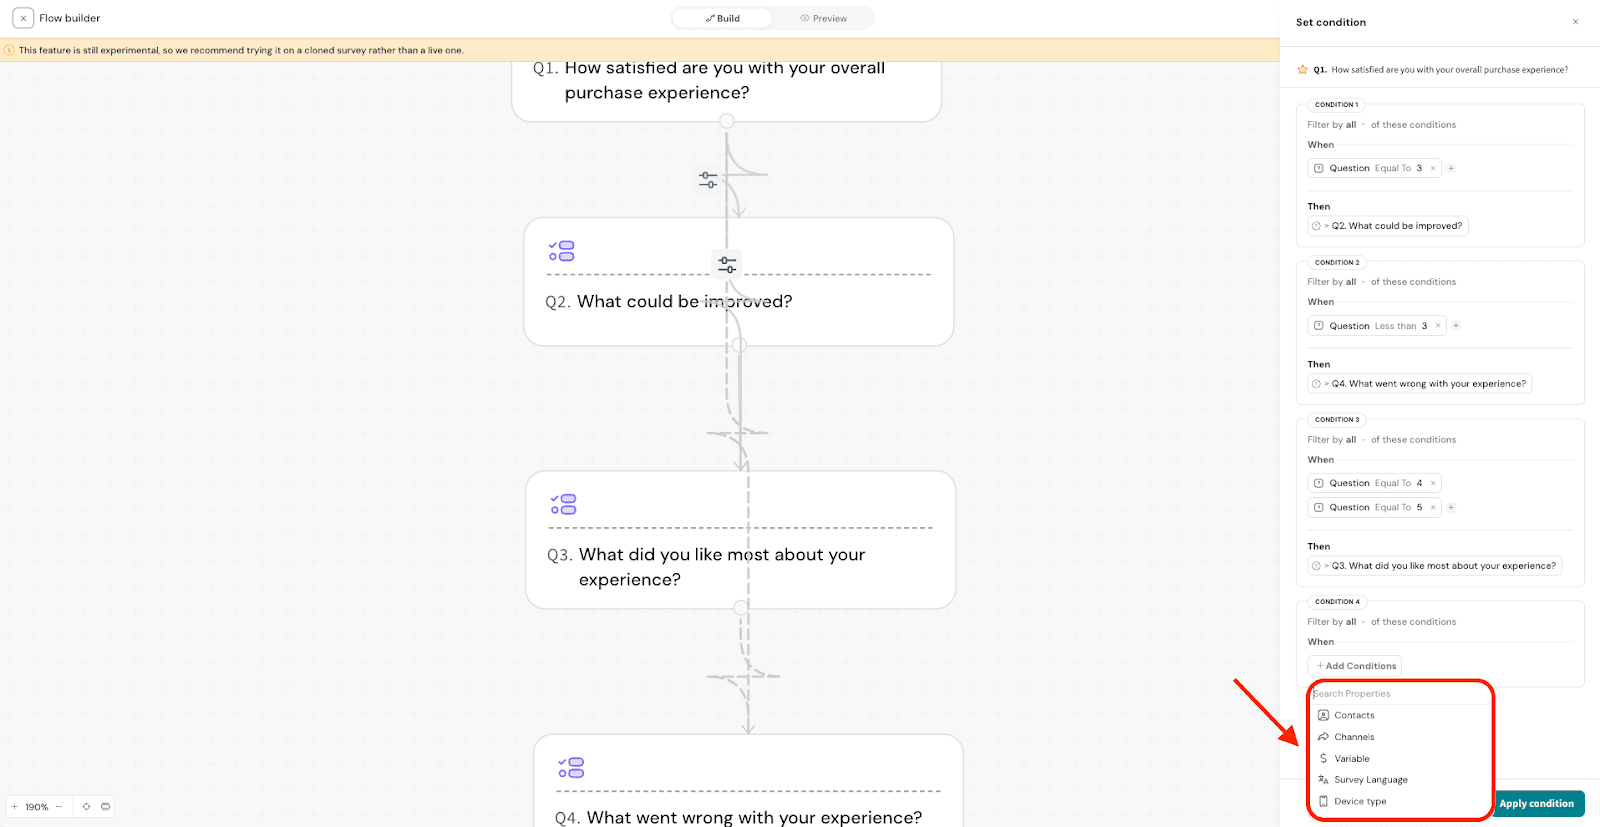
Powered By SparrowDesk