Search
Tracking metrics is essential, but constantly monitoring your dashboard can take time and effort. With alerts, you can stay informed about critical changes in your data without manual checks.
Set custom alerts to your performance metrics and get notified when you hit important milestones or when your metrics need attention.
Now, let’s go through the step-by-step process of setting up alerts.
1. Under Insights, click Alerts.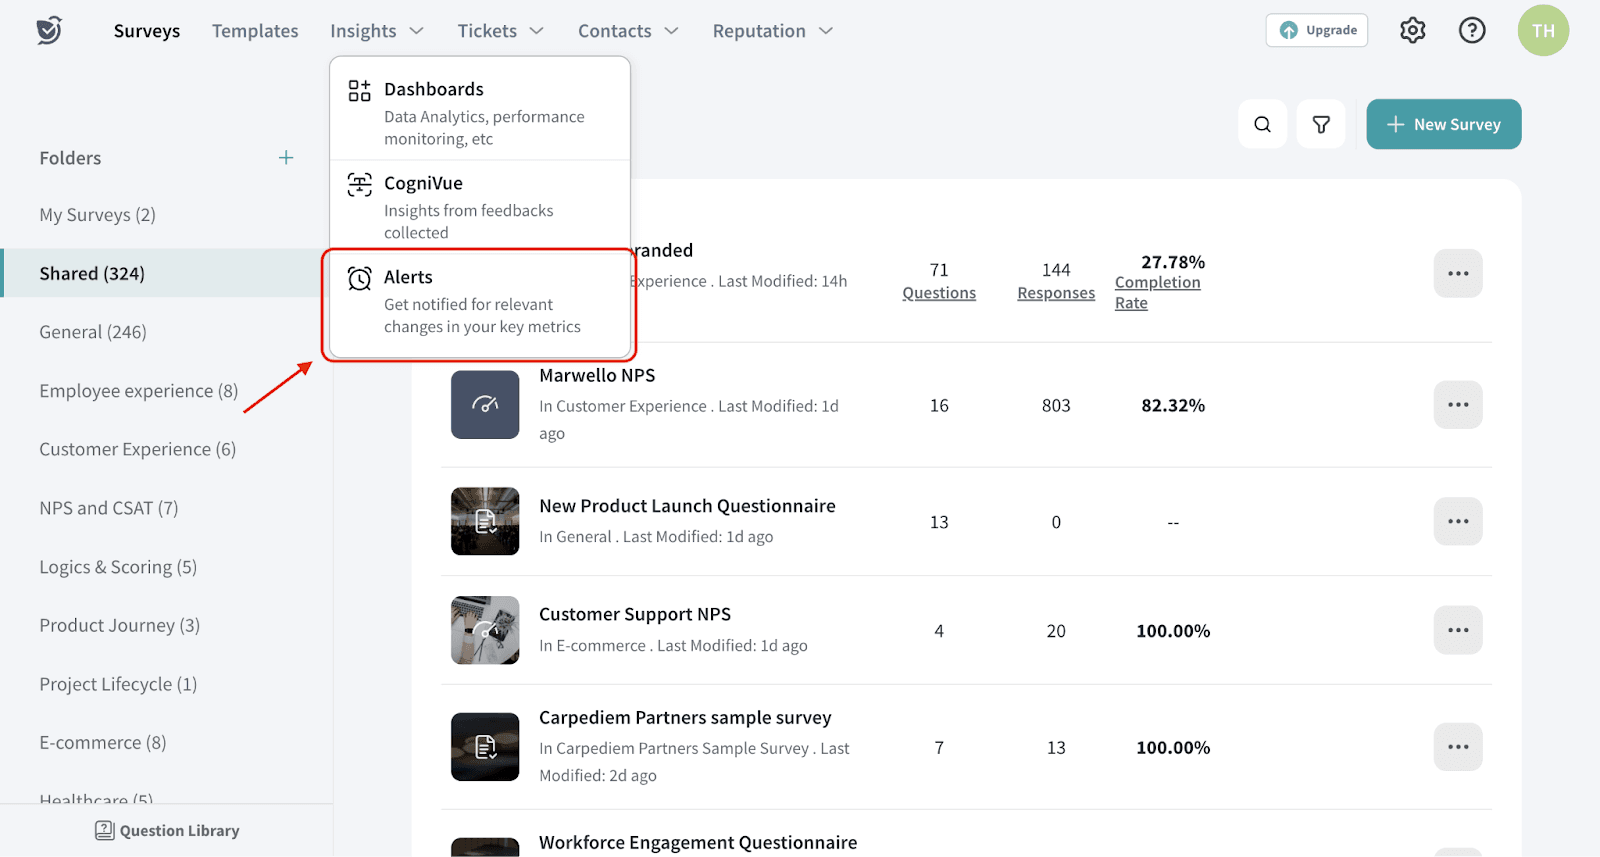
2. Click Create New Alert.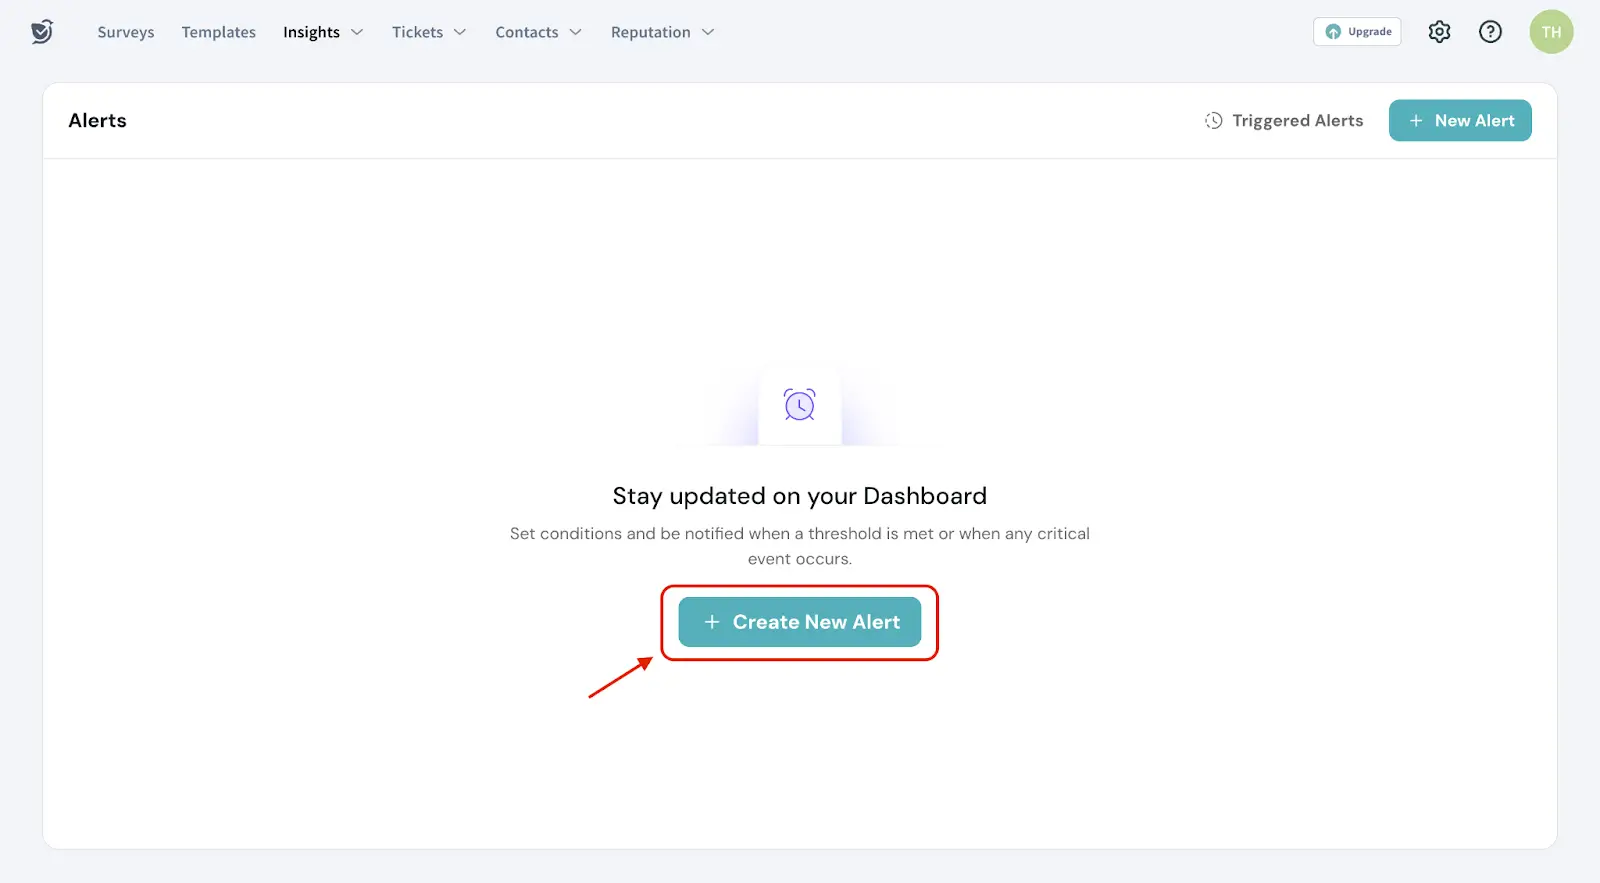
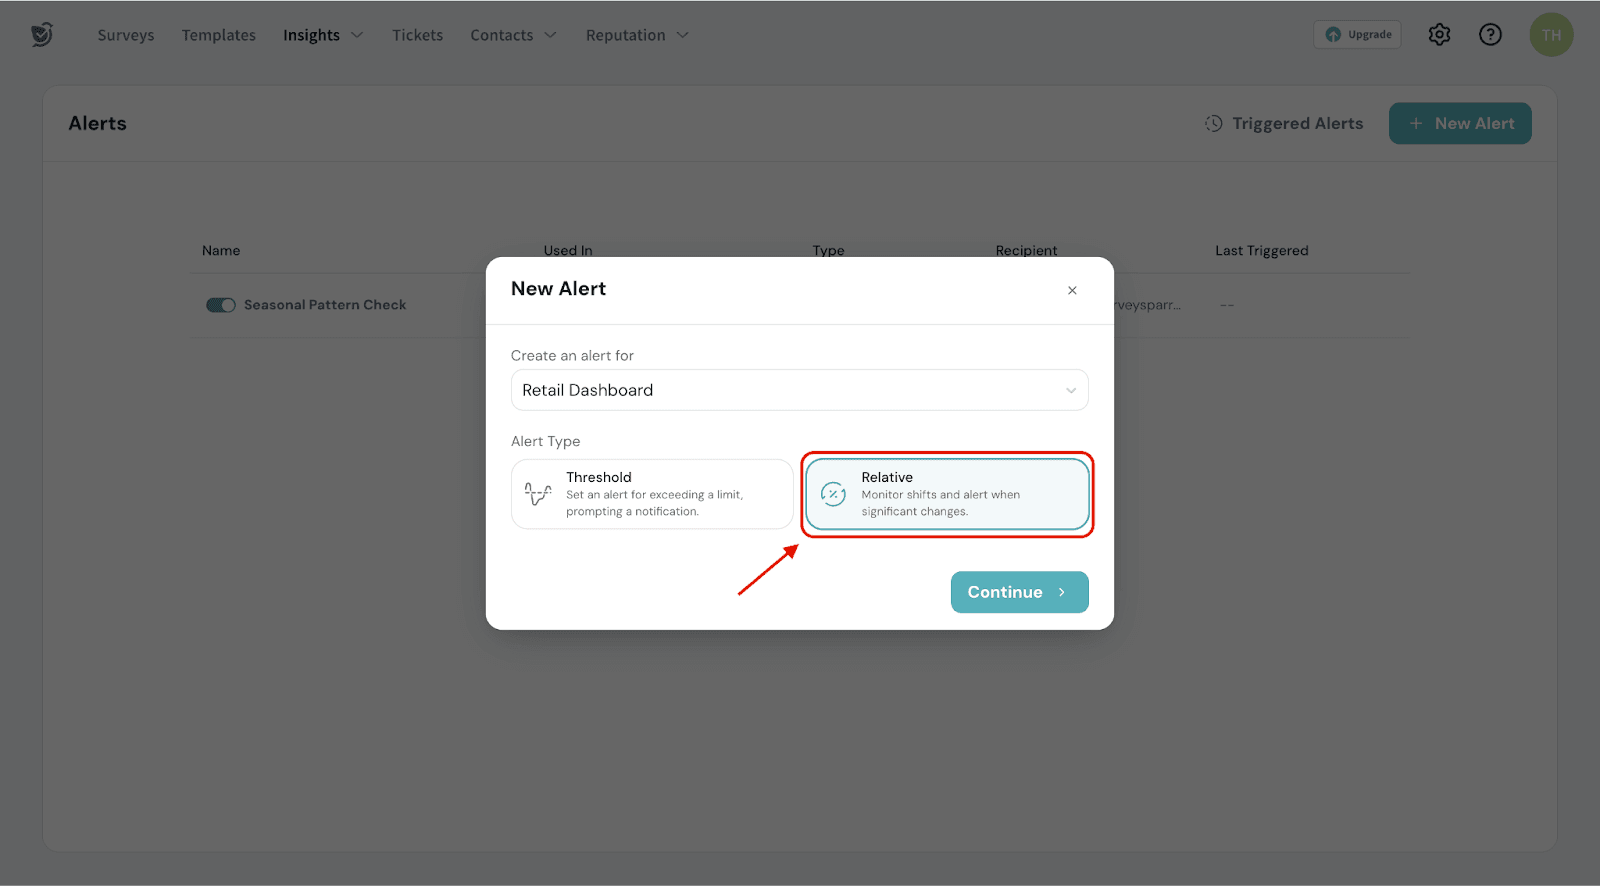
3. Choose the dashboard with the specific metric you want to monitor.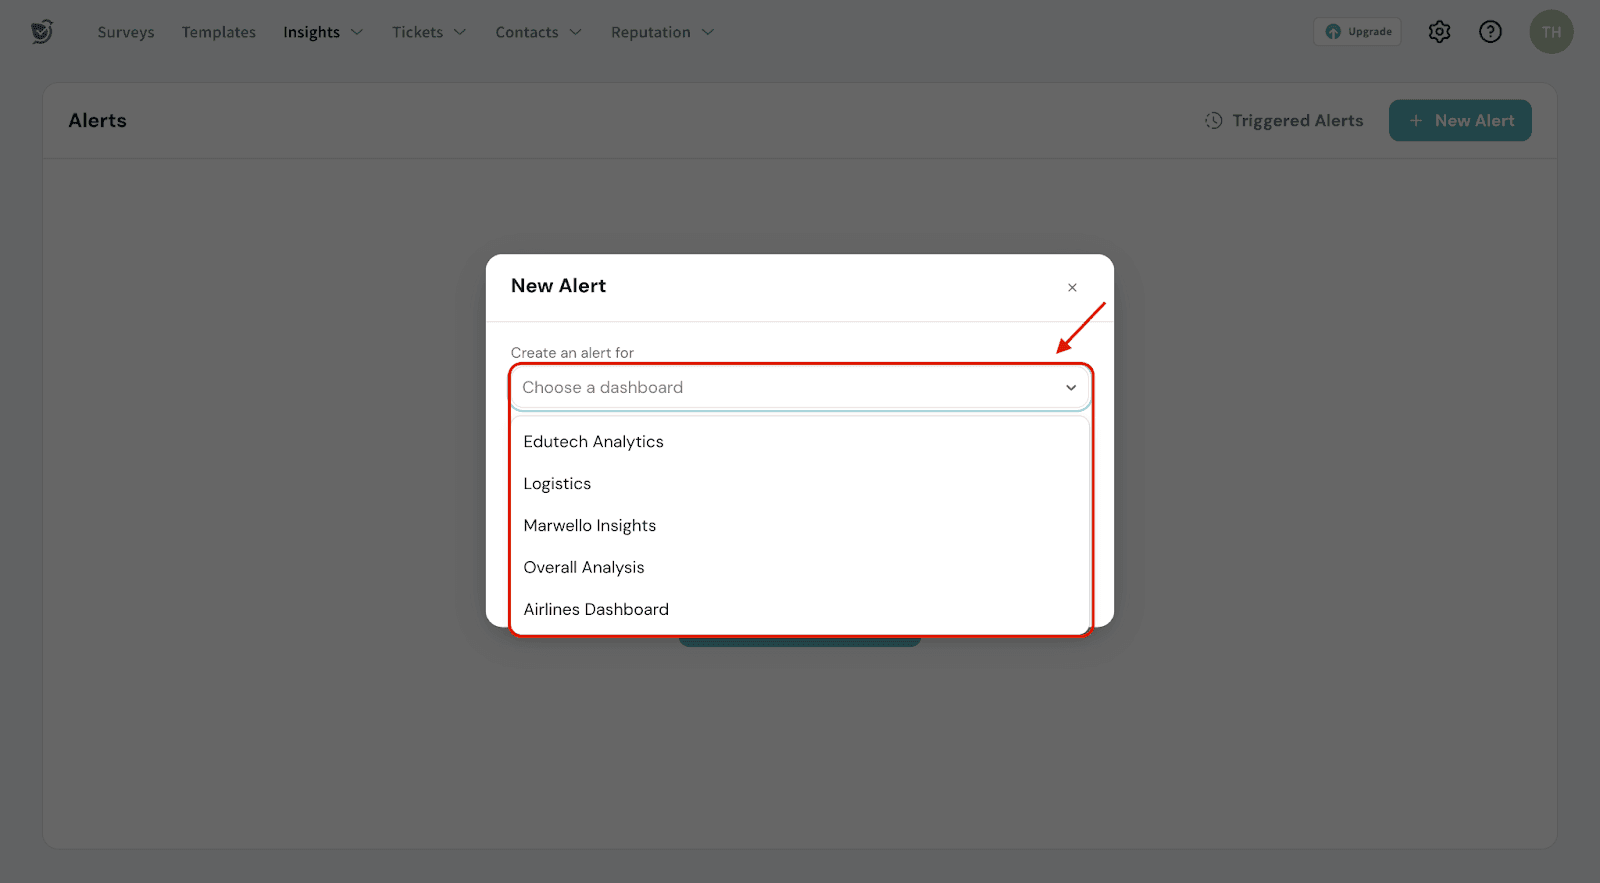
4. Choose the alert type.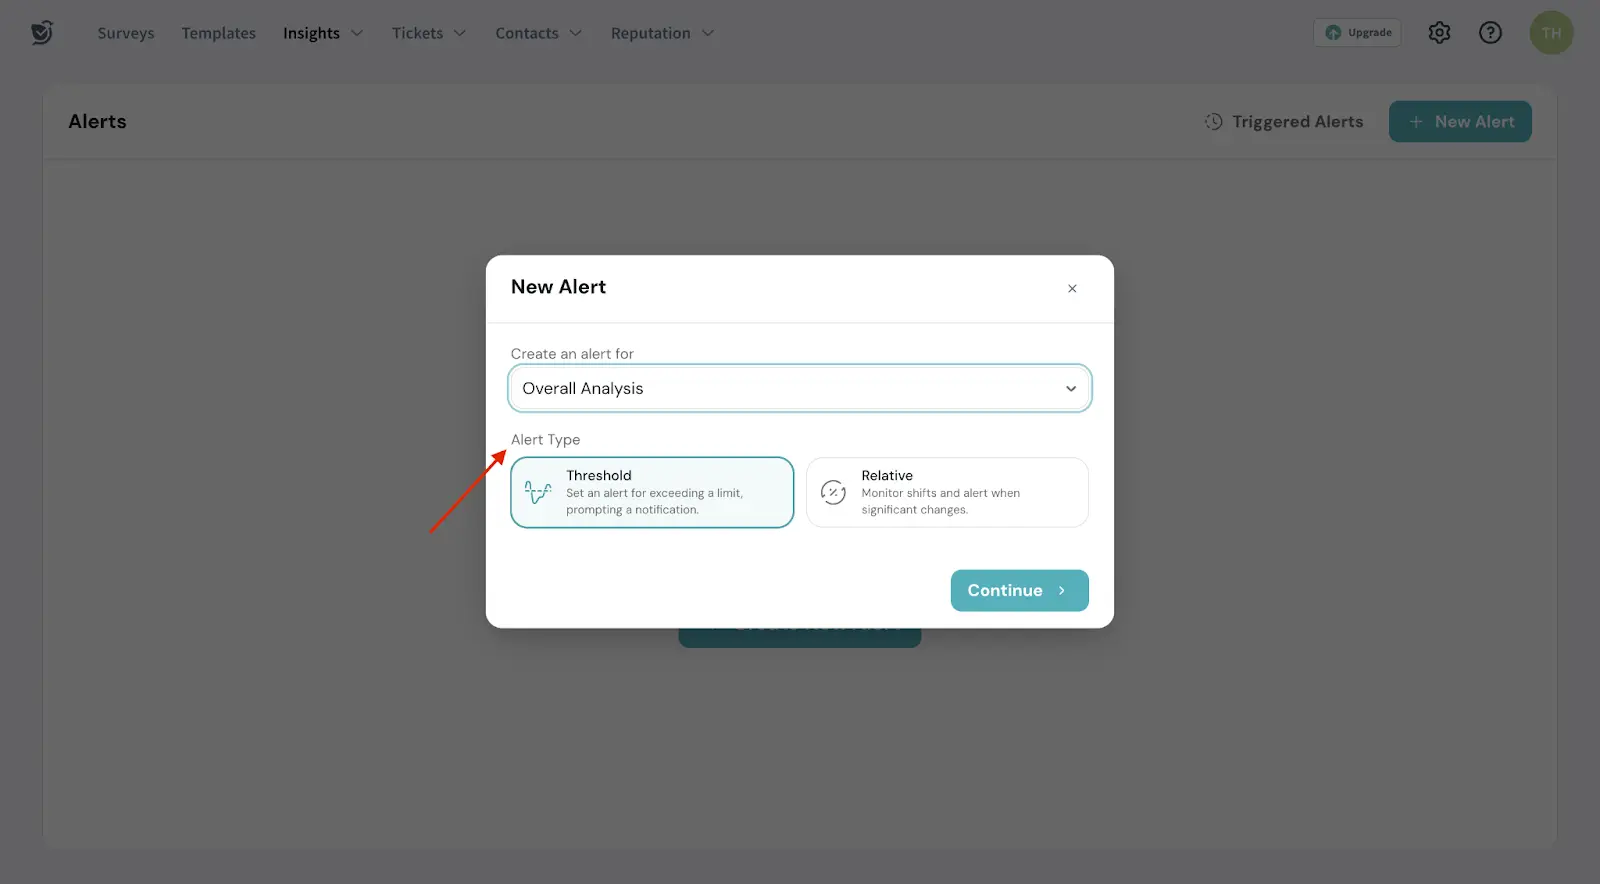
5. Click Continue.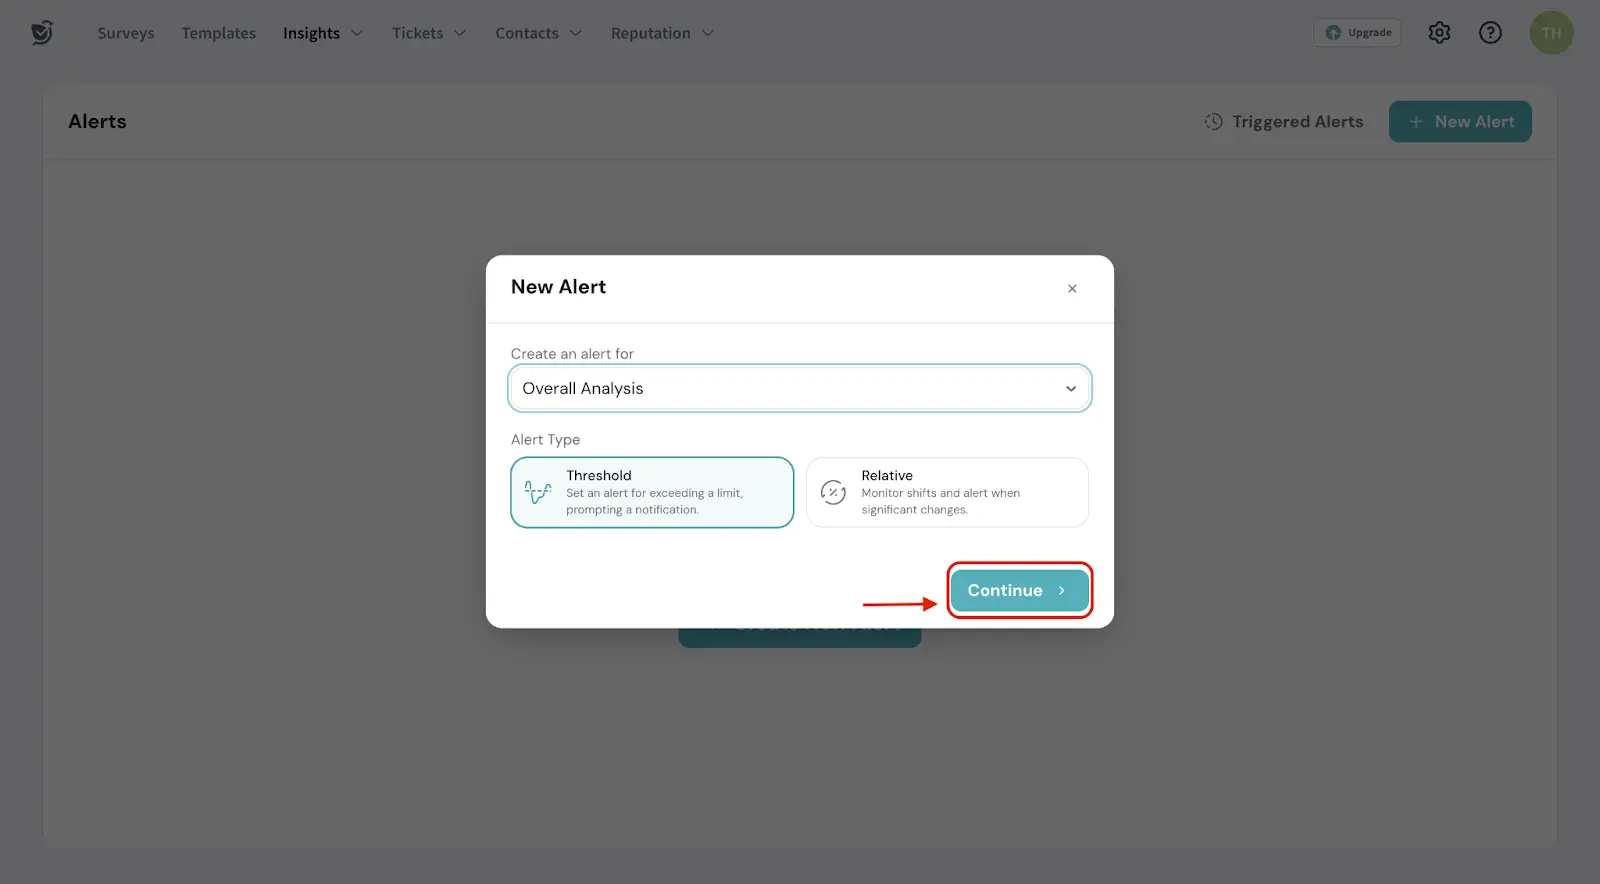
Setting up a threshold alert notifies you when your metrics reach above or below a specified value.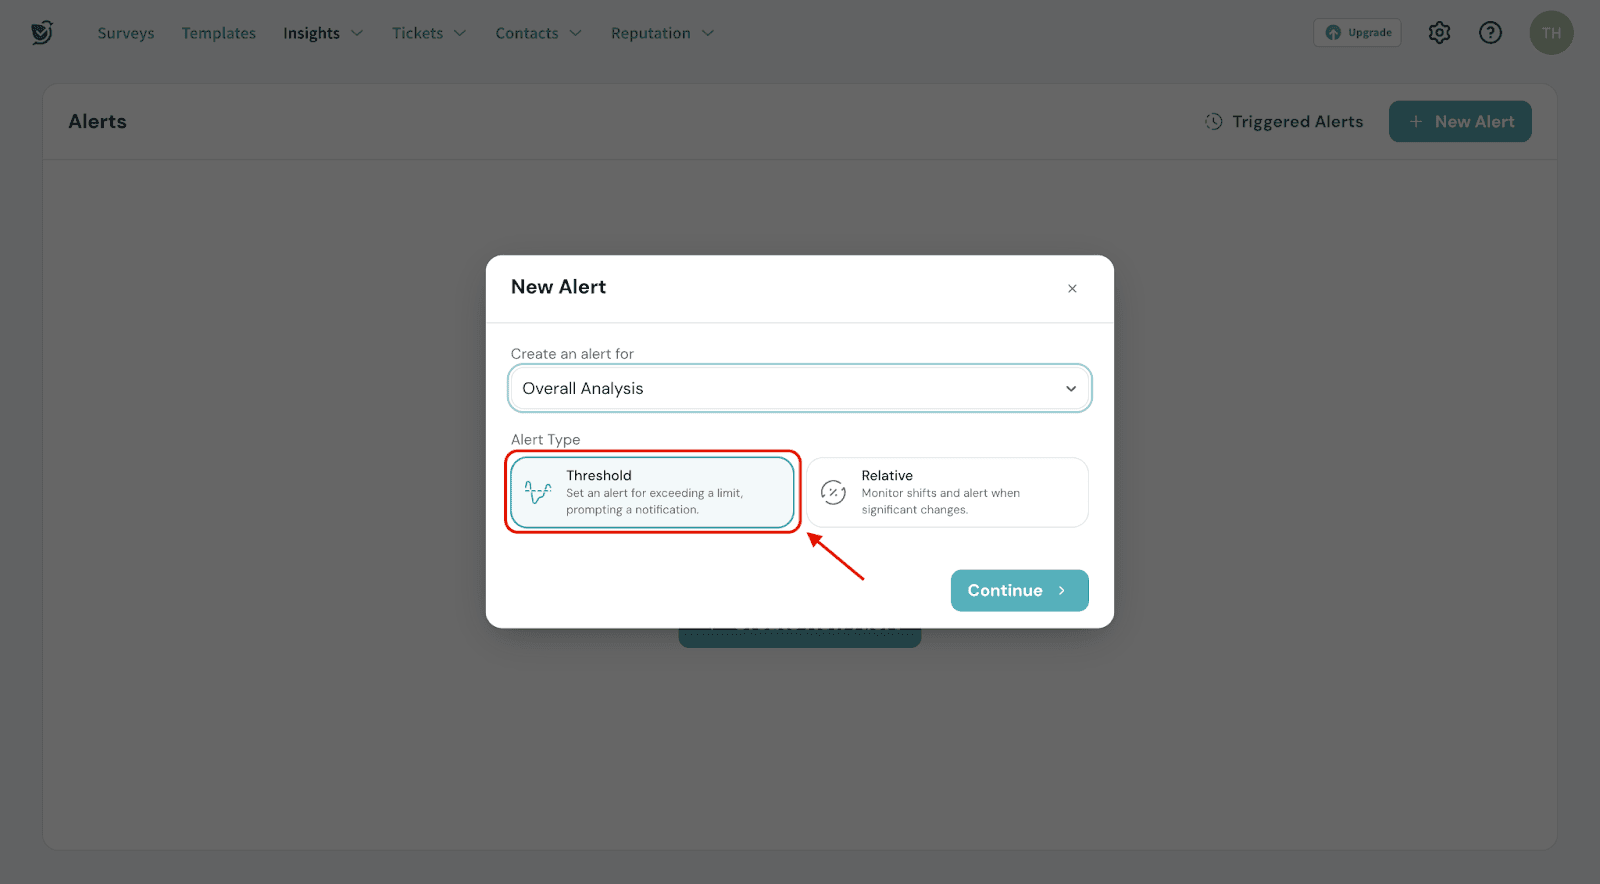
1. Enter a name for your alert.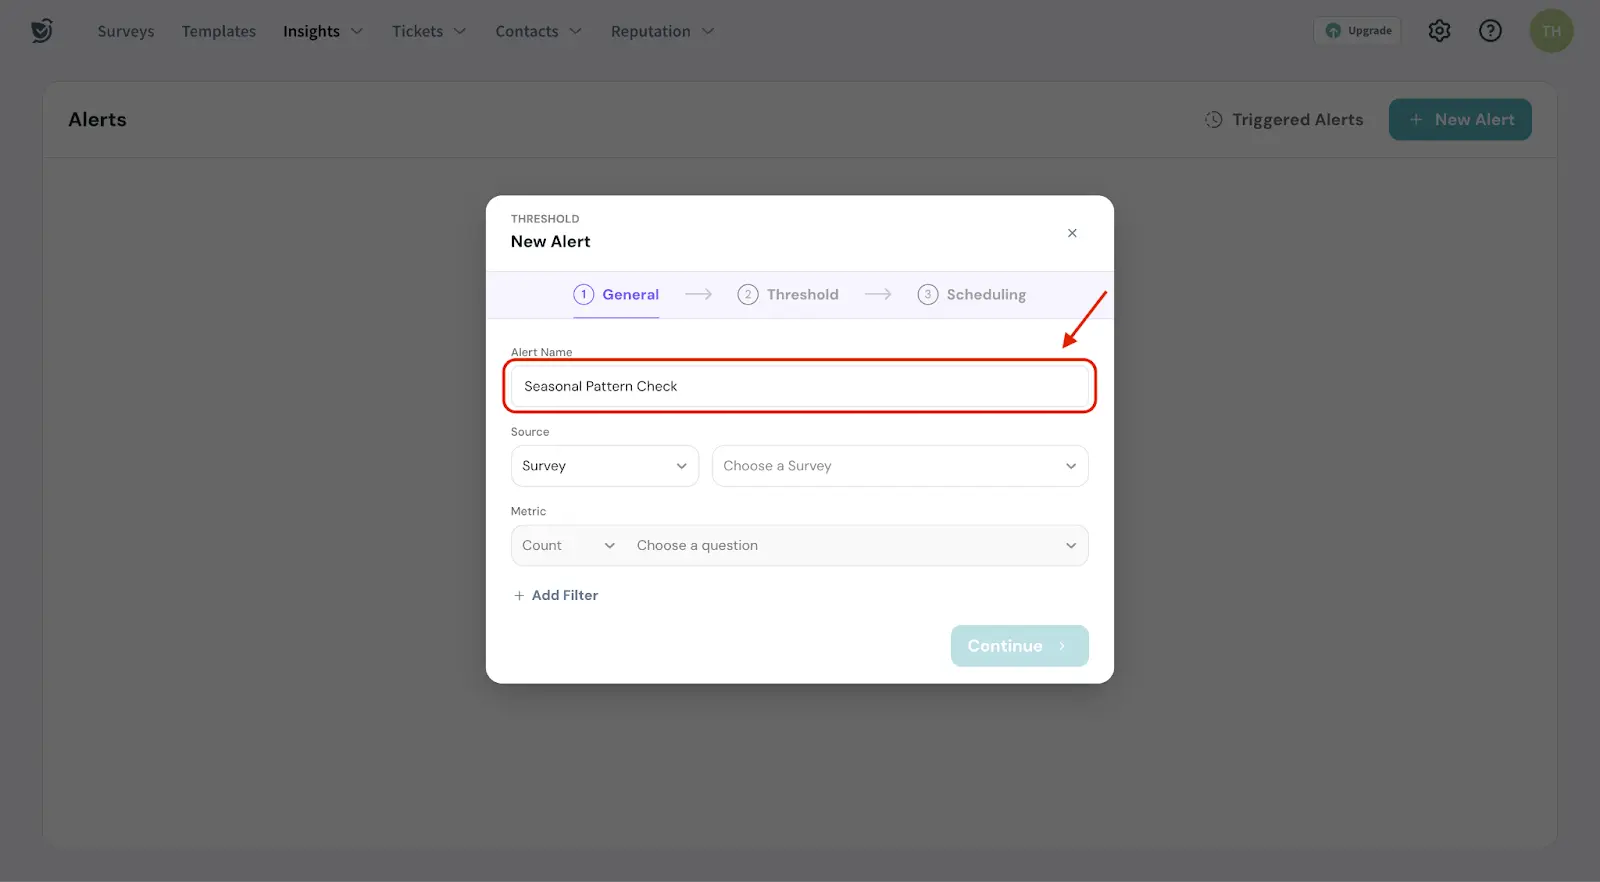
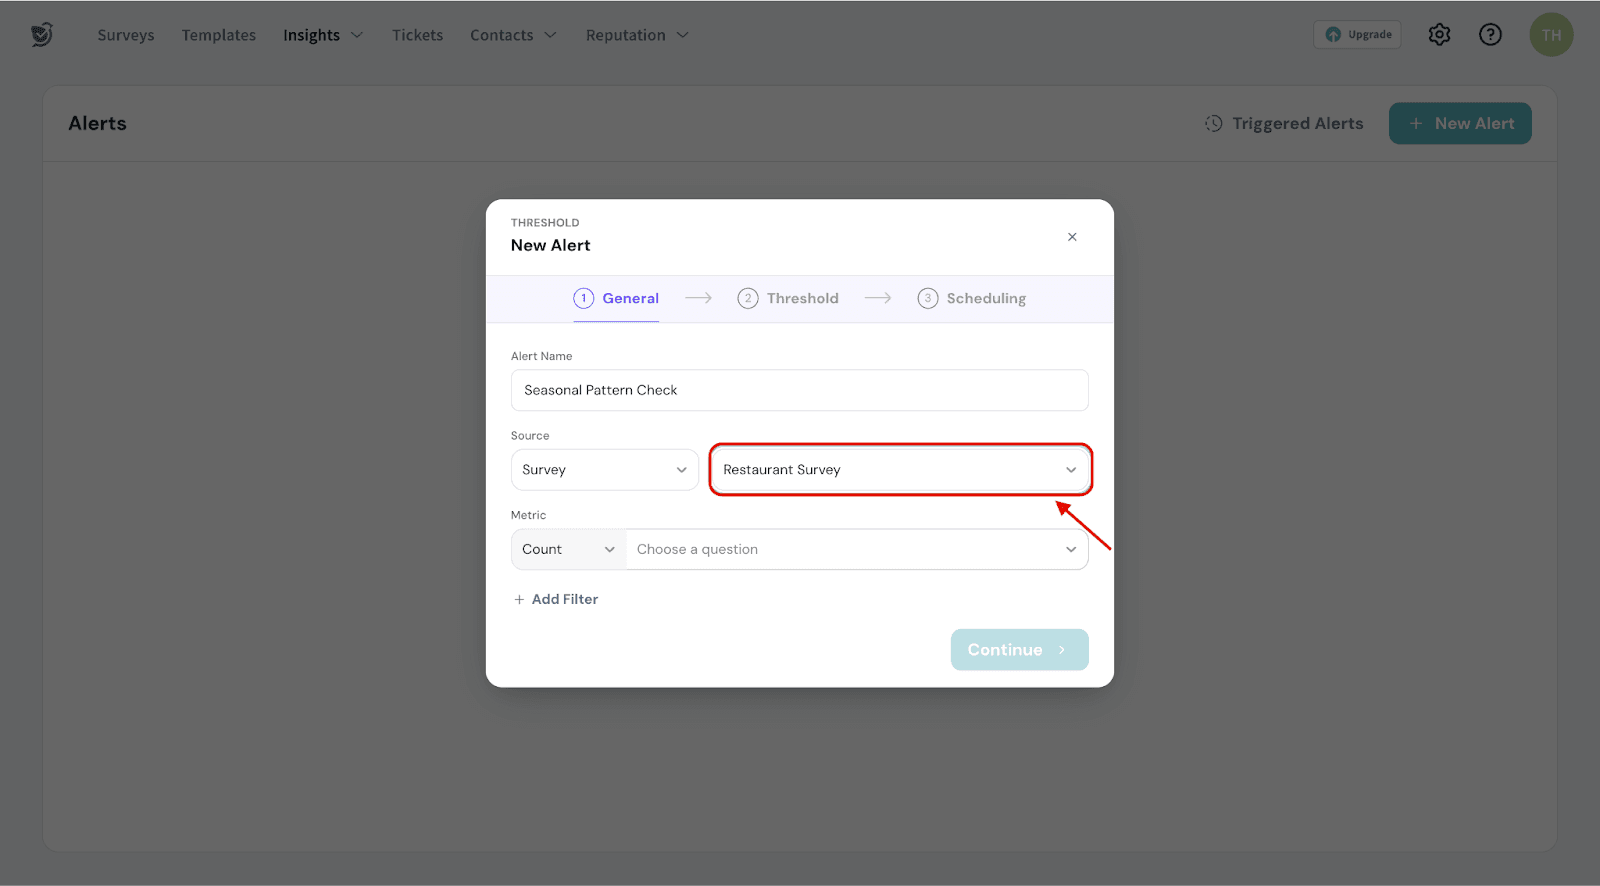
2. Select either Survey or Custom Metrics as your source.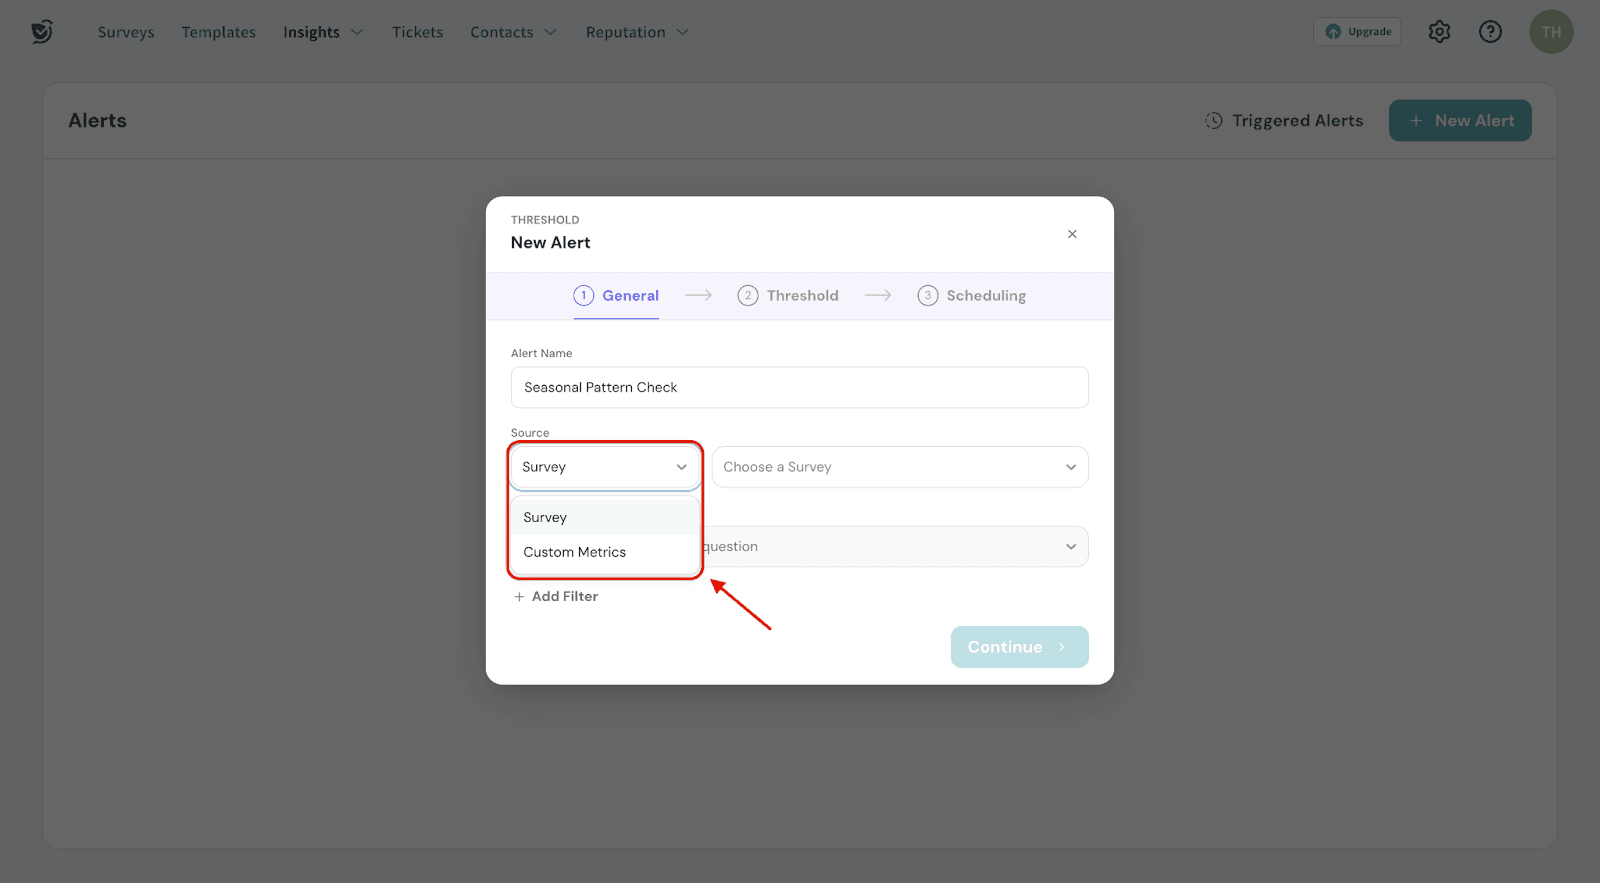
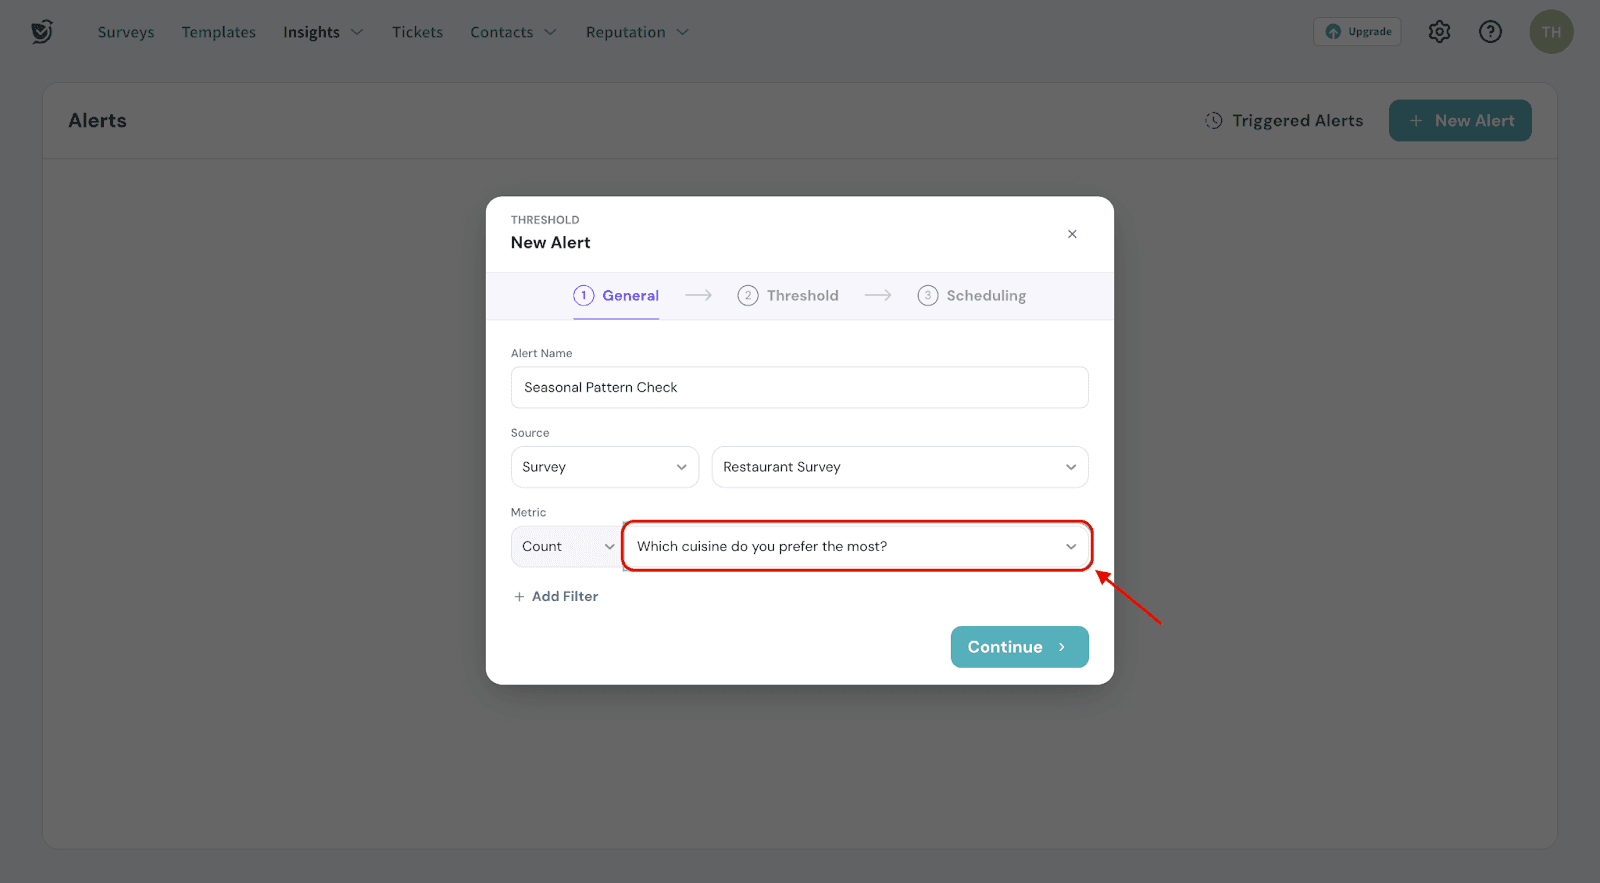
3. For surveys,
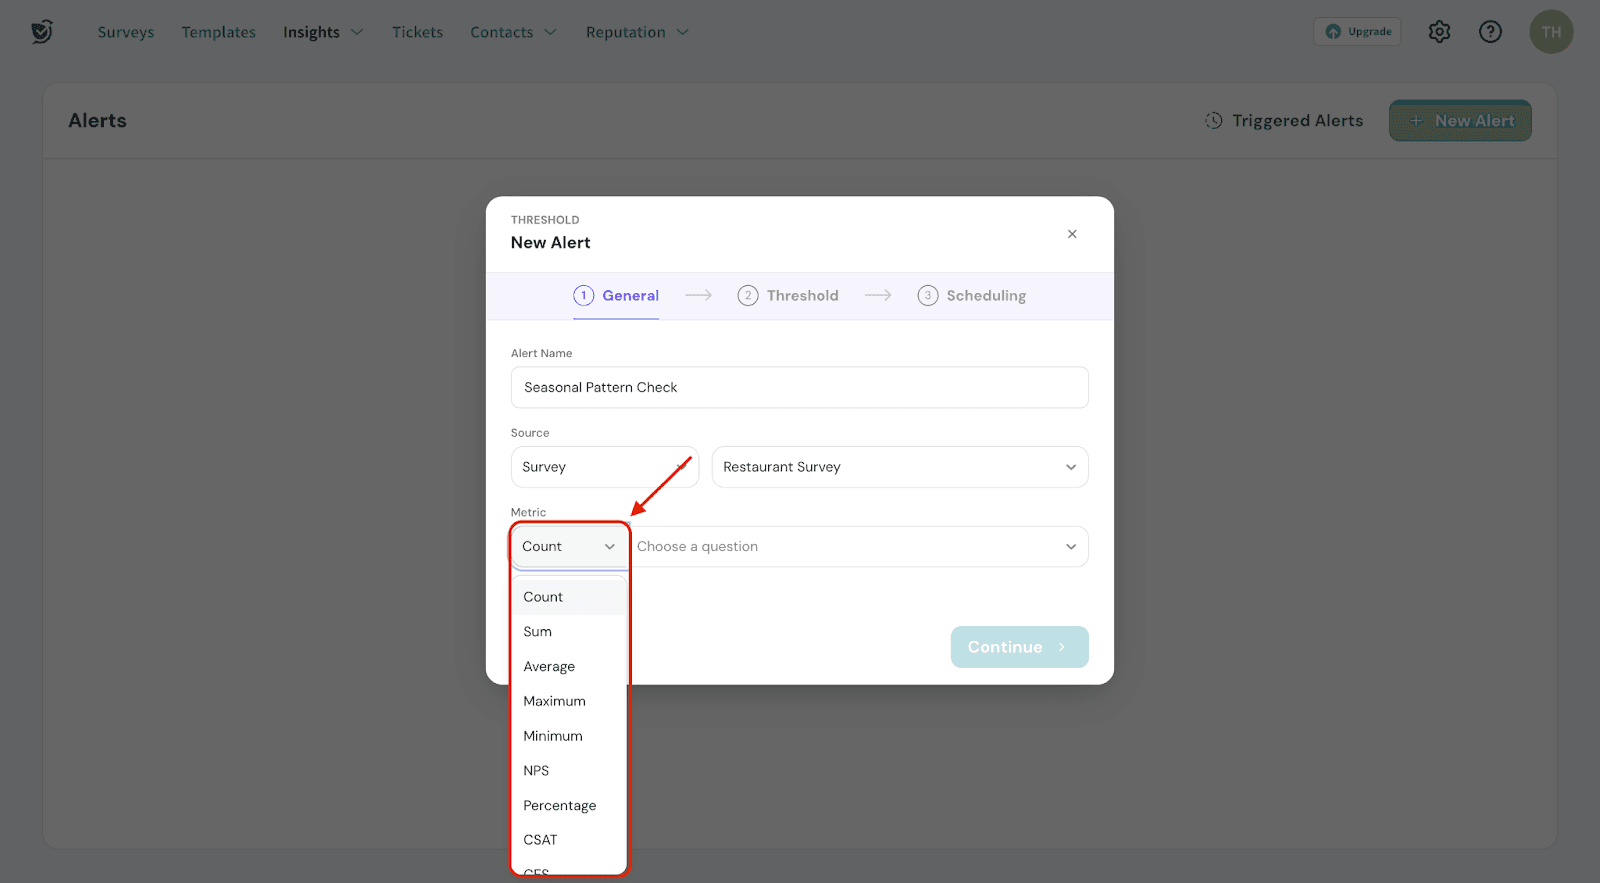
4. For Custom Metrics, select the desired metric from the list.
5. You can choose to add filters to focus on specific data.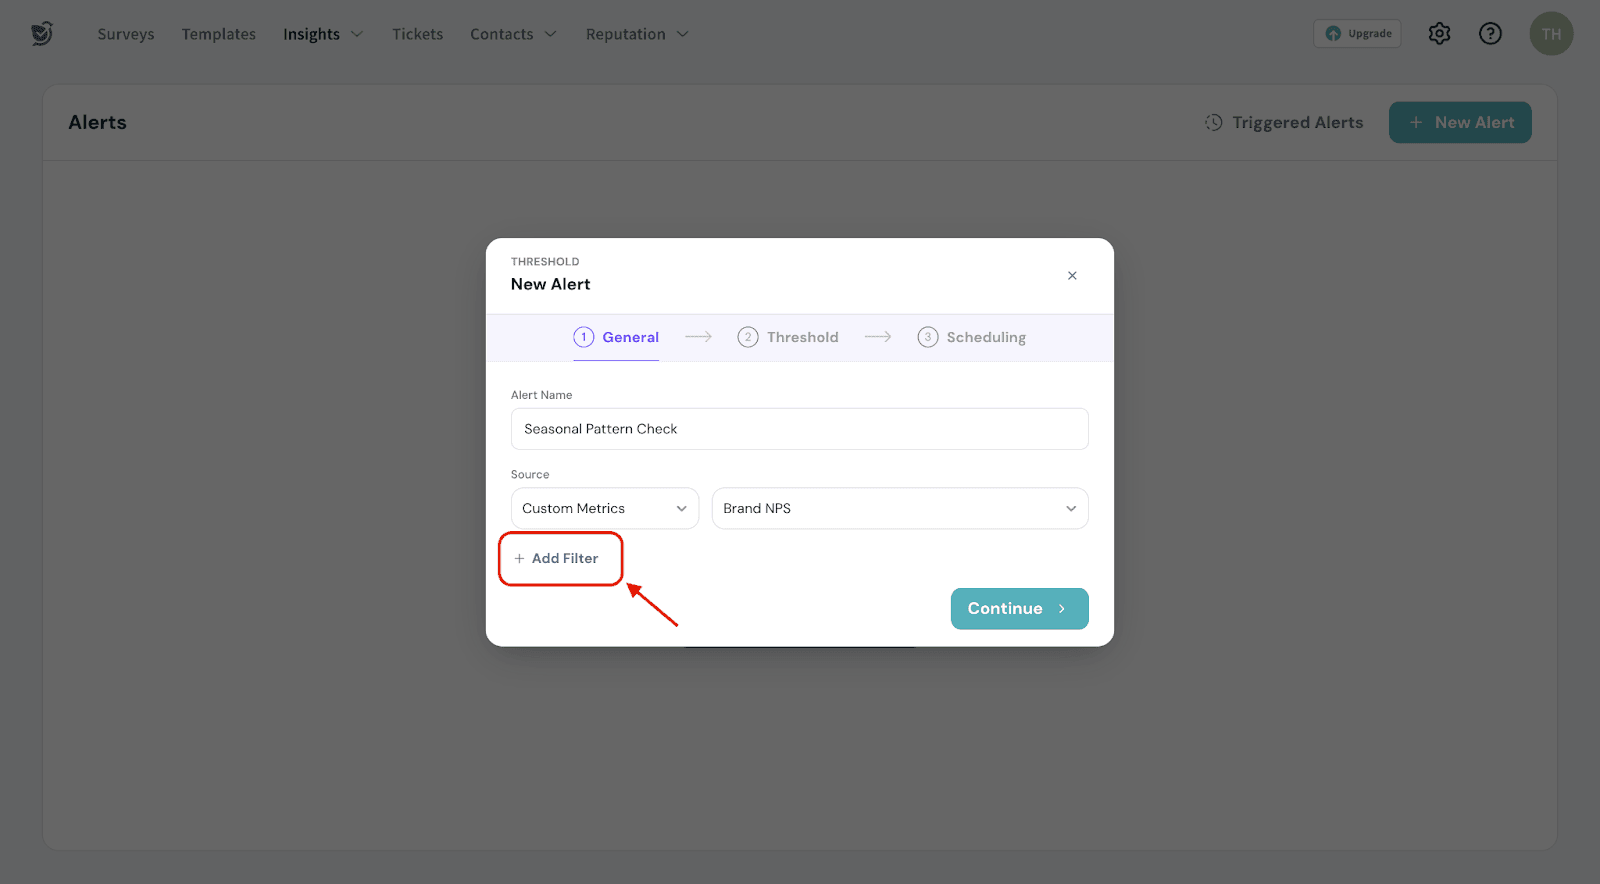
6. Click Continue.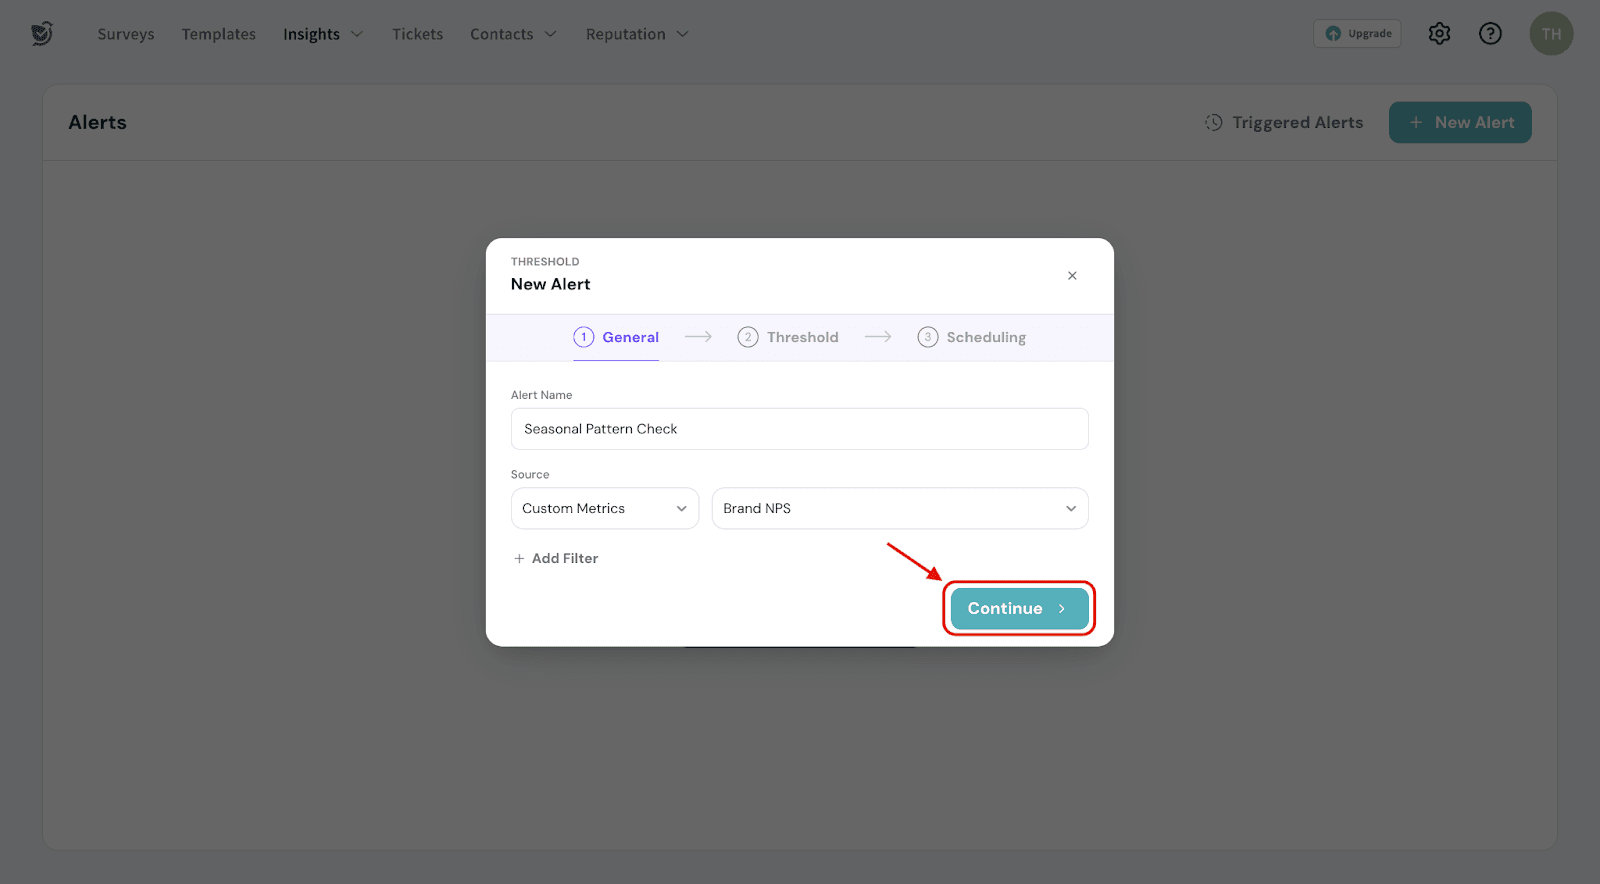
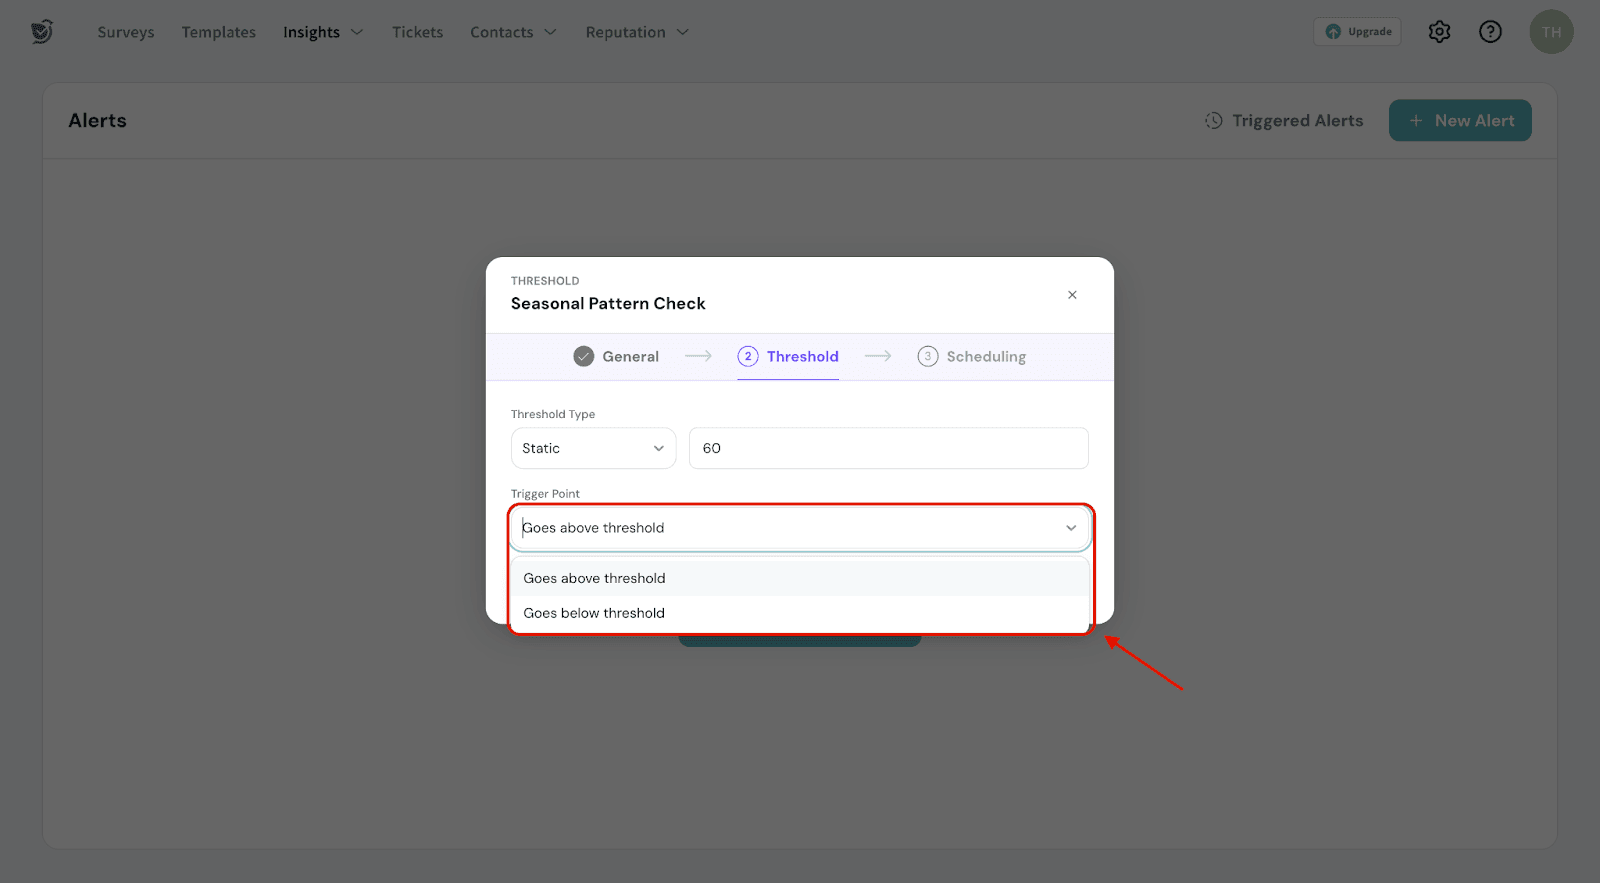
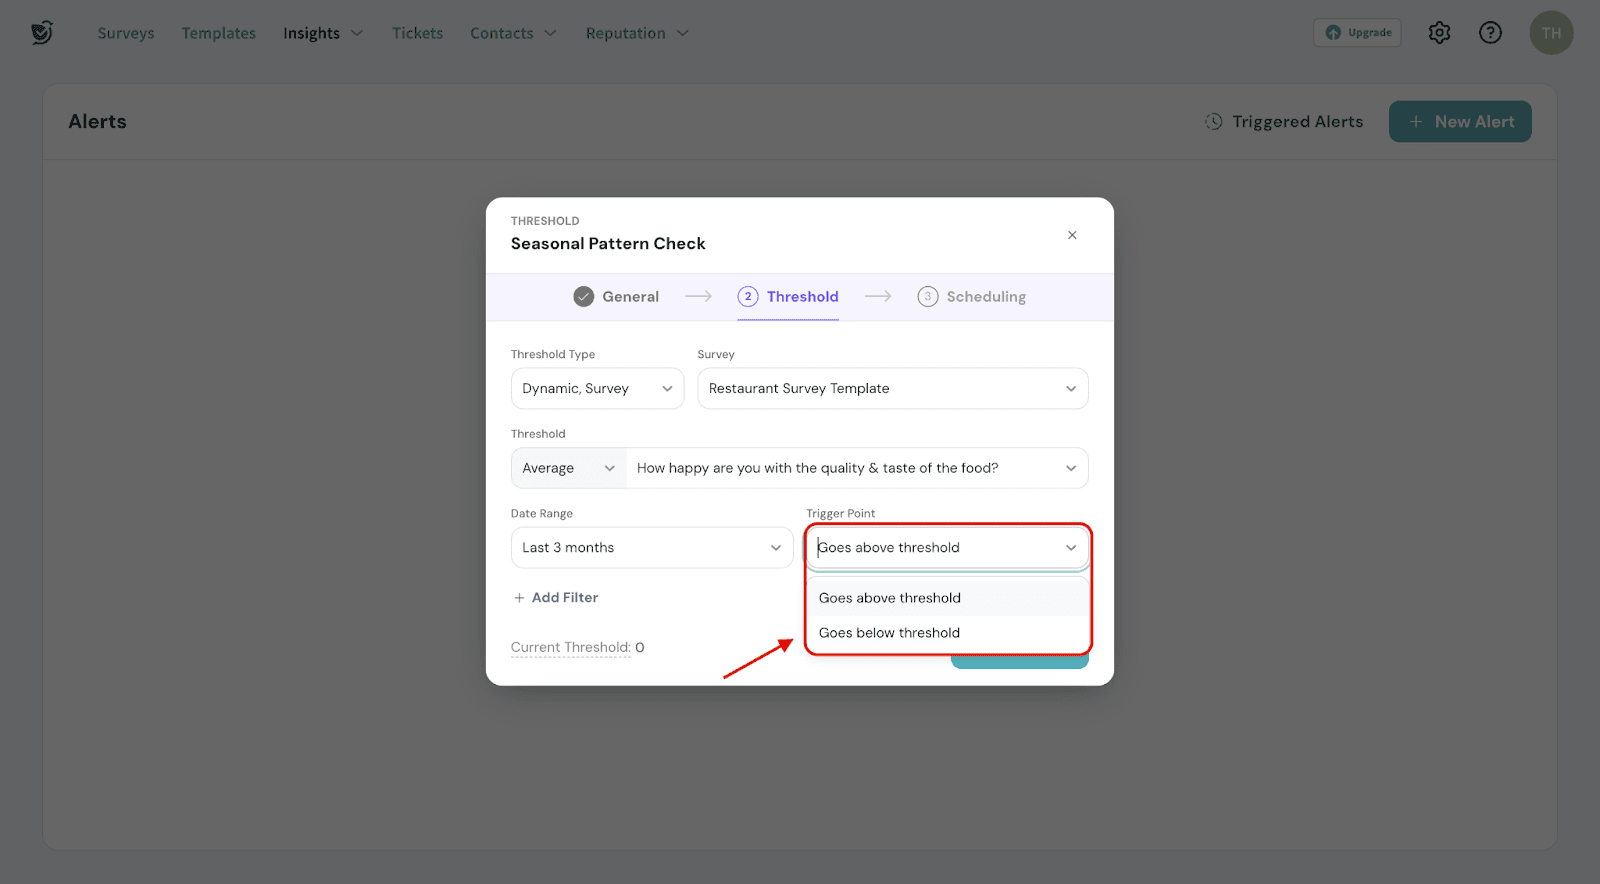
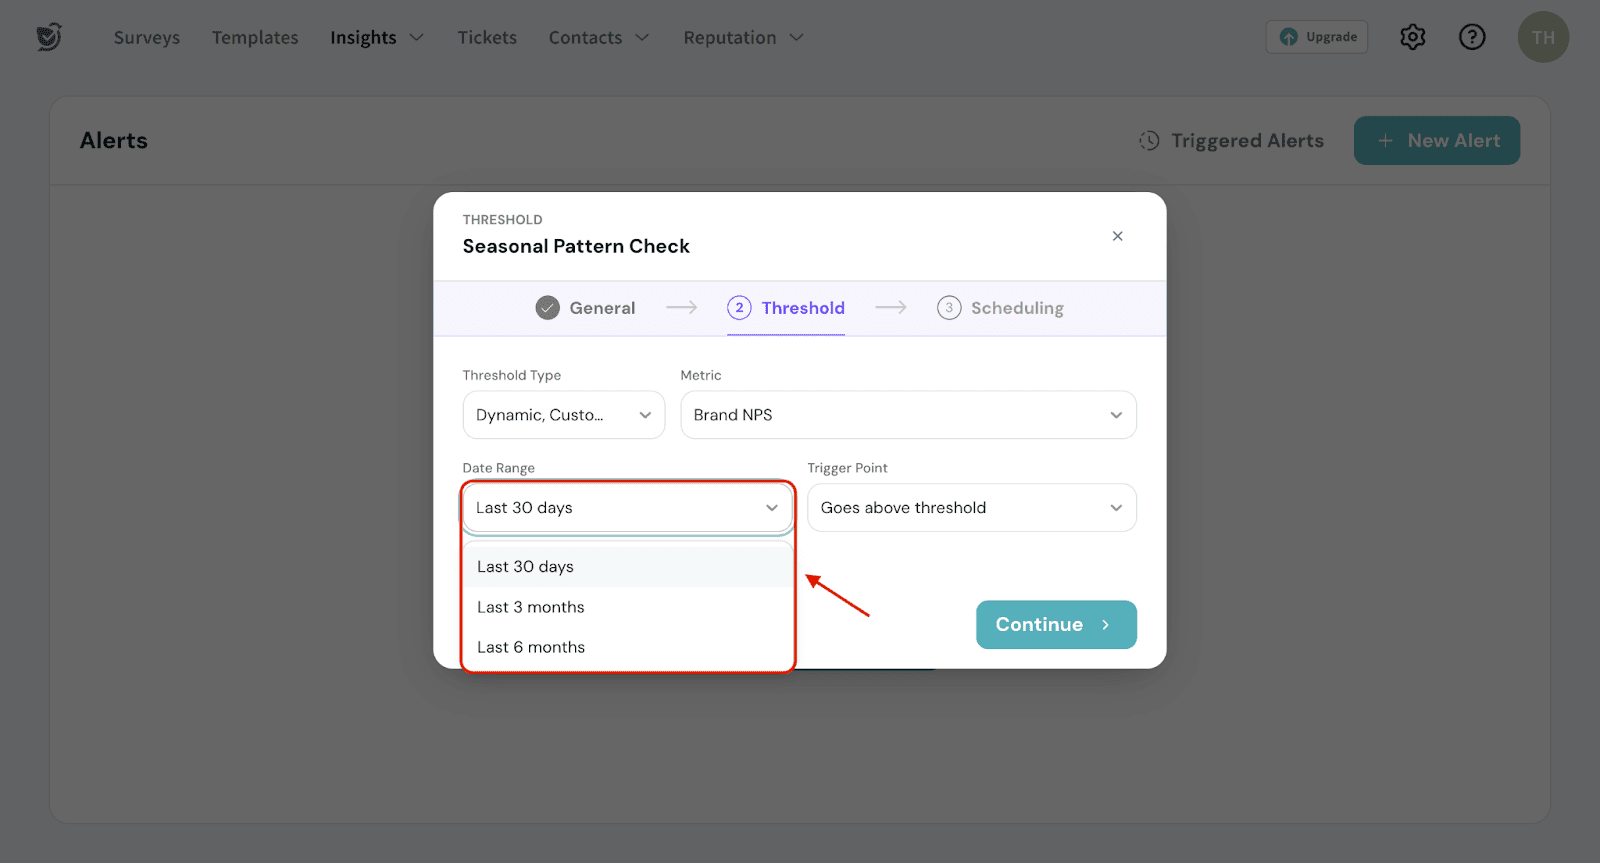
1. Select the threshold type.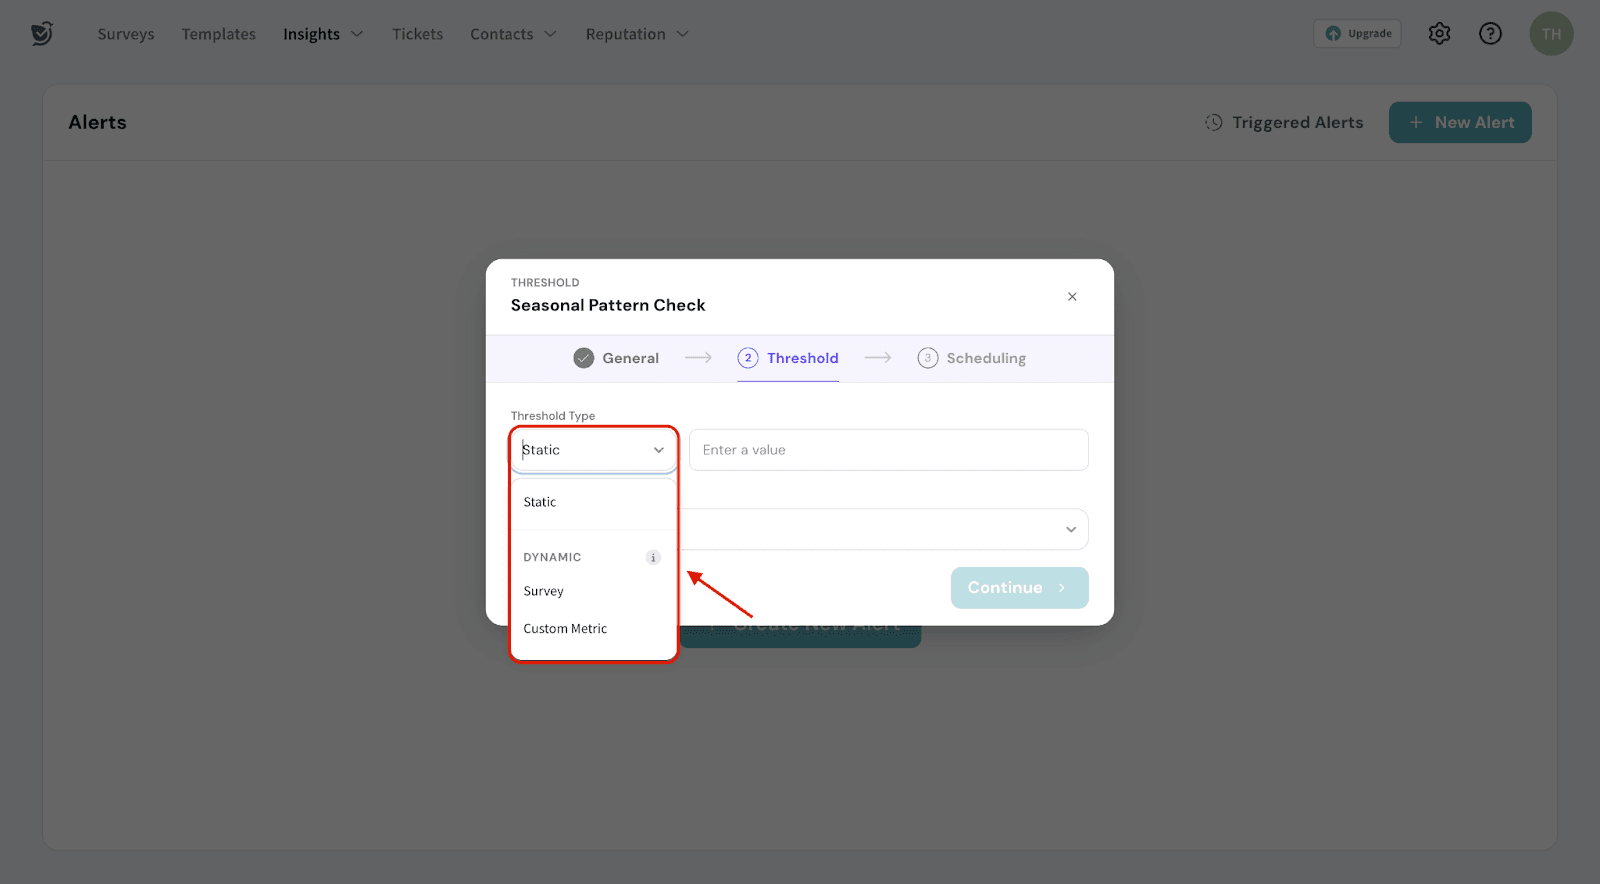
2. For Static threshold,

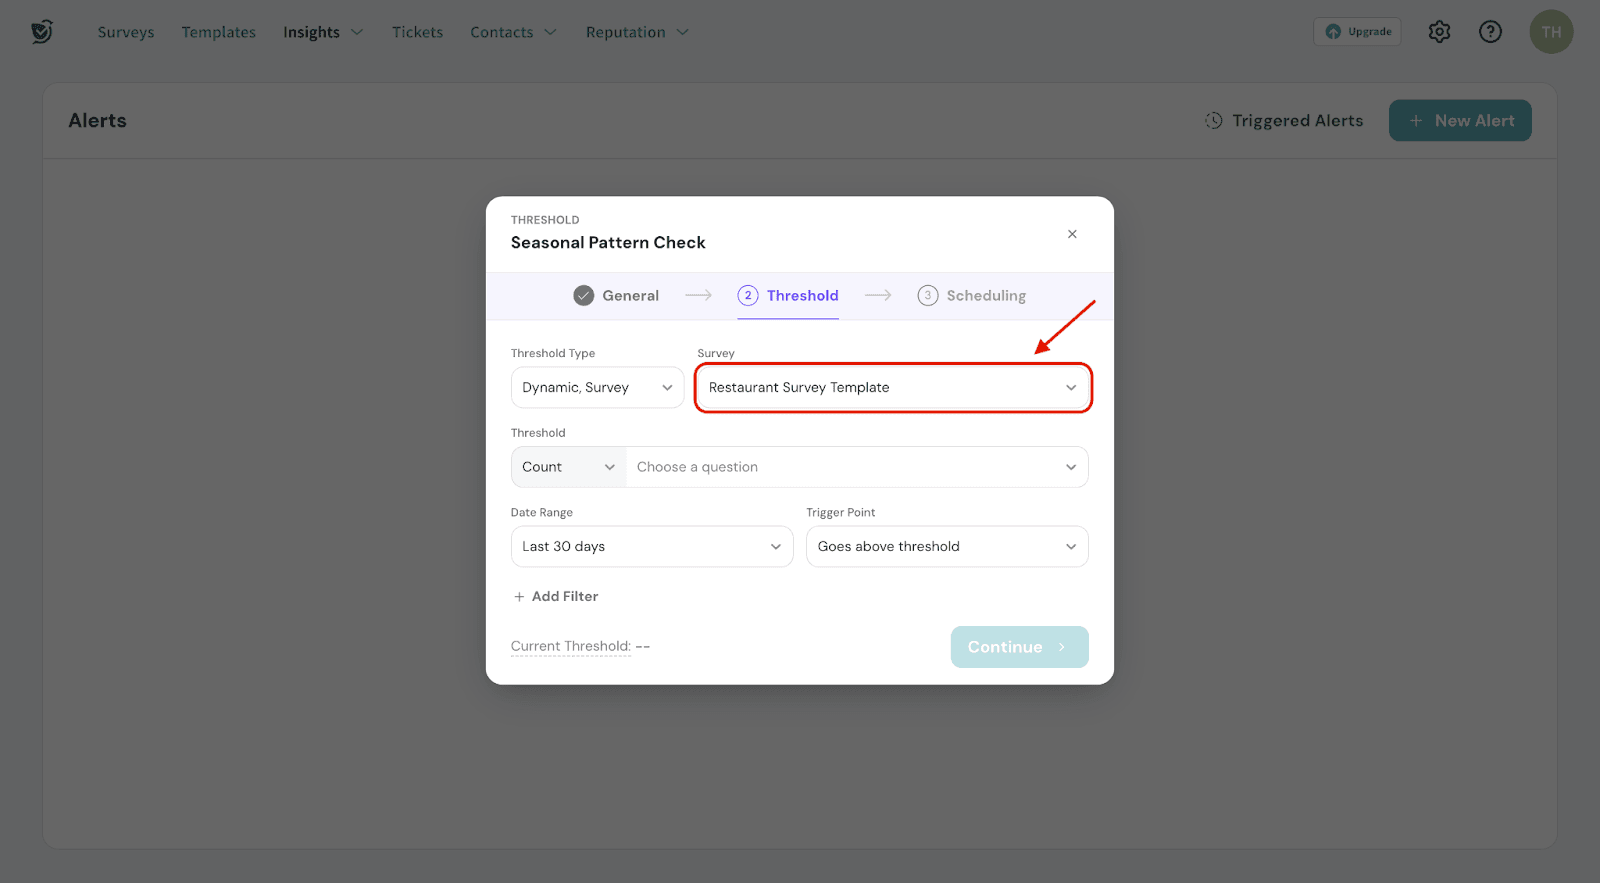
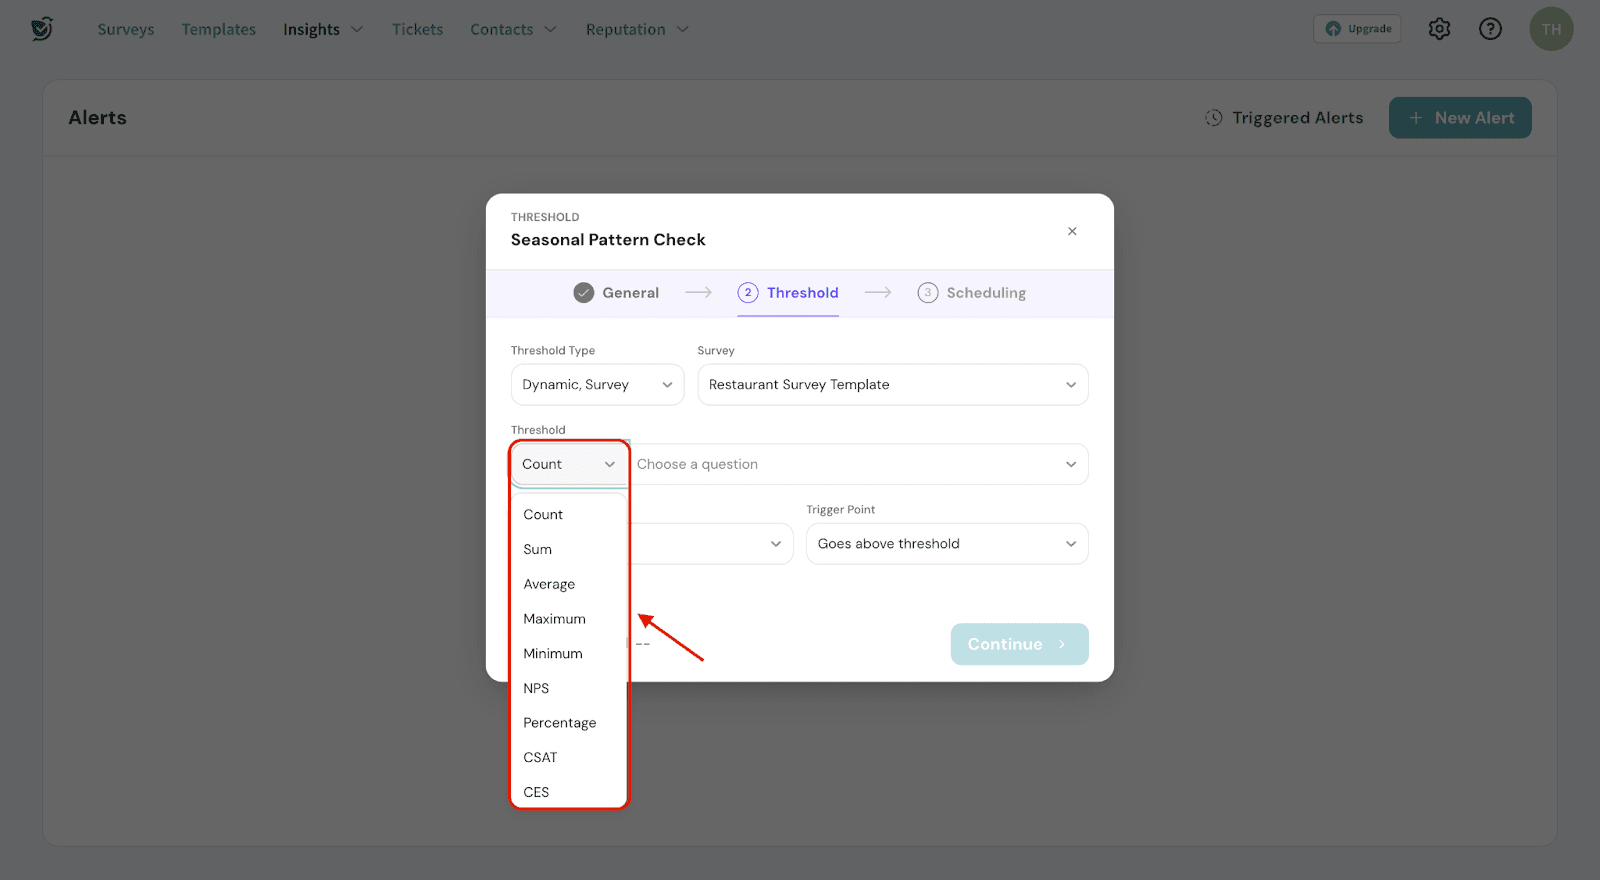
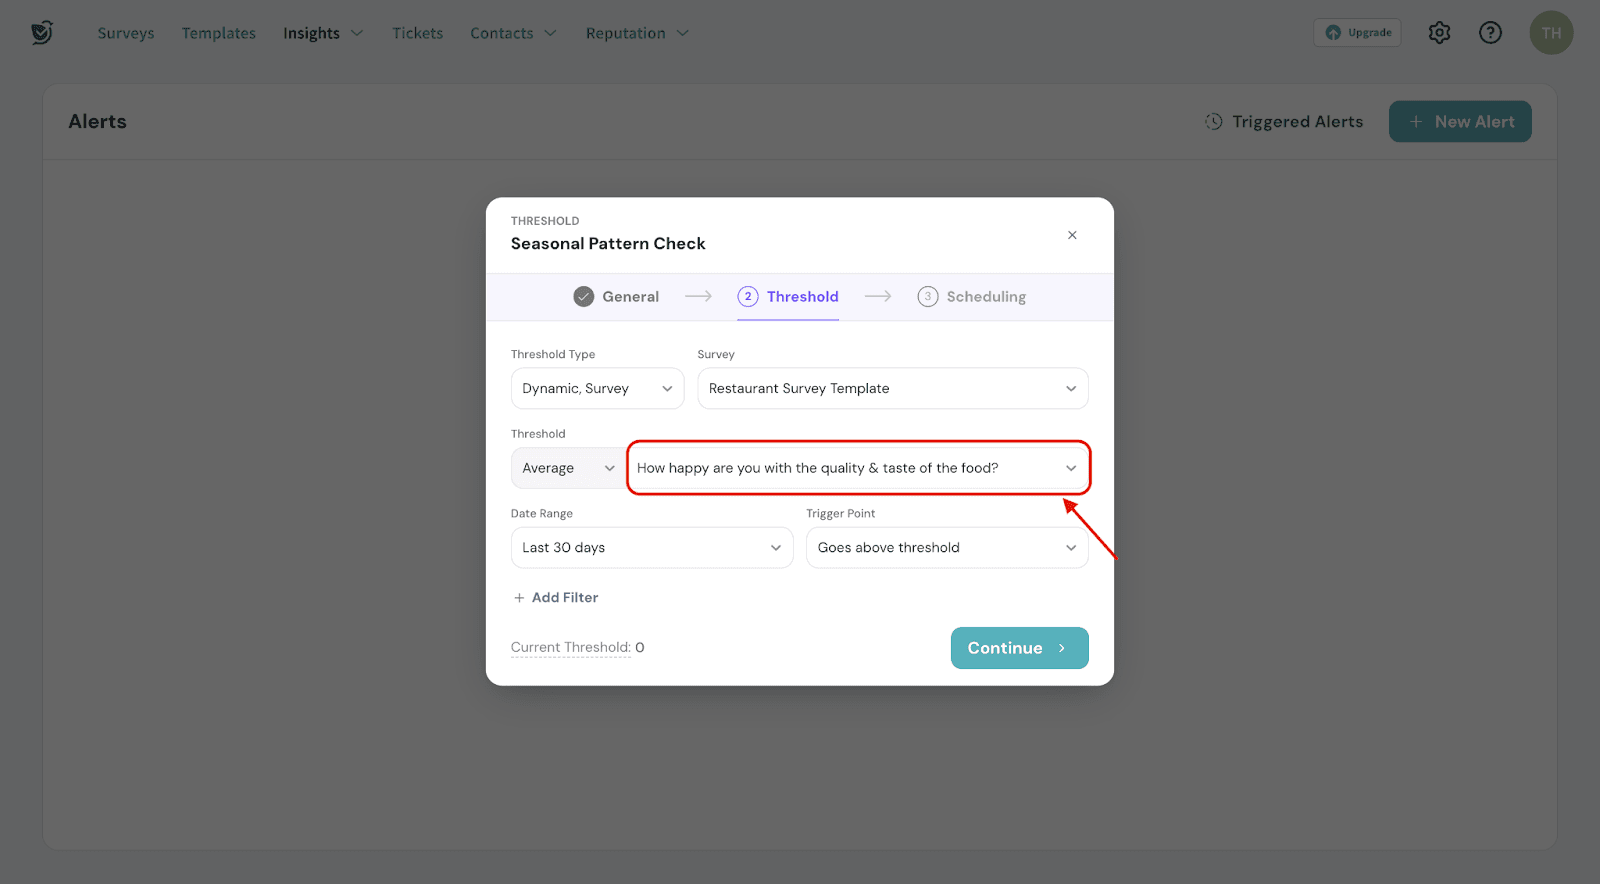
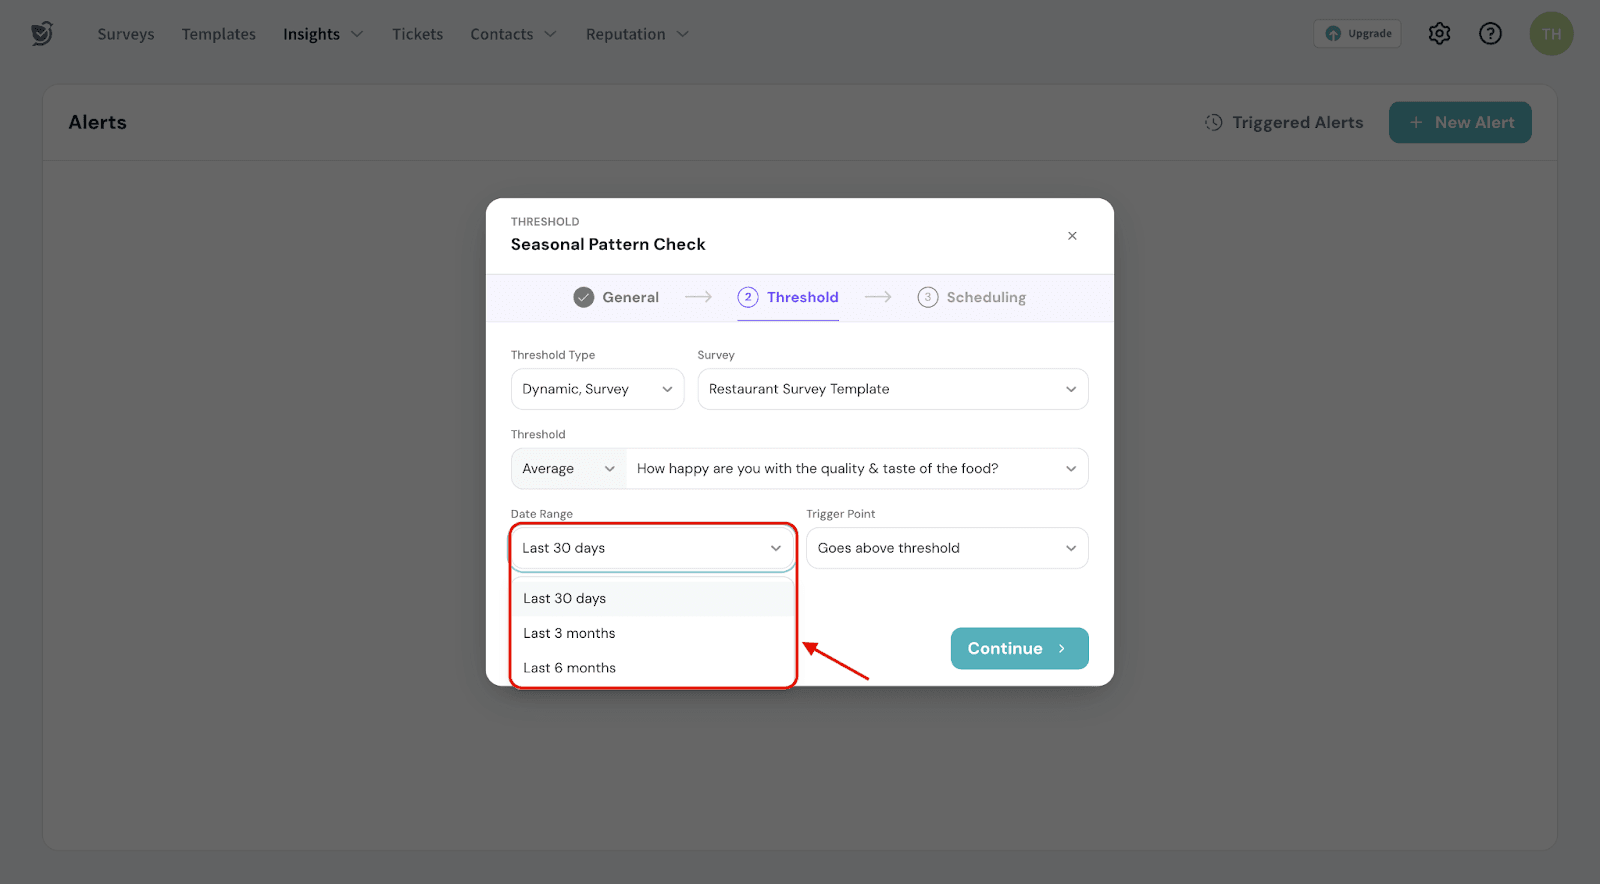
3. For the Dynamic threshold, choose either Survey or Custom Metric.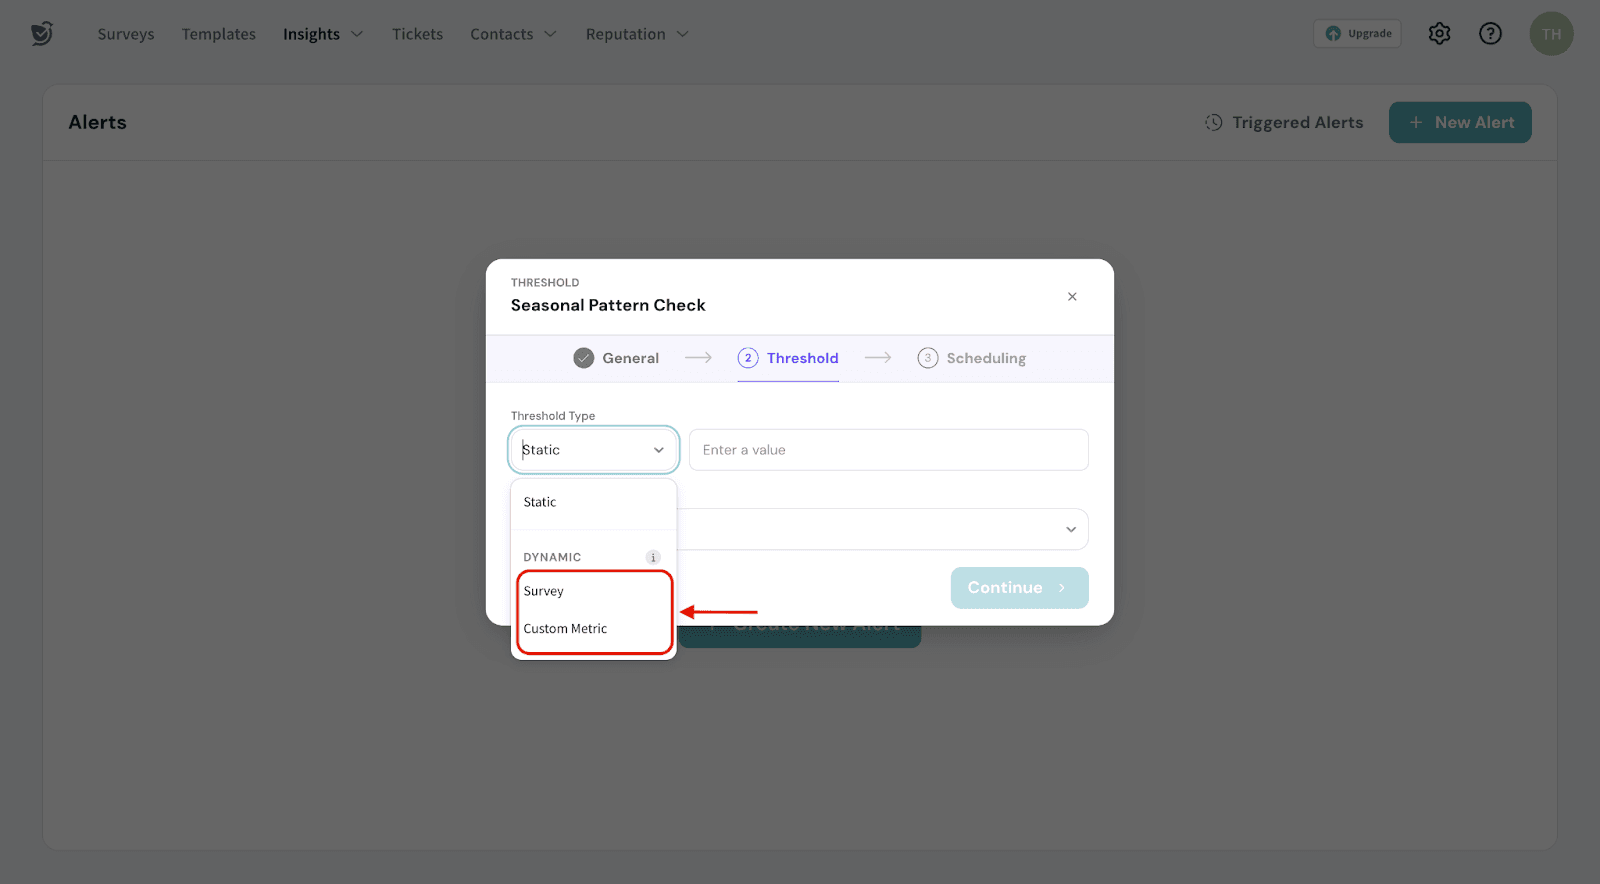
4. If you’re selecting Survey for Dynamic threshold:
5. If you’re selecting Custom Metric for Dynamic type:
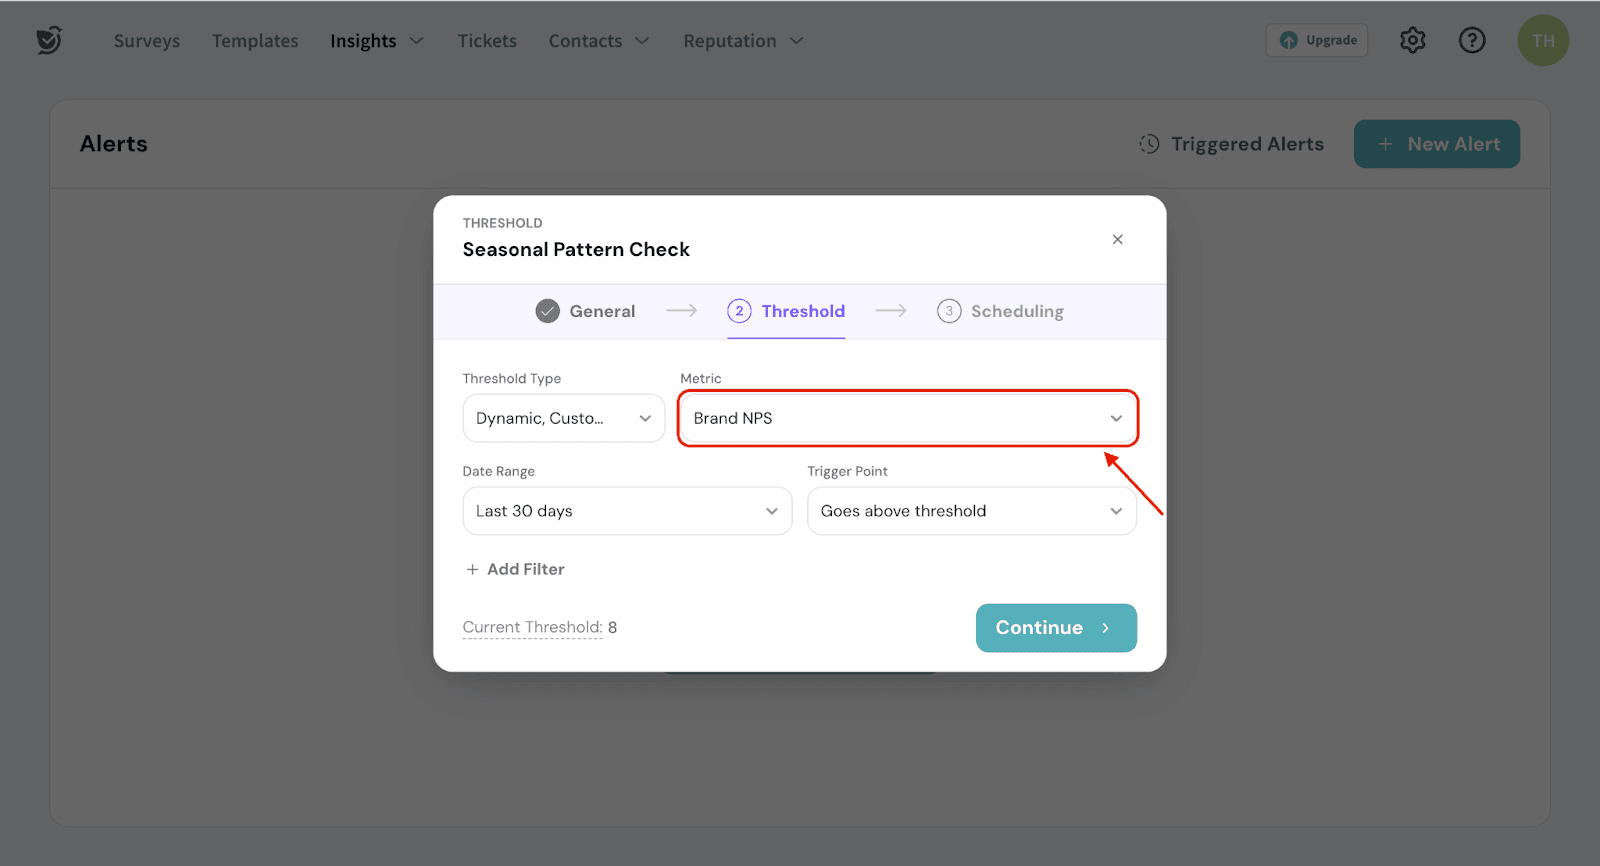
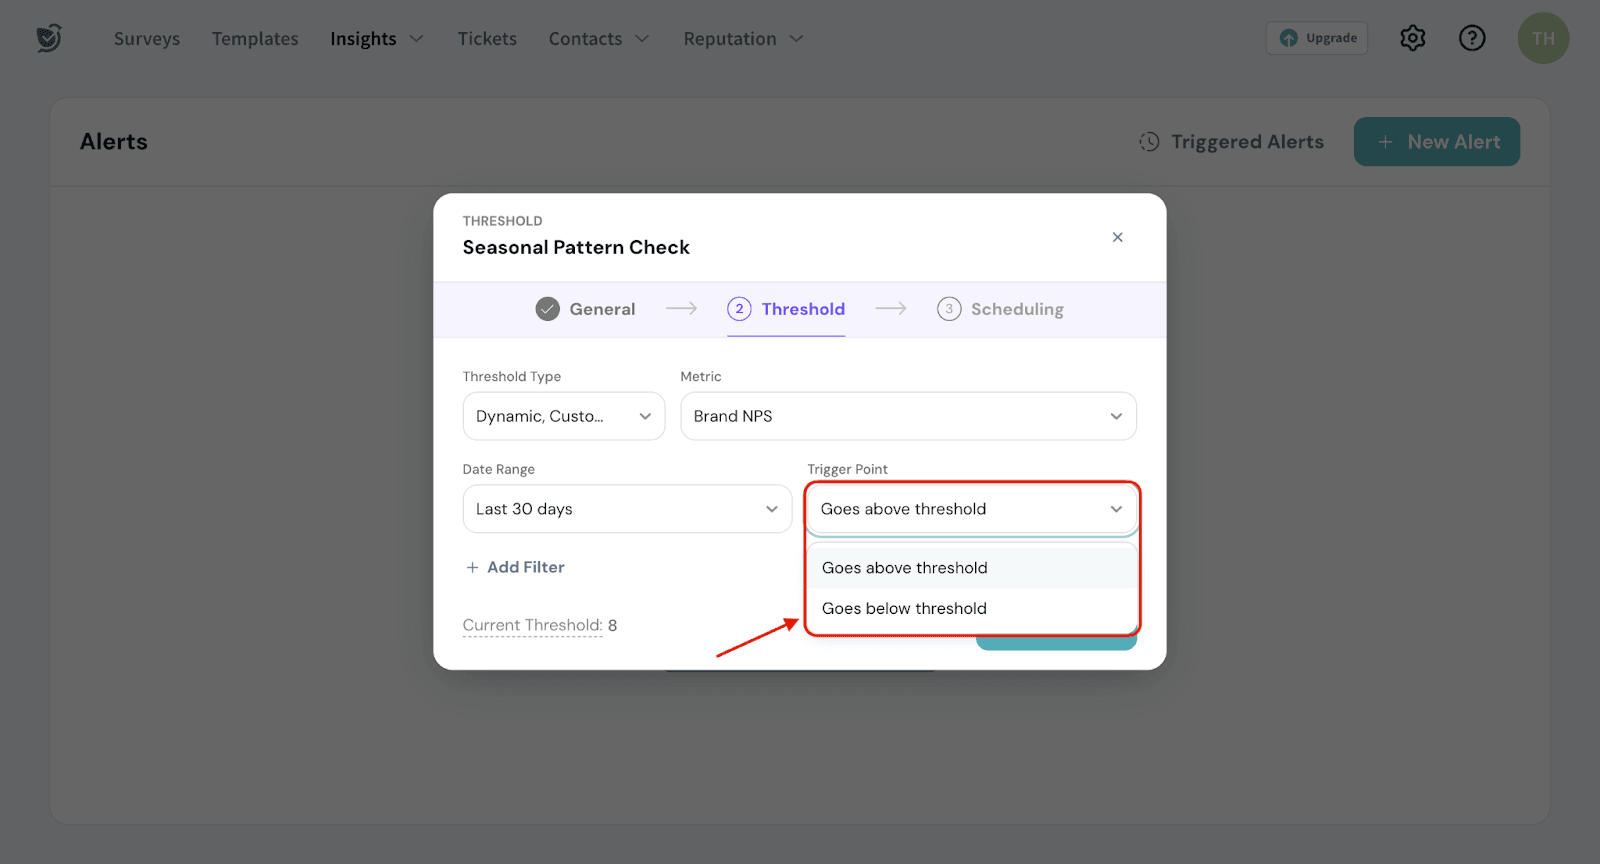
6. You can choose to add filters for the threshold metric.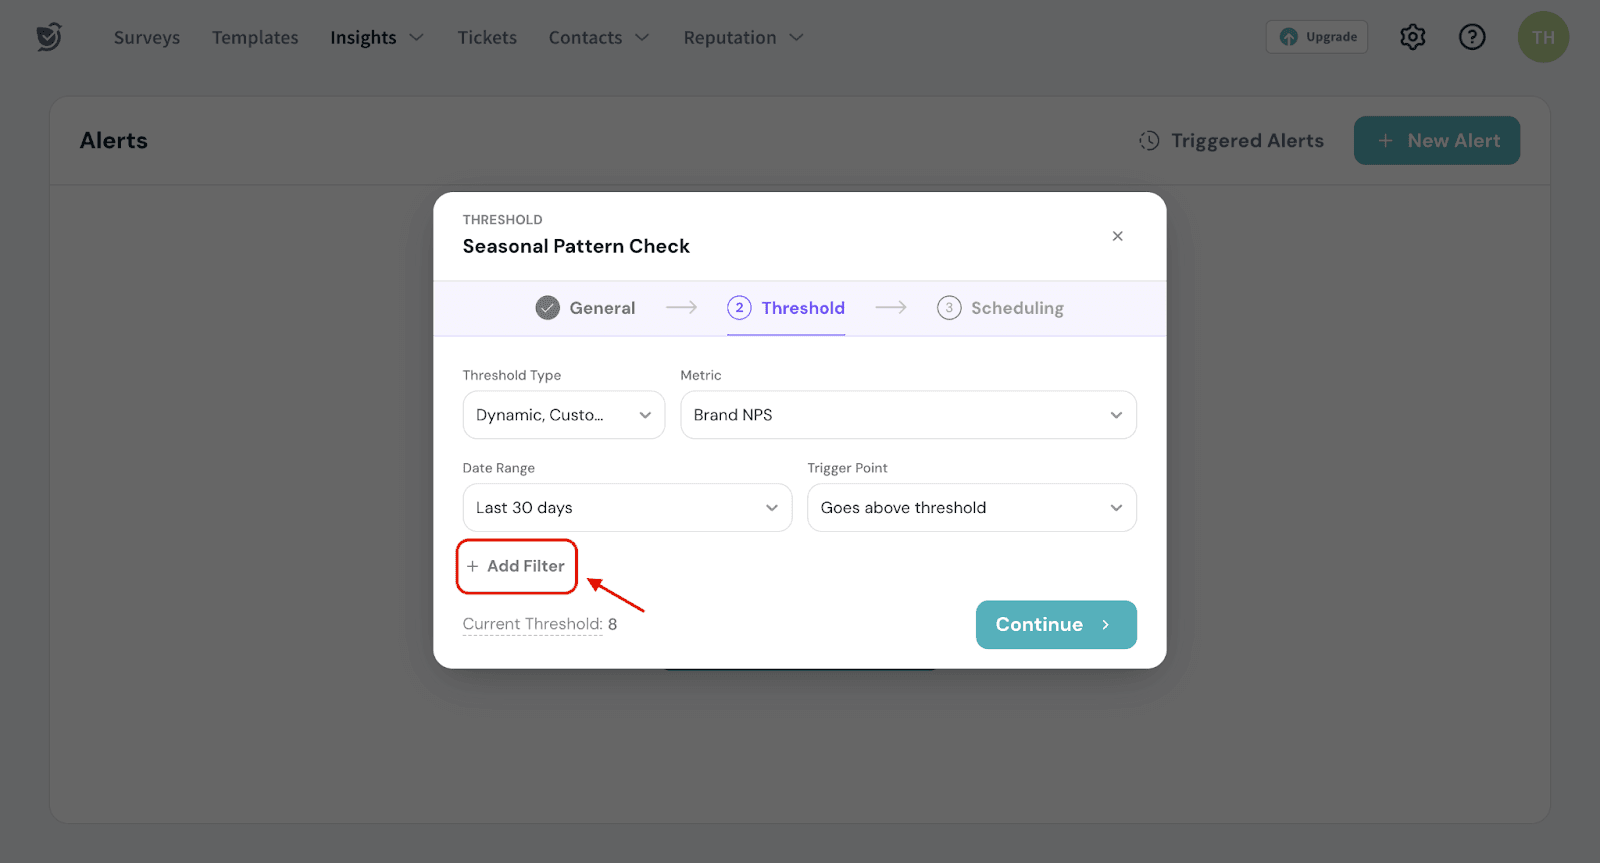
7. Click Continue.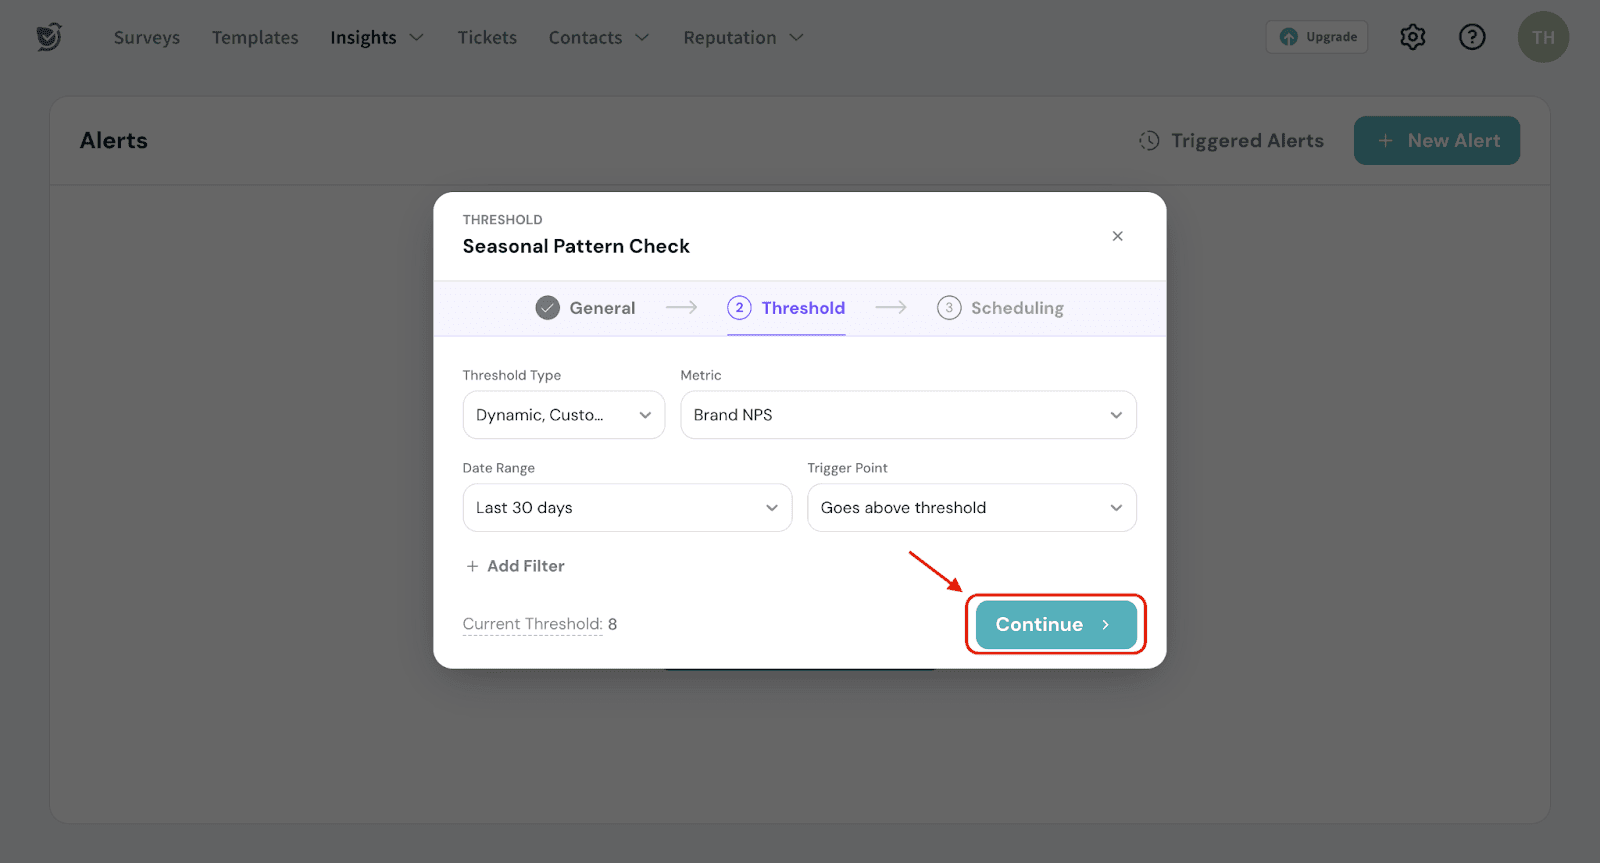
1. Decide how often you want to check for the alert condition.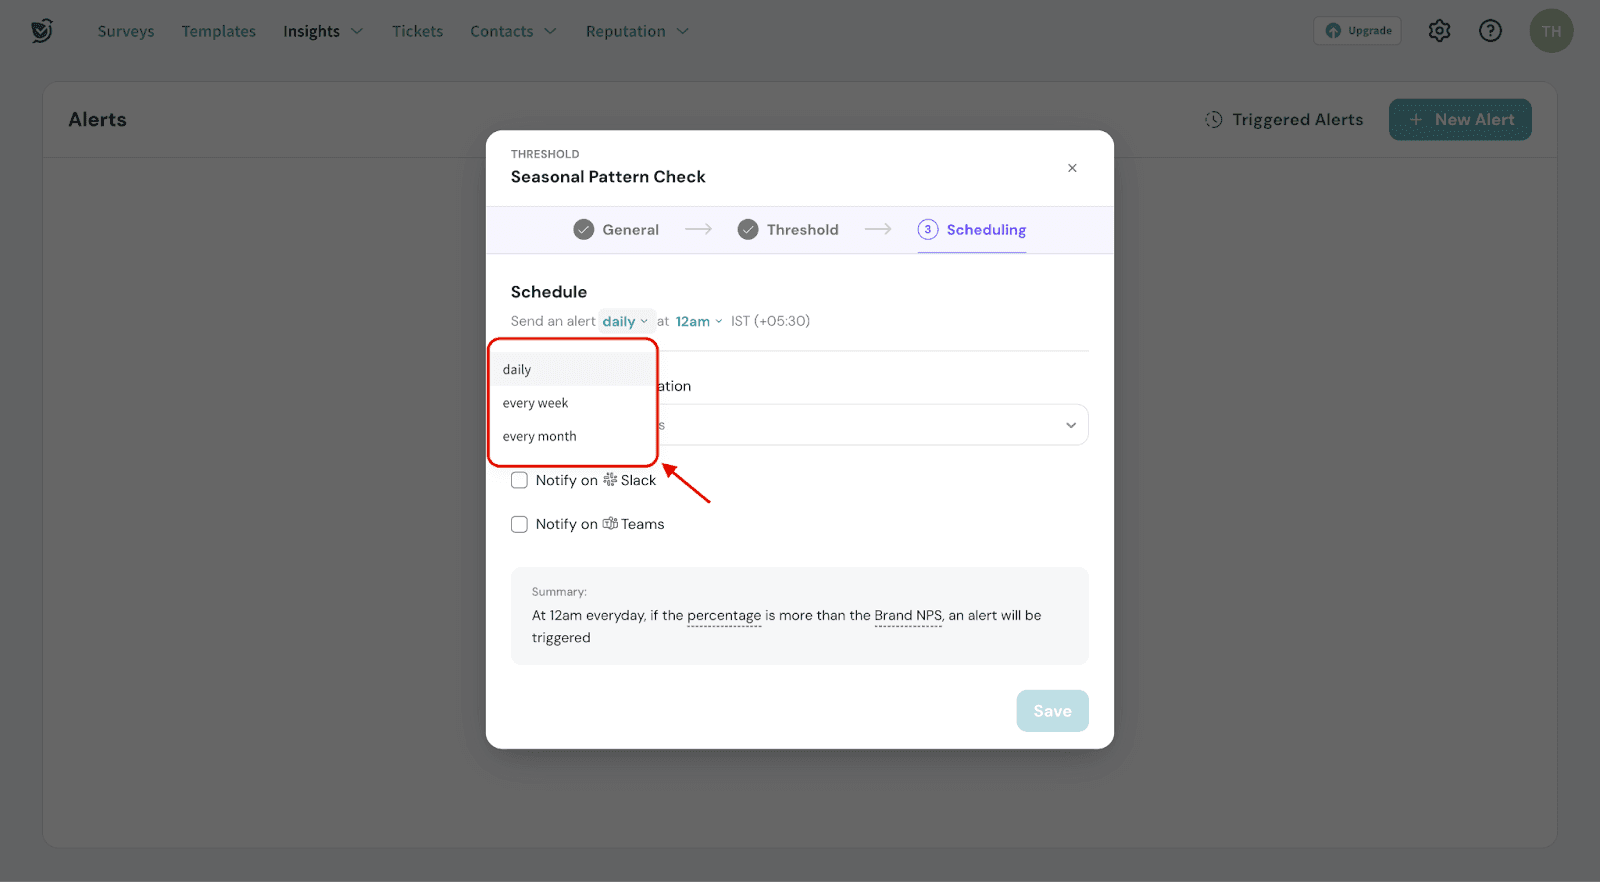
Note: You can specify the date, day, and time based on your choice of frequency.
2. Select the channel where you want to get notified.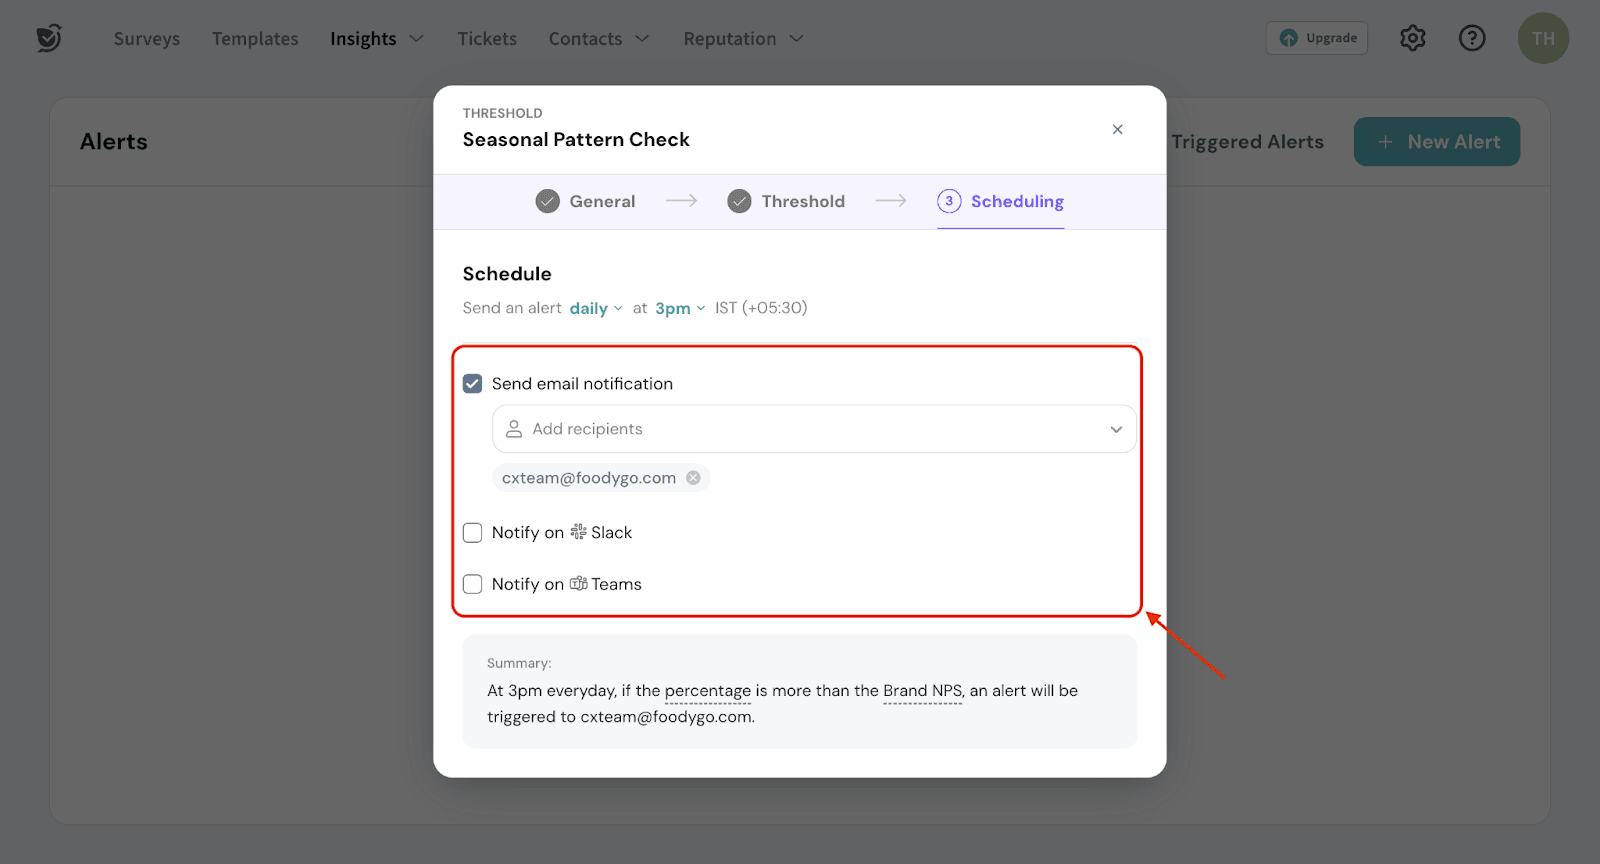
Note:
For notifications, you can also use Slack or Microsoft Teams channels:
3. Review the summary and click Save.
Setting up relative alerts helps you get notified when your metrics change by a specified percentage compared to a previous time period.
1. Enter a name for your alert.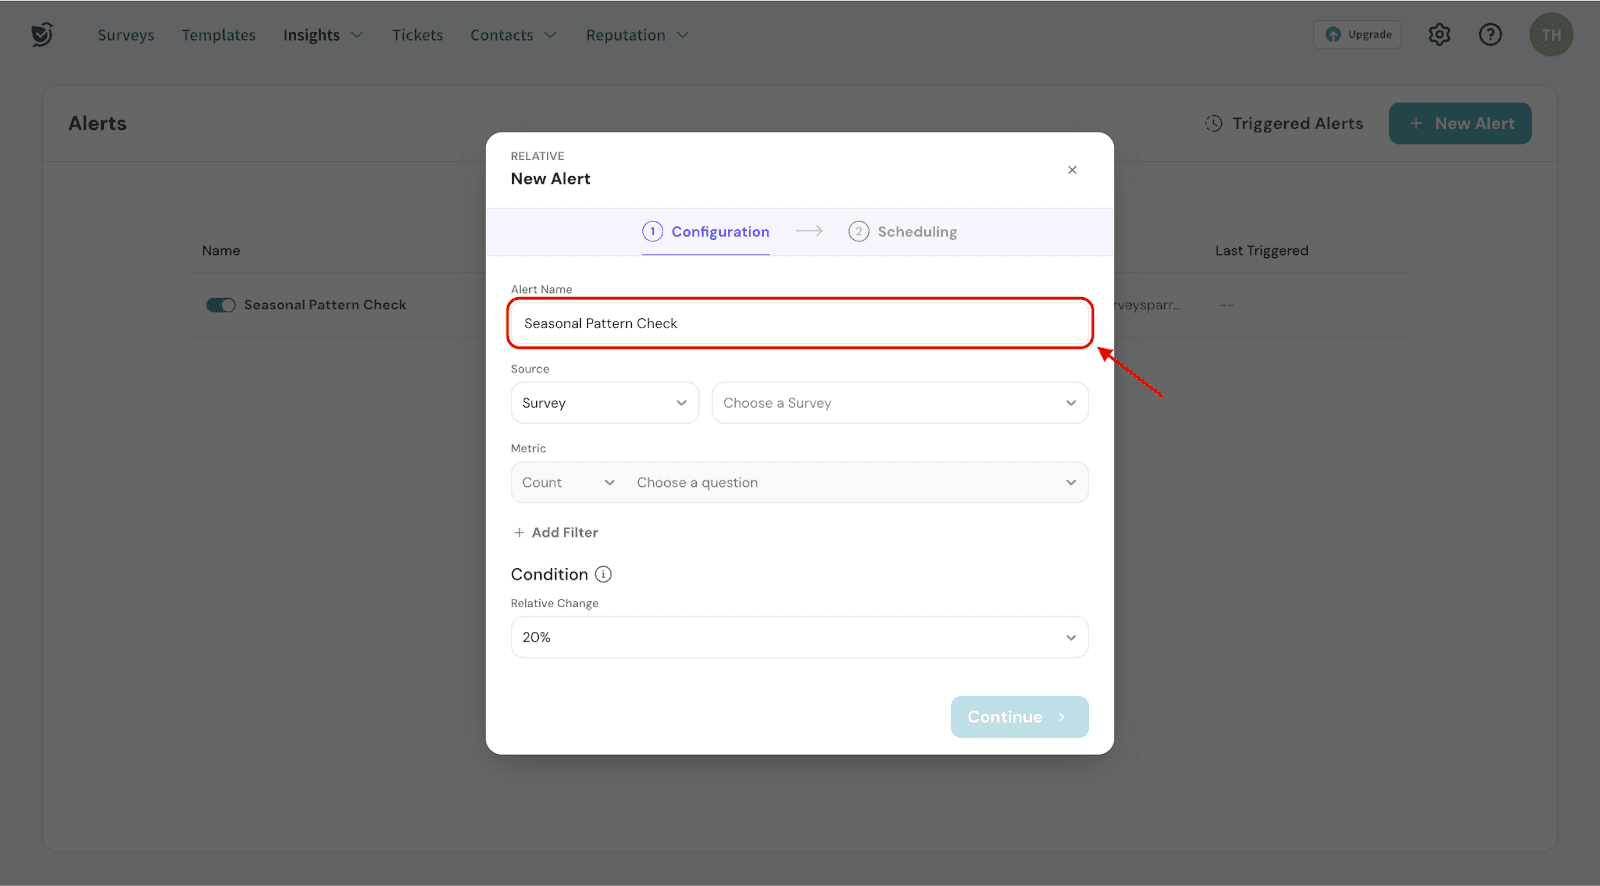
2. Select either Survey or Custom Metrics as your source.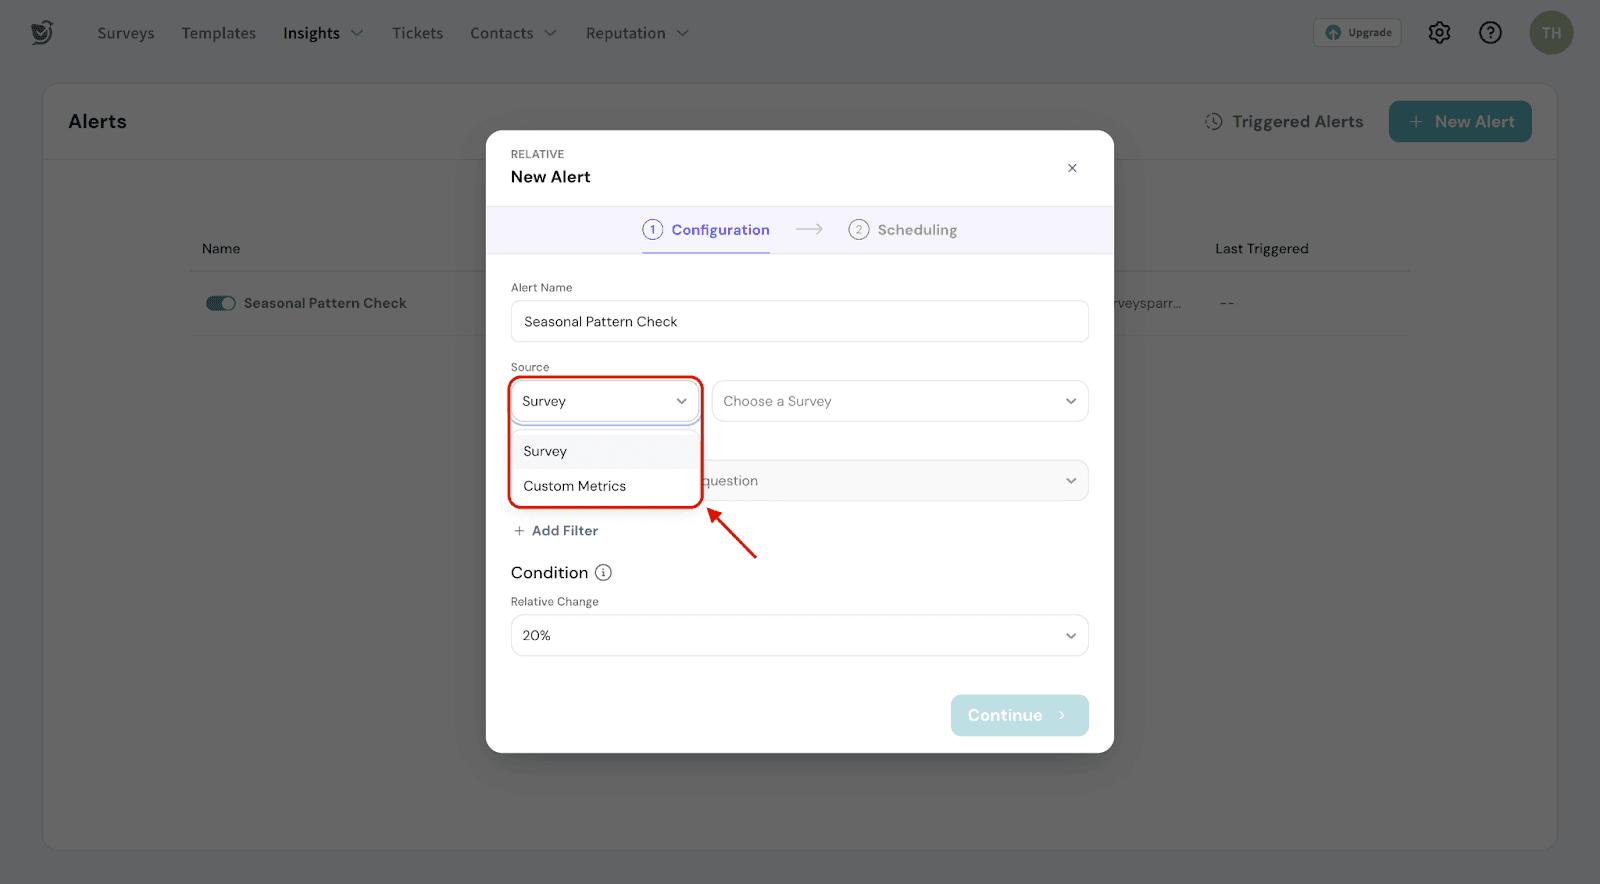
3. If you select Survey, configure the survey metrics you want to monitor.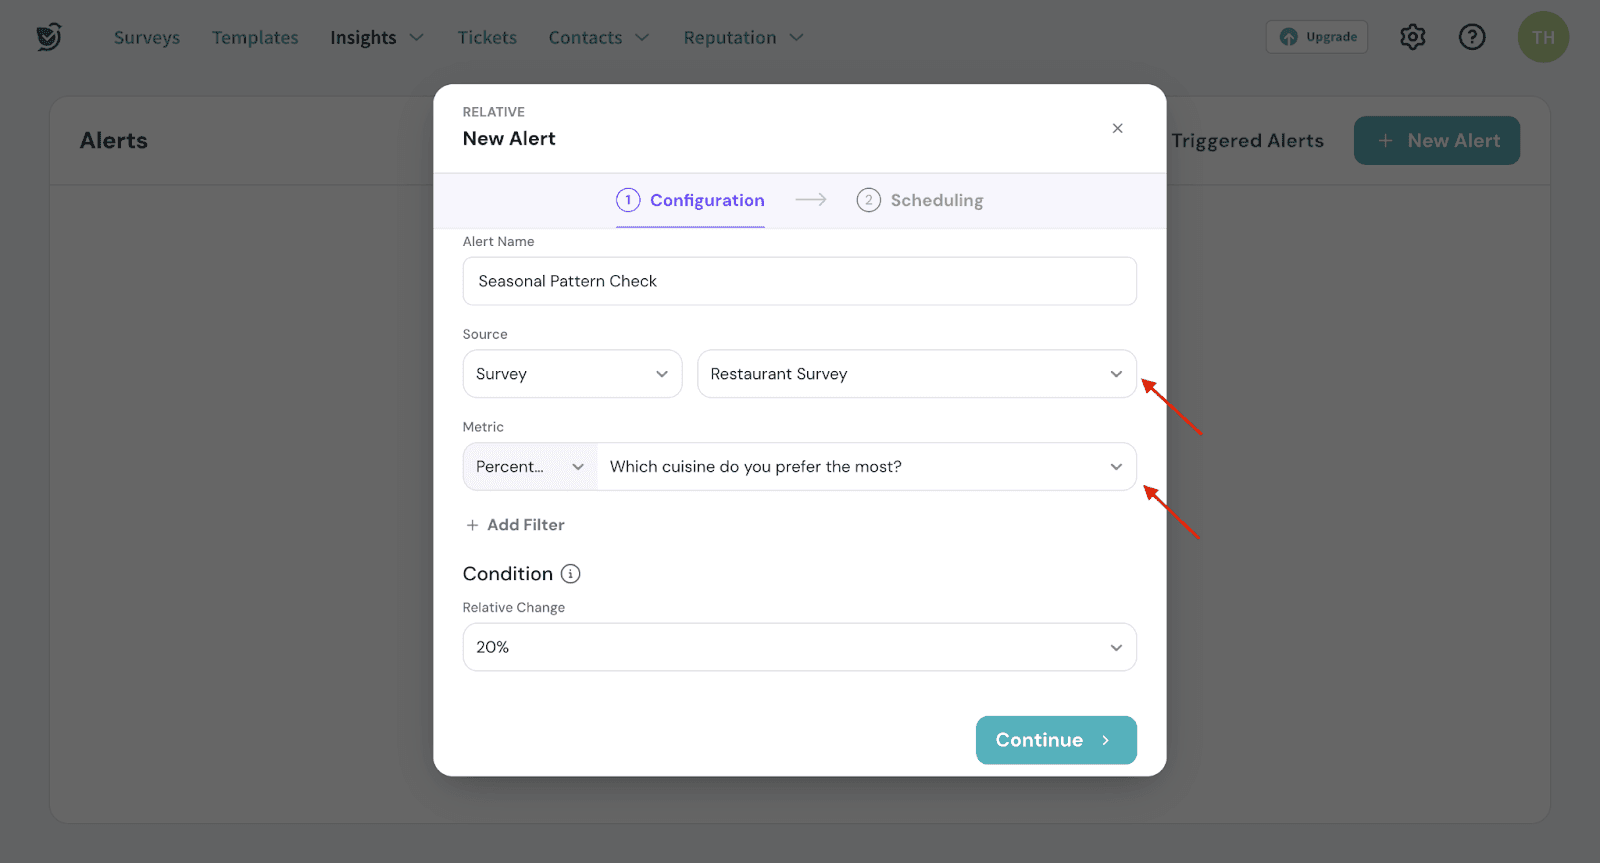
4. If you choose Custom Metrics, select the desired metric to monitor.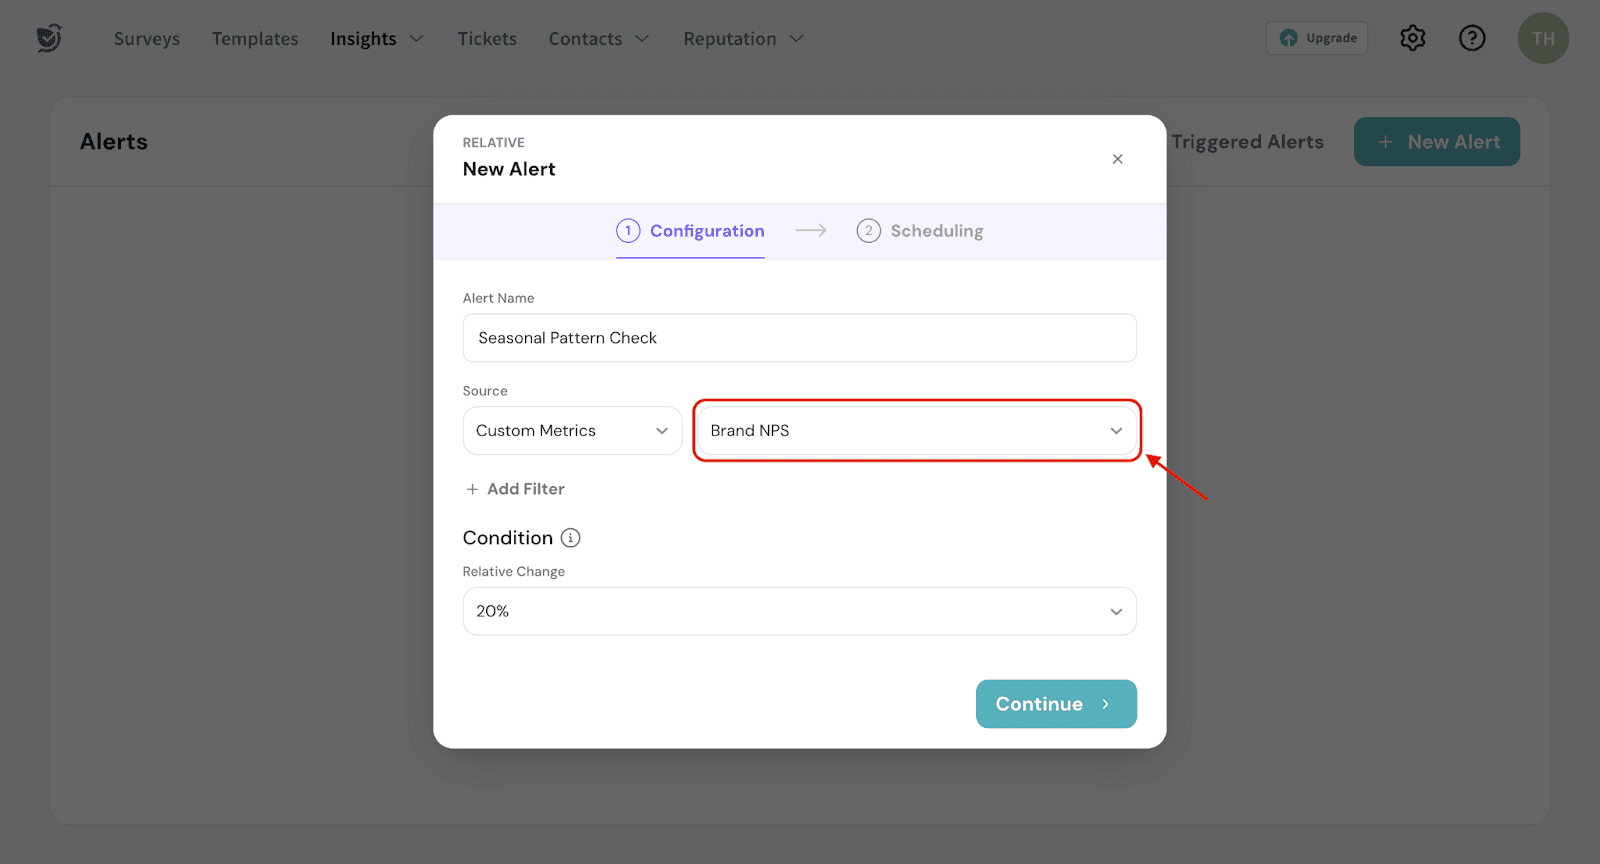
5. You can choose to add filters to focus on specific data.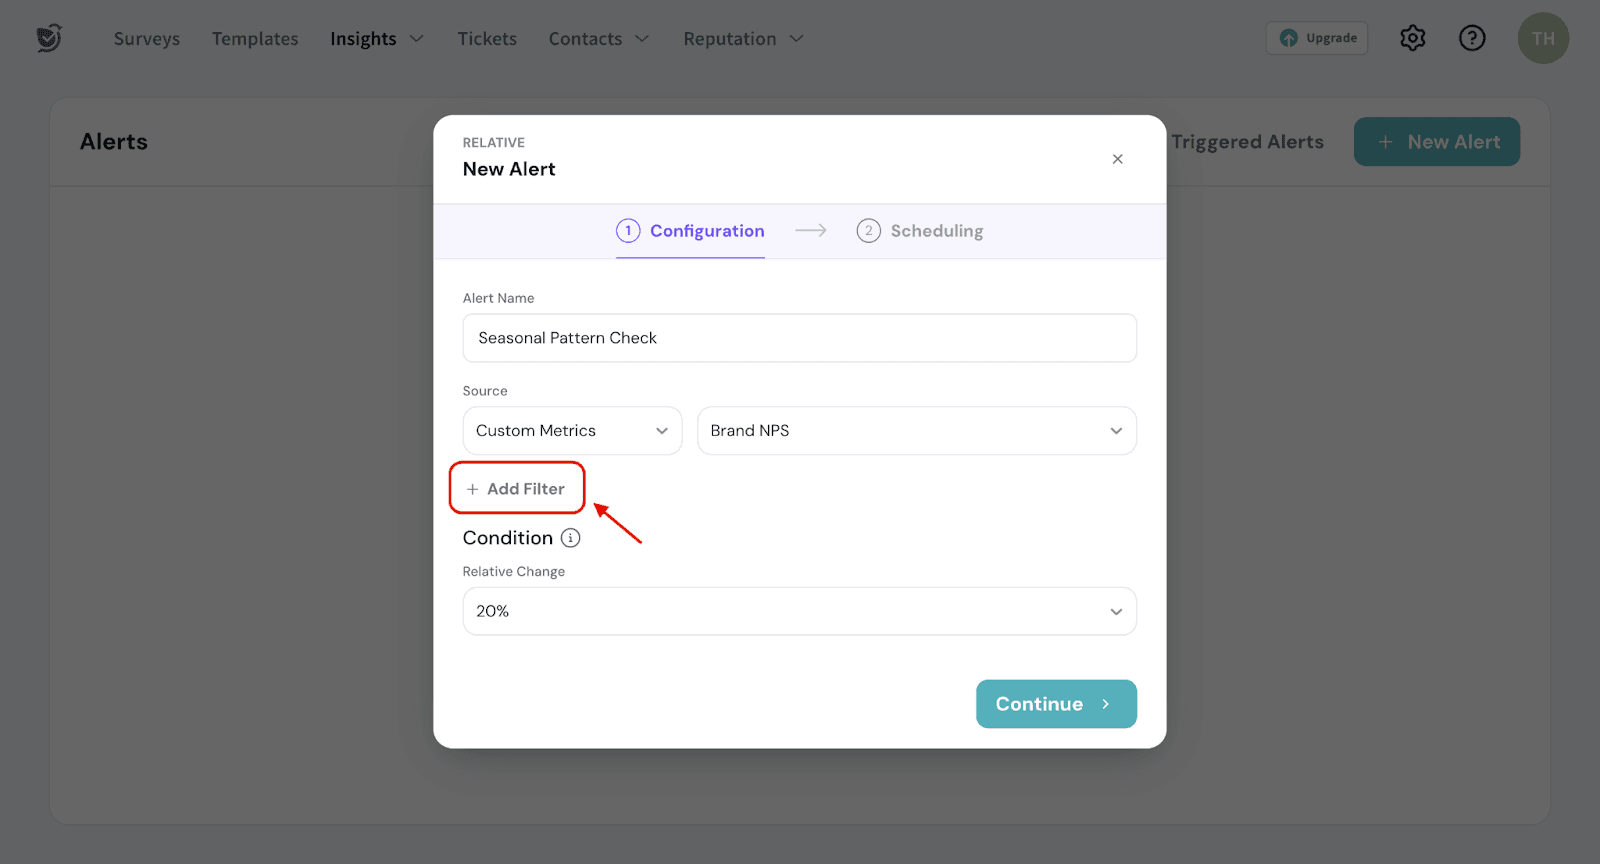
6. Choose the percentage of relative change to set the alert.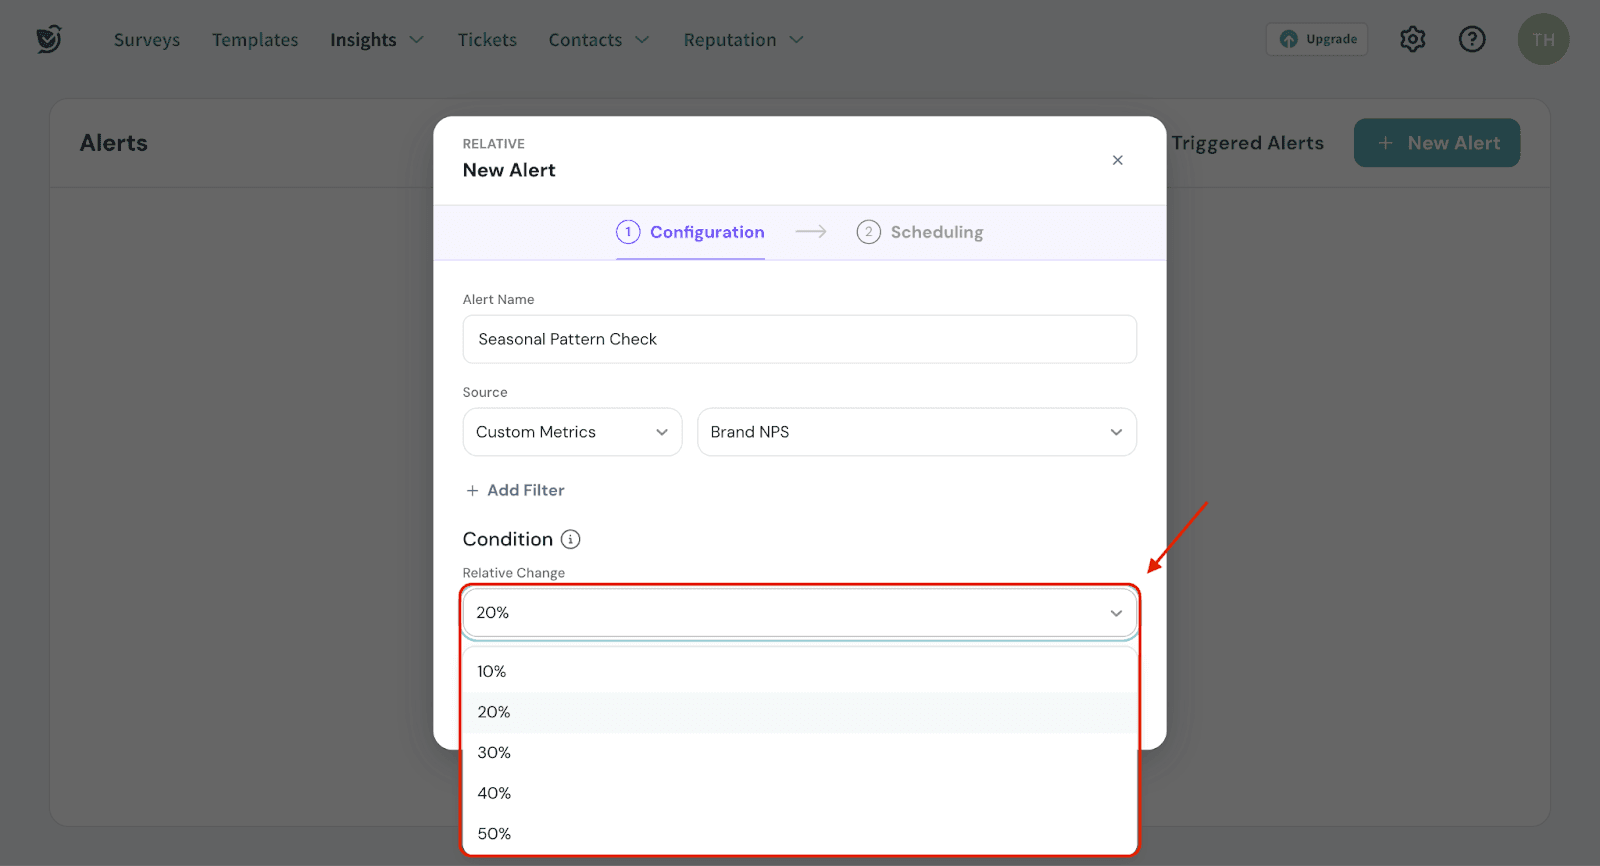
7. Click Continue.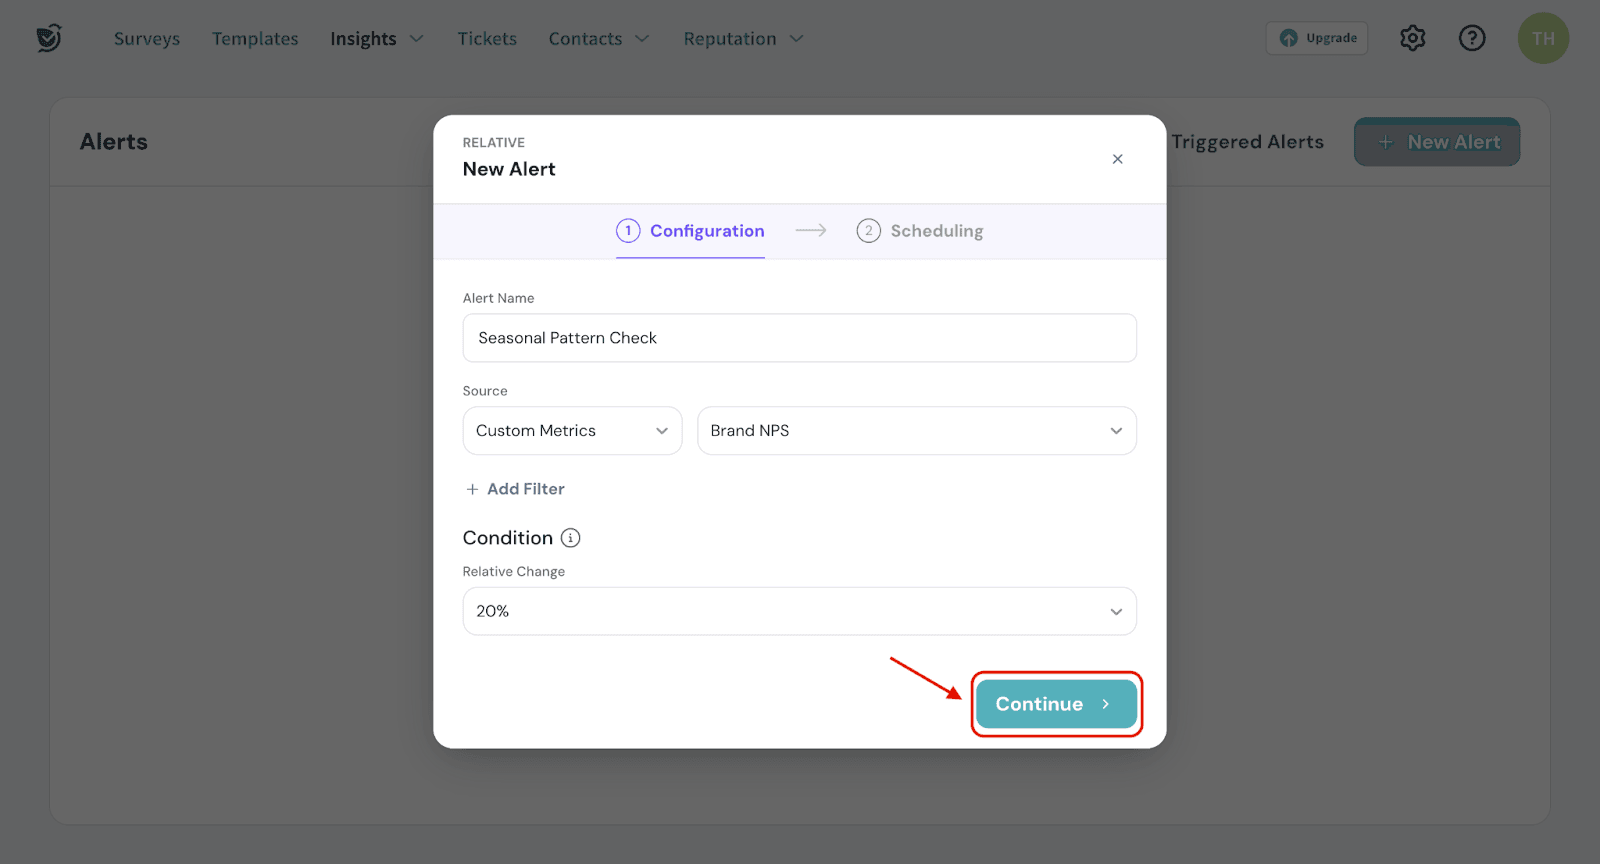
1. Choose the past time period you want to compare against.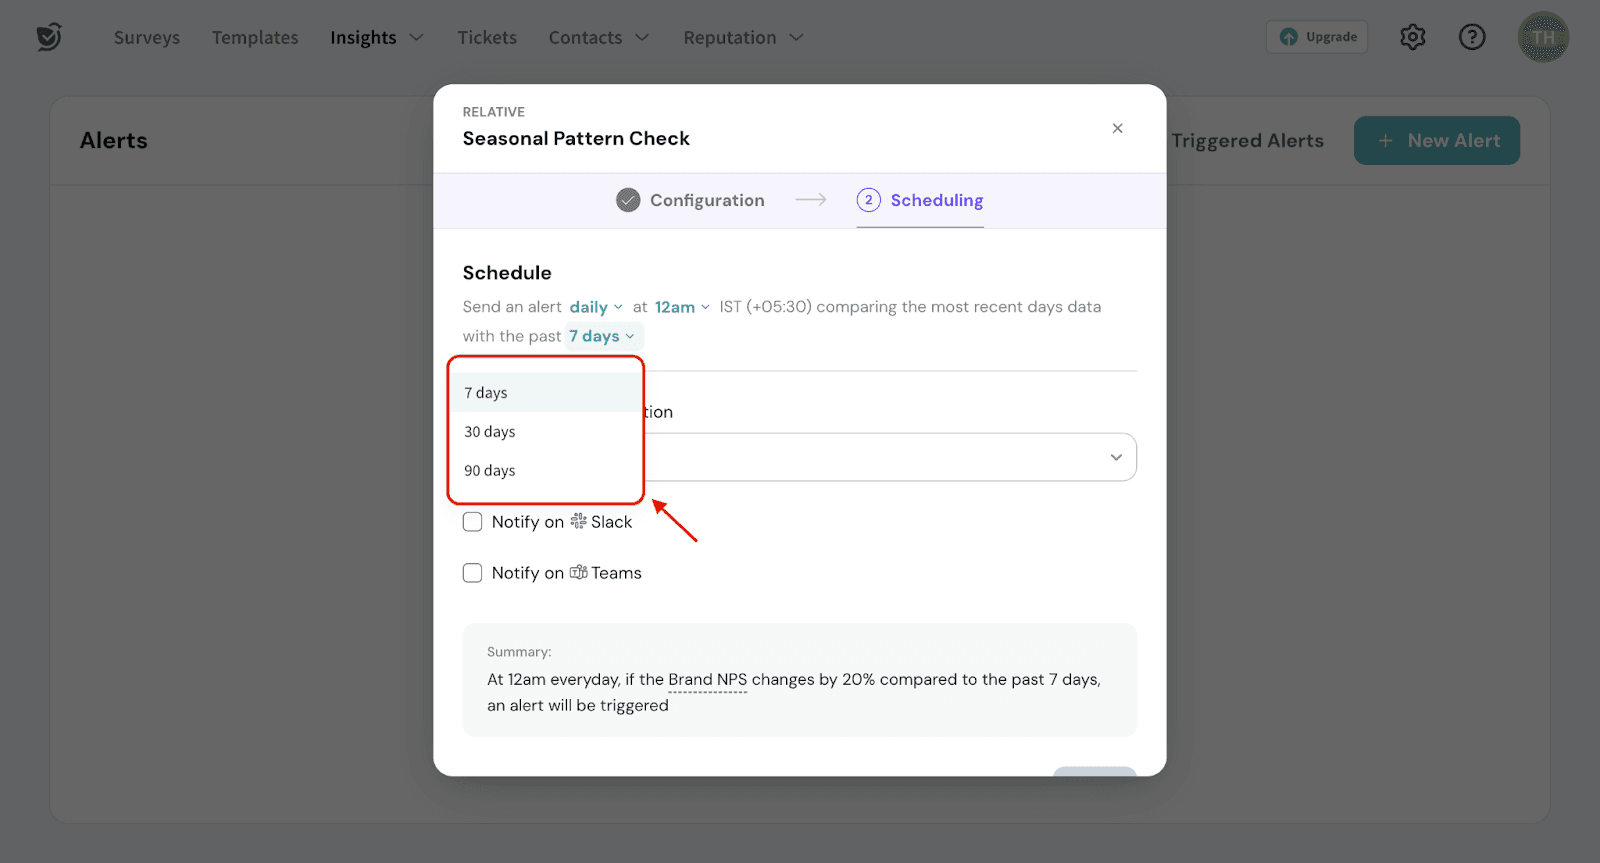
2. Select the channel where you want to get notified.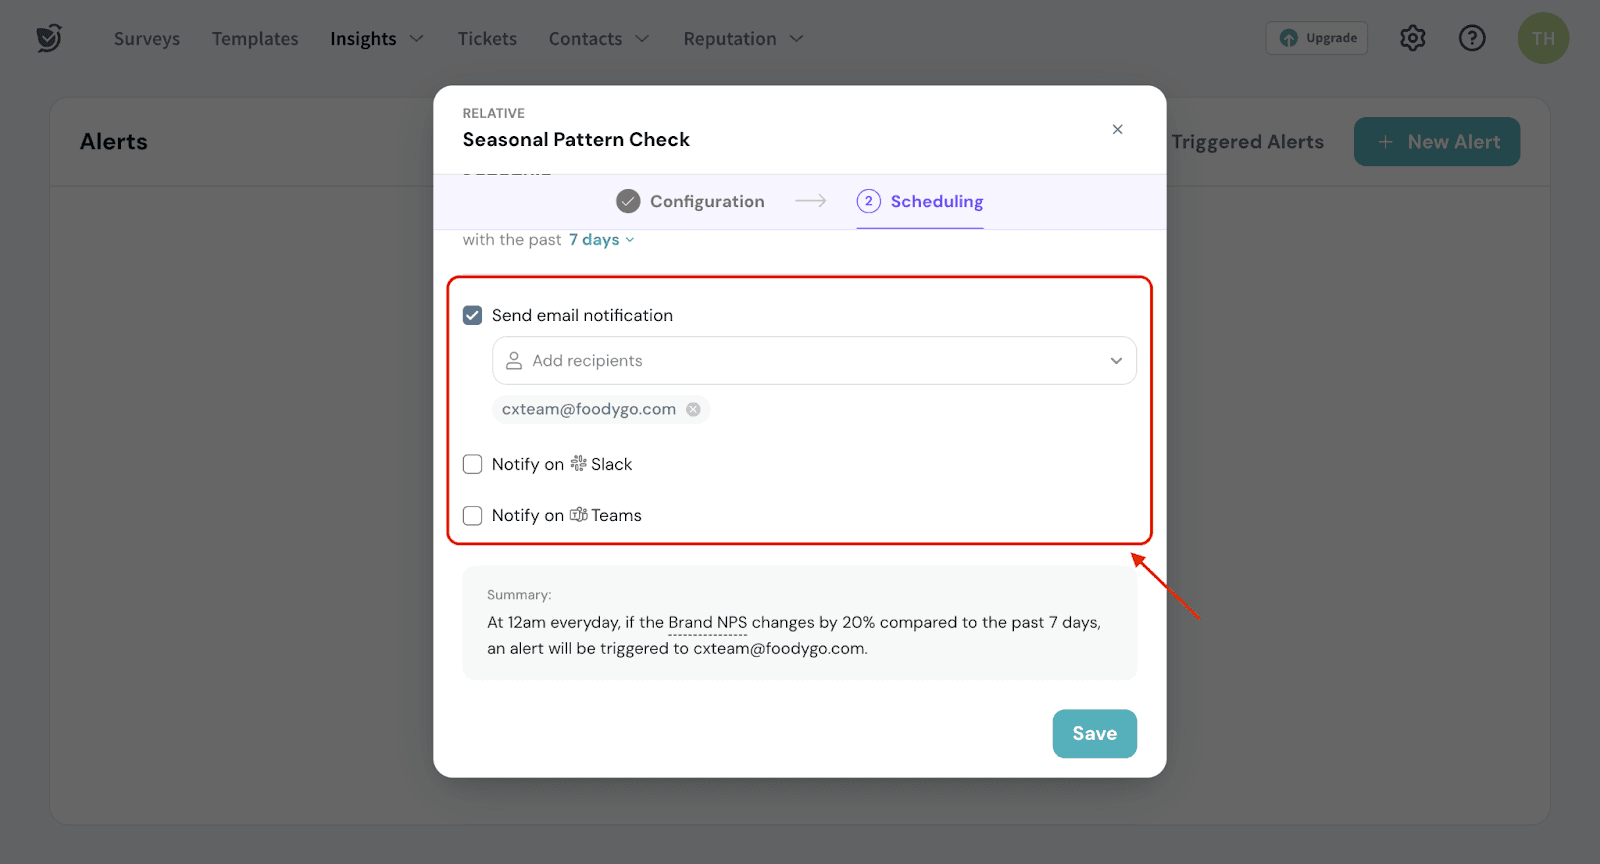
Note:
For notifications, you can also use Slack or Microsoft Teams channels:
3. Review the summary and click Save.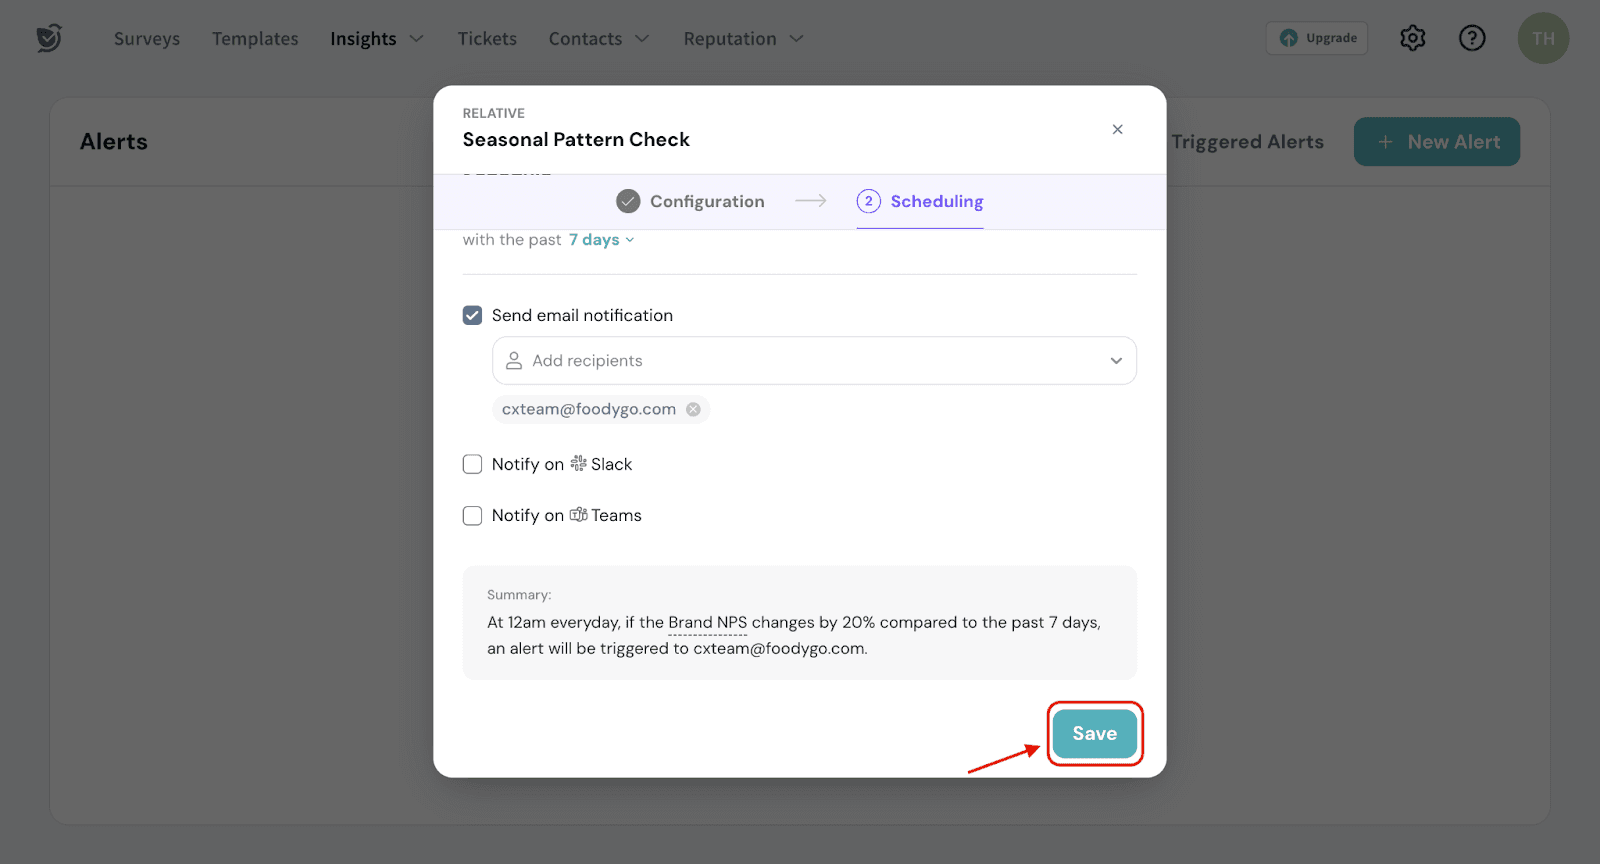
4. Toggle ON/OFF to enable or disable the alerts.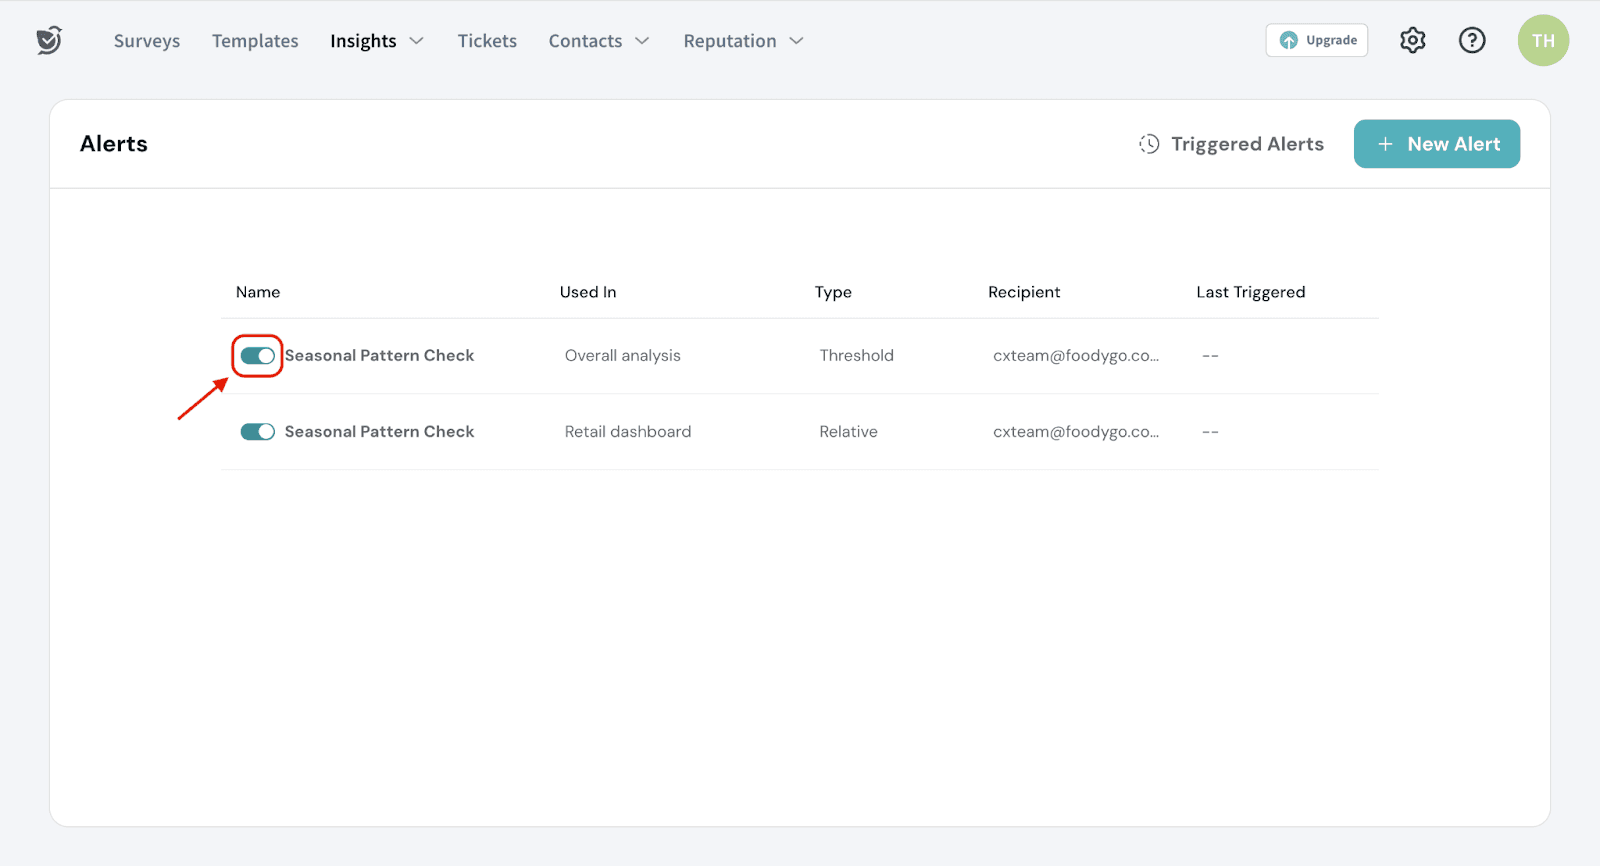
5. Click on the three dots at the right corner to check for the trigger history or to edit or delete the alert.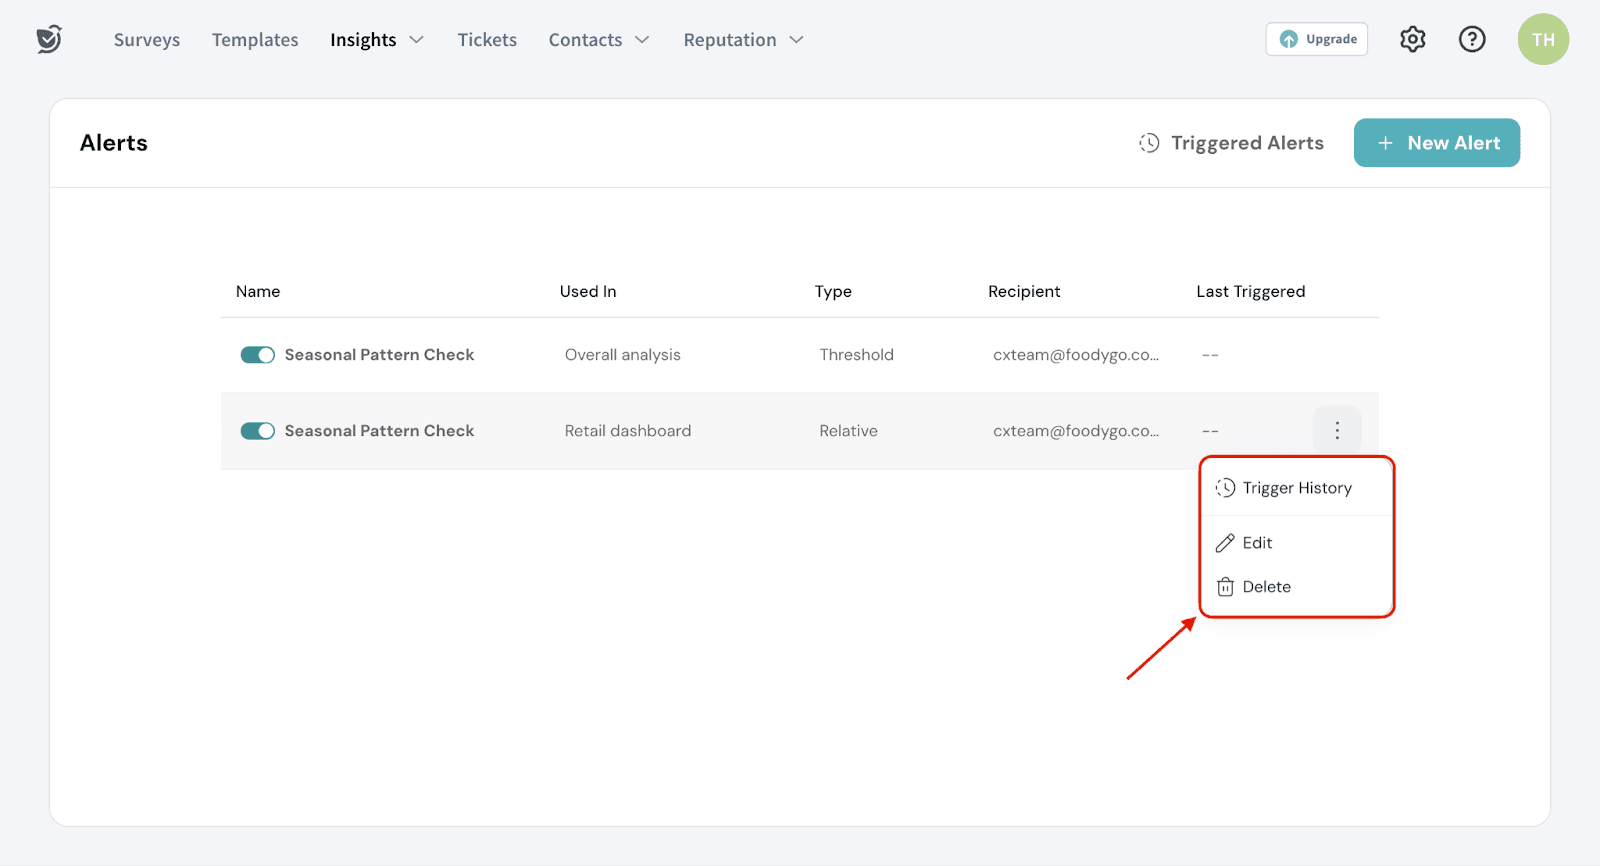
To know when alerts are activated and the details of each triggering event,
1. Click Trigger History.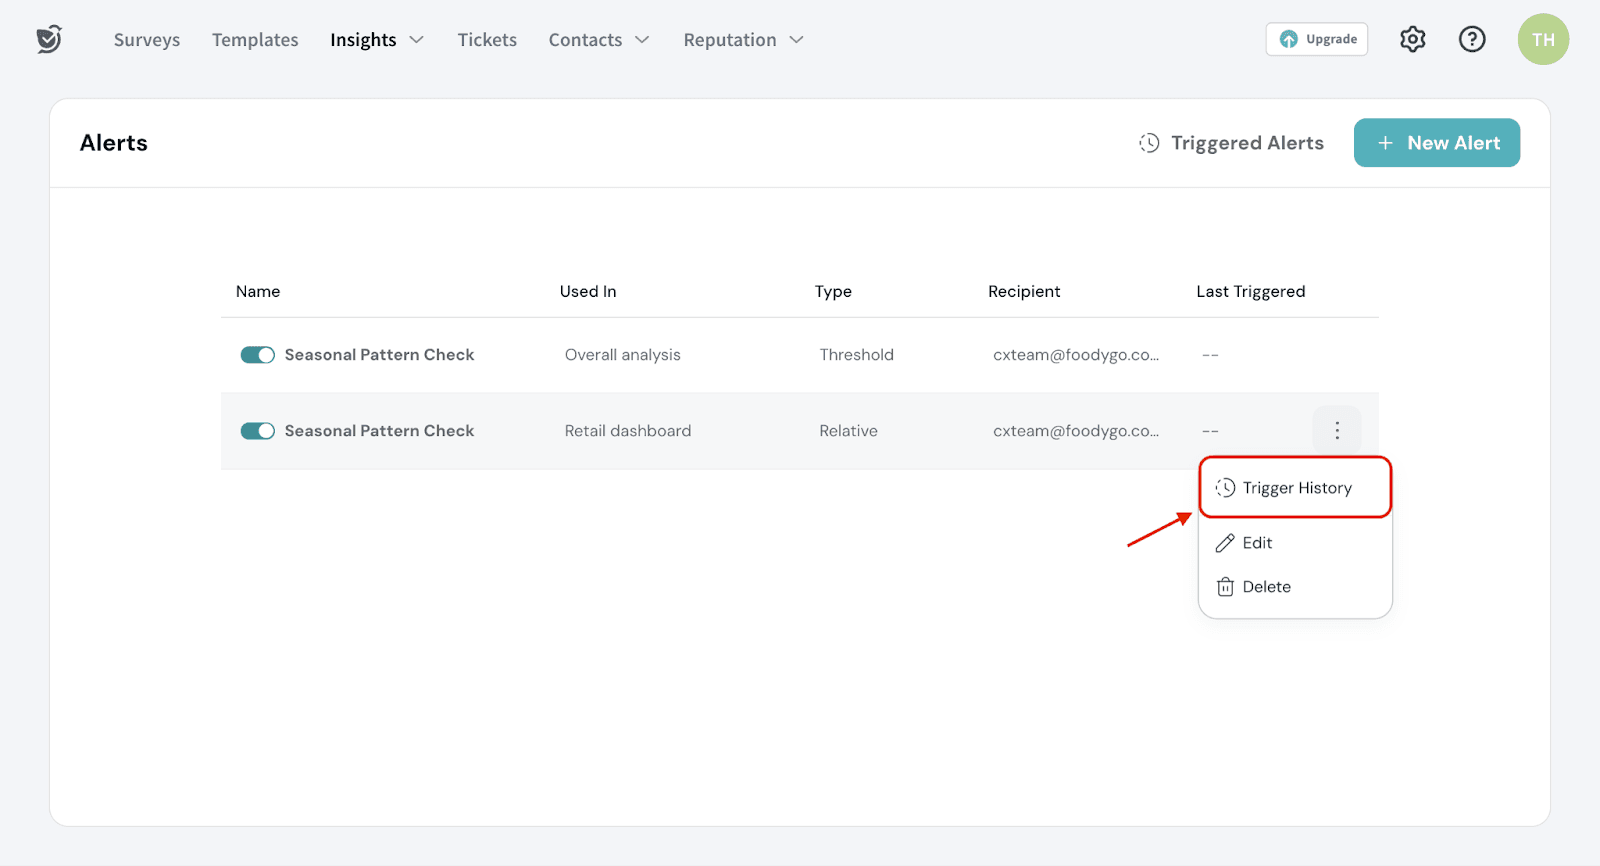
Gain a clear record of when and how the alert was triggered.
Apart from setting alerts globally, you can also set alerts on a dashboard level.
Here’s how:
1. Click the alert icon on the dashboard page.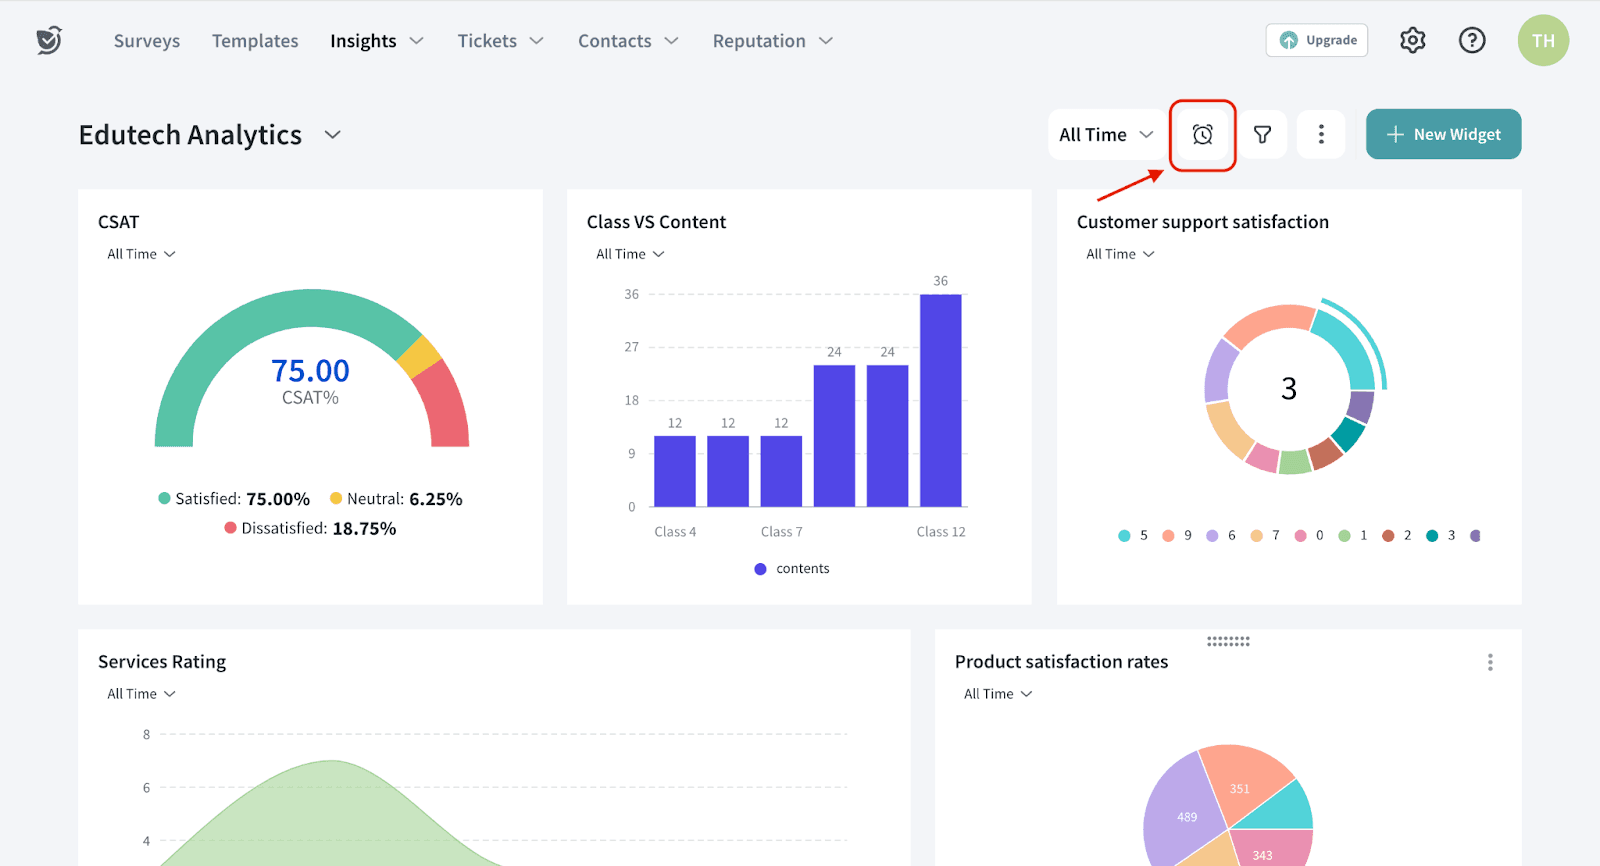
2. Click Create New Alert.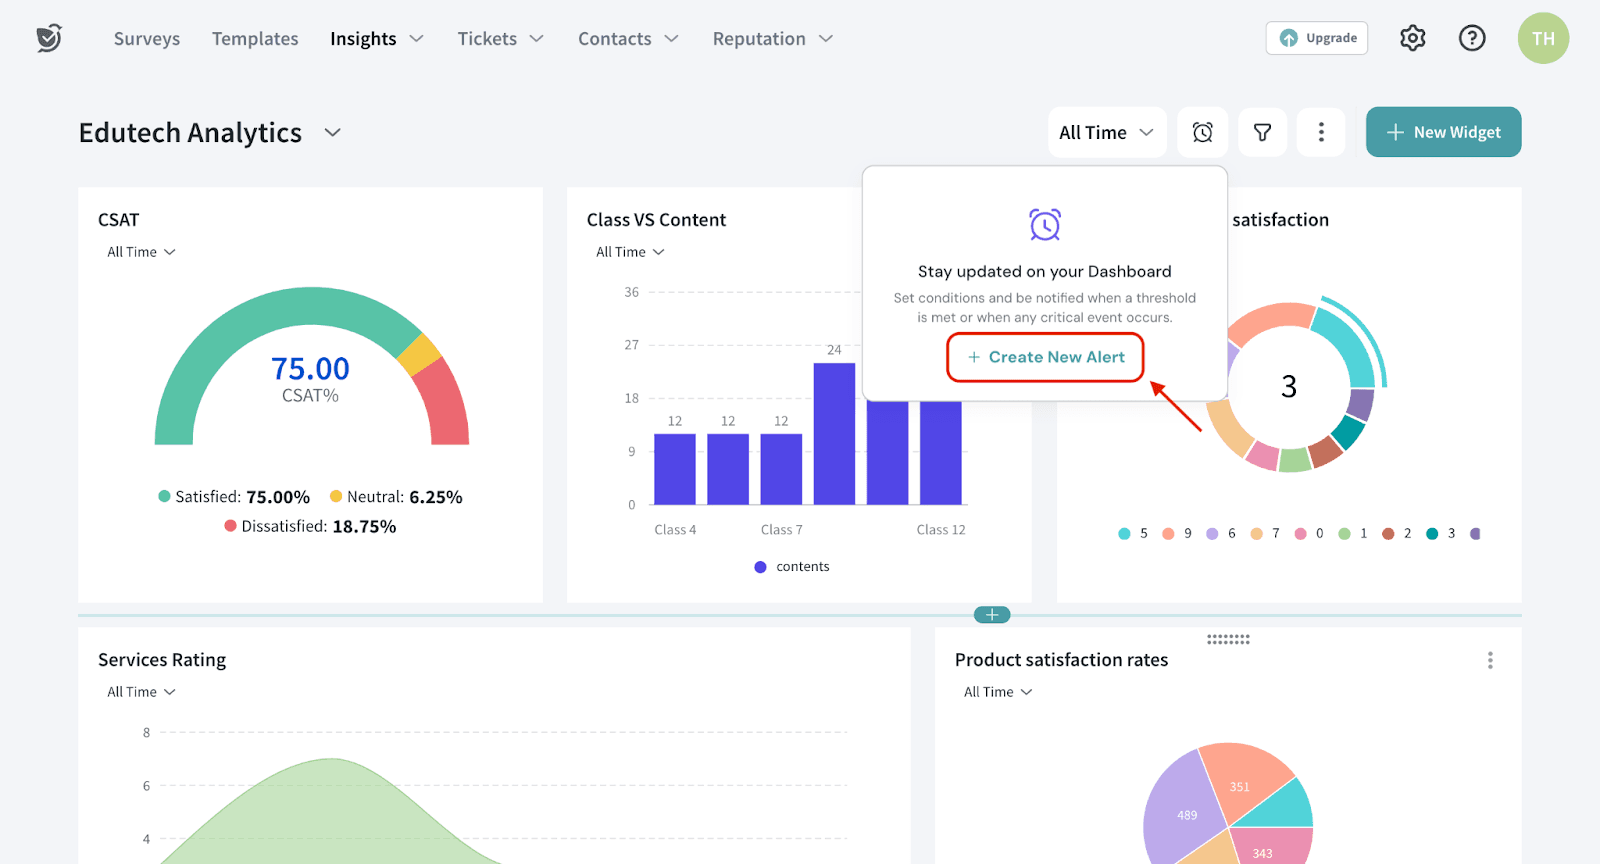
3. Choose the type of alert.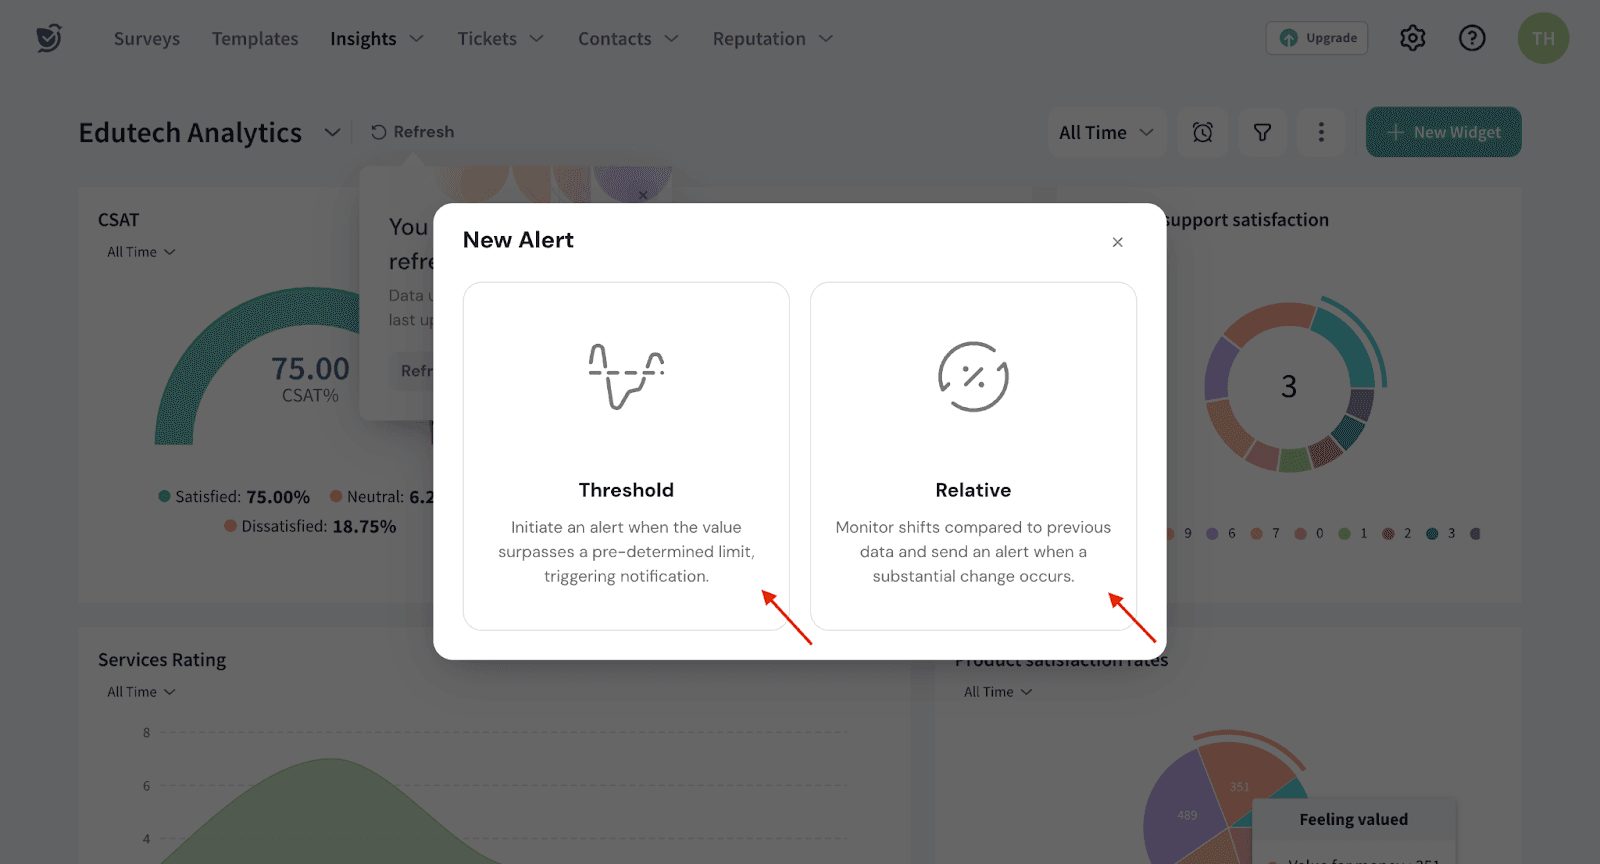
And continue with the steps mentioned to set up Threshold alerts and Relative alerts.
Below is an example of how alert notifications will appear in your Email.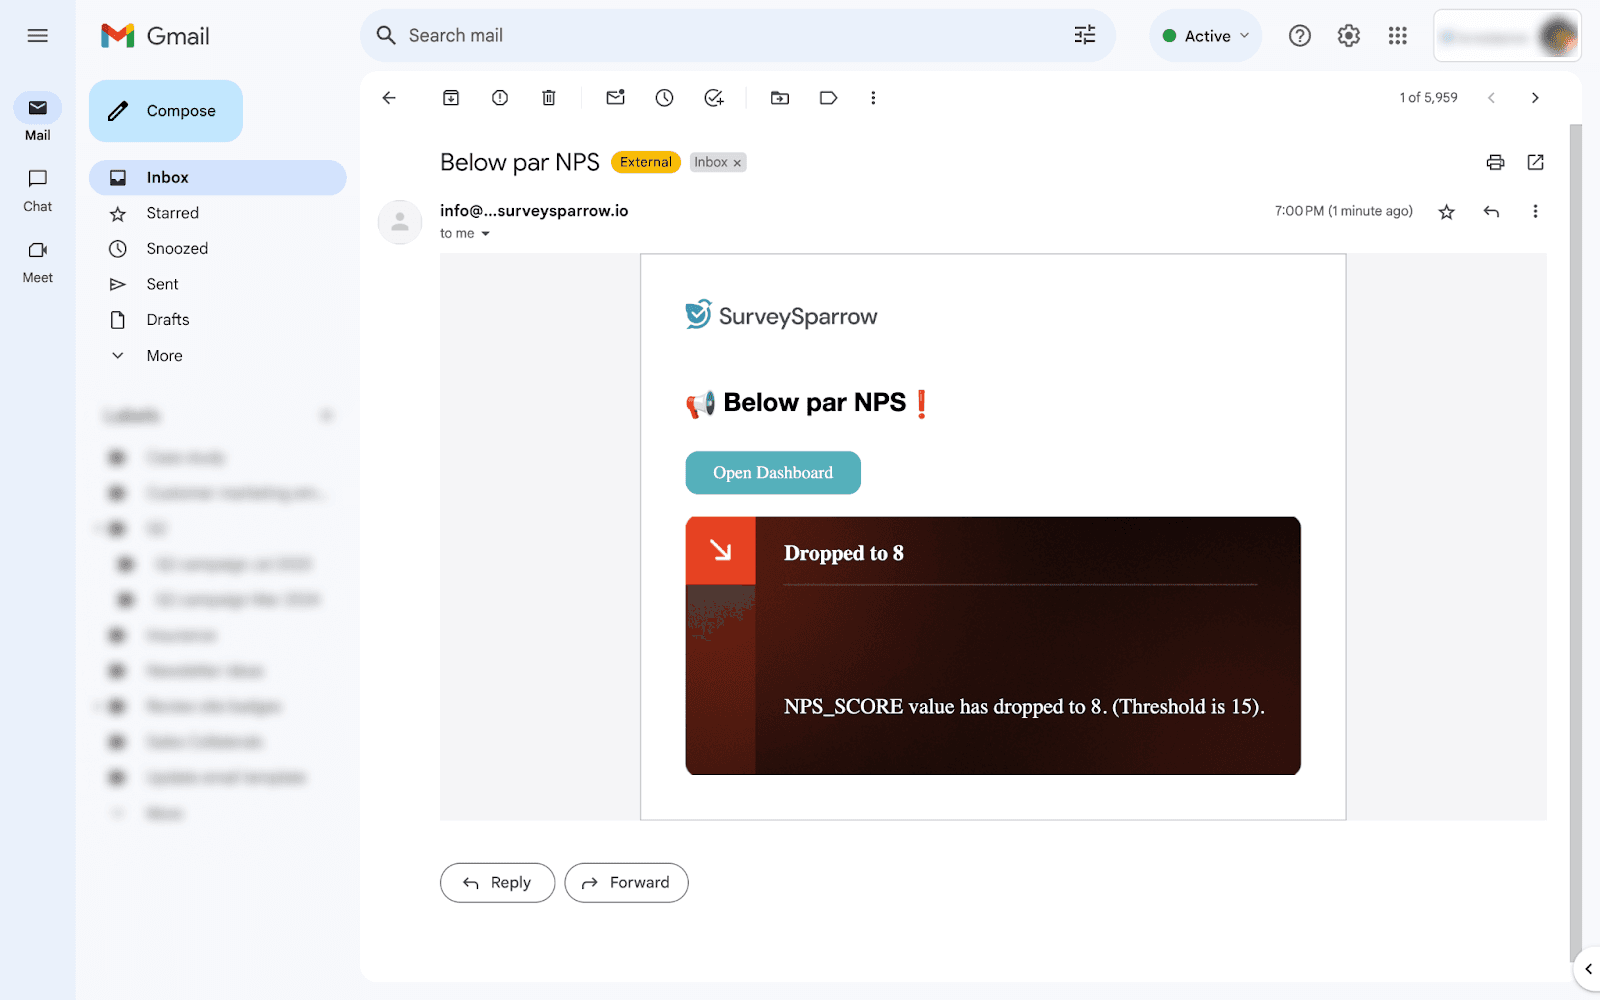
Note: On clicking Open Dashboard, you will be redirected to the dashboard with the specific metric.
Triggered Alerts show a comprehensive list of all the alerts that have been activated, providing details of each event.
1. Click Triggered Alerts.
2. Select the date range.
3. Analyze the triggered alerts to identify patterns and track frequent notifications.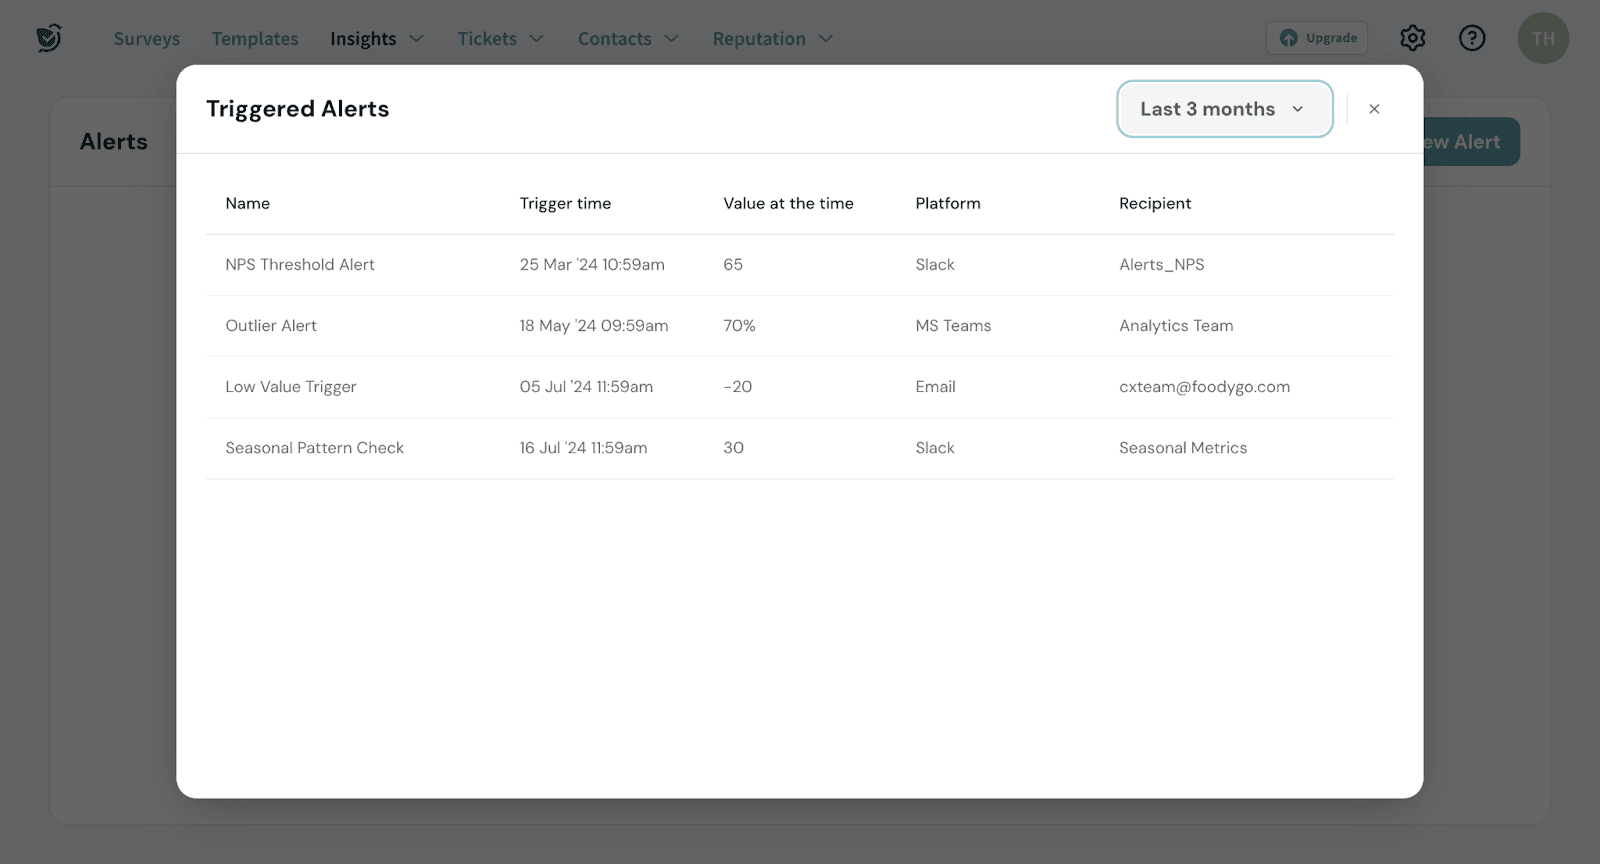
With these alerts set up, you'll stay informed about your important metrics without constant checking. Set up alerts and experience a more efficient, responsive approach to data management.
Feel free to reach out to our community if you have any questions.
Powered By SparrowDesk