Salesforce Integration - Sandbox to Production Migration
Venkata
January 17, 2025
Integrating SurveySparrow with Salesforce allows for seamless data flow and automation. This article will walk you through migrating your SurveySparrow Apex Triggers and Classes from Salesforce Sandbox to Production.
Step 1 - Configure Salesforce Integration in SurveySparrow (Sandbox)
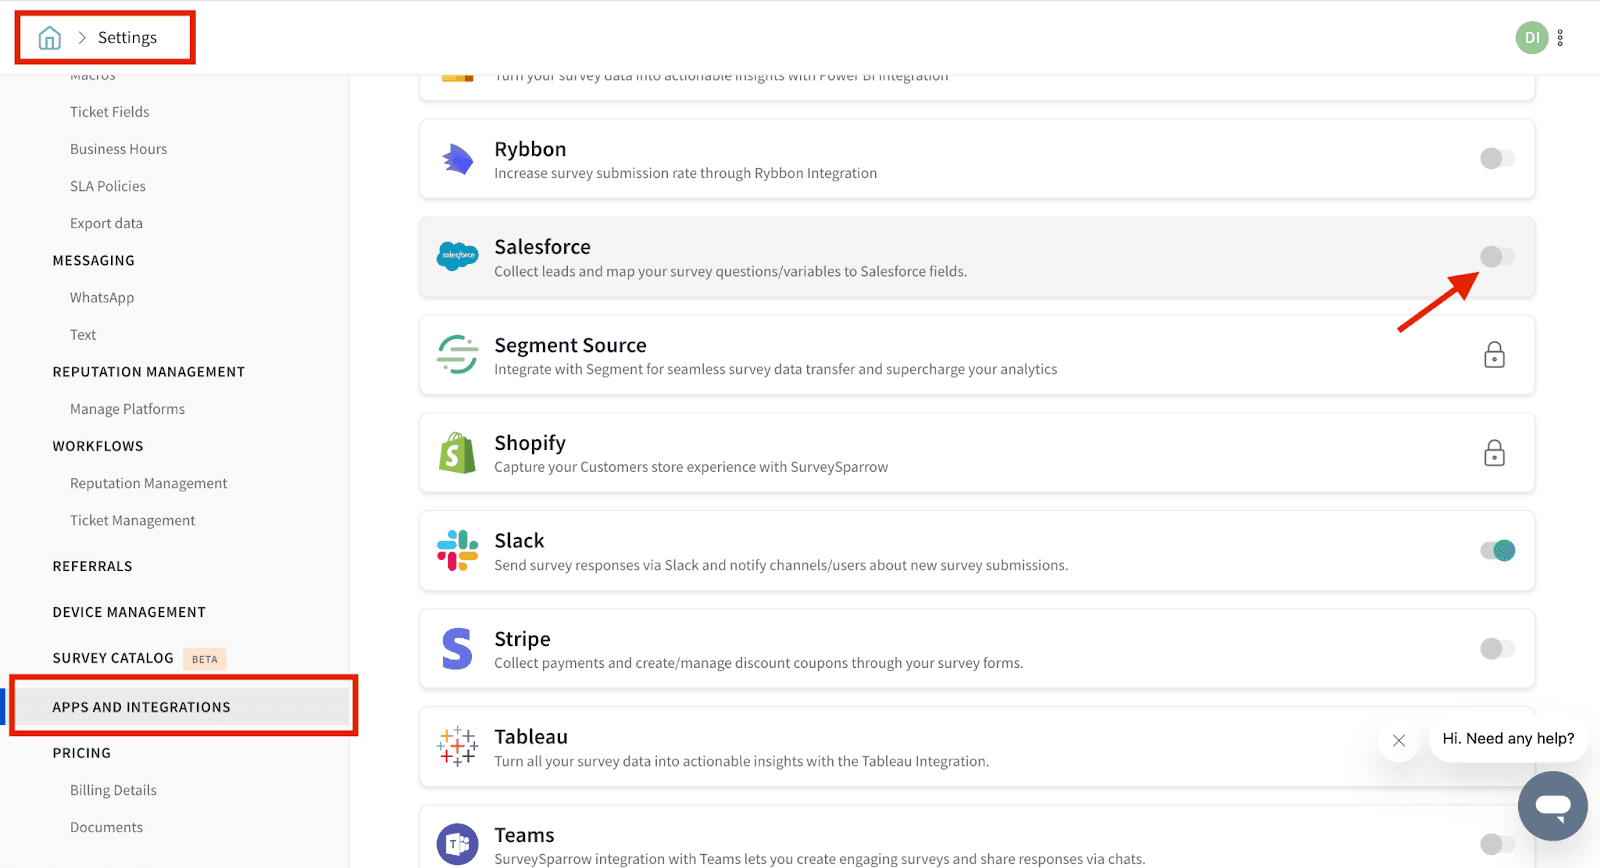
Navigate to Account Settings:
In your SurveySparrow account, go to the account level settings.
Select "Apps & Integrations."
Look for Salesforce integration and turn it on.
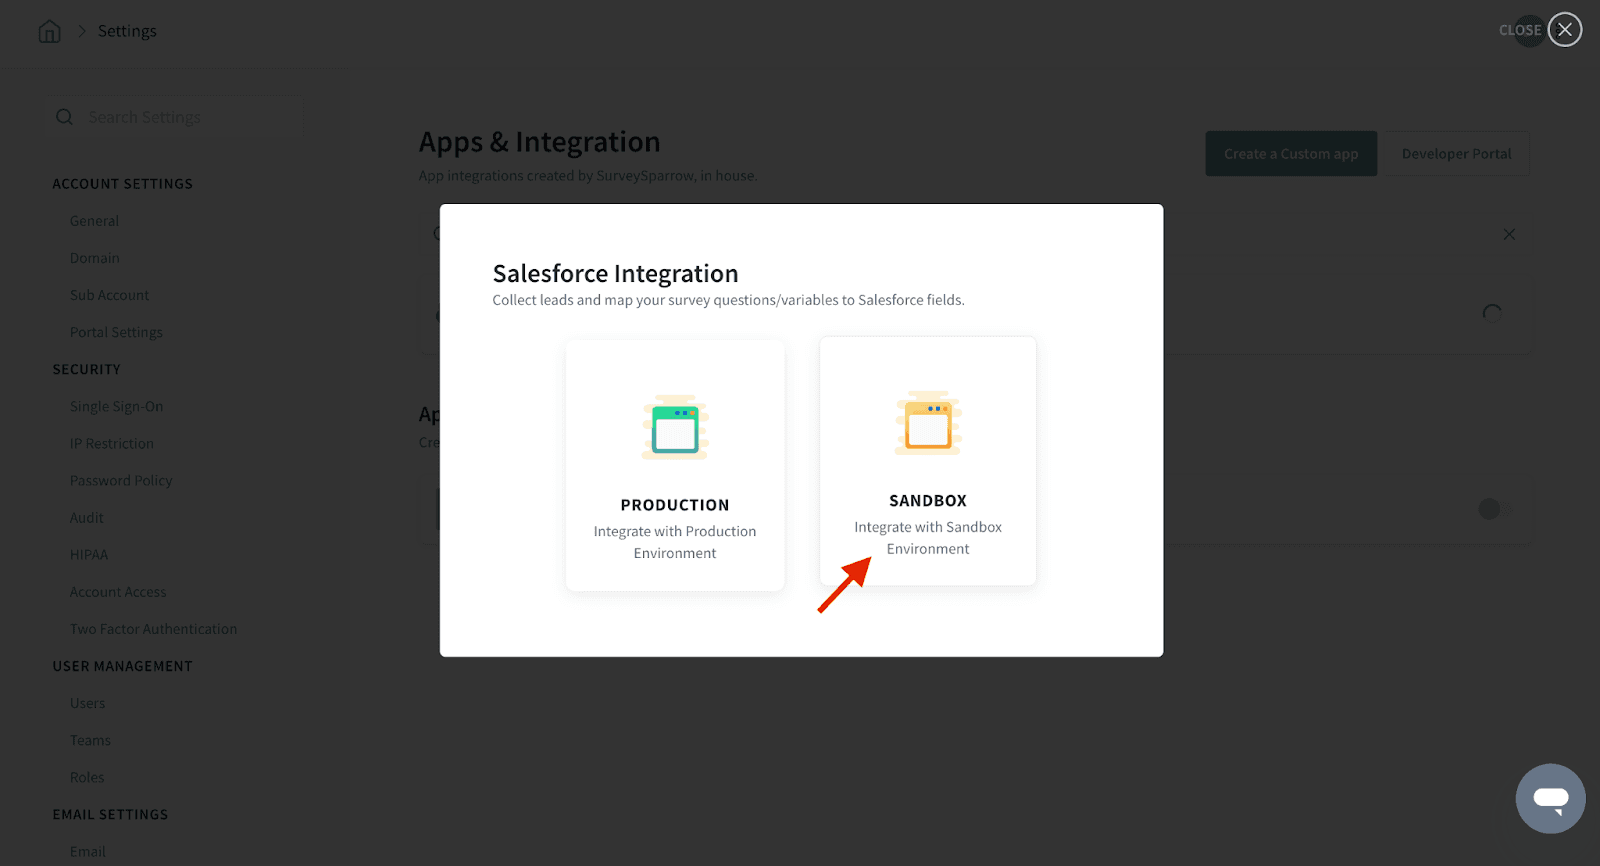
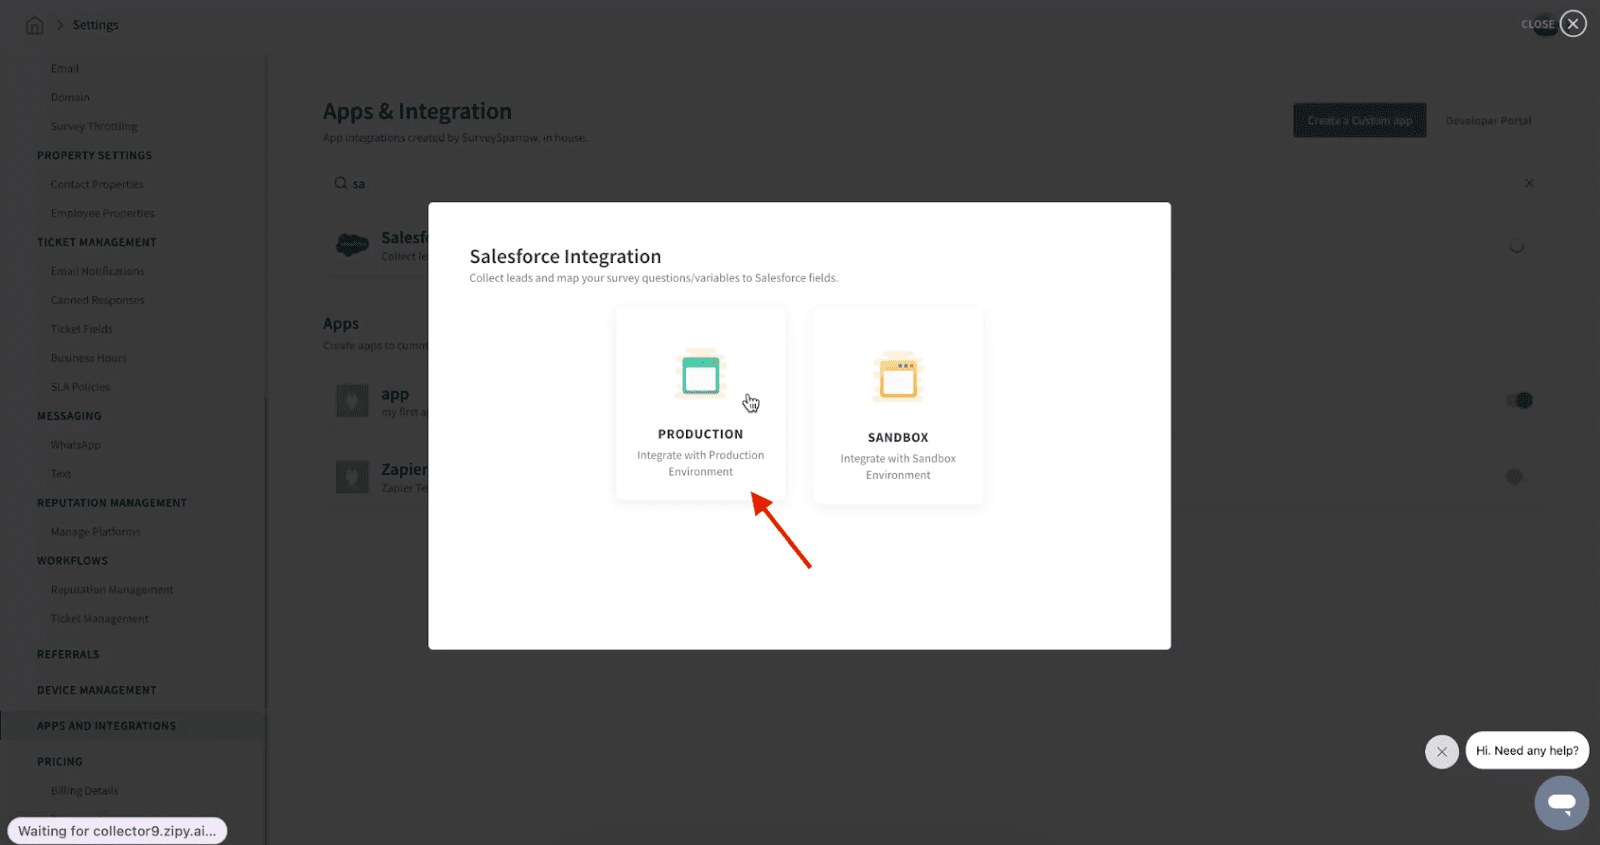
Select Sandbox Environment
On the following screen, choose the ‘Sandbox’ option.
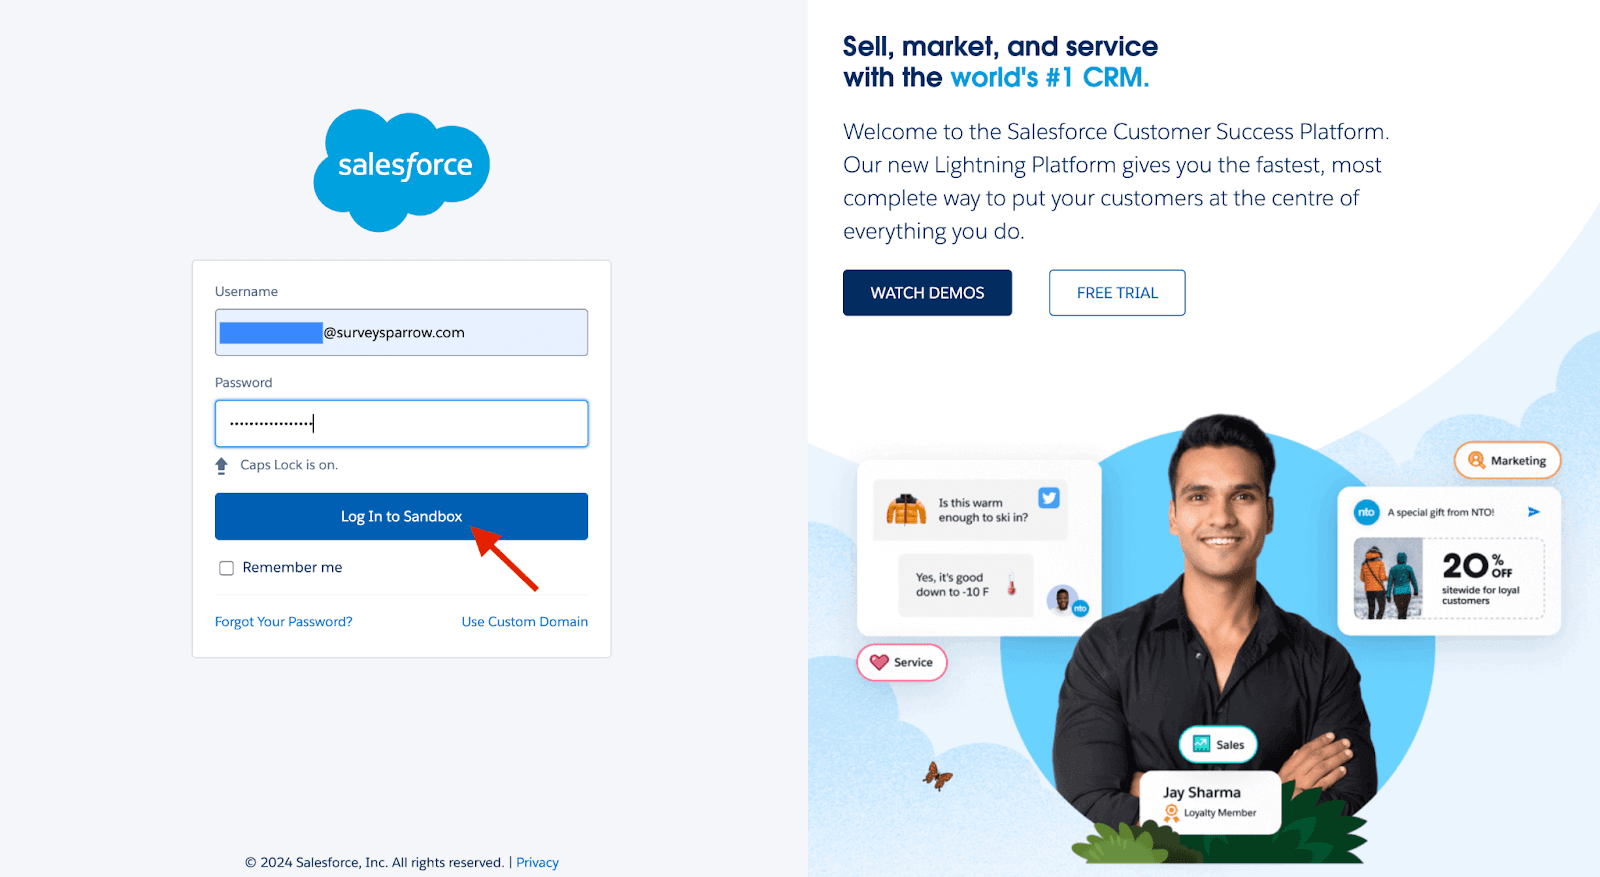
This will redirect you to the Salesforce login page. Log in with your Salesforce Sandbox credentials.
Setup Salesforce Integration at Survey Level
After a successful login, you will be redirected back to SurveySparrow.
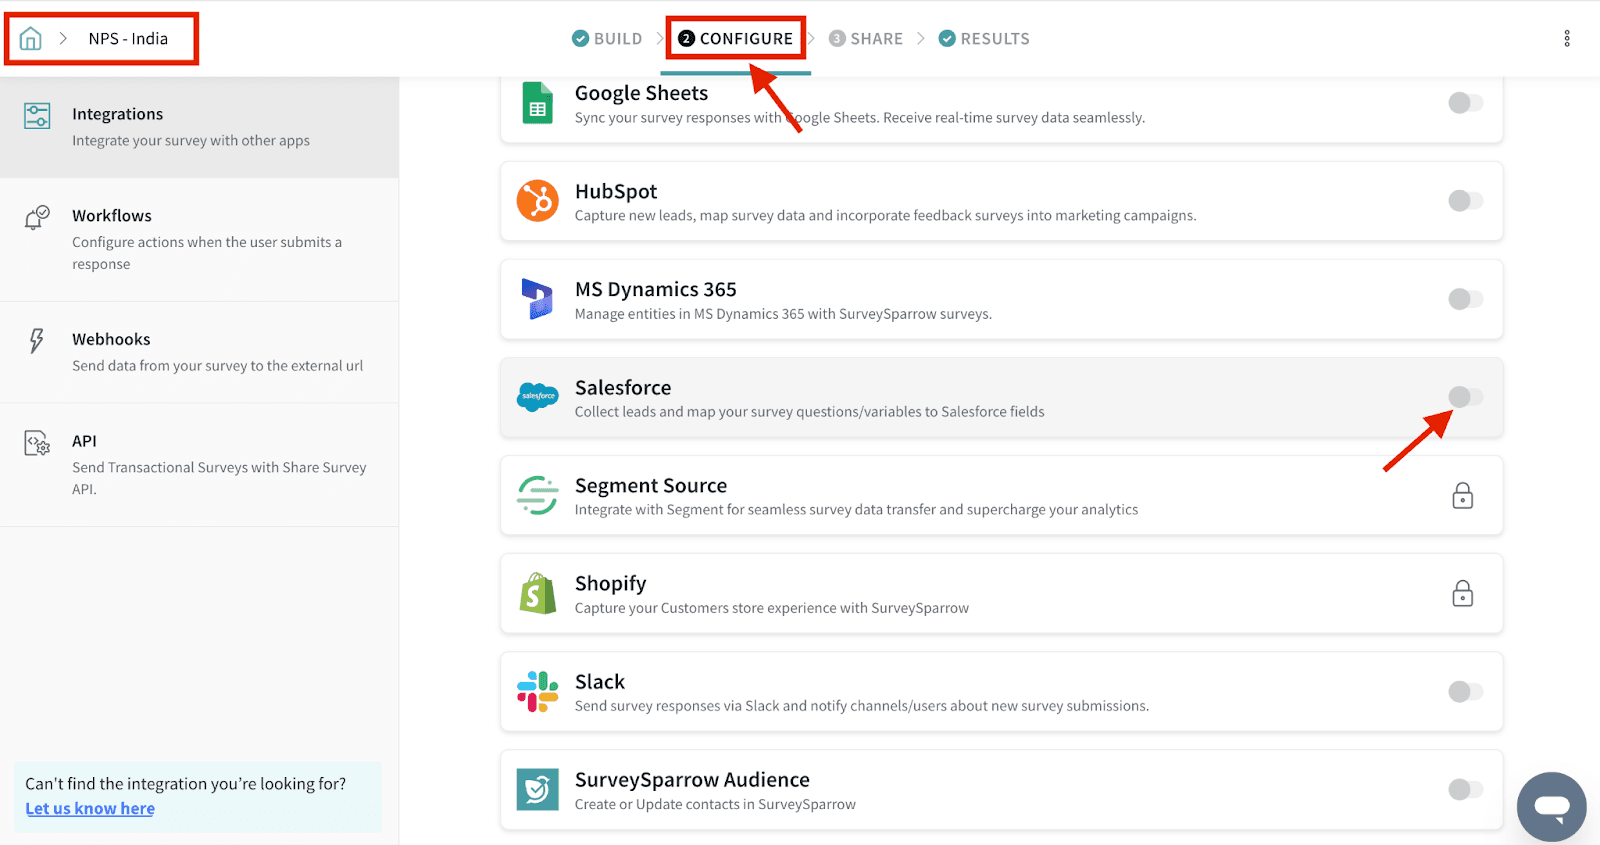
From a specific survey, go to the Integrate tab.
Find and turn on the Salesforce integration.
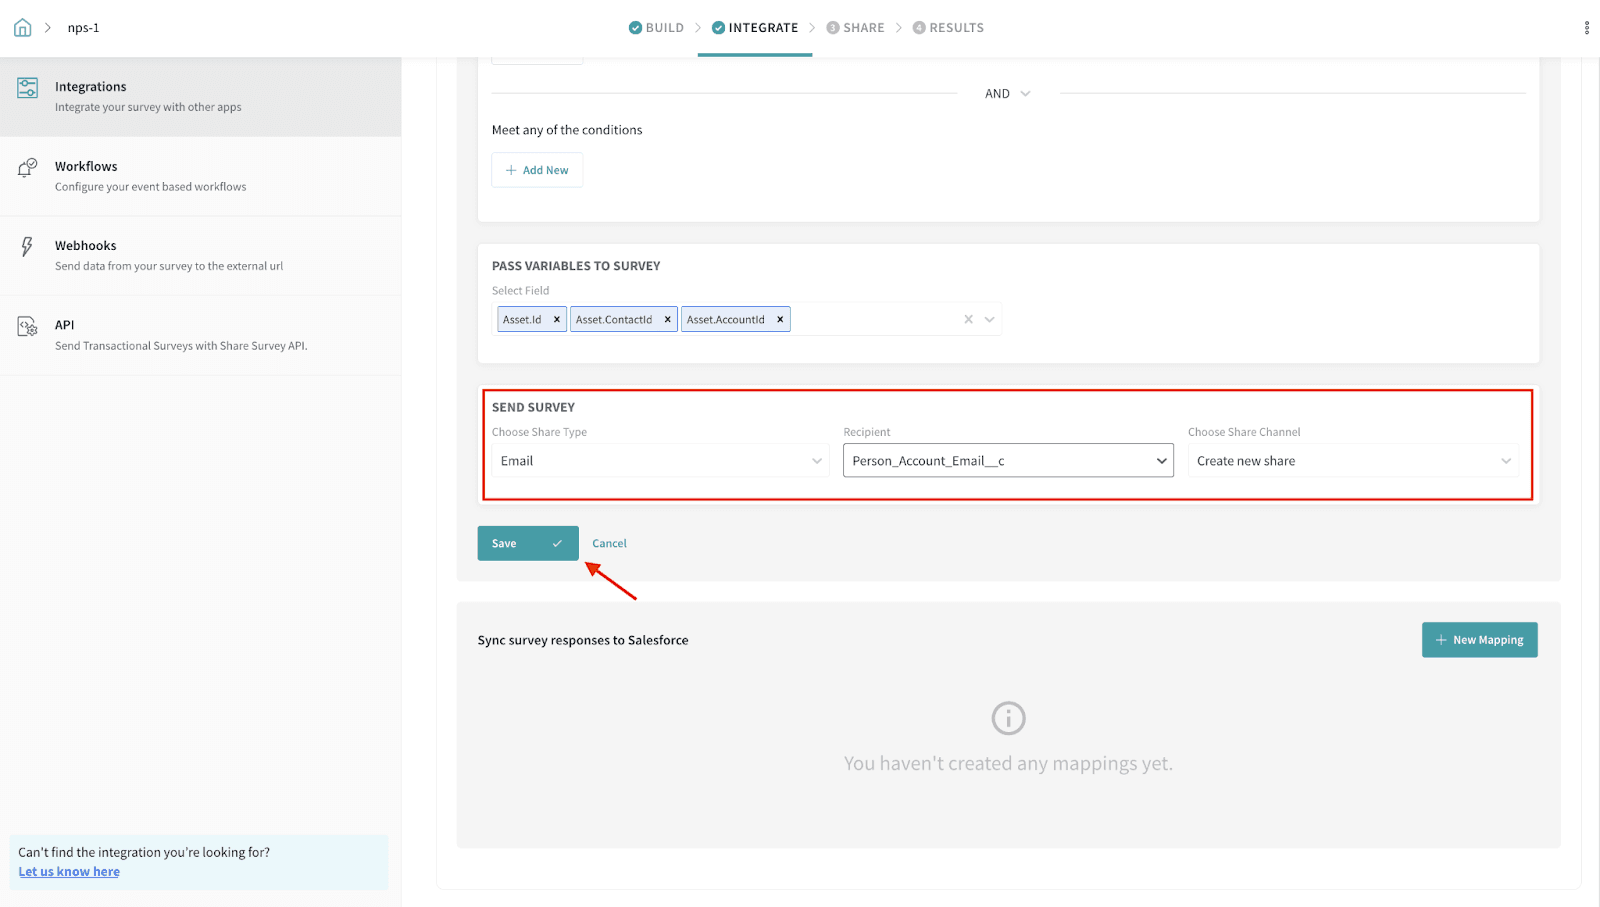
Fill in all required fields and set the trigger configuration by defining the trigger condition.
Choose the email field and select the share channel.
Click ‘Save’ to enable the setup process. This creates Apex class and Apex Triggers in your sandbox account.
The naming convention that we follow while creating the Apex Class and Apex Triggers are,
Apex Class - SurveySparrow<accountId>Class
Apex Triggers - SurveySparrow<surveyId>Trigger
Step 2 - Migrating from Sandbox to Production
Setup Apex Triggers
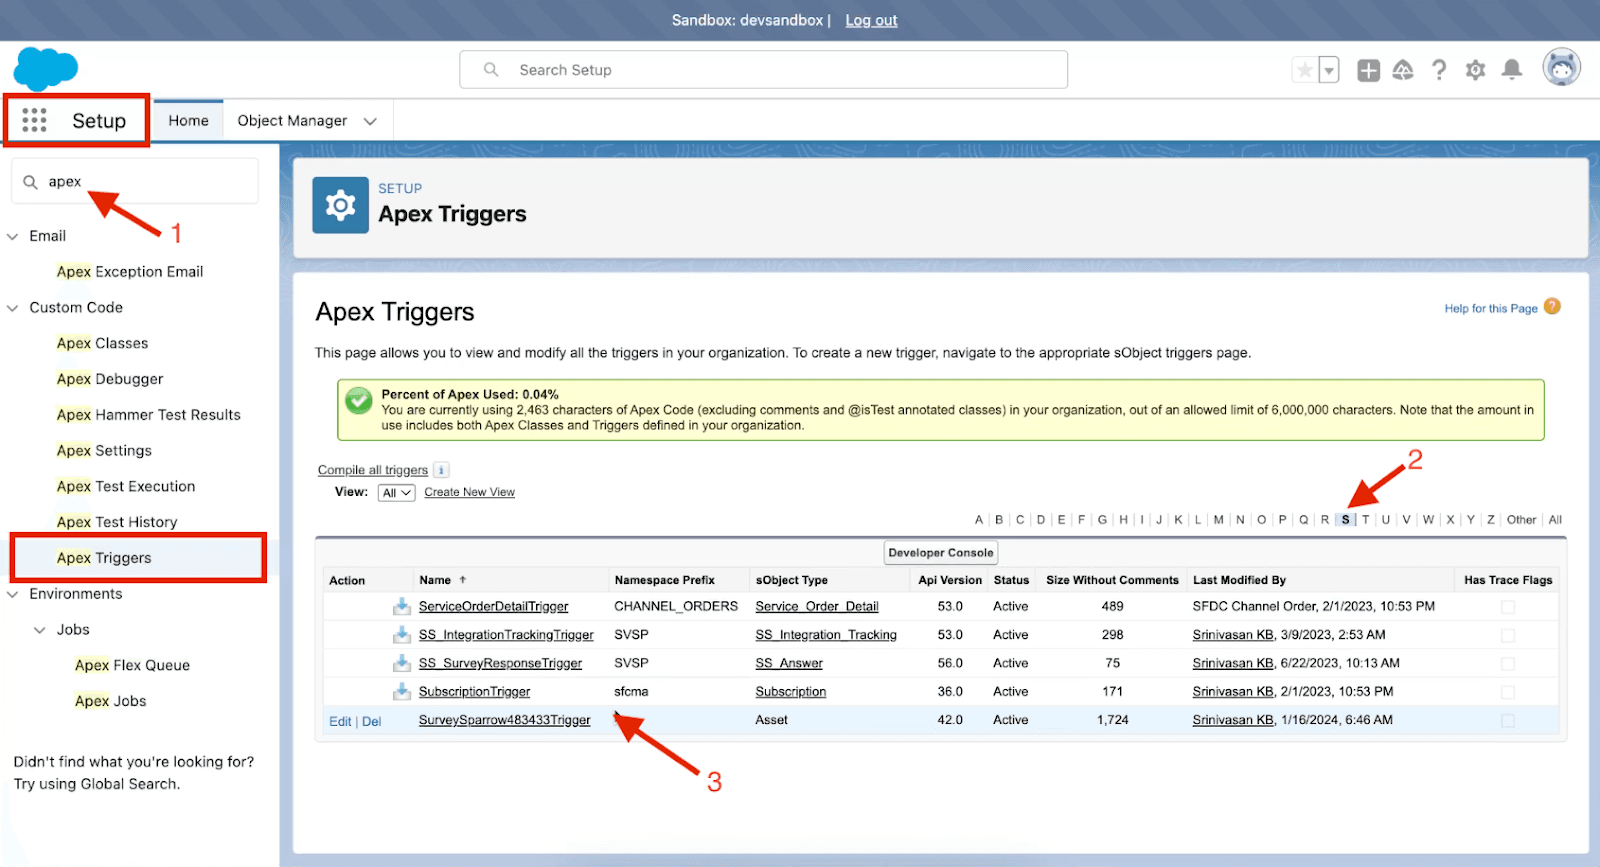
In your Salesforce Sandbox account, go to the Setup page.
Search for "Apex Triggers" in the Quick Find box.
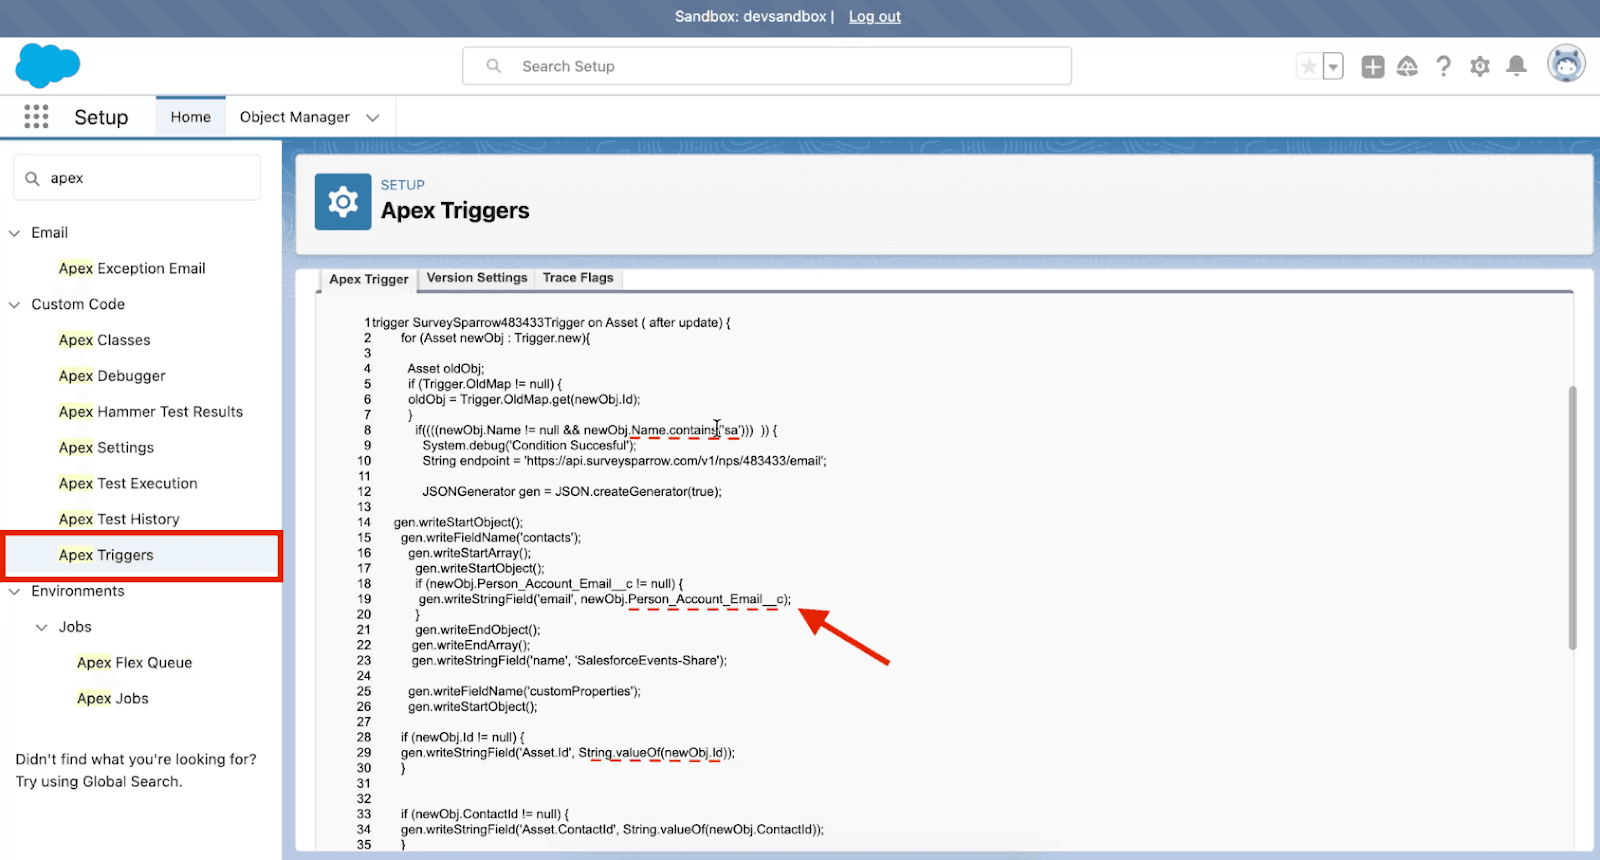
Under the ‘S’ category, select the SurveySparrow trigger to find the set condition.
Ensure that the Apex Triggers match the conditions you have set in your surveys.
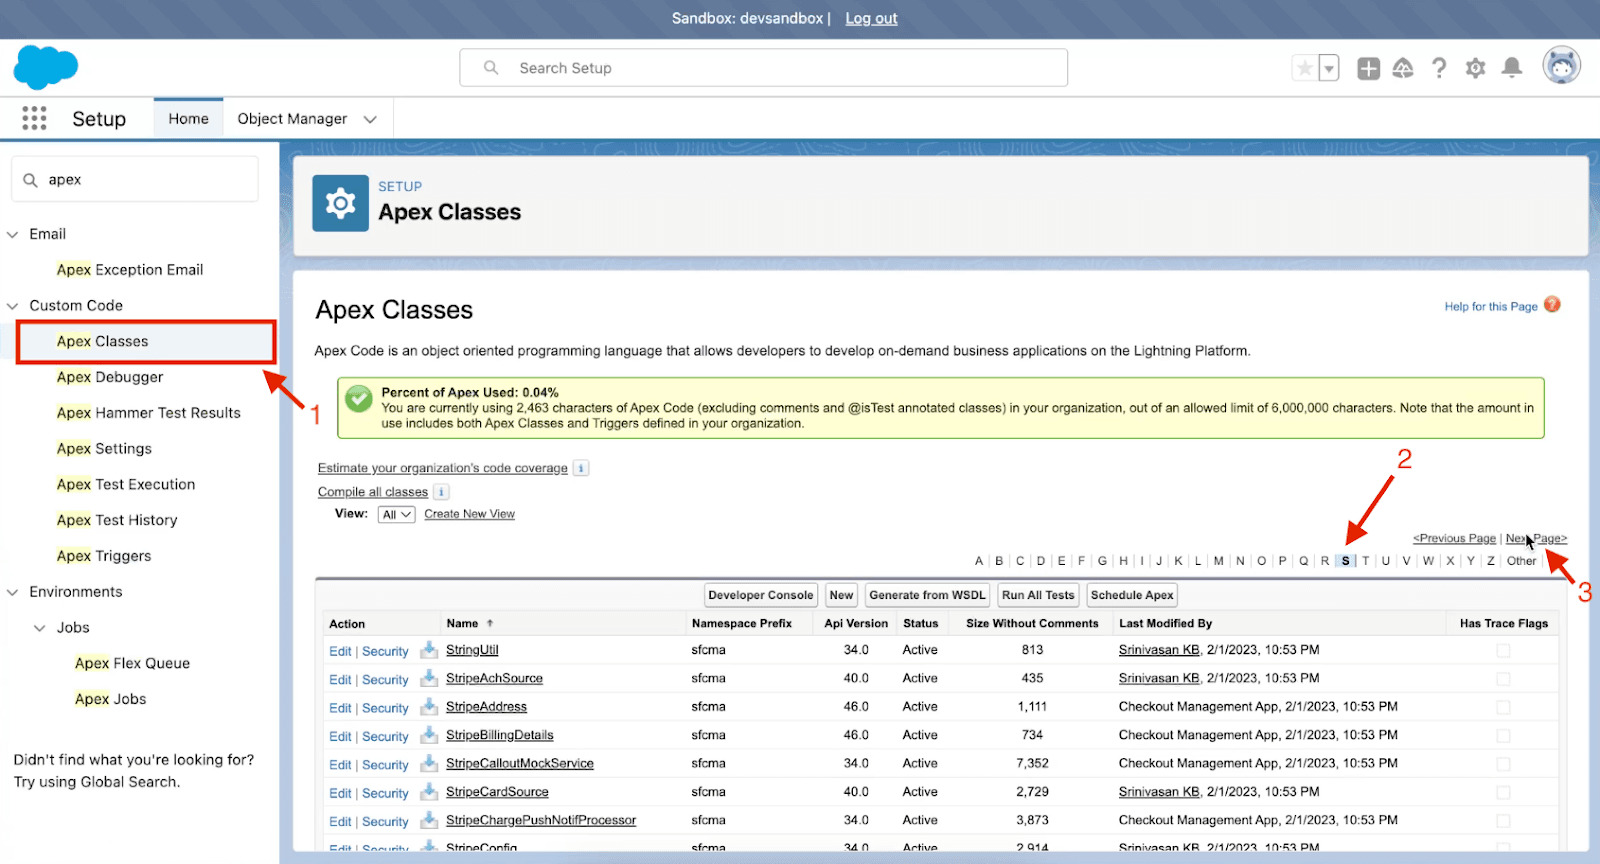
Verify Apex Classes
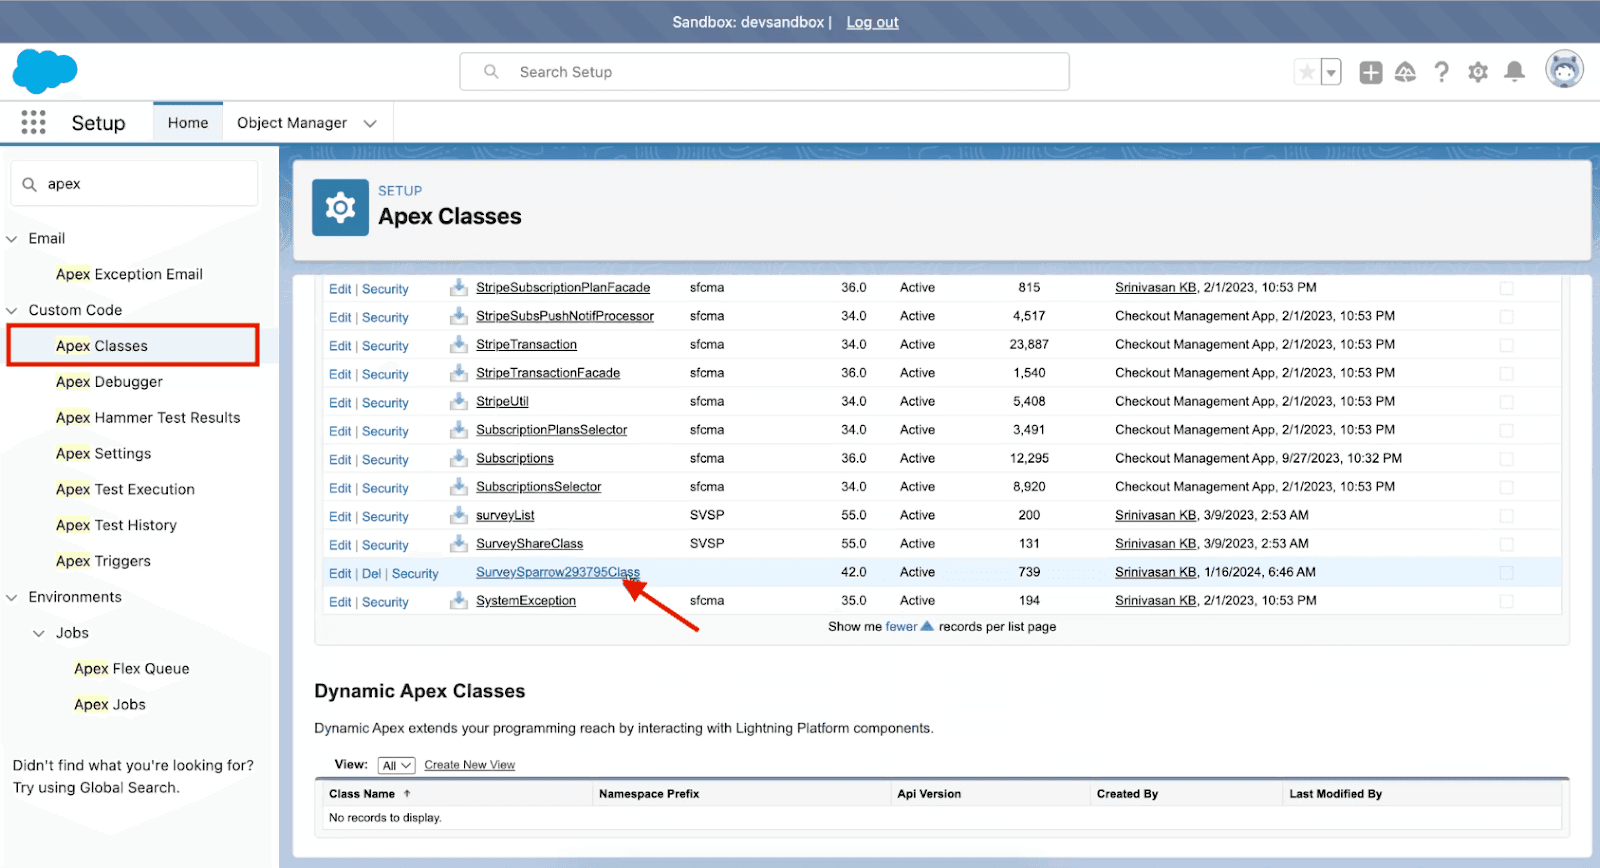
Under the ‘S’ category in the Apex classes, go to the last page to find the most recently added classes.
Verify if the recently added Apex classes are listed here.
Testing the trigger
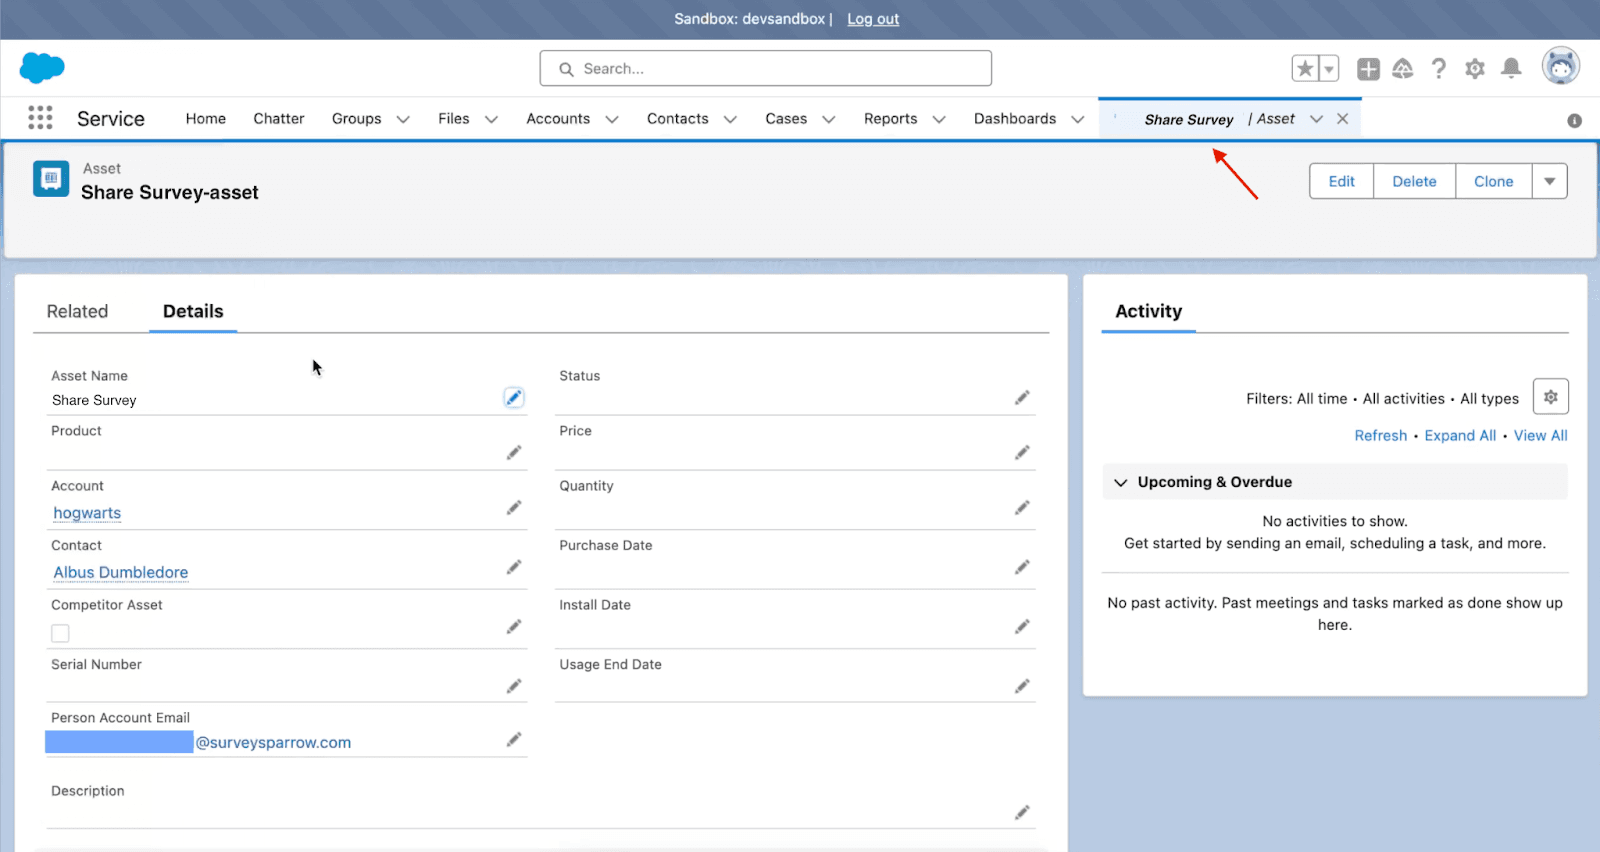
Create or update a record in the object that meets the conditions configured in the trigger and save it.
Ensure that the survey is triggered based on the specified conditions and the email field.
Step 3 - Write and Run Test Cases
Develop Test Cases
Write test cases based on the number of triggers and the trigger conditions.
Run different methods for each Apex Trigger that simulates the process for those triggers. (Note: Every test case differs based on the configuration they set in the SurveySparrow Salesforce integration)
Test case example
Here is a sample test case written for you to better understand the format:
@isTest public class SurveySparrowTriggerTest {
//Create the required test data @TestSetup static void setupTestData() { Contact testContact = new Contact( FirstName = 'Test', LastName = 'User', Email = '[email protected]' ); insert testContact;
Case testCase = new Case( Status = 'New', ContactId = testContact.Id, Reason = 'Question' ); insert testCase; }
//Query the created test records Case testCase = [SELECT Id, Status, ContactId, Contact.Email, Survey_Sparrow__c FROM Case WHERE Contact.Email = '[email protected]' LIMIT 1];
Test.startTest();
//Do the change to the record that will trigger the survey testCase.Survey_Sparrow__c = true; update testCase;
Test.stopTest();
System.assertEquals(1, mock.calloutCount, 'Expected one callout to be made.'); } }
@isTest
public class SurveySparrowCalloutMock implements HttpCalloutMock {

public Integer calloutCount = 0;

public HTTPResponse respond(HTTPRequest req) {
calloutCount++;
HTTPResponse res = new HTTPResponse();
res.setStatusCode(200);
res.setBody('{"status": "success"}');
return res;
}
}
Add Test Cases to Apex Classes
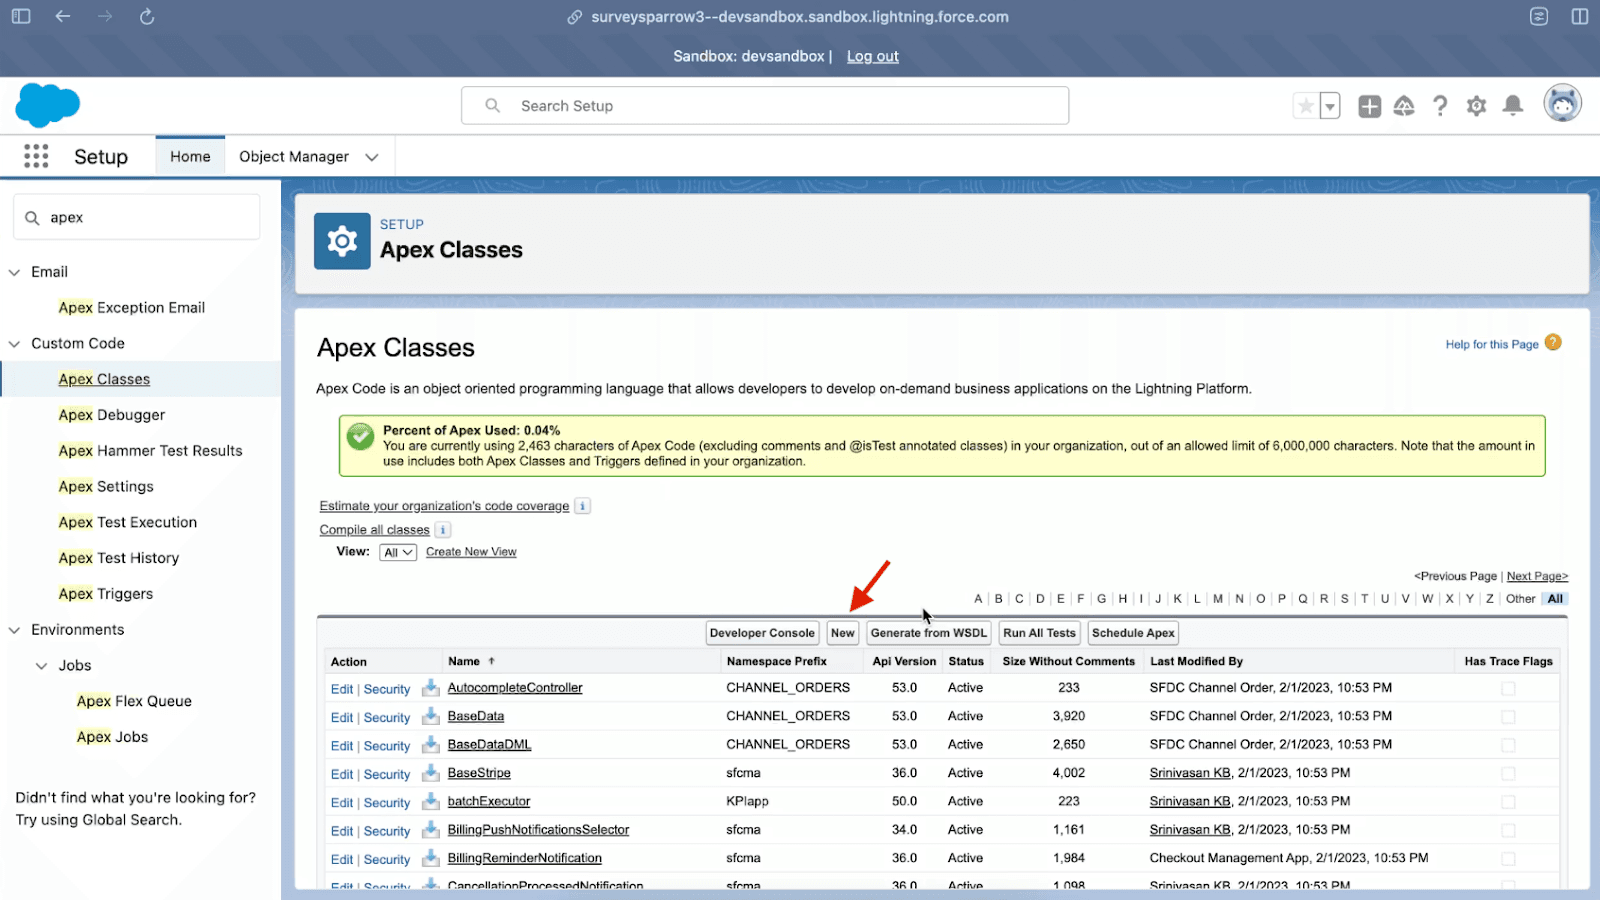
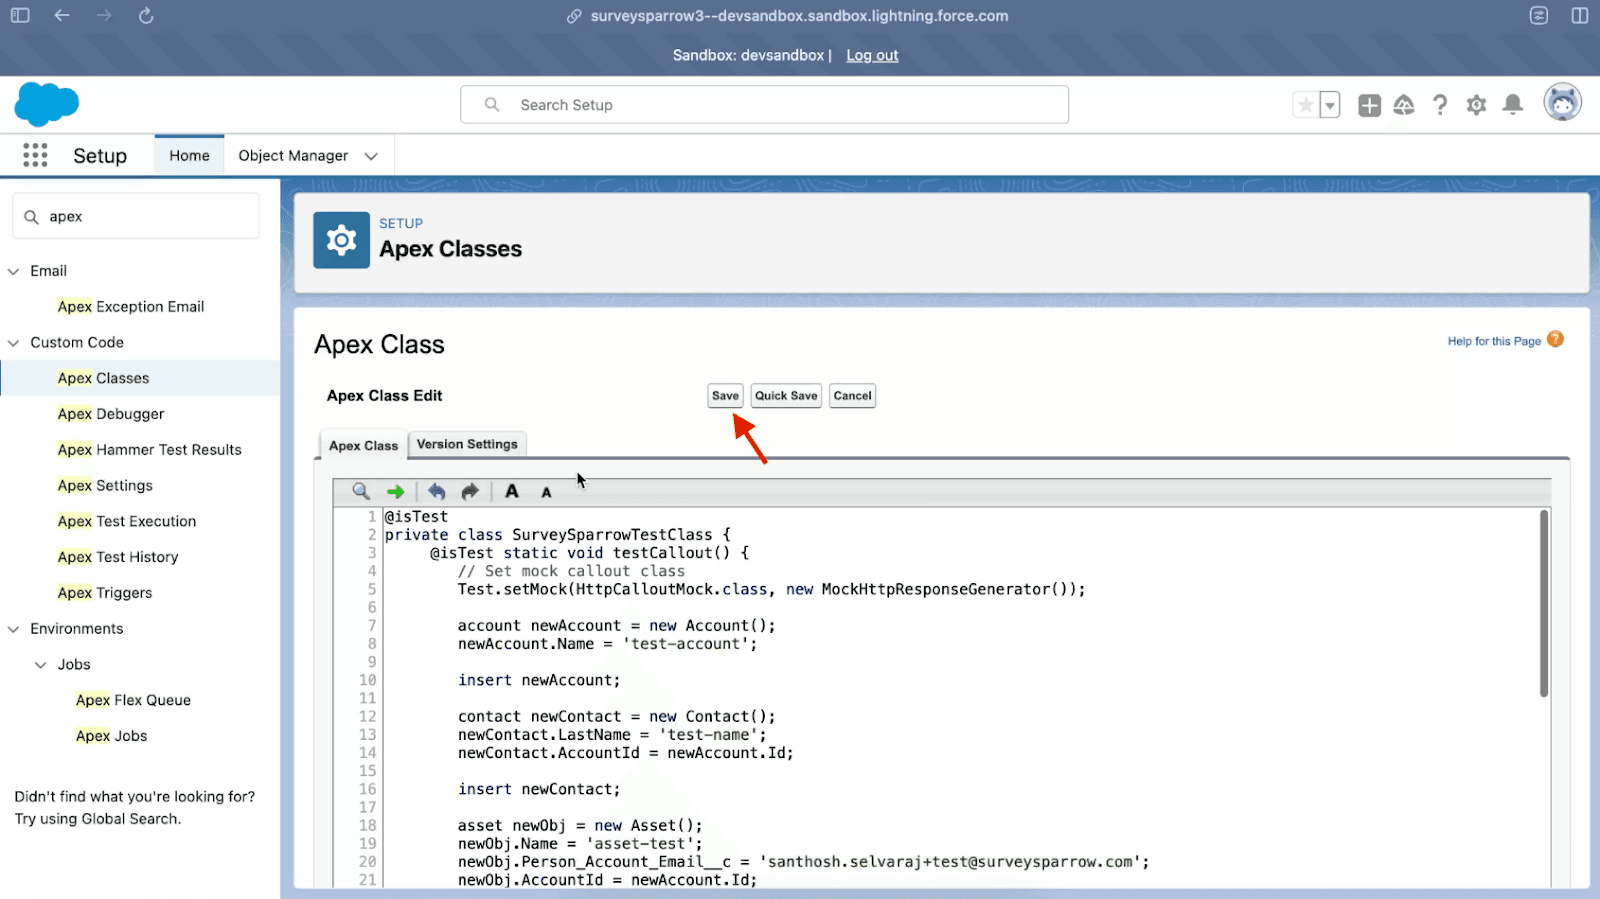
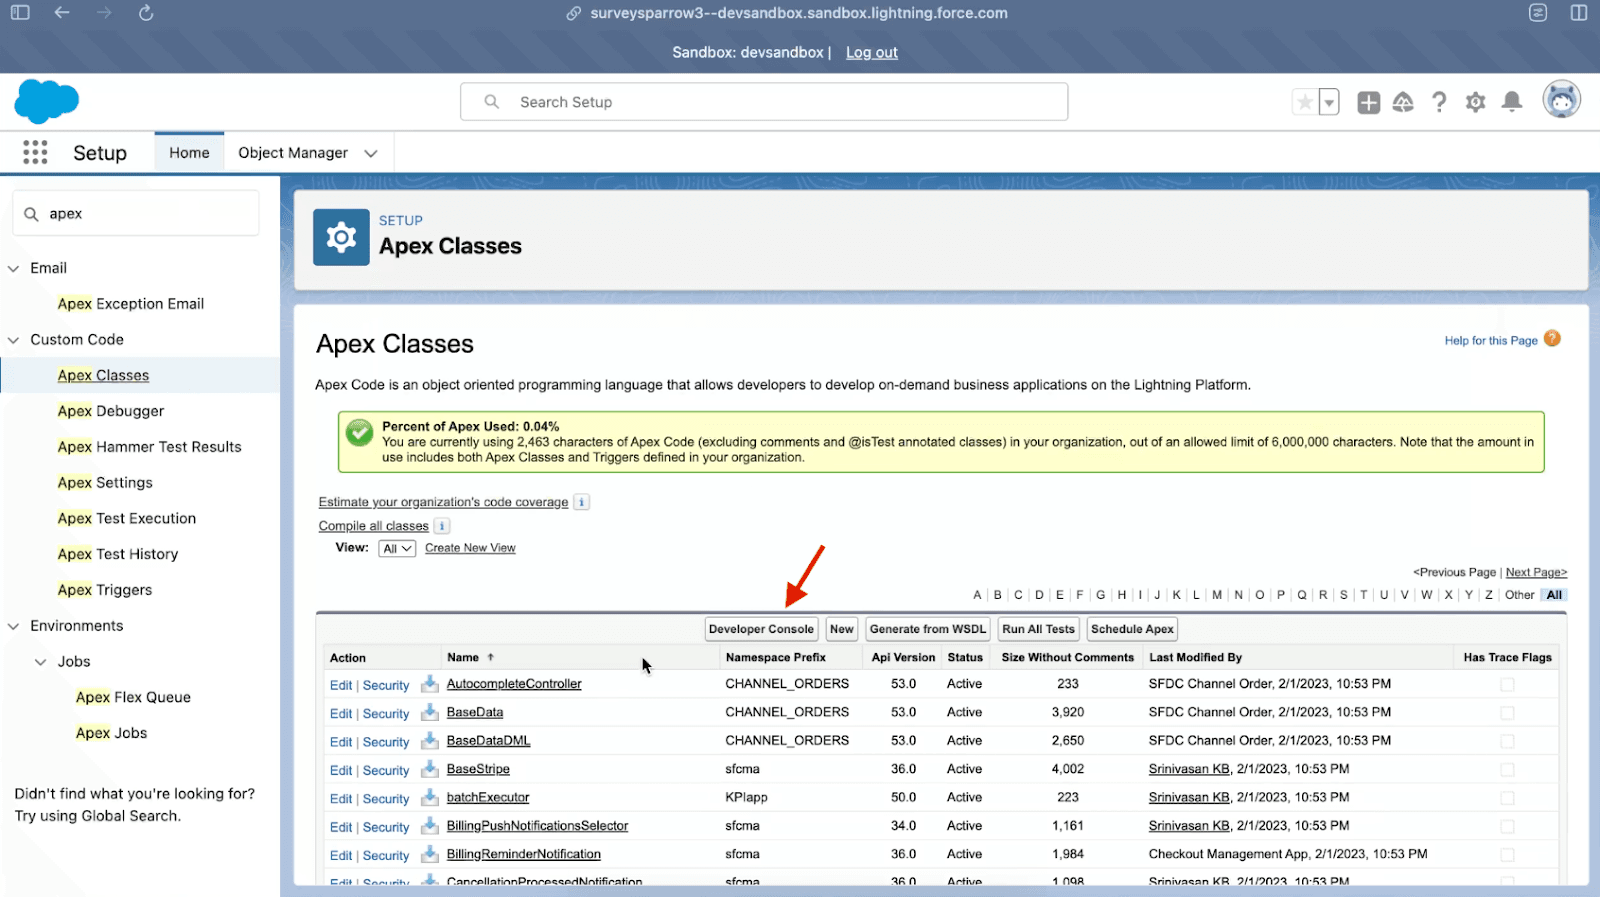
Go to the Apex Classes page and select ‘New.’
Paste the code for each test case and save it.
Run Test Cases
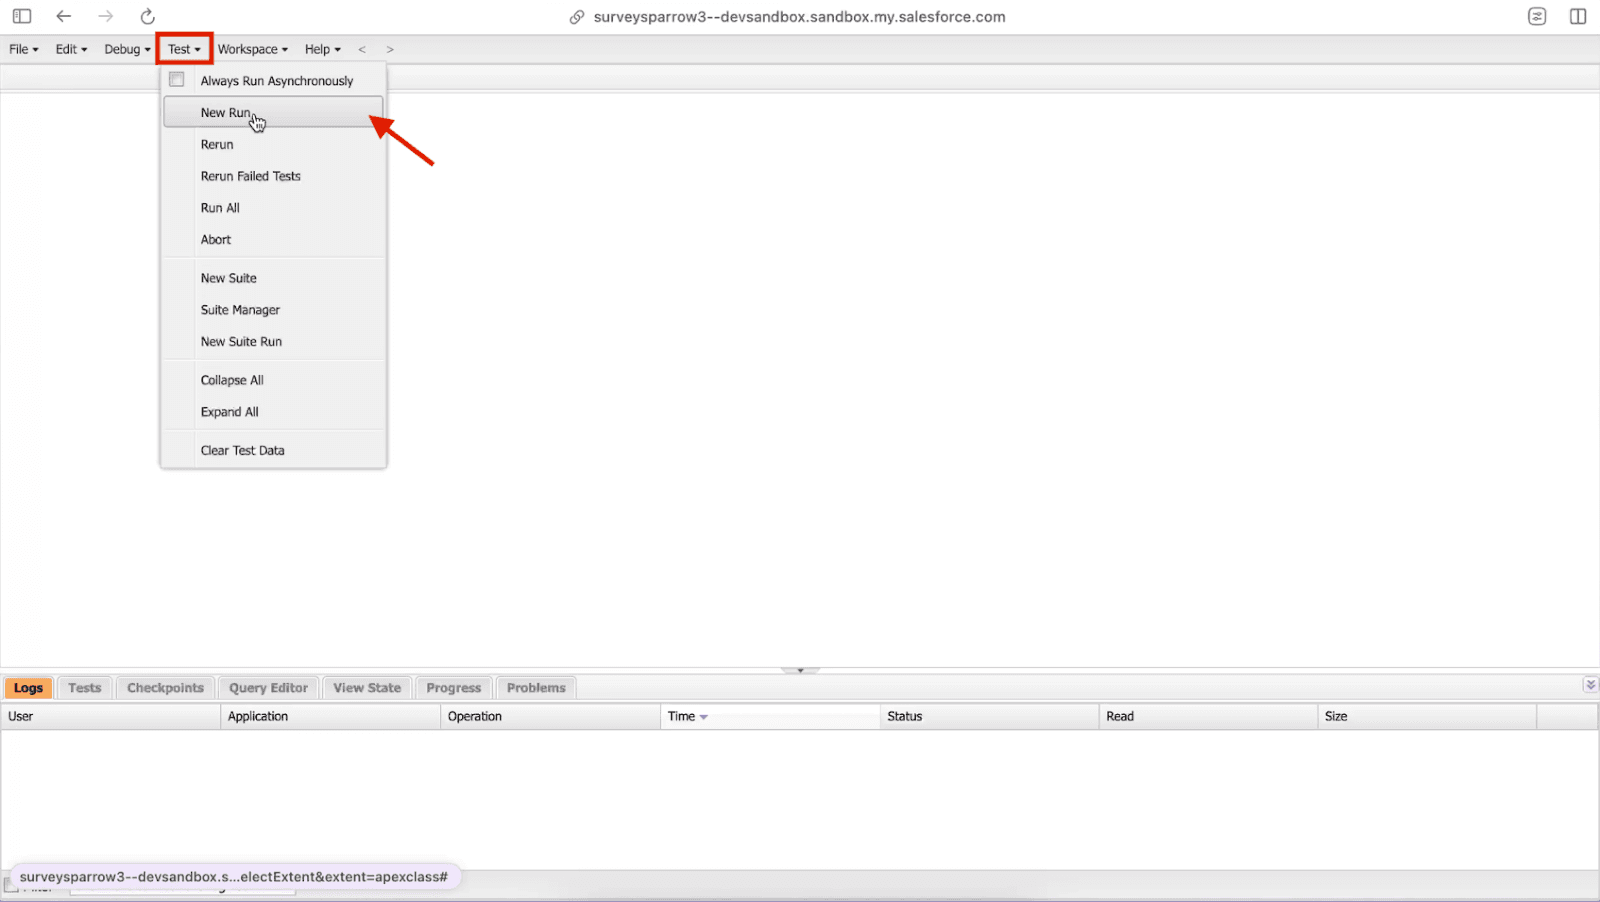
To verify the test cases, go to the Developer Console.
Click on “Test” and select ‘New Run’ from the dropdown menu.
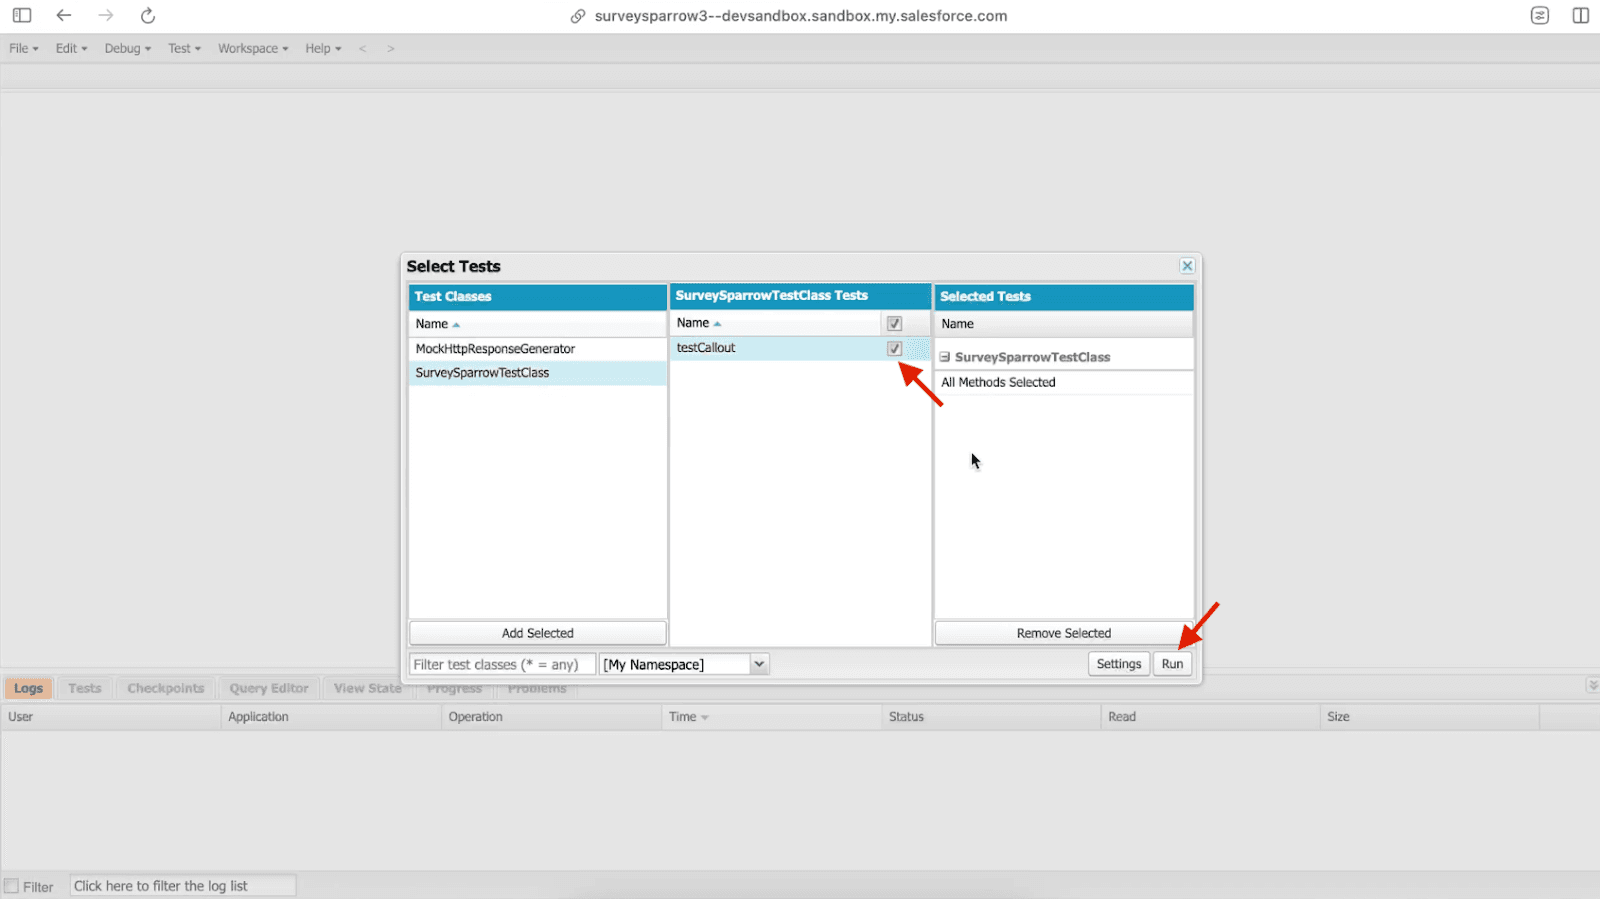
Select the test callout method and click ‘Run.’
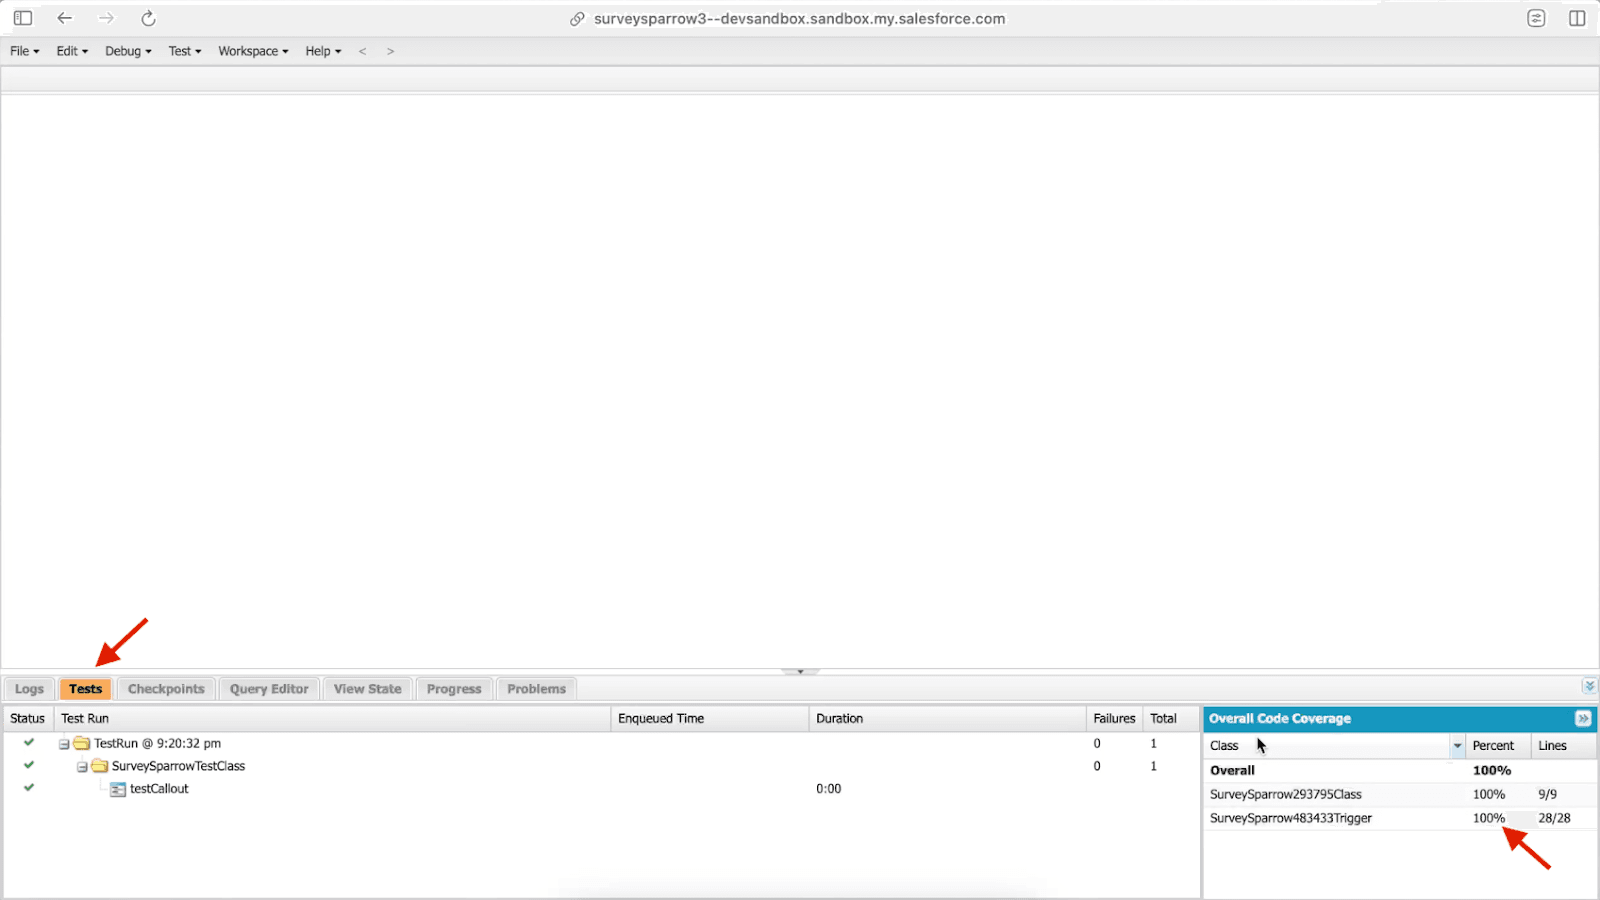
Review the percent of code coverage. (Note: Code coverage must be above 90% to move to production.)
Update the API version of the newly created Apex test classes
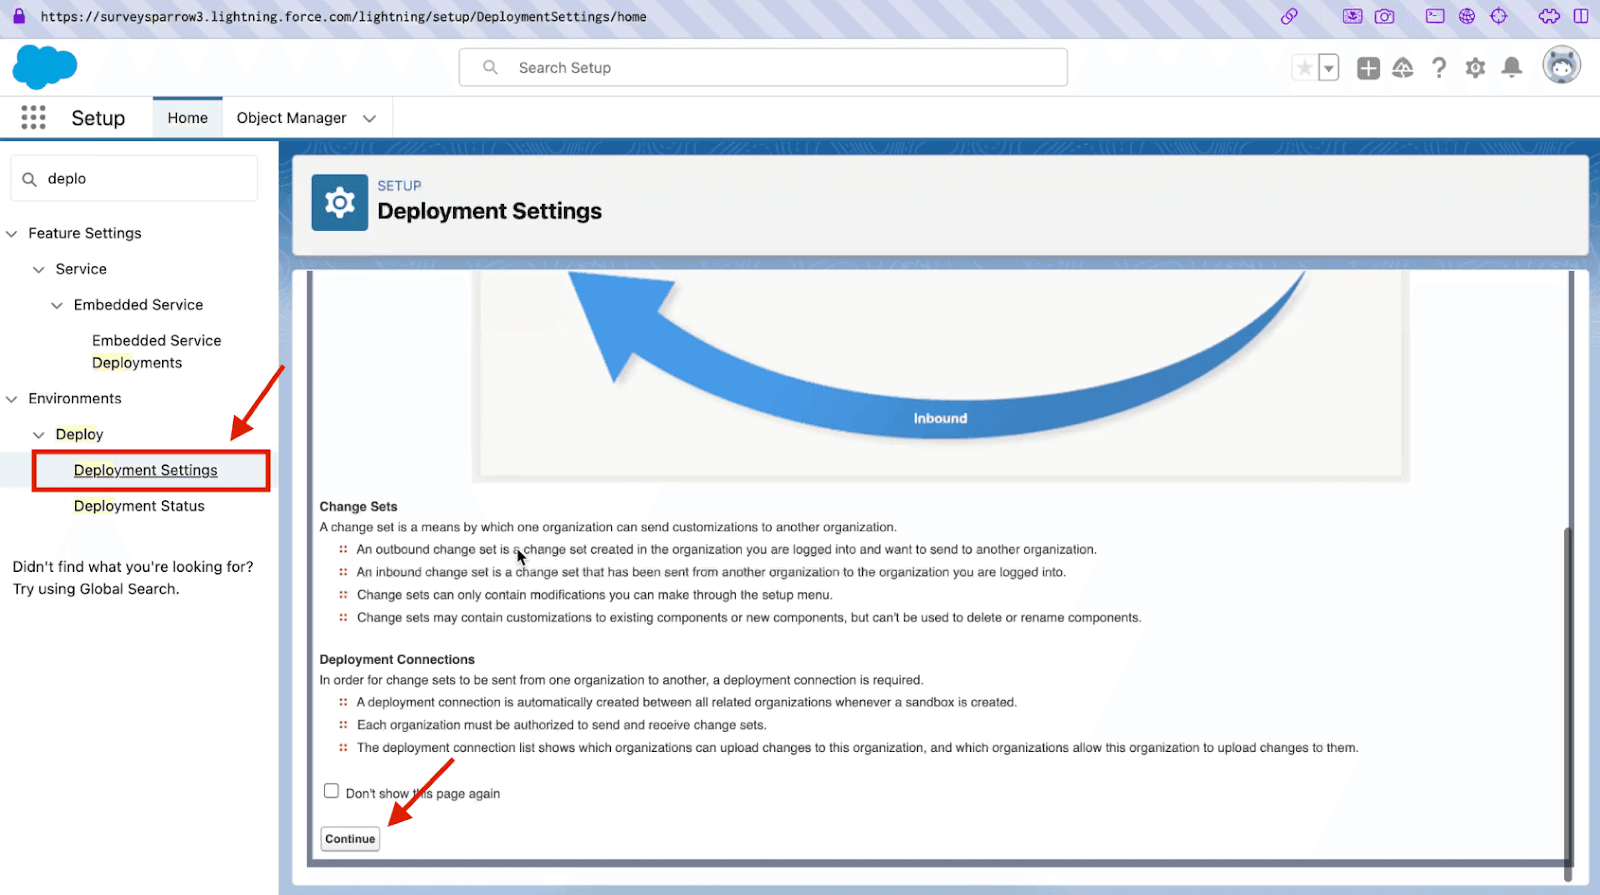
Step 4 - Enable Inbound changes in your Production Account
Enable inbound changes in your Salesforce Production account to avoid any disruption while uploading the outbound change set.
Go to the Production account.
Search for ‘Deployment Settings’ and click ‘Continue.’
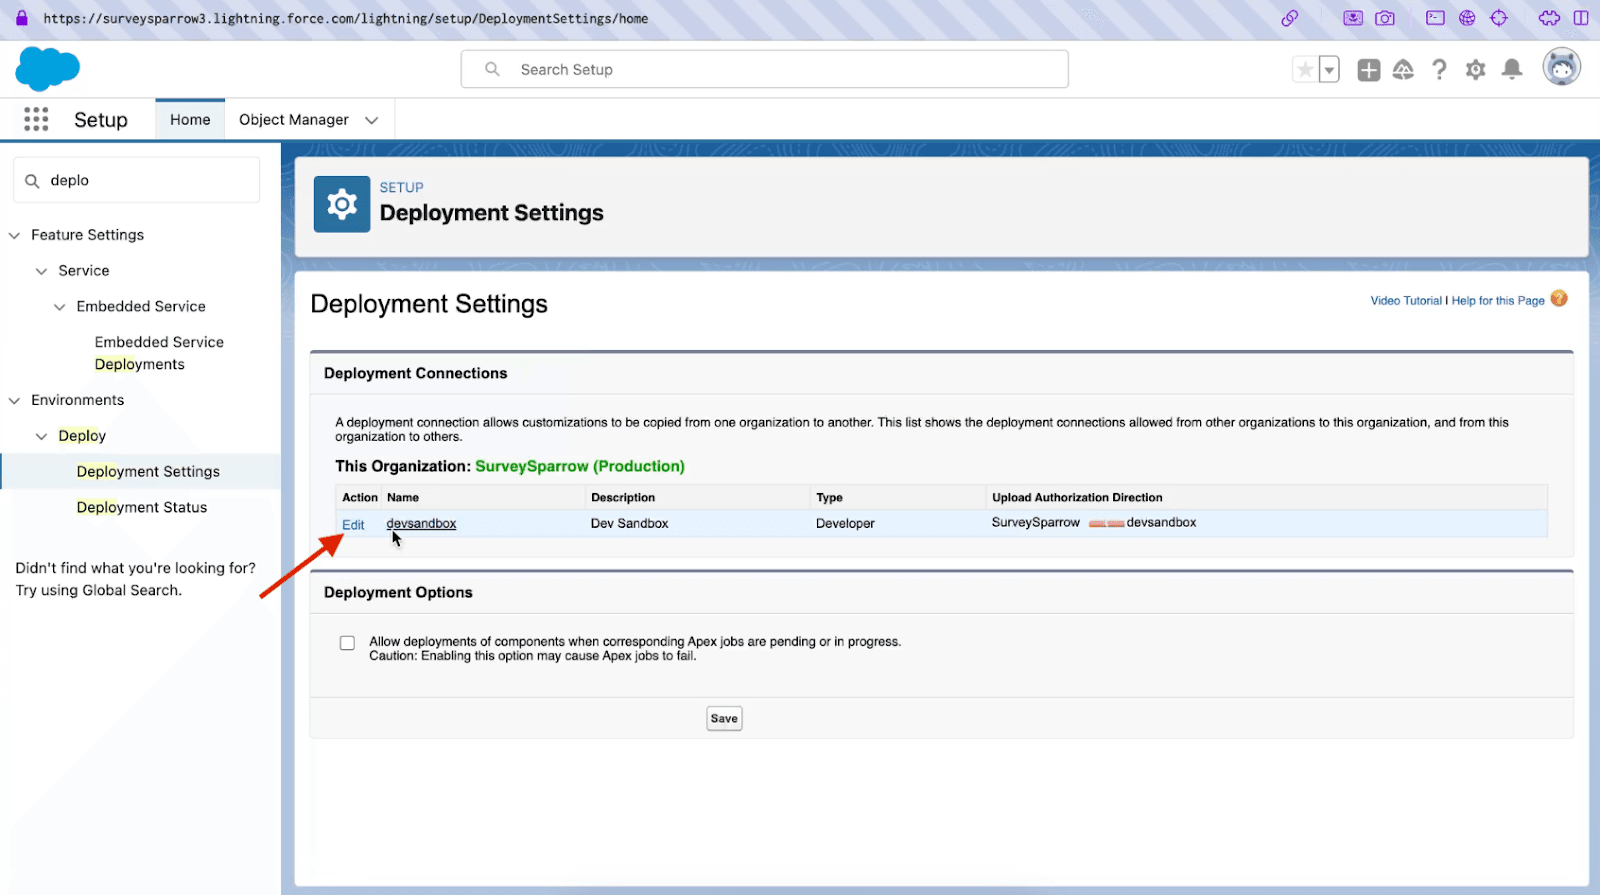
Click ‘Edit’ under action.
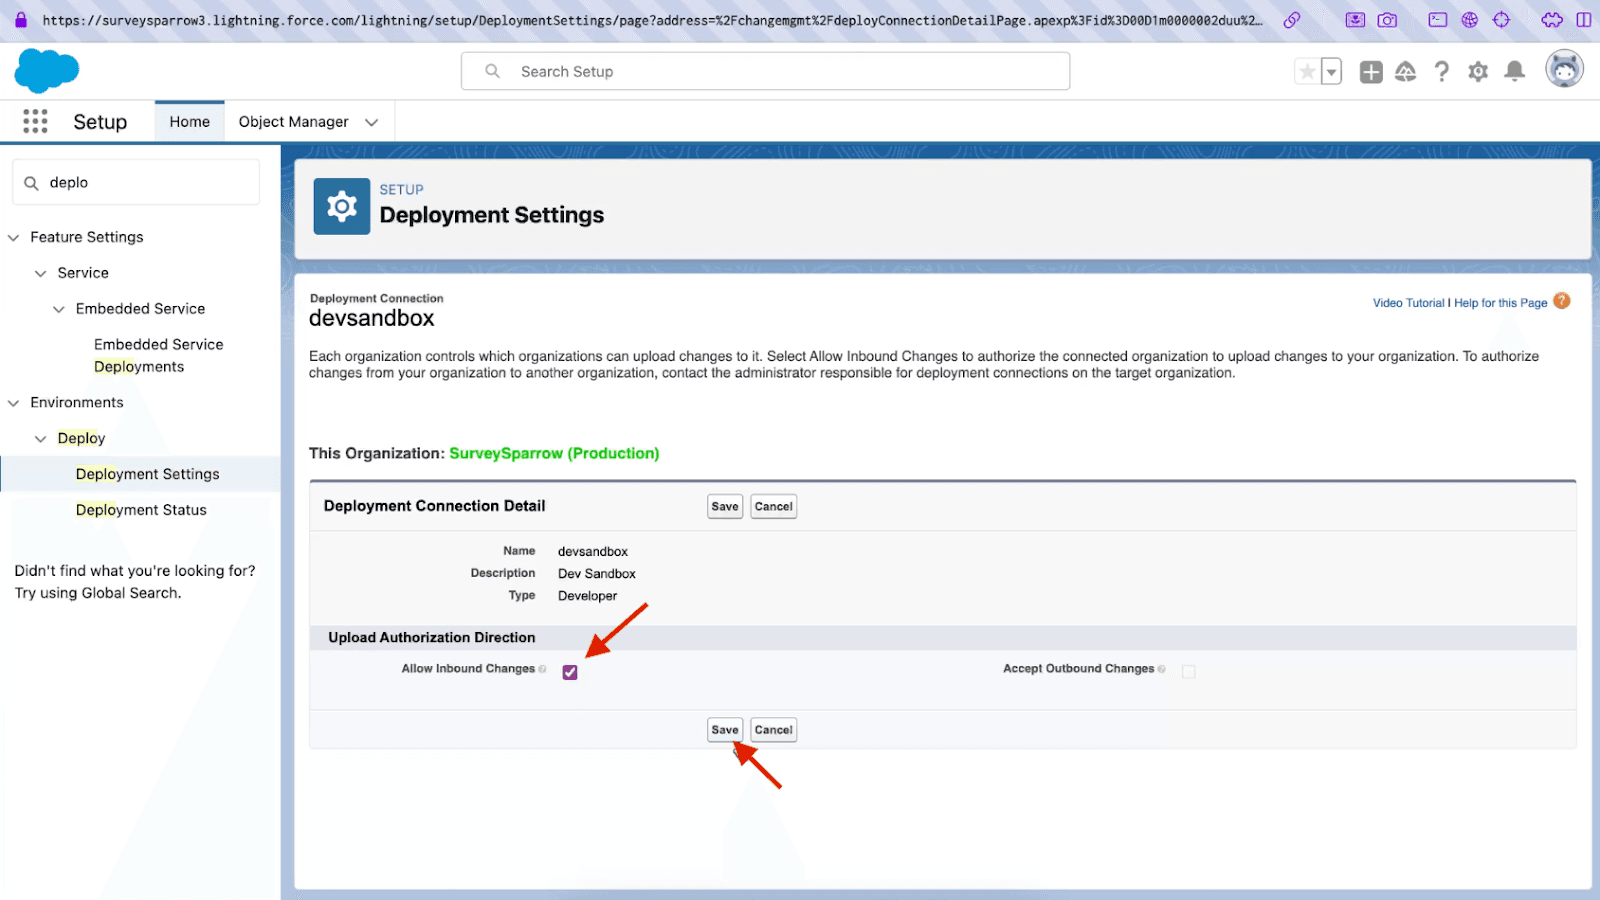
Check the box next to ‘Allow inbound changes’ and click ‘Save.’
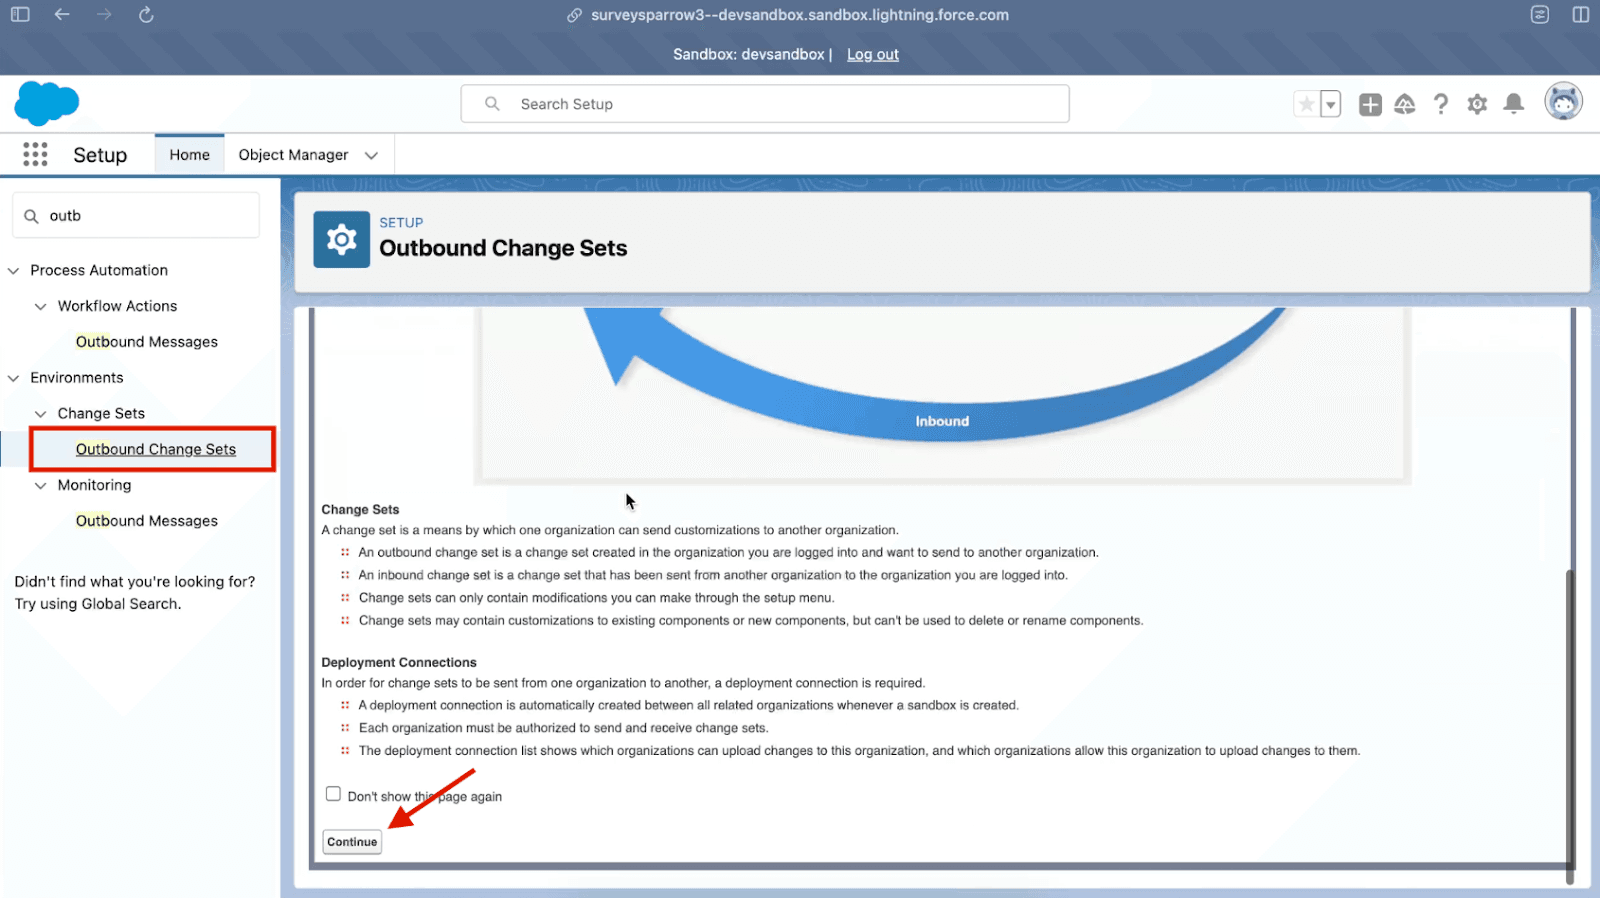
Step 5 - Create Outbound Change Set in Salesforce Sandbox
Prepare Change Set
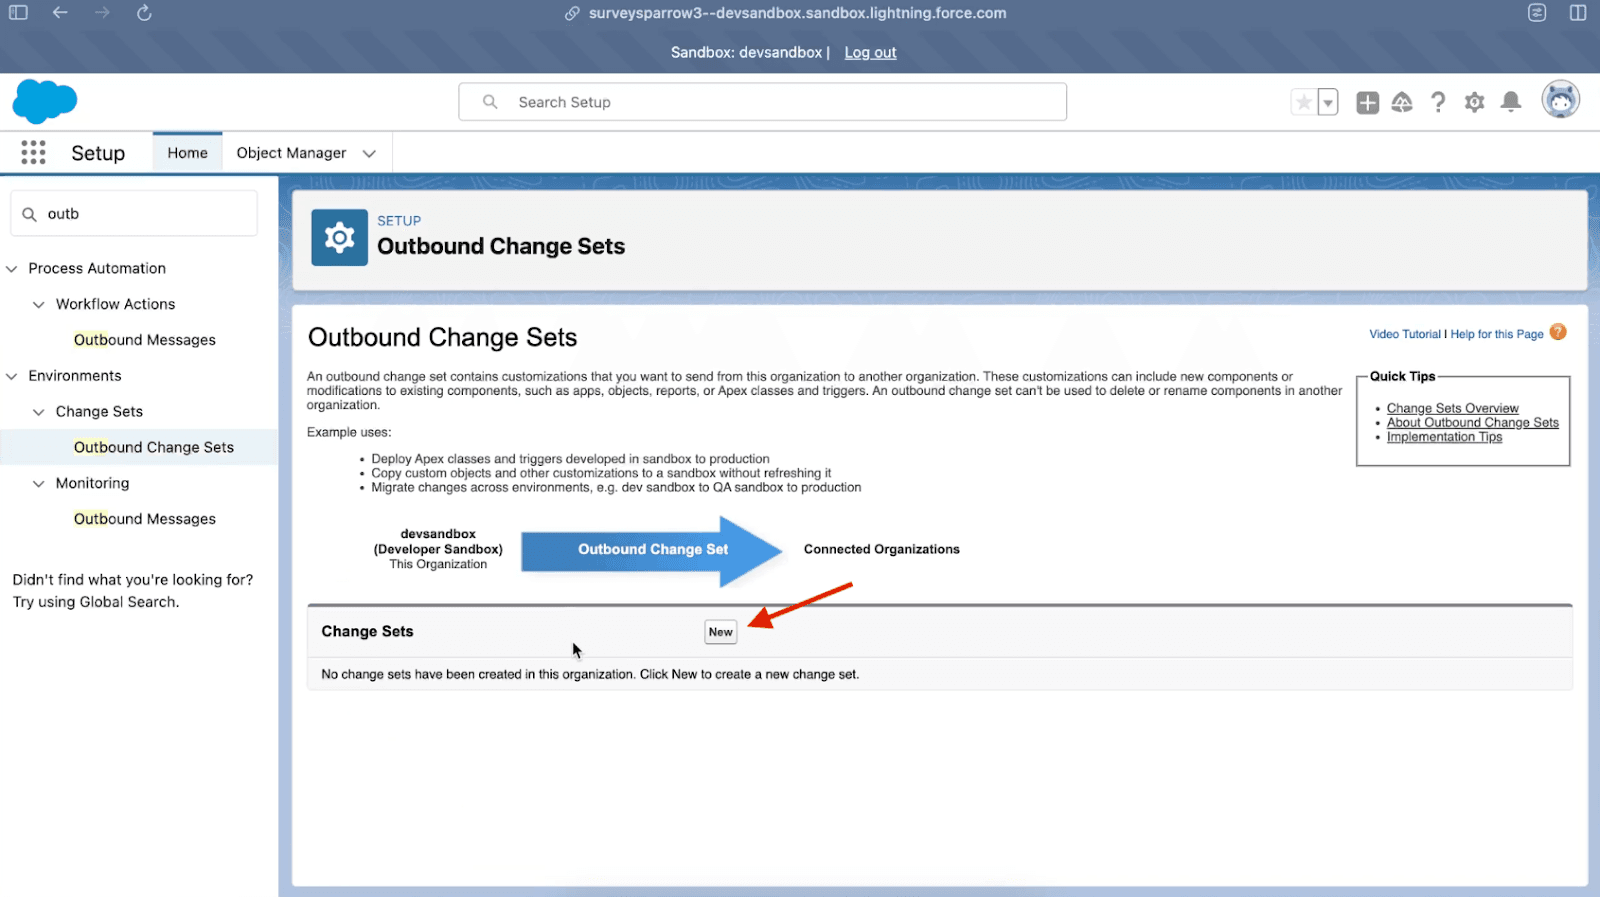
In your Sandbox account, search for “Outbound Change Set” on the Setup page and click ‘Continue.’
Click ‘New’ to create a new change set.
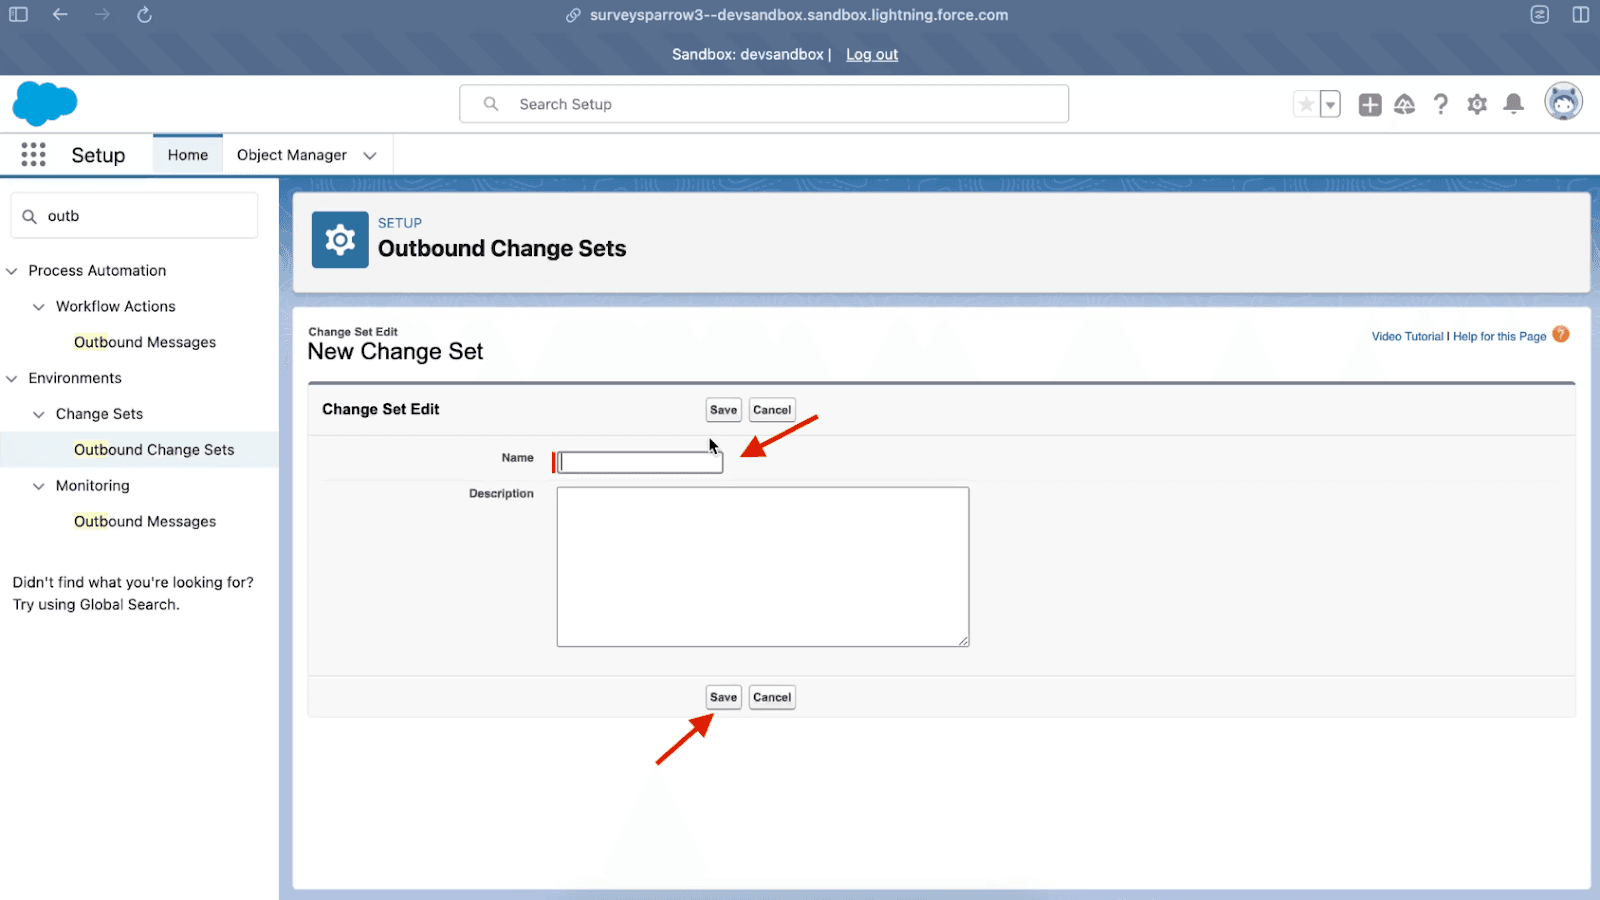
Name the change set and click ‘Save.’
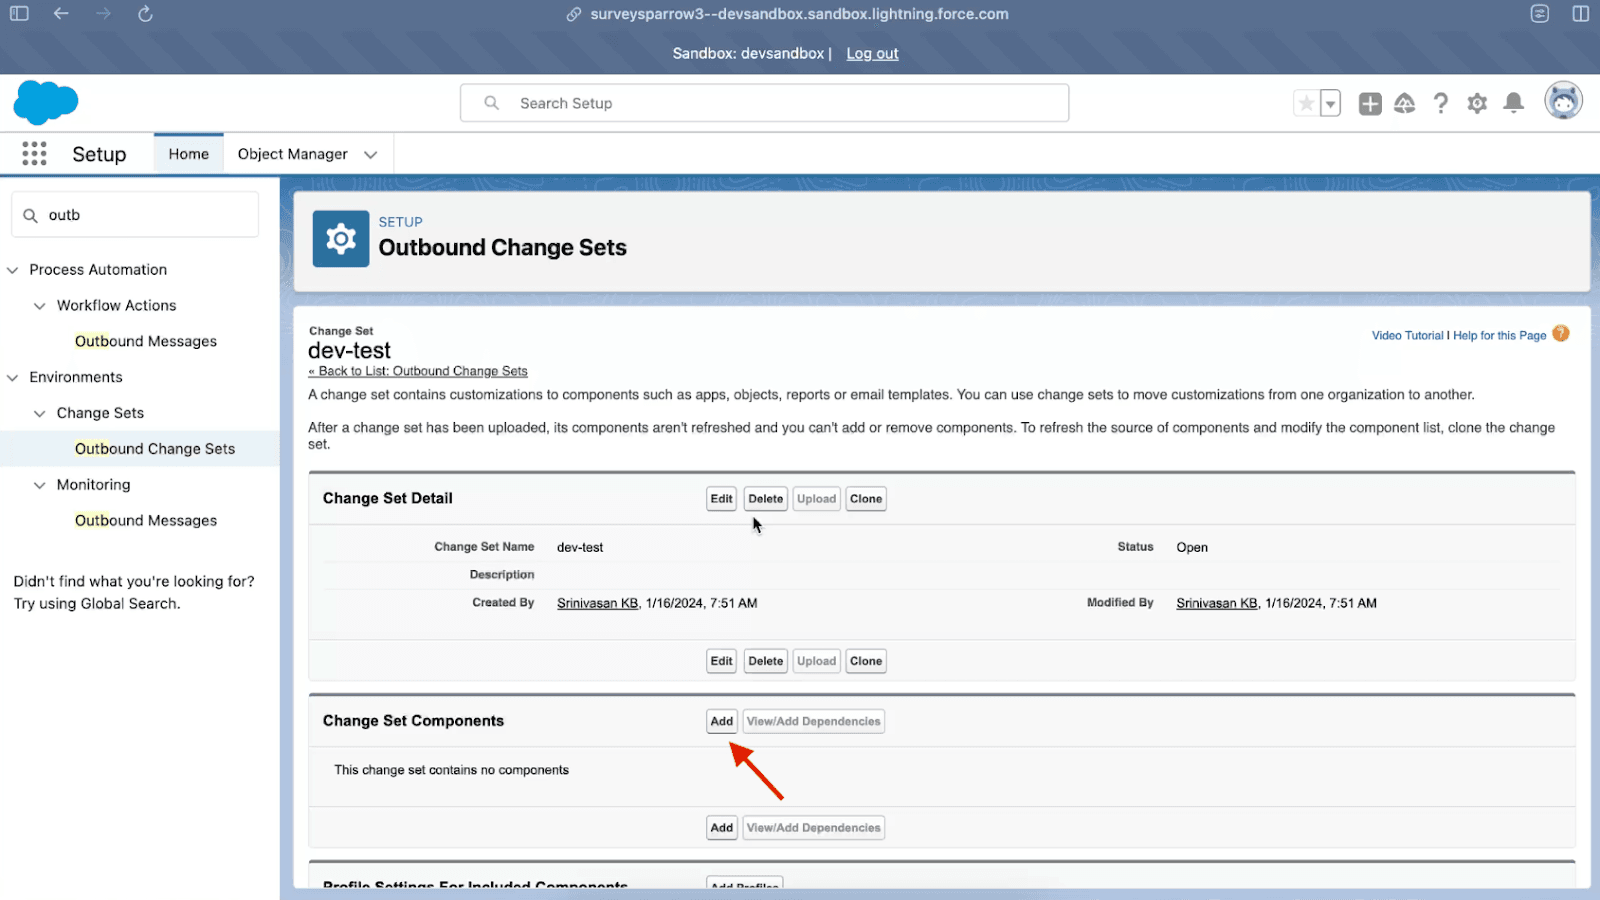
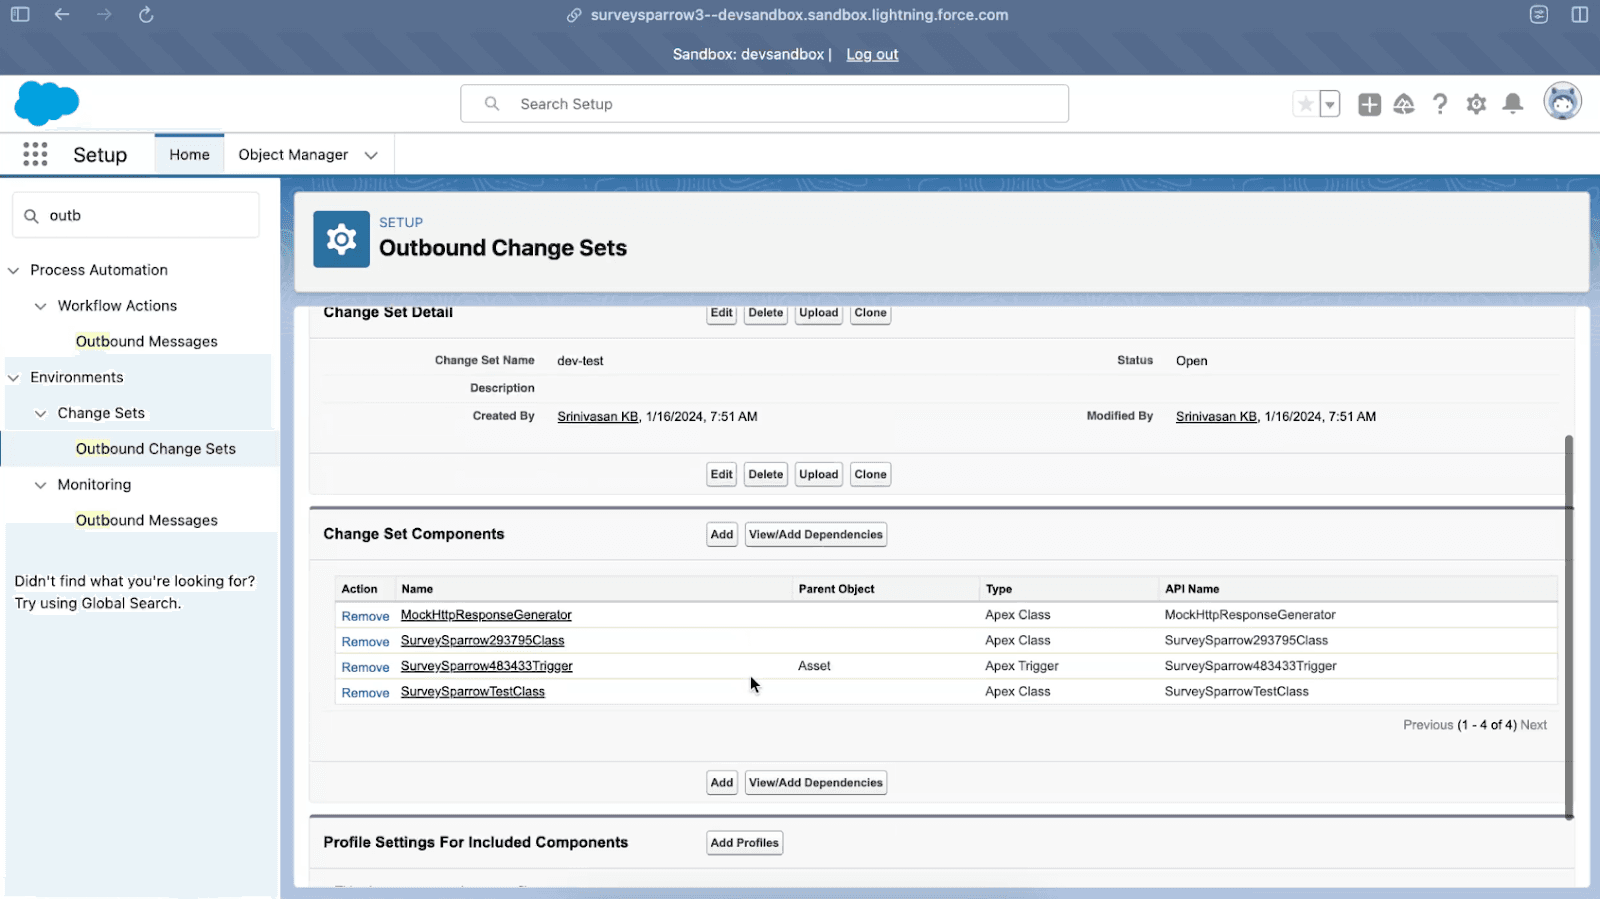
Add Components
Add the Apex Trigger by selecting it and clicking “Add.”
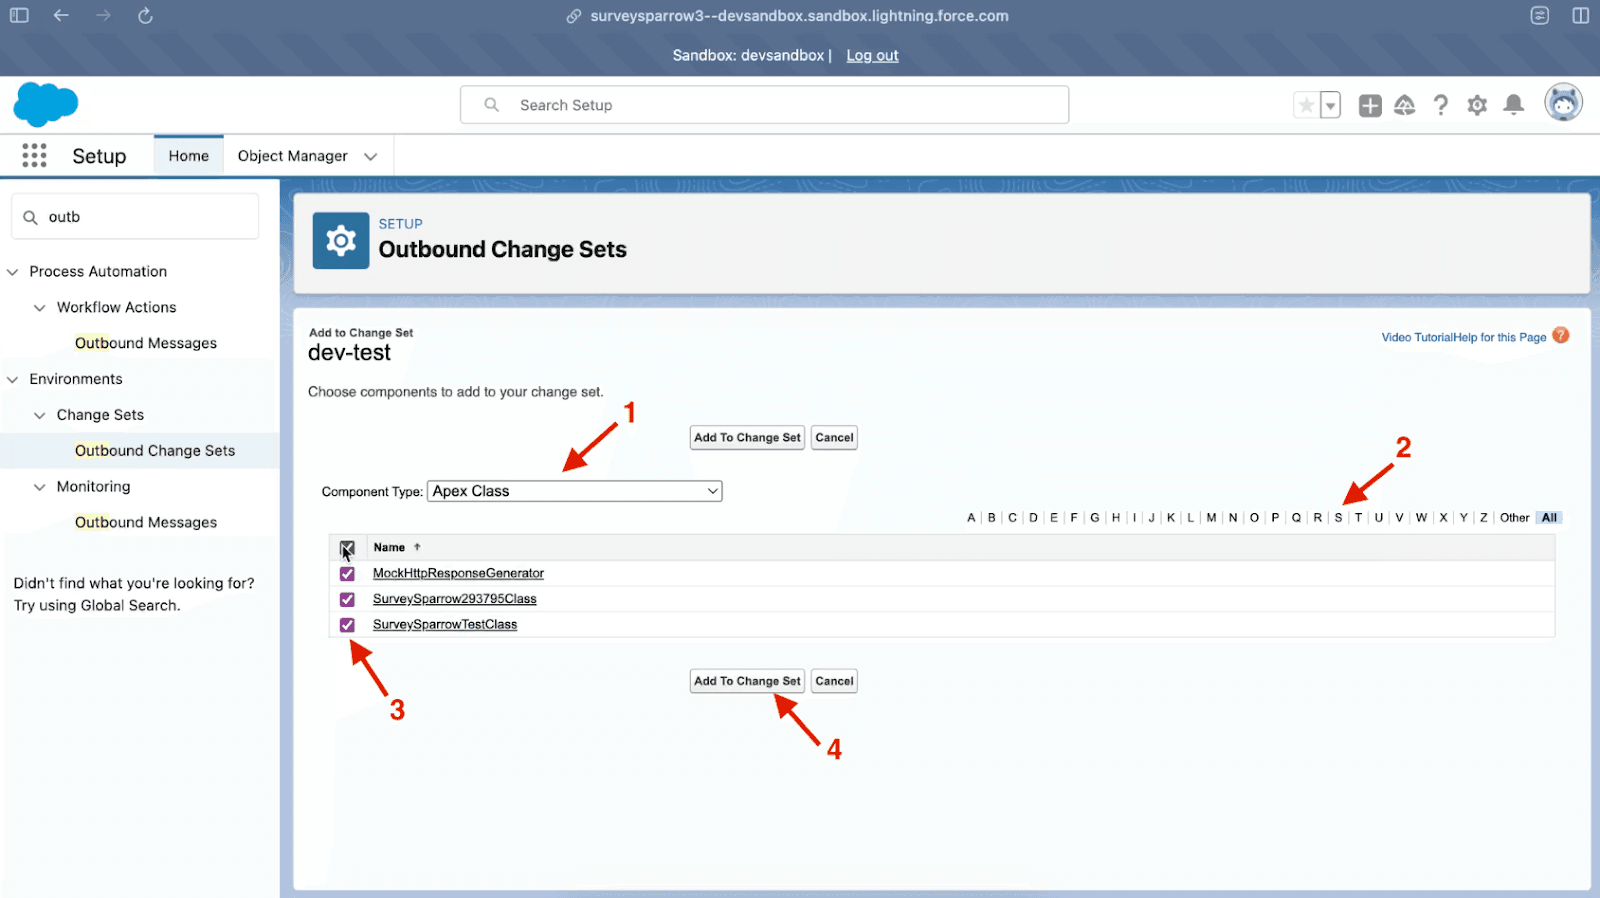
Add all the apex triggers, apex classes (including test classes)
Select all the added components and add them to the change set.
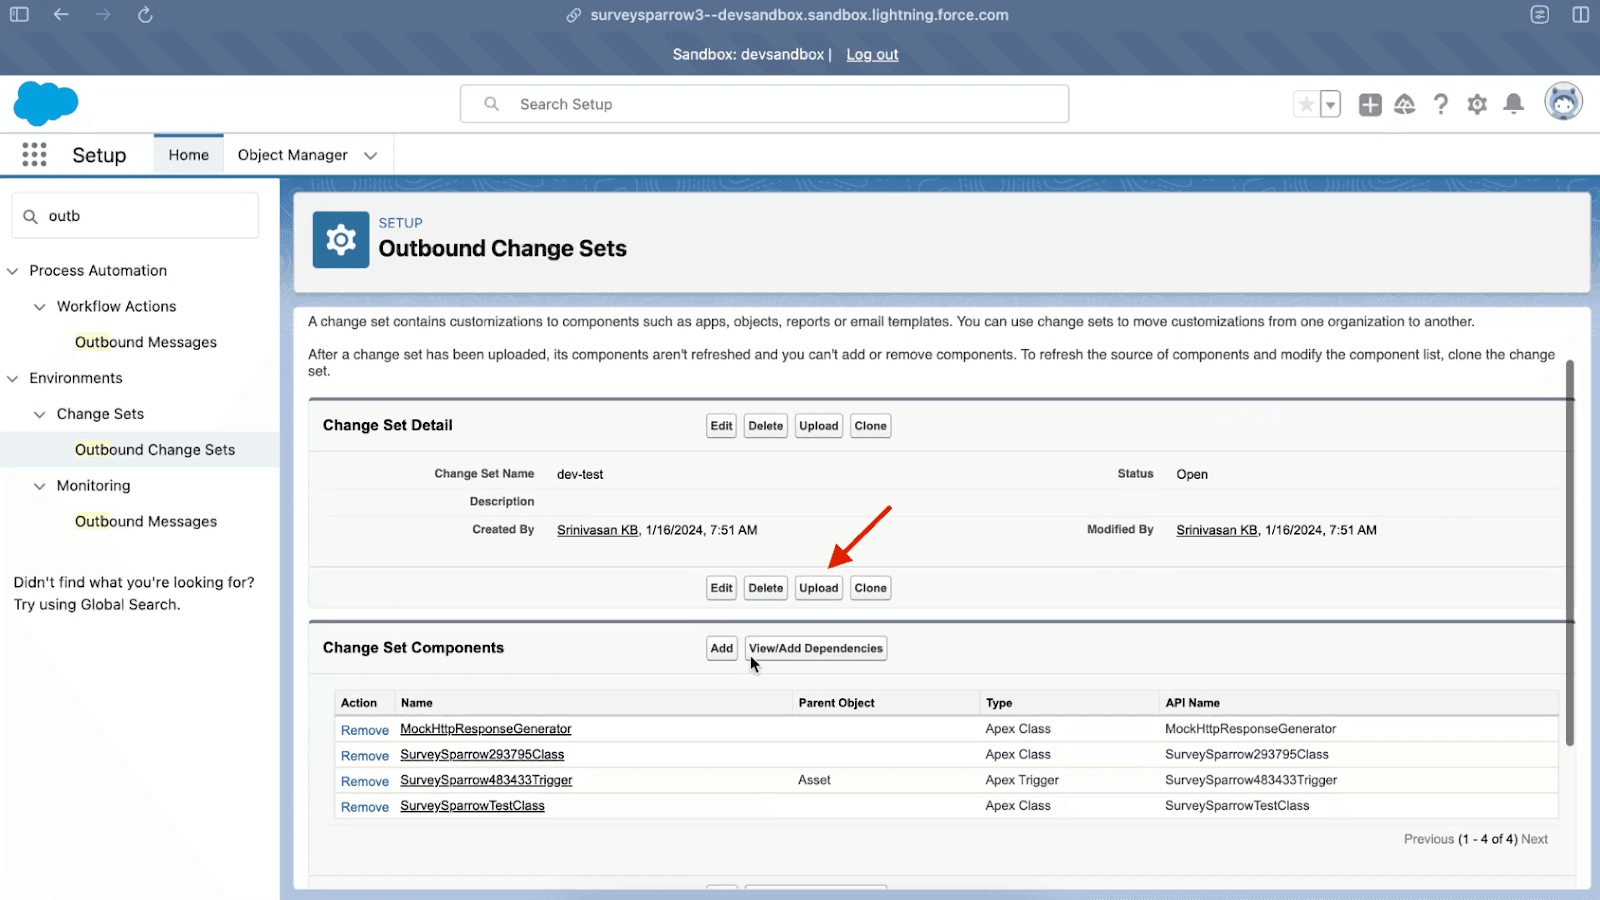
Upload Change Set
In the upload change set page choose the target organization.
Click ‘Upload’ and wait for the upload to complete.
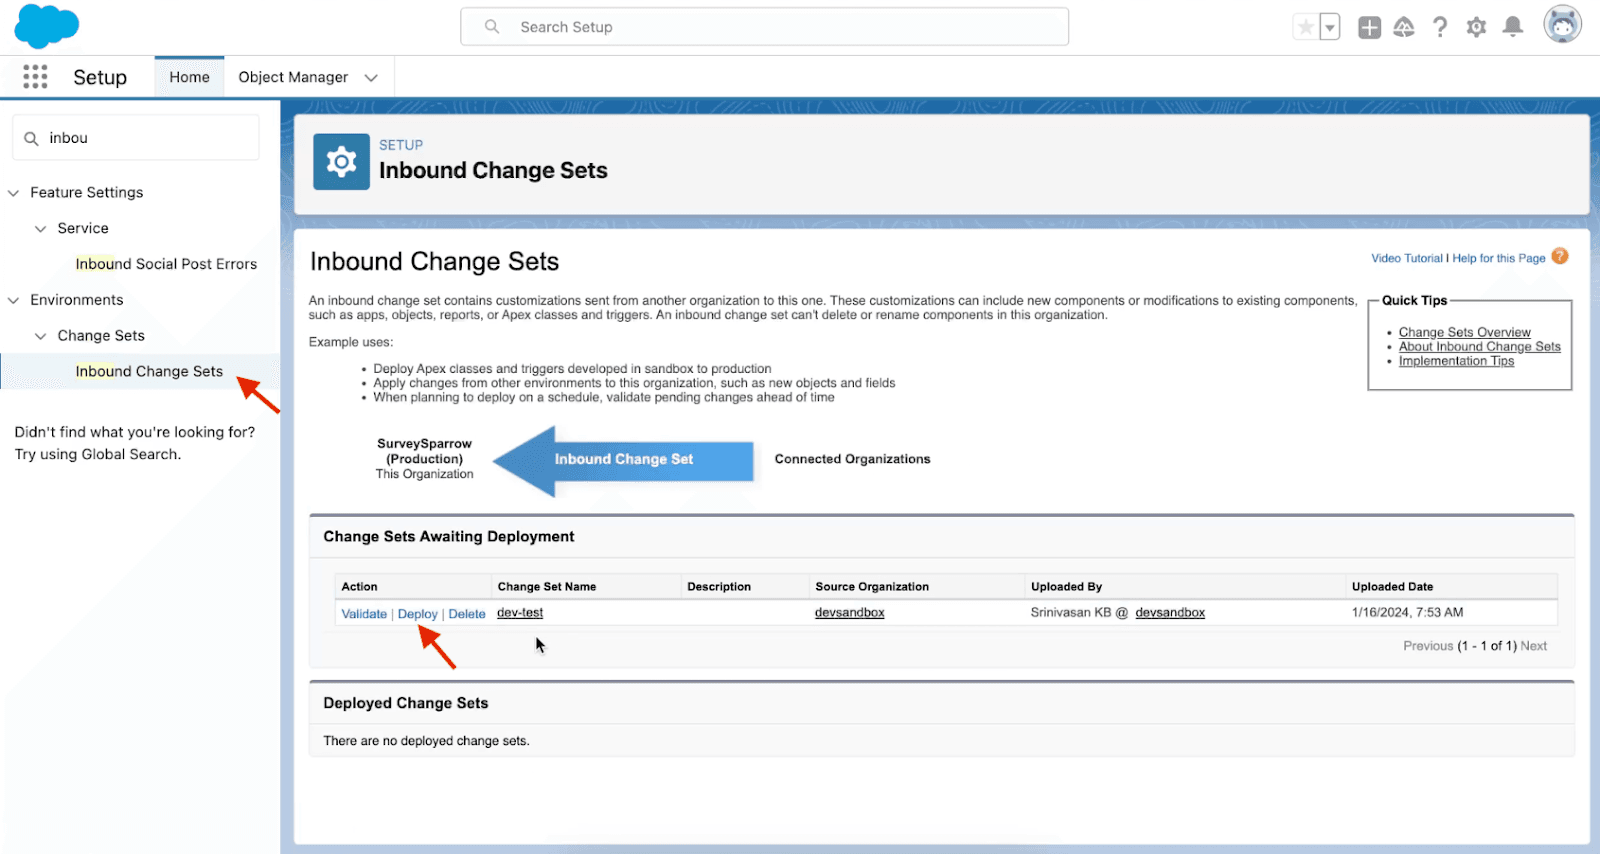
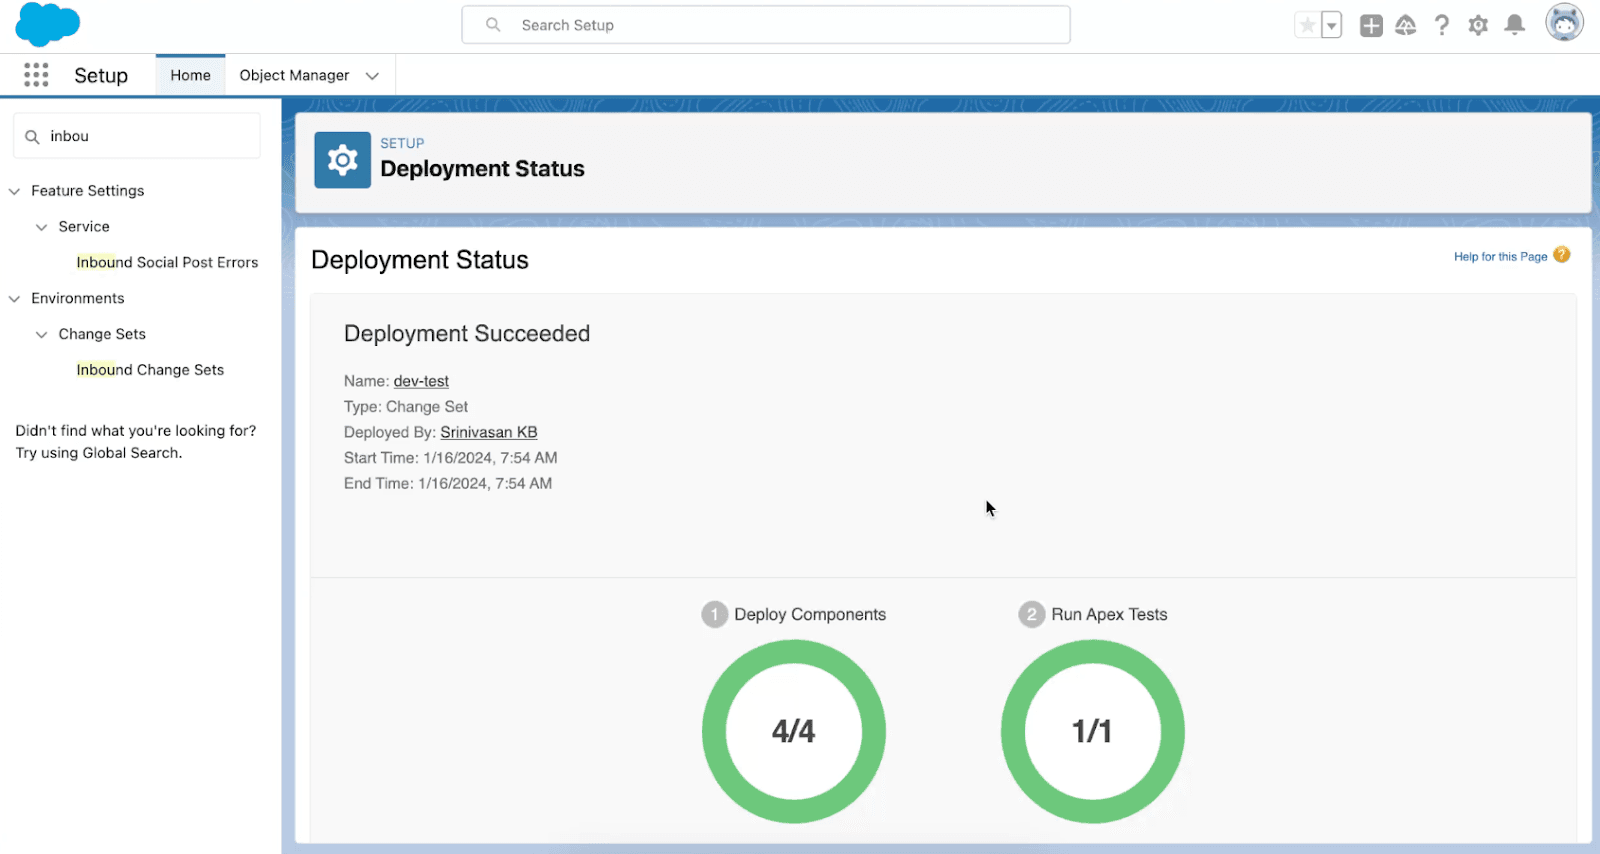
Step 6 - Deploy Change Set in Salesforce Production
Deploy Change Set
In the Production account, search for ‘Inbound Change Sets.’
Find the outbound change set that was pushed from the Sandbox.
Click ‘Deploy.’
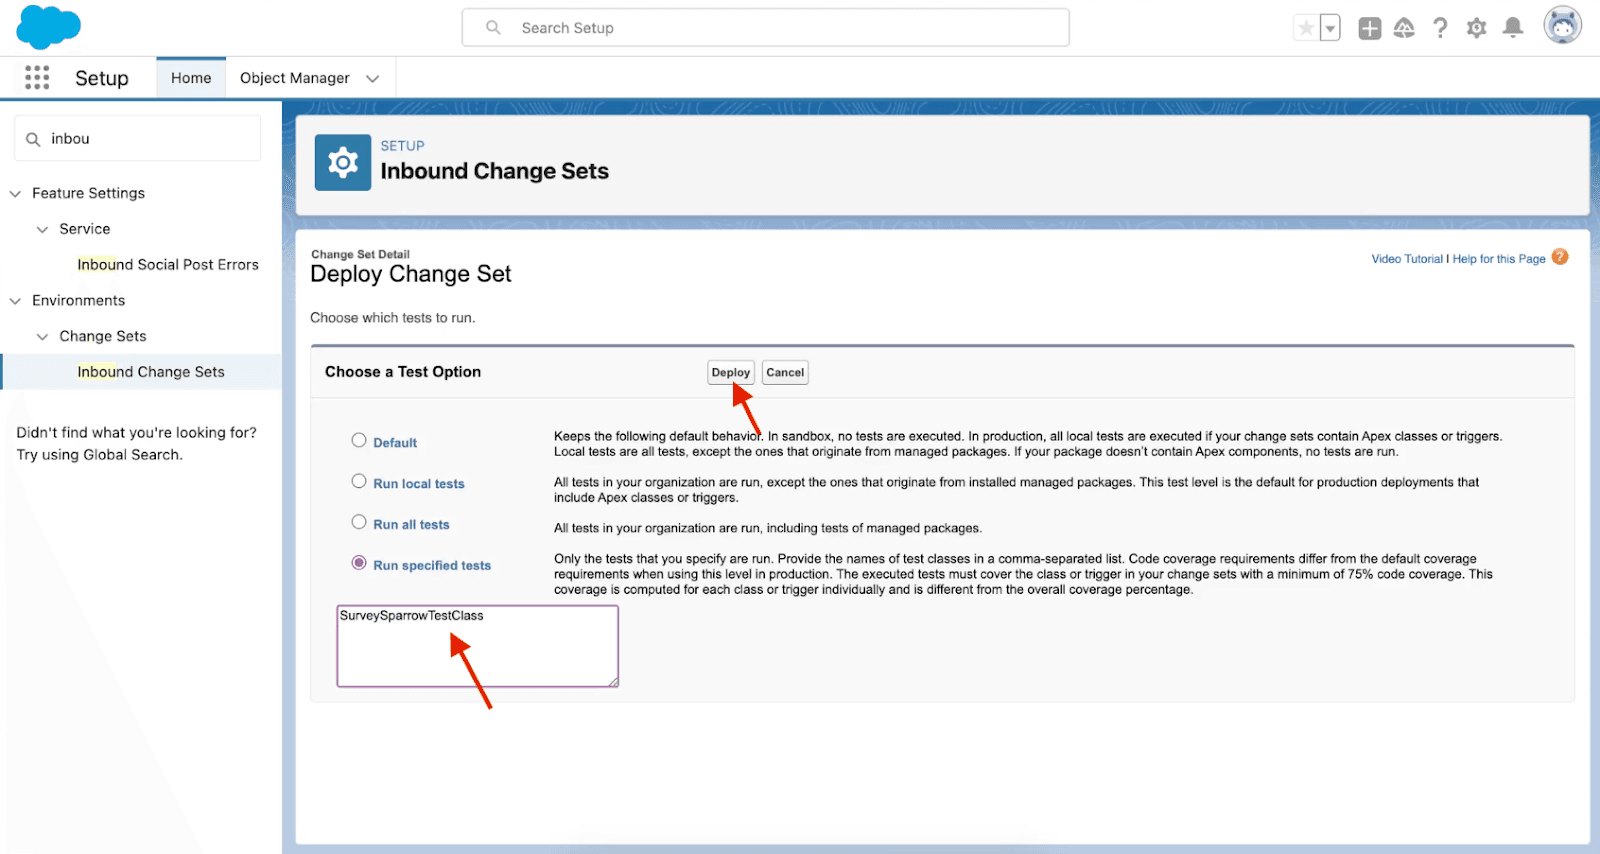
Run Specific Tests
Choose the test option you prefer. If you have a specific Test Class, run specific tests by entering the name of that specific test class.
Click ‘Deploy’ to start the process.
Check the deployment status to ensure it succeeded.
Step 7 - Mapping SurveySparrow Integration
For mapping survey responses to the production account, log out of the sandbox account and log in to your Salesforce account. To do that, follow these steps:
Update SurveySparrow Integration
Go to your SurveySparrow account.
In the account level settings, disable and then re-enable the Salesforce integration.
Now select the ‘Production’ option.
Connect your production account.
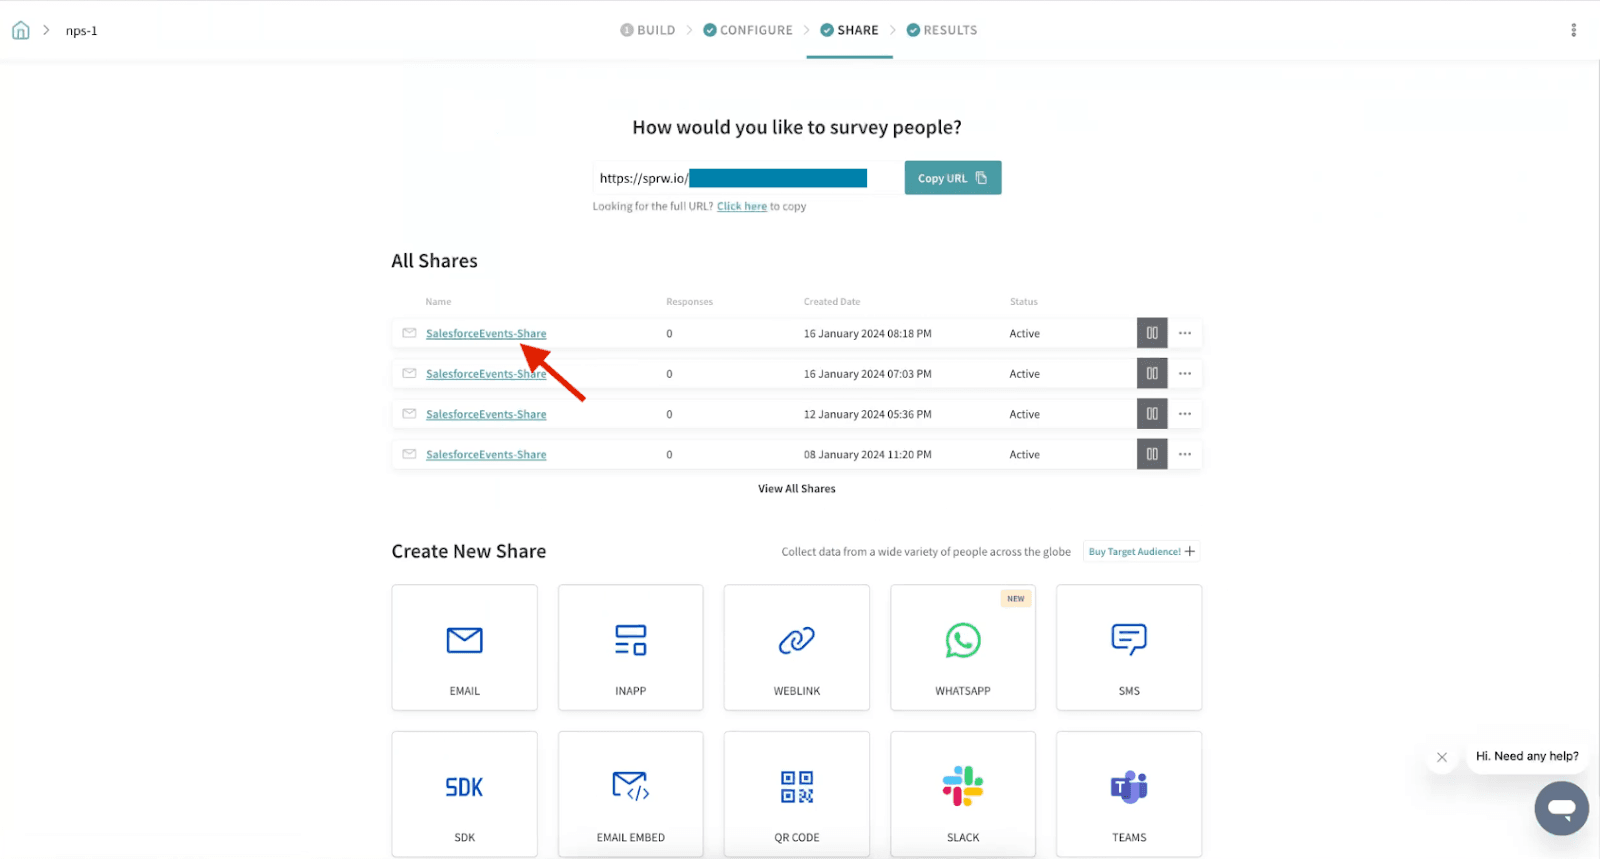
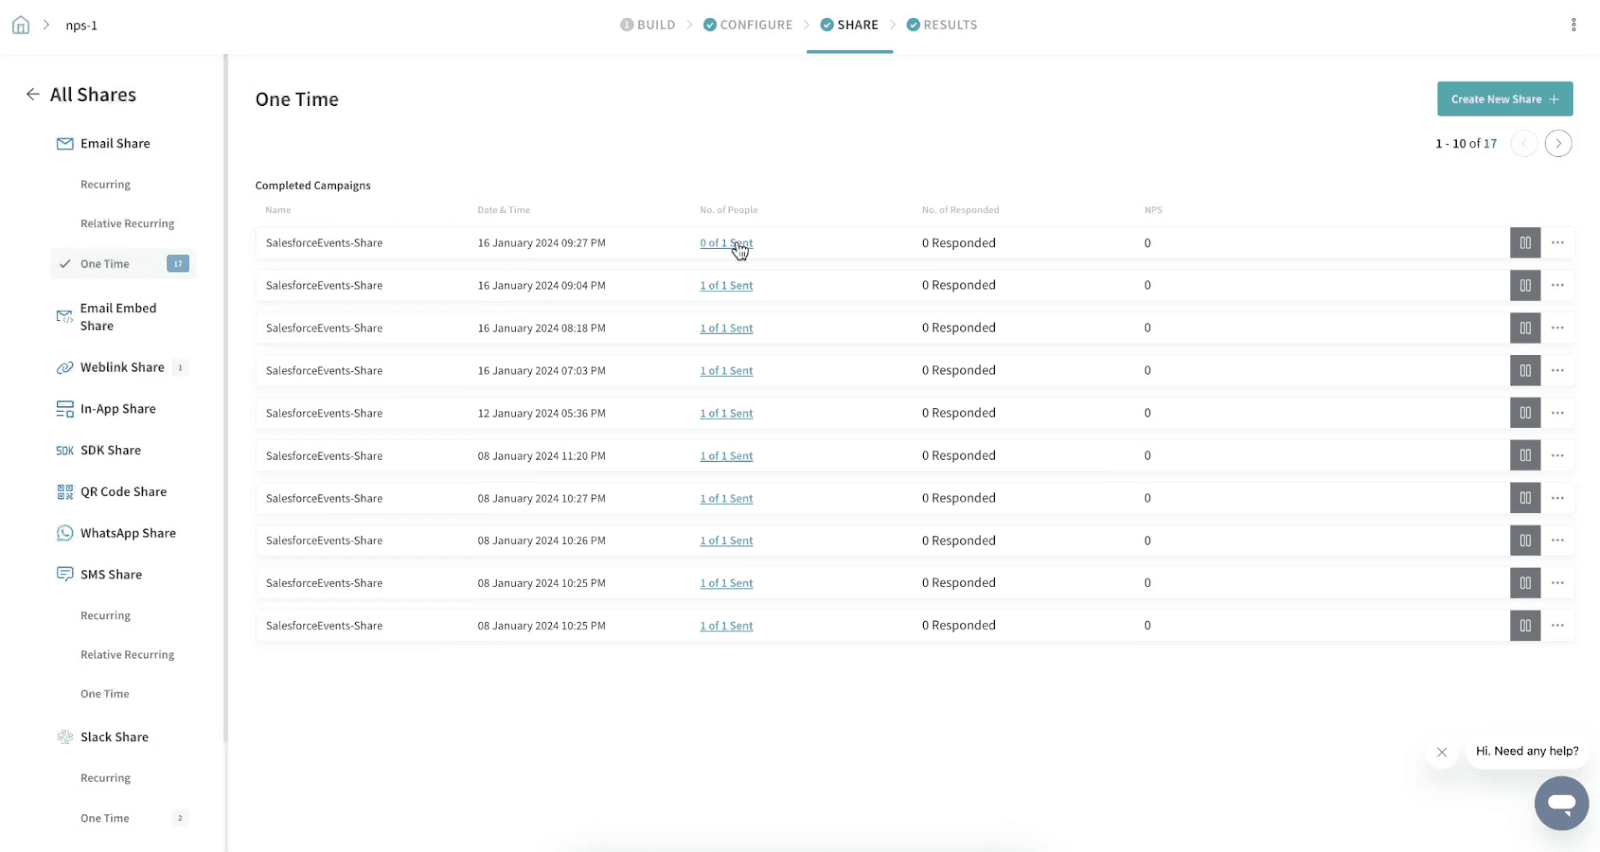
Trigger Email Share
In the Share tab, you will now be able to see the email share and the email will be triggered.
Note:
Ensure that the code coverage is above 90%, as this is a requirement for moving code to Production in Salesforce.
Directly disabling the Apex triggers from the SurveySparrow account is not possible. To discontinue the integration, you must remove the Apex triggers from the Production environment in Salesforce.