Search
NOTE: The process outlined in this article is outdated. To understand how to configure the latest version of the application, please visit this article.
Welcome to the SurveySparrow Application integration guide for Salesforce Marketplace configuration. This comprehensive guide will walk you through the installation process and post-installation setup, ensuring a seamless integration of SurveySparrow with your Salesforce environment. Follow the step-by-step instructions to set up SurveySparrow within Salesforce, enabling you to streamline survey processes and gather valuable insights. Whether you are a Salesforce administrator or an end-user, this guide provides clear and concise instructions to optimize your experience with SurveySparrow in the Salesforce Marketplace. Let's get started on enhancing your survey capabilities and maximizing the potential of these powerful platforms working together.
Installation Process
1. Navigate to SurveySparrow App in the AppExchange listing:
- Click on "Get It Now" to begin the installation process.
2. Log in to the AppExchange:
- If not logged in, you will be prompted to sign in.
3. Select Install Environment:
- Choose between sandbox or production install.
4. Accept Terms and Conditions:
- Check and accept terms and conditions, then click "Confirm and Install."
5. Log in to Target Salesforce Org:
- You will be prompted to log in to your target Salesforce org to initiate the installation.
6. Installation Settings:
-Select an installation option based on who should have access to the app: Admins only, All users, or Specific profiles.
- Click "Install."
7. Installation Confirmation:
- Users may receive a message indicating that the app is taking time to install.
- Click "Done" and wait for an email confirmation from Salesforce support.
8. Post Installation:
- Once complete, the SurveySparrow app will appear in your list of apps in the app launcher.
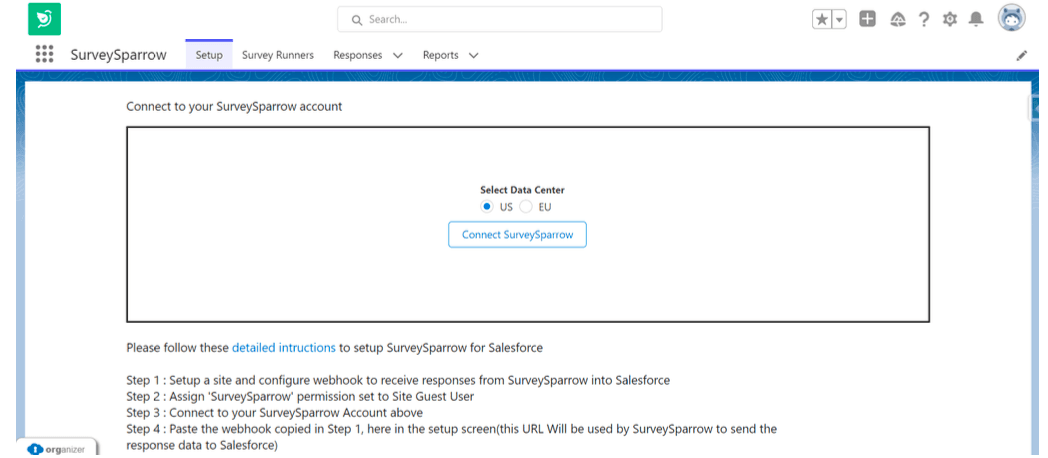
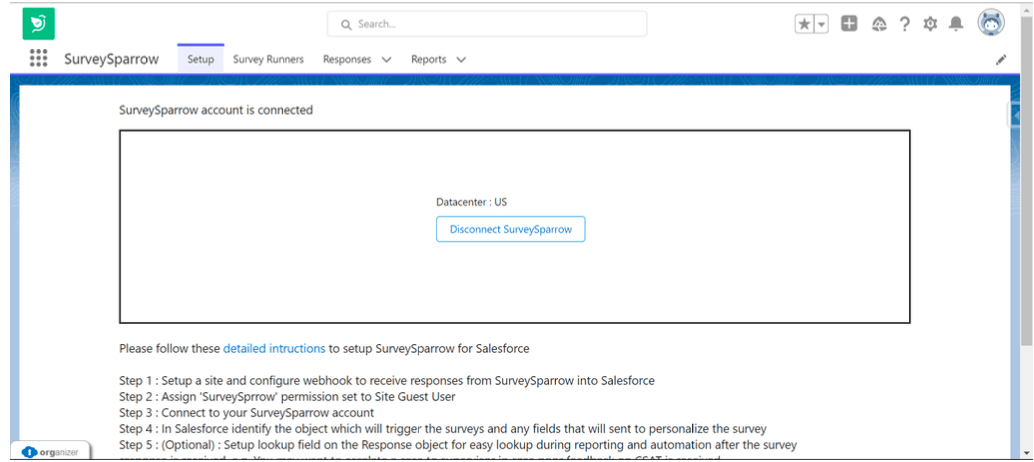
Post Installation Setup
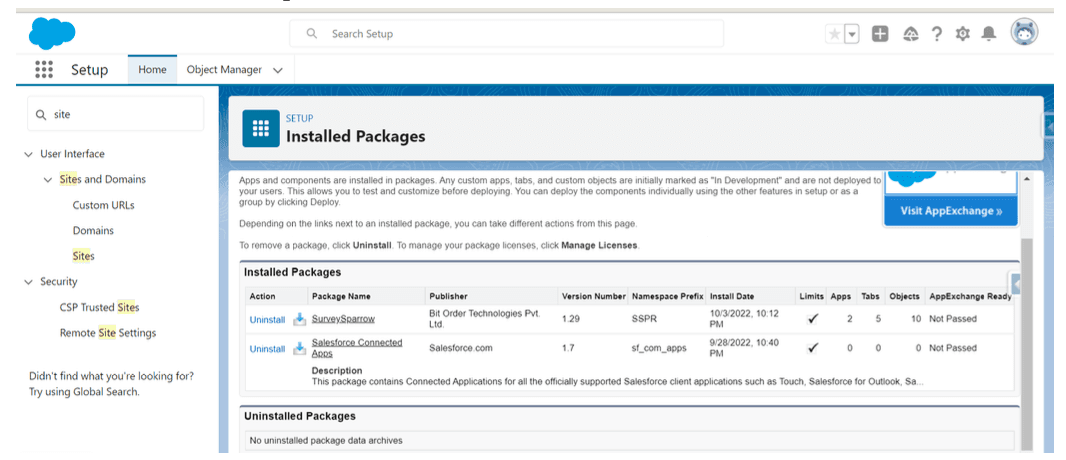
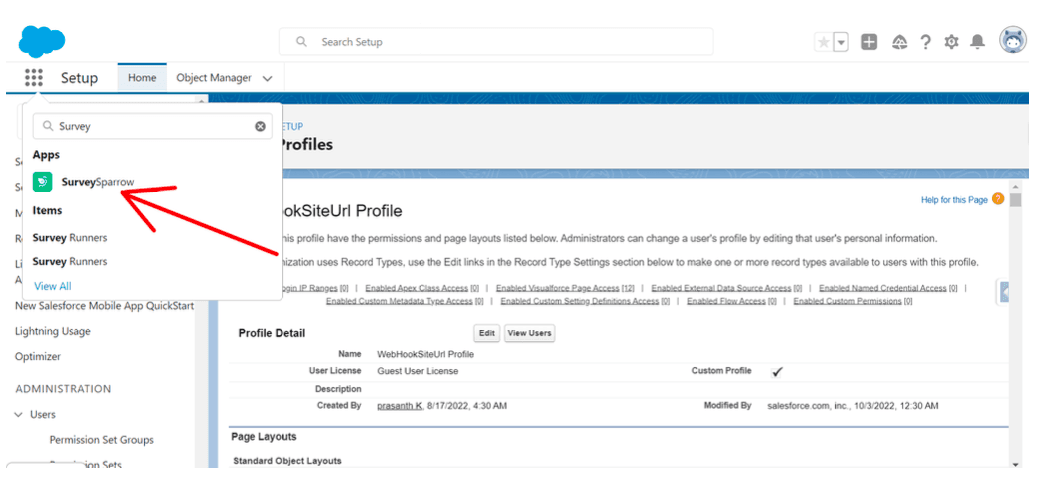
1. Navigate to Setup:
a. From Setup, search for "Site" and click on "Sites."
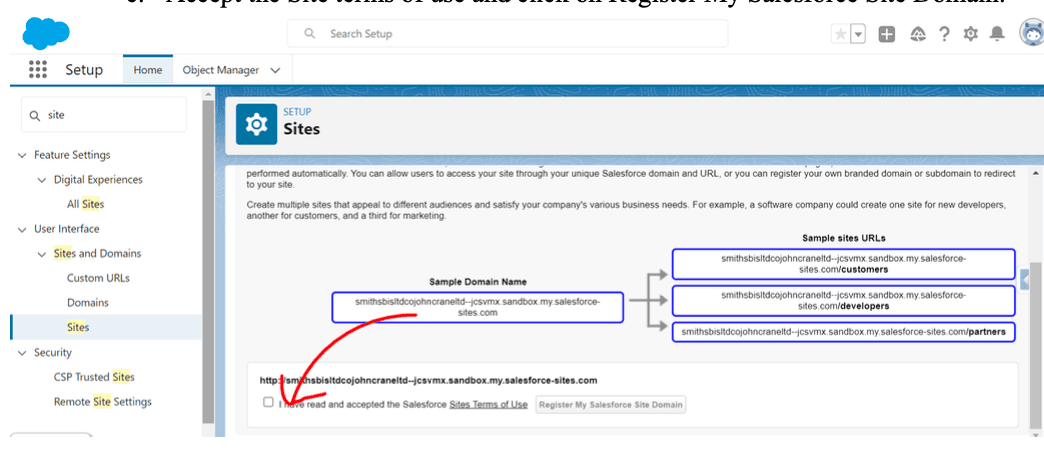
b. Register Salesforce Site:
- Accept the site terms of use and register your Salesforce site domain.
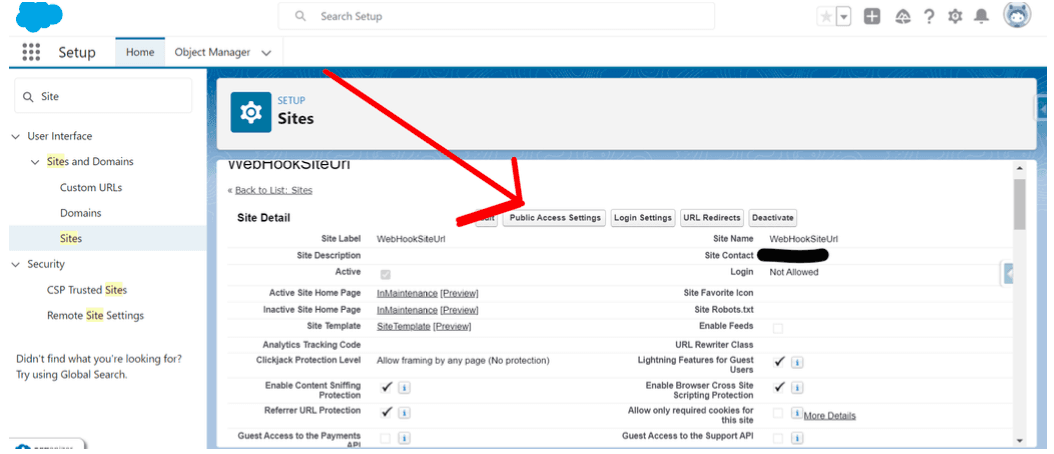
c. Create a New Site:
- Create a new site with a label, name, and active checkbox.
- Save the site.

d. Public Access Settings:
- Click on Public Access Settings.
e. Click on ‘Enabled Apex Class Access’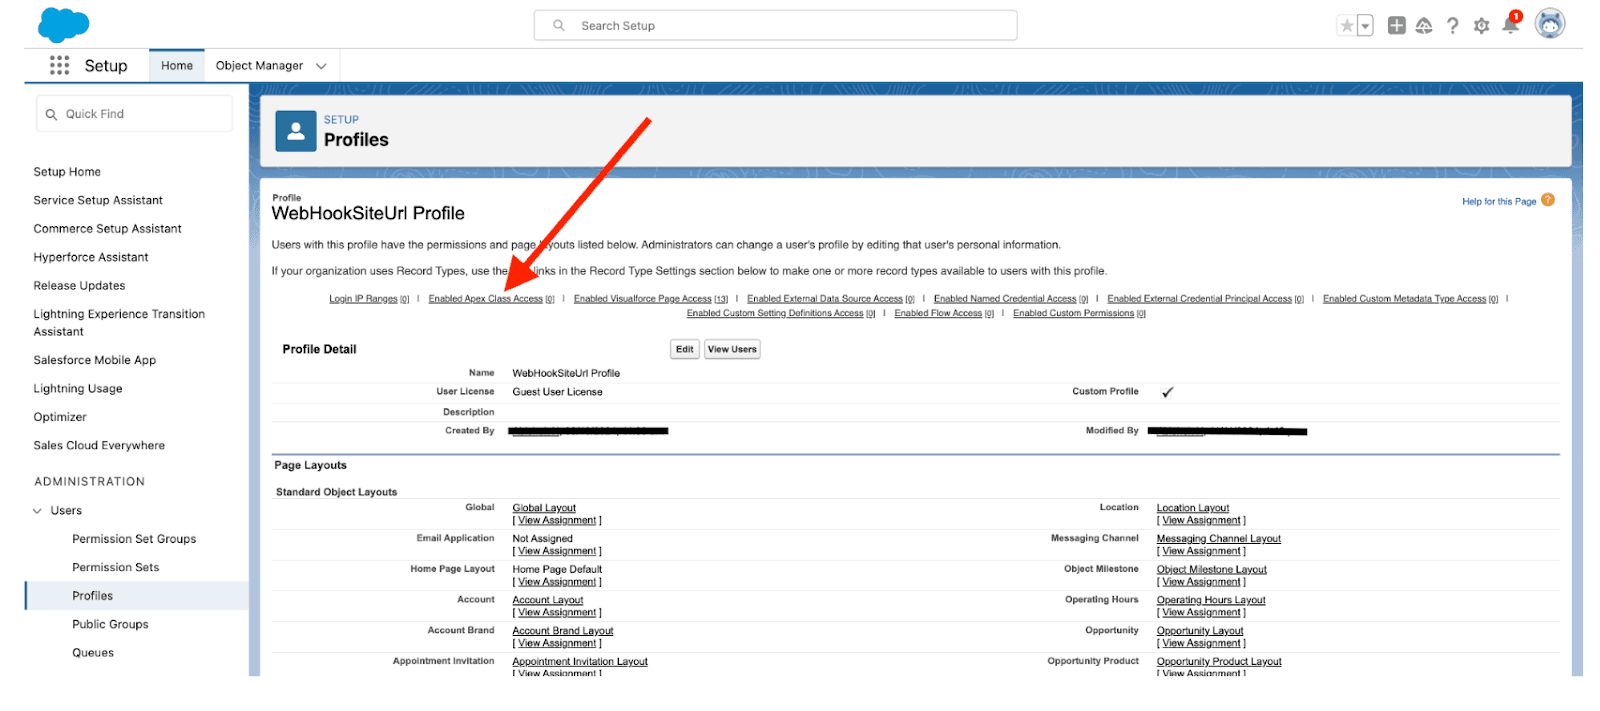
f. Click on ‘Edit’ under the Enabled Apex Class Access.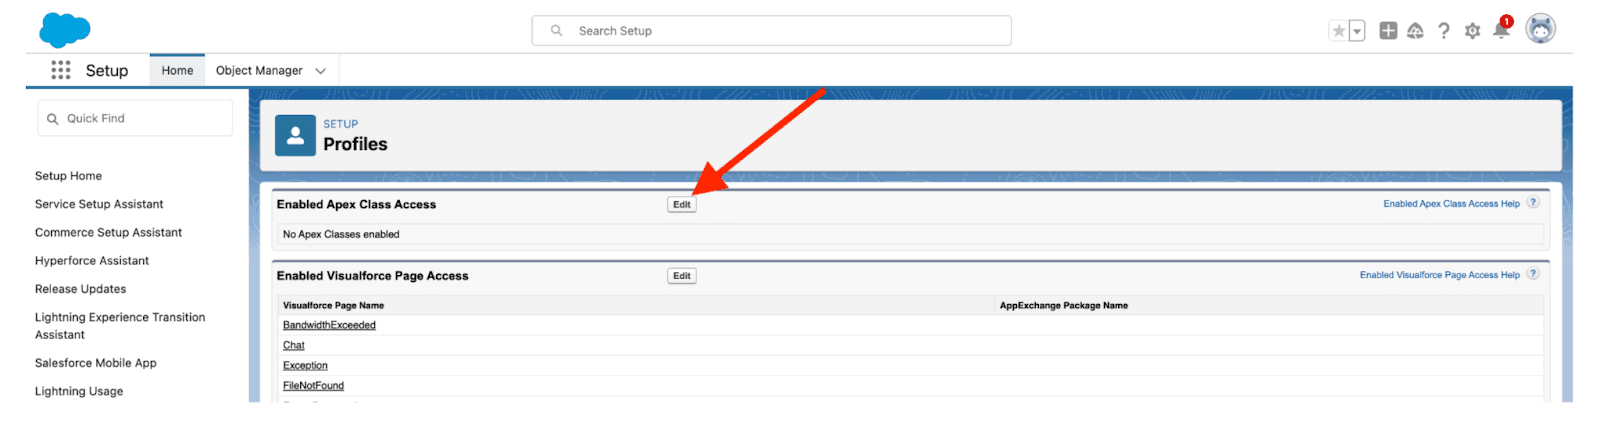
g.Select the ‘SVSP.WebHookResponseHandleClass’ Apex class and add to the ‘Enabled Apex Classes’ and click on ‘Save’.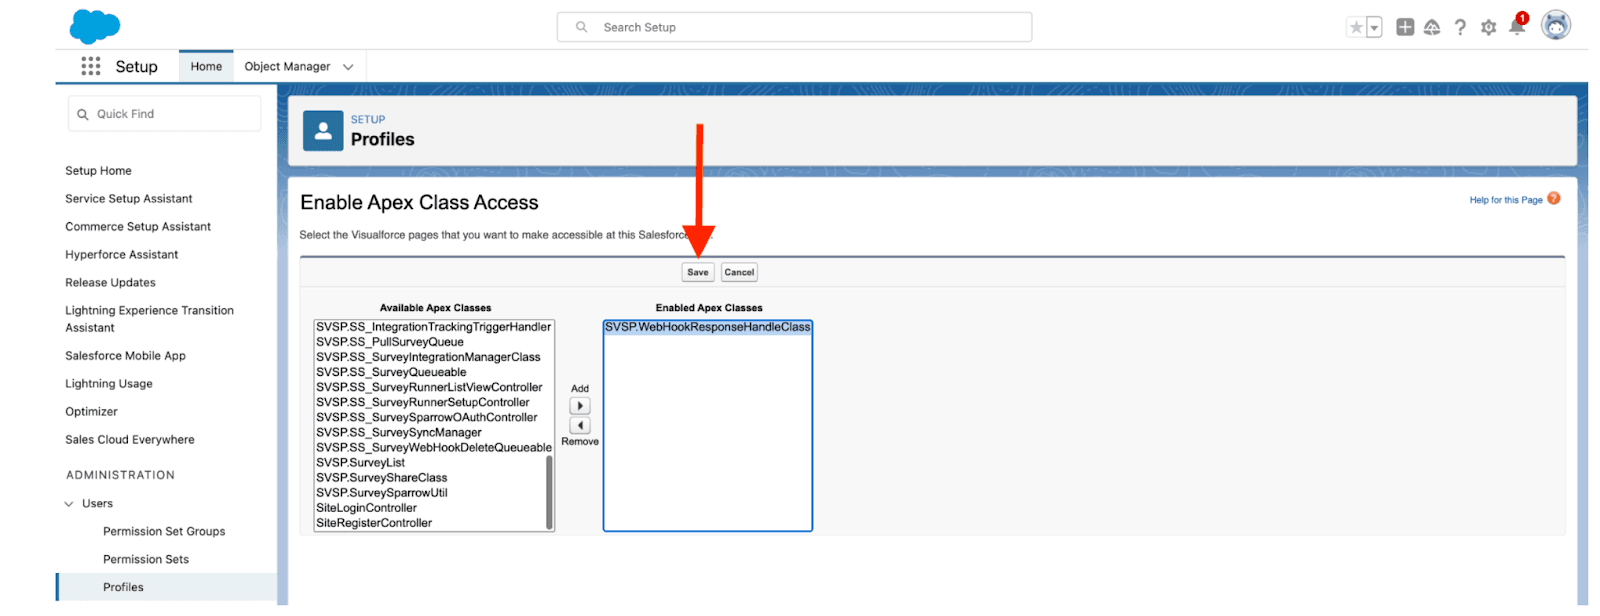
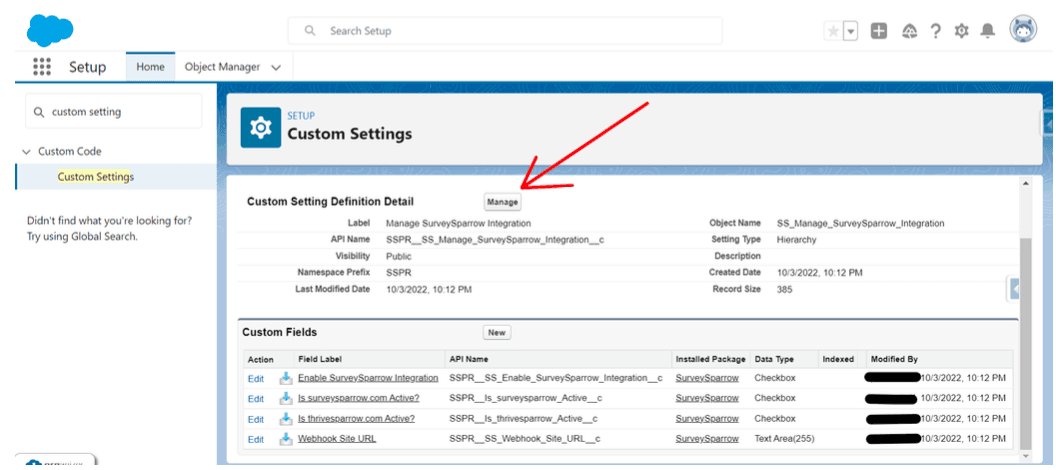
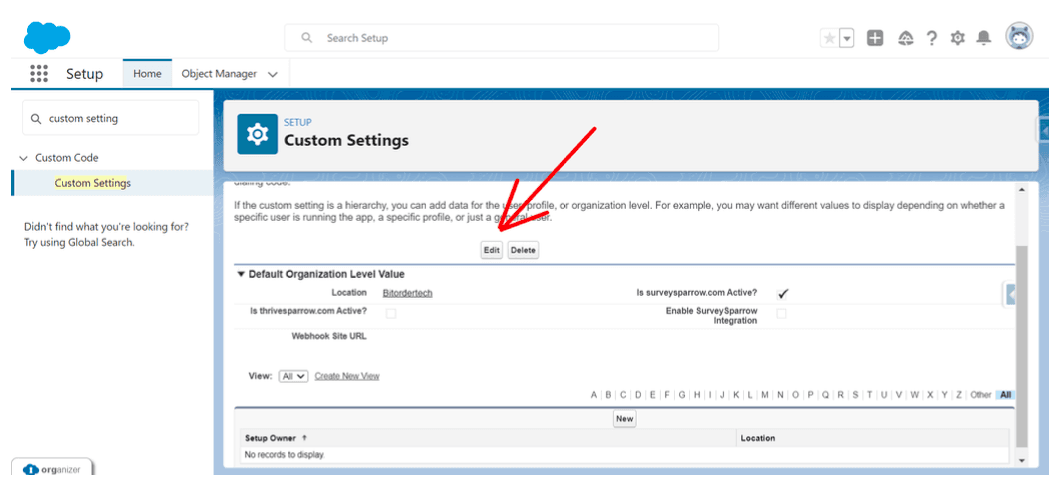
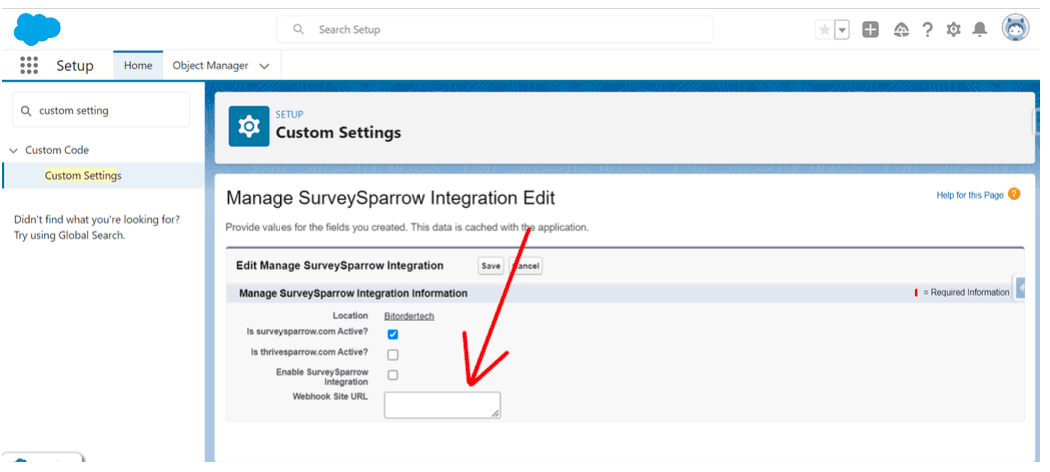
h.Configure Custom Settings:
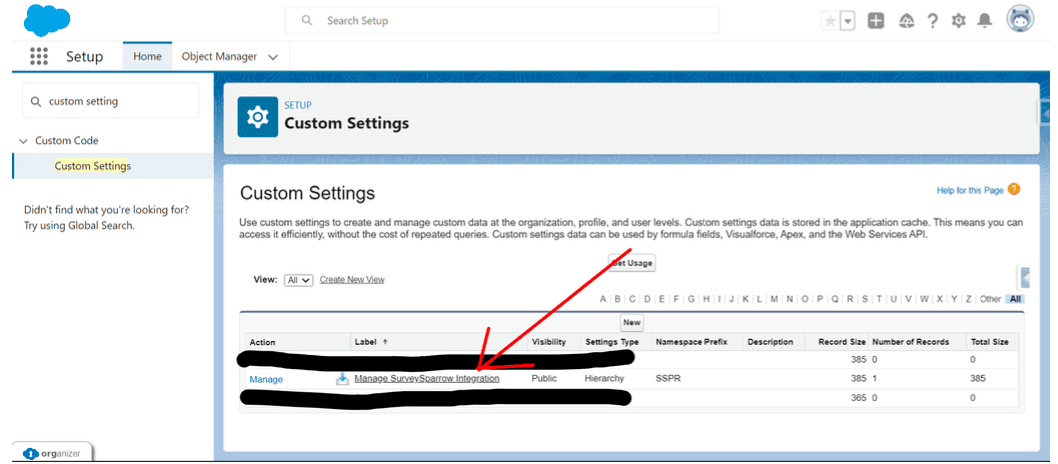
In Setup, search for 'Custom settings' and under Custom code, click 'Custom settings.'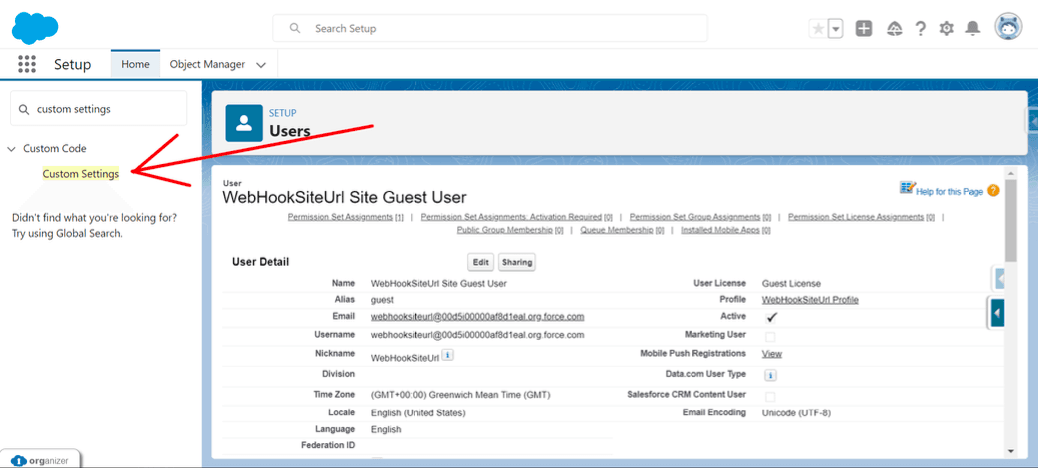
1. Manage SurveySparrow Integration.
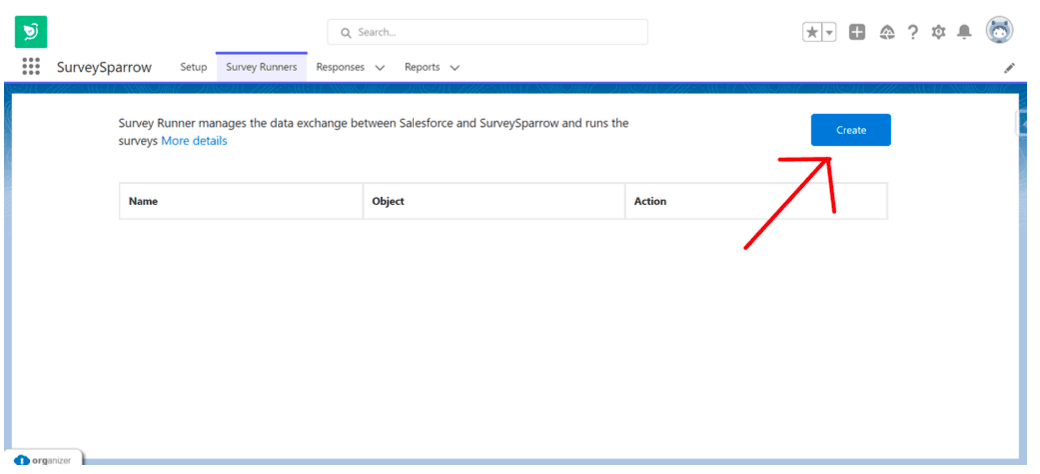
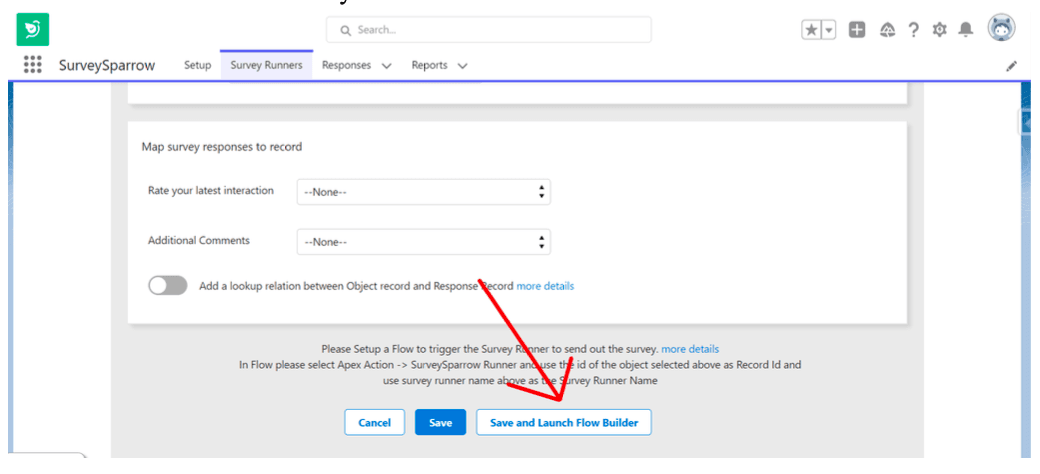
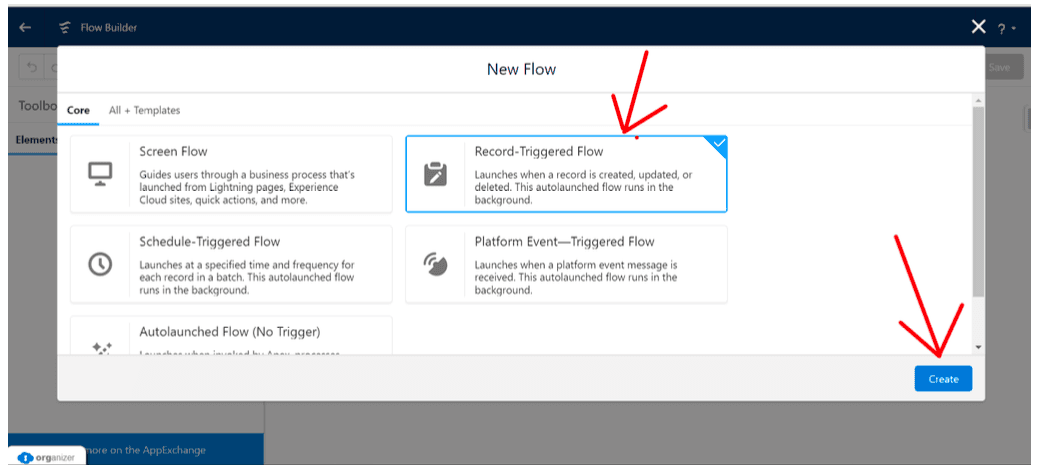
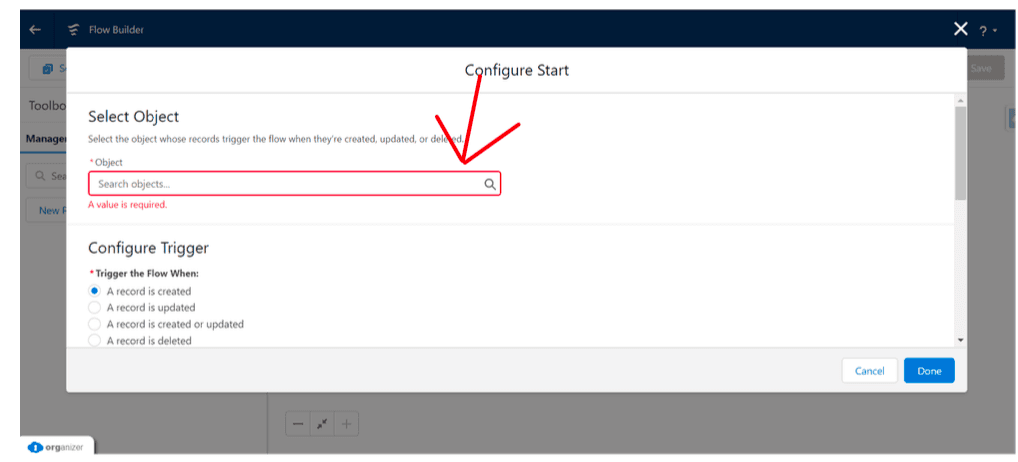
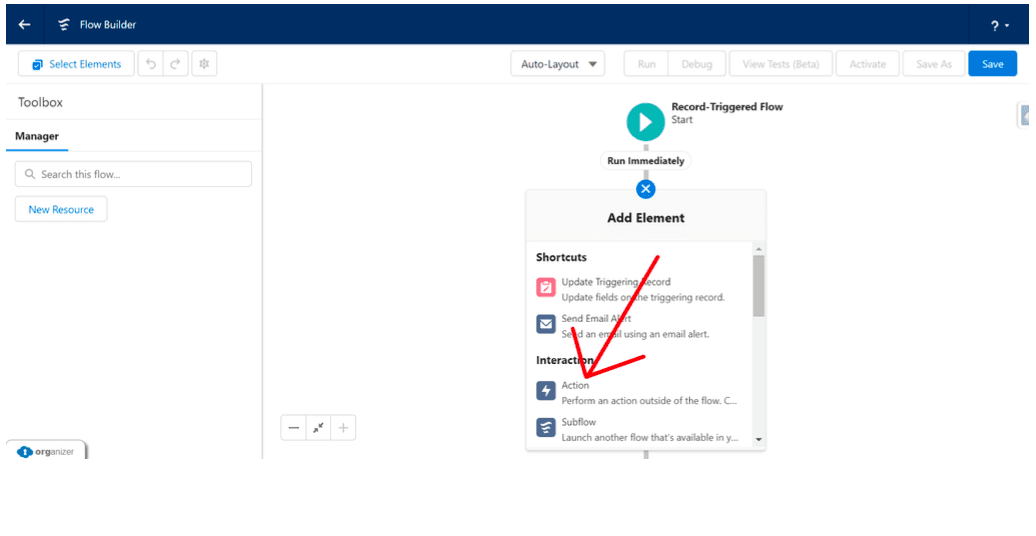
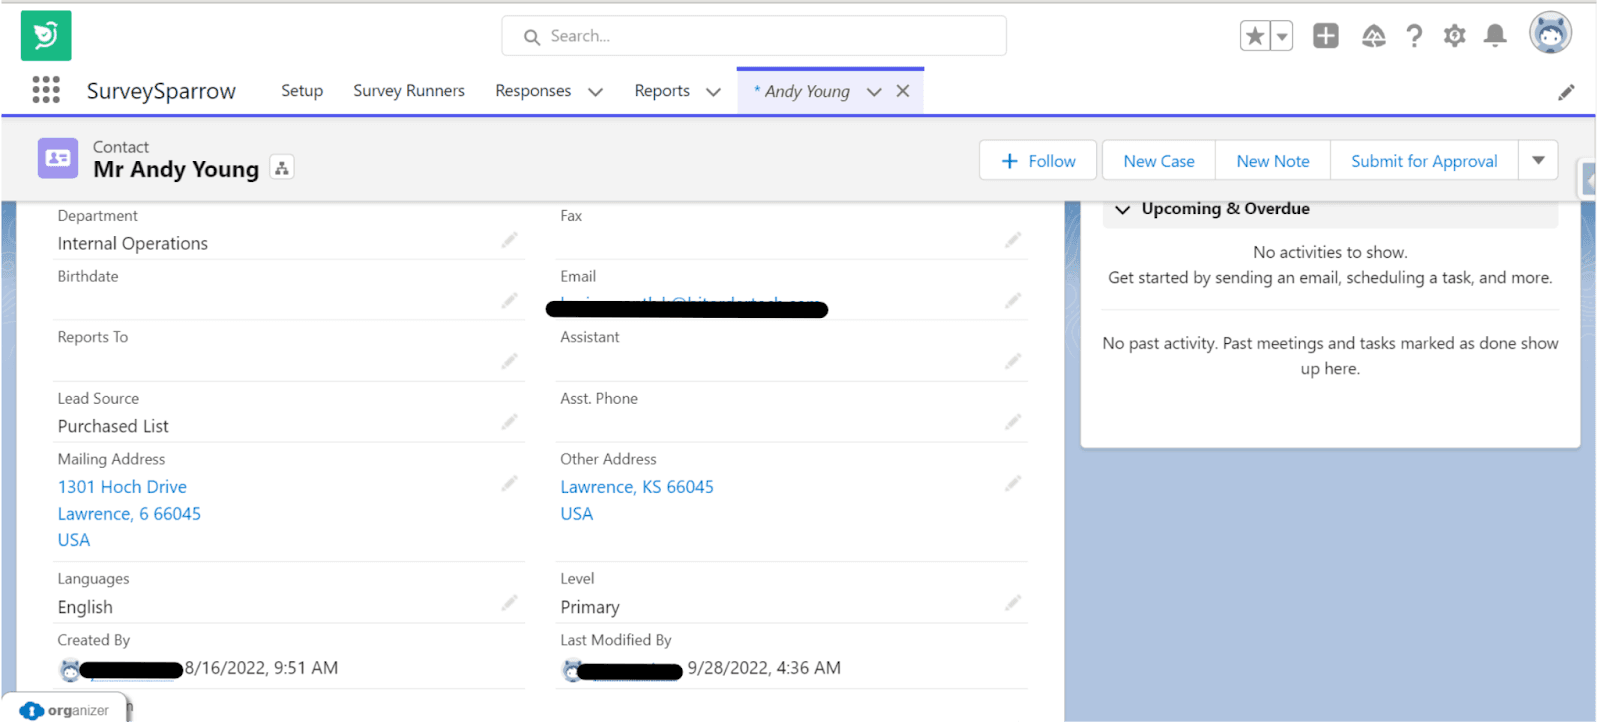
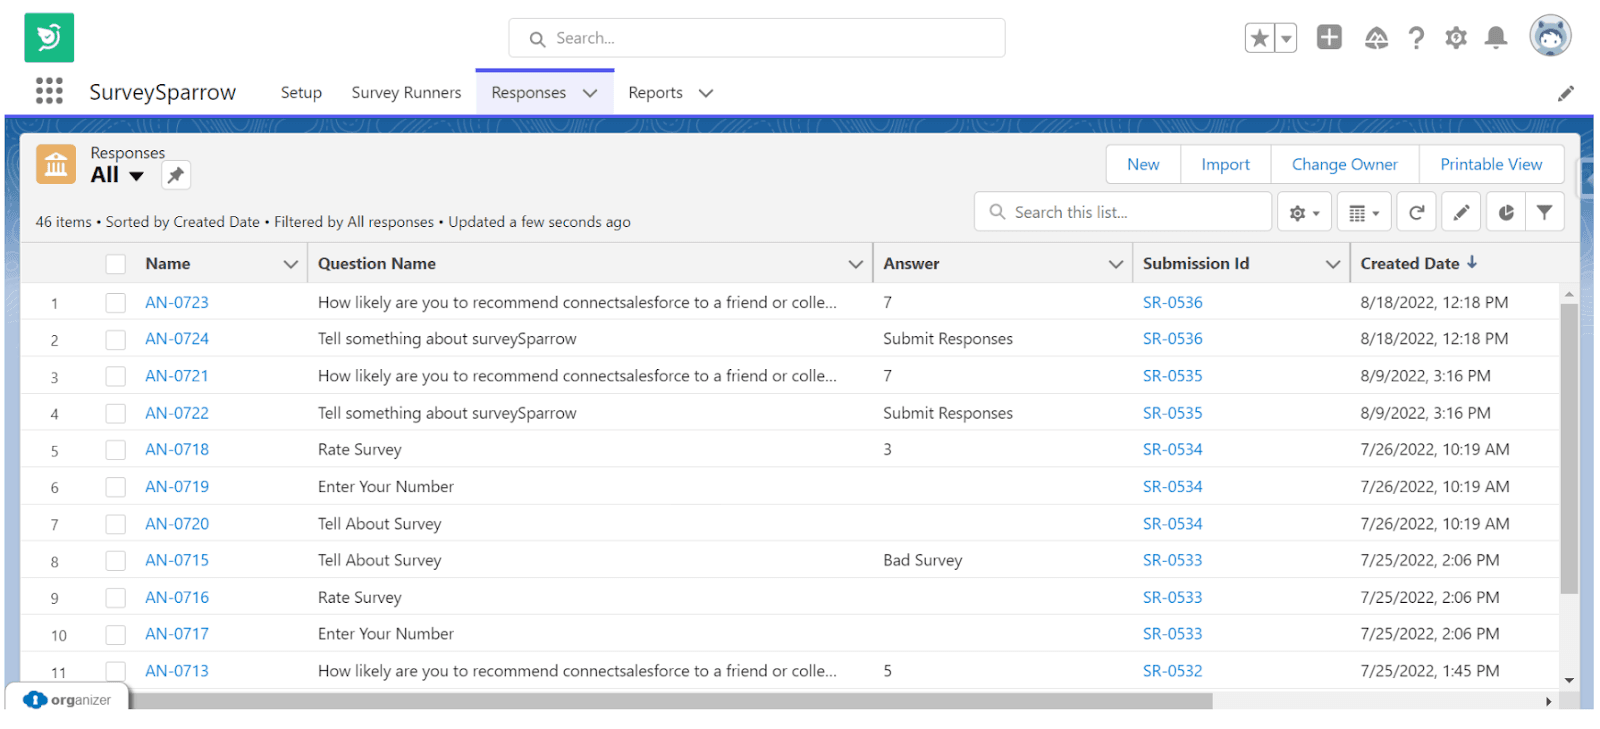
3.4. Responses and Reports Tab

Feel free to reach out to us if you have any questions. We’re just a chat away.
Powered By SparrowDesk