Search
Coda is a collaborative workspace that combines documents, spreadsheets, databases, and automation. SurveySparrow’s new integration with Coda (available as a Coda Pack) enables users to import survey responses directly into their Coda docs as structured tables. These tables can be updated any time with the latest responses, in just a click.
This eliminates the need for constant manual exports or copy-pasting in Coda, and instead brings customer feedback straight into the workflows where decisions happen.
Some valuable use cases include:
In this article, we'll zip through the processes of:
1. Open your Coda doc (or a page within) and click on Insert.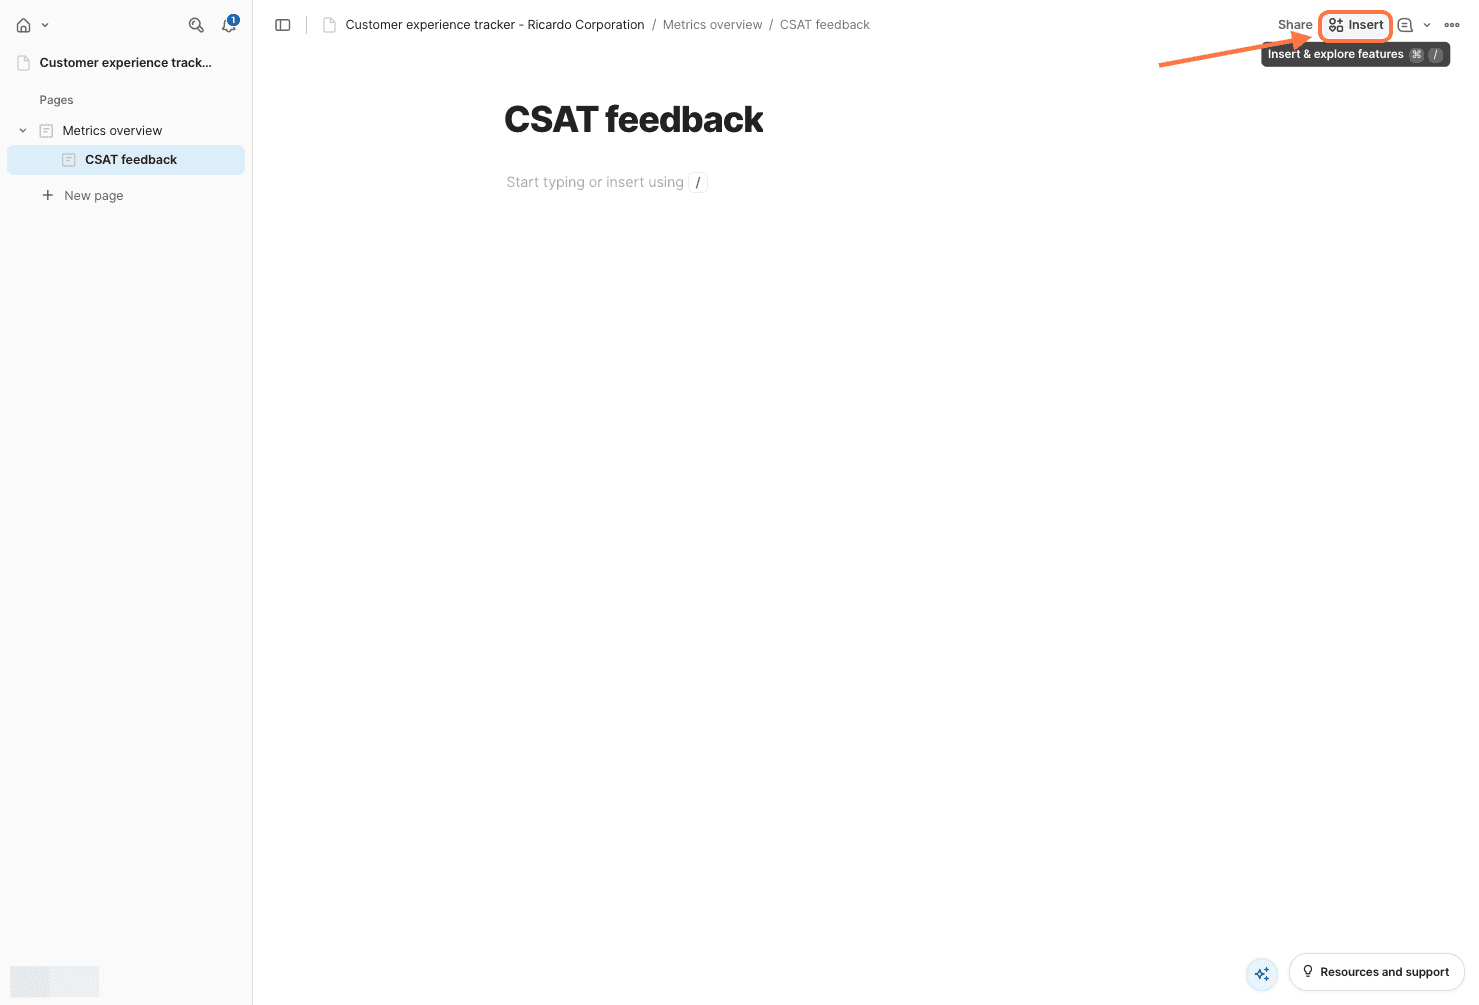
2. When the right-side panel opens, click on Packs.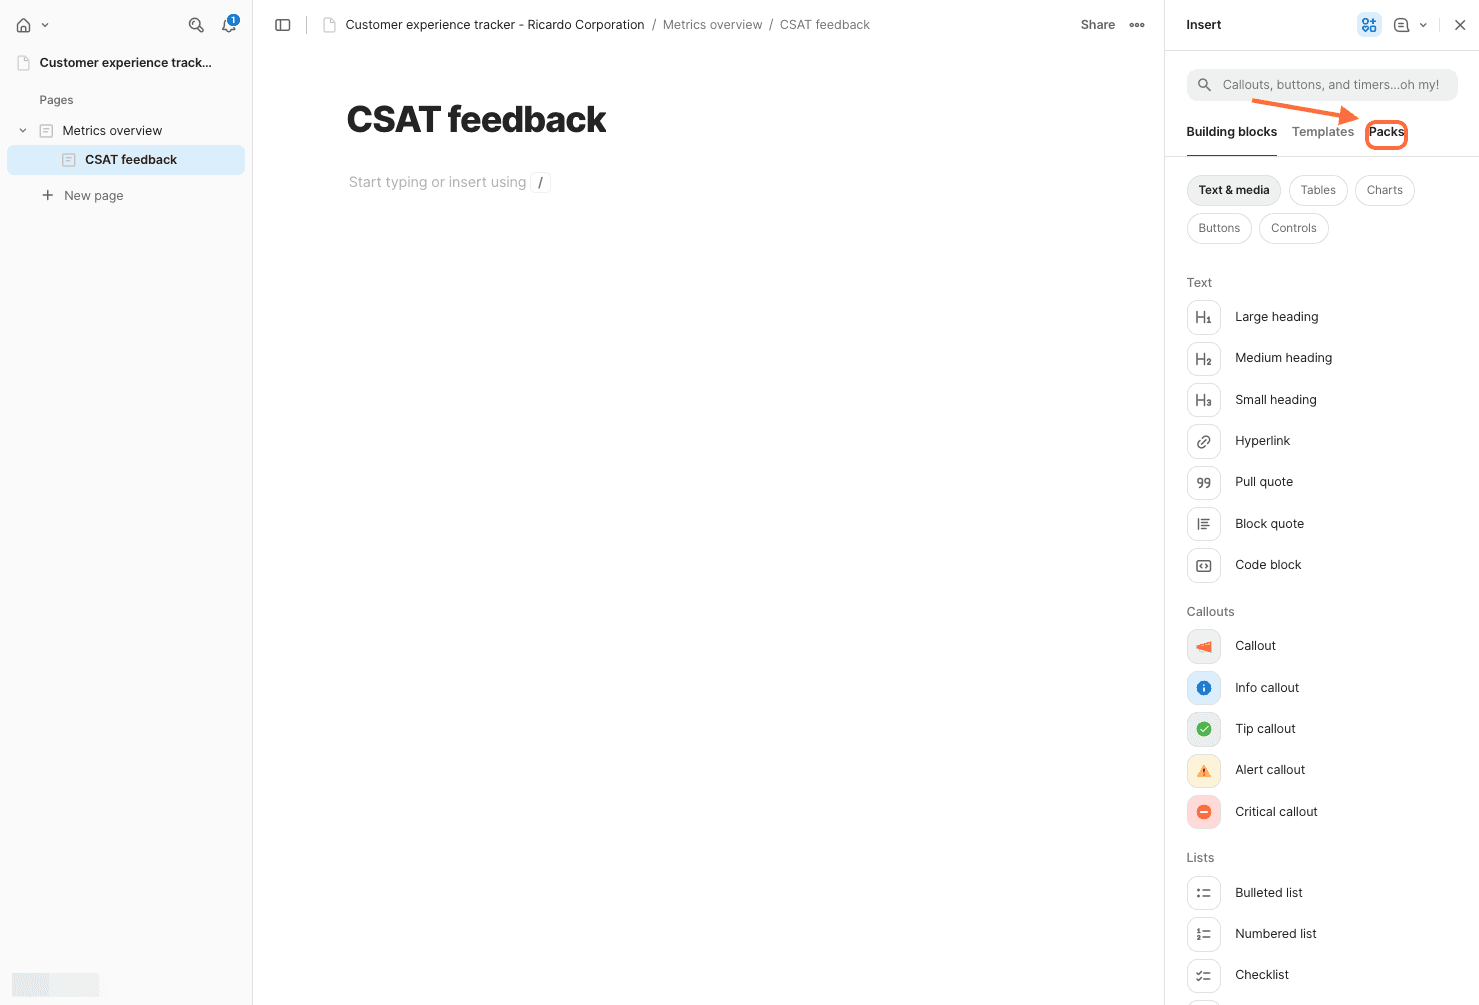
3. Use the search box to find the SurveySparrow Pack, then click on it.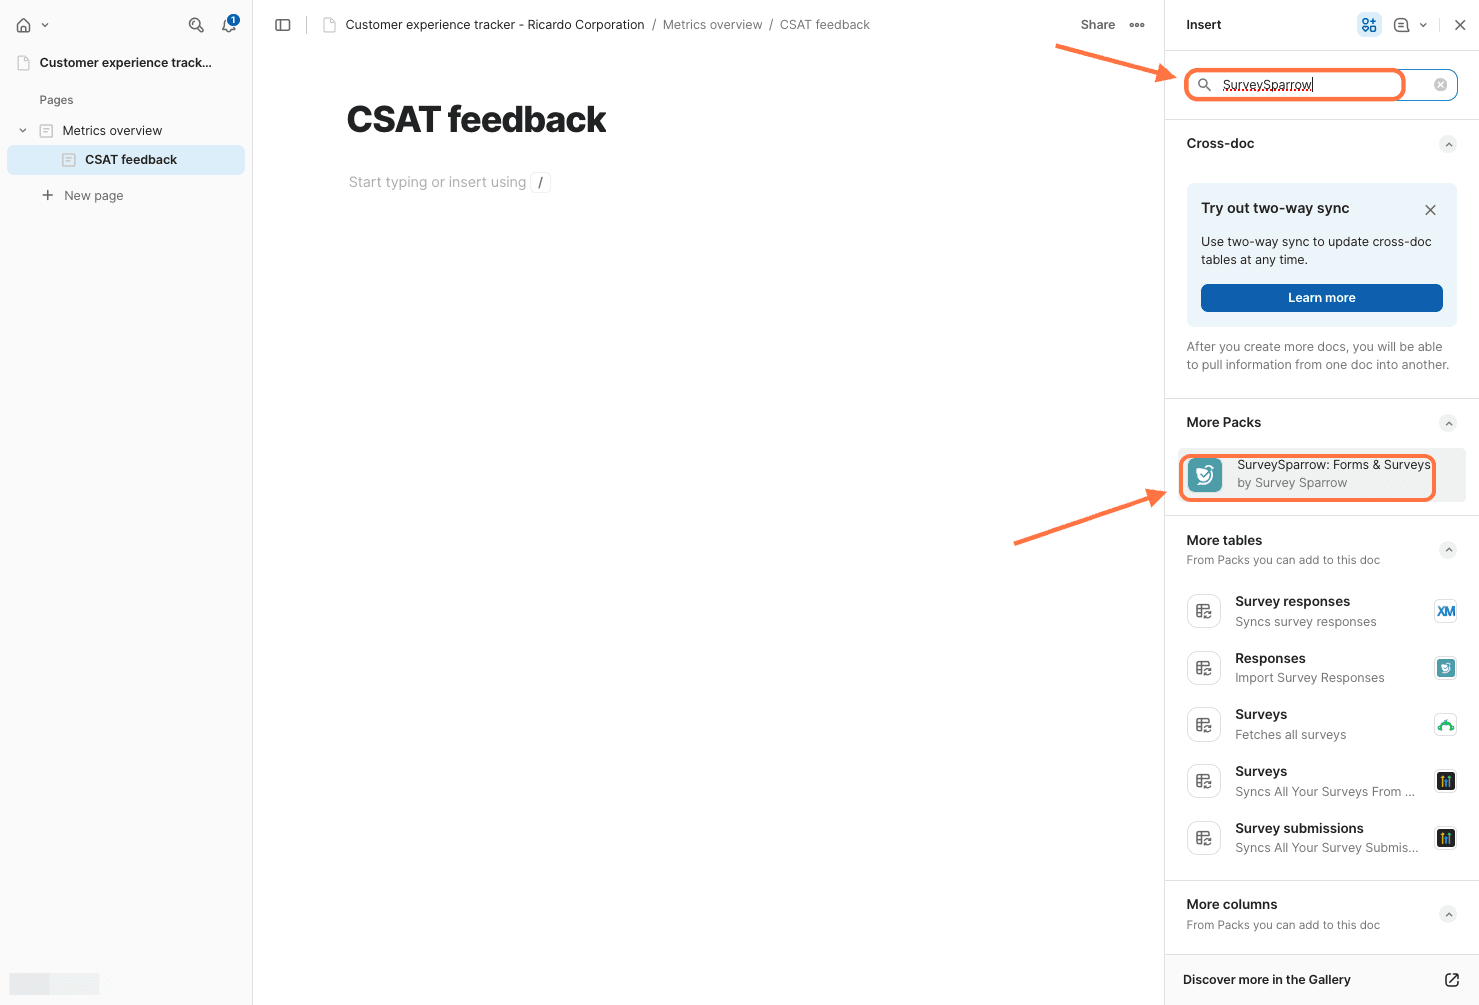
4. After the SurveySparrow pack pops up, click on Add to doc for free.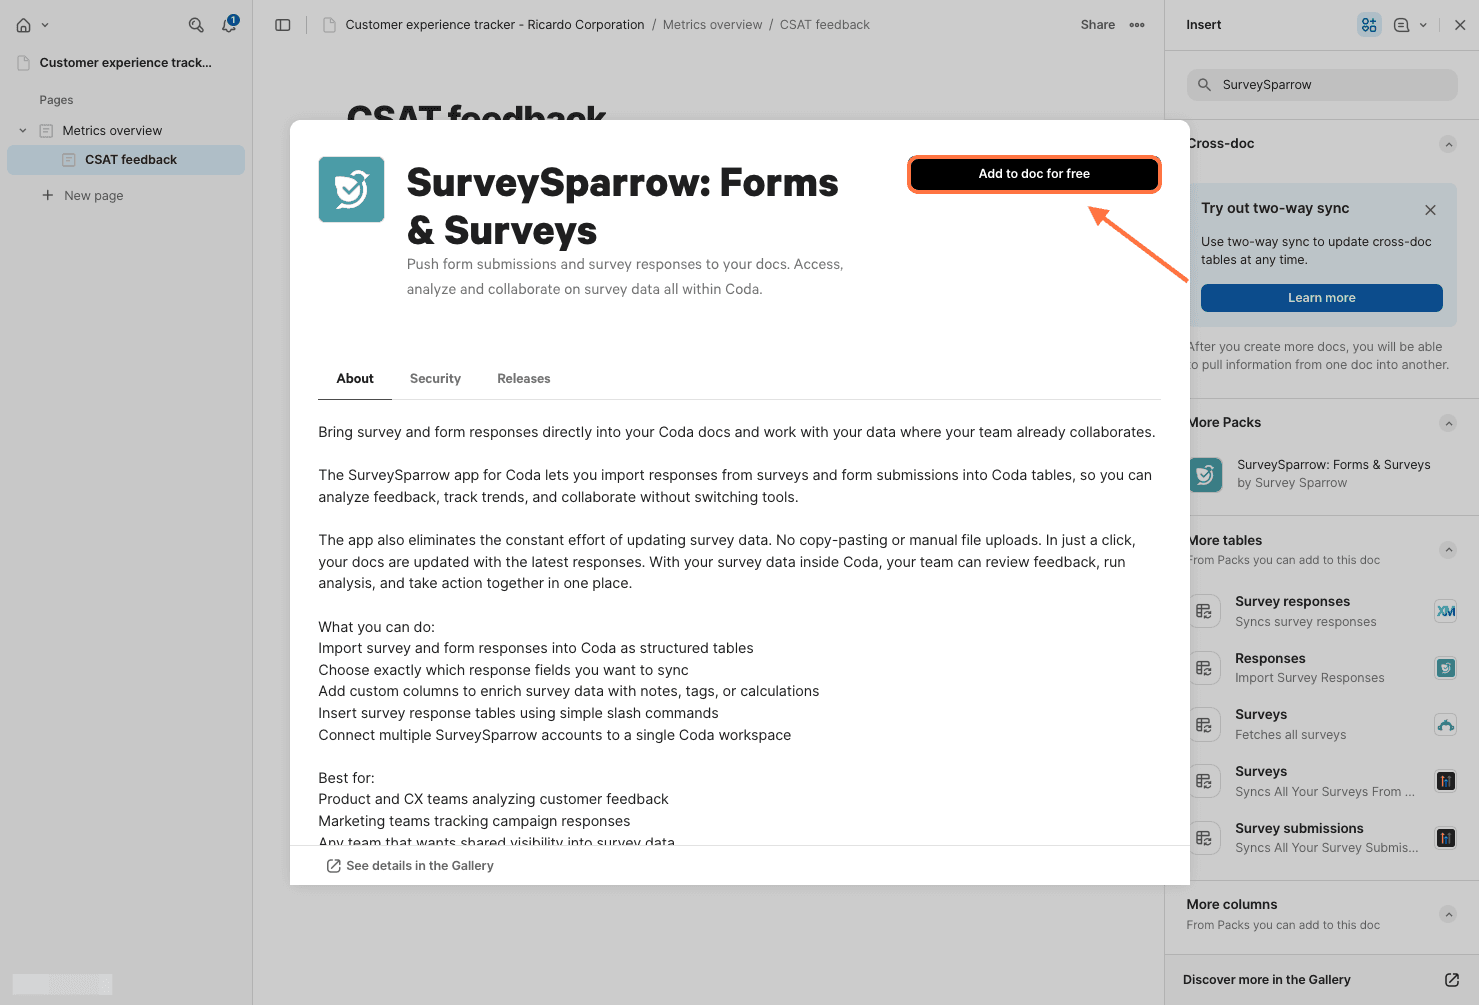
5. The SurveySparrow panel opens up, click on the Responses section to expand it.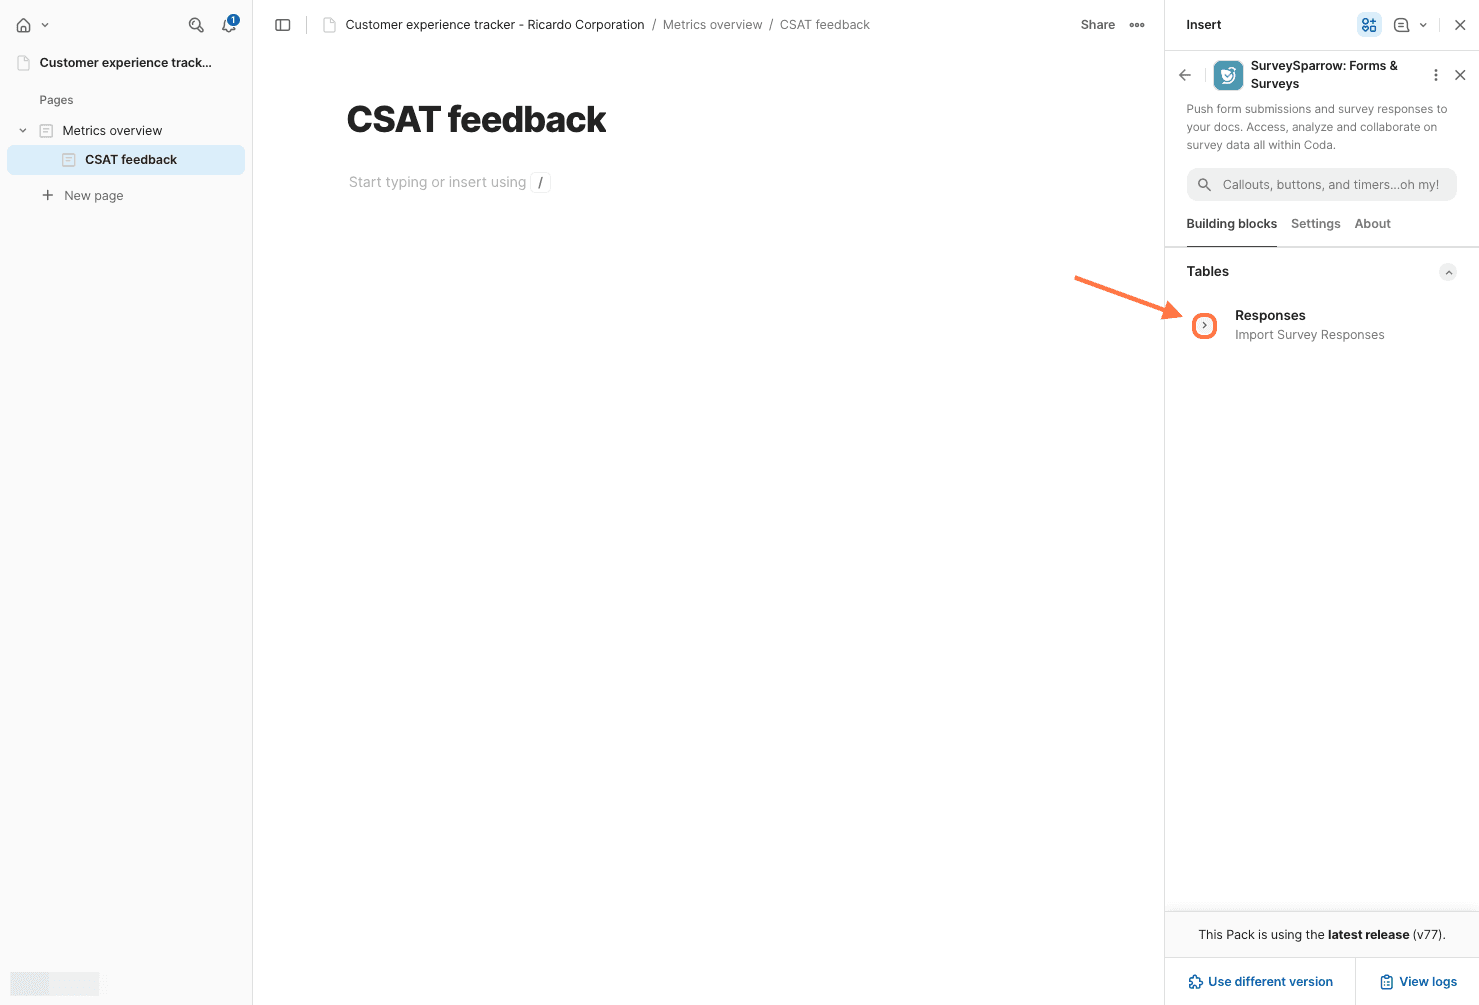
6. Click on Connect to SurveySparrow: Forms & Surveys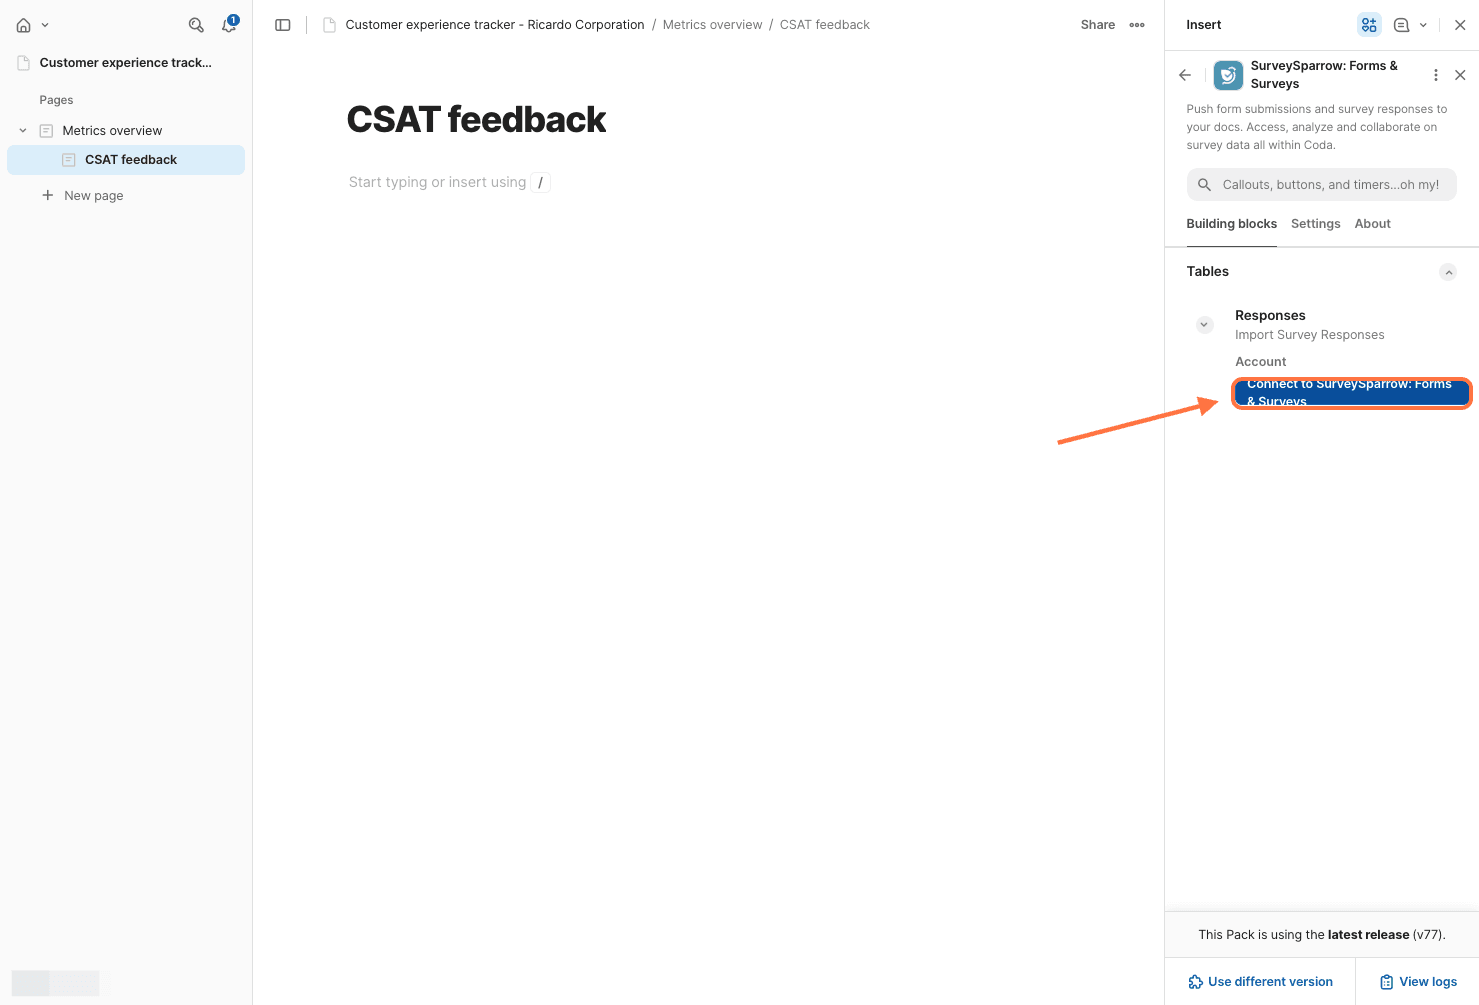
7. Click on Sign in with SurveySparrow: Forms & Surveys.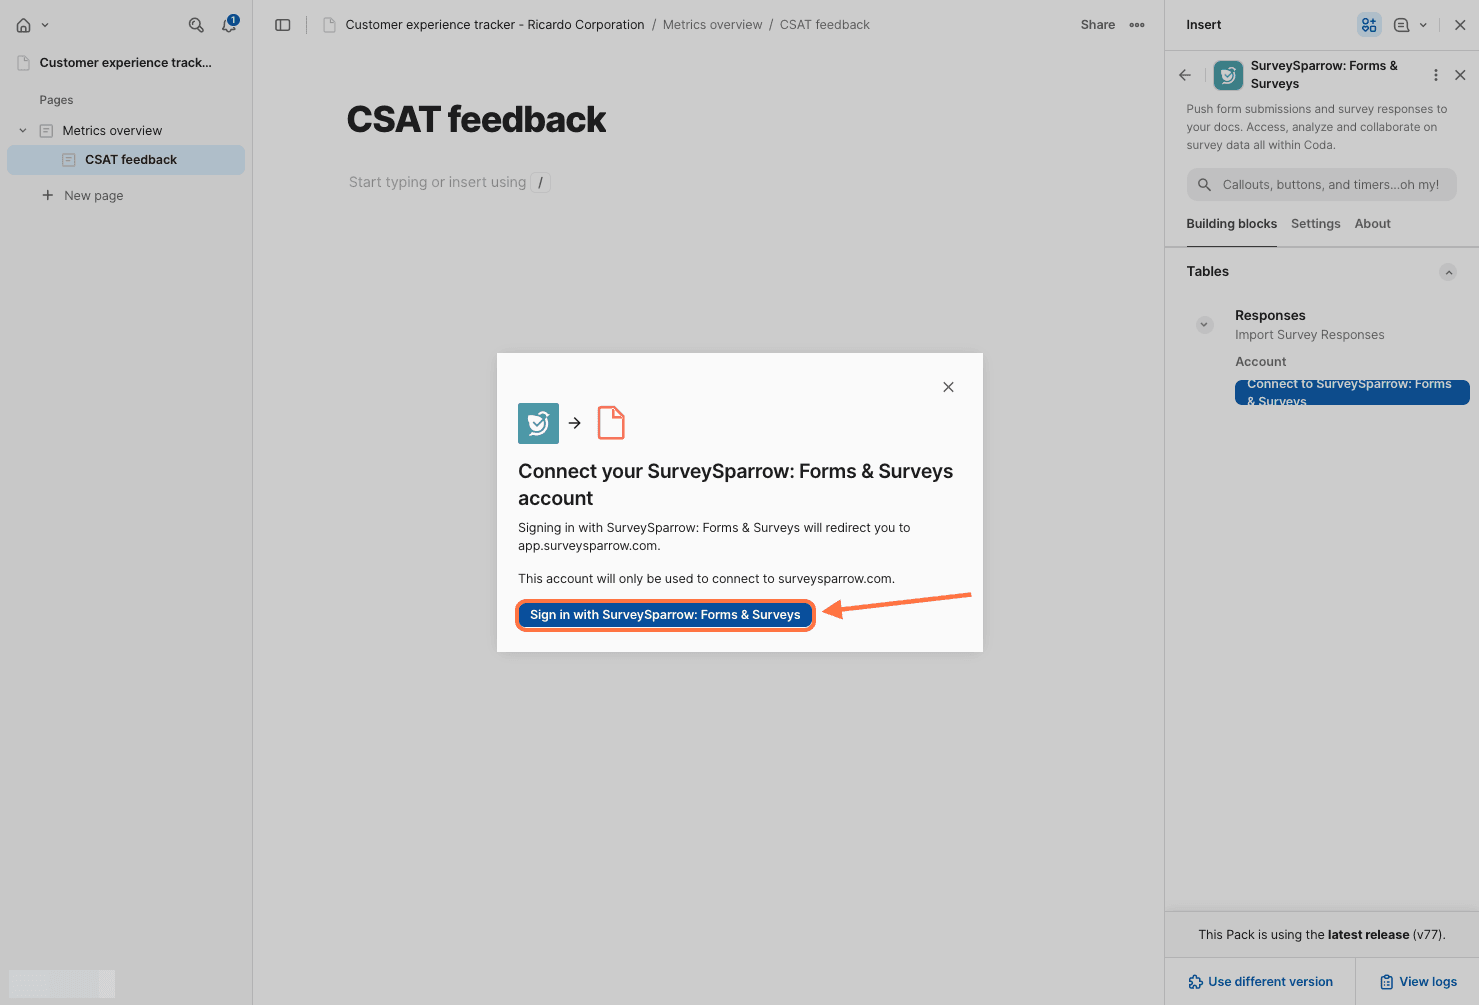
8. Another tab pops up with the sign-up form. Click on Login.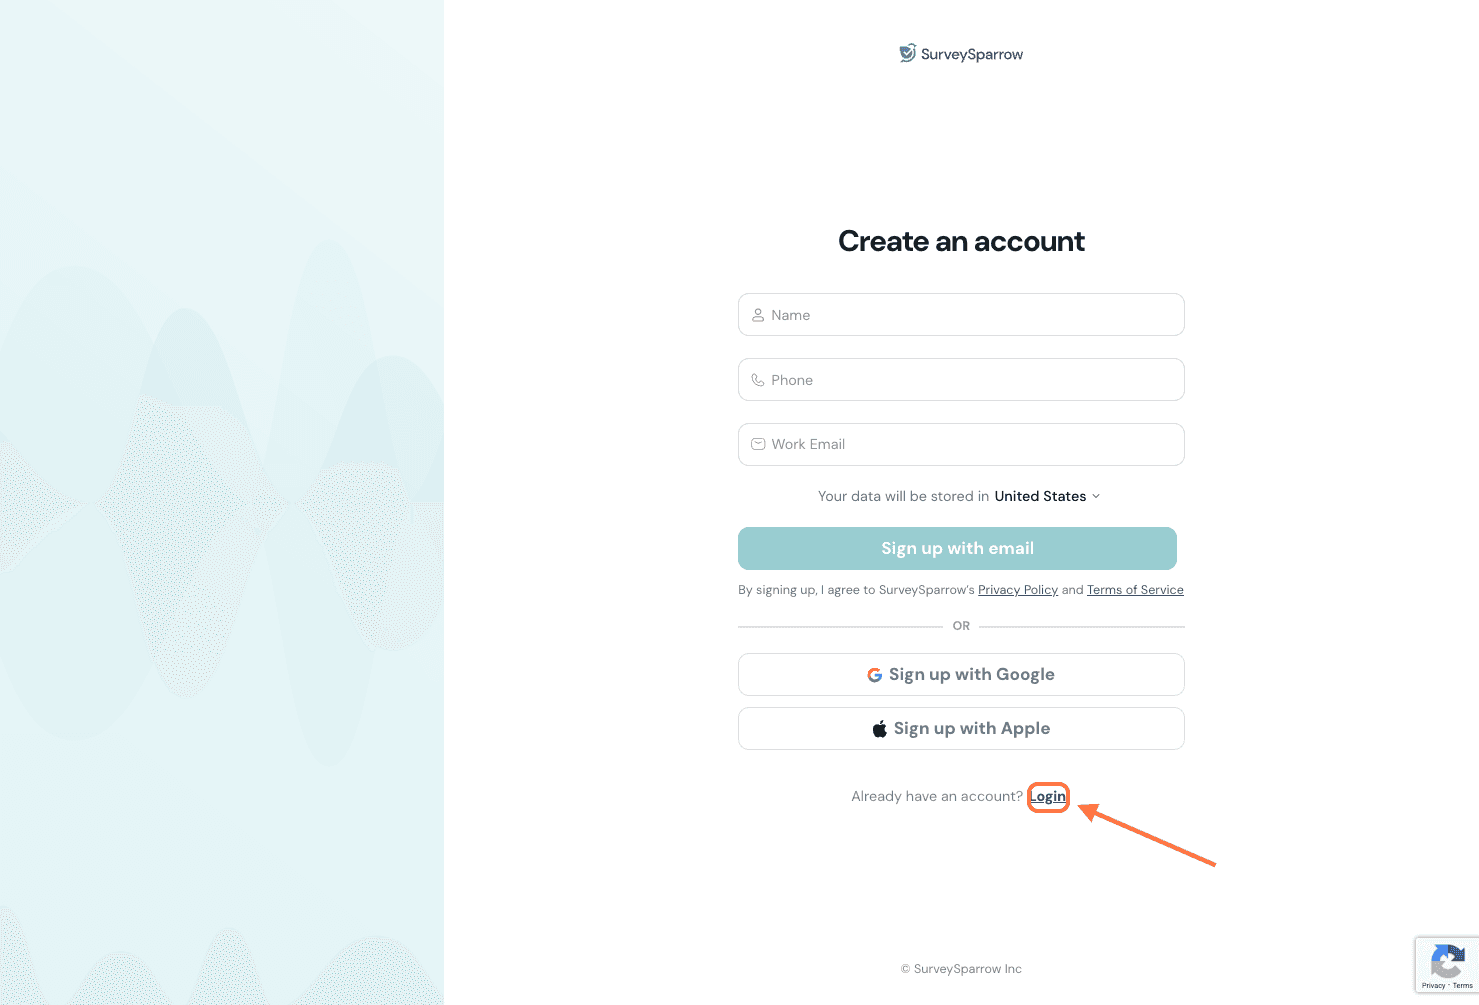
9. Enter your login credentials or use Google/Apple to complete login.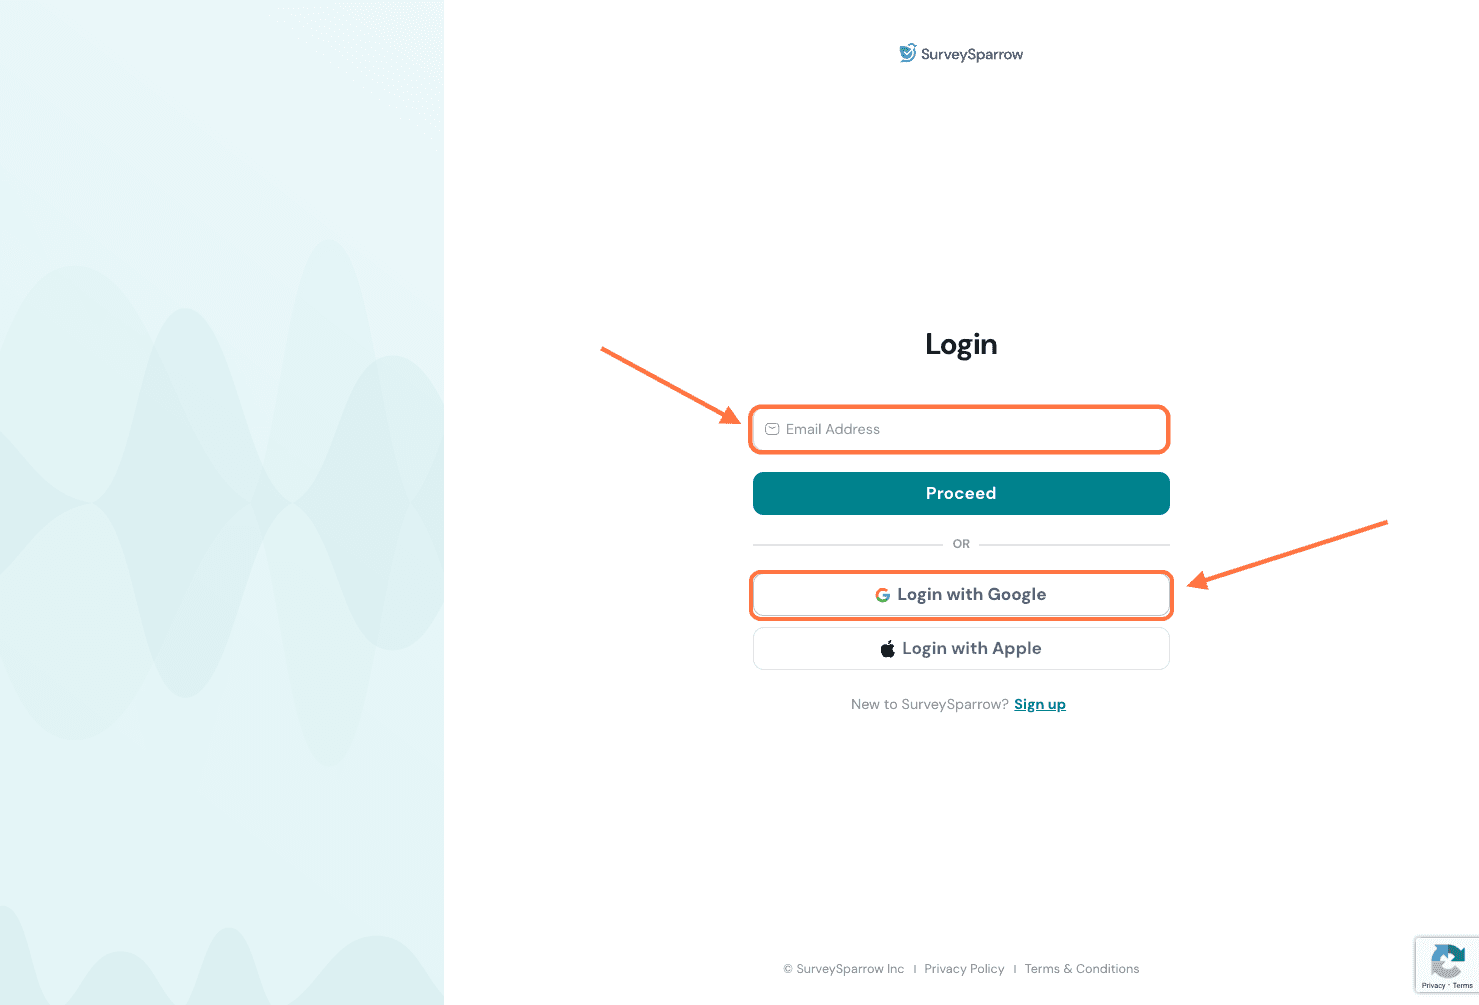
Note: If your email account is connected to multiple SurveySparrow accounts, you will need to select one to complete login.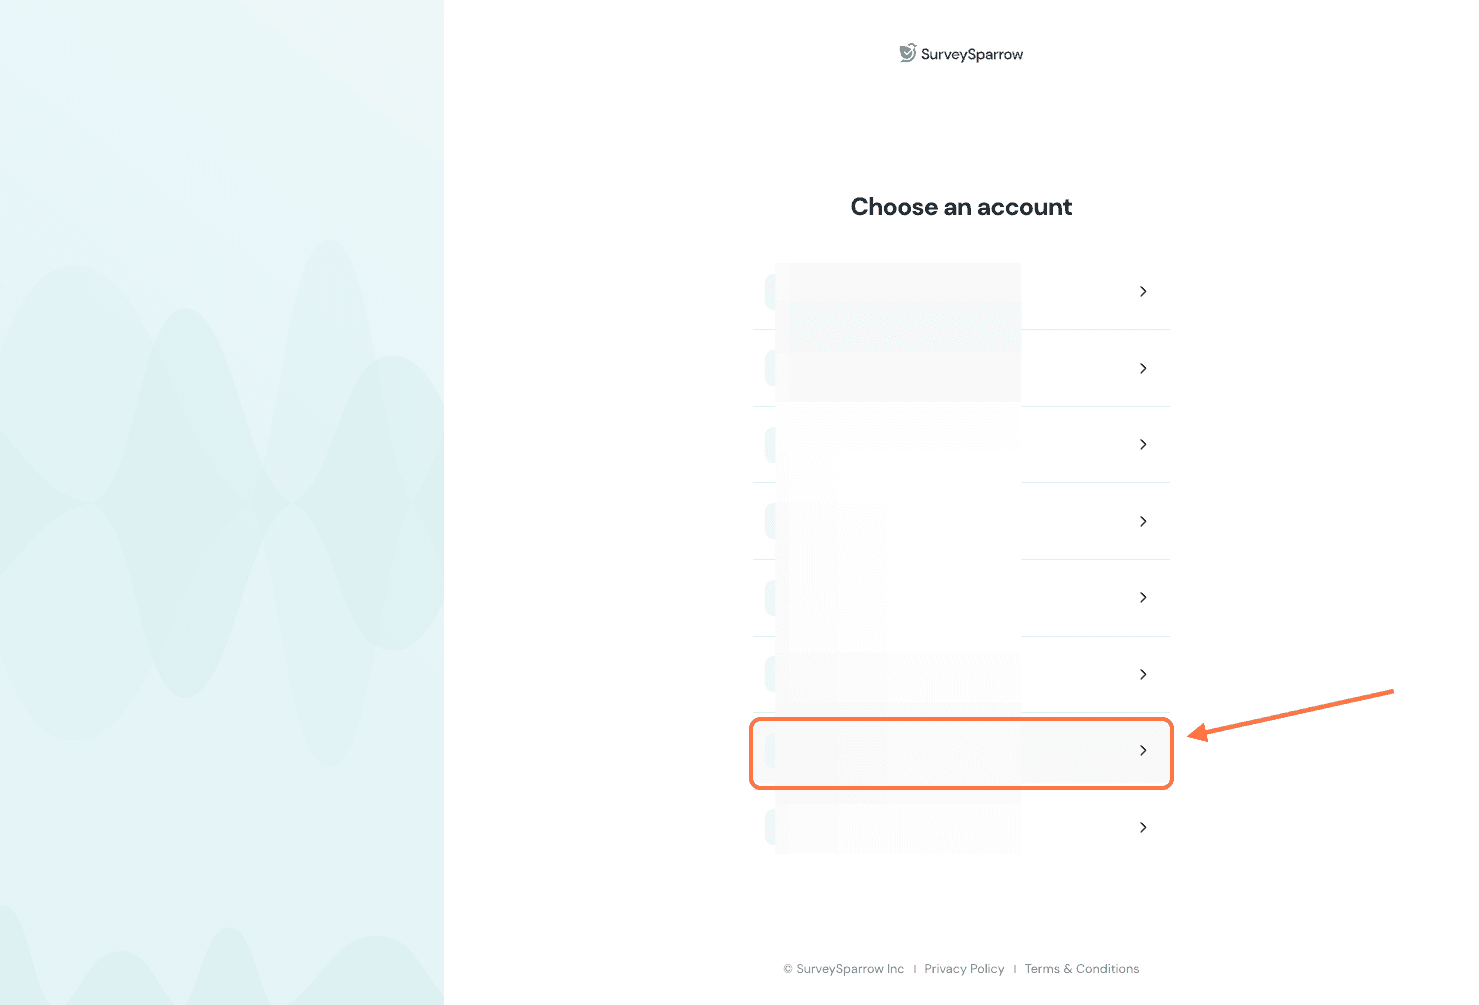
10. An authorization screen will appear, click on Authorize.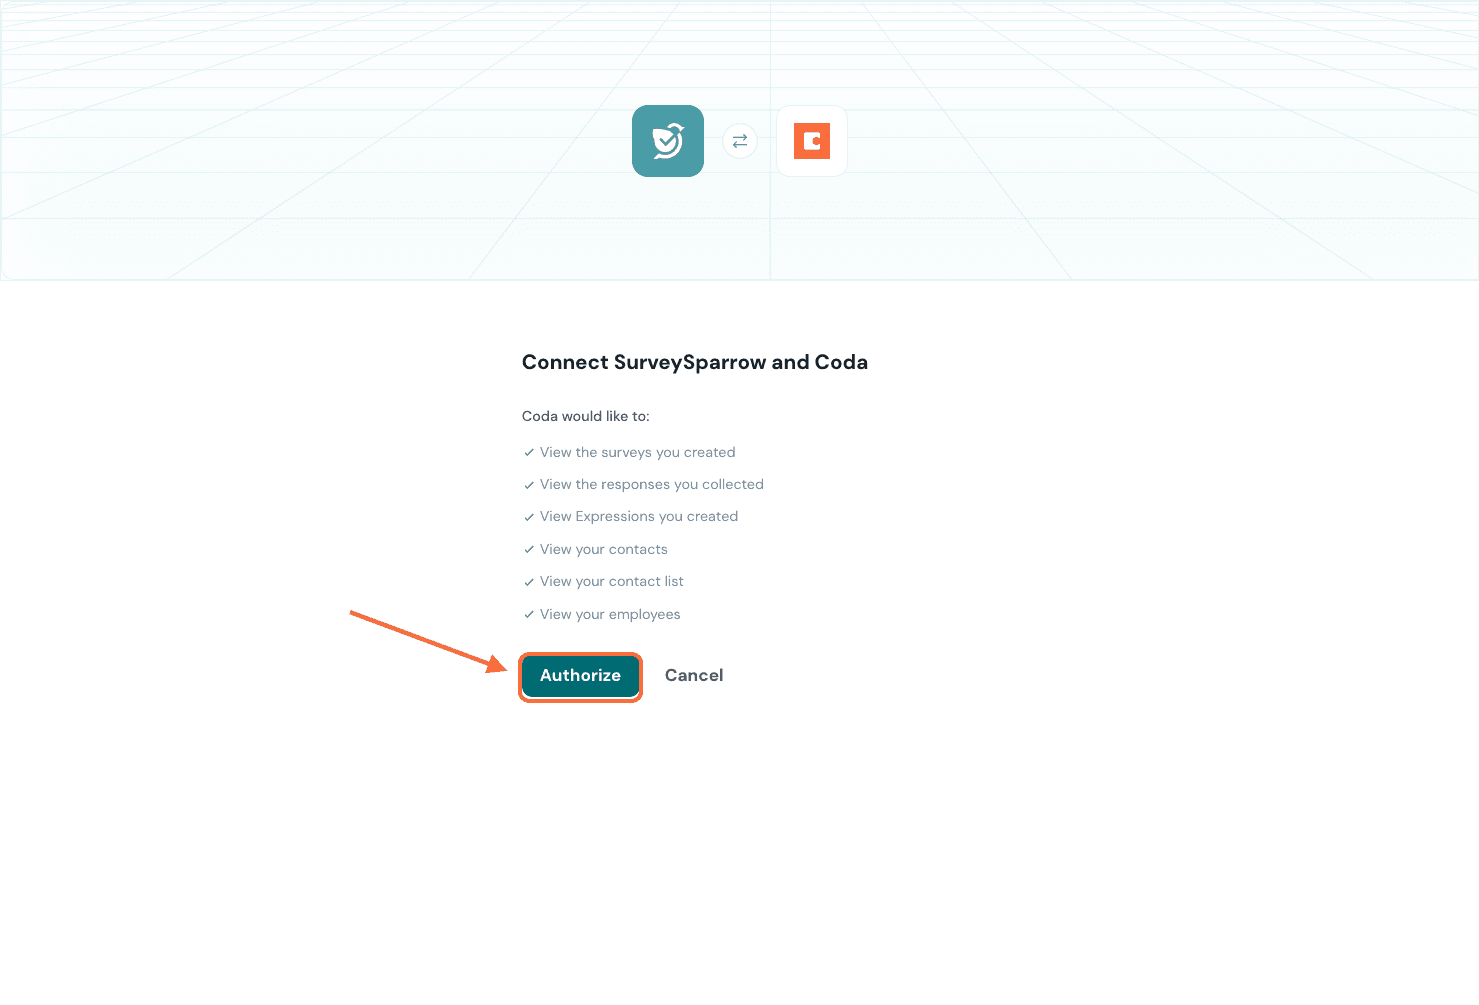
11. You’ll be returned to the Coda doc, where a final pop-up appears. Click on Complete setup.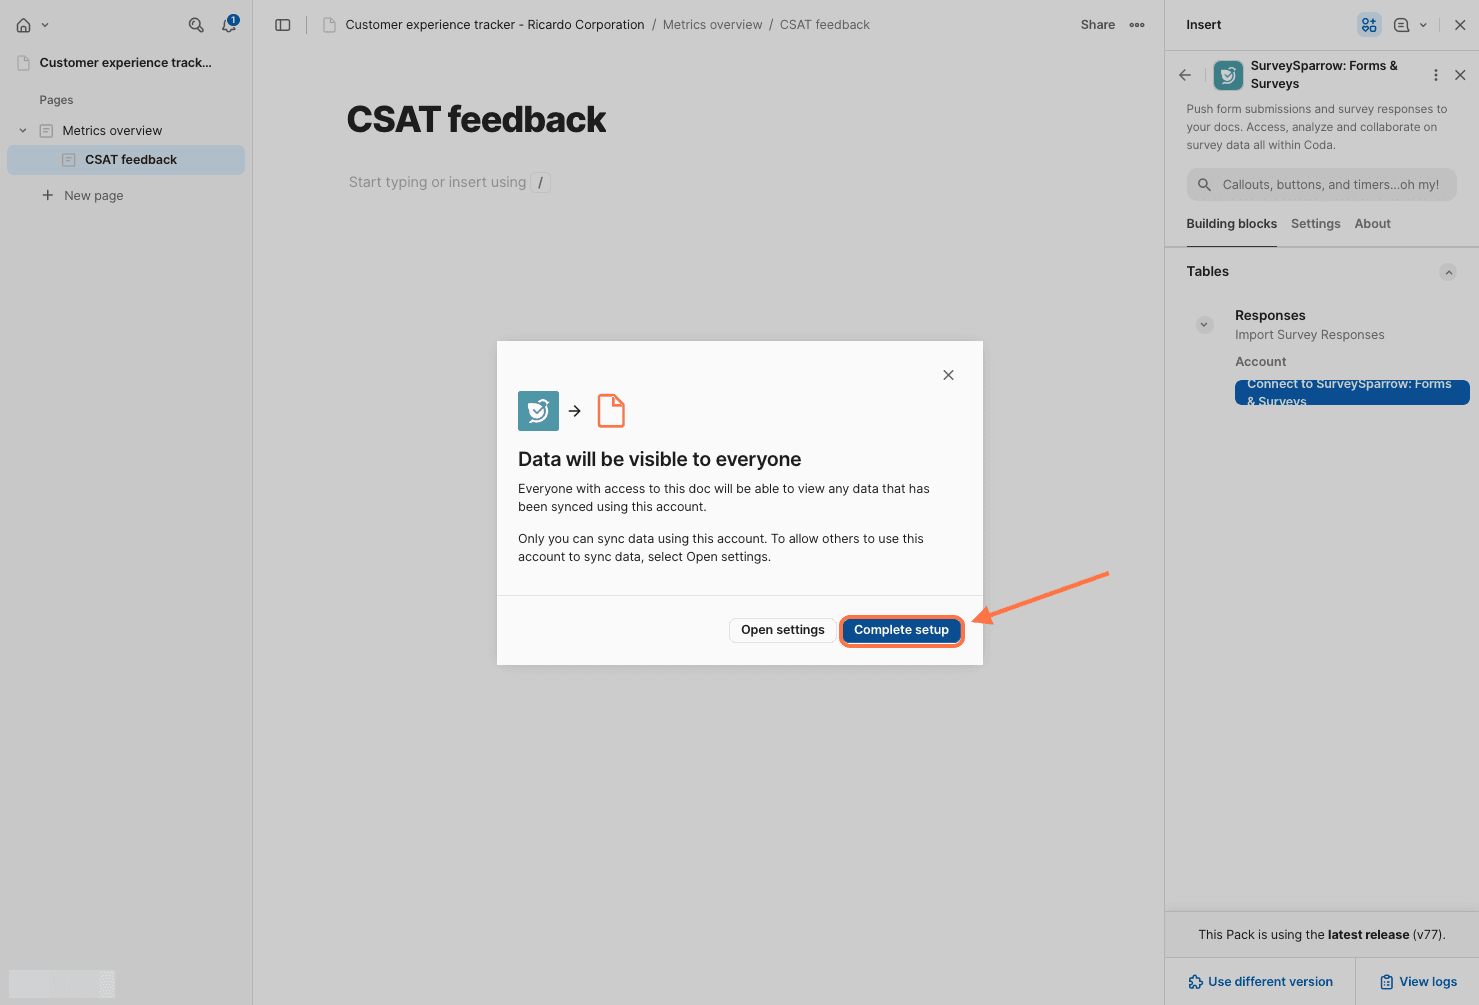
1. Now all your survey responses open up as a list of table blocks. If you wish to insert one into your doc, you can click and drag it into your doc. The pack settings will open in the side panel.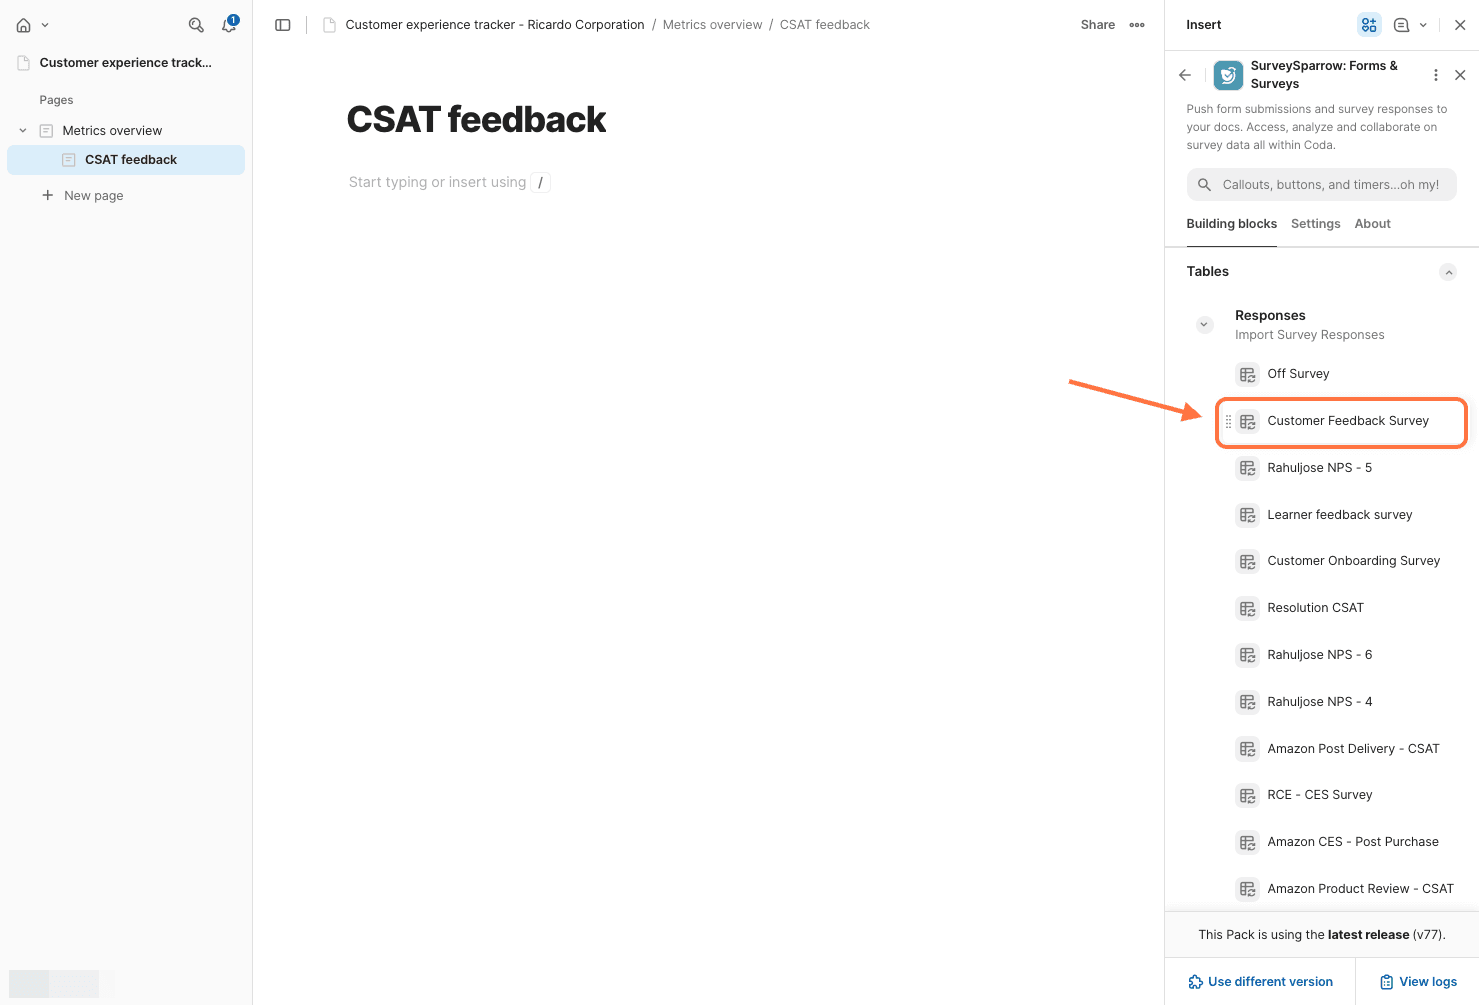
Note: You can also insert a table using slash commands. Type a slash (a menu appears), followed by responses. The SurveySparrow pack will appear, click on it.
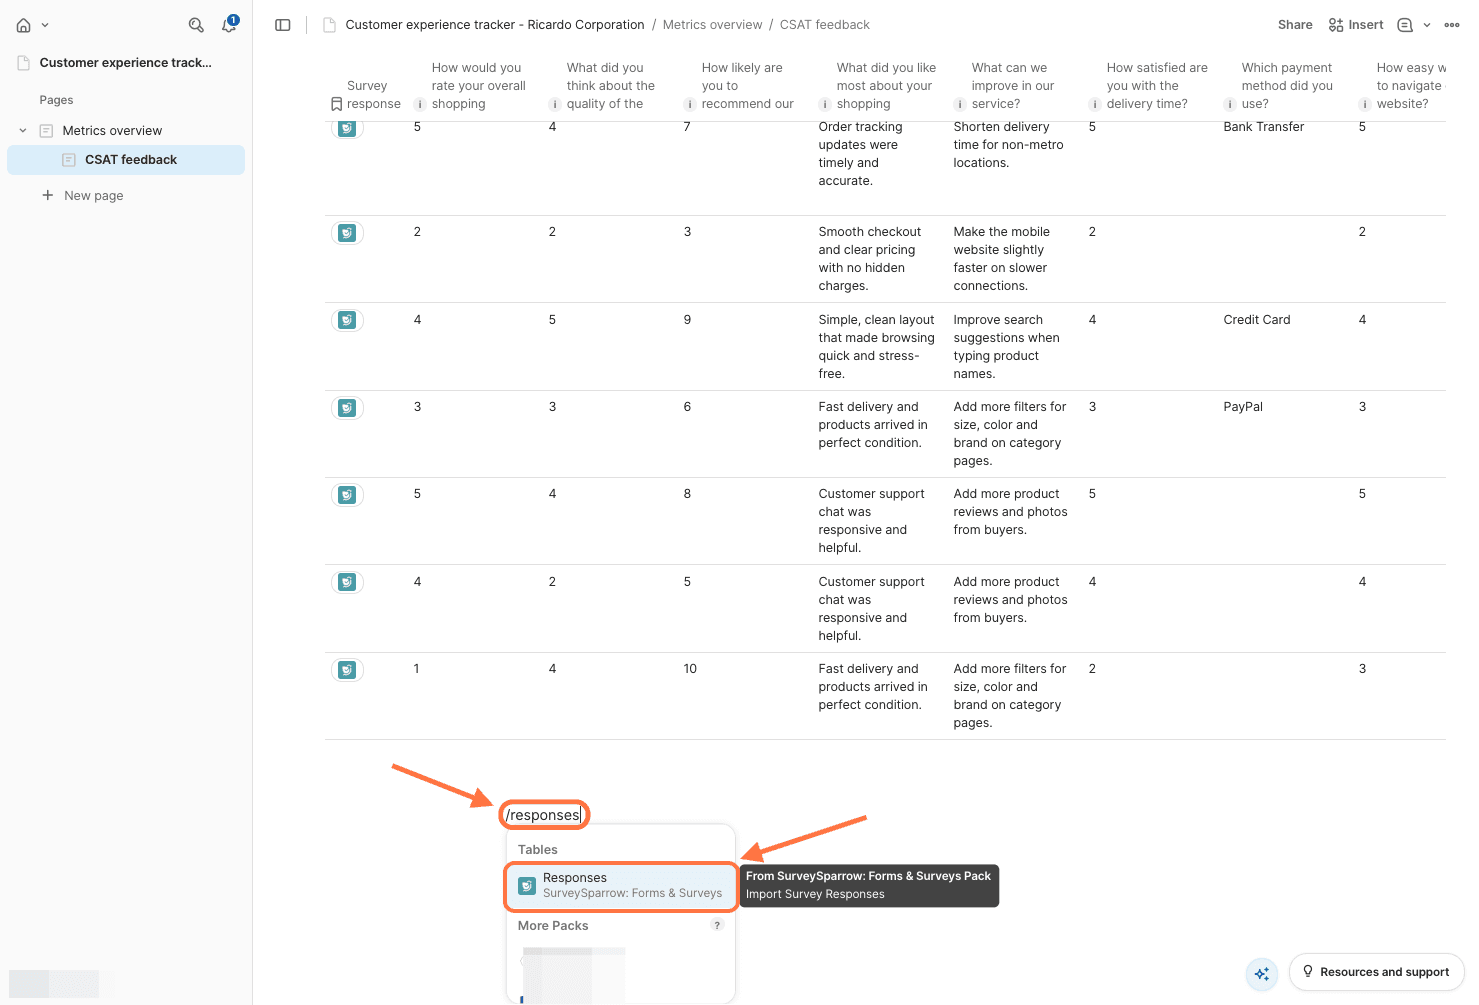
A list of surveys will appear. Click on the one you wish to add.
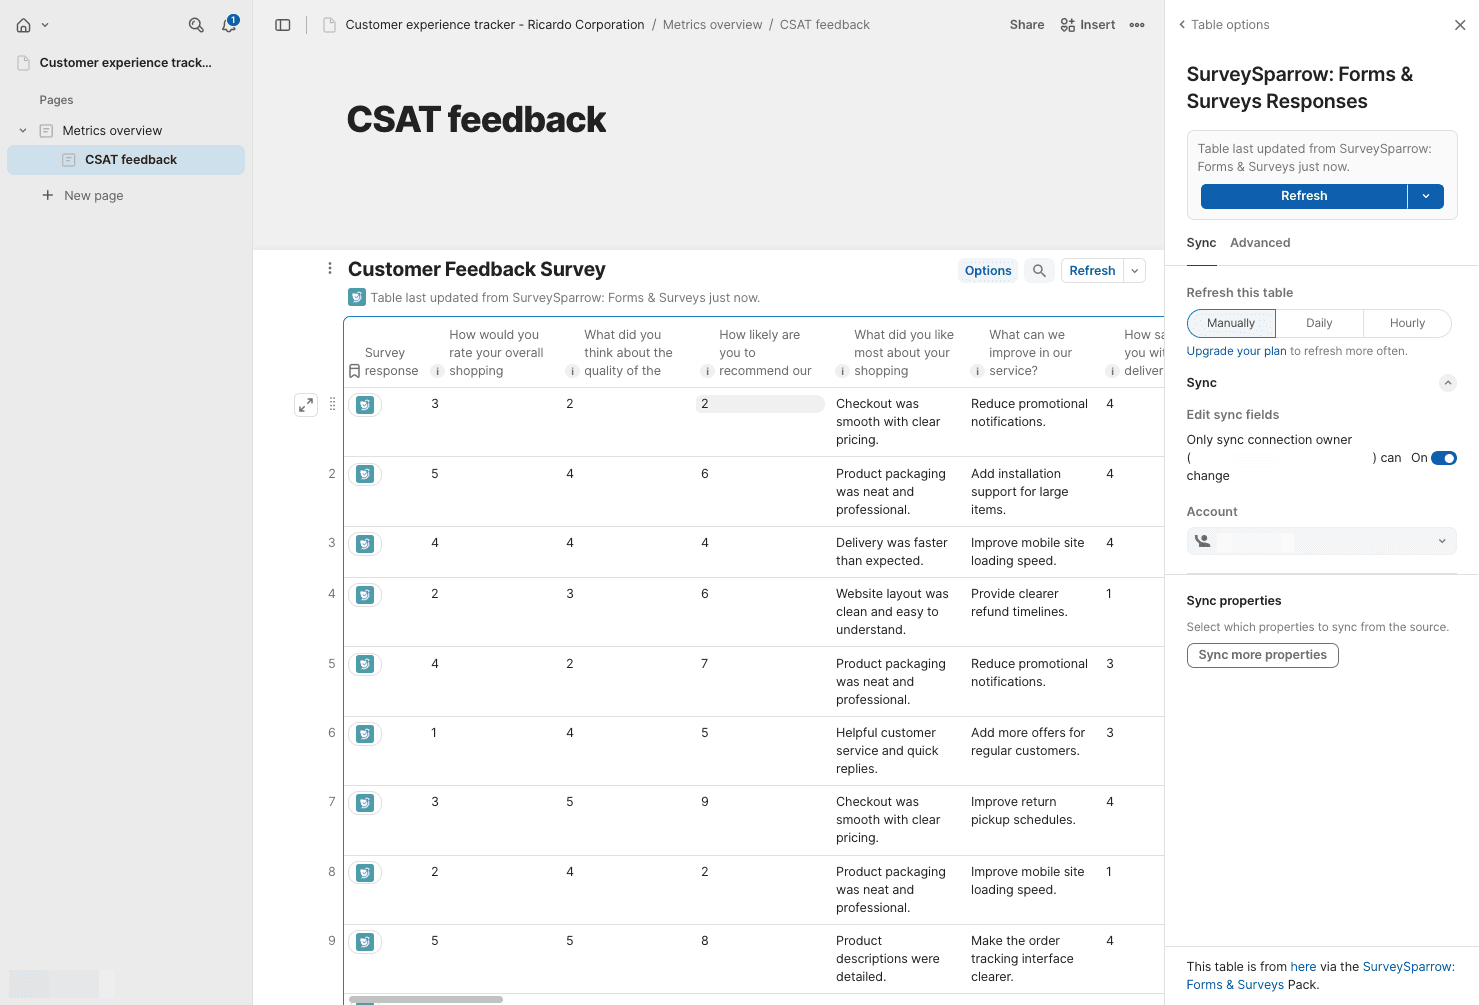
2. The table doesn’t refresh with the latest responses automatically. To sync it, click on the Refresh button (can be found above the table or in the table settings).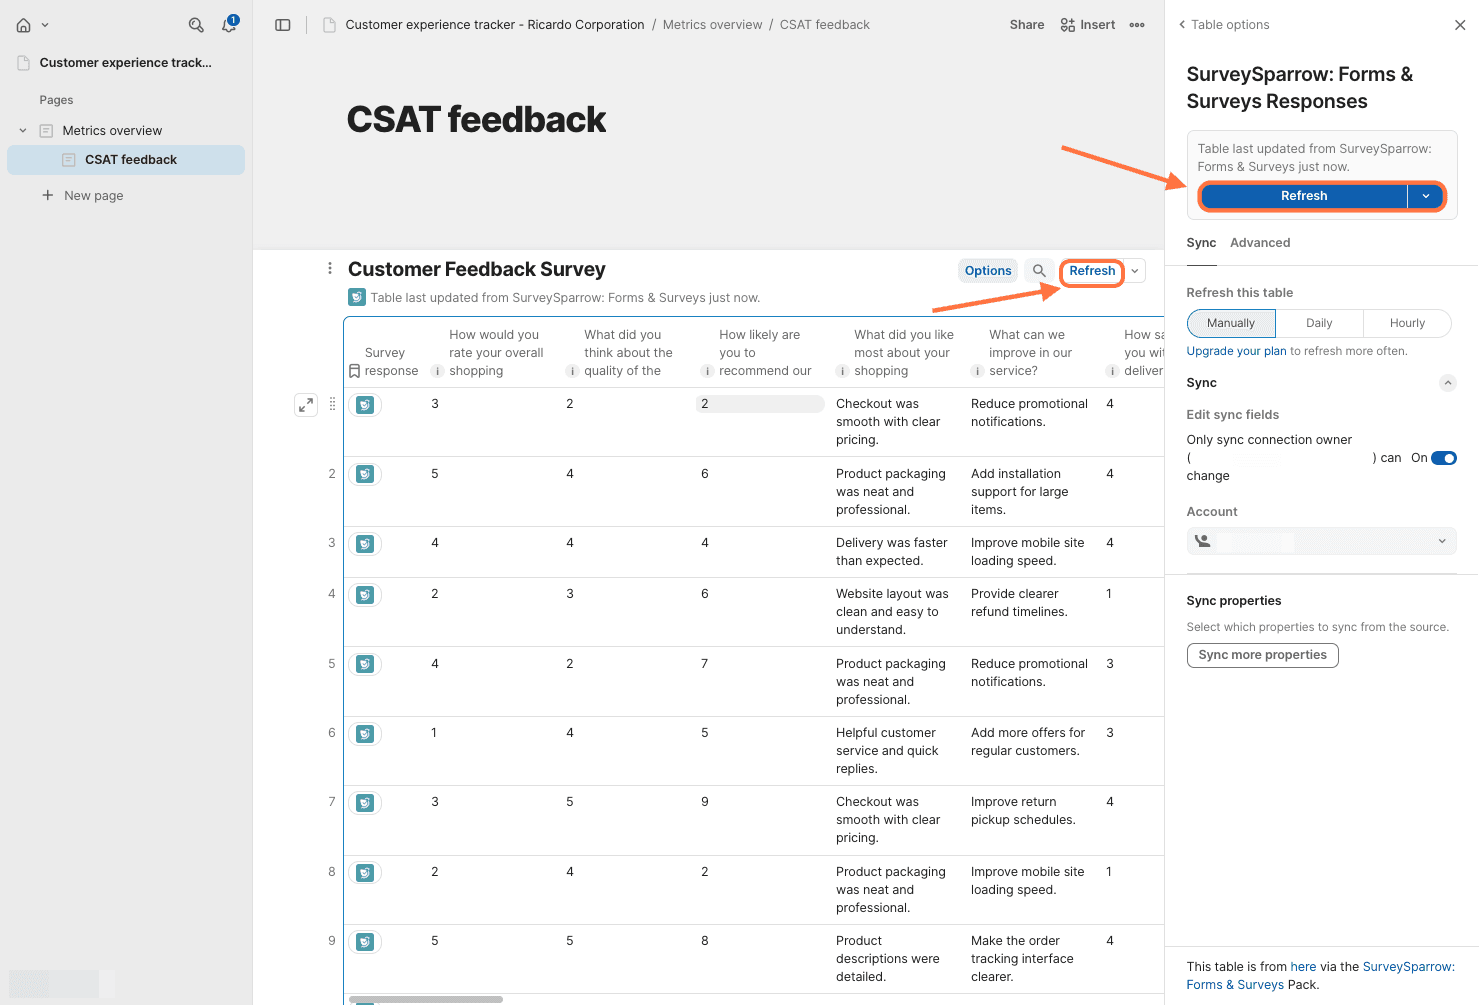
3. You can also connect multiple SurveySparrow accounts to the same pack. To do that, click on the drop-down menu under Account, and click on Set up another account.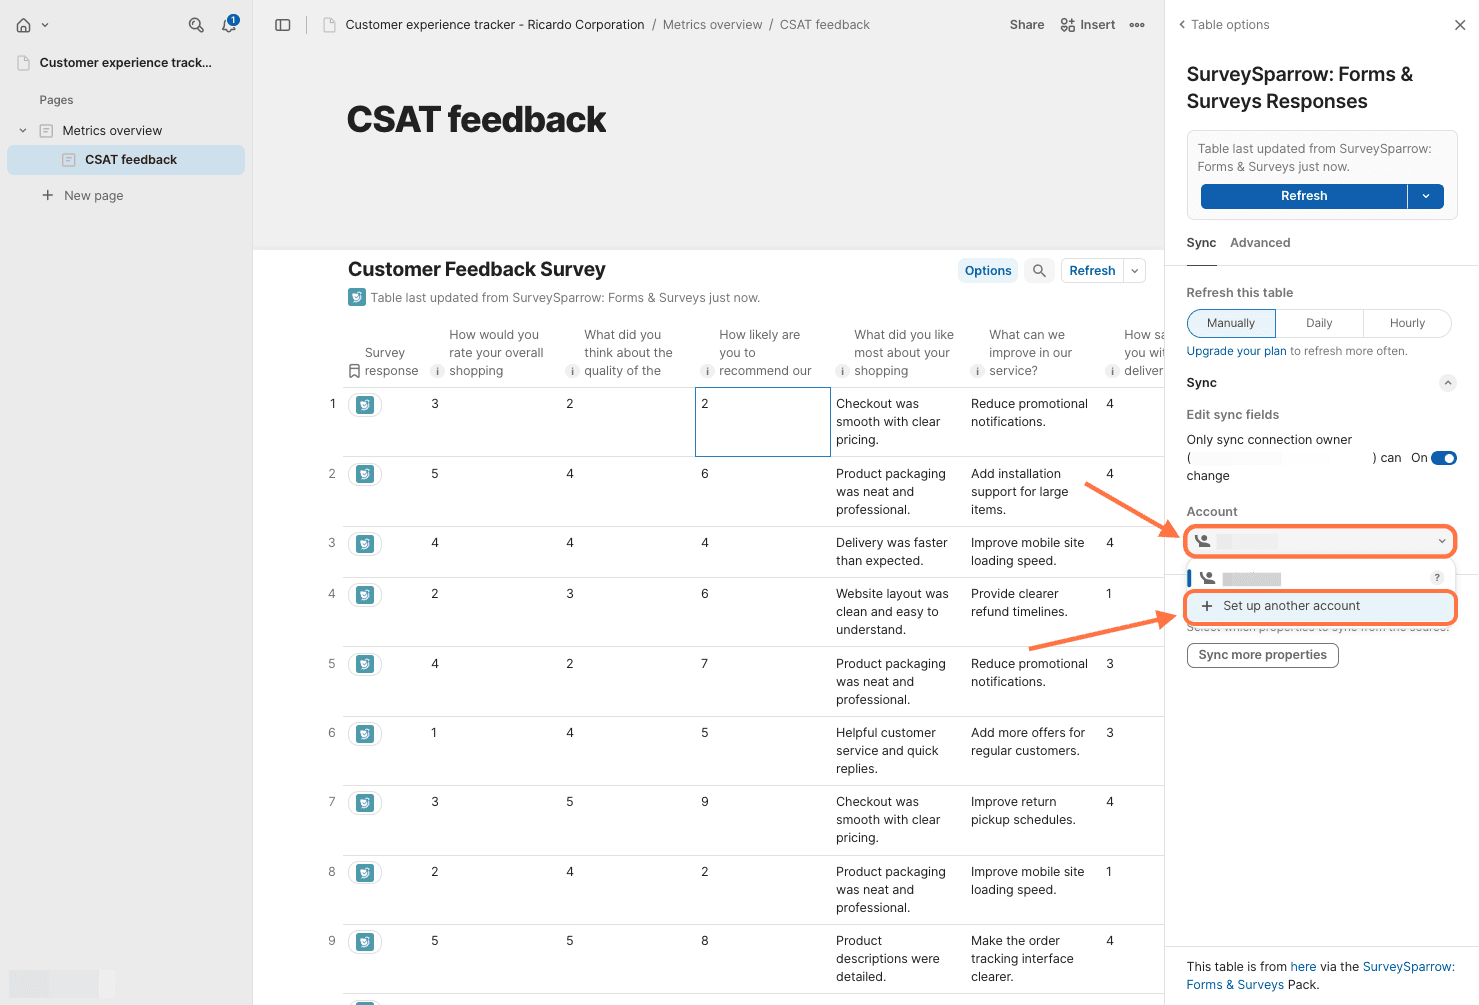
The same sign-up pop-up appears as before. Follow the same steps as shown above.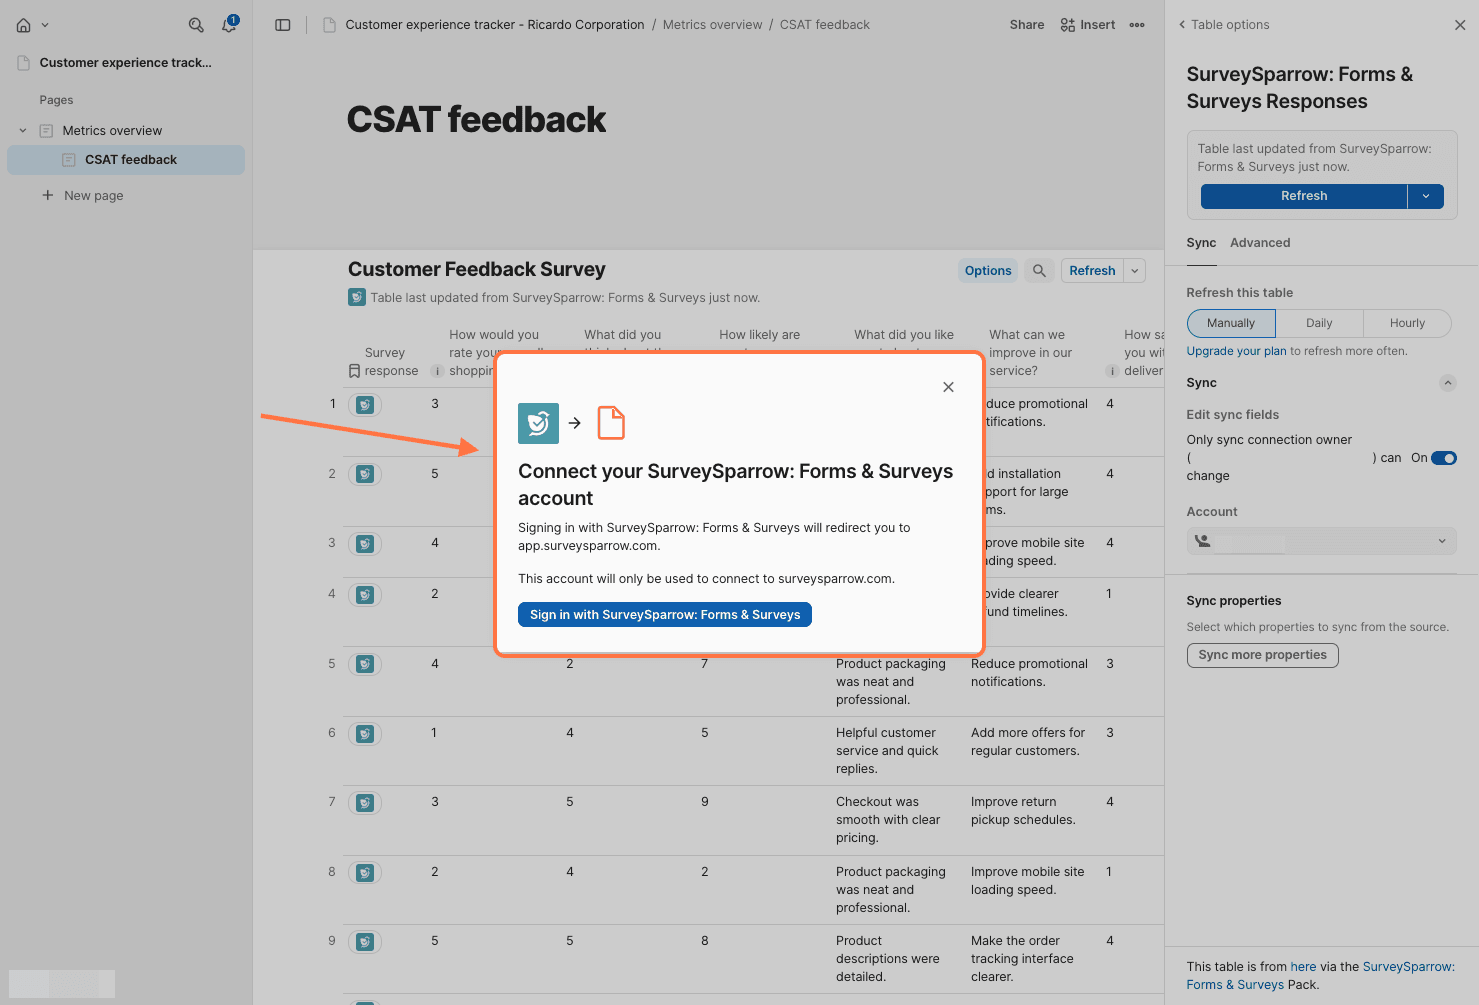
4. By default, all the response data is imported into Coda. But if you wish to pick and choose which fields to import, click on Sync more properties in the table settings panel.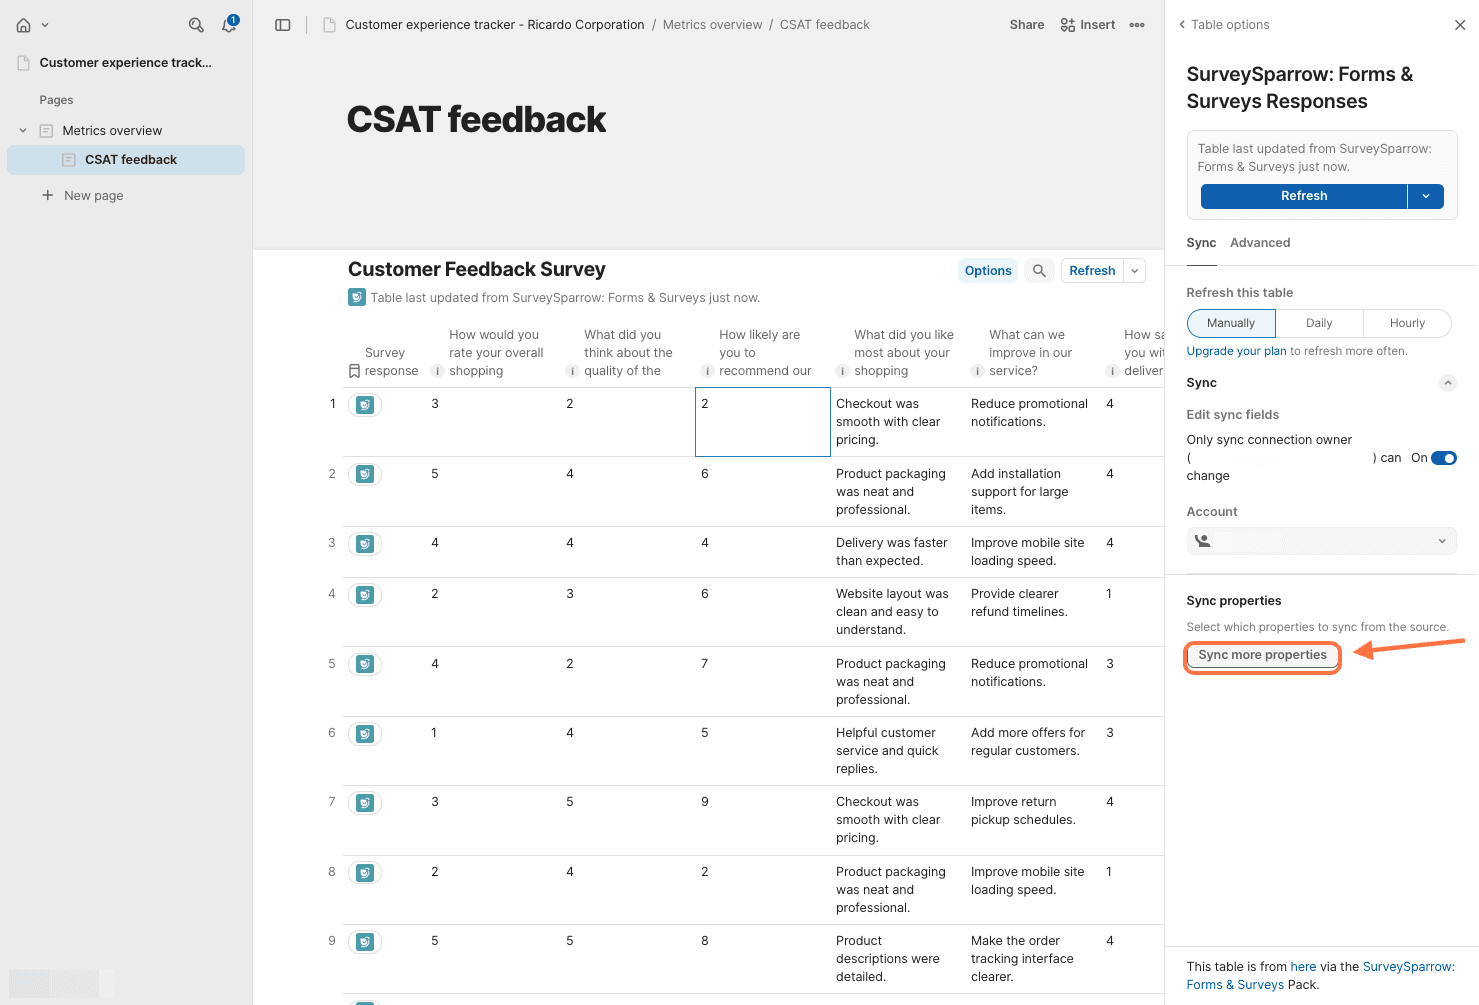
5. A checklist appears. By default, all the fields are selected. You can unselect them manually (use the search box to find the ones you want/don’t want), or click on Clear all to unselect everything at once.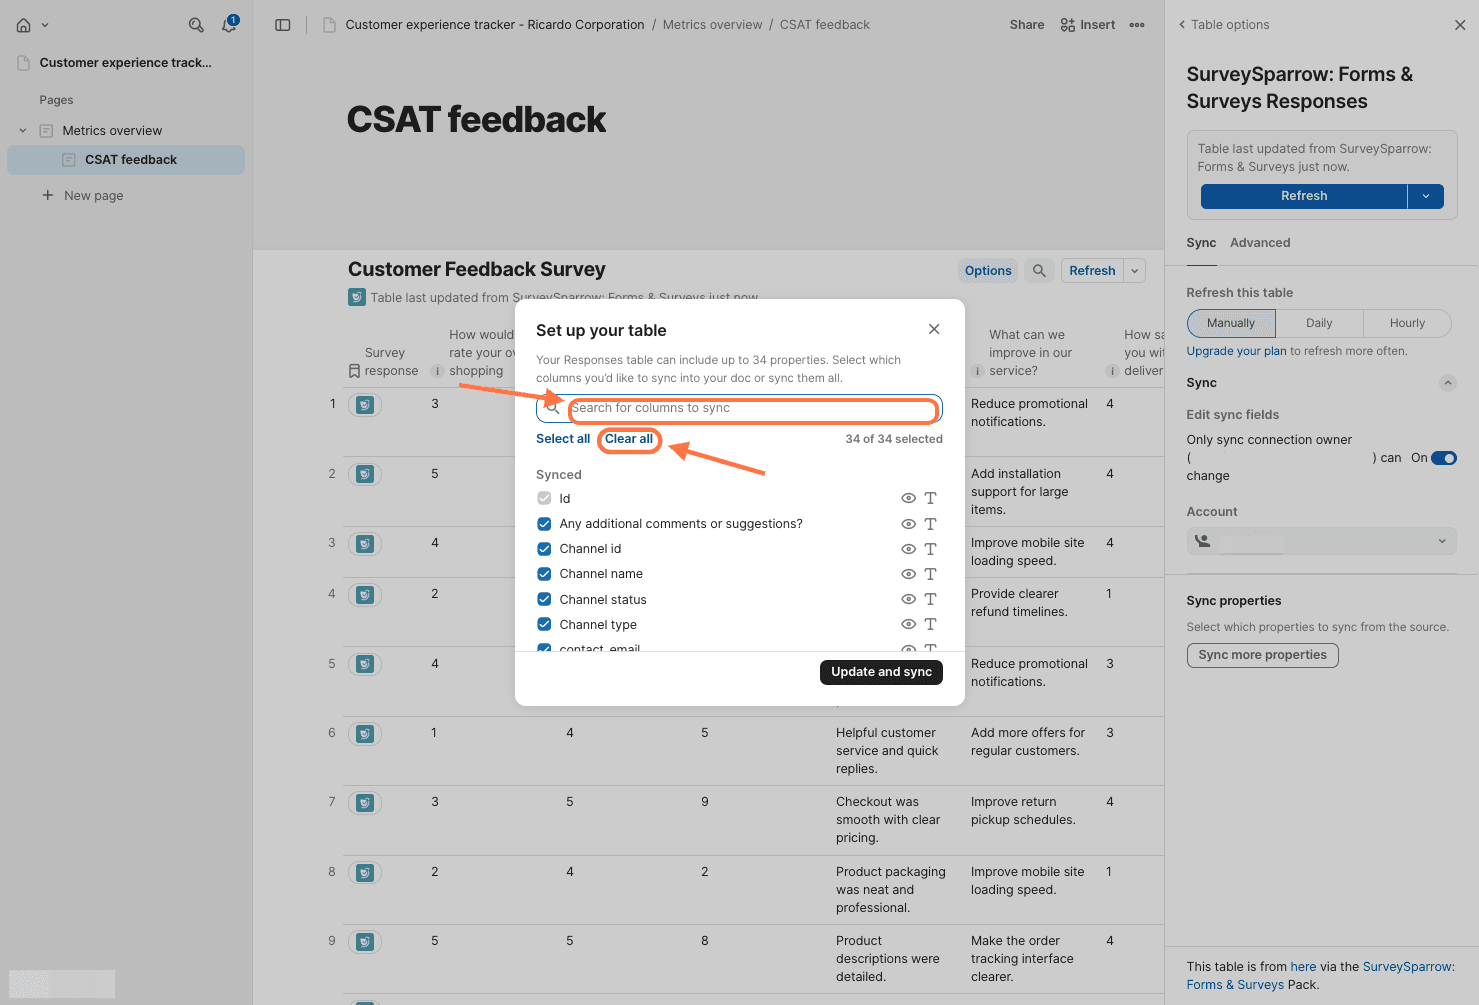
6. Once you’ve chosen all the required fields, click on Update and sync.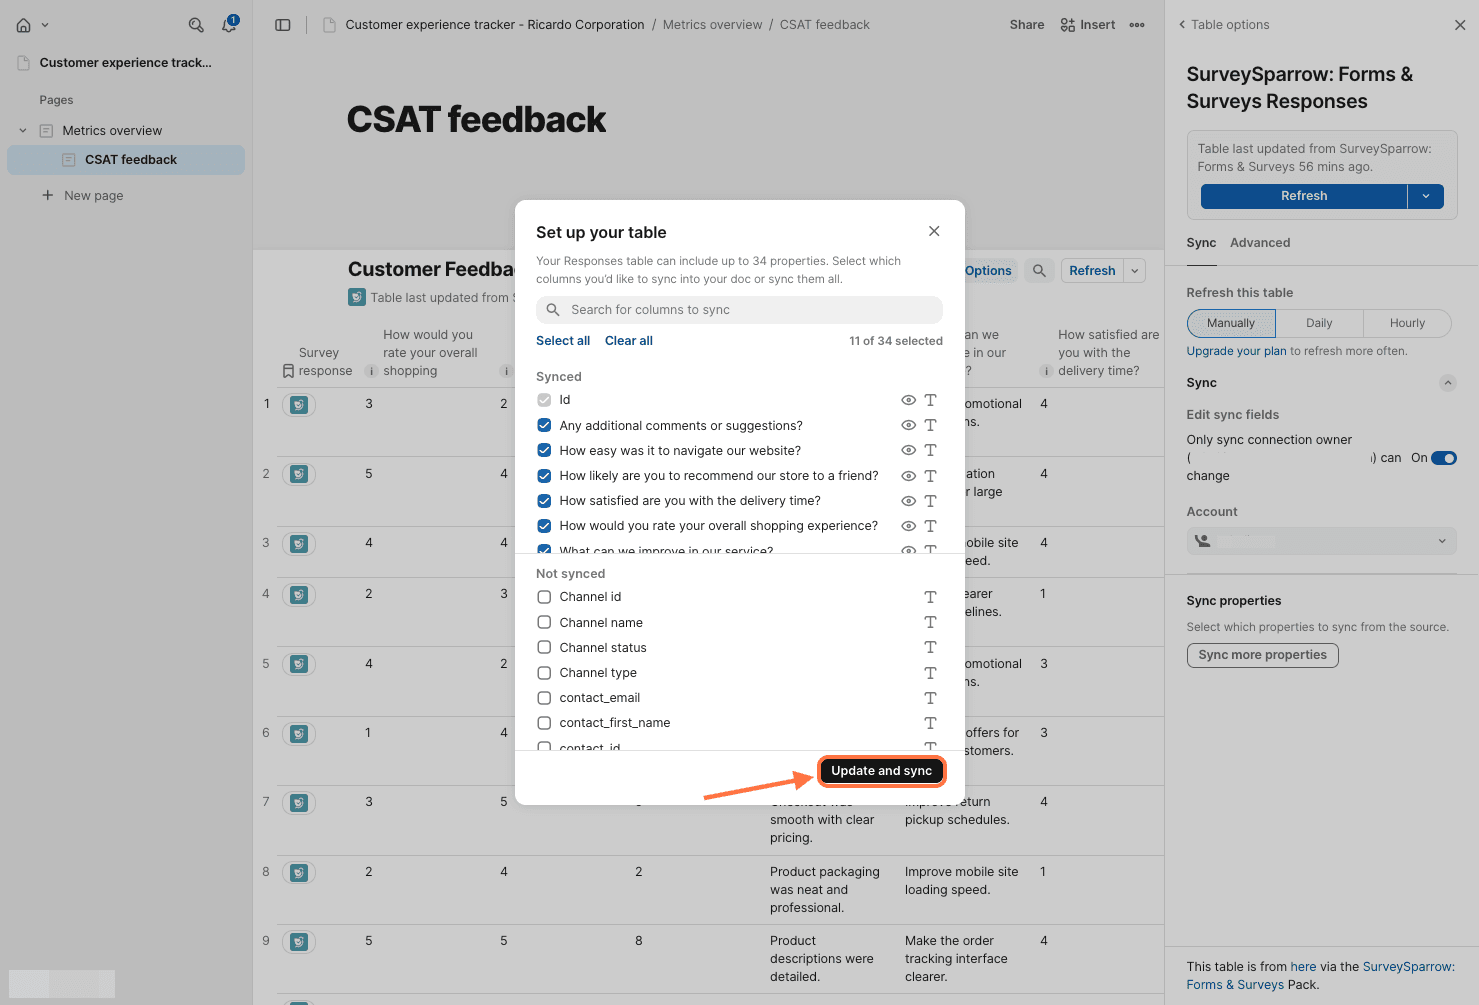
7. While you cannot edit the contents of the table, you can add new columns for additional information or notes. Scroll to the right end of the table and hover over the top right corner. When you see the plus icon, click on it.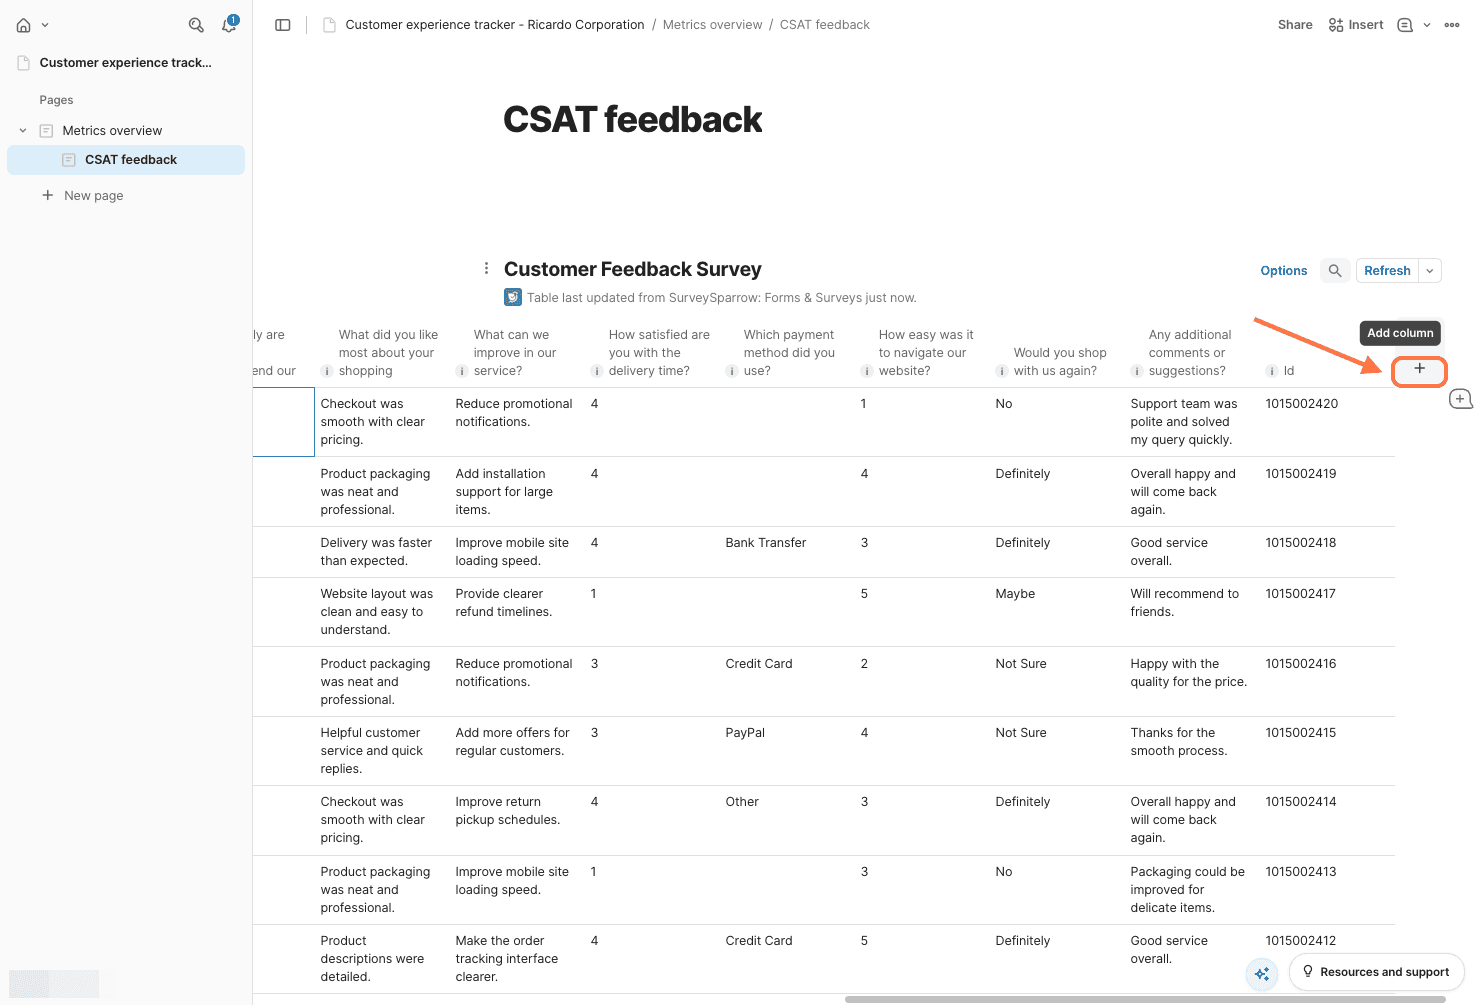
8. Then choose from a list of column types.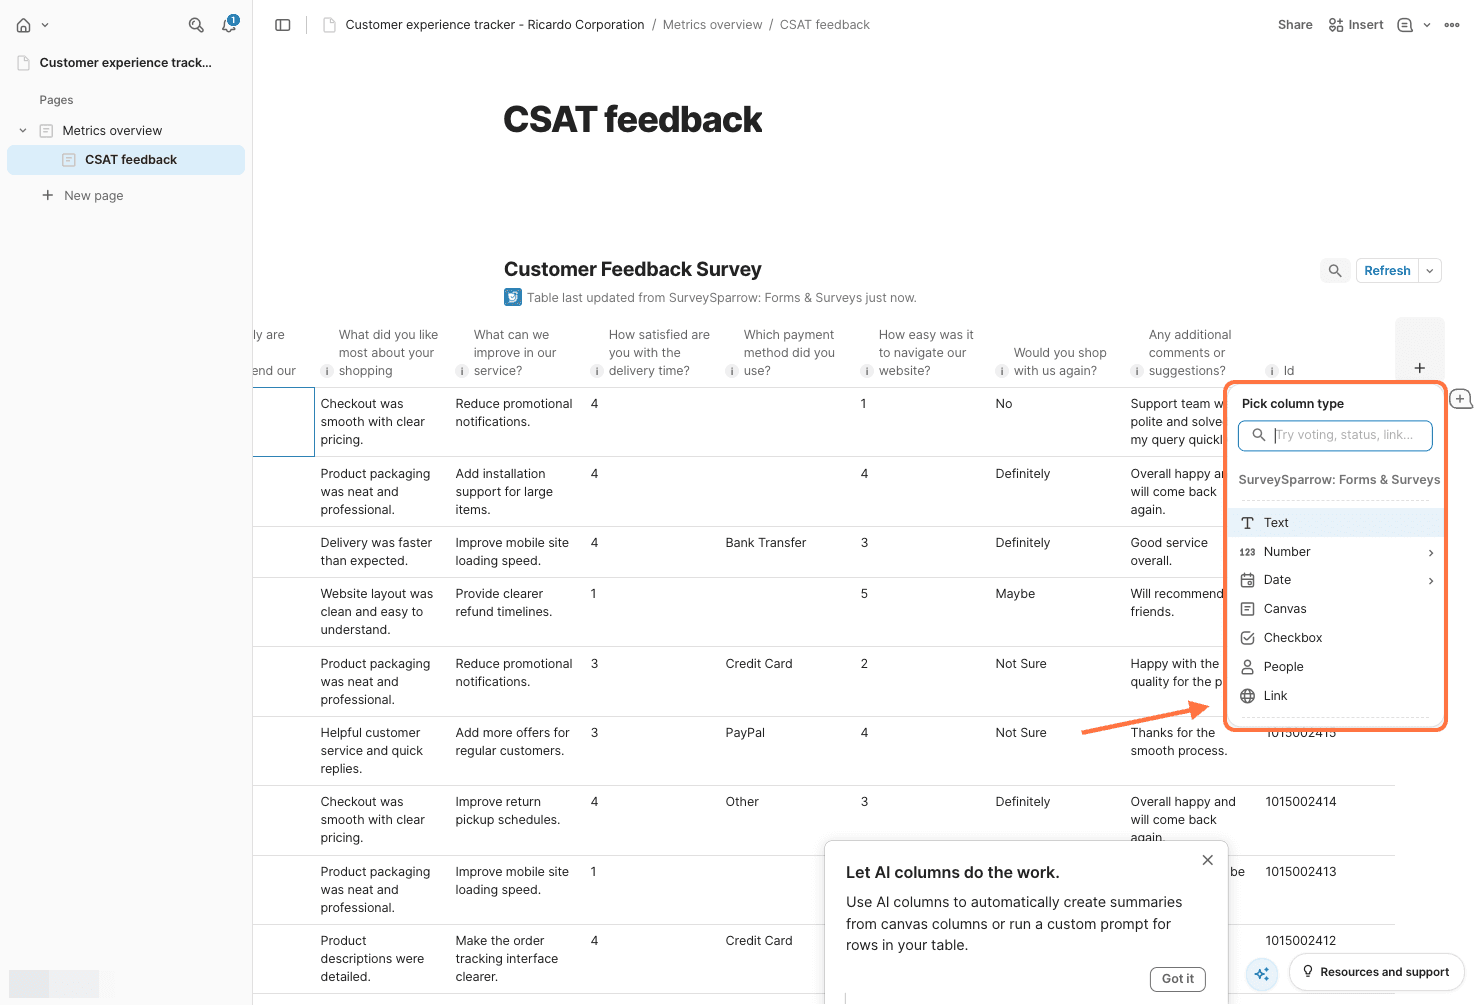
9. To delete the table, hover over the left of the table title. When you see the vertical three-dot icon, click on it, then click on Delete from the menu.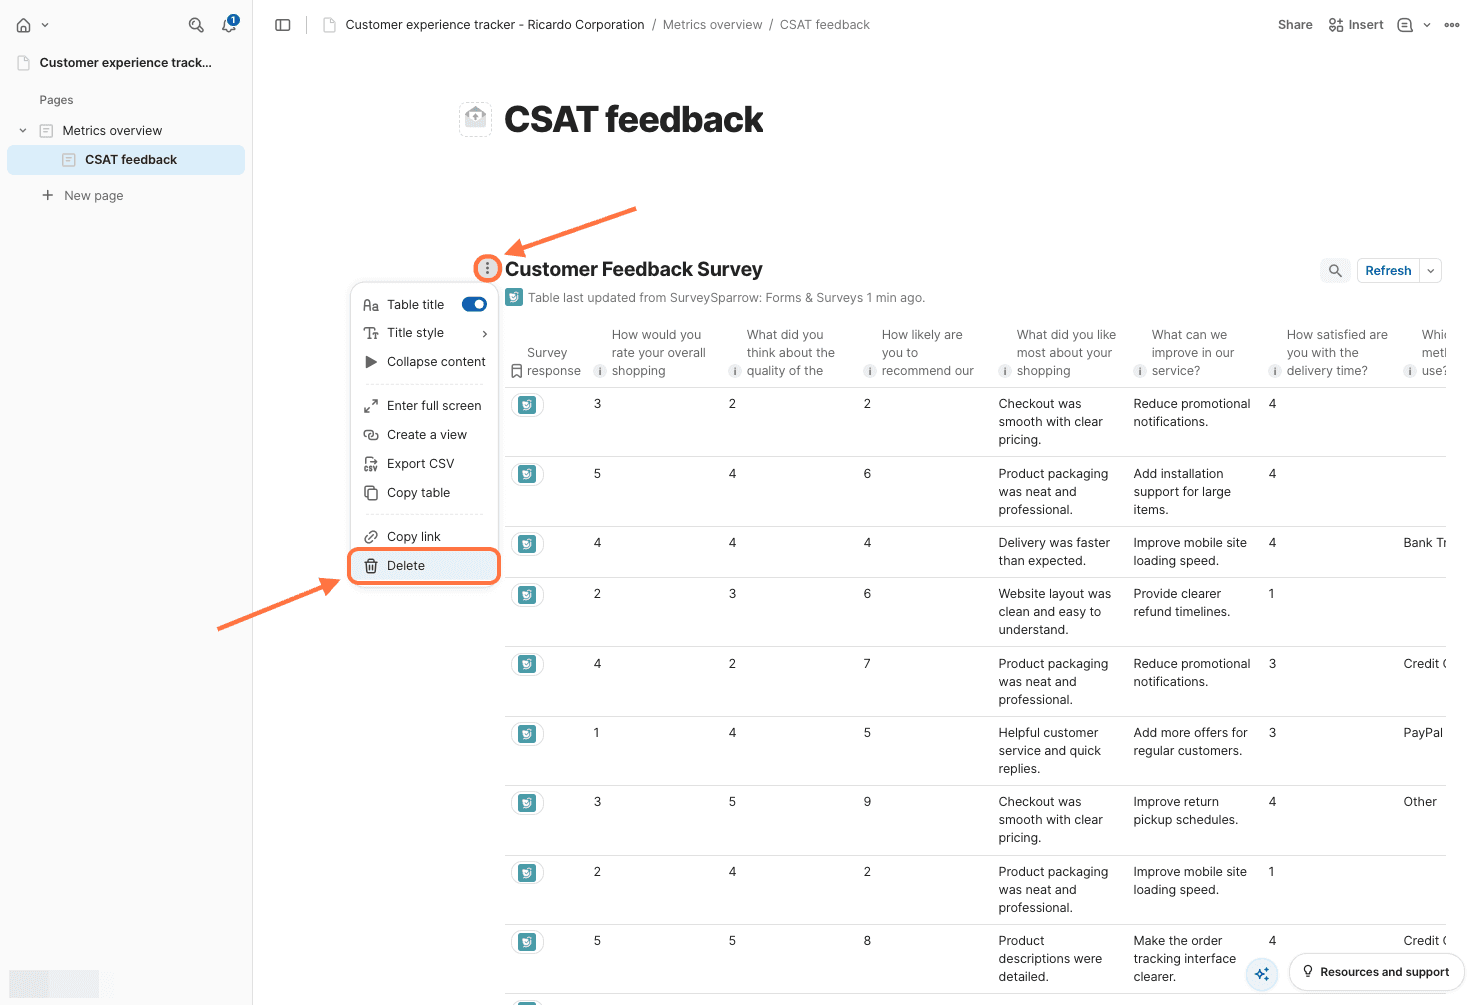
10. To access the table settings again later, click on the arrow next to Refresh, then select Settings.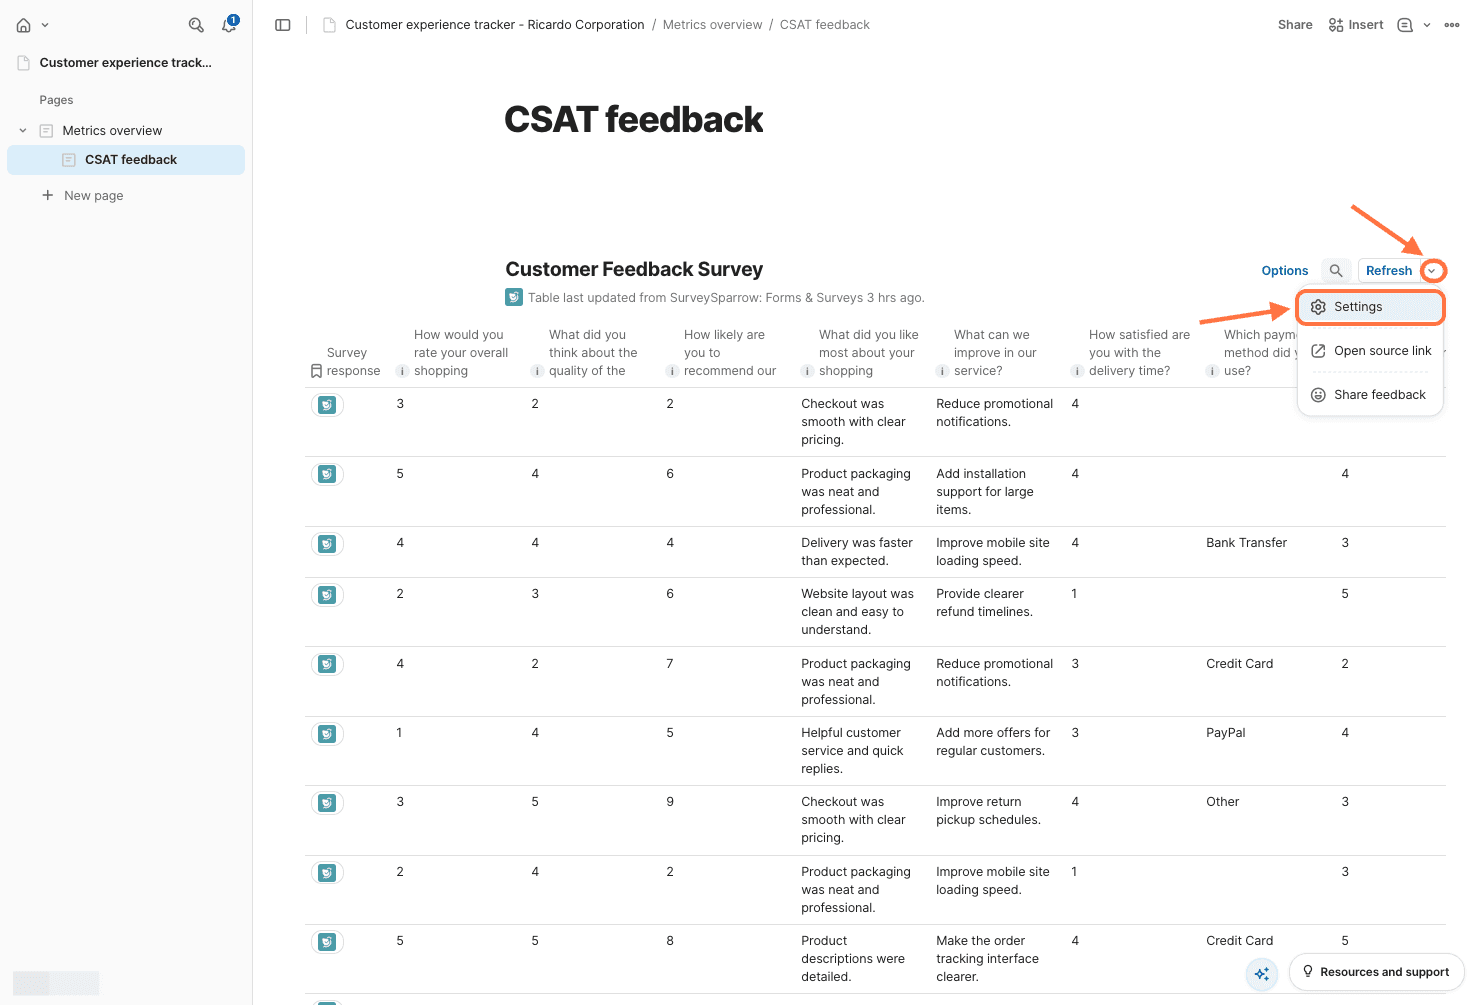
11. If you like to view the survey responses in the table back inside SurveySparrow, click on Open source link in the same menu. Another tab will open showing the responses section from your SurveySparrow account.
12. To remove the pack from your Coda doc, open the table settings panel. Then click on the vertical three-dot icon in the top right corner. Then click on Remove Pack from doc.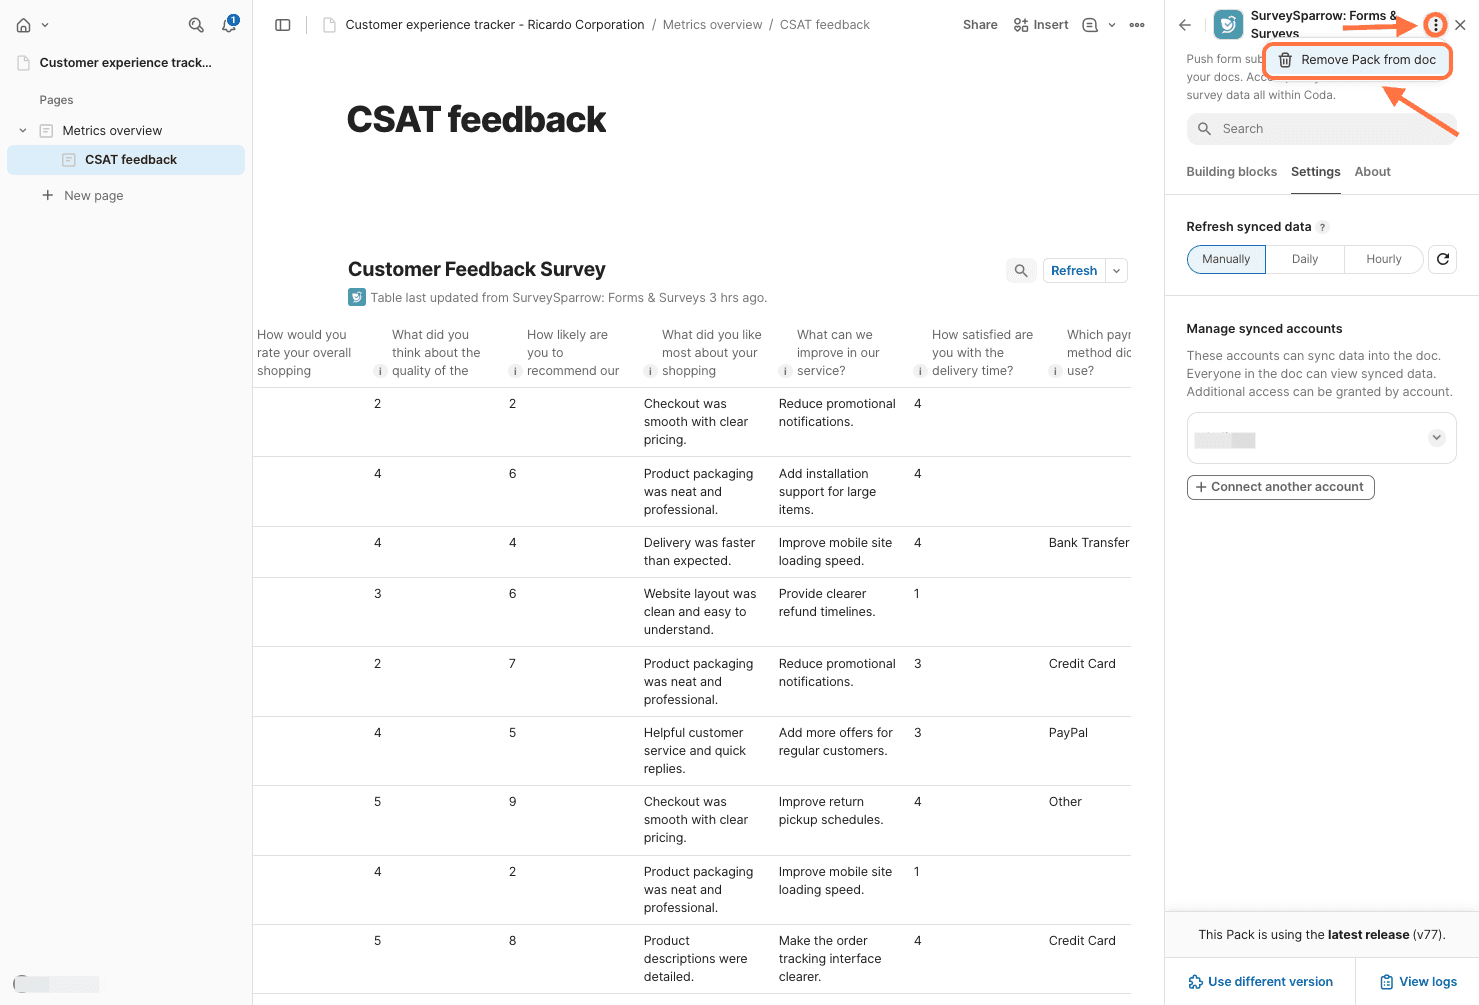
13. A confirmation pop-up appears. Click on Remove this Pack.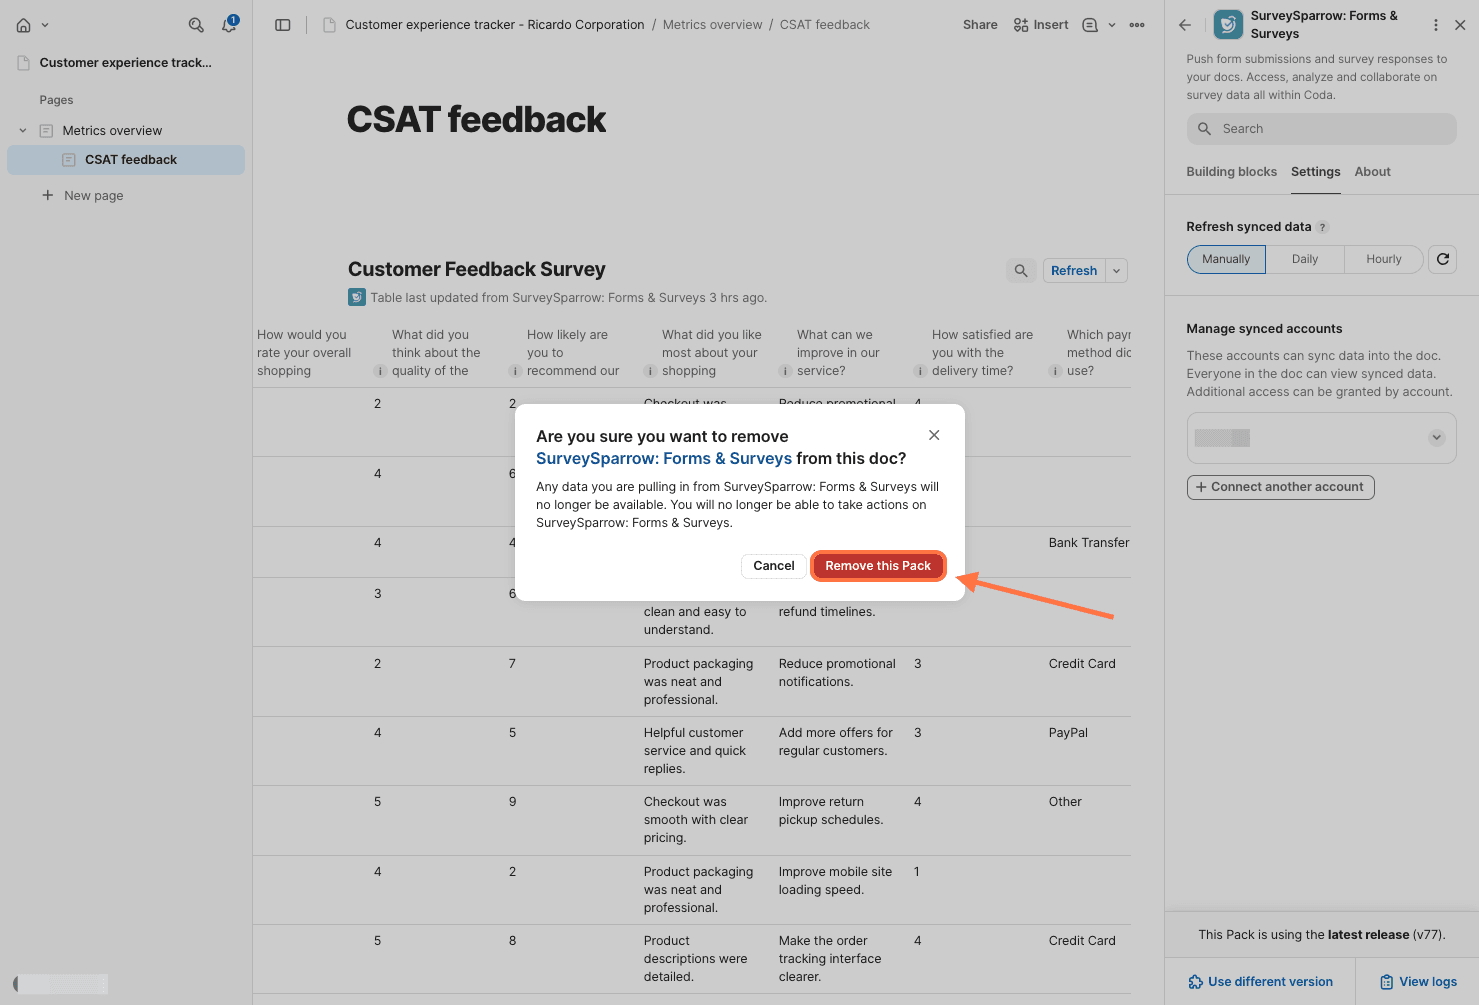
Just like that, you're now ready to start importing responses inside Coda! The SurveySparrow pack turns every Coda doc into a hub for survey data: right alongside your tasks, calendars, and metrics. Whether you’re managing projects or building dashboards, your data is now where you need it, when you need it.
Feel free to reach out to our community, if you have any questions!
Powered By SparrowDesk