
Reputation Management Overview
Manage online reviews from different platforms to improve your brand reputation.
Get centralized access to all your online reviews from Google, Facebook and manage them using SurveySparrow’s Reputation management. Let’s get an overview of how you can set up your reputation management for your business.
Manage reviews from different platforms
1. Once you log in to your SurveySparrow account, click the Reputation tab.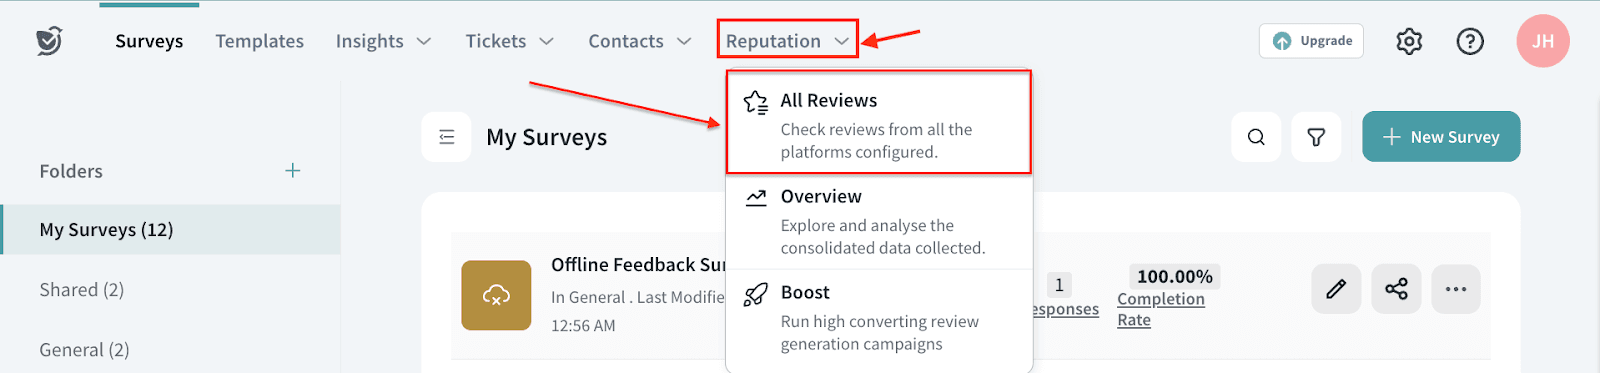
2. Click on the Manage Platforms button.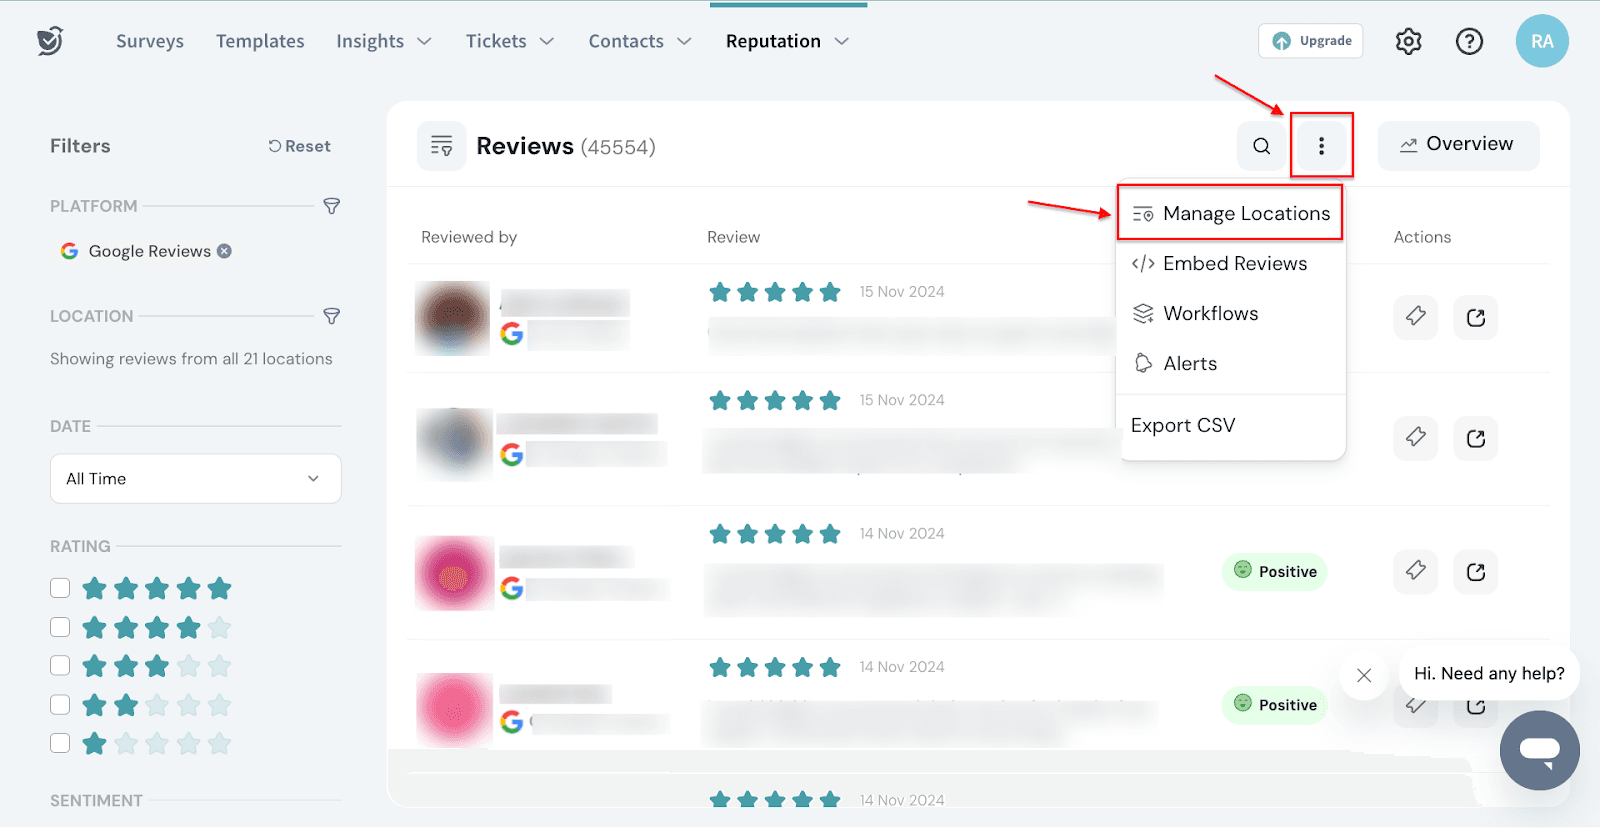
You will be taken to the Settings page to add a new platform.
3. Click Add New Platforms button. A slide-in panel will appear.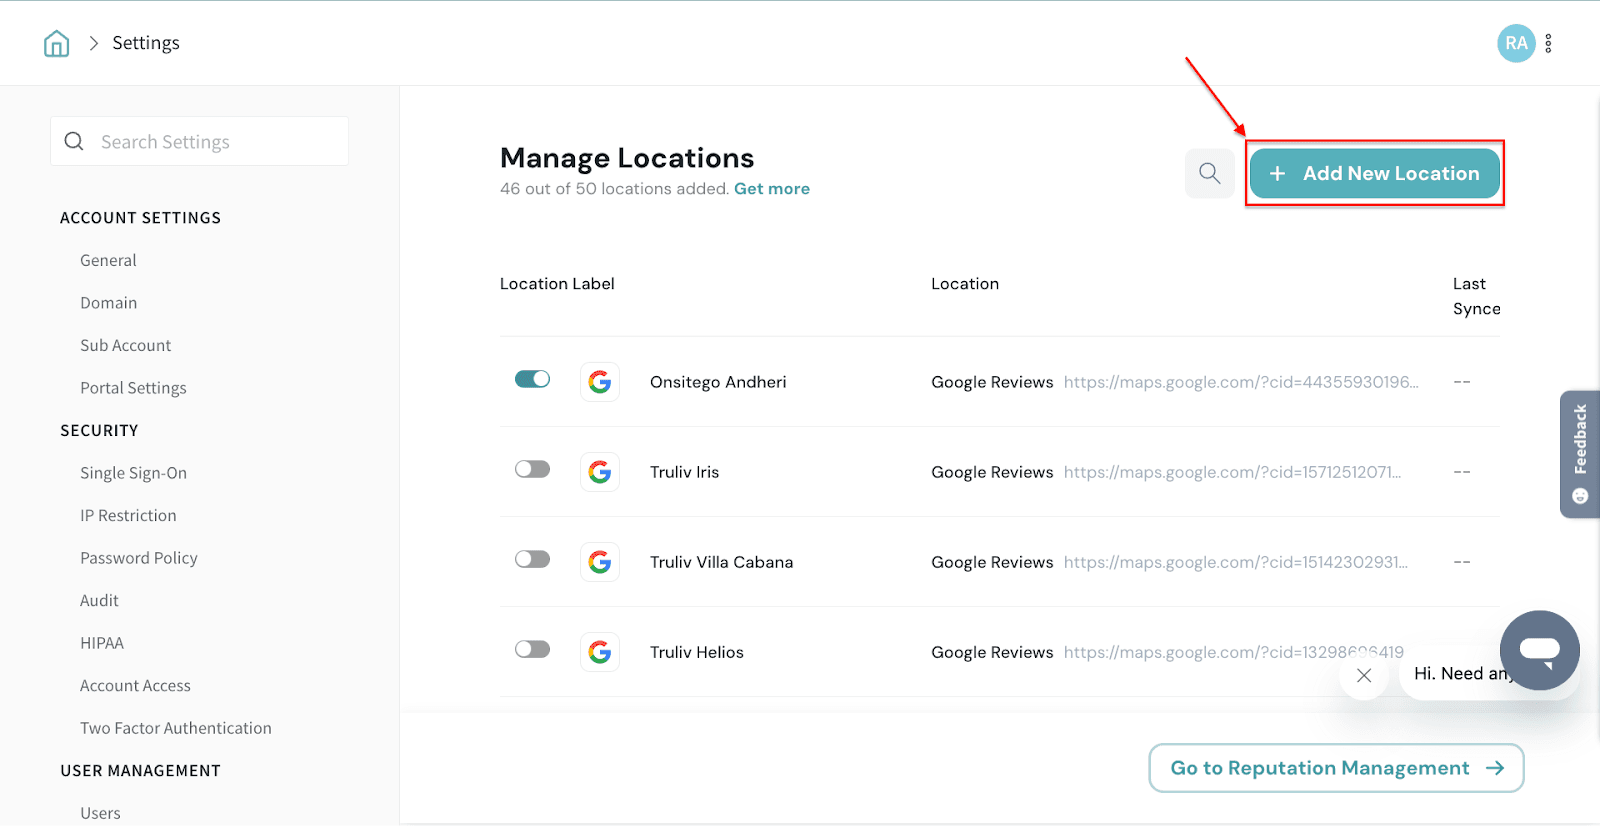
4. Choose the platform you want to add. In our example, we will be choosing Google Reviews.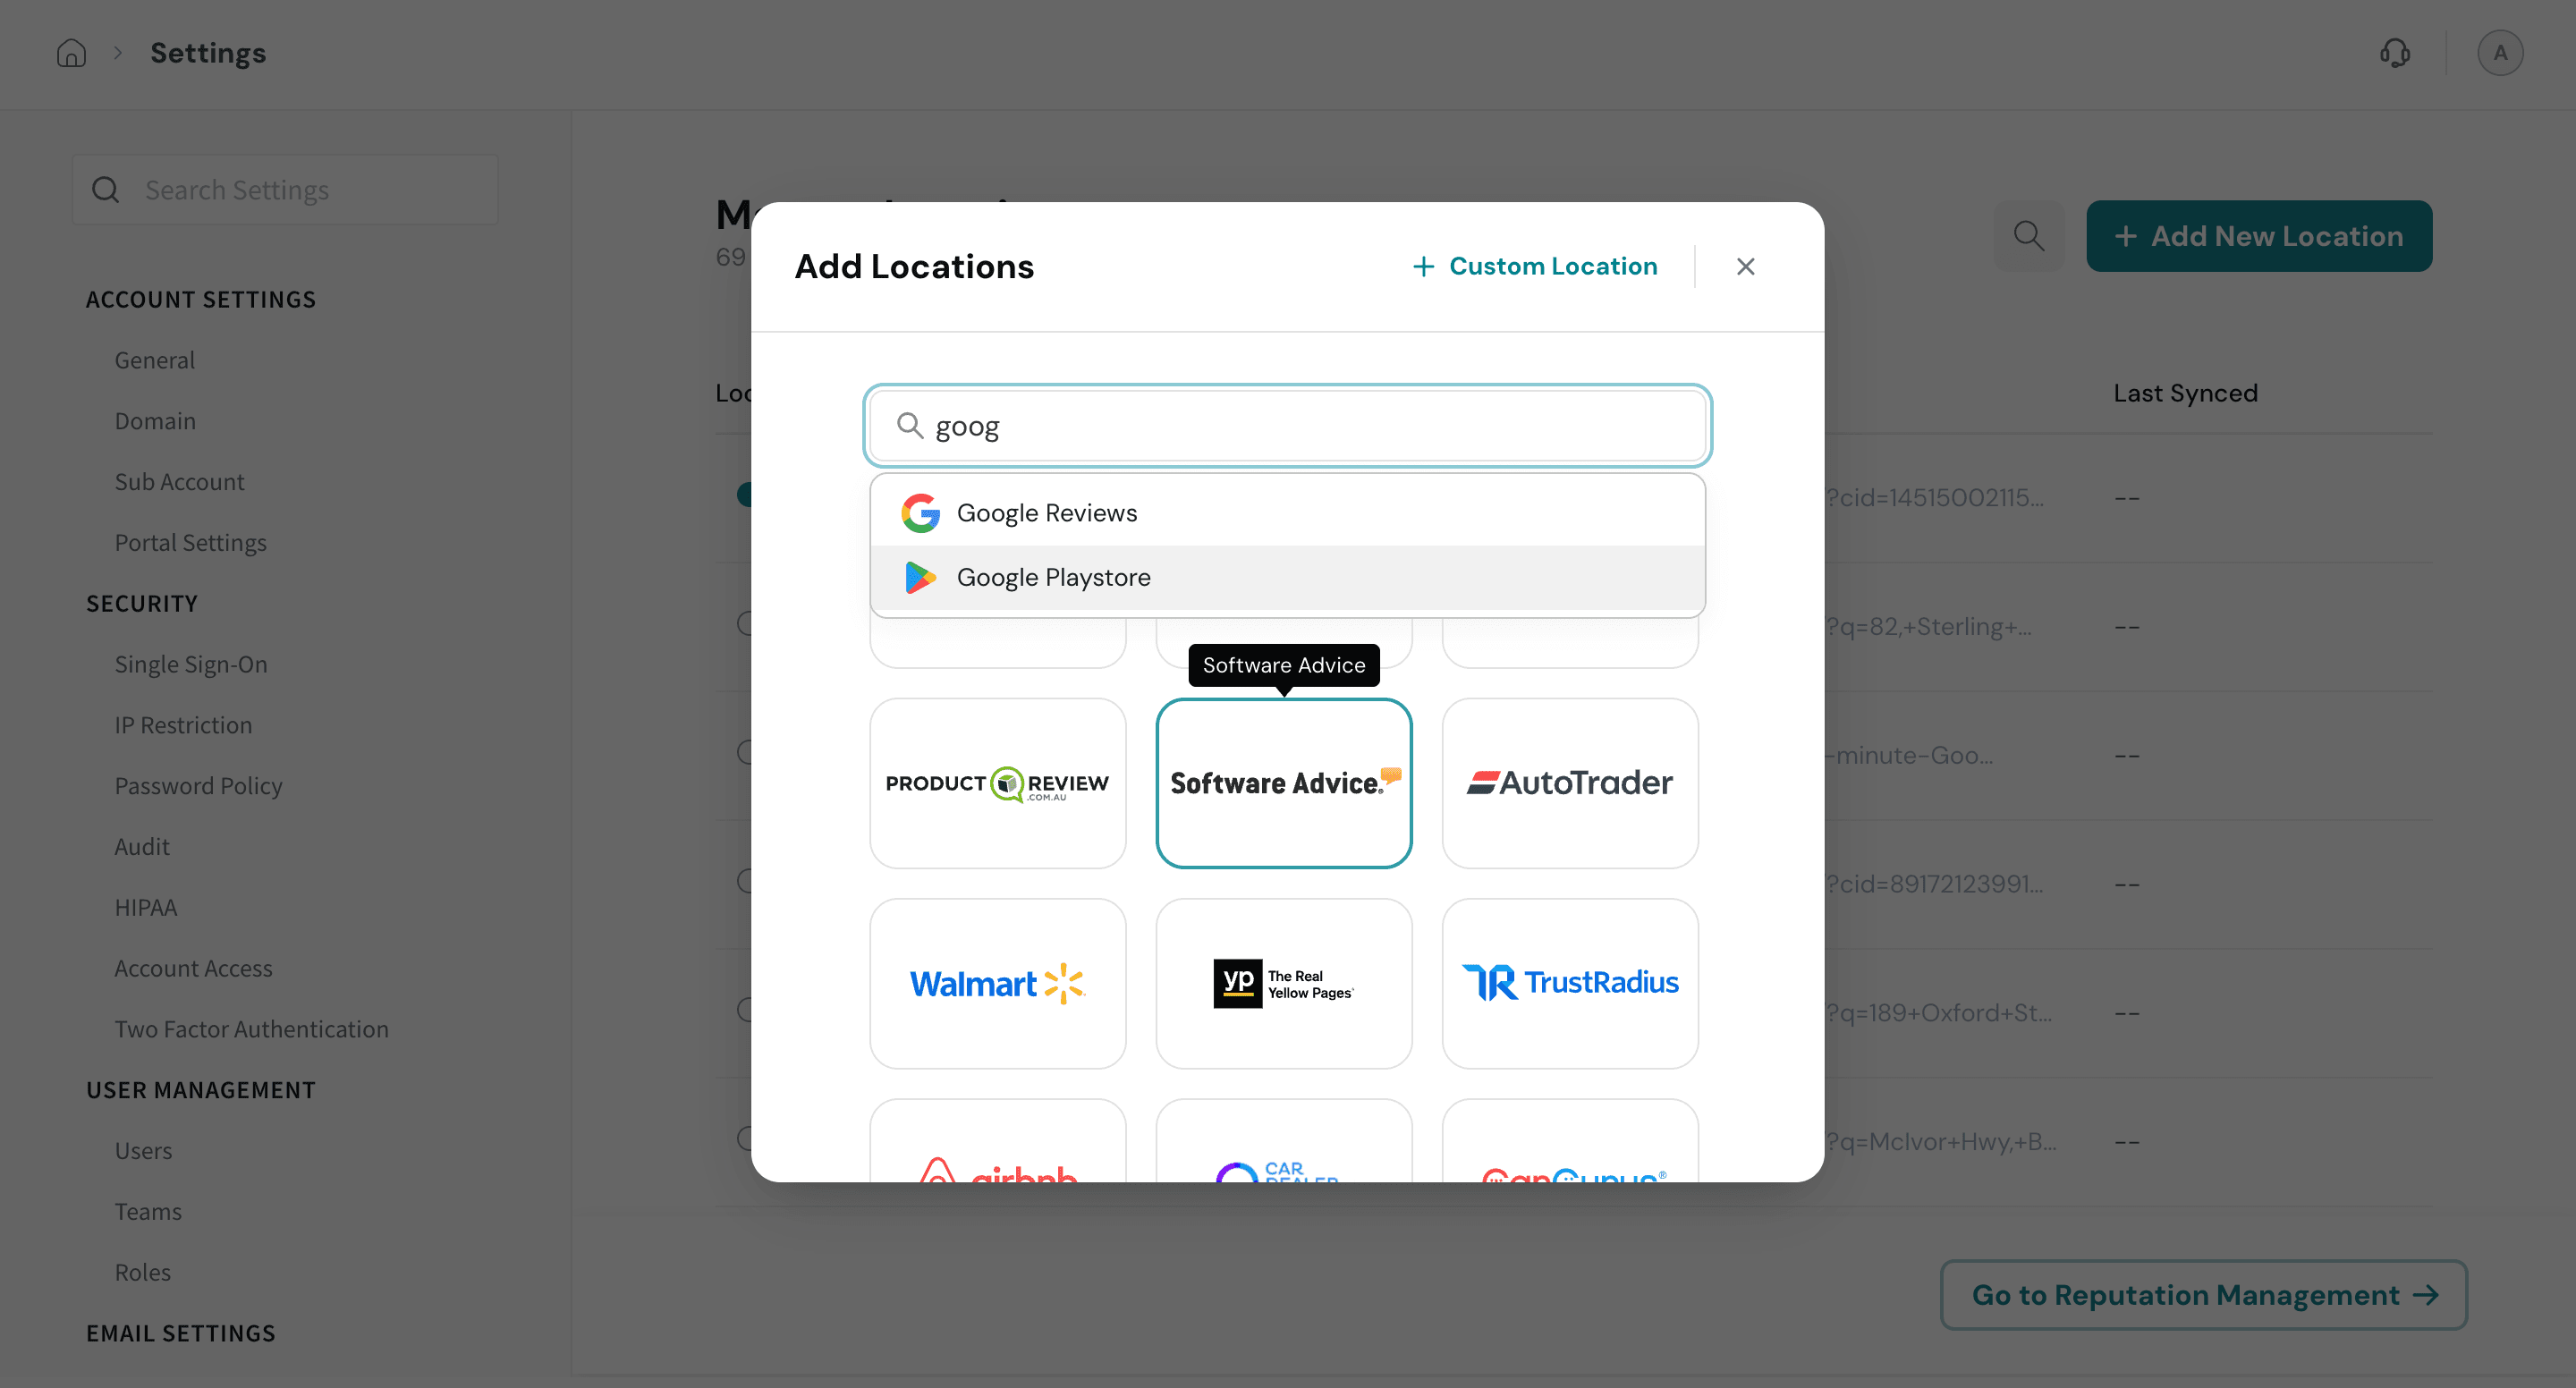
5. Authorize the request with your business account credentials.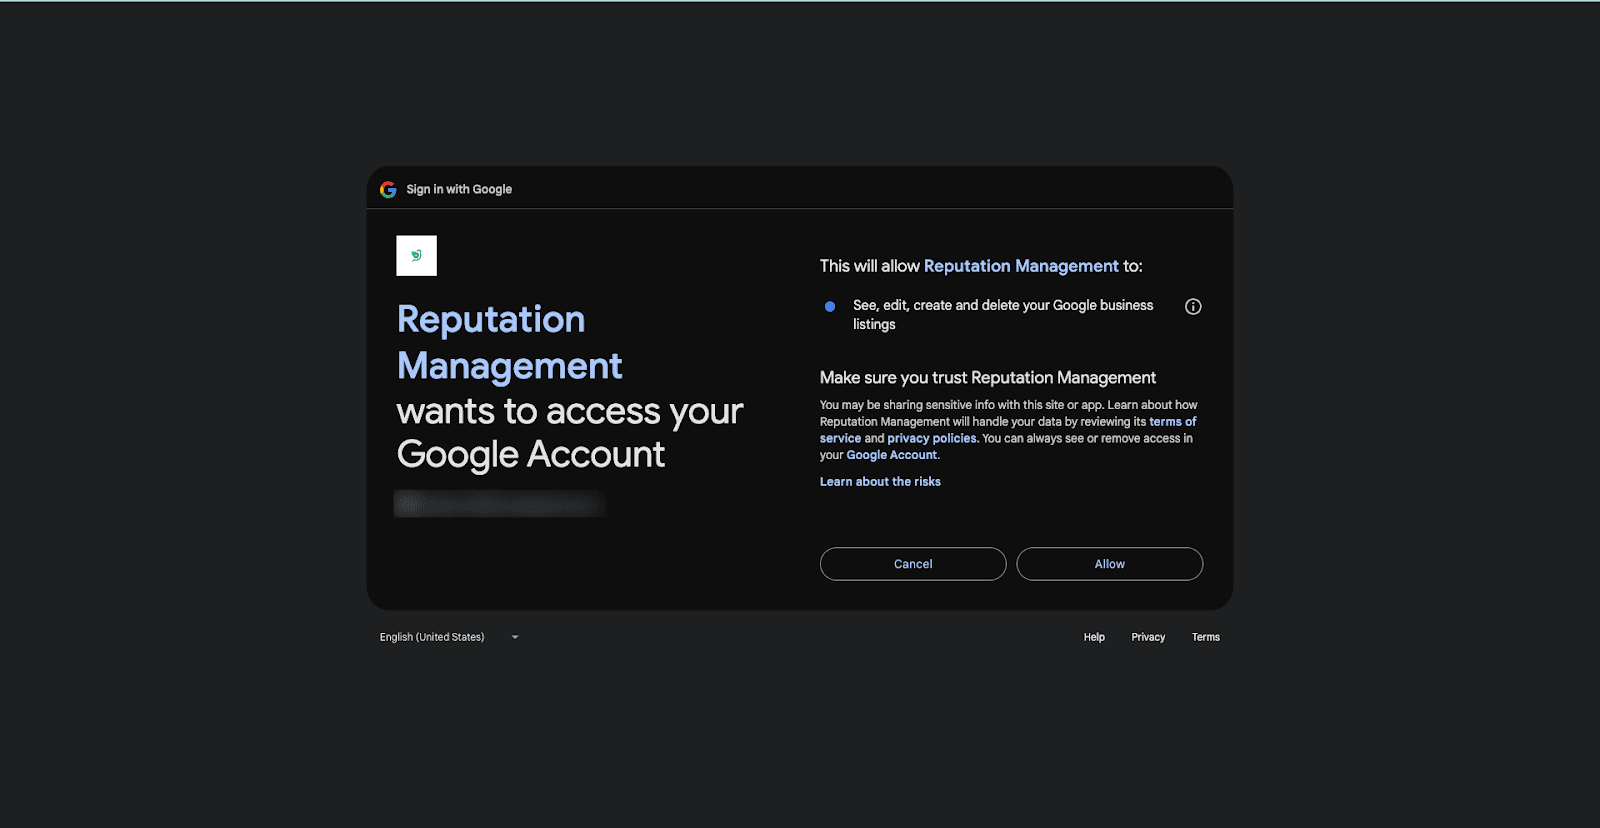
You can check the data that will be accessed by SurveySparrow.
6. Once the authentication process is completed, choose the location/shop. Add a label name for your reference.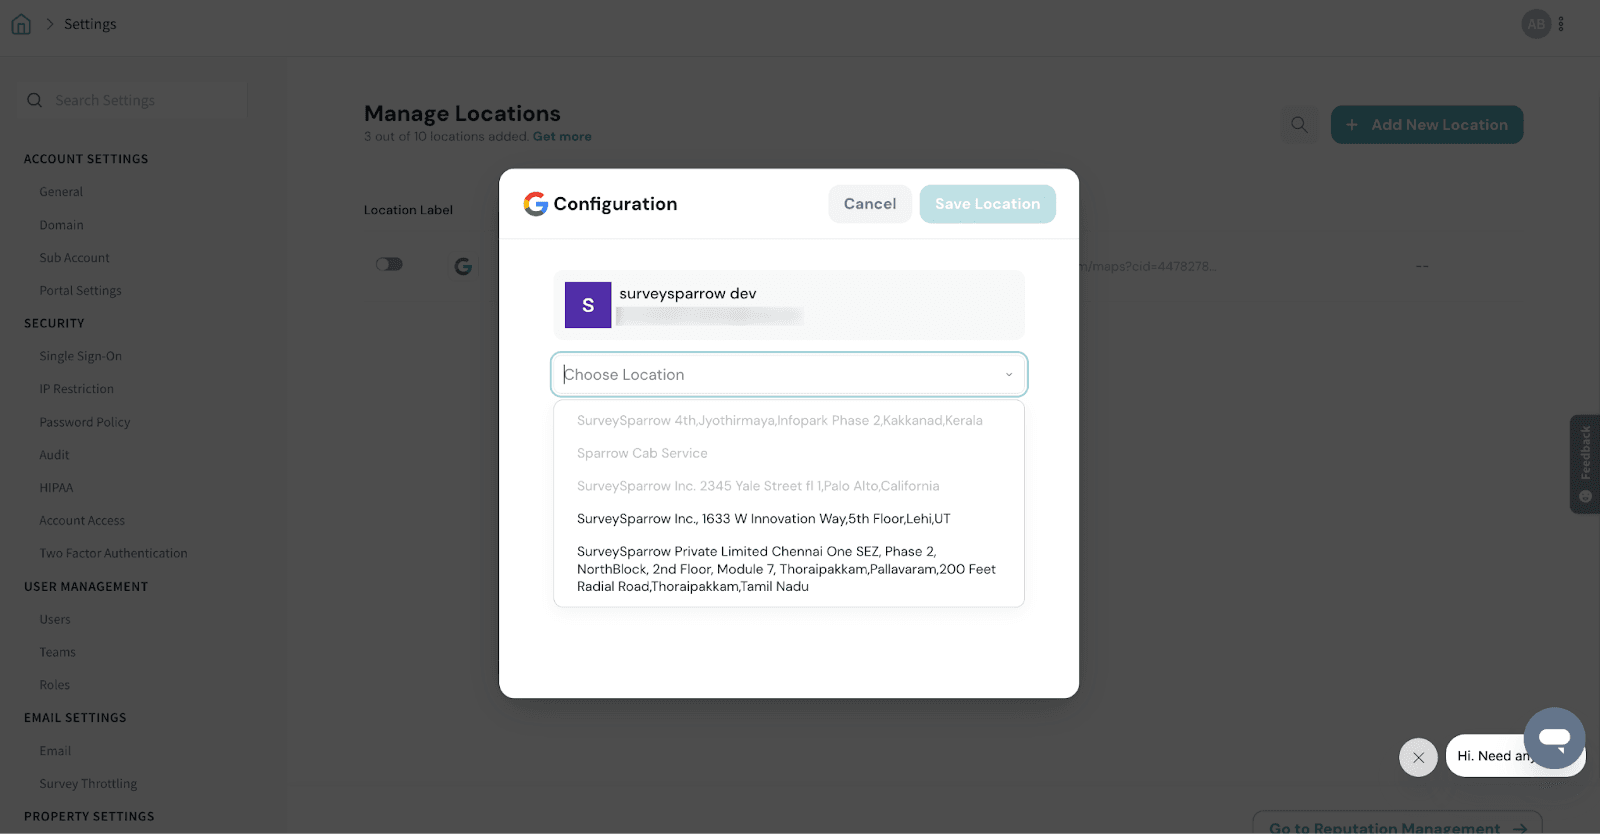
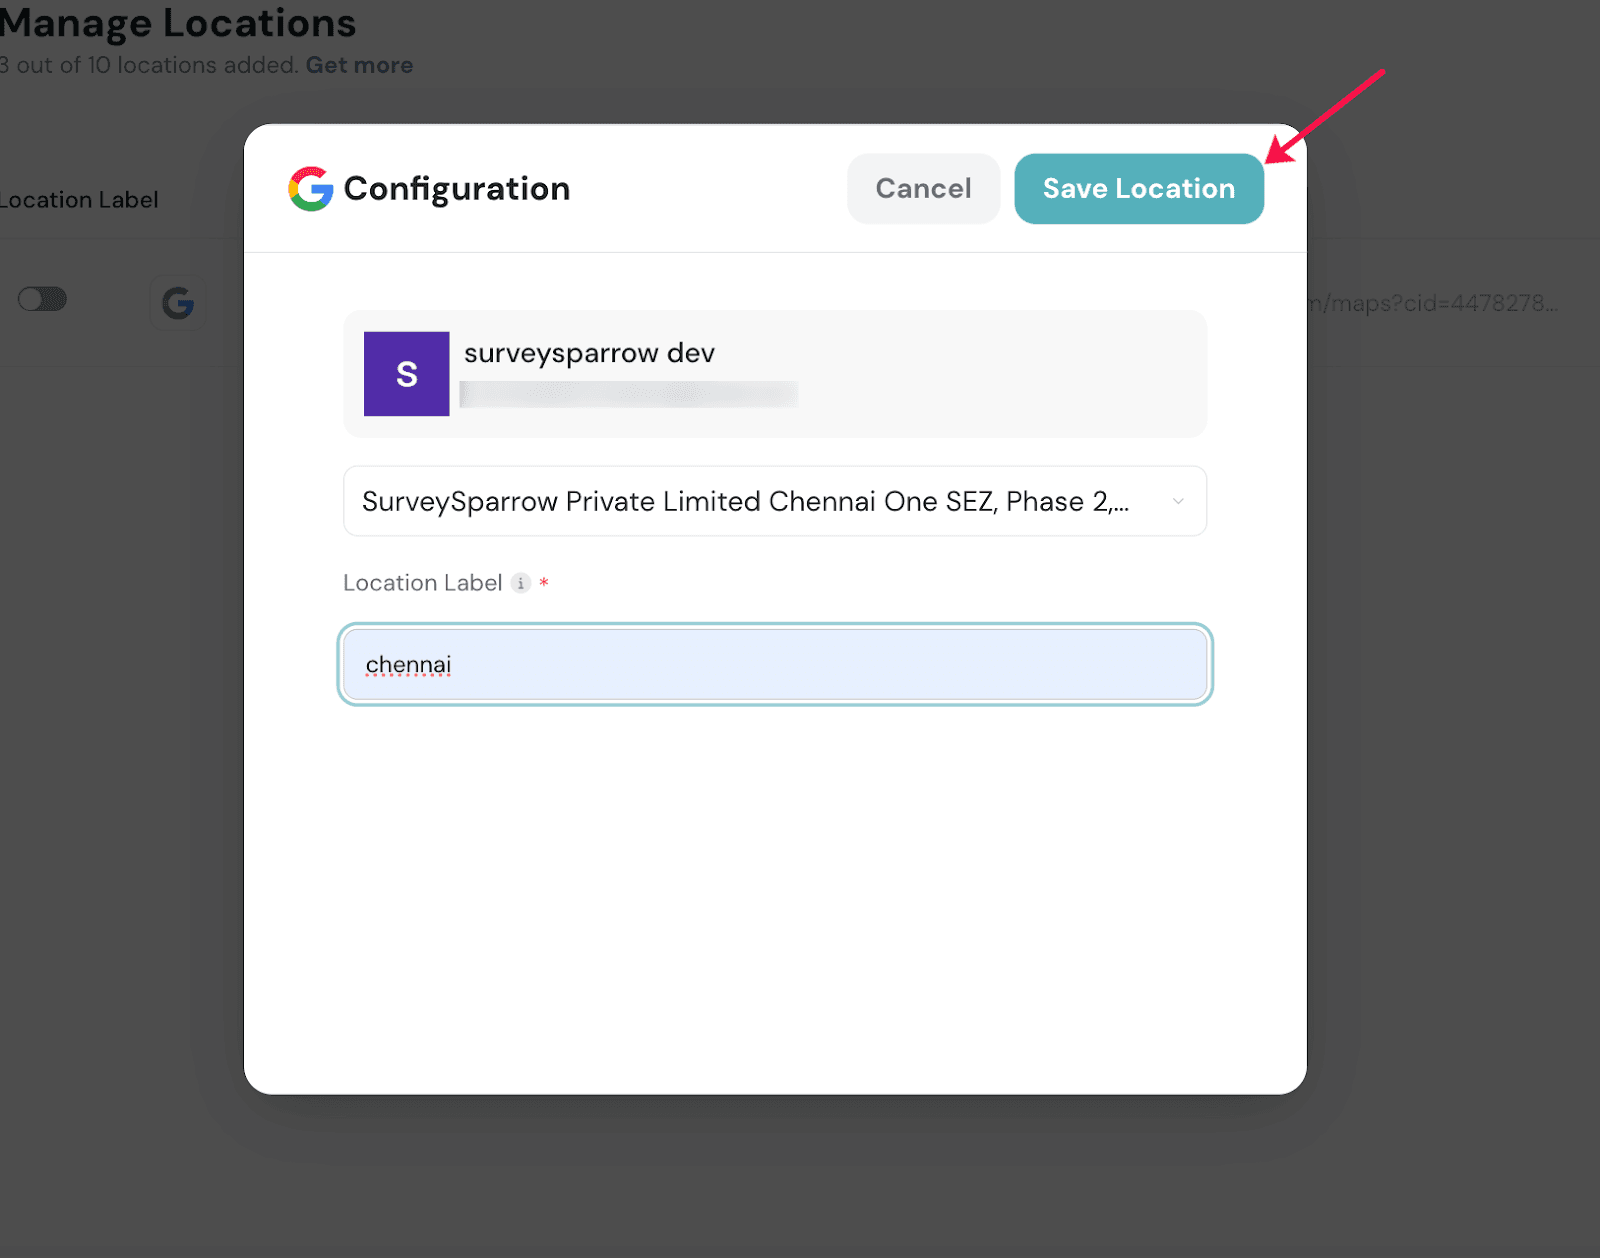
7. Click the Save Platform button.
All the online reviews of your business from the platform will be loaded under the Reviews section of Reputation management. You can now see all the ratings, reviews, and reviewer details.
Now, you can monitor and manage all your reviews using SurveySparrow.
Reviews section
Replying to the reviews
You can now respond to reviews from different platforms directly from SurveySparrow.
1. Navigate to the Reviews section of Reputation Management.
2. In the Actions column of the review you want to reply to, click the“Reply” icon, which will appear when you hover over it.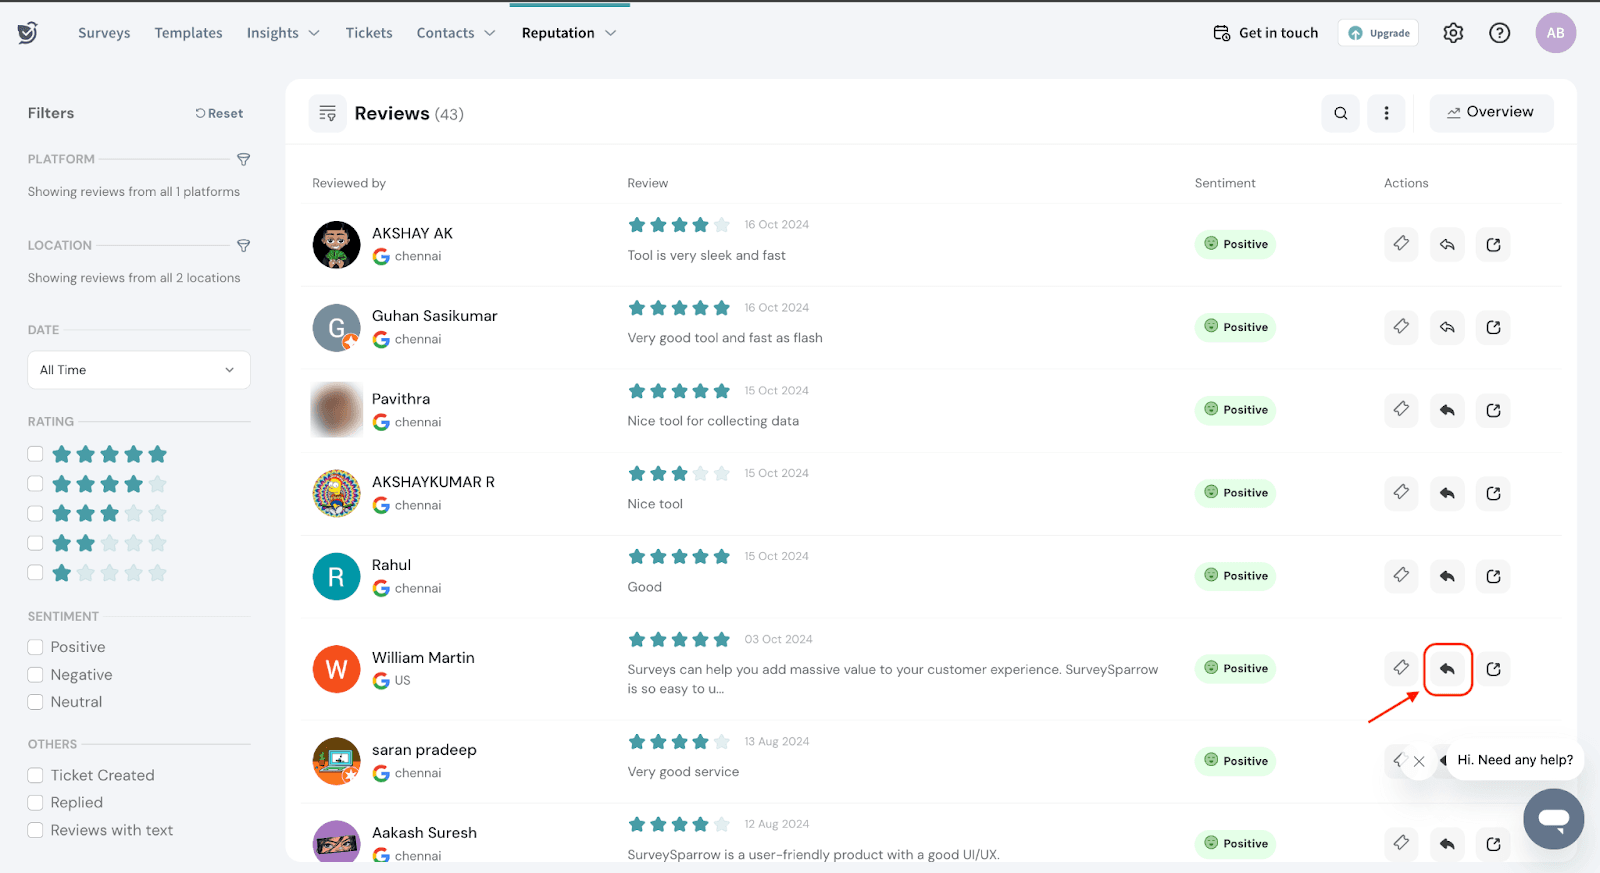
3. Enter your response to the review and click the Reply button. The reply will be instantly sent.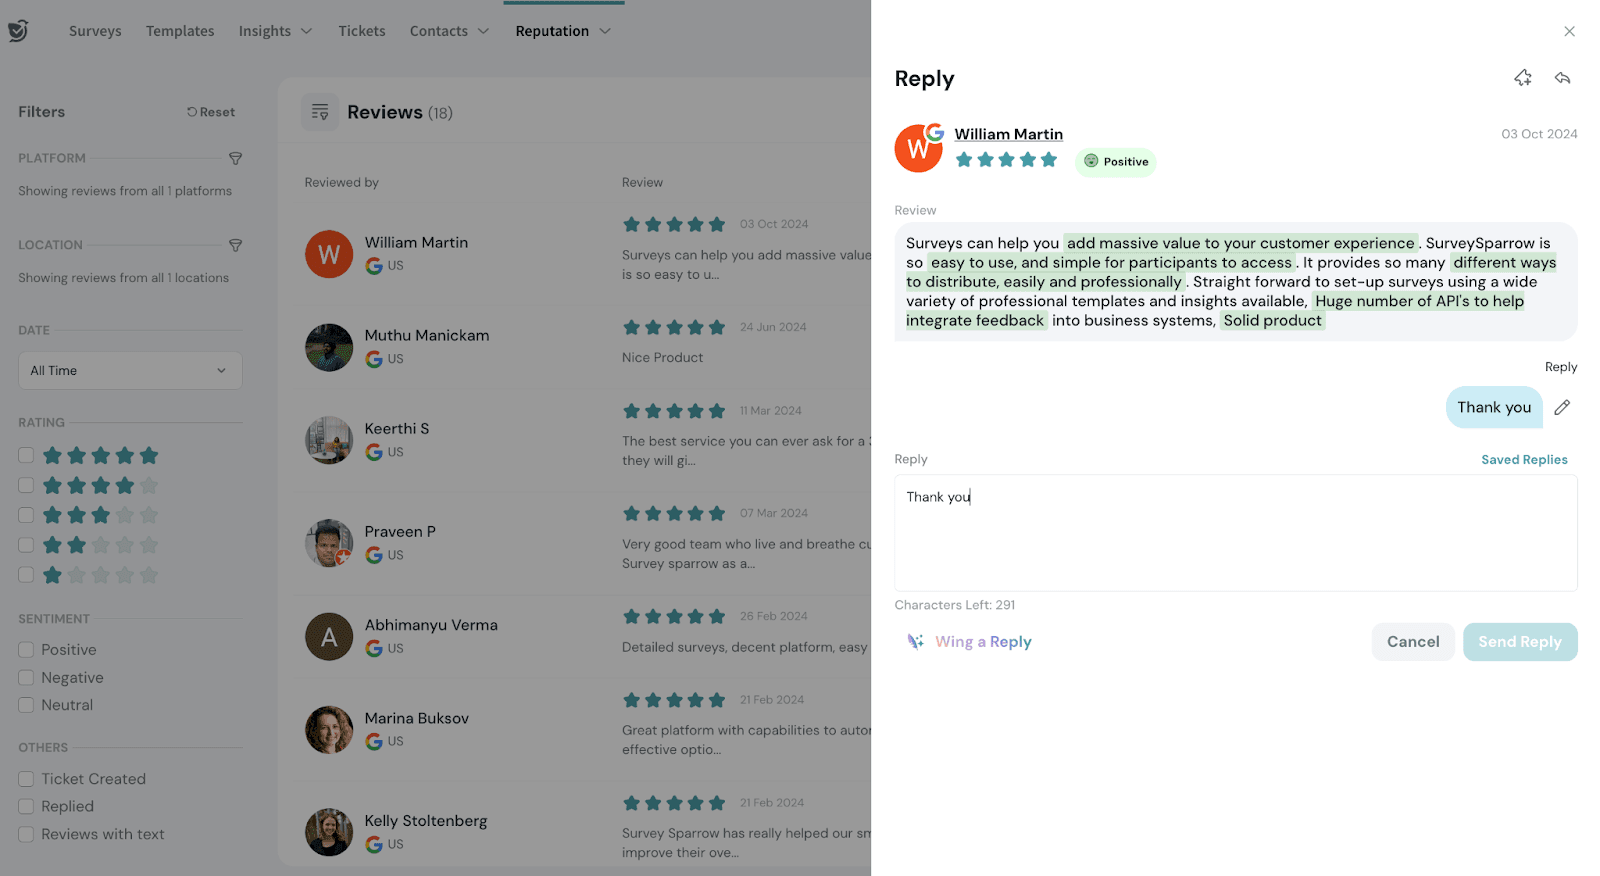
You can click on the review and have a conversational UI to view the last posted reply associated with that particular review.
Edit the reply
You can edit the reply to a review from SurveySparrow’s Reputation management. Let me guide you through the process.
1. Navigate to the Reviews section of Reputation Management.
2. Filter the reviews for which you have replied by checking the Replied filter in the View By panel.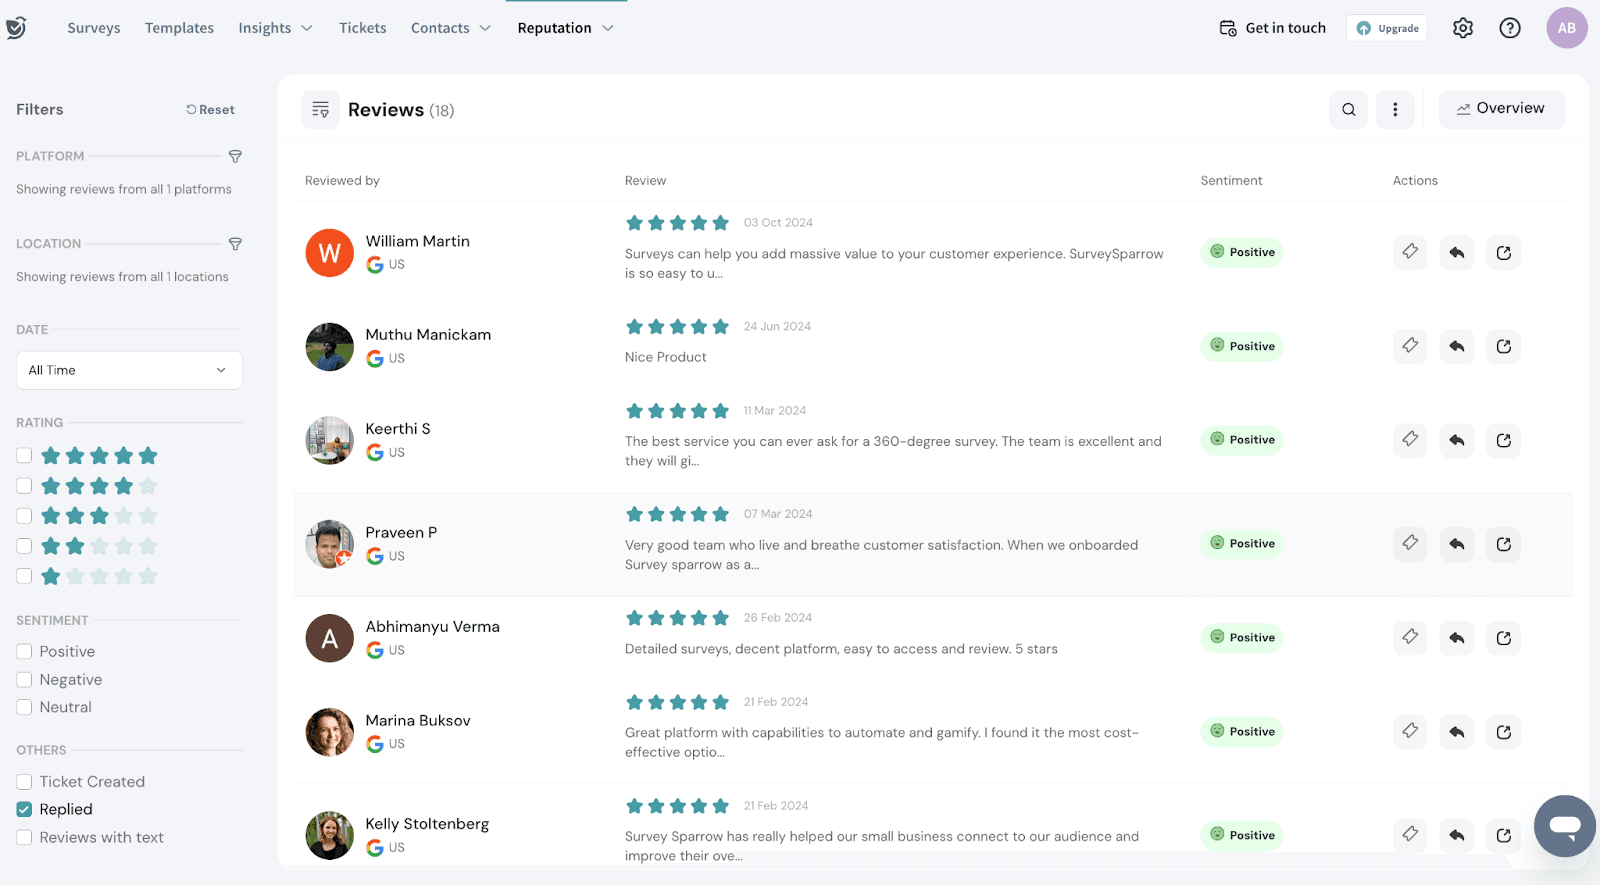
3. Click on a review to edit the reply.
4. Click on the edit icon present beside your reply.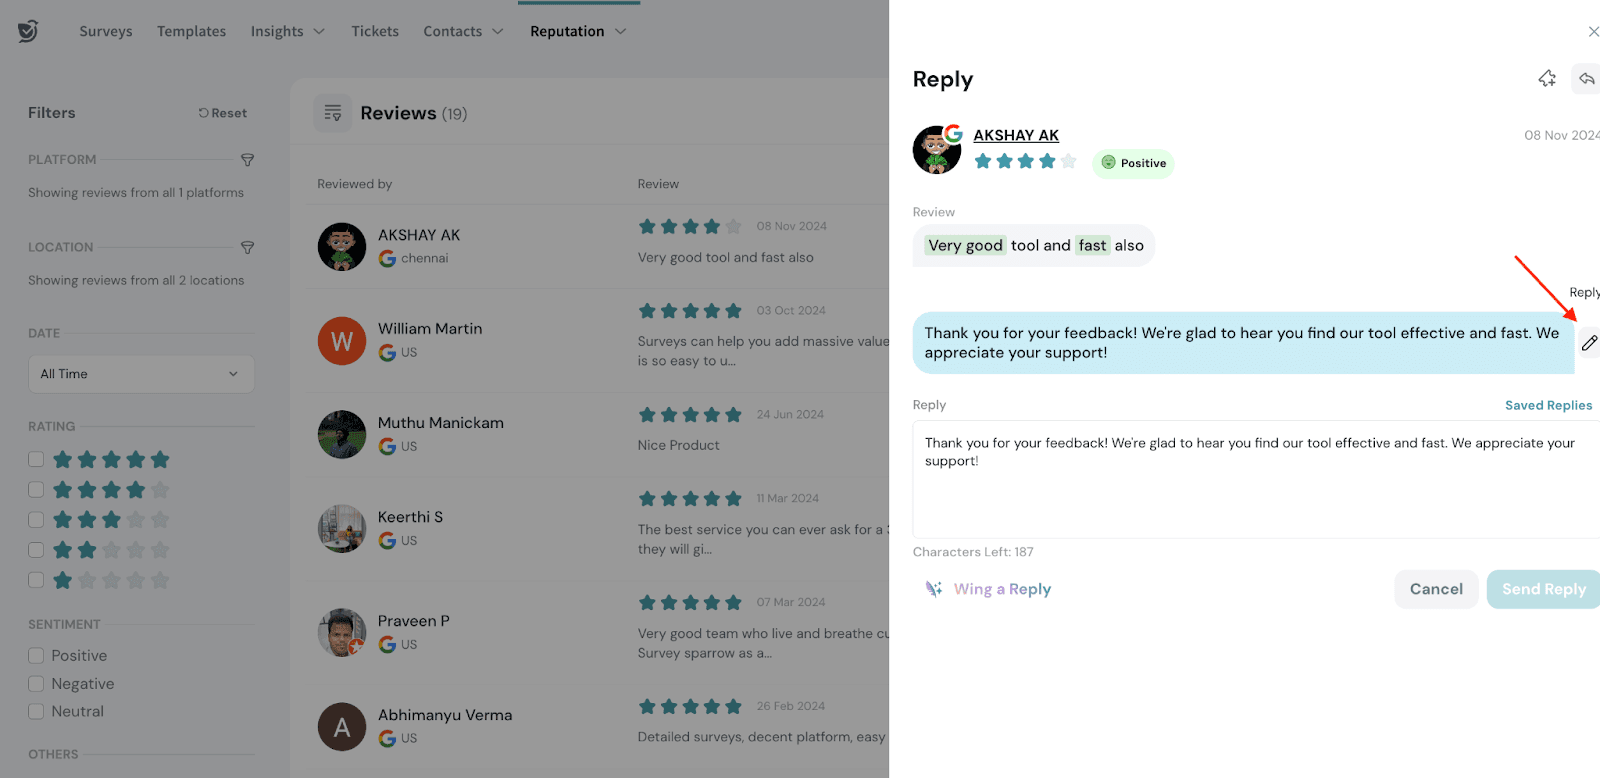
5. Edit your reply and click the Reply button.
Creating a ticket
For the reviews received, you can filter them and create tickets to close the feedback loop efficiently using SurveySparrow.
Let’s say that your company is getting a lot of good reviews and would like to double down on the best practices. You can create a ticket for the review and assign the right person to work on it internally.
1. Navigate to the Reviews section of Reputation Management.
2. Filter the reviews based on the rating received and the review's sentiment to create a ticket.
3. Click the “ticket” icon, which will appear for each review when you hover over them.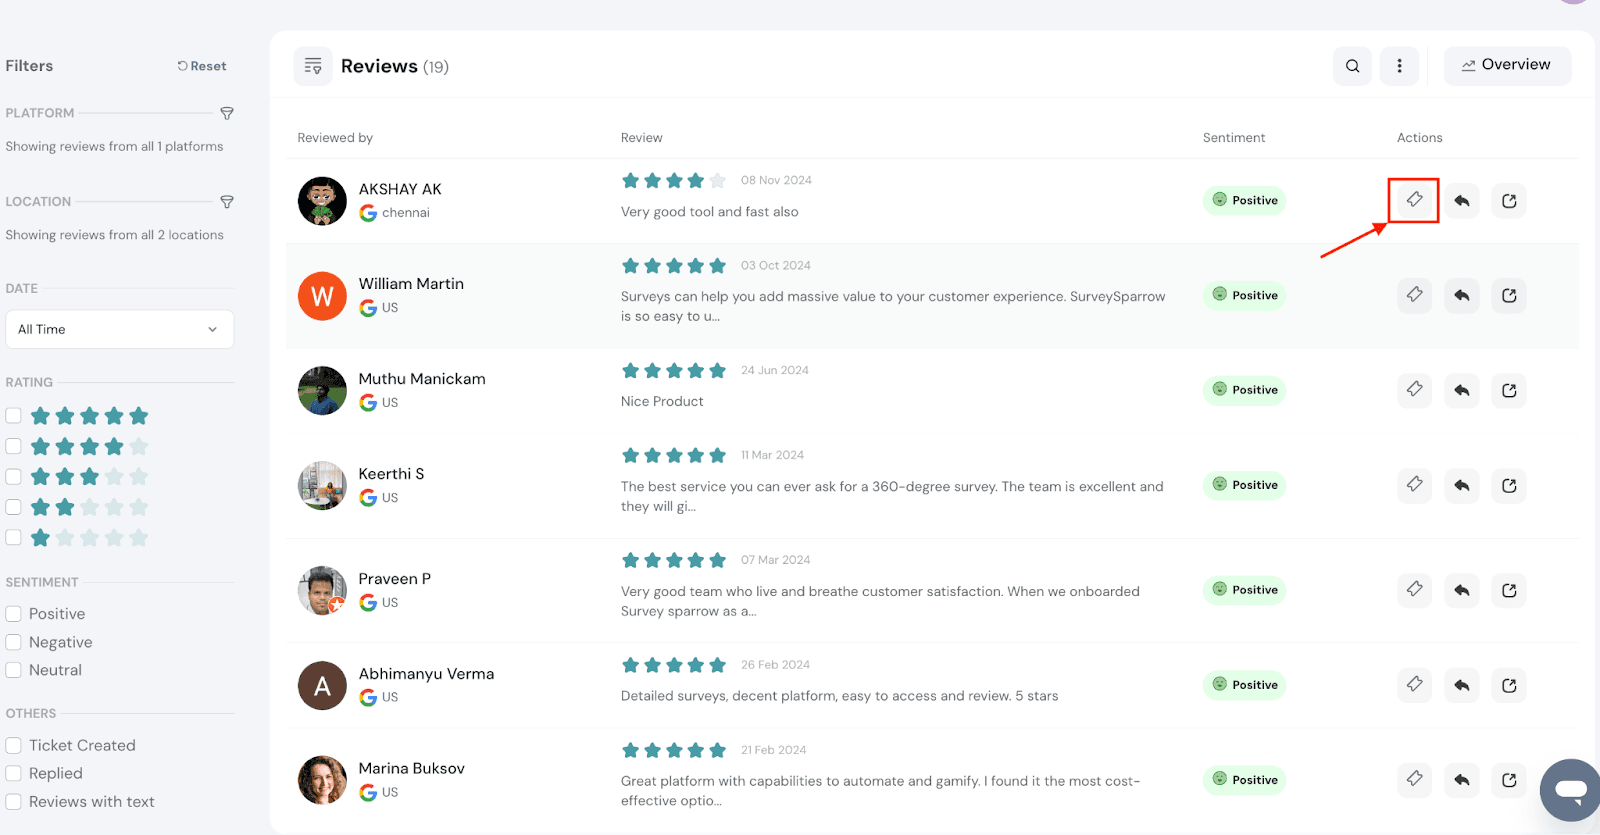
4. Add a subject to the ticket.
5. Provide a description for the ticket so that the assignee gets a good understanding of the ticket to resolve it.
6. Choose an assignee from the dropdown to handle the ticket.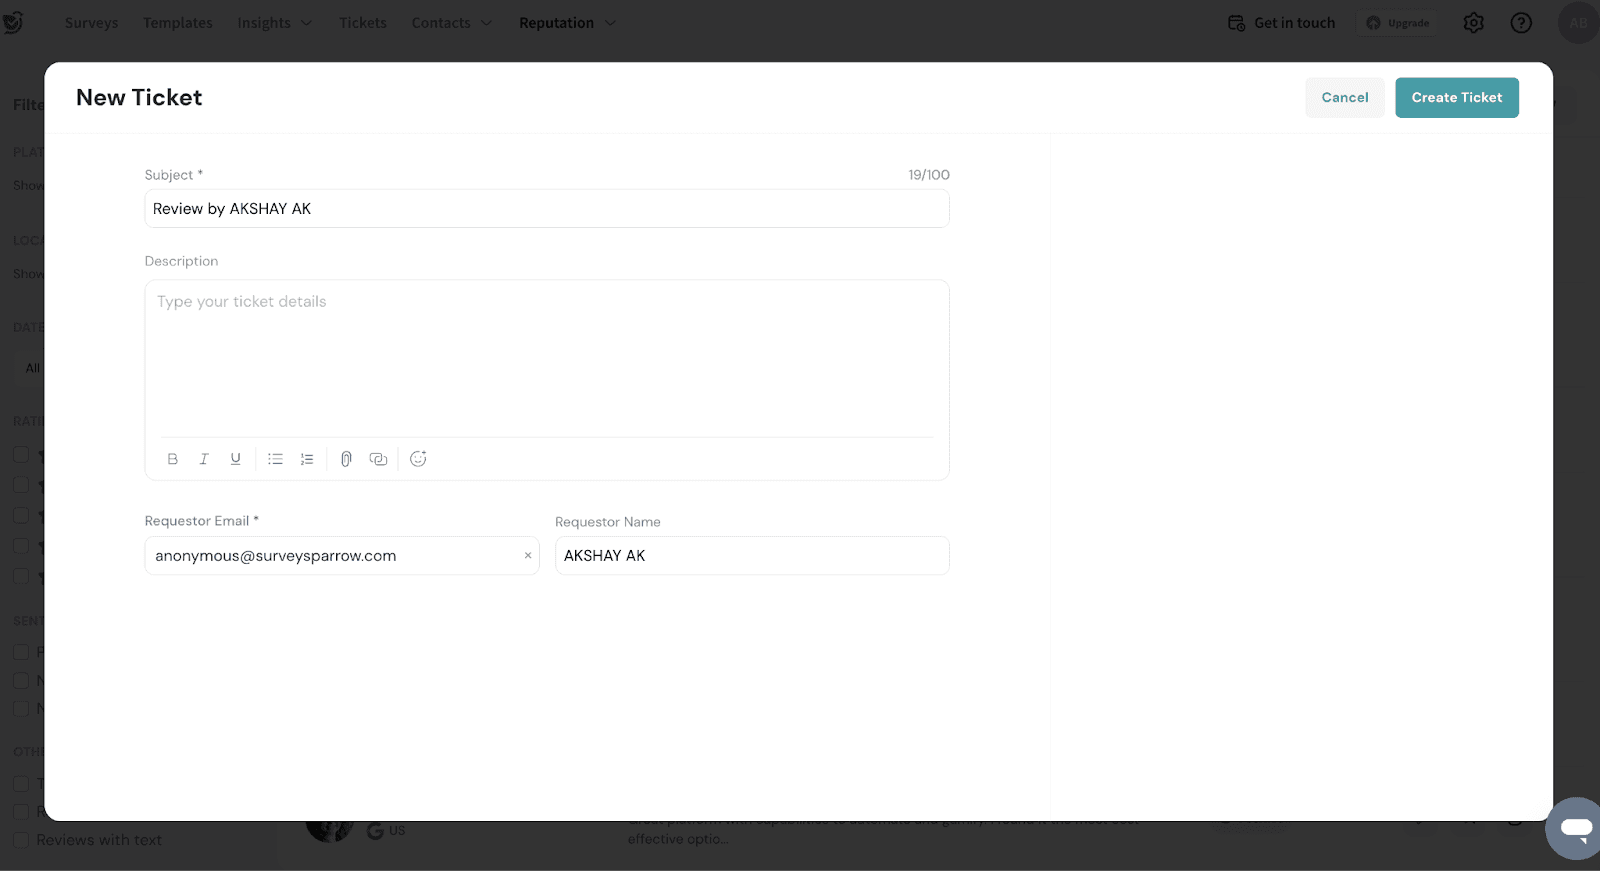
7. Click on the Create ticket button.
Now, you can go to the ticket management section to handle the ticket.
You can set the priority for the created ticket and internally work on it by setting a timeline.
You can collaborate with the right people to best approach the task and complete it with ease.
Overview section
Under the Overview section of Reputation Management, you can have a holistic view of your brand’s reputation with the reviews collected from different platforms.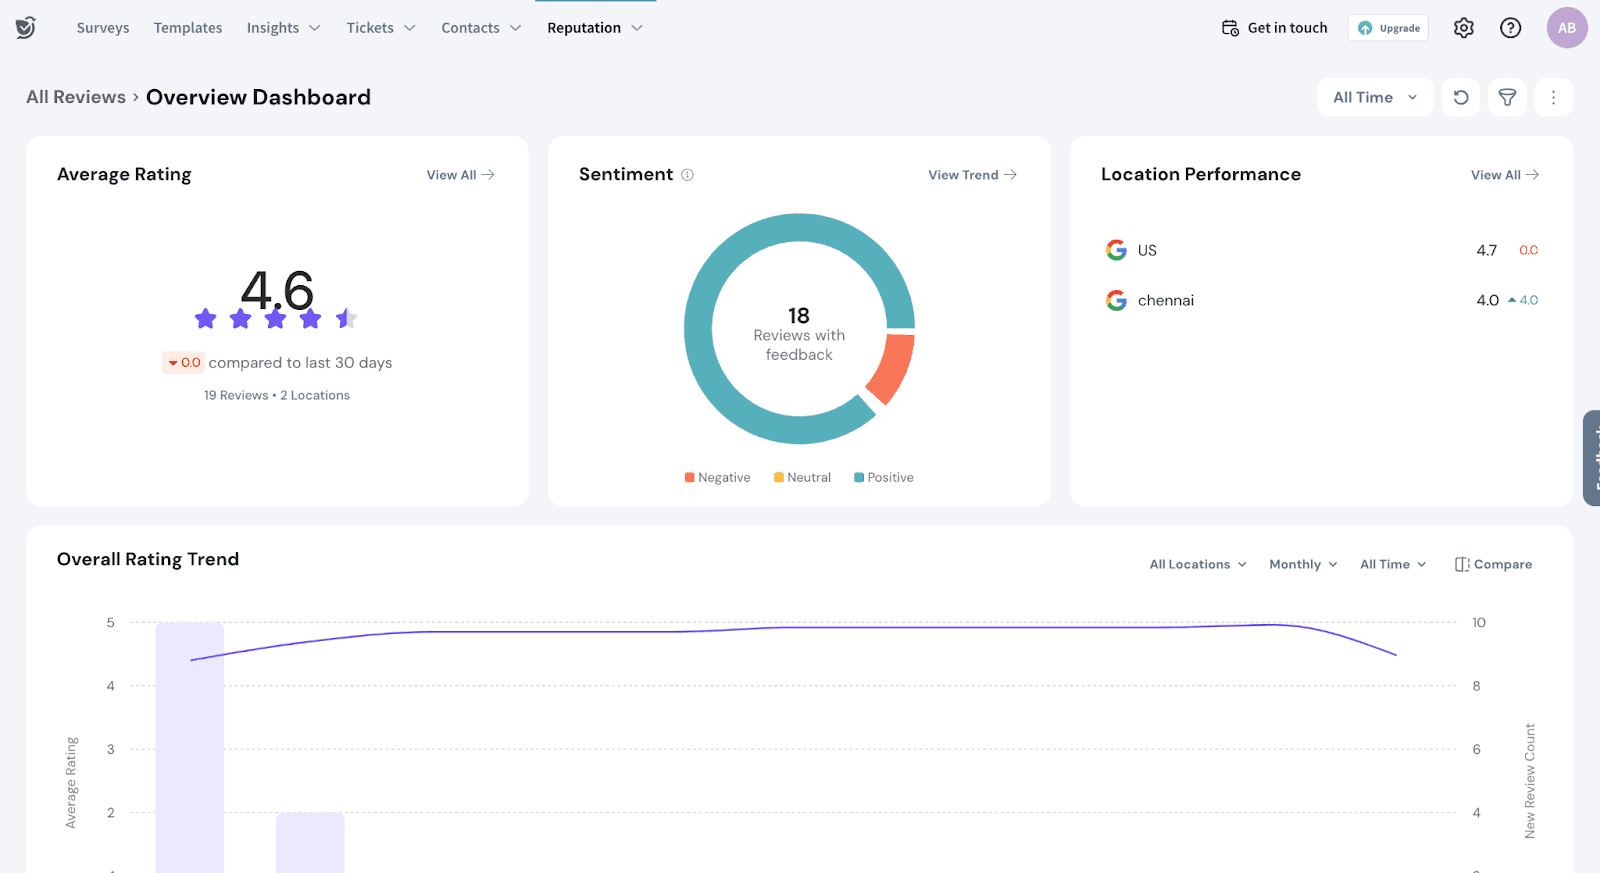
The average rating is shown along with a detailed visualization of your ratings. You can use the filters to view the platform-wise rating of your business and adjust the time period to drill down further.
Embed Reviews on your website
You can boast of your reputation by embedding the best reviews on your website. Let’s see how it is done.
1. Navigate to Reputation, click the vertical ellipsis icon and select Embed Reviews.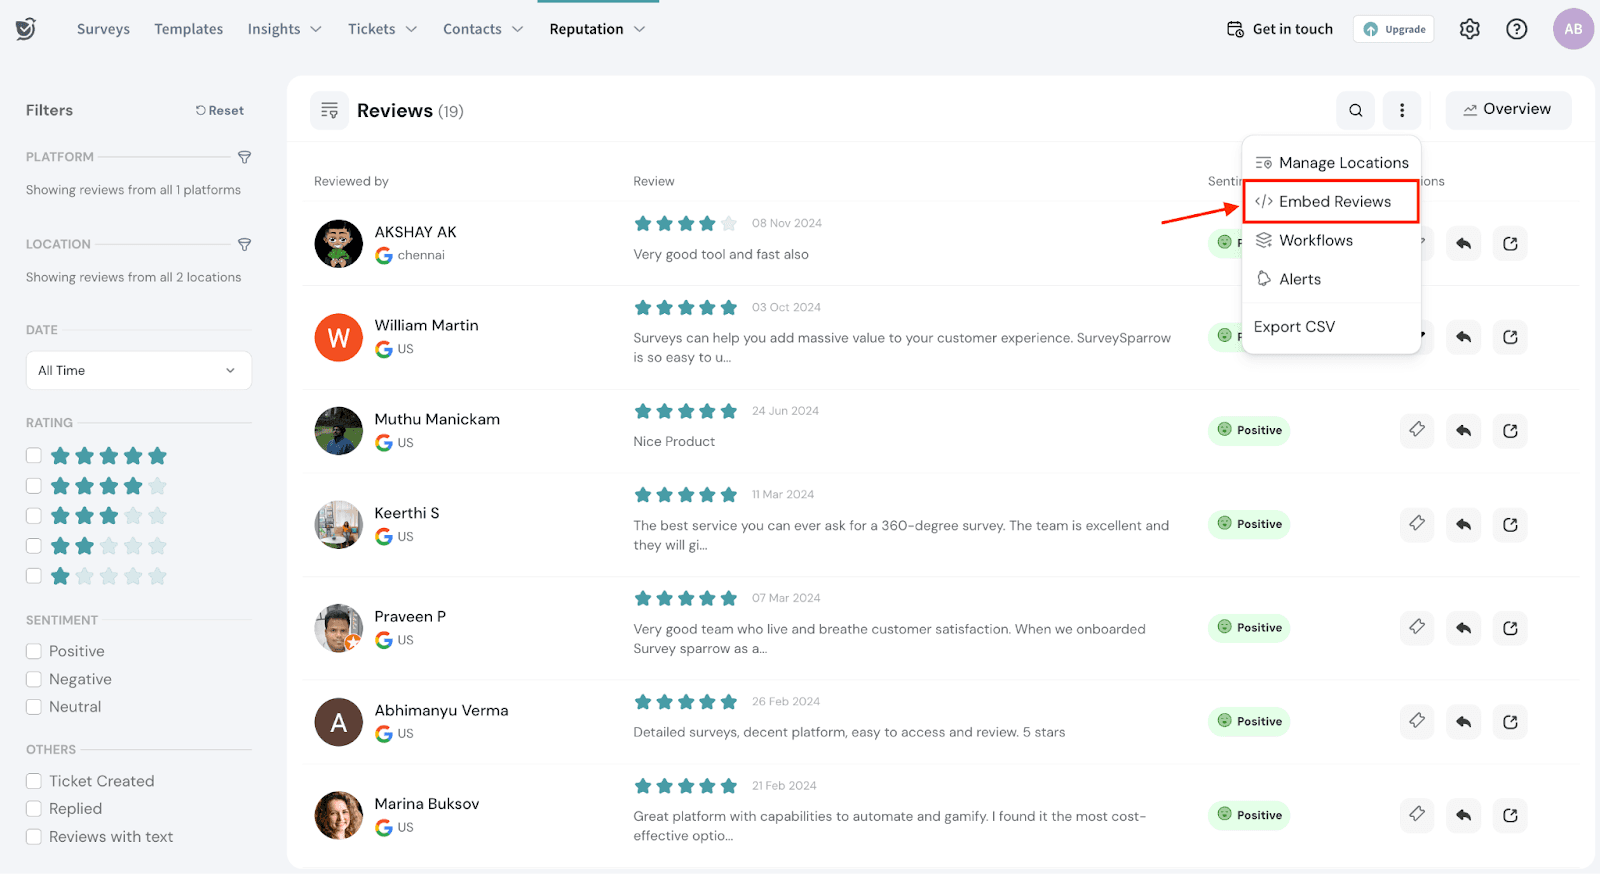
2. Now, you can customize how you would like to embed the reviews on your website.
3. You can choose from Carousel & List view for the widgets.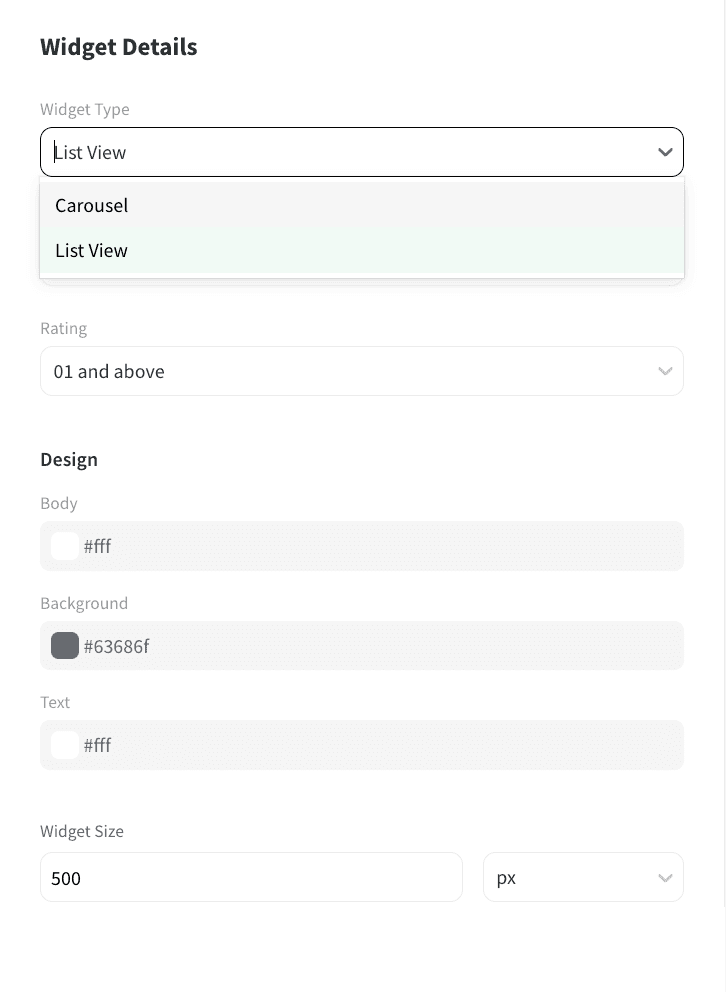
4. Choose the number of reviews to display and filter the ratings to get the desired reviews.
5. Customize the color for the body, background, and text of the widget to match your website design.
6. Once customizations are set, check the preview and click the Generate script button.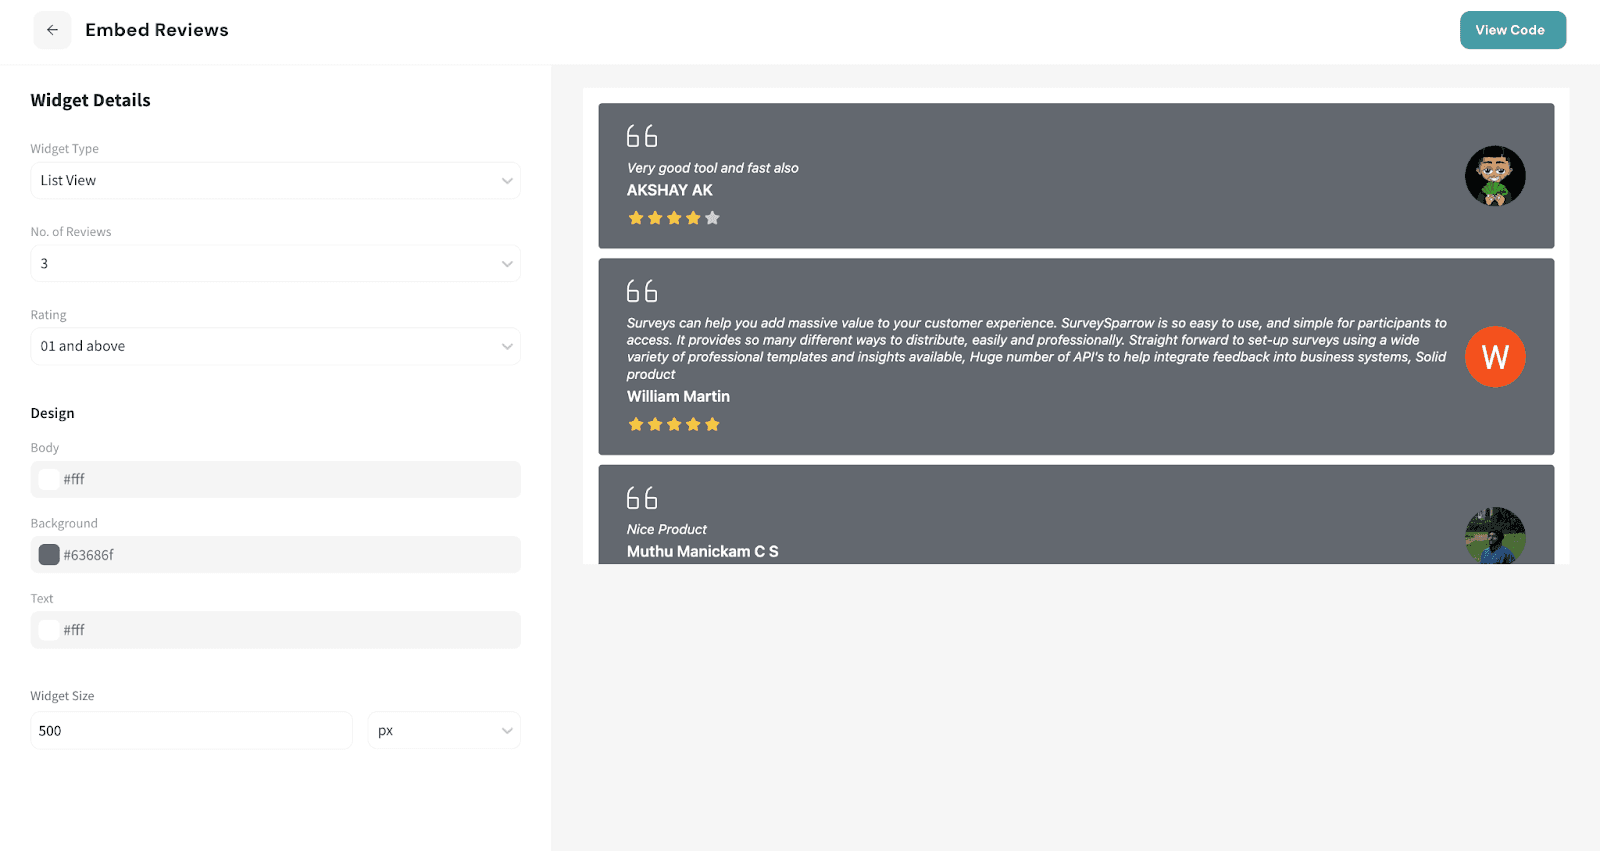
7. The script will be generated, and you can copy it by clicking the Copy Script button.
8. Paste the script anywhere between the <body> and </body> tag on your web page's HTML code to embed the reviews.
Note:
- Use your business account credentials while adding the review platforms.
- For a given reviewer, only the latest review and reply will be fetched for each platform.
- Currently, while creating a ticket for a review, the Reviewer e-mail will be set as [email protected] and will not affect the ticket management flow. We’ll keep you posted about getting the reviewer’s email to create tickets.
Benefits
- Reply to reviews across platforms from one place
- Visualize the ratings from different platforms
- Analyze the review trends for a timeline
- Highlight the best reviews by embedding them on your website
- Create tickets to notify the right people about the review and collaborate with your team to work on it
FAQs
1. What are the online review platforms supported?
Currently, you can manage your reviews on Google Reviews and Facebook. More online review platforms will be available soon.
2. How often do the review platforms sync to get the latest reviews?
At present, every 12 hours, the review data from the respective platforms will be updated under Reputation.
Please let us know if you face any difficulties. We are just a chat away.