Search
The Salesforce integration with SurveySparrow lets you seamlessly initiate surveys based on an event occurring in Salesforce, map survey responses back to the Salesforce fields & manage all the leads in one place. Using this integration, take proactive measures to transform your leads into customers and enrich your overall customer relationship management process.
With the Salesforce integration, you can:
Note: To track CSAT and NPS scores, create a Custom Object on your Salesforce account.
Here’s how the Salesforce integration helps you automate sending surveys when an event happens in Salesforce.
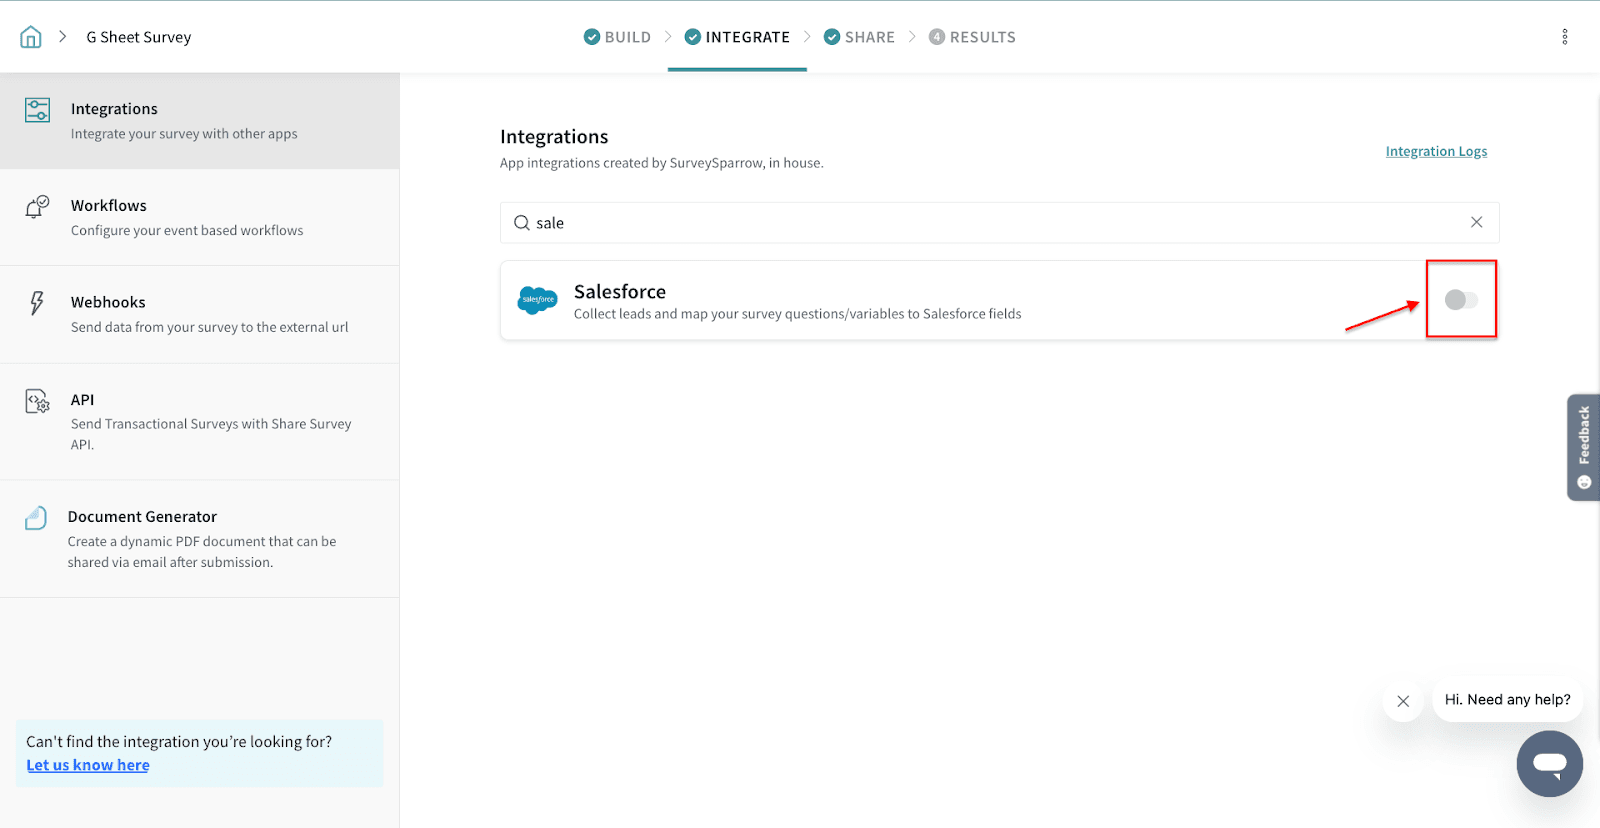
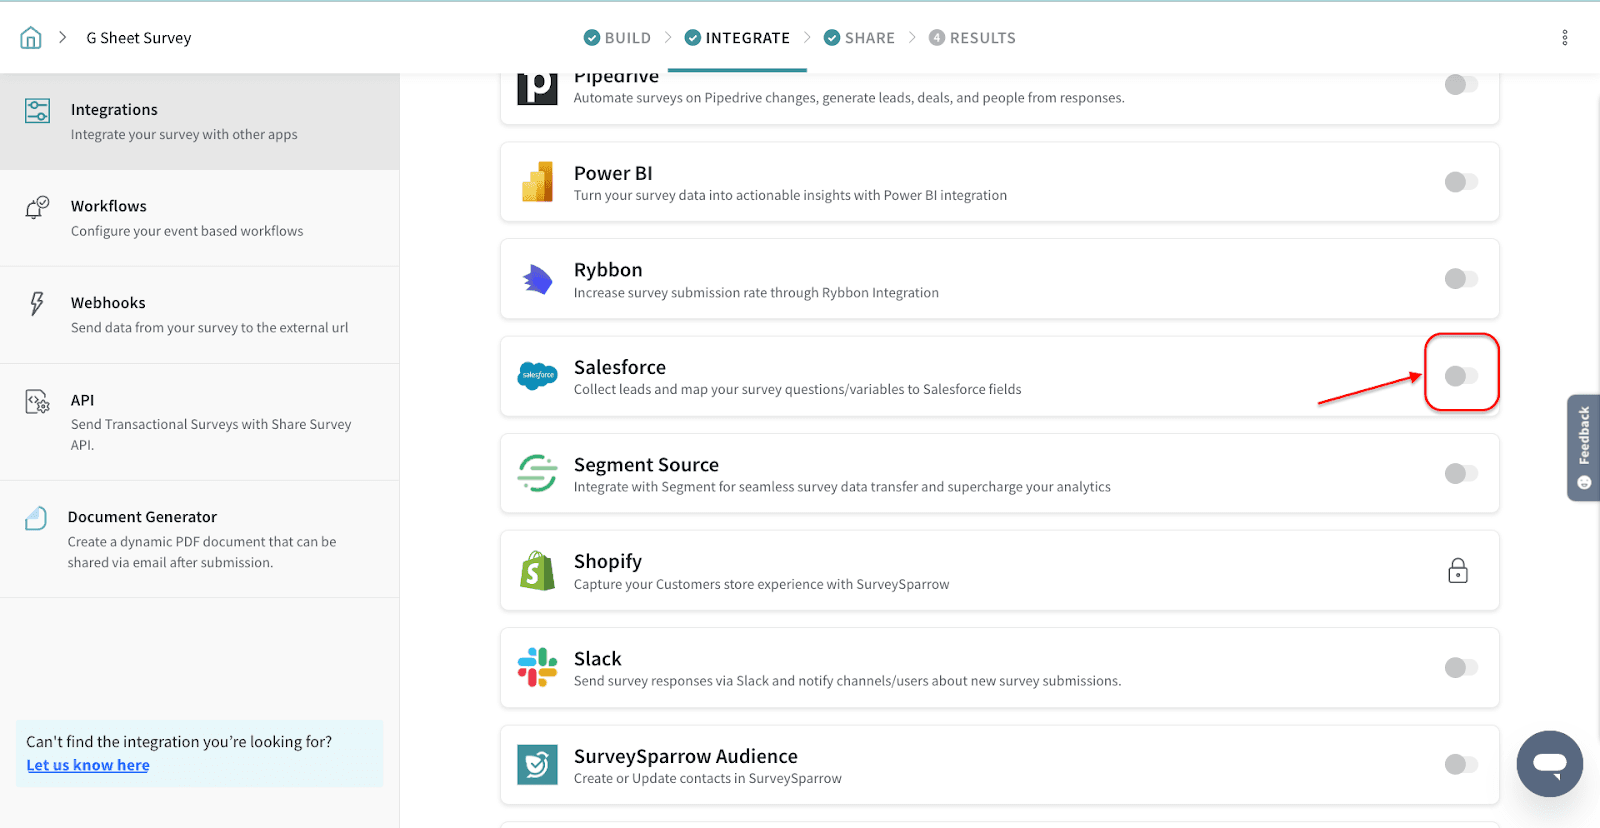
1. After logging into your SurveySparrow account, create a new survey or open an existing one. Navigate to Integrate tab & enable the Salesforce toggle.
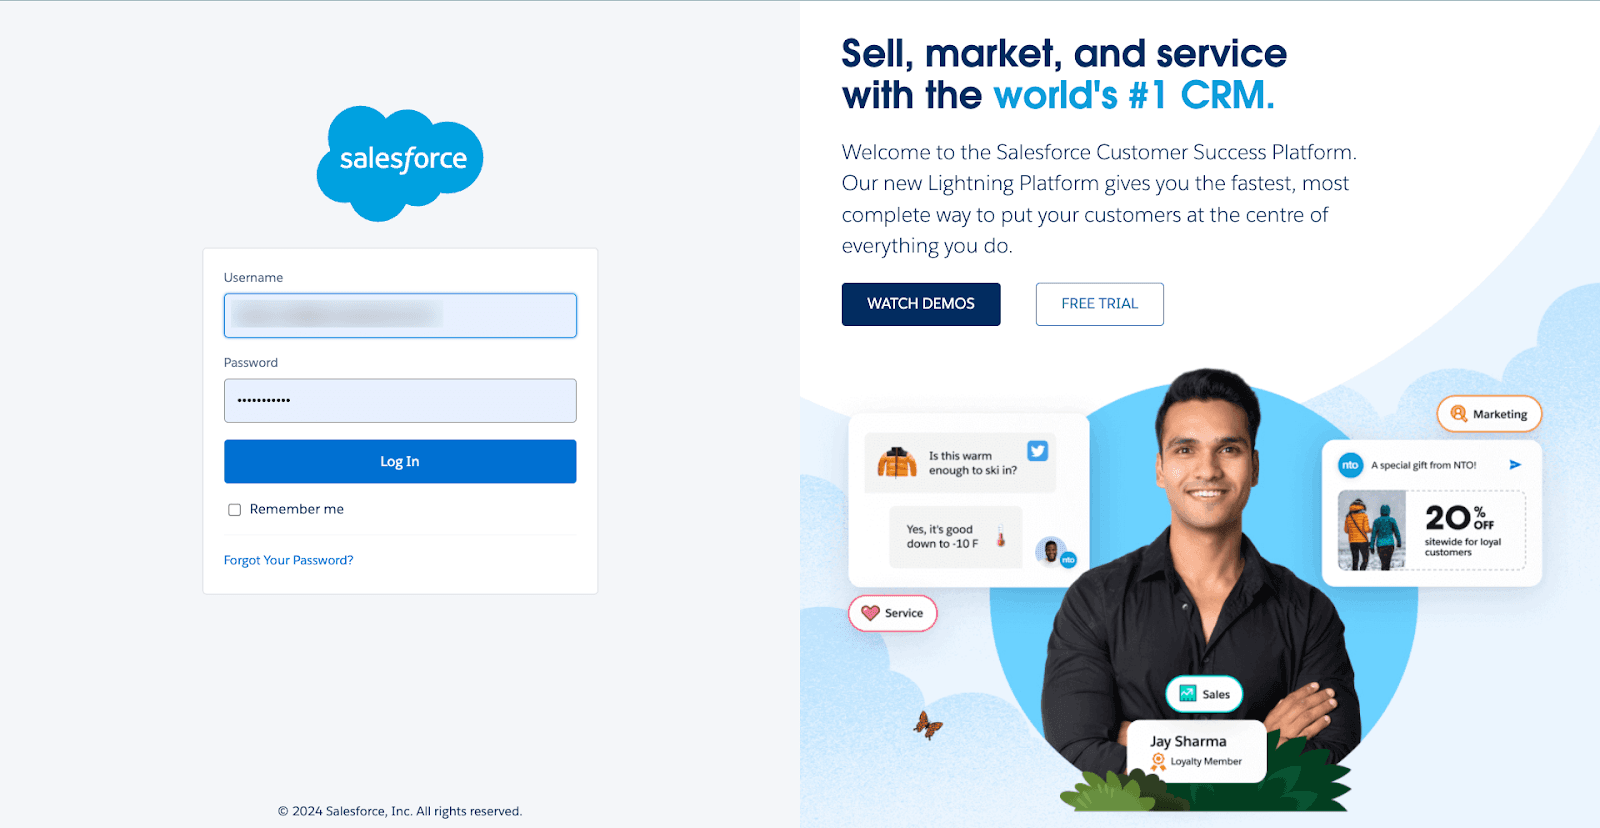
2. Enter your Salesforce credentials and authorize access to your SurveySparrow account.
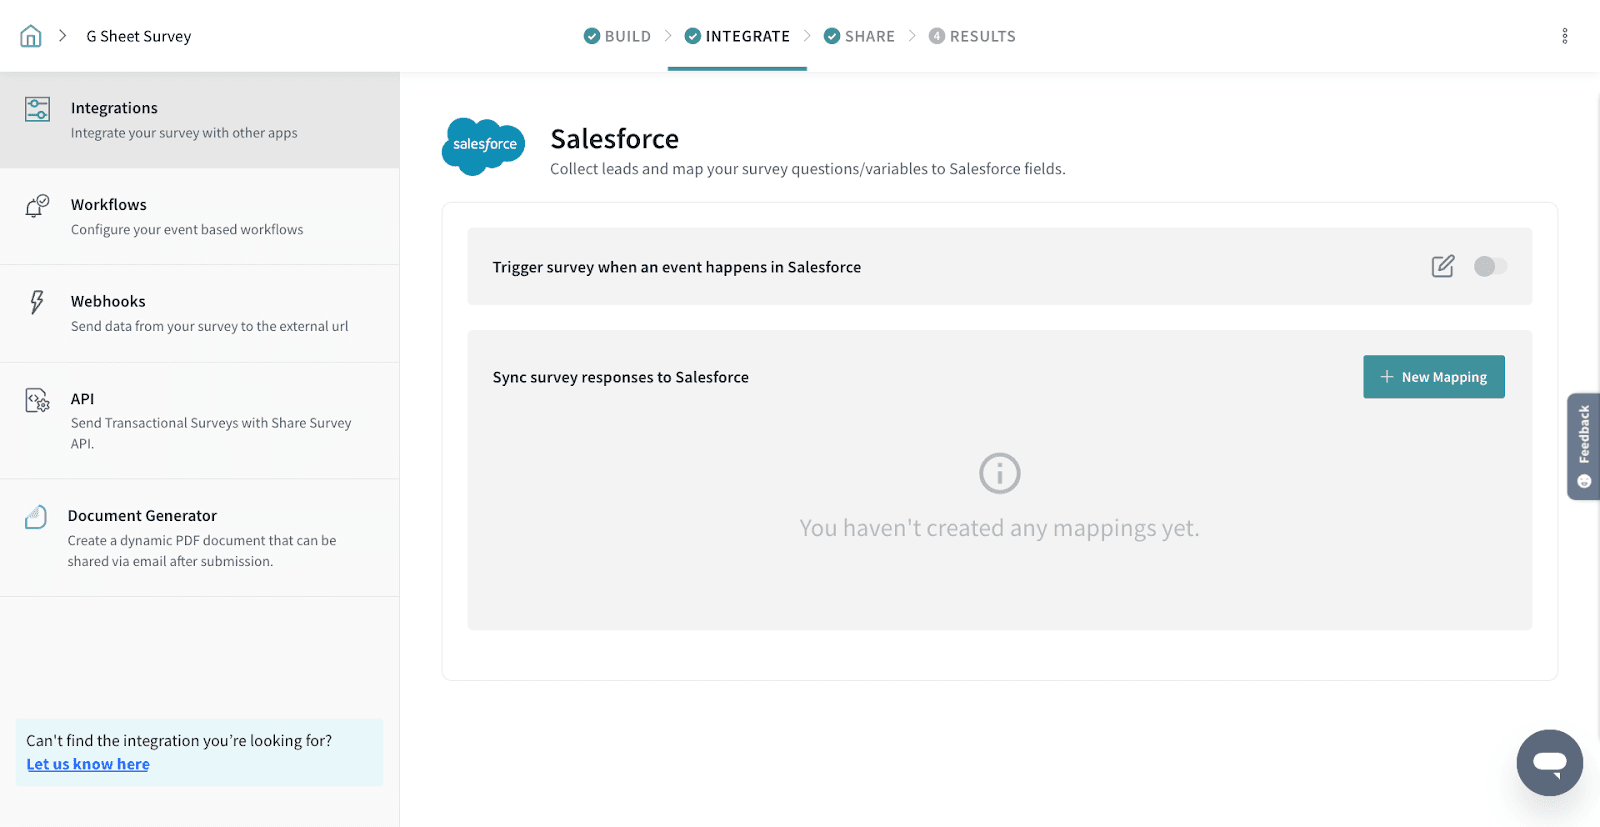
3. Once the integration is enabled successfully, navigate to Salesforce and enable the toggle - “Trigger Survey when an event happens in Salesforce”.
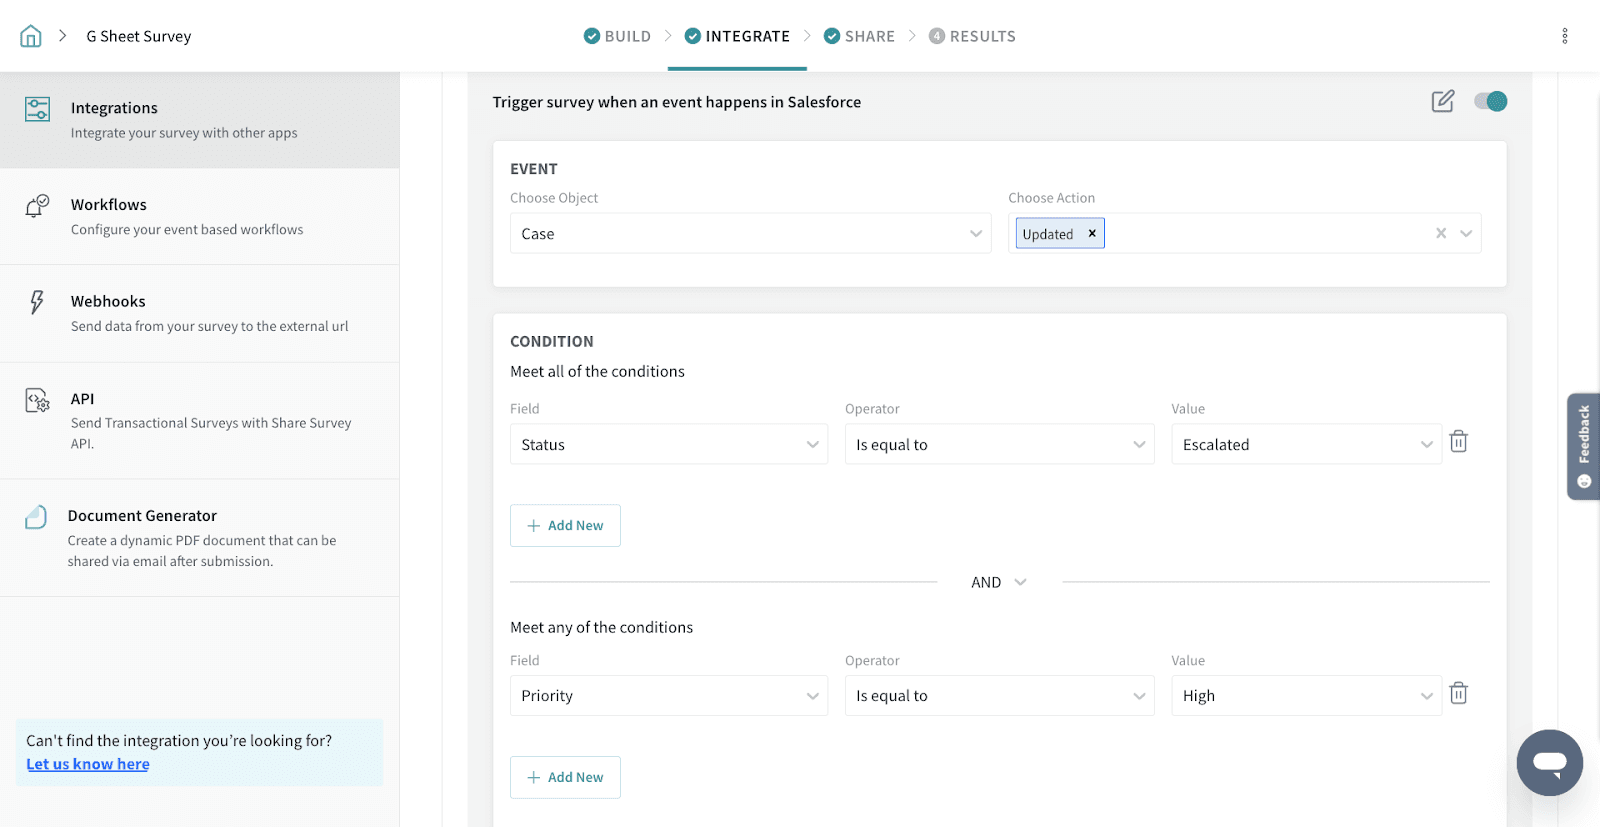
4. Choose an Event: Set the action for which you want the survey to be invoked.
5. Choose an Action: Once the object is selected, decide whether you want to create or update the existing fields
6. Add conditions(if any)
Note:Enter the condition(s) to have complete control over the respondents. Fill in the “Field”, “Operator” and “Value” slots. If you were to enter multiple conditions, then the survey is initiated only if all the conditions are met.
Eg: Trigger surveys automatically when the “case”
7. Enter the email address/addresses: Type in the email addresses of the recipients to whom you want the surveys to be sent out.
8. Choose share channel: Select the email share channel to which you want your surveys to be rolled out.
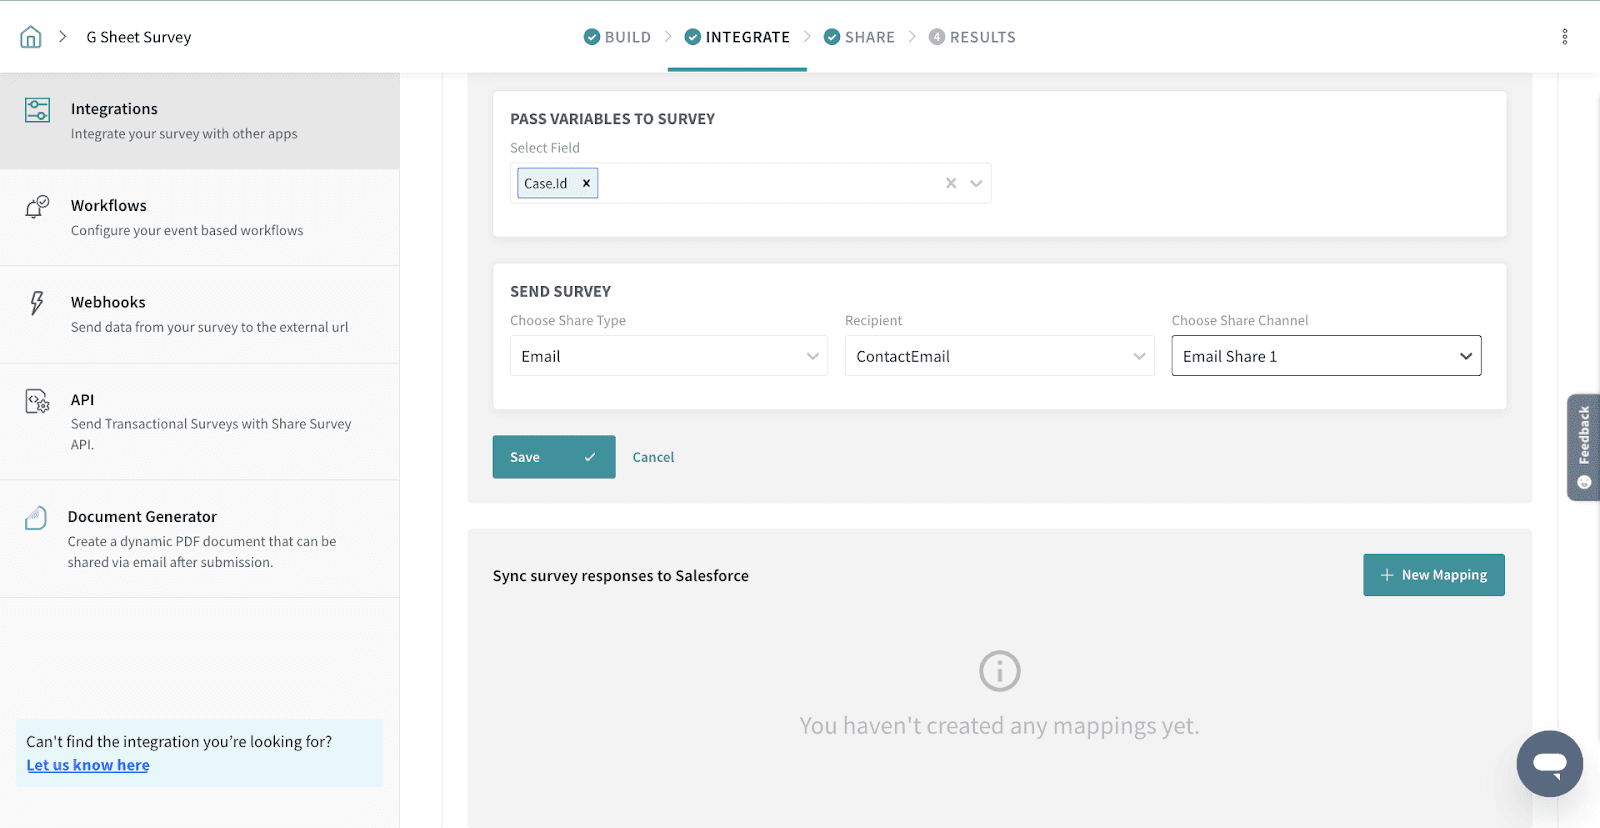
Once you have filled in all the appropriate fields, click “Save” to complete the action.
Note: For NPS surveys, you can pass the desired object variables to the surveys you invoke.
To map survey responses back to the Salesforce fields, Select “+New Mapping” and follow the procedure below.
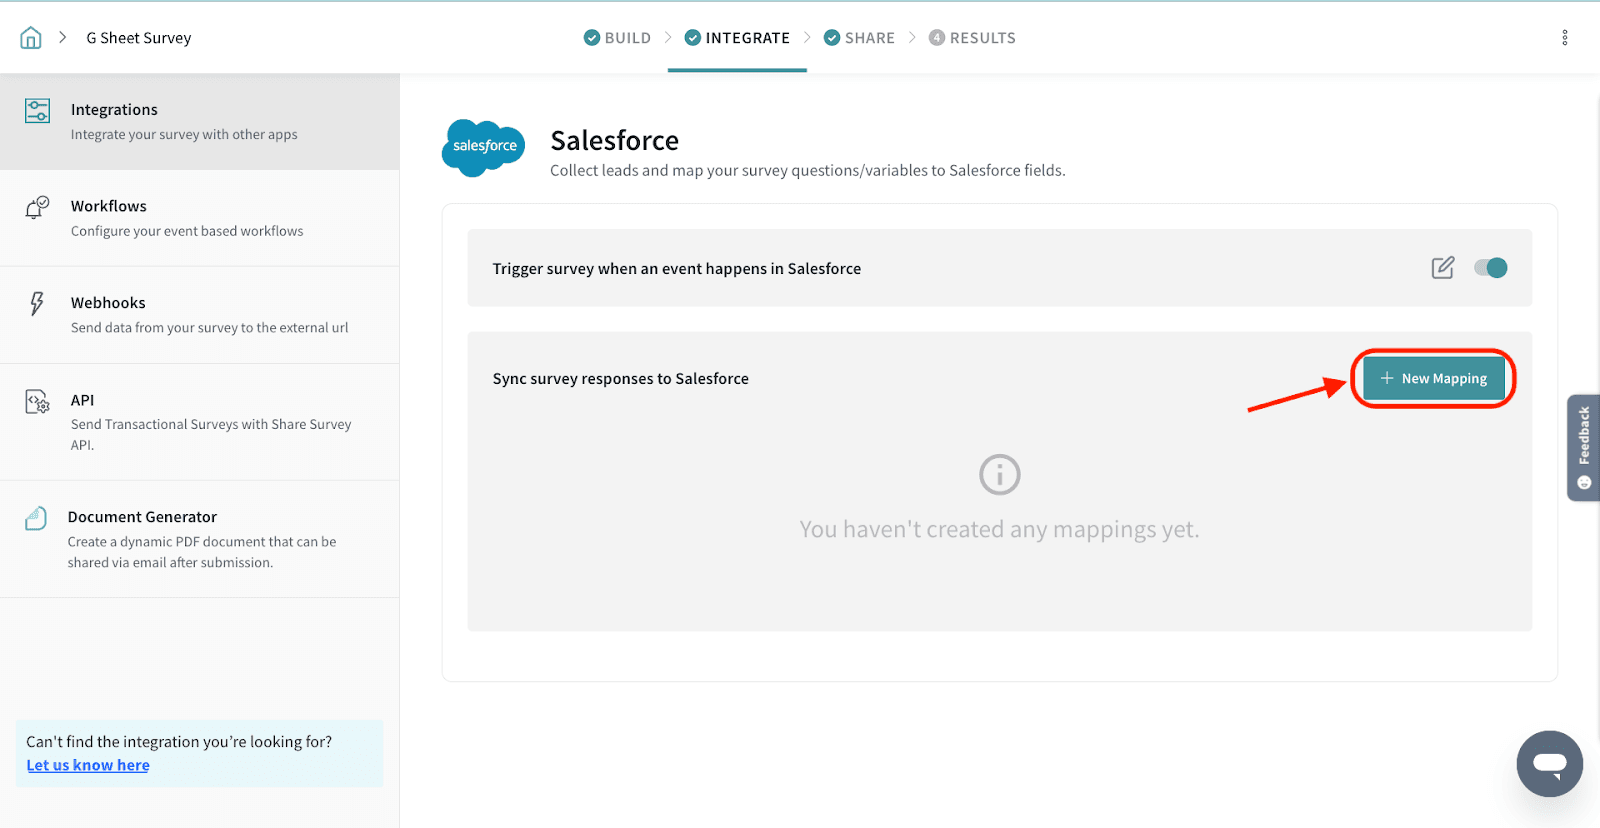
1. Choose the Mapping type: Decide whether you want to create a new entry or update an existing one
2. Select the Salesforce object: From the drop-down list, select the object to which you want to be mapped back.
3. Map your Salesforce fields: Enter the field Type, Select the Question, Salesforce Field, and Default value you want to map. You can enter as many fields as you require.
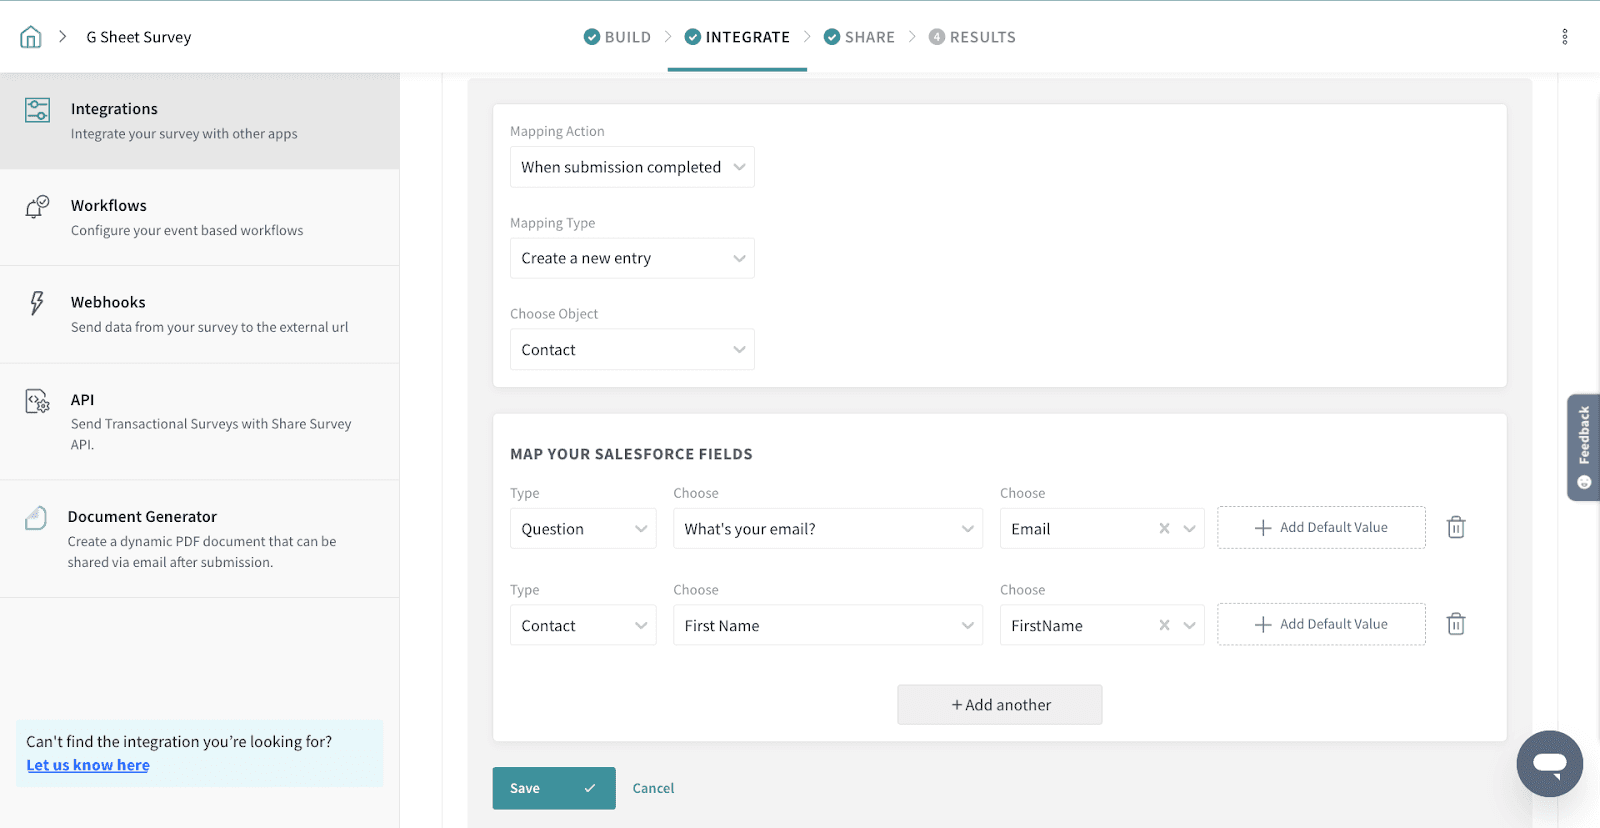
Eg: Map the following survey responses back to your Salesforce account when the object is “Contact”:
Suppose the object is “contact”, the selected survey responses will be mapped back to your Salesforce fields.
The responses customer submits for these questions will be directly added to the designated Salesforce Fields.
Once you’ve added the fields, select Save to complete the mapping process.
Note:
1. From your survey settings, navigate to Apps and integrations. Select Salesforce and then import Contacts. Select the contacts you wish to import.
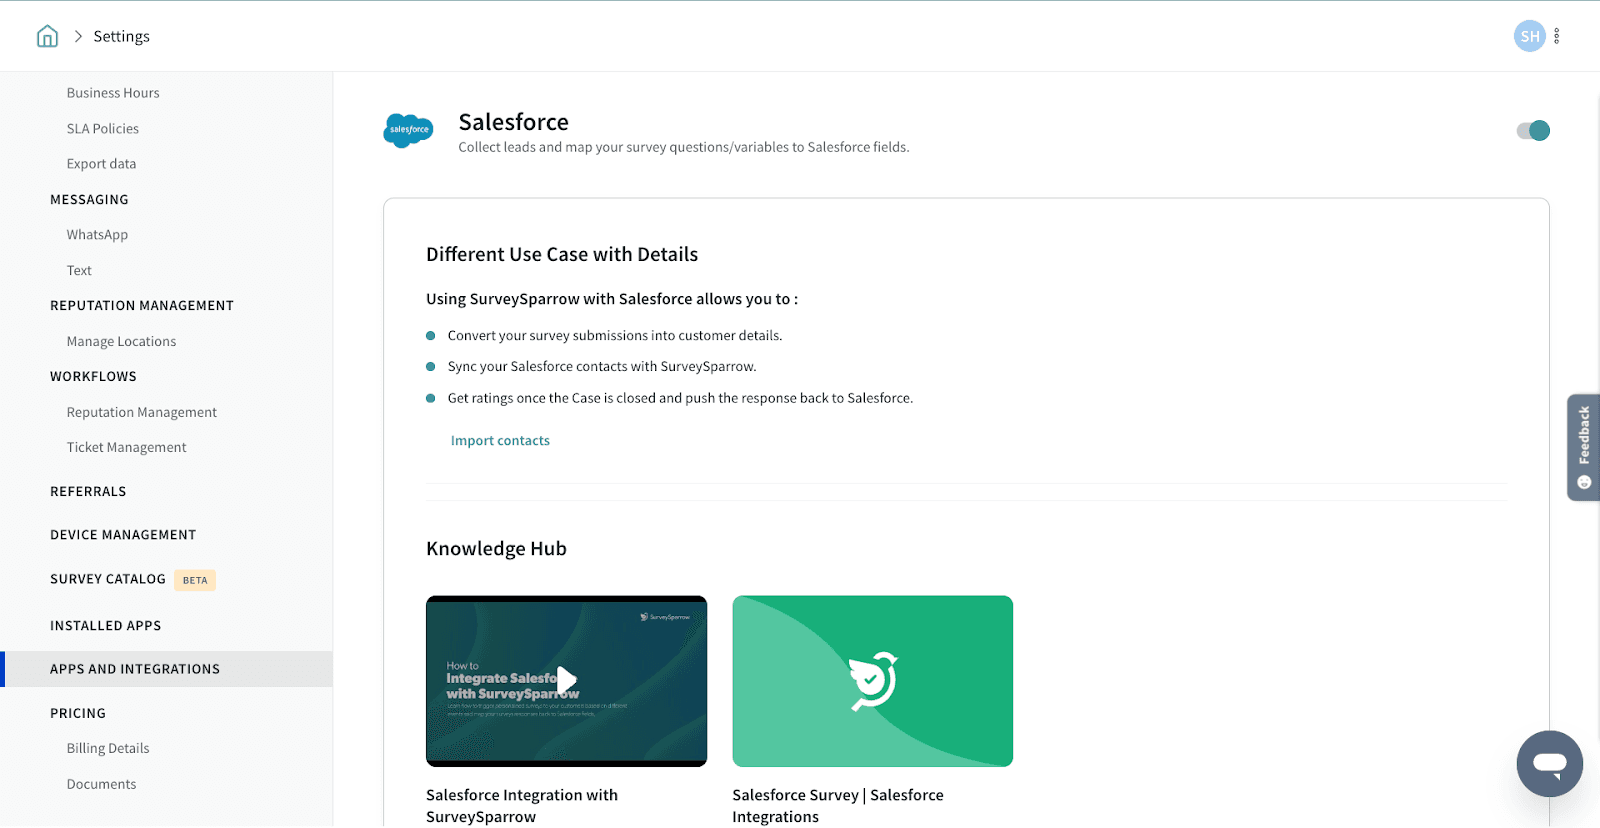
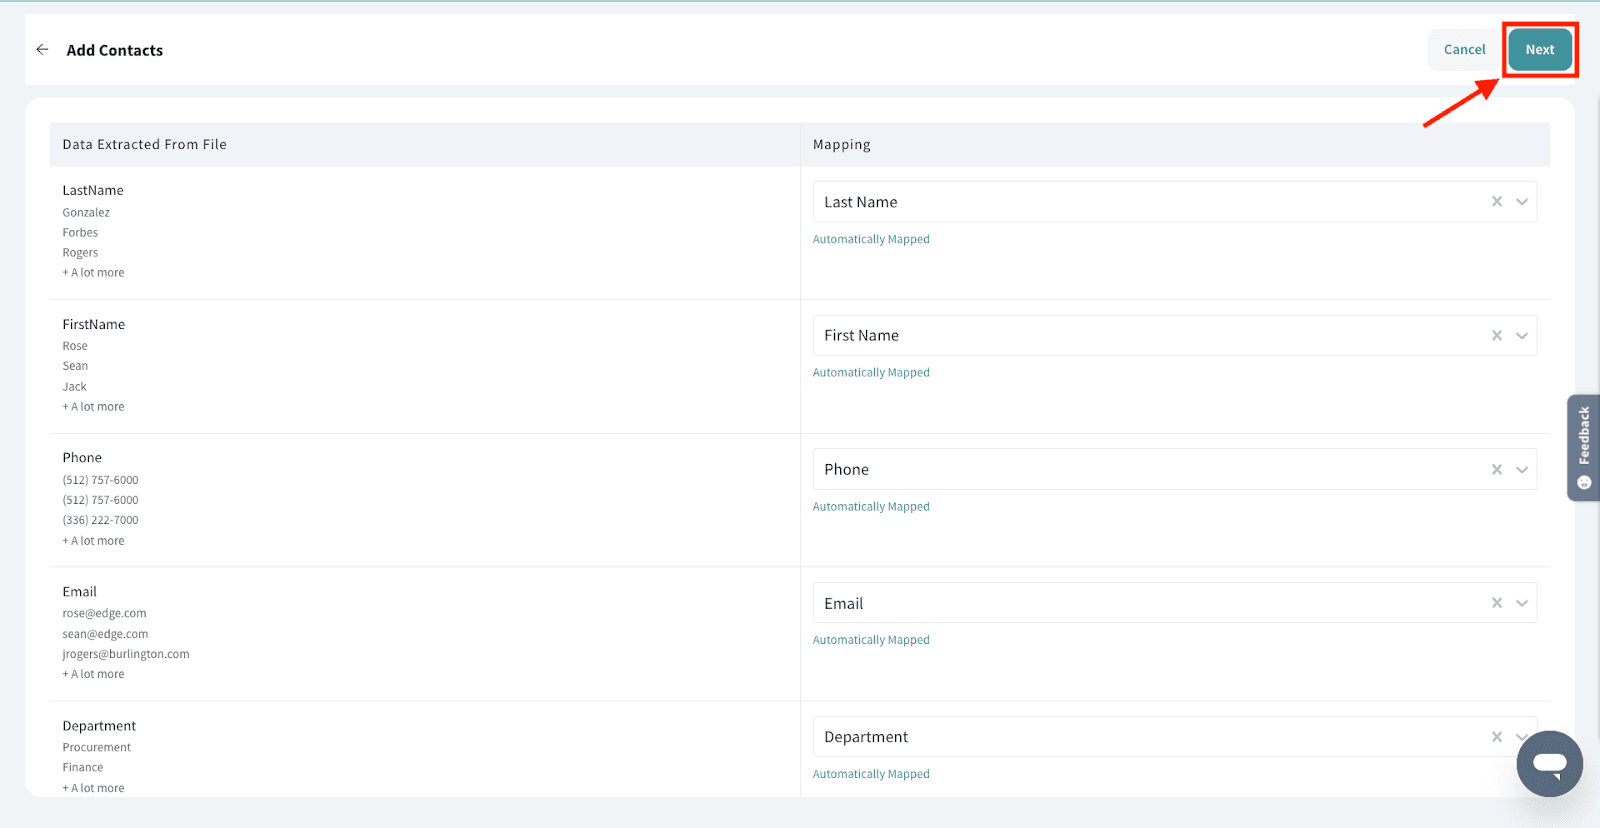
2. Map the required contact fields from Salesforce, name your import, assign a new label and enable the recurring import toggle button if you wish to import the contacts on a daily/weekly/monthly basis.
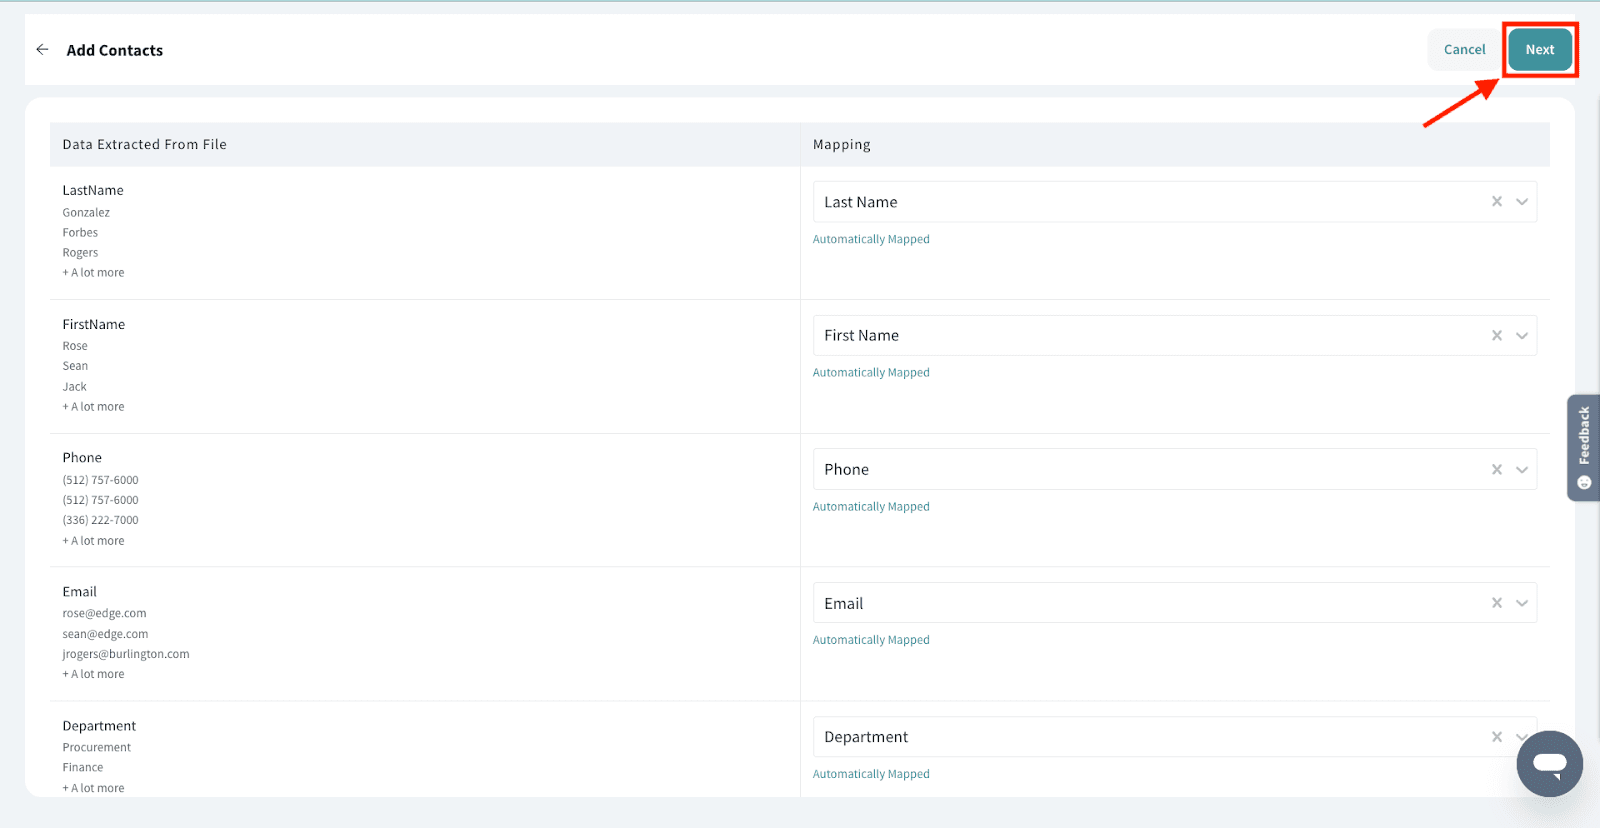
3. Click “Finish import” to complete the process.
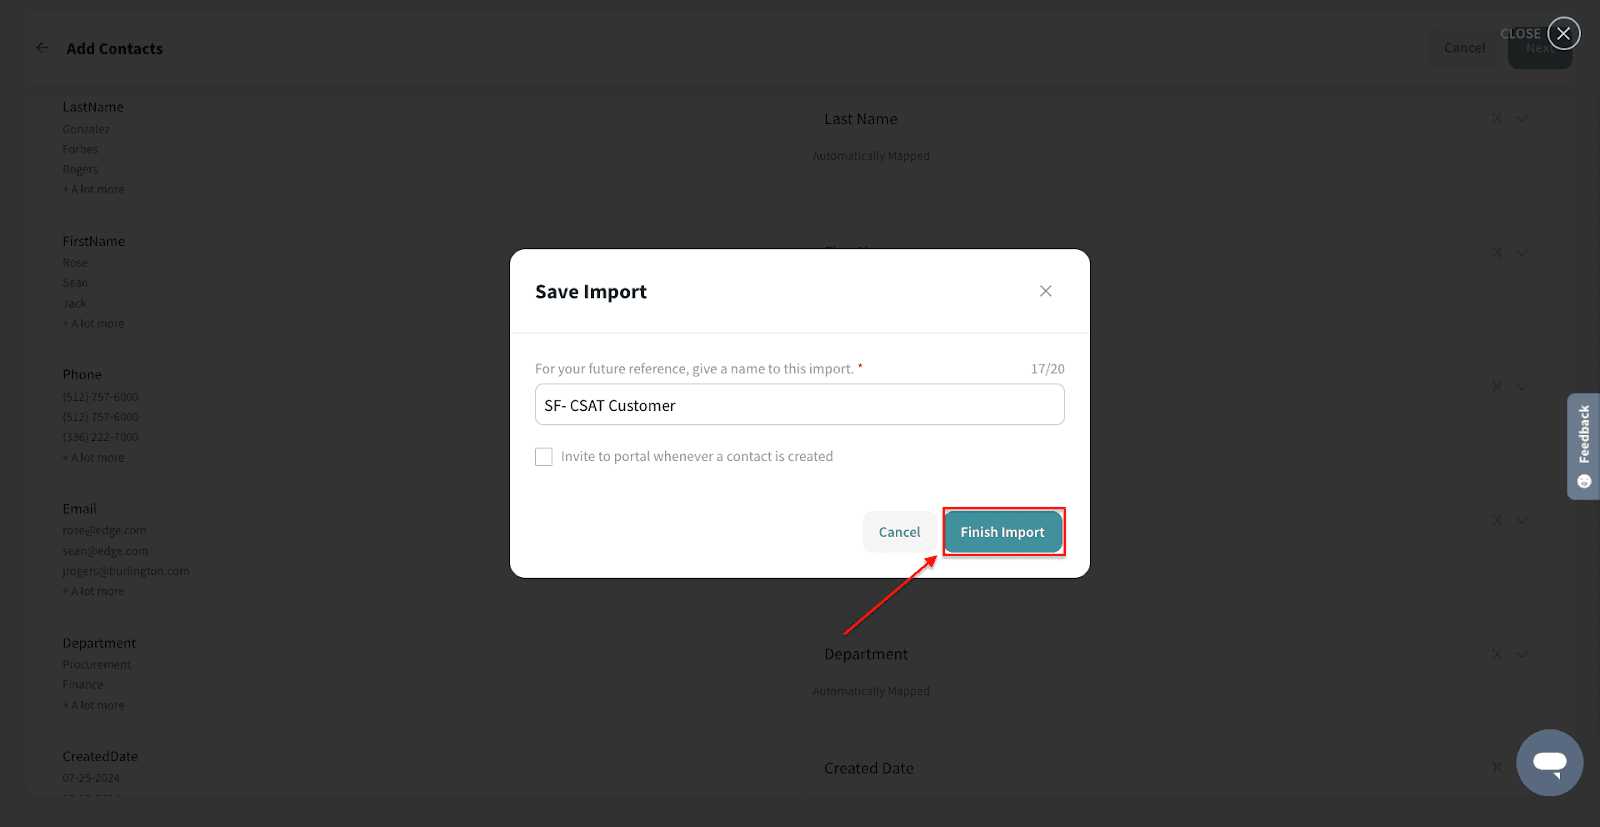
You have now successfully imported the contacts from Salesforce.
If you wish the disable the integration, switch off the Salesforce toggle on your Integrate tab.
And that's it! That is how the SurveySparrow-Salesforce integration can be configured for your requirements.
Please reach out to us if you have any questions. We are just a chat away!
P.S: To know more about Configuring SurveySparrow Application in Salesforce Marketplace, visit here.
Powered By SparrowDesk