Search
Zendesk integration with SurveySparrow lets you create and update contacts/tickets on your Zendesk account directly from your survey responses. You can further trigger surveys and collect feedback effortlessly whenever a ticket update occurs in the Zendesk app.
With SurveySparrow integration with Zendesk, you can:
Let’s see how it works
1. After logging into your SurveySparrow account, create a new survey or open an existing one.
2. Navigate to the Integrate tab & enable the Zendesk toggle.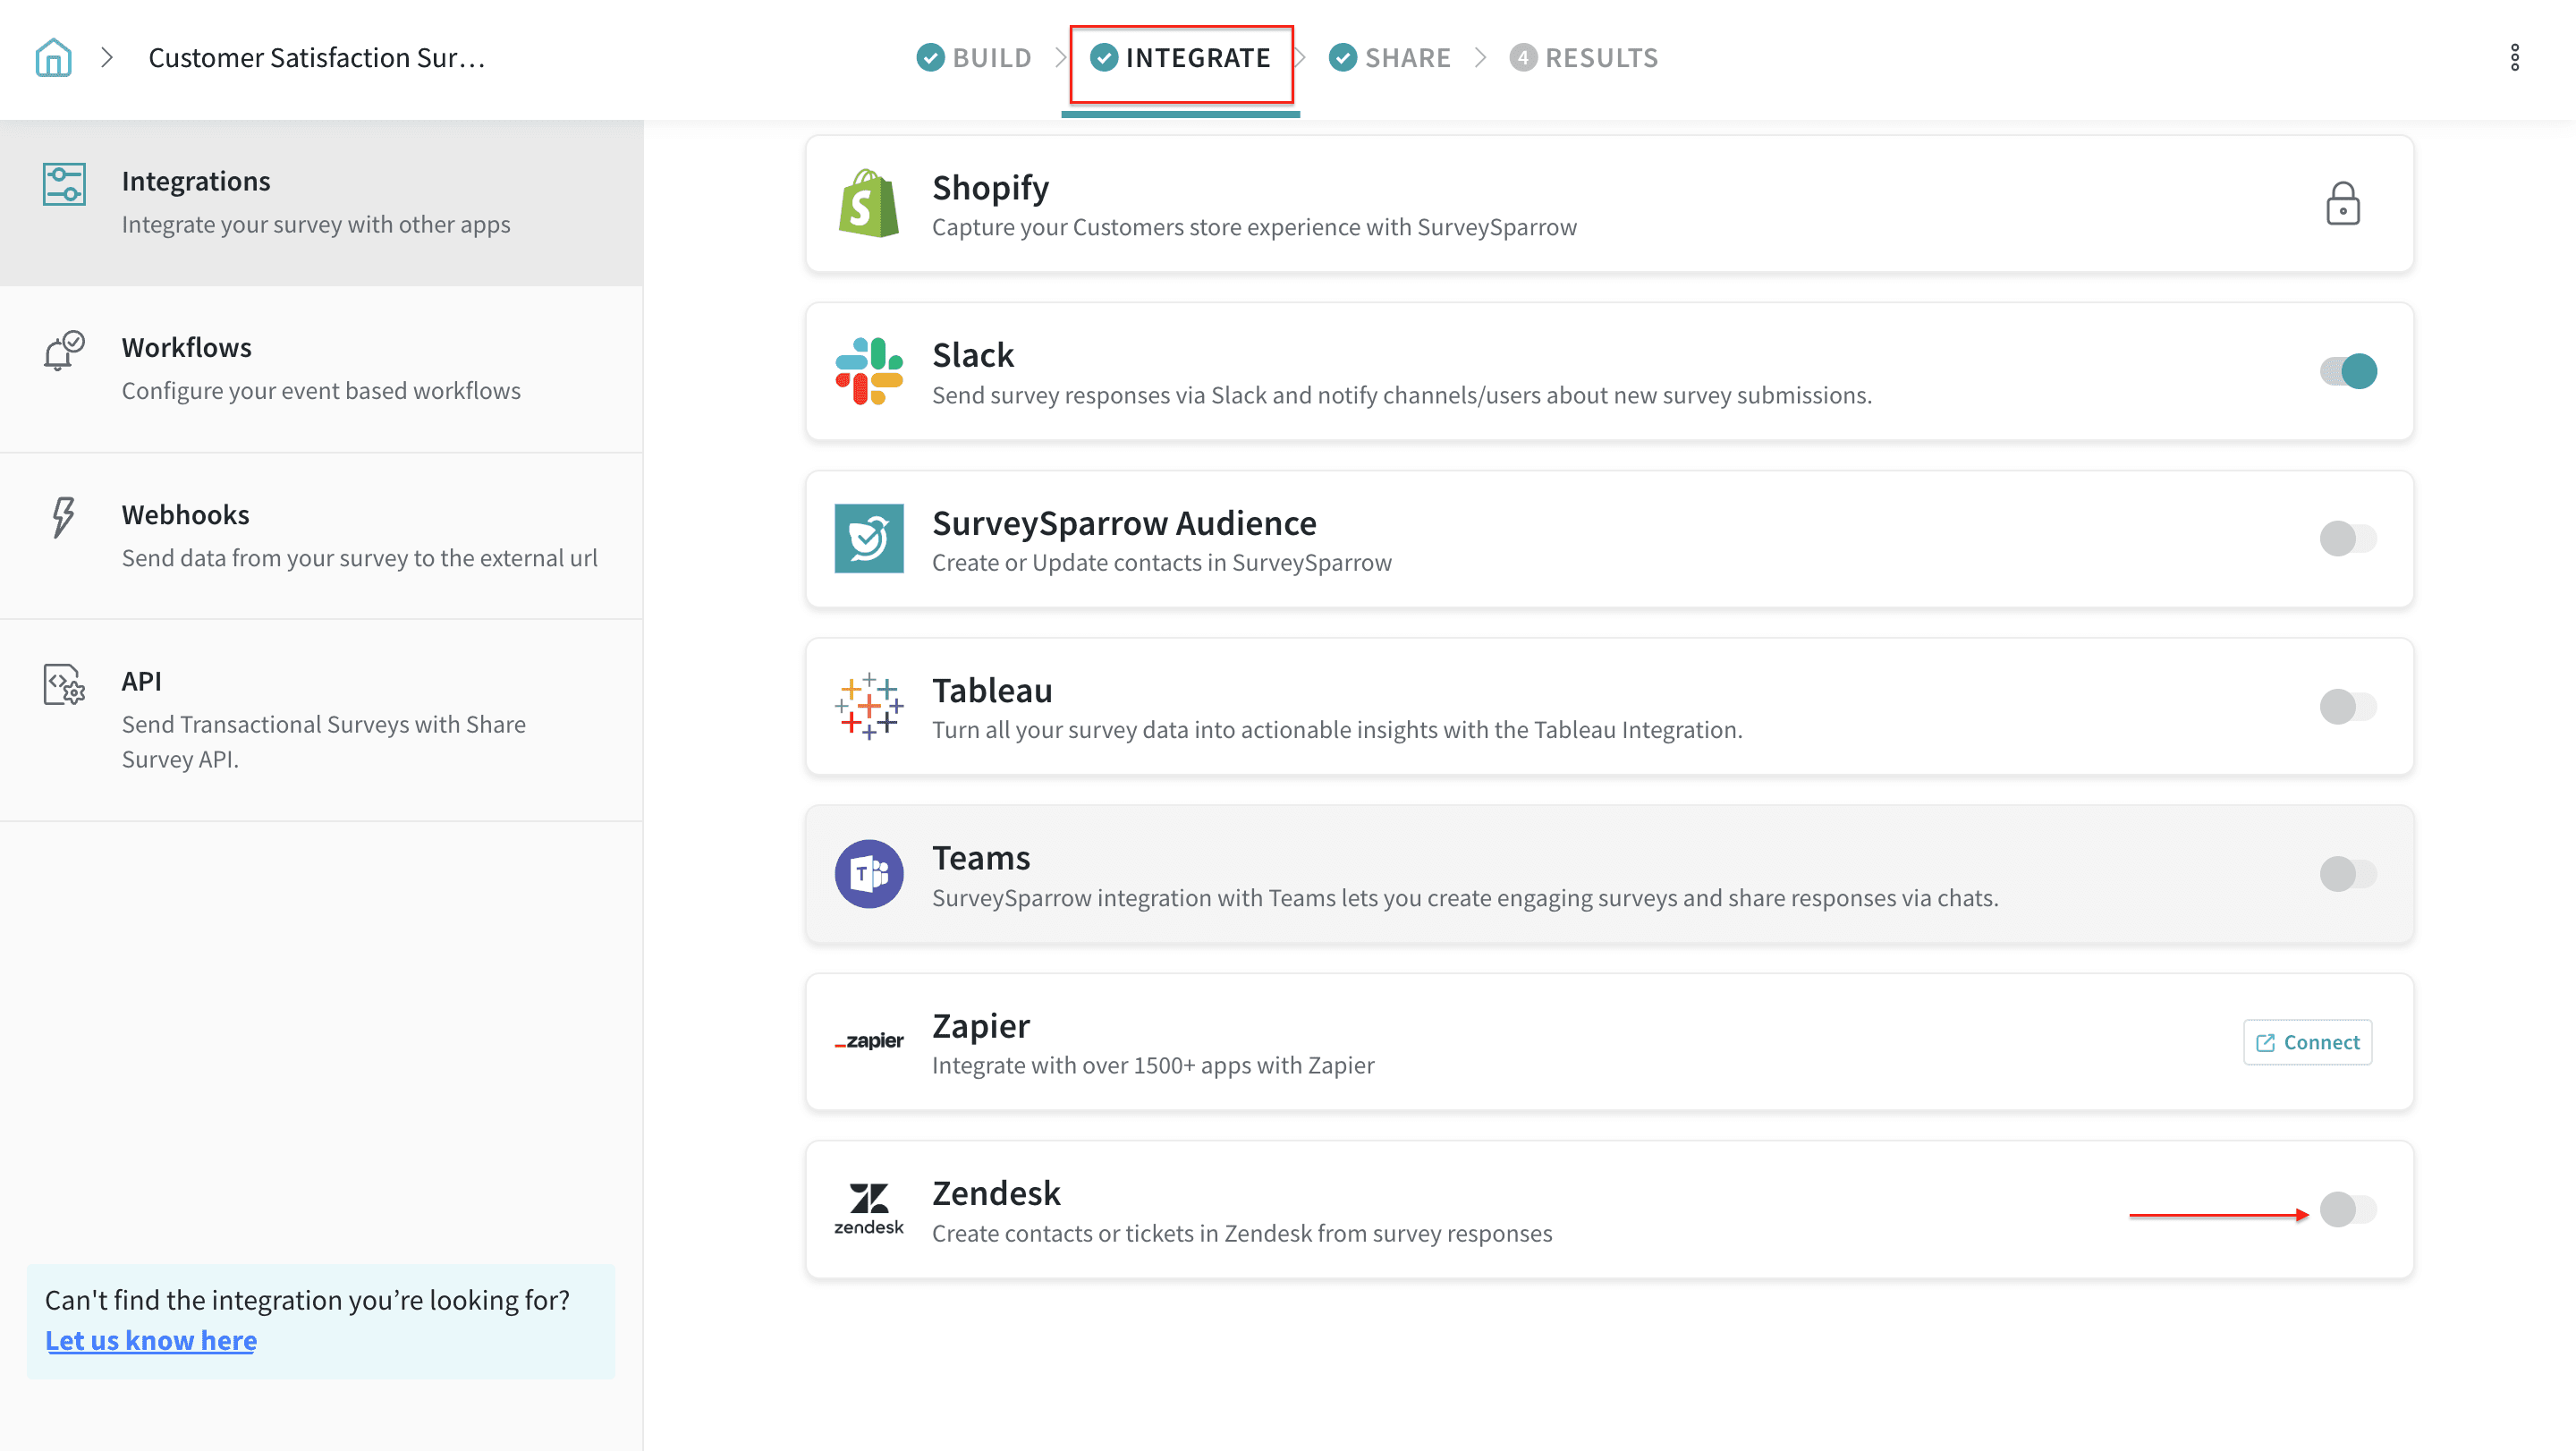
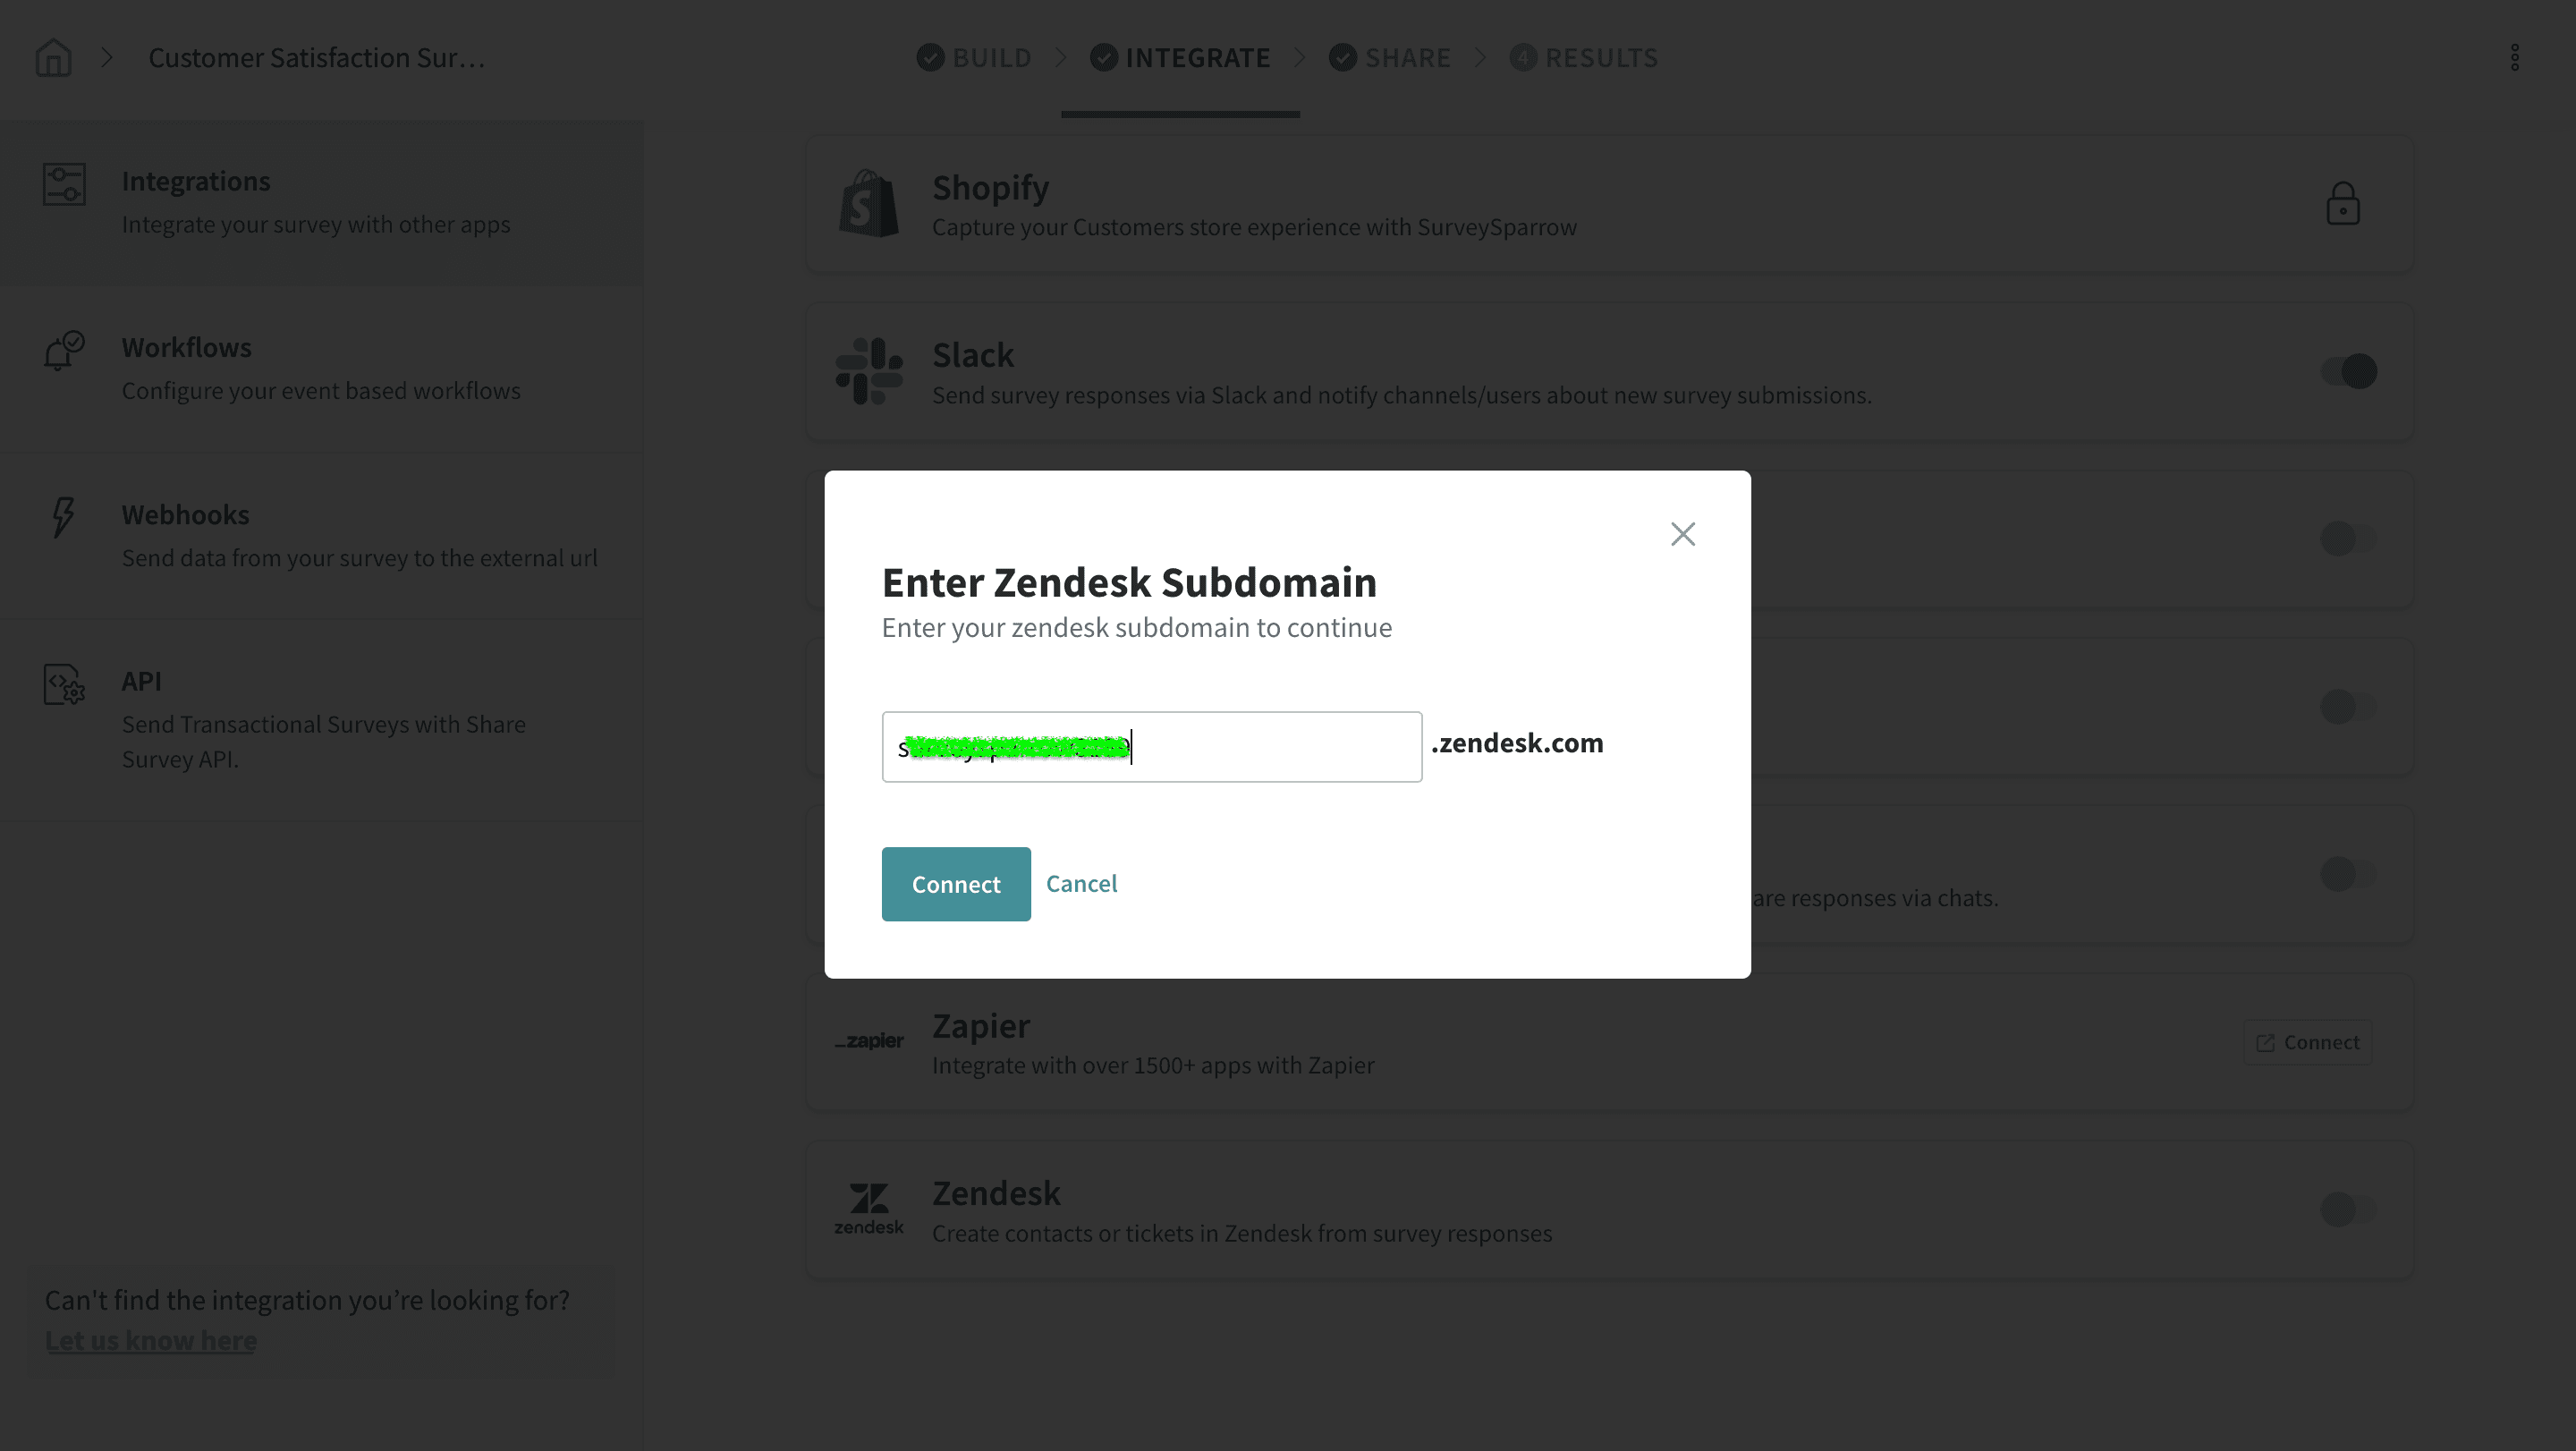
3. Enter your Zendesk subdomain URL and authorize access to your SurveySparrow account.
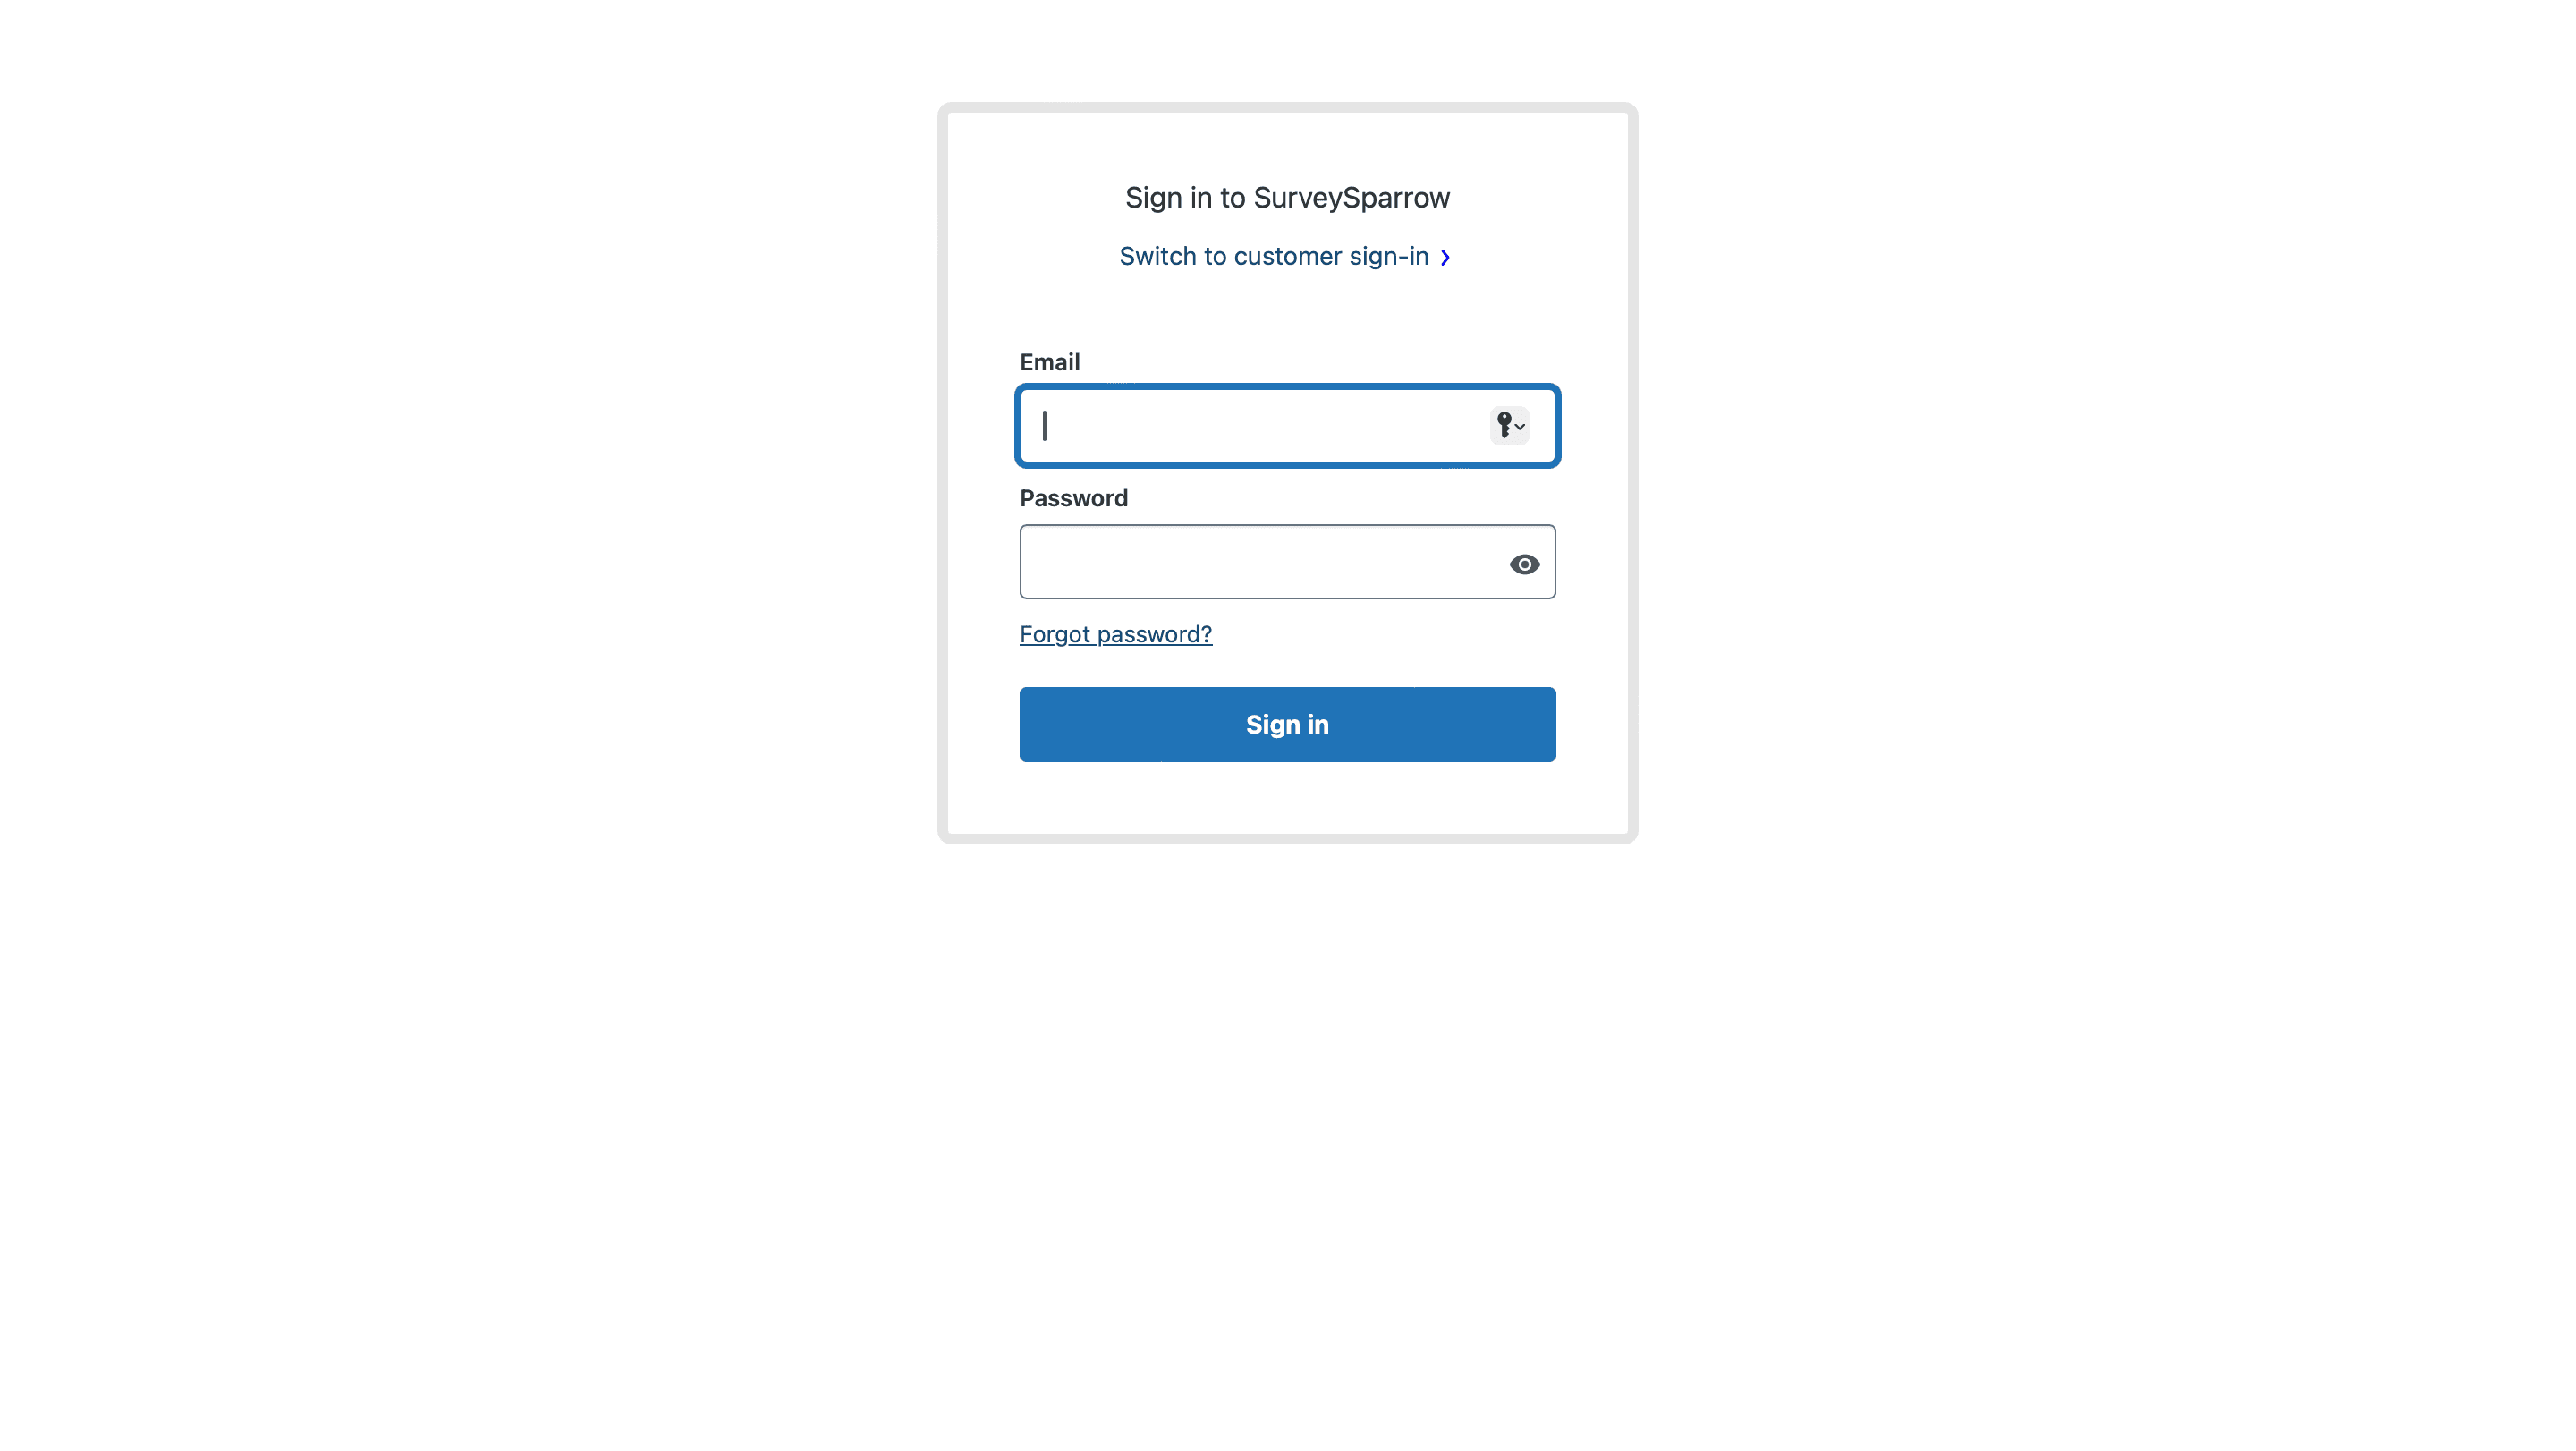
4. You’ll be redirected to the Zendesk Sign-in page. Enter your credentials and log in to your Zendesk account.
5. Once the authorisation is done, you can choose to create/update contacts and tickets on Zendesk directly from your survey responses.
1. The first step is to install the SurveySparrow account from the Zendesk app marketplace.
2. Navigate to Settings on your Zendesk dashboard and click on Marketplace under Apps.
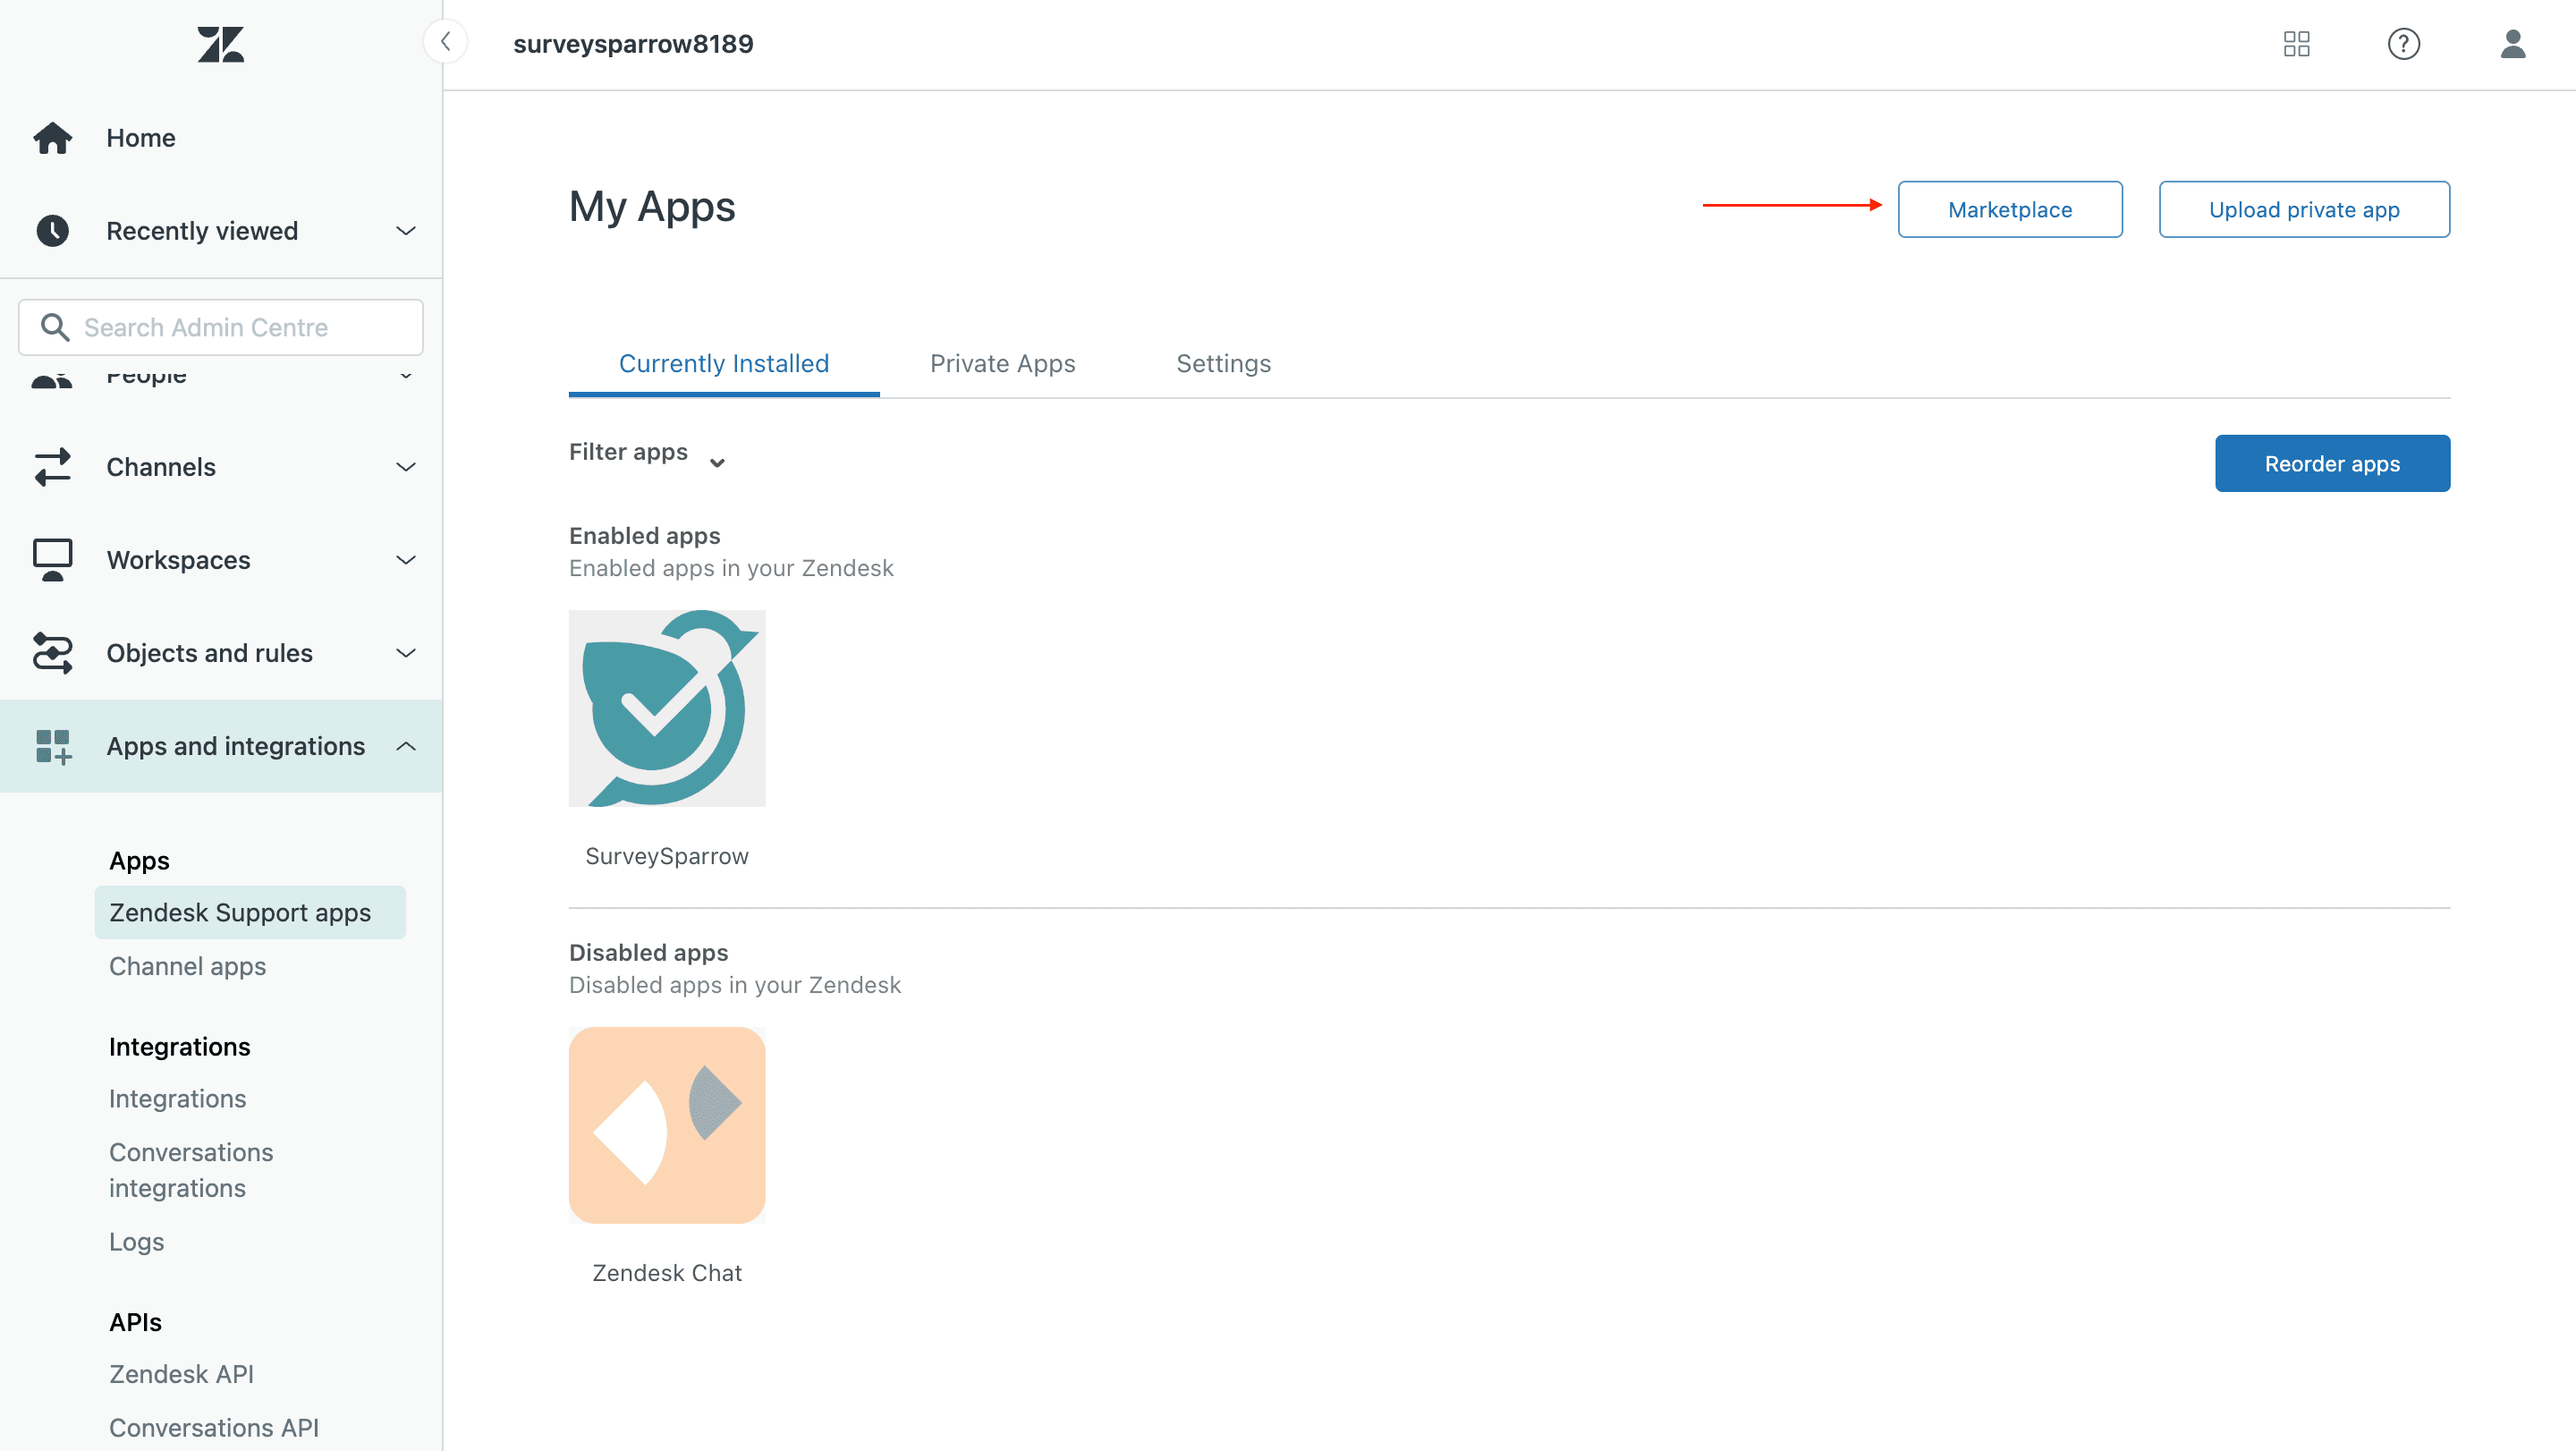
3. Search for the SurveySparrow app in the Search bar and install it.
4. Once the app is installed, you will notice the SurveySparrow app on your Zendesk dashboard Settings. (Refer to the screenshot below)
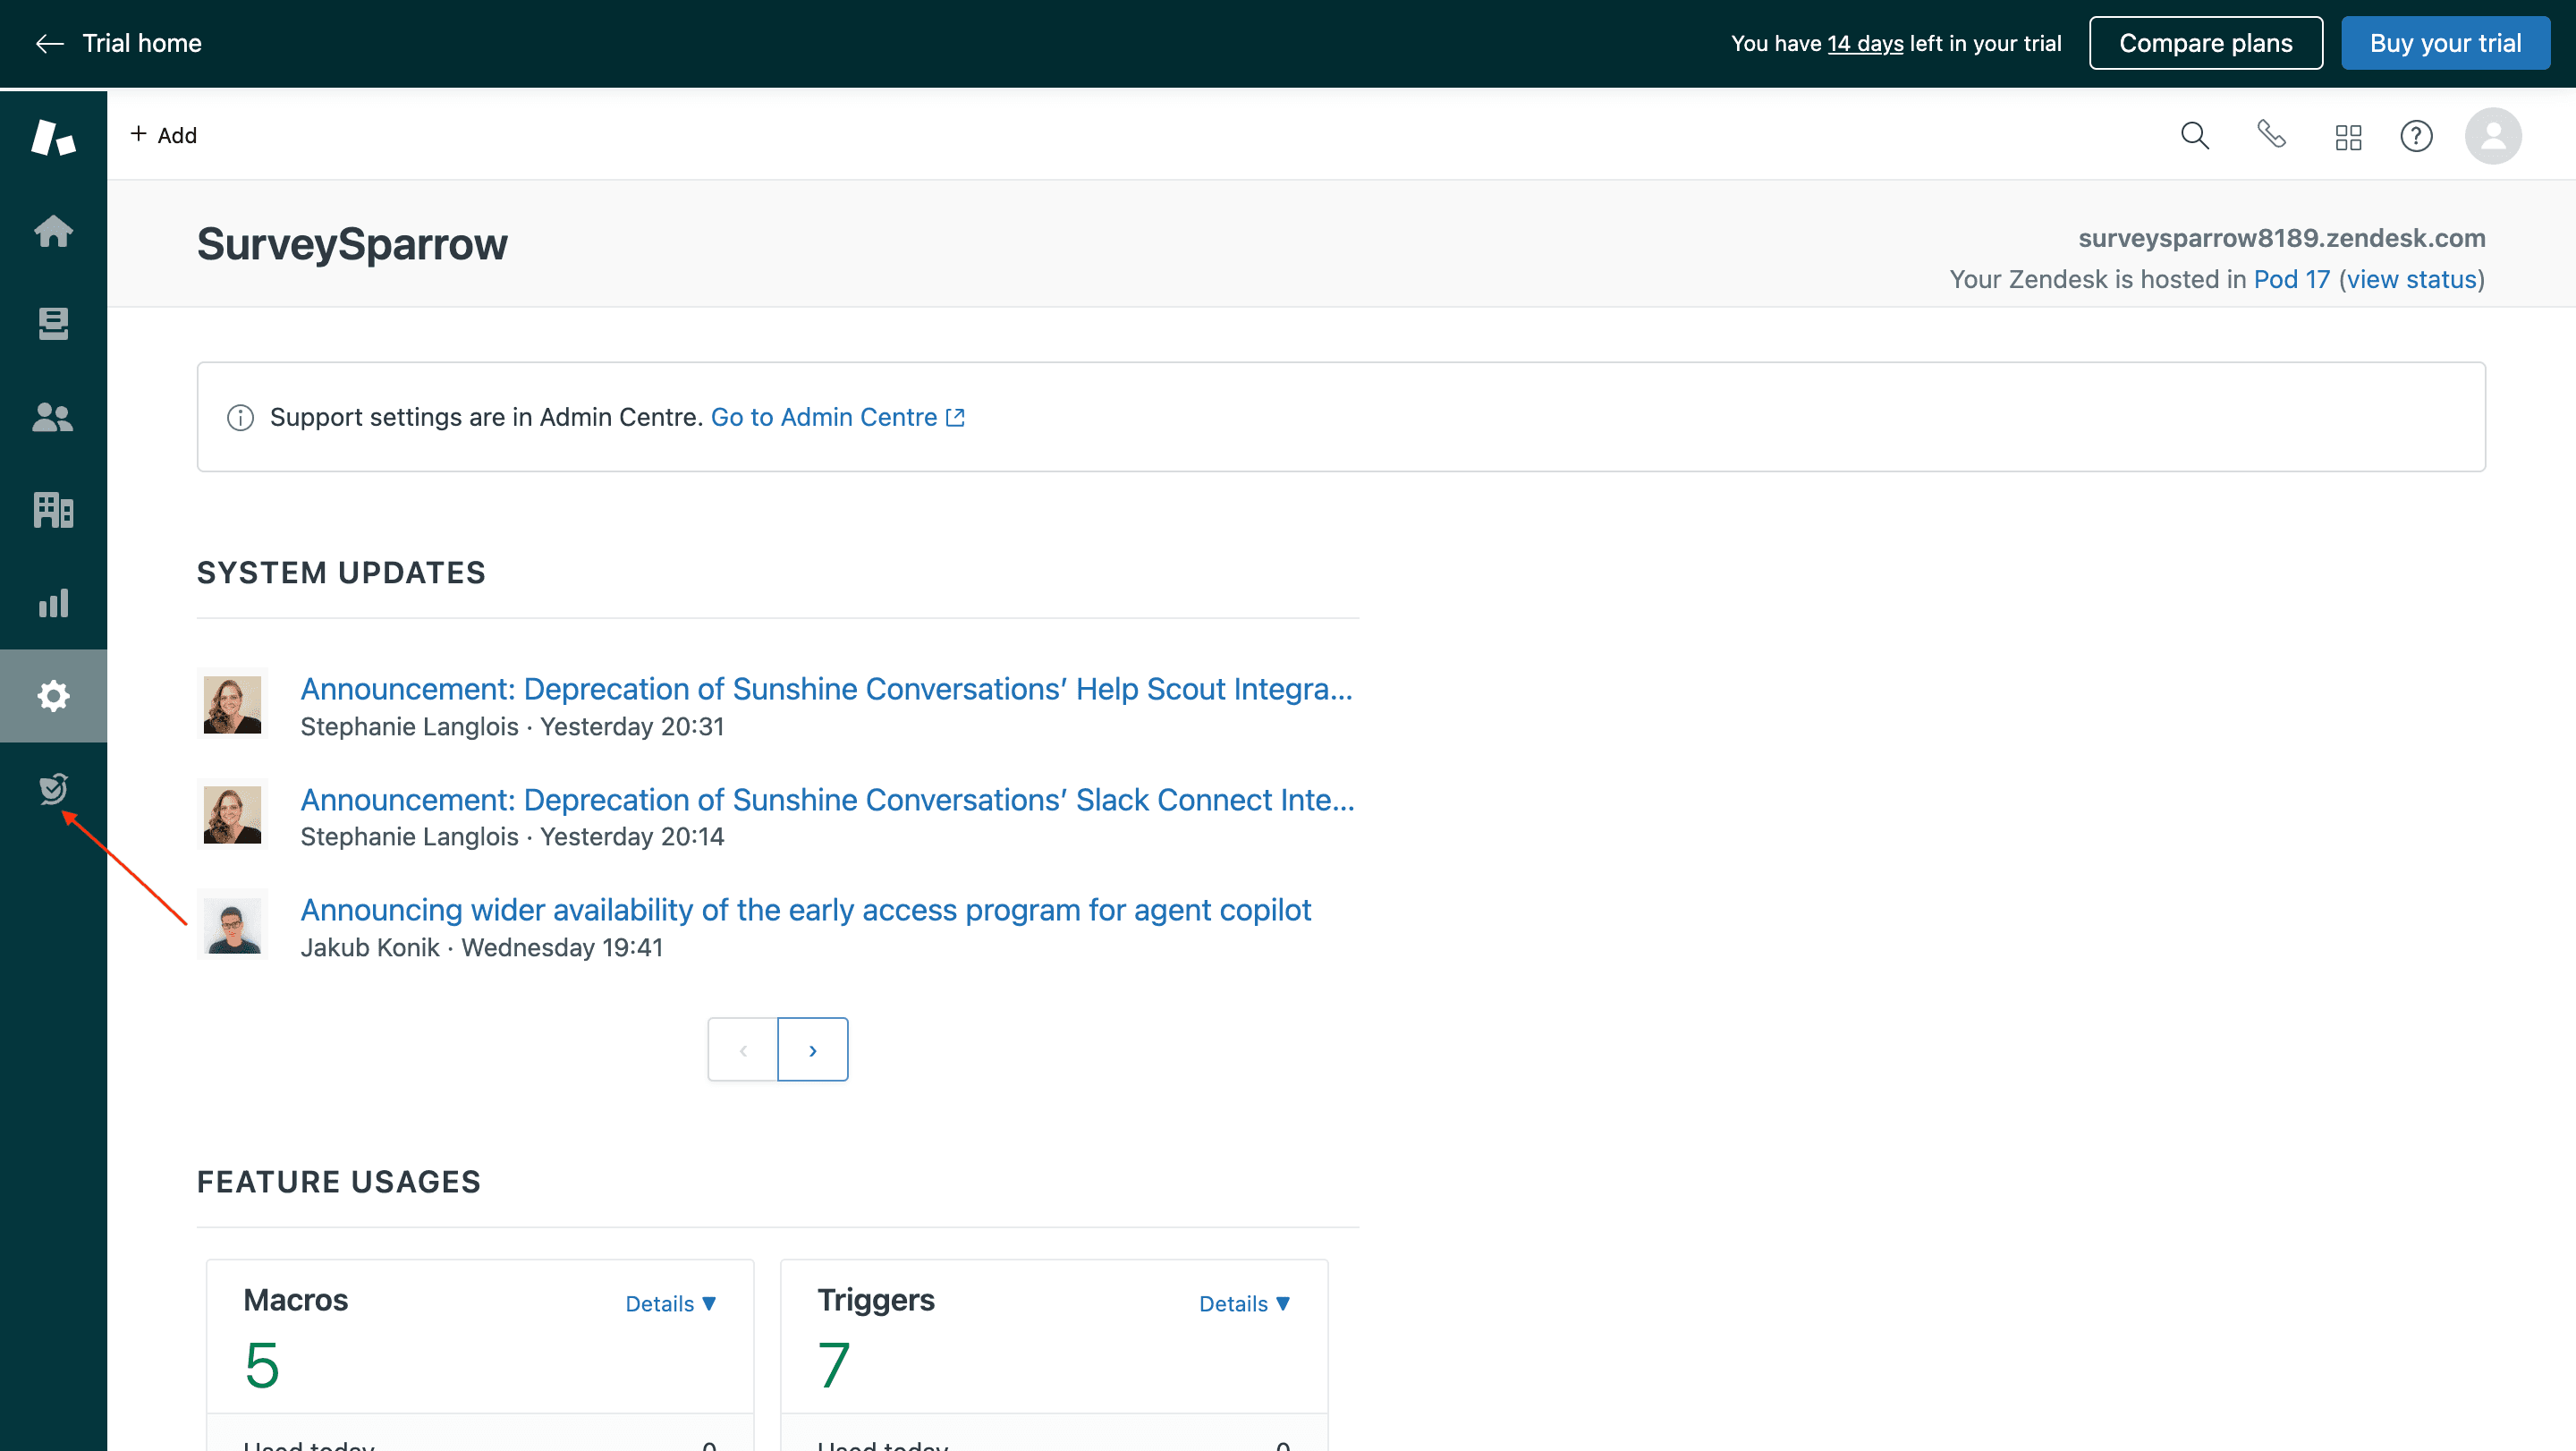
5. On the click of your SurveySparrow app, you’ll be directed to the below page.
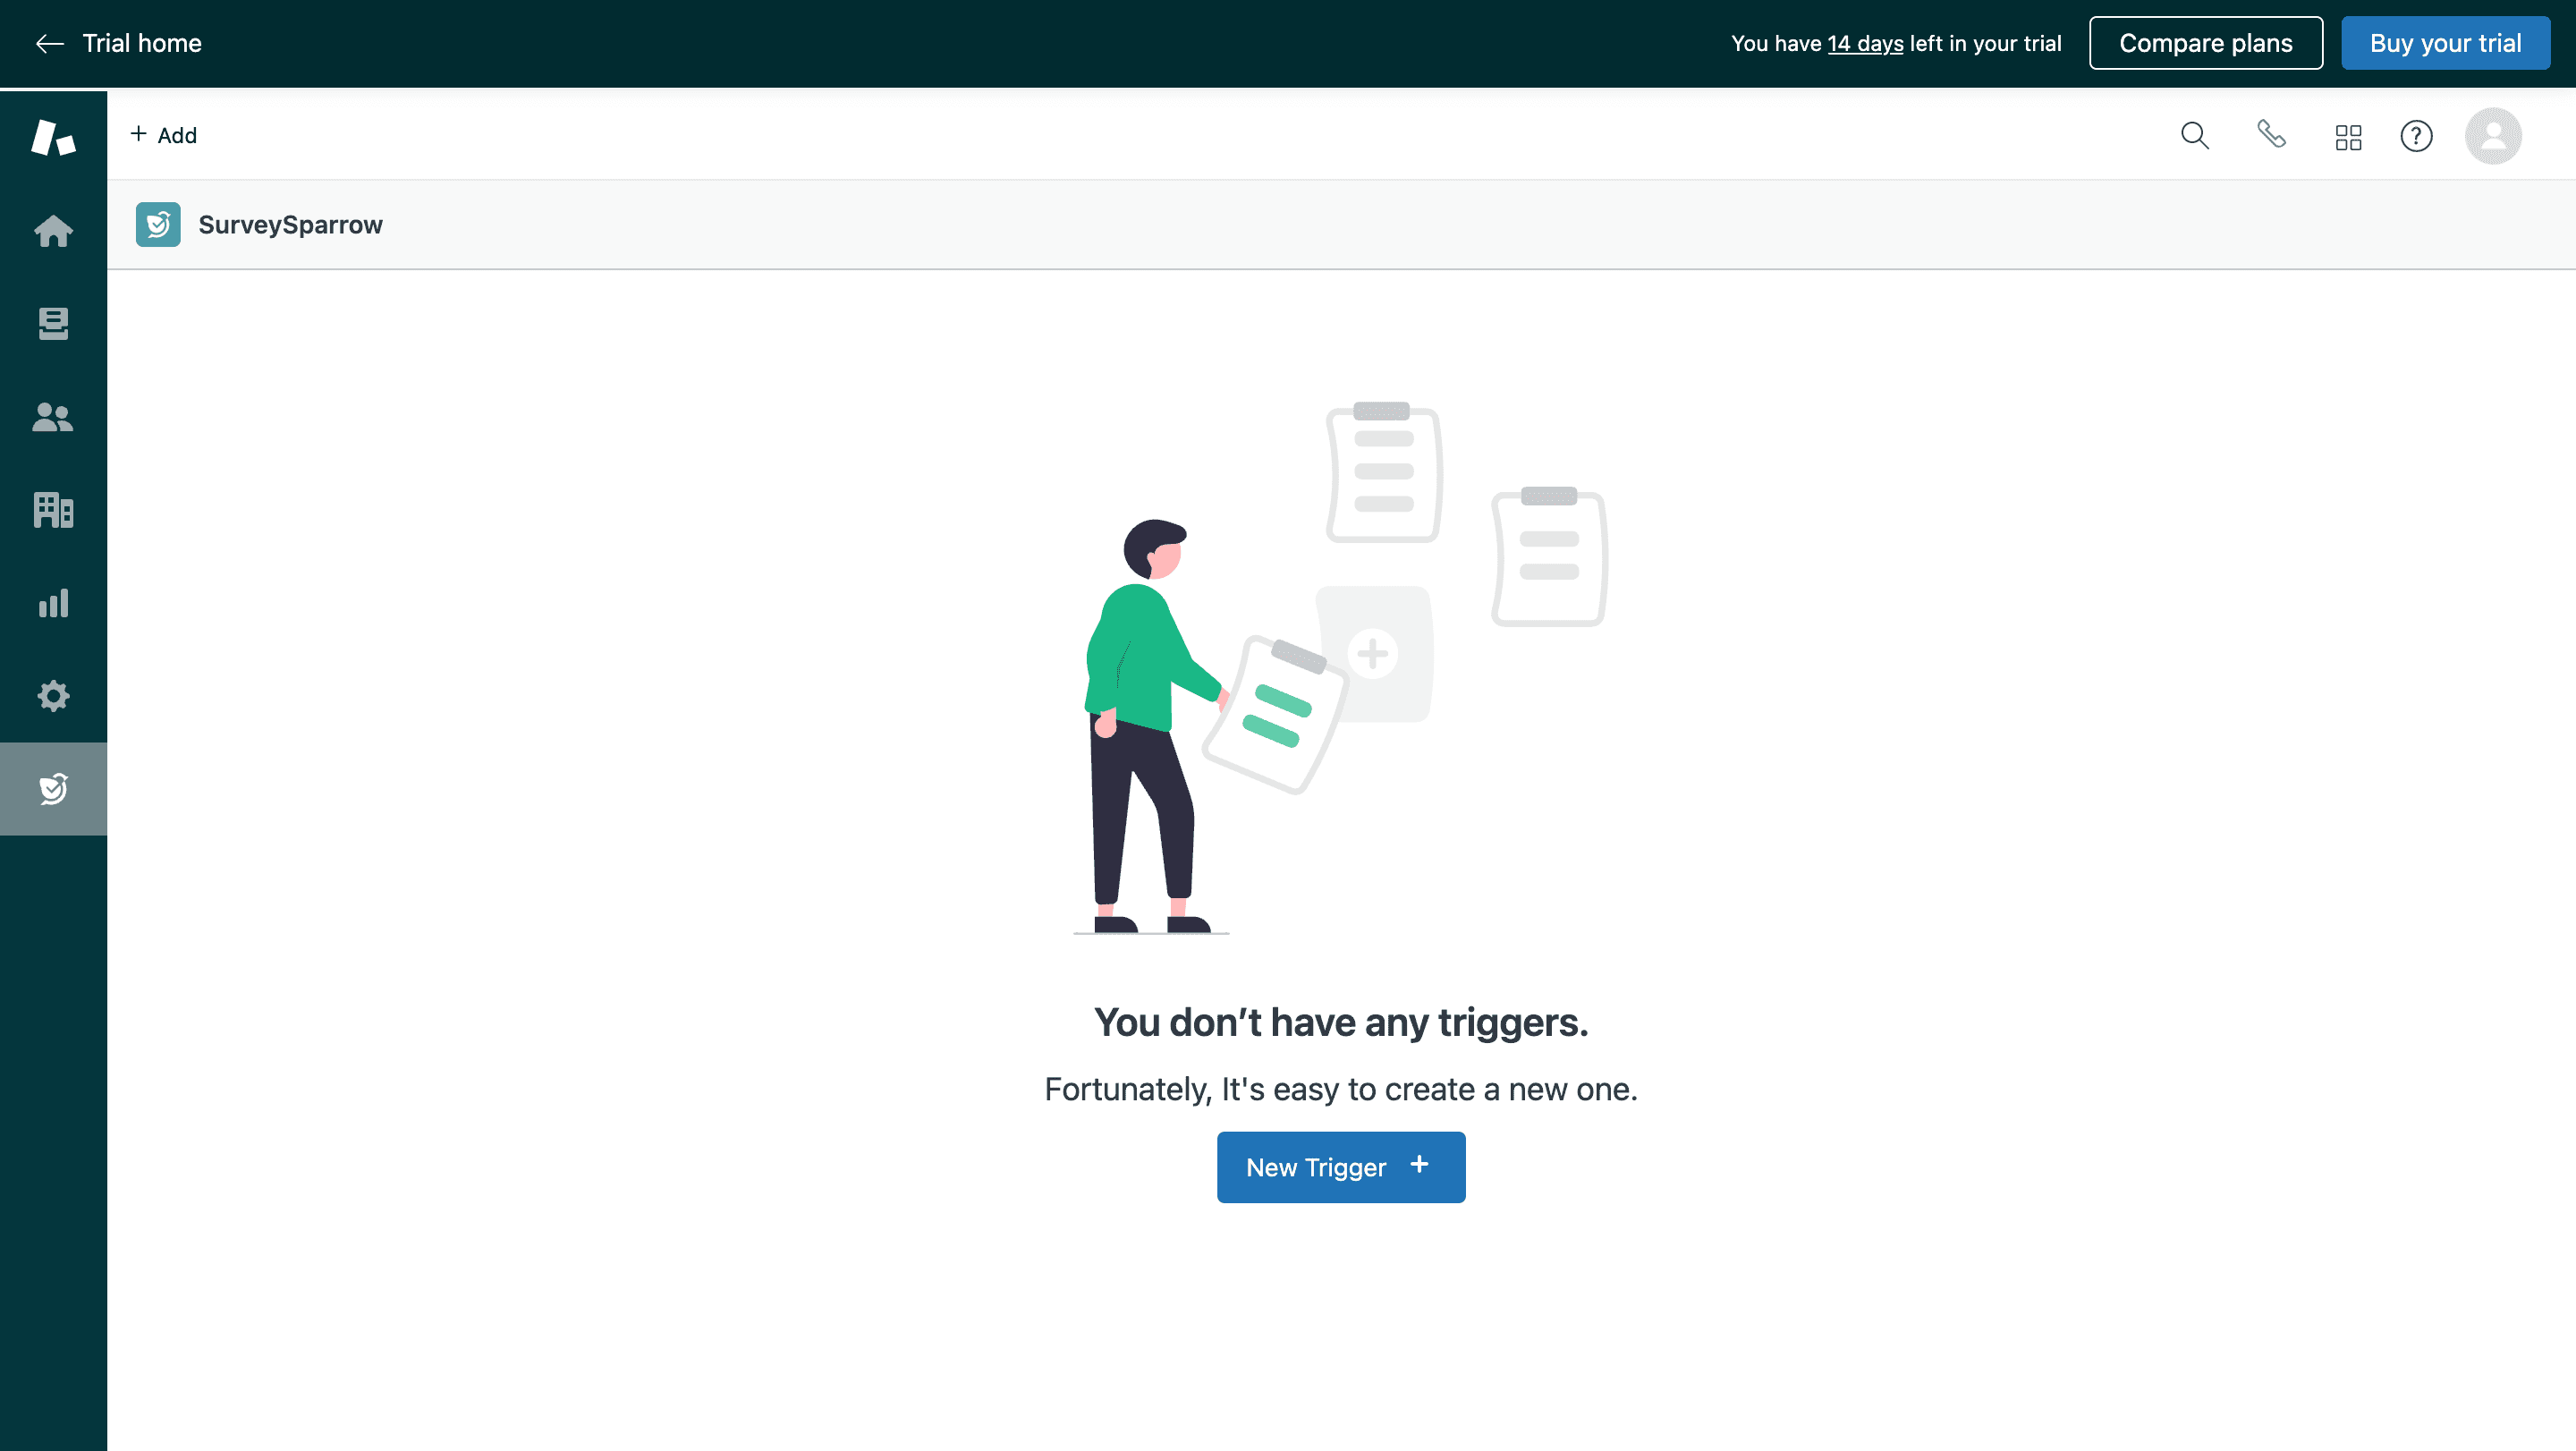
Now, let’s see how to create a new trigger.
1. To create a new trigger, click on the "New Trigger +" button.
2. Name the trigger and give a description, for future references.
3. Parallely, make sure to create a survey and an email share on your SurveySparrow account.
4. Now, choose the survey type, the survey, and email share, from the dropdown. You can set delays if you want.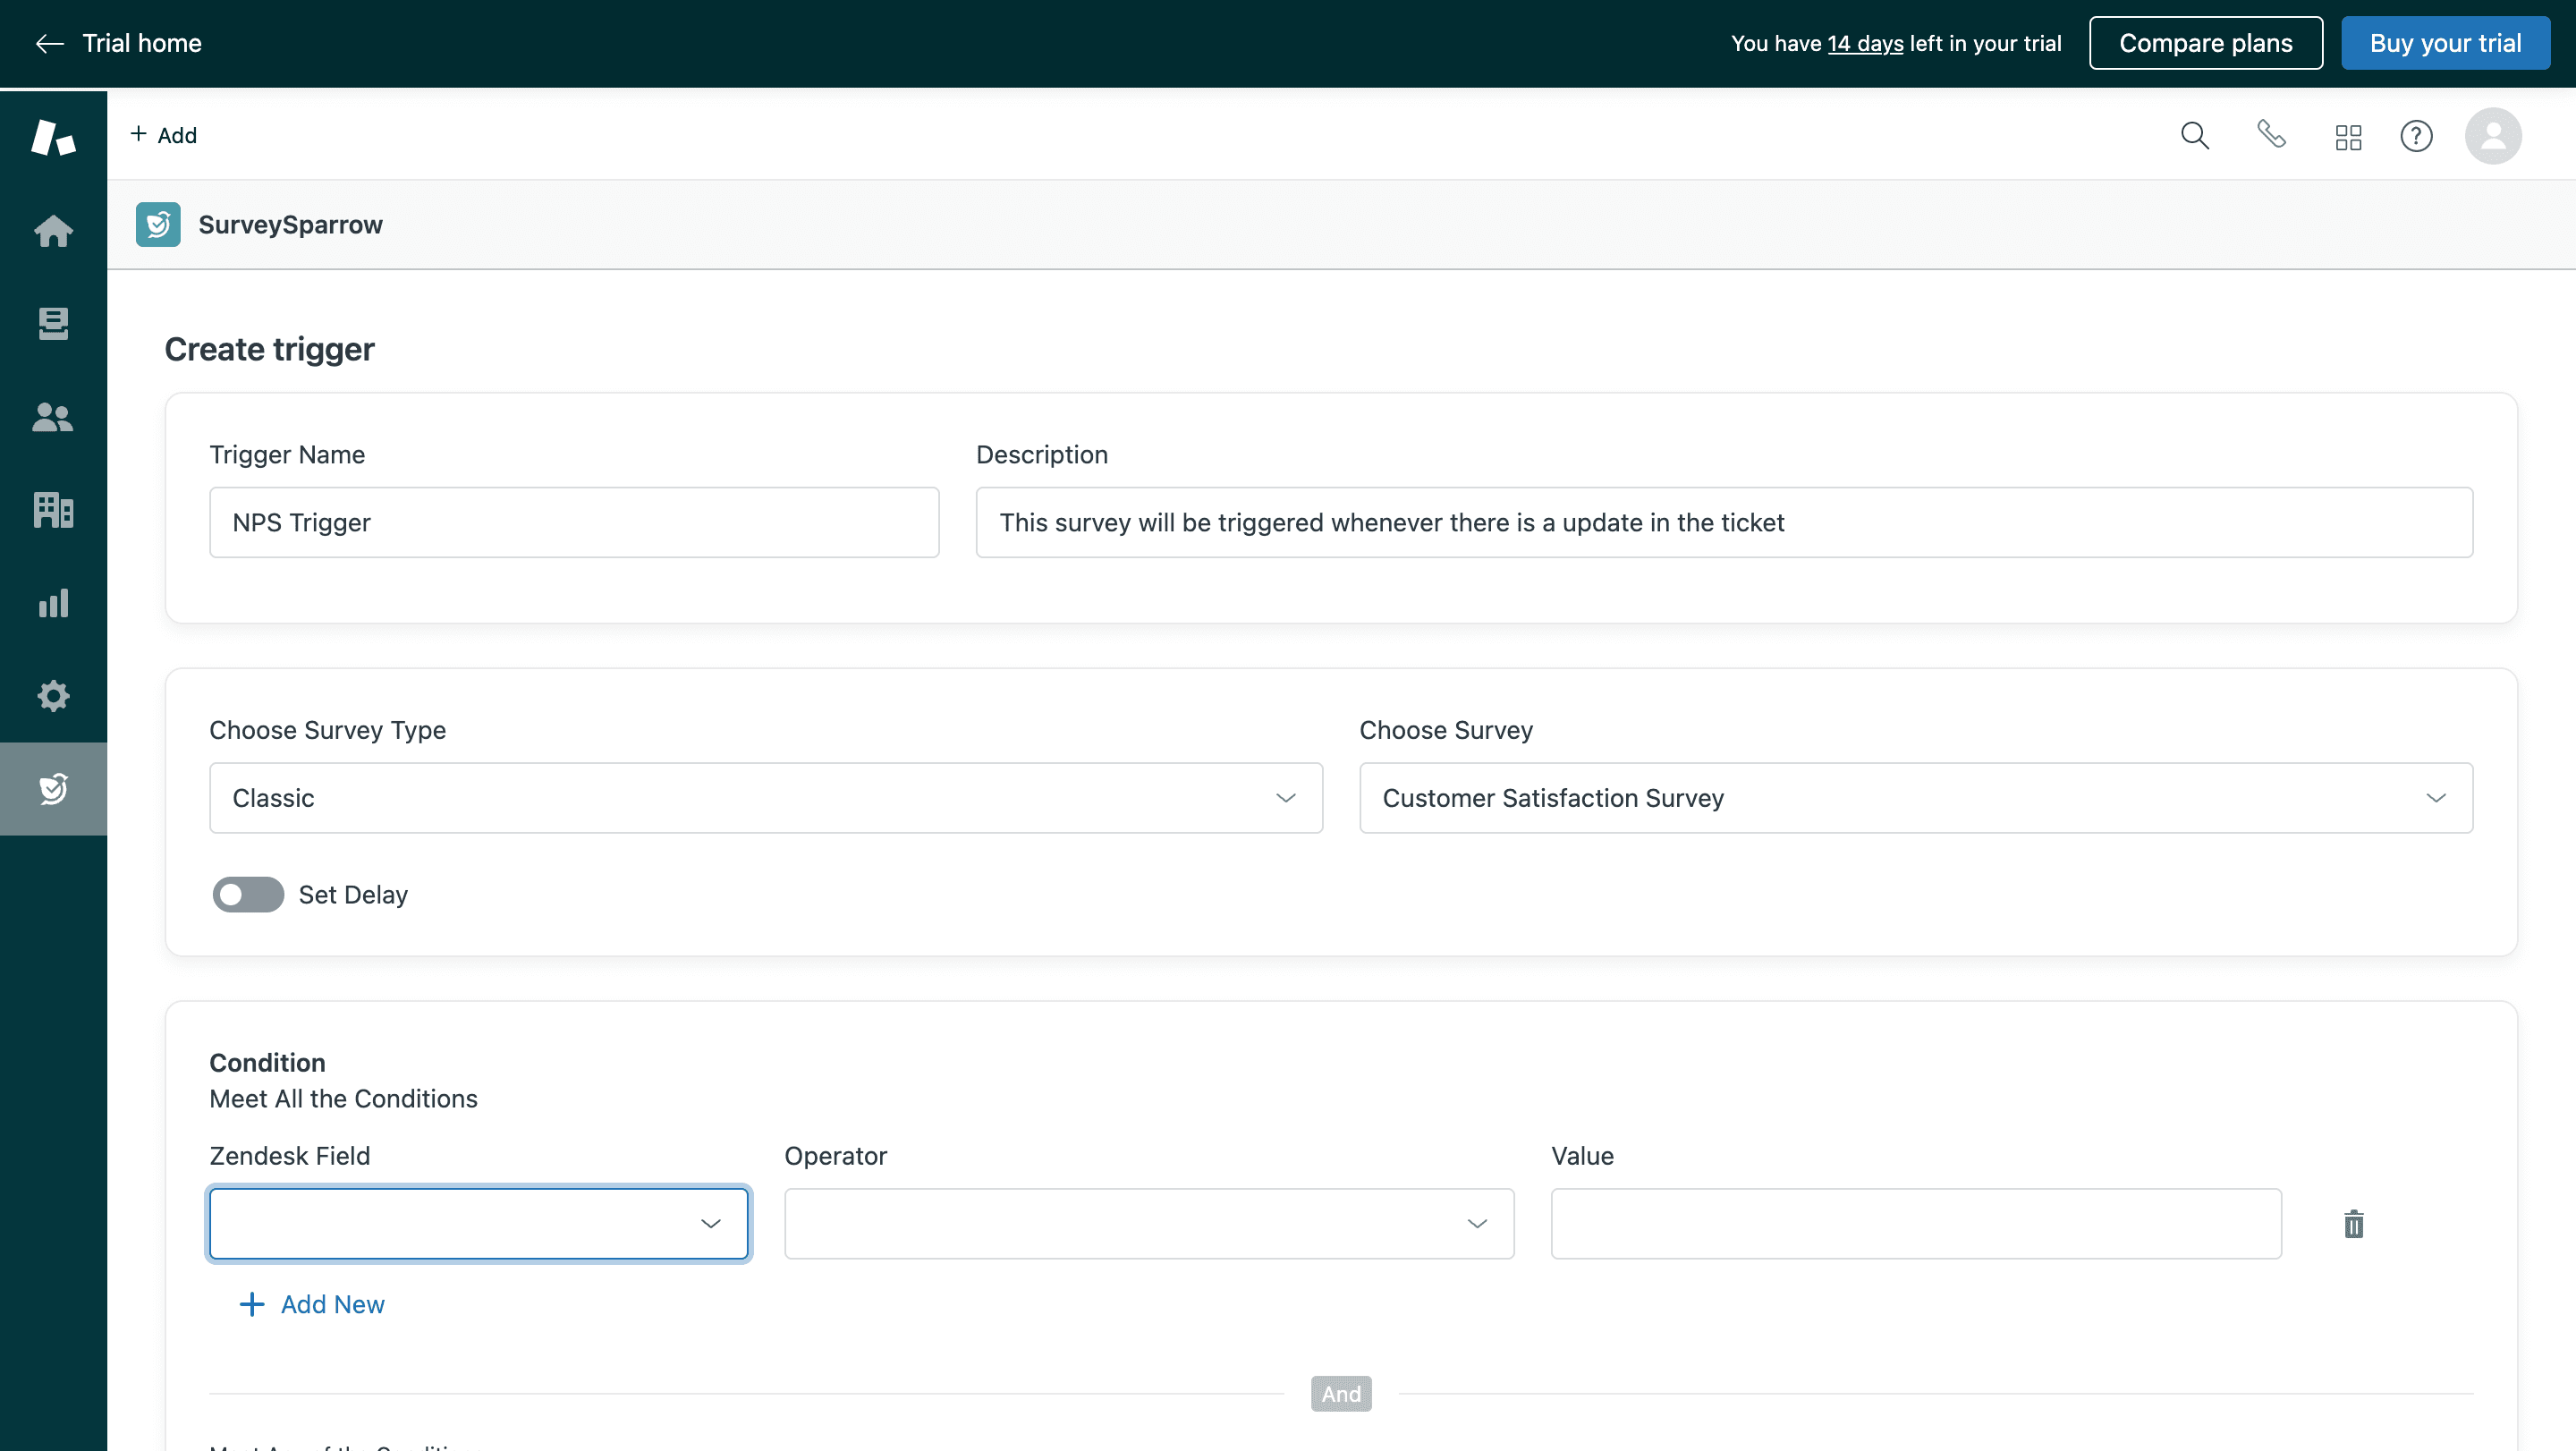
5. Once done, set the conditions for the trigger. In our case, our condition will trigger an NPS survey when the ticket status is solved. You can have multiple conditions if you want.
6. Pass variables to the survey. In our case, we have passed the variable Ticket ID.
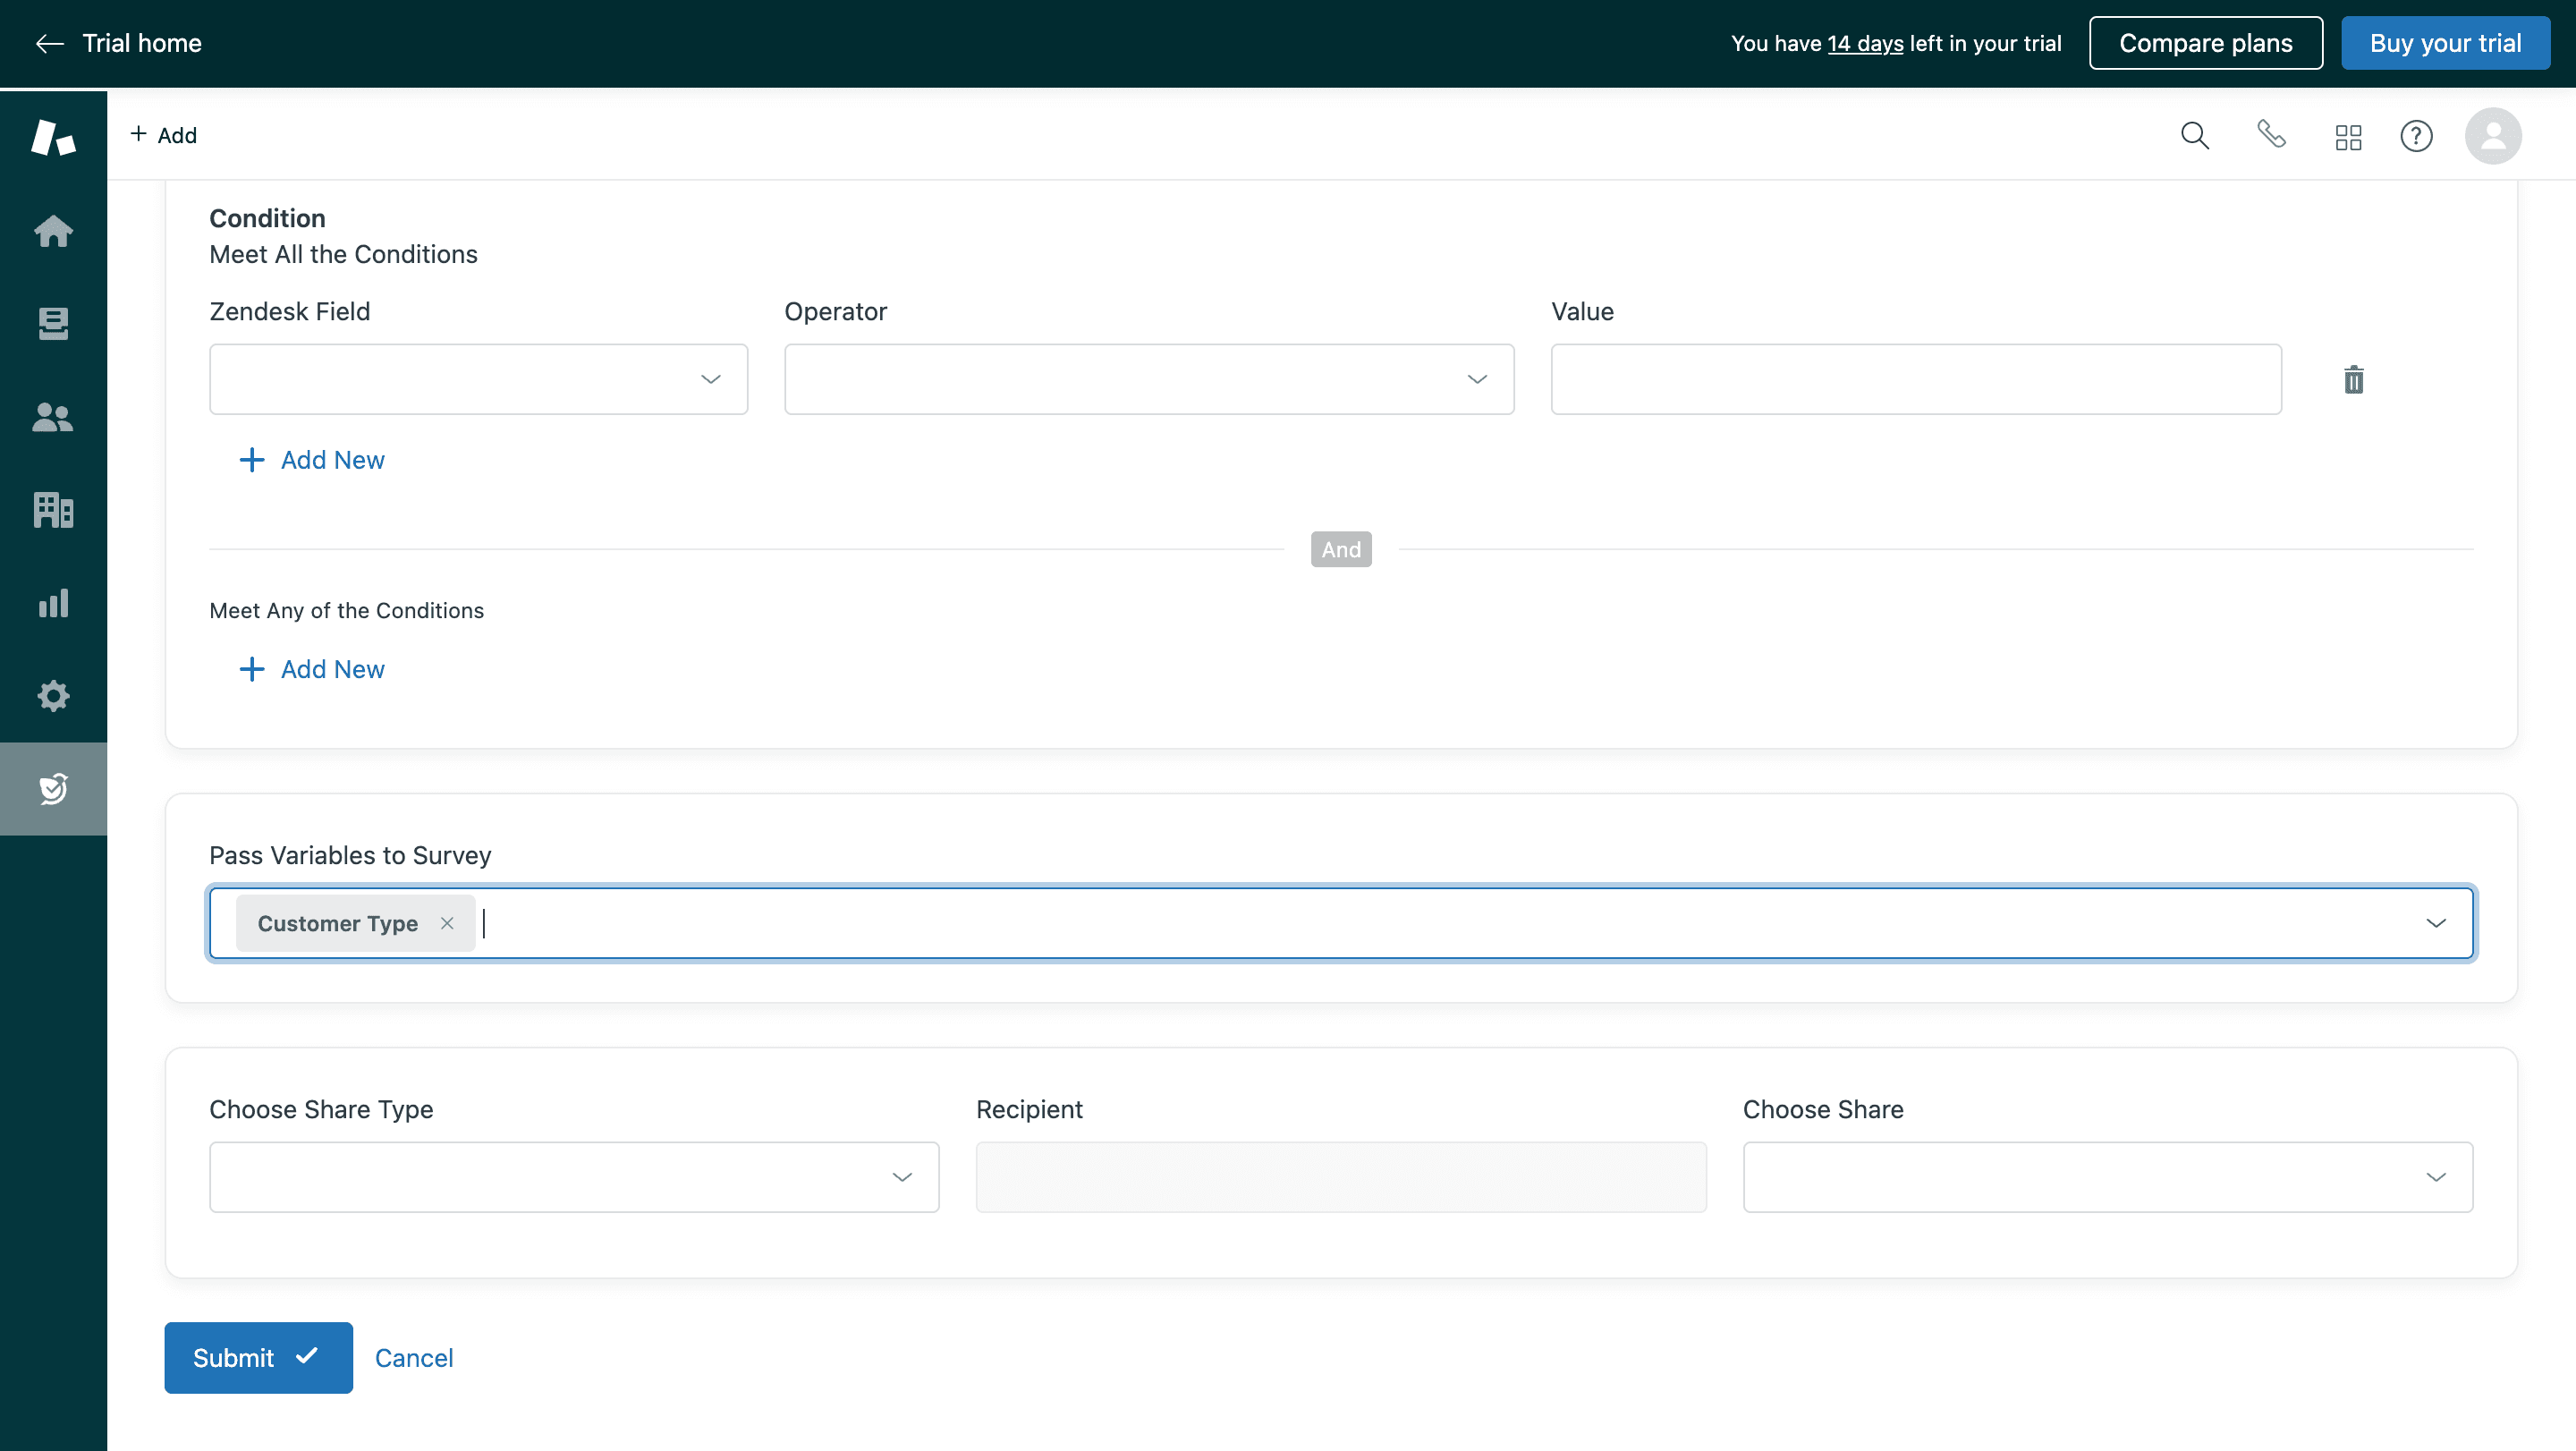
7. Once everything is done, click on Submit to save all the details.
8. All the triggers you have created on your Zendesk account will be visible under Dashboard.
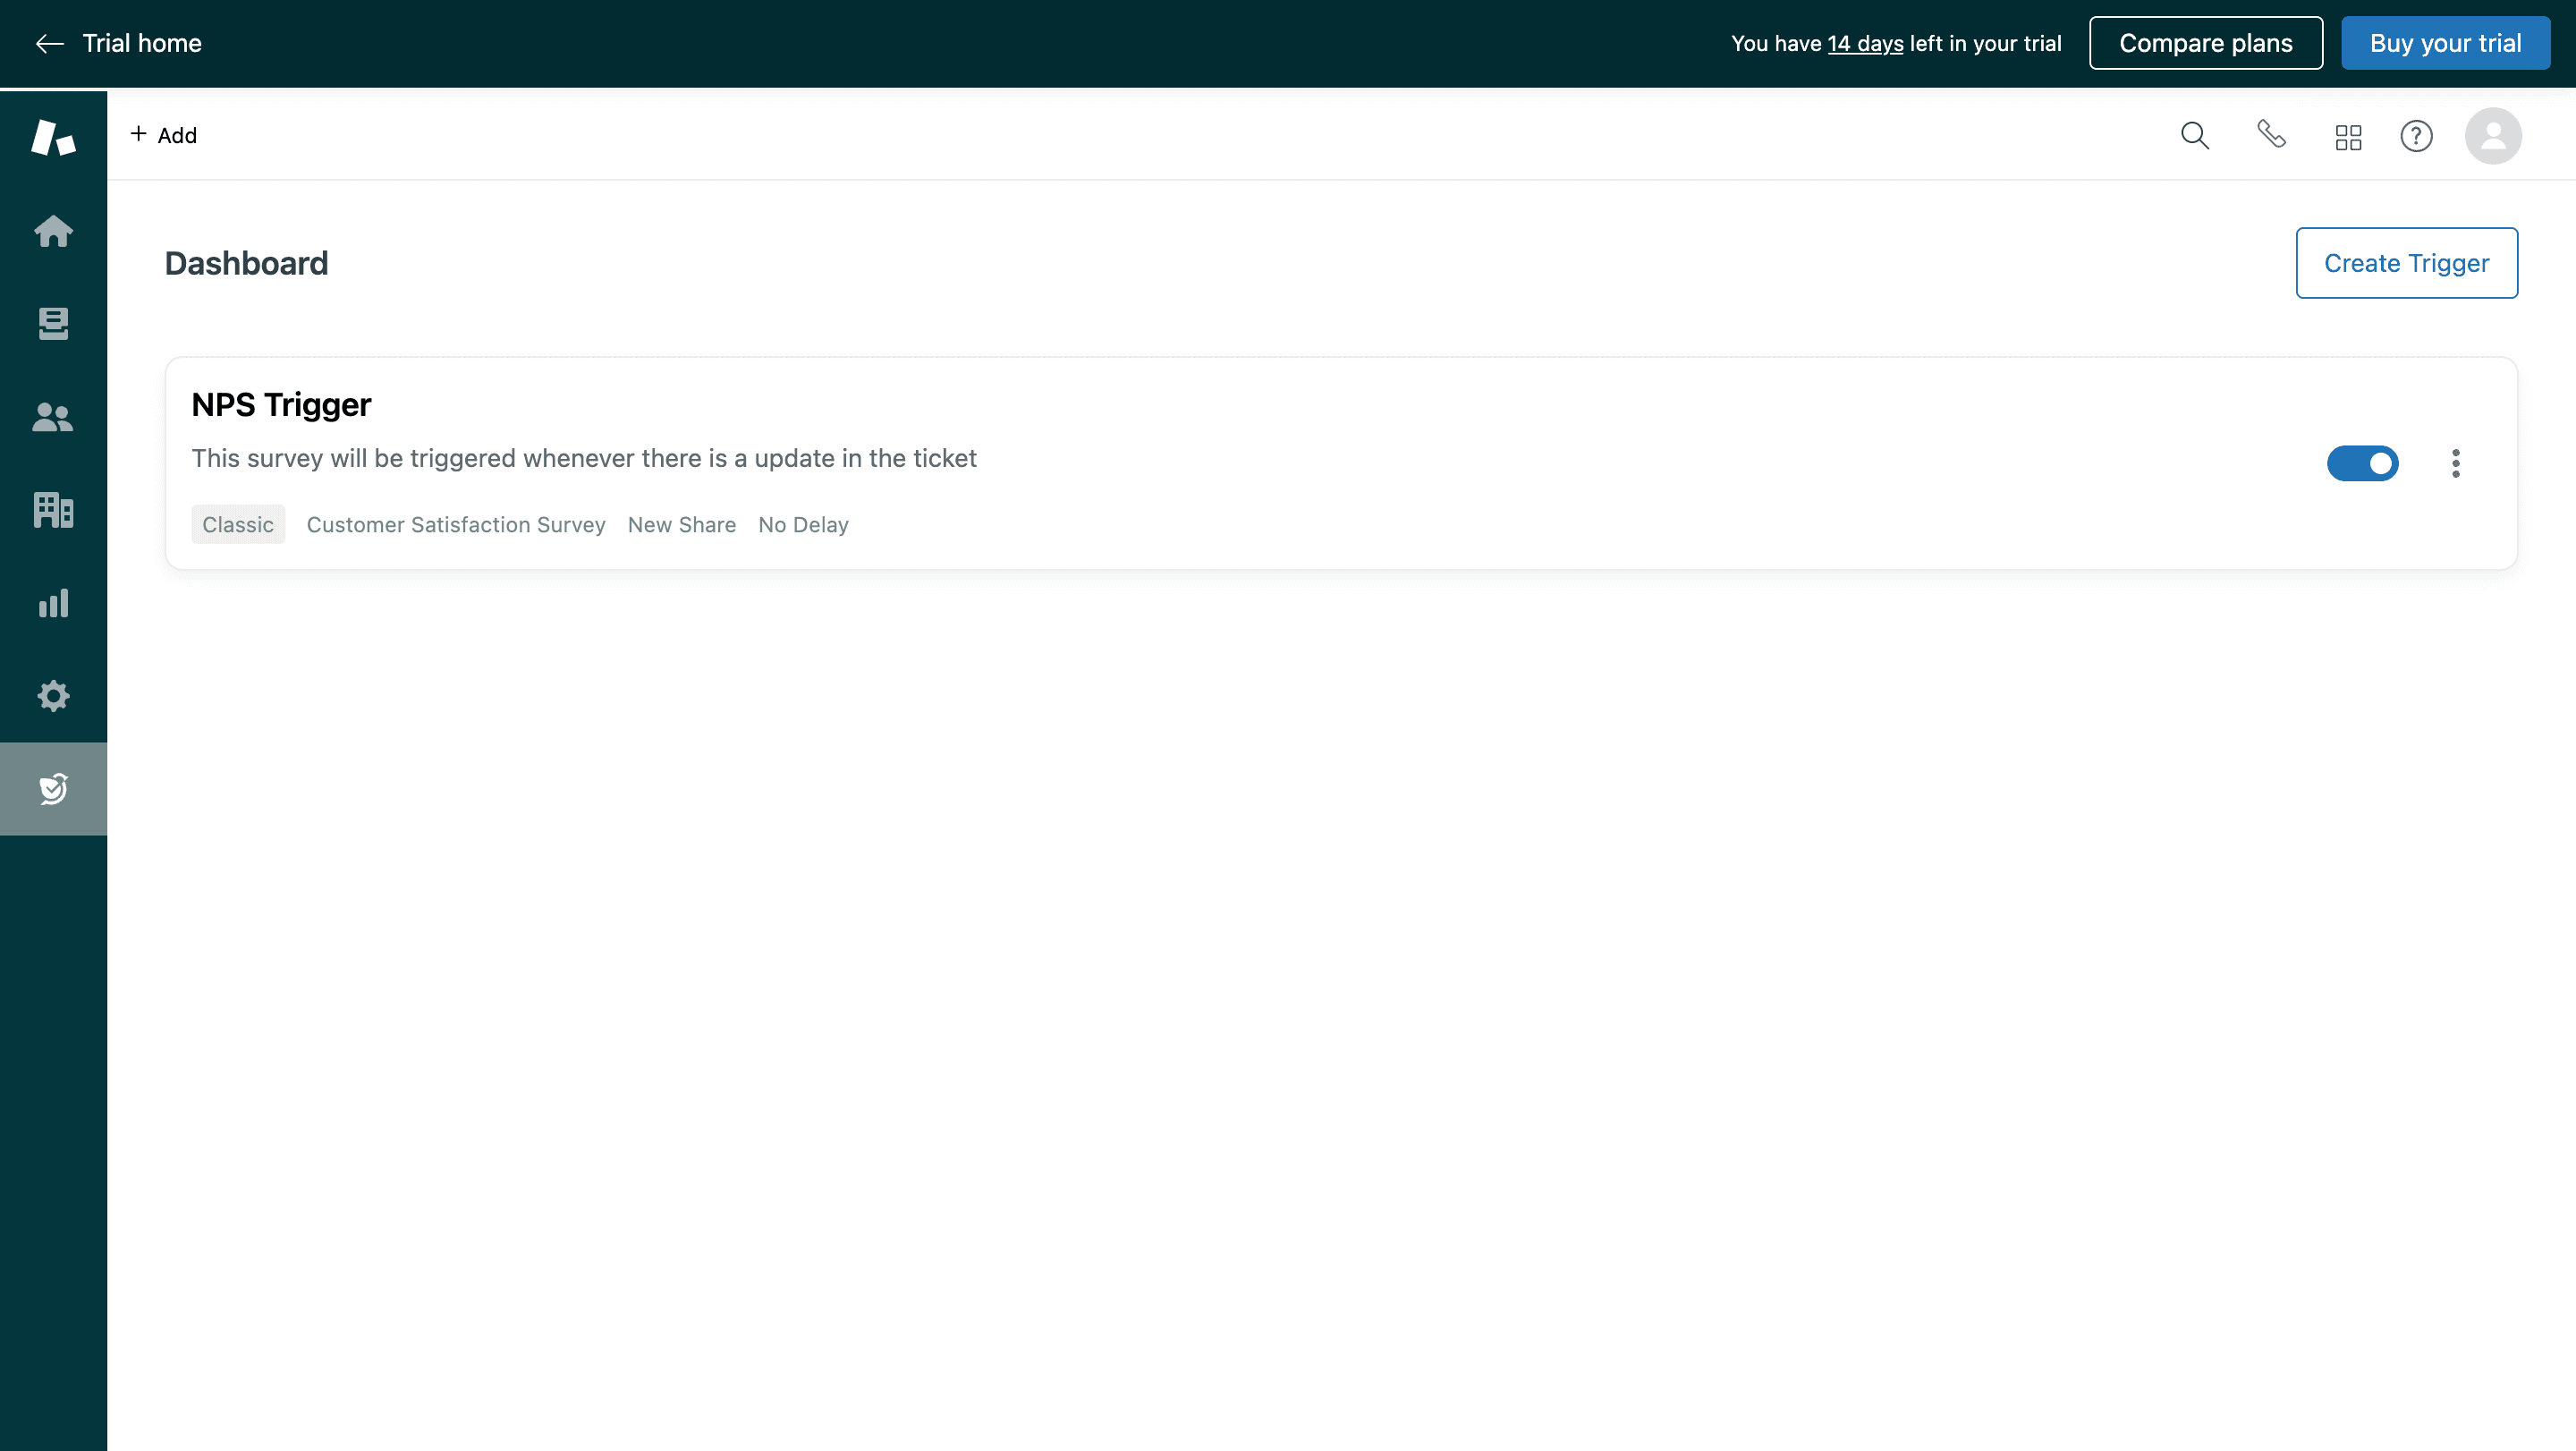
9. Now, when the ticket status is solved, an NPS survey will be triggered to the email id of the Requester.
1. Choose the Zendesk Object as User and Action as Create from the dropdown list.
2. Map your survey responses with the corresponding Zendesk fields.
3. Click Save to save all your actions.
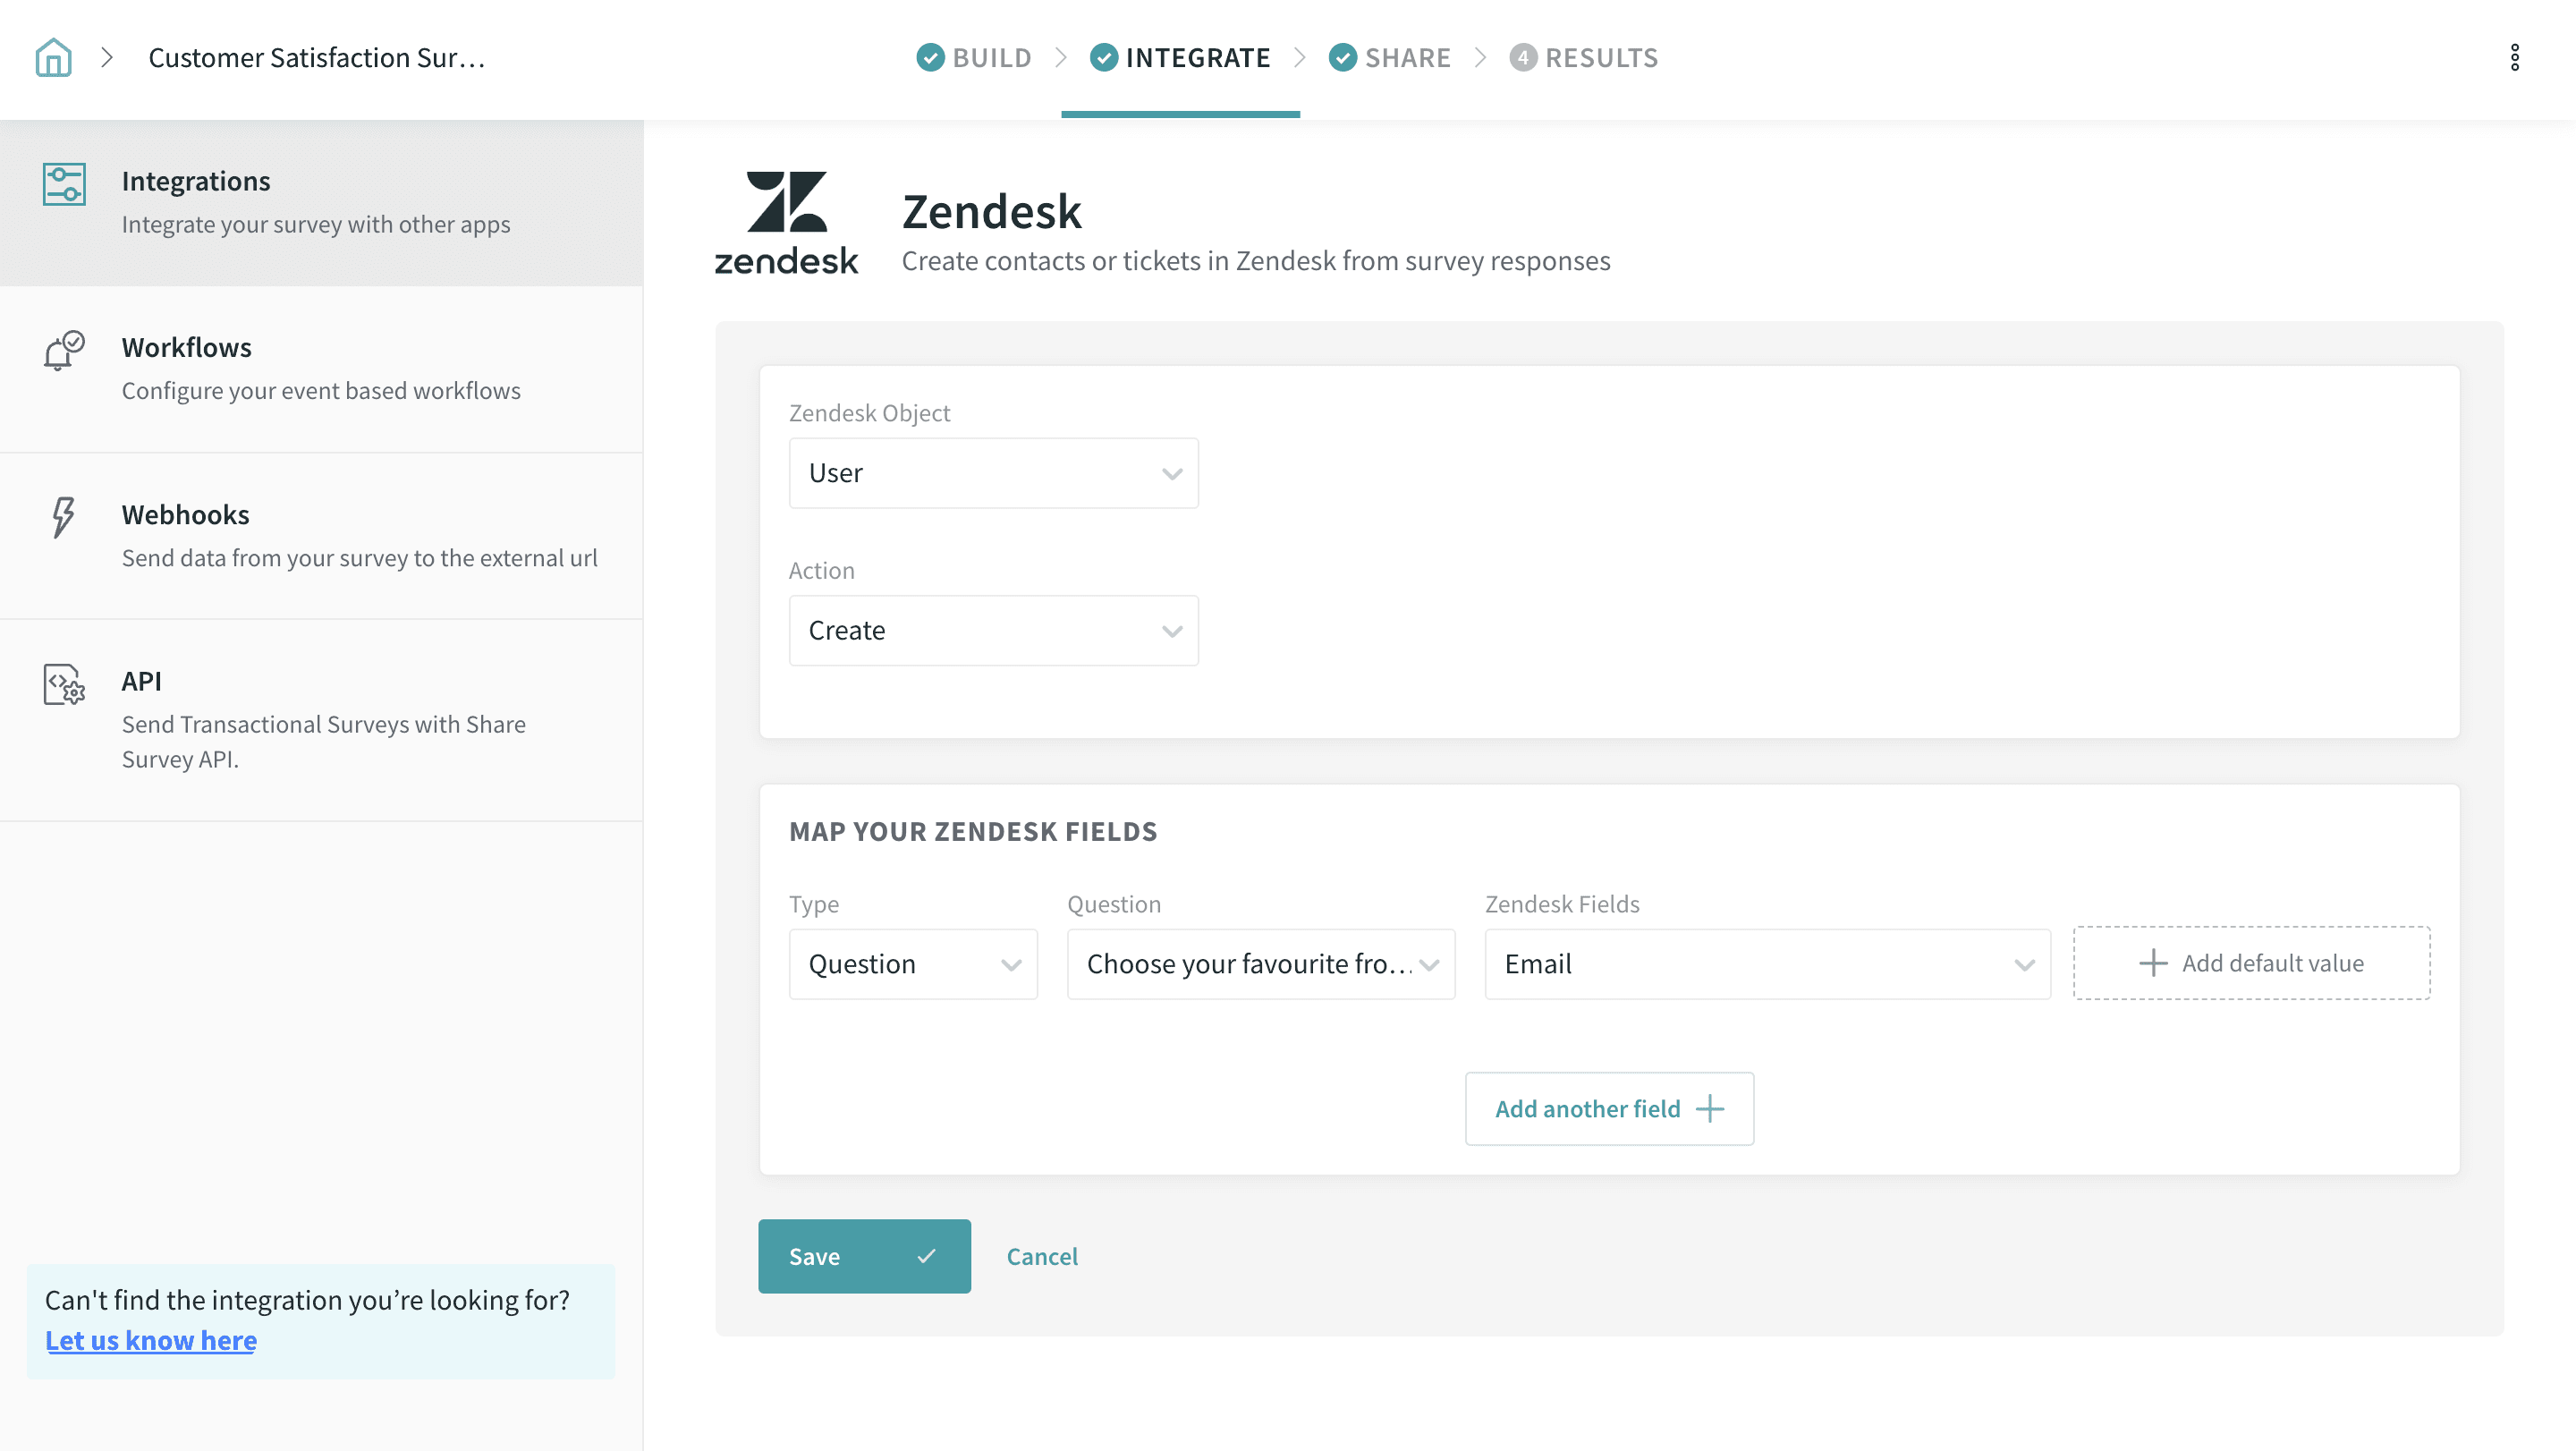
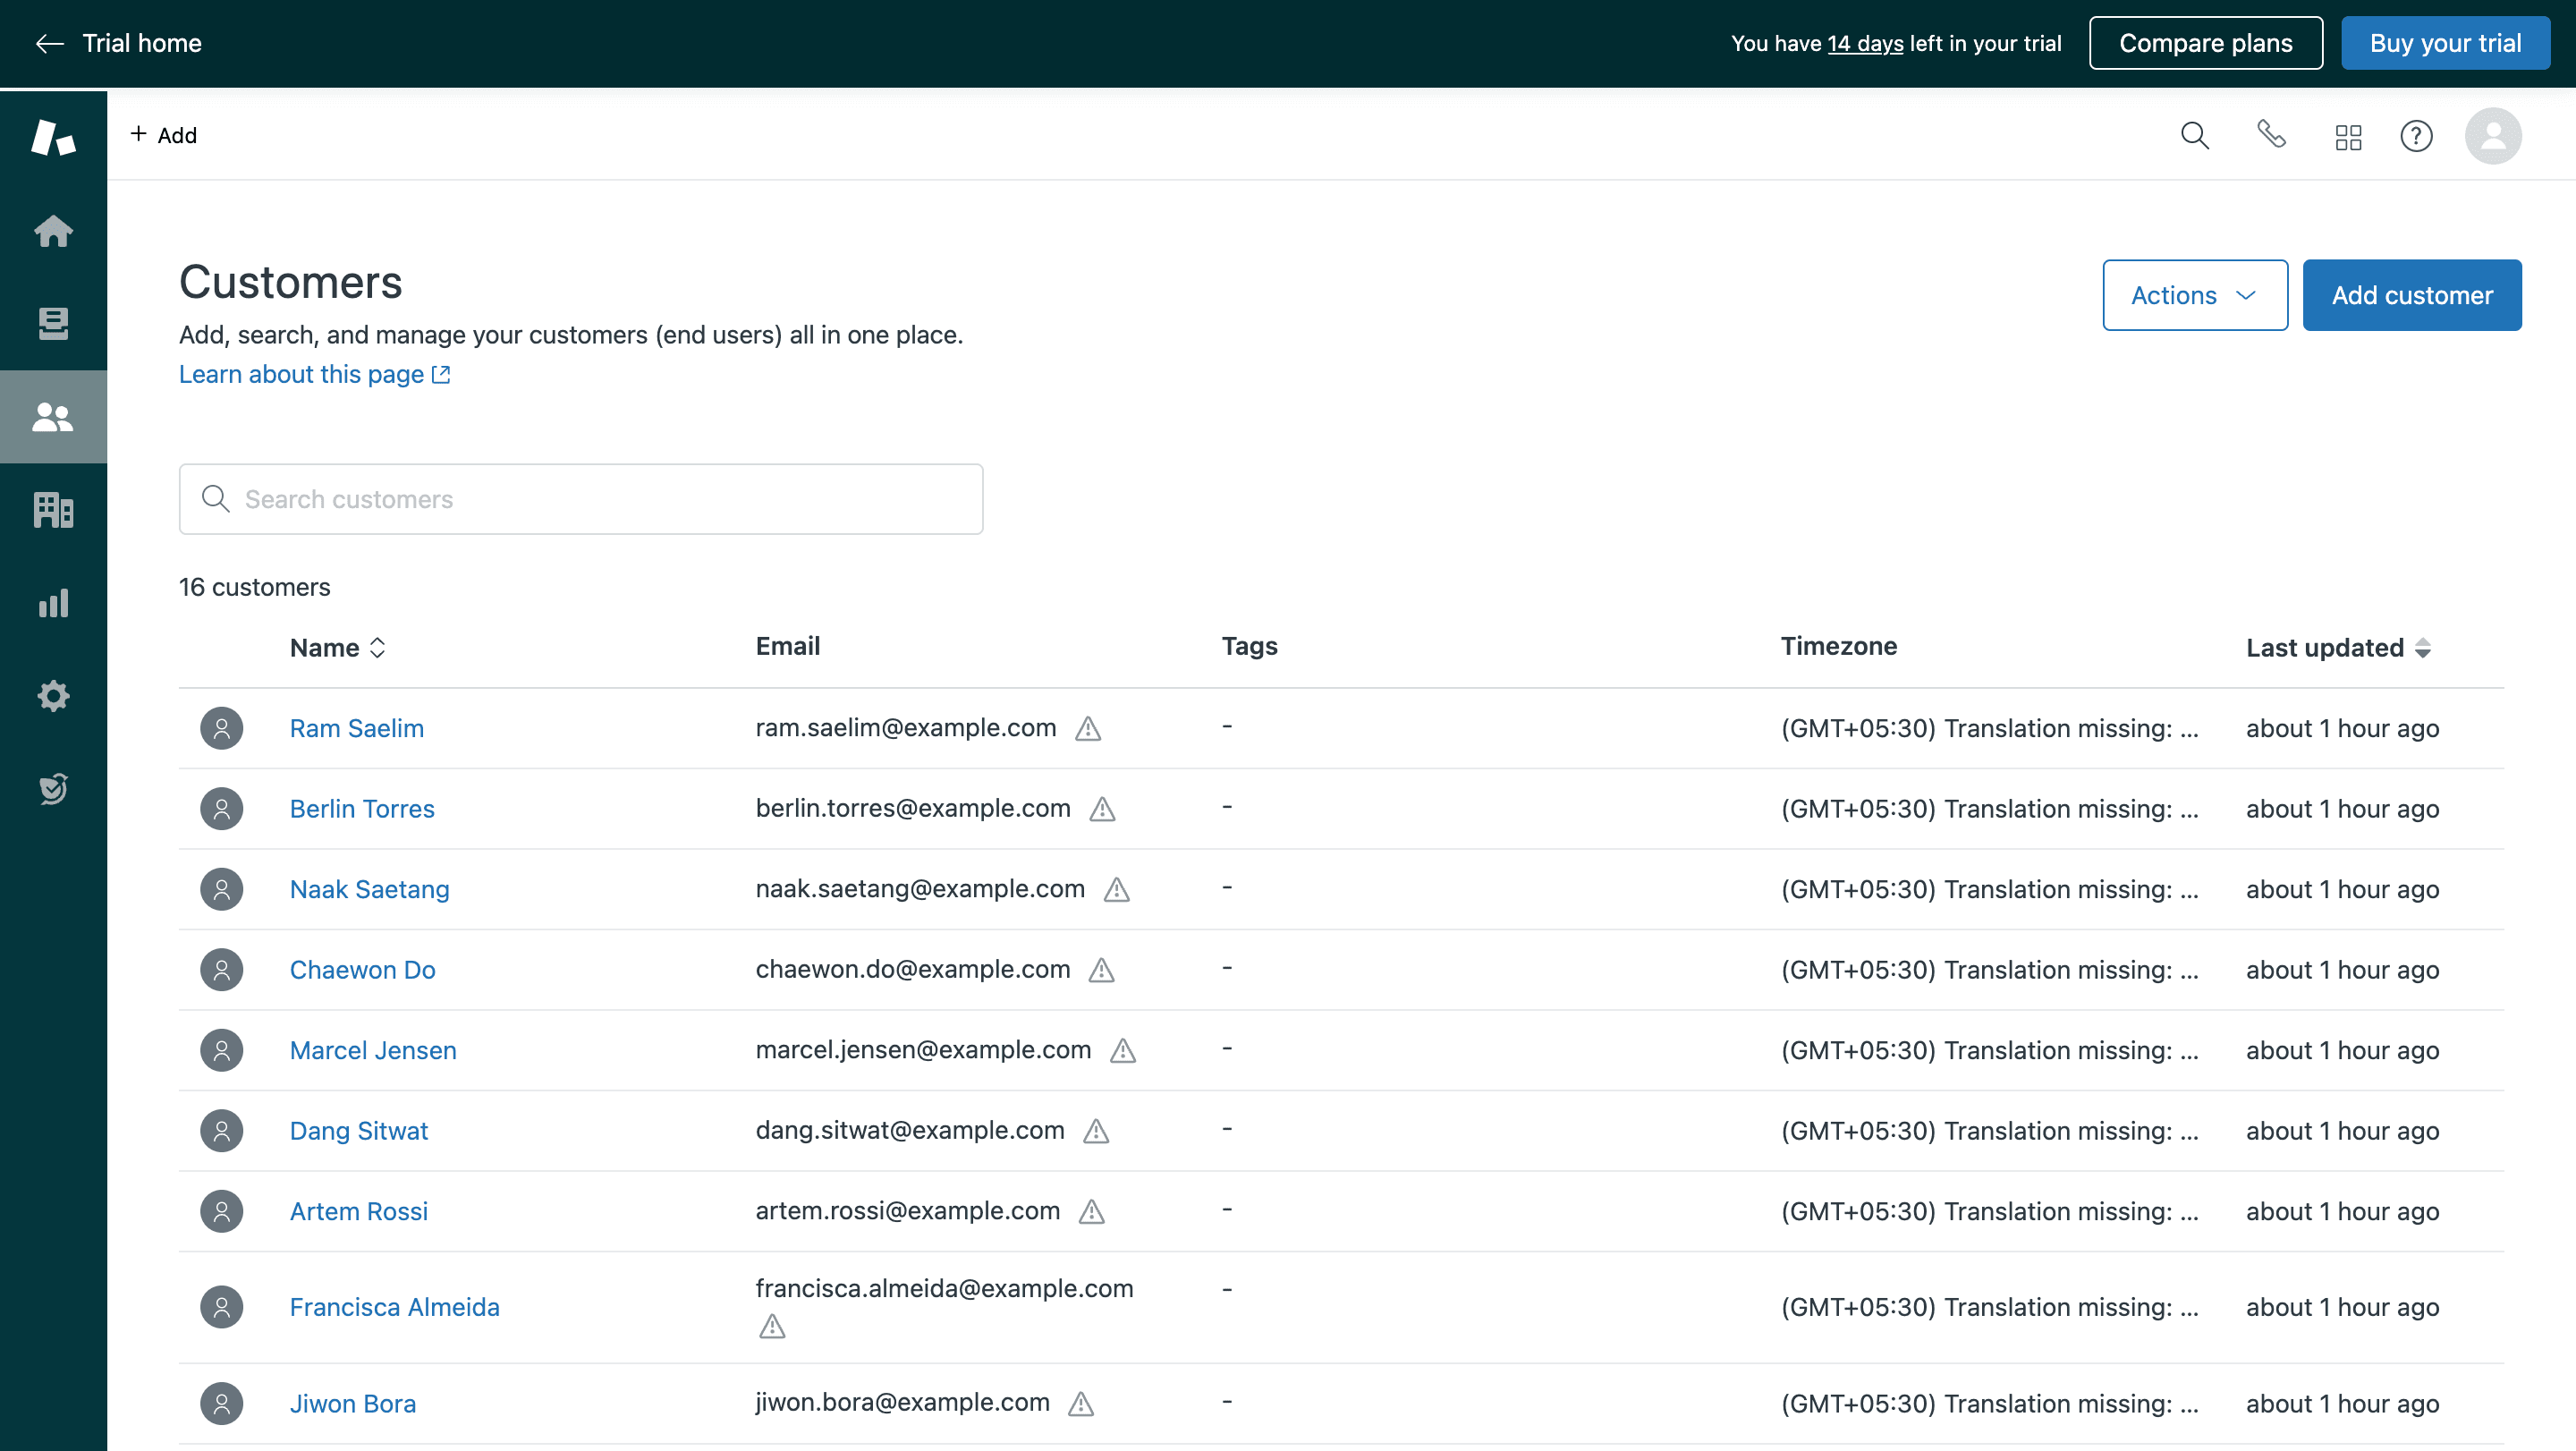
Now whenever your survey gets a new response, a new contact is created on Zendesk, in real-time. You can find all the updated details of your customer under Customer Lists on your Zendesk account.
1. Choose Update as the Action type on the Zendesk mapping page.
2. Then, you will have to create a new custom variable under the Global Variables section of your Survey Builder.
3. Create a custom variable, say userid.
4. Now, go back to the Zendesk Mapping Page and choose the unique identifier type as Variable and select the variable (in our case, it’s userid) from the dropdown.
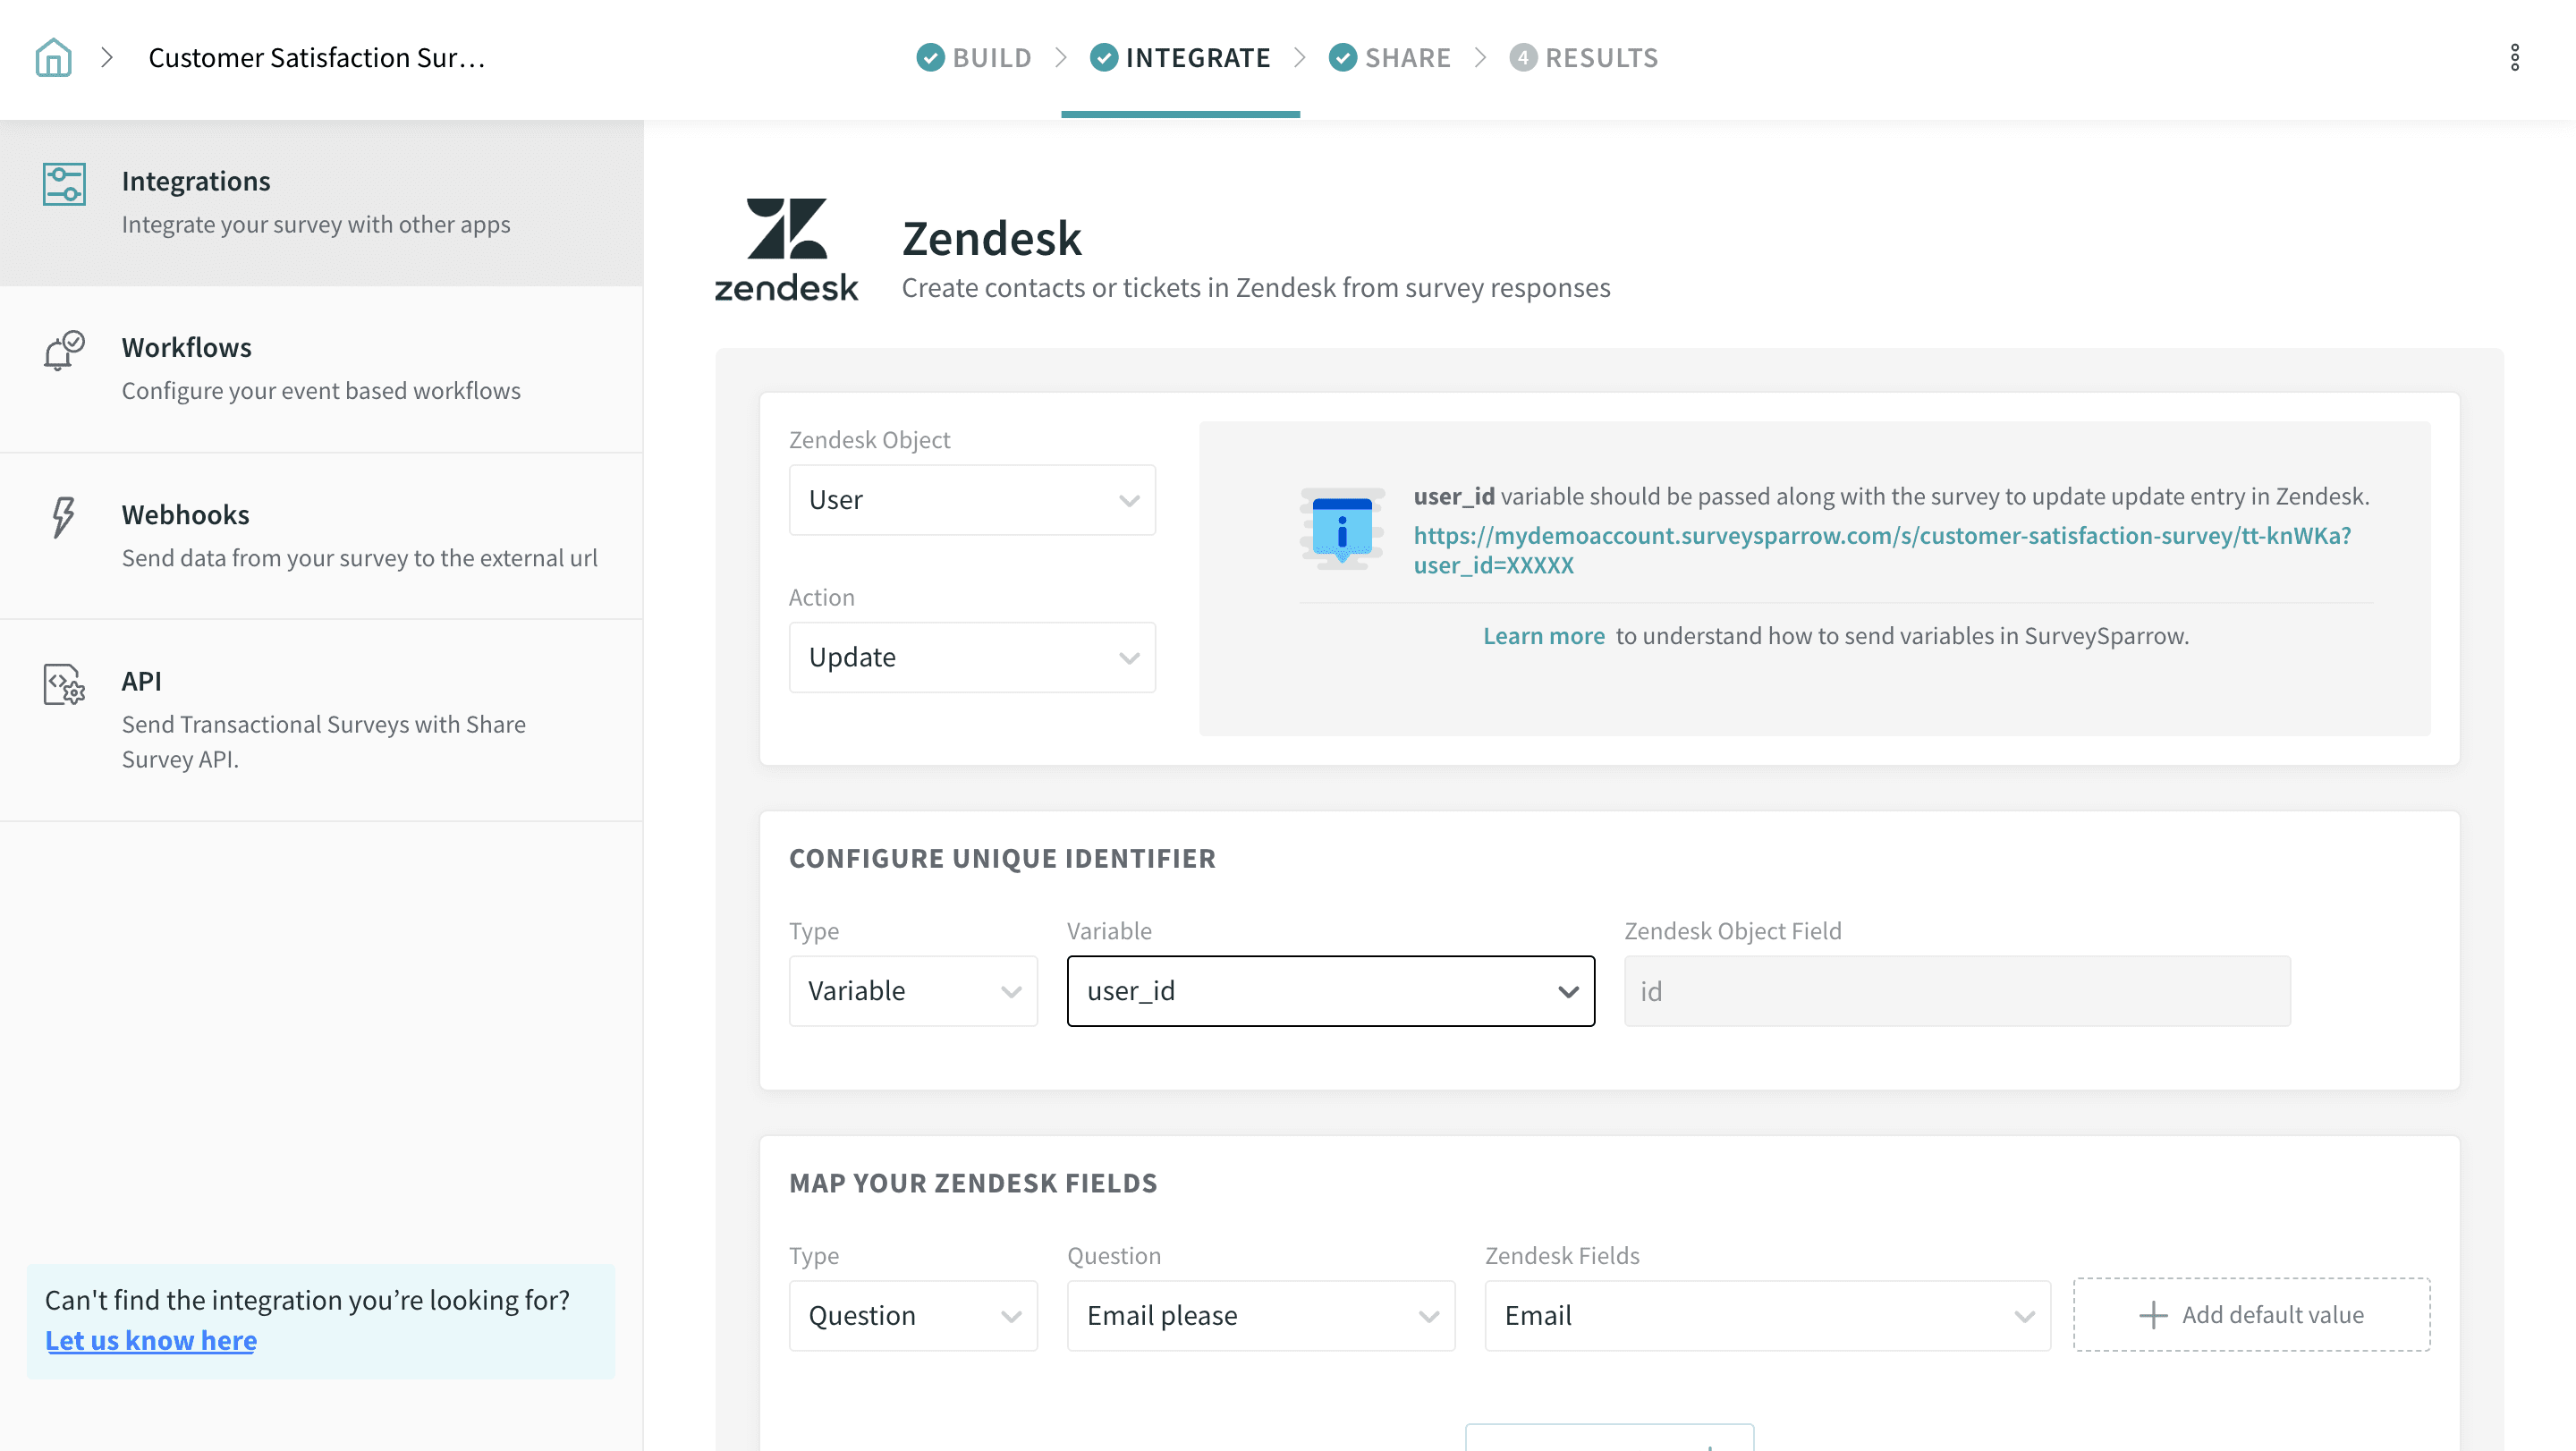
5. Map your survey response with the corresponding Zendesk fields.
6. Click Save to save all your actions.
7. The variable user_id should be passed along with the survey to update ticket entries on Zendesk. Eg. If your user id is 46, the survey URL which you need to share should be https://<subdomain>.surveysparrow.com.com/s/Prospecting-Leads-Survey/tt-12d?userid=46
Click here to understand how to send variables in SurveySparrow or take a look at the below screenshot to understand how the survey is shared along with the user_id in the survey URL.
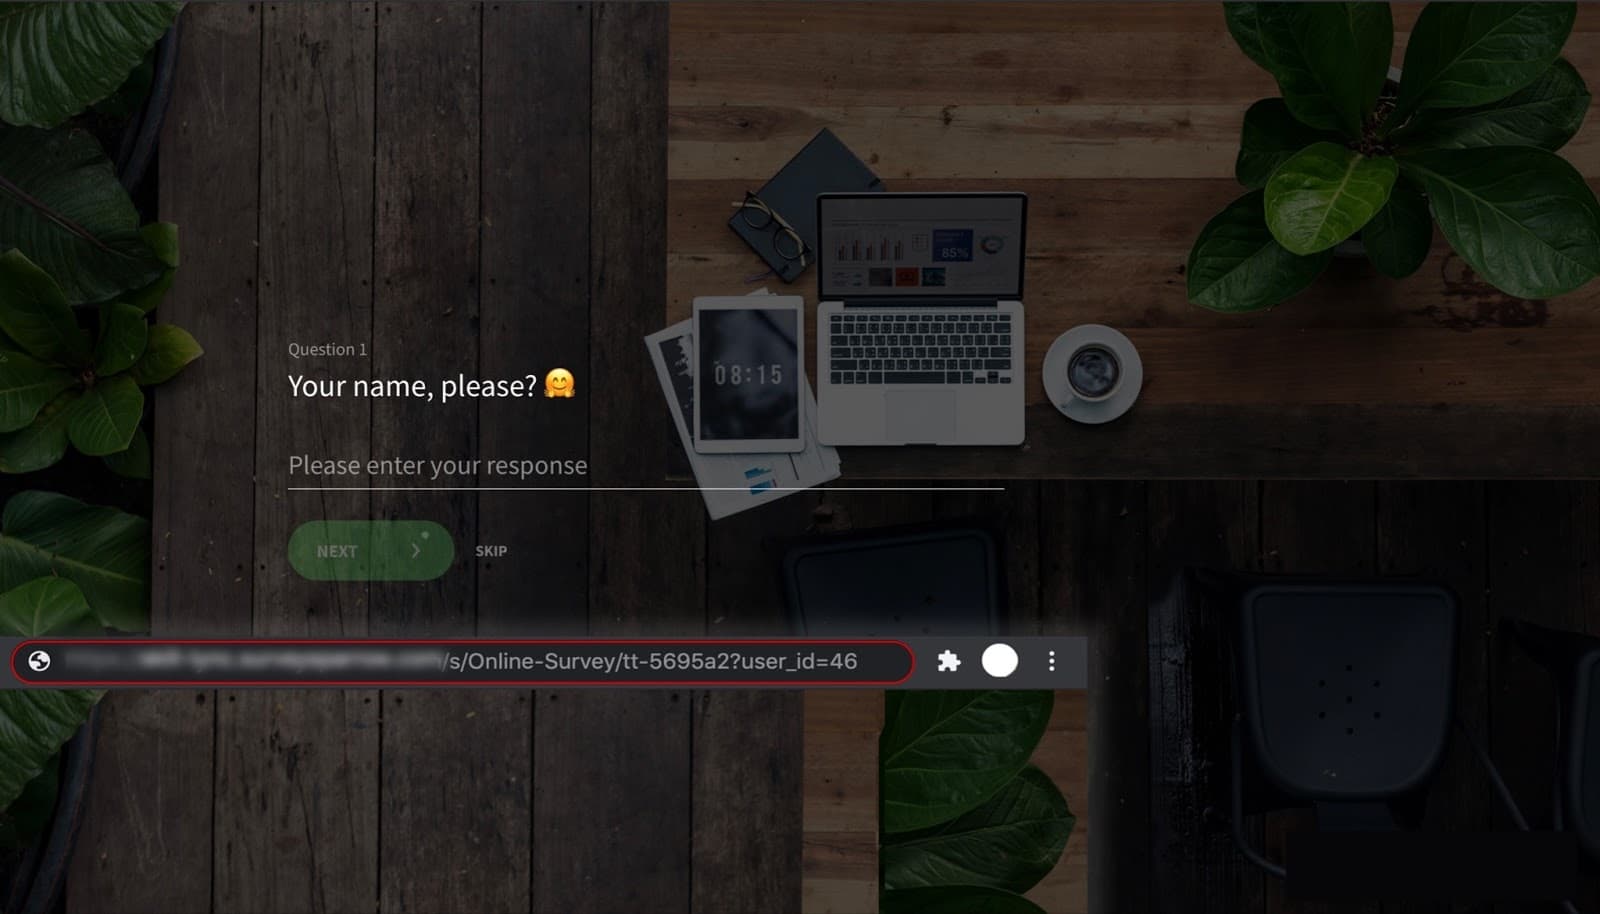
8. Now, when your survey is shared and gets a new response, all the new details will get updated under an existing userid, on your Zendesk Account.
That's it. Now that you've understood how to create or update contacts on Zendesk from survey responses, let's dive into how to create/update new tickets on Zendesk from survey responses.
1. Choose the Zendesk Object as Ticket and Action as Create from the dropdown.
2. Once done, map your survey responses to the corresponding Zendesk fields.
3. Click Save to save all your actions.
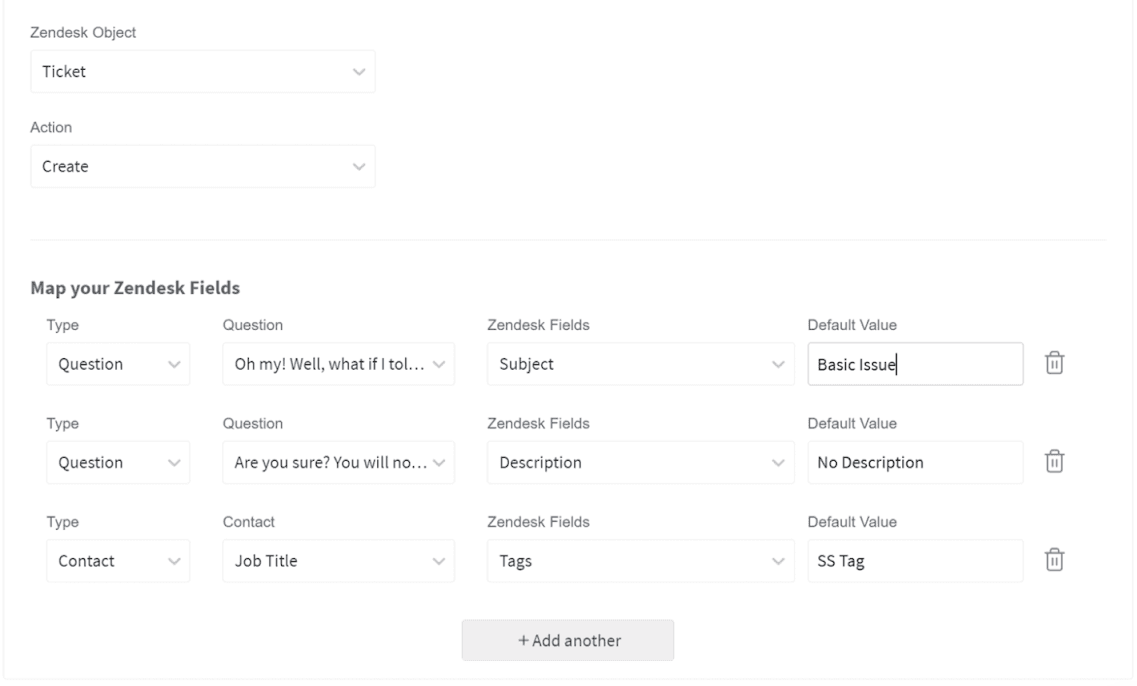
Now whenever your survey gets a new response, a new ticket is created on Zendesk, in real-time.
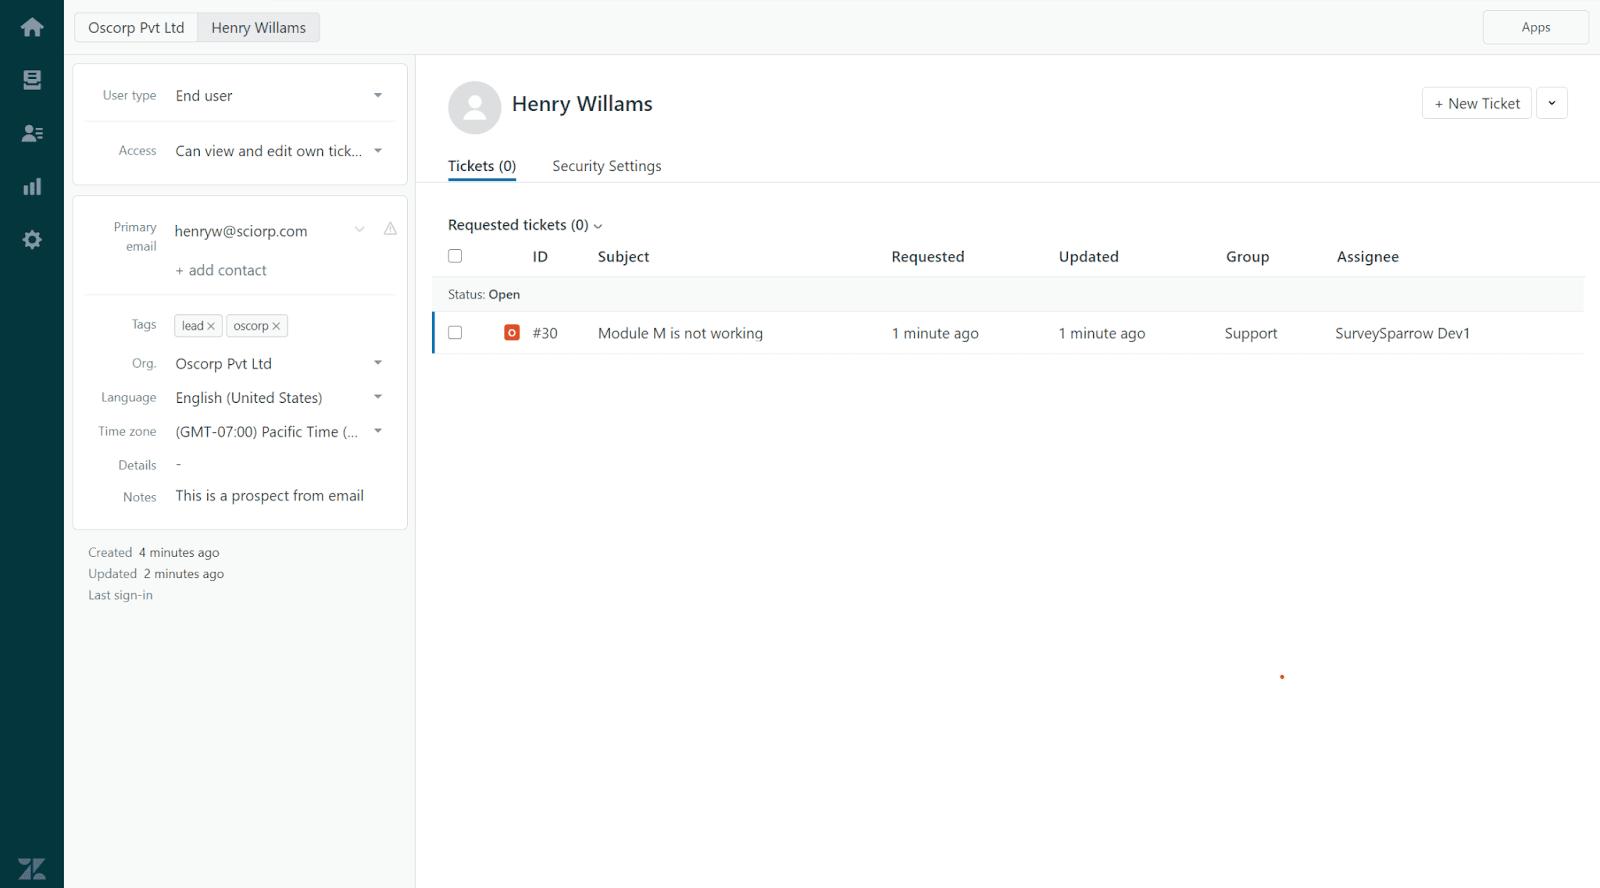
You can find all the new tickets created under All unsolved tickets, on your Zendesk account.
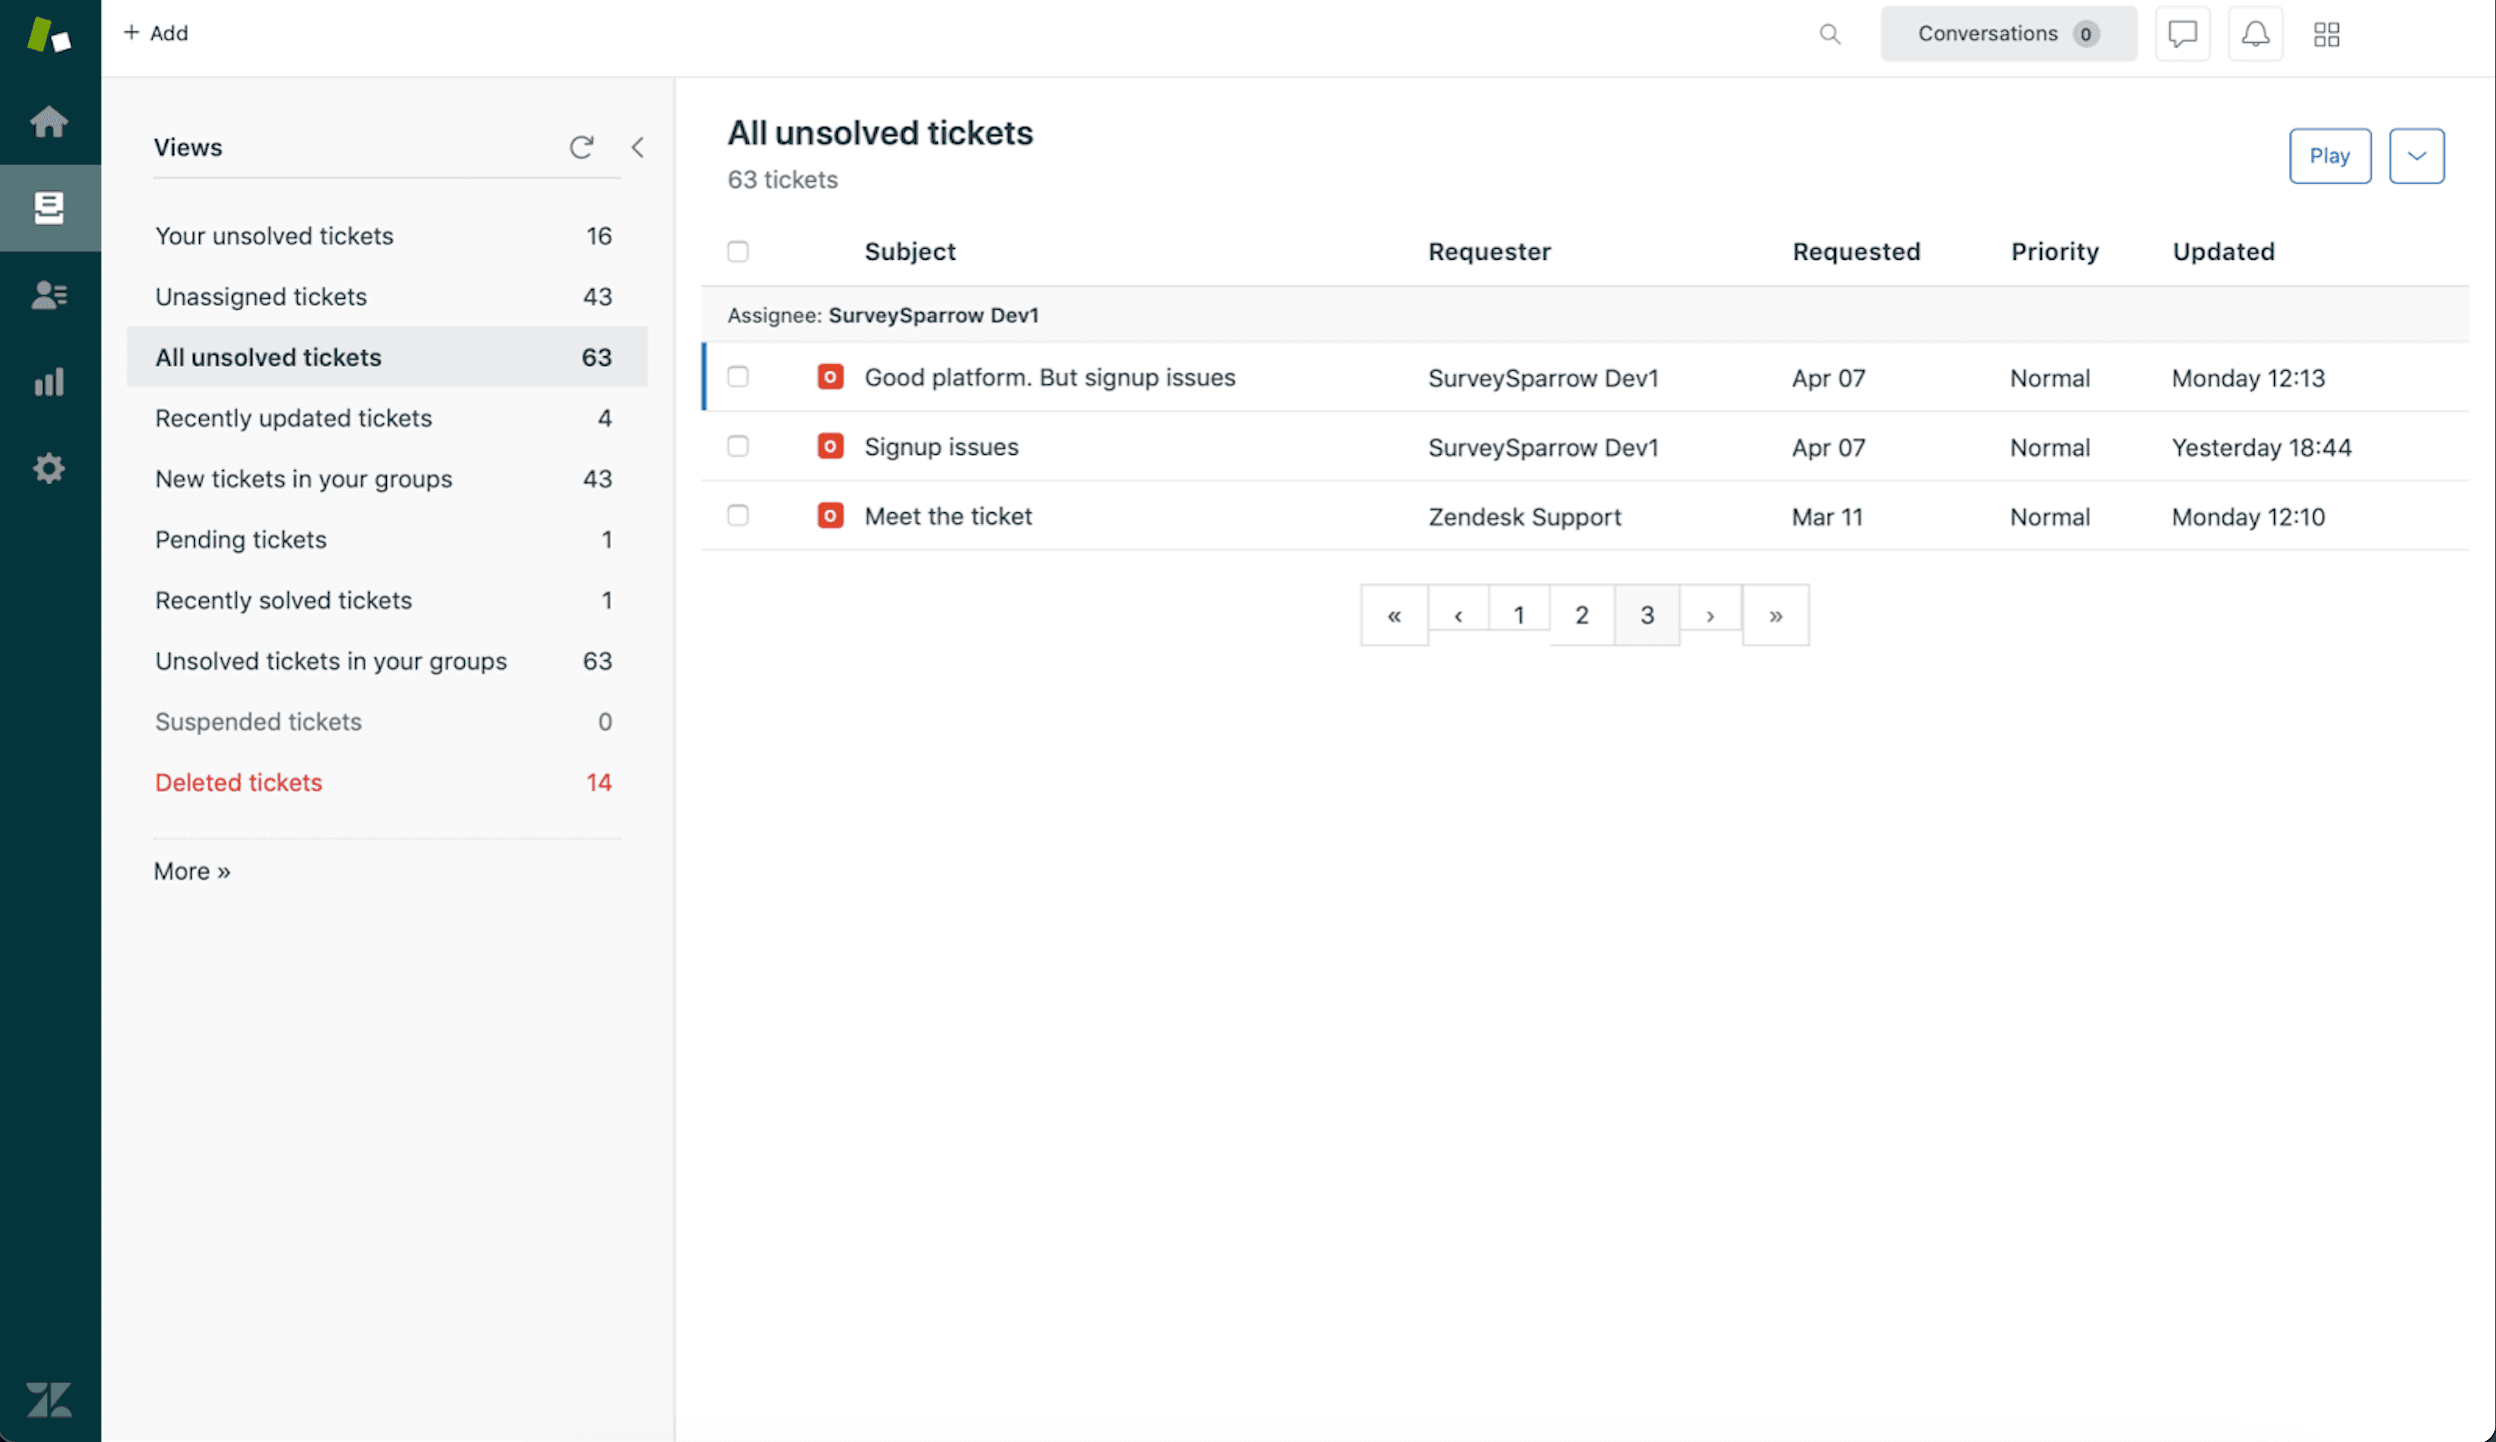
1. Choose Update as Action Type.
2. Then, create a new custom variable by navigating to the global variable section of your Survey Builder.
3. Create a custom variable, say ticketid.
4. Go back to the Zendesk Mapping Page. Choose the unique identifier type as a variable and select the variable (in our case, it’s ticketid) from the dropdown.
5. Map your survey responses to the corresponding Zendesk Fields.
6. Click Save to save all your actions.
7. The variable ticket_id should be passed along with the survey to update ticket entry of Zendesk. E.g. If your existing ticket id is 46, the survey URL which you need to share should be https://<subdomain>.surveysparrow.com.com/s/Prospecting-Leads-Survey/tt-6df3a0?ticketid=46
Click here to understand how to send variables in SurveySparrow or take a look at the below screenshot to understand how the survey is shared along with the user_id in the survey URL.
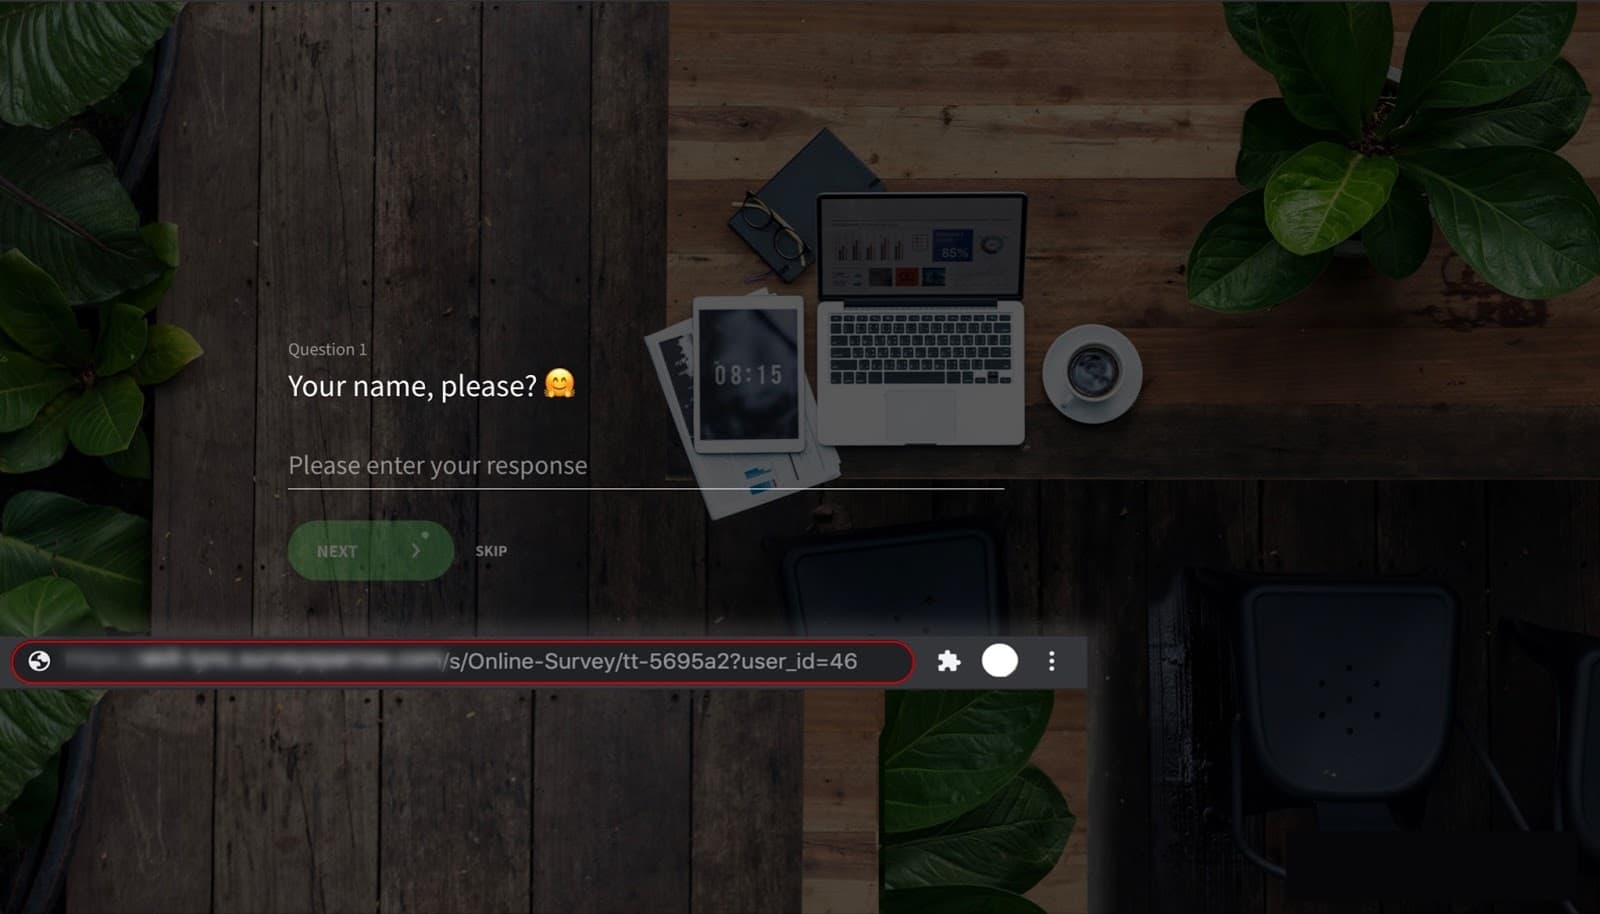
8. Whenever the survey gets responses, the existing ticket will be updated with new details in real-time.
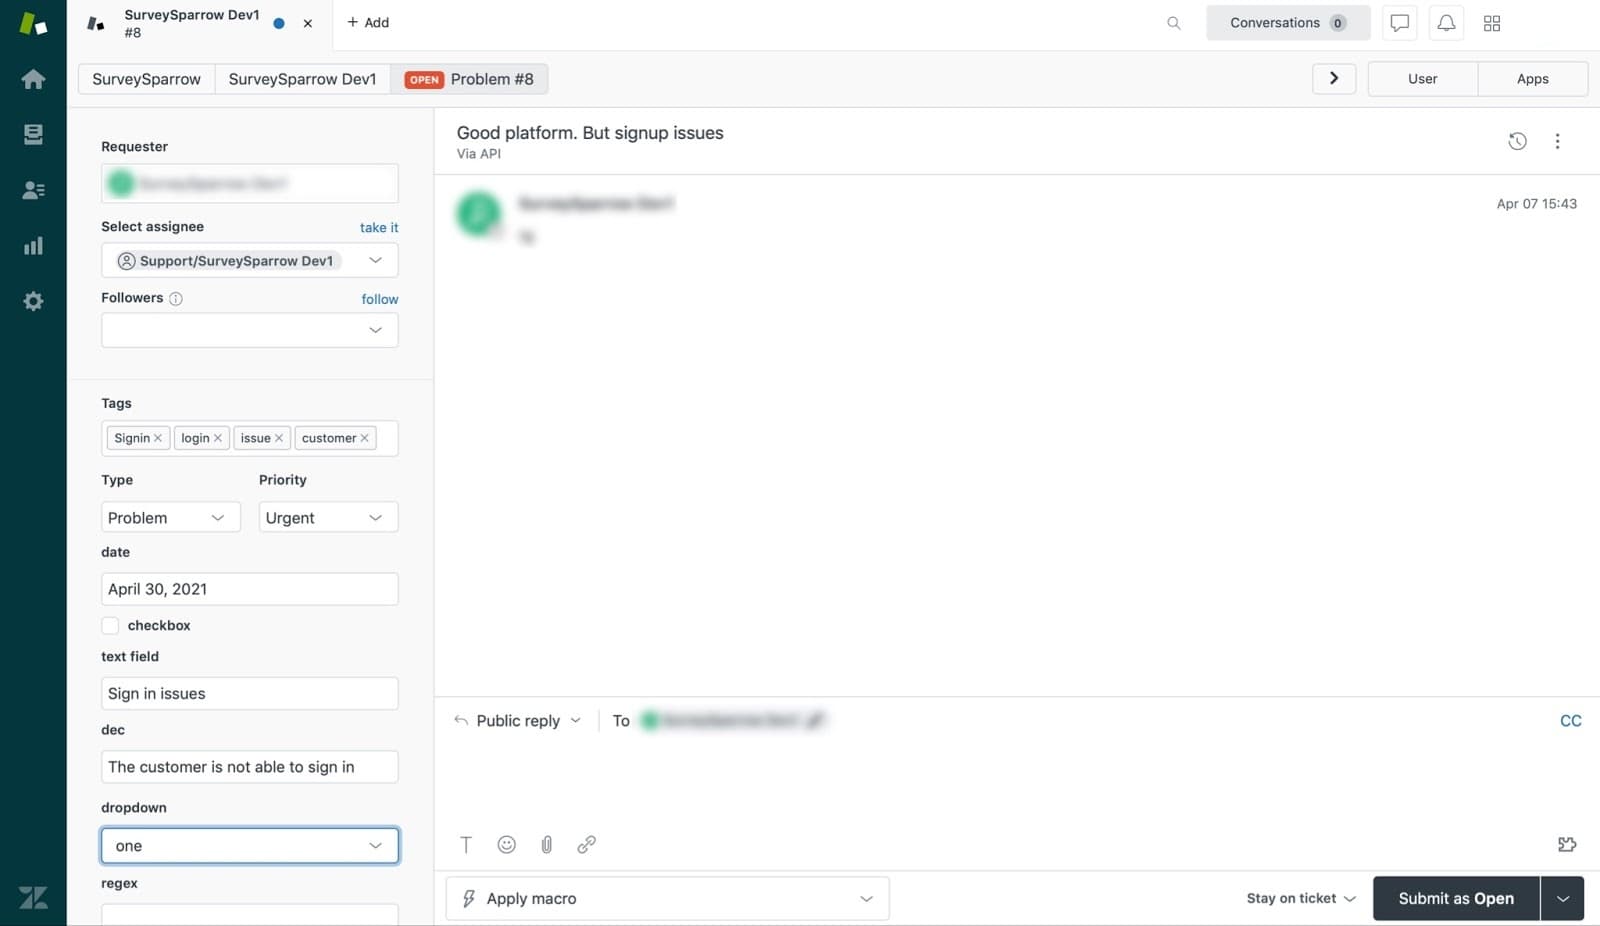
That's all about Zendesk <> SurveySparrow integration. To disable the integration, go to the integrate tab and disable the toggle.
Please reach out to us if you have any questions. We are just a chat away!
Powered By SparrowDesk