
Integrating SurveySparrow with Microsoft Teams
The Microsoft Teams integration with SurveySparrow lets you create and share surveys and polls, track responses and view reports in real-time, without moving an inch from your Teams account. The integration also enables you to collaborate with your team for better productivity.
With the Microsoft Teams integration, you can:
- Conduct daily standups/weekly reflections with your team to track tasks and achievements.
- Check in with all your employees/reportees every 30 or 60 days to measure employee sentiment.
Let’s walk through the process of:
- Installing the SurveySparrow app inside Microsoft Teams
- Connecting your SurveySparrow account to the app
- Sharing surveys inside Microsoft Teams
- Sharing polls inside Microsoft Teams
- Viewing survey/poll responses inside Microsoft Teams
Note: This integration is not available for personal accounts (Free plan).
Installing the SurveySparrow app inside Microsoft Teams
1. Inside your Microsoft Teams workspace, click Apps from the left panel.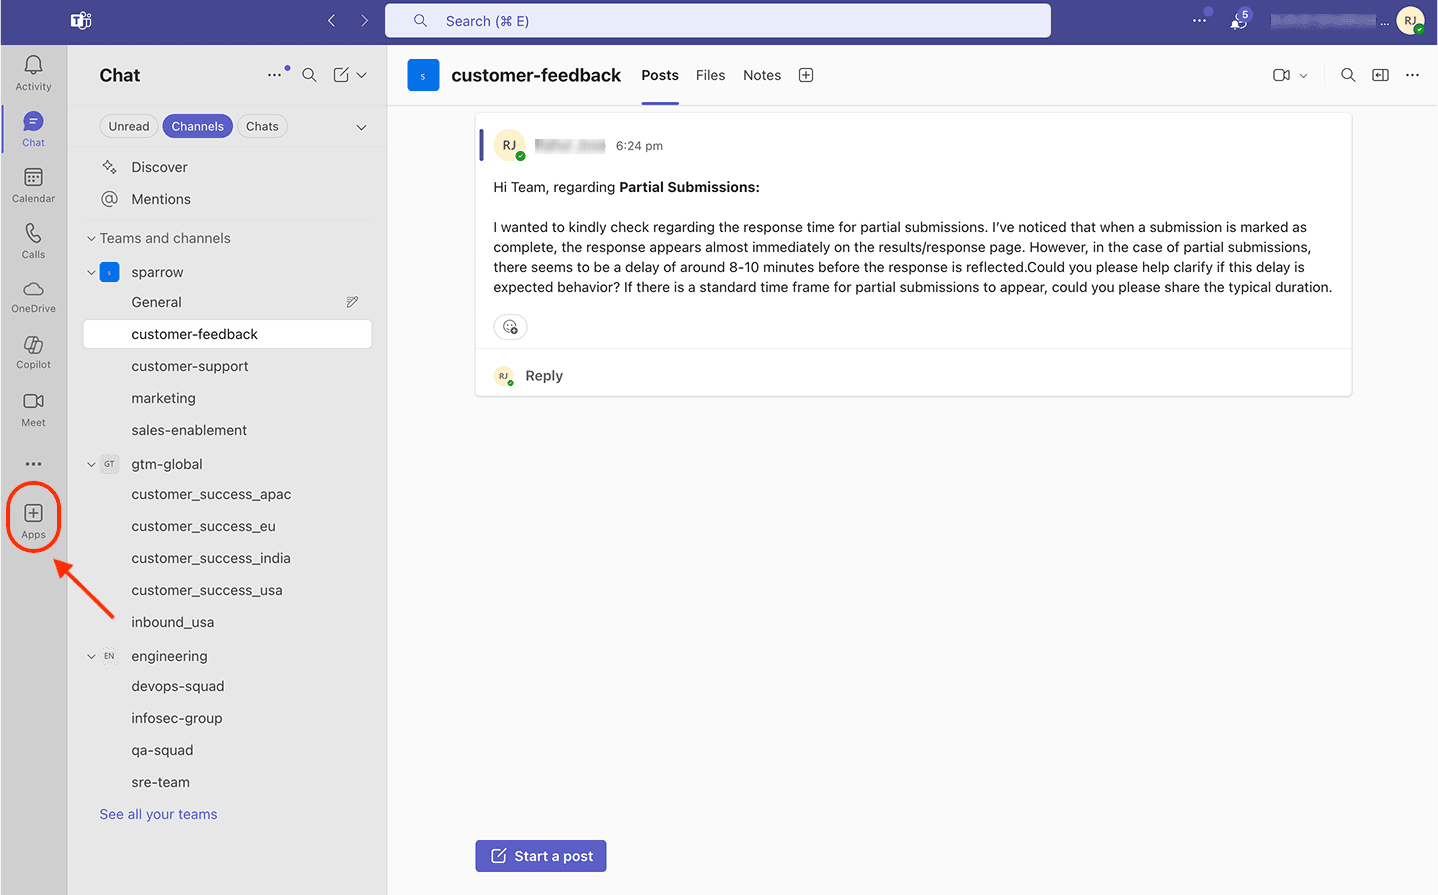
2. When the Apps section opens, use the search box to find SurveySparrow.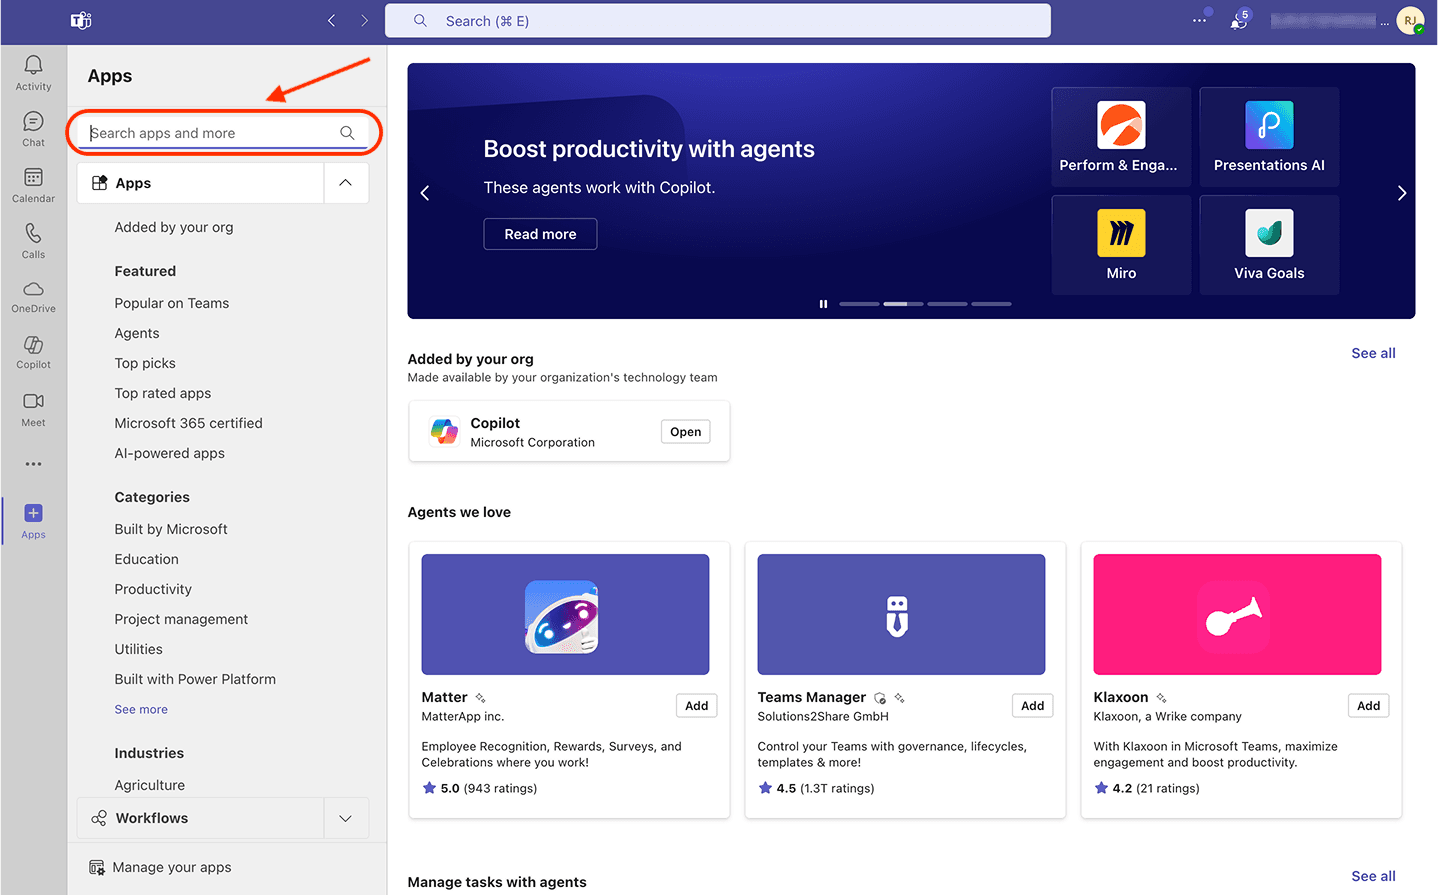
3. When the app shows up, click on it.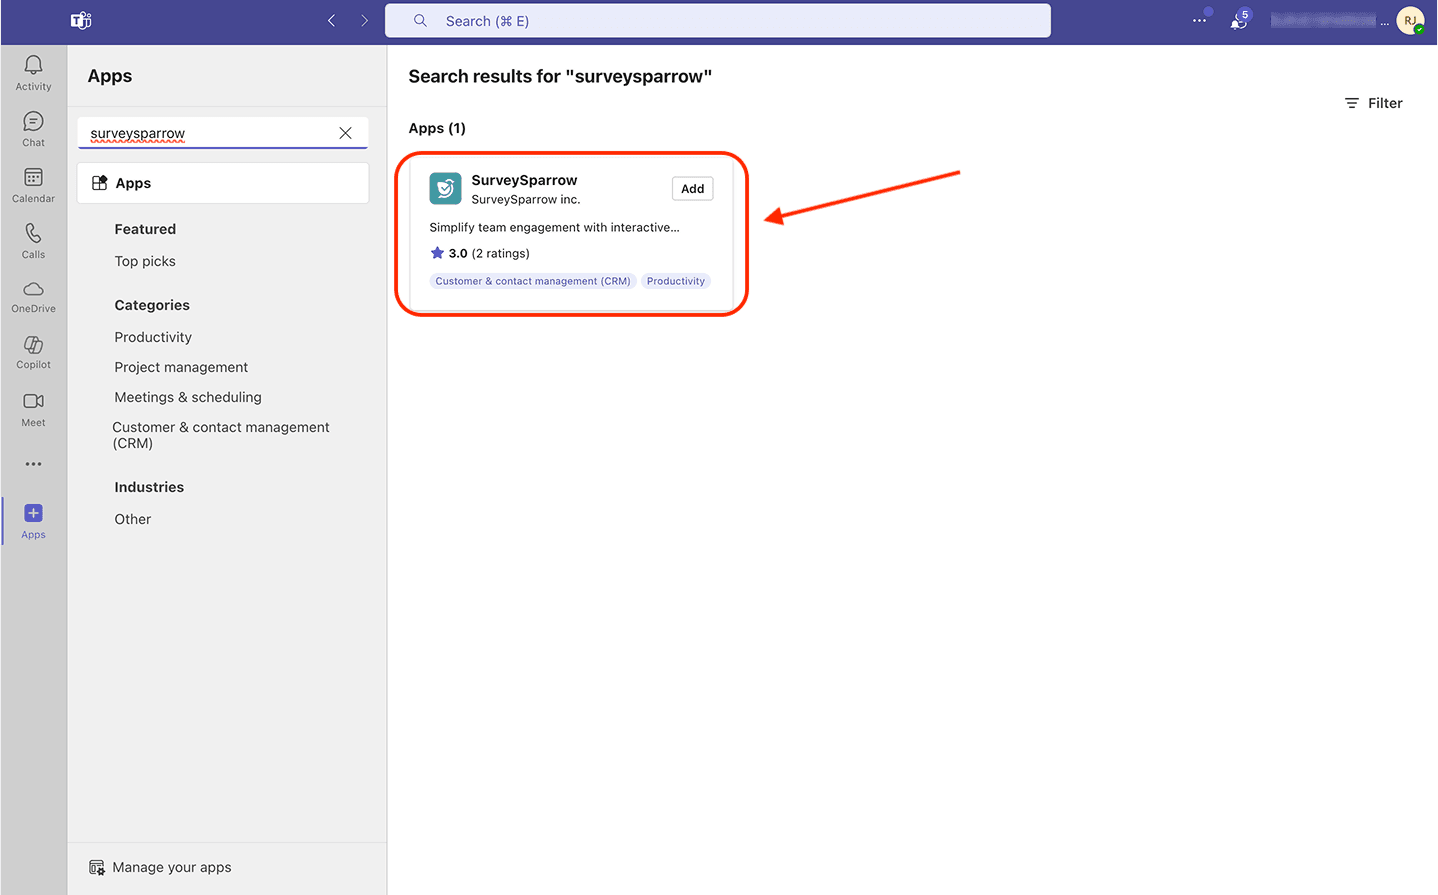
4. A window pops up. Click Add.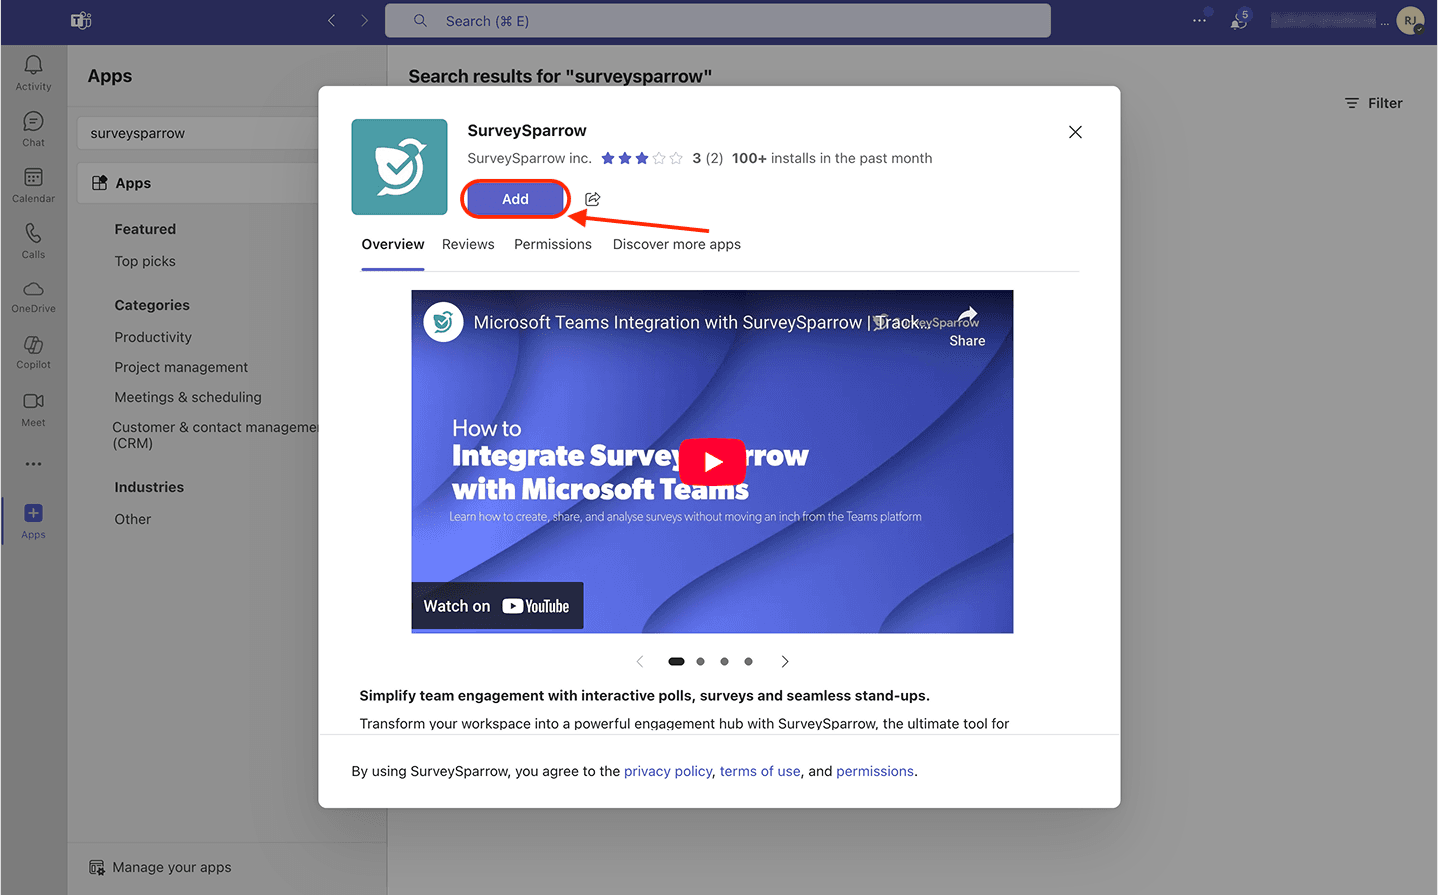
5. After installation, a success message appears.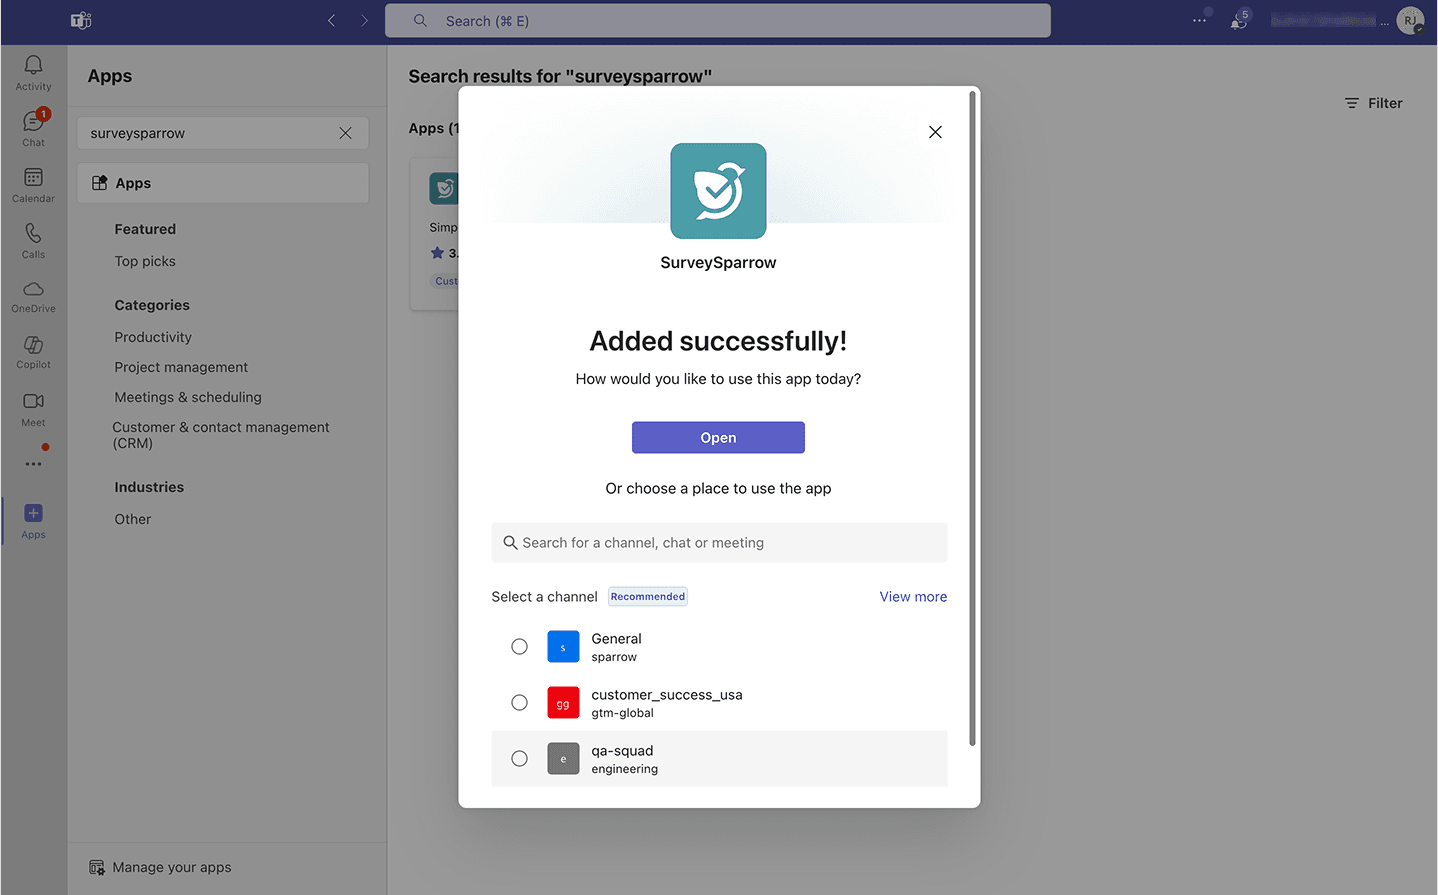
Note: You can add the SurveySparrow app only to a team’s channels and groups, not chats with individual users.
Connecting your SurveySparrow account to the app
6. After the app is added, you need to connect your account. To do this, you can open the app directly, or add it to a channel. Let’s start with the first process. Click Open.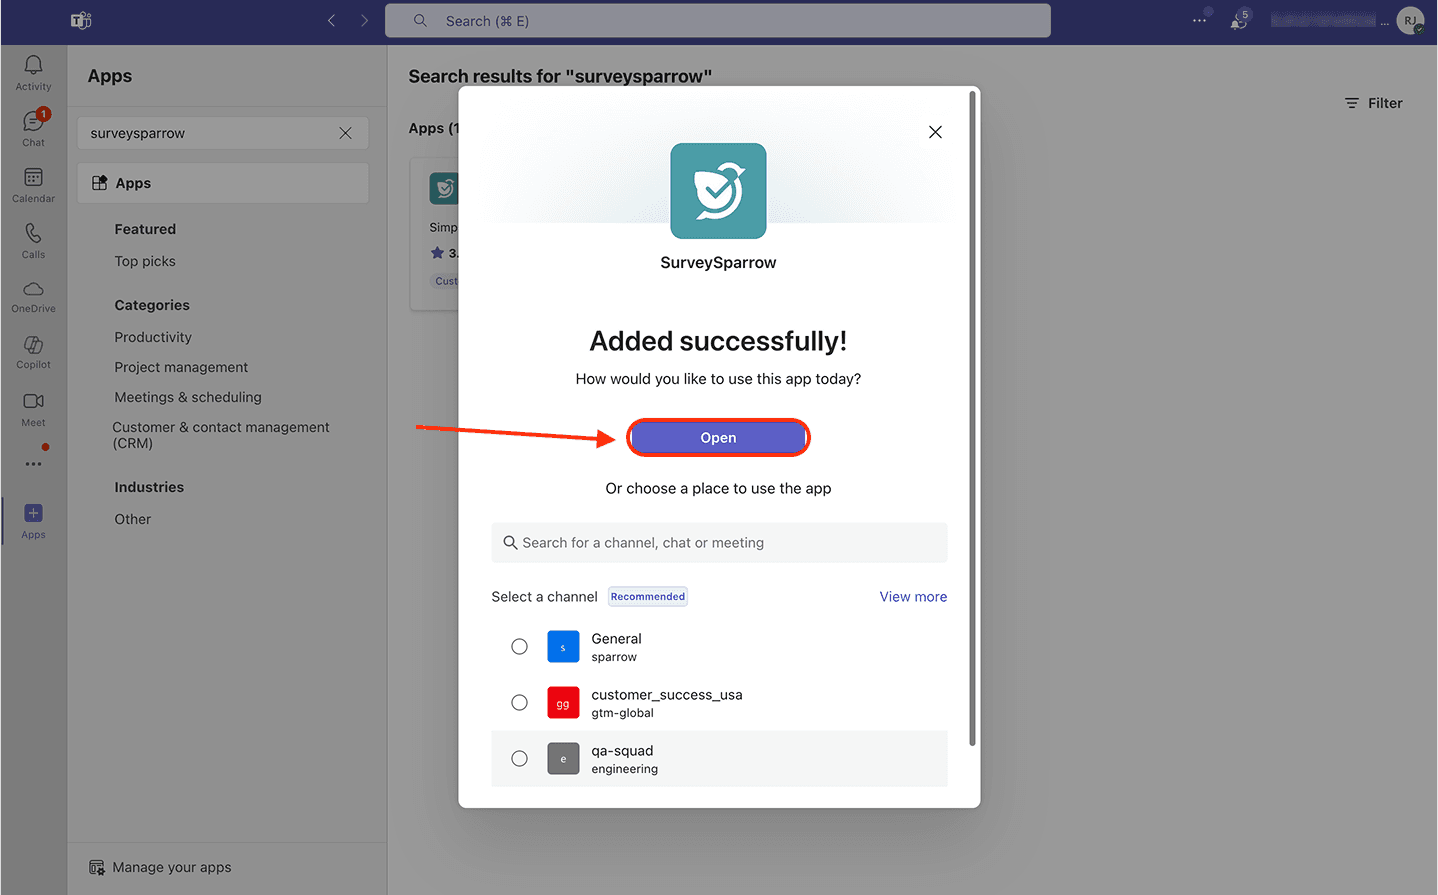
7. You are then taken to the SurveySparrow app. Under the Dashboard section,a login screen appears. Use your Microsoft account or account credentials to complete the login process.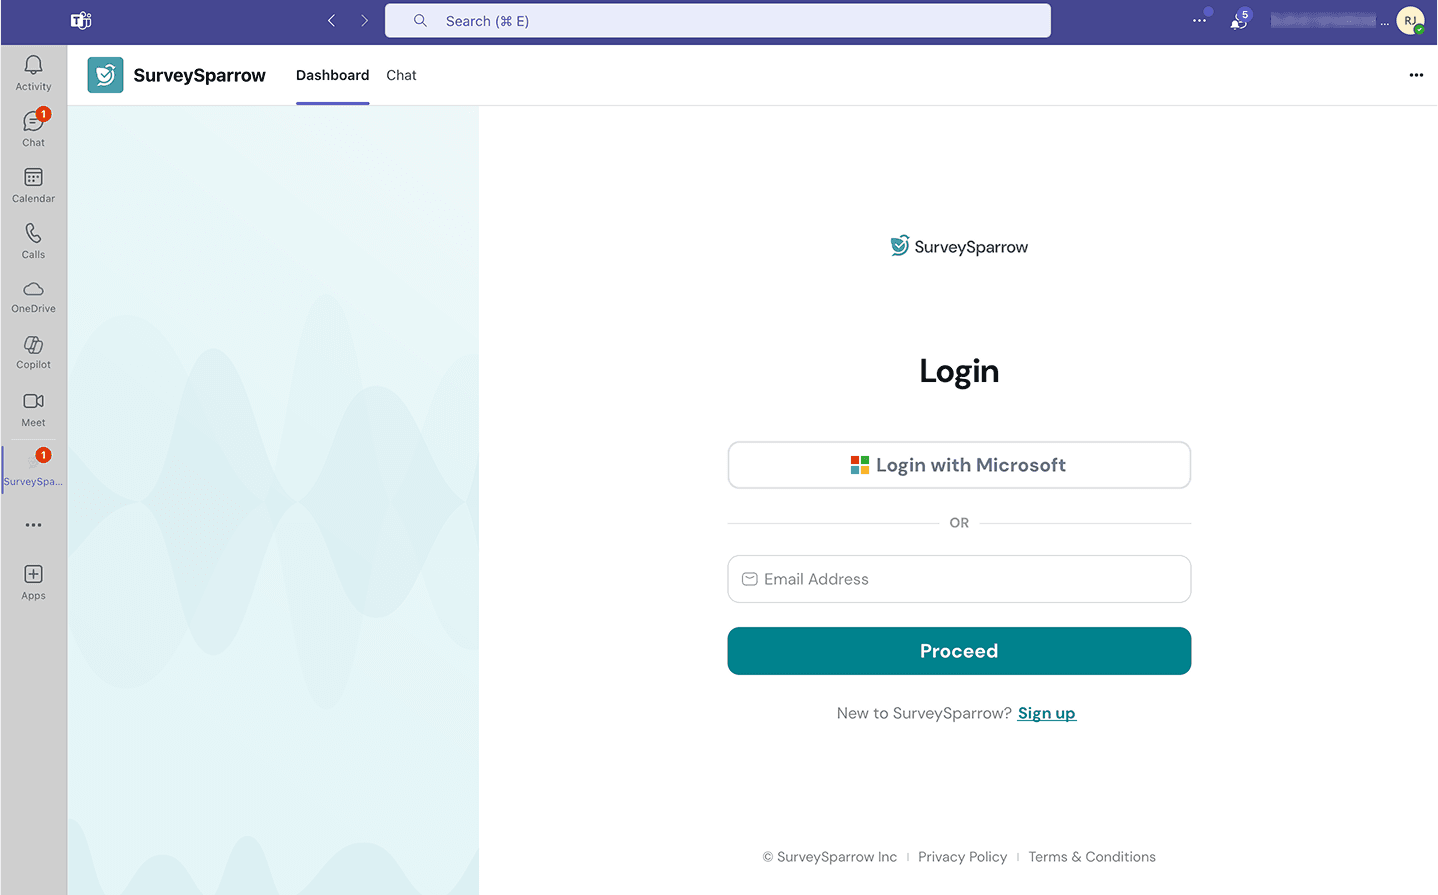
8. After logging in, the SurveySparrow account dashboard opens. You can create polls and surveys inside this interface.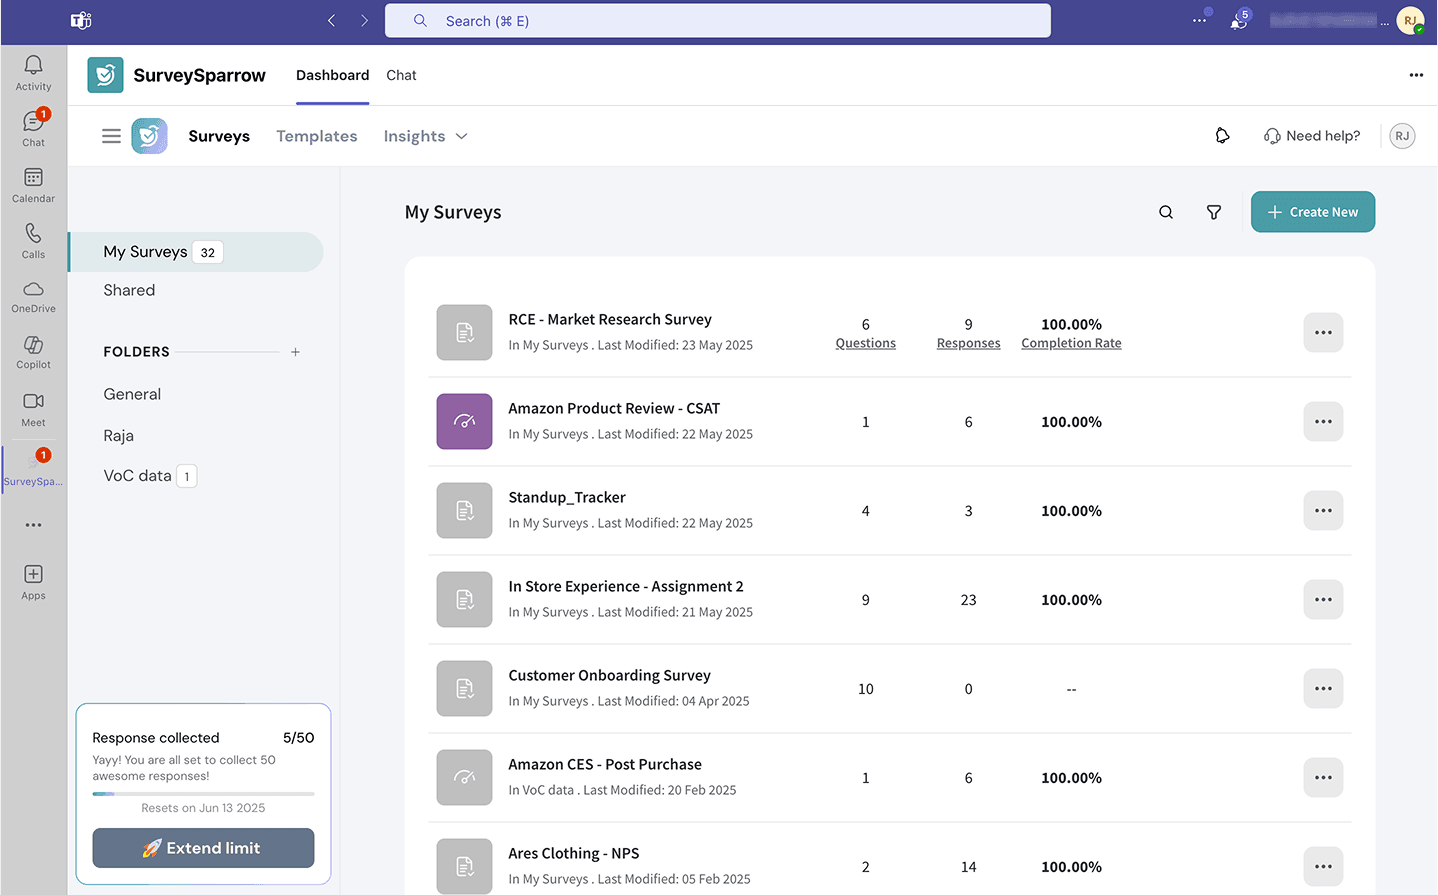
9. However, if you want to instantly use SurveySparrow within a channel, choose from the list (or use the search box) in the post-installation window, then click Go.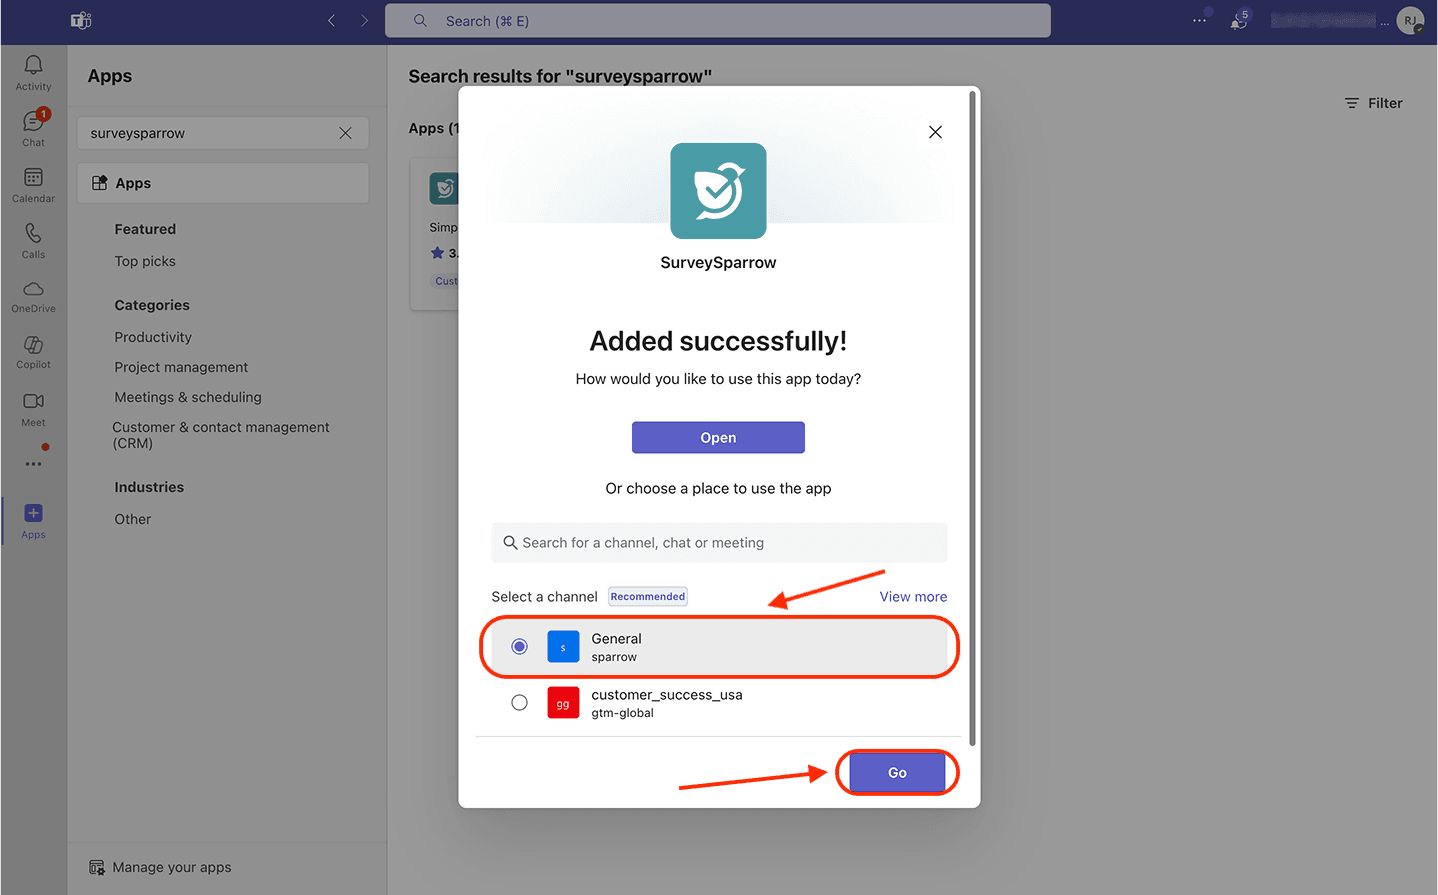
10. You are then taken to the channel/meeting, where you’ll see a message from SurveySparrow. Click see more to expand the message.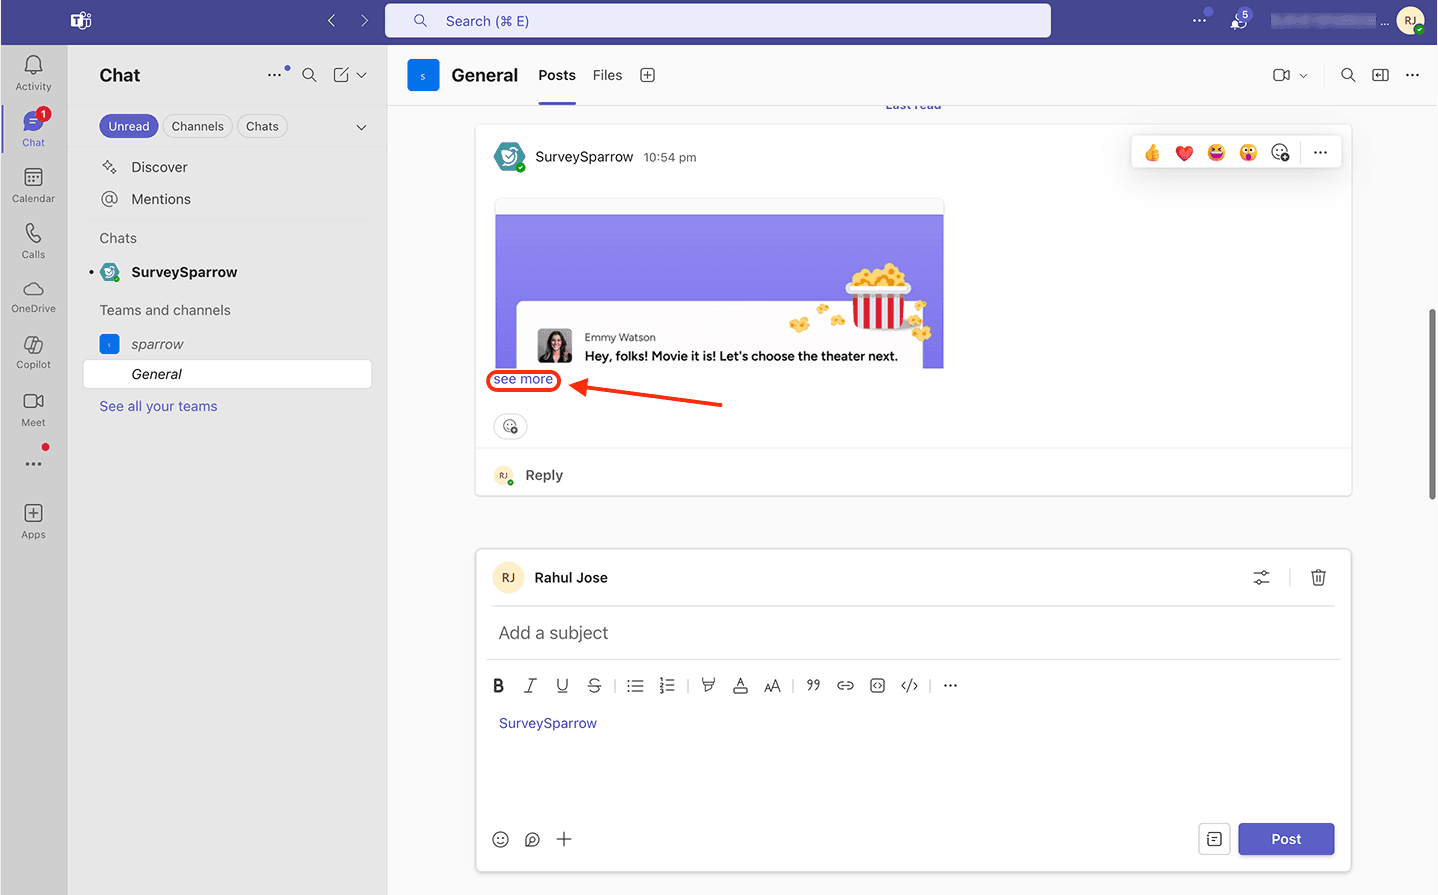
11. Click Connect.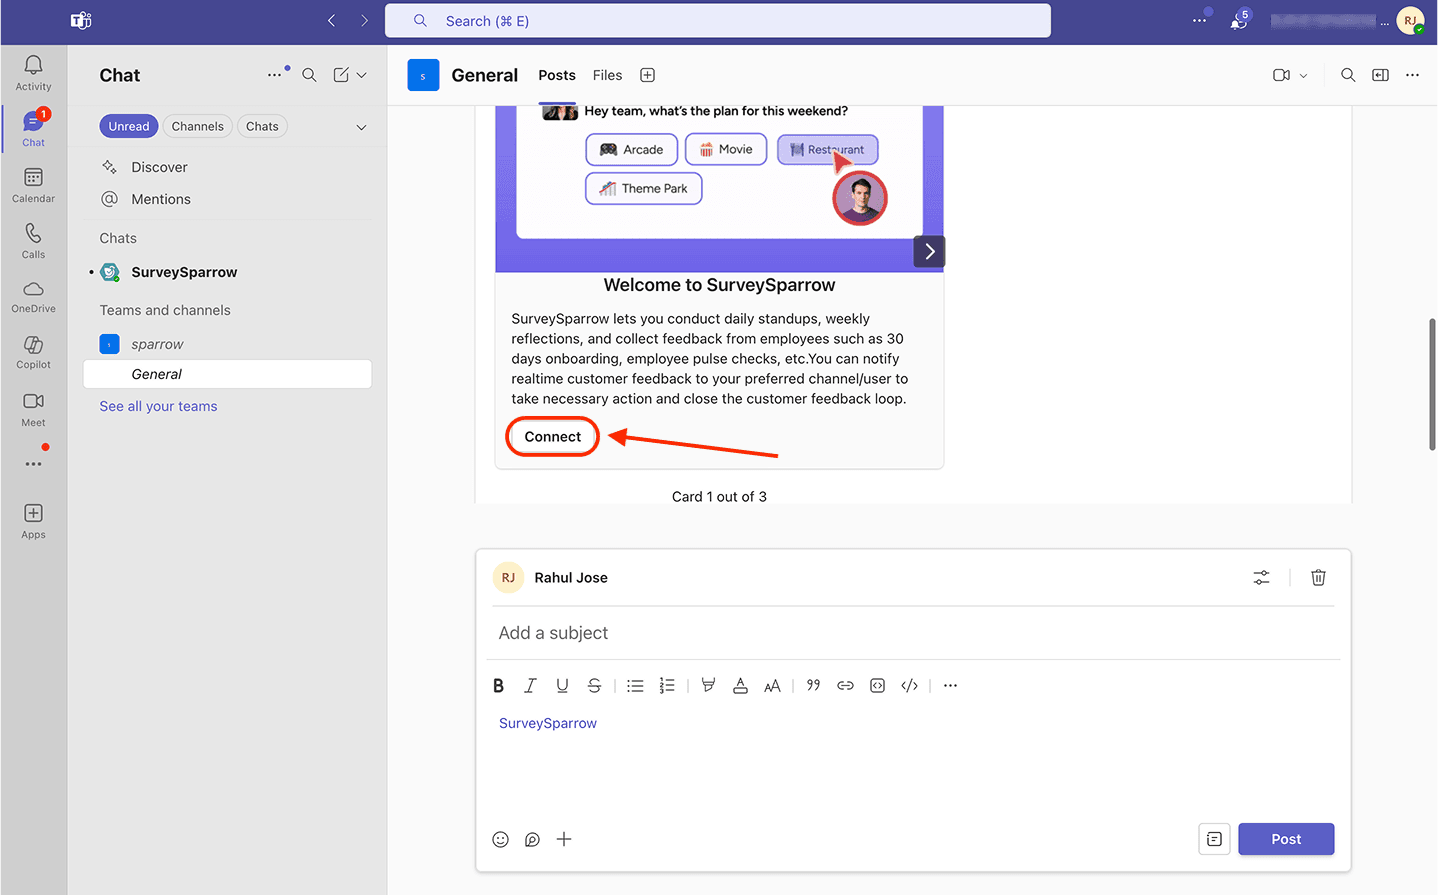
12. A sign-up window pops up. If you already have an account, click Login, then proceed with the same process as described above.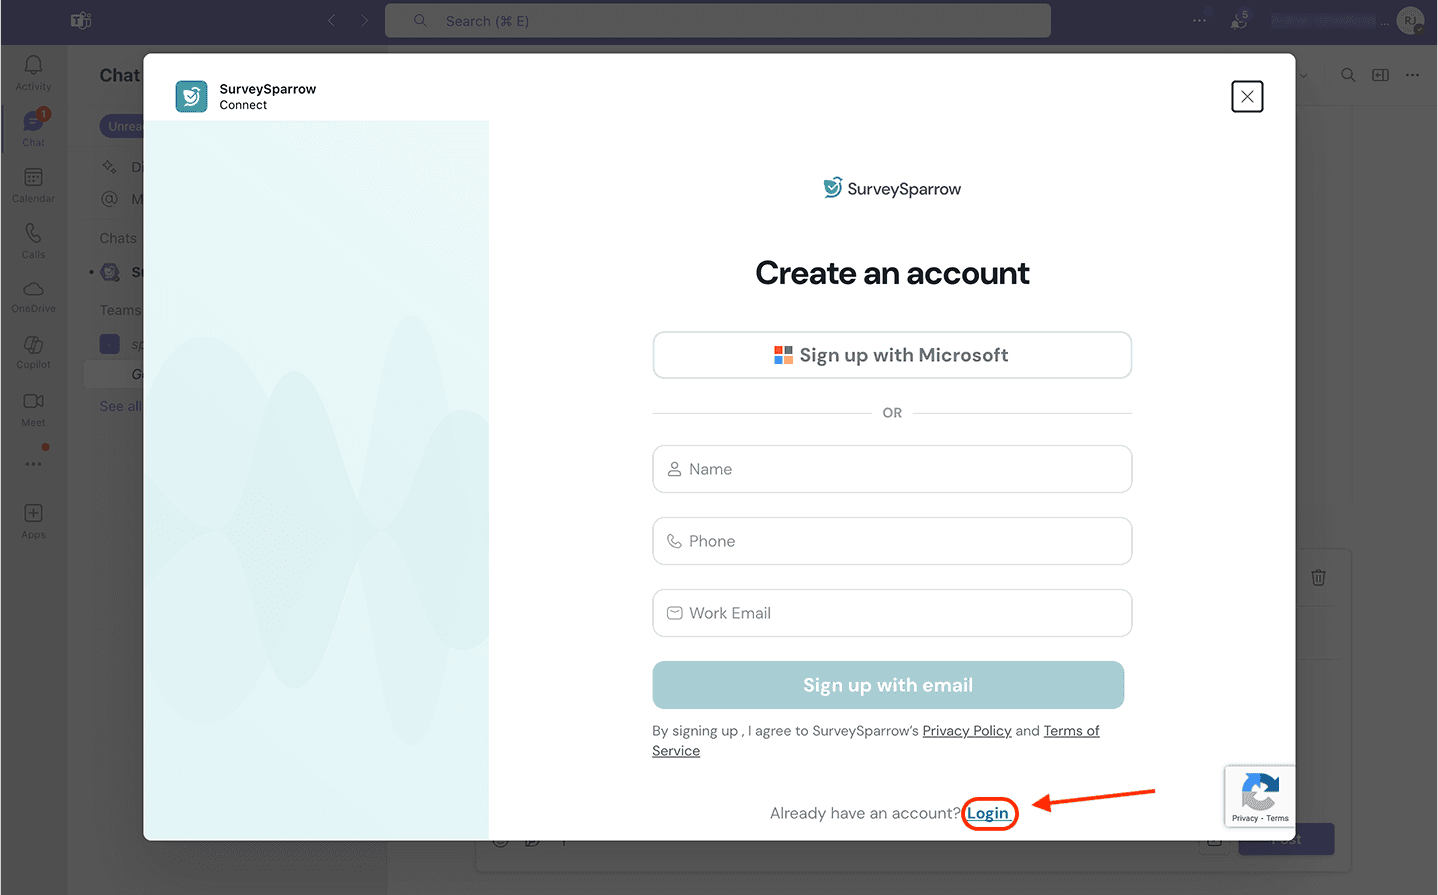
13. The login window turns into the account dashboard where you can create polls and surveys.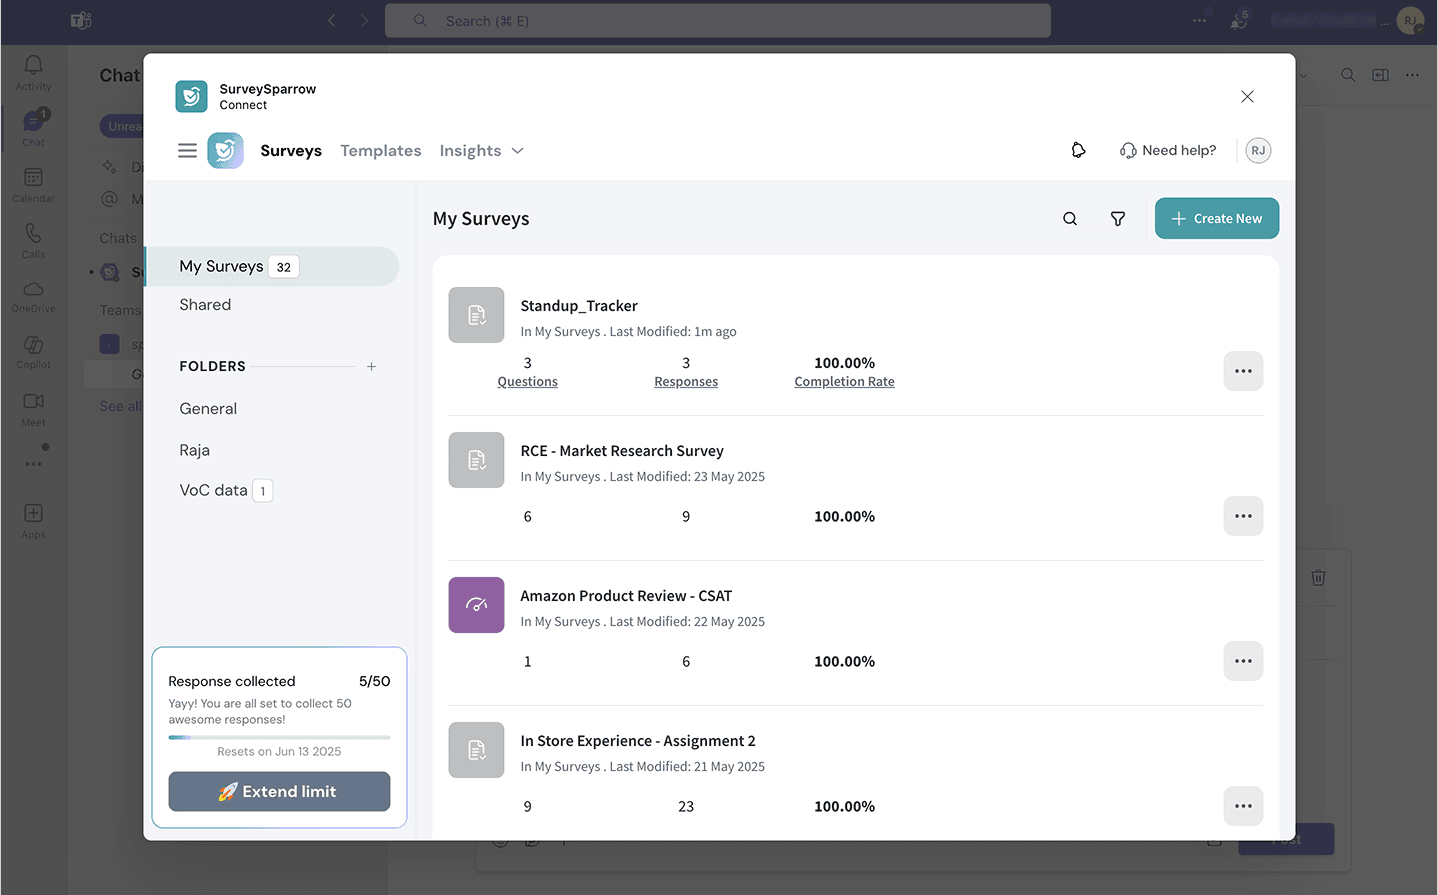
Note: When you add the SurveySparrow app to a channel inside a team, all the other channels of the team will also get instant access.
14. If you want to add the SurveySparrow app to another team, start a post in a channel inside the team. Then click on the plus icon in the text box.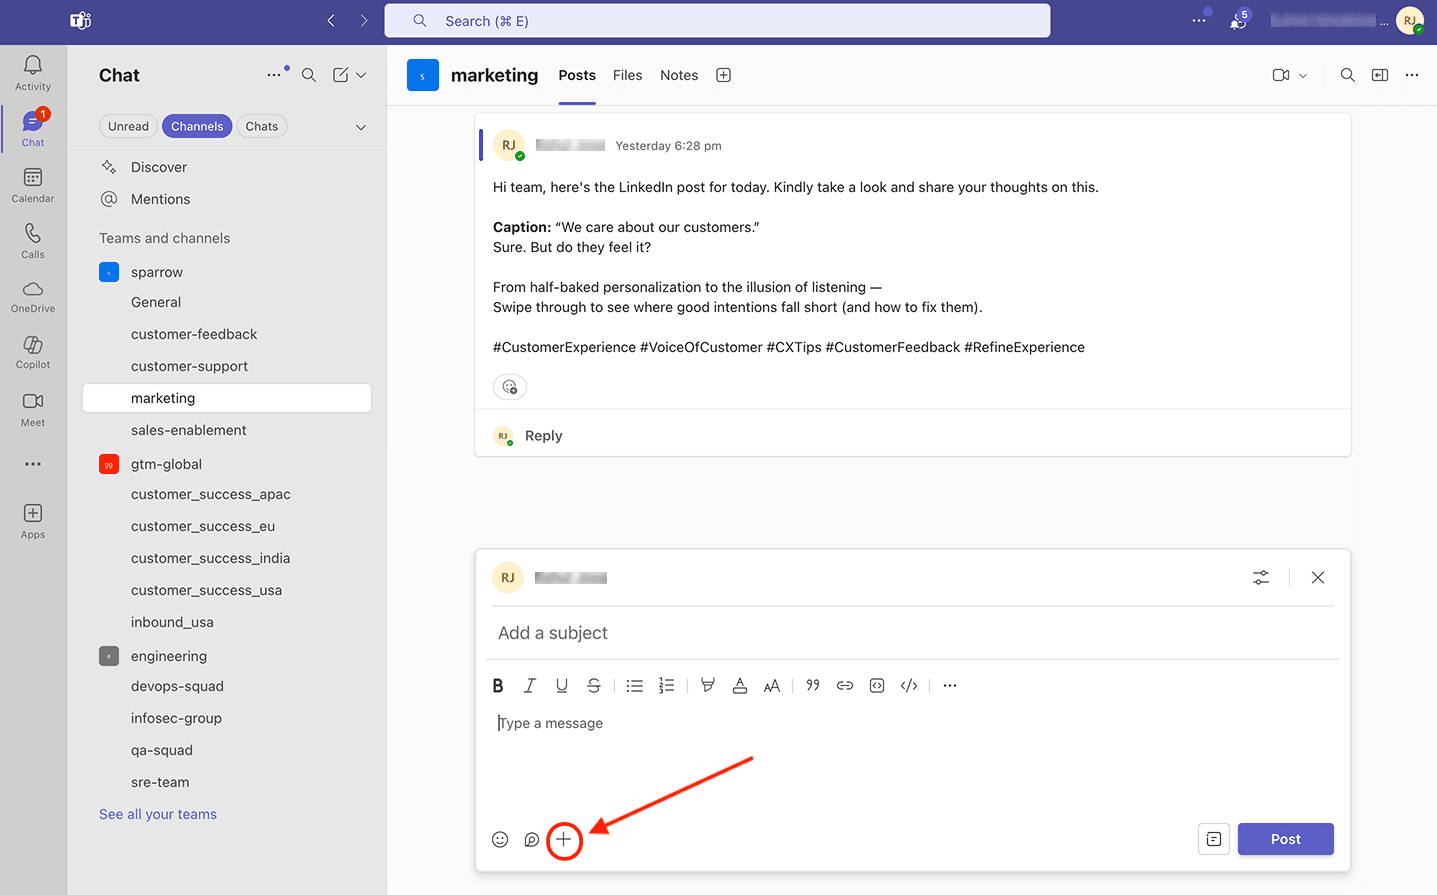
15. Then search for SurveySparrow in the pop-up menu. Click on it when it appears.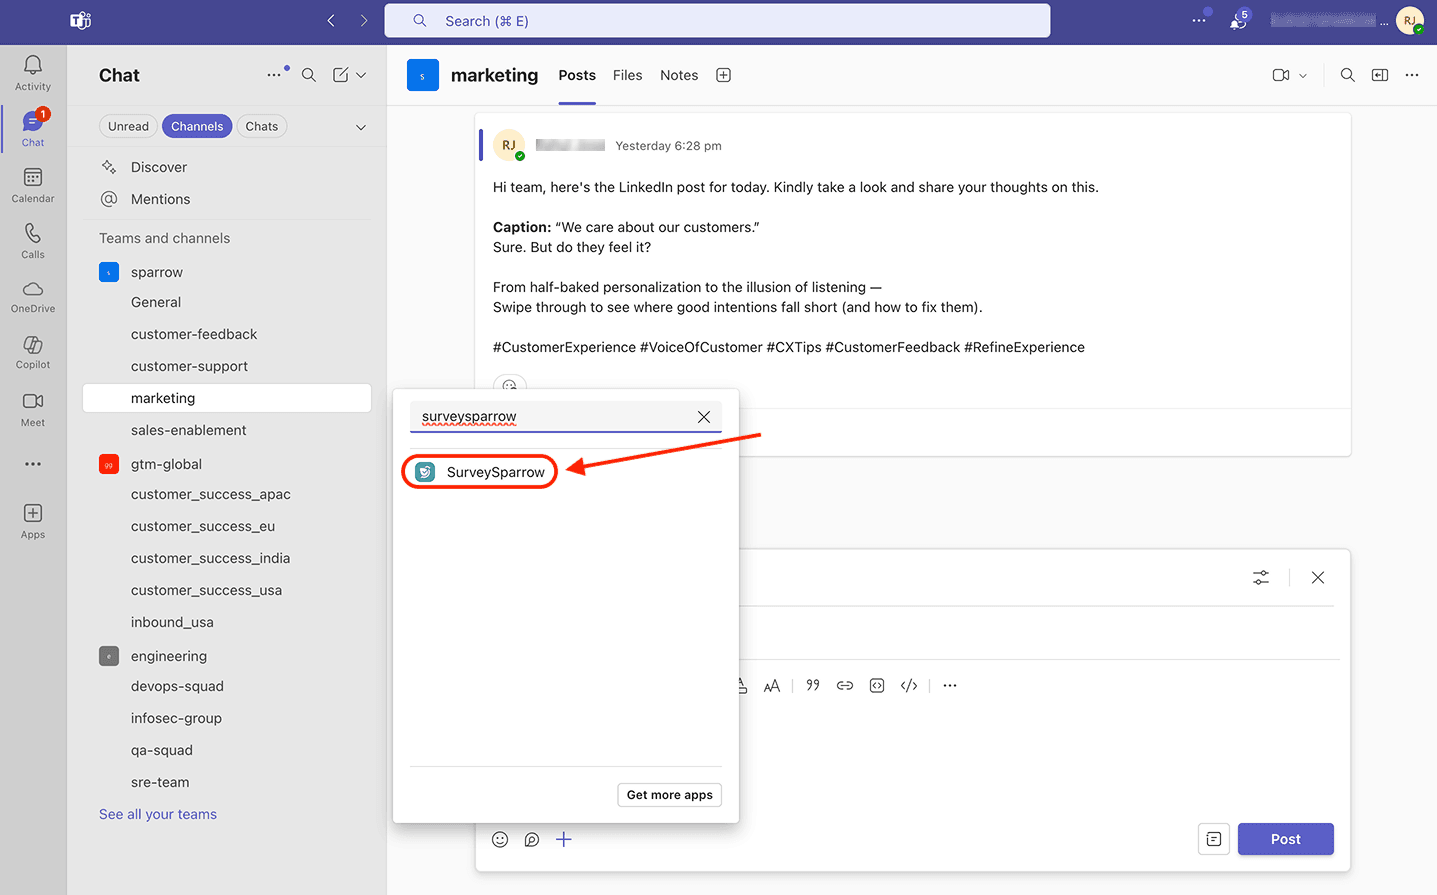
16. Another window appears. Click Add.
17. You will be asked to add another device. Click Remove for the oldest logged-in device and proceed.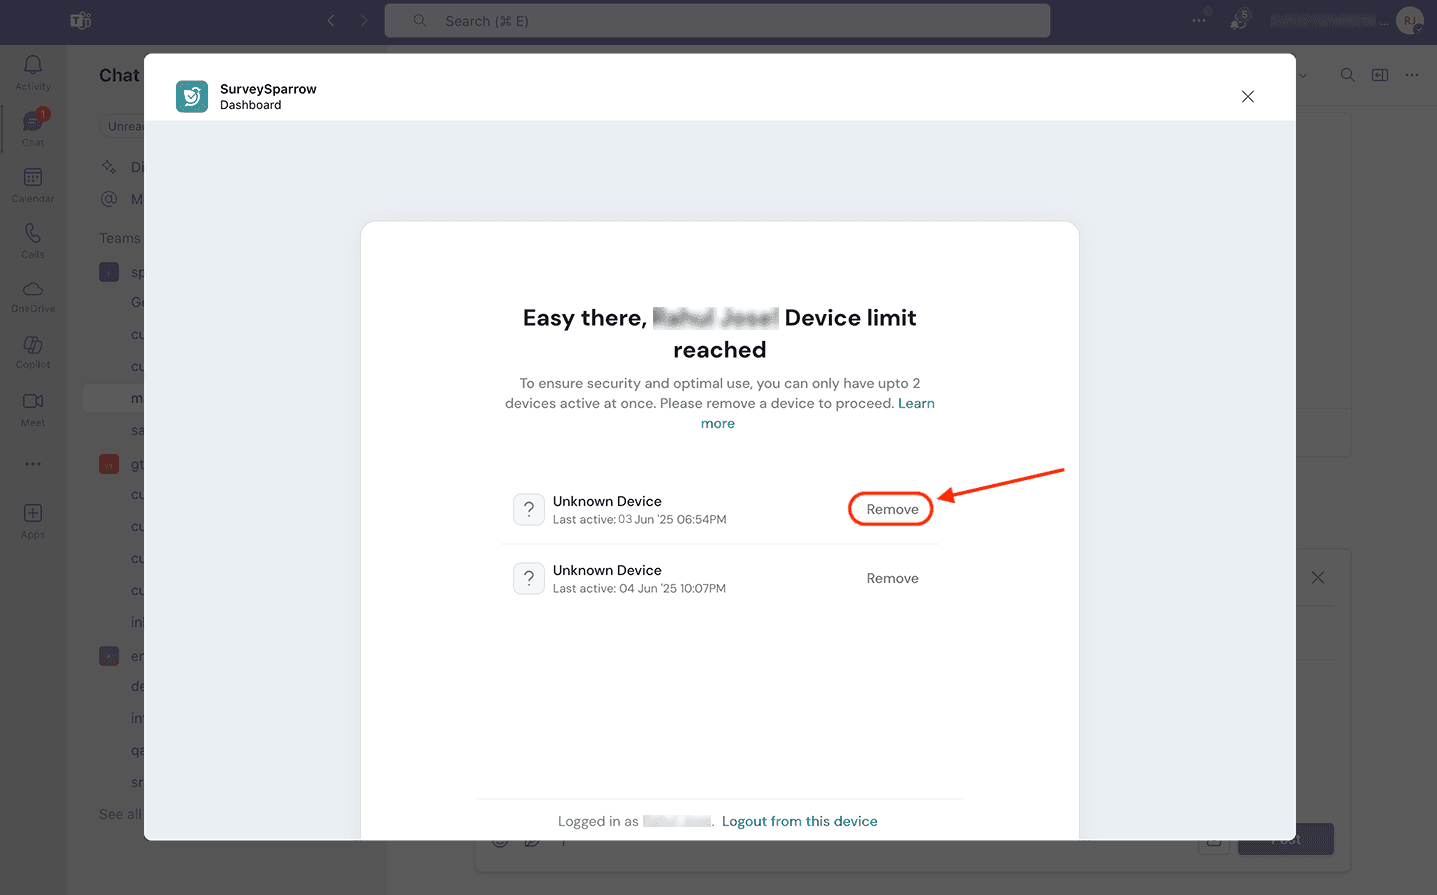
Note: This will not affect the SurveySparrow app added to other teams prior.
Sharing surveys inside Microsoft Teams
To share a survey to a channel, start a post in the channel and open the SurveySparrow app as described.
18. The product dashboard window pops up. If you’d like to start from scratch, click Create New, then click Survey.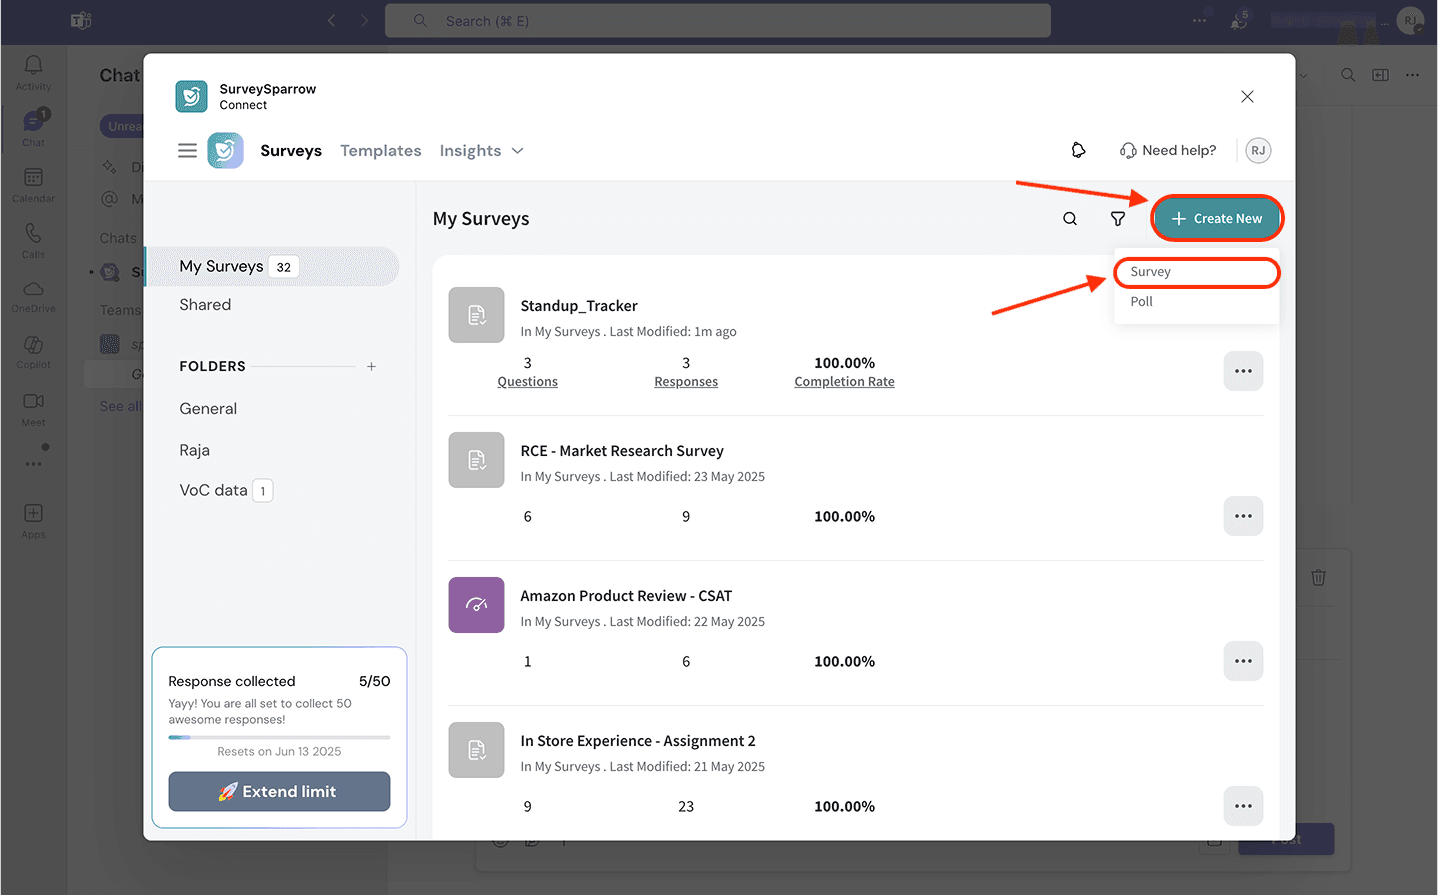
19. The survey builder opens up. After you create the survey (questions and design), go to the share section.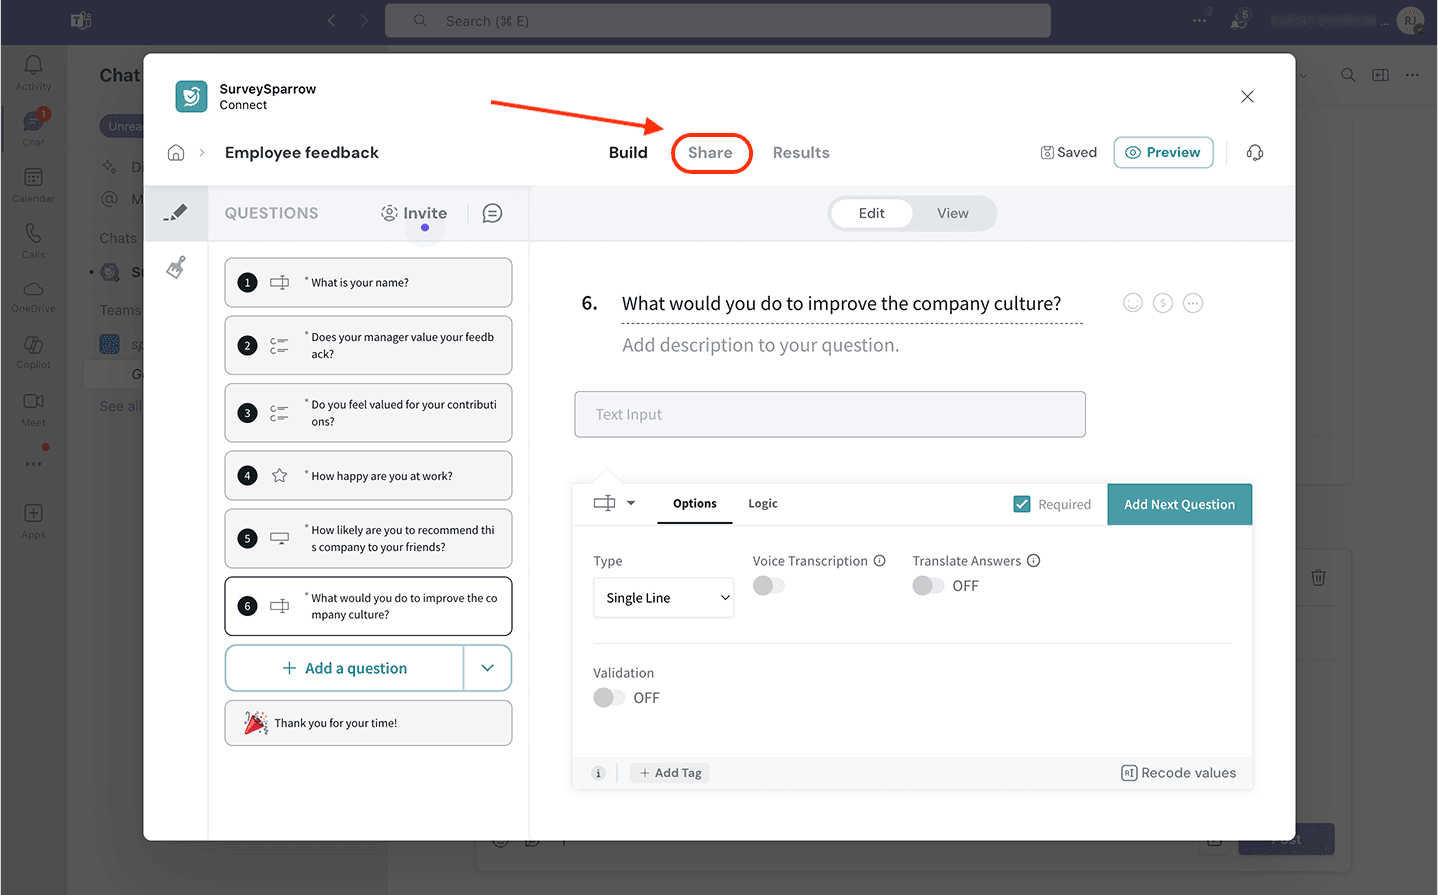
20. Inside the Share section, you can customize the name of the survey share and the content of your survey notification message. You can also preview the survey. After that, click Next > Share to proceed to the scheduling.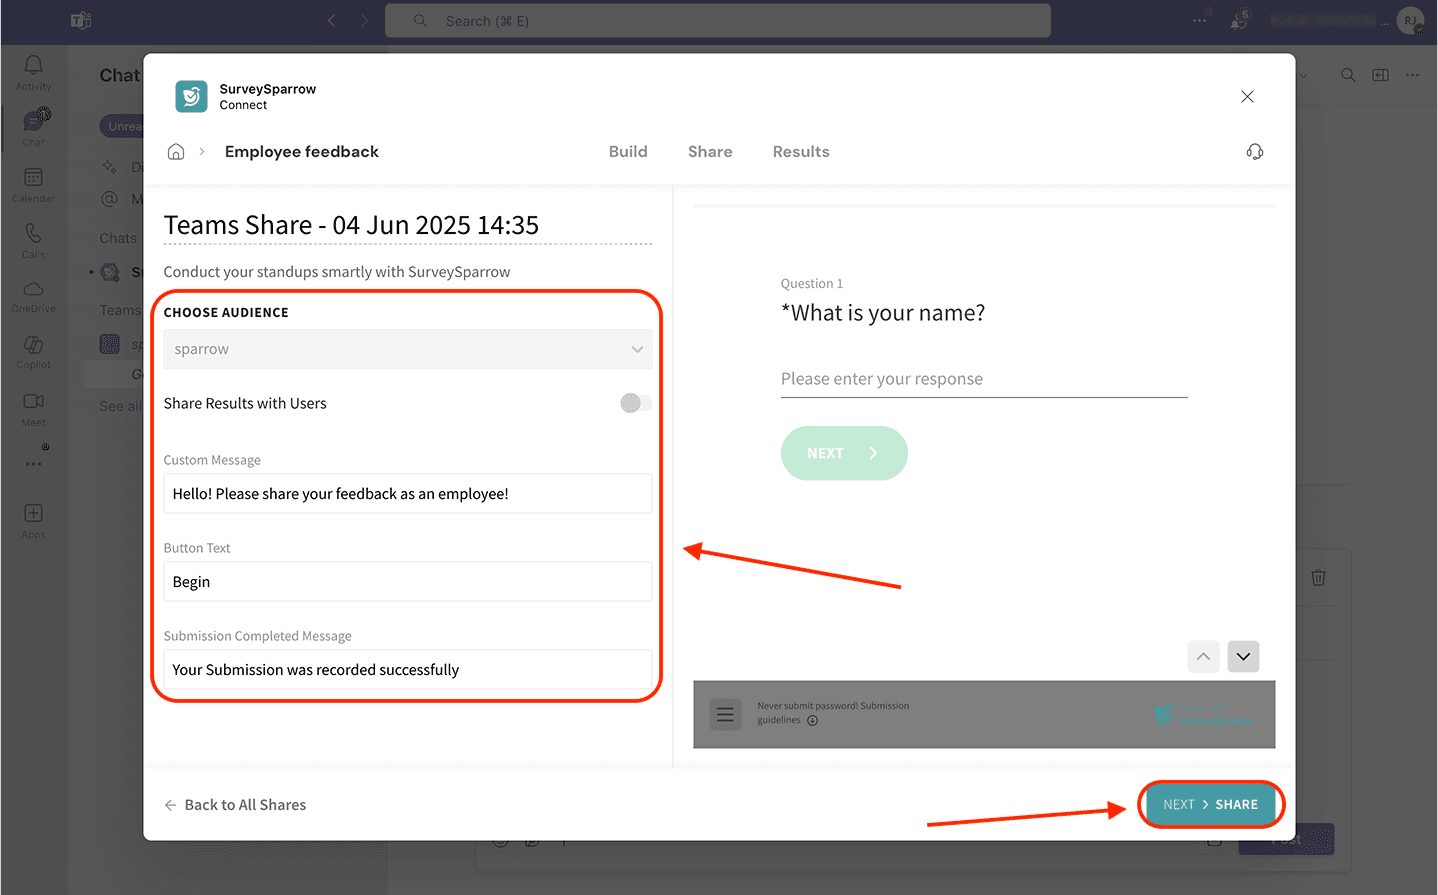
Note: When you open the SurveySparrow app inside a team's channel, the team becomes the audience itself - it cannot be modified. To choose the audience, you will have to open the survey inside your regular SurveySparrow account and create a Microsoft Teams Share from there.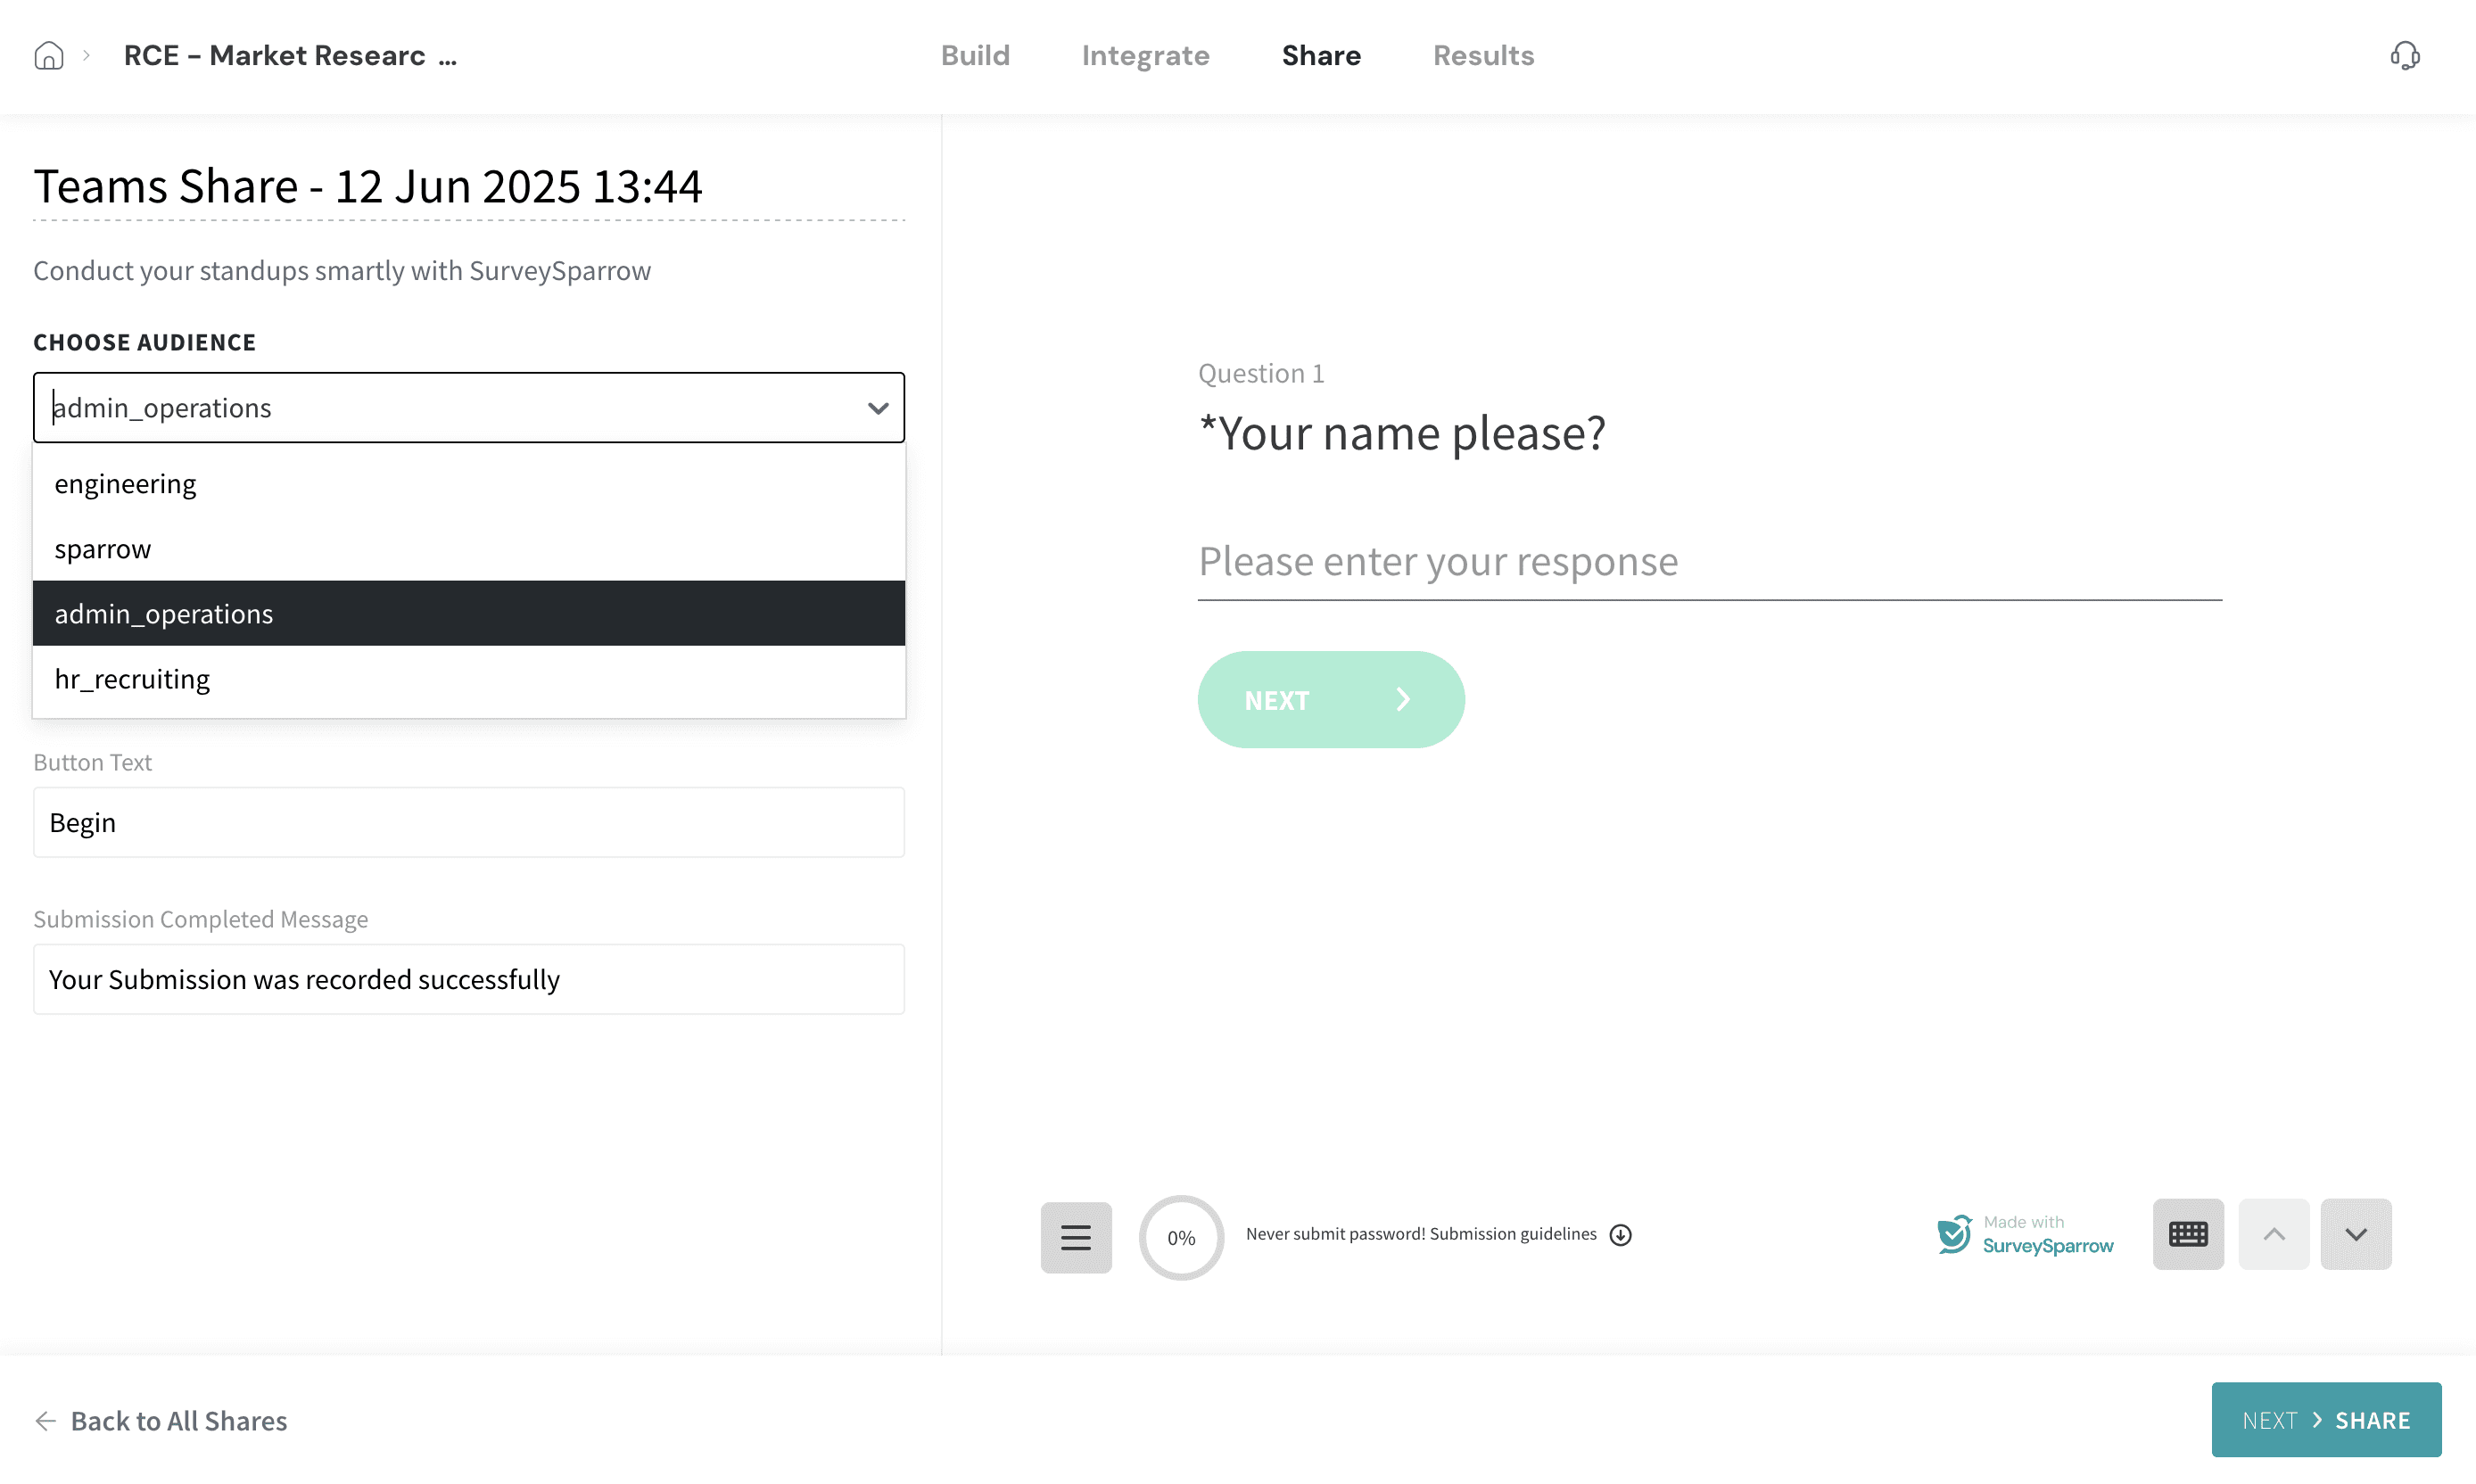
21. If you’d like to send the survey right away, click Share Now. But you also have the option to schedule a survey. Let’s explore the process. Start by clicking on Schedule.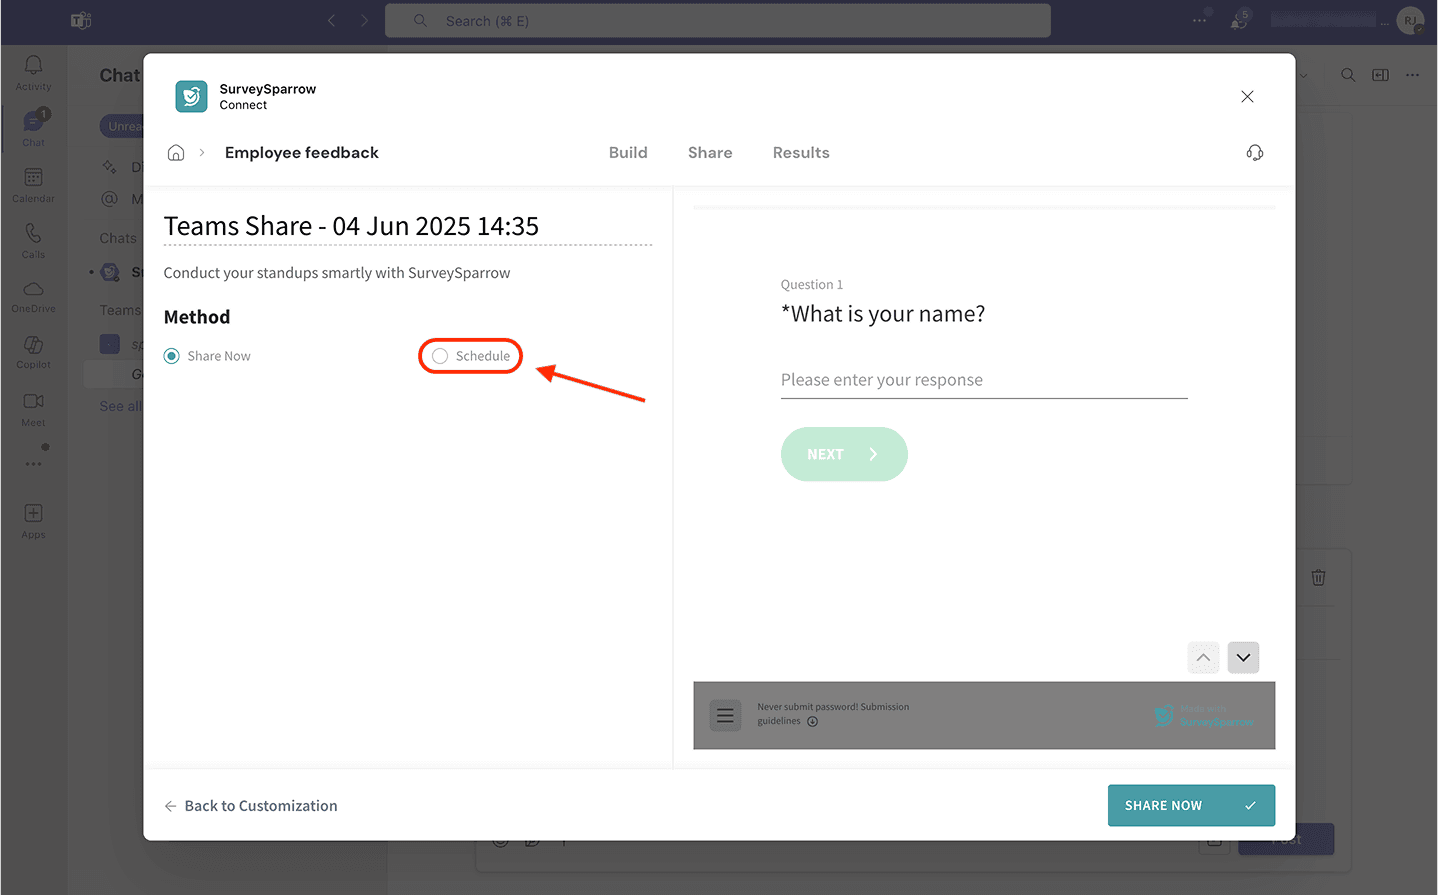
22. You can customize these scheduling controls: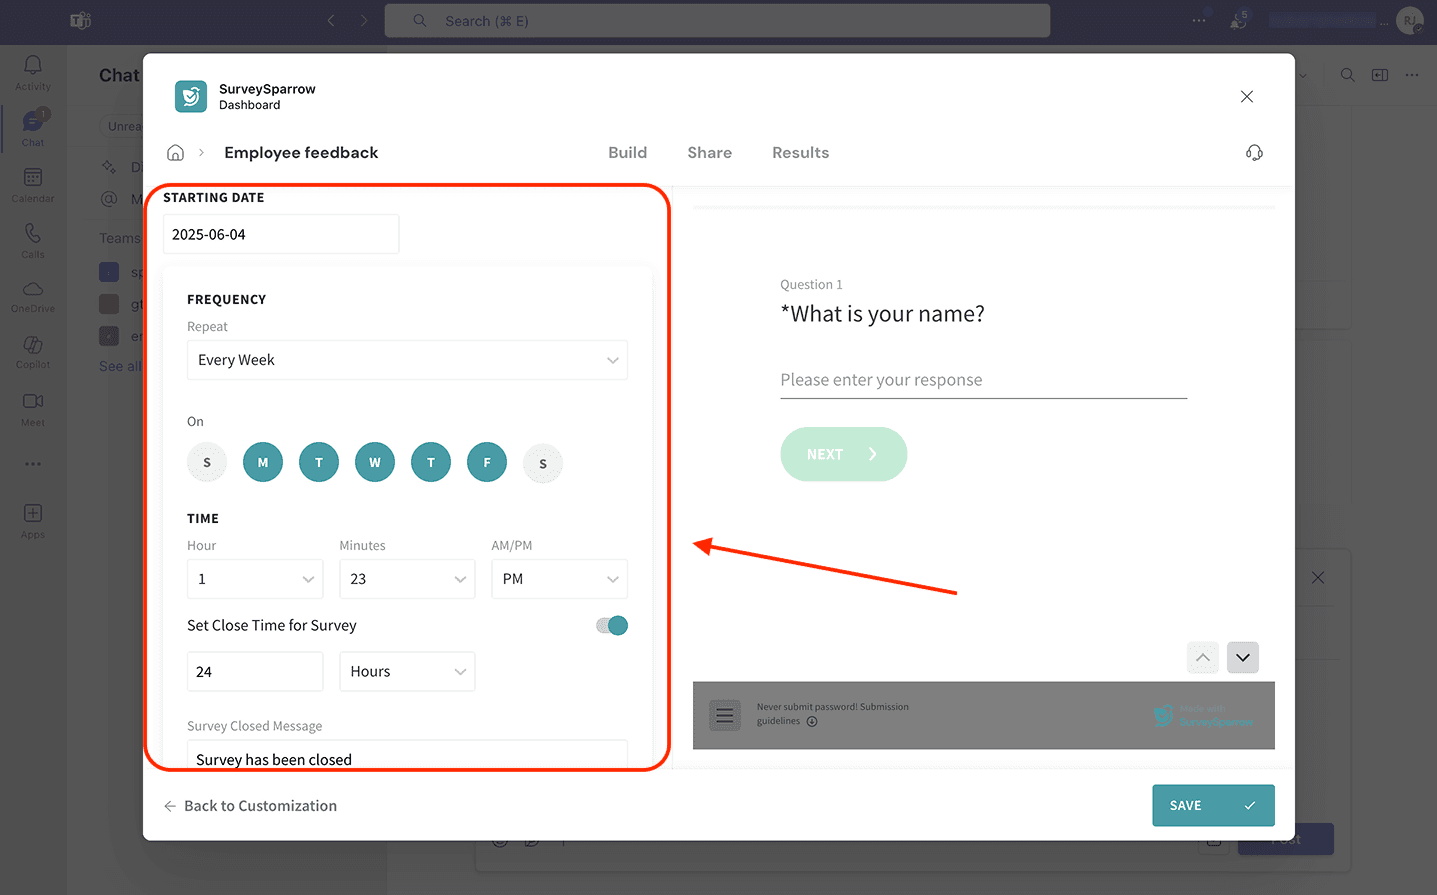
- Starting date - The first day on which you want to send a survey.
- Frequency:
- Repeat - The desired delivery cadence (Weekly, Monthly, Annually)
- On - dates on which to send the survey.
- If weekly,you can select any number of days of the week.
- If monthly, you can select any number of days of the month.
- If annually, you can select any number of days of any number of months.
- Time - Set the exact hour and minute to send the survey, in AM or PM.
- Close time (optional) - The duration of time after which the survey is automatically closed
- Survey closed message - what channel members see after the survey is closed.
23. Once the survey scheduling is complete, click Save.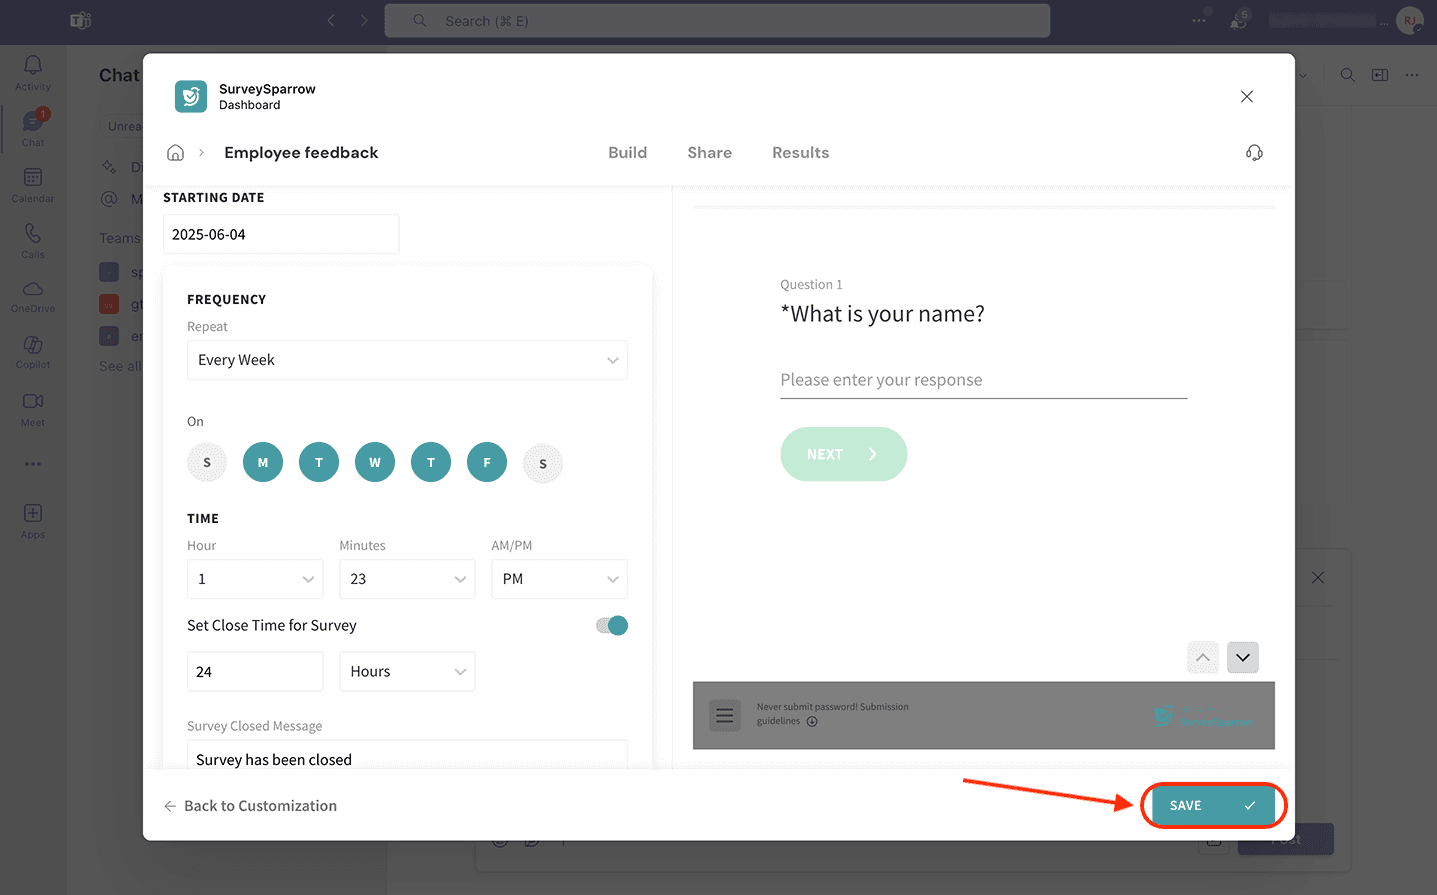
24. The list of shares opens up. To create another share, click New Share.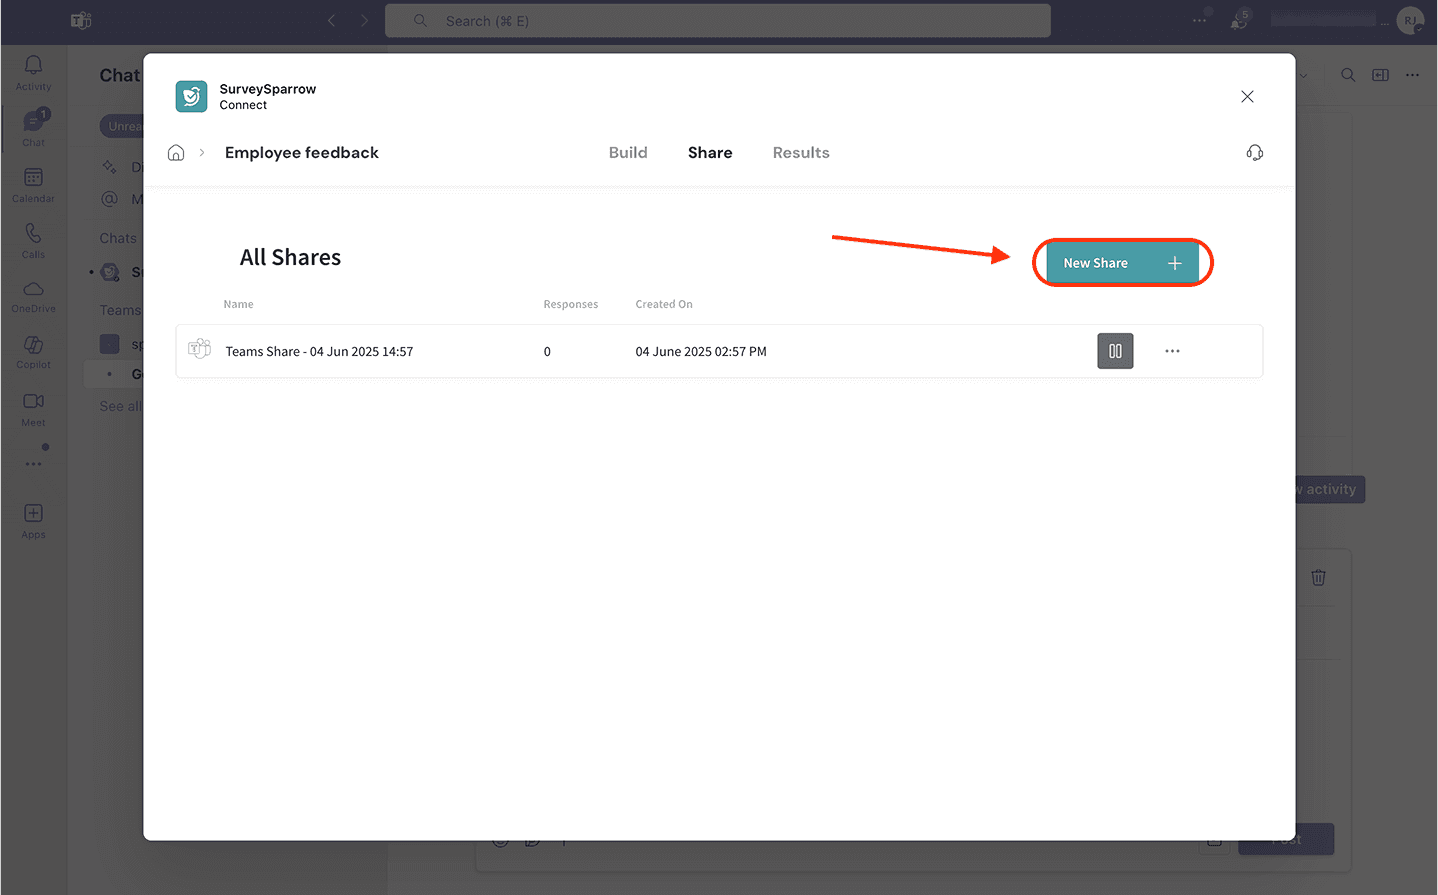
25. This is how the survey appears to respondents. To answer it, click Take Survey.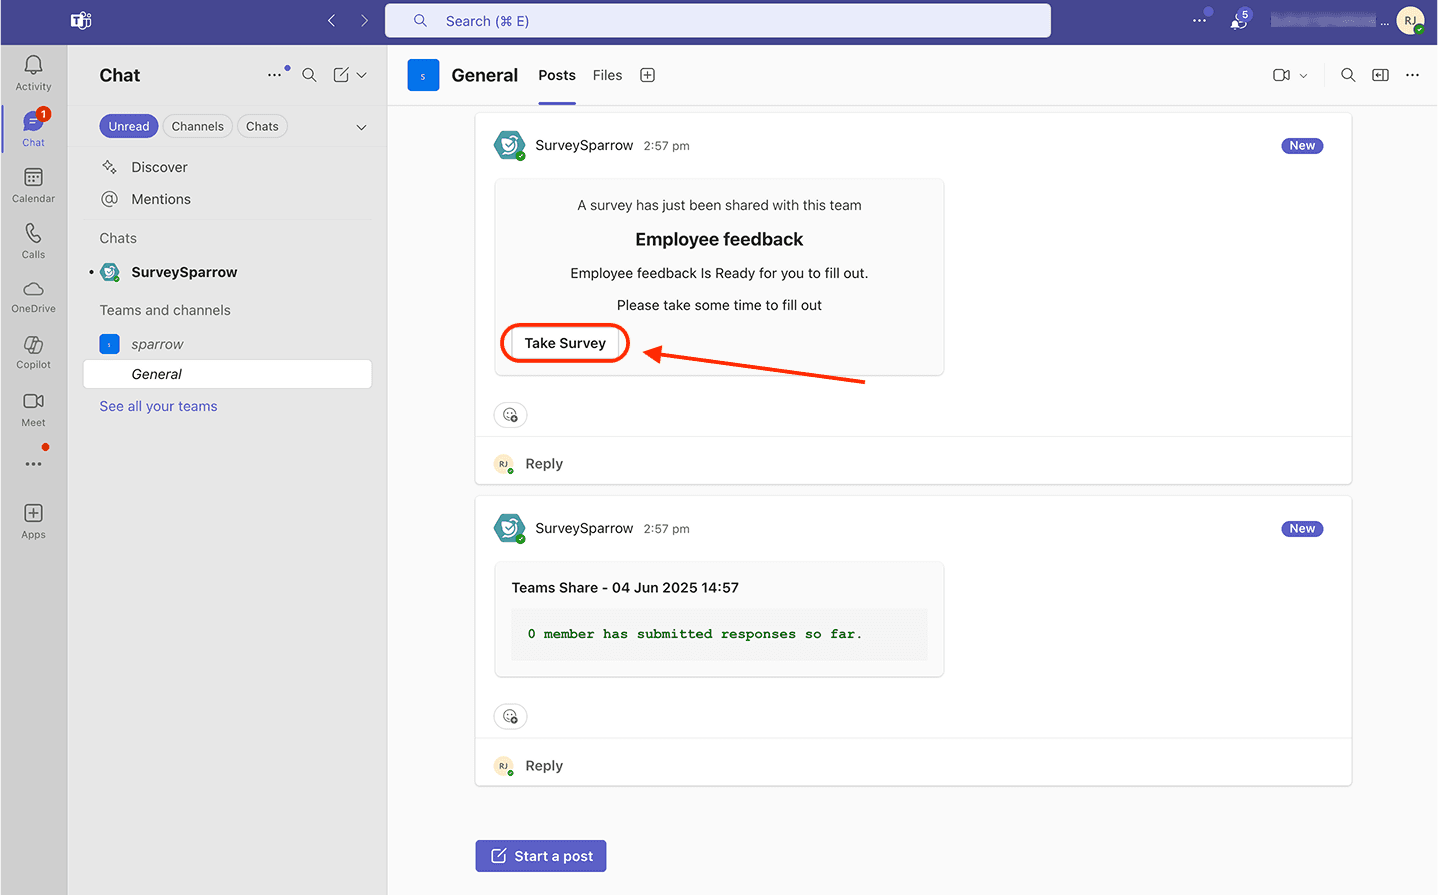
26. Channel members can answer the survey right inside Teams.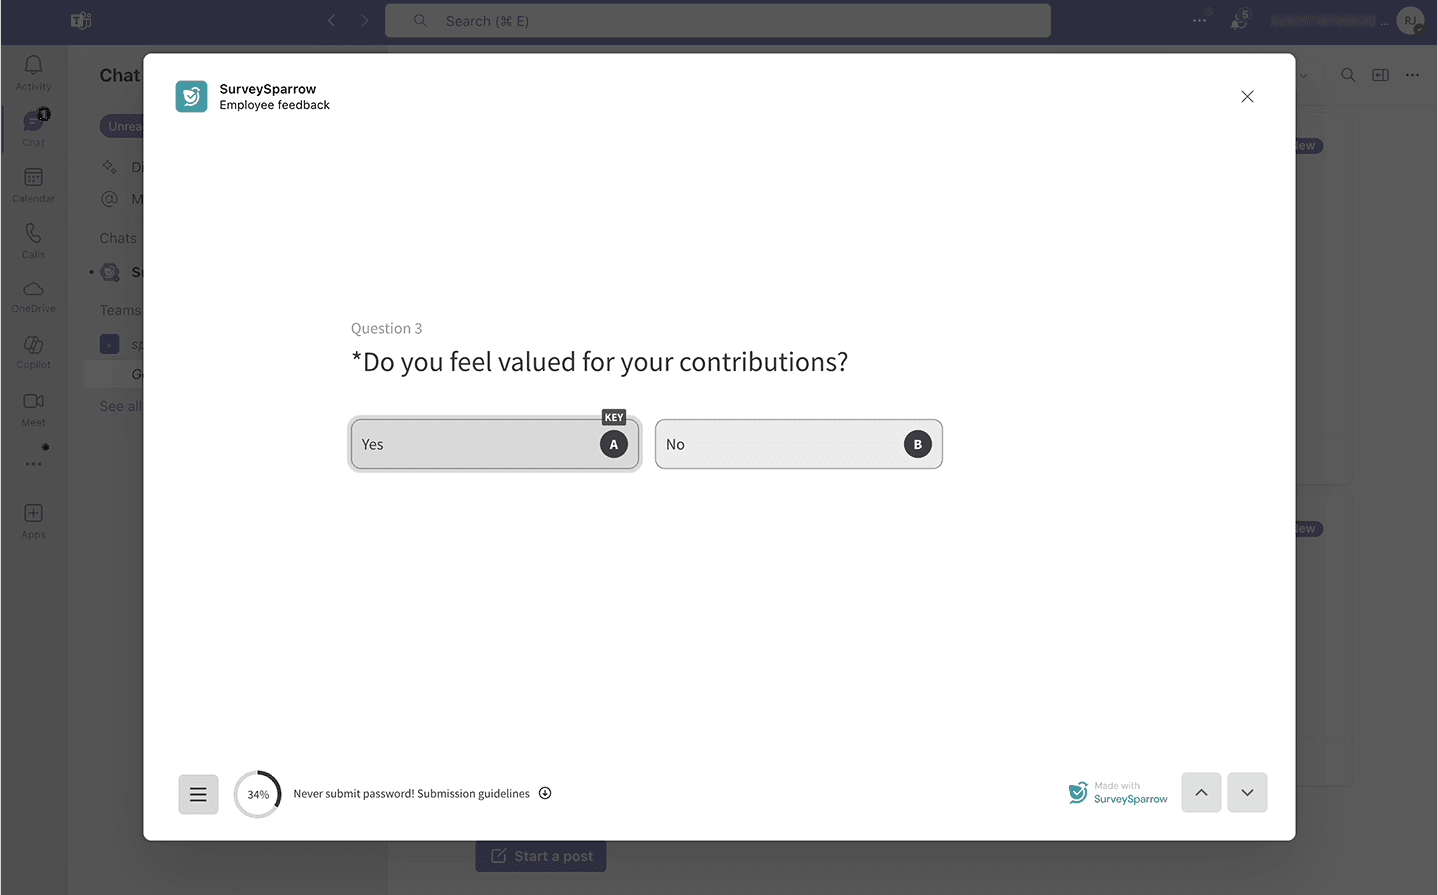
27. When a survey is sent to a channel, there is an accompanying counter that displays the number of respondents.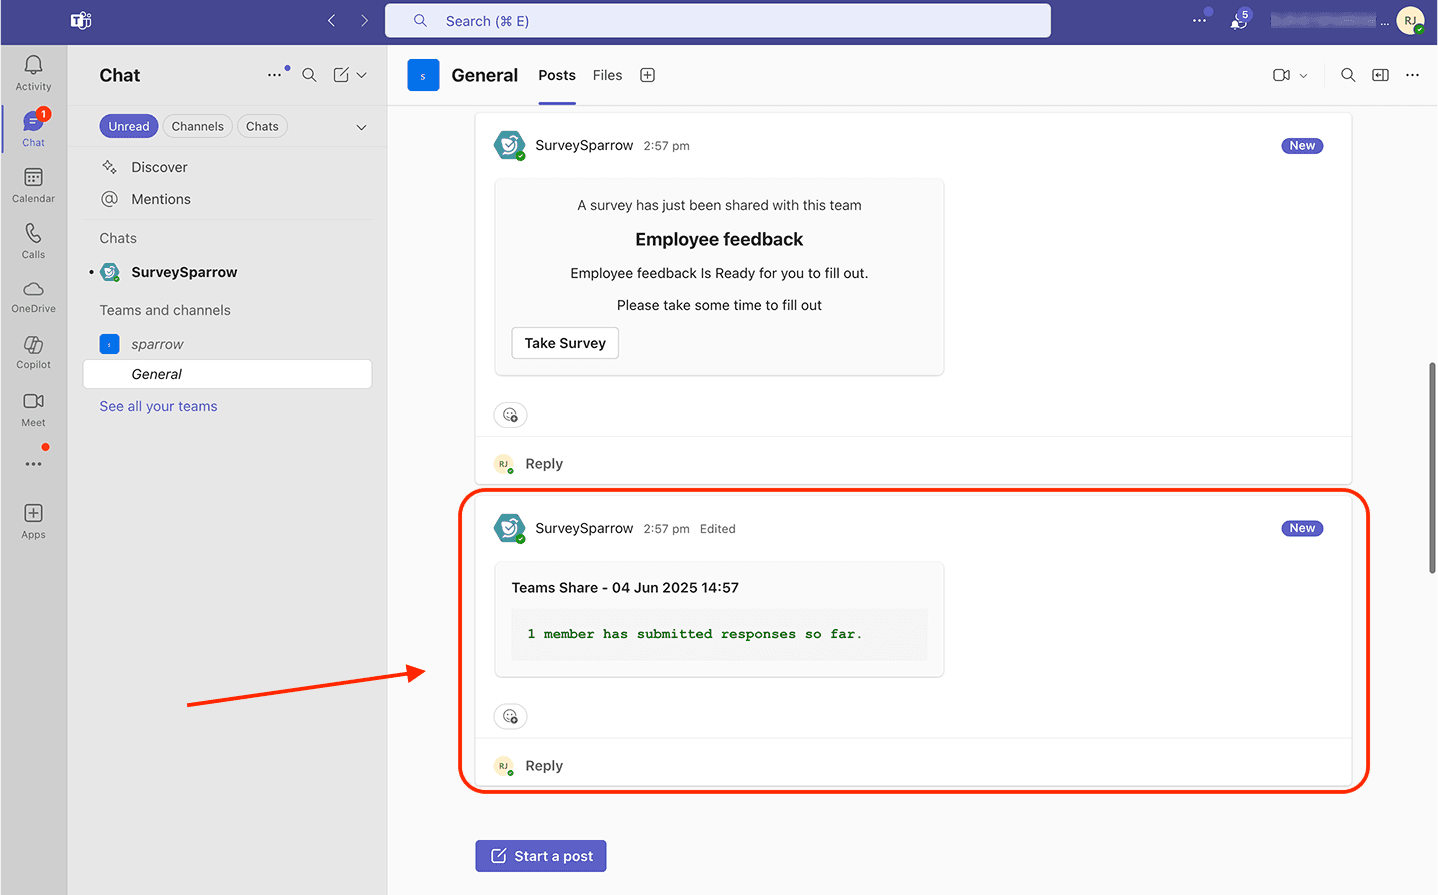
Note: When a survey is shared to a channel and when it gets responses, all the channel members will be notified.
Sharing polls inside Microsoft Teams
Apart from surveys, users can also create and share polls using the SurveySparrow app. Let’s explore the steps.
Note: These polls cannot be seen in your regular SurveySparrow account.
28. Inside the SurveySparrow app, click Create New, then click Poll.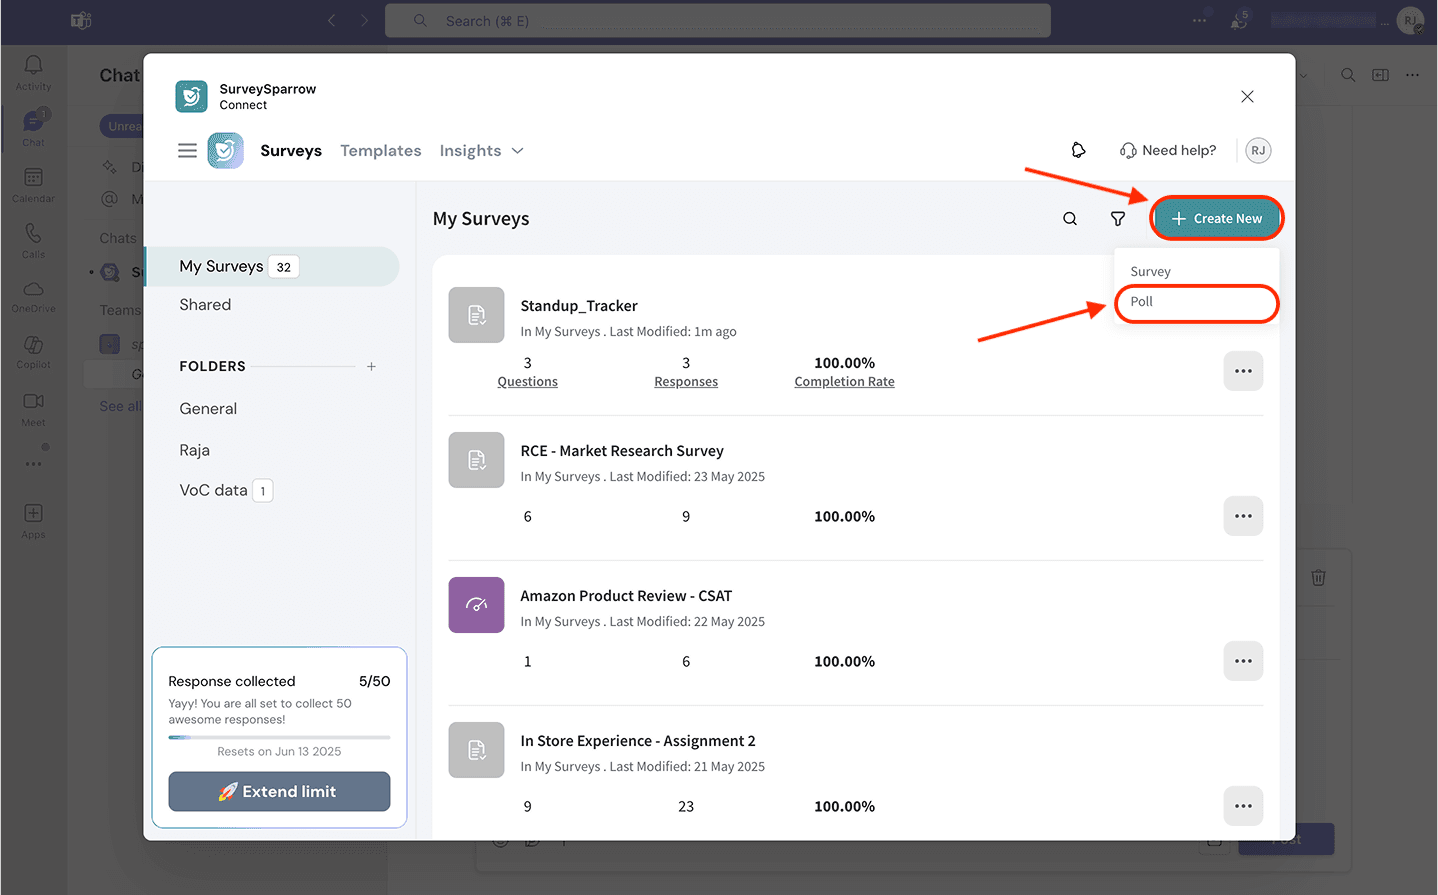
29. Name your poll. If you want to change the folder in which the poll sits, click on the drop-down menu. Then click Poll Title.
30. Then the poll builder opens up. You can only create one multi-choice question. After creating it, head to the Share section.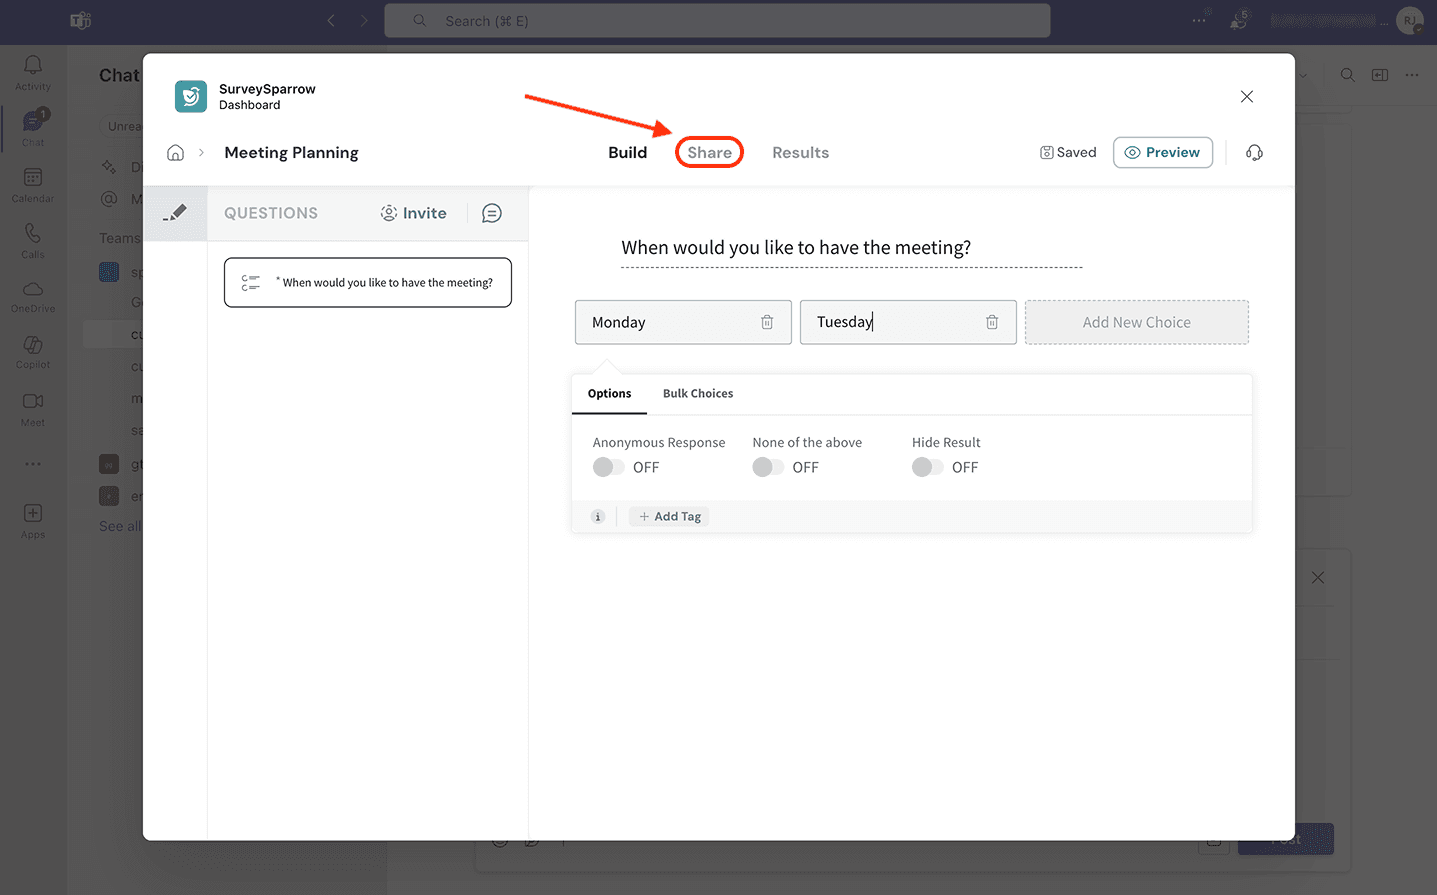
31. Customize the name of the poll share and the content of your poll notification message. After that, click Next > Share to proceed to the scheduling.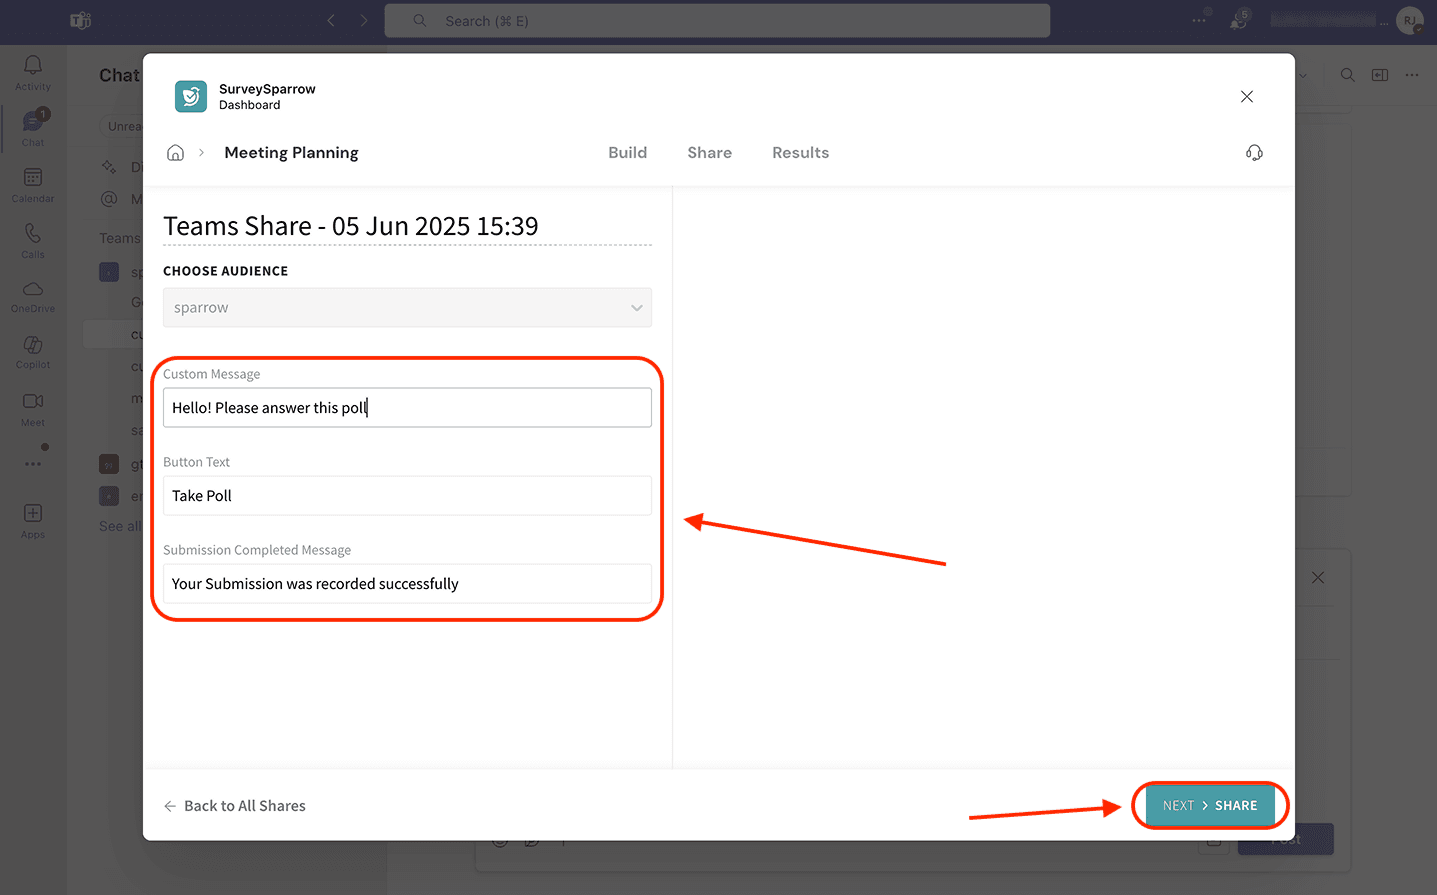
32. Polls cannot be scheduled. But if you want to automatically close the poll after a scheduled timeframe, click the toggle button next to Poll Duration.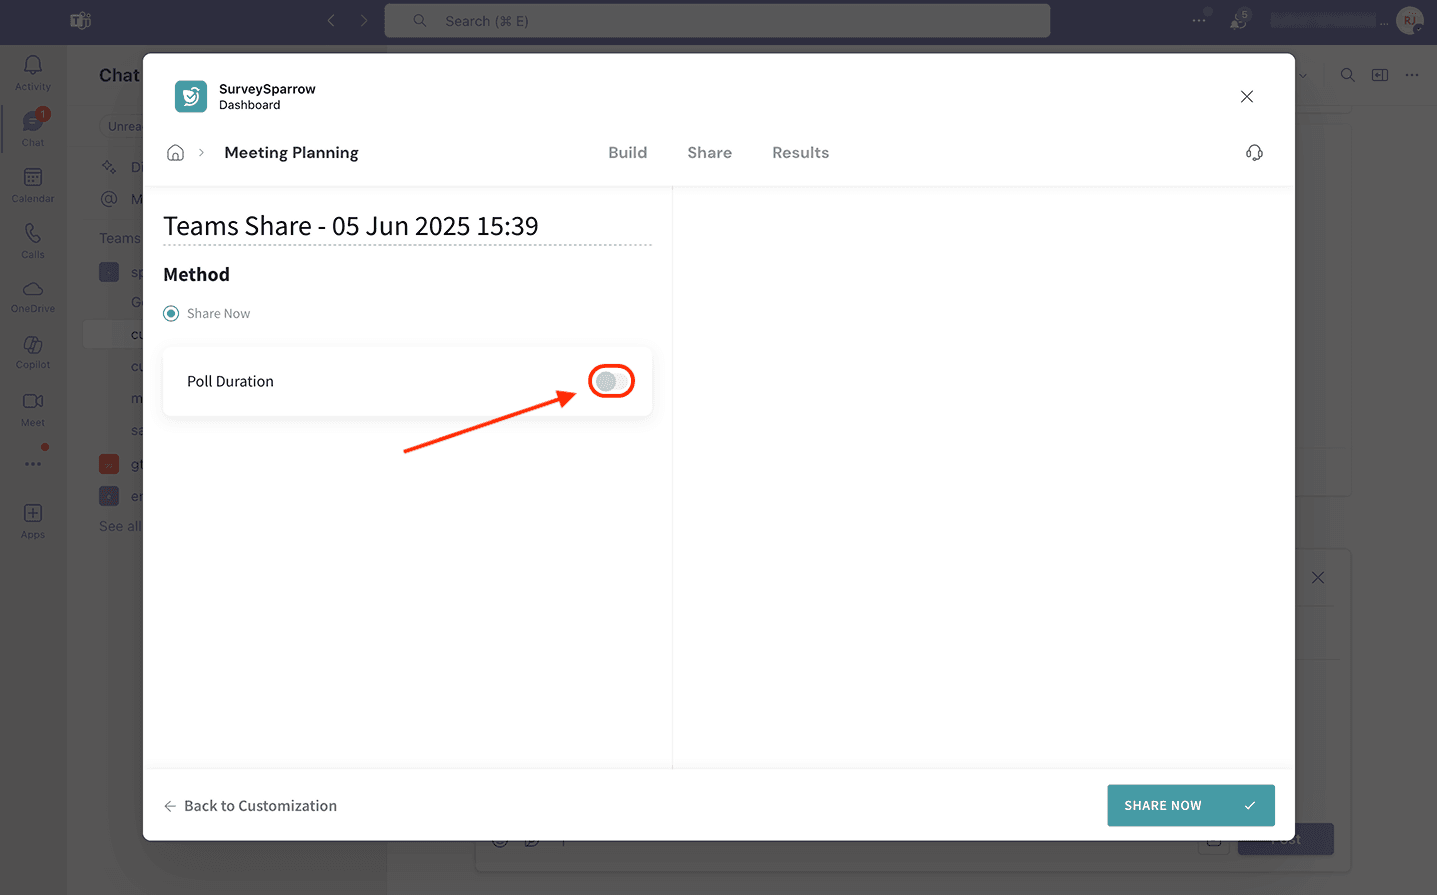
33. You can then set the date and time on which the poll closes. Once you’re done, click Share Now.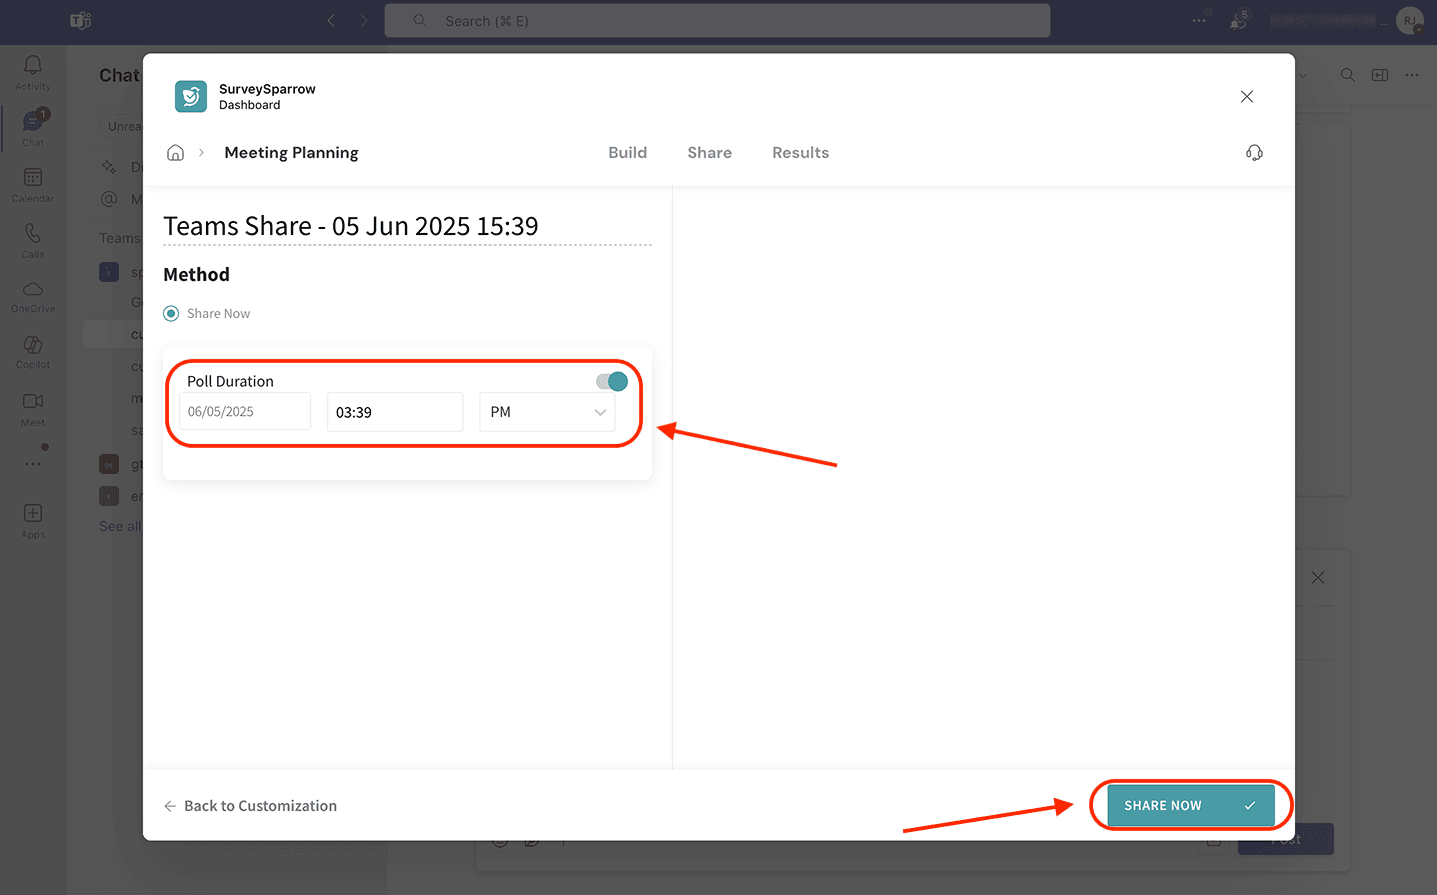
34. The list of shares opens up. If you want to create a new share, click New Share.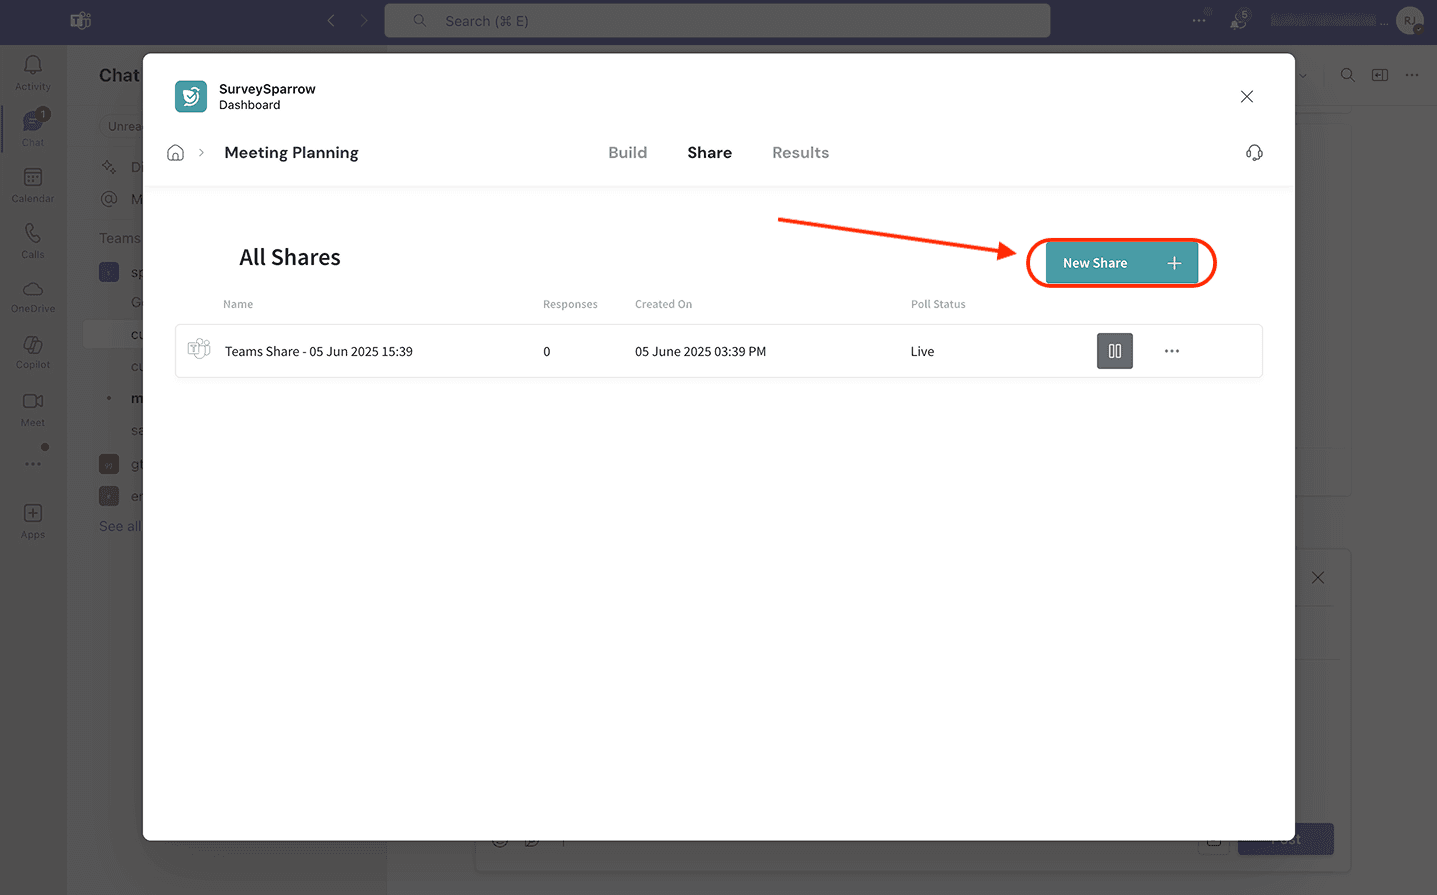
35. This is how the poll appears to respondents. There is also an accompanying counter that shows the number of respondents.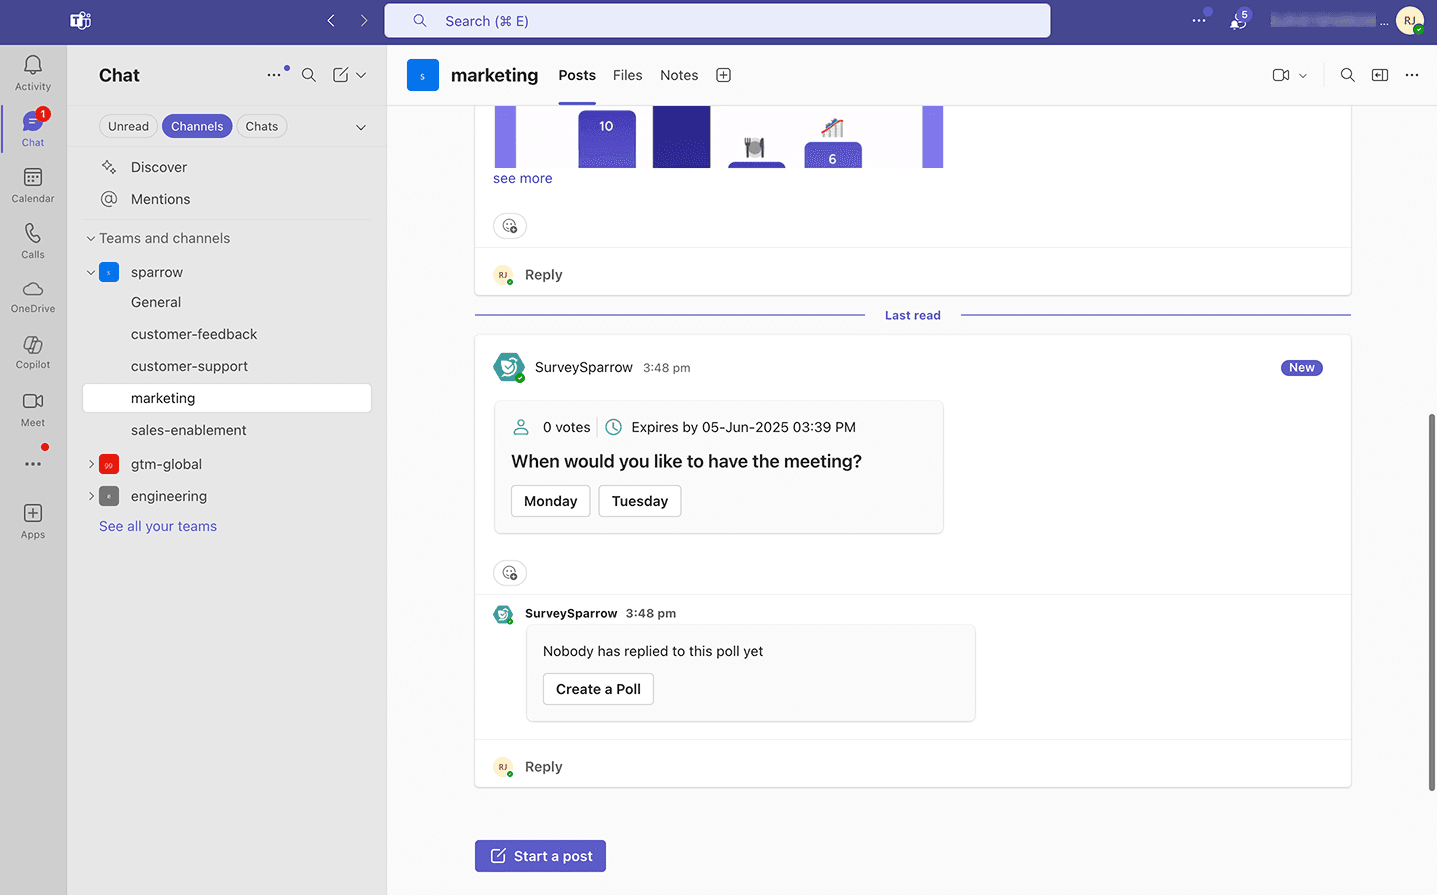
Viewing survey/poll responses inside Microsoft Teams
36. In the SurveySparrow app (direct or inside channel), open the survey/poll that you shared and head to the Results section.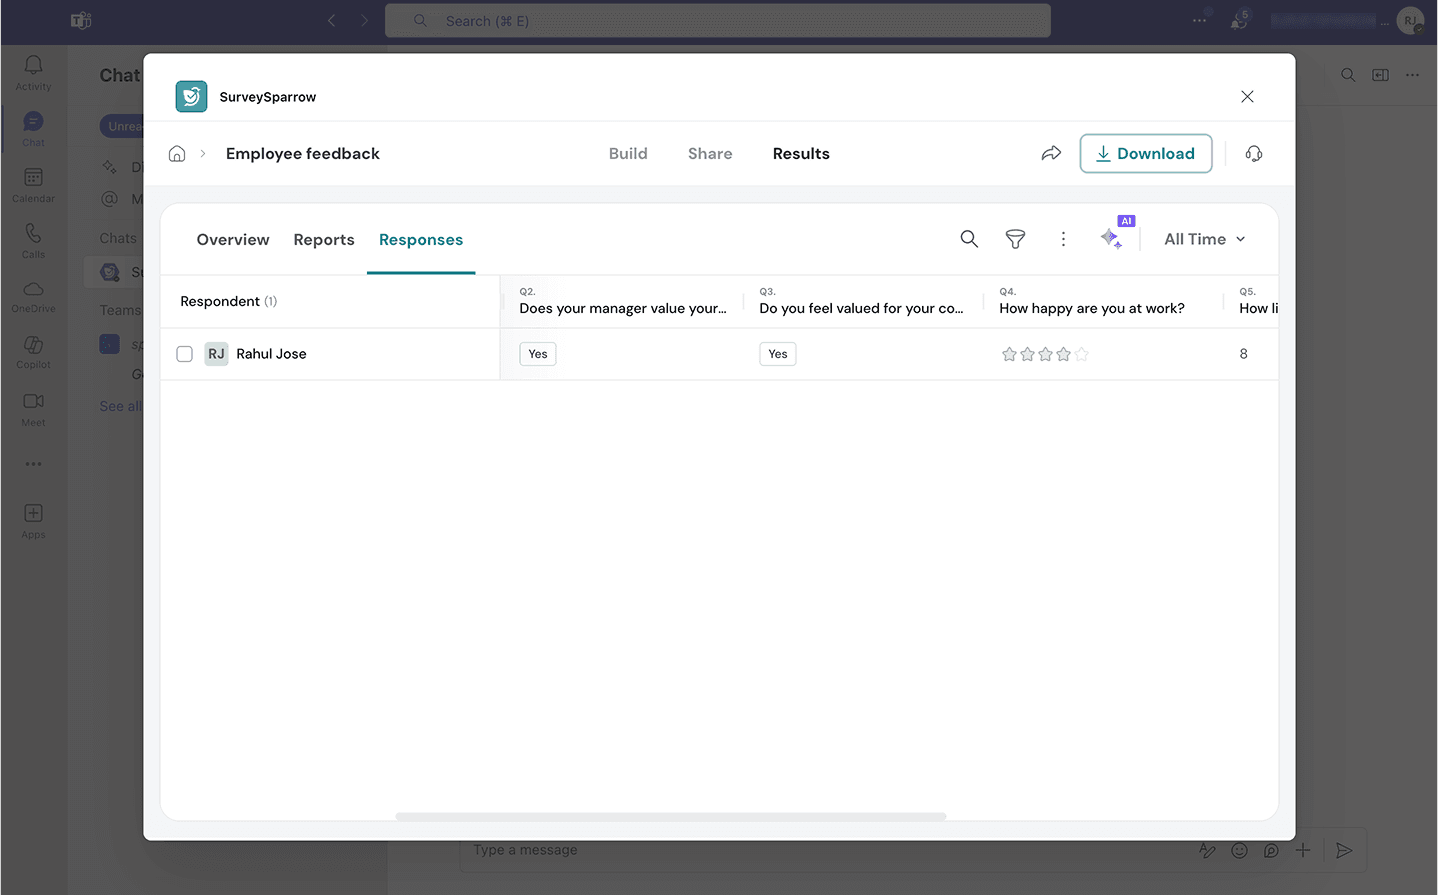
From here you can also generate reports.
Note: You can also view the responses by directly opening the SurveySparrow app and opening the Chat section. You’ll see result cards corresponding to each survey share you sent. To view the results generated through a share, click on Responses. The SurveySparrow app opens up with the responses section of the survey.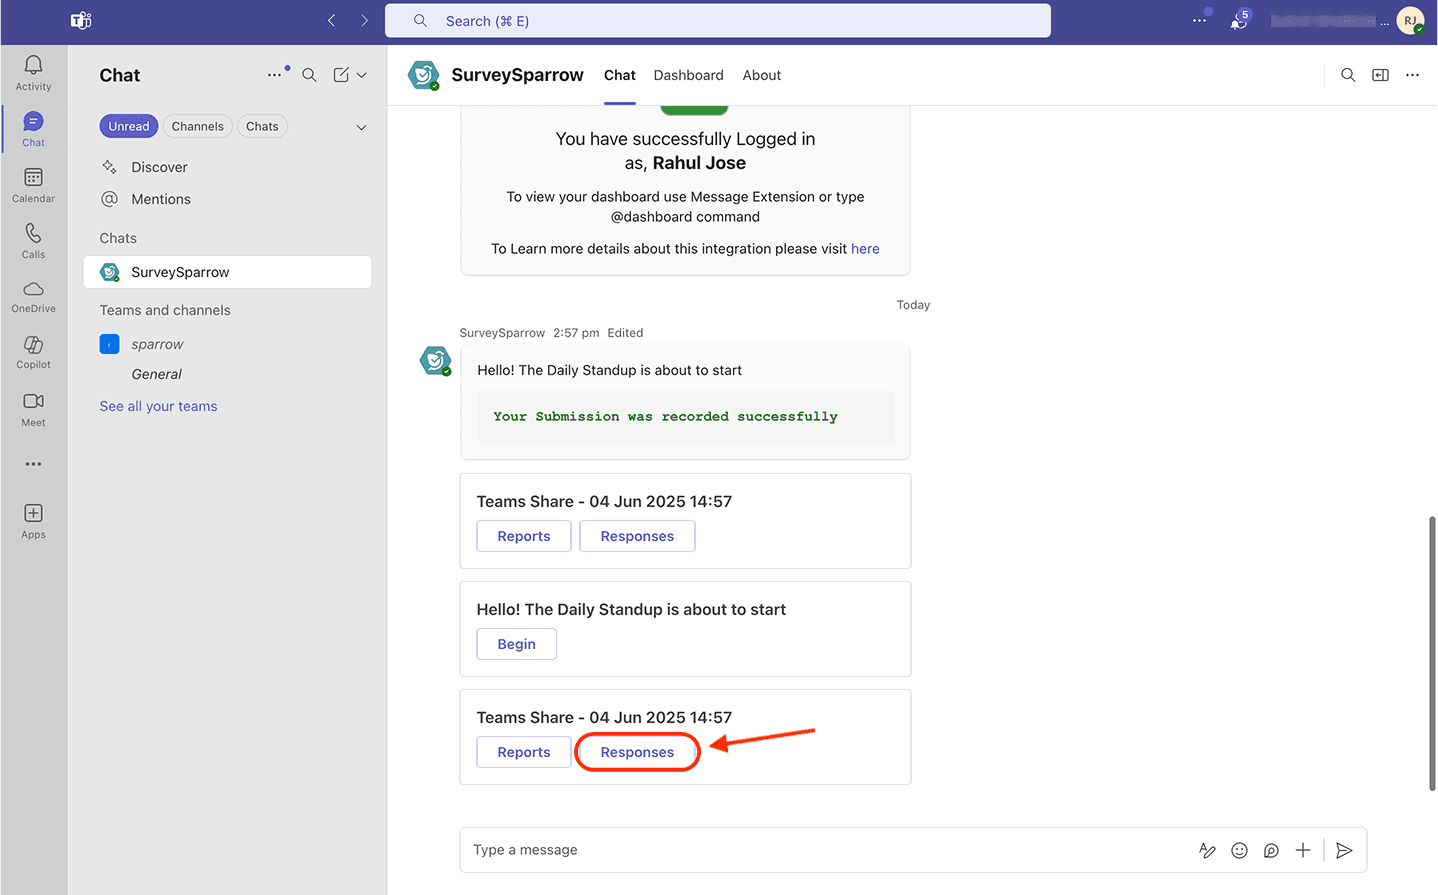
Similarly, to view the responses for polls, click View Results.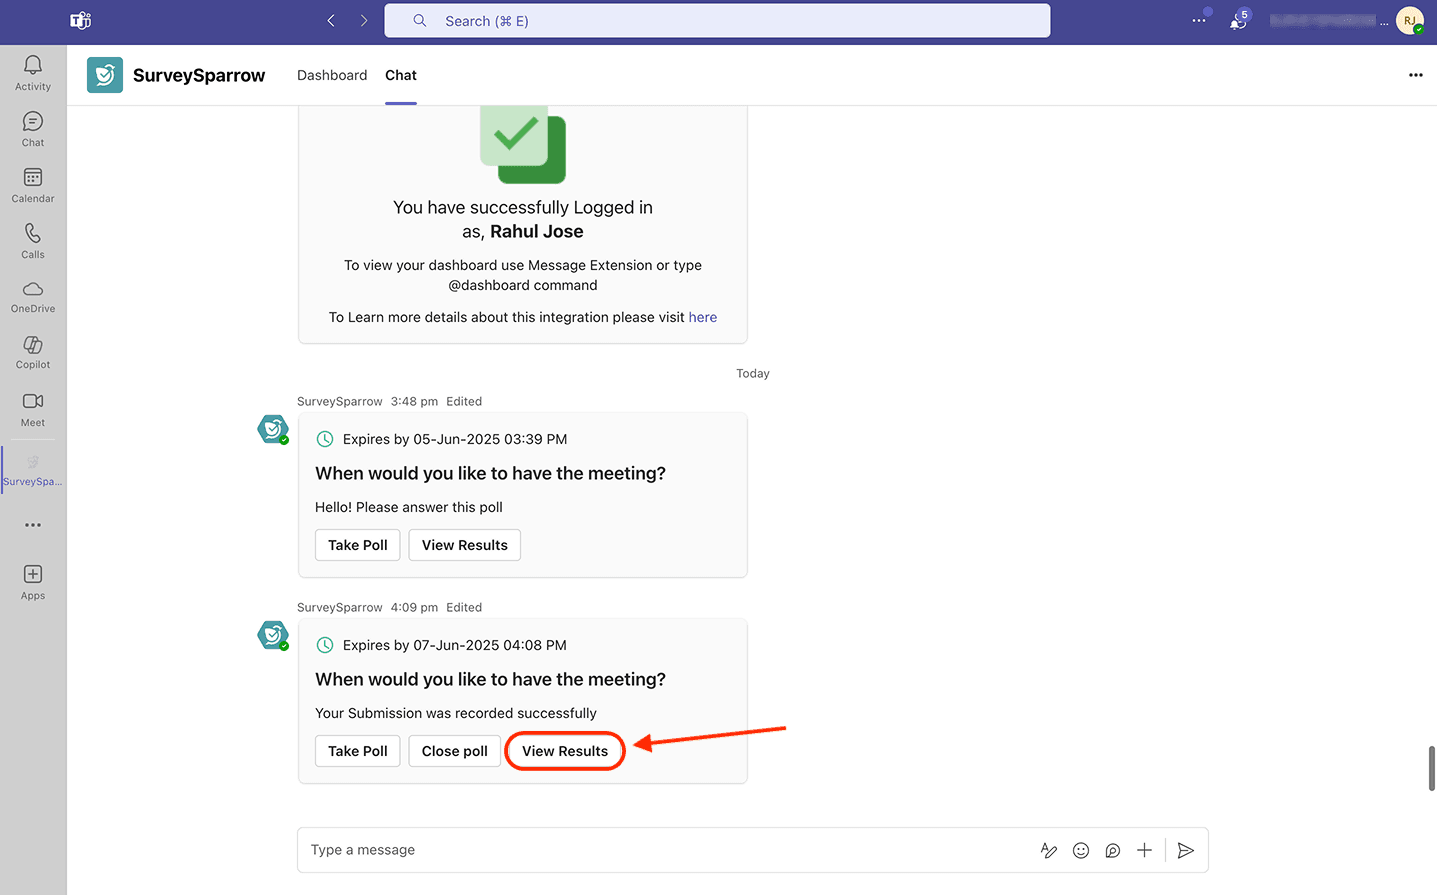
Now you can easily collect feedback right where your colleagues work to make smarter decisions, drive projects with clarity, understand the pulse of your employees and foster engagement. Create a culture driven by feedback and transparency, all within the comfort of your inbox.
Feel free to reach out to our community if you have any questions.