
Search
Ticket Templates let teams customize how tickets are created and managed by controlling which fields appear and when based on the context of the ticket. Instead of one-size-fits-all forms, each team can design templates tailored to their workflows, ensuring only relevant fields are shown to agents.
Why is it important?
In many organizations, all ticket fields are shared across teams, meaning every agent sees the same set of fields, regardless of their relevance. When one team updates a field’s structure or mandatory status, it impacts others unintentionally. This leads to cluttered forms, unnecessary complexity, and slower ticket resolution. It also increases the risk of inaccurate data and a fragmented customer experience.
Ticket Templates solve this by showing only the fields that matter to each team or use case. This means agents can act faster, with more context resulting in quicker resolutions, fewer back-and-forths, and more personalized support. The outcome? A smoother, more efficient experience for customers, every time they reach out.
Let’s look at an example to understand.
ABC Healthcare, a digital health platform, has multiple internal teams managing different aspects of customer experience—technical troubleshooting, appointment handling, billing queries, and clinical assistance. Previously, all CX tickets displayed the same set of fields, regardless of which team handled them. This meant that technical teams saw irrelevant billing fields, and appointment teams had to scroll past clinical data they didn’t use.
This not only slowed down internal processes but also negatively impacted customer experience. Agents spent more time navigating ticket fields than resolving issues, leading to delays and frustration for customers.
By implementing Ticket Templates, ABC Healthcare now tailors ticket fields to each team. Each group sees only the fields relevant to their workflow. Technical teams view device and software related fields, while billing teams focus on payment and insurance details. This targeted experience helps agents respond faster and more accurately, ultimately delivering a smoother, more satisfying support experience for customers.
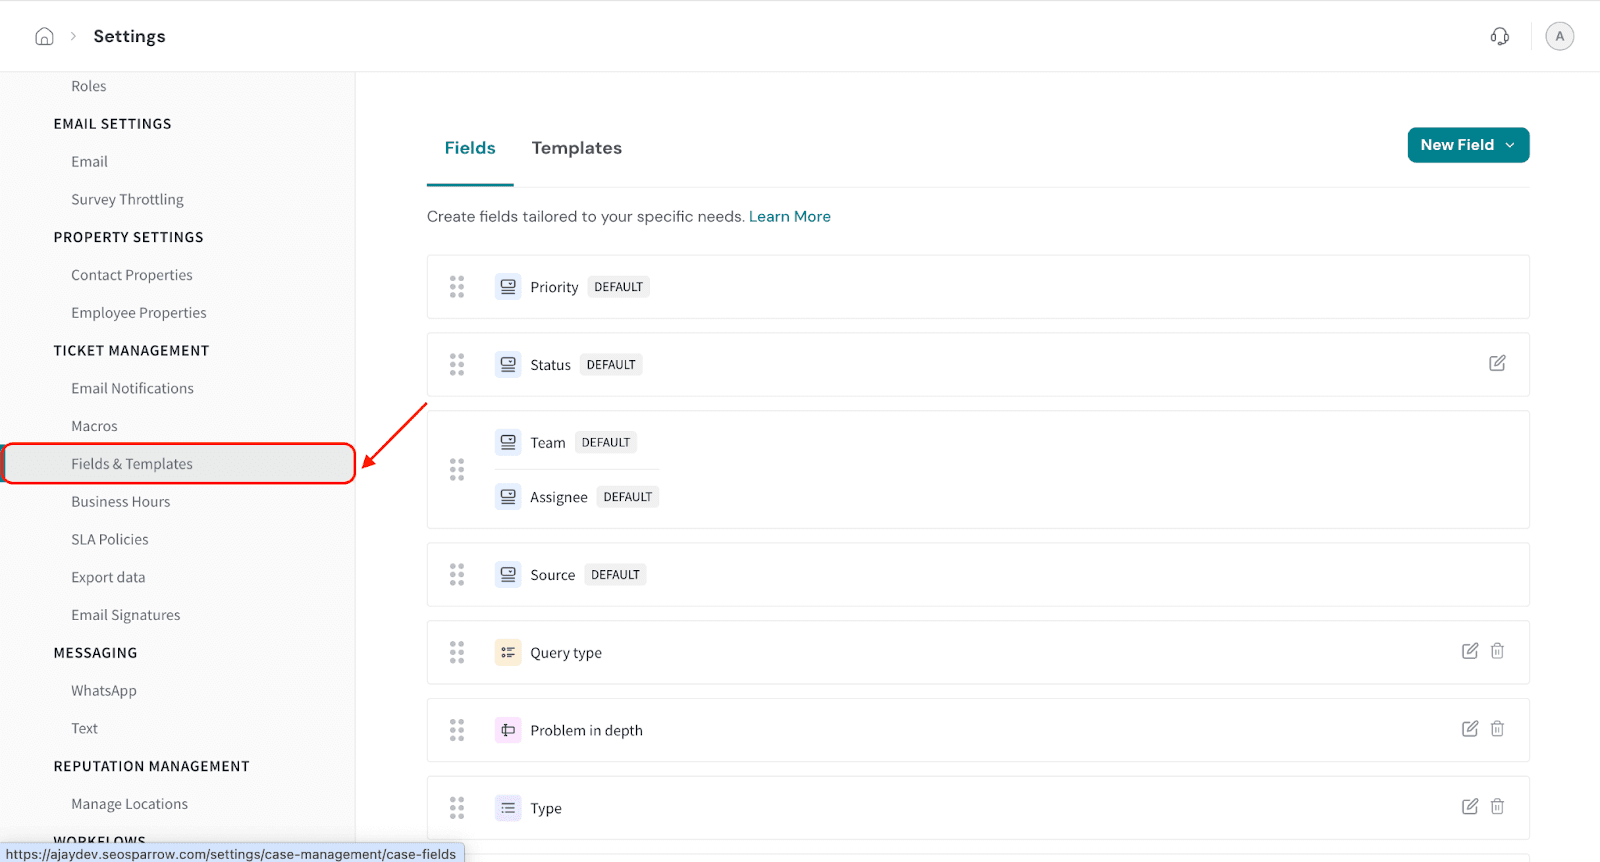
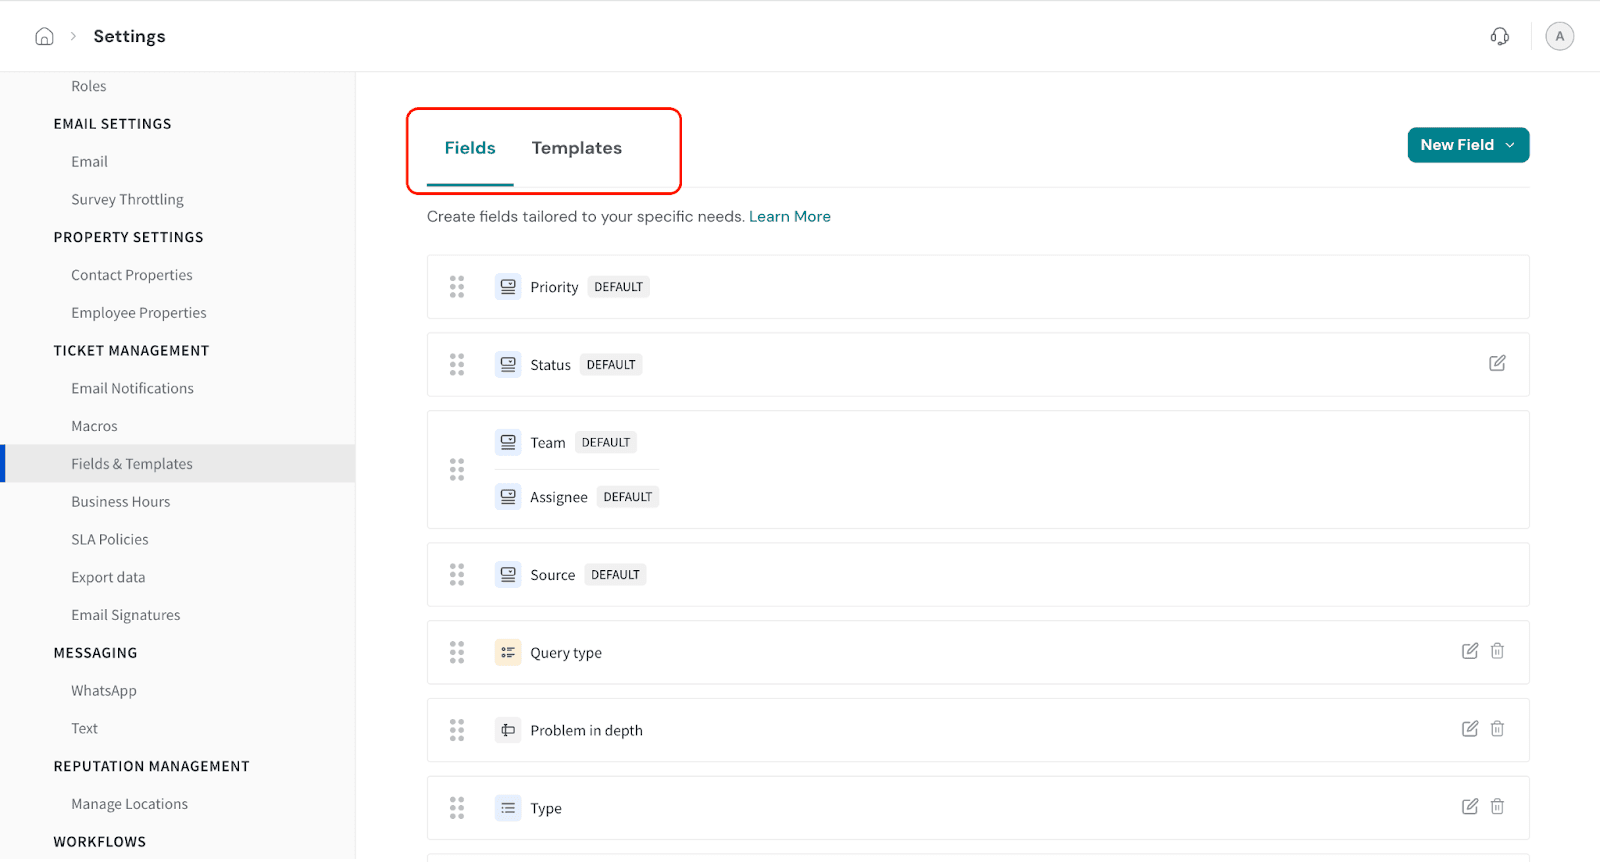
Lets see how to set up a Ticket Template
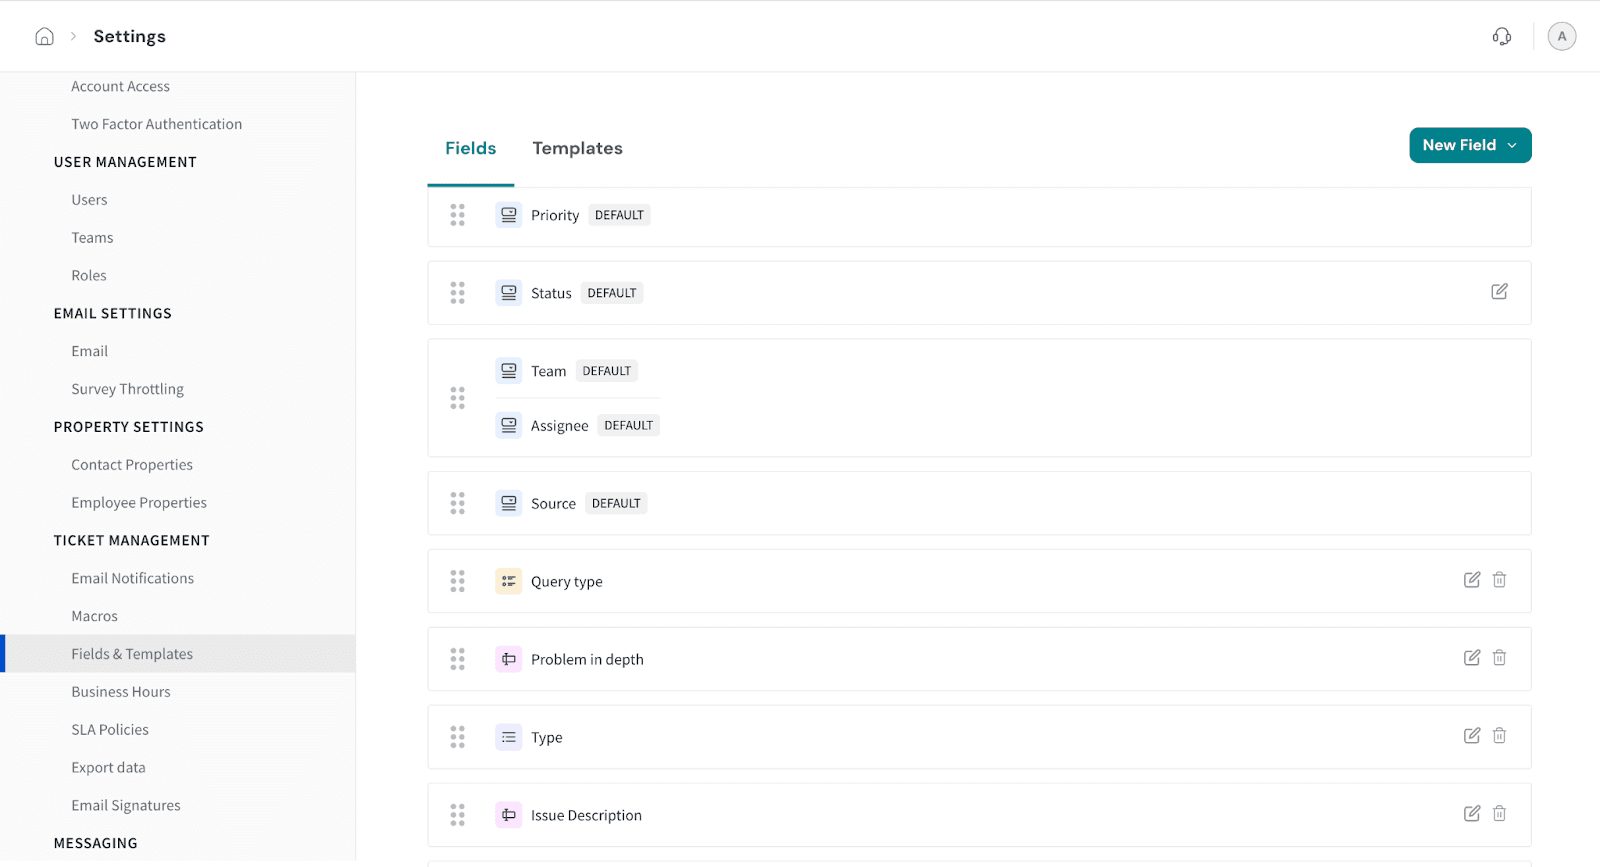
These fields are system-defined and cannot be removed, but you can rearrange their order to match your preferred layout.
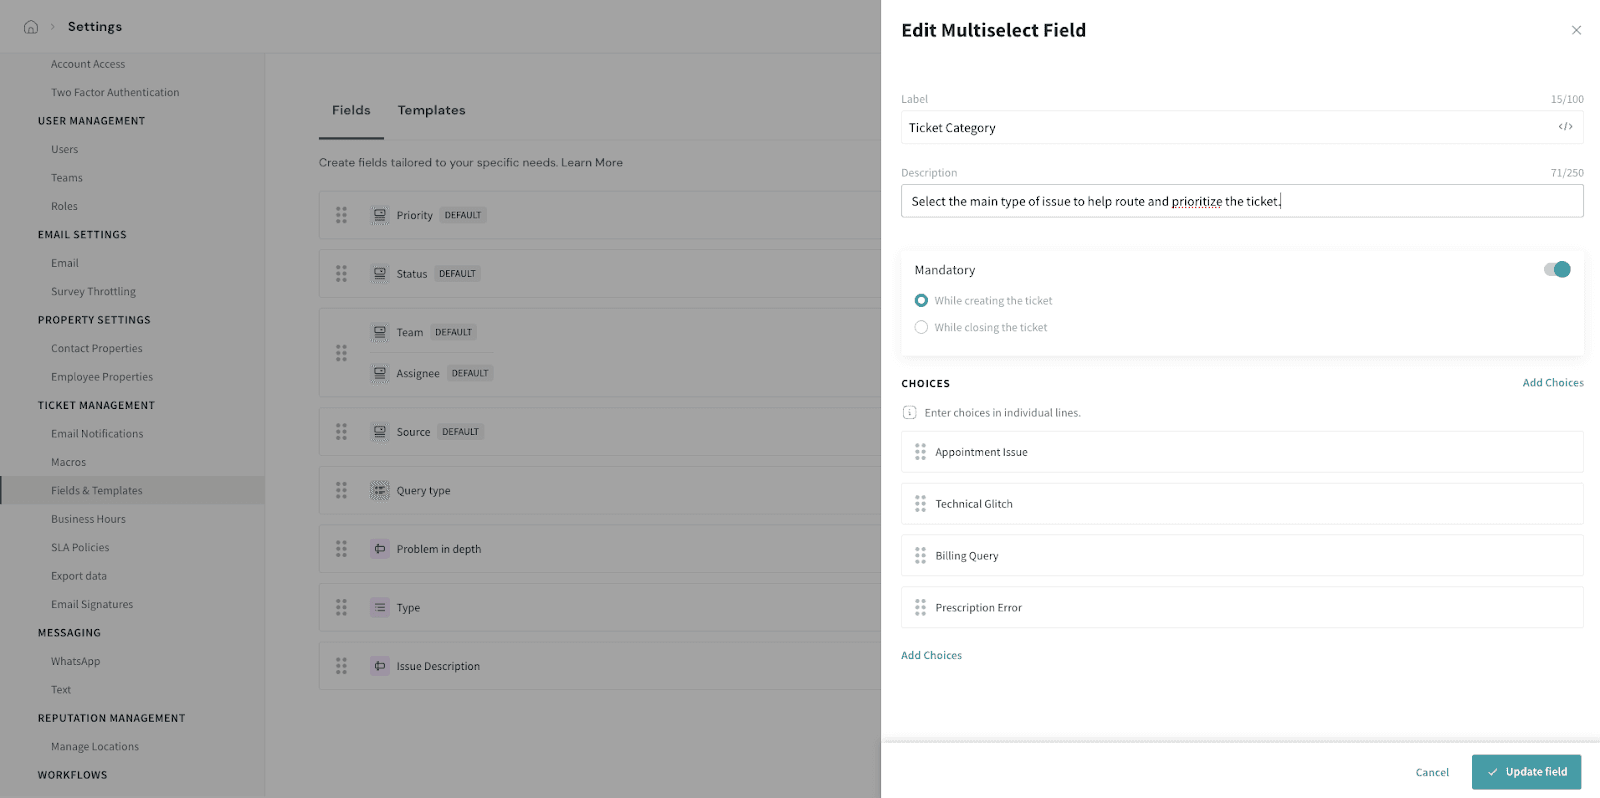
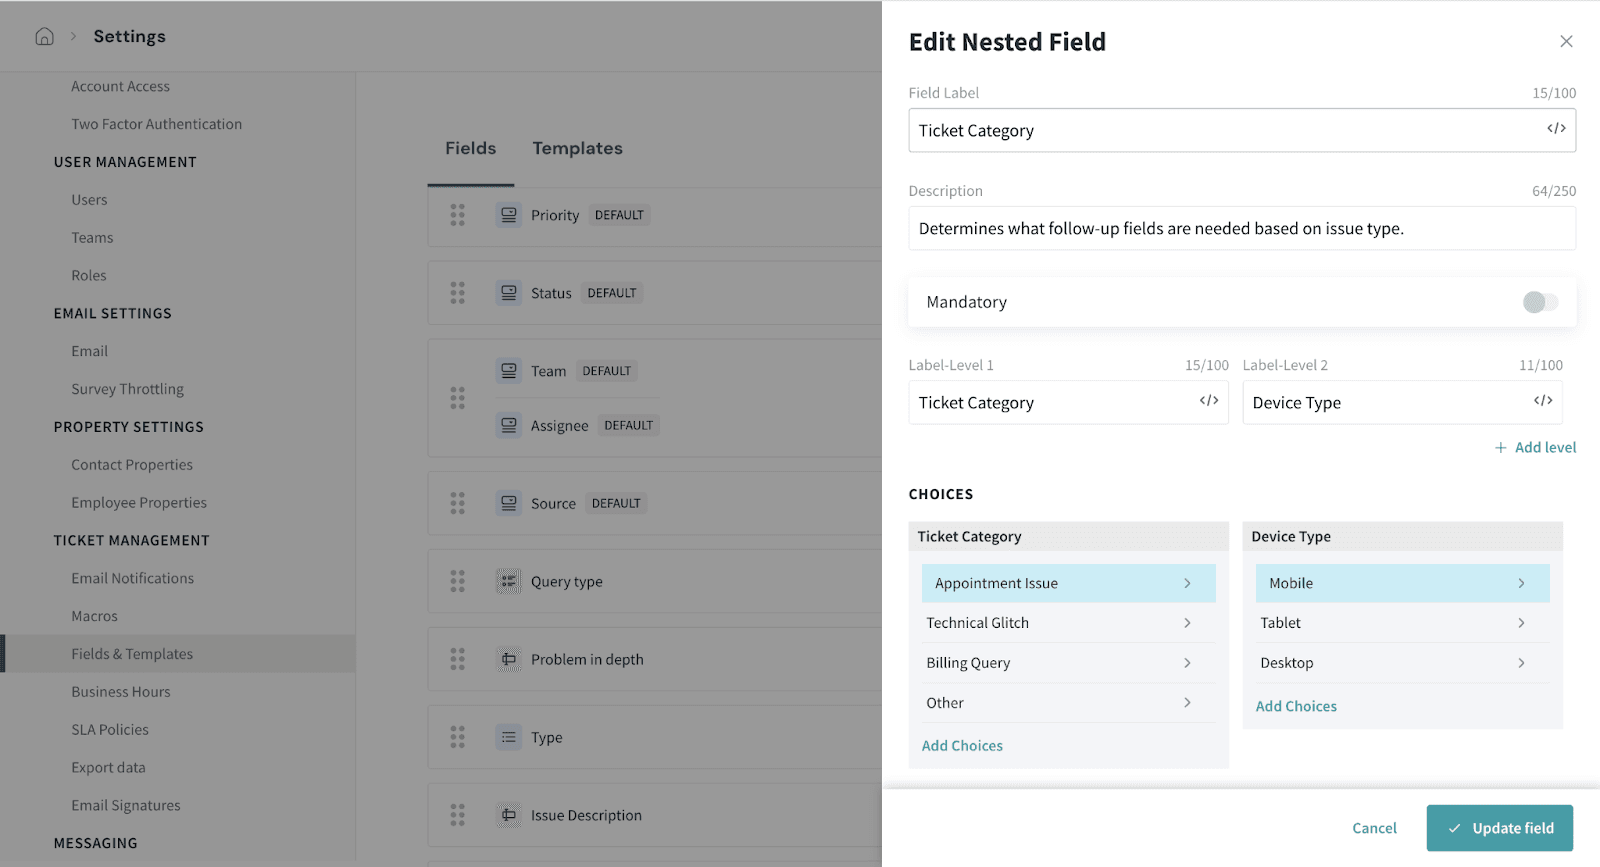
There are 5 types of fields you can create: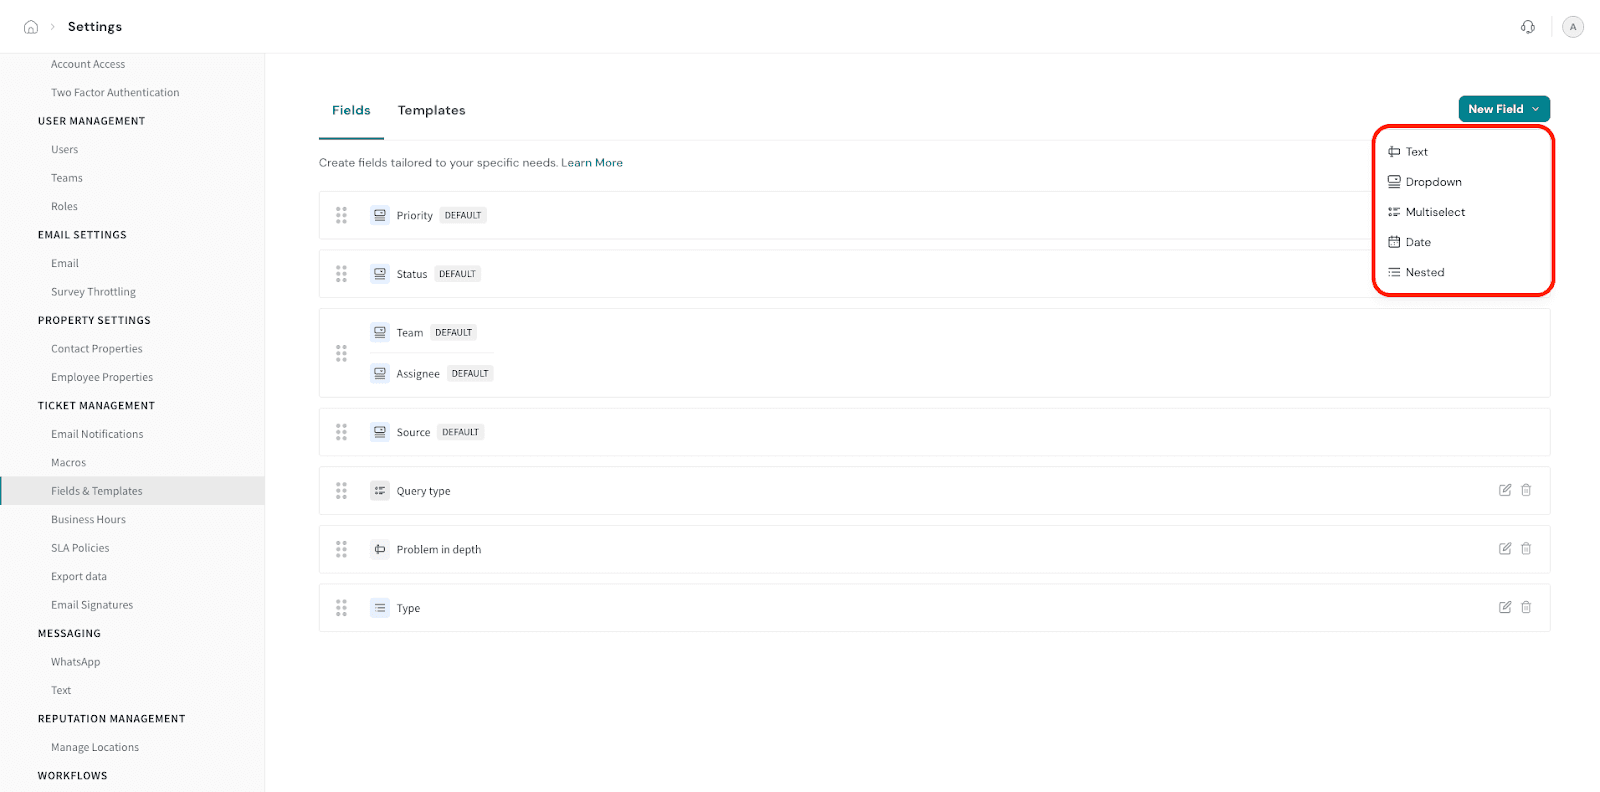


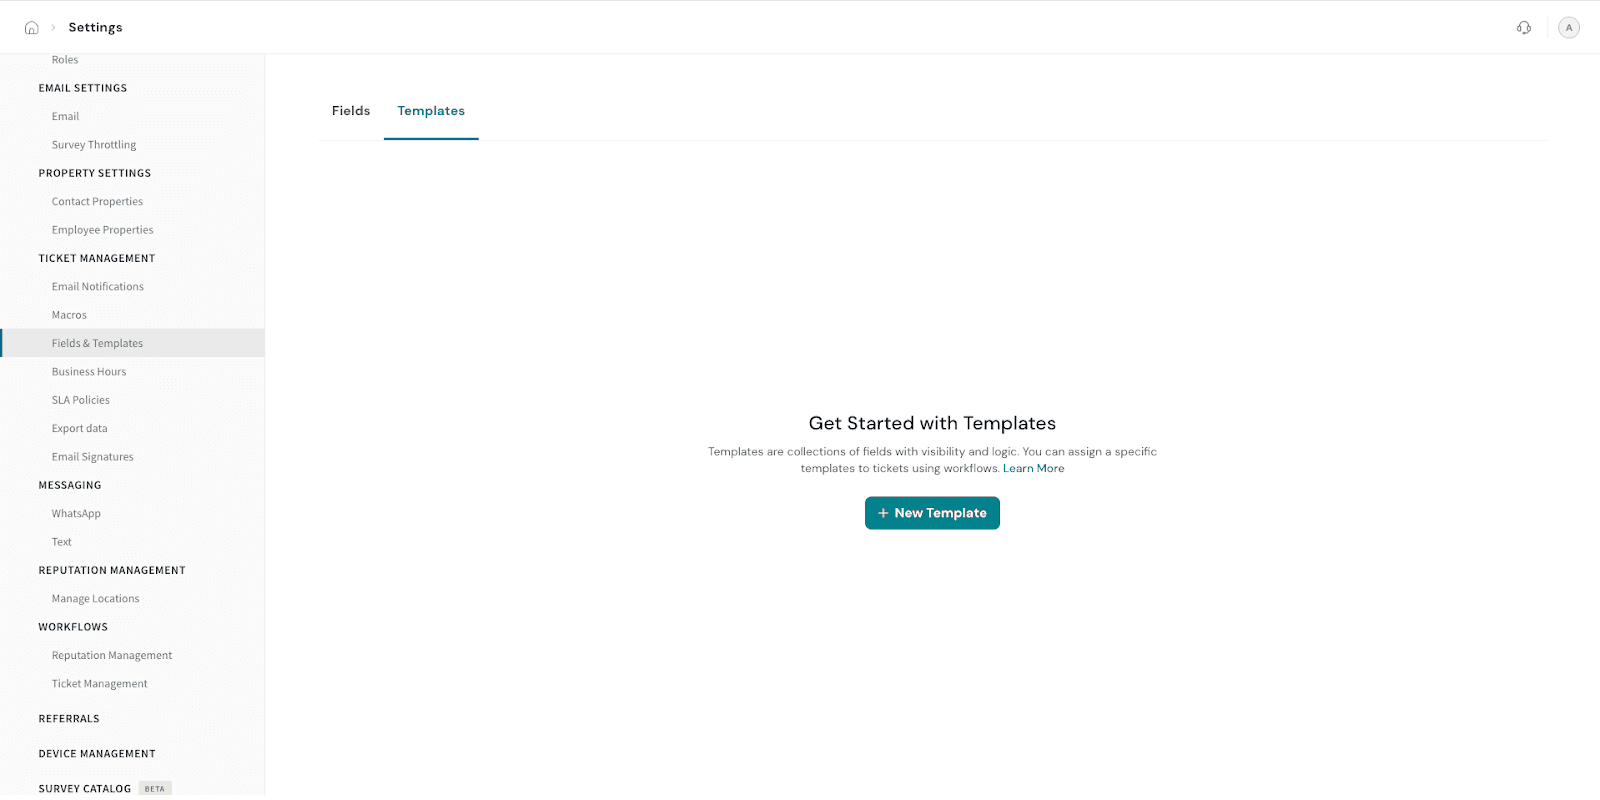
5.1. Enter a name for your template. You can also add a description to provide context, though it’s optional.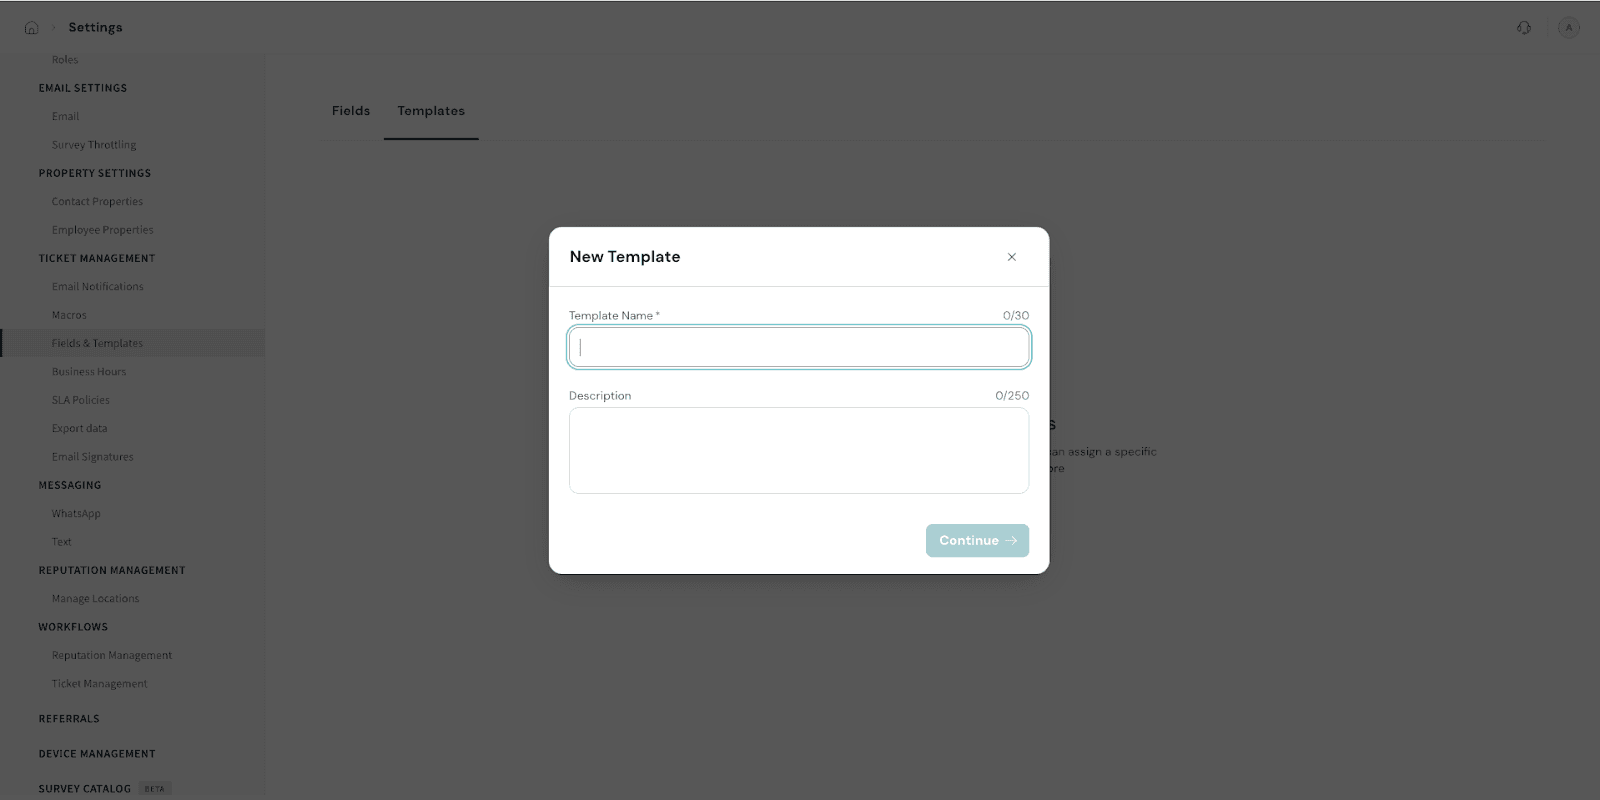
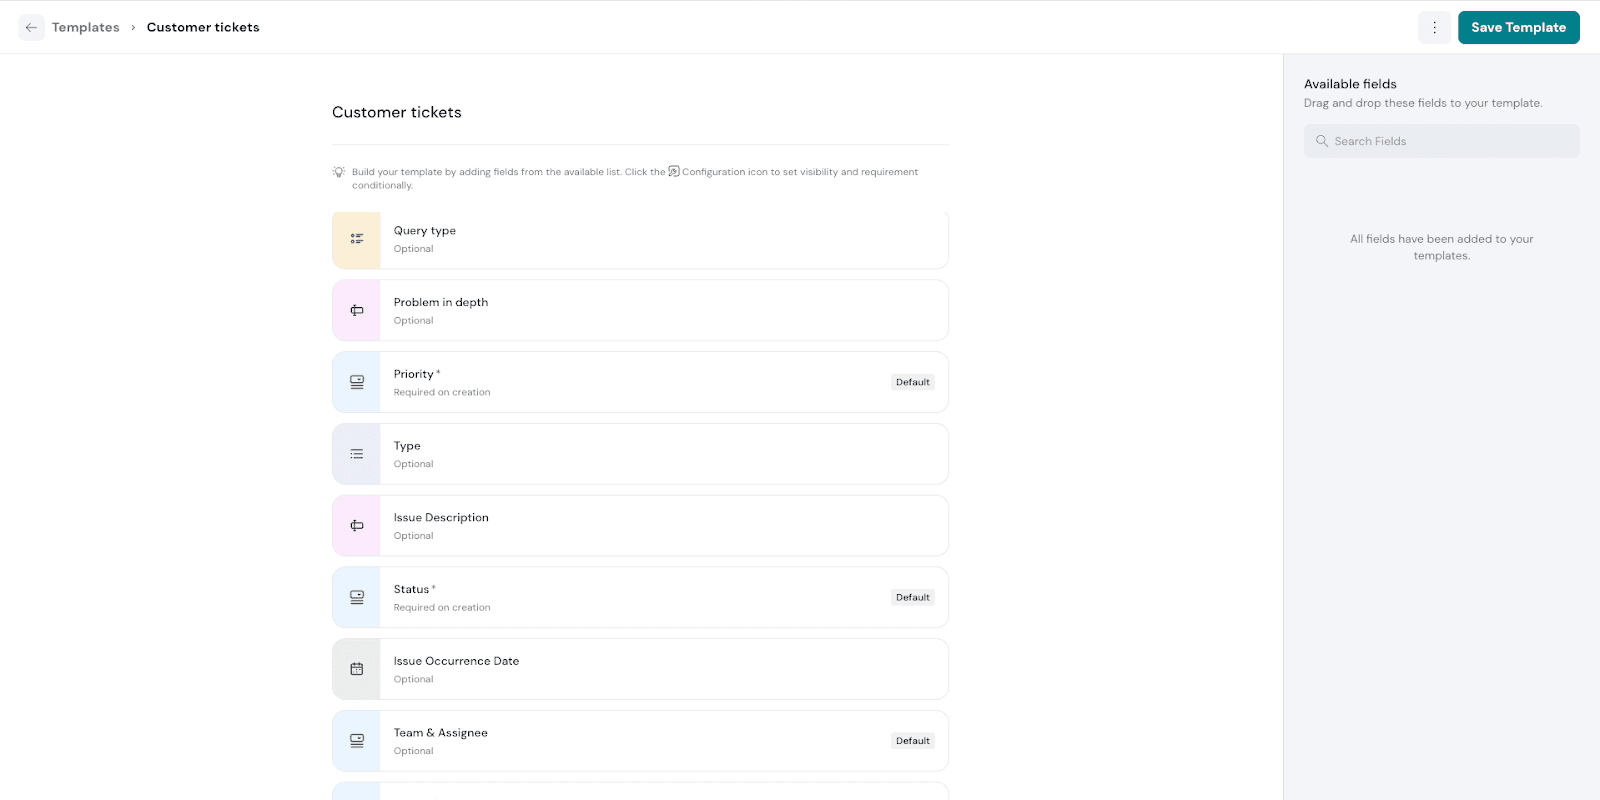
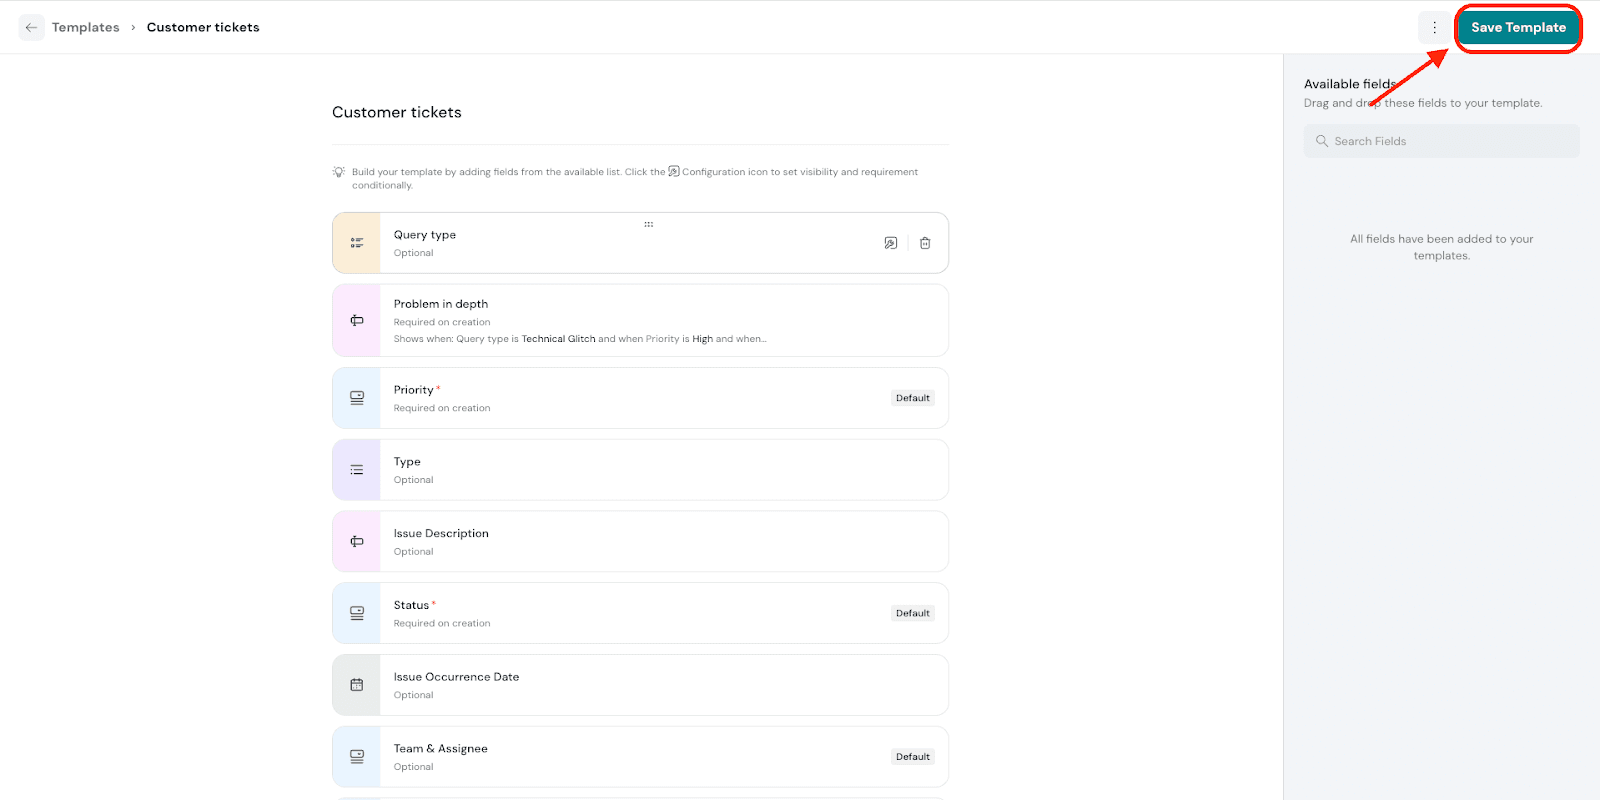
5.2. Four default fields will be included automatically. You can rearrange them to suit your preferred order.
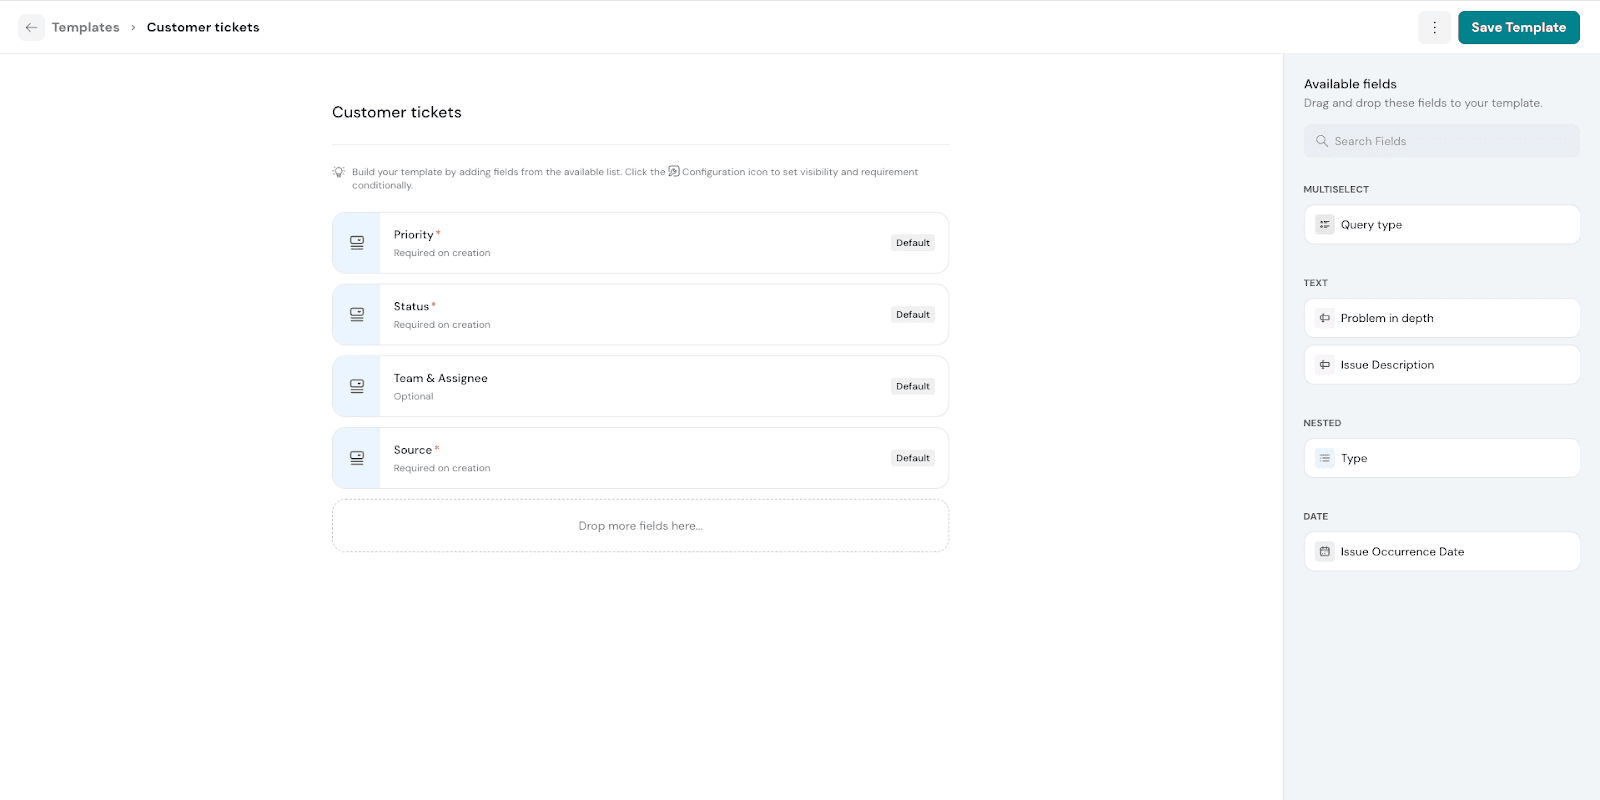
5.3. All your created fields will appear in the side panel. You can drag and drop the ones you want to include in the template.
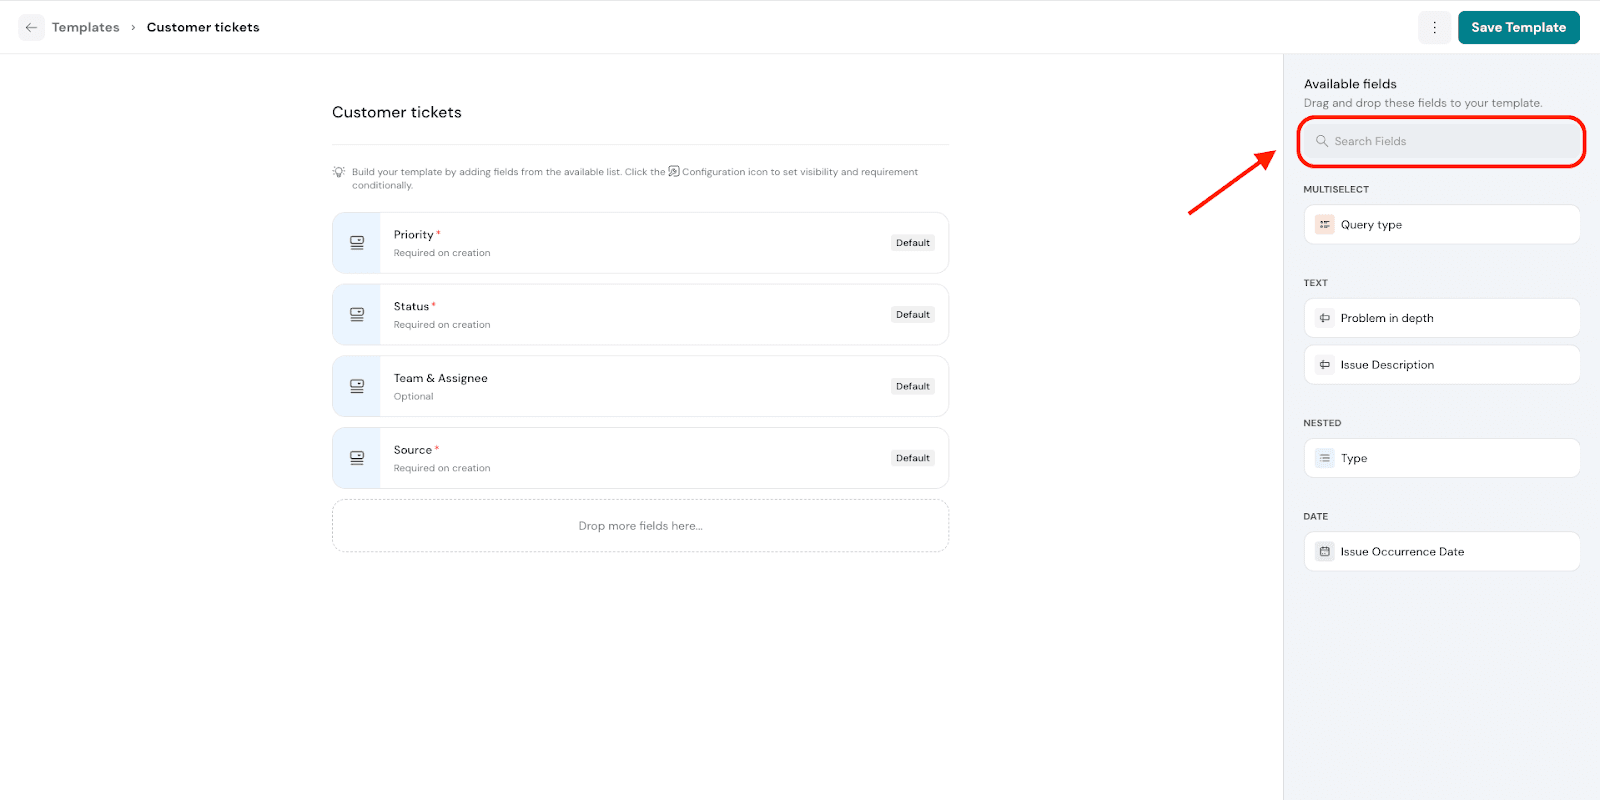
5.4. Use the search bar on the right to quickly find and add specific fields you’ve created.
5.5. For each custom field, you can configure its visibility settings. Click the Configure icon on the respective field to set when it should appear based on user input.
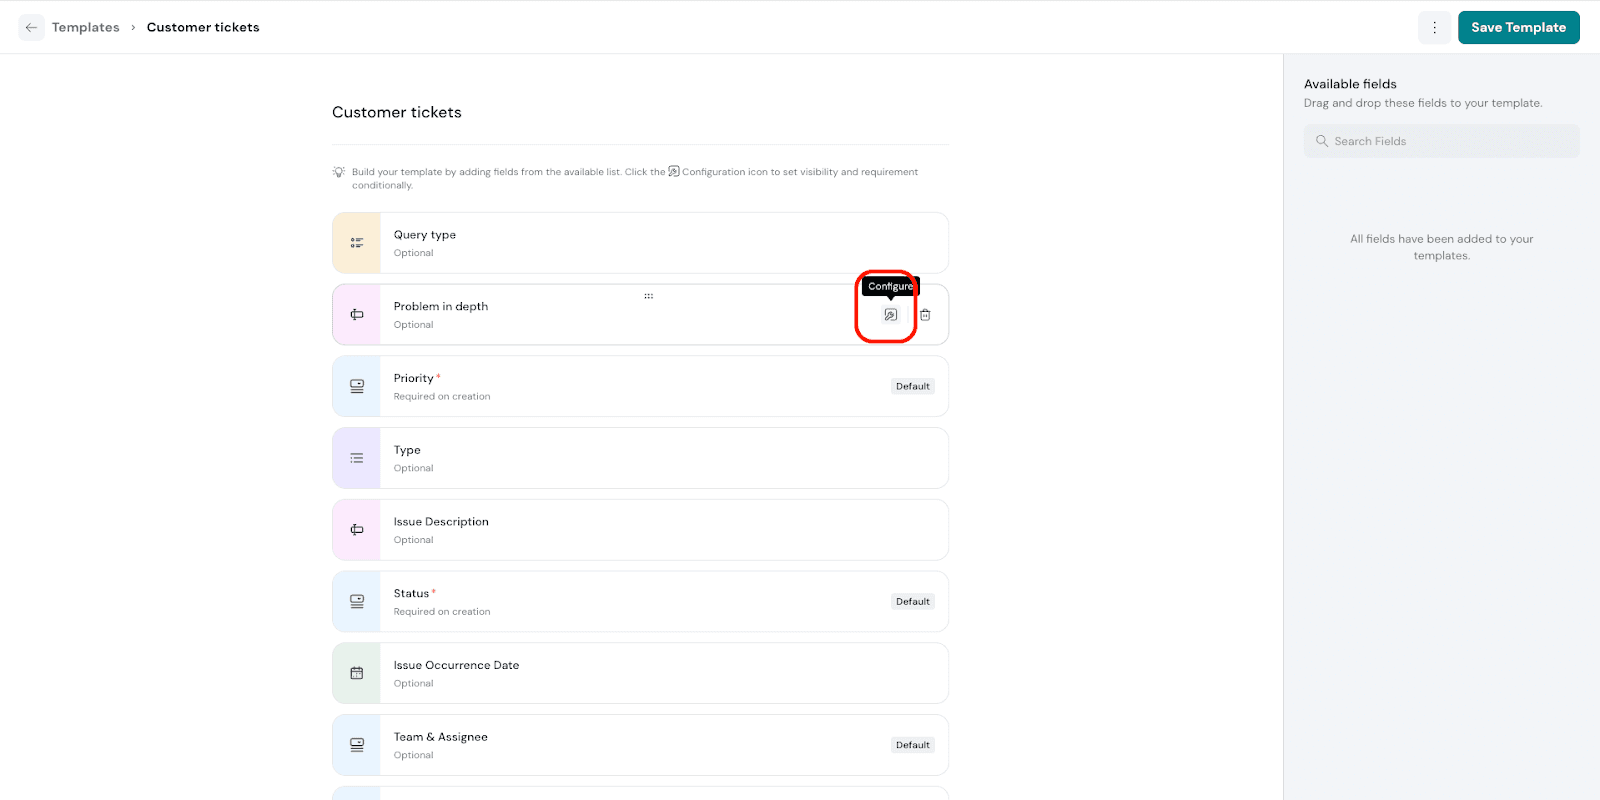
5.6. Set display conditions to control when a field appears. The field will only be shown when the specified conditions are met.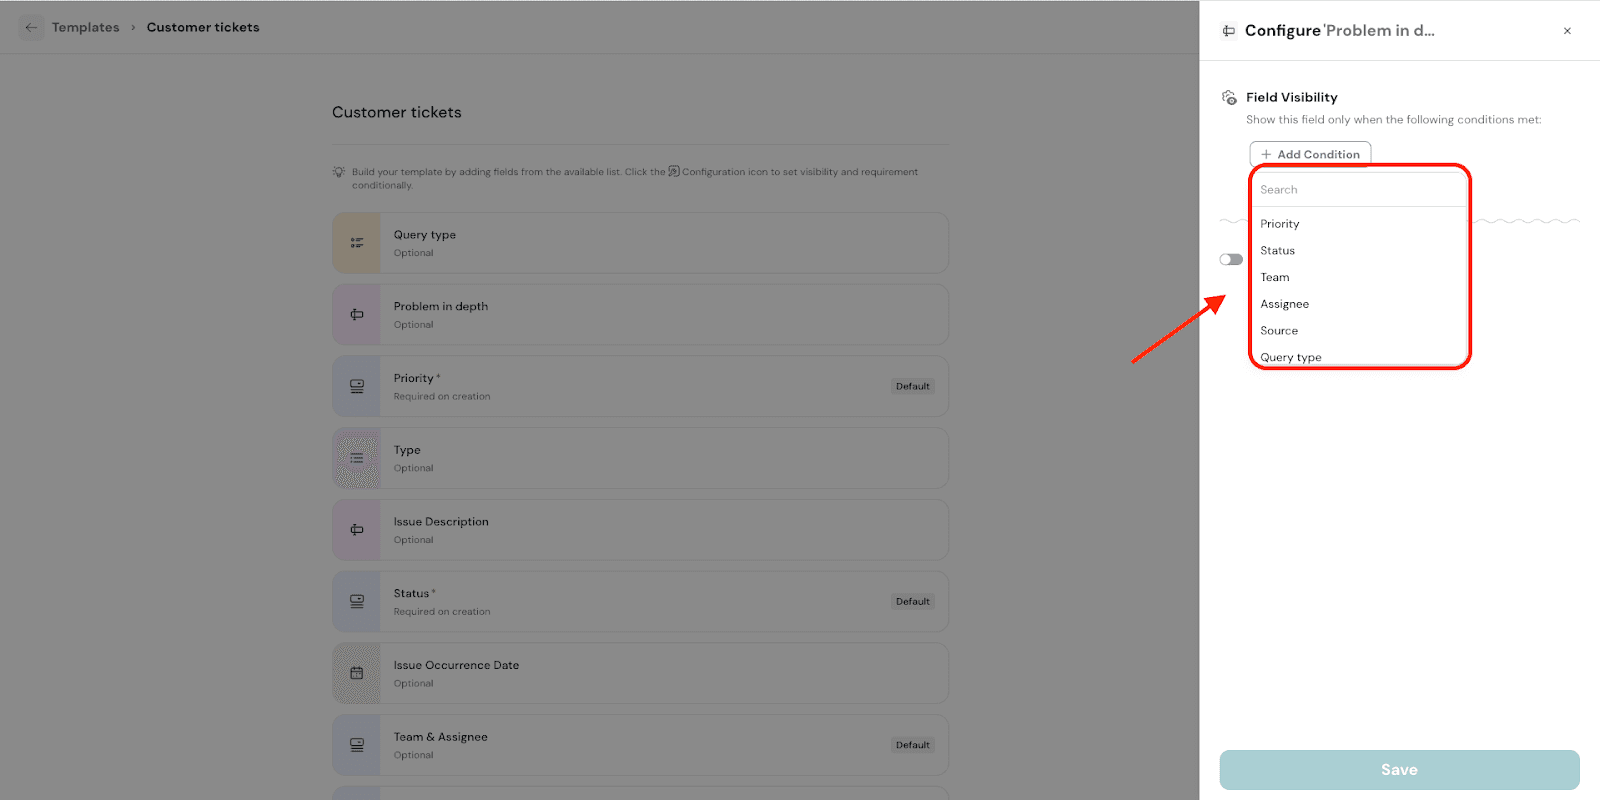
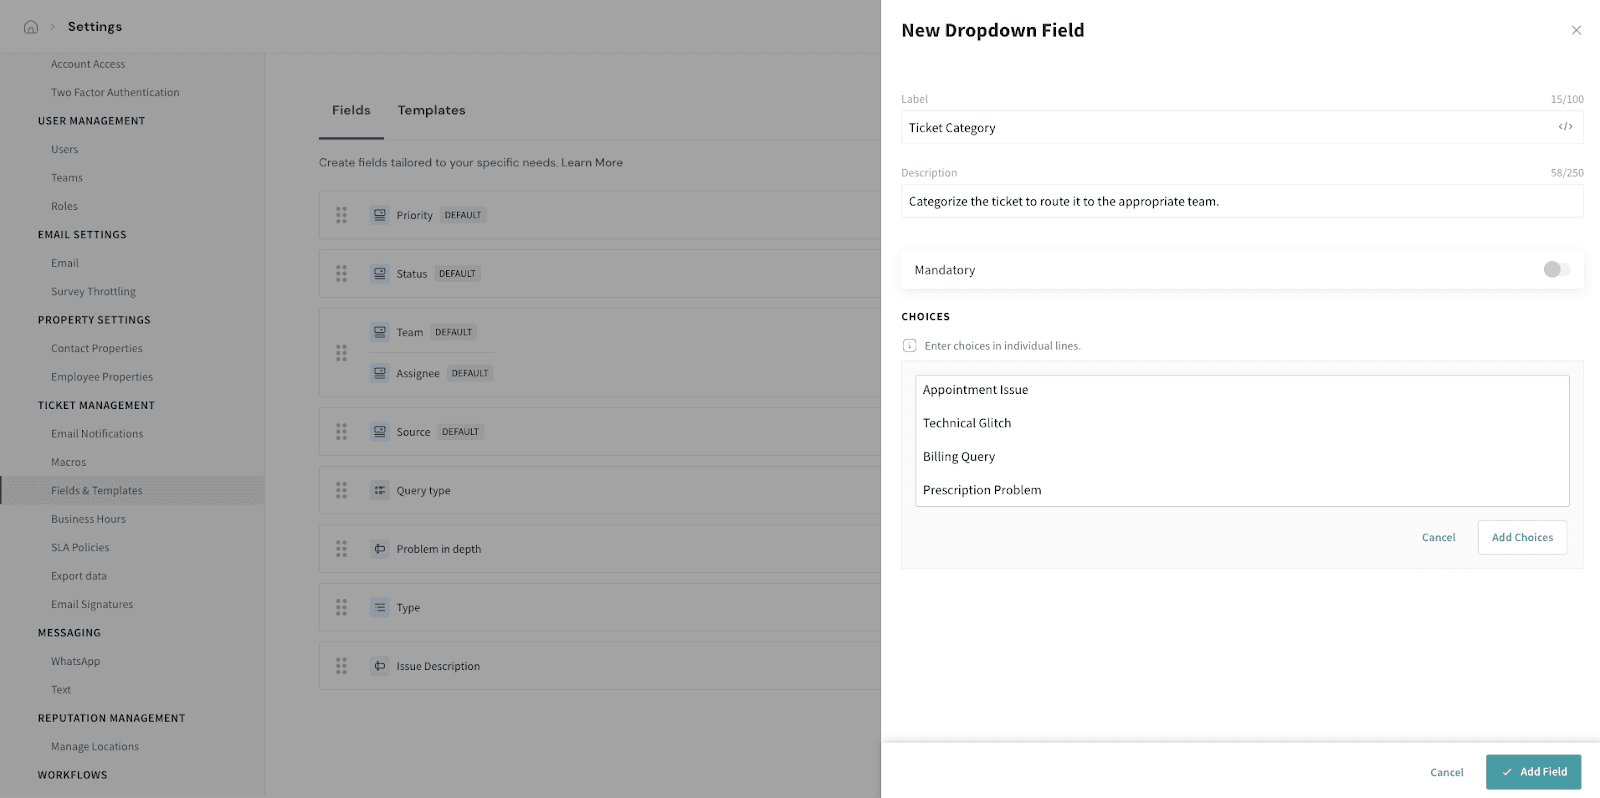
For instance, ABC Healthcare’s technical support team needs to see the "Problem in Depth" field only when the Ticket Category is set to Technical Glitch, the Priority is High, and the Status is Open.
To configure this, use the Add Another option to set multiple conditions. Then choose how they should be evaluated using And When or Or When:
This ensures that internal teams only see fields relevant to their workflow, improving efficiency and keeping the ticket interface focused leading to faster, more accurate responses and better CX.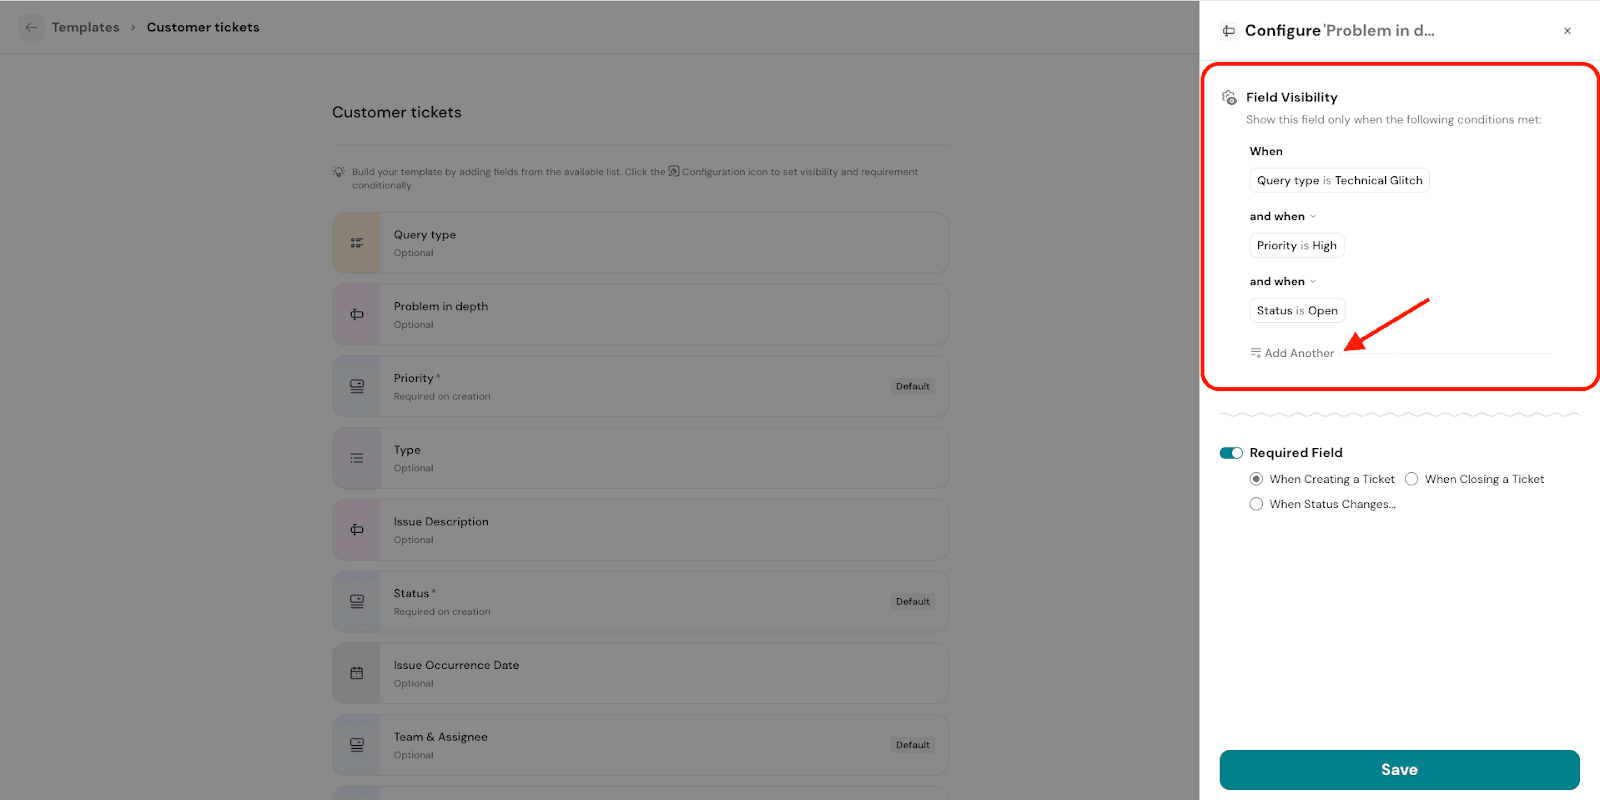
5.7. You can also choose to make the field mandatory by enabling Required Field. Then, specify when it should be required -while creating a ticket, when closing a ticket 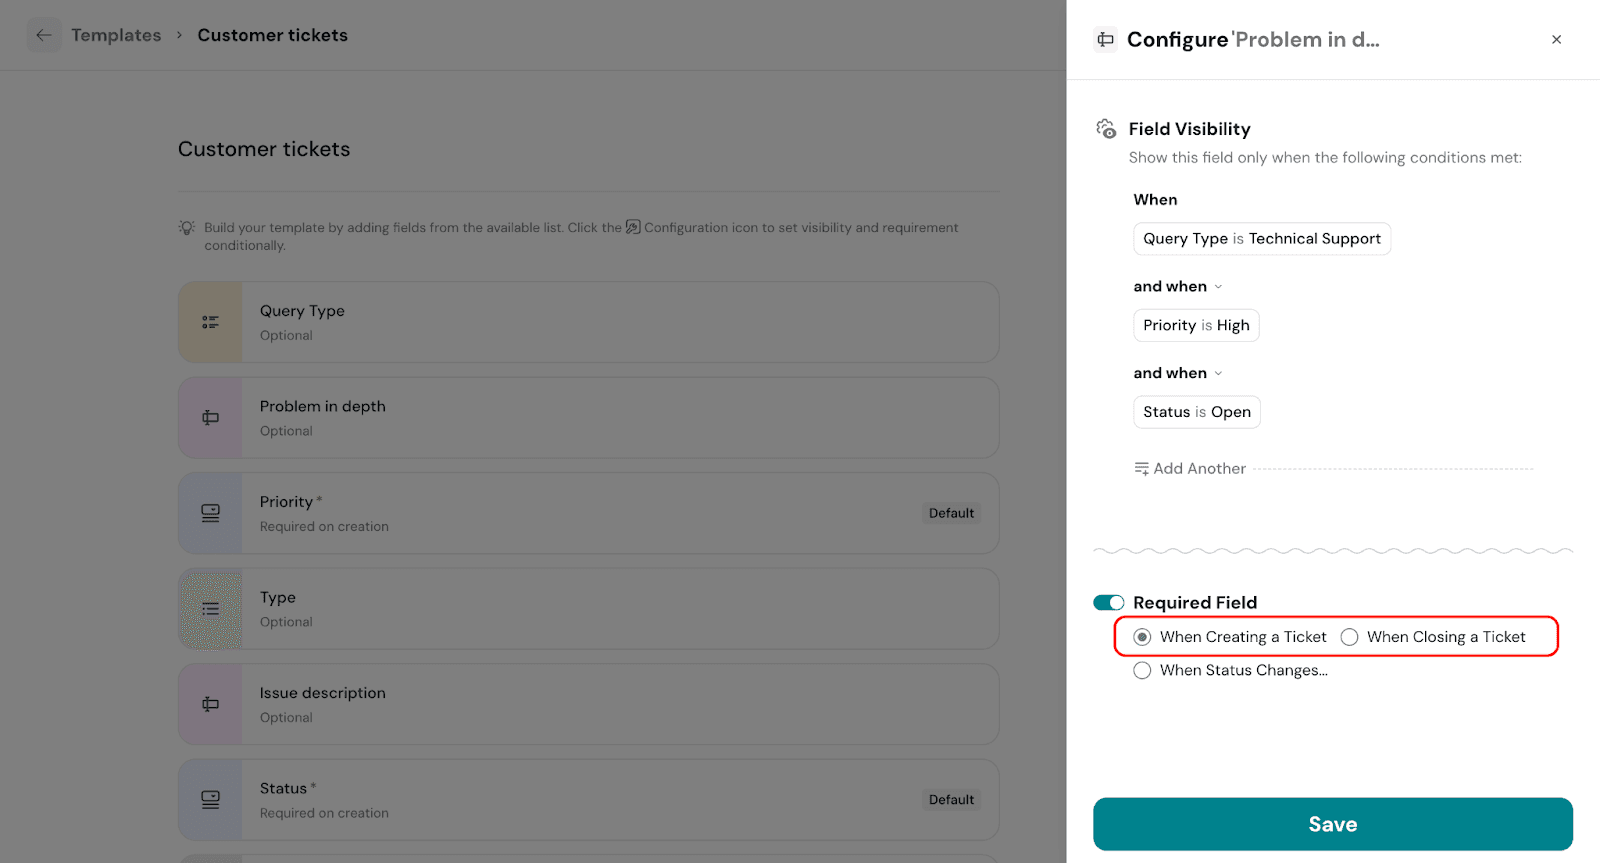
When Status Changes
In addition to making a field required while creating or closing a ticket, you can also configure it to become mandatory when the ticket status changes.
When you set this condition, you'll see a list of default status options along with any custom statuses you've added.
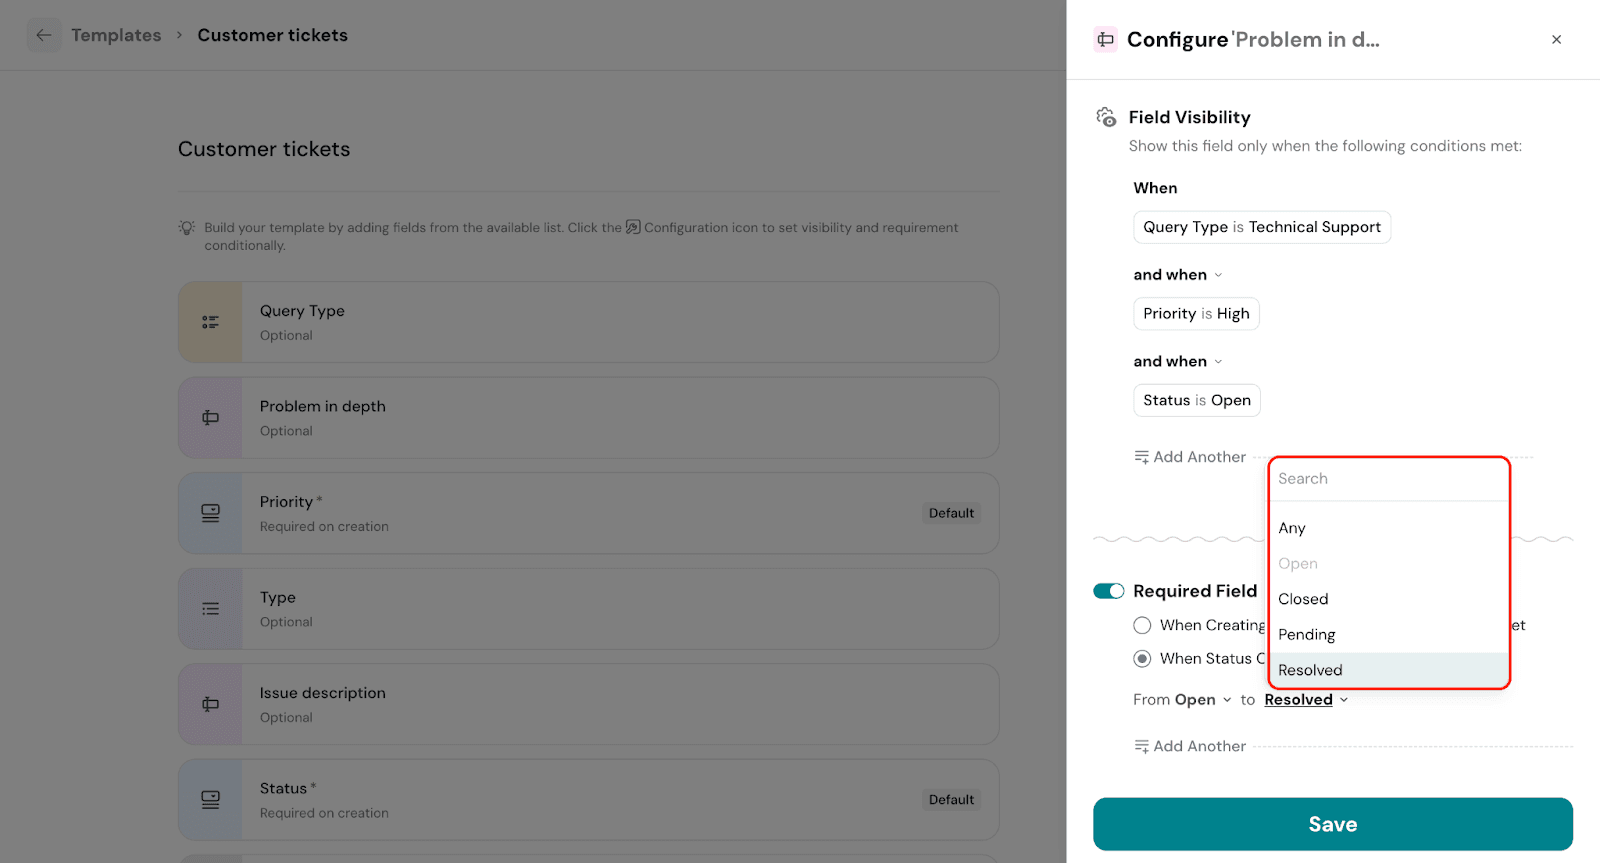
You can define a specific status transition. For example, from Open to Closed and the field will be required only during that change.
Alternatively, selecting "Any" ensures the field is required whenever the status changes, regardless of the direction.
This level of control helps ensure agents fill in important information at just the right stage of the ticket journey, improving data consistency and enabling smoother handovers between teams.
5.8. Once configured, click Save to apply the changes.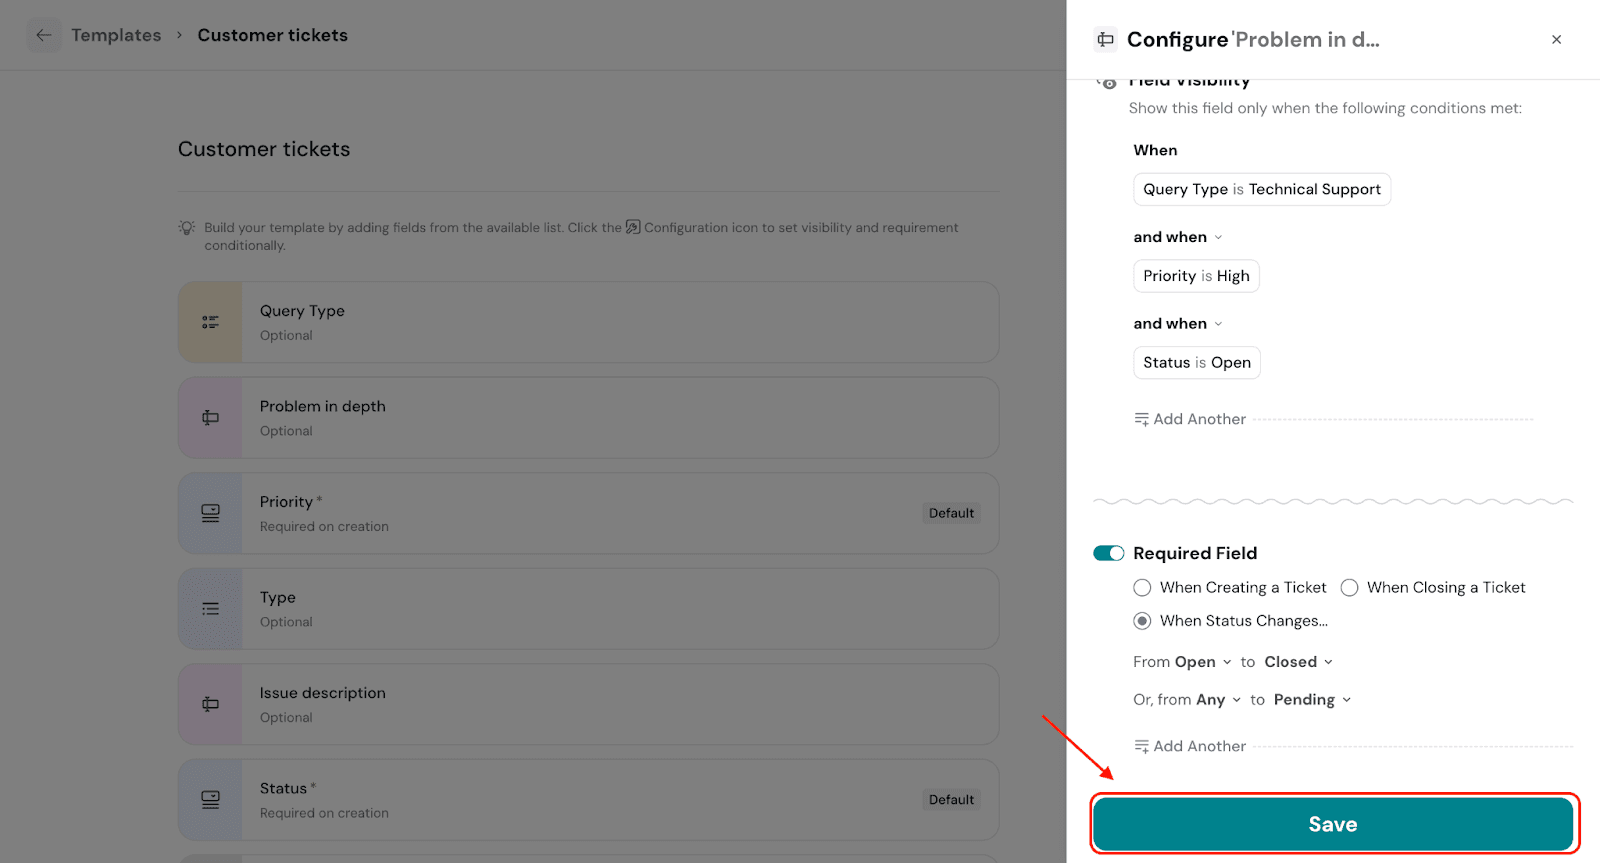
6. Once you’ve set the display conditions for the fields, click Save to save the template.
7. The next step is to incorporate the template into your survey workflows. To do this, go to the relevant survey, navigate to Workflow.
Note: The template is available in the reputation workflow also.
8. Select the Action as Ticket.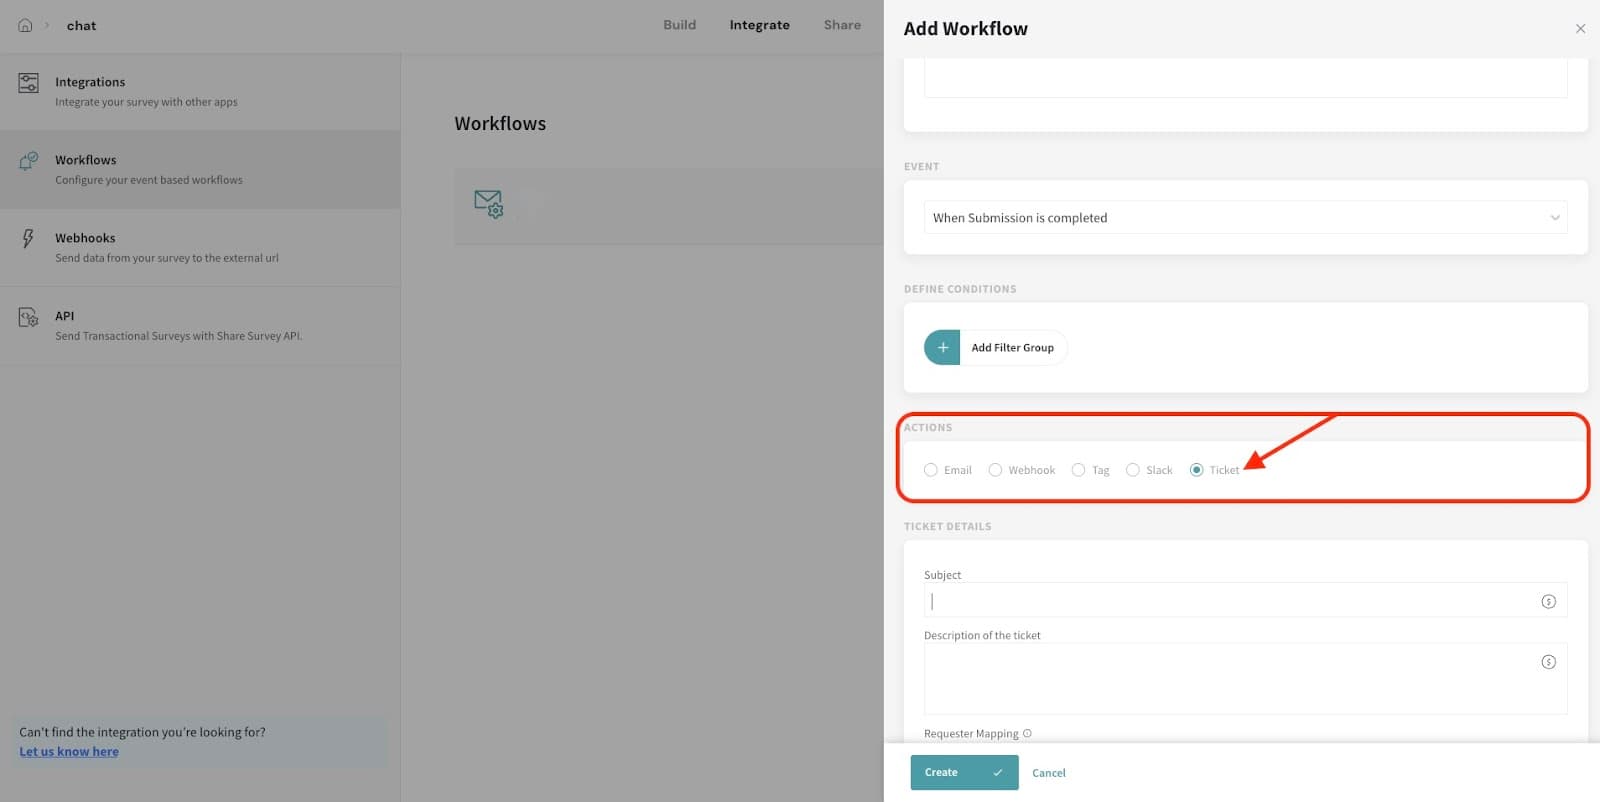
9. You’ll see the Choose Template option. Click on it to select the desired template.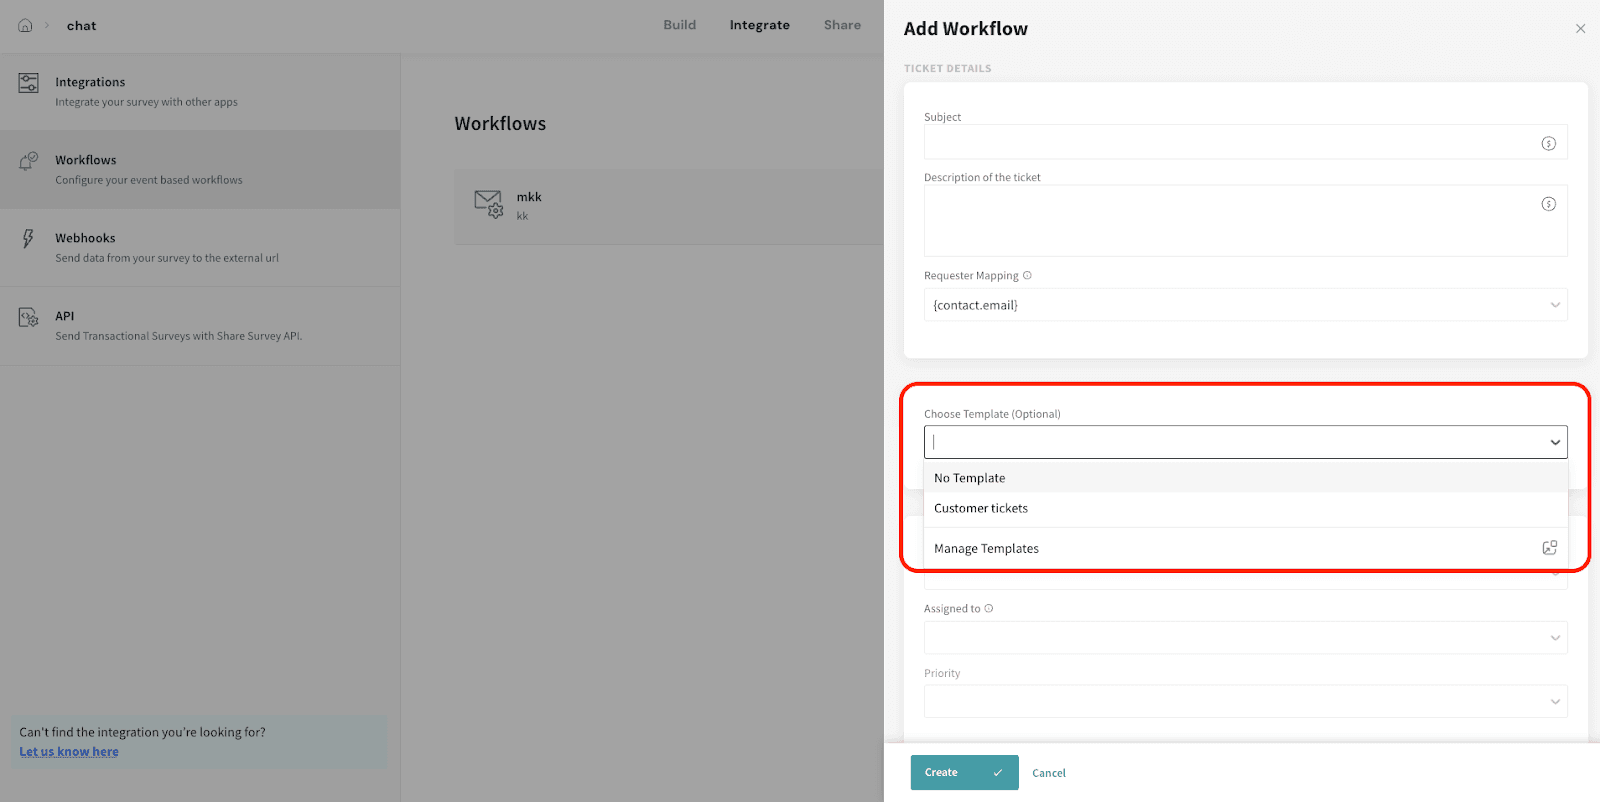
10. Under that, you’ll see a list of templates you’ve already created.
11. Select the desired template. This will apply the entire template, including all configured fields and display settings, to the ticket.
Powered By SparrowDesk