Ticket Filtering allows teams to narrow down and manage support tickets by applying specific conditions such as contact properties, survey response properties, or review ratings and properties. This makes it easier to focus on the most relevant tickets, leading to faster resolutions and improved support efficiency.
For large support operations that handle hundreds of tickets daily, filtering is essential. It reduces the time spent manually searching through queues, helps prioritize urgent issues, and ensures that no critical ticket is overlooked keeping response times low and customer satisfaction high.
Let's look at a use case to understand. A customer of an online electronics store reports receiving a defective product and leaves a poor CSAT rating. With hundreds of tickets in the queue, it’s difficult for the support team to identify and prioritize this important issue without a proper filtering system. As a result, the customer’s complaint could go unnoticed for longer, leading to frustration and a poor customer experience.
Here’s how Ticket Filtering helps:
Improved ticket discovery: Support agents can quickly find relevant tickets by filtering based on survey responses, review ratings, and requestor details, avoiding the need to manually sift through long queues.
Smarter workflow automation: Tickets from dissatisfied customers or high-priority segments are automatically routed to senior agents or escalated based on pre-set filter criteria, ensuring faster resolutions.
Better dashboard insights: Managers can apply filters to tickets overview dashboard, creating more accurate and meaningful reports to track negative feedback trends and improve decision-making for proactive support.
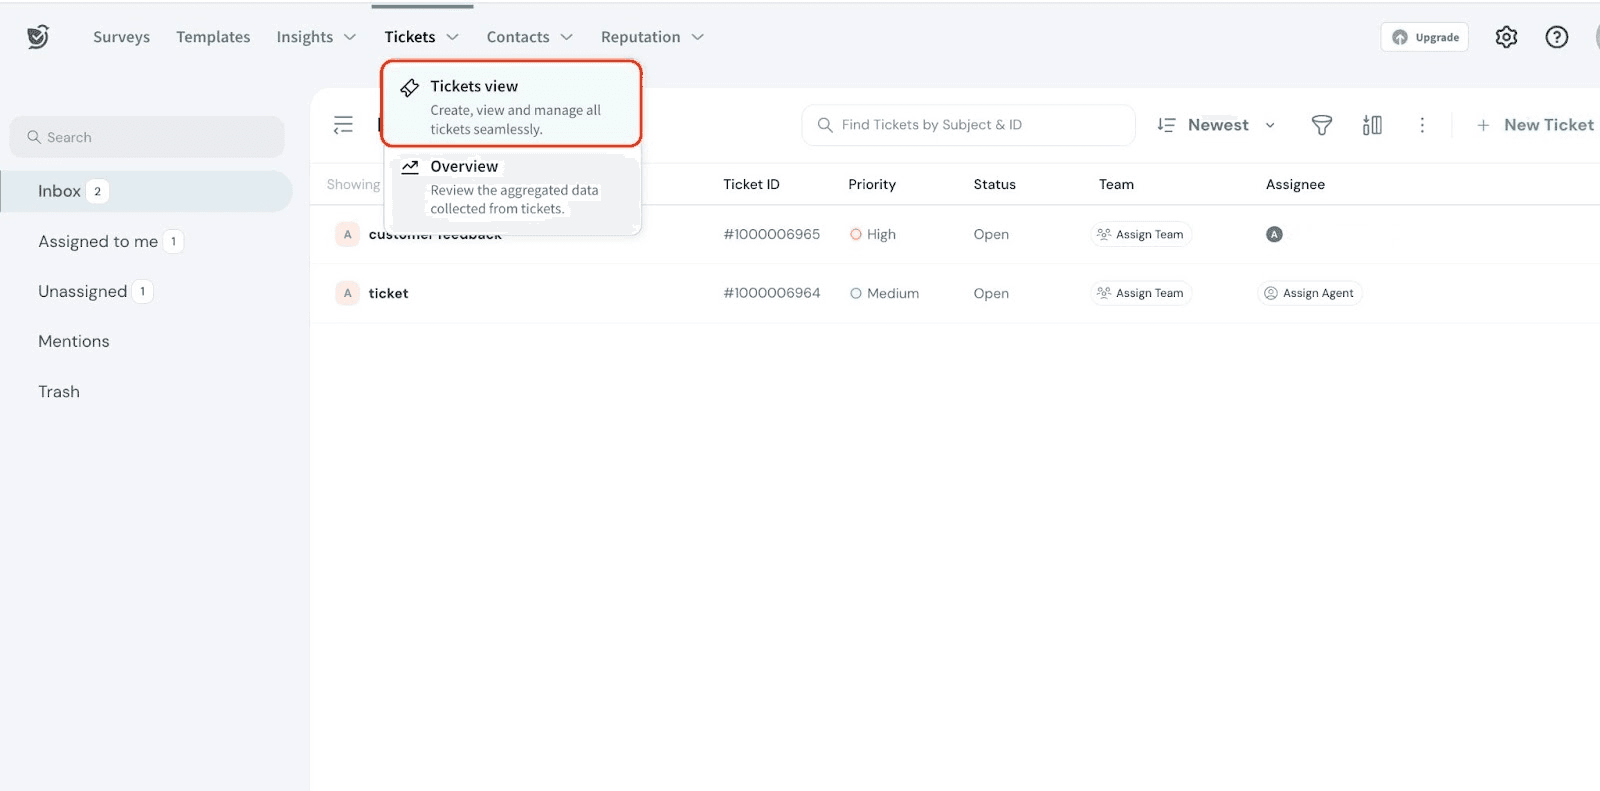
Ticket Filtering is primarily used in
Ticket View
Overview Dashboard
Ticket Workflows
Ticket Filters in Ticket View
Here’s how we can filter tickets in Ticket View.
Navigate to Tickets view under Tickets.
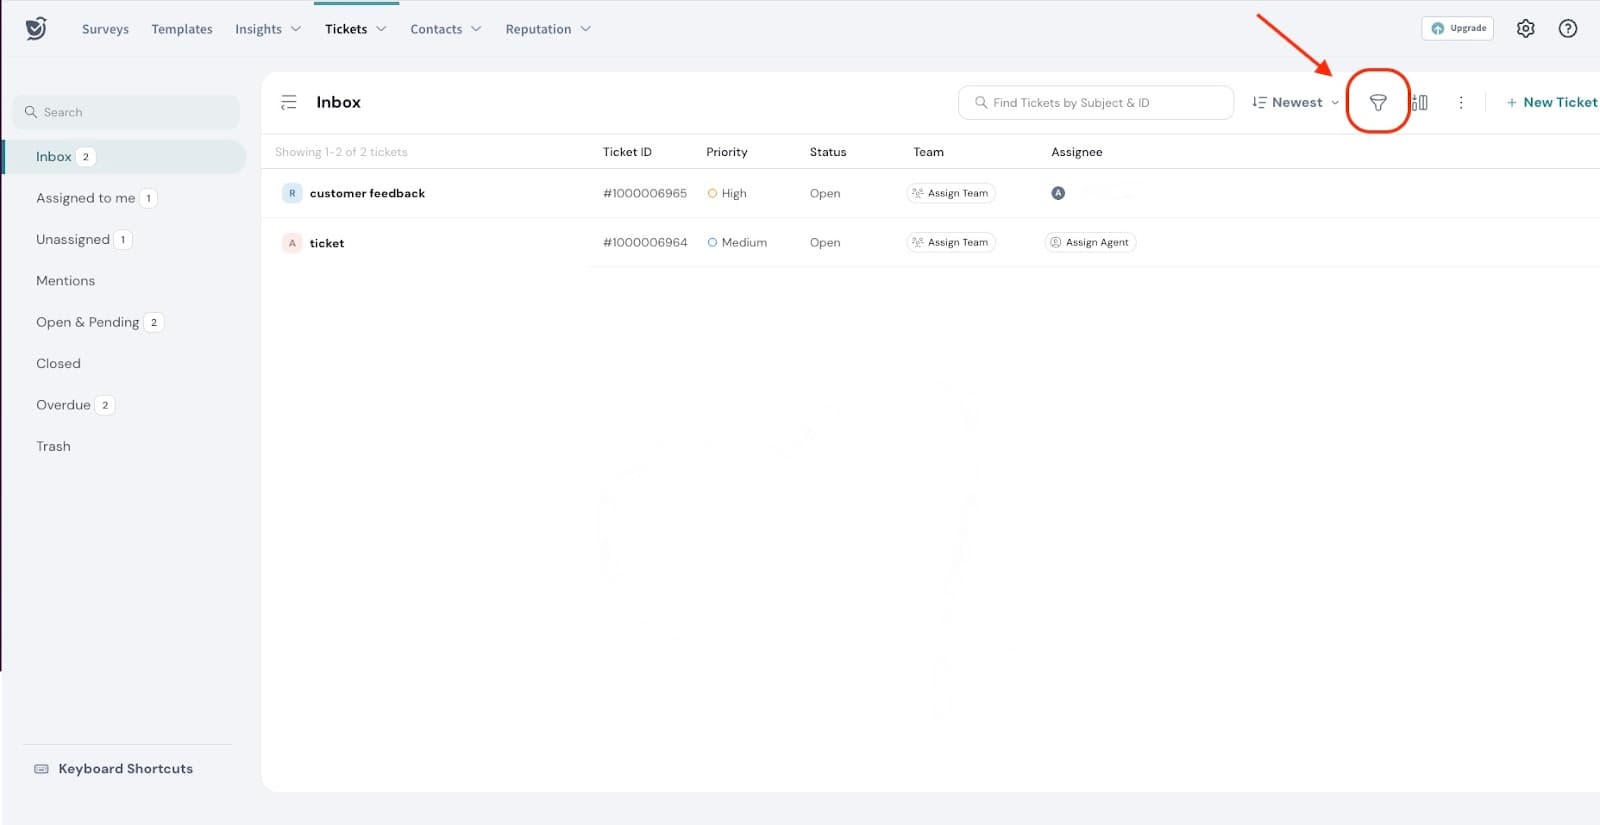
Go to the funnel icon on the top right.
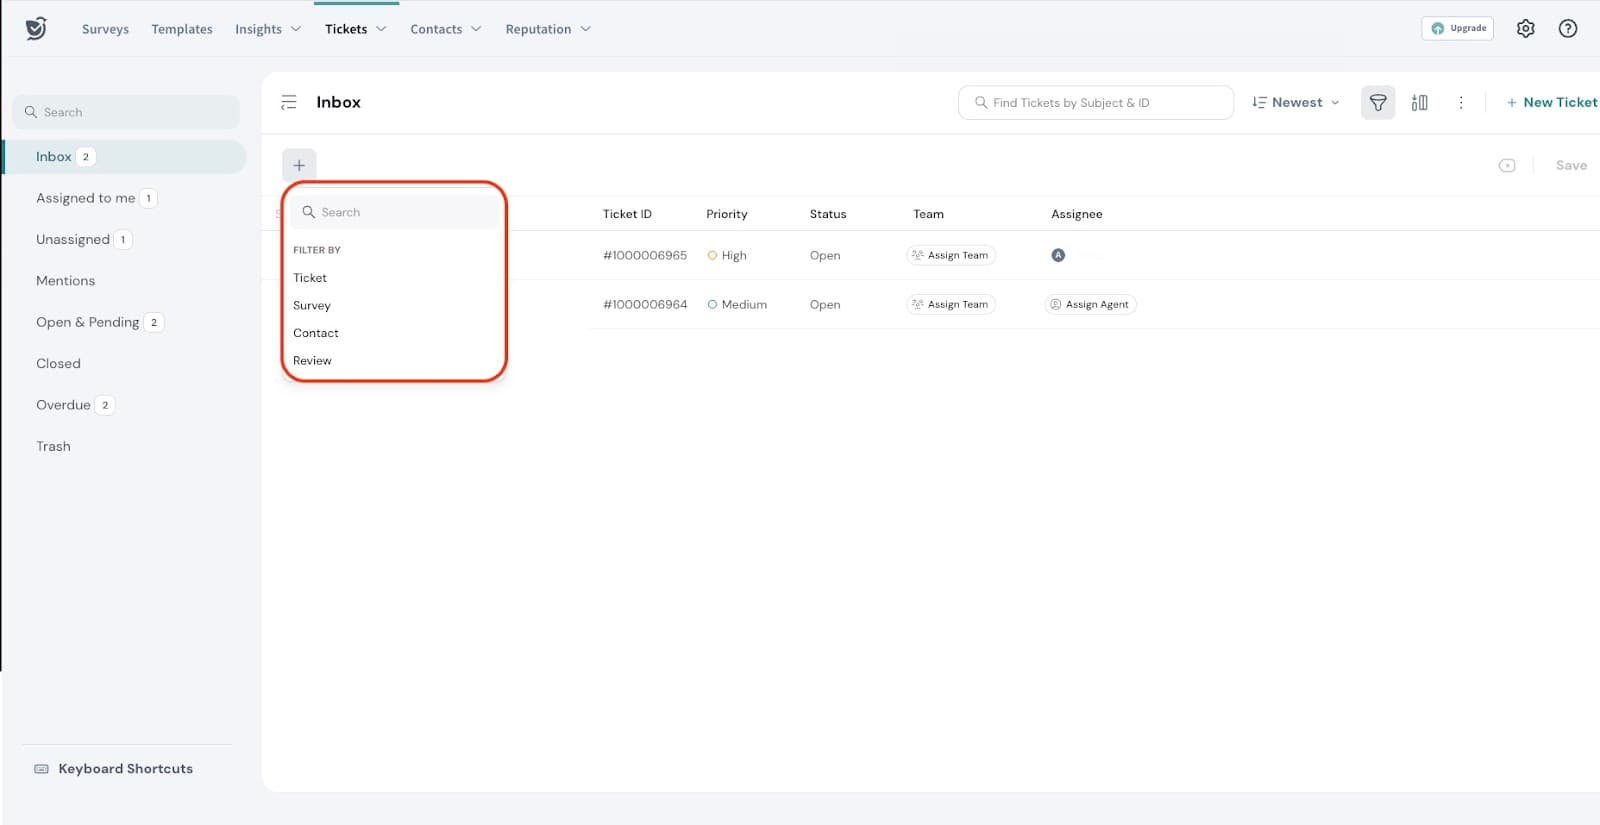
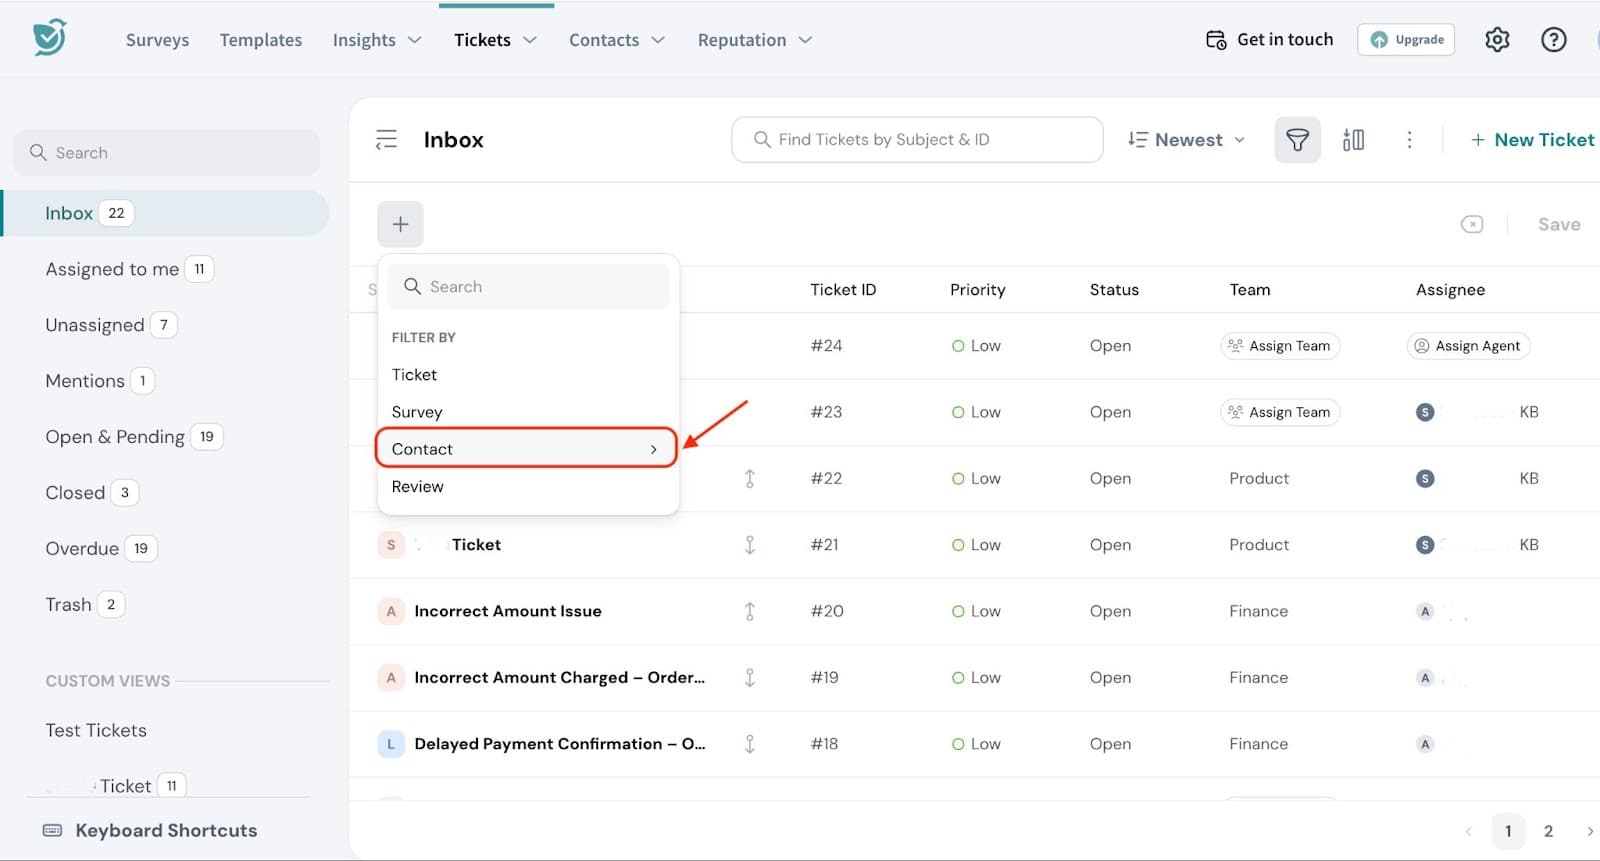
You will be able to filter by
Ticket
Survey
Contact
Rating
Ticket Filtering
Ticket Properties Filtering allows support teams to organize and manage large volumes of incoming tickets by applying specific conditions related to the ticket itself—such as its status, priority, requester, or assigned agent. By narrowing down the ticket list, teams can focus on the most urgent or relevant issues, streamline their workflow, and ensure faster, more efficient resolution.
Let’s see how to filter based on ticket filters.
Go to Ticket under Filter By.
You can filter tickets based on attributes like priority and status, assignment details like assignee or team, and time-based criteria such as resolution date or creation date.
Below are the different options available under Ticket filters:
Priority filters tickets based on how urgent they are marked—such as Low, Medium, High, or Urgent. Example: In our case, filter by High Priority to find critical tickets like the one where a customer reported a defective product, ensuring they’re resolved quickly.
Status lets you filter tickets based on their current progress—such as Open, Pending, Resolved, or Closed. Example: Filter by Open status to focus on unresolved tickets, including the defective product complaint that still needs attention.
Team allows you to view tickets assigned to a particular support team, helping distribute workloads and monitor team performance. Example: Filter by the Customer Success team to track how they're handling tickets related to poor delivery experiences.
Time-Based Criteria include filters like ticket creation date, resolution date, or first response due. These help prioritize tickets based on when they were received or how long they’ve been open. Example: Filter by tickets created in the last 24 hours to quickly identify and respond to recent issues like the defective product complaint.
Survey Filtering
Survey Properties Filtering lets you narrow down tickets based on the feedback customers have shared through surveys. You can filter by survey type (like CSAT, NPS), specific survey names, or response details such as channel, location, or device used. This helps support teams quickly spot negative feedback, identify patterns, and prioritize tickets that require urgent attention.
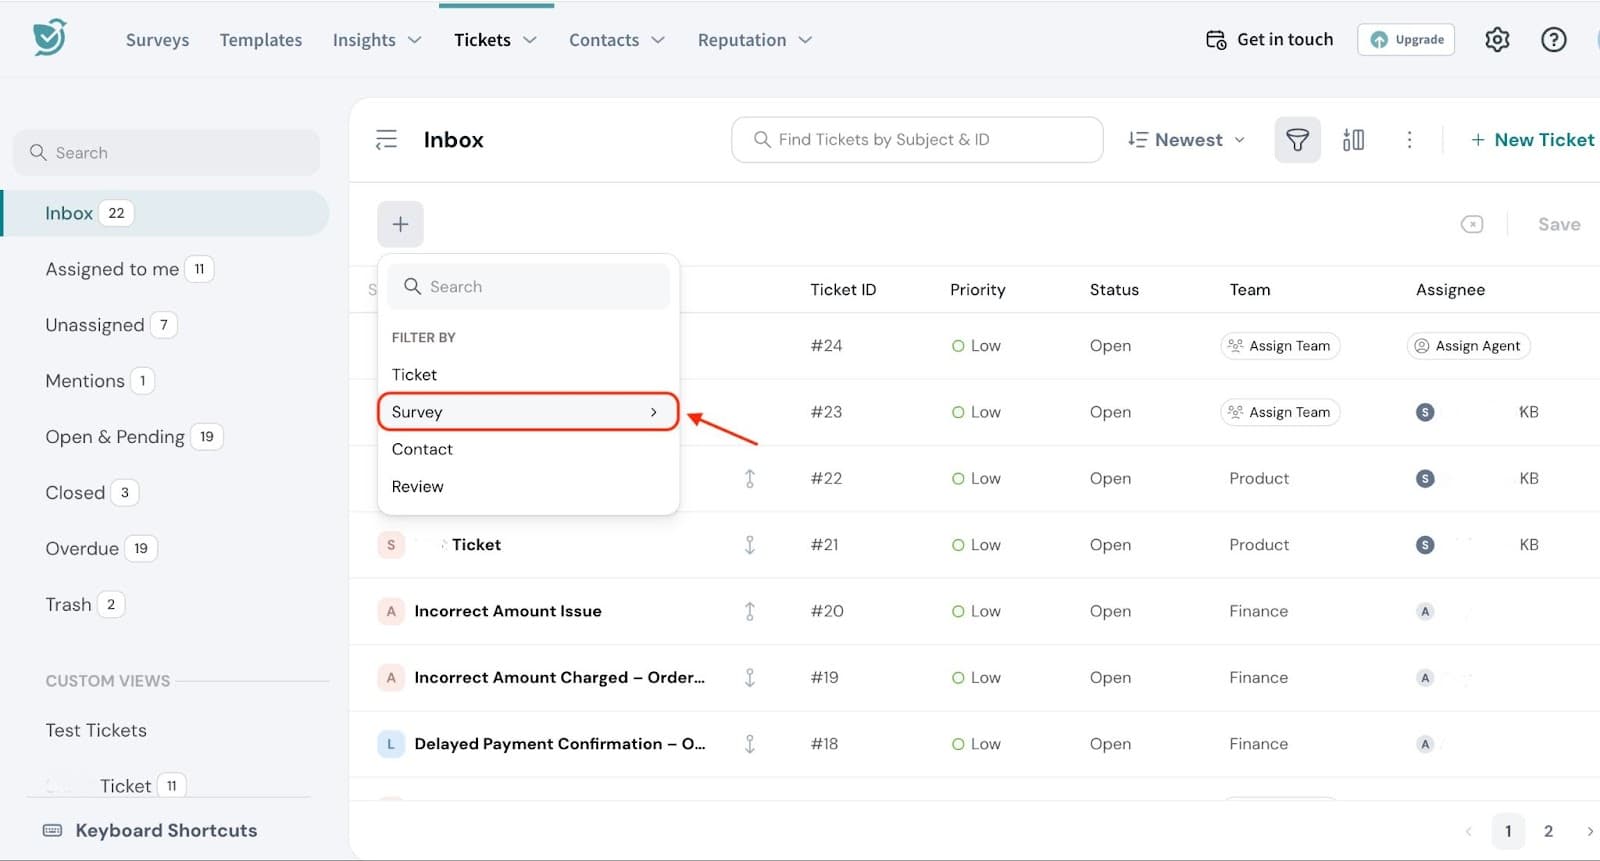
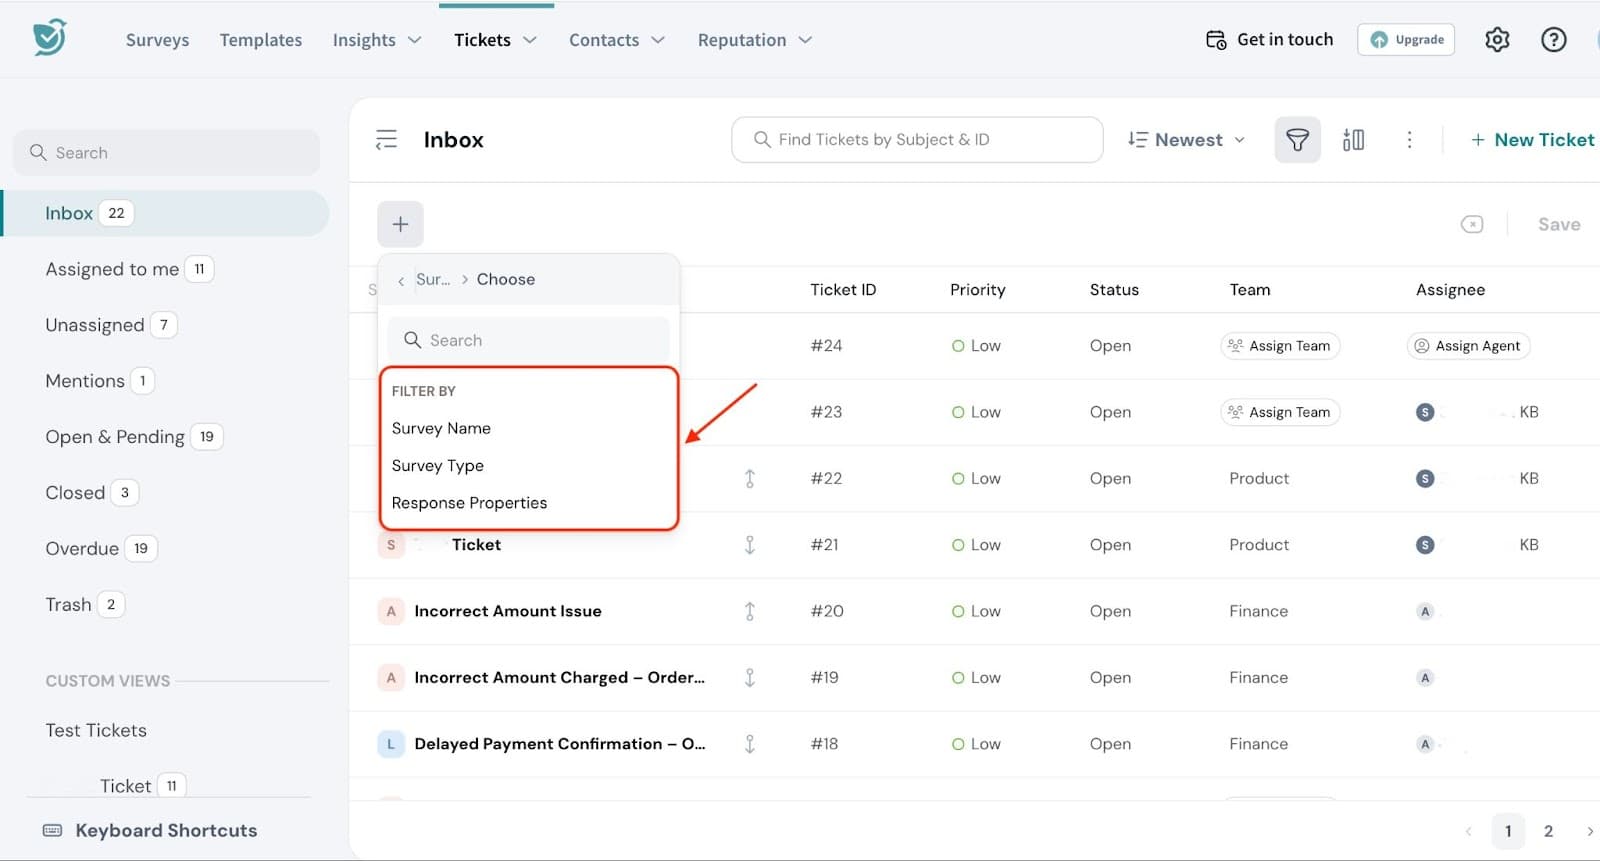
Go to ‘Survey’ under ‘Filter By’.
You will be able to filter further based on Survey Name, Survey Type and Response Properties.
Below are the different options available under Survey filters:
Survey Name filters tickets based on the specific survey that was sent. You can filter by names like “Post-Purchase Feedback”, “Return Experience Survey”, or any survey name.
Example: In our case, we can filter by "Post-Purchase Feedback" to easily identify all tickets related to the delivery experience, including those where customers, like the one who received a defective product, left feedback.
Survey Type filters tickets by the kind of survey used. This includes CSAT (Customer Satisfaction), NPS (Net Promoter Score), or CES (Customer Effort Score).
Example: Filter by “CSAT” to focus on satisfaction responses and quickly identify other customers who had poor experiences.
Response Properties lets you filter tickets based on how and where the survey was submitted. This includes the communication channel (email, chat, web etc), customer location, device type, browser, and more.
Example: Filter by channel set to email and location as California to find similar low-CSAT tickets submitted through email from that region.
Contact Filtering
You can filter tickets based on various contact properties to help quickly locate and manage relevant support requests. Here’s how we can filter based on Contact.
Go to ‘Contact’ under ‘Filter By’.
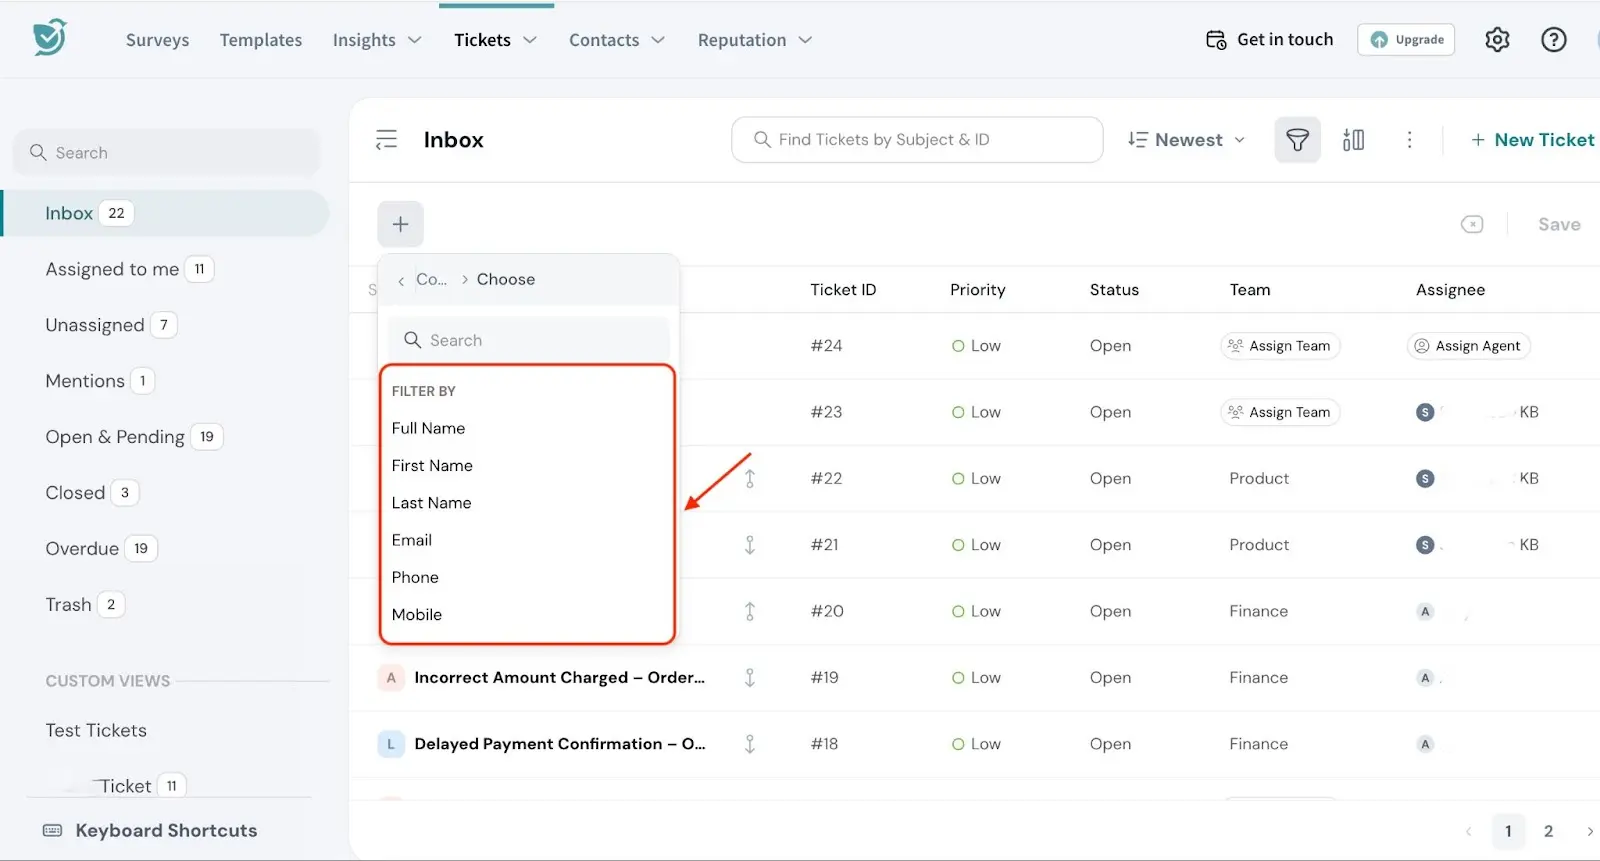
You will be able to filter further based on Name, Contact detail and Create data.
Below are the different options available under Contact filters:
Name Filters lets you filter tickets based on the contact's Full Name, First Name, or Last Name. This helps you quickly locate tickets from a specific customer when you know their name or part of their name.
Example: In our case, filter by Full Name to find the ticket from the customer who reported receiving a defective product. This ensures their issue is addressed promptly and doesn't get overlooked in a large queue of tickets.
Contact Details lets you filter tickets based on various contact details such as Email, Phone, Mobile, Language, Agent Email, and Job Title. These filters help you focus on tickets related to a specific contact or communication method, allowing for a more tailored support experience.
Example: Filter by Email to locate all tickets submitted by the customer's email address, ensuring that no related issues are overlooked. You can also filter by Language to prioritize tickets from customers who speak the same language, helping to ensure smoother communication and faster resolution.
Created Date lets you filter tickets based on when the contact was created. This helps you focus on tickets from newly added customers and is ideal for onboarding support or tracking early user issues.
Example: Filter by Created Date to find tickets submitted by recently added customers. This helps you quickly identify and support new customers like the one who just signed up and reported a defective product, ensuring their first experience is handled with extra care.
Review Filter
You can filter tickets tied to customer reviews, making it easier to track sentiment, improve response times, and manage reputation.
Example: In our case, filter by reviews less than 3 to quickly find negative feedback, like the complaint about the defective product. This allows the team to address poor experiences promptly and prevent further dissatisfaction.
Go to Review under ‘Filter By’.
You will be able to filter further based on Platform, Location and Rating.
Platform Filter lets you narrow down tickets based on where the customer review was submitted, such as Google, Trustpilot, or other third-party review platforms. This helps teams track feedback by source and assign follow-ups based on ownership or priority.
Example: Filter by Trustpilot to view tickets where customers reported issues, such as receiving a defective product, through that platform. This ensures public feedback is addressed quickly to protect brand reputation.
Location Filter helps you focus on tickets linked to reviews from specific regions, cities, or countries. This is especially useful for identifying geographic patterns in customer sentiment, service issues, or recurring complaints tied to certain areas.
Example: Filter by Location to find all low-rated reviews submitted from California, making it easier to investigate issues like frequent delivery problems or damaged products reported in that region.
Rating Filter lets you sort tickets based on the review score. You can set conditions like less than, greater than, equal to, or not equal to a specific rating to highlight high or low sentiment tickets.
Example: Filter by rating less than 3 to quickly find negative reviews, like the one from the customer who was unhappy with the defective product. This allows for faster resolution and follow-up.
Ticket Filters in Ticket Overview Dashboard
Filters in dashboards are essential for gaining a focused and actionable overview of ticket data. They allow you to refine the information displayed, so you can quickly identify trends, monitor critical issues, and evaluate support team performance. By using filters based on ticket properties, survey responses, review ratings, or contact details, teams can optimize their dashboard experience to prioritize the most relevant data.
In our example, the support team wants to track the effectiveness of their response times. By applying filters in the dashboard, they can view metrics for the tickets created from the CSAT survey alone. This helps the team quickly spot tickets that are taking longer to resolve and are resulting in poor customer satisfaction, allowing them to take corrective action before the issues escalate.
Here’s how we can filter tickets in the Overview Dashboard.
Navigate to Overview under Tickets.
Go to the funnel icon on the top right of the dashboard.
You’ll see filter options grouped under Ticket, Survey, Contact, and Review—just like in the ticket view. 4. Apply the same filtering steps covered earlier to narrow down data in your dashboard. This helps generate more focused insights, track trends by segment, and monitor key metrics like resolution time and open tickets count by region or ticket volume by contact type.
Pro Tip: Dashboards become more actionable when filters are used to highlight the data that matters most.
Ticket filters in Workflows
Filters help define specific conditions when setting up ticket workflows. You can use filters based on survey responses, reviews, contact details, and more to automatically assign, escalate, or route tickets. This ensures that important issues are handled promptly and by the right teams.
In our example, let’s say a customer from California leaves a negative review and a low CSAT rating, we can set up a workflow where tickets from that region, submitted via email, with poor survey responses and low review scores are automatically assigned to the Customer Success team for immediate follow-up, ensuring faster resolution and a better customer experience.
Here’s how we can filter tickets in Ticket Workflows.
Go to Settings.
Navigate to Ticket Management under Workflows. 3. Create a New Workflow. 4. Under Define Conditions, you will be able to Add Filter Group. 5. You will find options to filter tickets based on Survey type, Response type, Review type, Contact Type. 6. Use the same filtering steps explained above to create conditions in workflows. This helps automate ticket assignments, escalations, or follow-ups based on specific criteria like survey scores, review ratings, or contact information, ensuring the right tickets reach the right teams faster.
Pro Tip:Use filters to trigger workflows based on high-impact signals, like negative CSAT, poor reviews, or priority customers, so critical tickets are routed and resolved without delay.
Feel free to reach out to our community if you have questions.