
Search
An email signature is a pre-defined block of text automatically added at the end of the reply in a ticket management system. It usually includes the agent’s name, job title, department, and company branding elements like logos, links, or disclaimers.
In CX ticketing workflows, email signatures help create a consistent and professional appearance across all customer communications irrespective of which team agent sends the message.
Let’s look at a use case to understand better.
A customer of a fashion eCommerce store fills out a feedback form to share their experience with a return and a ticket is created for this issue. Over a few days, the customer receives replies from three different agents. One email has a first name only, another has no signature, and the third includes inconsistent formatting.
The customer starts to question if they're really dealing with the same company and doesn’t know who to follow up with.
In this case here’s how Email Signature can help:
Minimizes risks of typos, or missing contact details in replies.
Lets see how to set up an Email Signature
1. Navigate to Settings on the top right.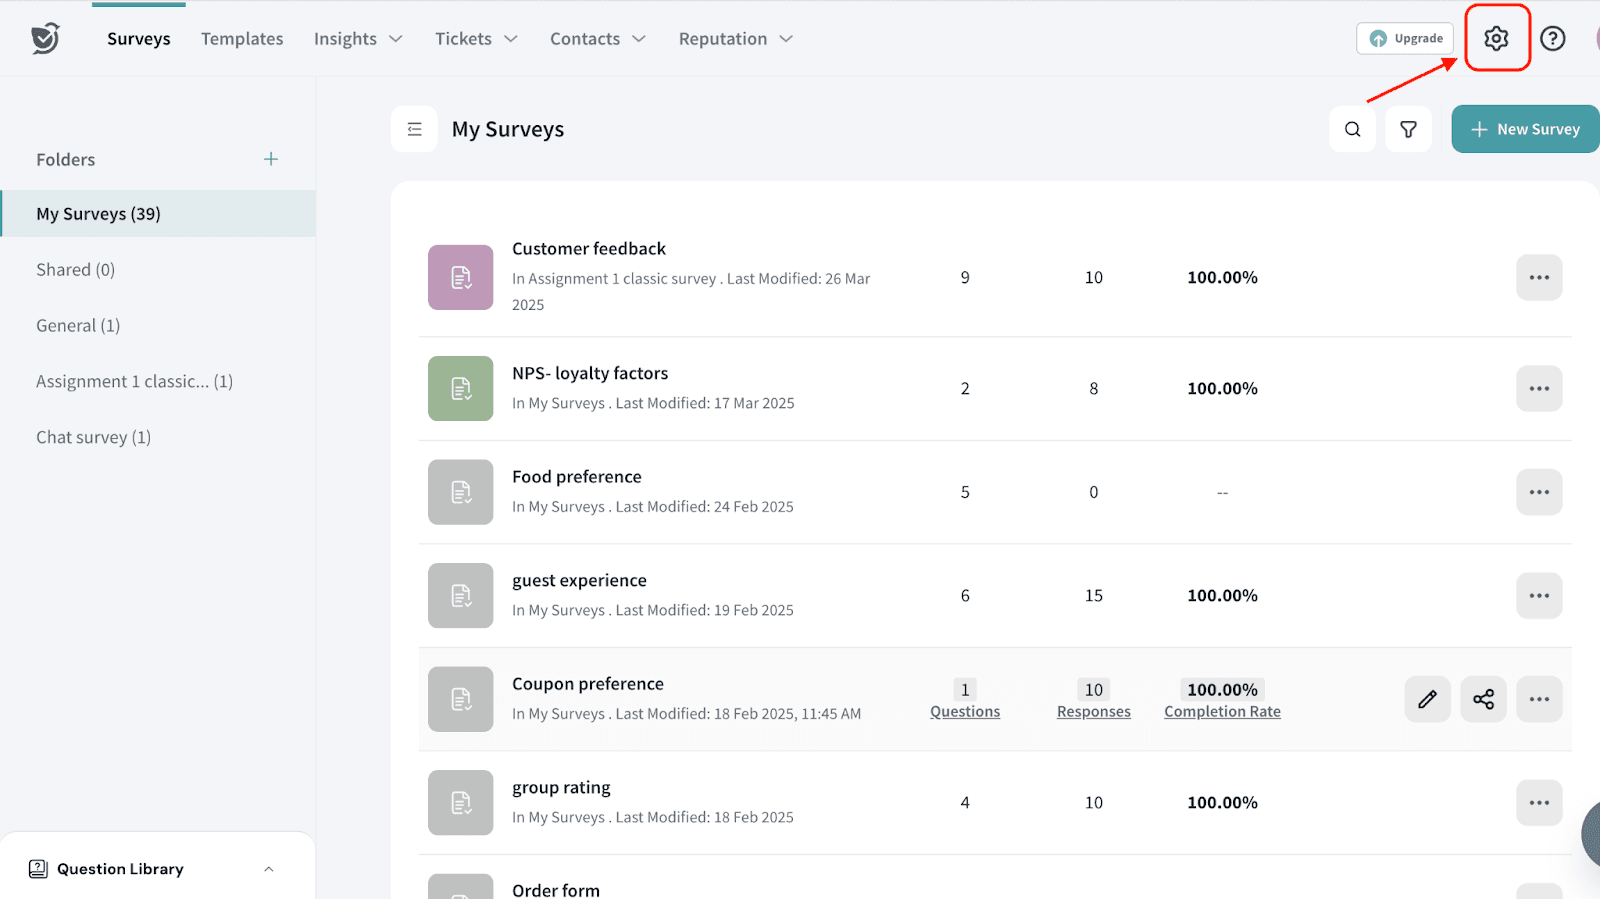
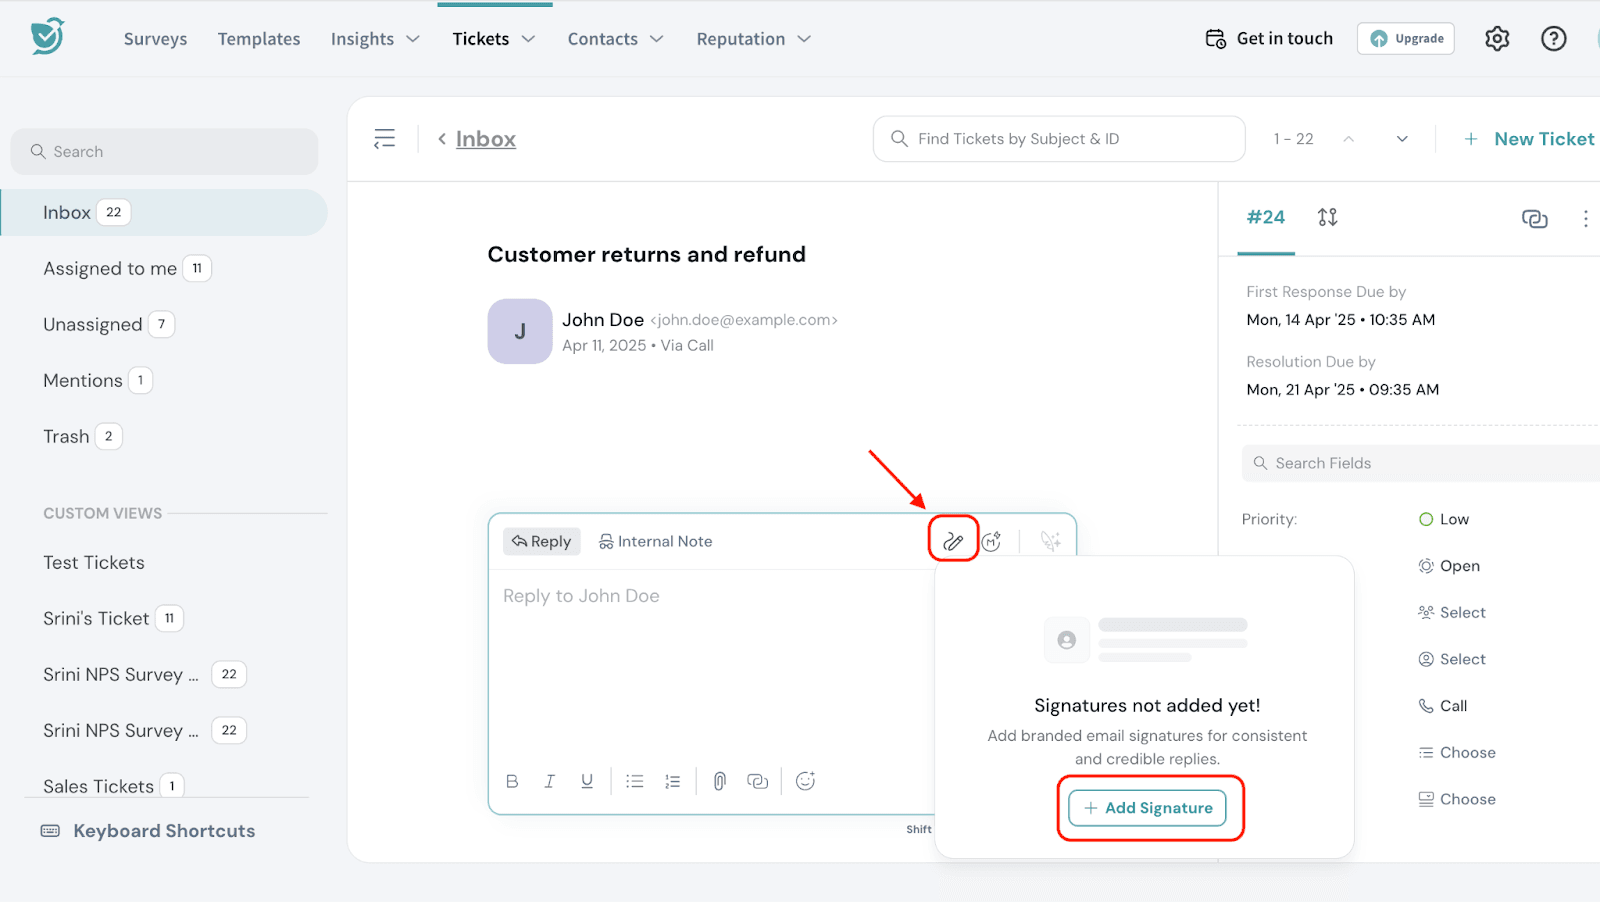
2. Go to Email Signatures under Ticket Management and click on ‘Add Signature’.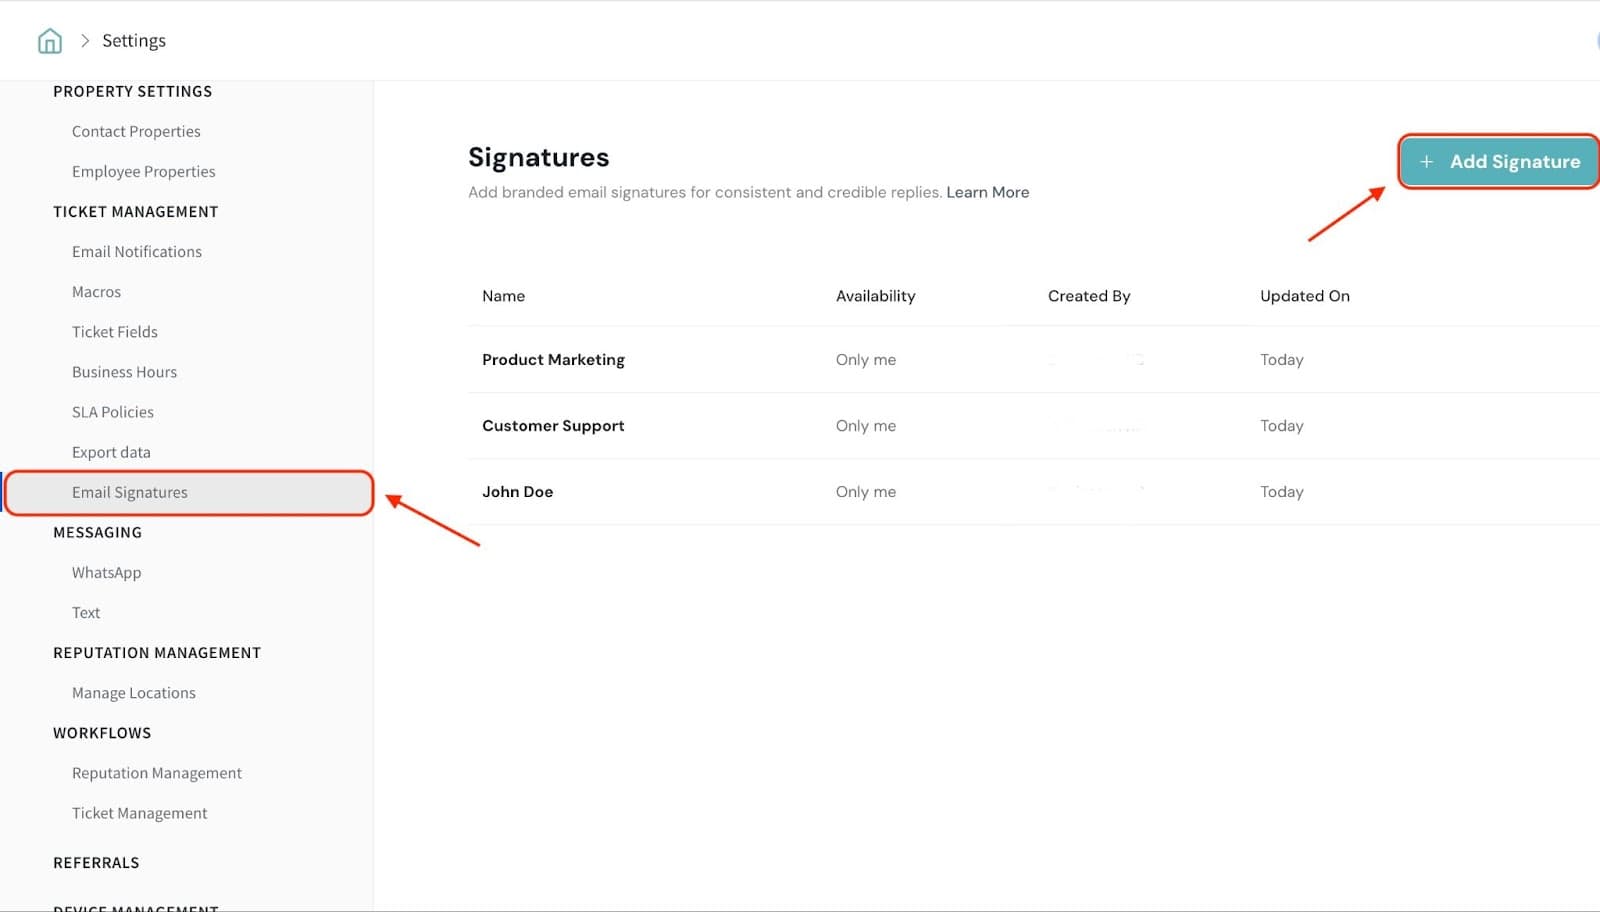
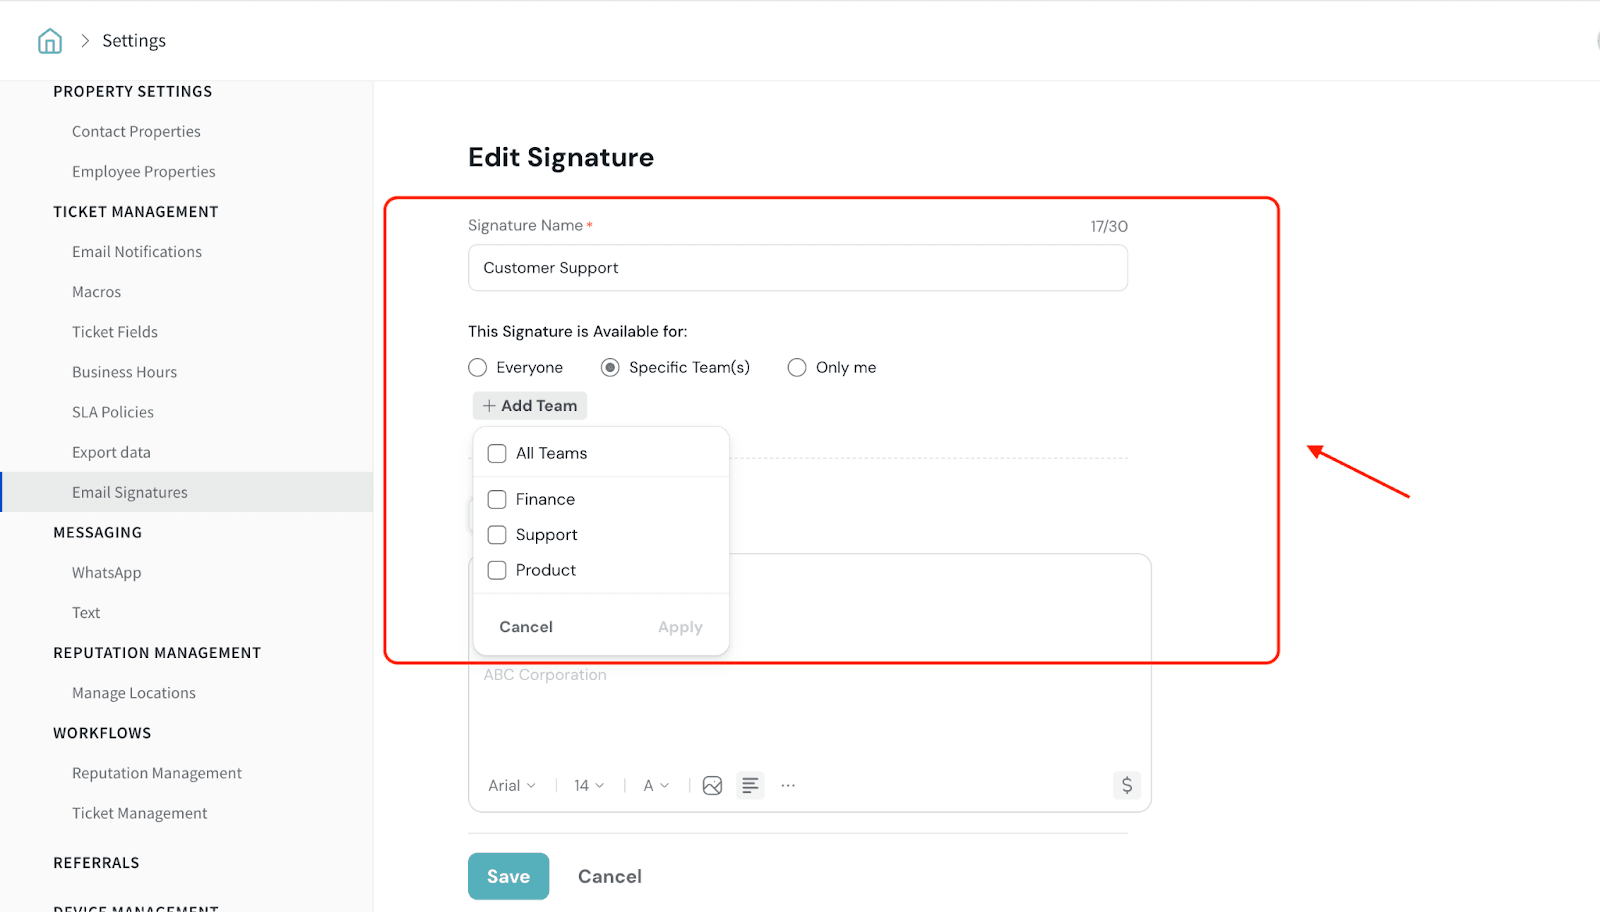
3. Enter the following fields to create a signature.
3.1. Give a name to your signature.
3.2. Set access permissions
Choose who can access and use the signature. You will have three options:
4. The next step is to design the signature. There are two types of signatures you can create:
Simple Signature
In a simple signature, you can include basic text such as a closing greeting, the signatory’s name, designation, and company name. In addition you can also include images and links as part of the signature.
In our example, a simple signature could look like this:
Regards,
William
Customer Support Manager
ABC Corp
Note: You can also customize various formatting options, such as 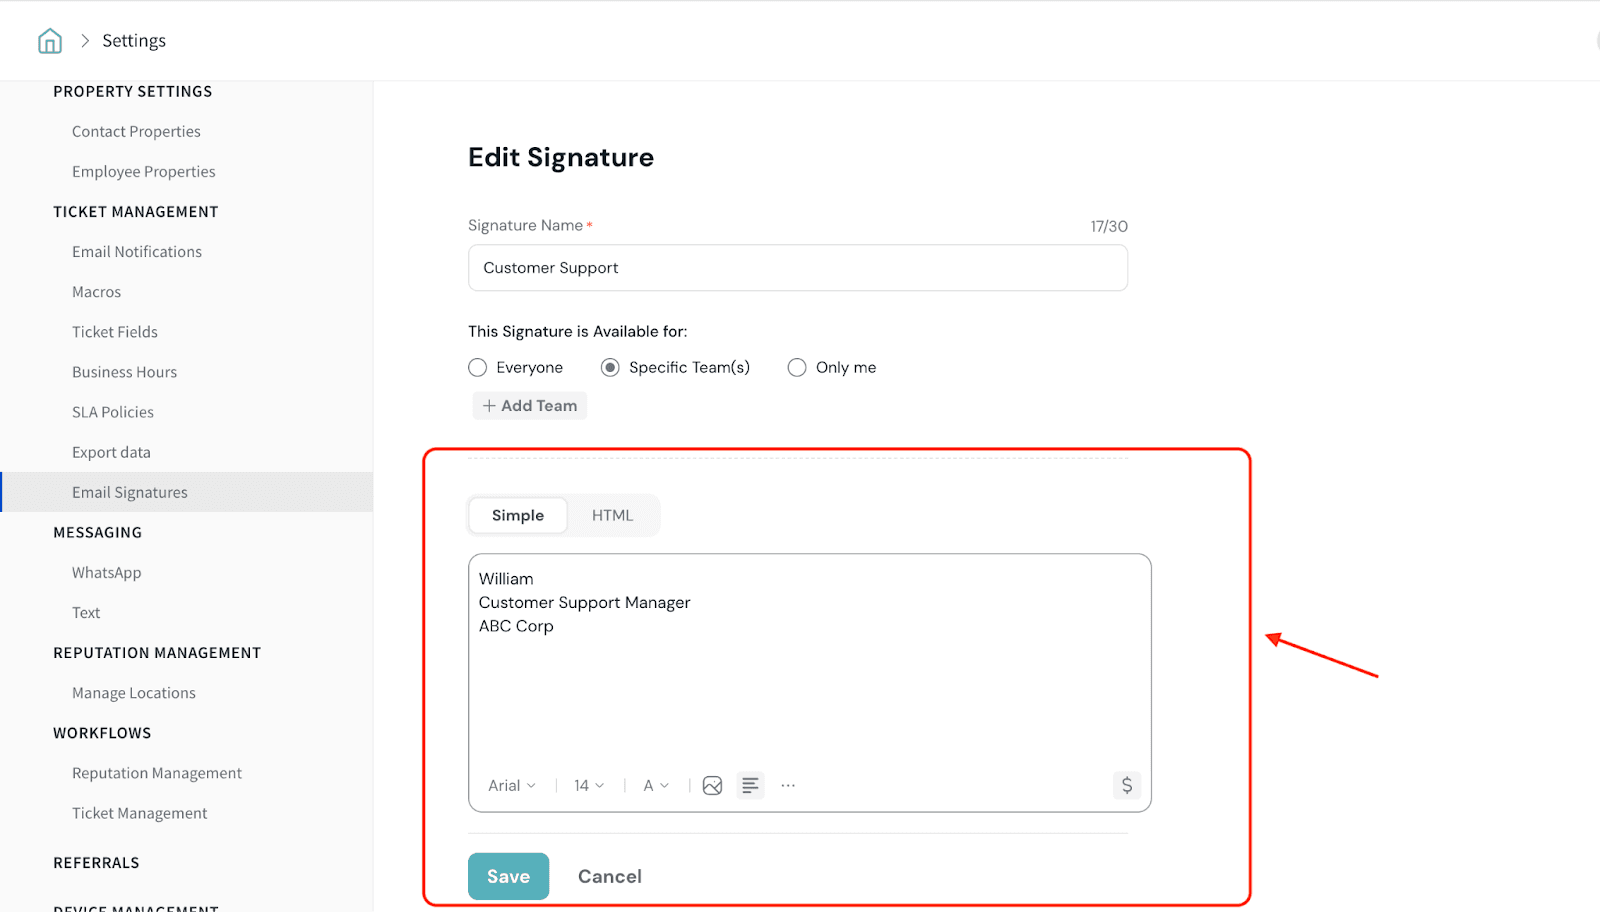
Indentation of the signature.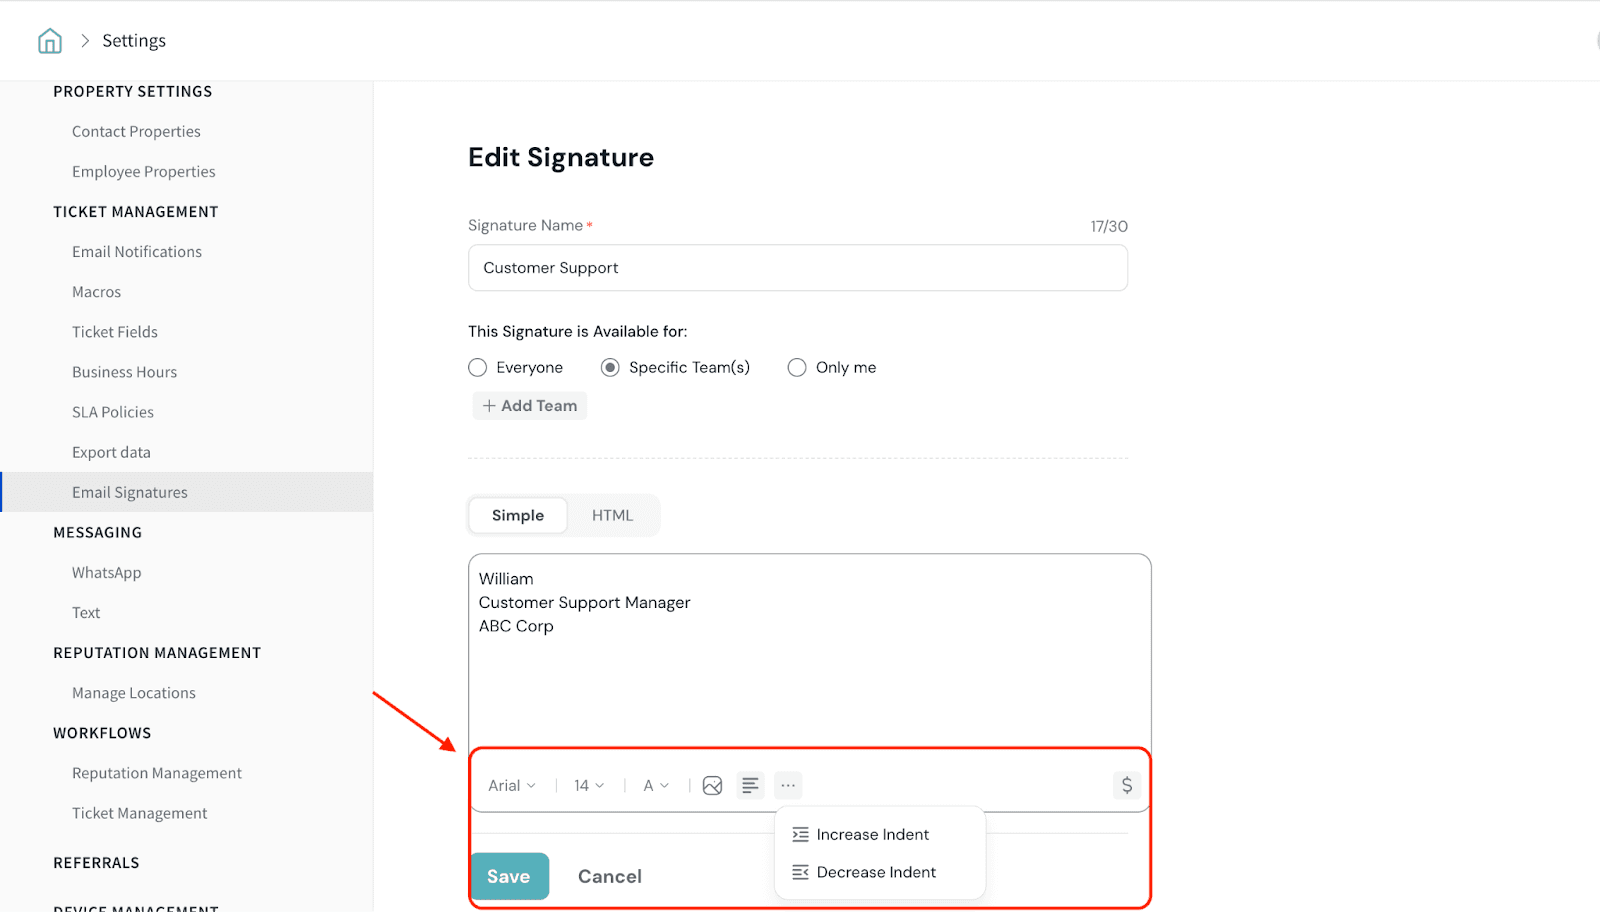
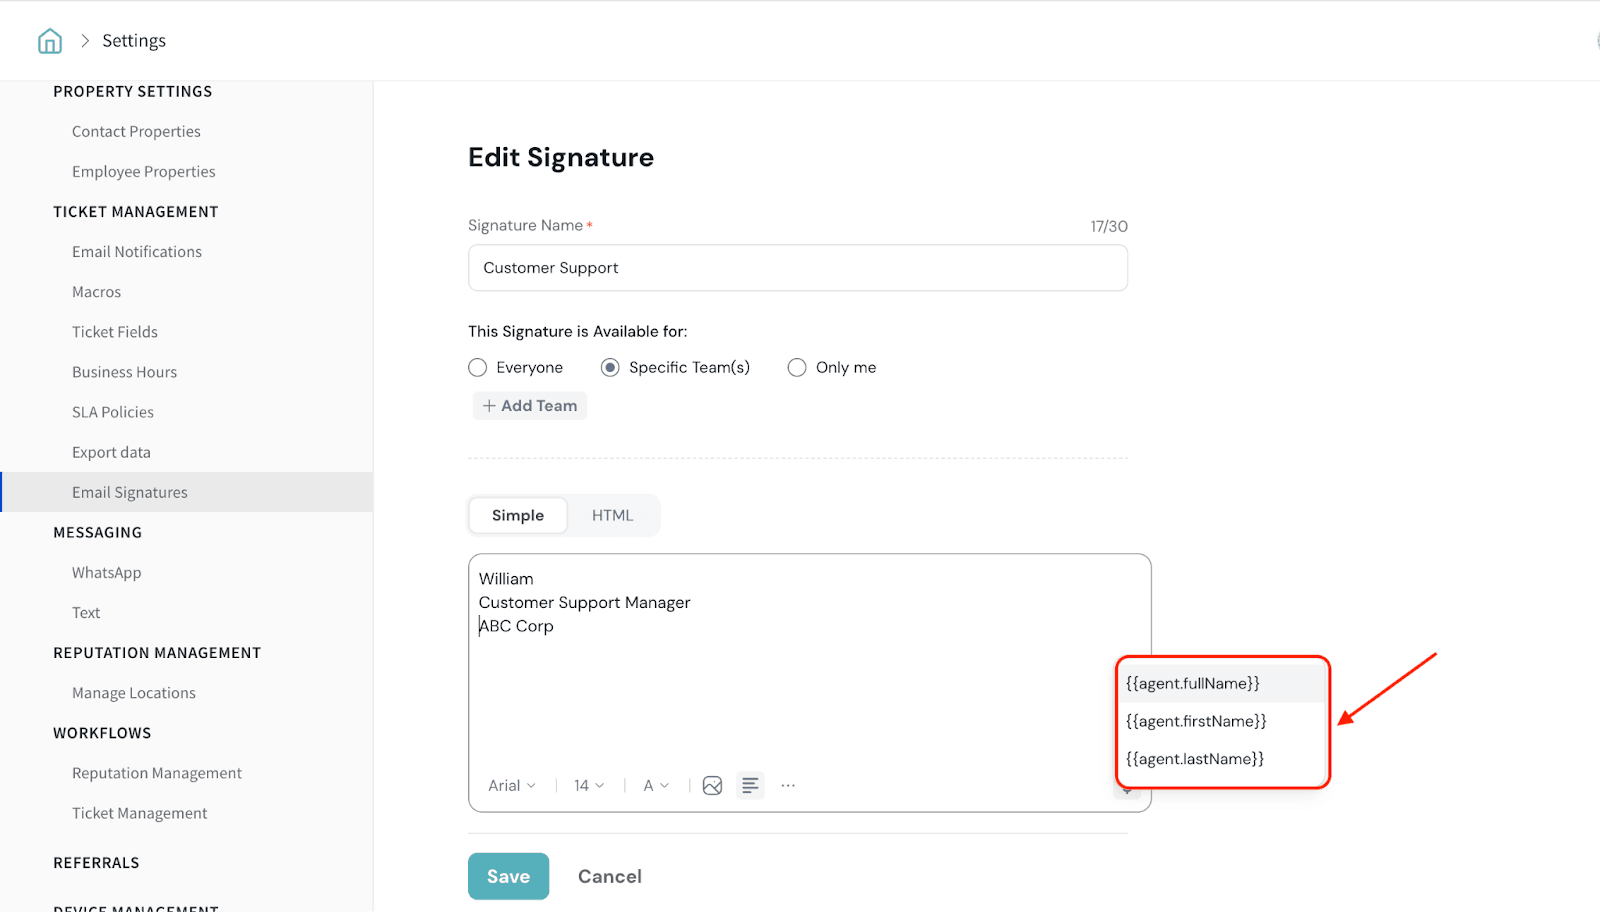
With the $ icon, you can use placeholders to automatically insert agent information into each message. These dynamic fields ensure that each agent's signature is personalized without requiring manual edits.
For example:
HTML Signature
With HTML signature, you can use your own HTML code to style support emails with branded fonts, colors, and layouts. You can add clickable links, logos, and images for a polished, professional look. It also helps keep formatting consistent across teams, so every message feels on-brand and easy to read.
Note: You can also see a live preview of the signature as you design it, making it easy to adjust the layout and styling in real time. 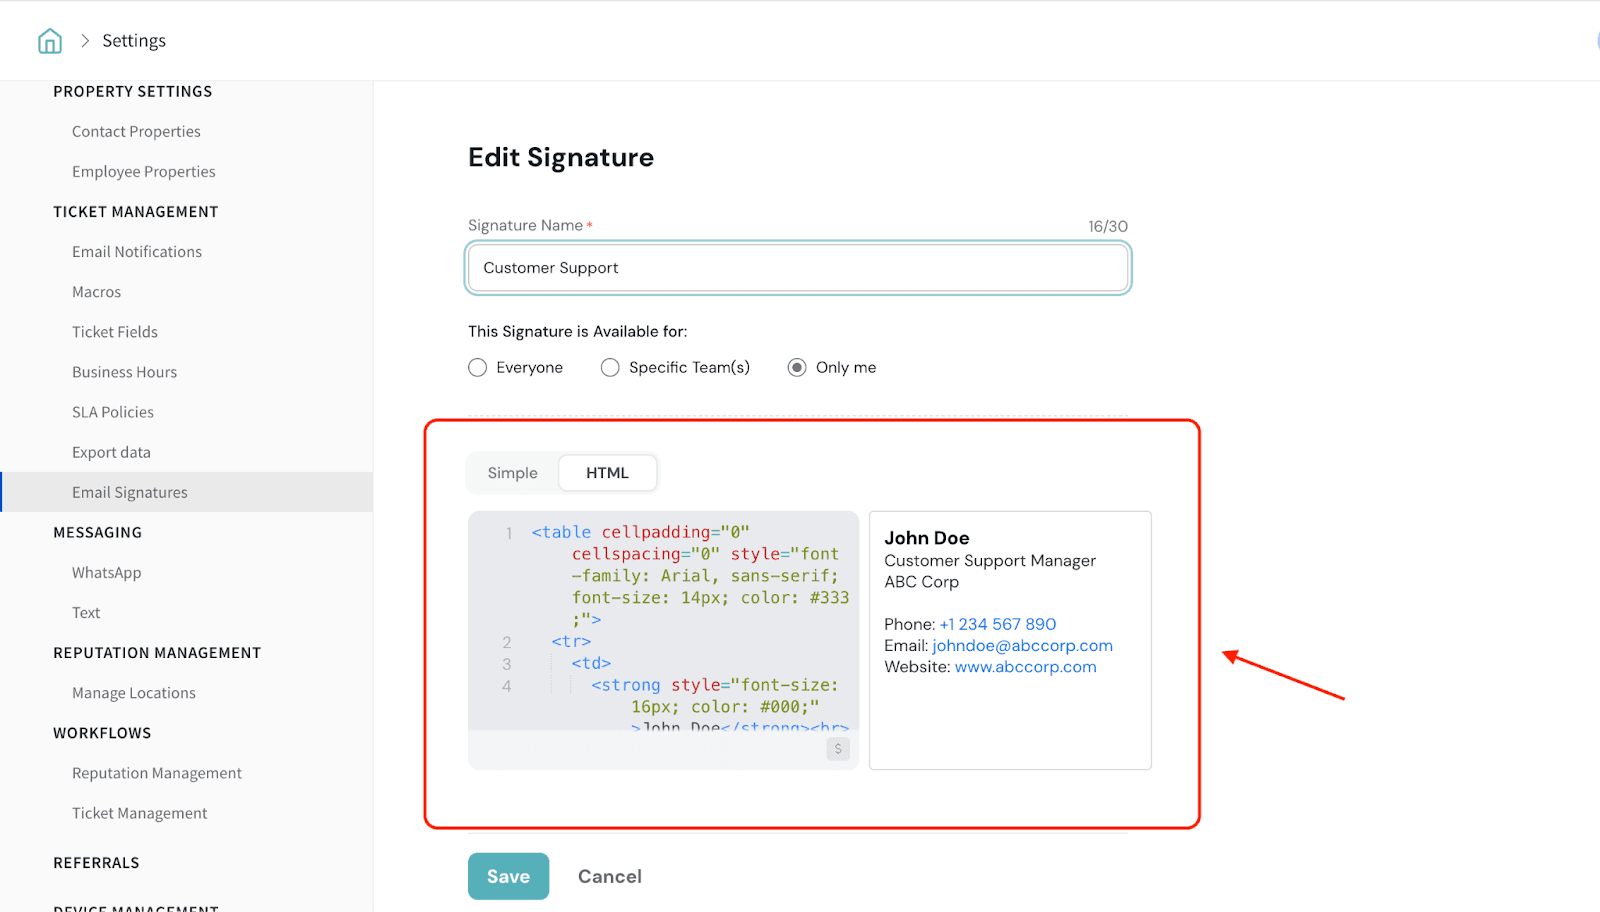
5. Click Save to apply and store your signature.
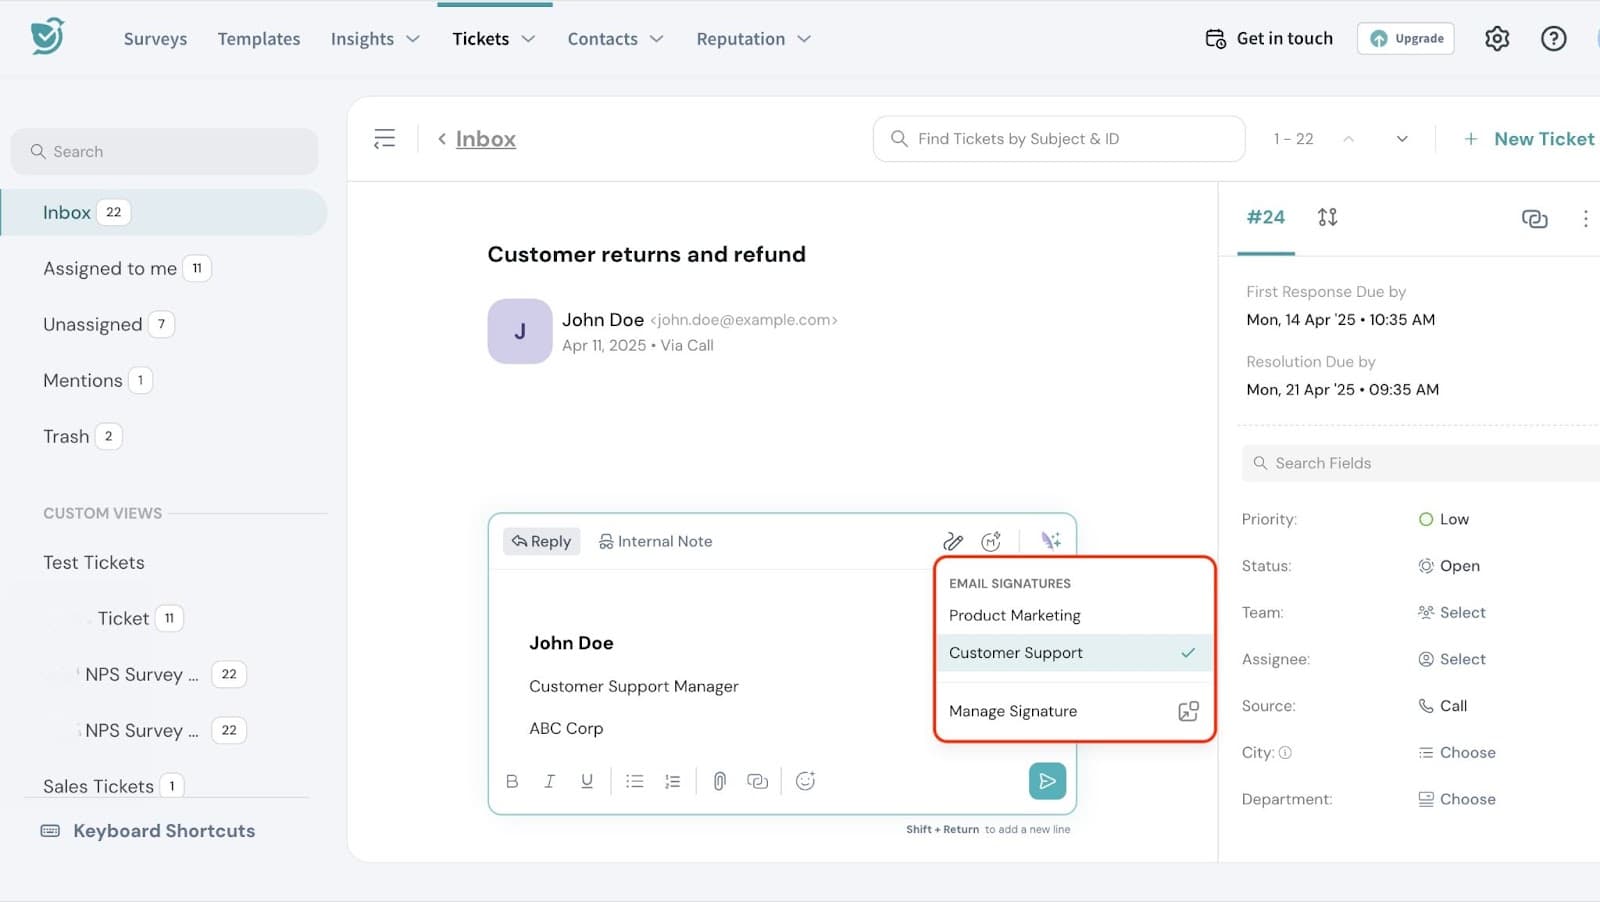
Adding Signature in Mails
Here is how you can add a signature in mails.
That’s all about setting Email Signature .
Feel free to reach out to our community if you have questions.
Powered By SparrowDesk