
Setting Alerts in Social Listening
Alerts in social listening notify you instantly about key mentions, trends, or potential crises related to your brand. These alerts are triggered when there is a sudden increase in mentions of specific keywords or a shift in sentiment, whether positive or negative, across social media.
Let's look at an example to understand.
Starbucks' social media team notices a surge in conversations all over Instagram about their Espresso shots. Users are talking about changes in taste and flavor, with some describing the coffee as more bitter or weaker than usual.
Loyal customers questioned if the recipe had changed, while others shared suggestions, driving even more engagement. As multiple users tagged Starbucks and conversations grew, the spike in mentions signaled a rising concern that could impact customer trust and brand perception.
With a busy schedule, keeping track of social media mentions and sudden spikes in conversations can be challenging. In such cases, alerts help by automatically detecting trends in sentiment and engagement. This helps you stay informed about the changes and ensure you are at the top of your game.
In this scenario, here’s how Alerts can help:
- Notify a sudden spike in mentions, helping identify concerns before they escalate.
- Track sentiment changes, allowing to monitor brand perception and address negative feedback.
- Providing insights into industry trends, alerts help stay ahead of competitors.
- Give real-time alerts to engage quickly with customers and respond to feedback.
- Identify viral trends early, to act before the conversation gains traction.
Let’s see how to set up
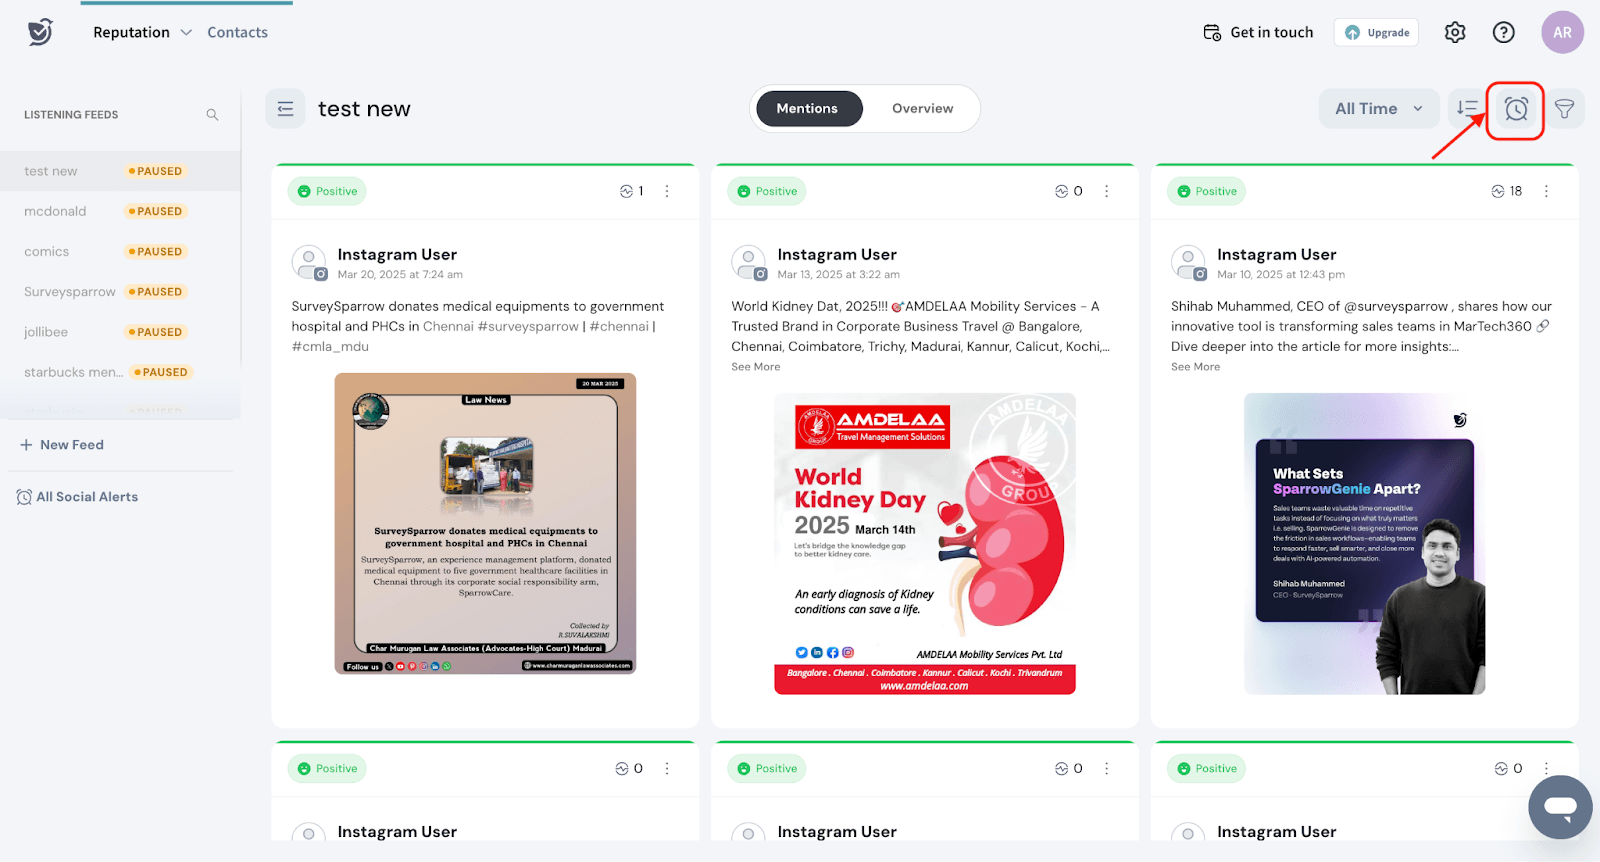
- Navigate to the Mentions tab under Social Listening.
- Click on the alerts icon in the top right corner to configure your alert settings.
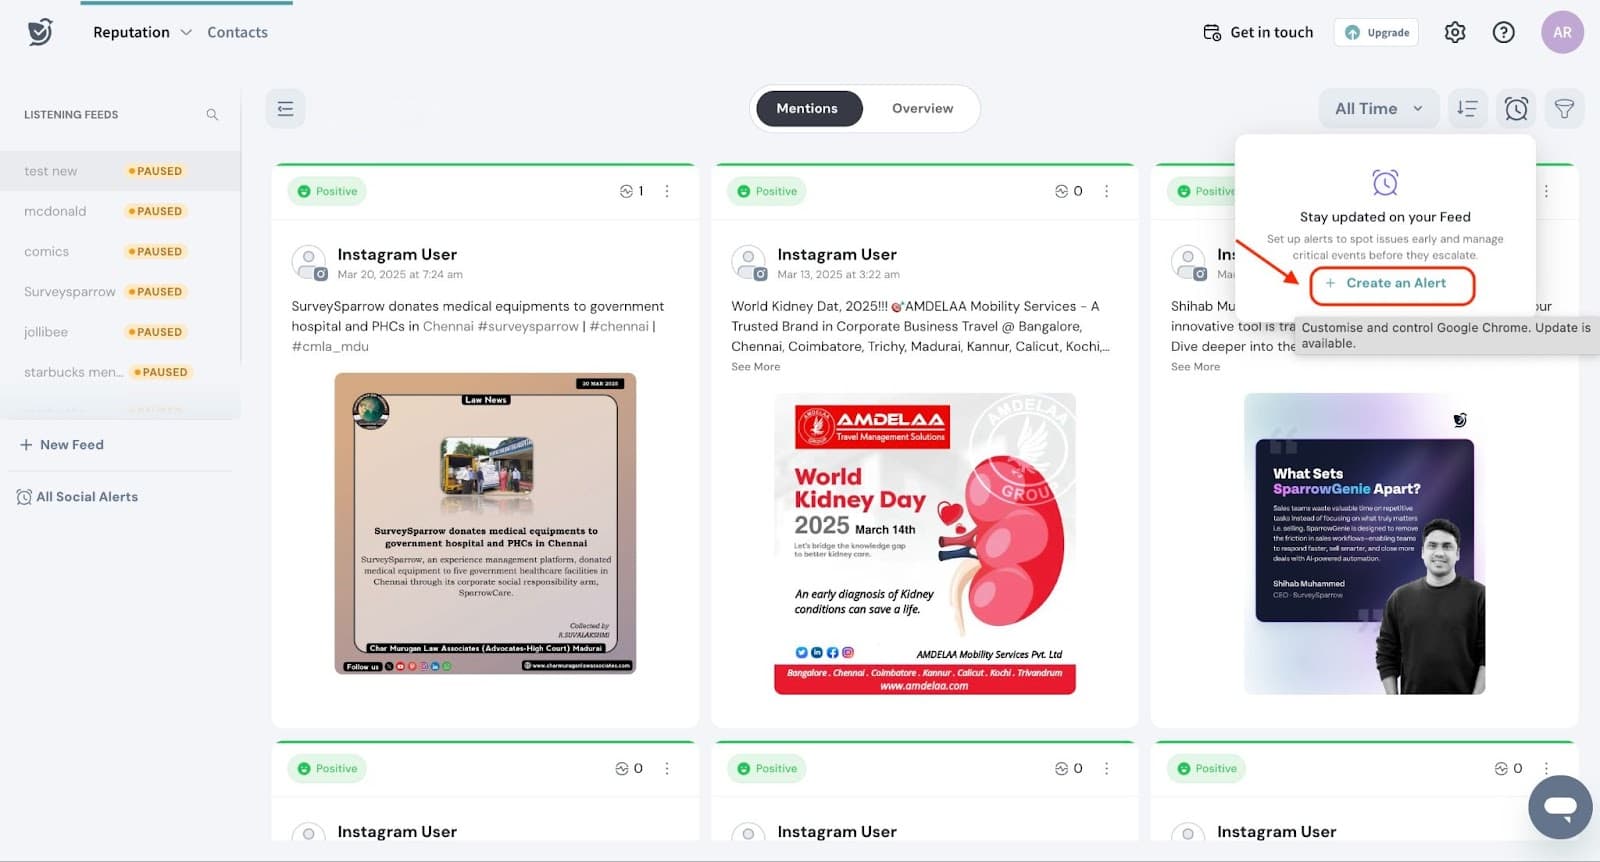
- Click on Create an Alert
- There are two types of alerts:
Standard Alert – This is triggered when specific conditions are met, such as mentions of a particular keyword or phrase.
Anomaly Alert – This detects sudden spikes or deviations from normal patterns, signaling unusual activity or trends.
4.1. Enter a name for your alert.
4.2. Select the feed you want to monitor from the dropdown menu.
4.3. Choose the sentiment for notifications—positive or negative mentions.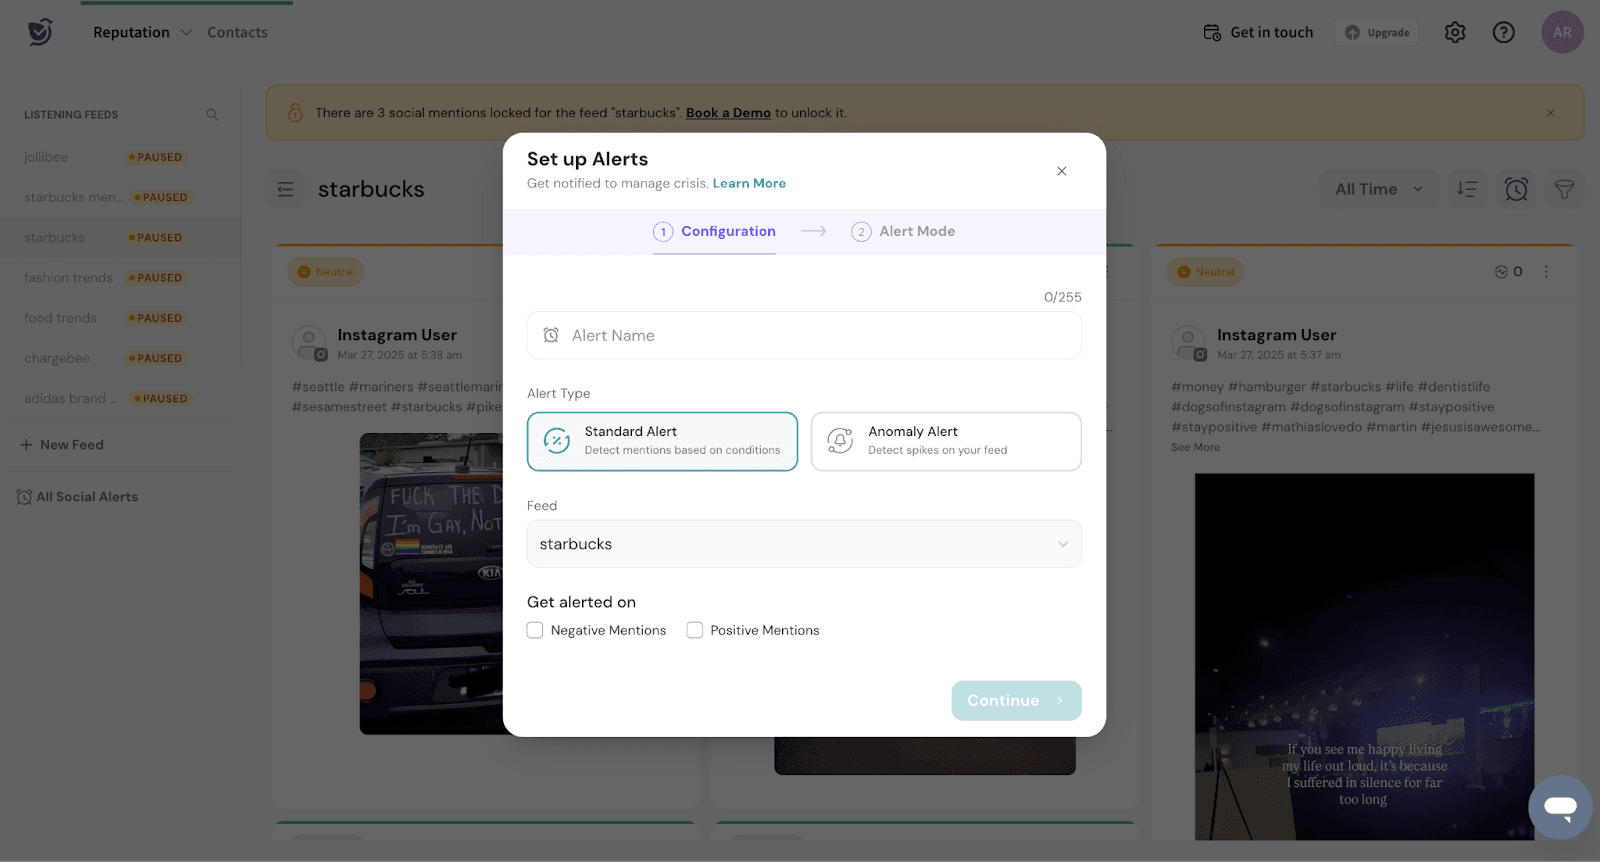
- If setting up an Anomaly Alert, specify the mention volume threshold to detect unusual spikes.
Note: If you are having an anomaly alert, also ensure you choose the level of sensitivity. The following is how the sensitivity is considered
Low Sensitivity – Triggers alerts only for major anomalies when deviation exceeds 50%, helping to avoid false alarms.
Medium Sensitivity – Triggers alerts for moderate changes when deviation exceeds 30%, balancing responsiveness and accuracy.
High Sensitivity – Detects even small deviations when deviation exceeds 10%, ensuring all potential issues are caught but may result in more frequent alerts. 
4.4.Click Continue to proceed.
4.5. You can now choose the Alert mode.
To do this you can choose to receive alerts via Email or Slack.
4.5.1 For Email alerts, select the email ID where notifications should be sent.
4.5.2. For Slack alerts, ensure your Slack account is connected to the system.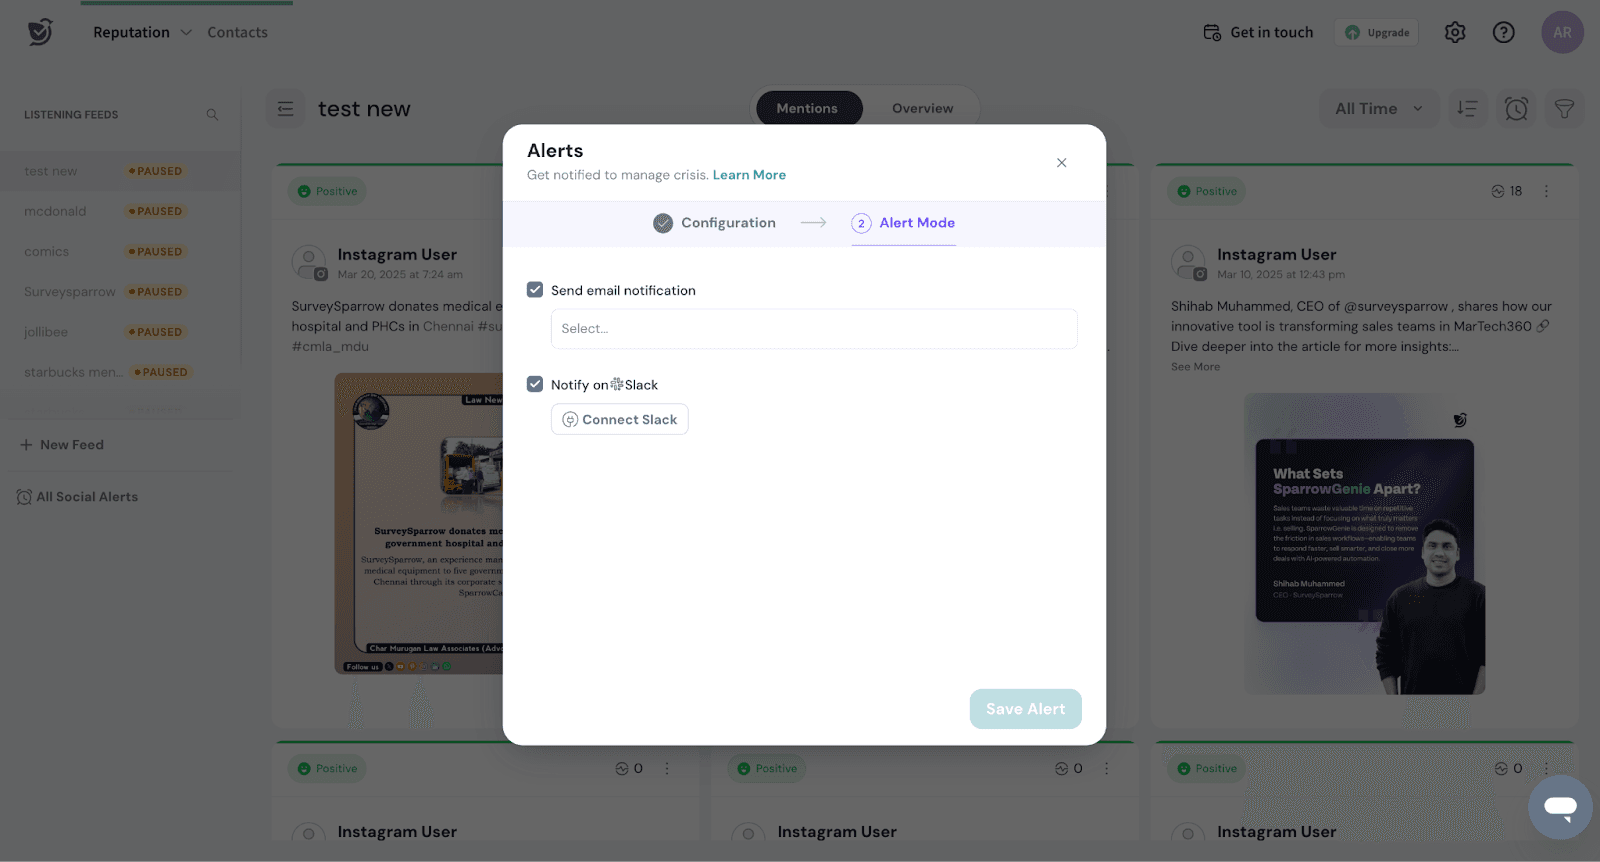
4.6. Click "Save Alert" to finalize your settings and activate the alert.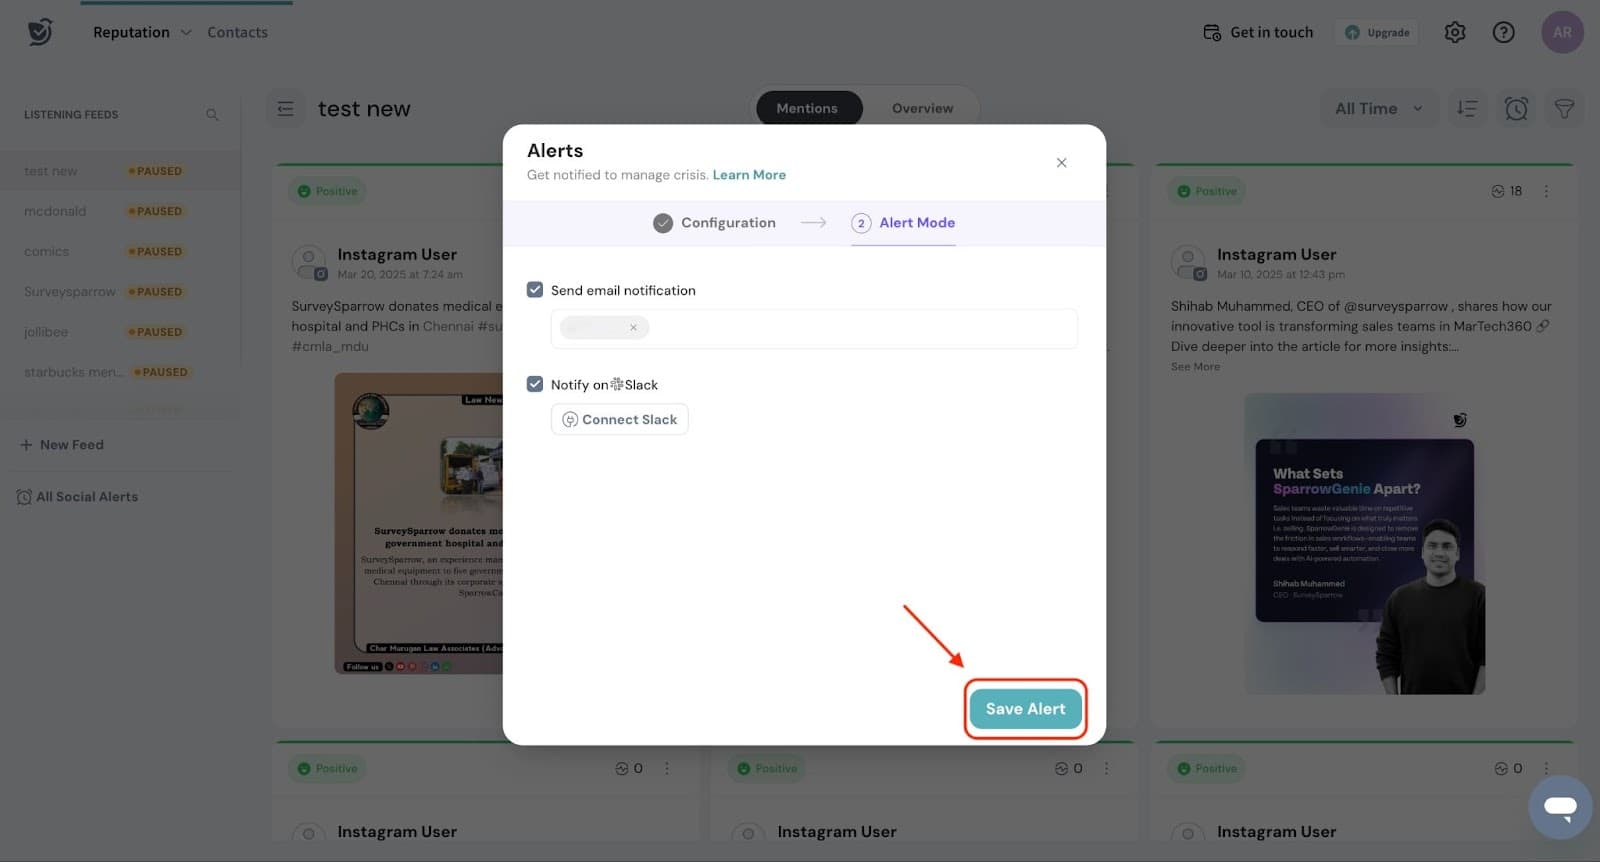
Trigger history
After setting up alerts, you can view the Trigger History.
1. Go to All Social Alerts.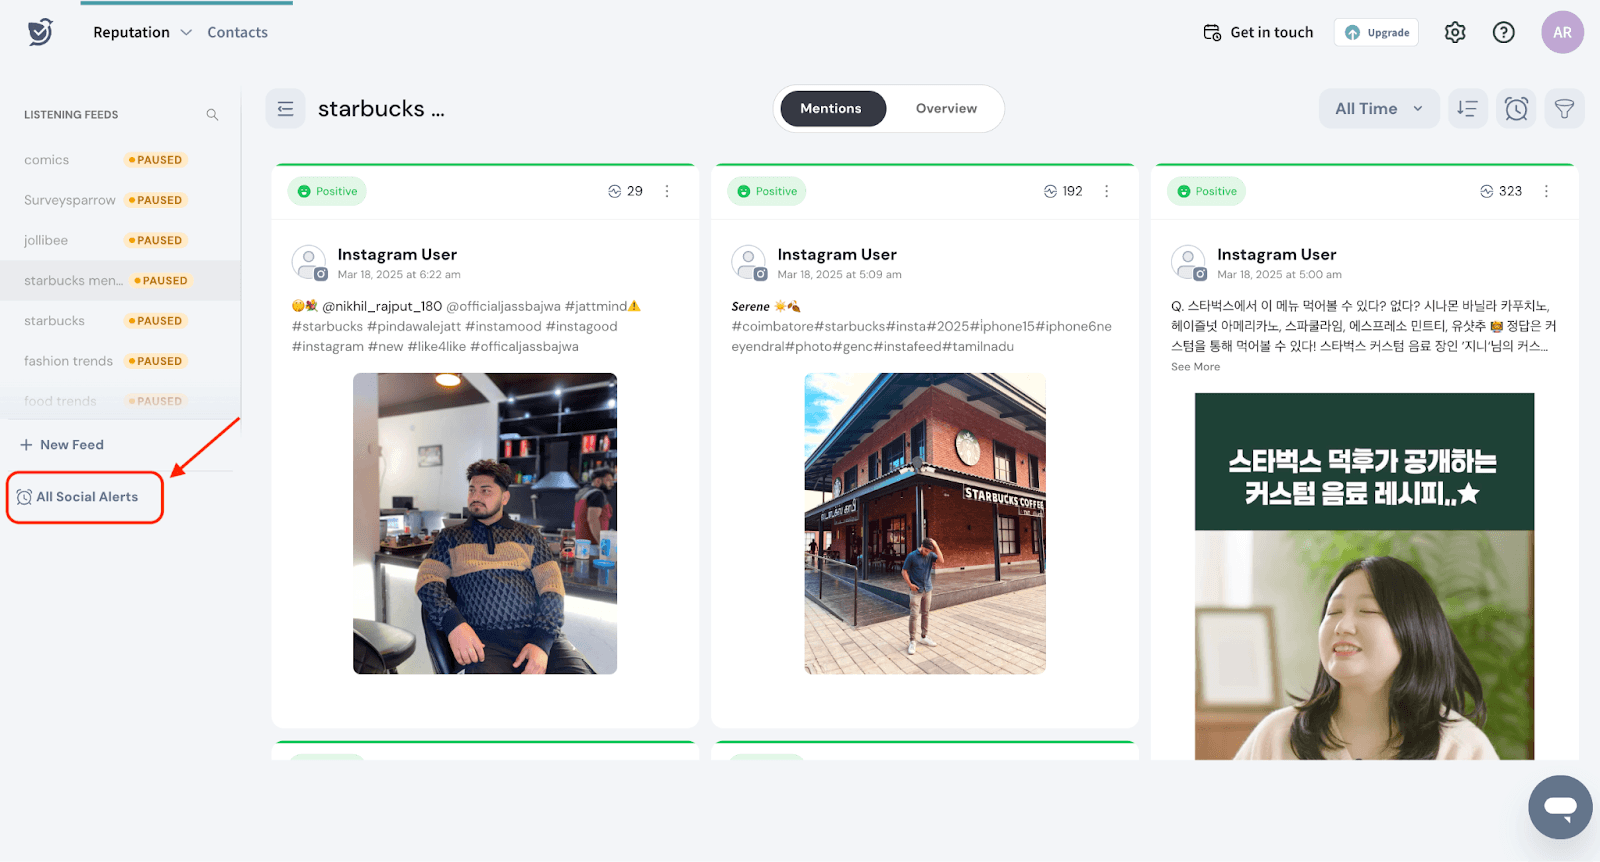
2. Click on the three dots next to the alert and select Triggered History to view past alerts. 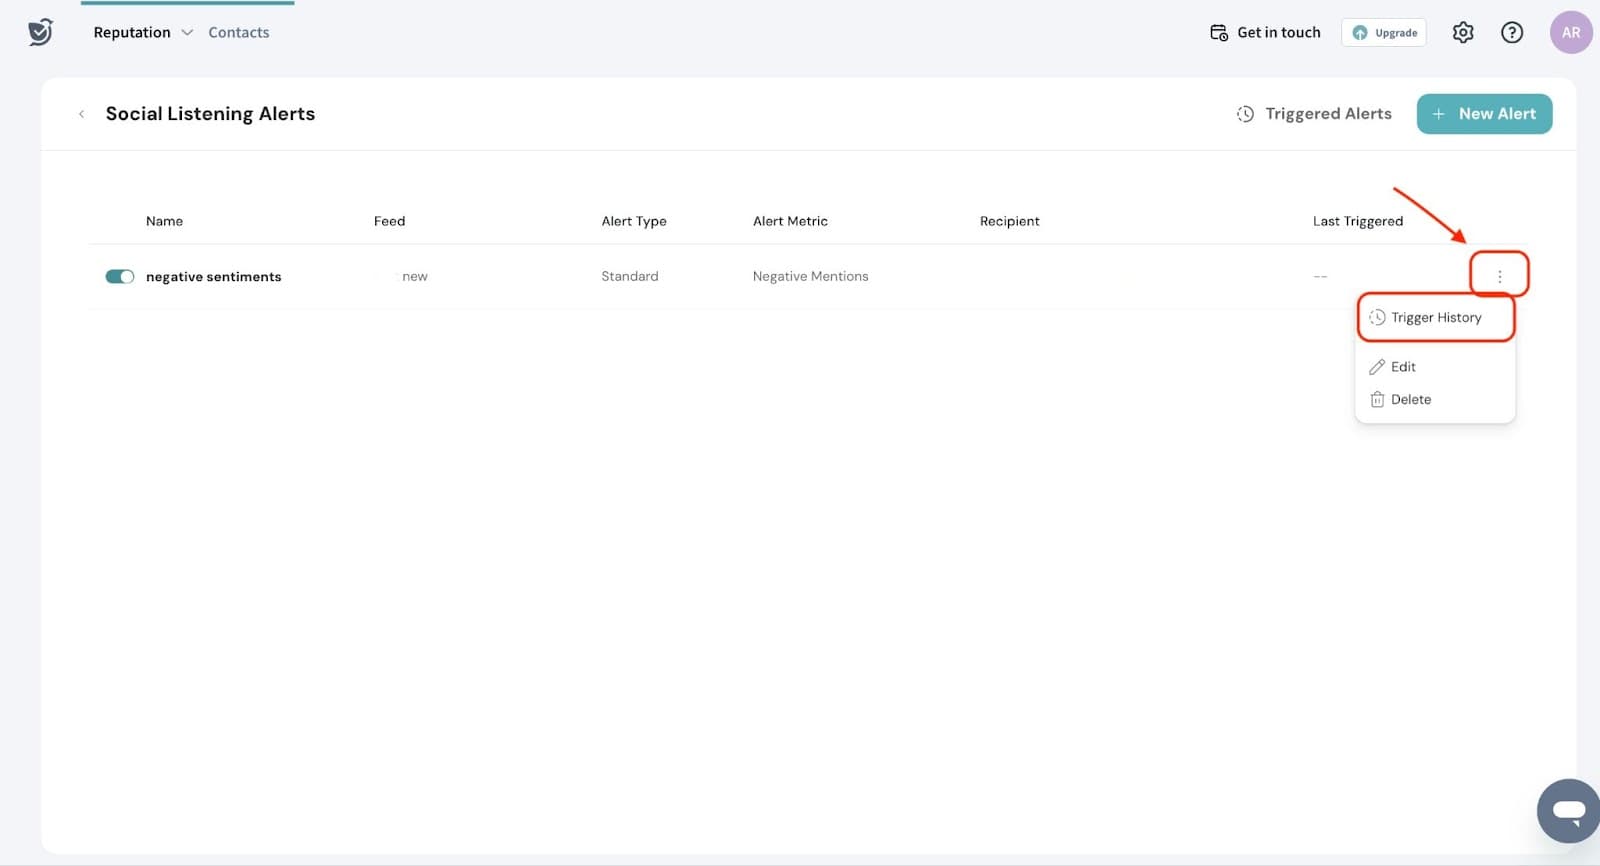
3. You will see a list of alerts created for the feeds, including the time, the platform where the alert was triggered, and the recipients who received the alerts.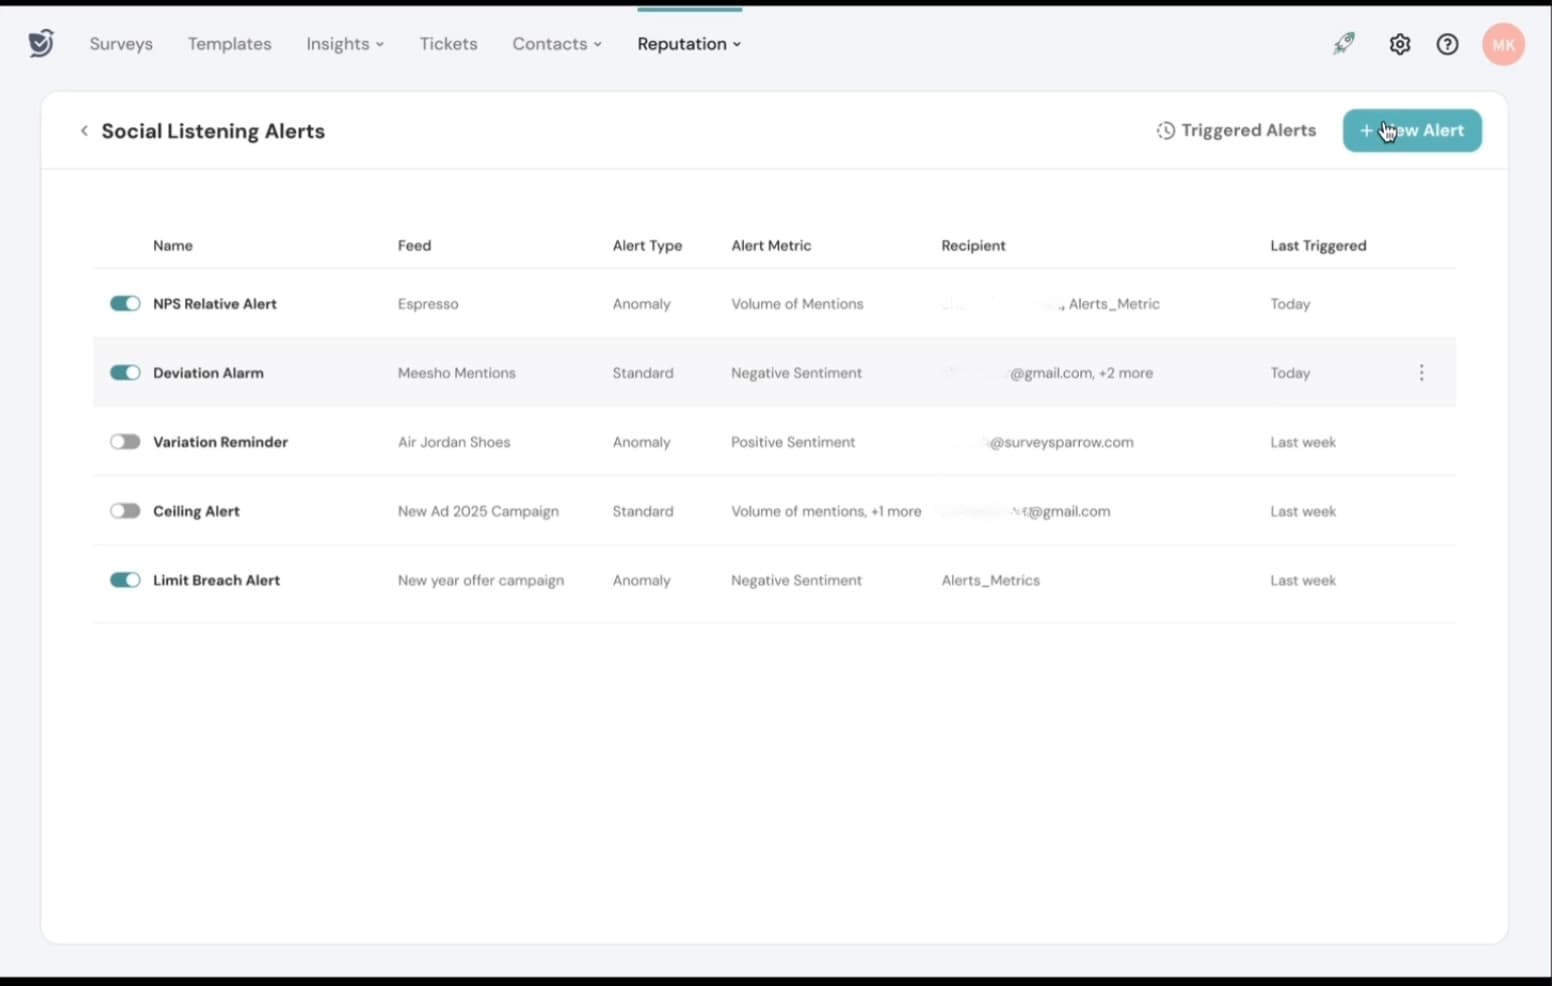
4. You can view the list of all past alerts set. From here, you can also choose to enable or disable specific alerts as needed.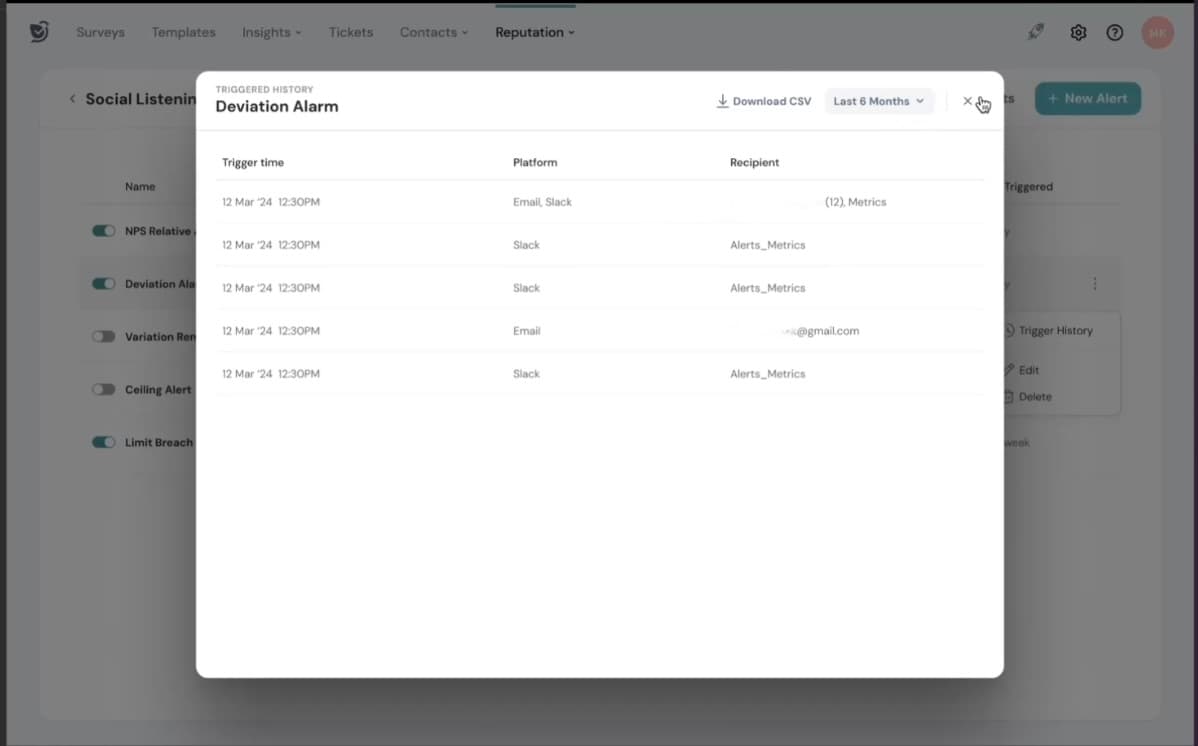
That’s all about setting alerts !
Feel free to reach out to our community if you have questions.