Search
Jira is a renowned project management tool used by business teams the world over. It is suited for bug tracking, issue tracking and agile project management. SurveySparrow’s app for Jira allows teams to bring customer/stakeholder feedback into their Jira workspaces, so that they can easily prioritize, track and resolve it. Users can create survey triggers, map responses into Jira as tickets, embed surveys inside tickets and view the responses in Jira itself.
In this article, we will walk through the processes of:
Note: Survey triggers and response mappings are only supported in SCRUM type projects.
1. Inside your SurveySparrow account, open Account Settings by clicking on the gear icon.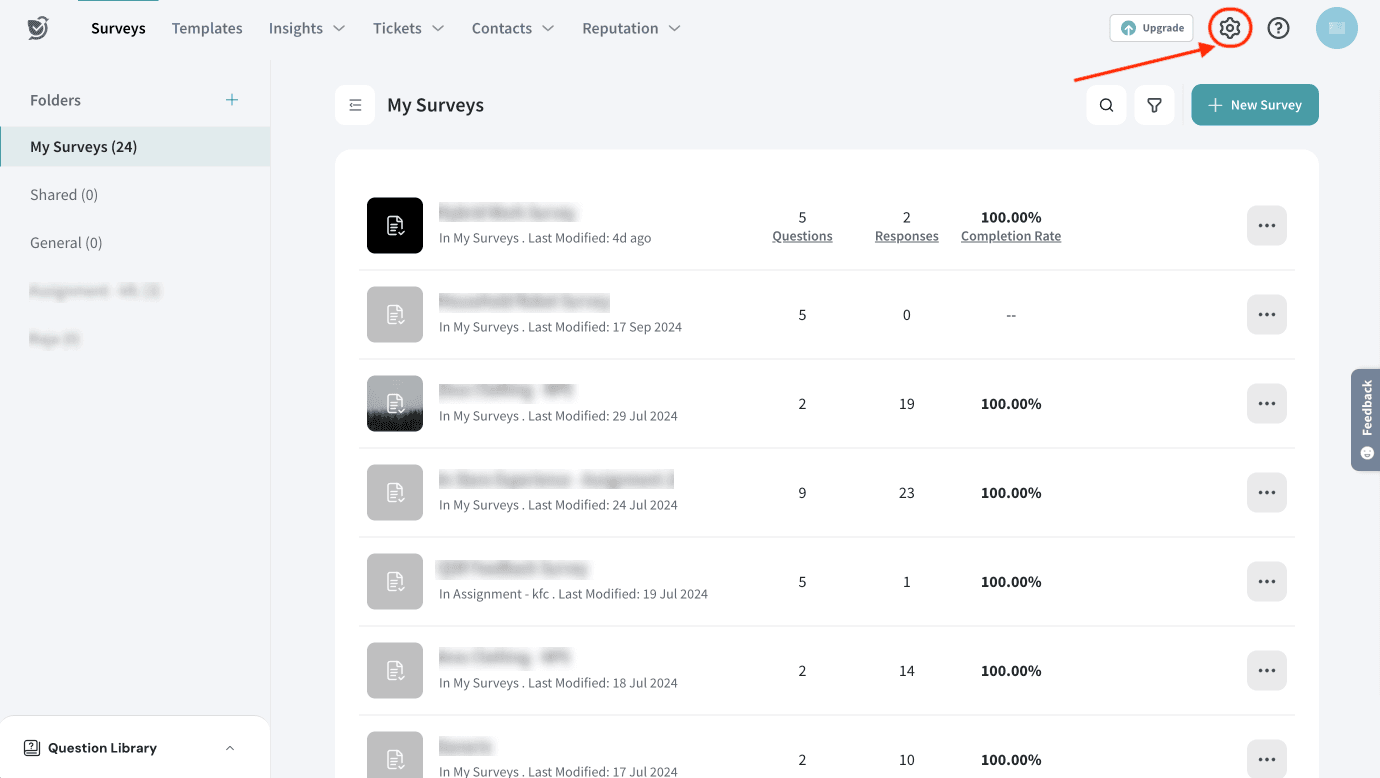
2. Scroll down the left panel until you see Apps and Integrations, then click on it.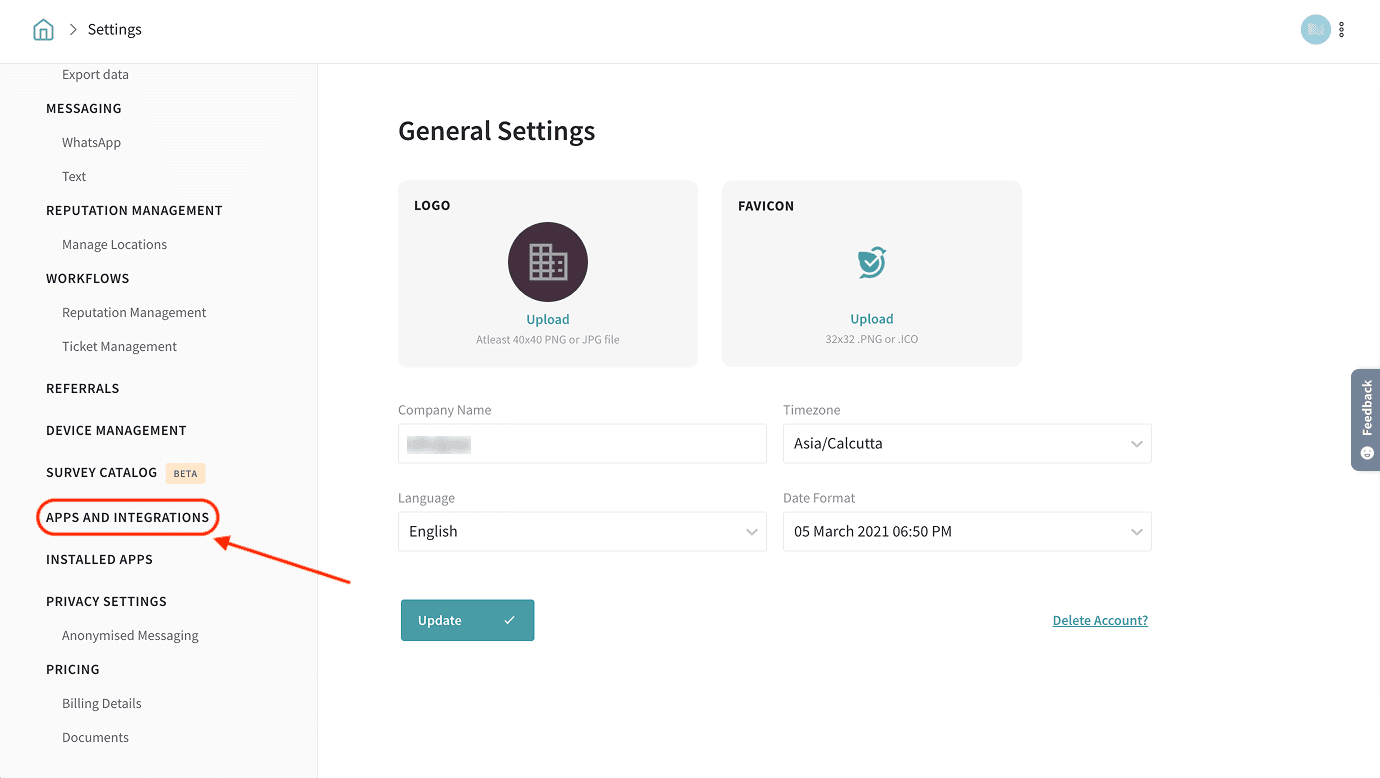
3. Search for the Jira integration, then click on the Connect button.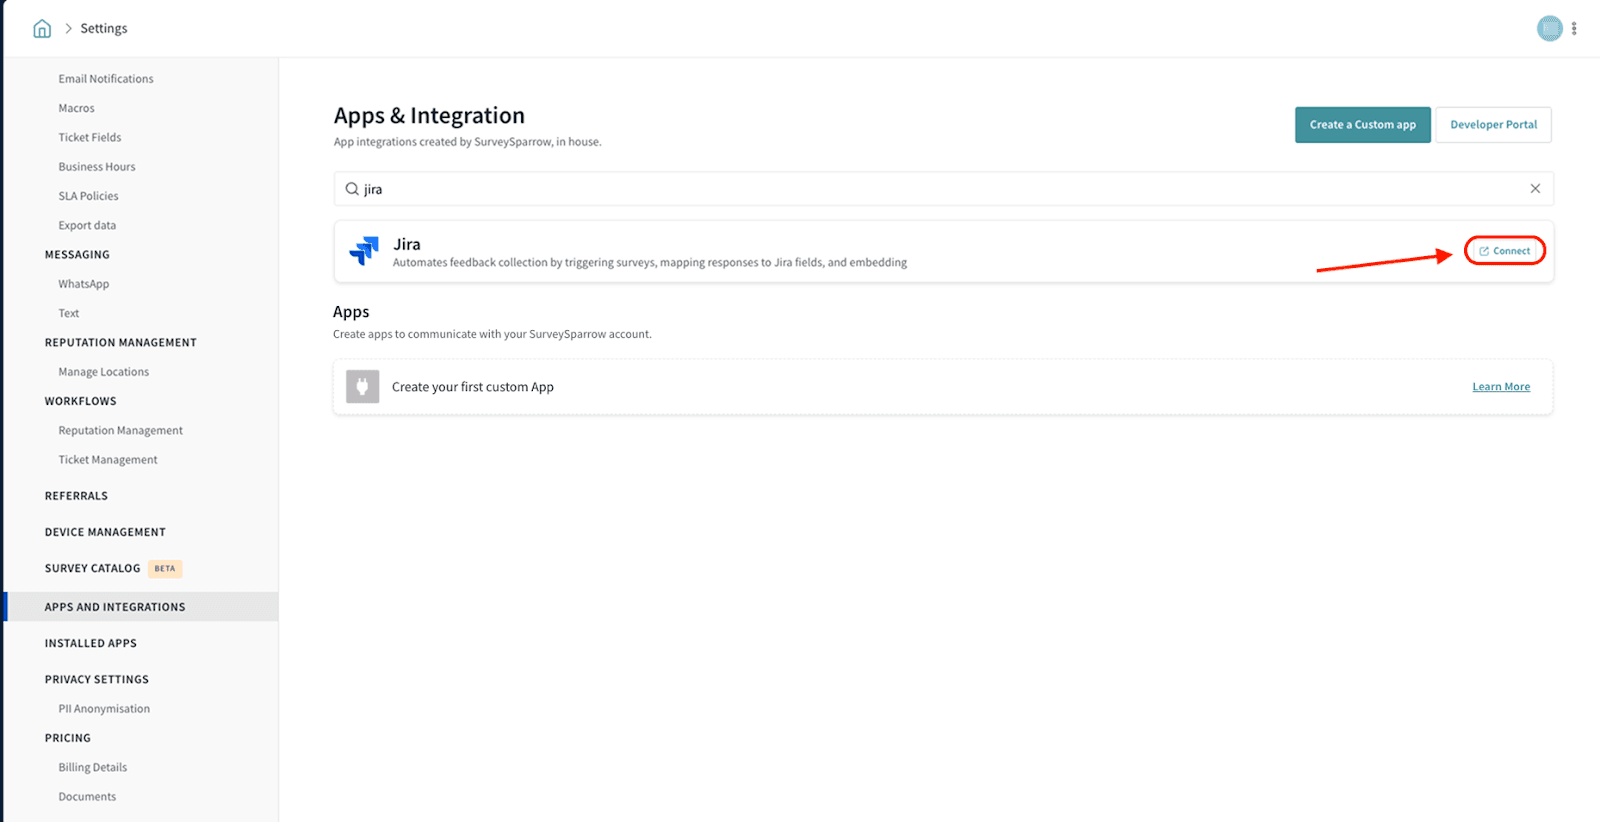
4. You will be redirected to the SurveySparrow app page on the Jira marketplace. Click Get it now.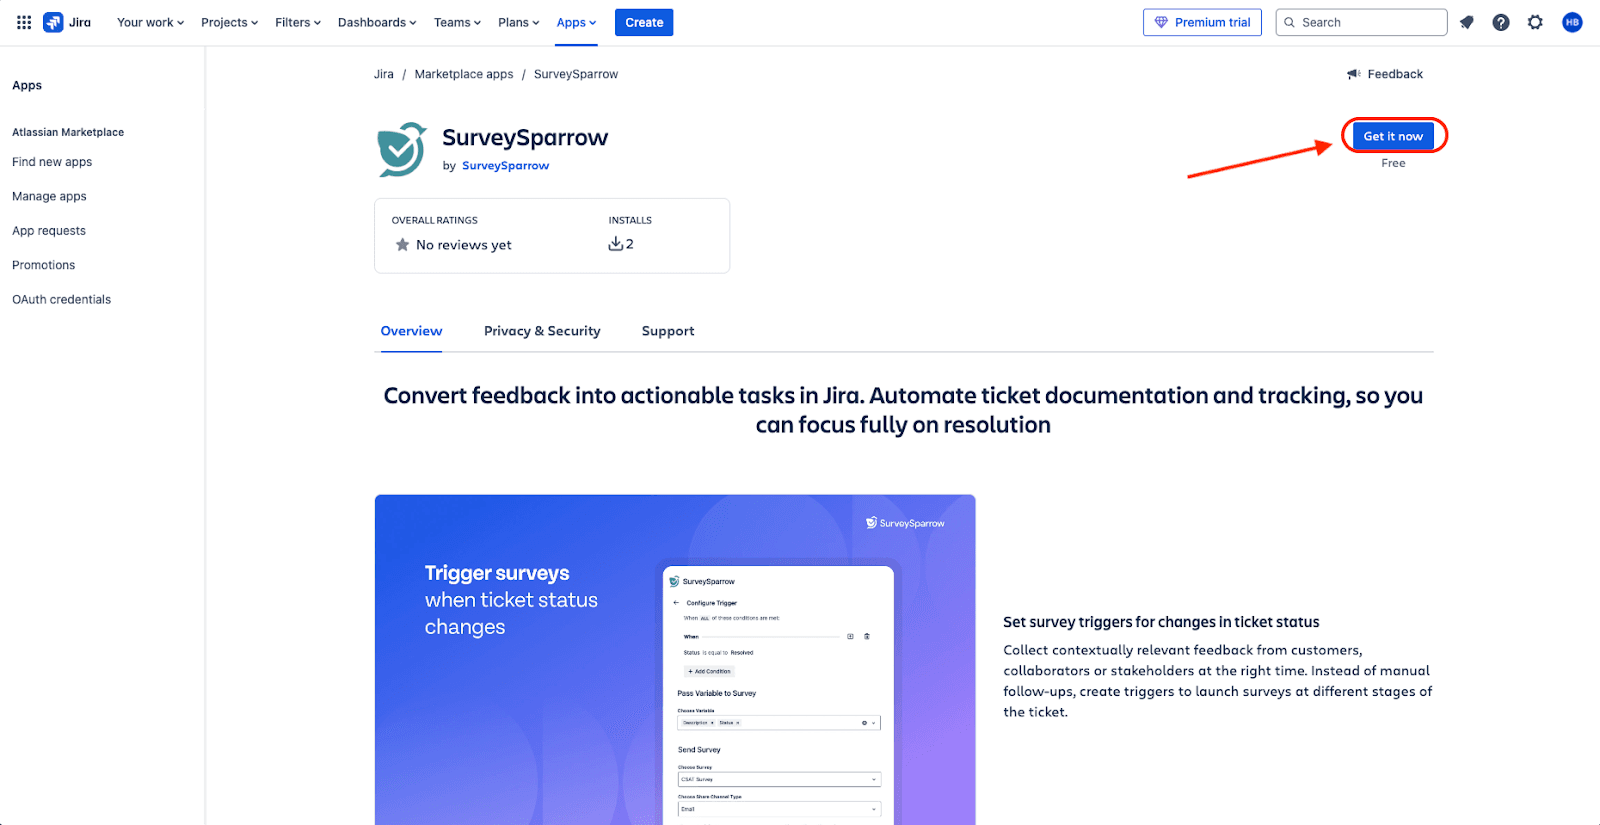
Note: You must be logged into Jira prior to doing this.
Note: If you are not the admin of your Jira project, you will have to request their approval to install the app. After clicking on the Get it now button, a pop-up will appear, with a pre-filled message. You can edit or rewrite it completely. Once done, click Submit request.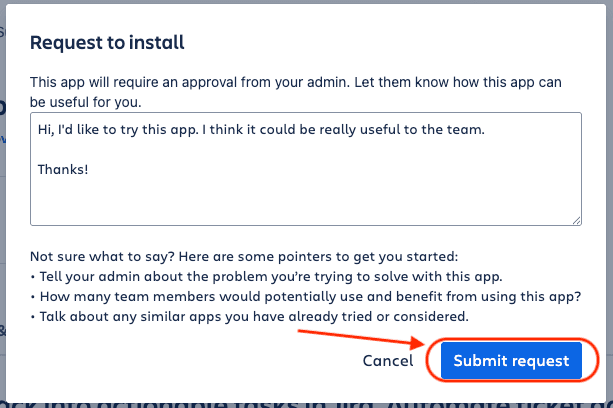
5. After the app is installed, return to your project within the Projects module. You will see the SurveySparrow app in the left panel. Click on it.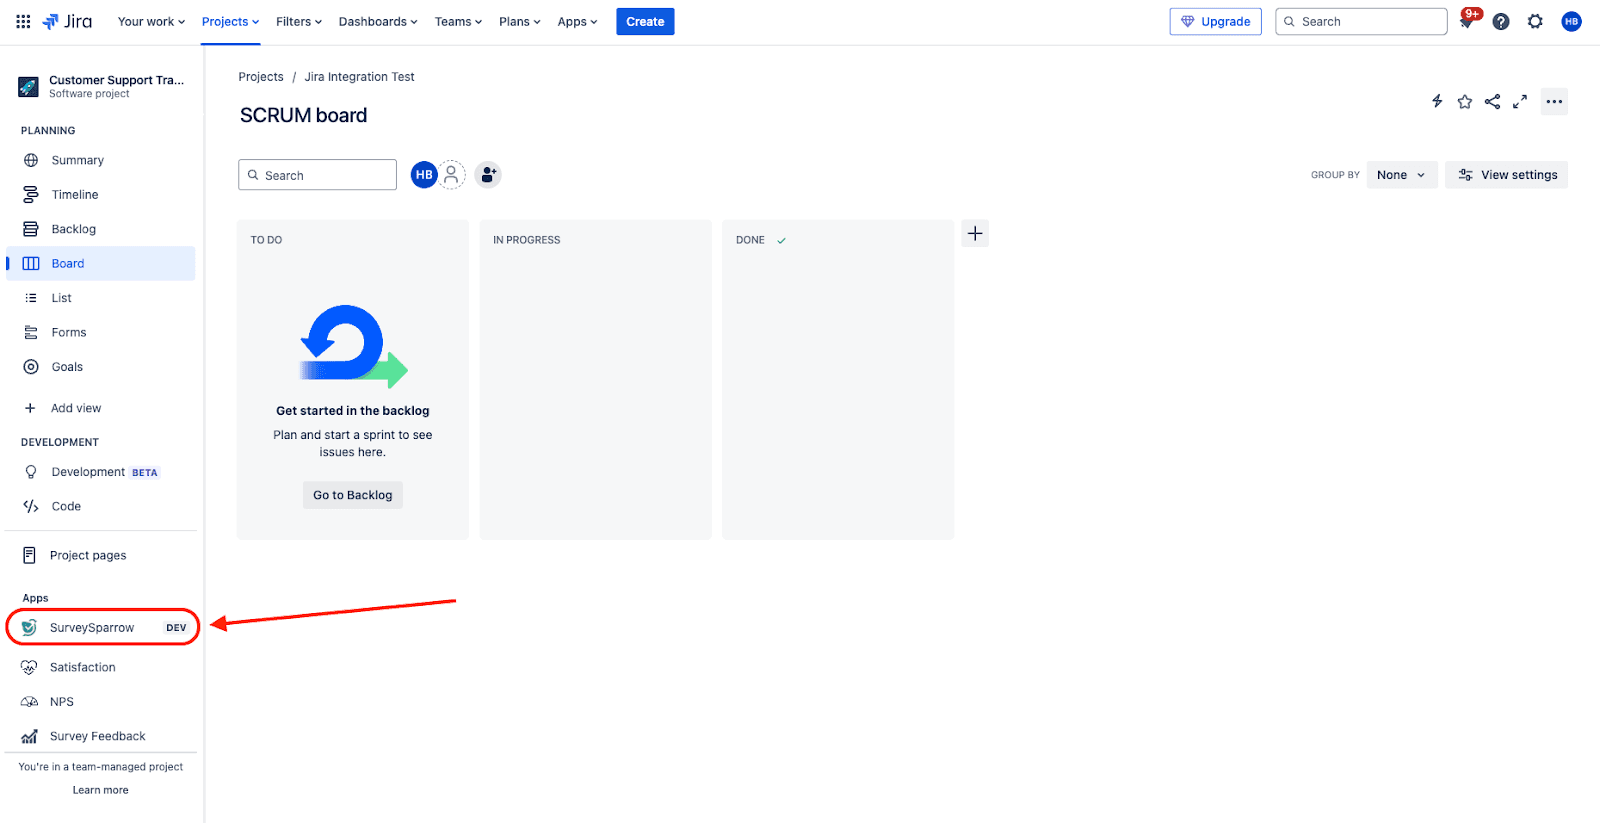
6. You will see a screen asking you to connect SurveySparrow and Jira. Click Continue.
7. A security pop-up appears. Click Continue.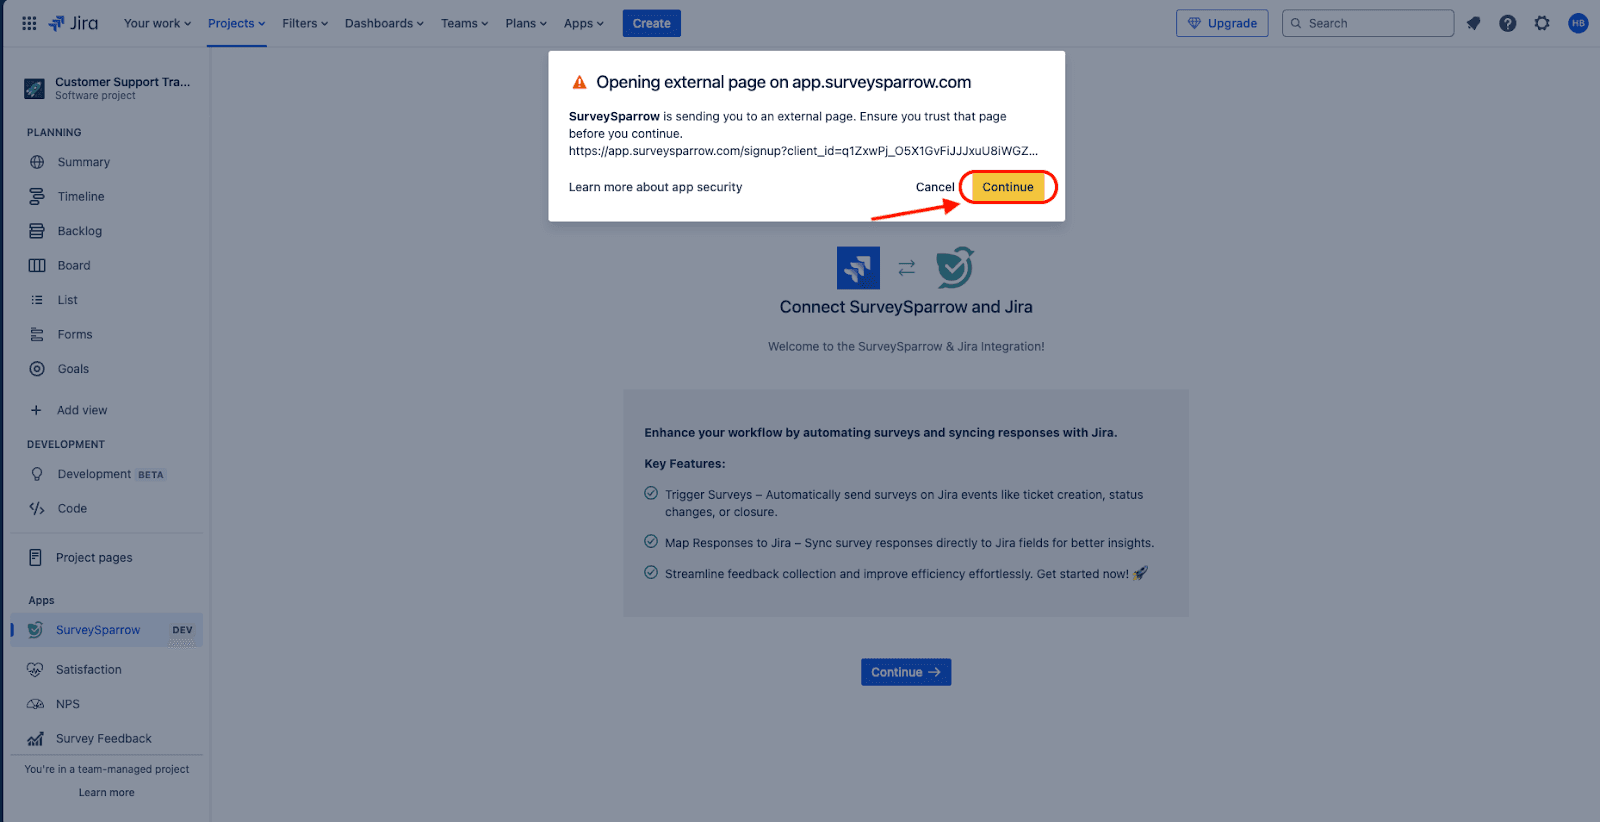
8. You will be redirected to a SurveySparrow sign-up page. Click Login.
9. In the login screen, type the email associated with your SurveySparrow account. Then click Proceed.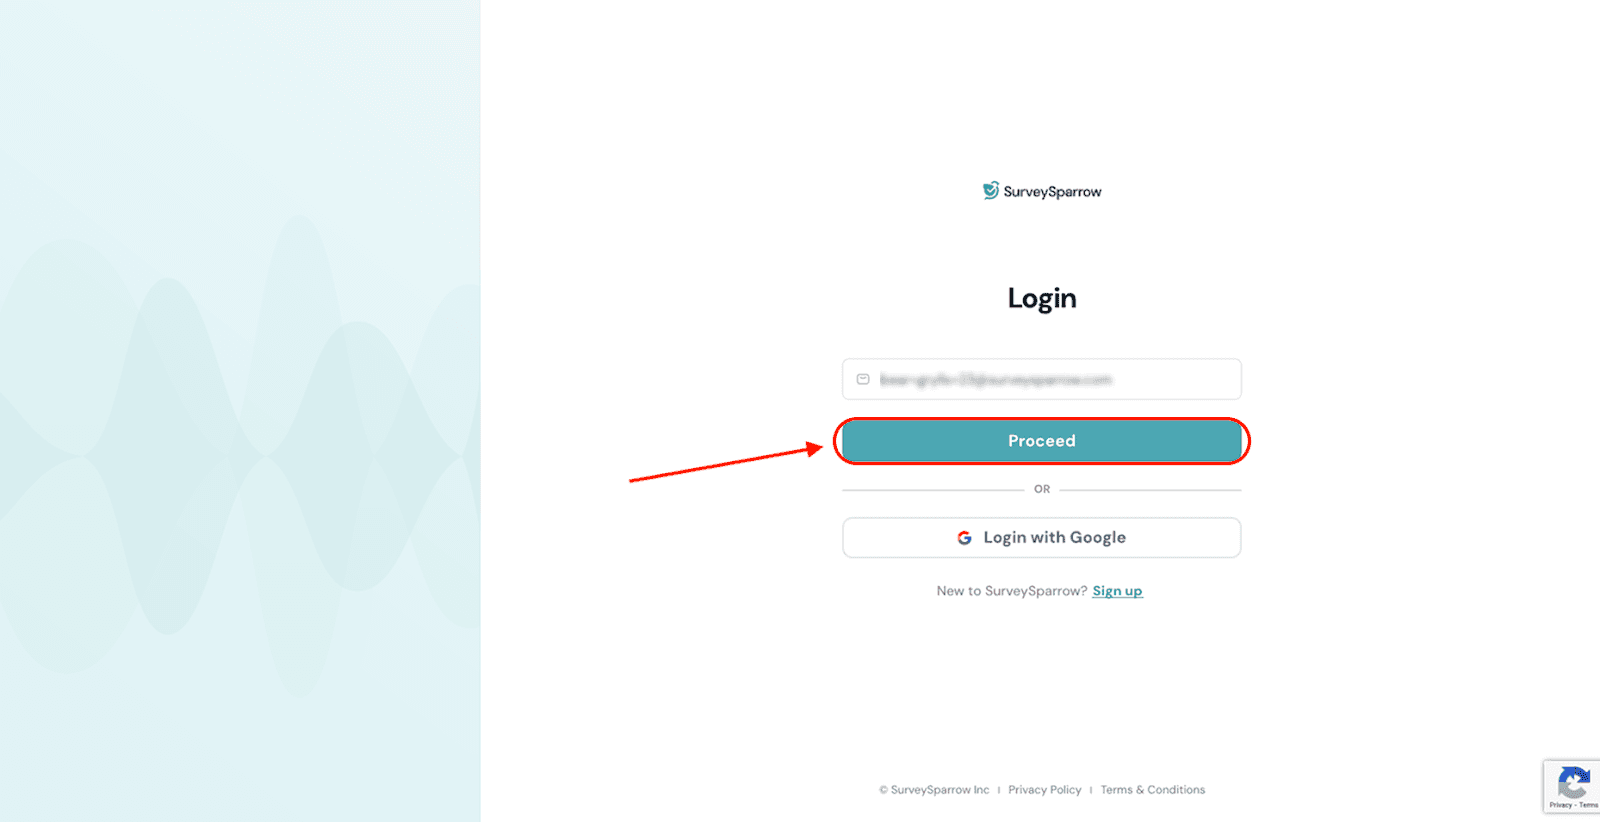
10. Then type in your password and click Login.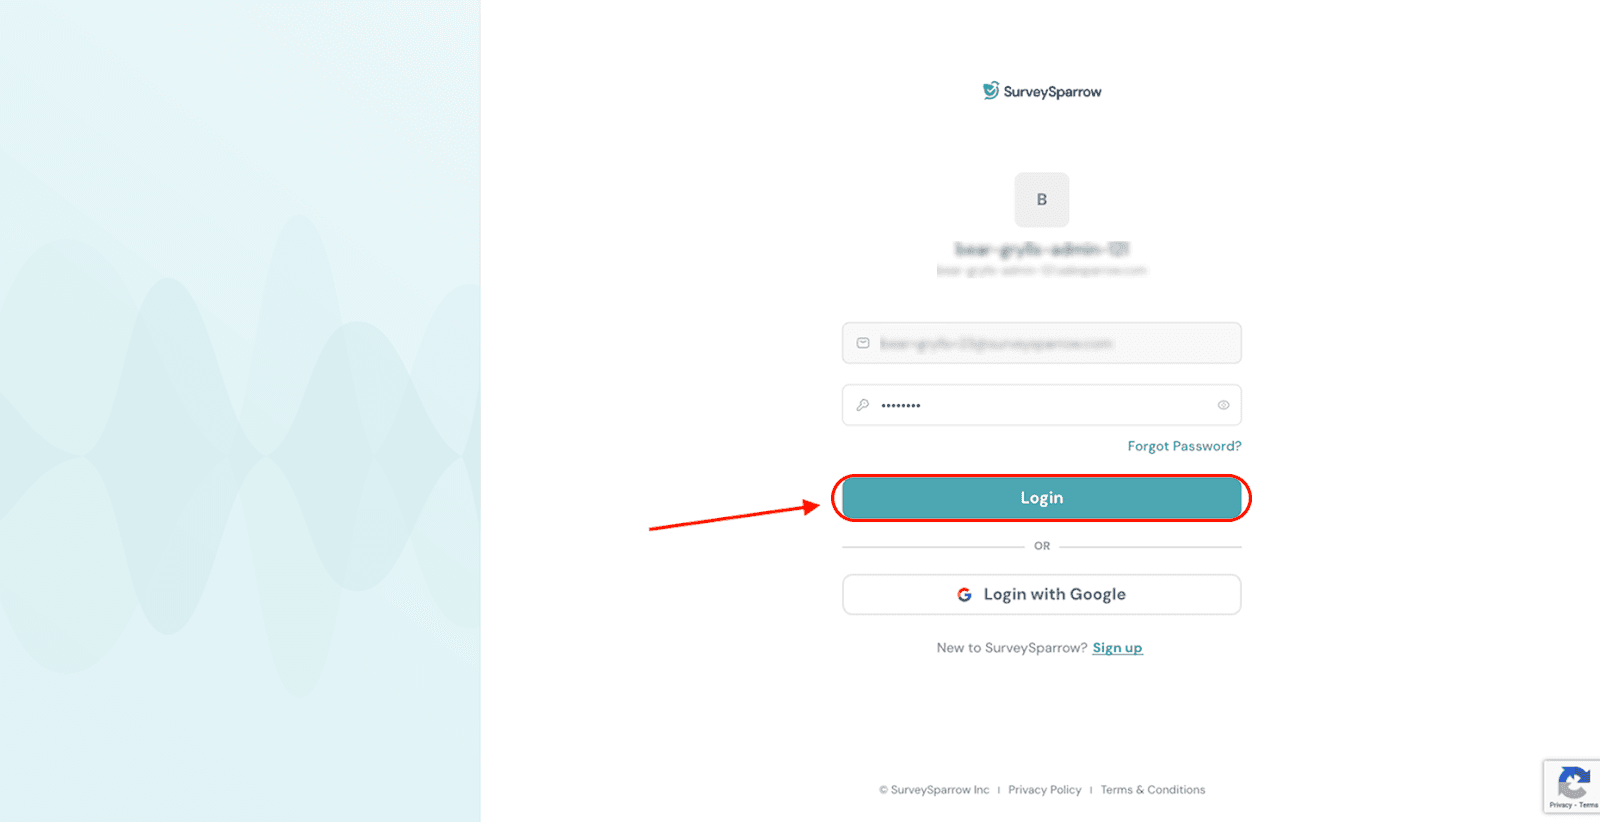
11. After this, you reach the final authorization screen. Click Authorize.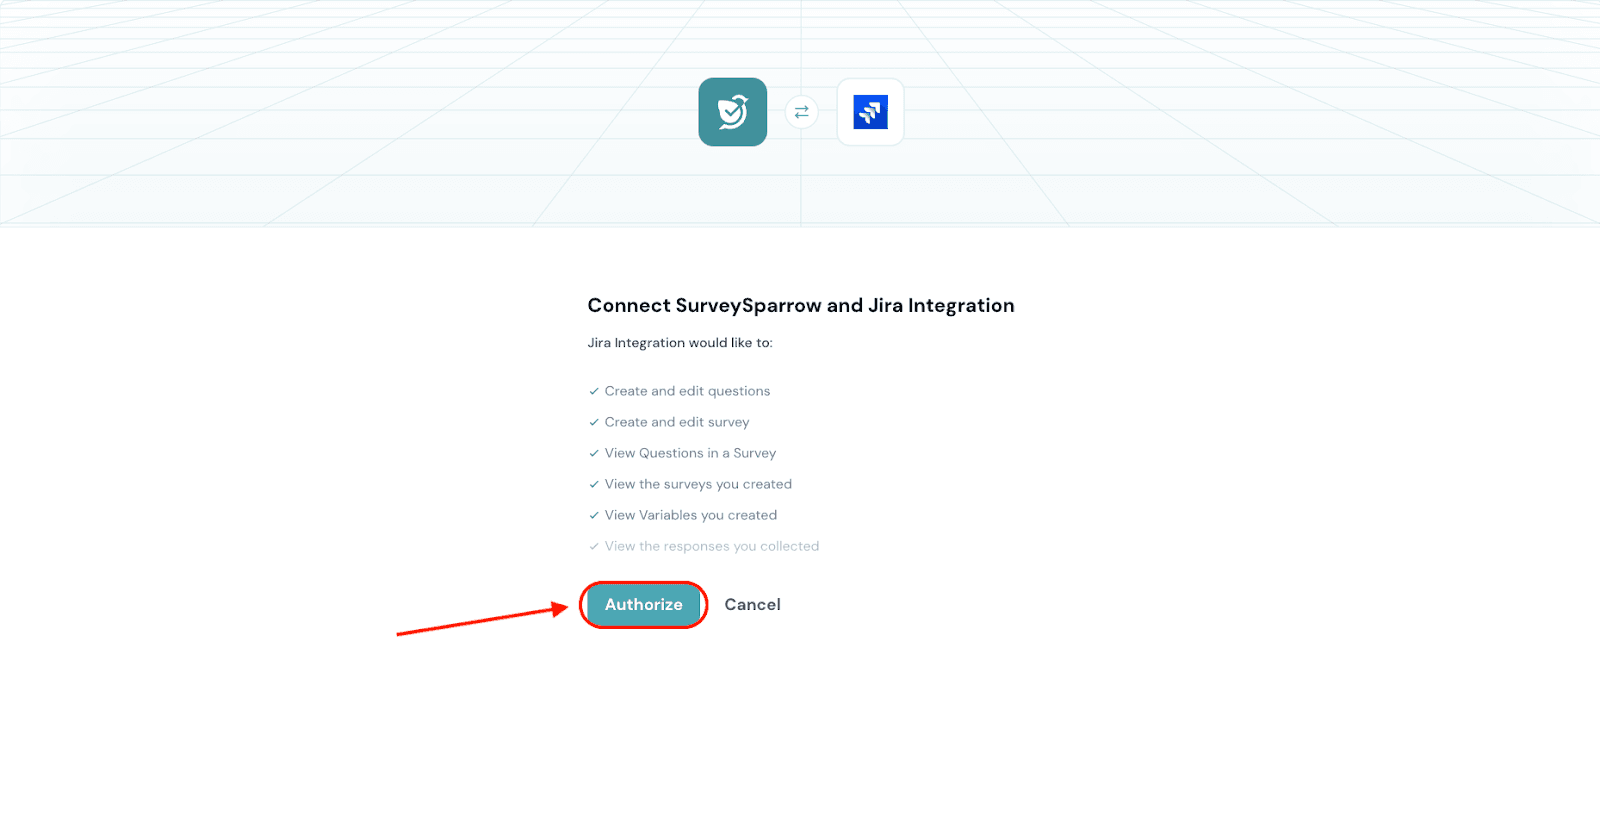
After this you will return to the SurveySparrow app inside Jira.
1.After opening the app, click on Trigger.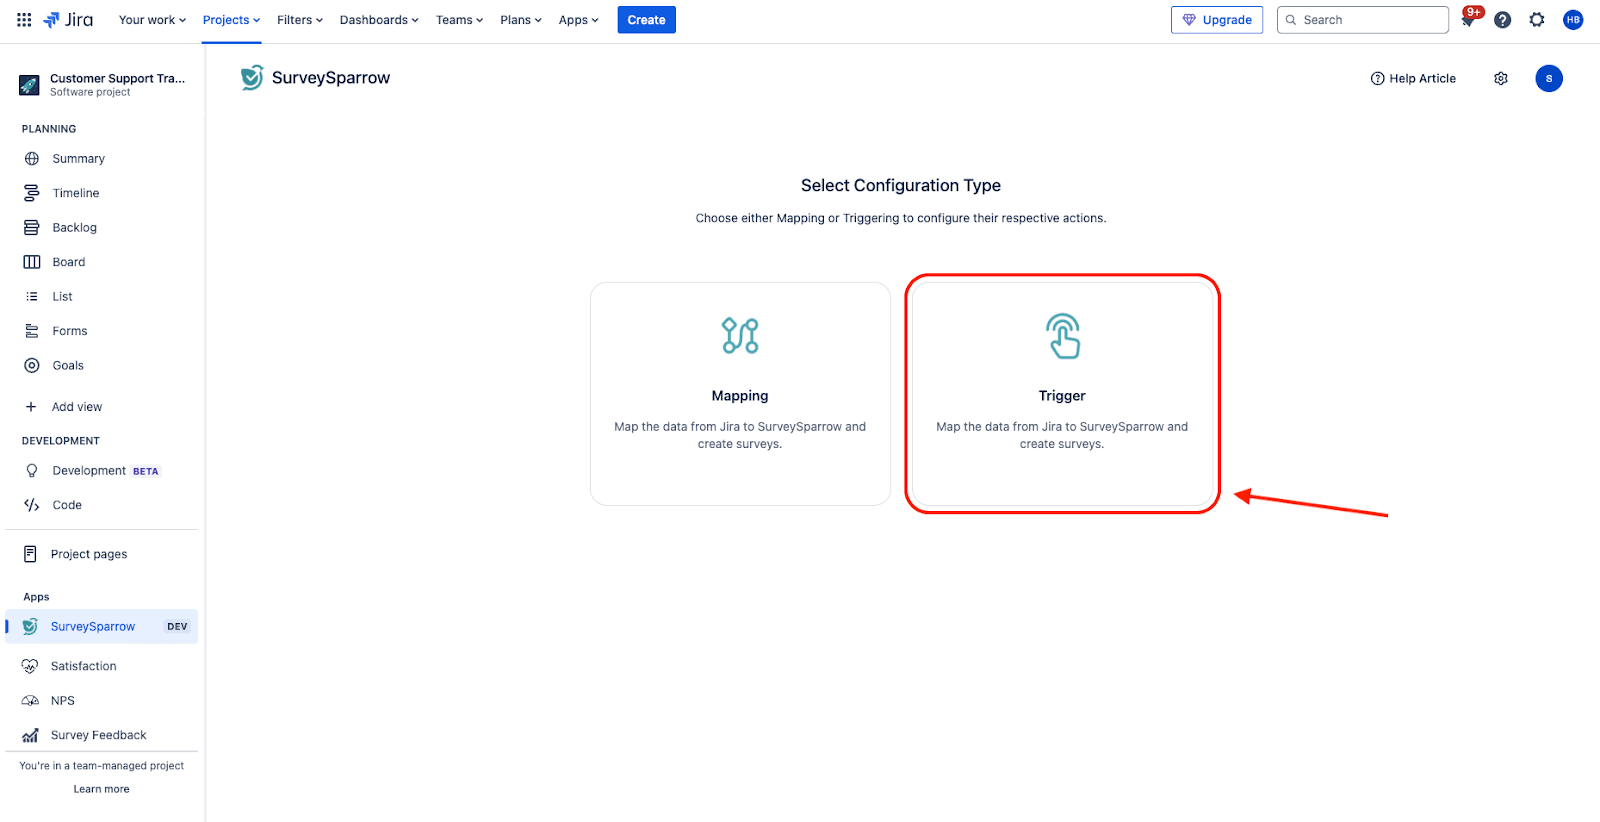
2. Here you will have to set up the event. First decide where you want the trigger to be located. To do this, click on the drop-down menu under Choose Project.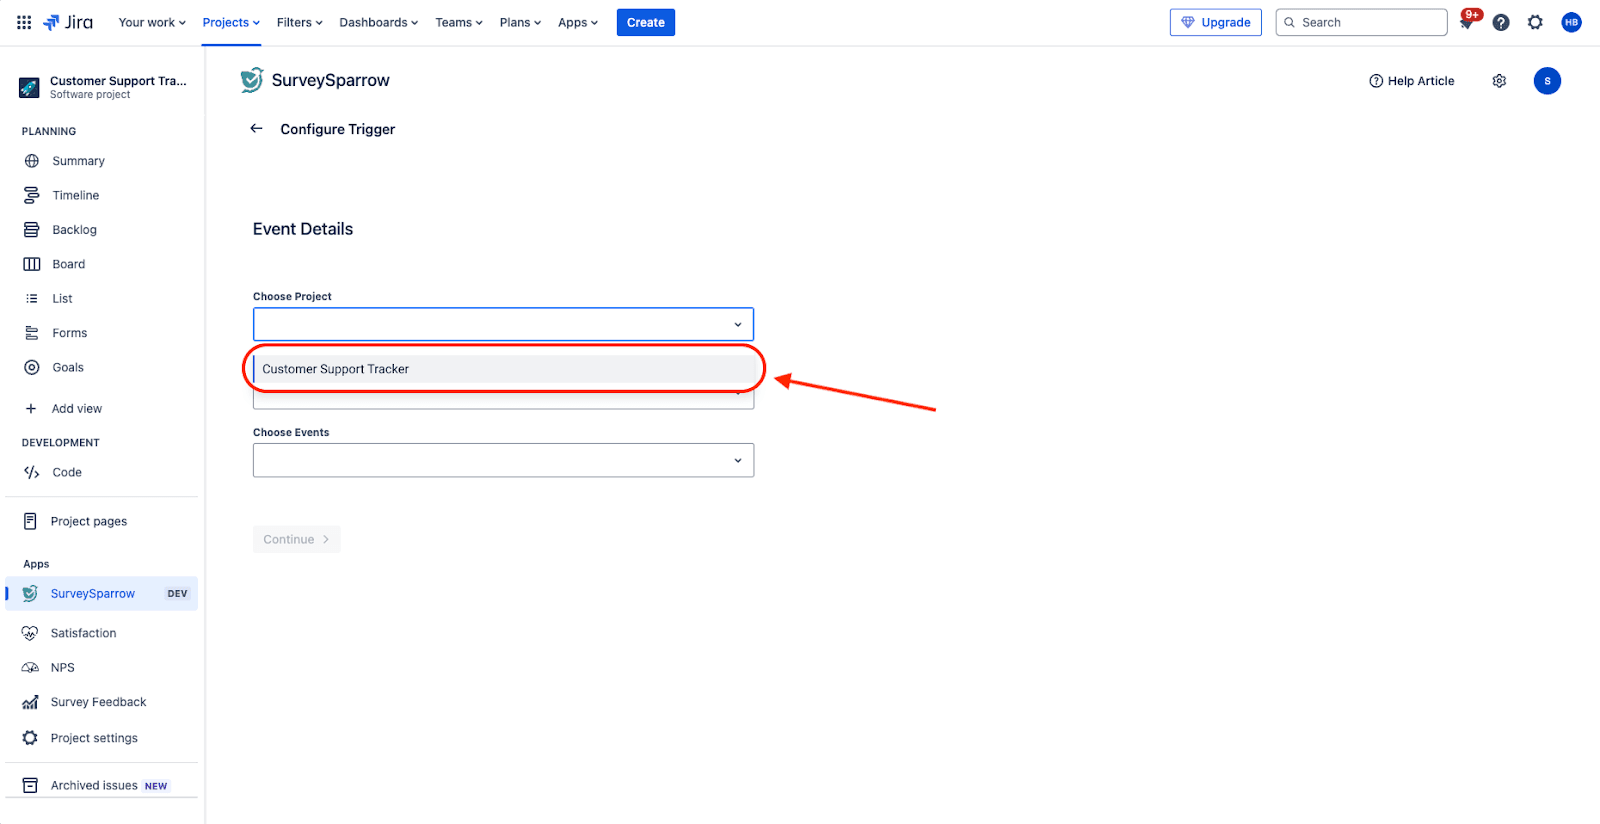
3. Next, choose the type of issue that you want to focus the trigger on. To do this, click on the drop-down menu under Choose Issue Type.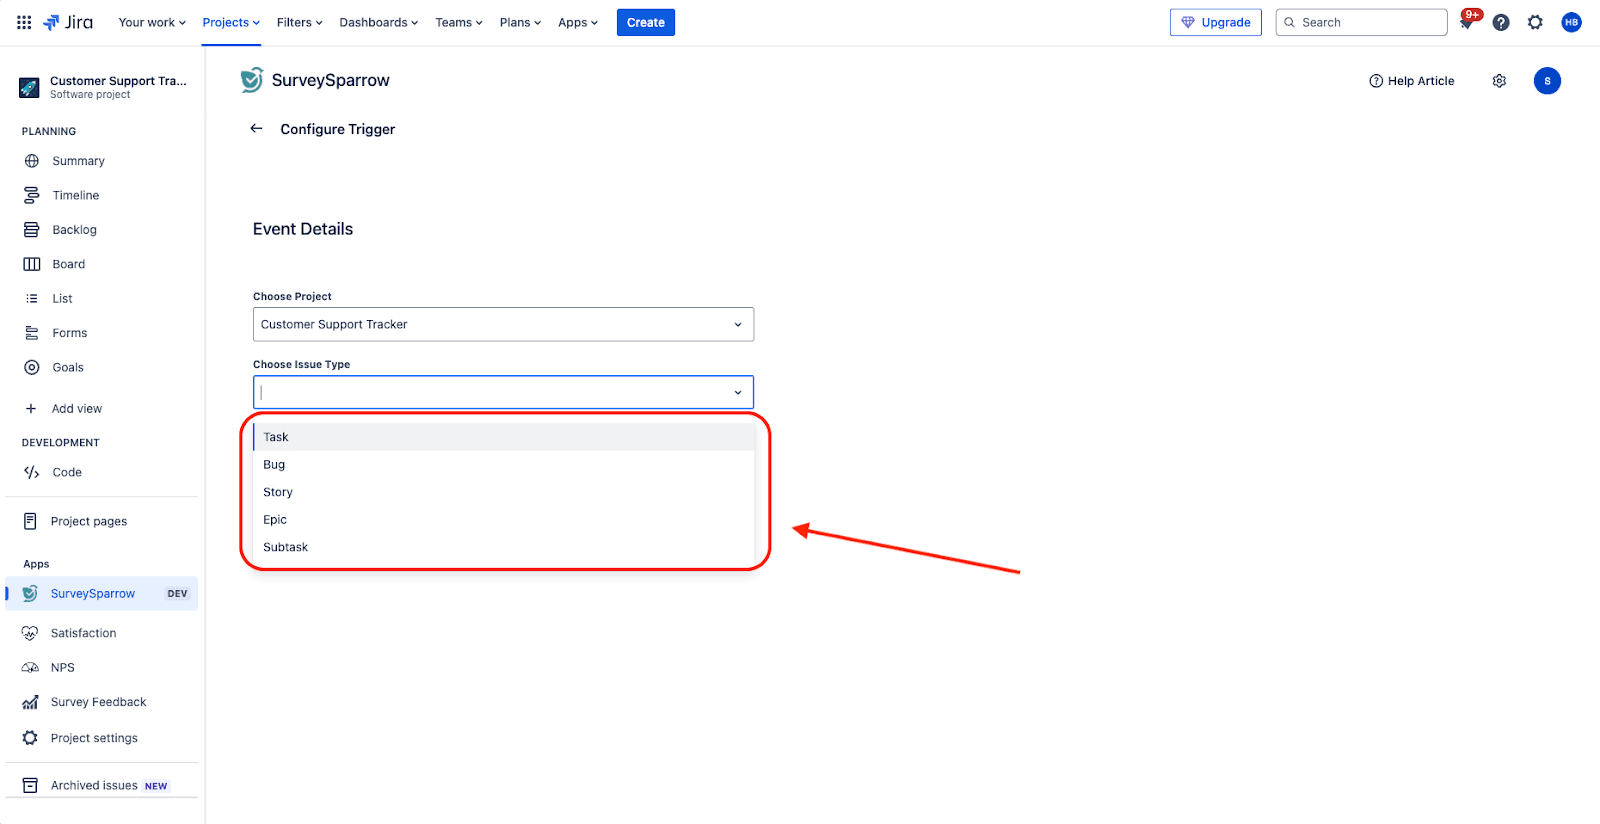
4. Then choose the trigger event. To do this, click on the drop-down menu under Choose Events. You can choose from 3 events: Created, Updated, Deleted.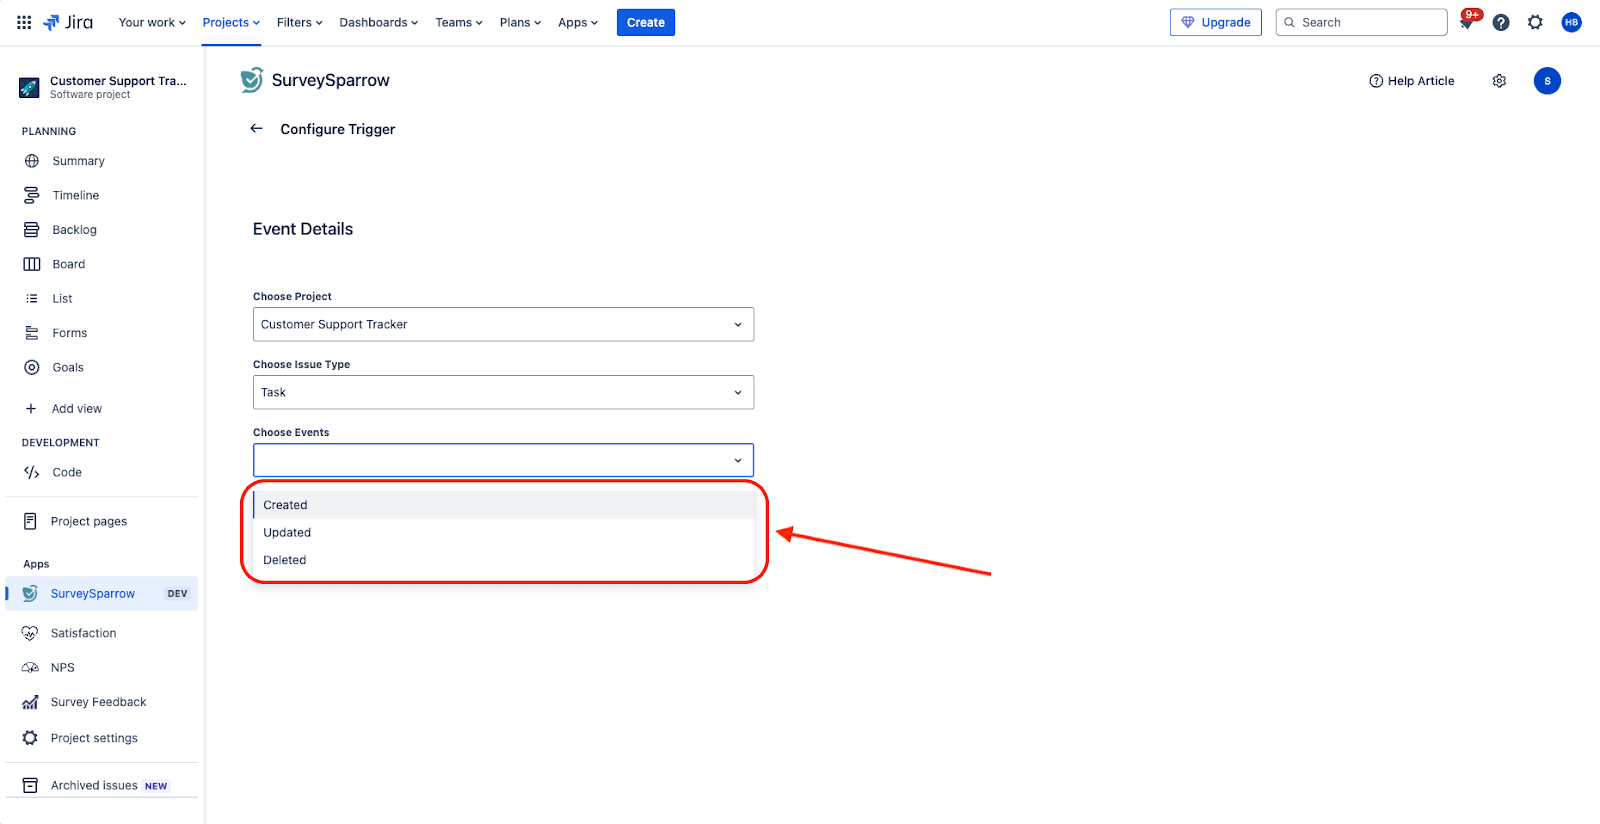
5. After the trigger event is ready, click Continue.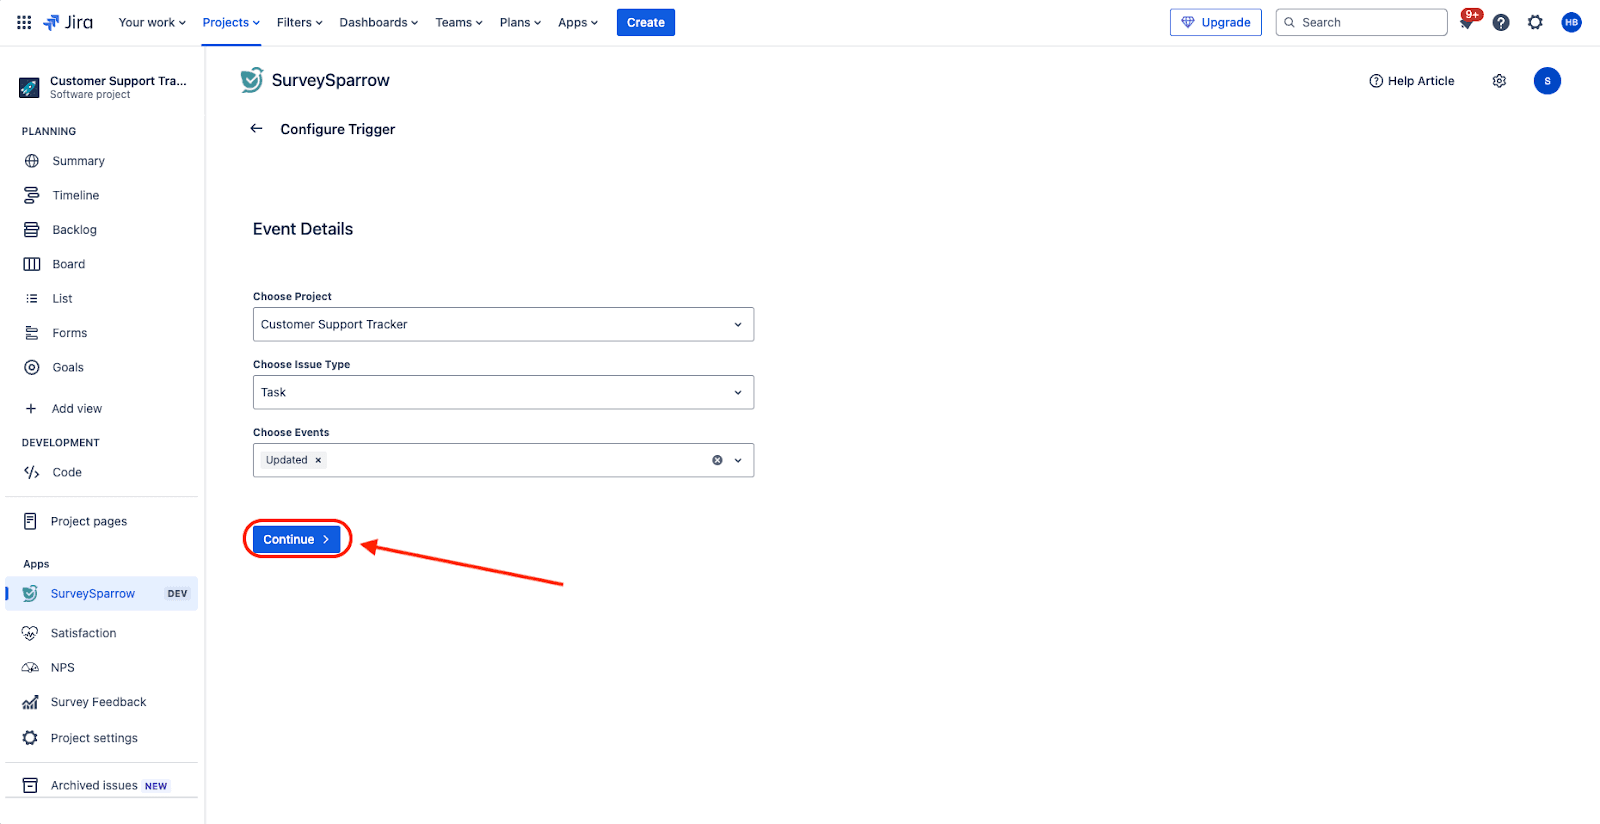
6. Now you will have to define the exact trigger conditions. You can choose how narrow/broad your targeting is by choosing between All or Any. The default option is And, click on it to switch to Any.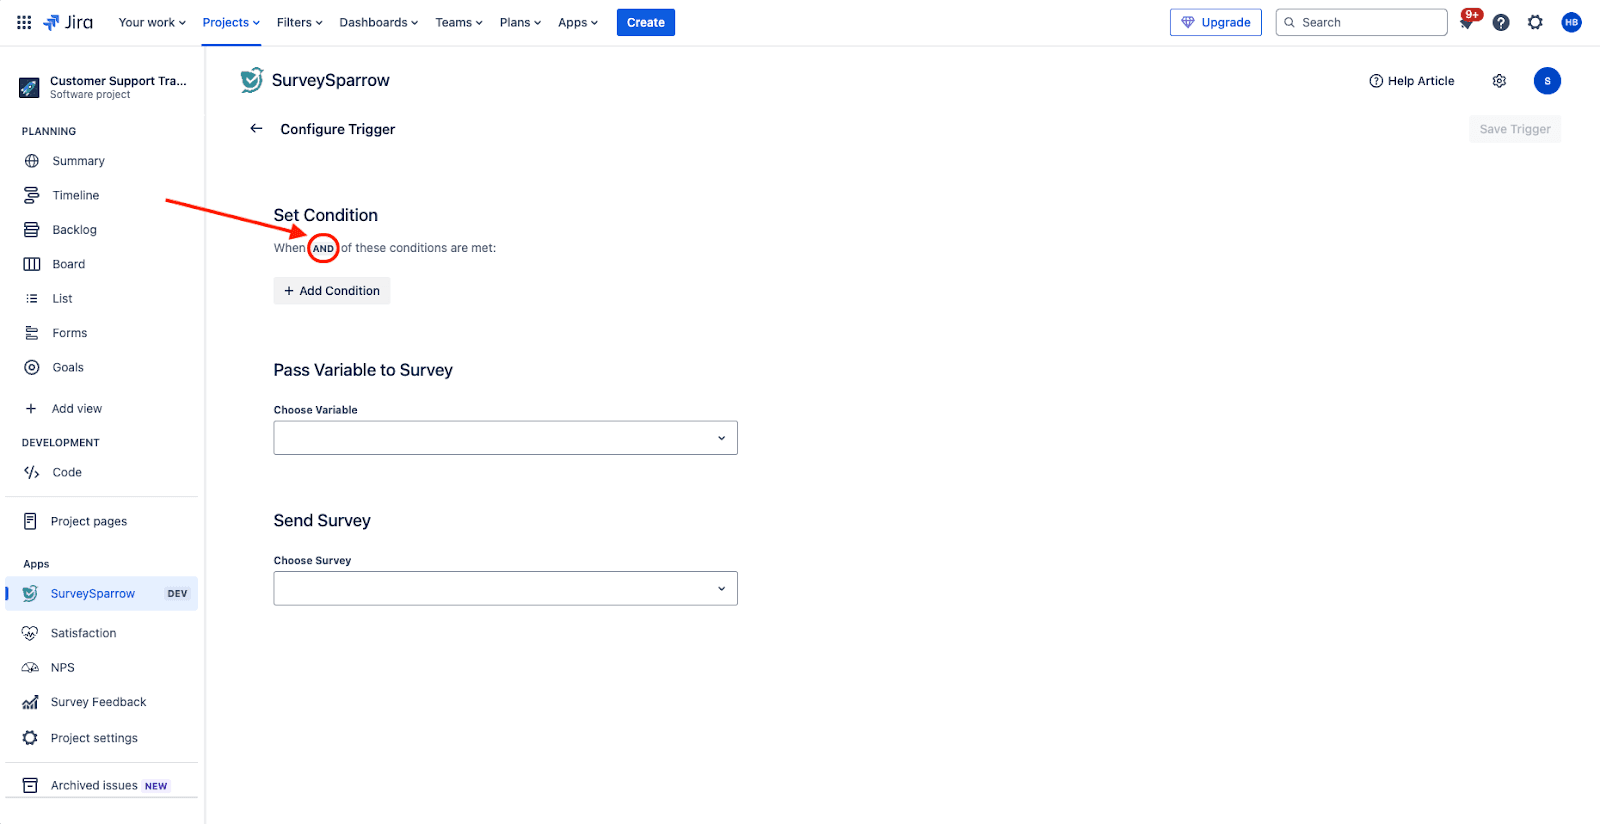
7.Then click Add Condition to begin.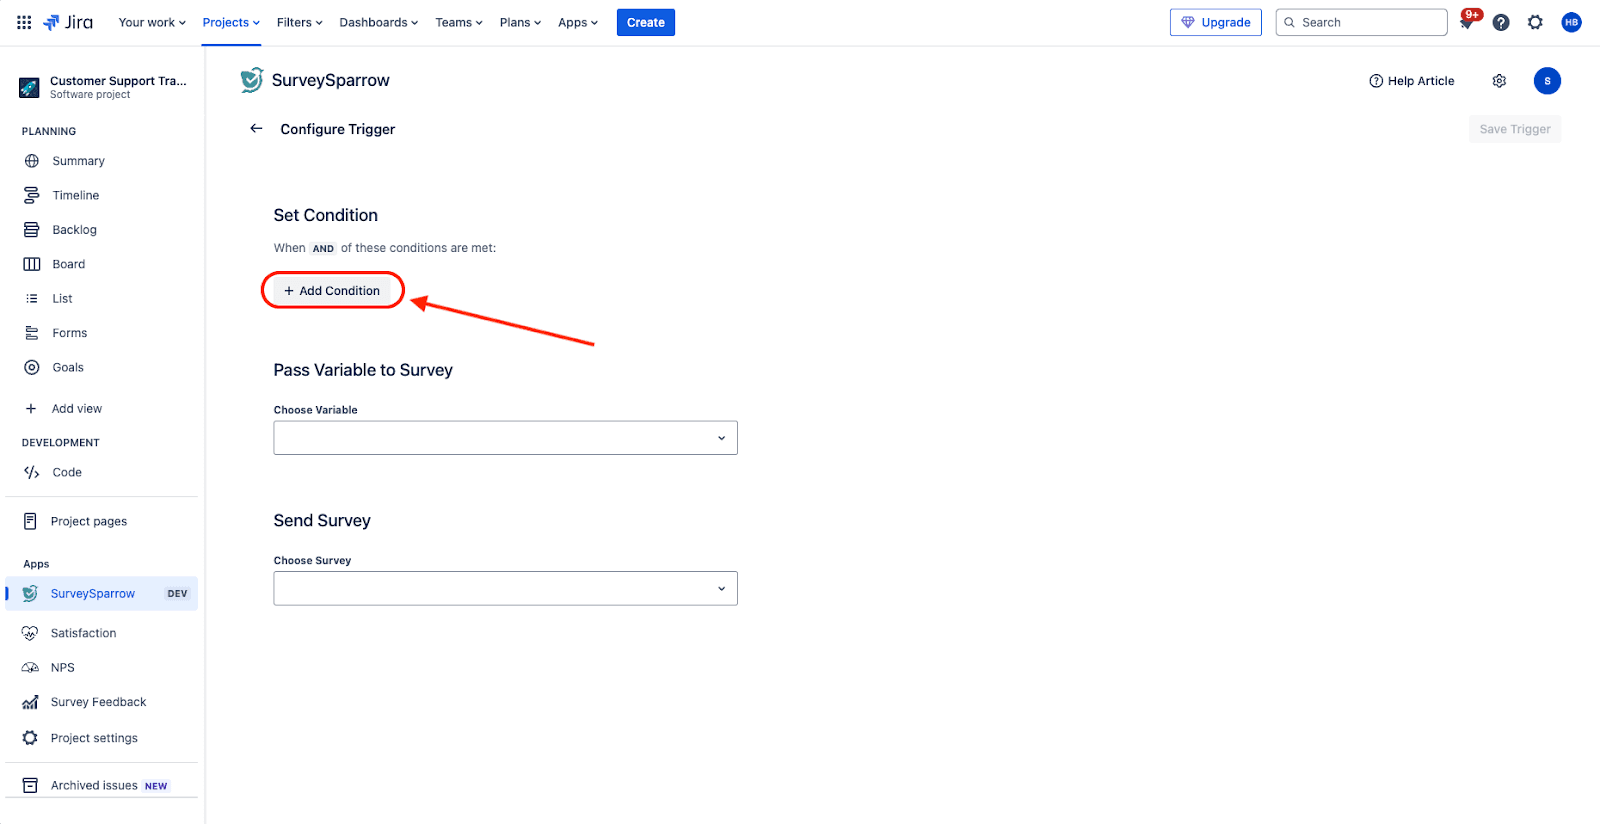
8. Choose the Jira field where the trigger event should occur.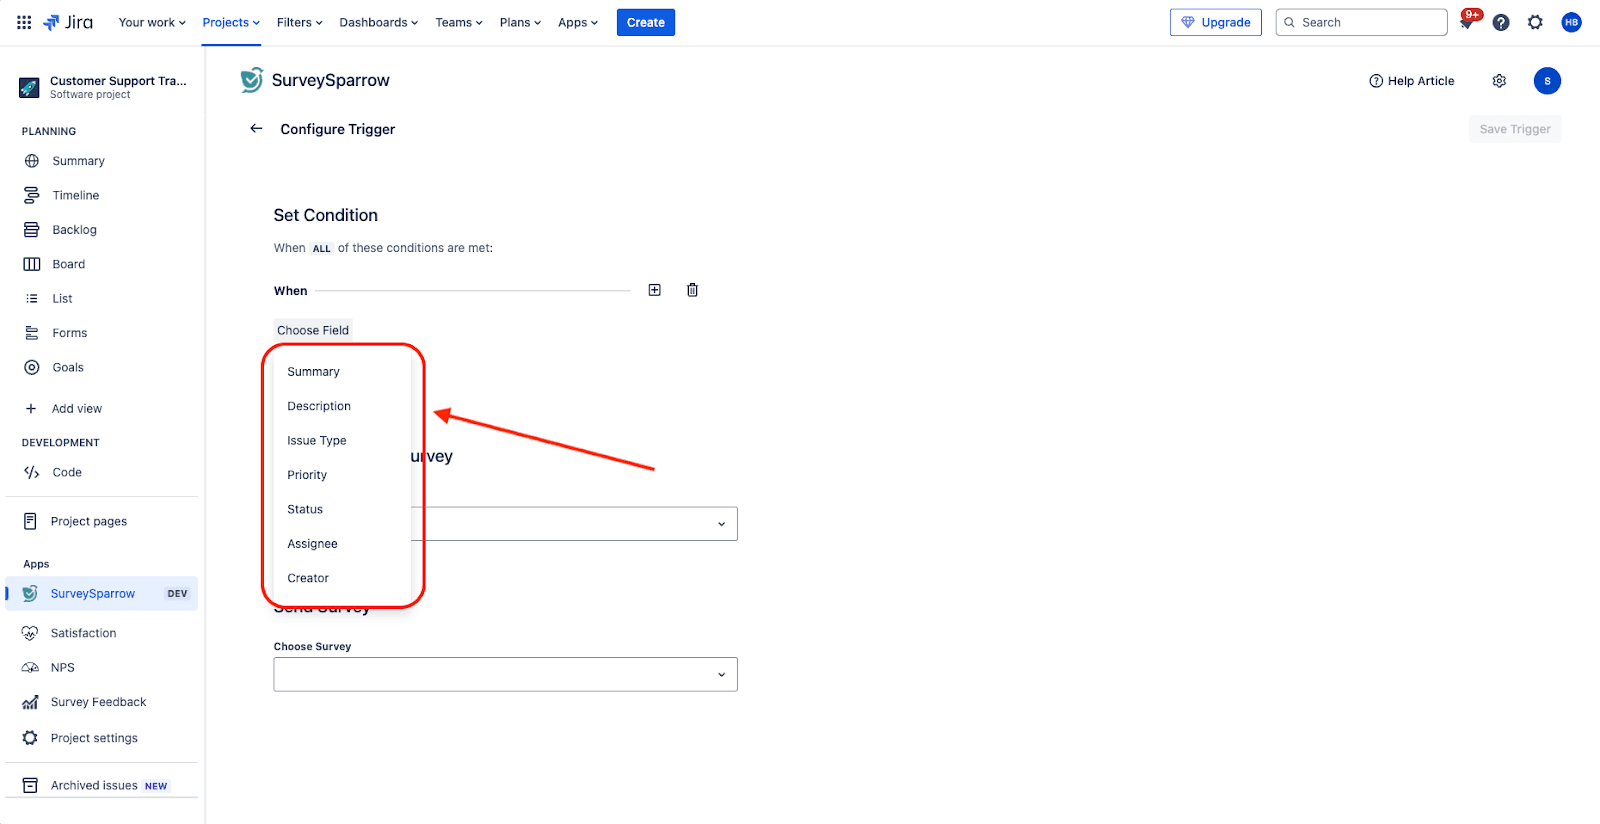
9. Then choose the condition for the value from the field.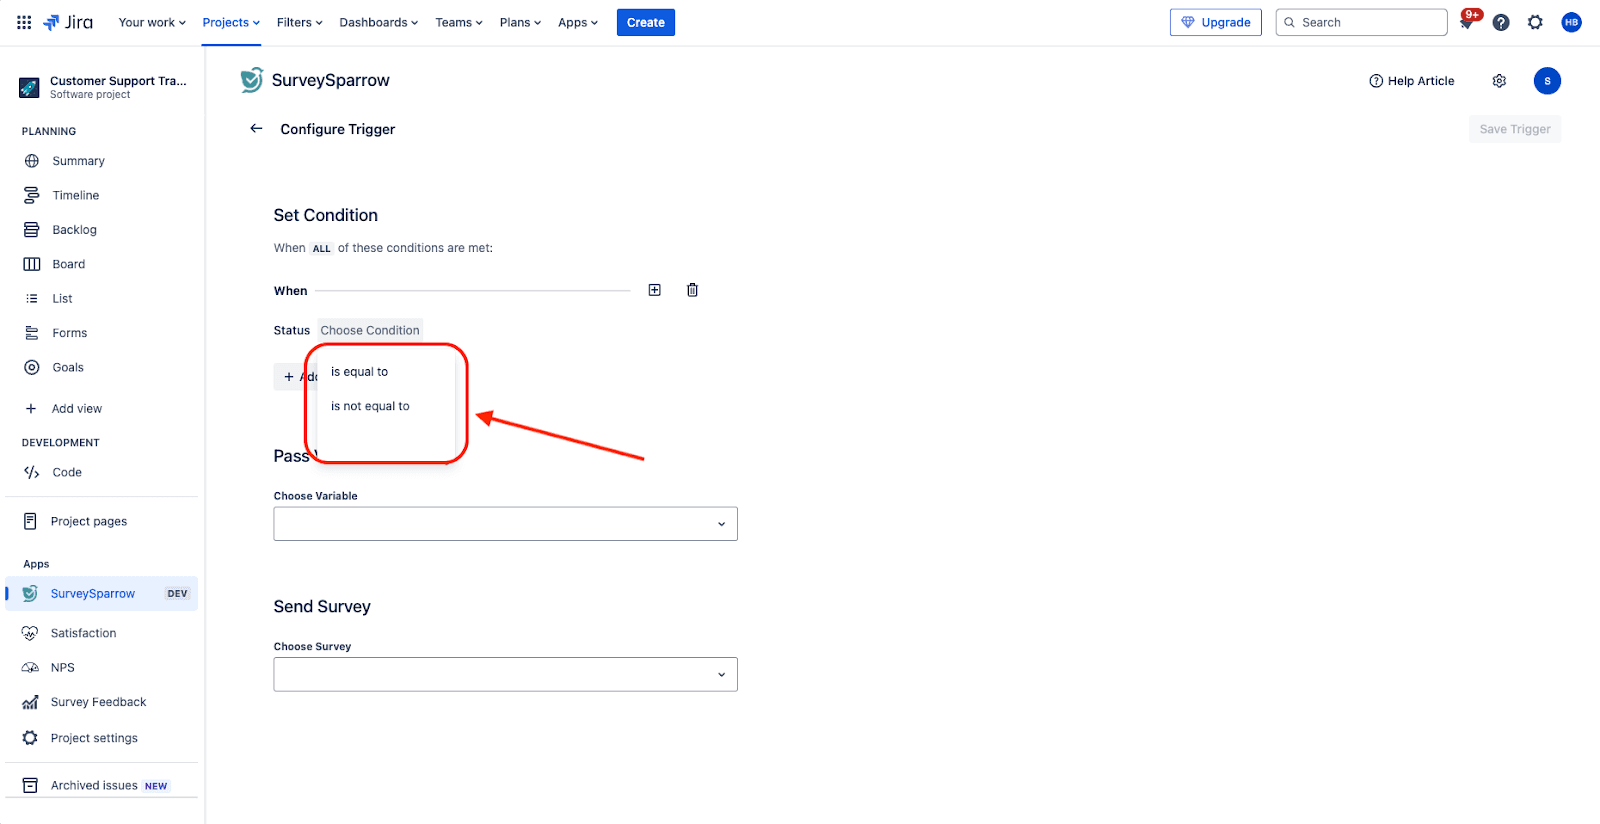
10. Choose the value that should appear in the field.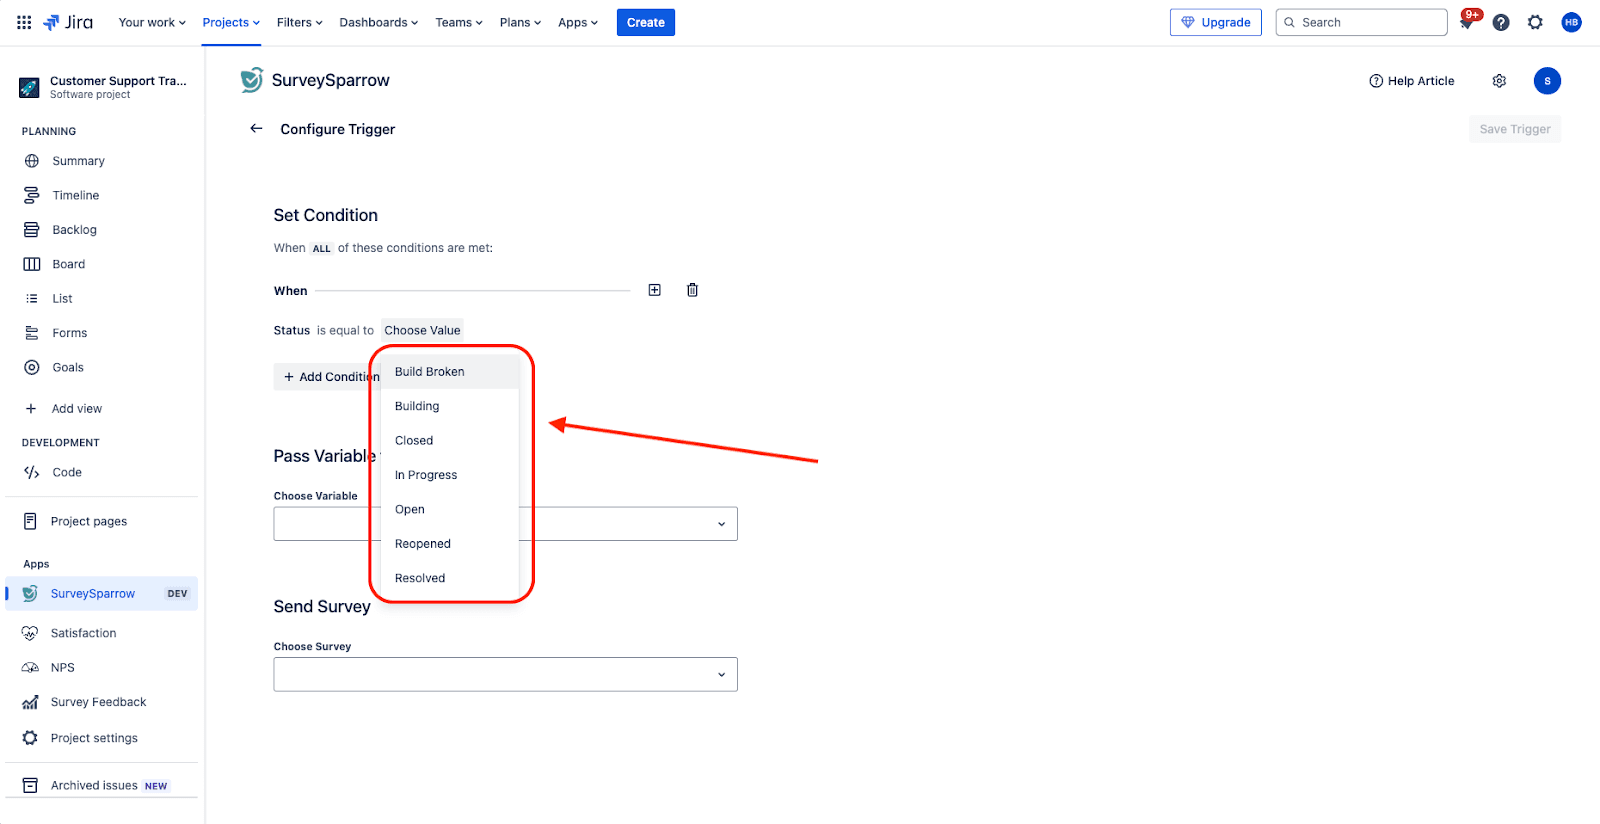
11. You can make the condition even more specific with additional fields, by clicking on the plus icon. If you wish to add a completely new condition, click Add Condition.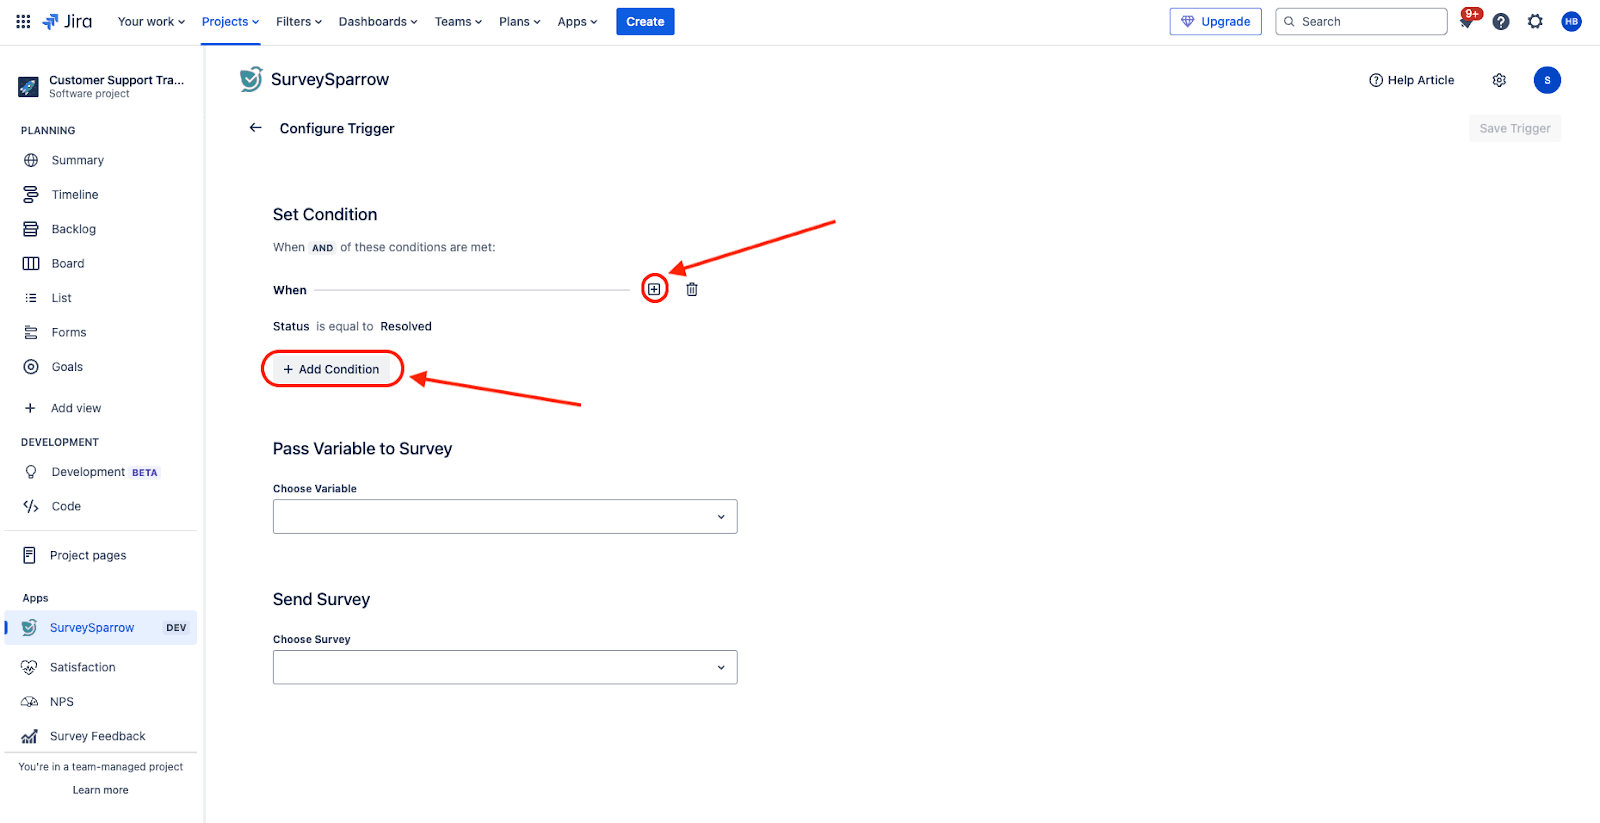
12. After your conditions are ready, you need to add variables to pass on to the survey. These variables will enrich the responses with relevant context. To do this, click on the drop-down menu under Choose Variable.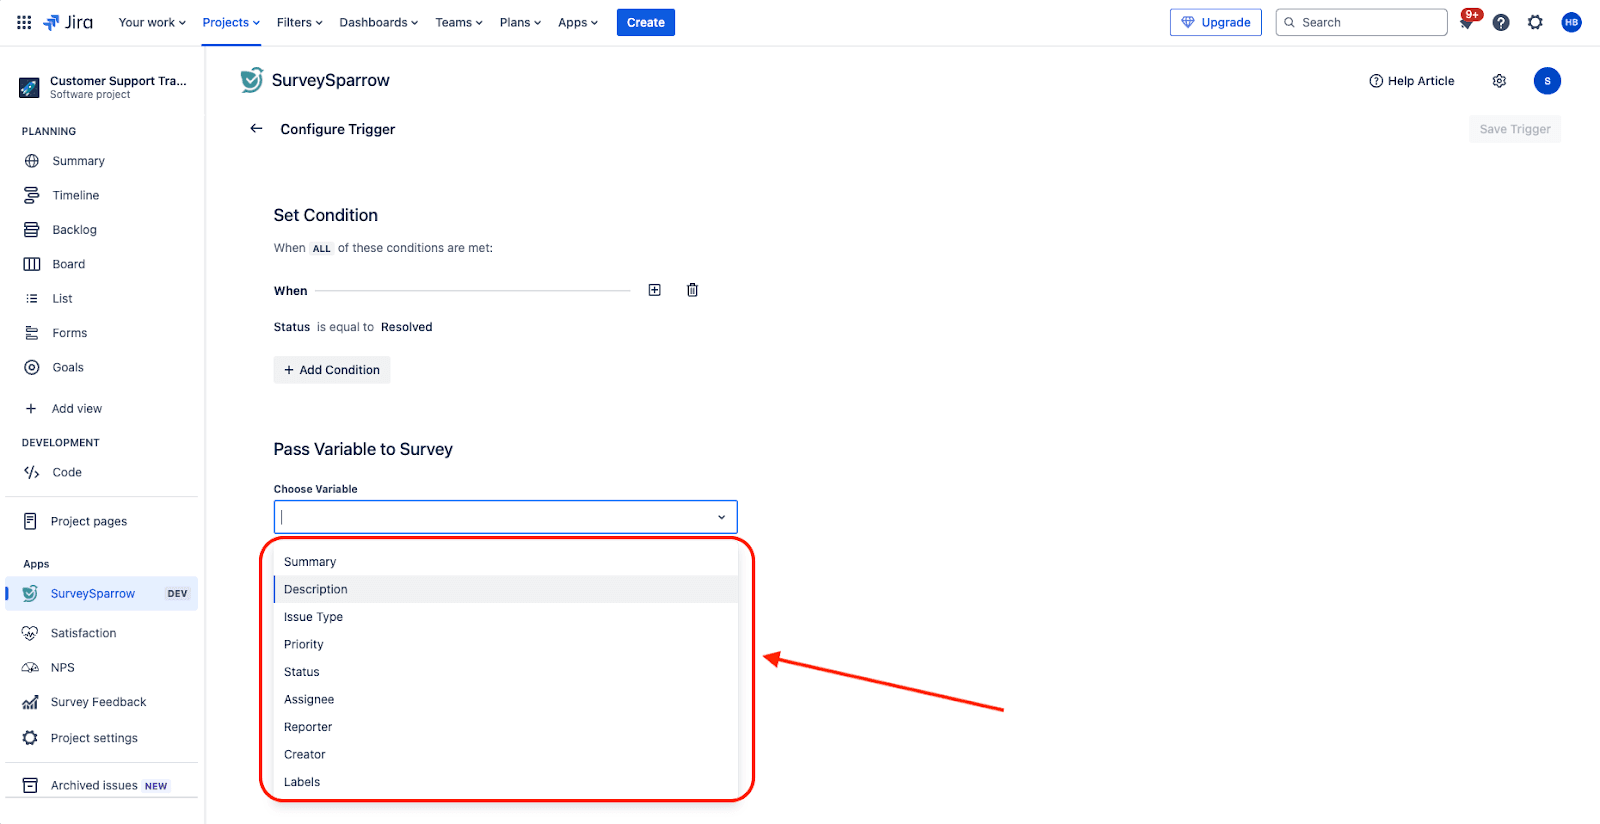
13. Following this, you need to configure the survey deployment. First click on the drop-down menu under Choose Survey to select the survey to send.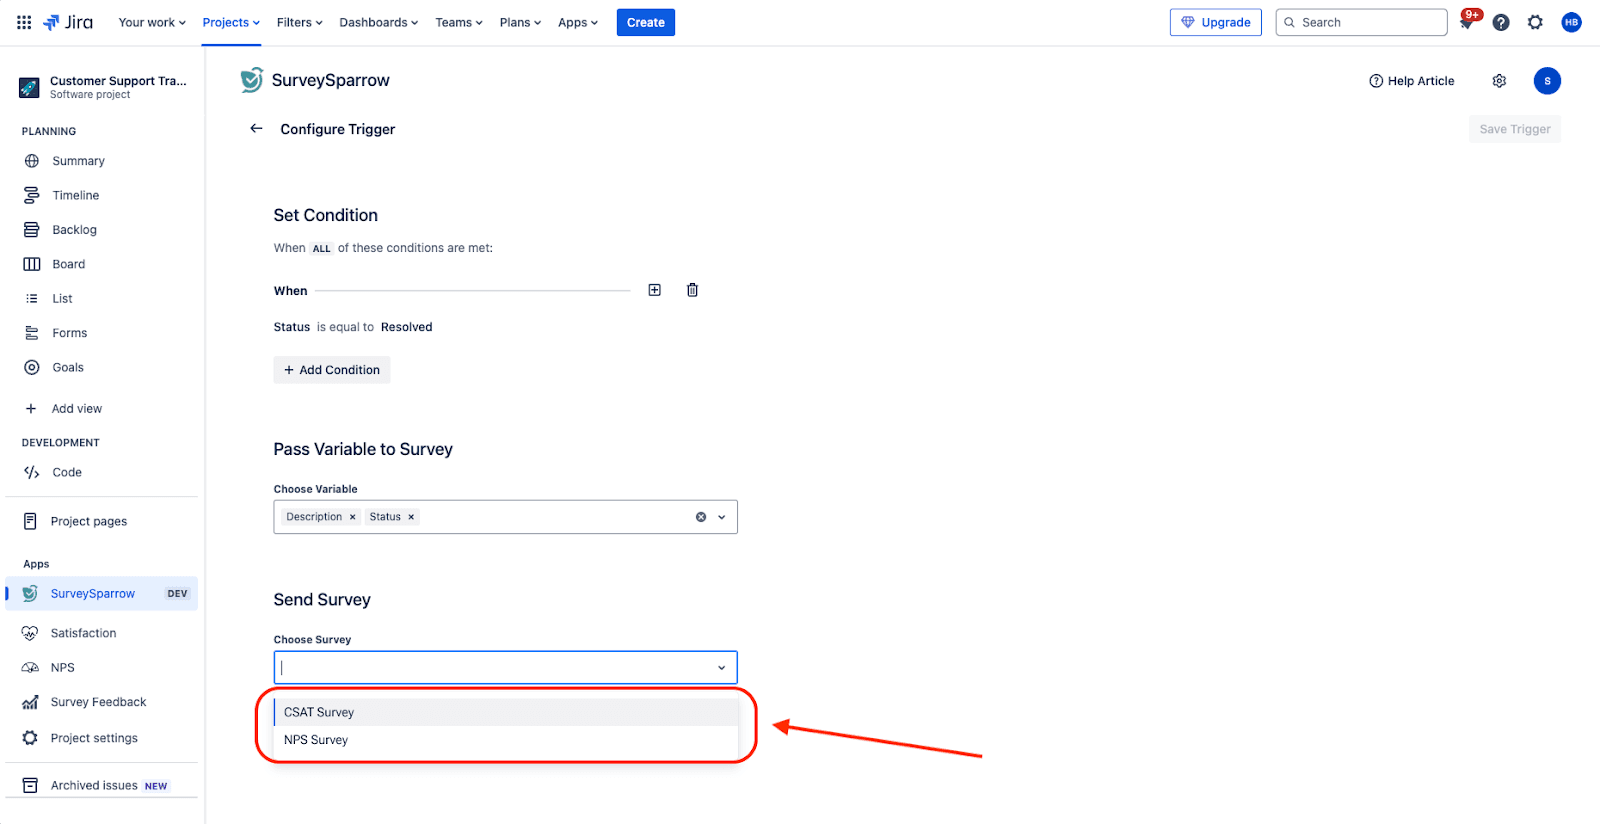
14. Next, select the type of share channel through which the survey must go. You can choose one of the following: Email, SMS and WhatsApp.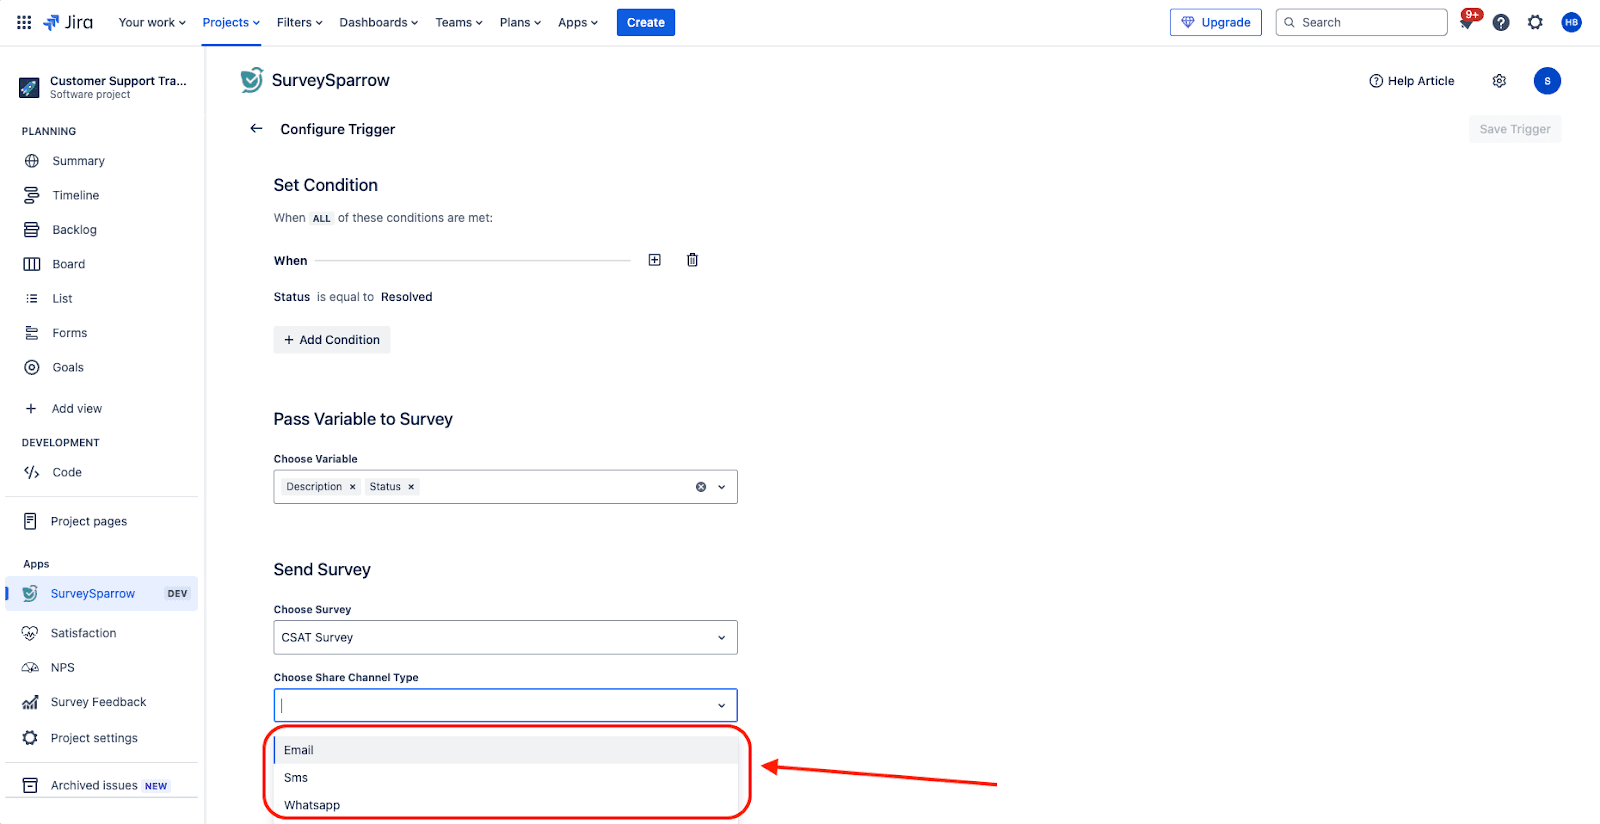
15. You’ll also have to select the recipient of the survey. Click on the drop-down menu under Choose Recipients and decide from: Assignee, Creator and Reporter.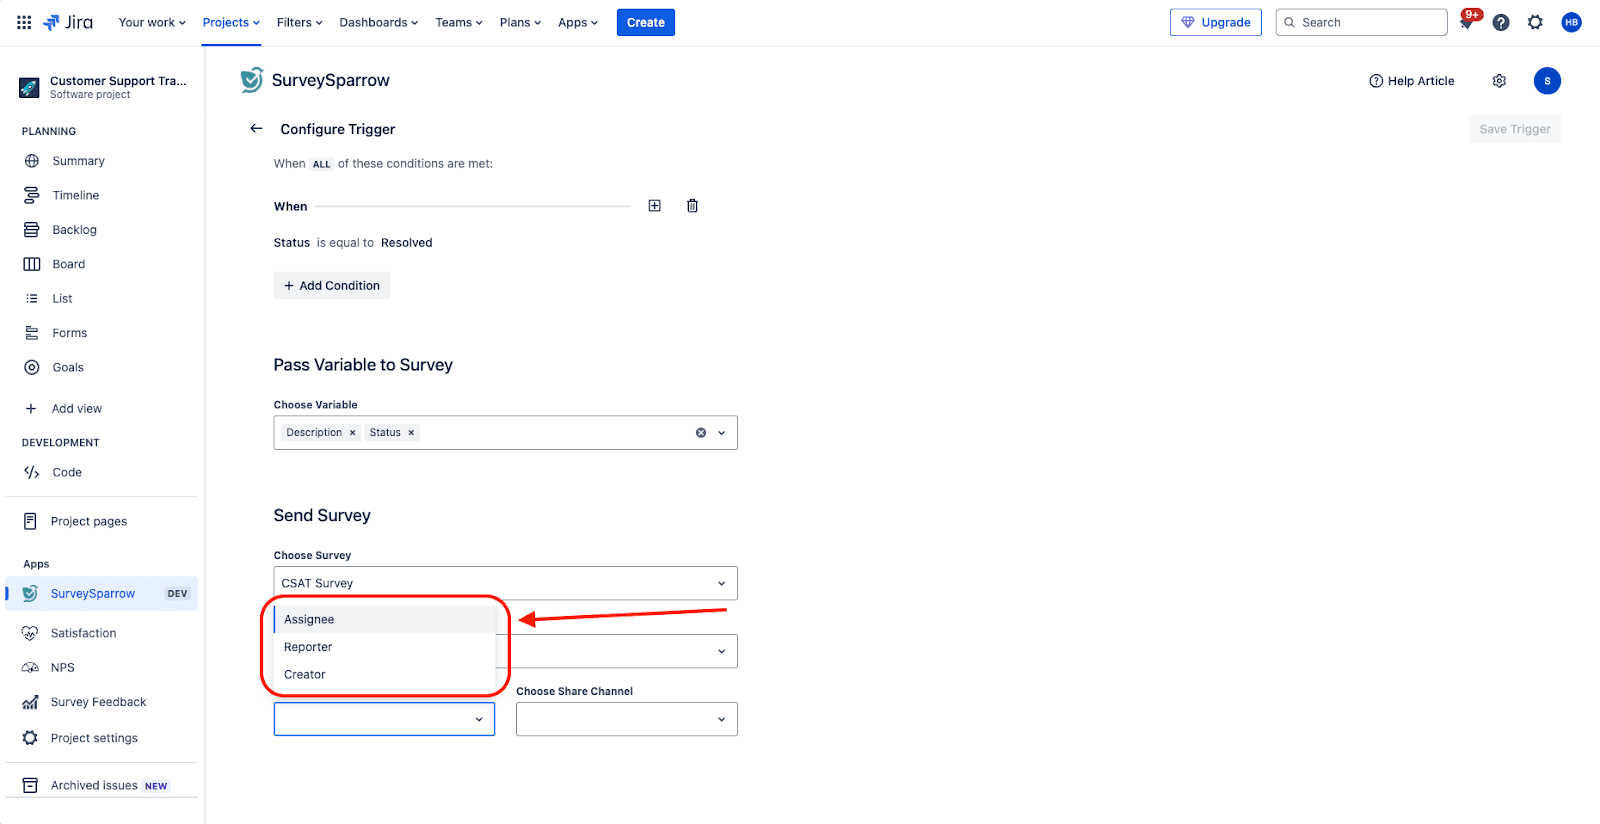
16. The final step is to choose the specific share channel that has been created inside SurveySparrow for the selected share type. Click on the drop-down menu under Choose Share Channel.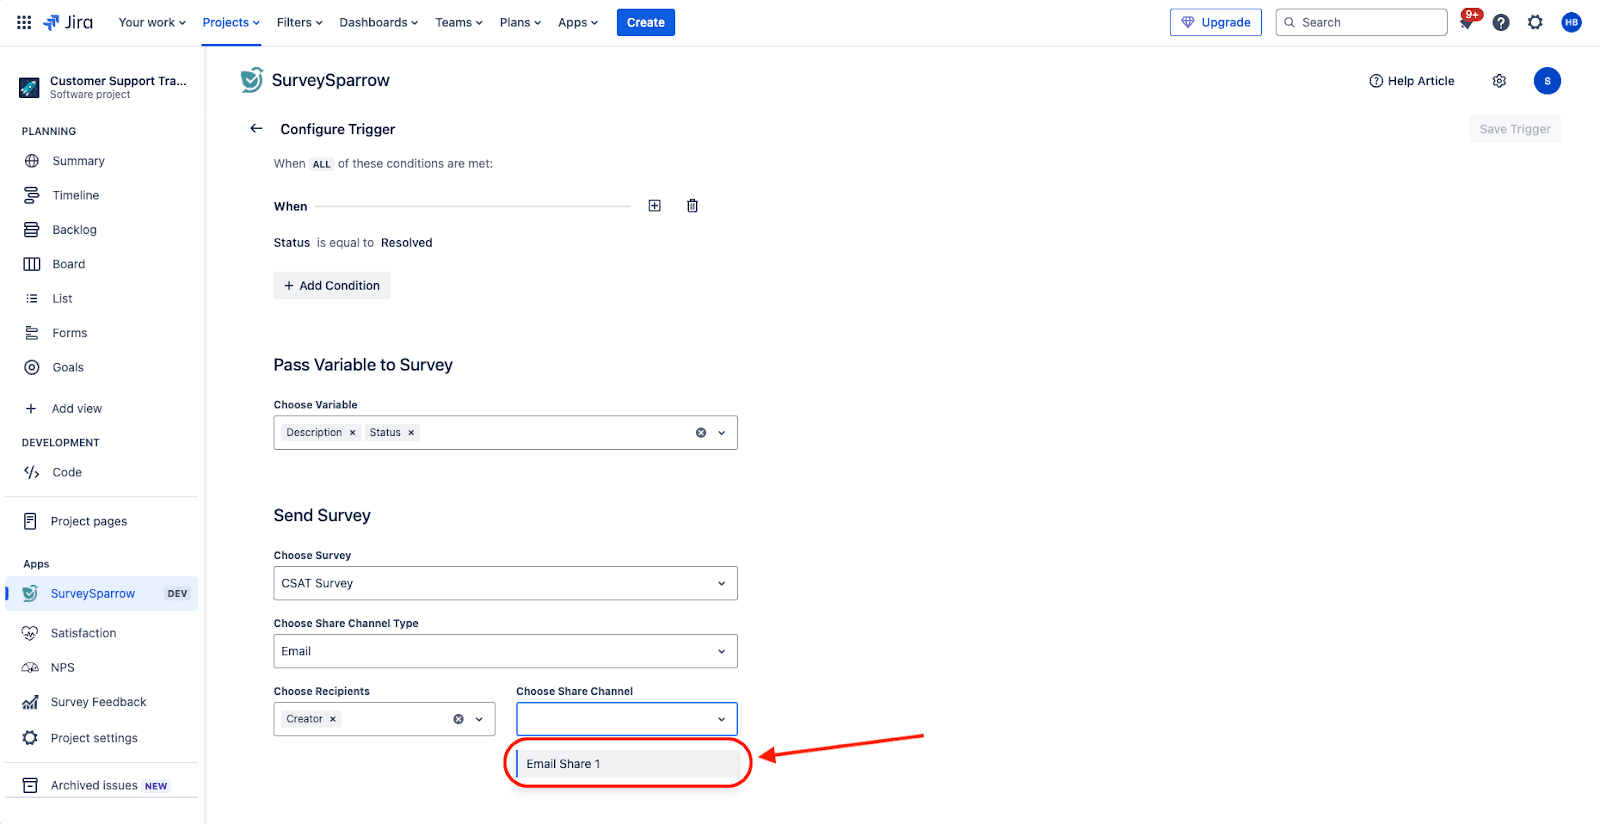
17. The trigger is ready to save. Click Save Trigger.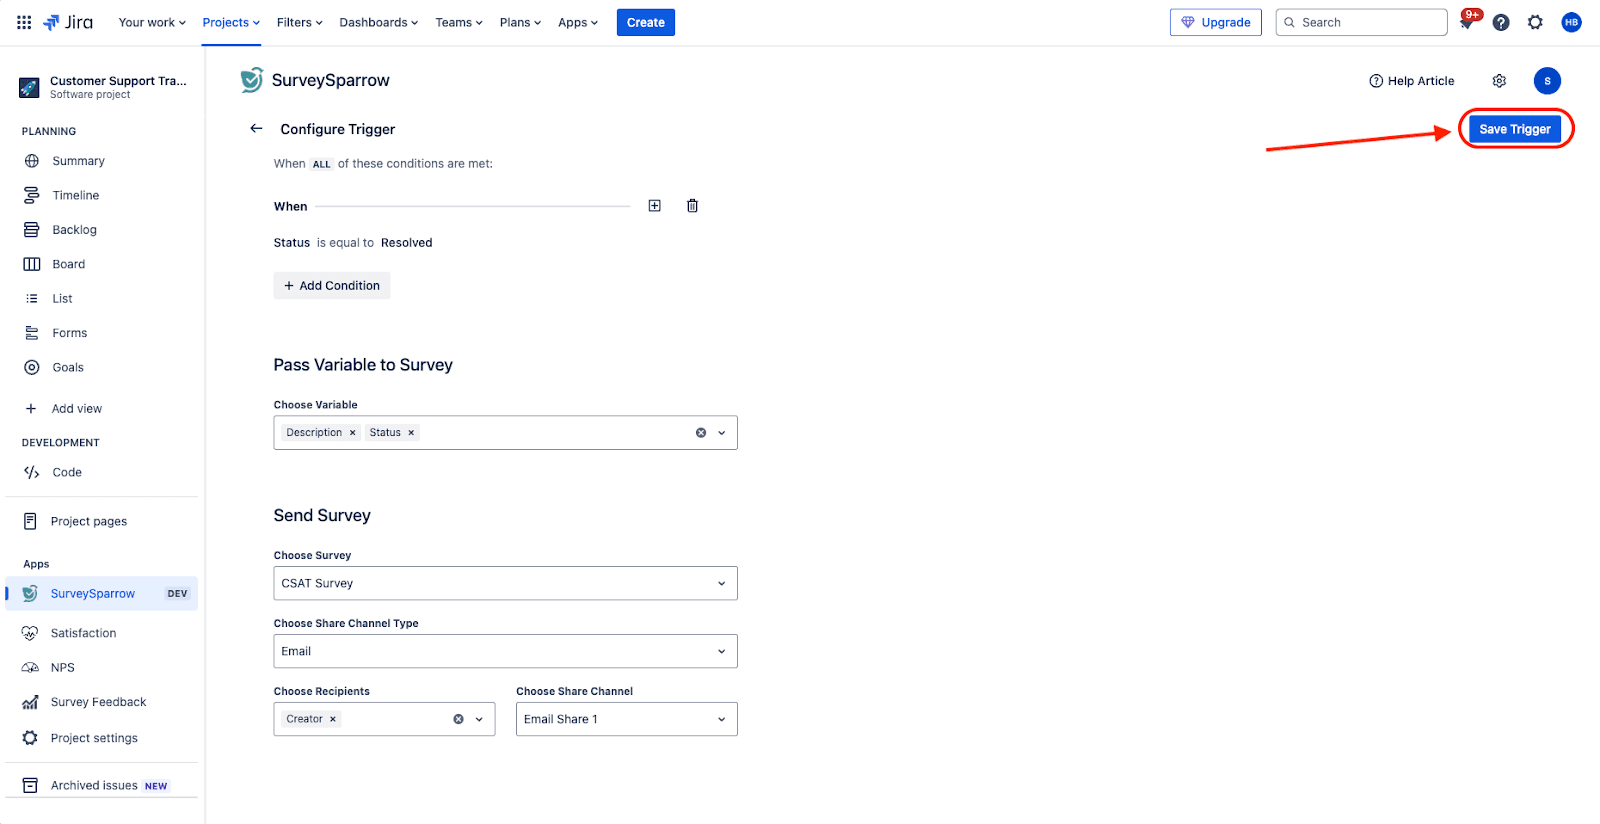
18. You will also be asked to enter a name for the trigger. Once you have done it, click Save.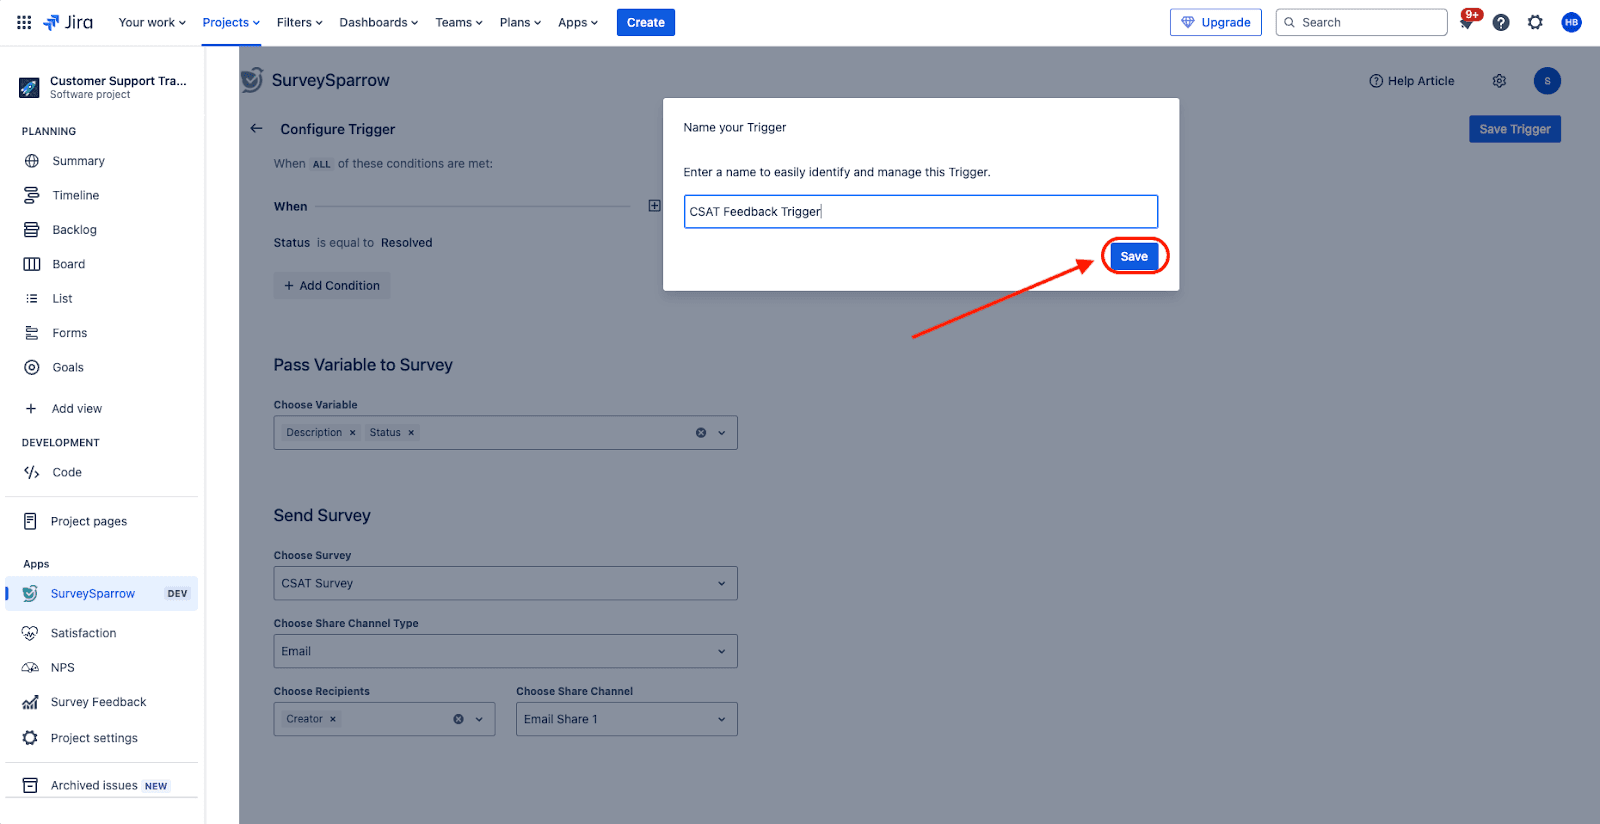
19. You will be taken to the dashboard, where you can get an overview of the tickets generated through the app. Since you’ve just started, all the metrics will be 0. To view the trigger, click on the Survey Configuration tab.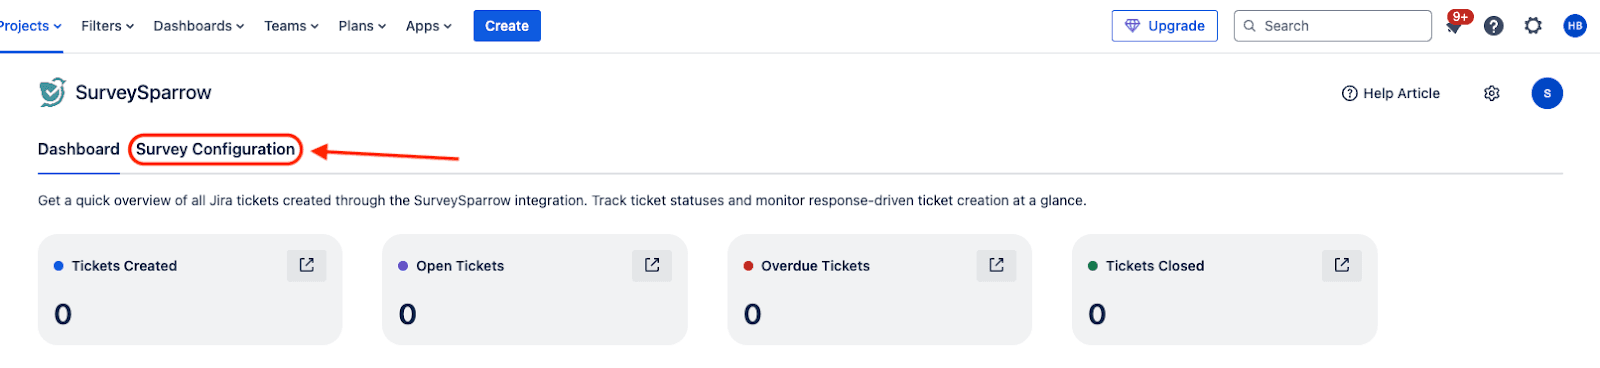
20. Here, you will be able to see all the triggers and mappings that are created. You can pause the trigger, edit or delete it, and add new triggers or mappings.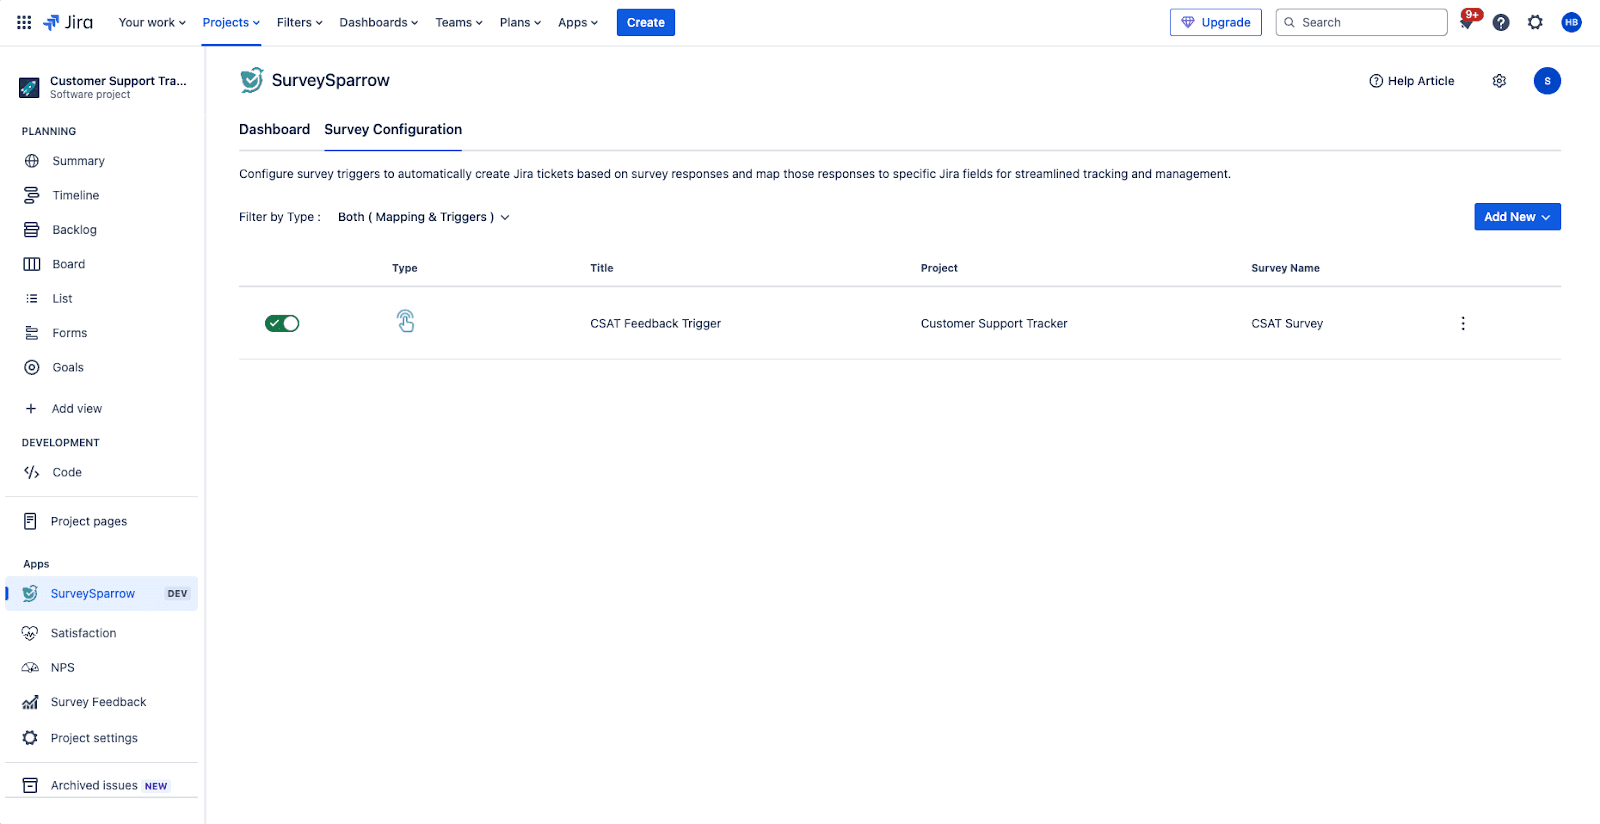
Note: If you’ve already created a trigger/mapping, head to the Survey Configuration tab. Click Add New, then click Trigger.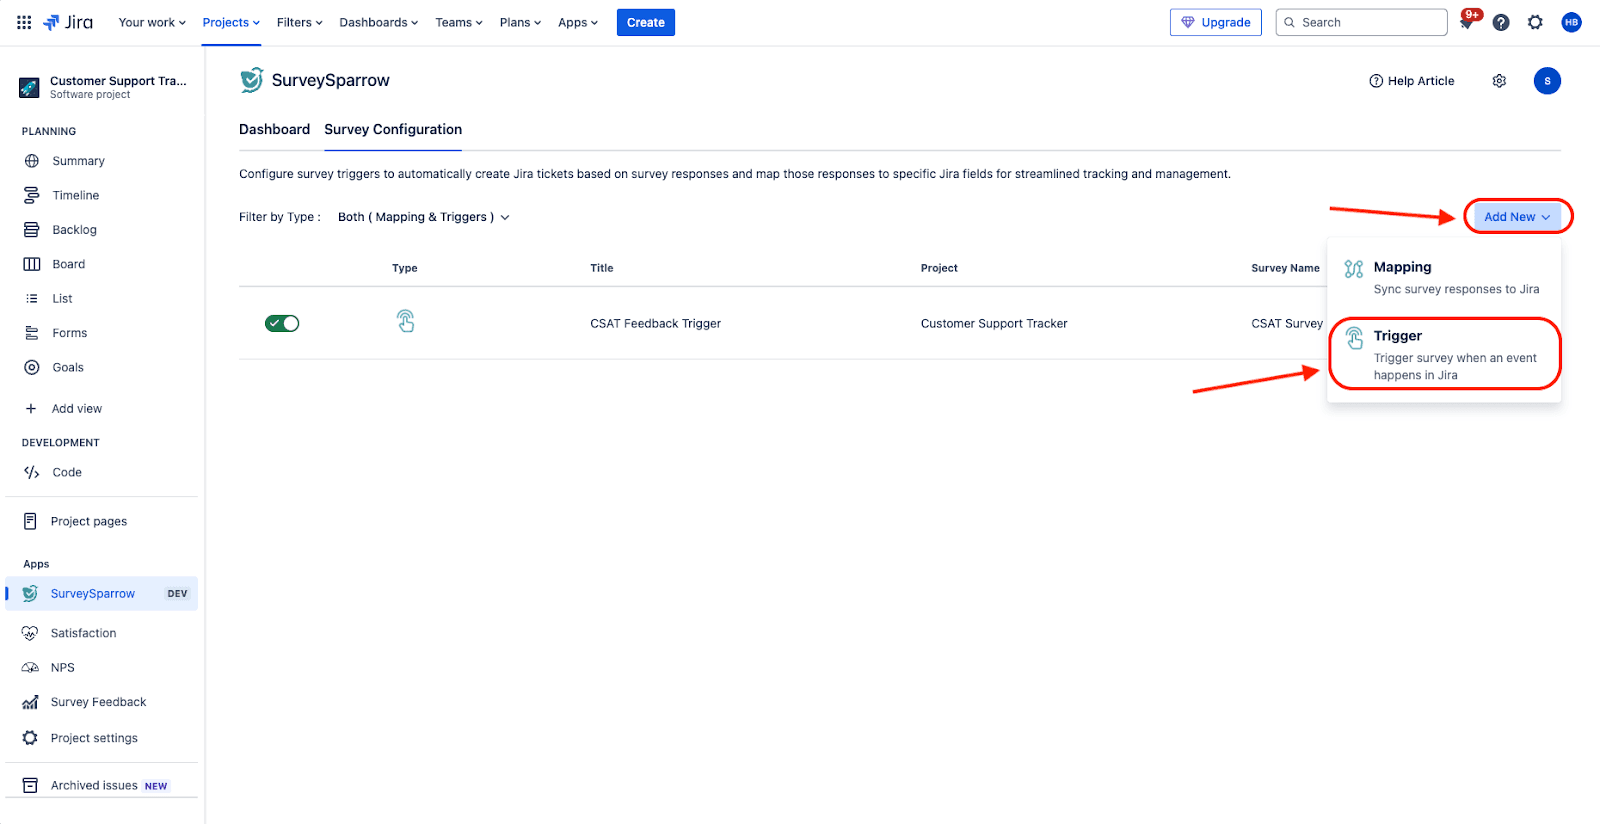
1. After setting up the app, click Mapping.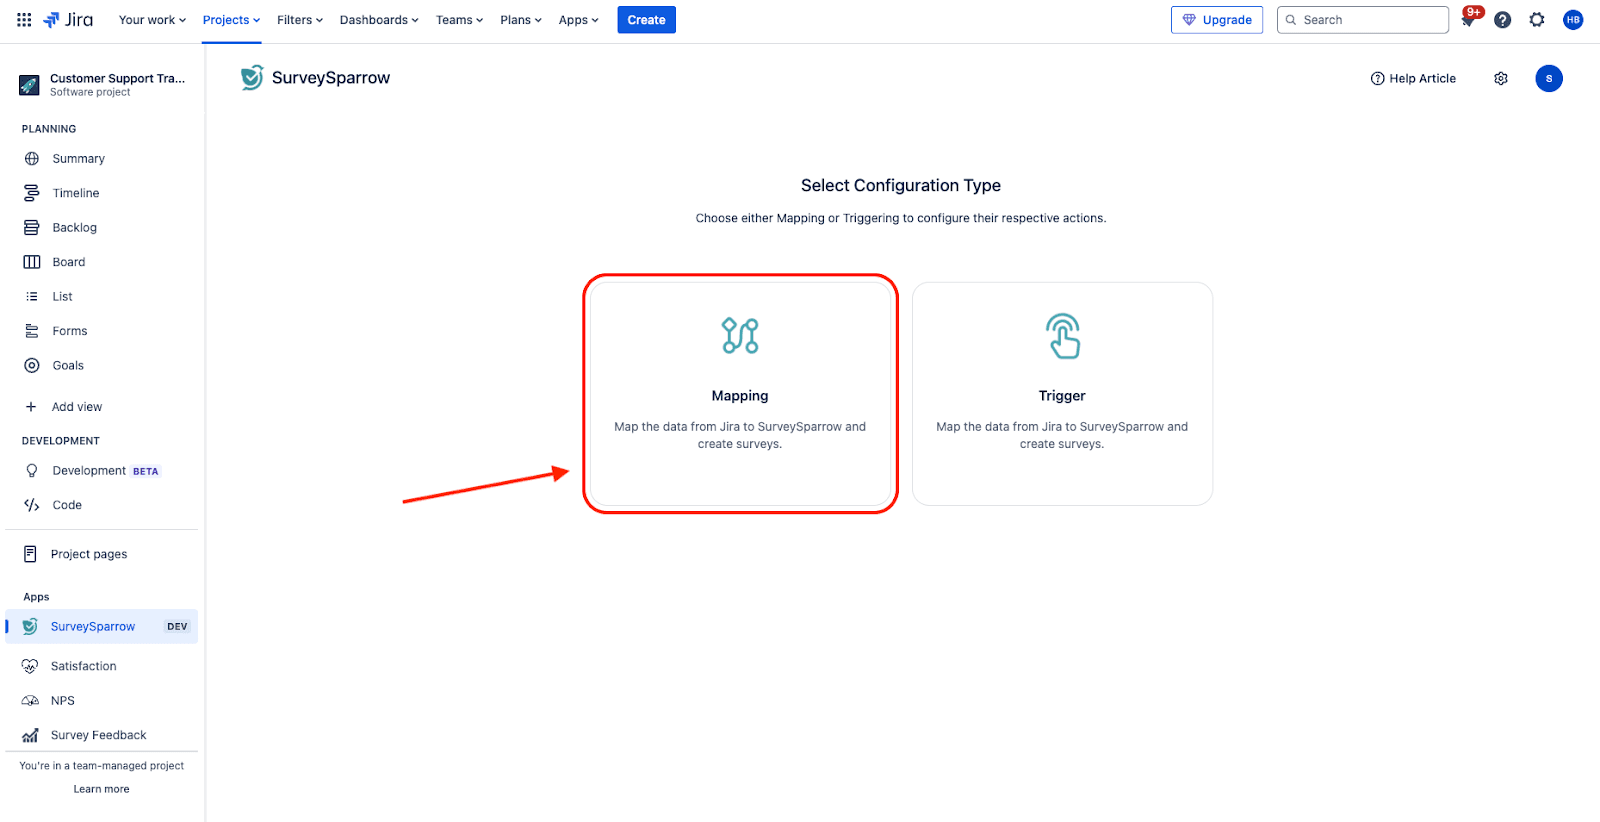
Note: If you’ve already created a trigger/mapping, head to the Survey Configuration tab. Click Add New, then click Mapping.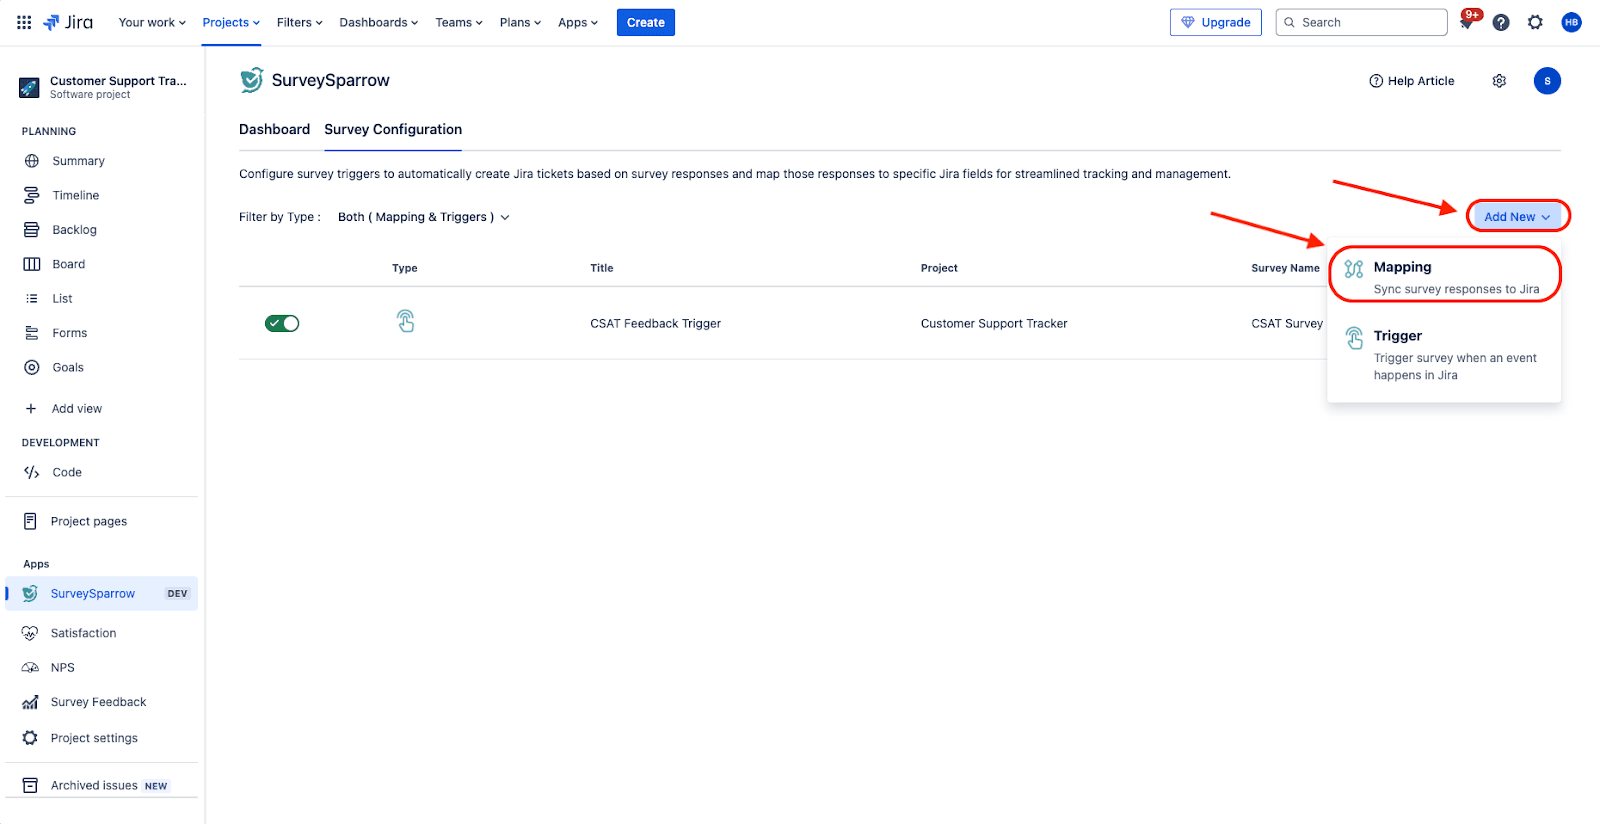
2. You will have to set up the mapping details first. Start by choosing the project. Click on the drop-down menu under Choose Project.
3. Next, you will have to choose the type of ticket that gets created from the survey responses. Click on the drop-down menu under Ticket Type.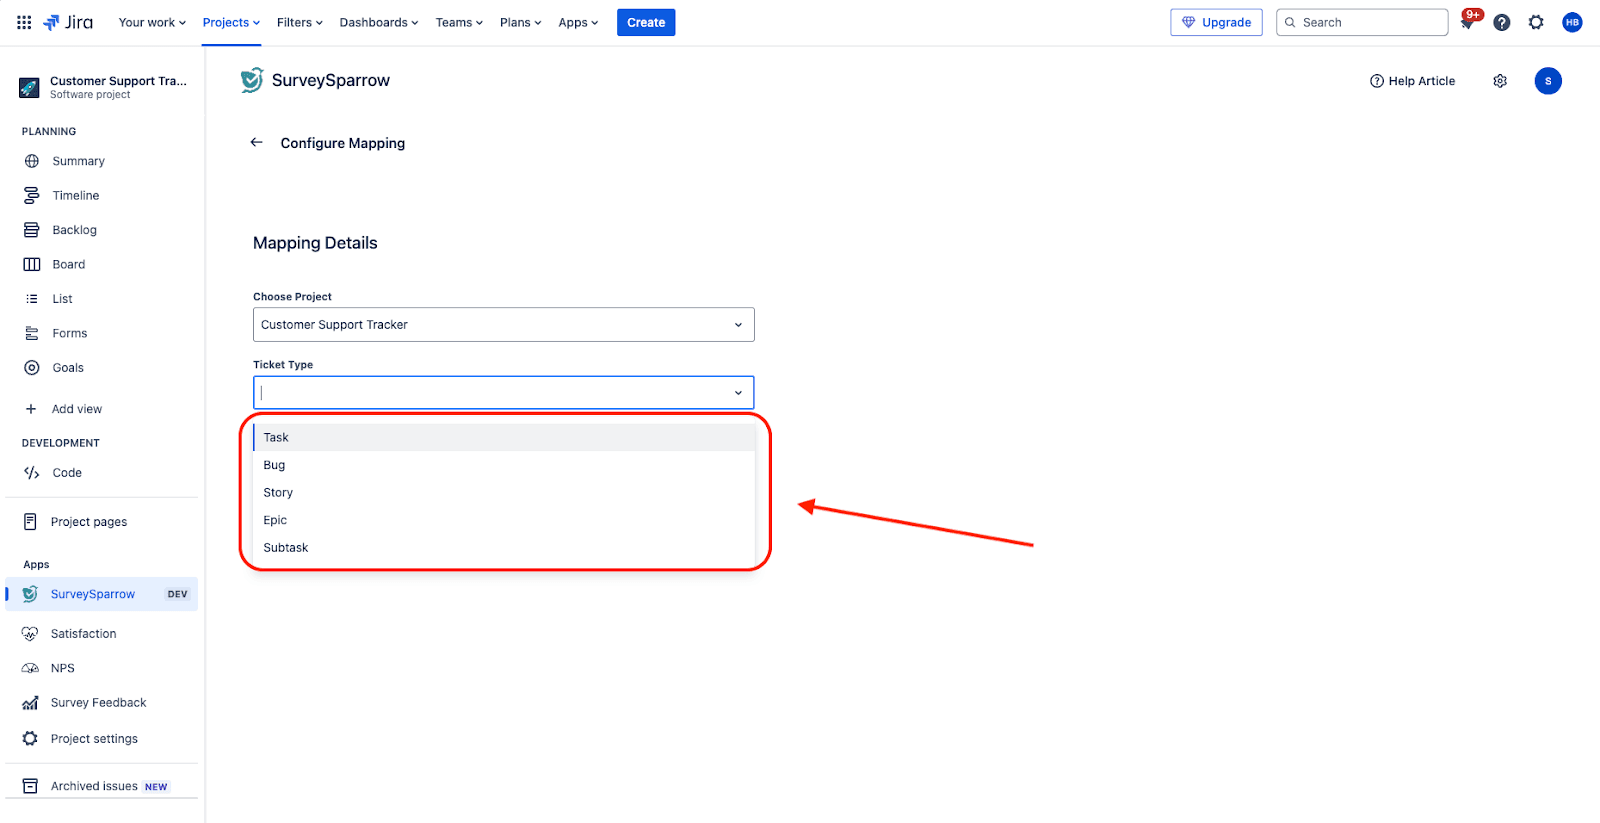
4. You will also have to select the survey from which the mapping has to happen. Click on the drop-down menu under Choose Survey.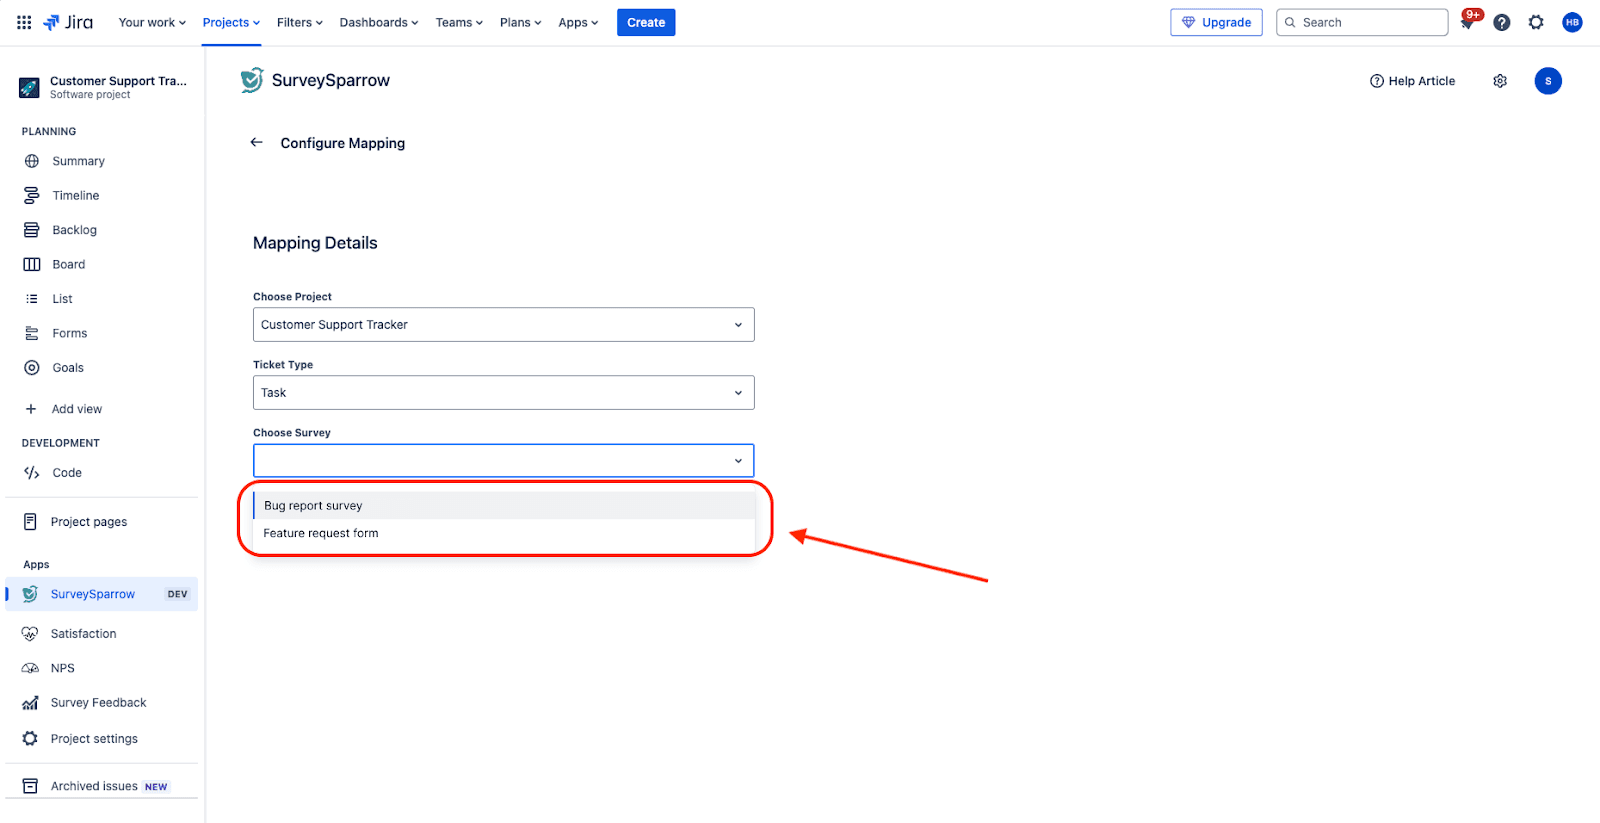
5. The mapping’s initial settings are ready. Click Continue Mapping to proceed.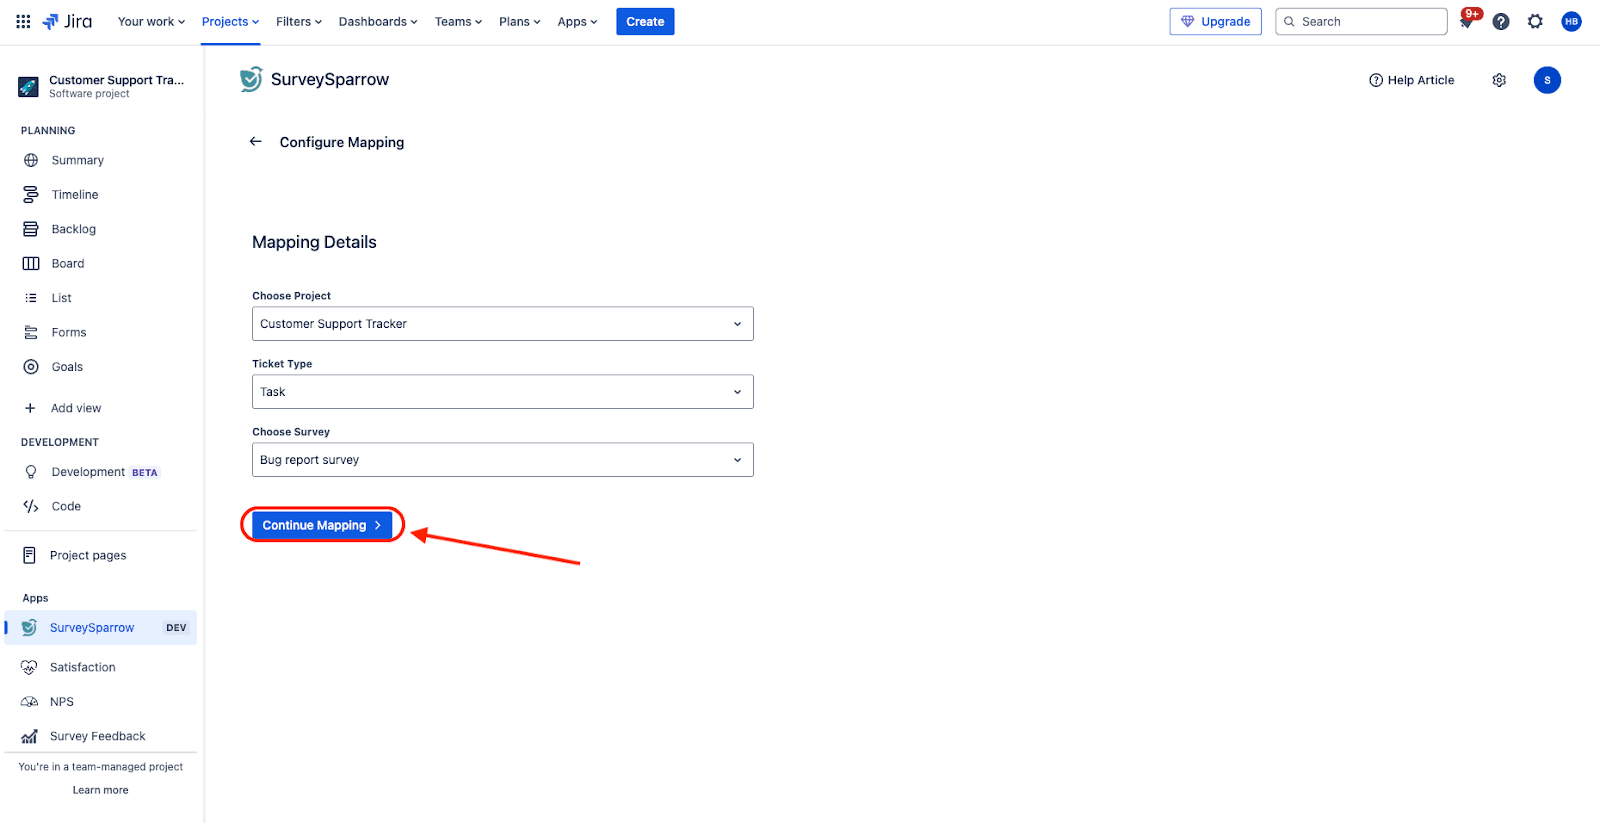
6. In the next stage, you will have to define the Jira fields where survey data has to be mapped. There are two mandatory mappings for the Reporter and Summary fields in Jira which have to be defined, plus an optional mapping.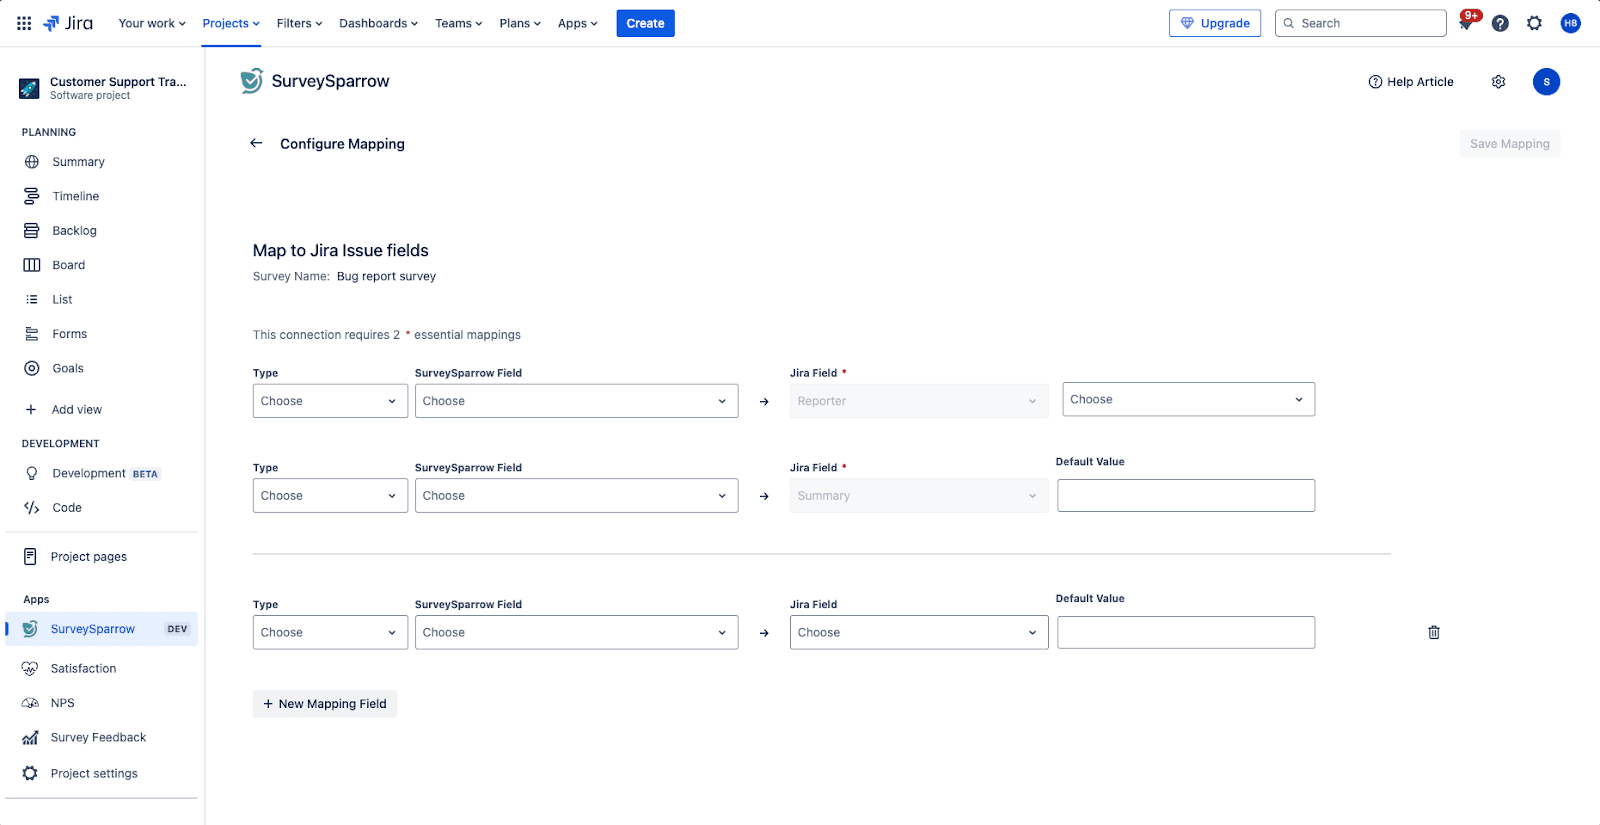
7. Start by selecting the type of data from SurveySparrow which has to be mapped. Click on the drop-down menu under Type.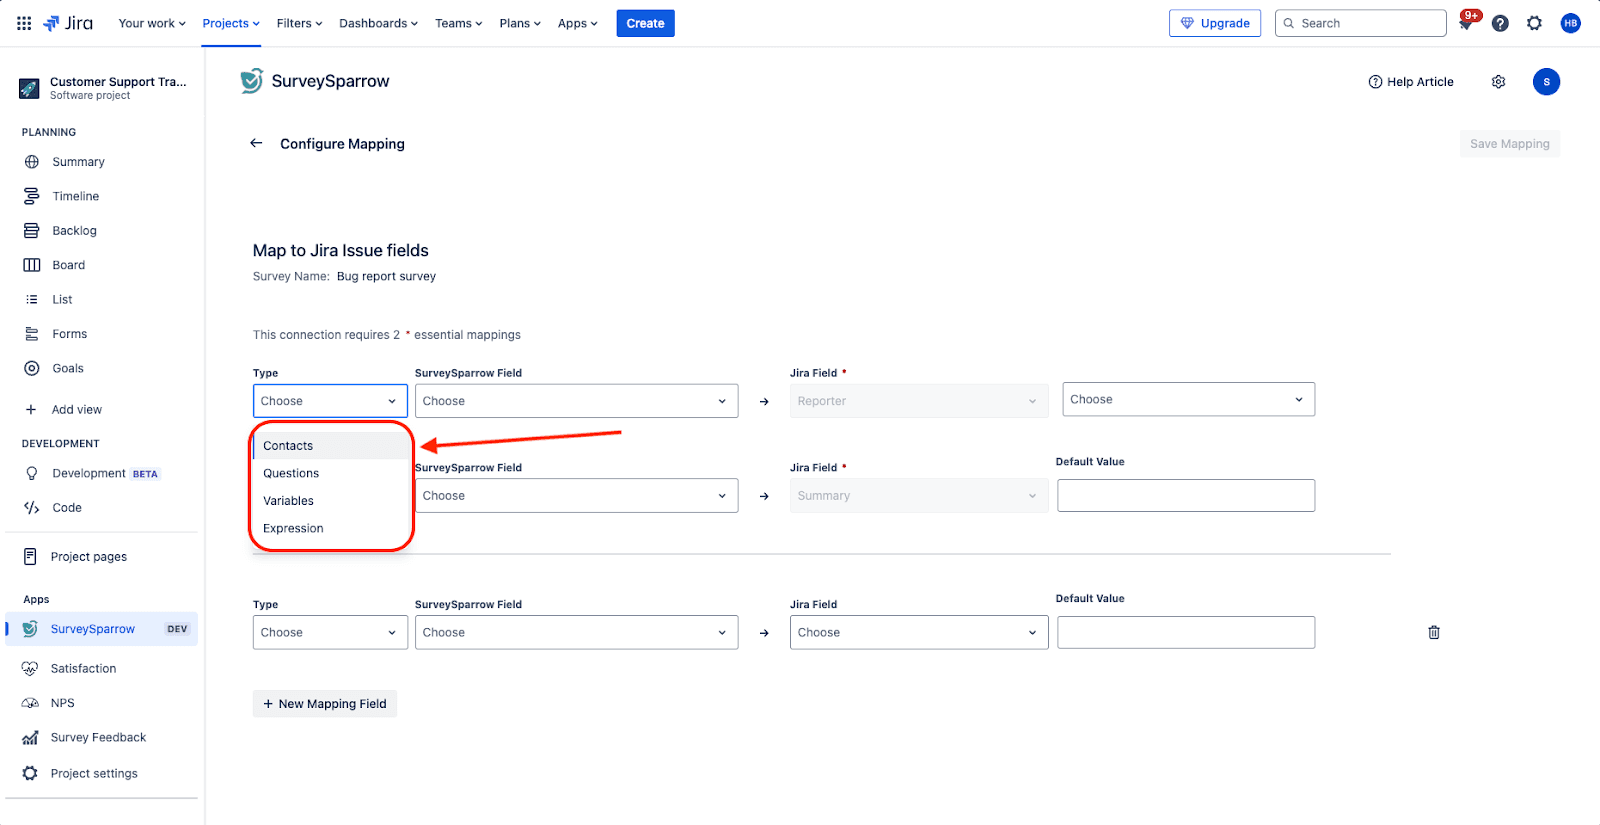
8. Then, decide from which SurveySparrow field the data should be sourced. Click on the drop-down menu under SurveySparrow Field.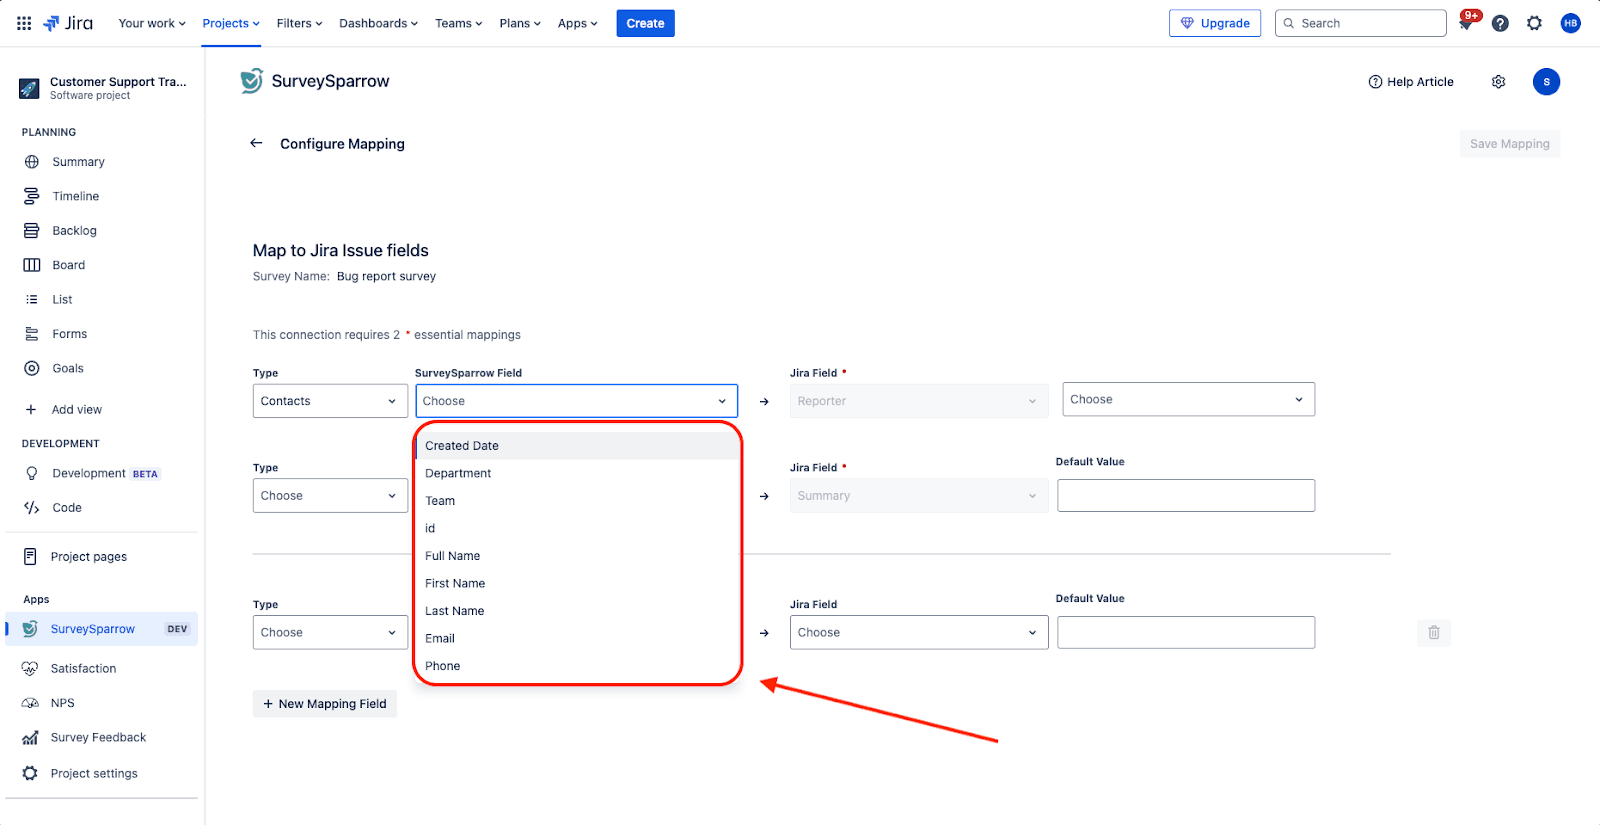
9. For the reporter mapping, you can select an user from the Jira project as a default value. If there’s no data from SurveySparrow, this value will be added.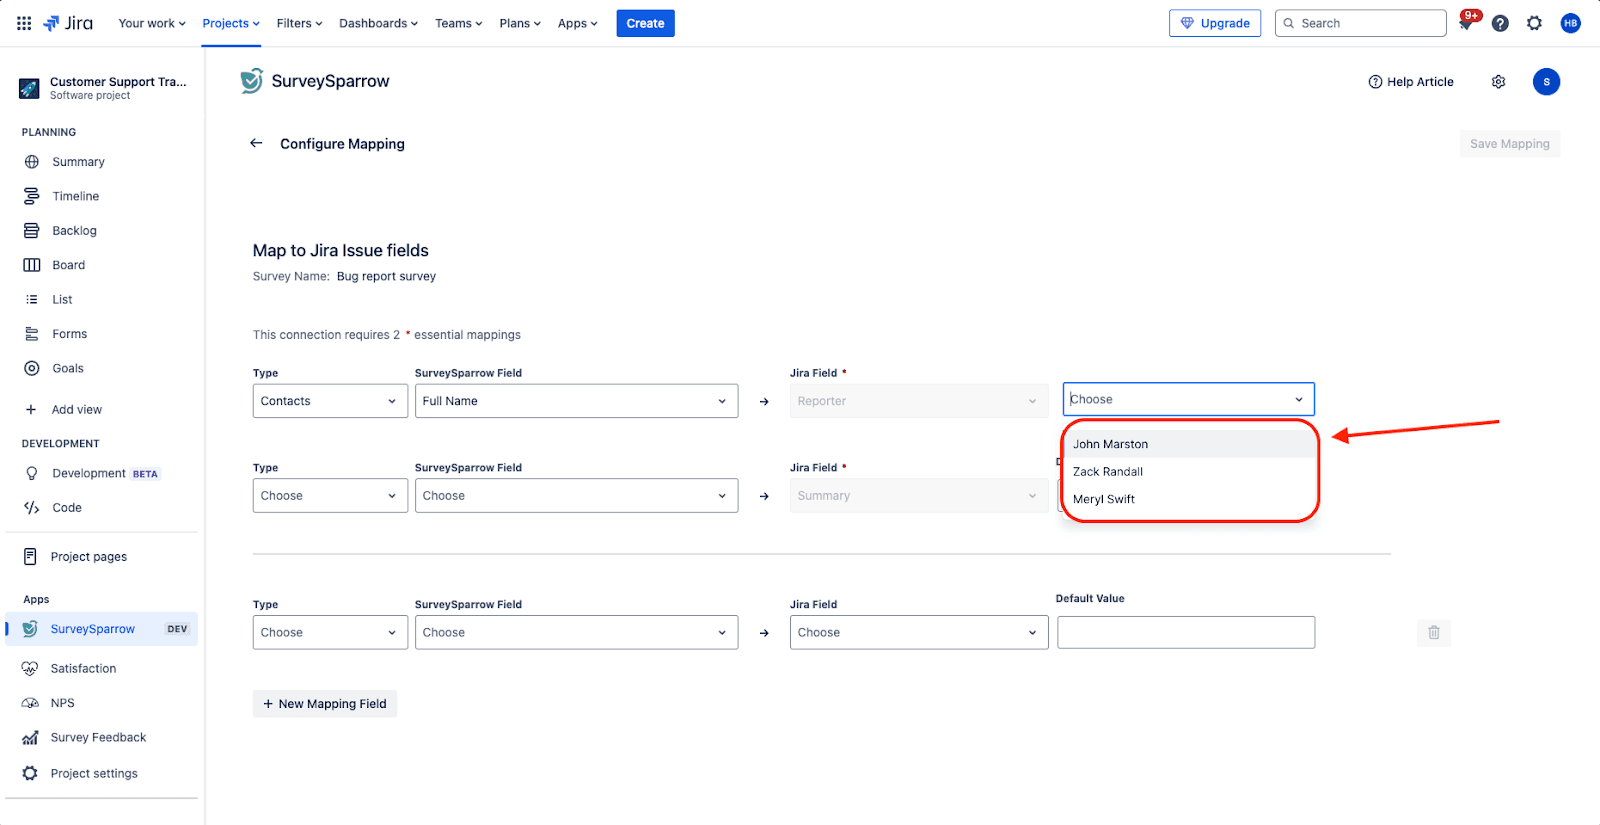
10. For the summary mapping and optional mappings, you can choose to create a default value. If there is no data from SurveySparrow, the default value is populated in the corresponding Jira field.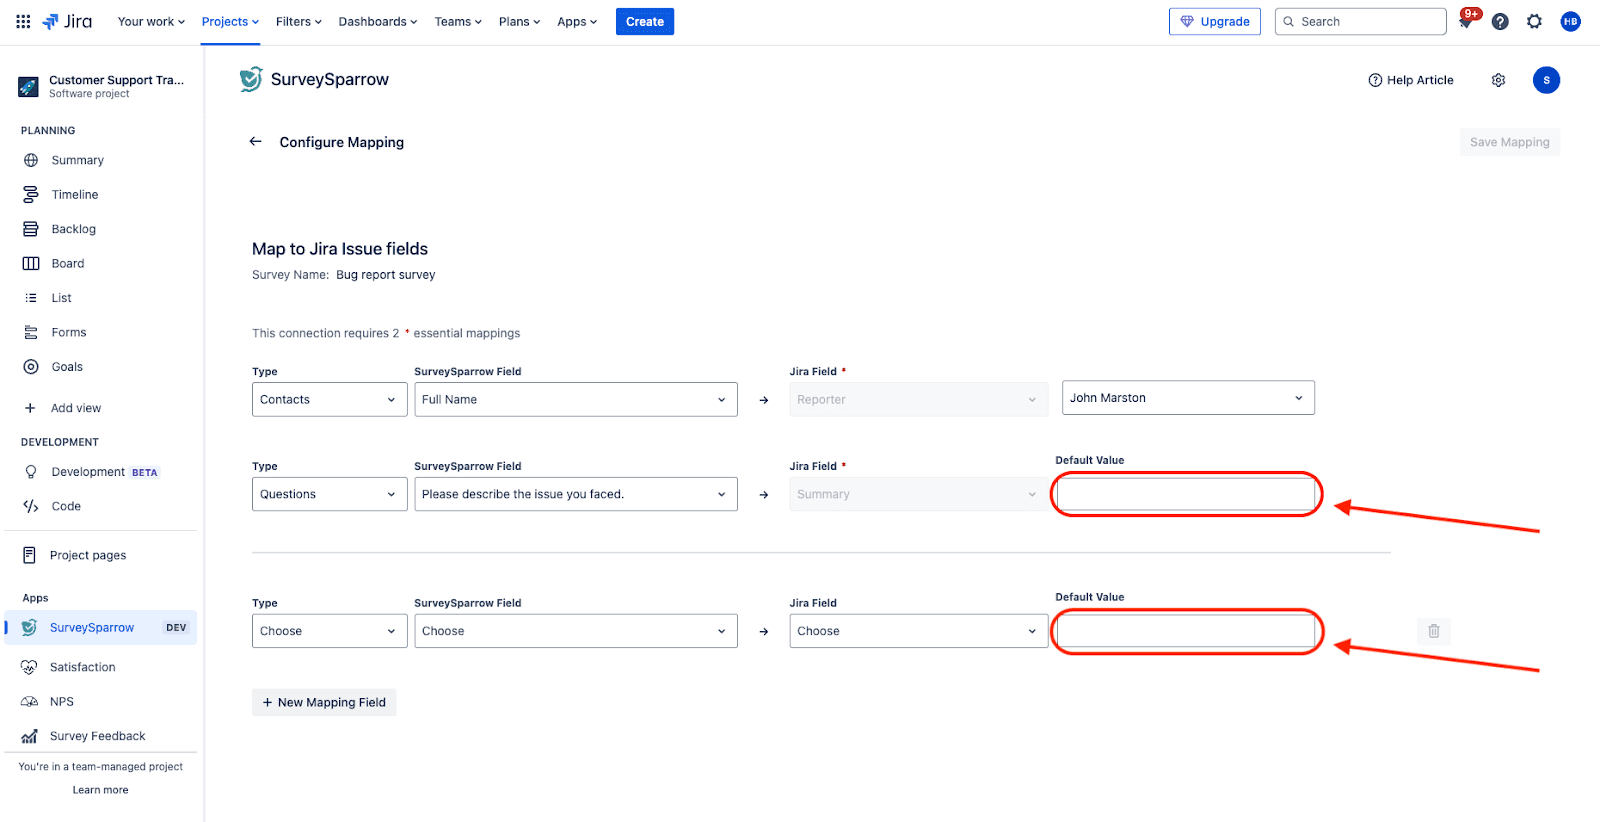
11. For the optional mapping, repeat the same steps as before. However, you also have to choose the Jira field, by clicking on the drop-down menu.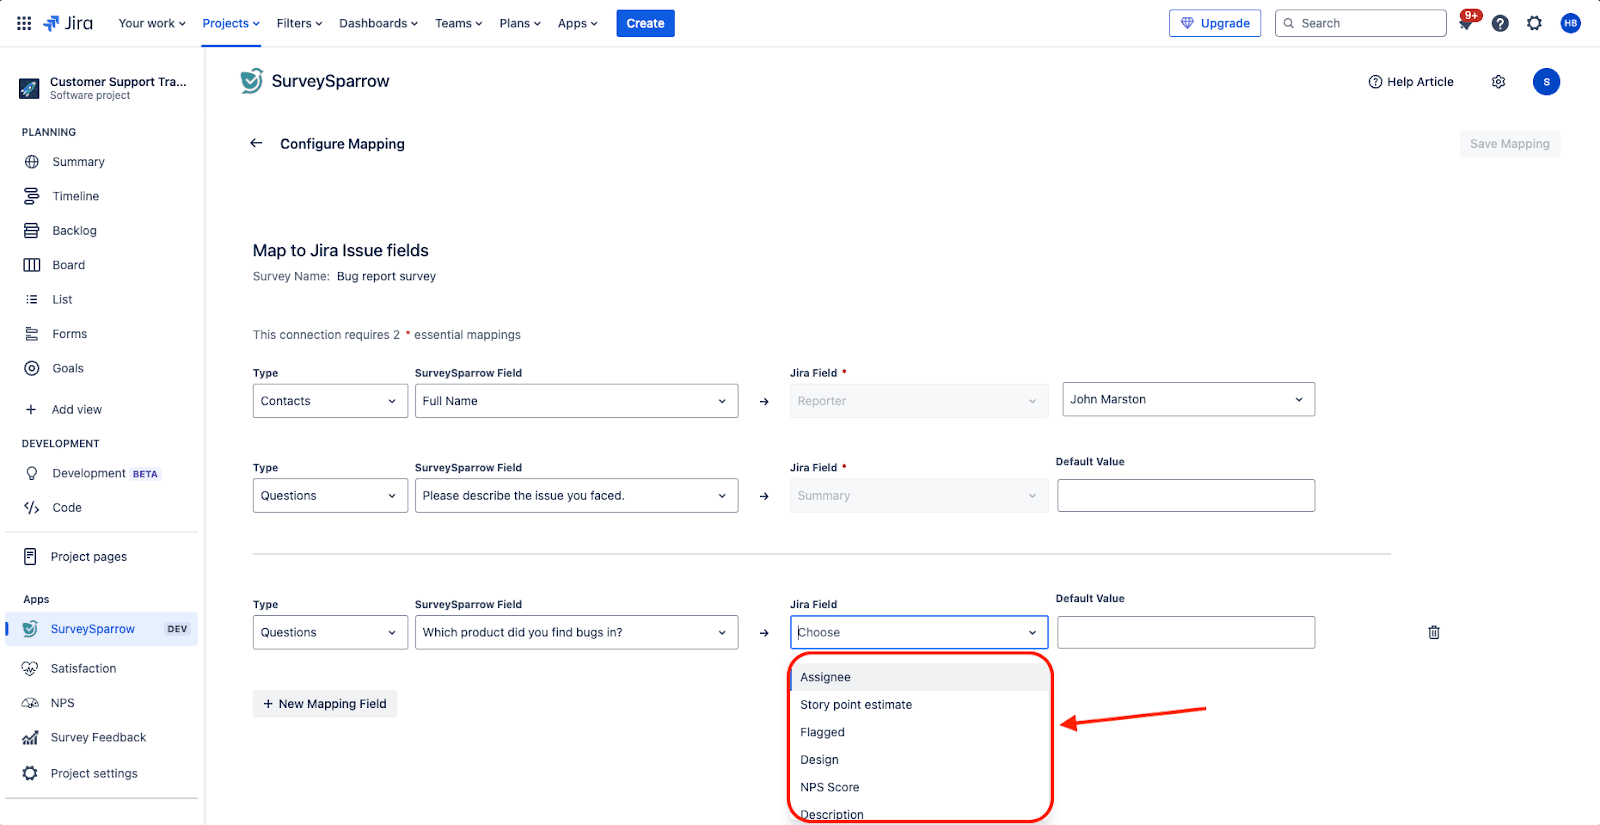
12. Click New Mapping field to add other optional mappings. When you are ready, click Save Mapping.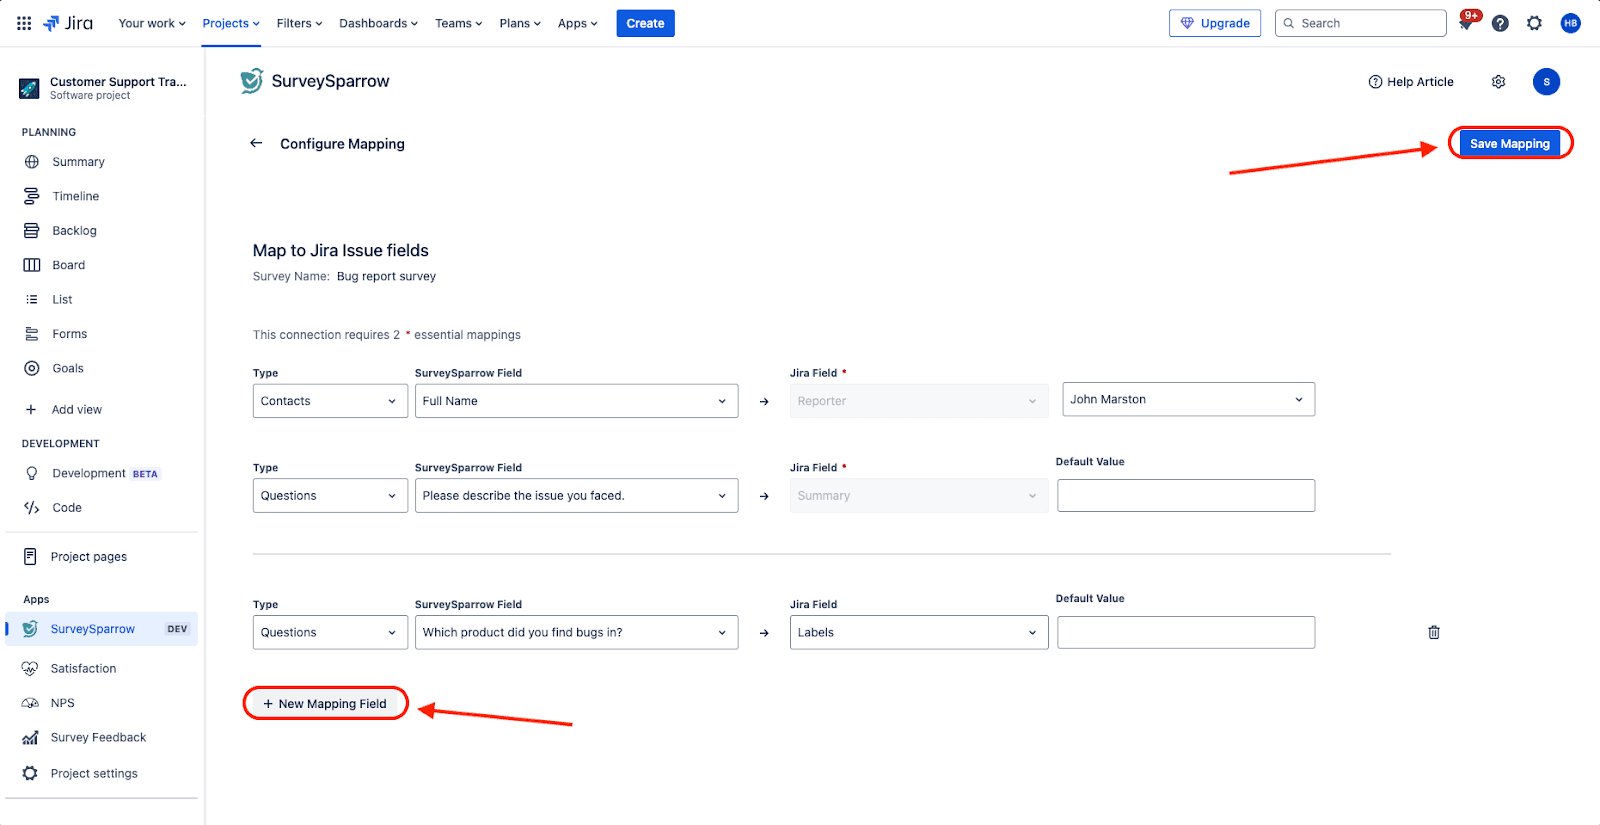
13. Finally, you will have to create a name for the mapping. Once done, click Save.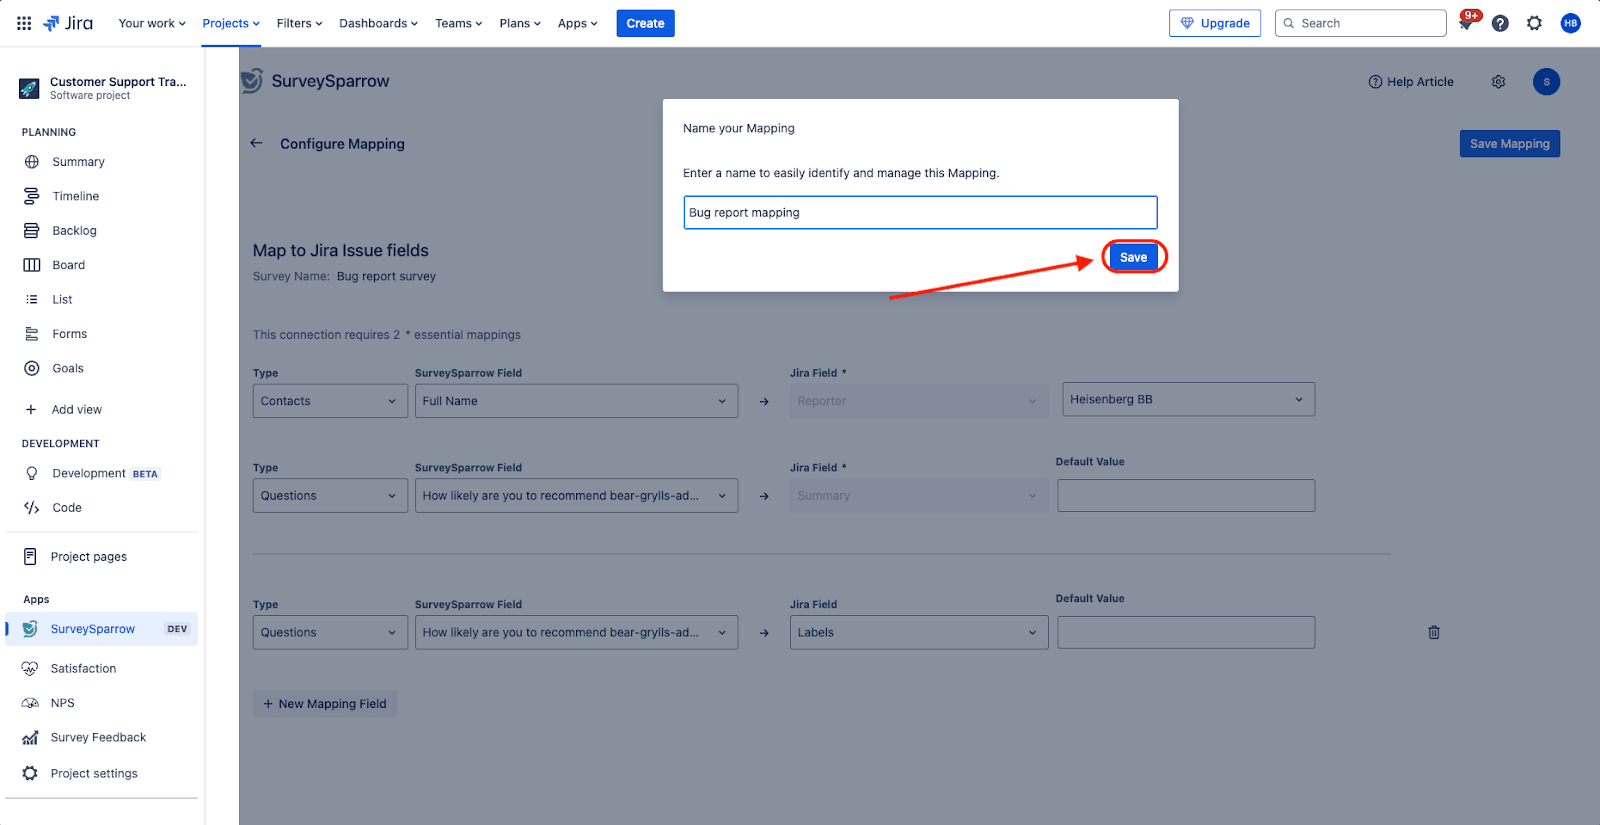
1. Inside Jira, click on Filters in the header, then click on All issues to view all the tickets created.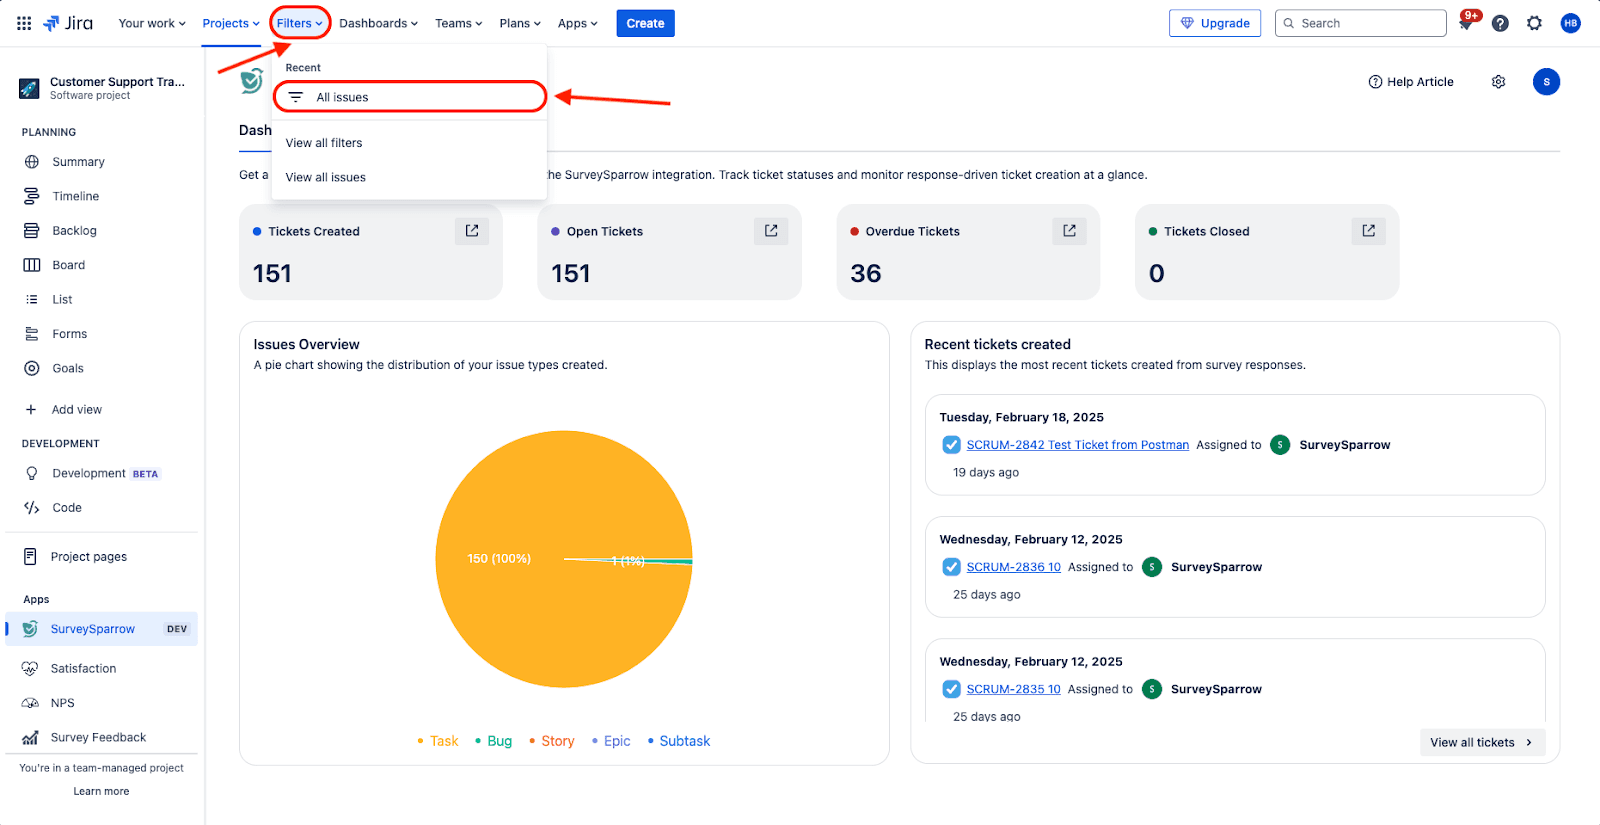
Note: If you only want to view the tickets that were created via the SurveySparrow app, click on View all tickets.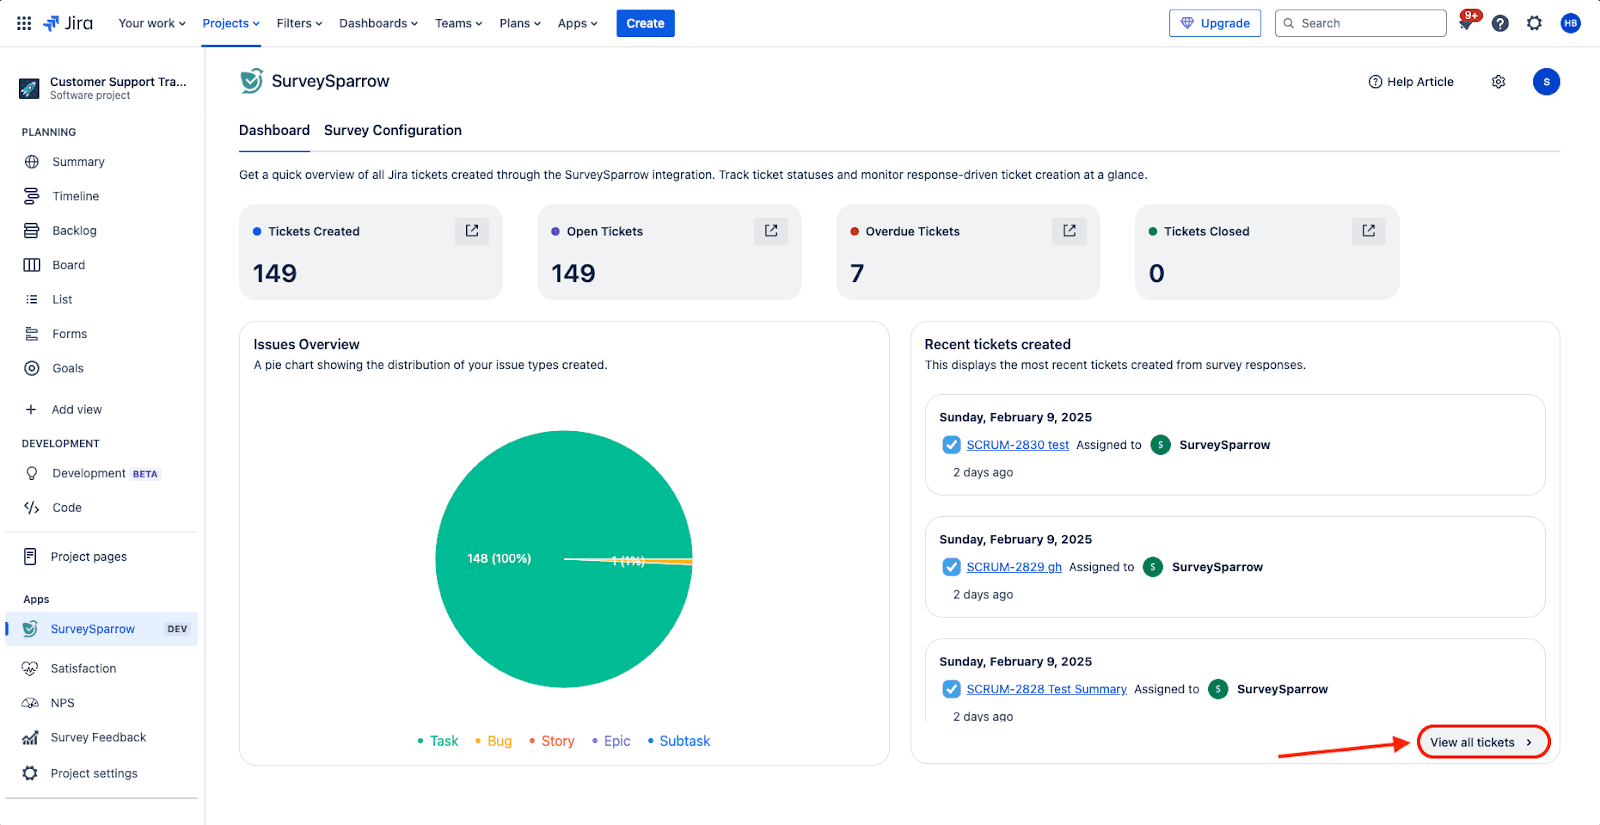
2. Here, you will be able to see the tickets created. Open the ticket inside which you want to embed a survey, then click on the gear icon.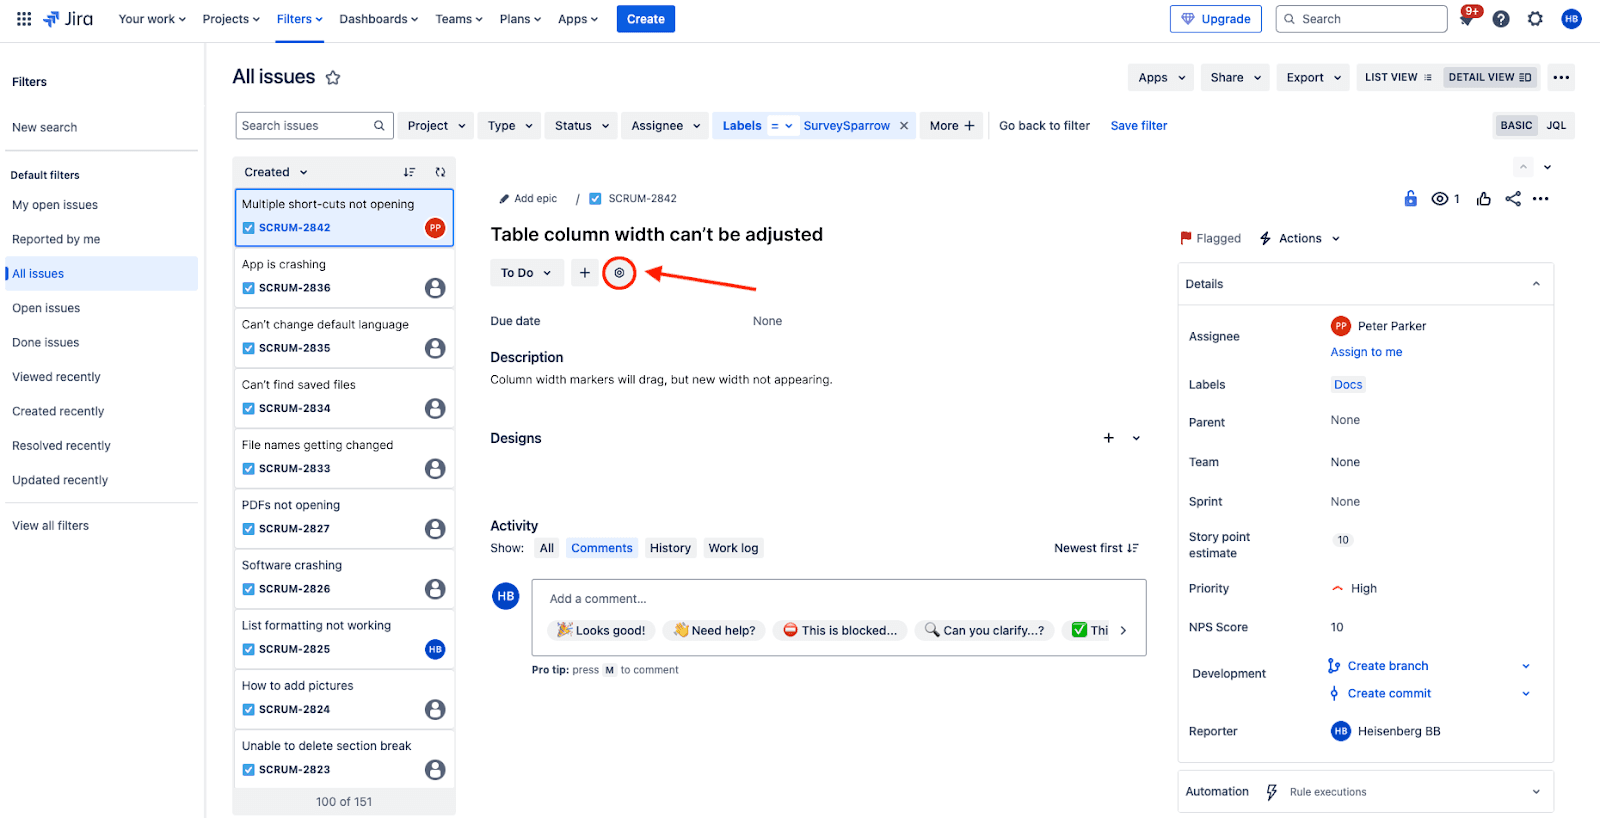
3. Choose SurveySparrow from the drop-down.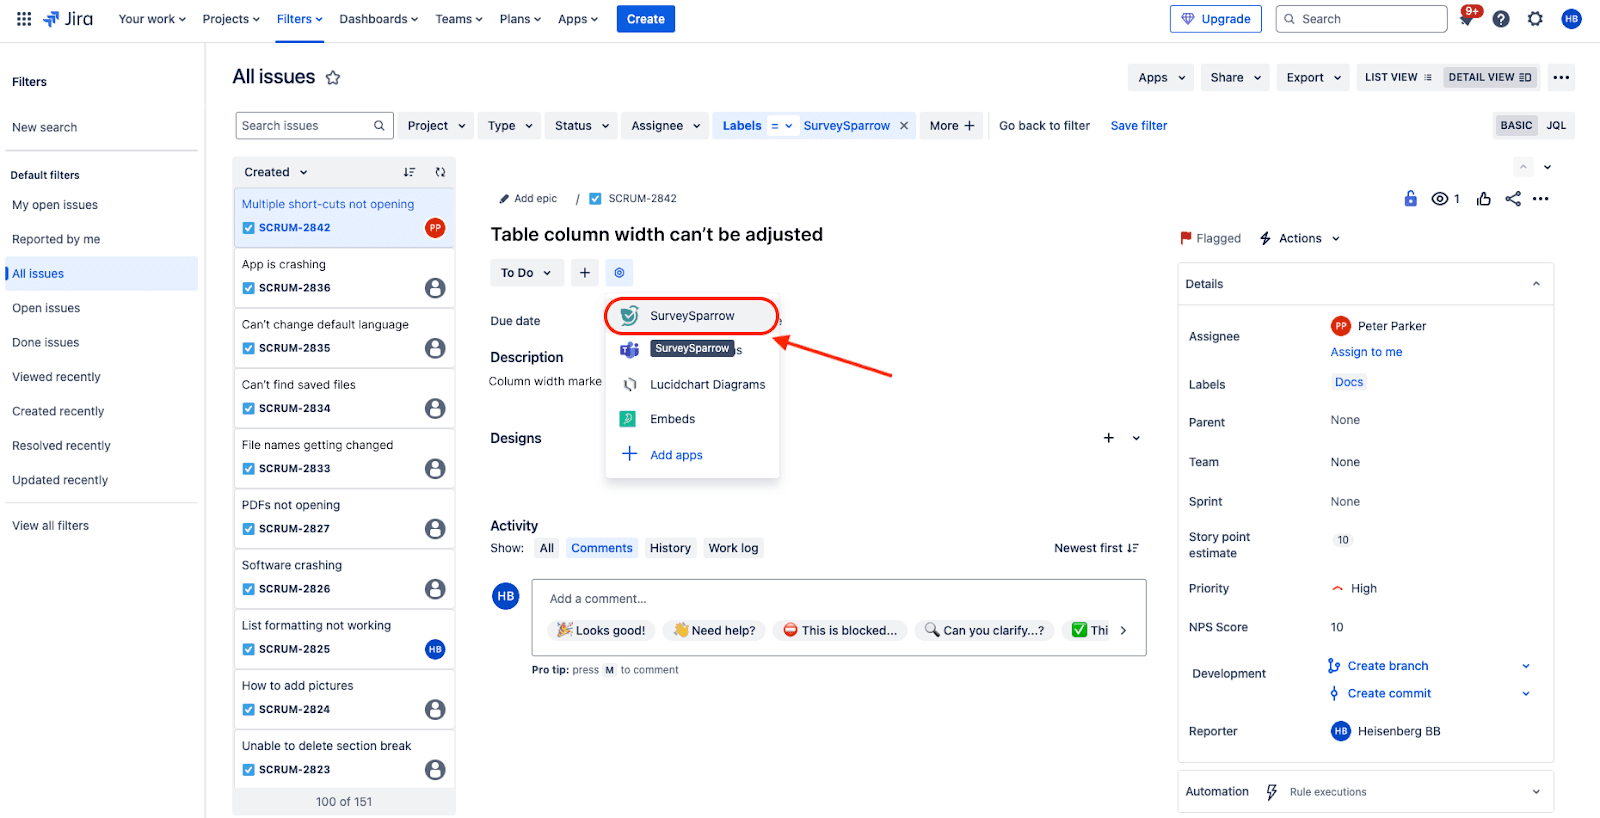
4. A window opens inside the ticket. Click on Link Surveys.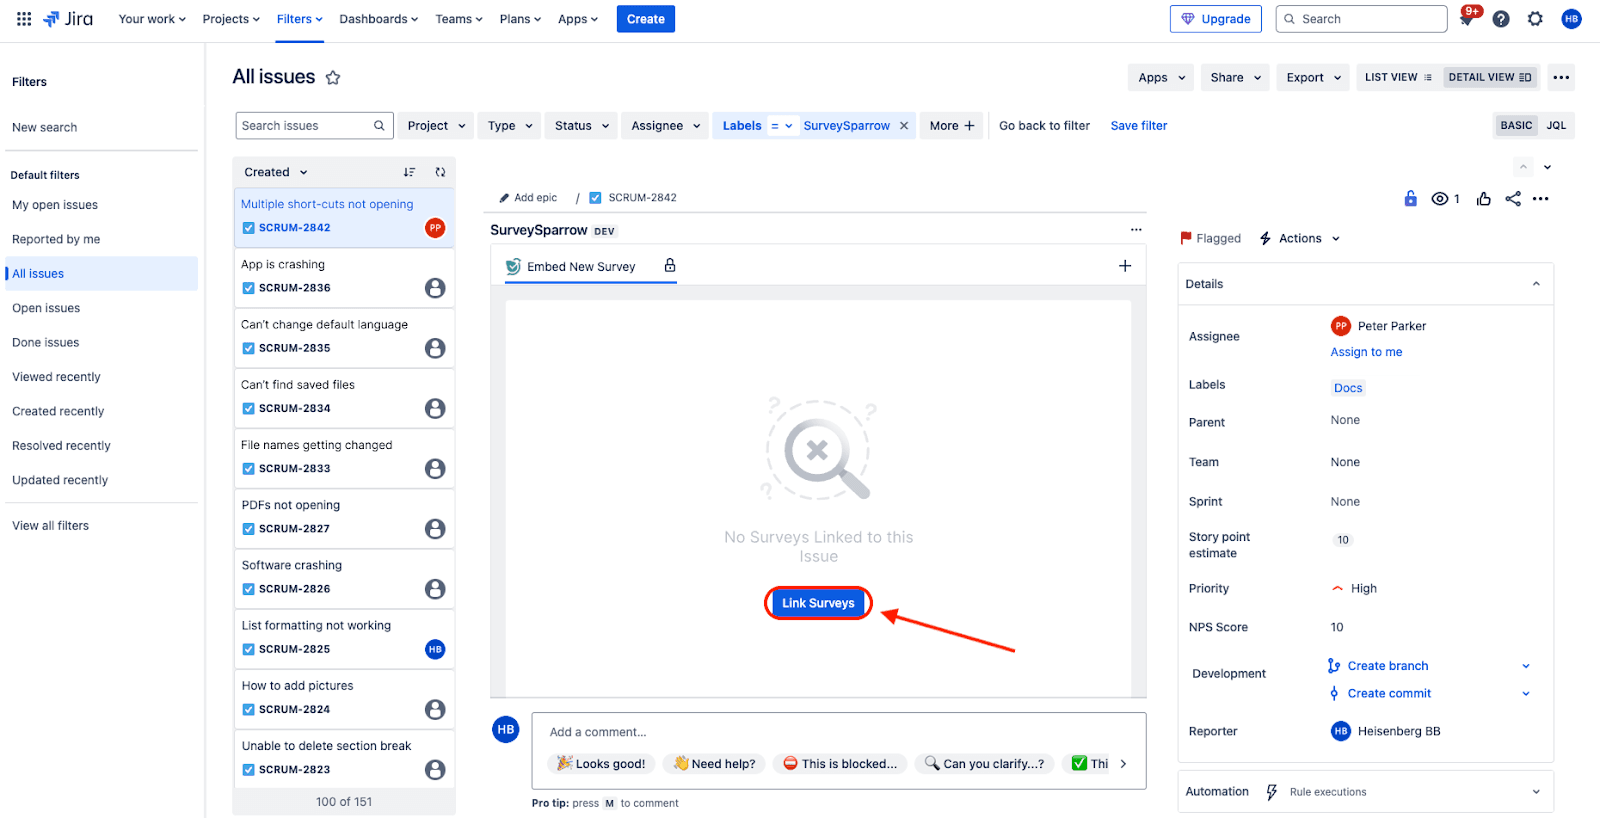
5. Inside the window, a configuration pop-up appears. You must start by choosing the surveys to embed. Click on the drop-down menu under Surveys and choose from the options.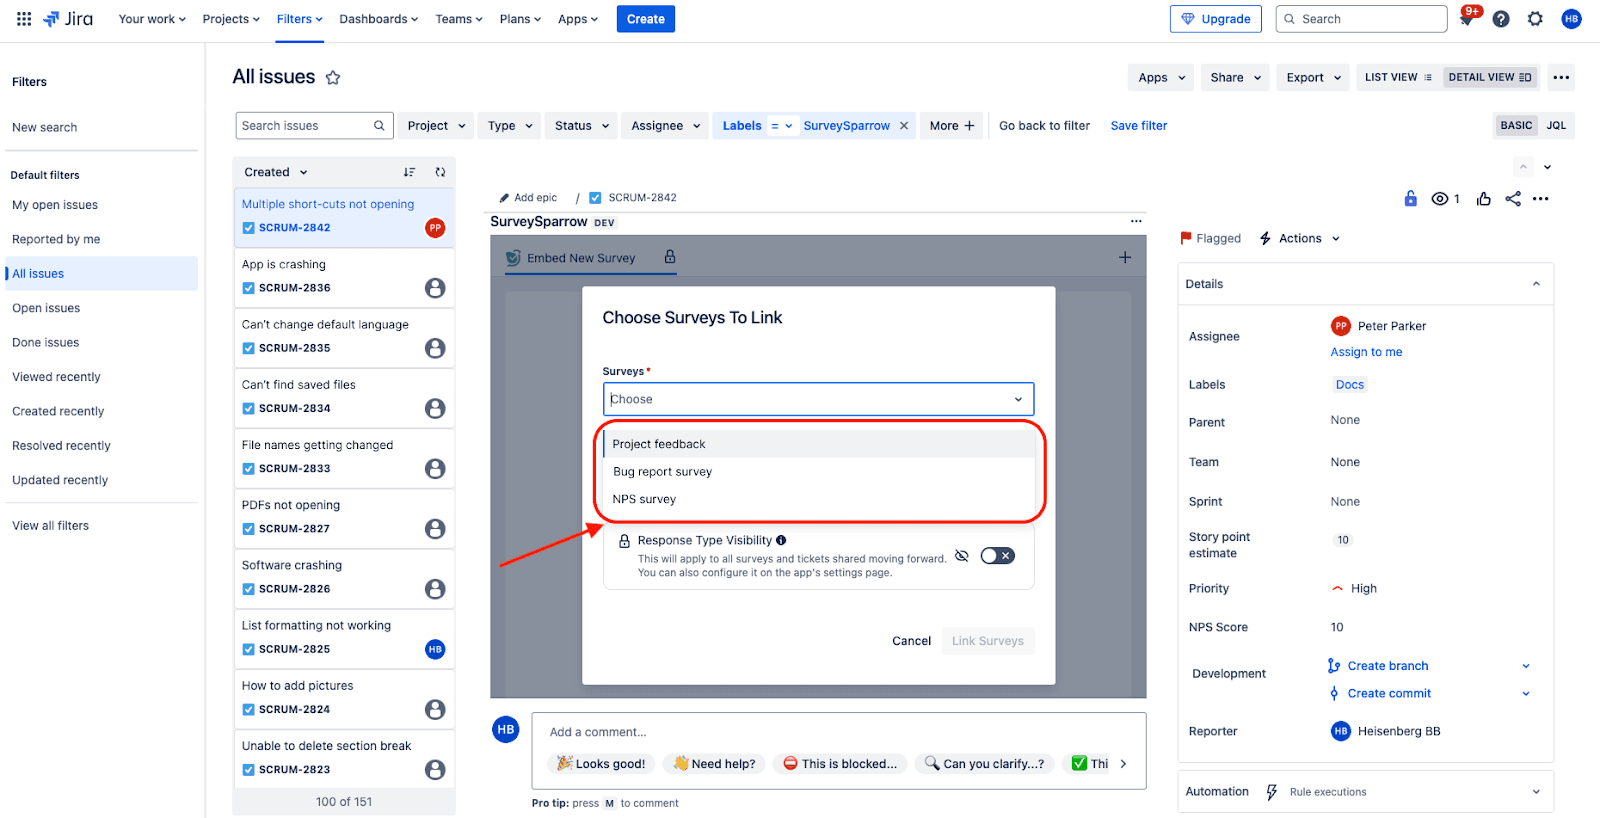
Note: You can add more than one survey.
6. The next step is to configure the response anonymity. You can choose between anonymous responses and identified responses (the email linked to the respondent’s Jira account is captured). The default option is identified responses.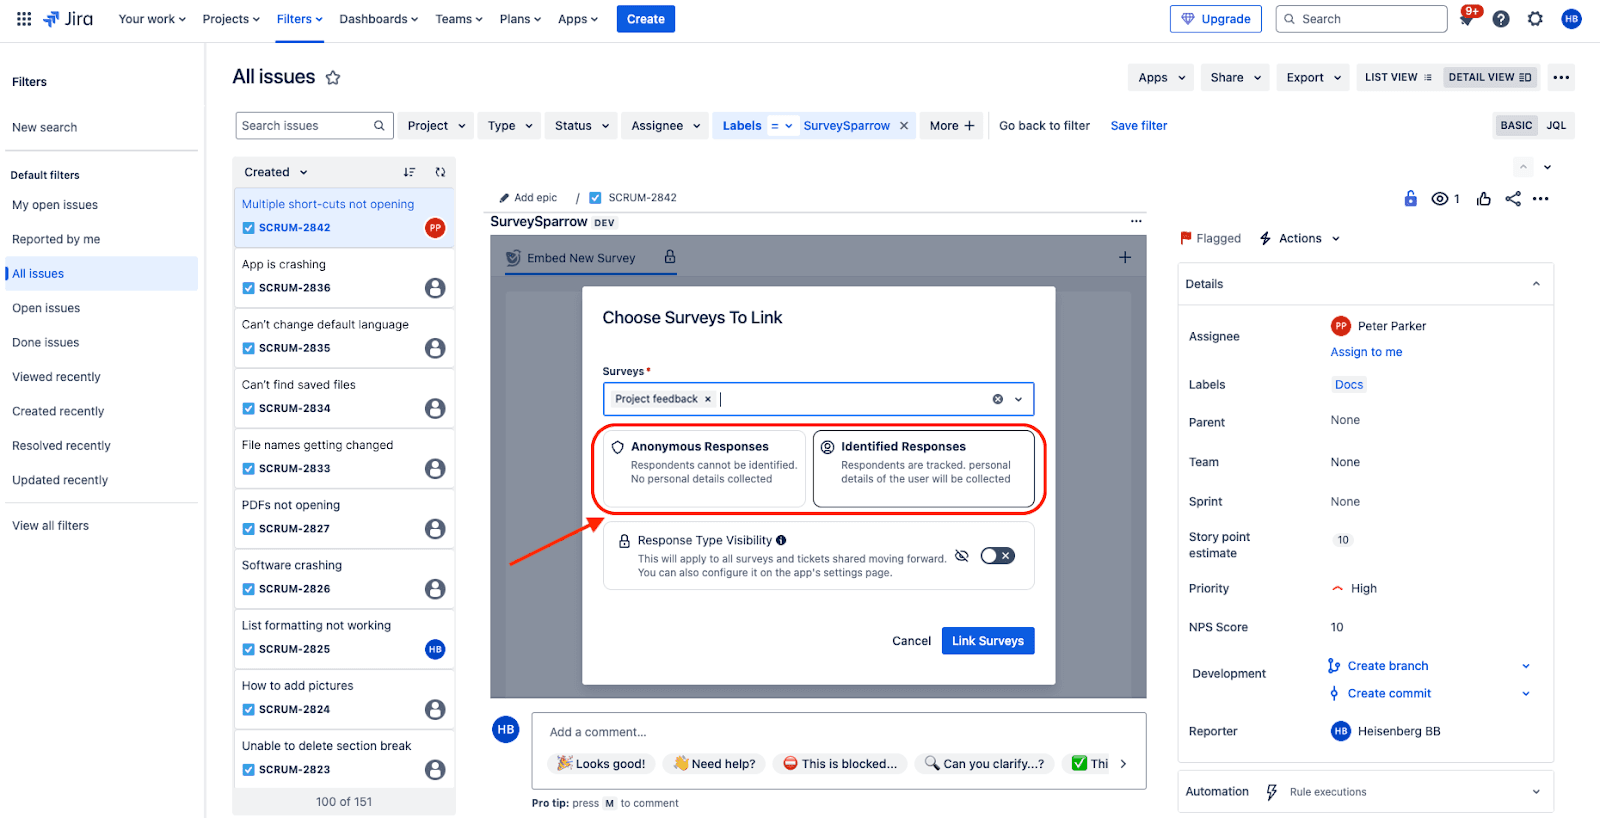
7. You can also set the visibility of the response type on the survey by clicking on the toggle. If this is enabled, users will be able to tell if the survey responses are anonymised or not. By default, this visibility is disabled.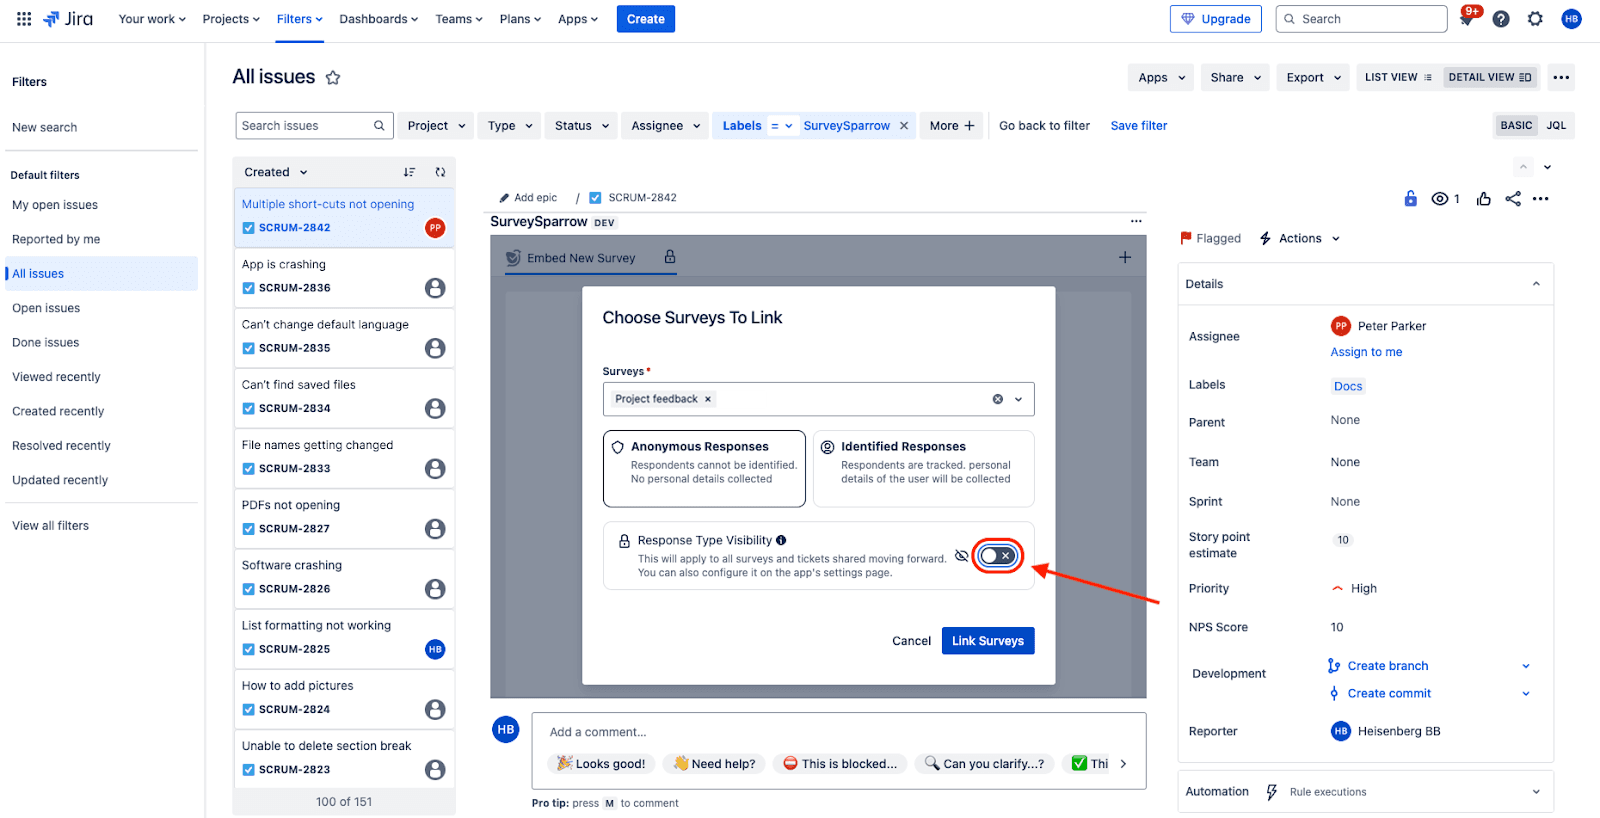
8. To finish, click Link Surveys.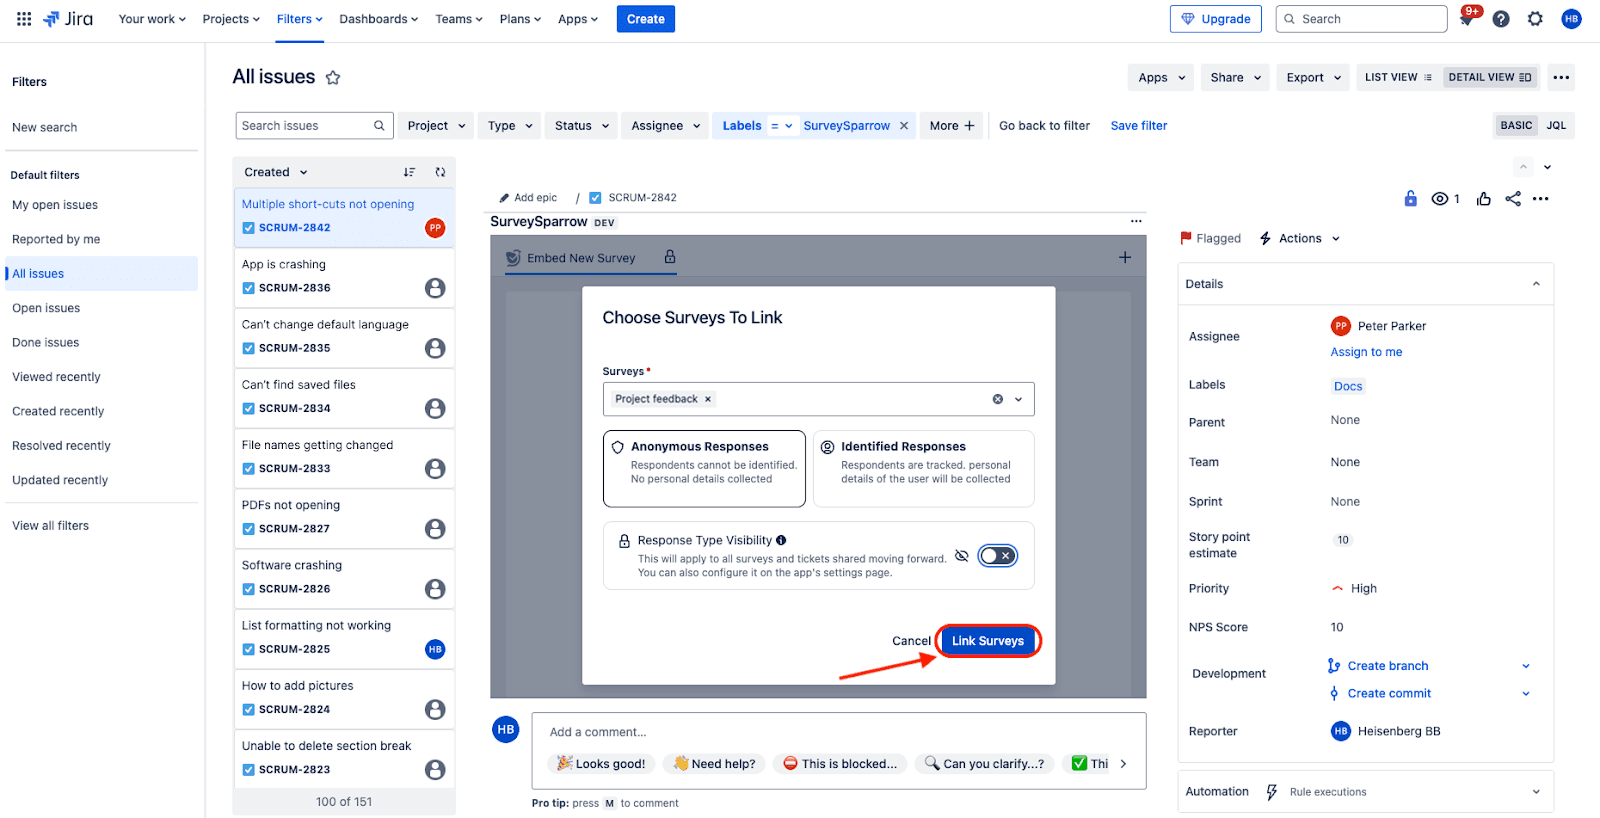
9. To add other surveys, click on the plus icon to the right of the window and repeat the steps above.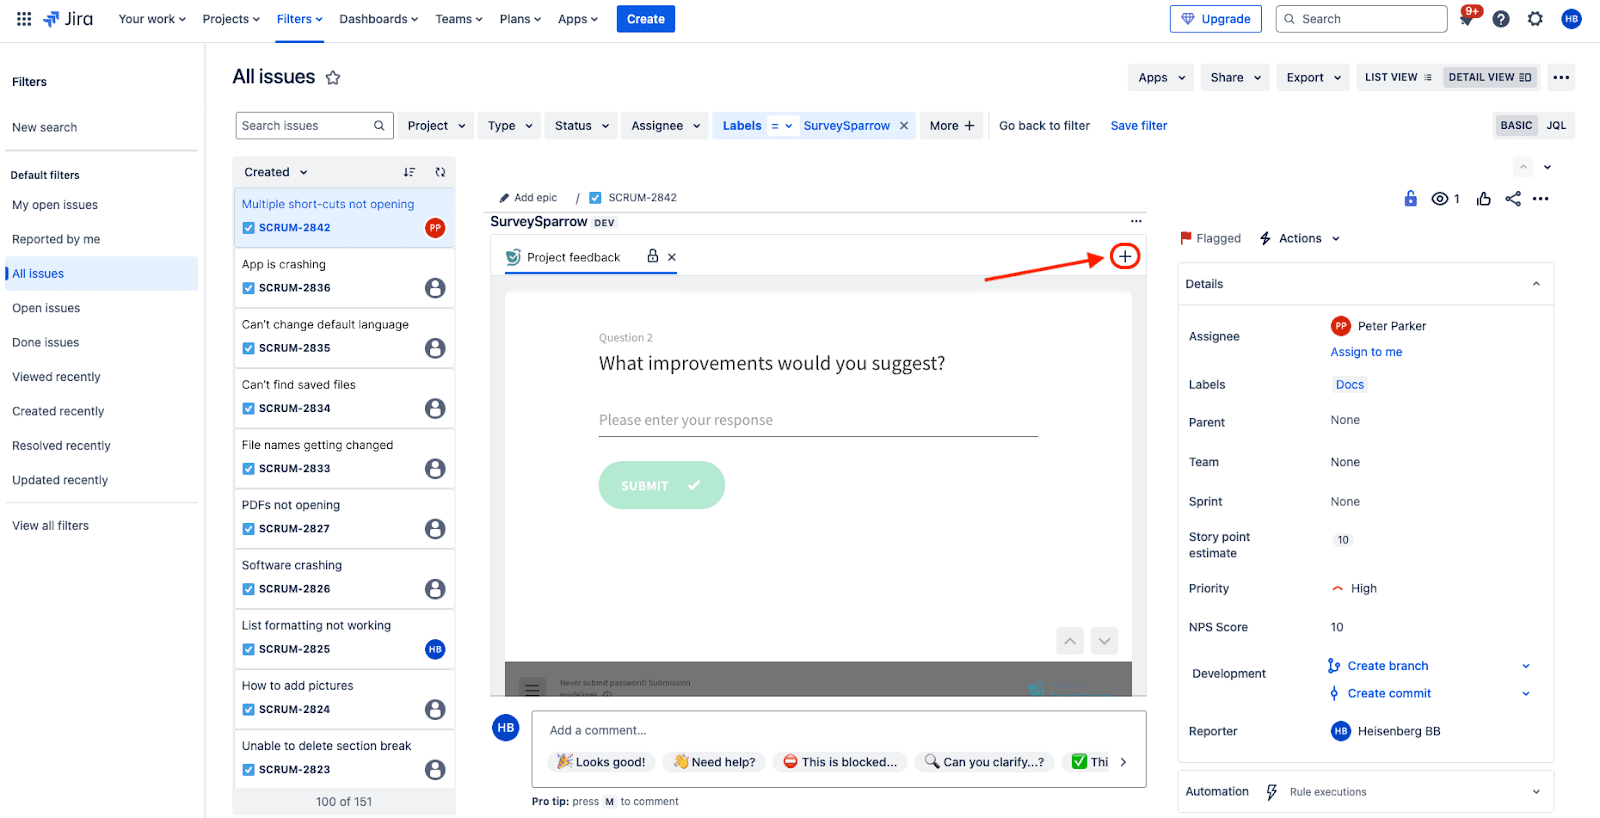
The SurveySparrow Insights widget showcases recent responses of any survey that’s embedded in the ticket (up to 50), as well as the aggregate metrics of a CX survey (eg: NPS breakdown). If the ticket was created from responses to a survey, the widget will also show you the parent responses.
Note: You can only access it if the ticket has been created from survey responses and/or if a survey has been embedded in the ticket.
1. To access it, scroll through the actions section inside a ticket. When you see the SurveySparrow tile, click to expand it.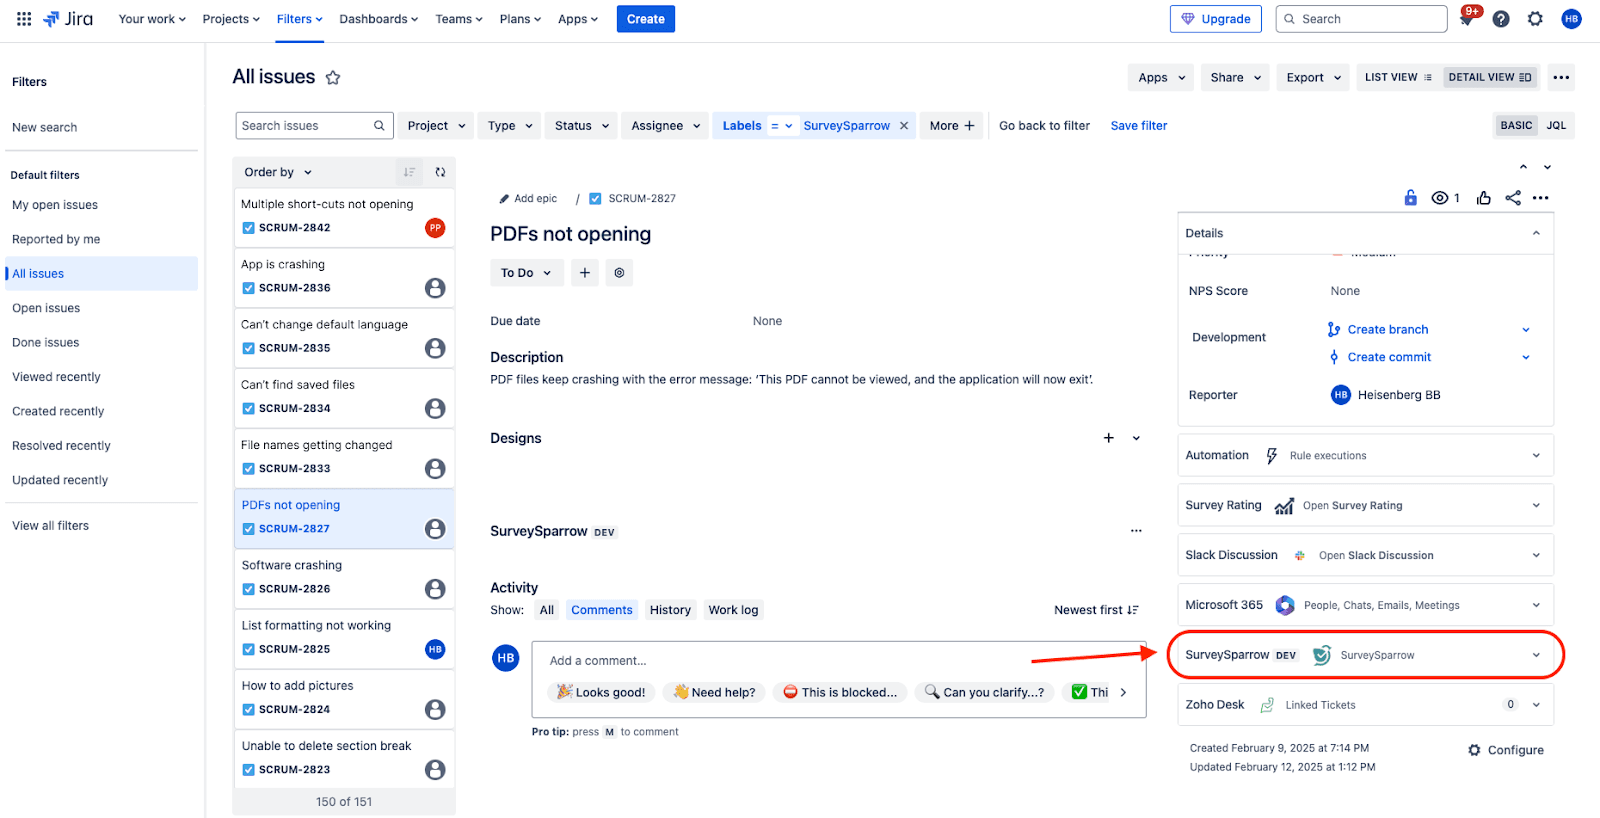
2. Since the ticket in this screenshot originated from a set of responses, you can click View Response to look at the parent responses.
3. If you have embedded a survey in the ticket, you will also be able to view the aggregate metrics and responses. In case you have embedded multiple surveys, you can click on the drop-down to switch between each survey’s insights.
4. To get more information about the responses, click on the arrow to be redirected to your SurveySparrow account.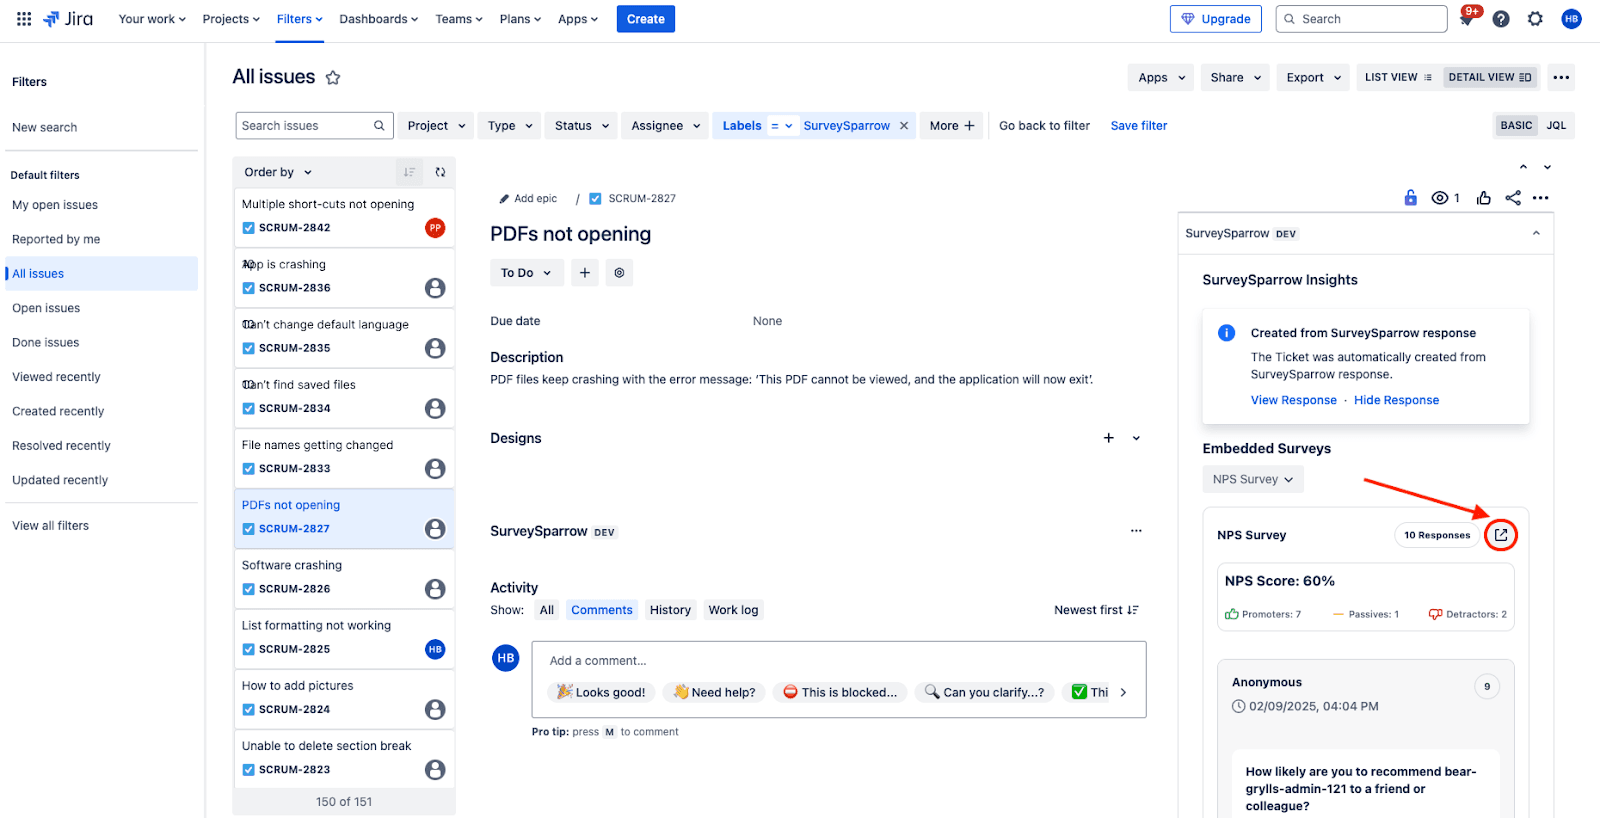
The SurveySparrow app for Jira keeps your team focused on customer feedback by bringing it where they work. Now they can effectively plan and collaborate to fix critical issues and keep customers happy.
Feel free to reach out to our community, if you have any questions.
Powered By SparrowDesk