
Integrating Adobe Marketo Engage with SurveySparrow
Generate leads, and transform your prospects into loyal customers with enriching experiences
Integrating a marketing automation platform like Adobe Marketo Engage with an experience management platform holds significant importance in fostering a seamless and impactful customer journey. By connecting these two powerful tools, businesses can not only efficiently generate leads but also elevate the overall customer experience as these leads transition into customers.
This holistic approach aligns marketing efforts with a comprehensive understanding of customer needs, ultimately contributing to sustainable business growth. Let’s get started on the pre-requisite details needed from your Marketo Engage account to connect with SurveySparrow.
How to create a Role with API access in Adobe Marketo Engage?
1. Log in to your Marketo Engage account.
2. Navigate to the Admin section.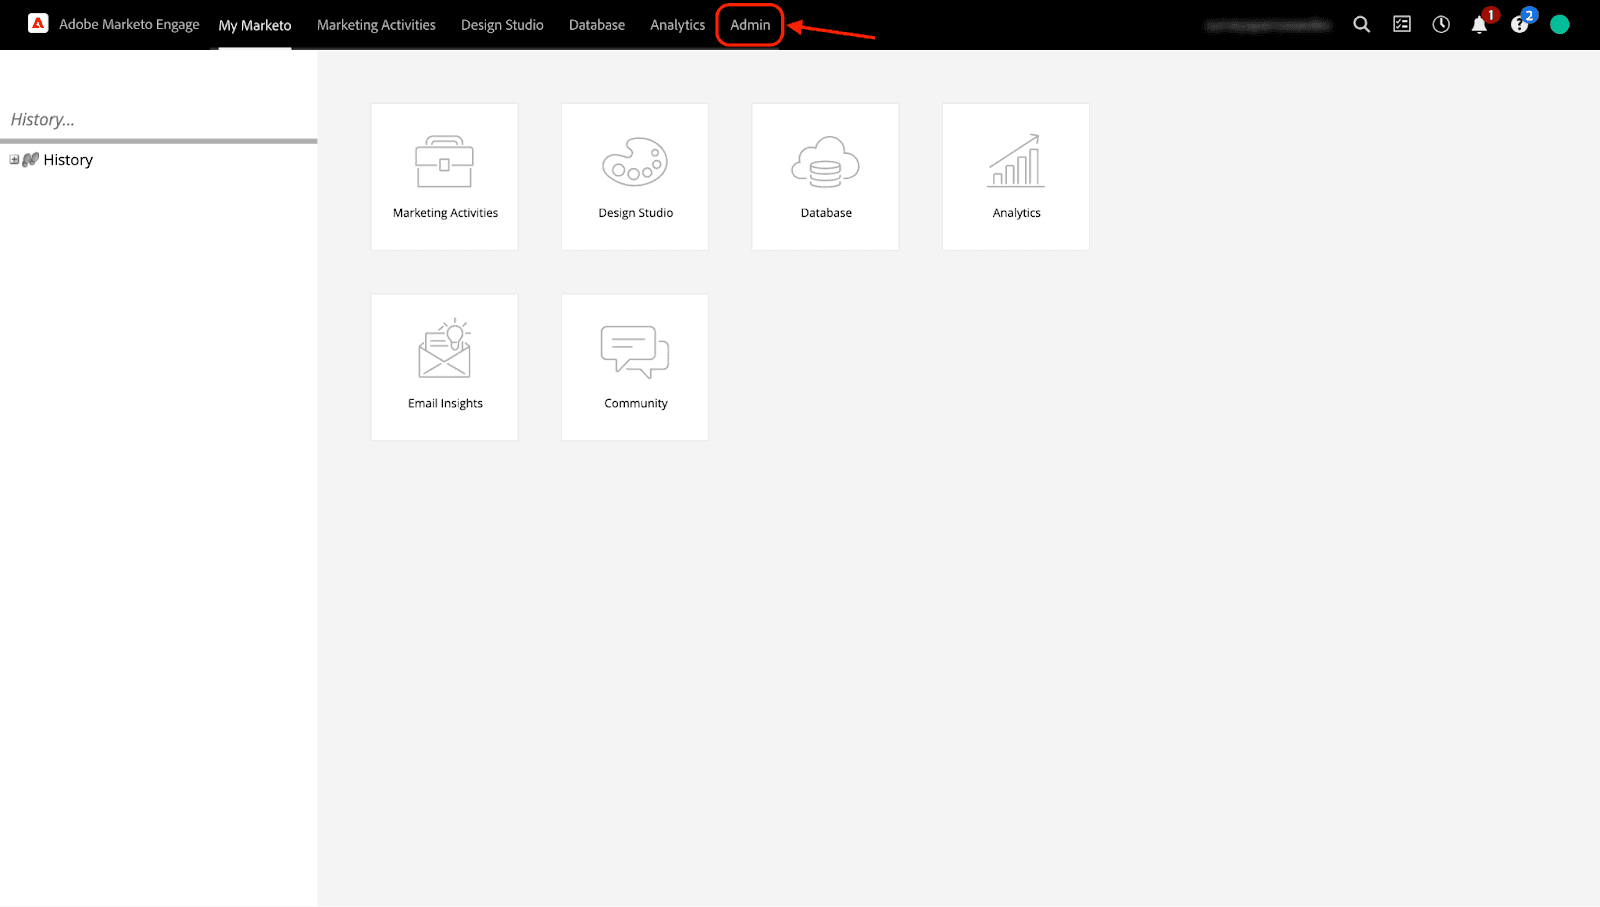
3. Go to Users & Roles.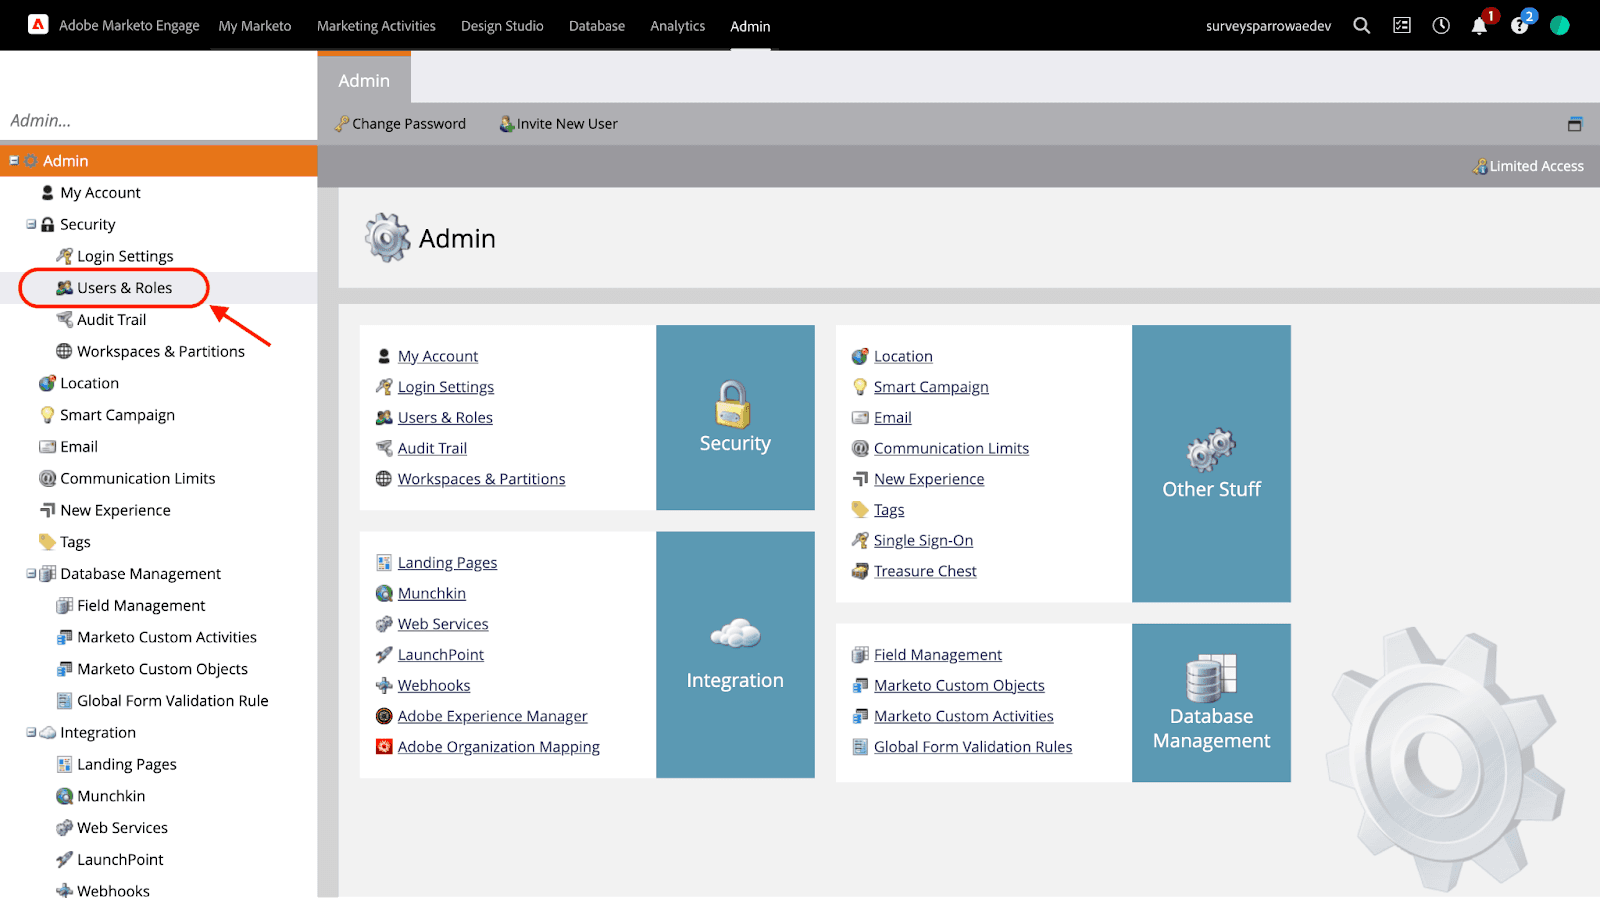
4. Move to the Roles section.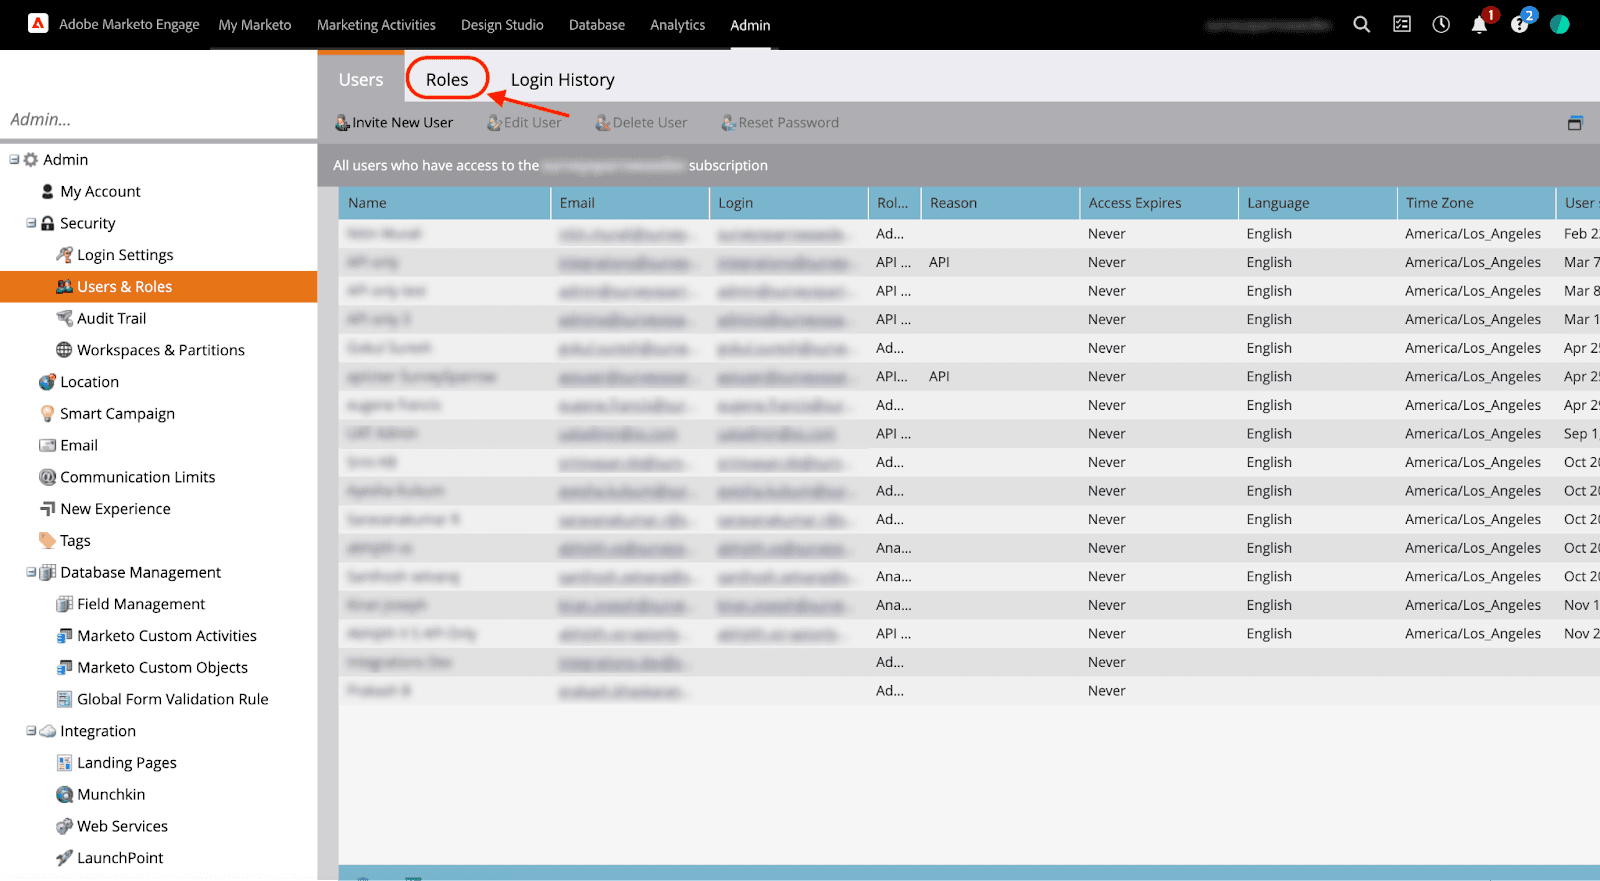
5. Click New Role.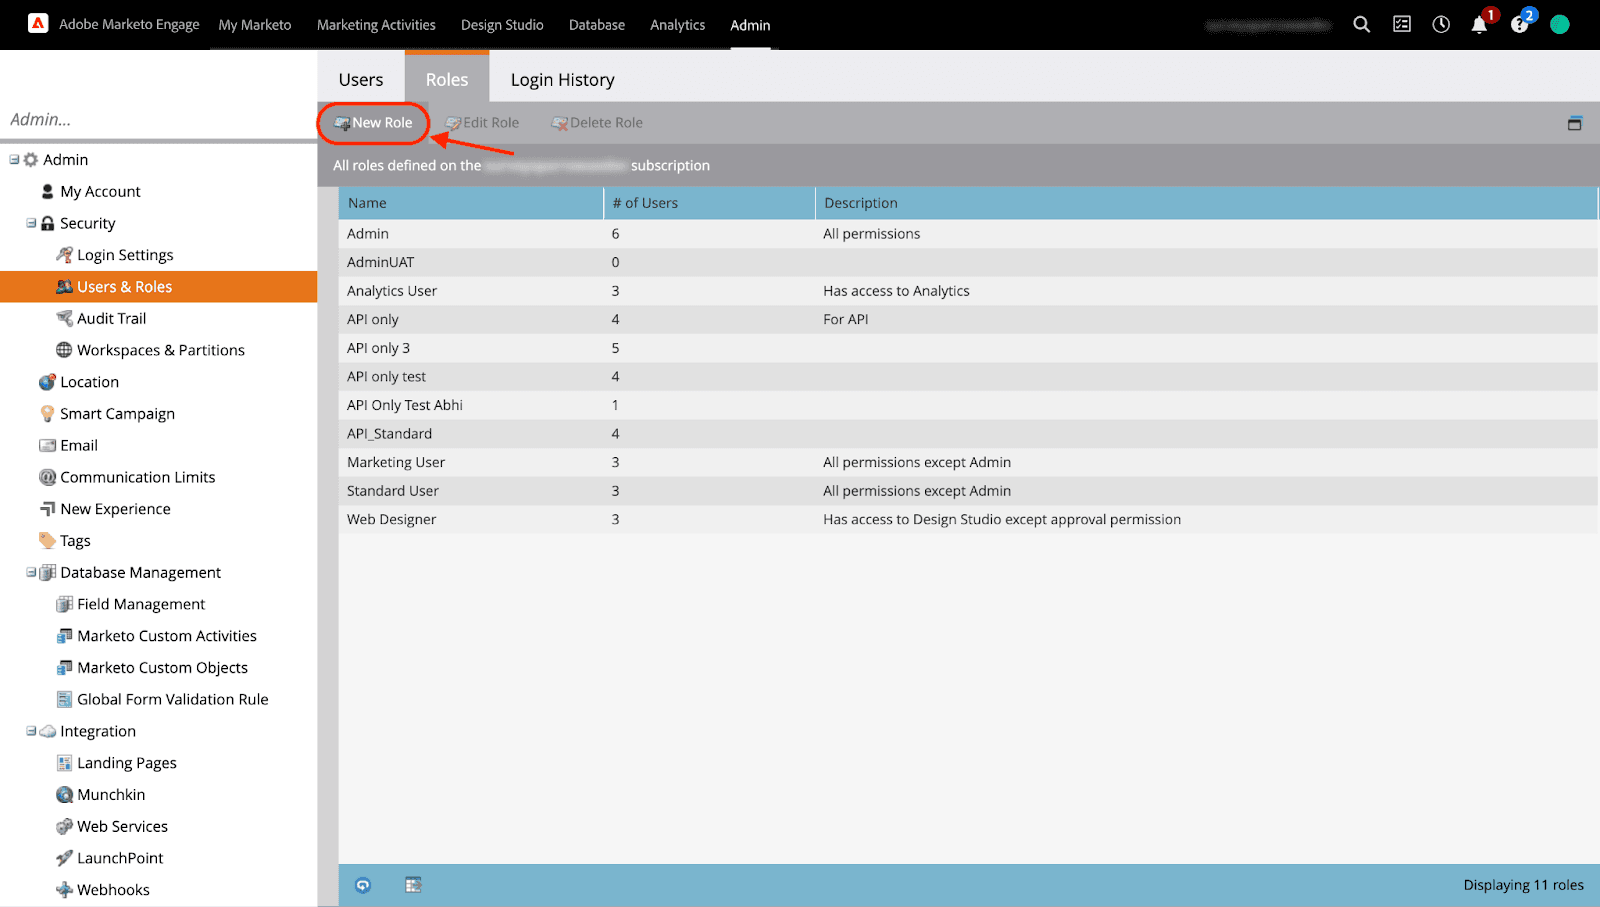
6. Enter a Role Name for your reference. Add Description if needed.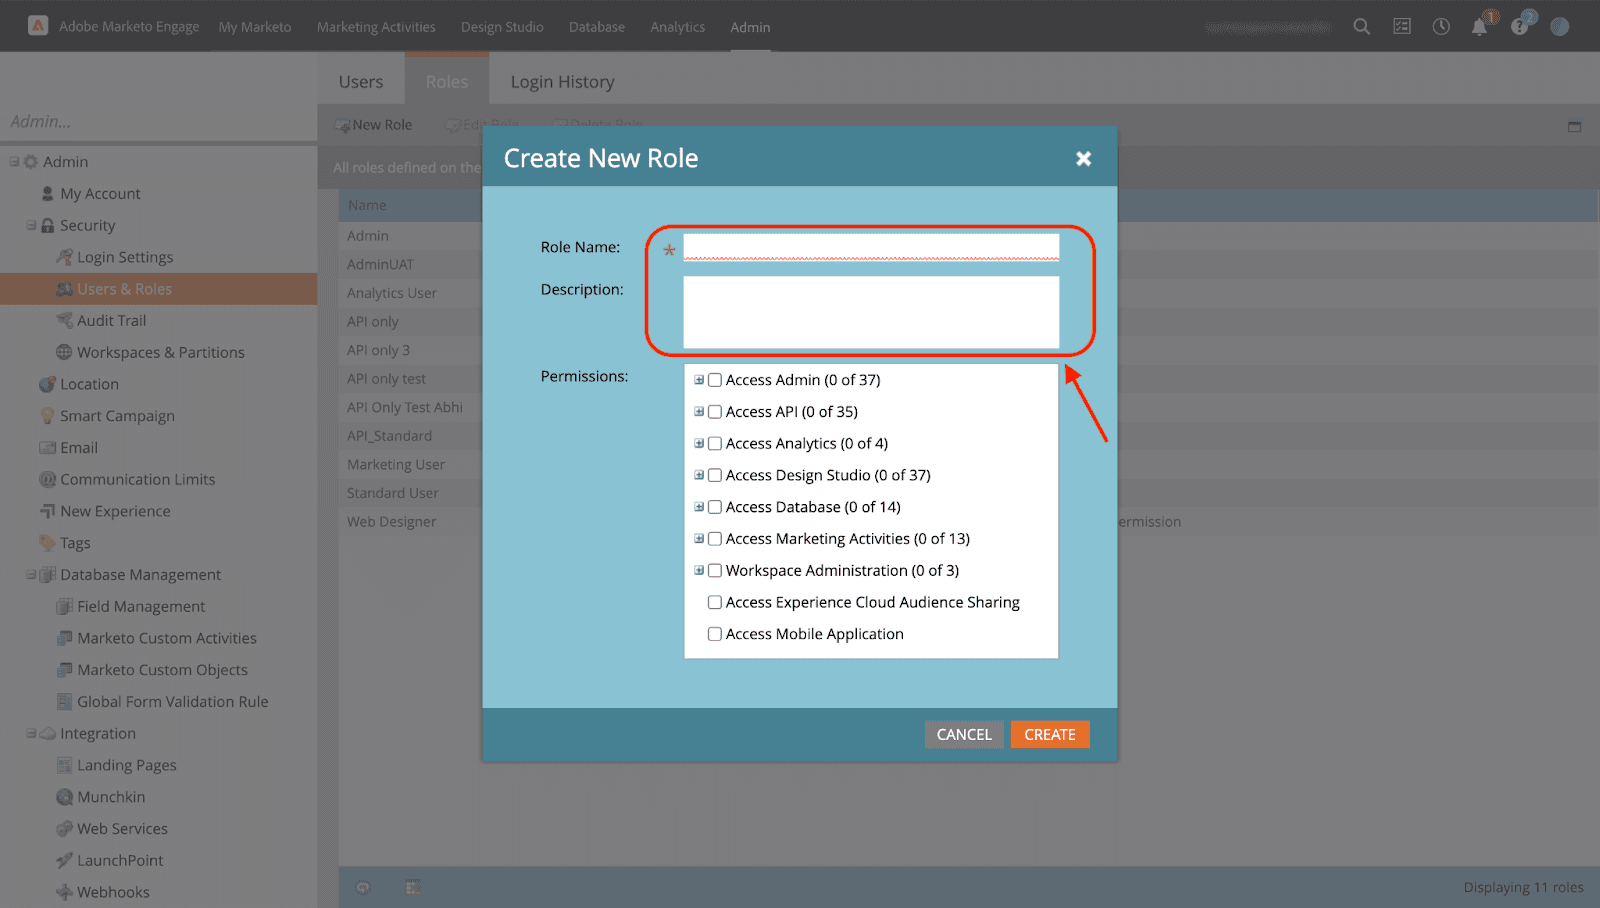
7. Select Access API permission.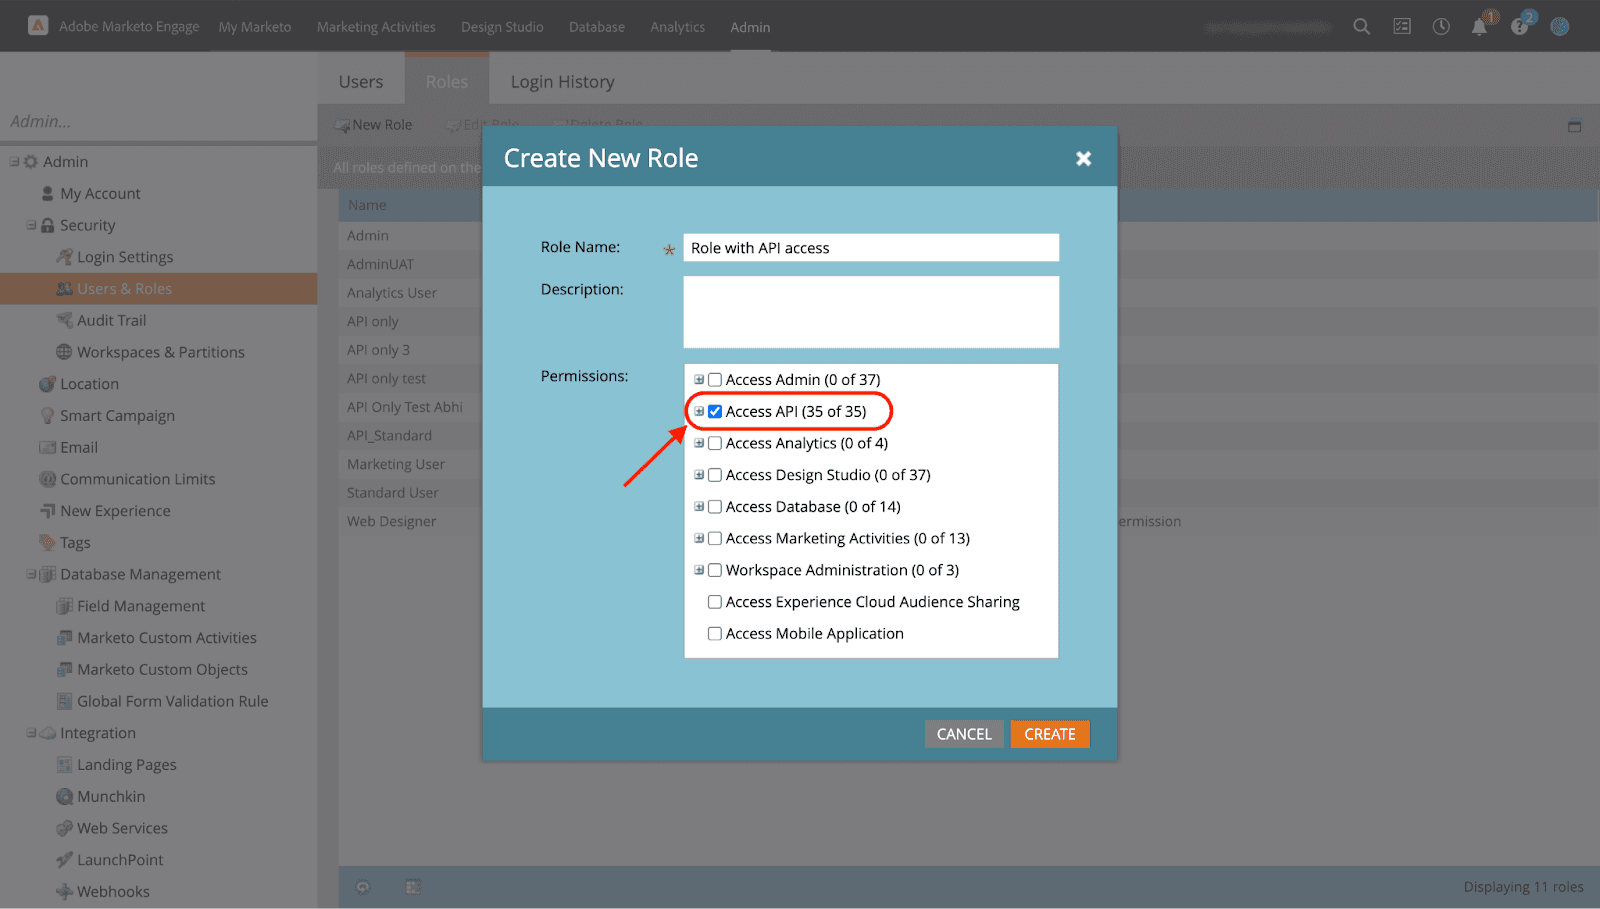
8. Click Create.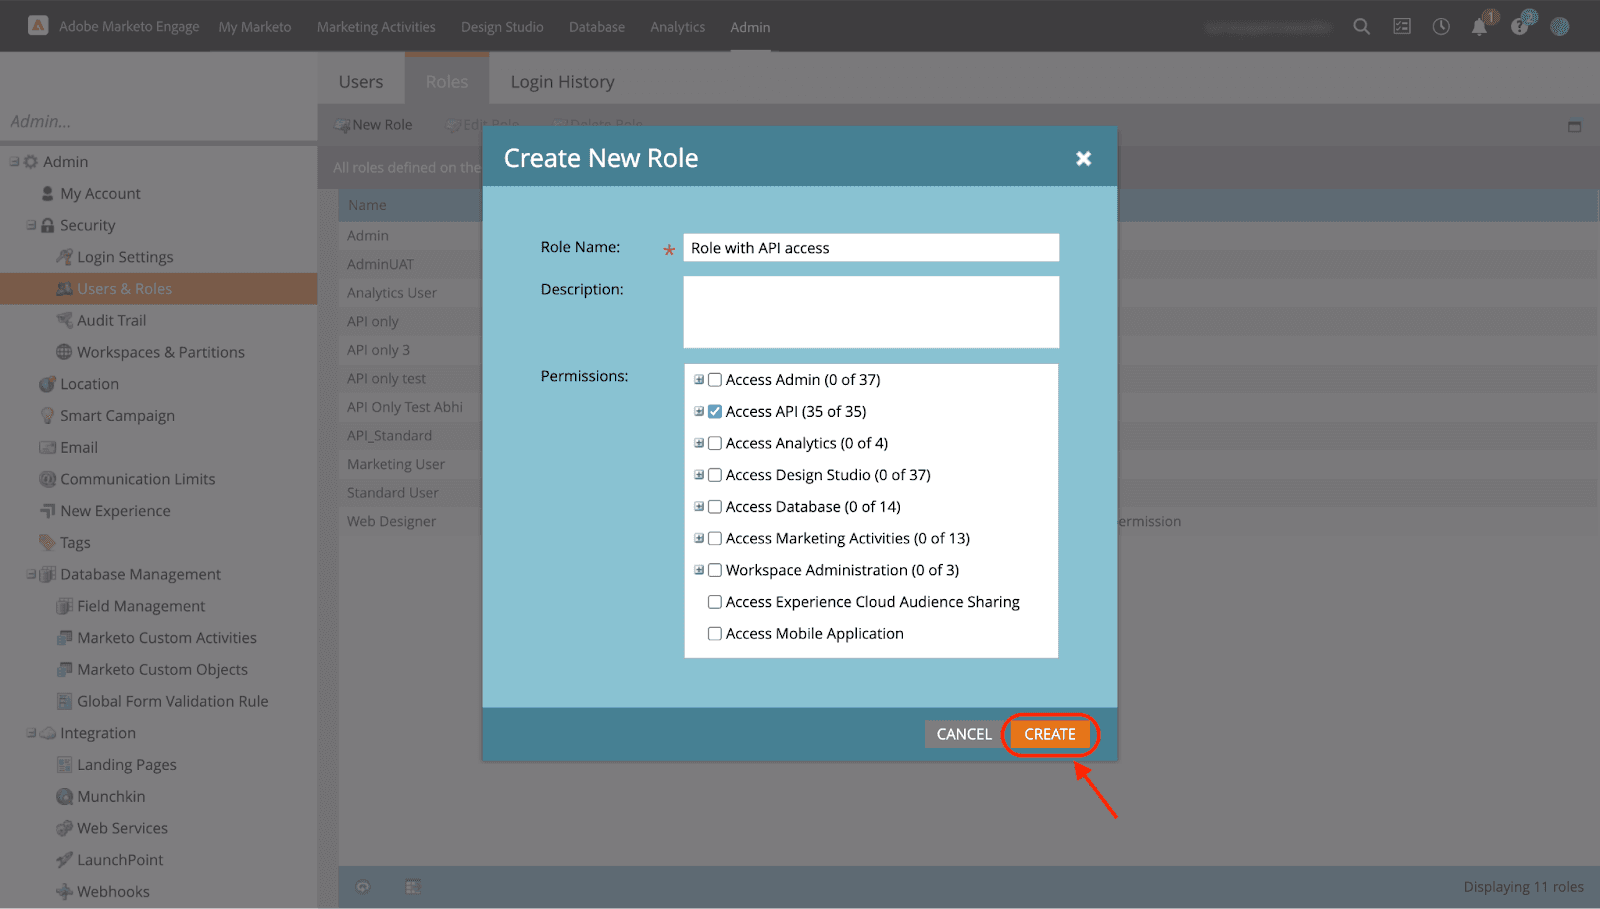
You’ll now see the new role created under the Roles section.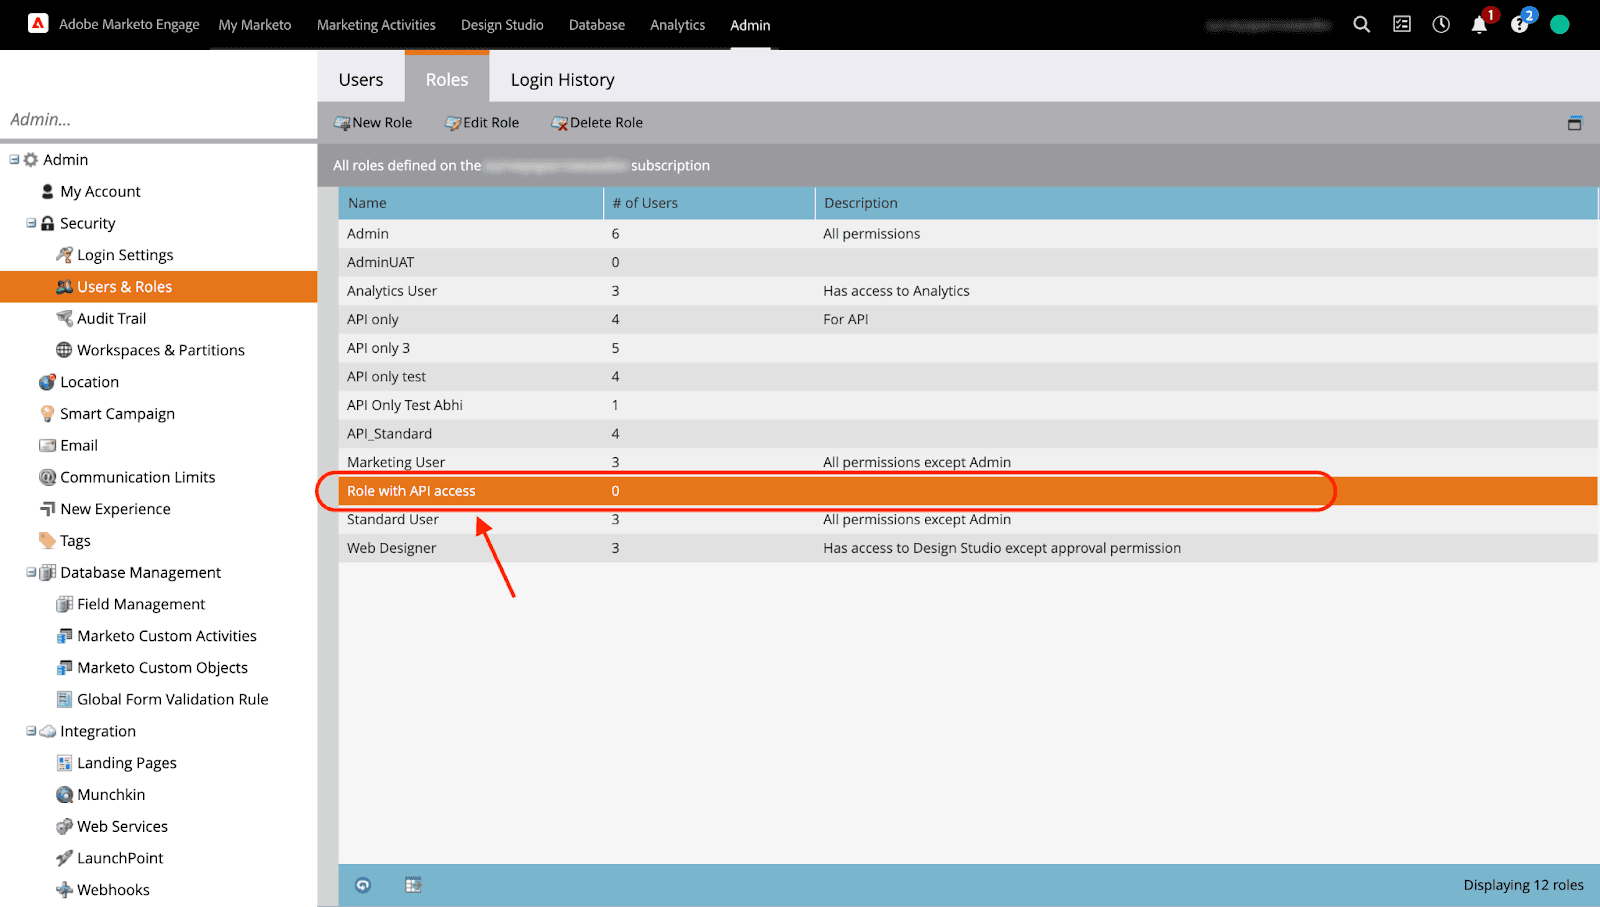
How to add a User in Adobe Marketo Engage?
1. Navigate to the Users section.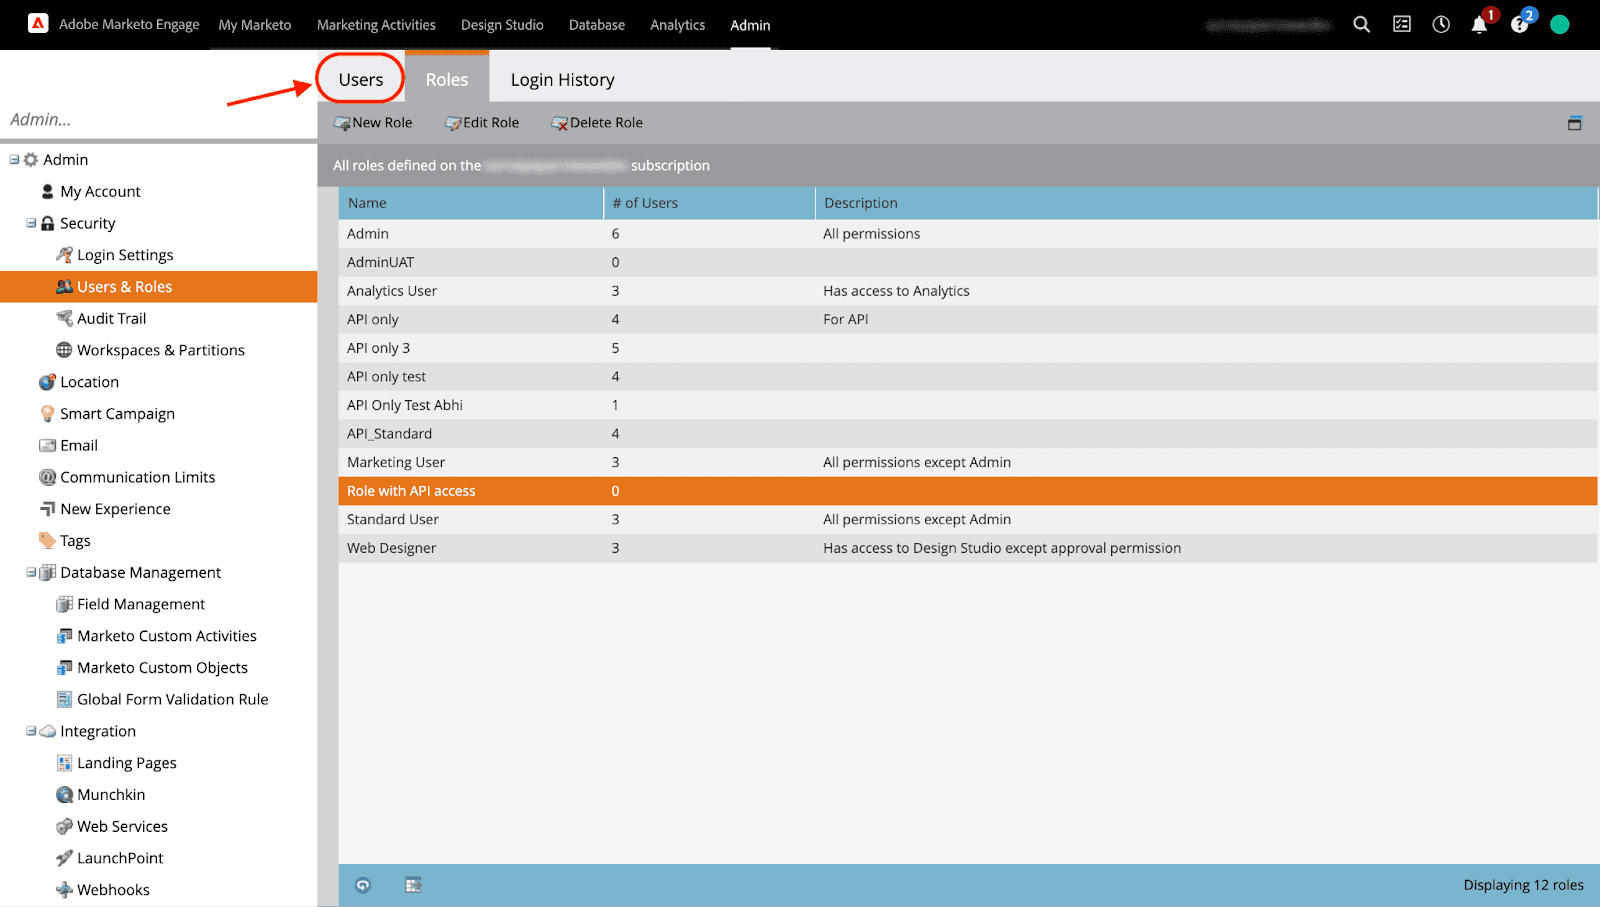
2. Click Invite New User.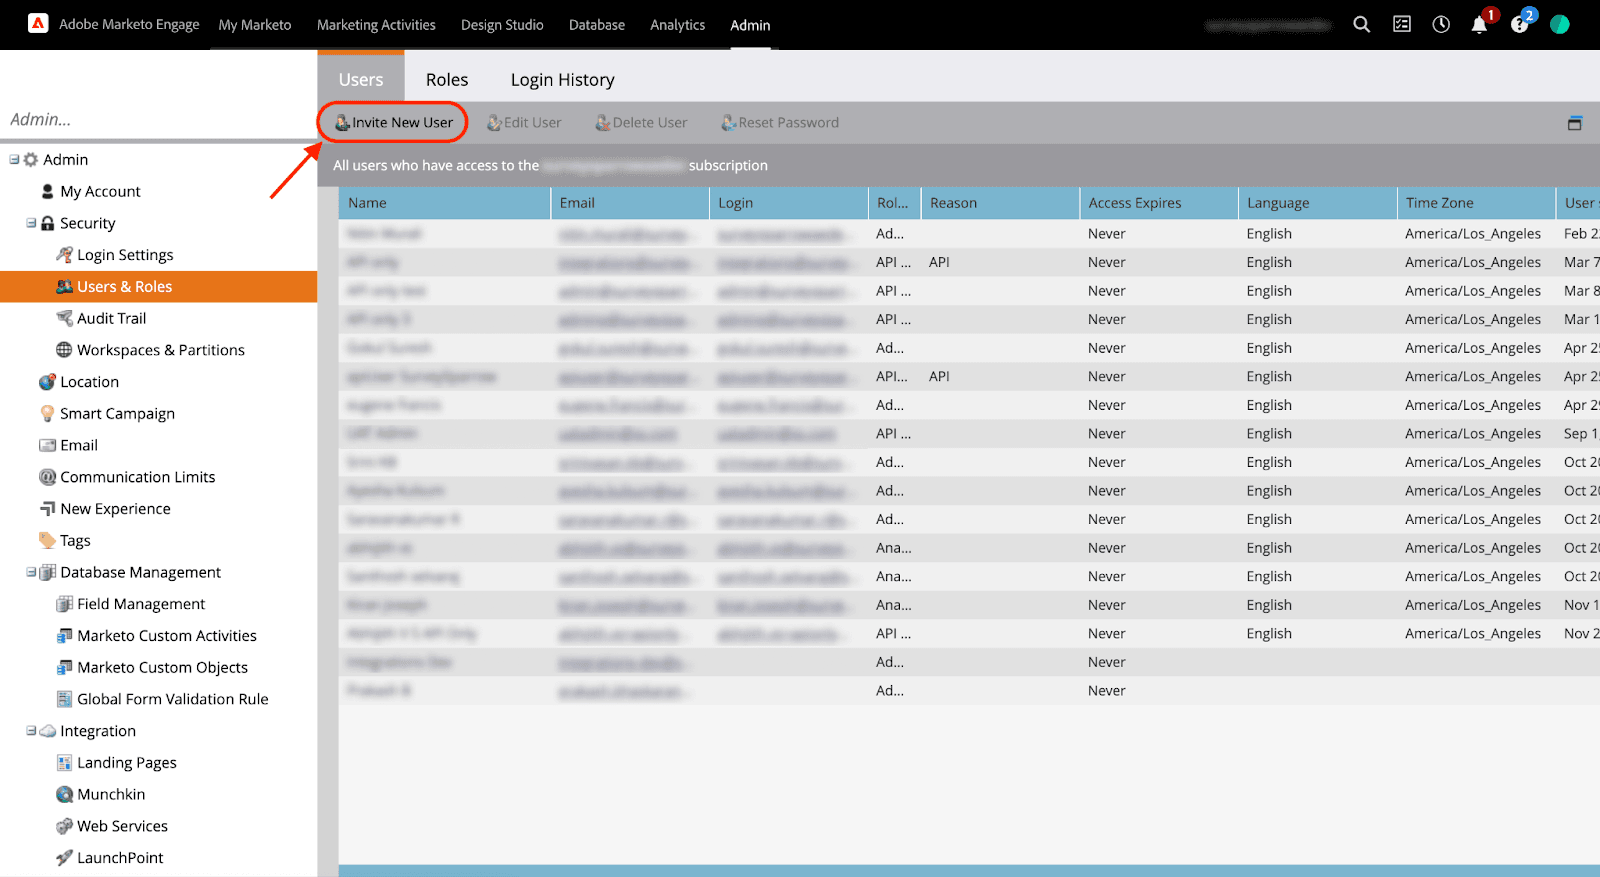
3. Enter the mandatory details and click Next.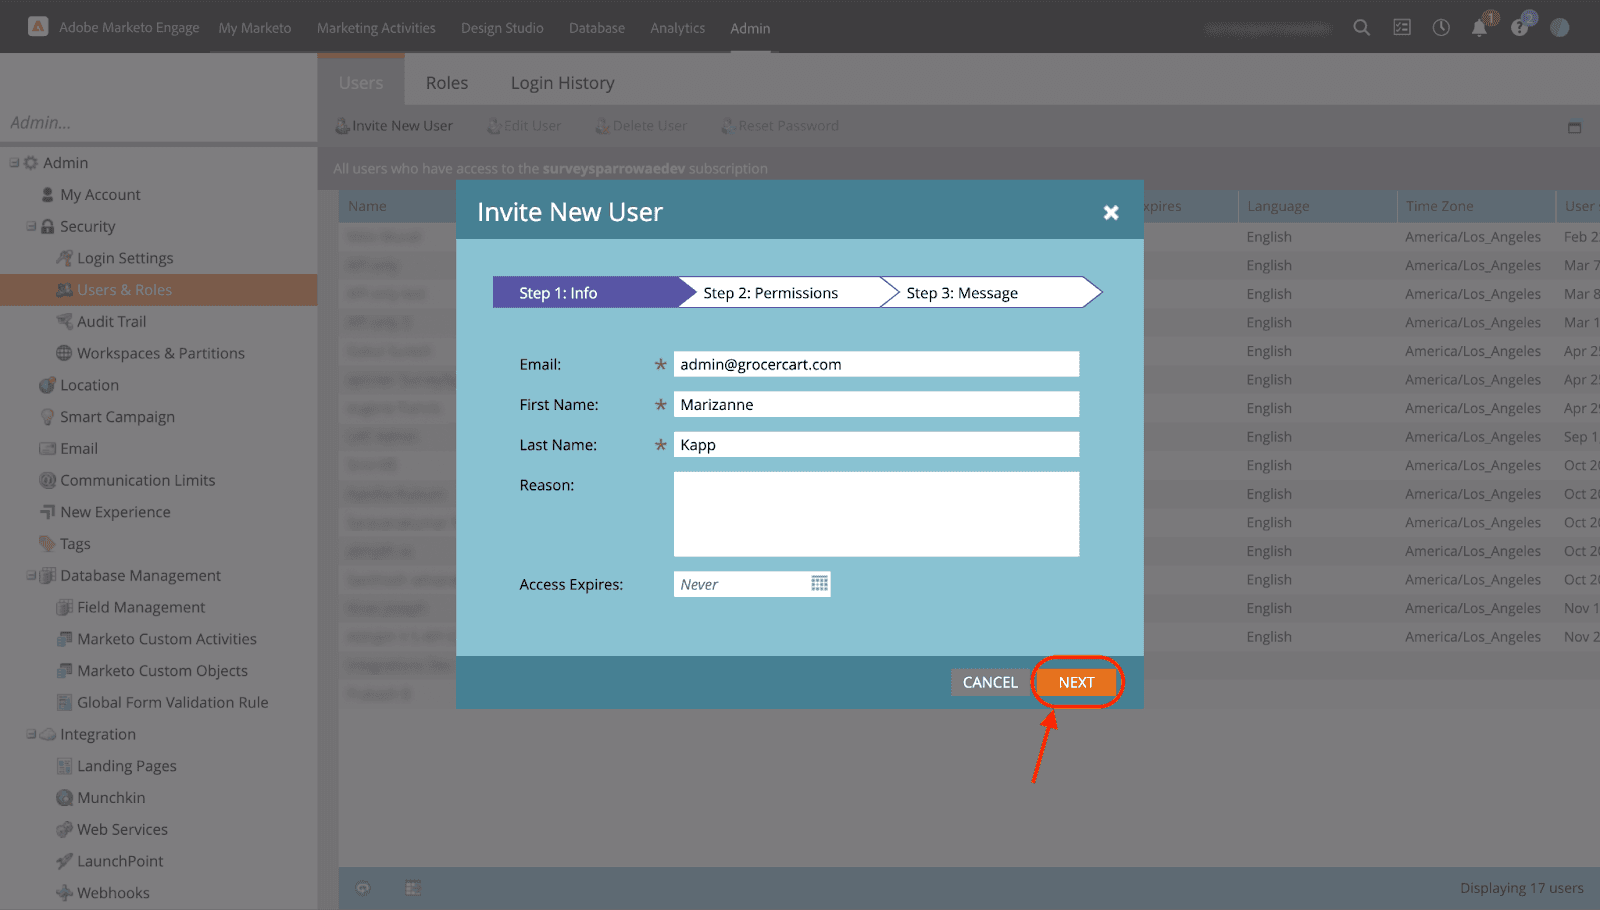
4. Add the role with API access.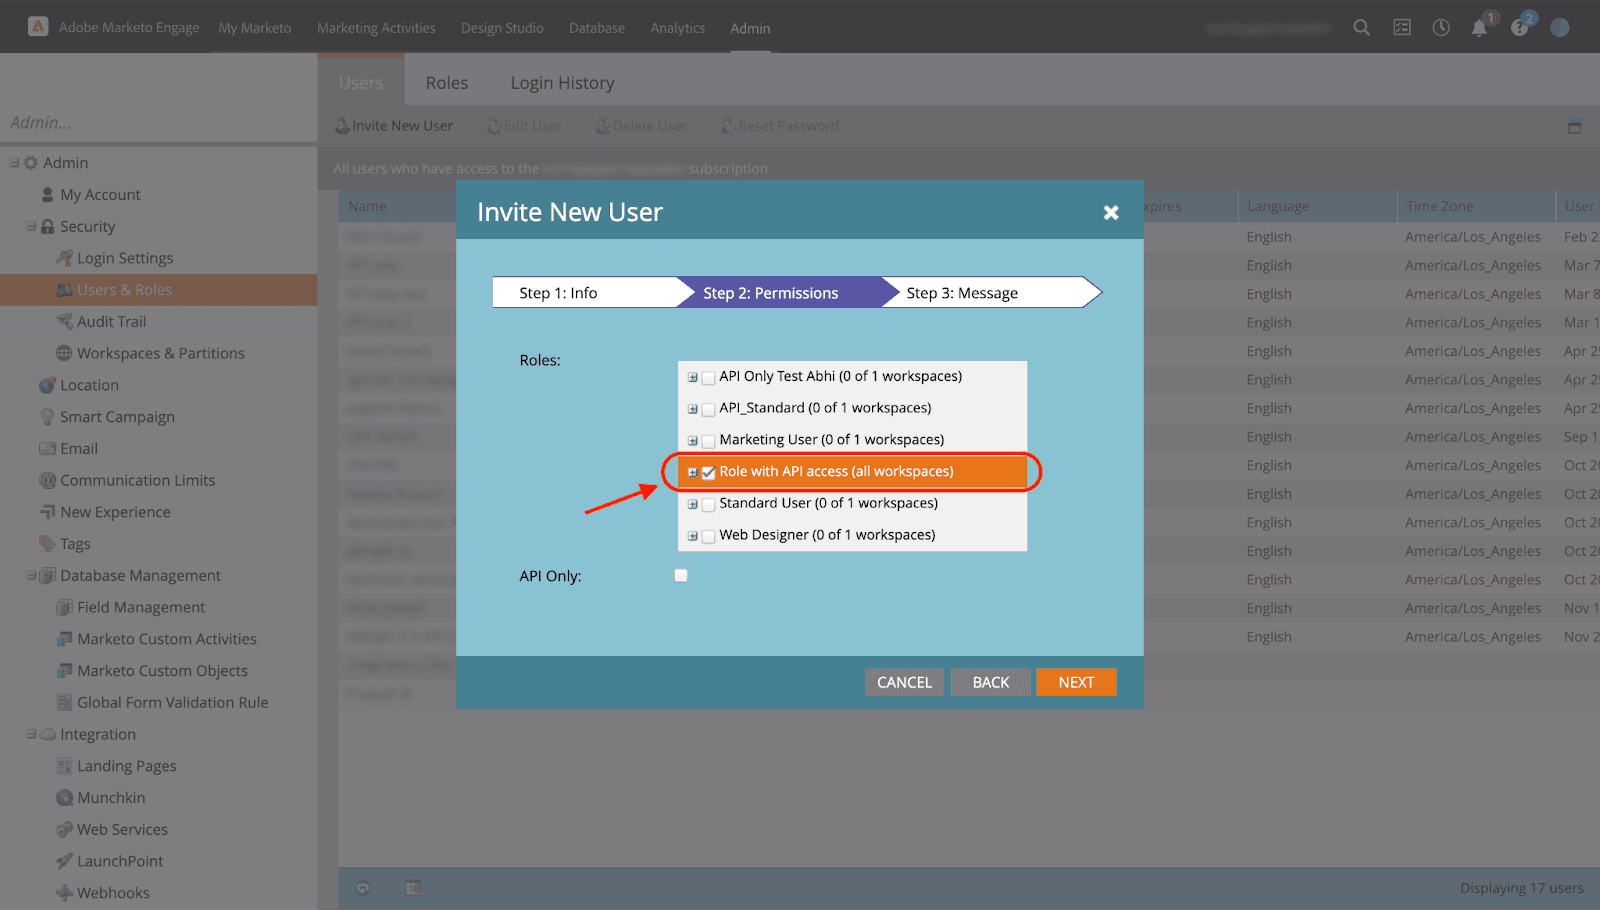
5. Click Next.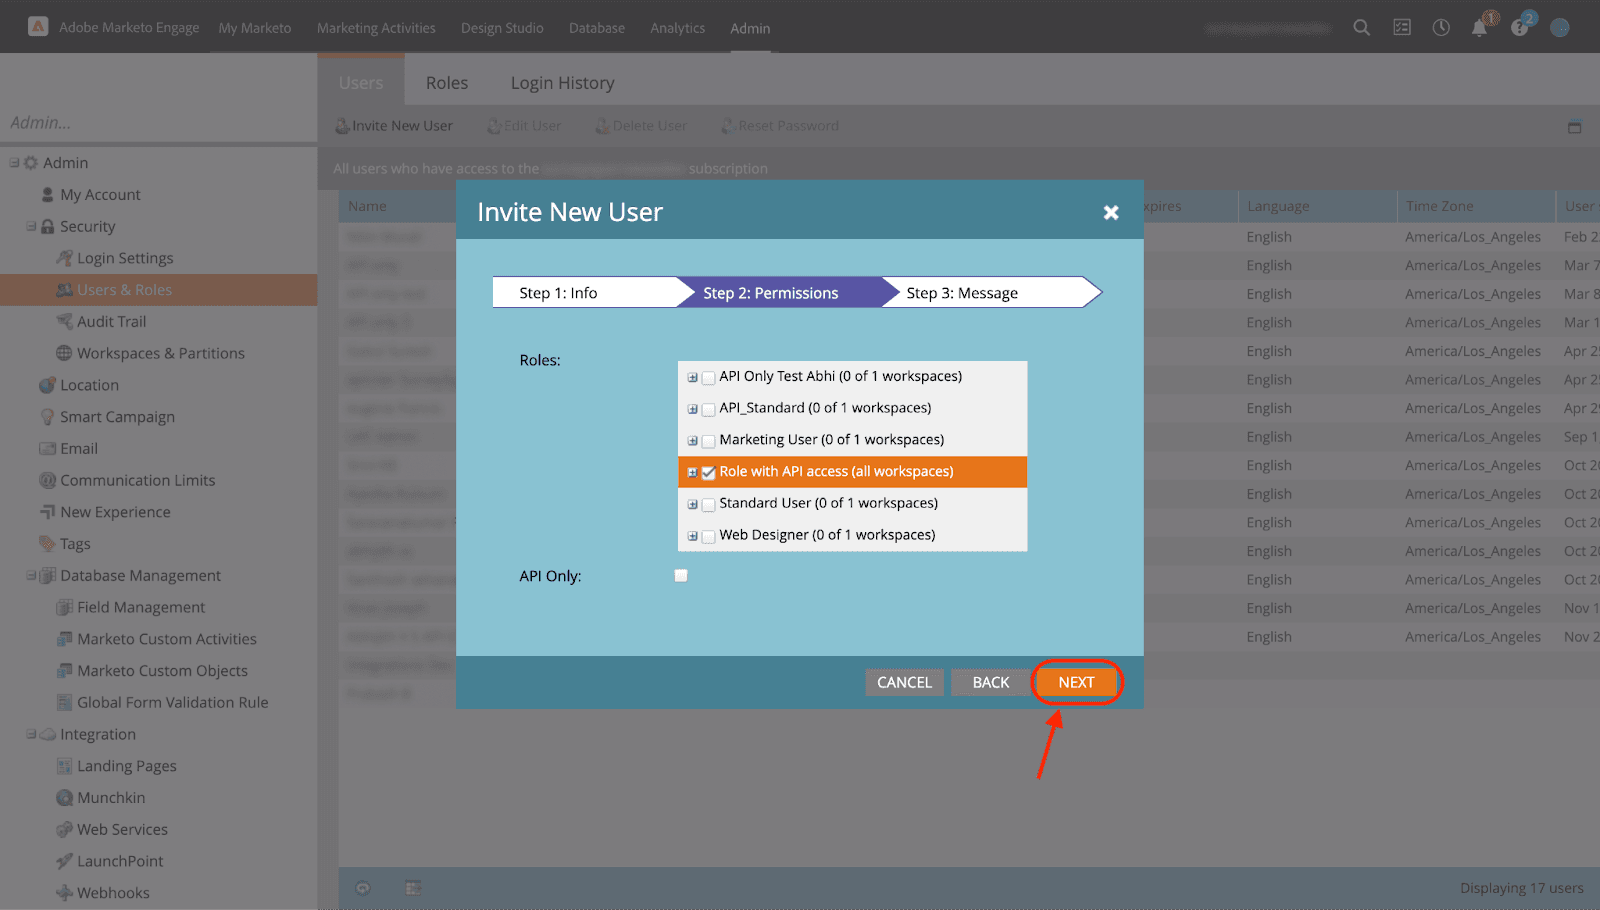
You’ll now see the new user with the specified role added under the Users section.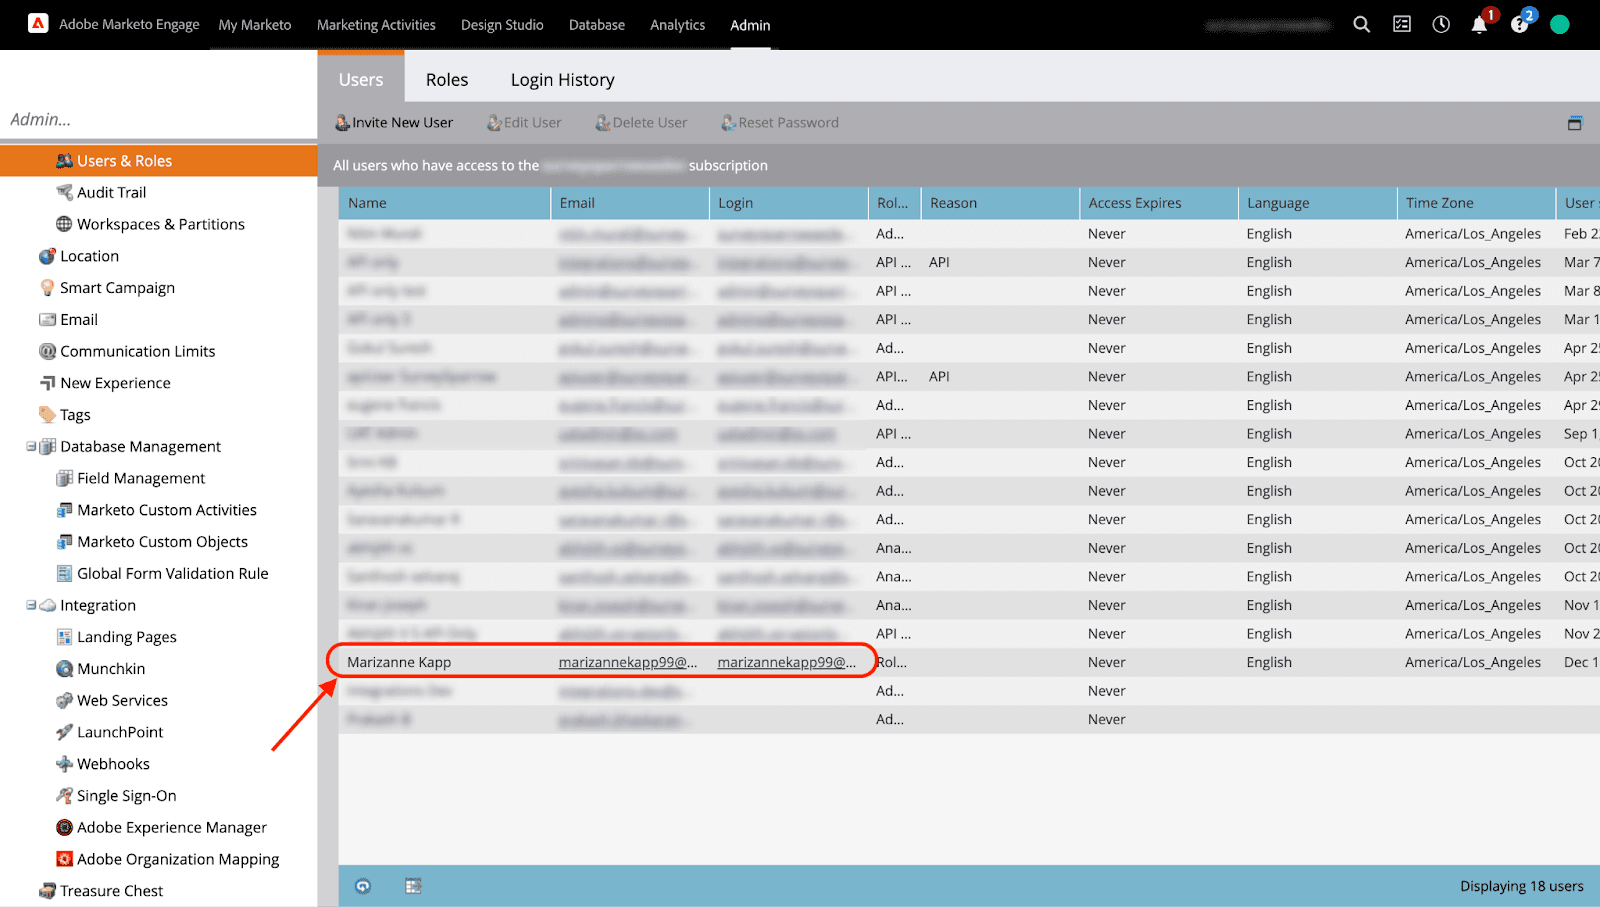
How to create a New Service in Adobe Marketo Engage?
1. From your Admin page, navigate to the LaunchPoint present under Integration.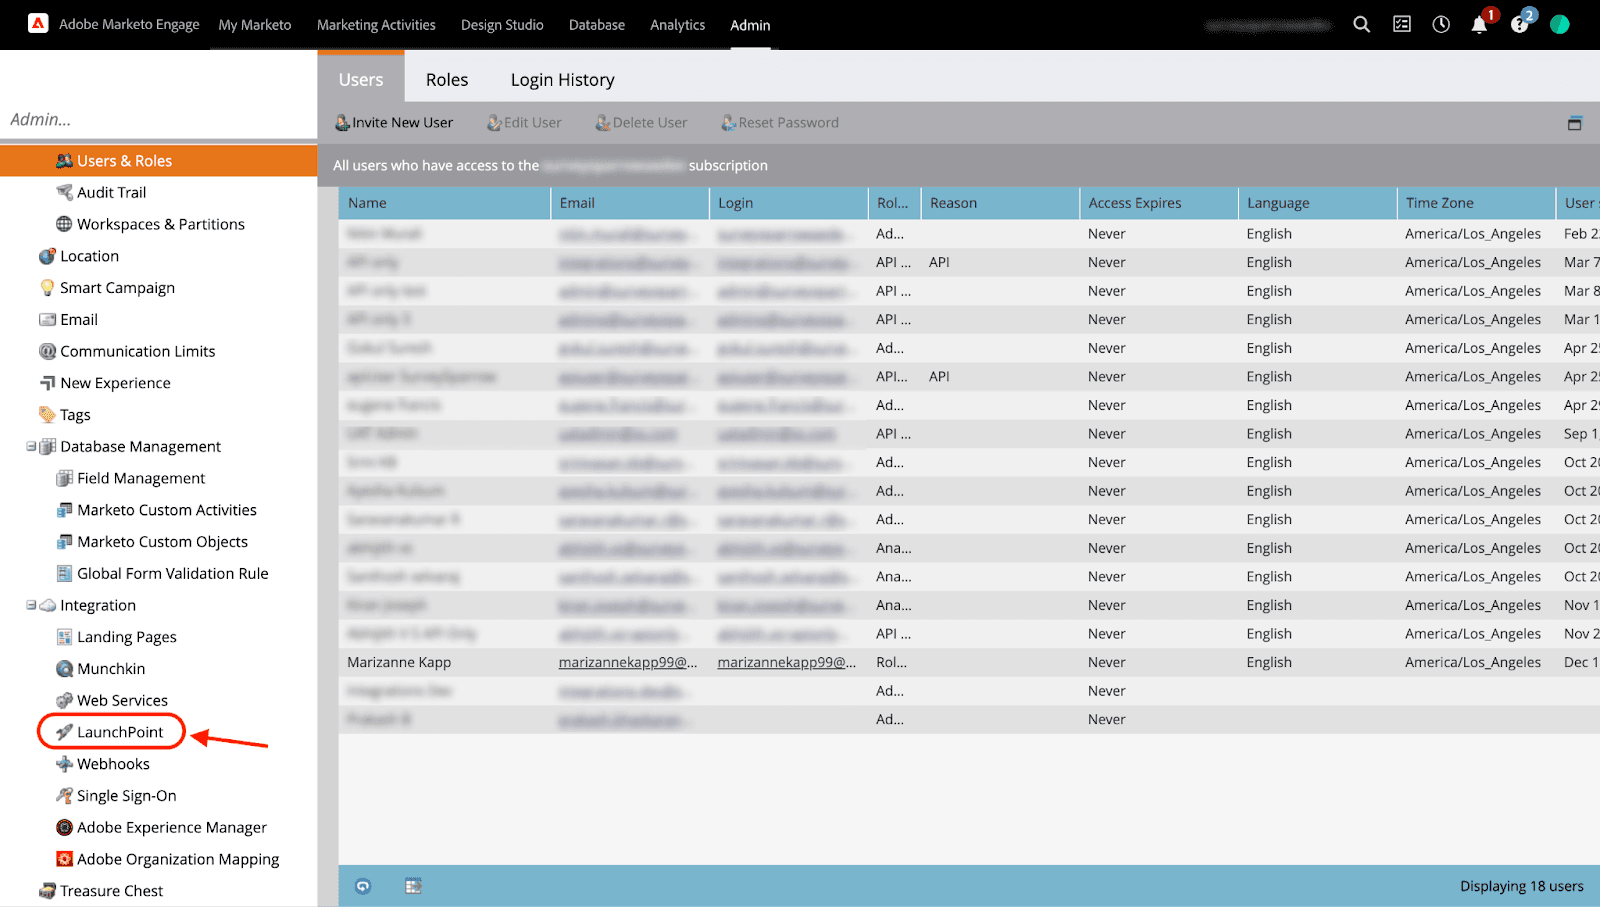
2. Click New > New Service.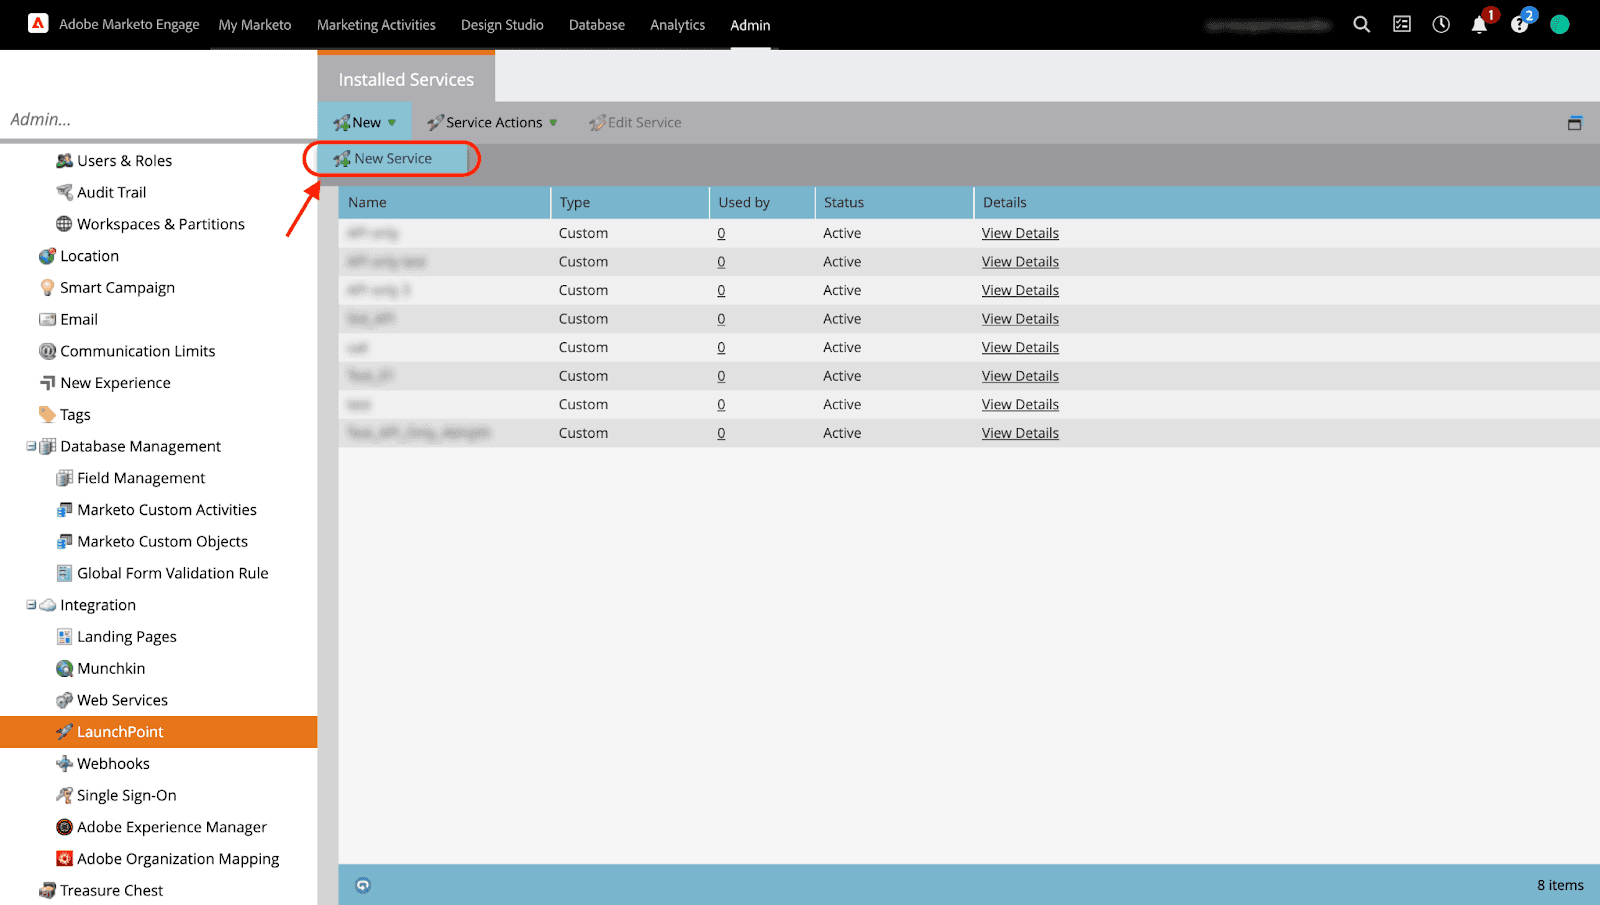
3. Enter the Display Name for your reference.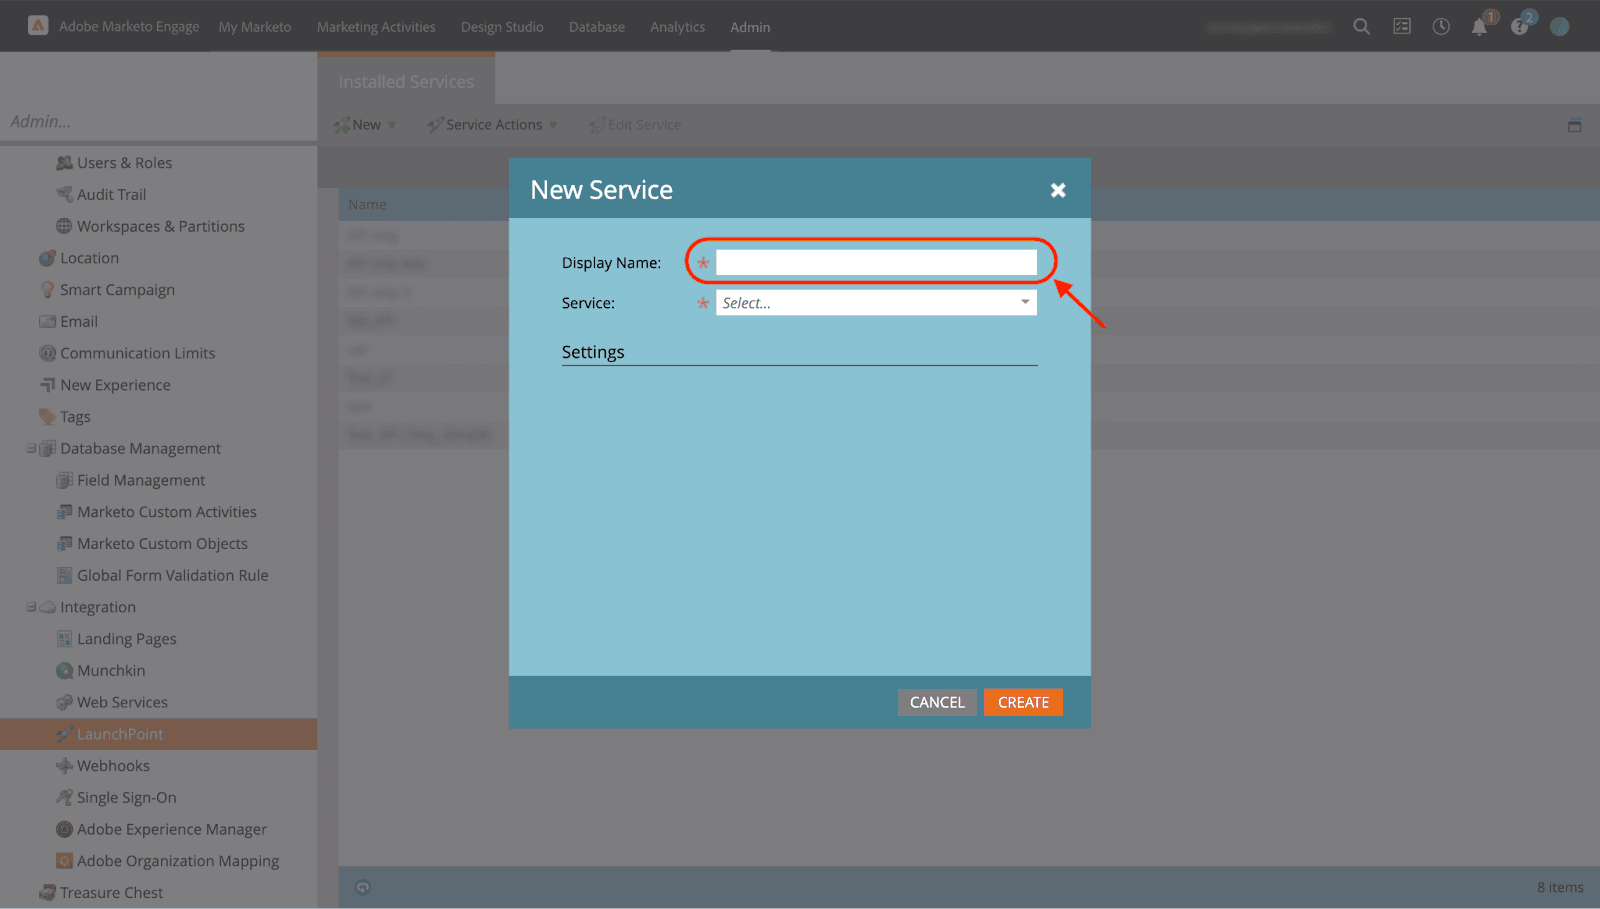
4. Select Custom from the Service options.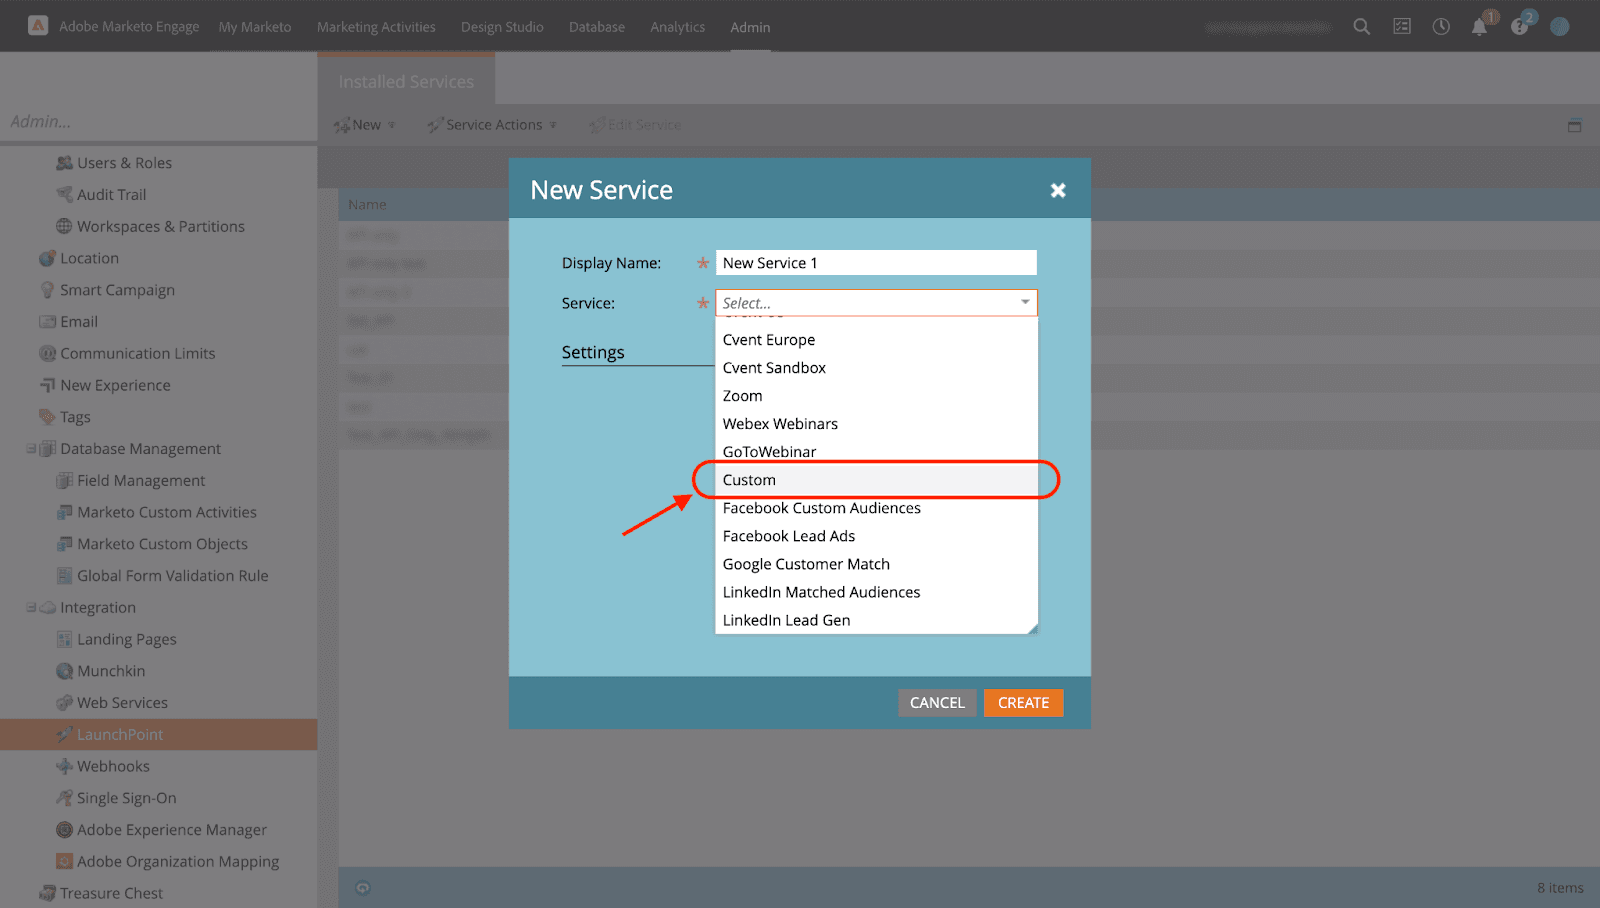
5. Enter a description for your reference and select a user with API-only access.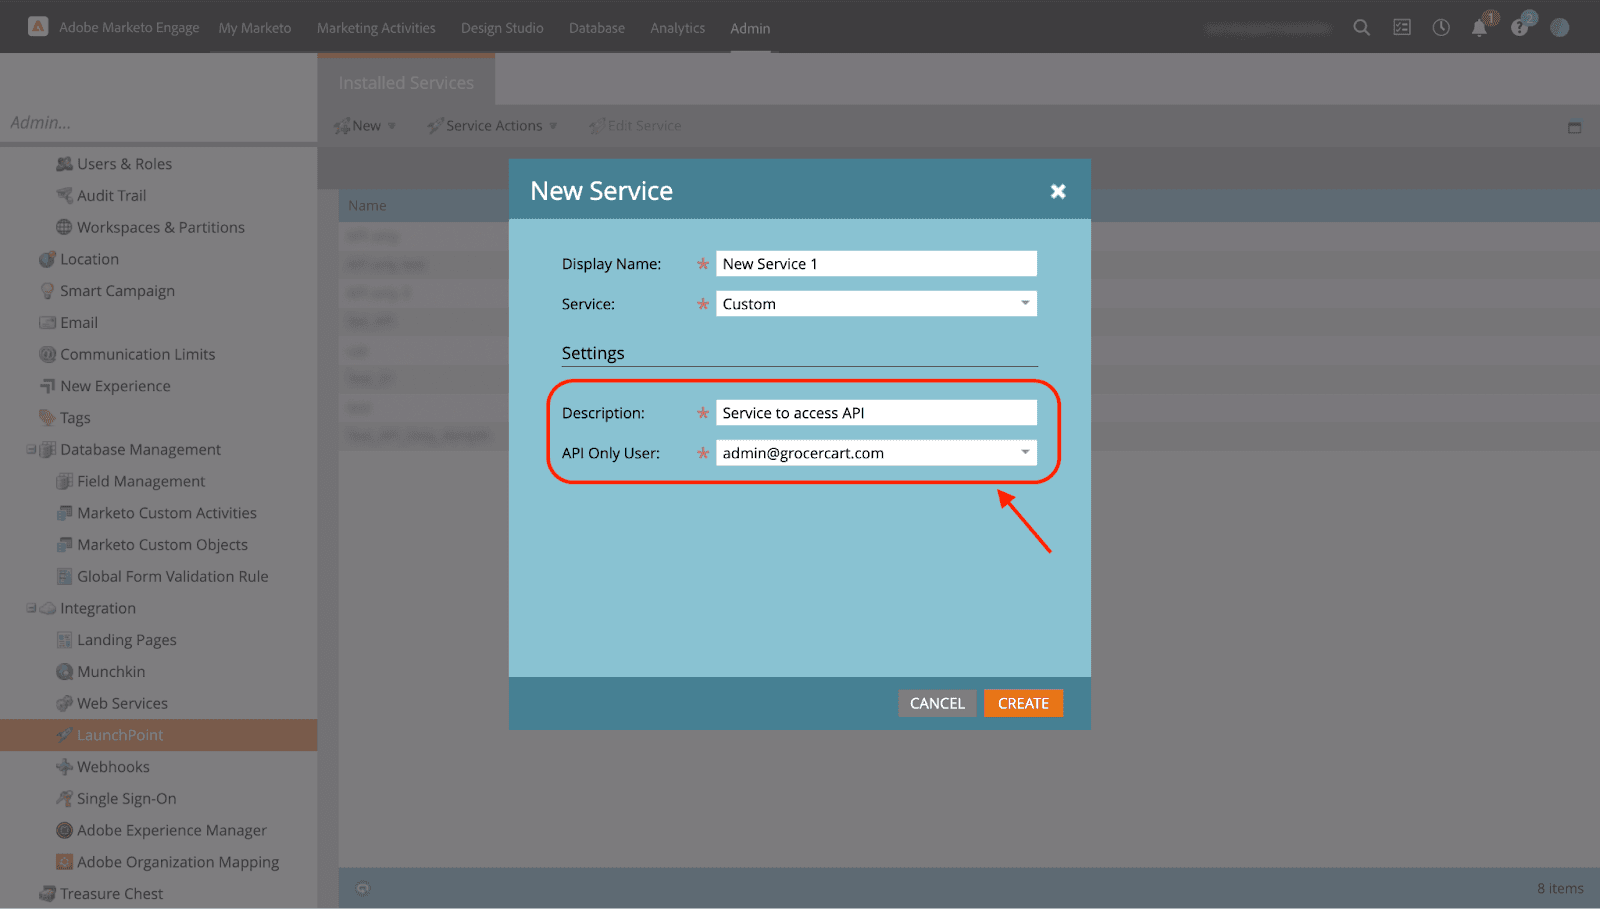
6. Click Create.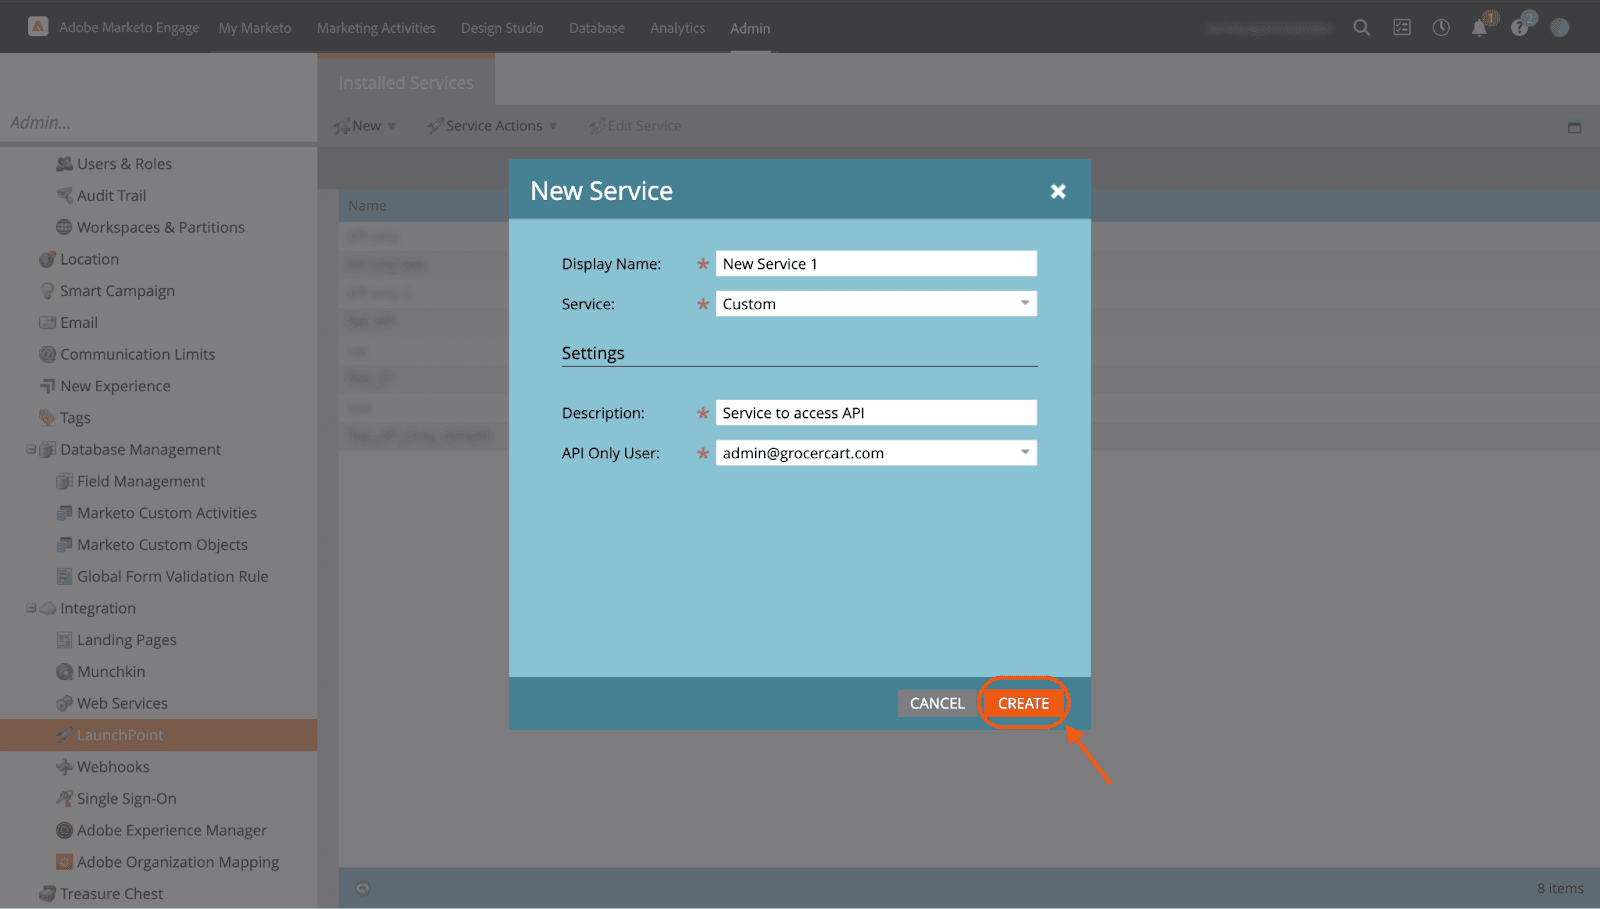
You’ll now see the new service under the Installed Services in Launchpoint.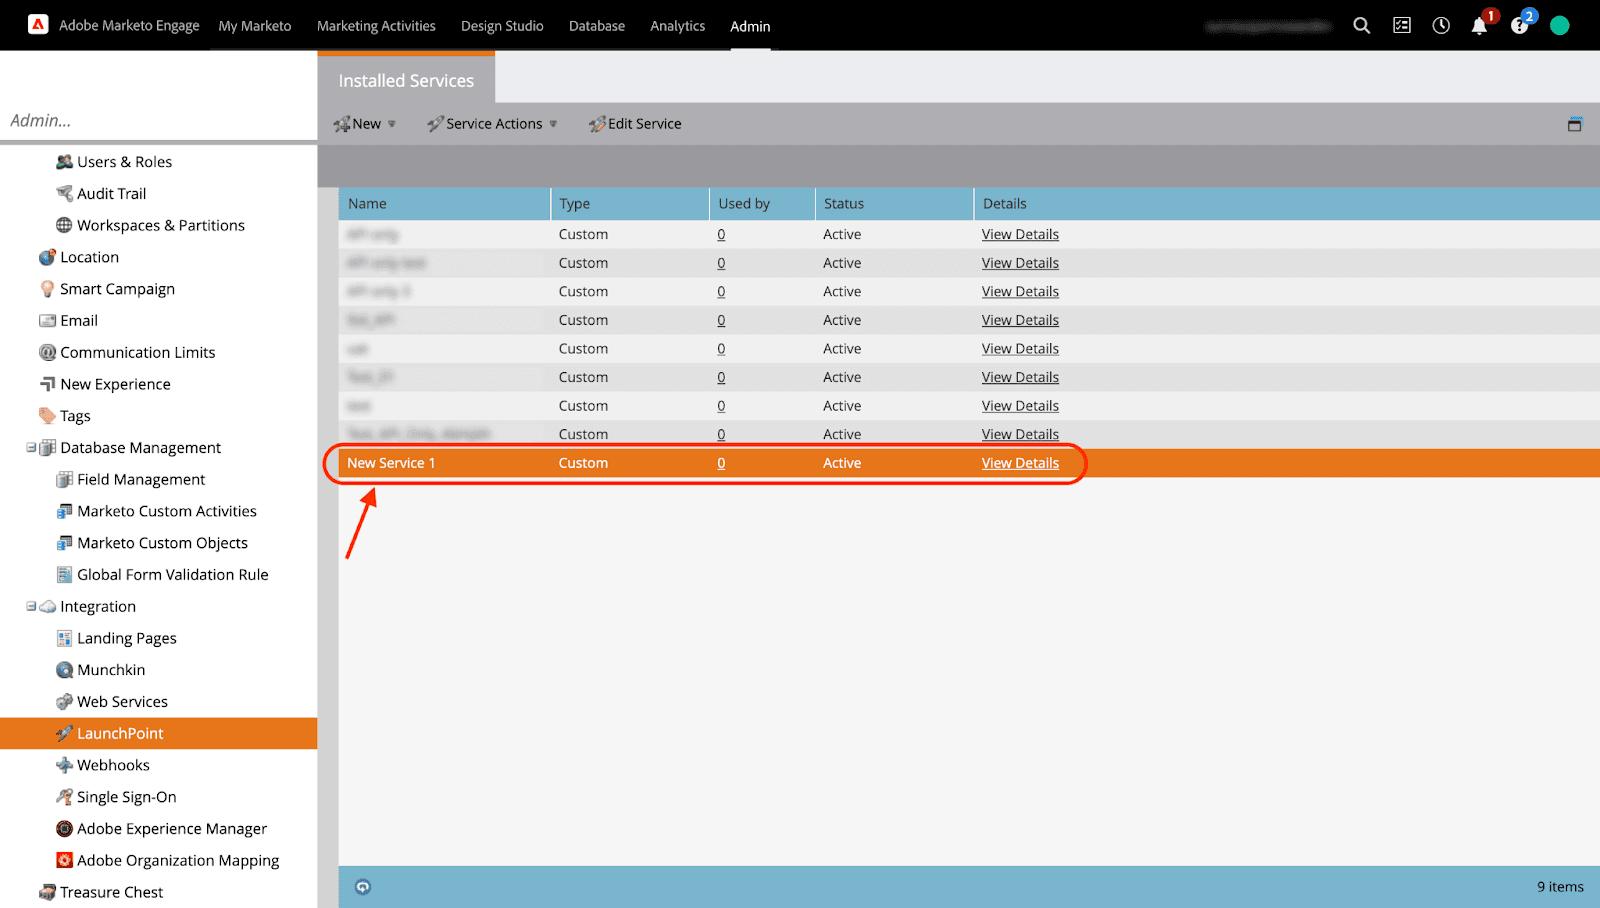
How to get the Client ID and Client Secret?
1. Click View Details of the installed service that you created.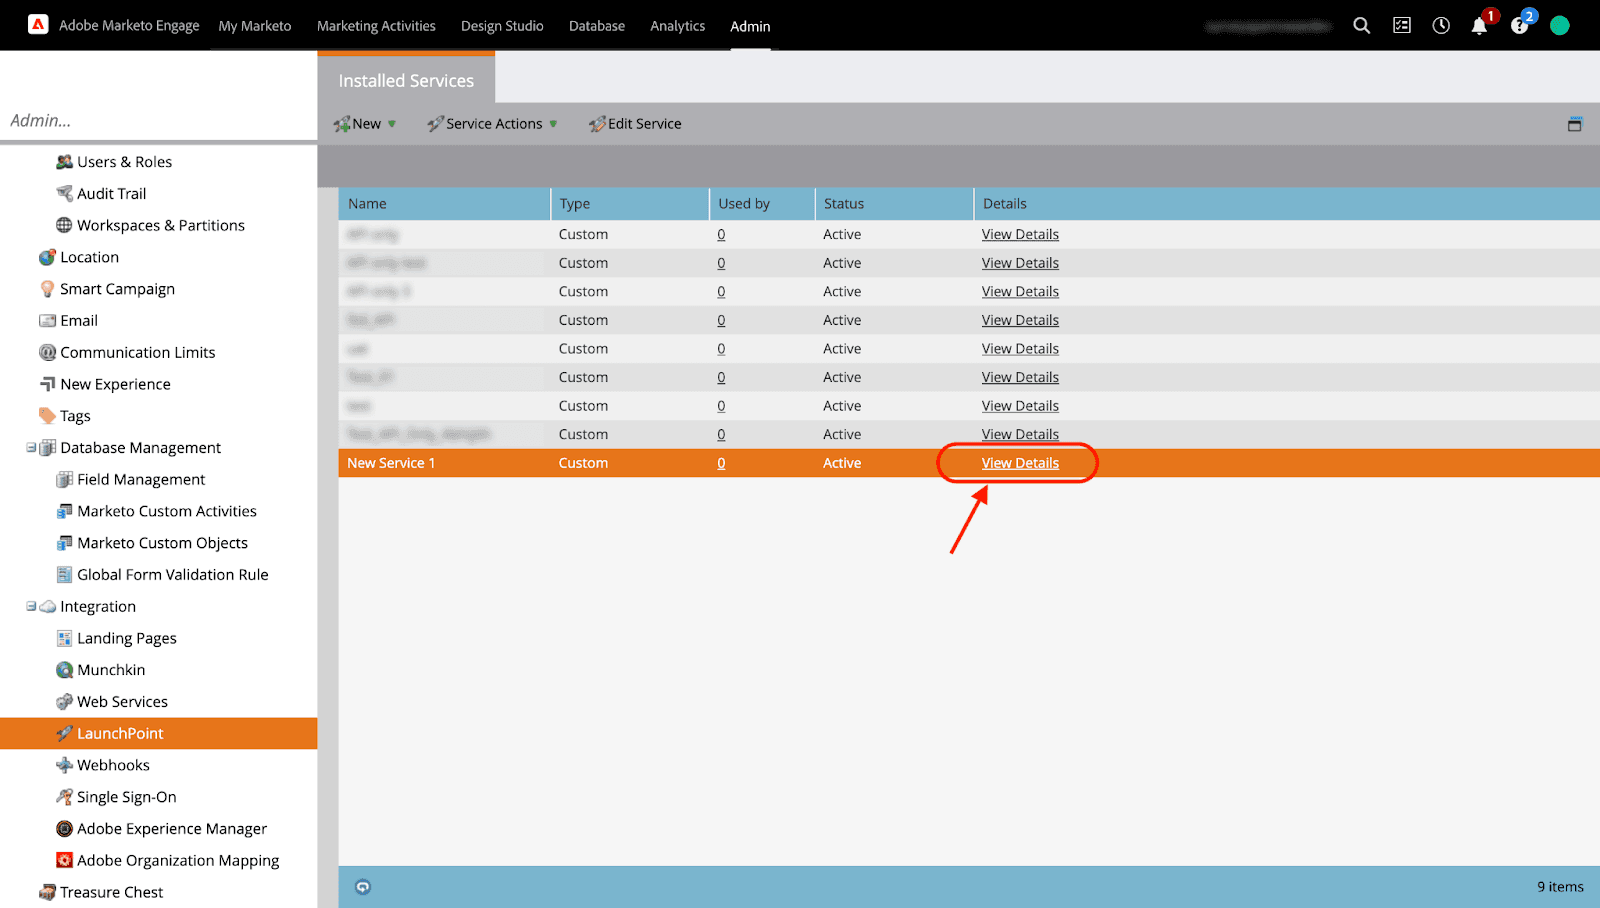
2. Copy the Client ID and Client Secret. Keep it ready to establish the integration with SurveySparrow.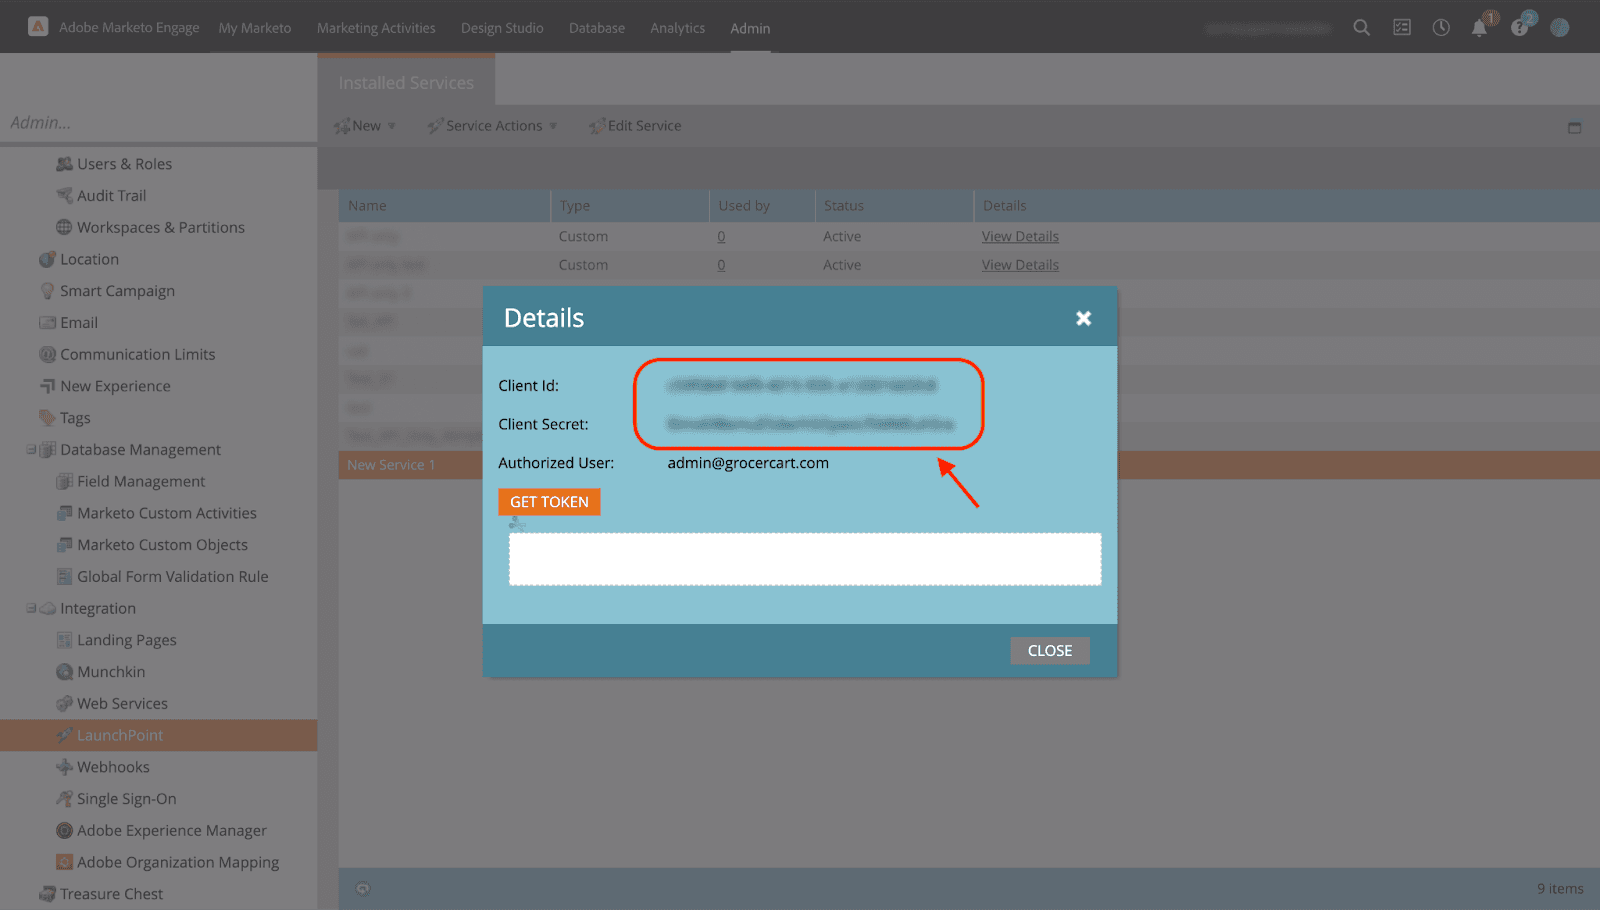
How to find the REST API endpoint?
1. Navigate to Web Services under Integrations.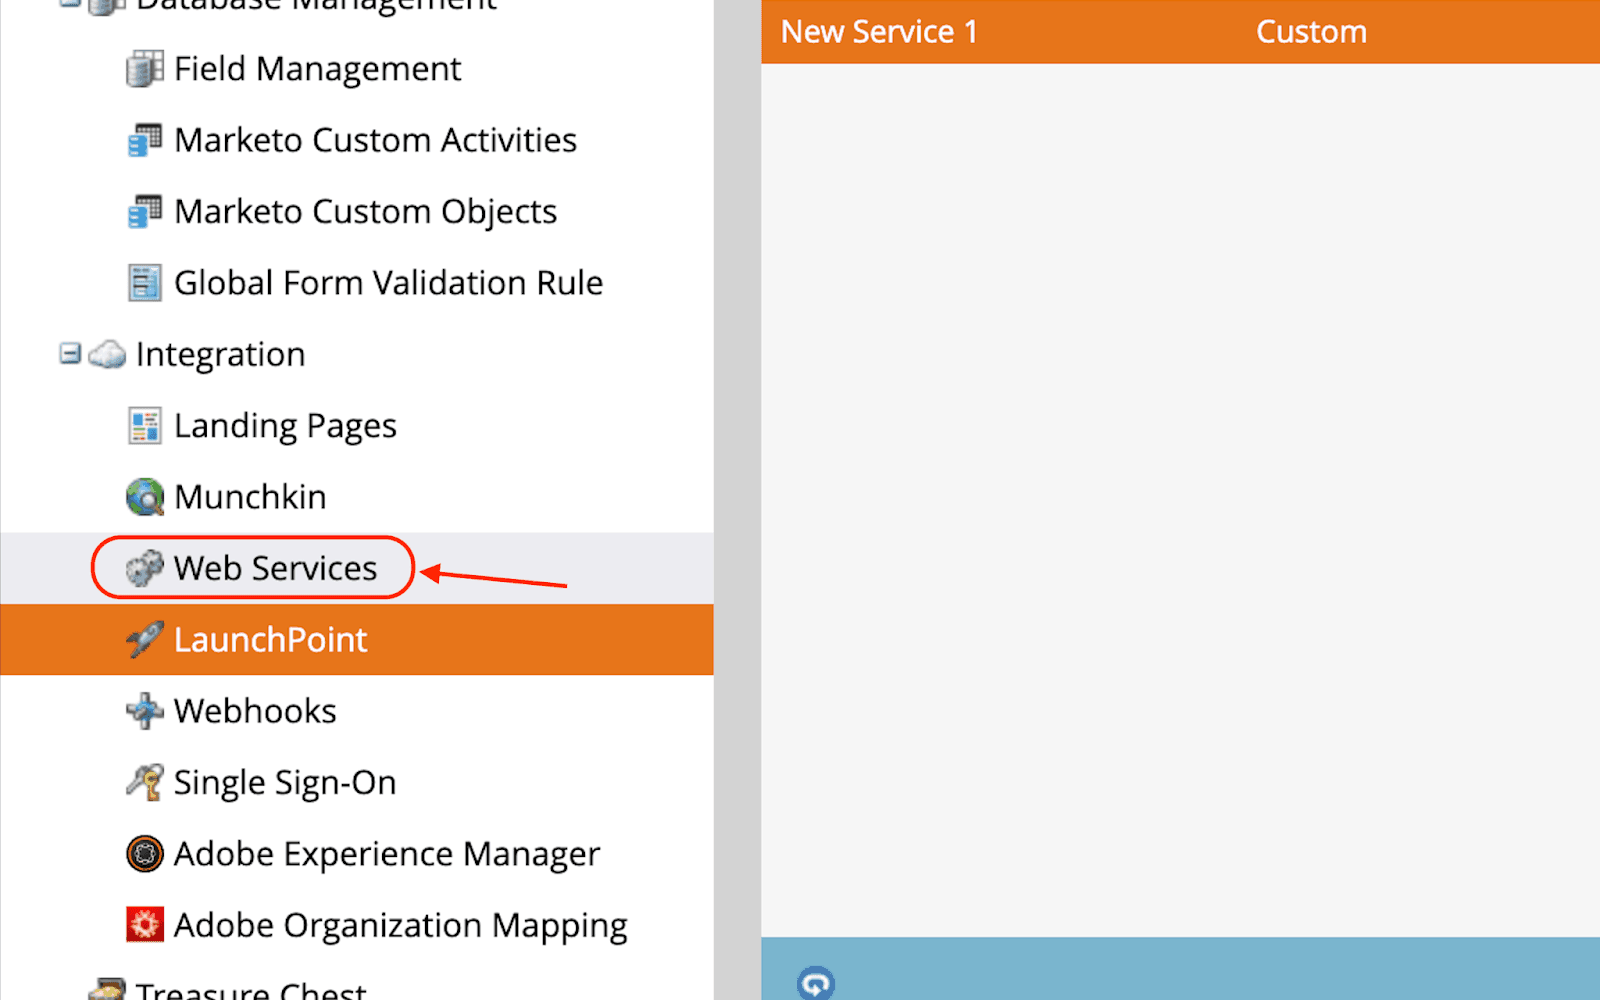
2. Under REST API, copy the highlighted portion of the Endpoint as shown below.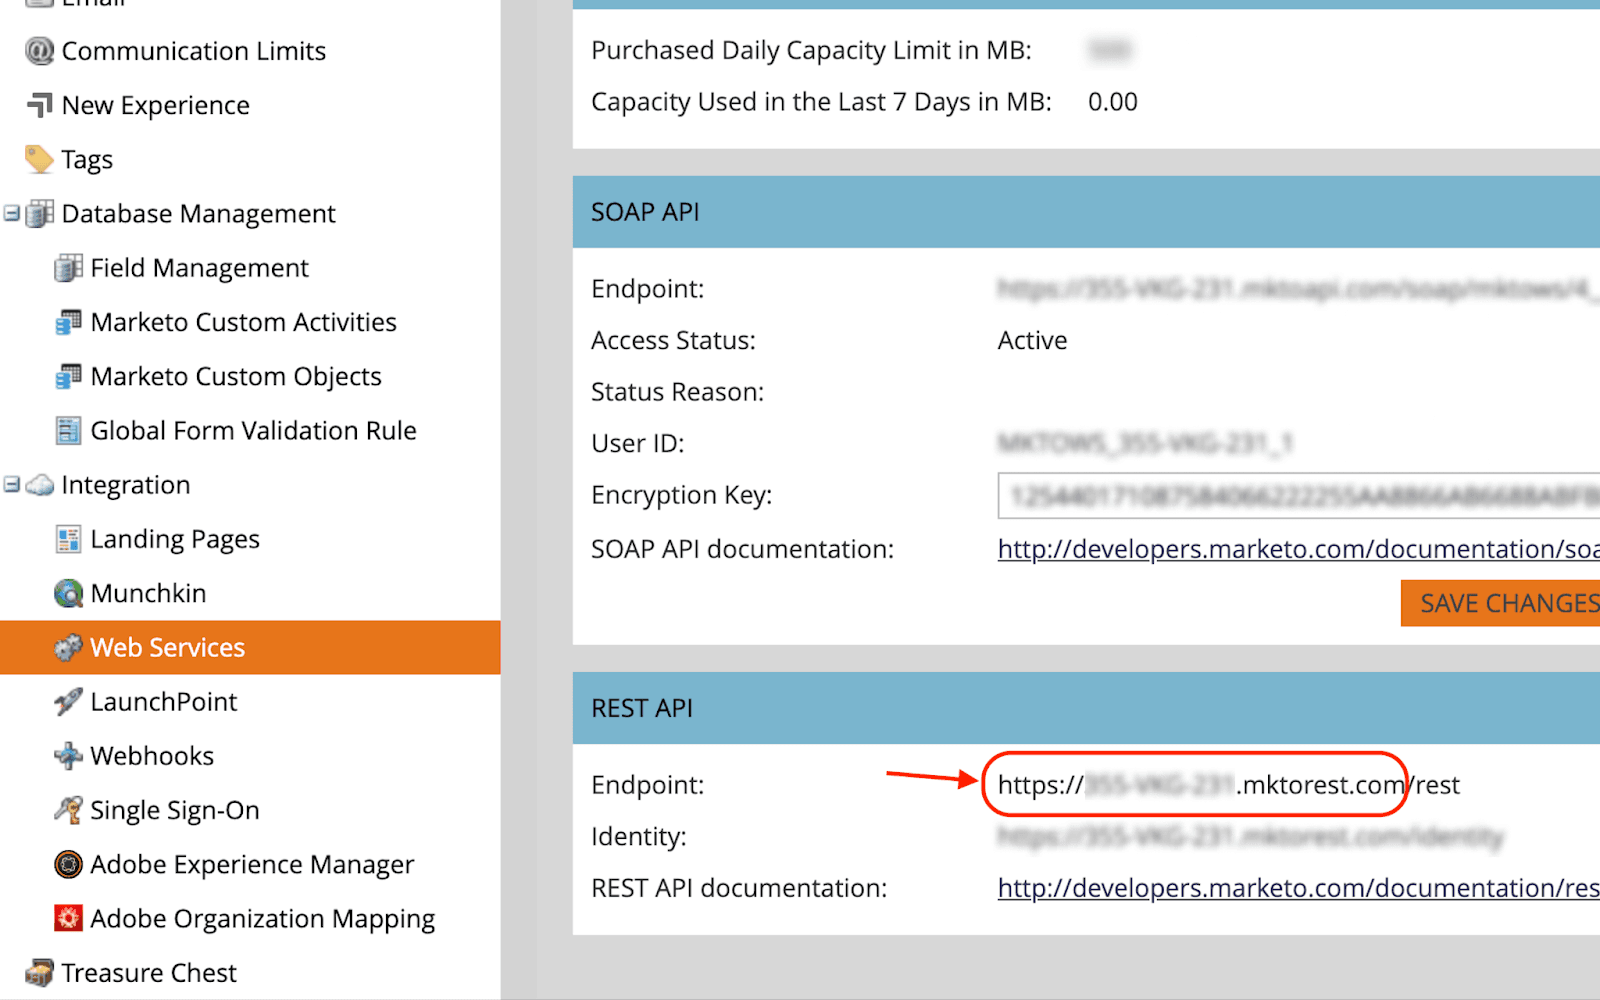
How to connect Adobe Marketo Engage with SurveySparrow?
1. Log in to your SurveySparrow account.
2. Navigate to your Account Settings.
3. Go to the Apps and Integrations section.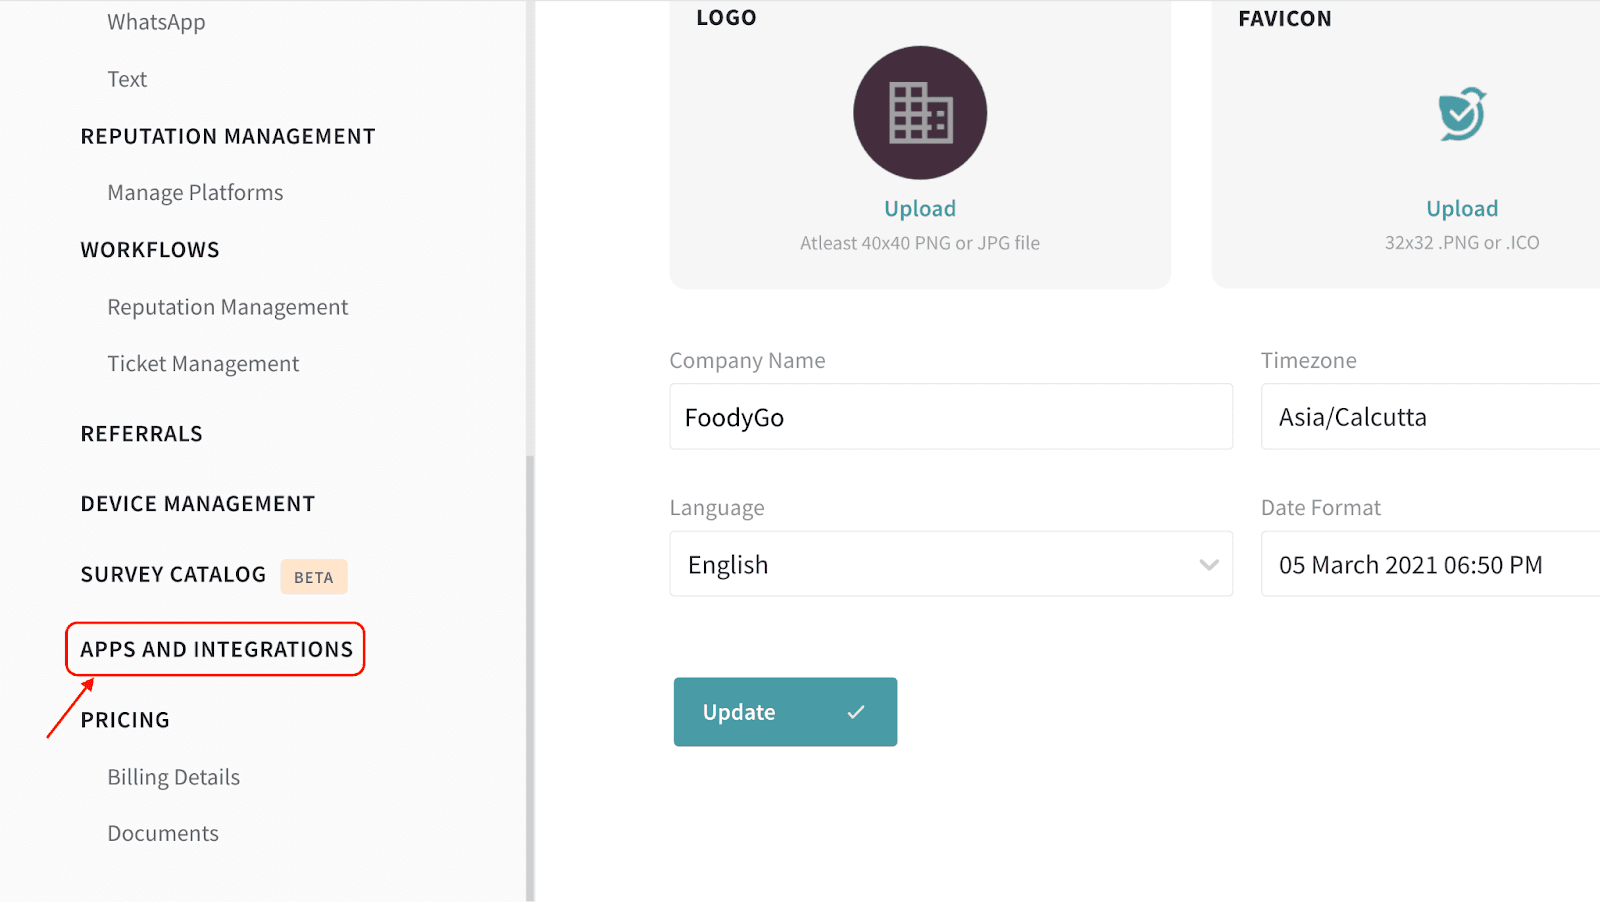
4. Enable the toggle for Marketo integration.
5. Enter your Client ID, Client Secret, and Rest API Endpoint. Click Authorize.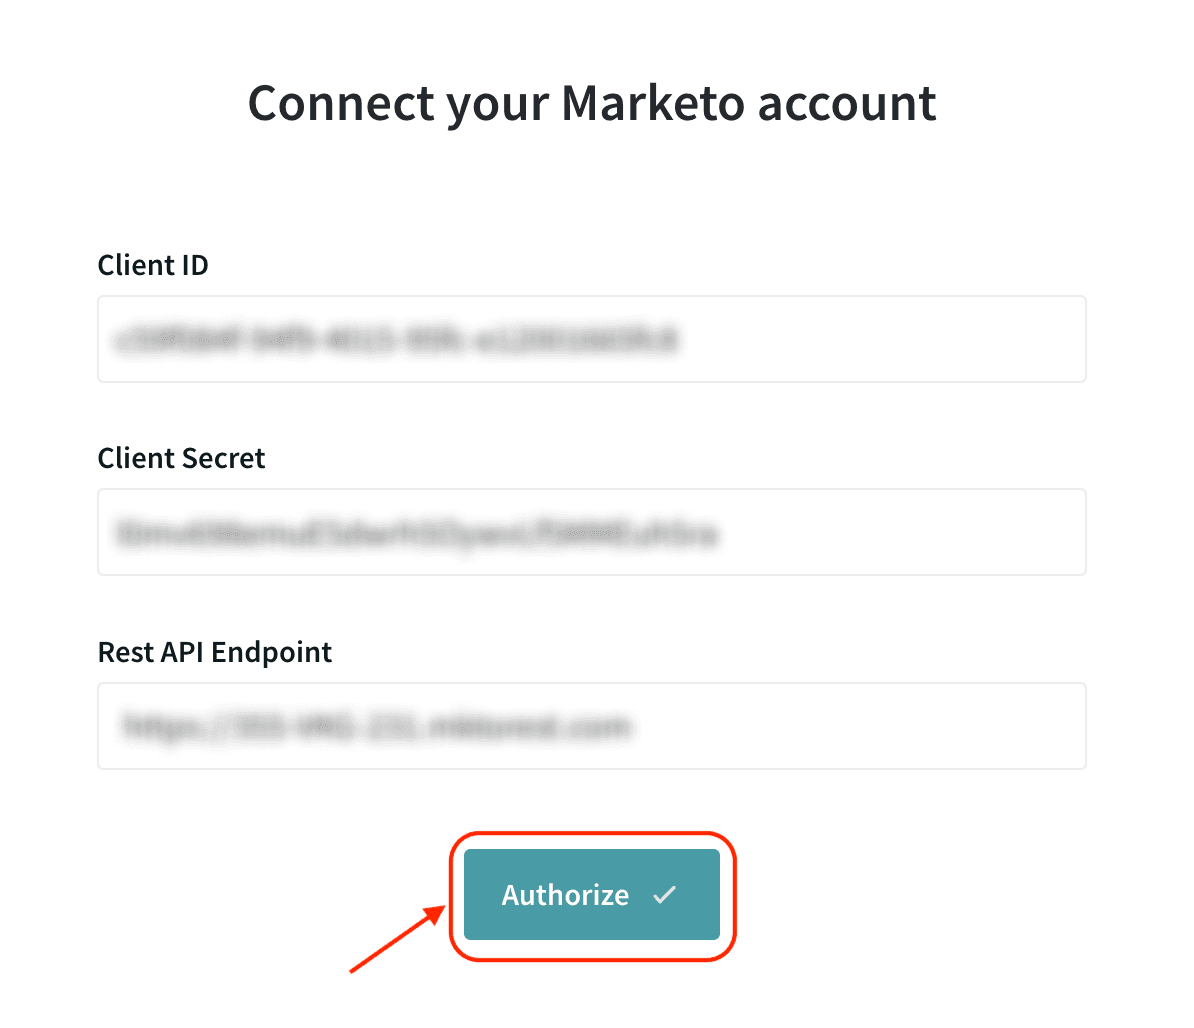
That’s it! You’ve successfully enabled the integration.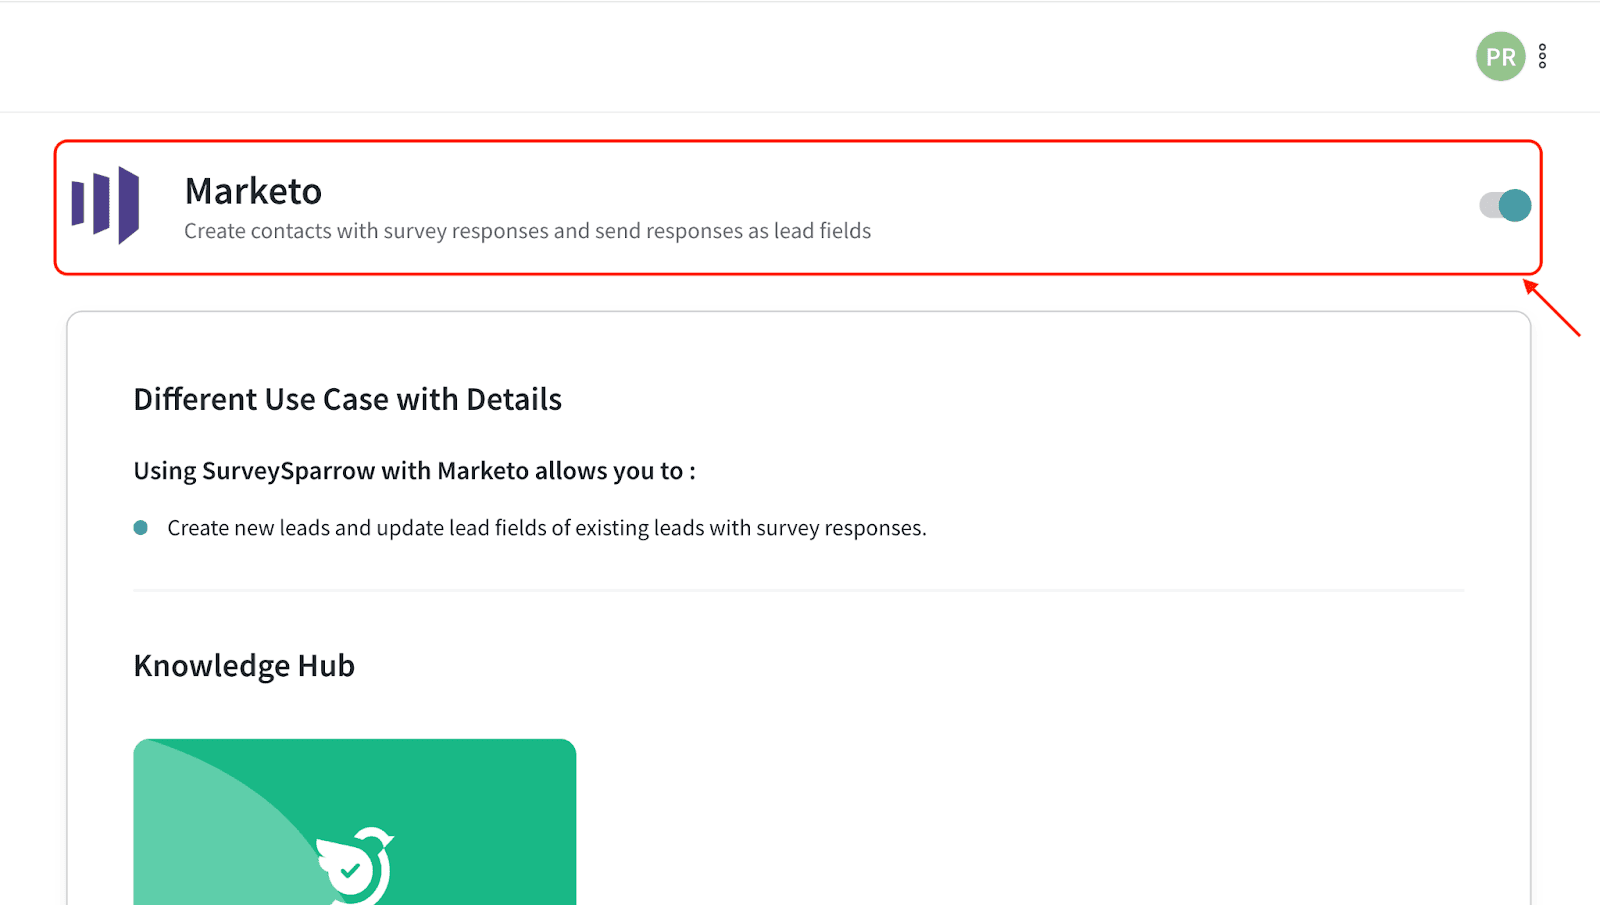
Create or Update a lead in Adobe Marketo Engage account
1. Navigate to the Integrate section of your survey.
2. Enable the Marketo integration.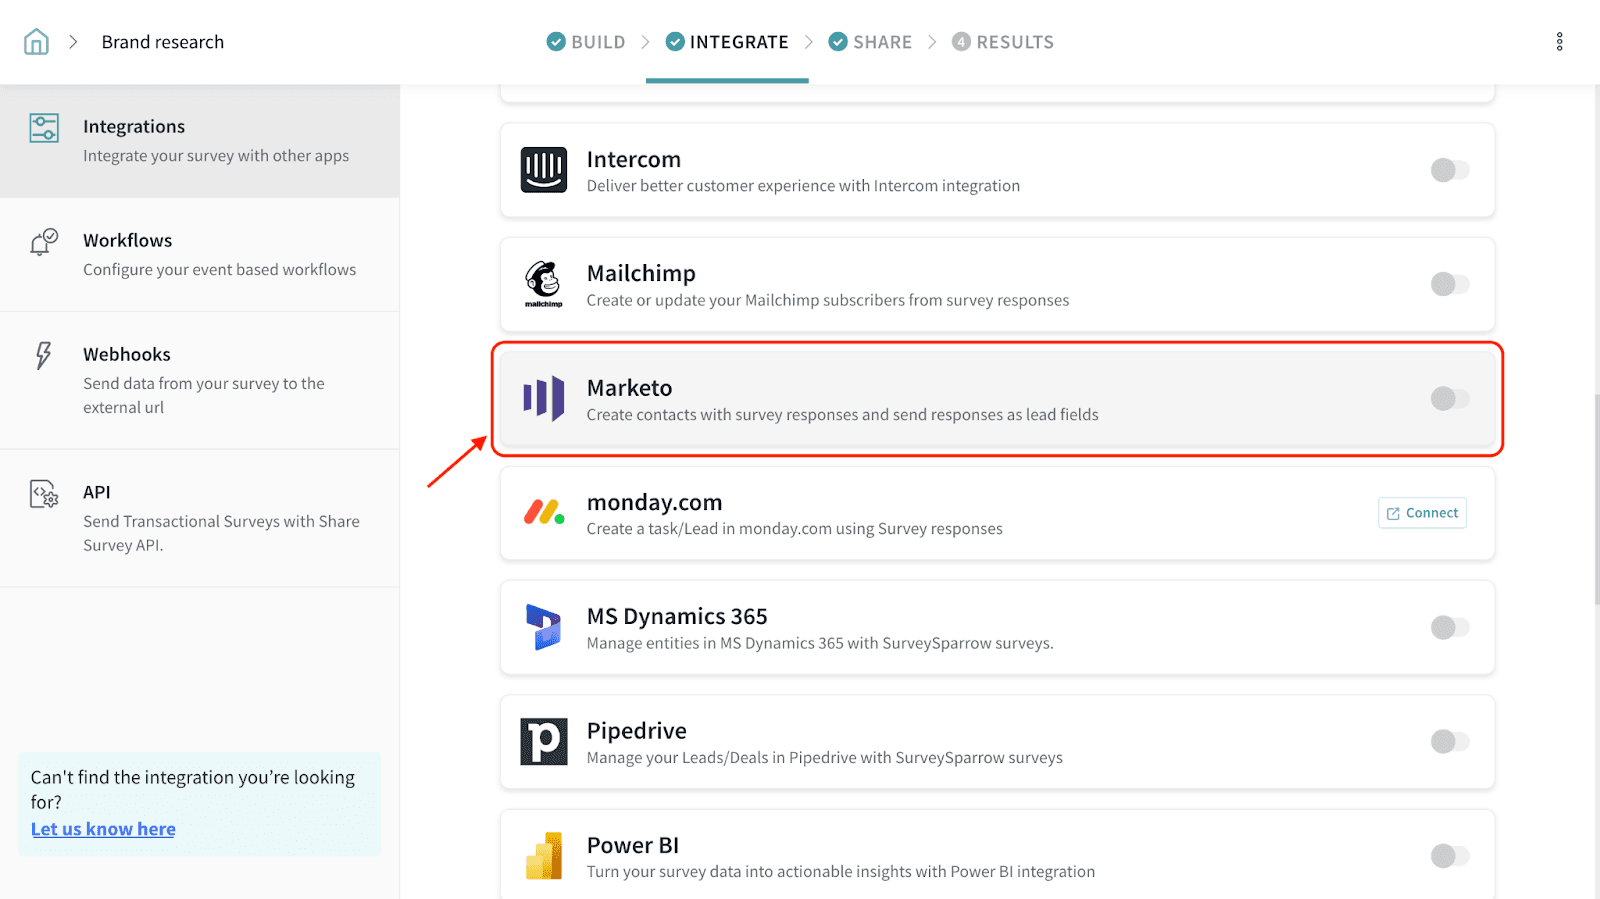
3. Choose a list present in your Marketo Engage account to add leads. (Optional)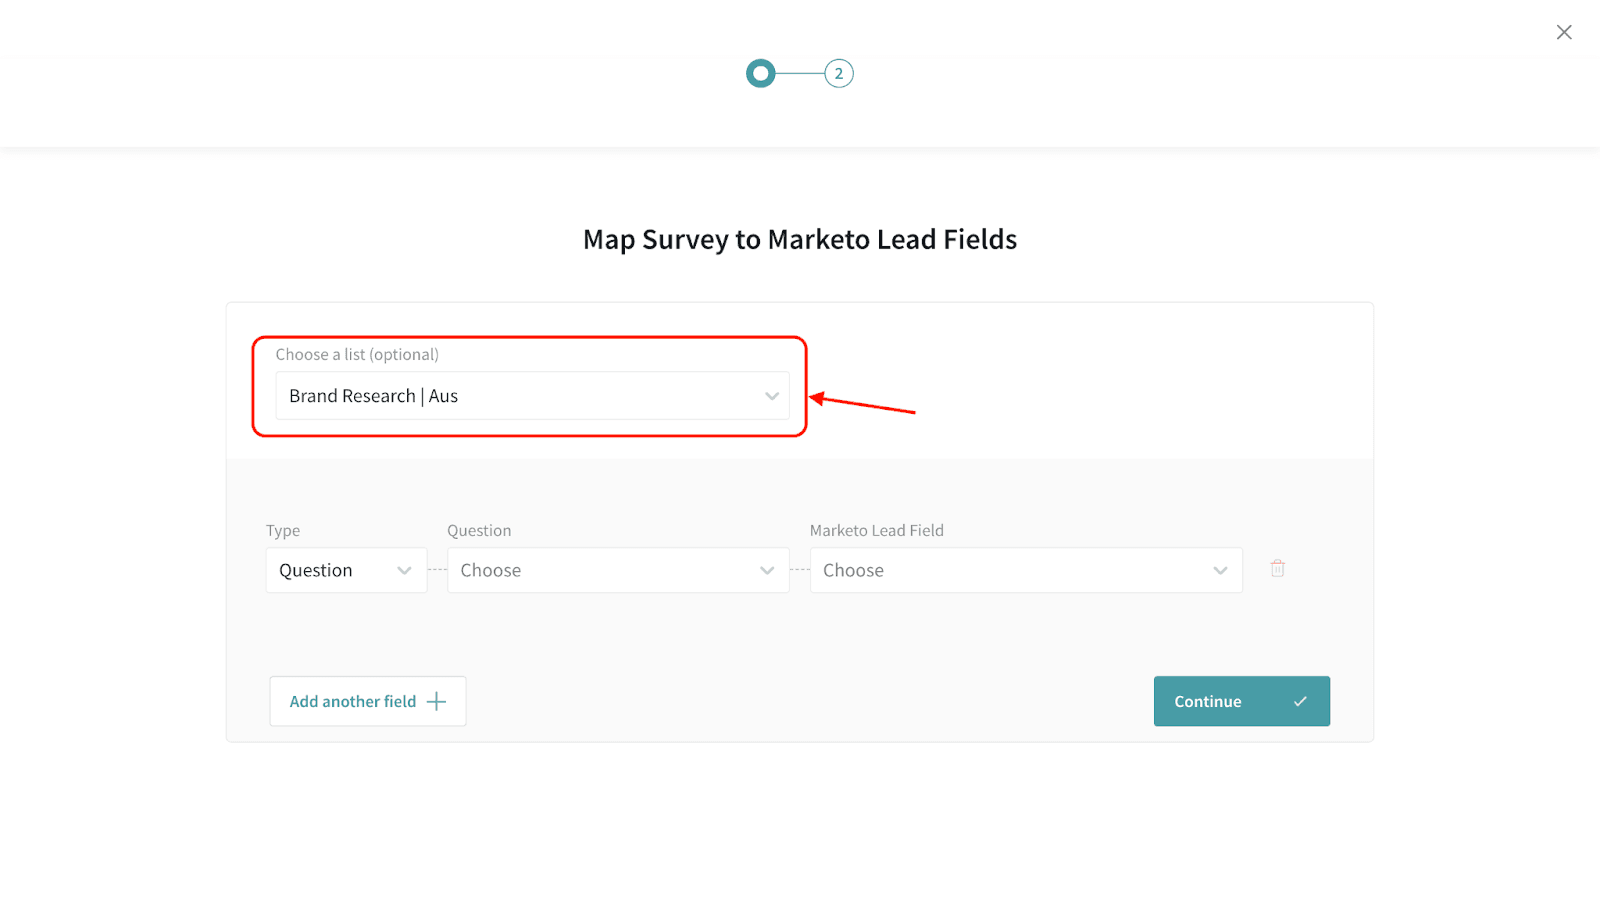
4. Choose a Type from the available options.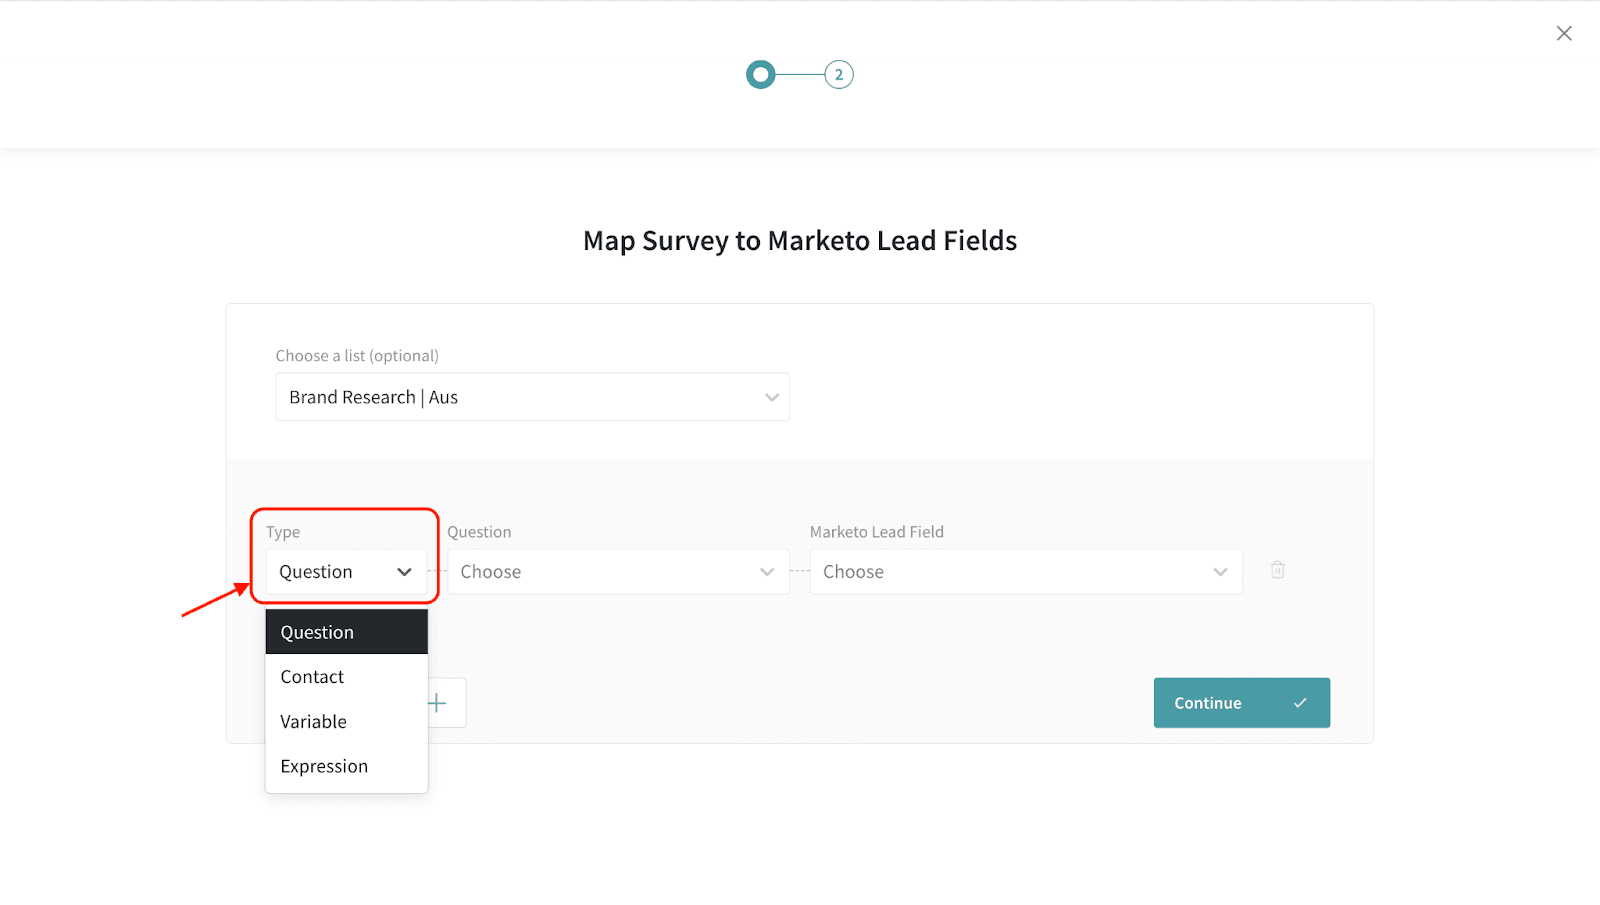
5. Choose the corresponding question whose response has to be sent to Marketo Engage.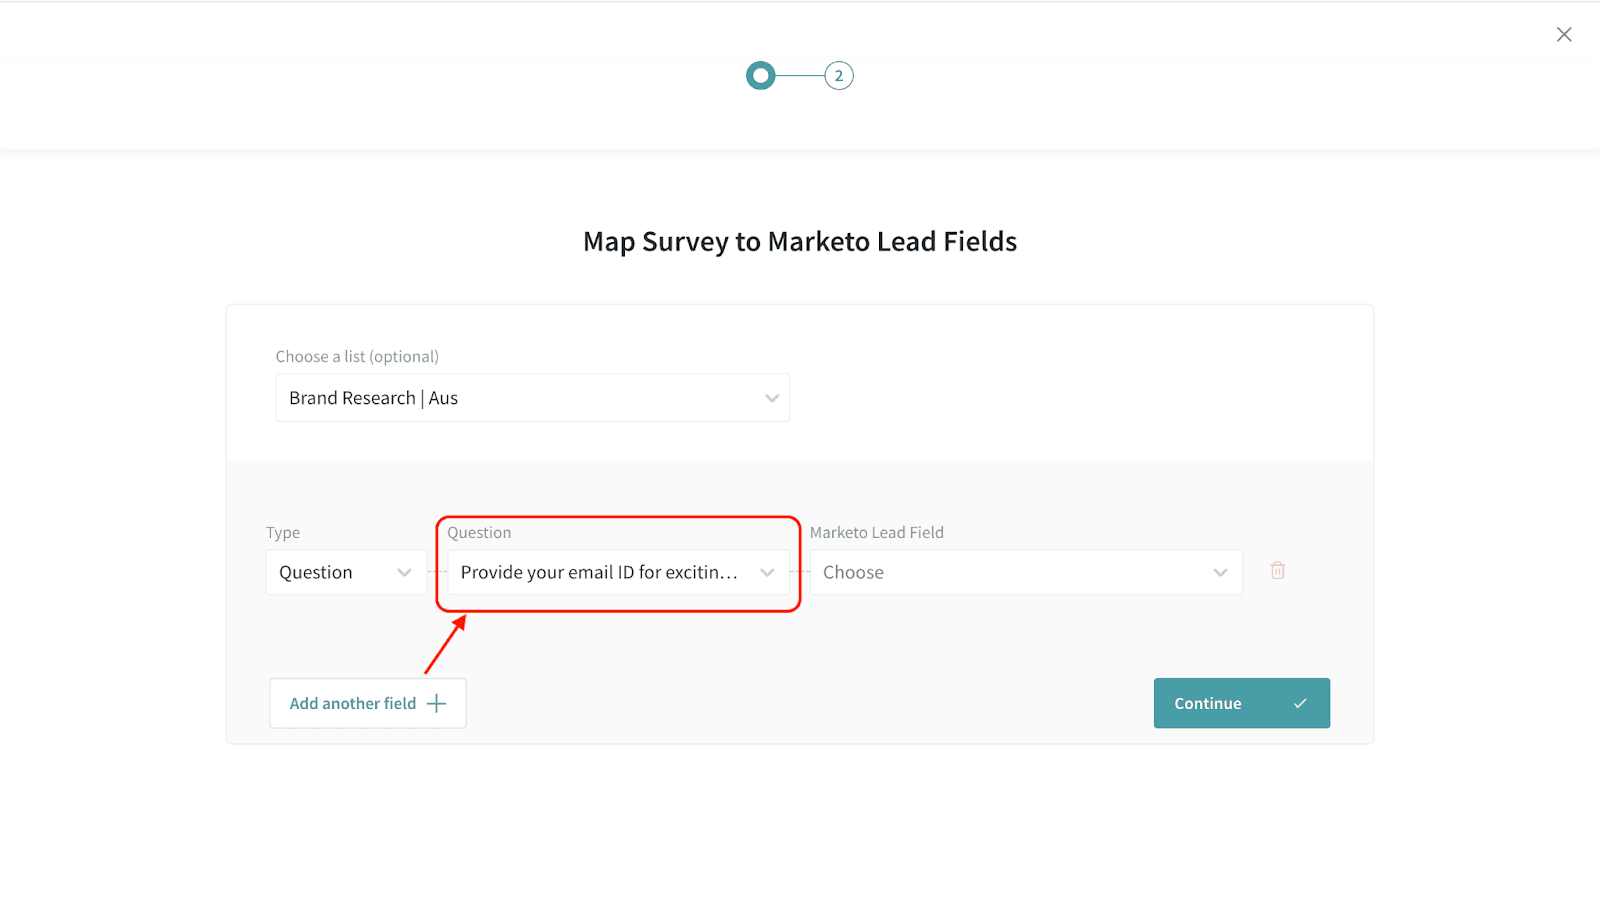
6. Choose the field you want to map in the Adobe Marketo Engage list.
7. To add more details to be sent, click Add another field.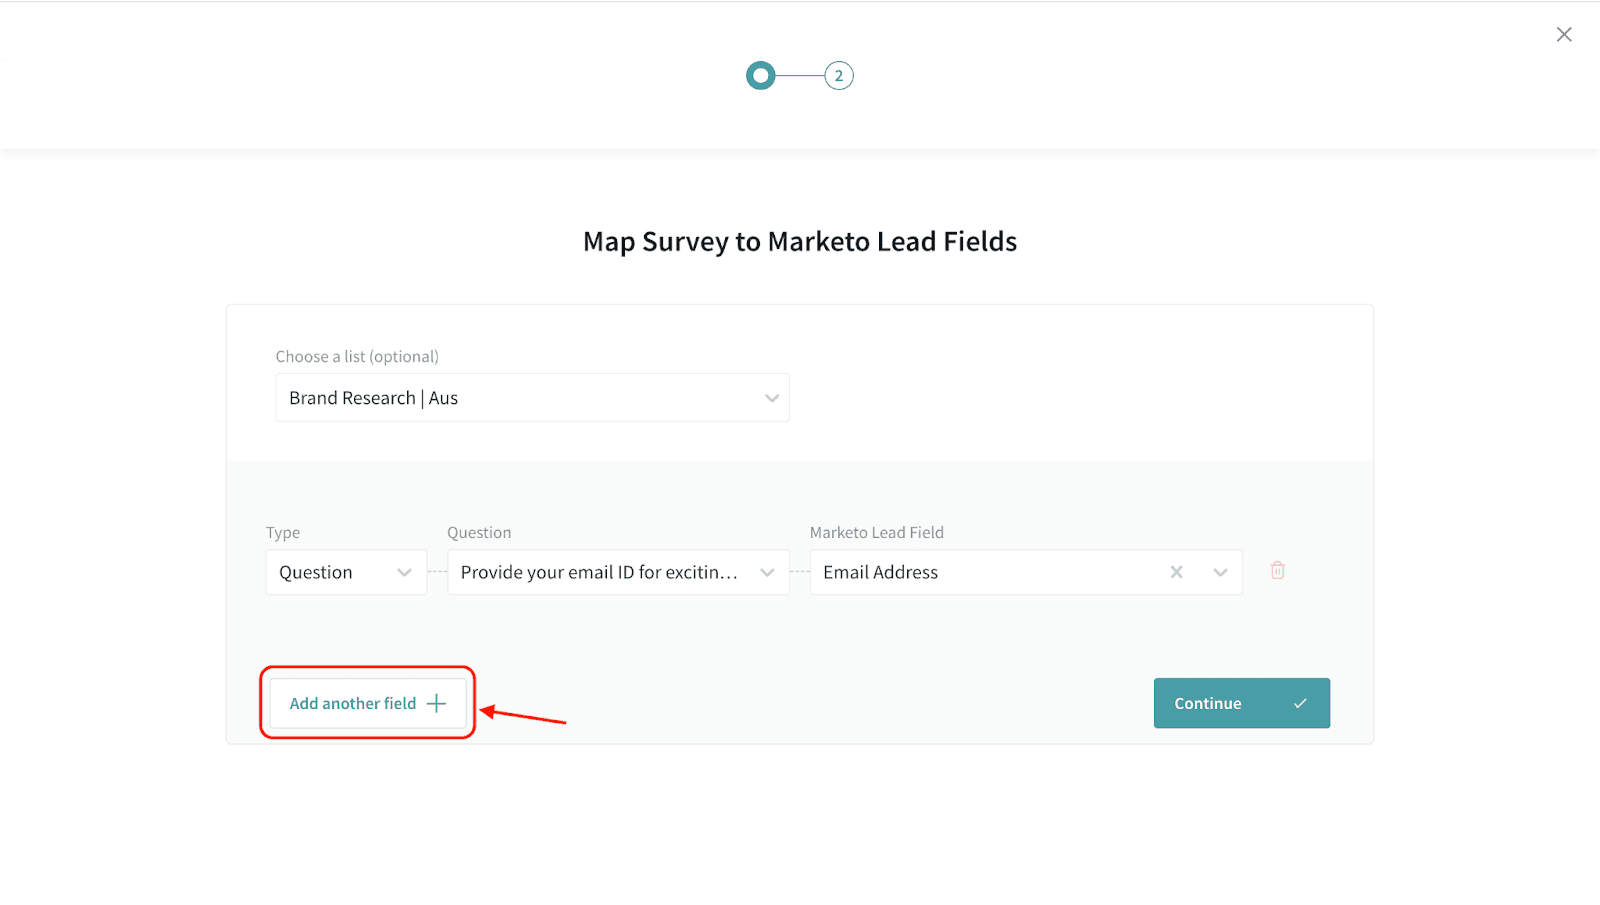
Here, you can choose to dynamically create a custom field in your Marketo Engage account.
Enter the field name under Marketo Lead Field and click Create New Lead Field. Please note that the field will be created in your Marketo Engage account as soon as you click Create New Lead Field.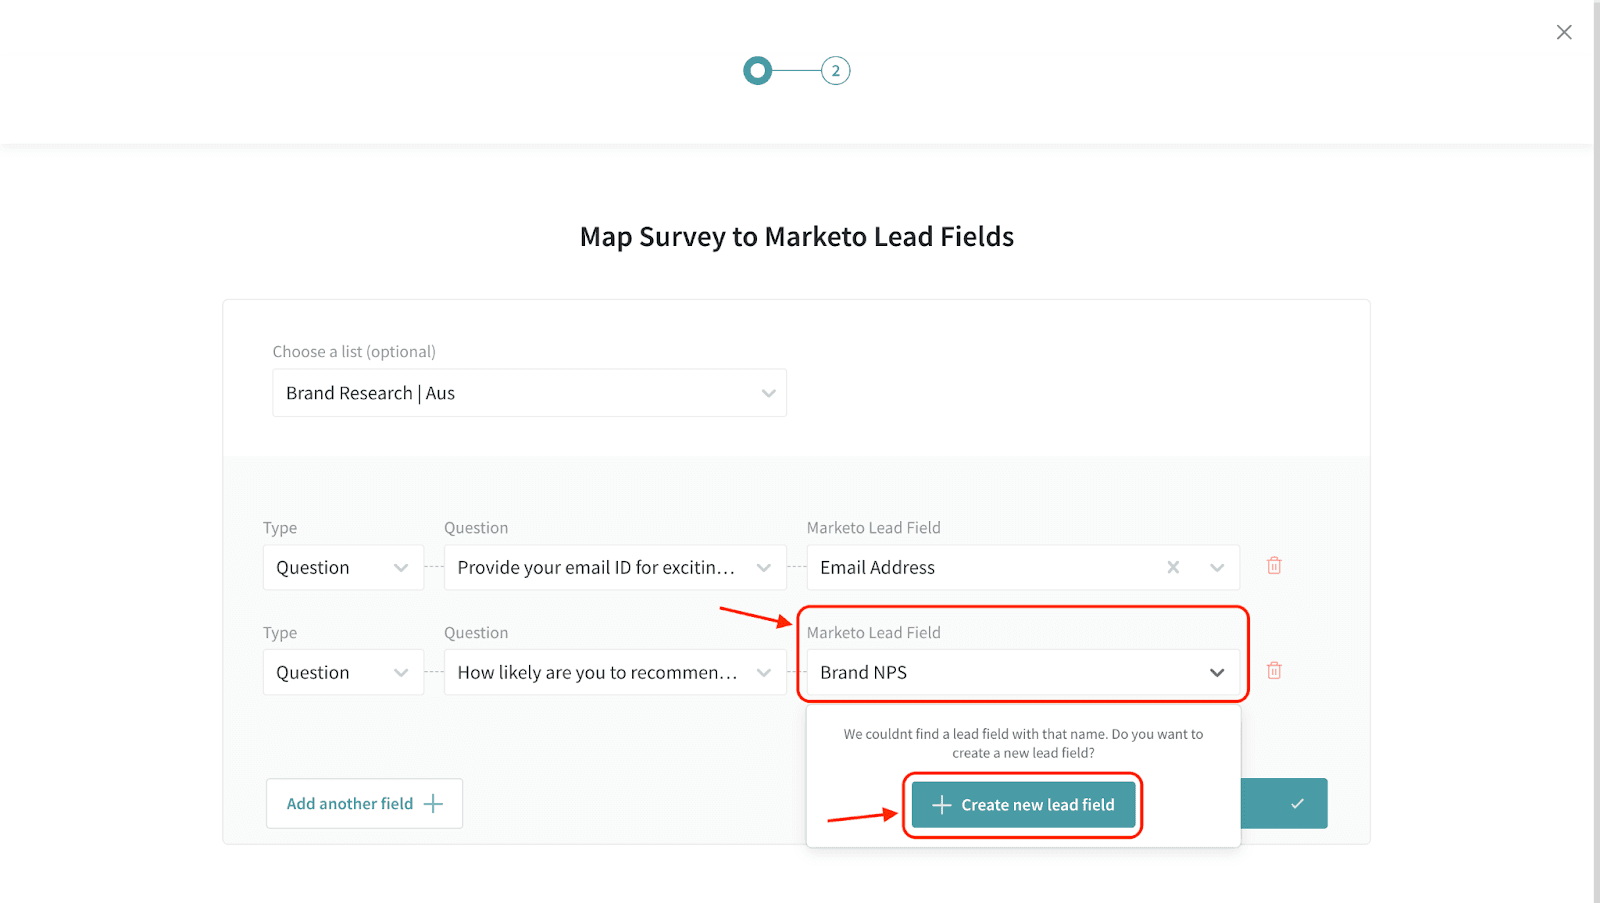
8. Click Continue.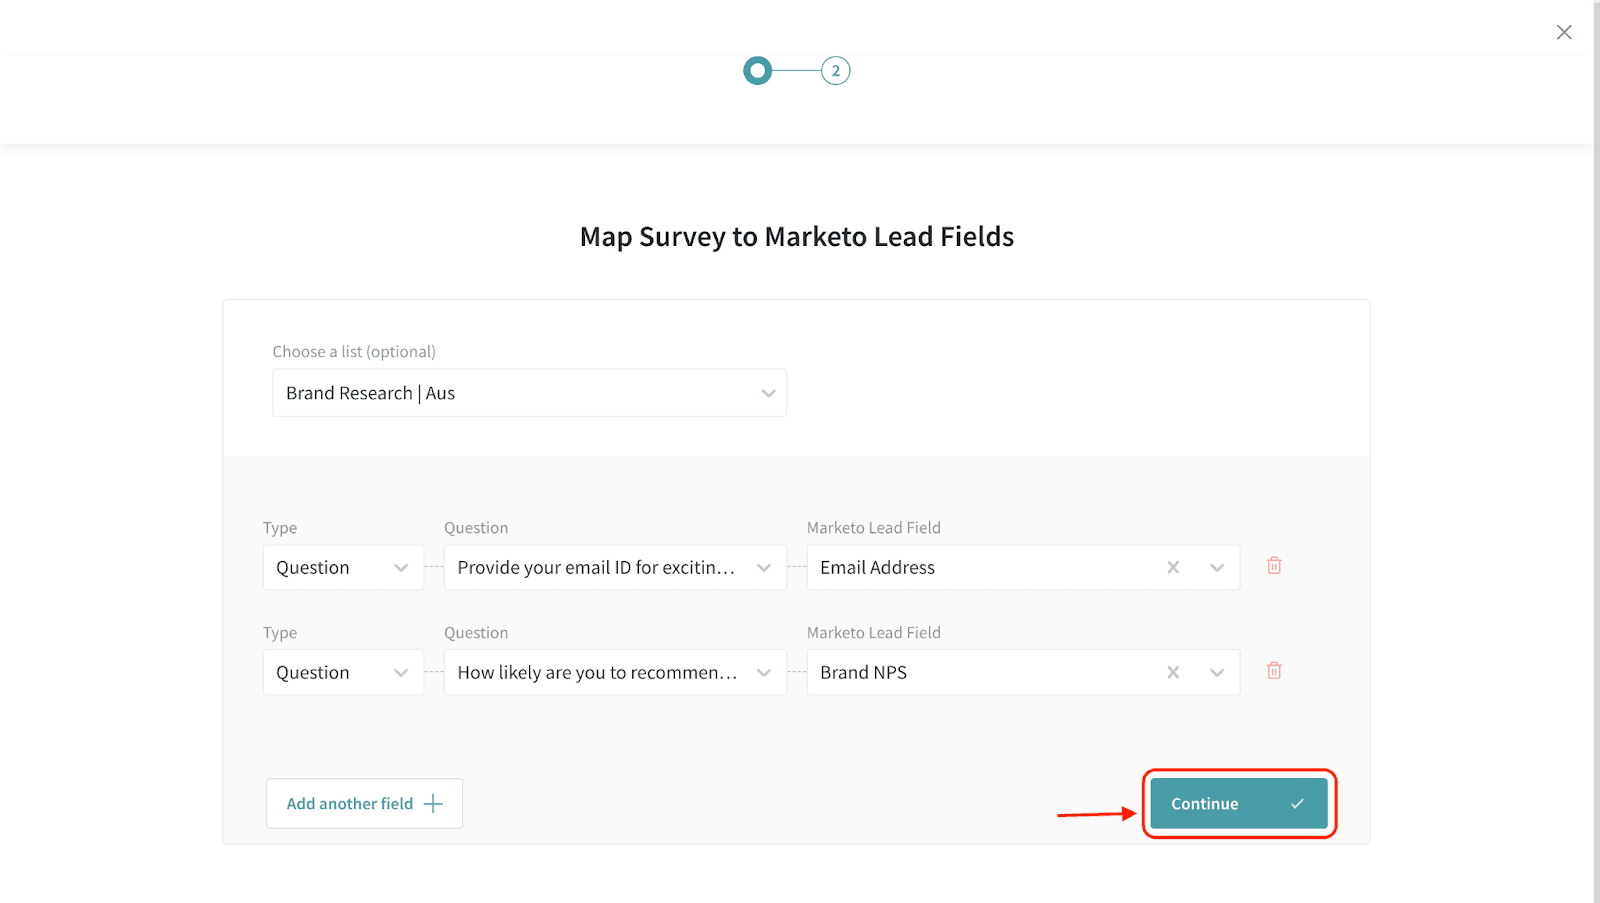
9. Click Activate Integration to complete the integration setup.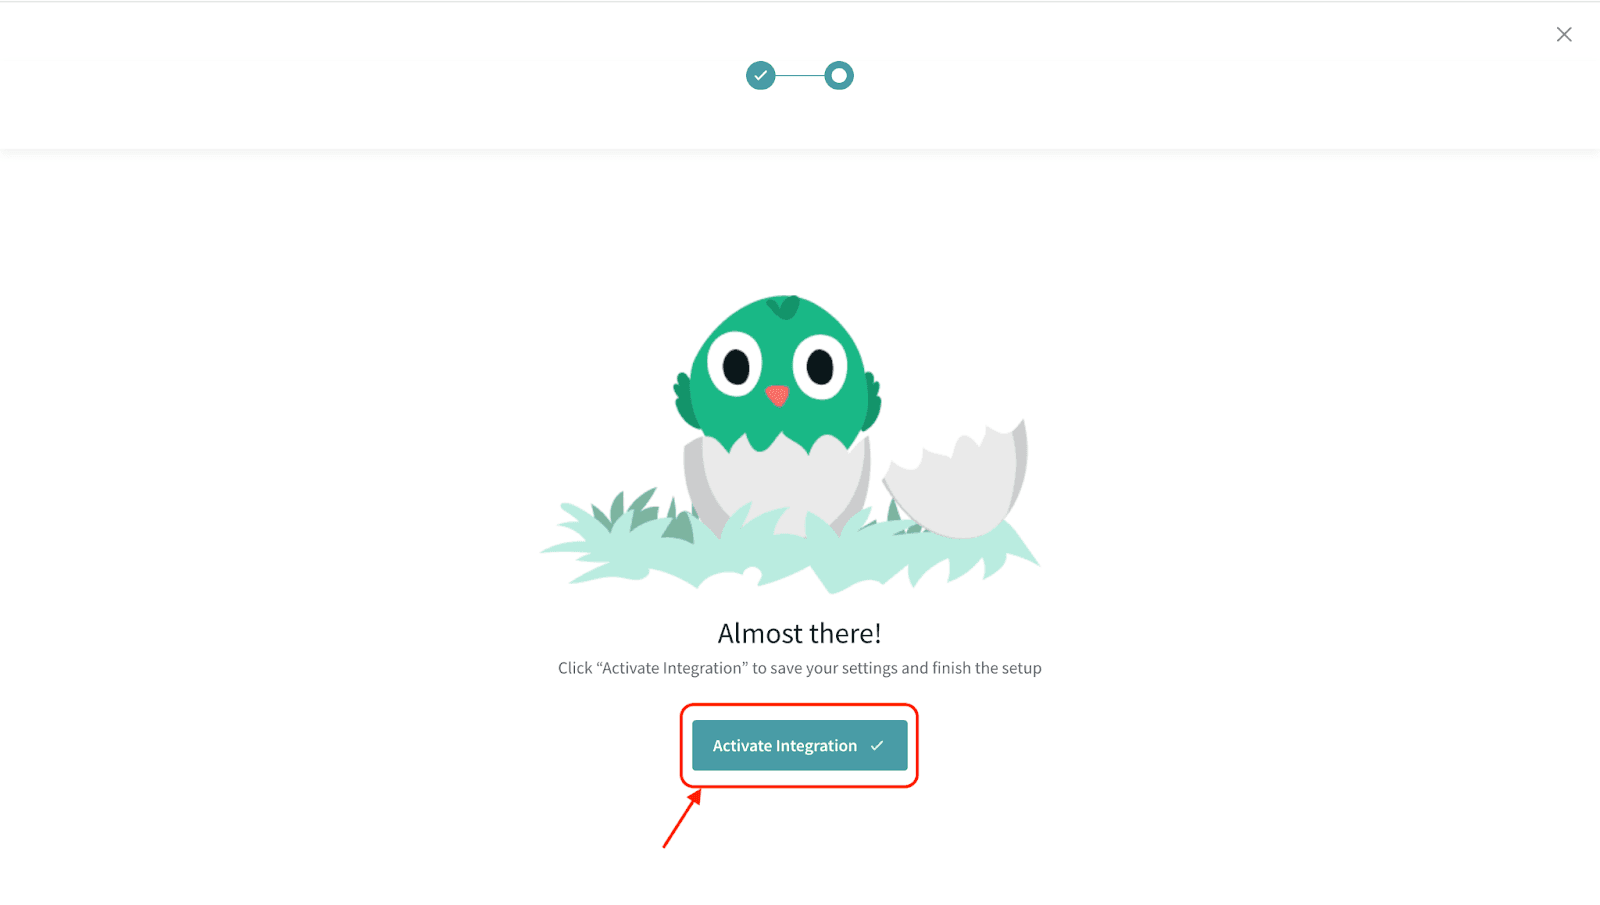
That’s it! You’ve now successfully set up the integration to create or update leads in your Marketo Engage account.
How to disable the integration?
1. Log in to your SurveySparrow account and navigate to your Account Settings.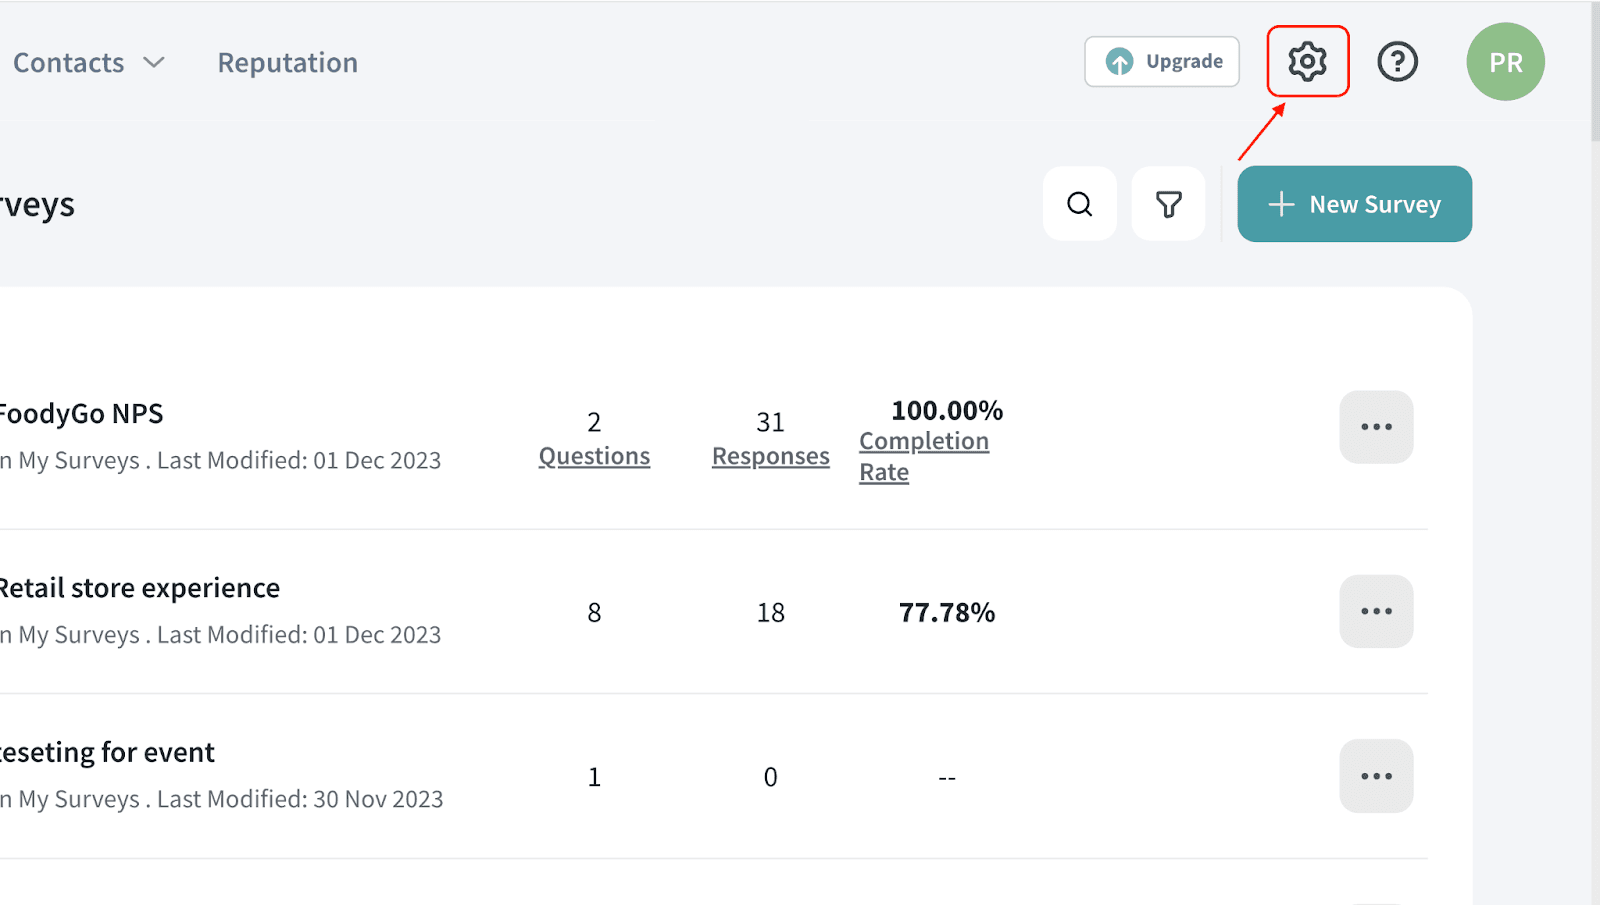
2. Head to the Apps and Integrations section and turn off the Marketo’s toggle.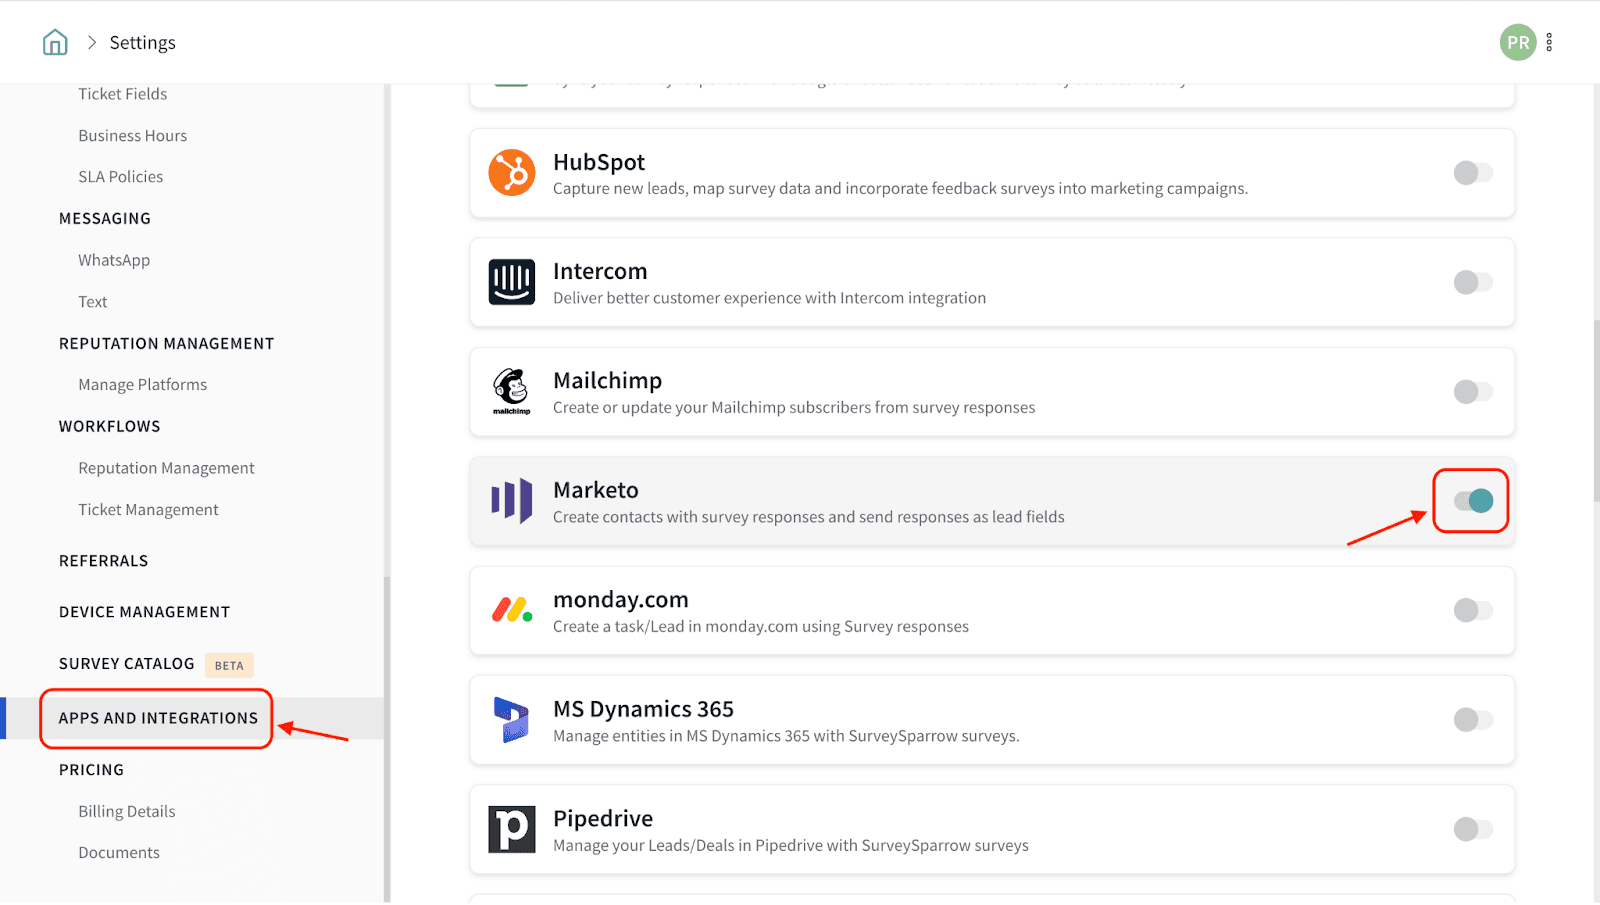
Note
- Ensure that the Adobe Marketo Engage user is assigned the role with API access
- Make sure you copy only the highlighted part in the REST API Endpoint as shown in this document(Do NOT copy the entire URL)
- If you choose not to add leads to a specific list, they’ll be added to All People under System Smart Lists
- It is mandatory to include mapping a data Email Address of your Marketo Engage account
- Custom field will be created in your Marketo Engage account as soon as you click Create New Lead Field.
- If there’s an entry for a given Email Address in Marketo Engage, the lead fields will be updated with the mapped data
- At present, partial submissions are not supported
Please reach out to us if you have any questions. We’re just a chat away!