Search
Saving time by automating recurring processes is one of the key ways to enable Support Agents to handle more important tasks with ease. With the help of workflows in Ticket management, a huge chunk of manual effort can be reduced. As a result, operational efficiency increases and contributes to a better customer experience.
Now, let’s see how to set up workflows to manage tickets.
1. After logging in to your SurveySparrow account, navigate to the account settings page and click Ticket Management under Workflows.![]()
2. Click New Workflow to get started with setting up the automation.![]()
3. Add the basic details of the workflow for your reference.![]()
You can set up the workflow trigger based on different events in Ticket management. Let’s know more about the events to choose the best one for your requirements.
You can trigger the workflow upon ticket creation. Automate the desired actions when a ticket is created for the corresponding event.![]()
For any changes in the priority level of the ticket from one to another, you can trigger the automation. It can be from any priority level to another.
You can trigger a workflow for any changes in the ticket’s status. It will enable you to identify the importance of the ticket and handle it accordingly.
The Assigned To is one of the important fields of a ticket. When that field is updated, you can set up a workflow according to your needs.
There could be different teams involved in managing a ticket. So, when there’s an update in the Team field for the ticket, you can configure a workflow.
For any changes in the due date, you can set up a workflow to take the necessary actions to keep the stakeholders informed.
You can trigger a workflow when there’s an update in any of your custom fields created for Ticket management.
Set up an automation to keep the concerned stakeholders informed about the latest replies added to the ticket.
4. Choose an event and set the corresponding fields to trigger the workflow.![]()
5. Click Add Filter Group to add the necessary conditions.![]()
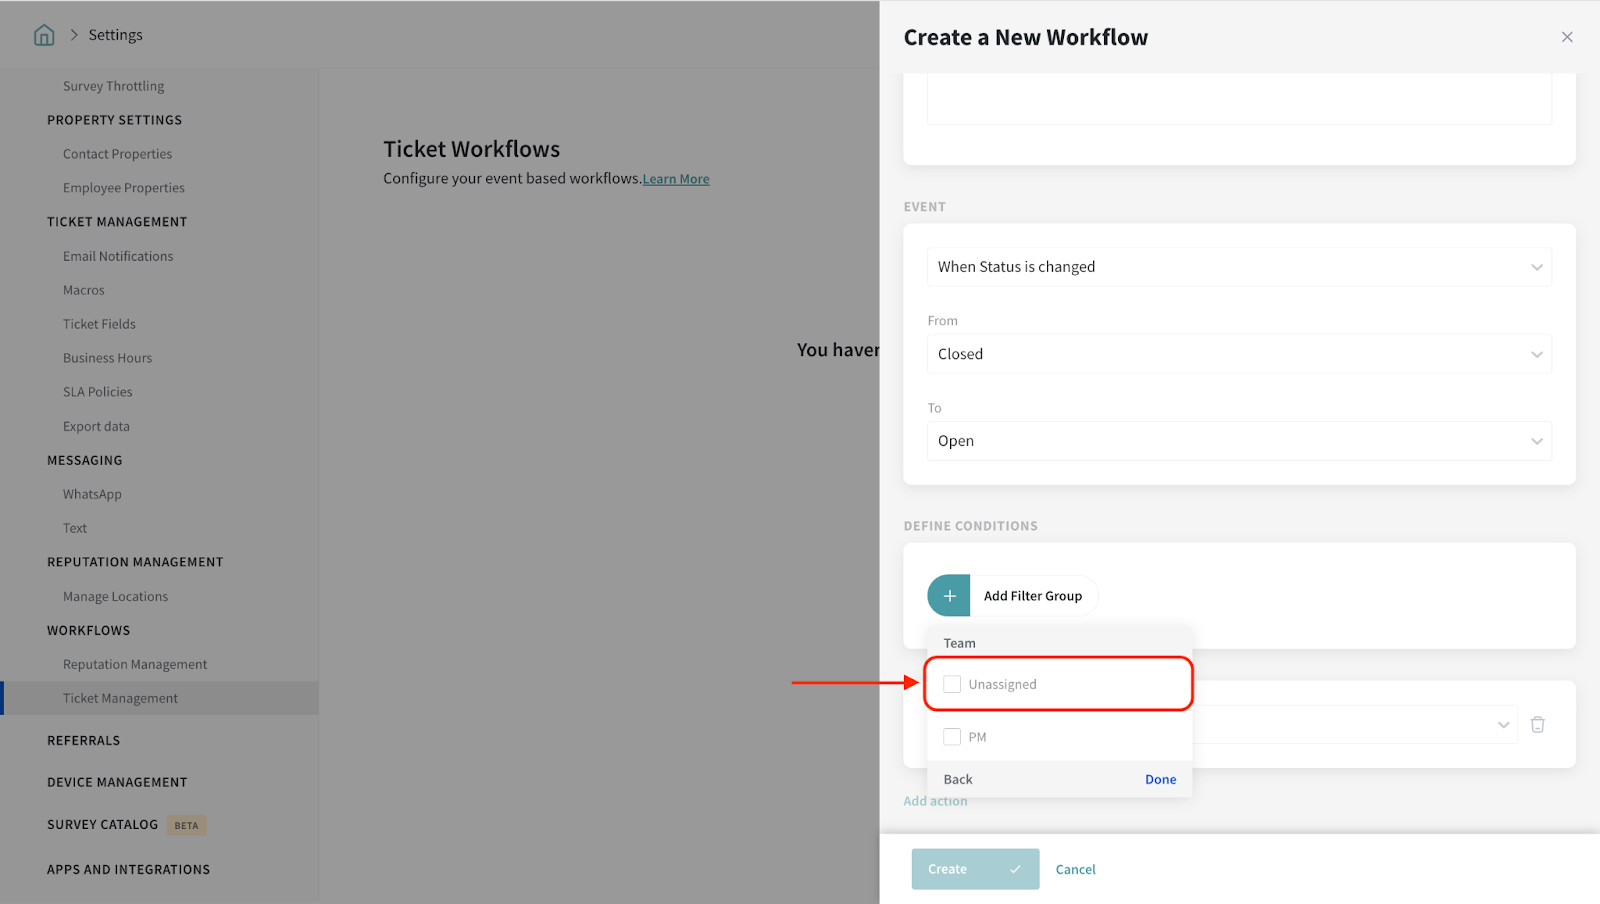
An "Unassigned" option is available under "Assigned to" and "Team", enabling you to get alerts for tickets that are created but remain unassigned, ensuring timely attention to such tickets.![]()

6. Under Actions, select an option of your choice.![]()
The Webhook, Send Mail, and Add Internal Note actions in Ticket Management workflows now support additional options to include more ticket details.
You can also pass Requestor Contact Properties (ID, Name, Email) and Source Properties (Survey Name, Survey ID, Review ID, etc.) for better tracking and updating external platforms with APIs.![]()
For example, in Webhooks, we can now pass Ticket ID, Contact ID, Source Details, and Agent Information as variables when sending data to an external CRM system.
This allows businesses to sync ticket updates automatically, ensuring CRM updates, better tracking, and improved workflow automation across platforms.
7. Add the corresponding details for the action and click Save.![]()
8. You can choose to add more actions to the workflow by clicking Add action and following the above two steps.![]()
9. Once you add all the details for your workflow, click Create.![]()
Now, you can see the workflow listed in the Ticket Workflows section.![]()
Turn off the corresponding toggle to disable the workflow. Yes, that's it!![]()
That’s all you need to get started with setting up workflows to manage your tickets in SurveySparrow. Configure the workflow once for events of your choice and see them in action forever. Of course, you can disable a workflow if needed :)
Feel free to reach out to our community, if you have any questions.
Powered By SparrowDesk